User Management
Getting Started
To manage your organization’s users, click on the Settings module and the 'Users' section.
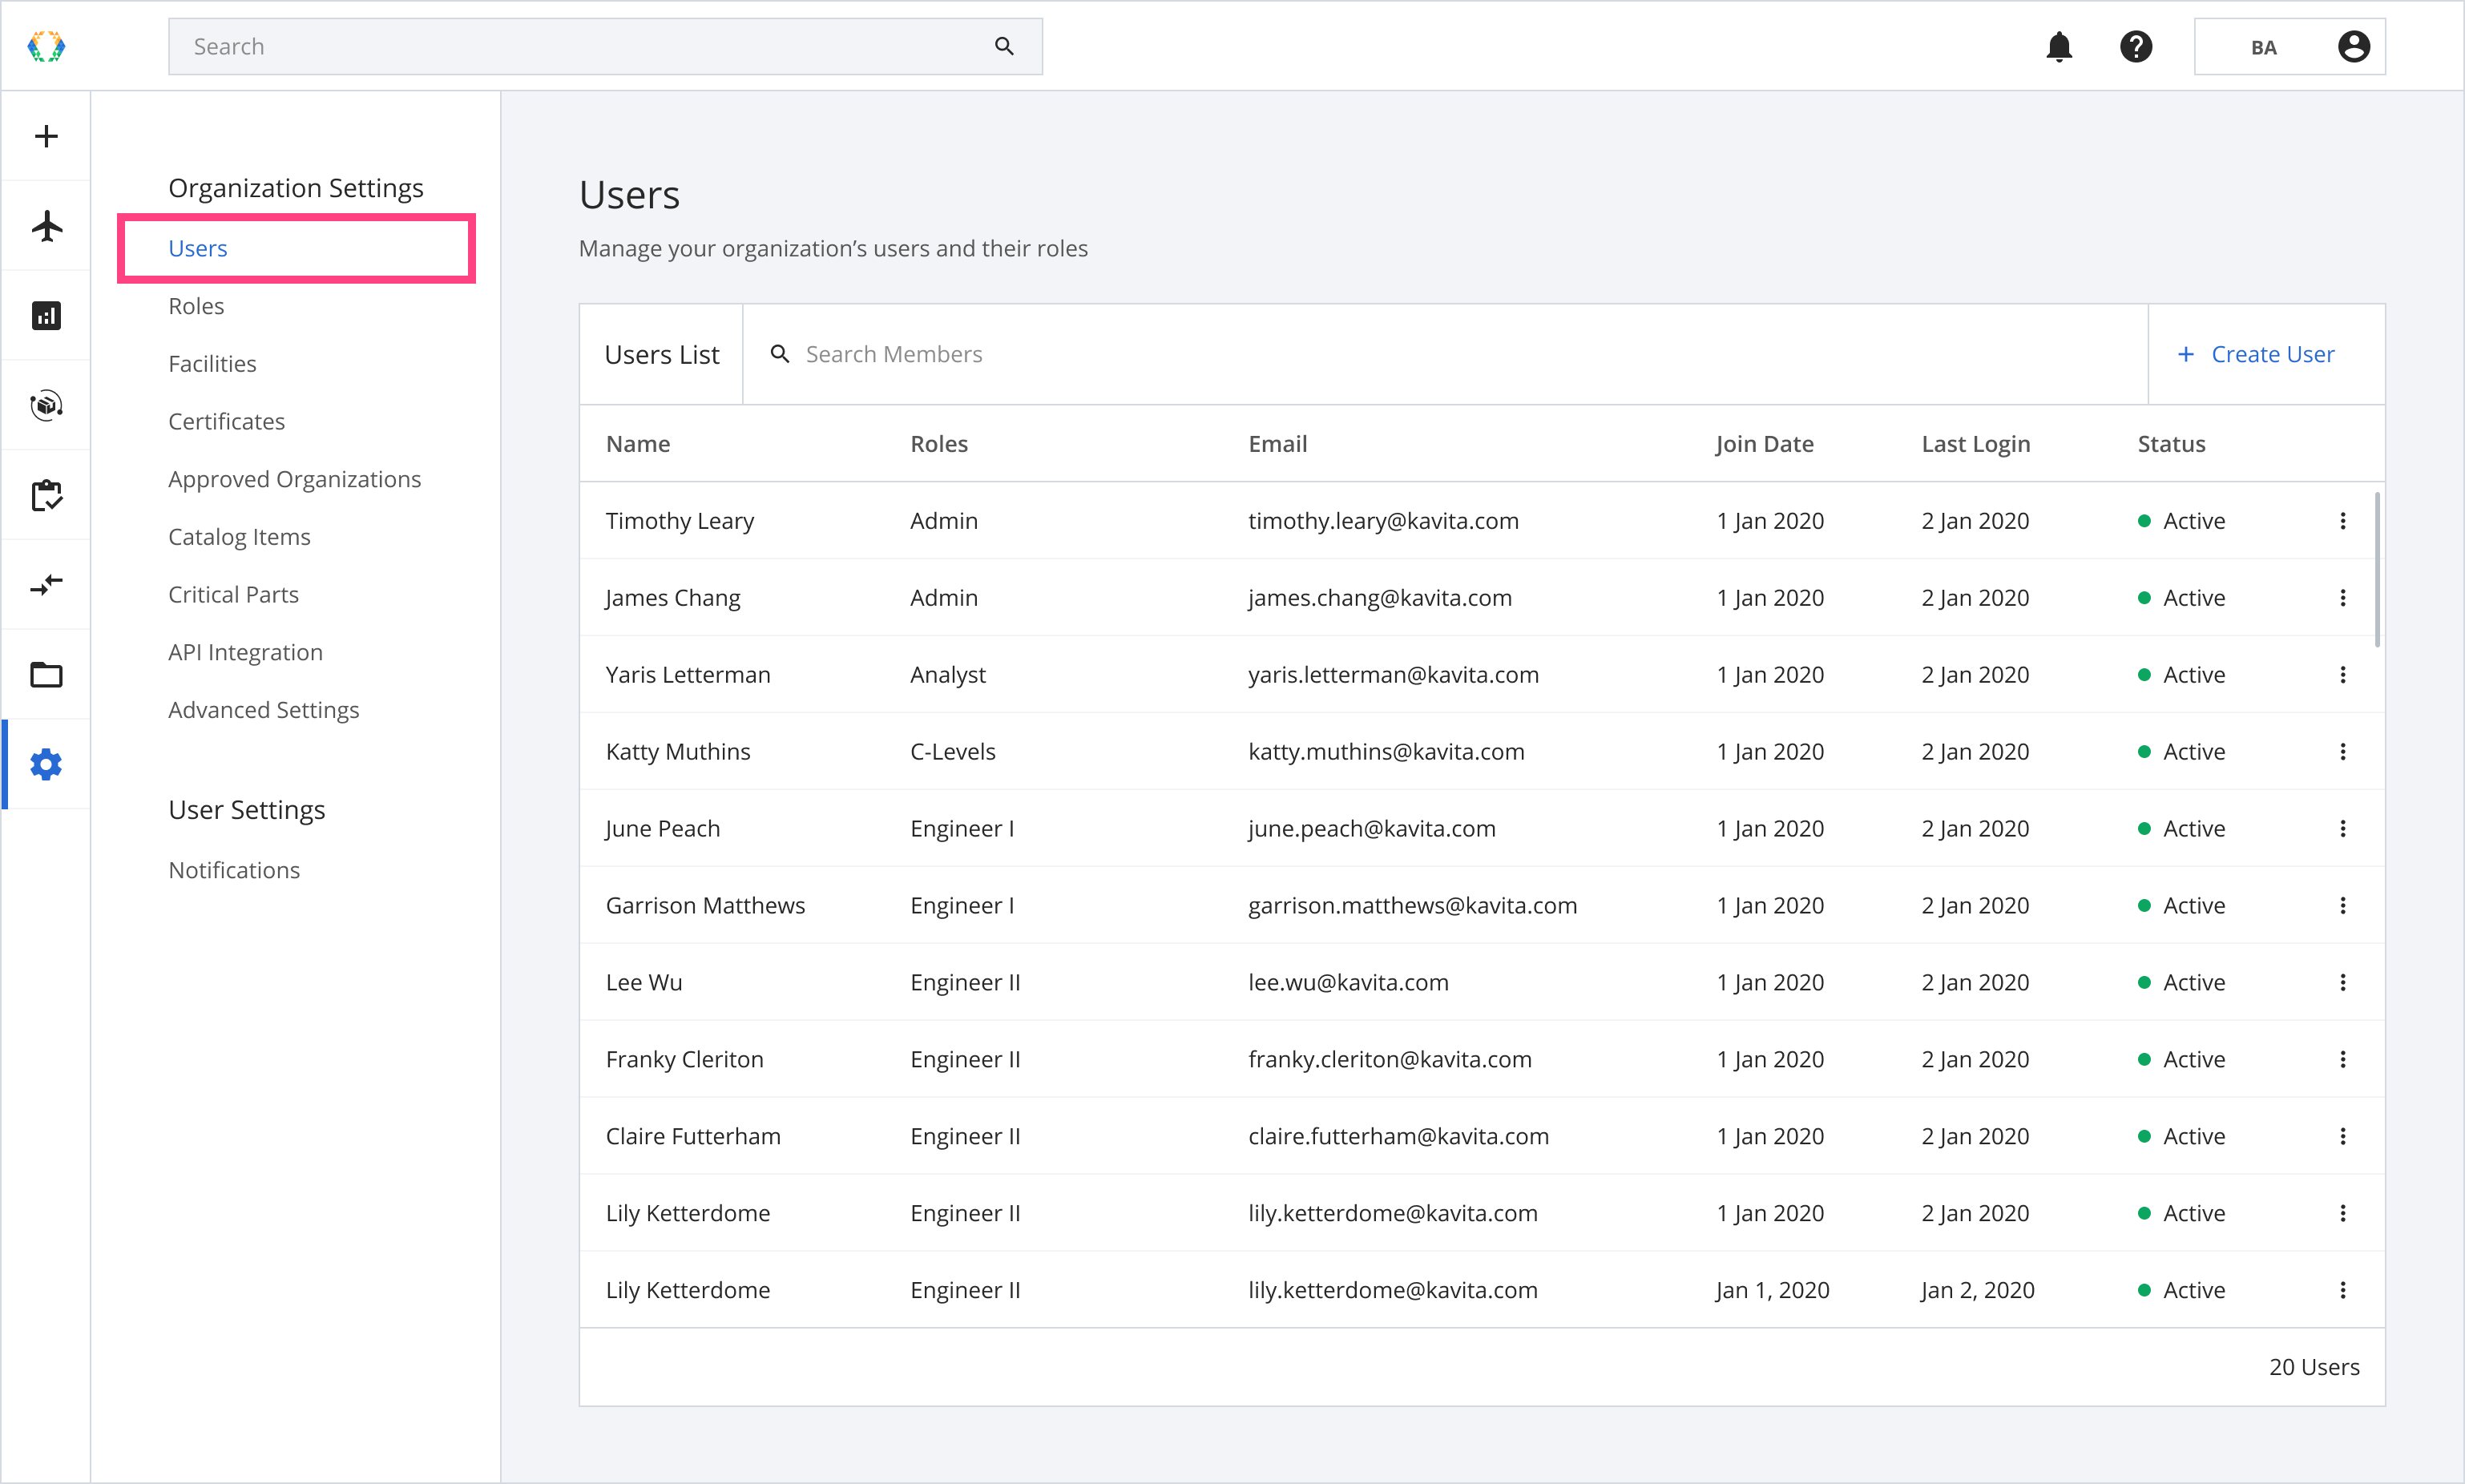
Users List Layout
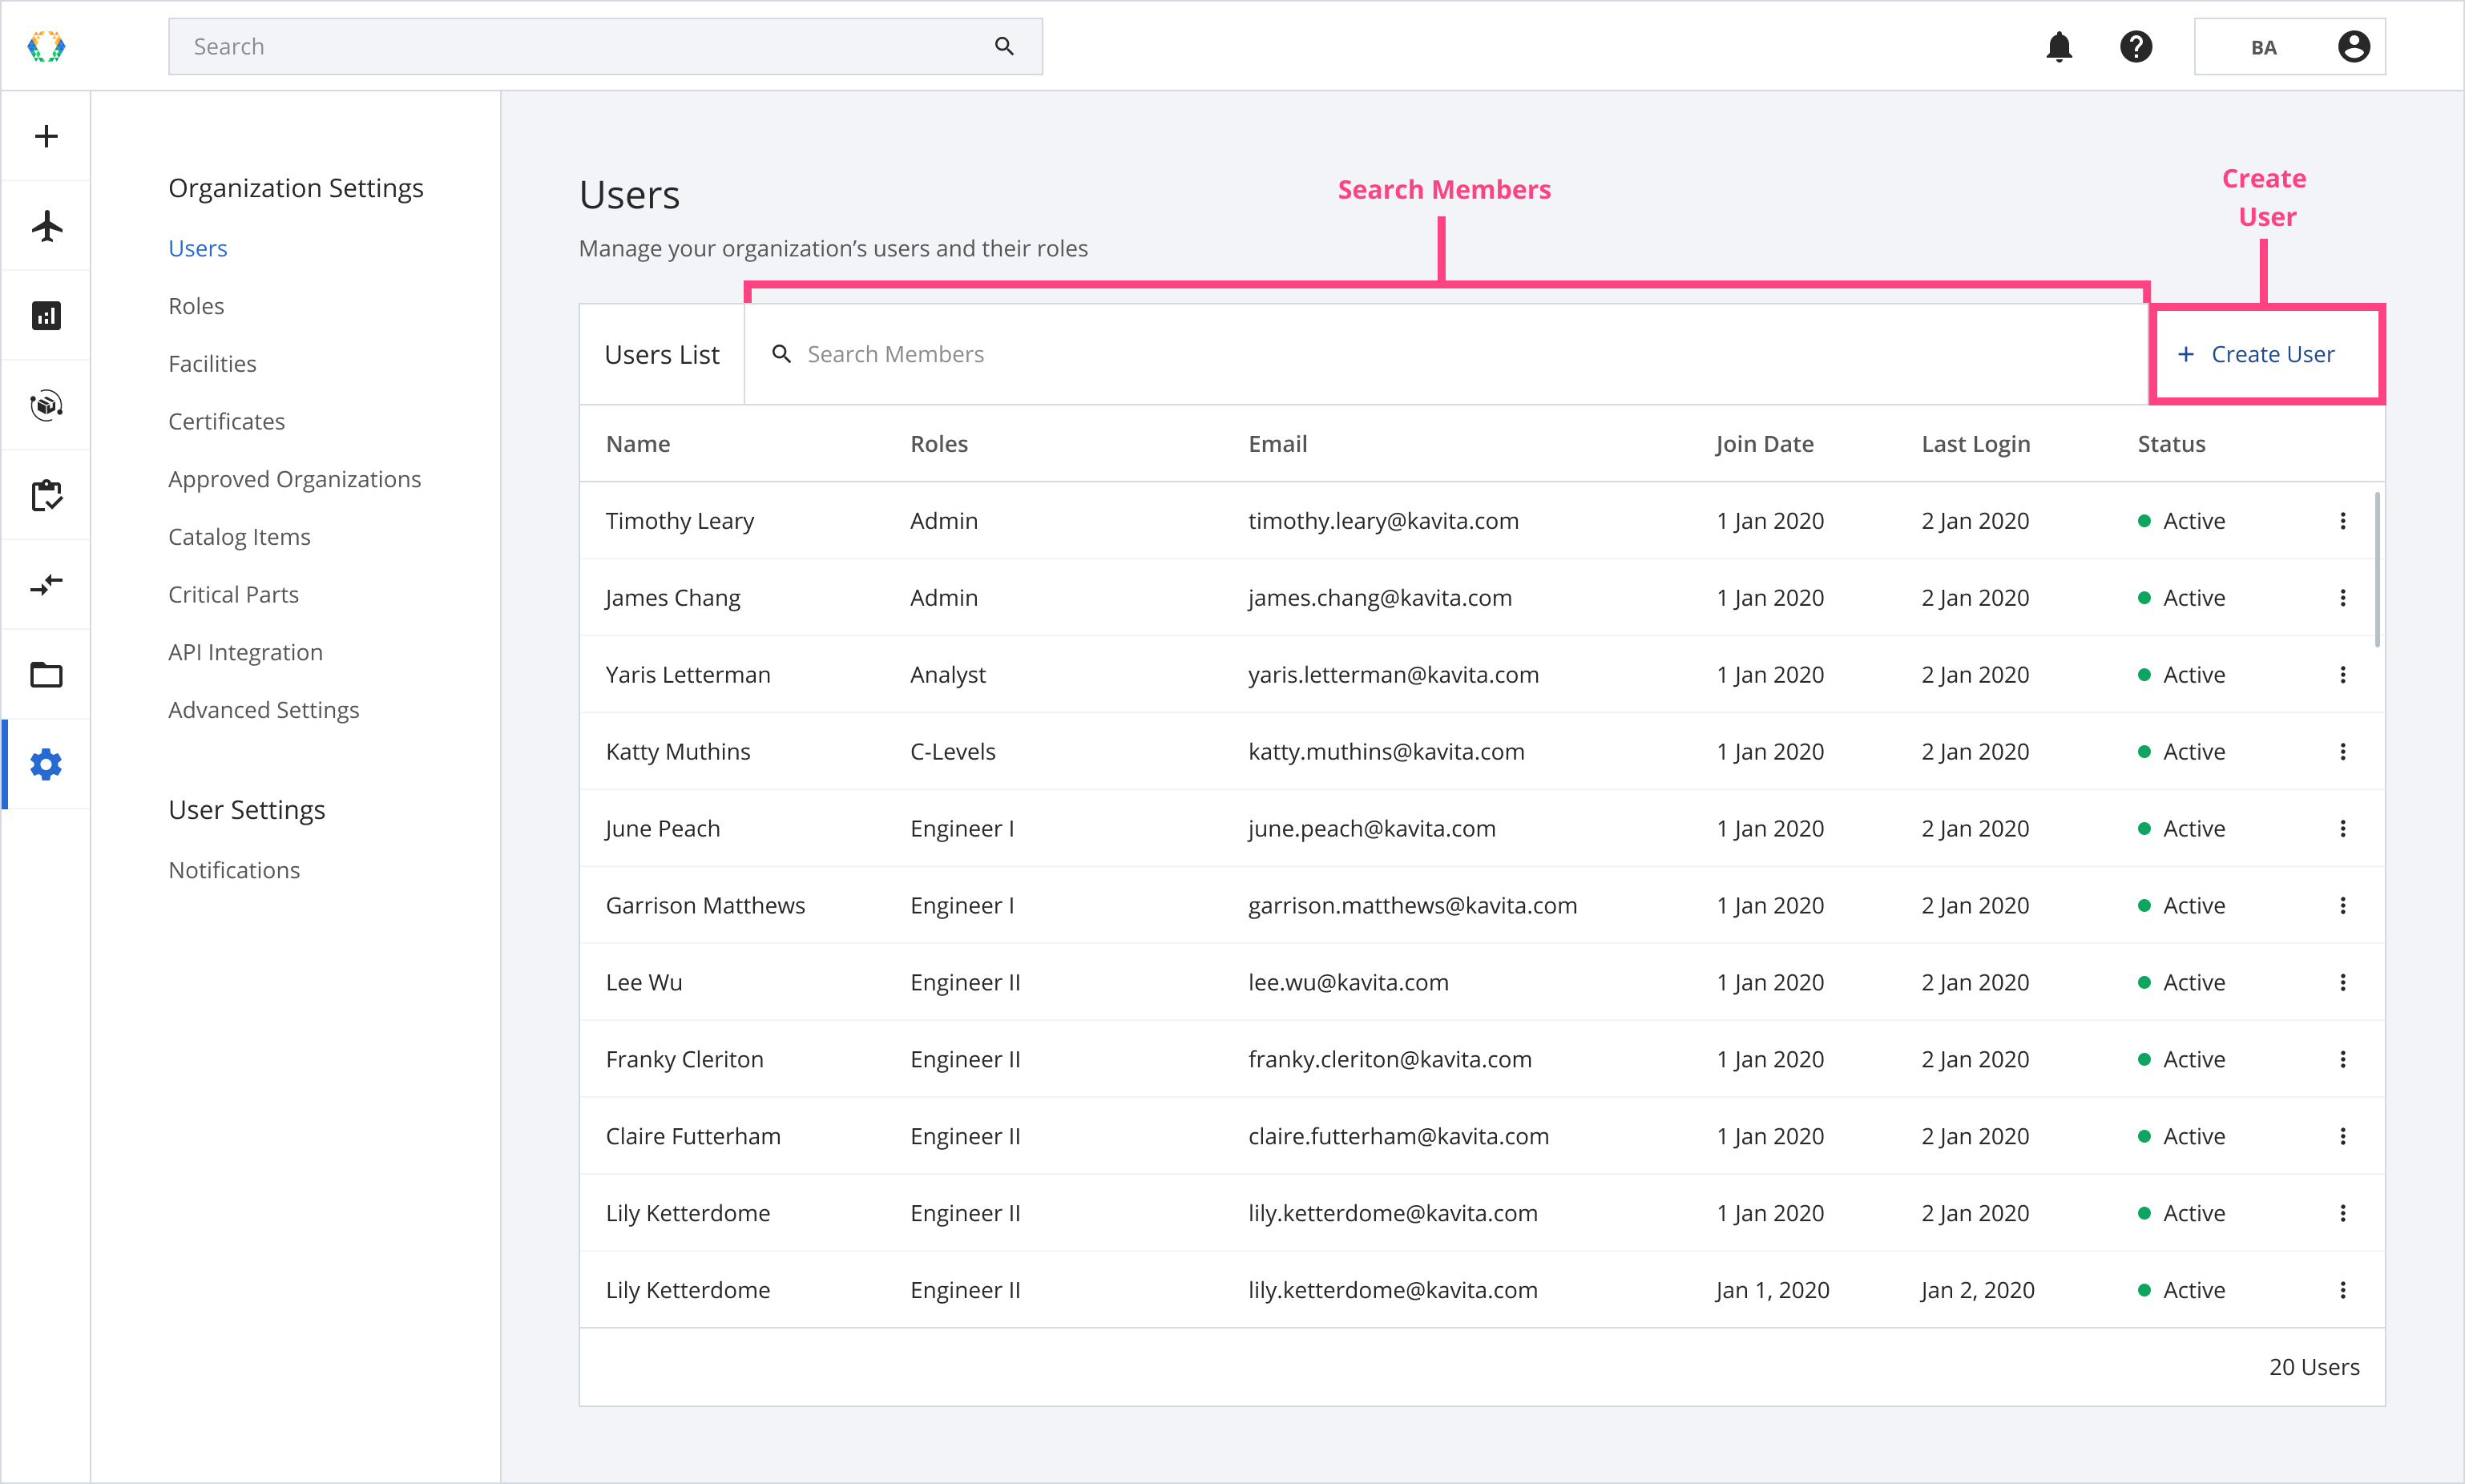
Searching on the Users List
The search bar on the users list allows you to search for users within your organization.
| Searchable Parameters |
|---|
| Name |
Create Users
Step 1: From the users list, click 'Create User'.
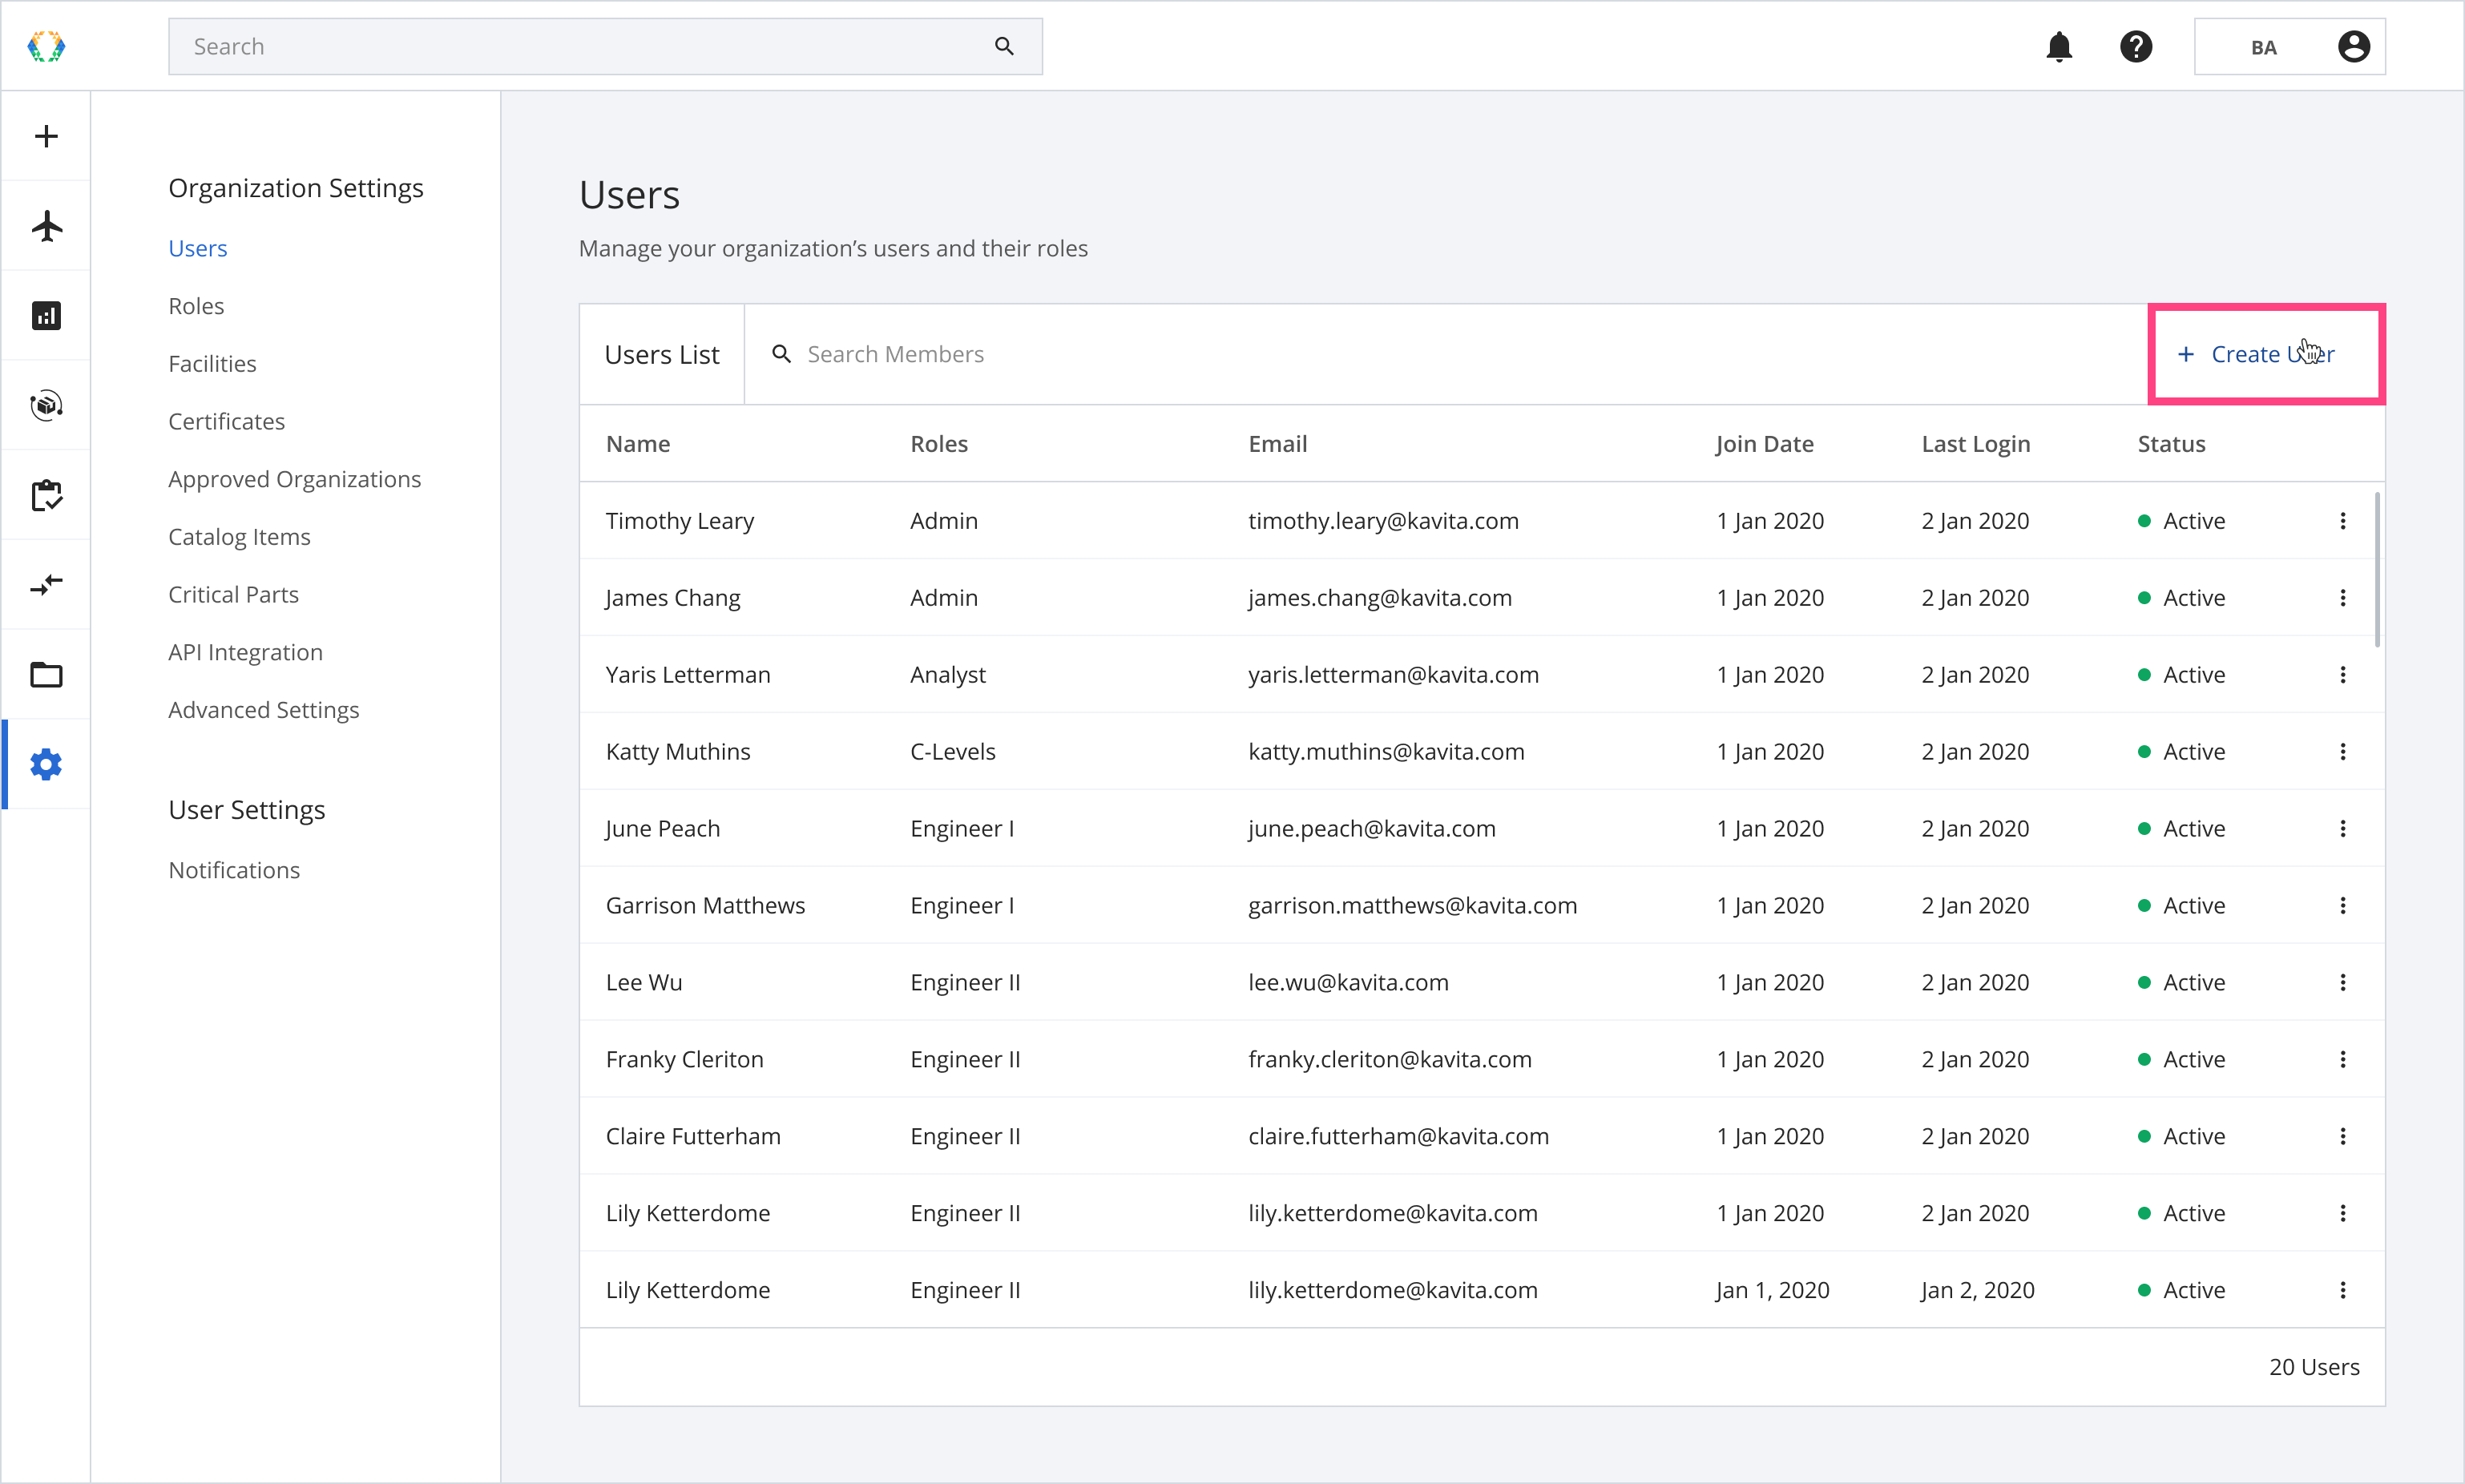
Step 2: Provide the details for the new user.
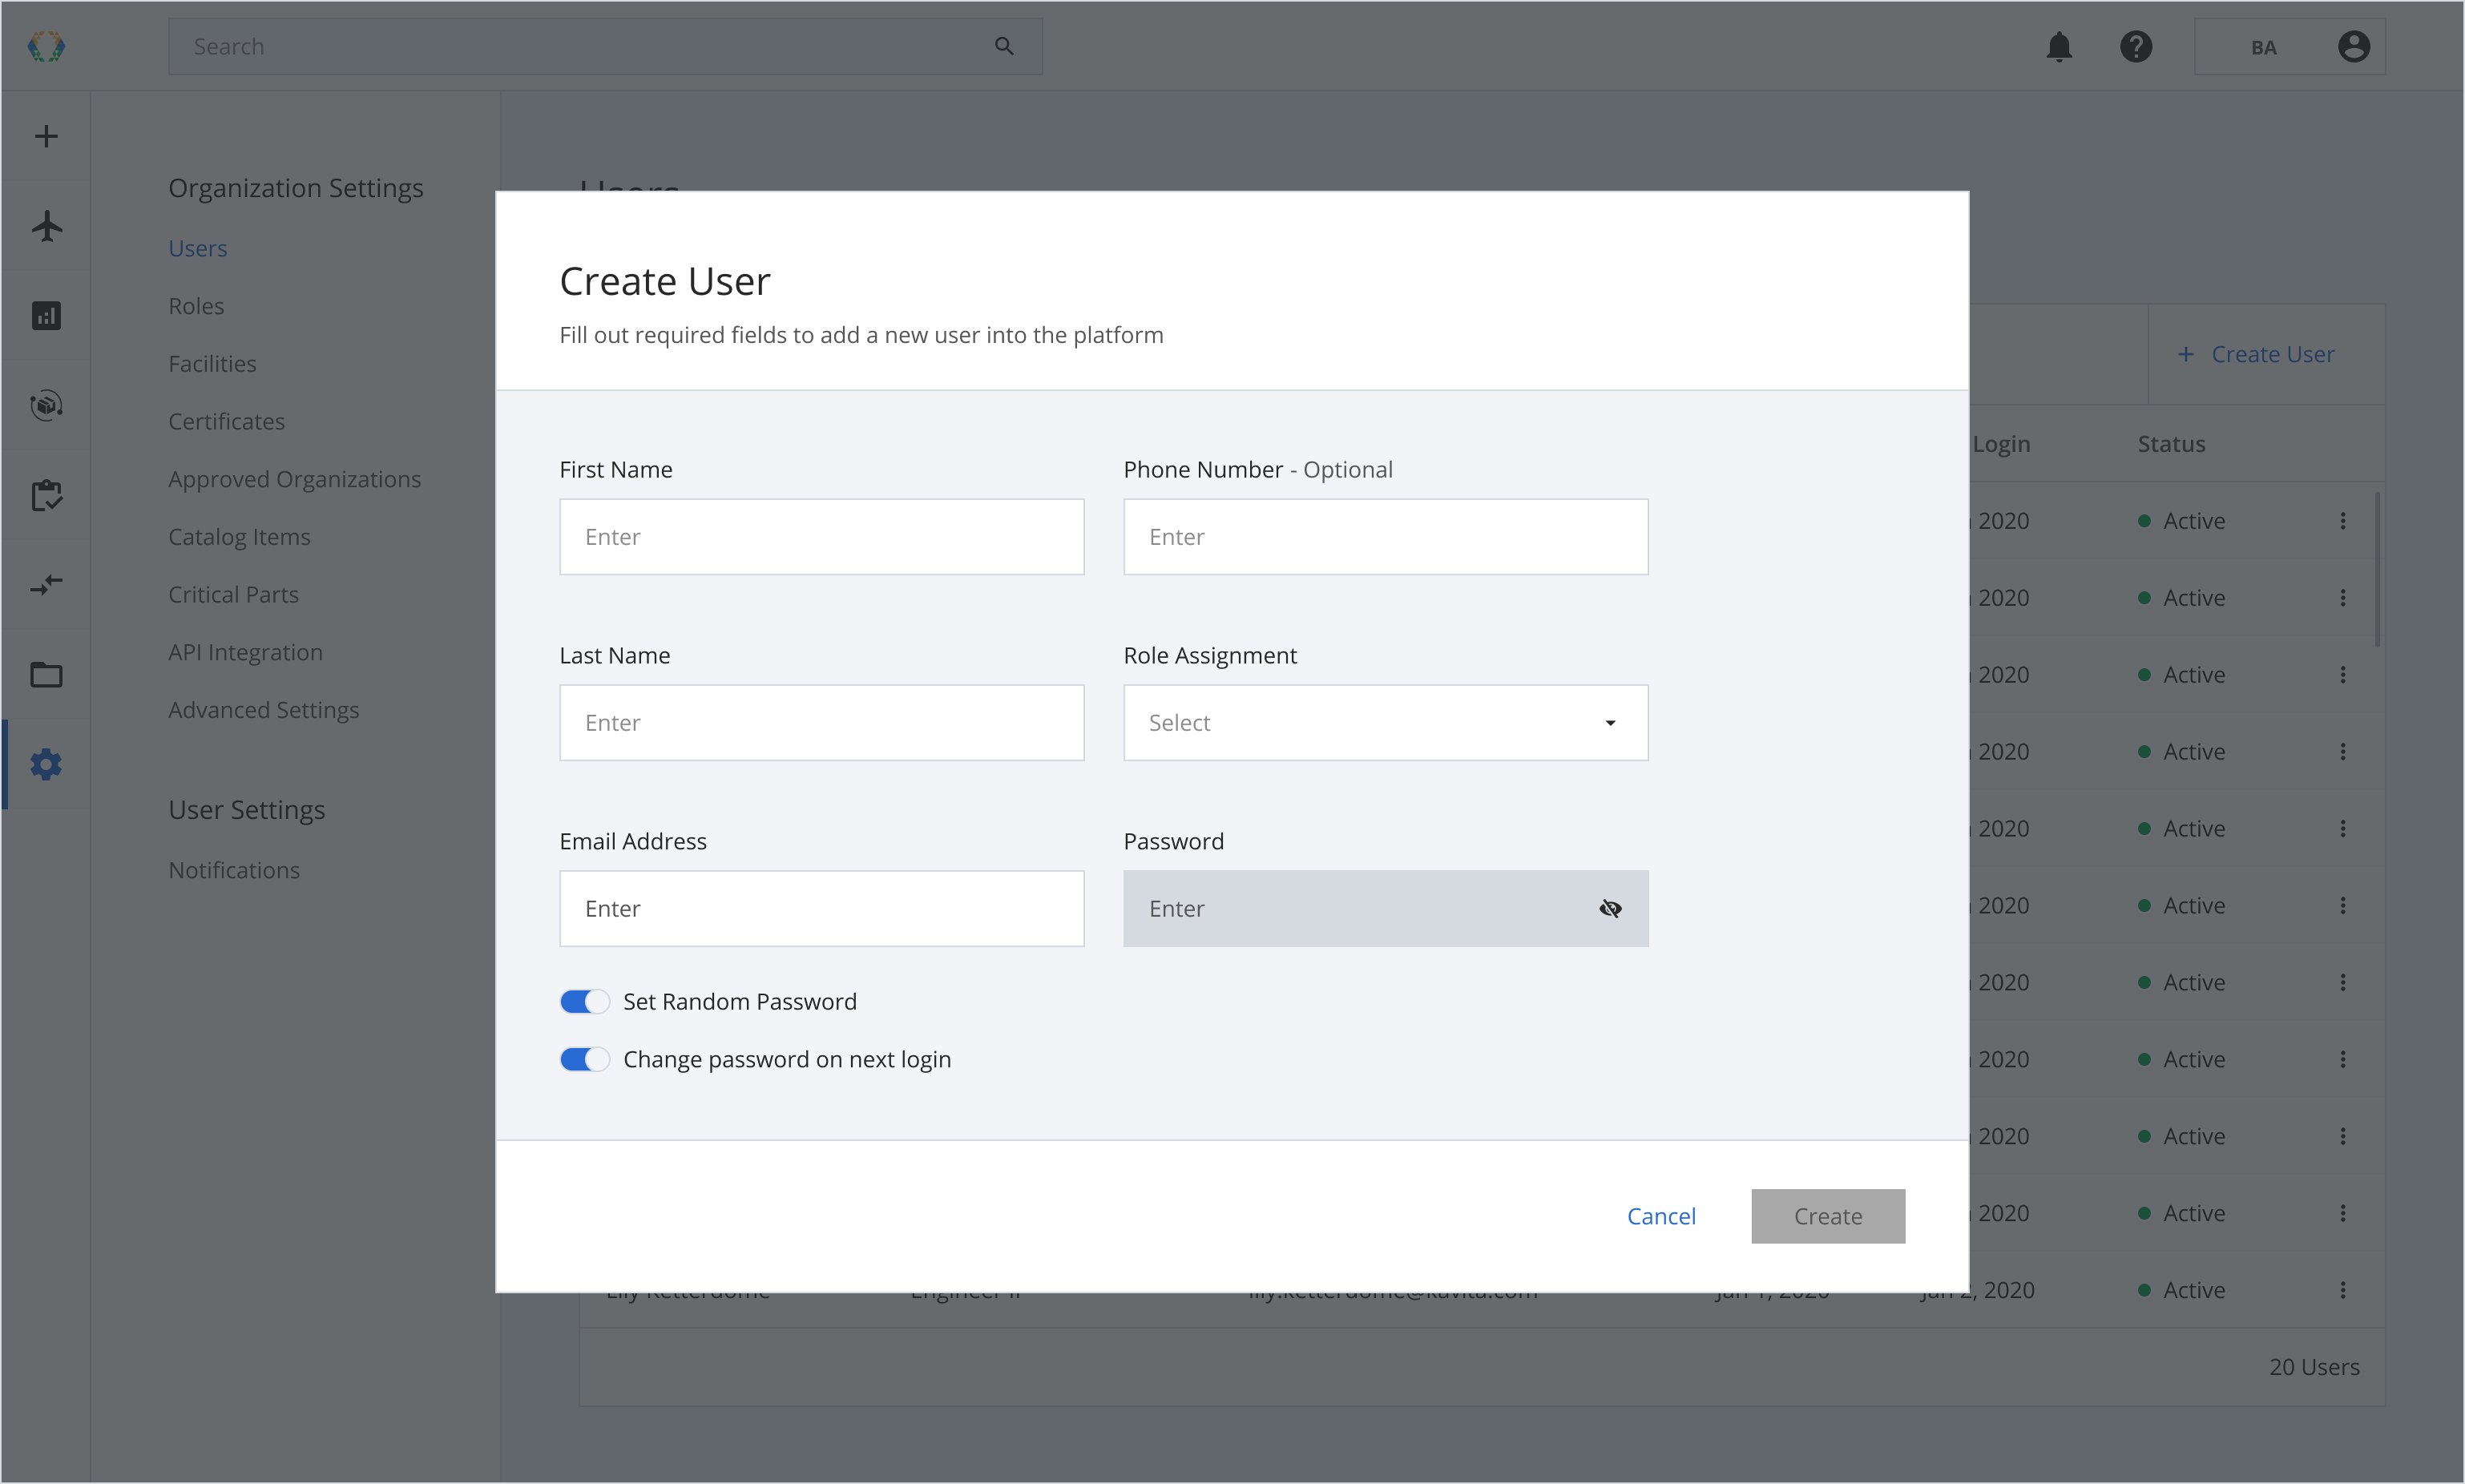
Step 3: Select a role for the new user.
Each role has different access and permissions on the platform. Please ensure that you select the suitable role for your new user.
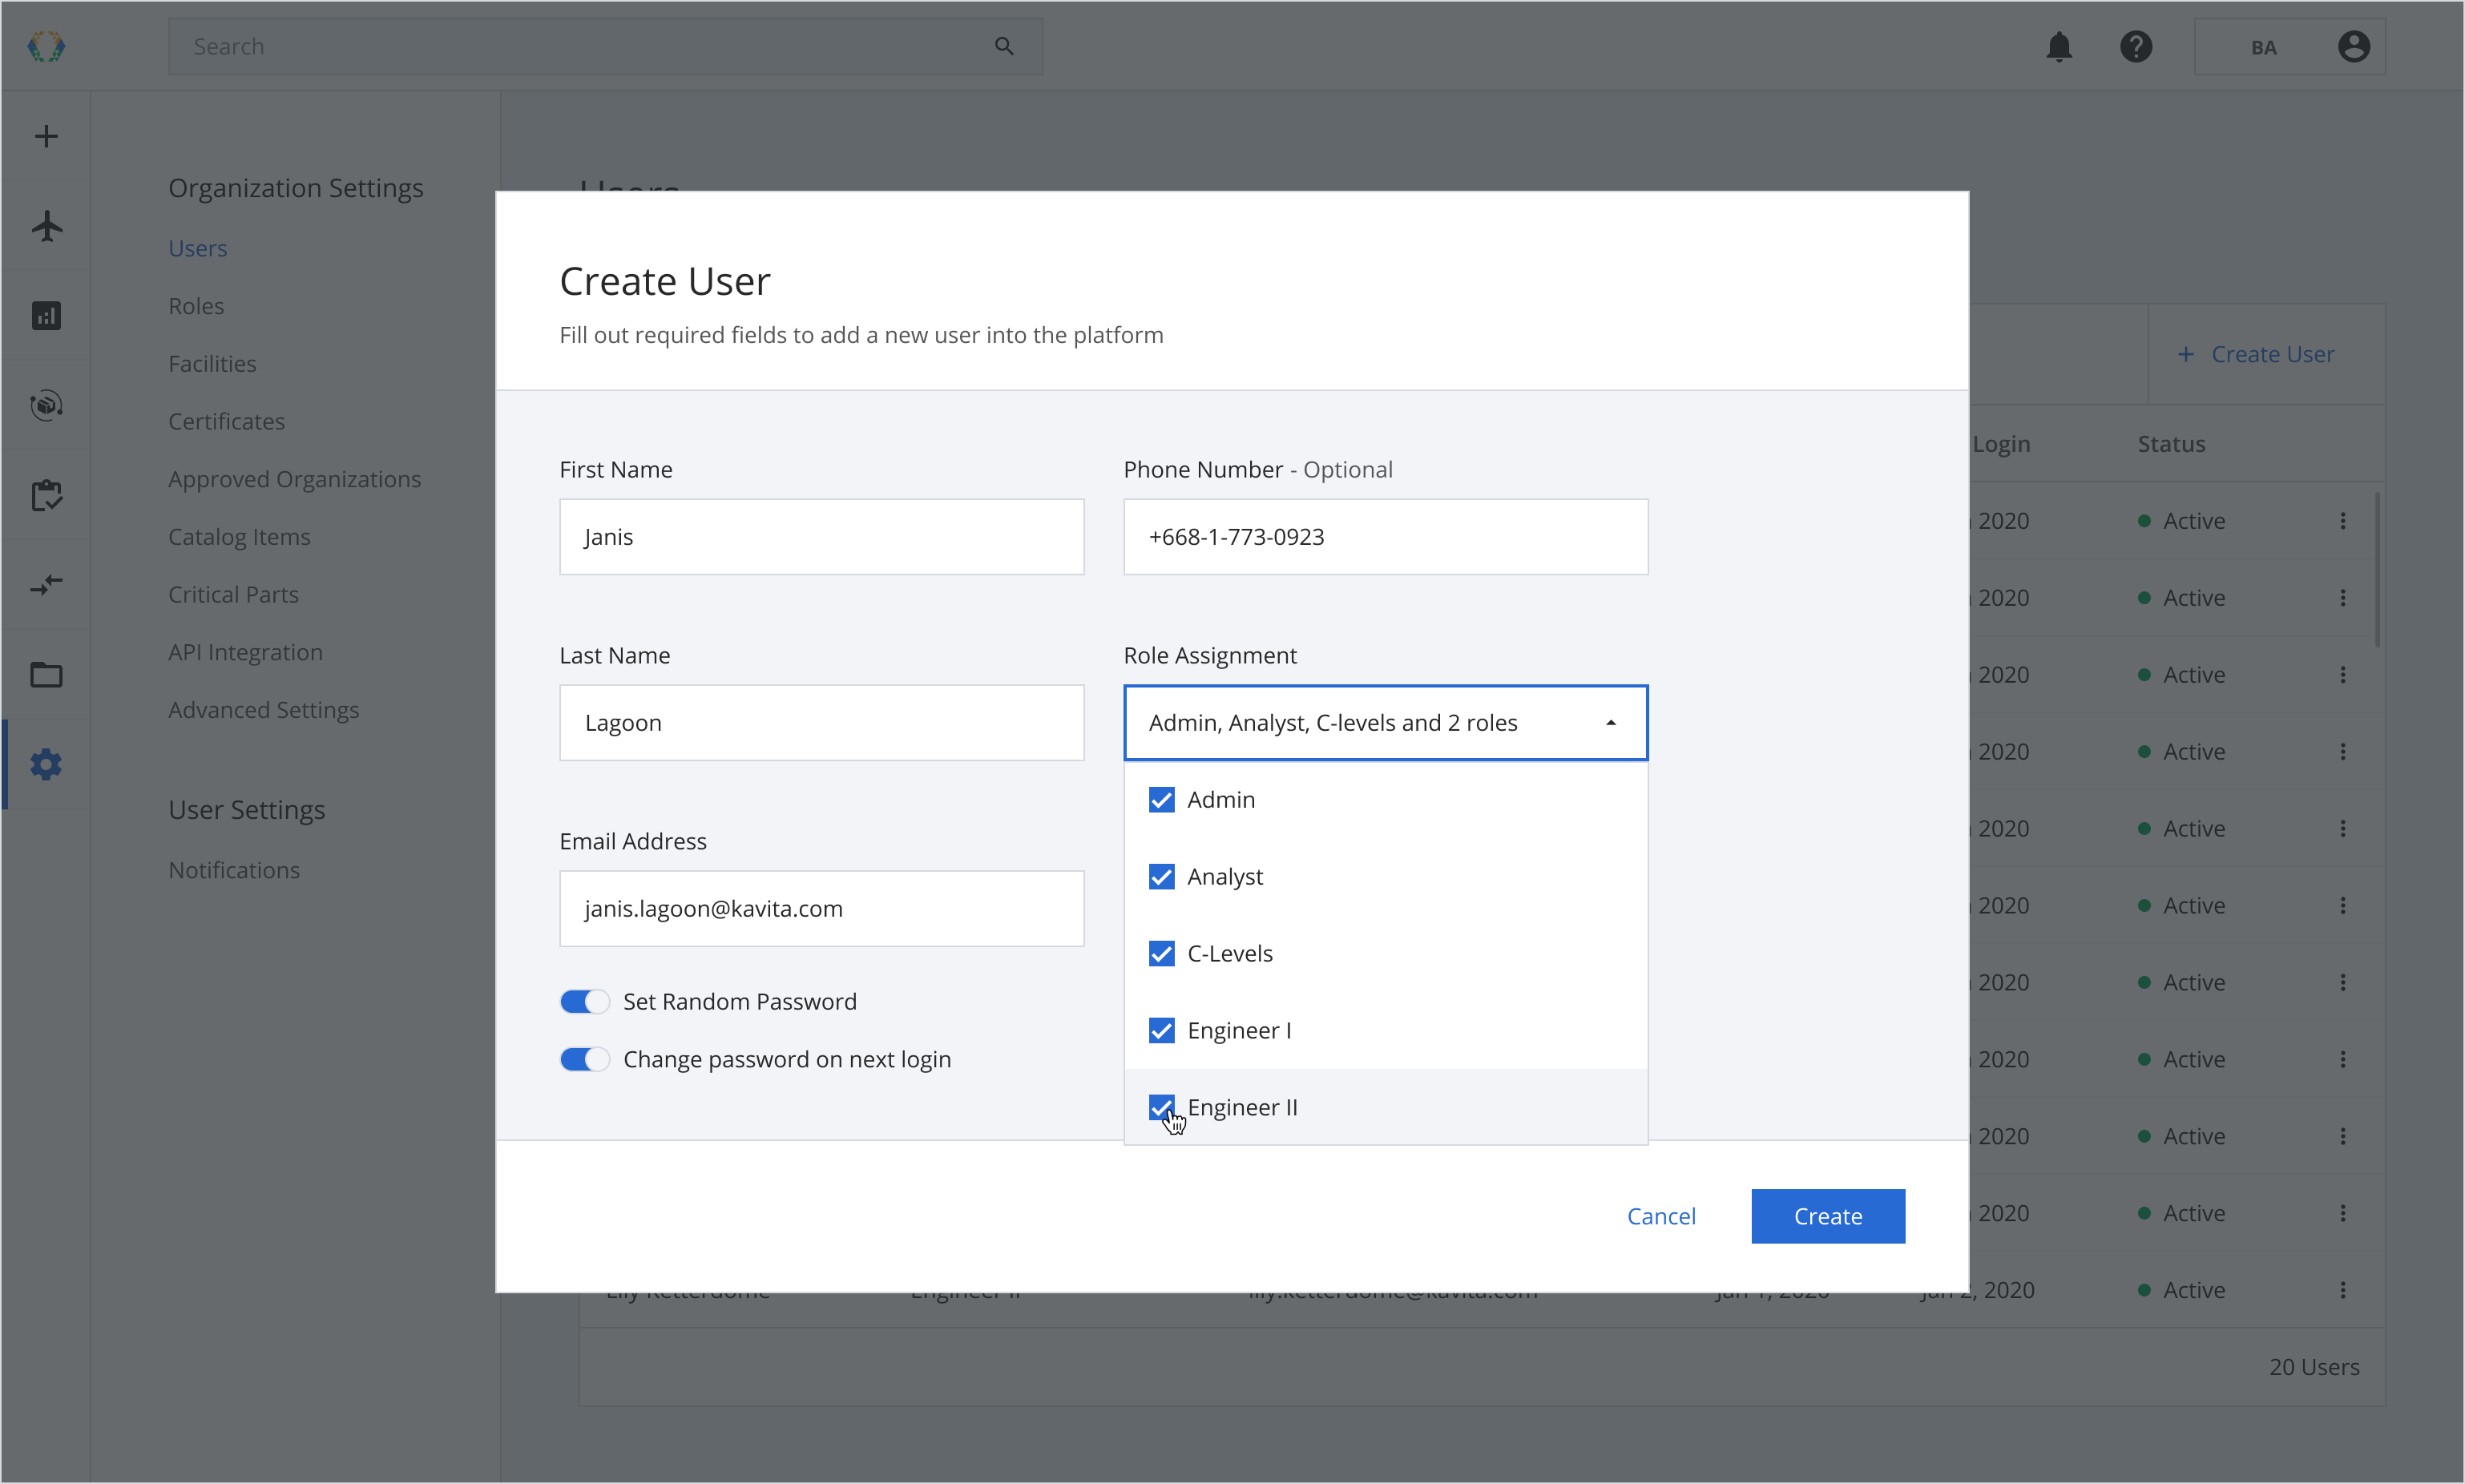
Step 4: Click 'Create'.
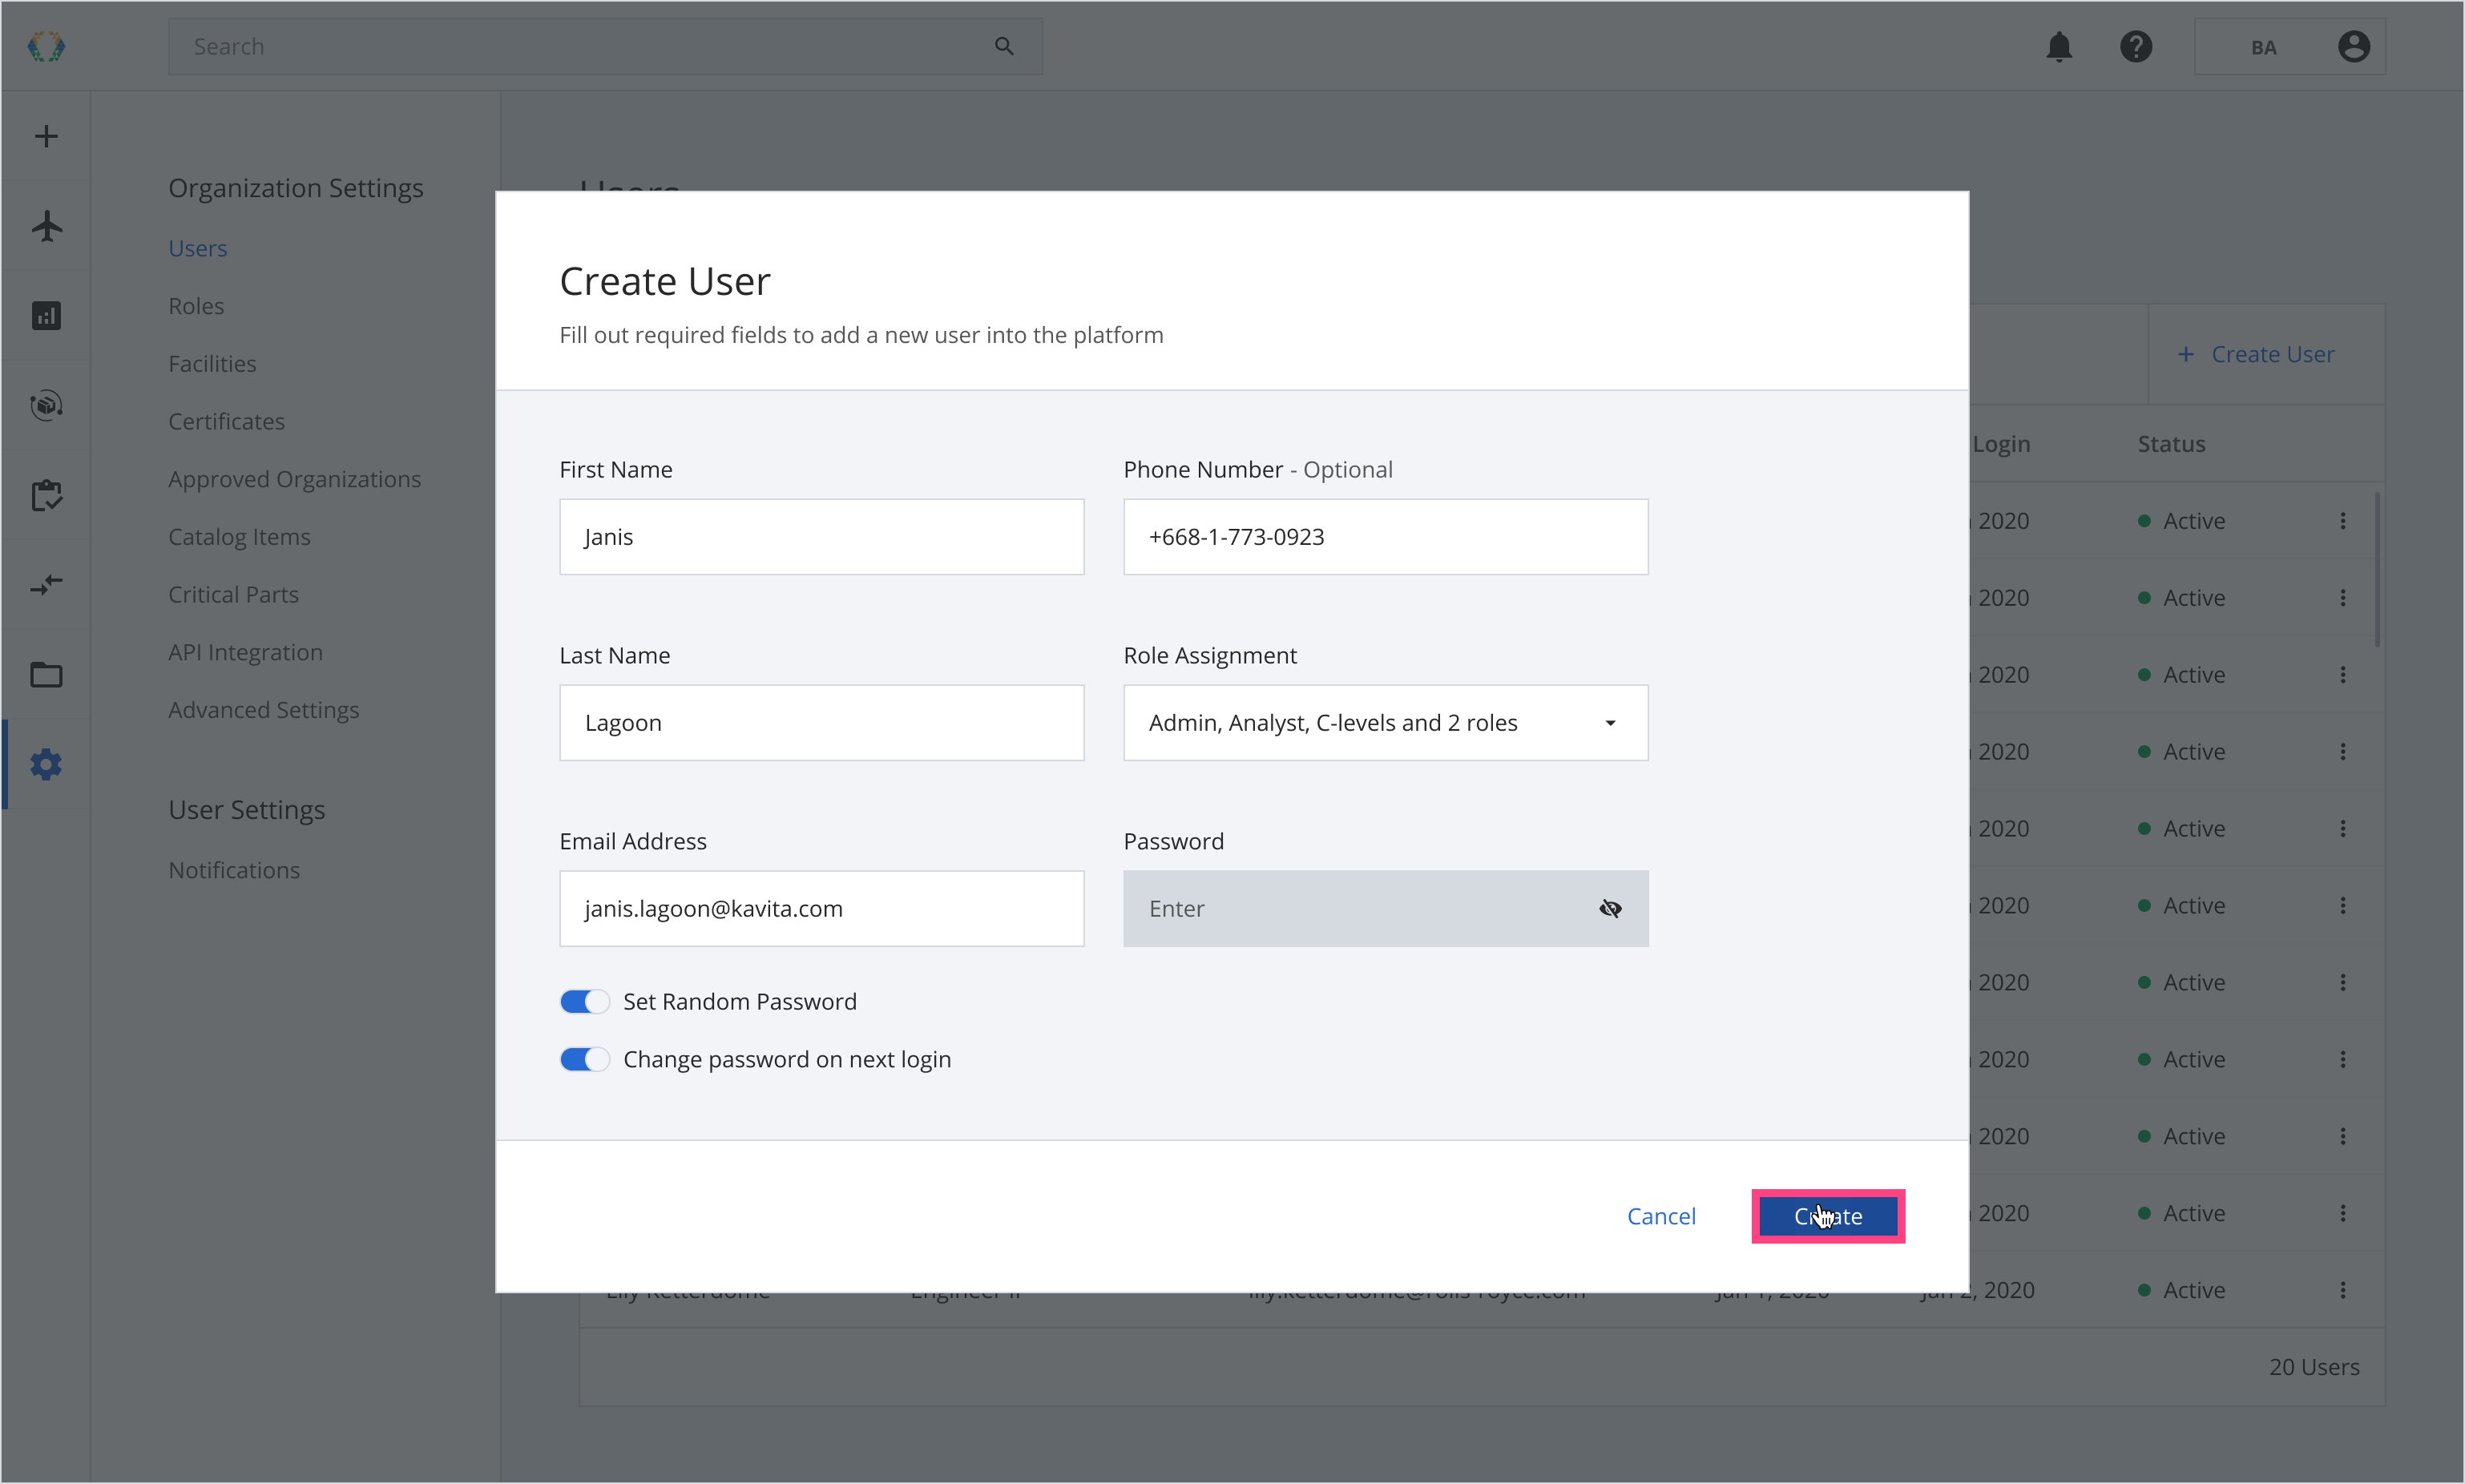
Optional: You can turn the toggle off to set a custom password for the new user.
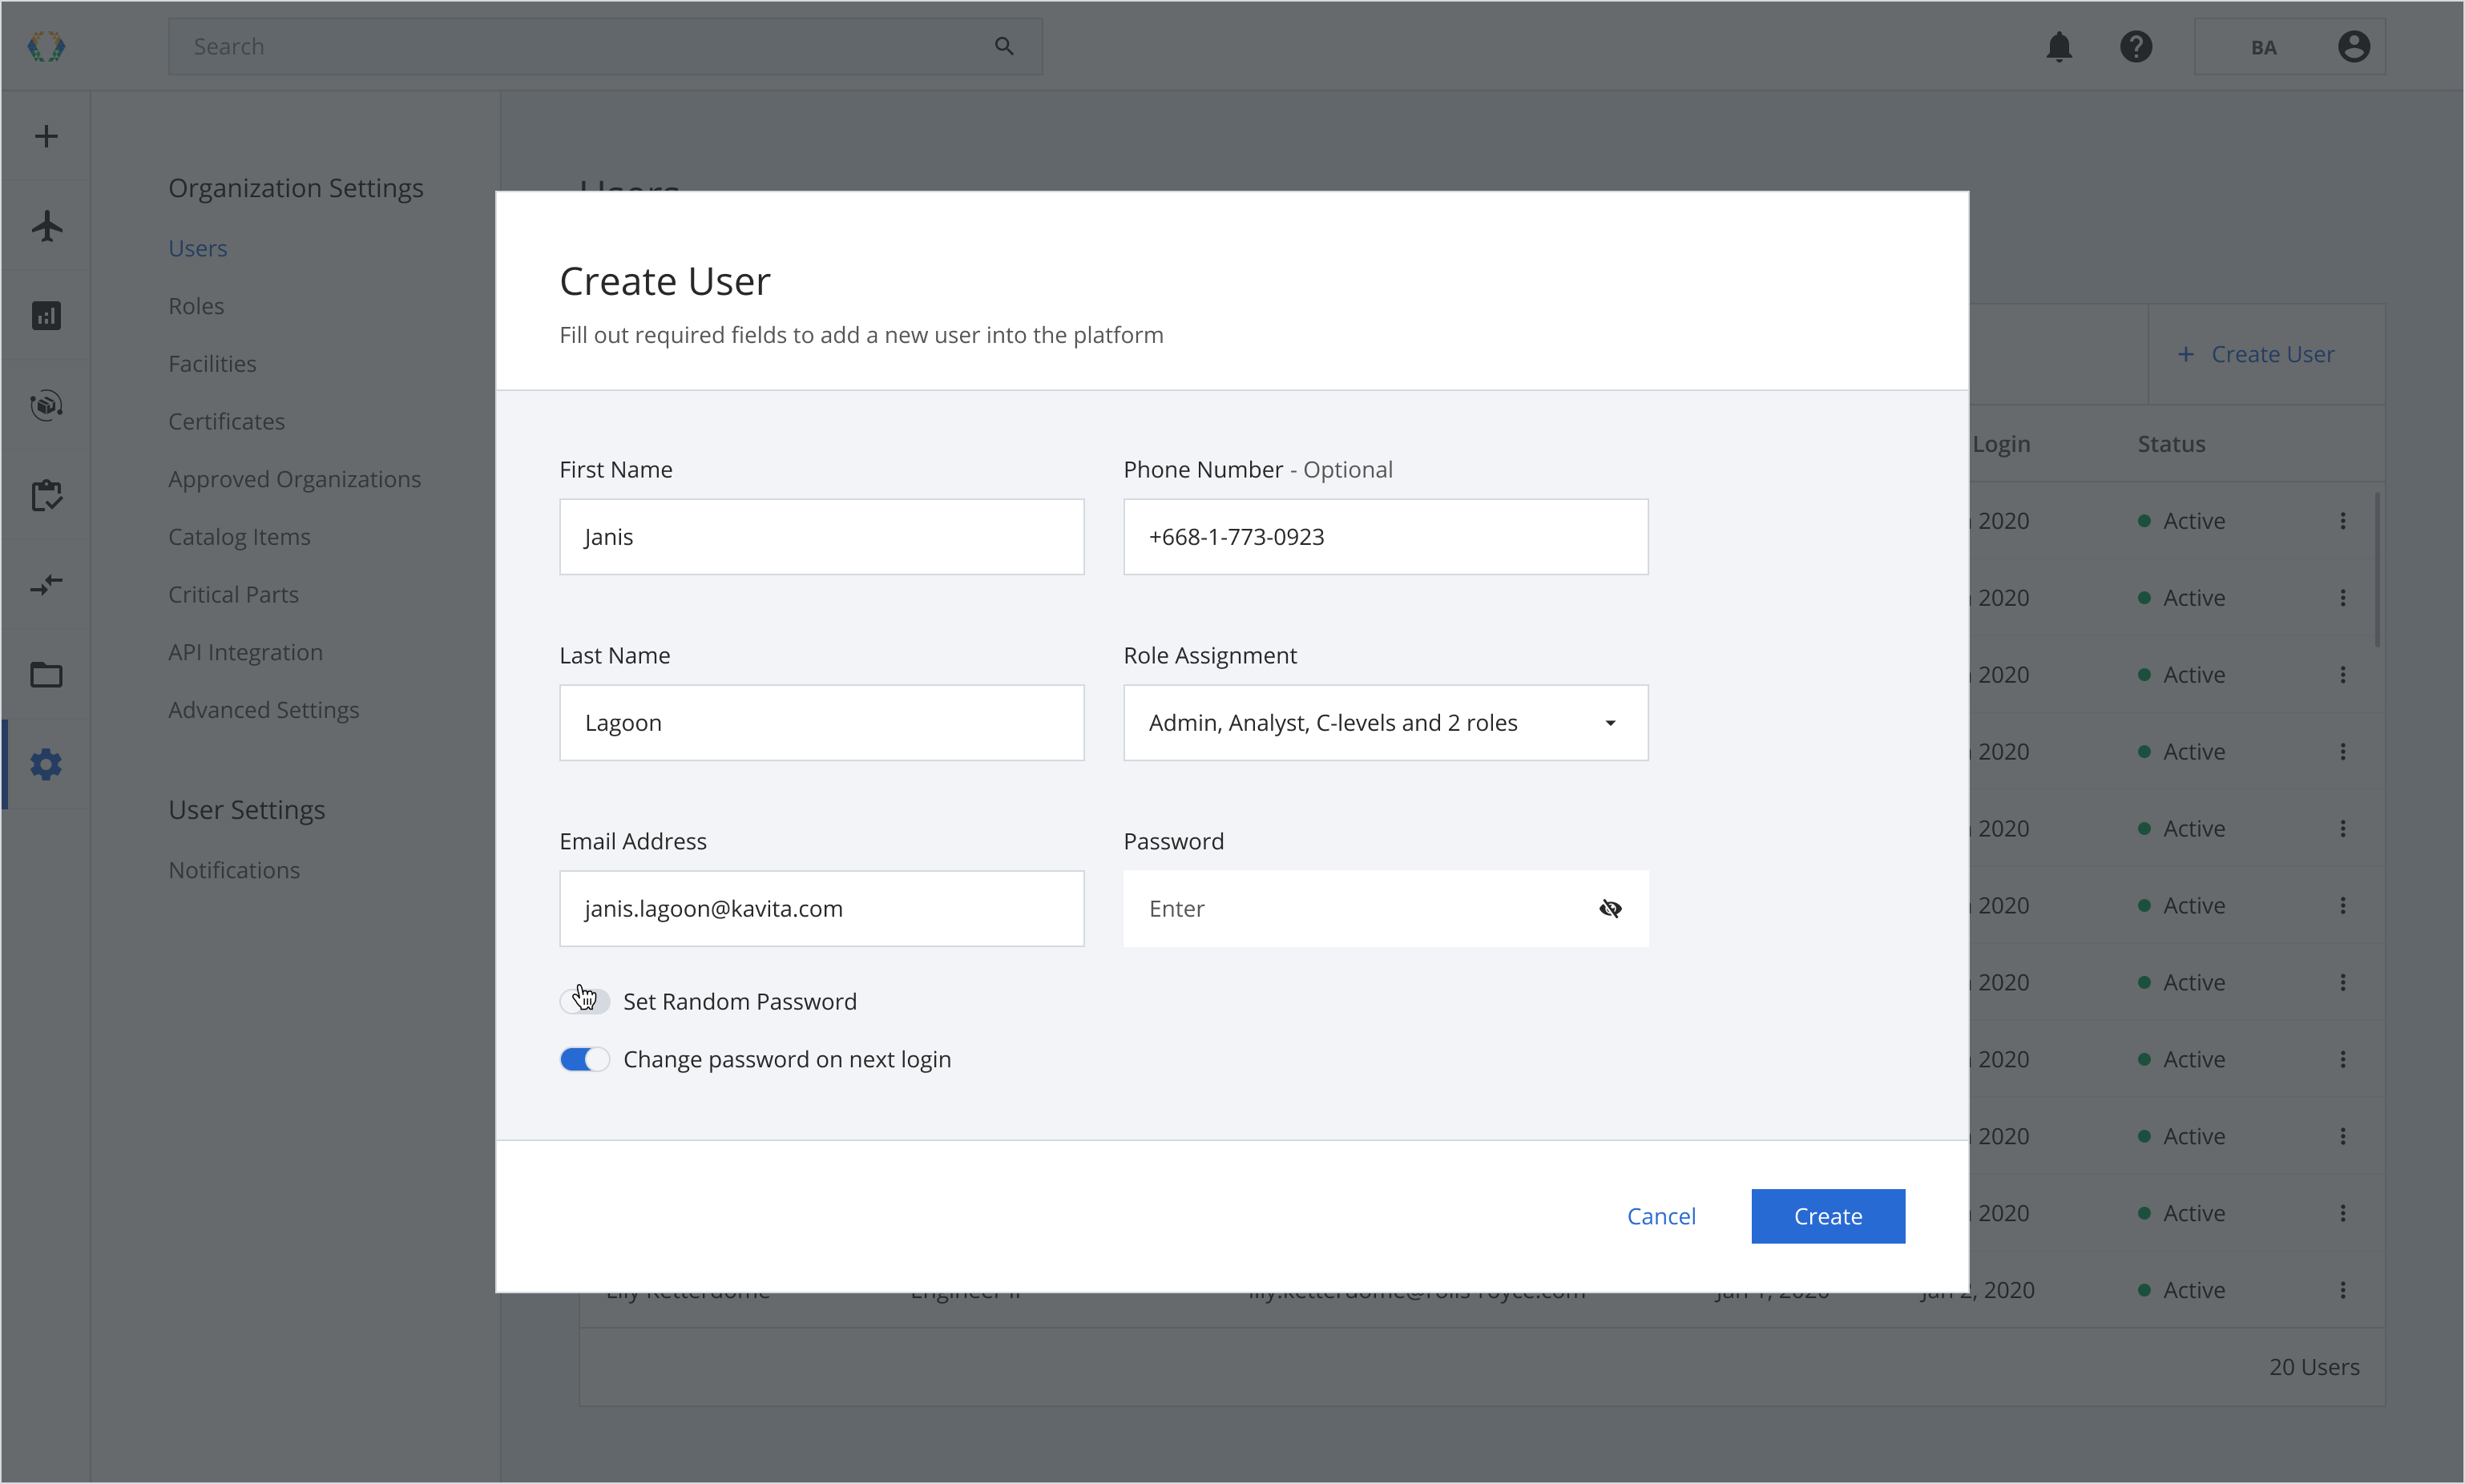
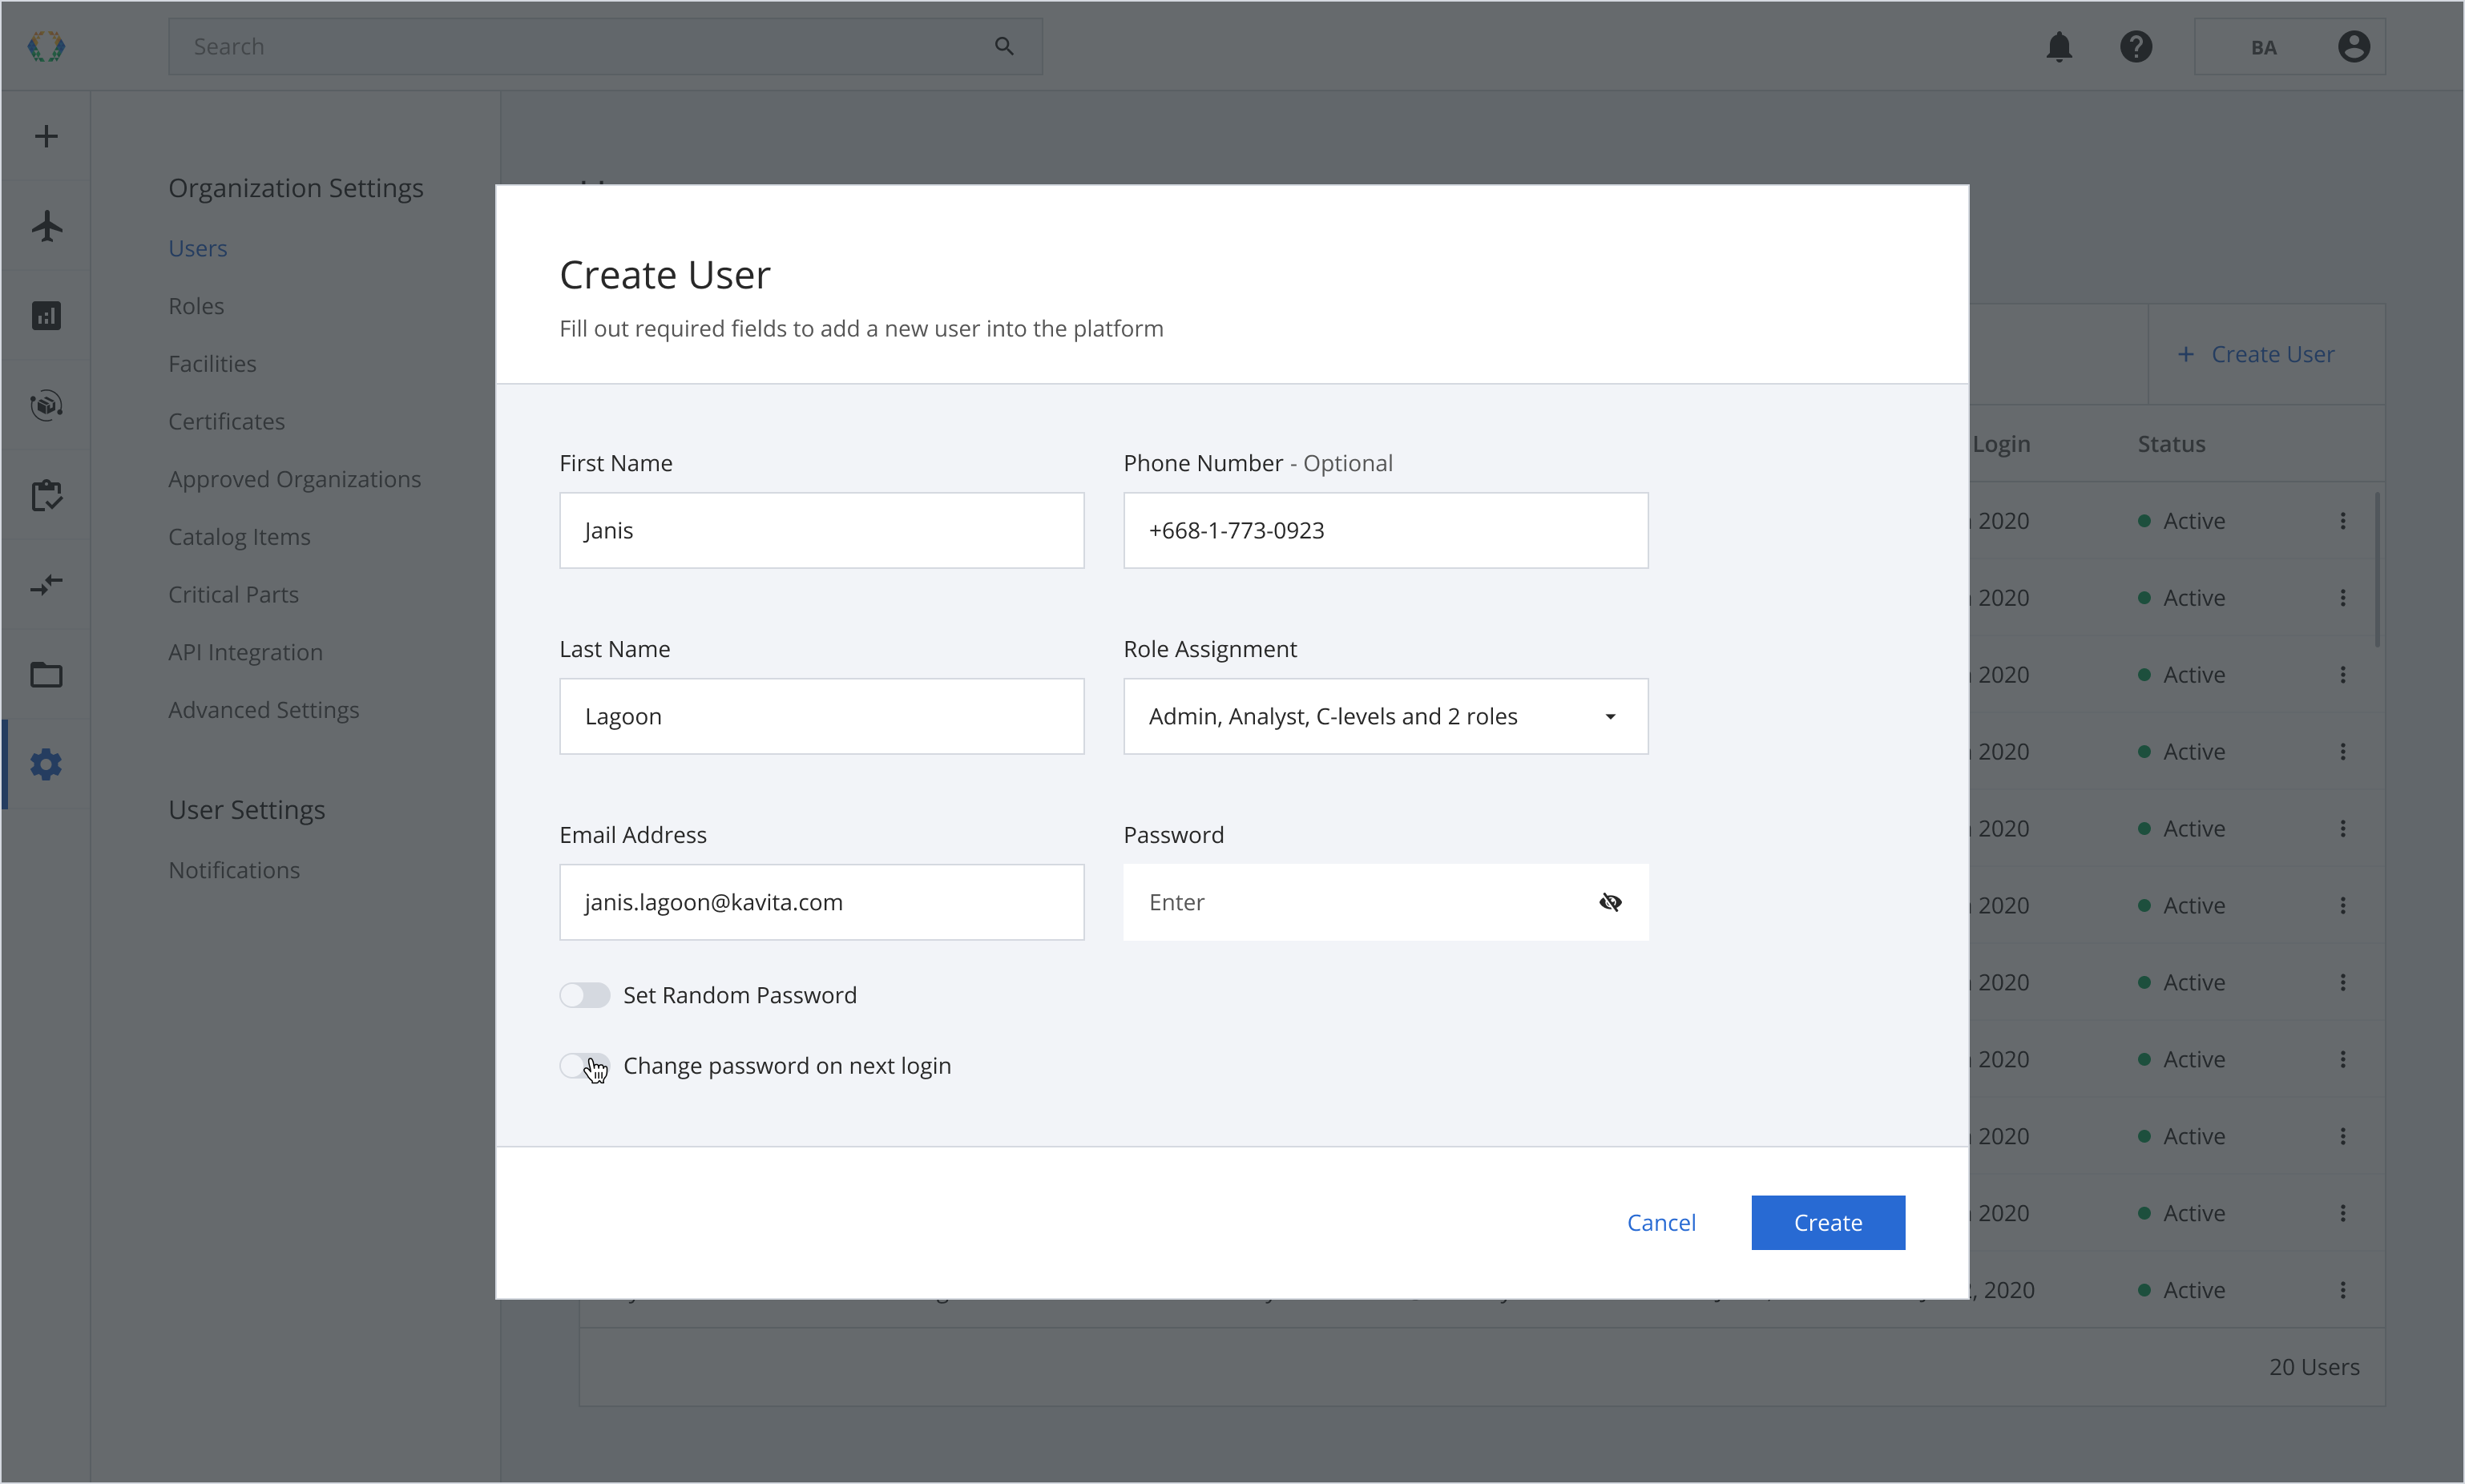
Optional: You can turn the toggle off so your user will not be prompted to reset their password upon login.
Step 5: Once the new user's details are added, a green message will appear at the bottom right corner of the users list.
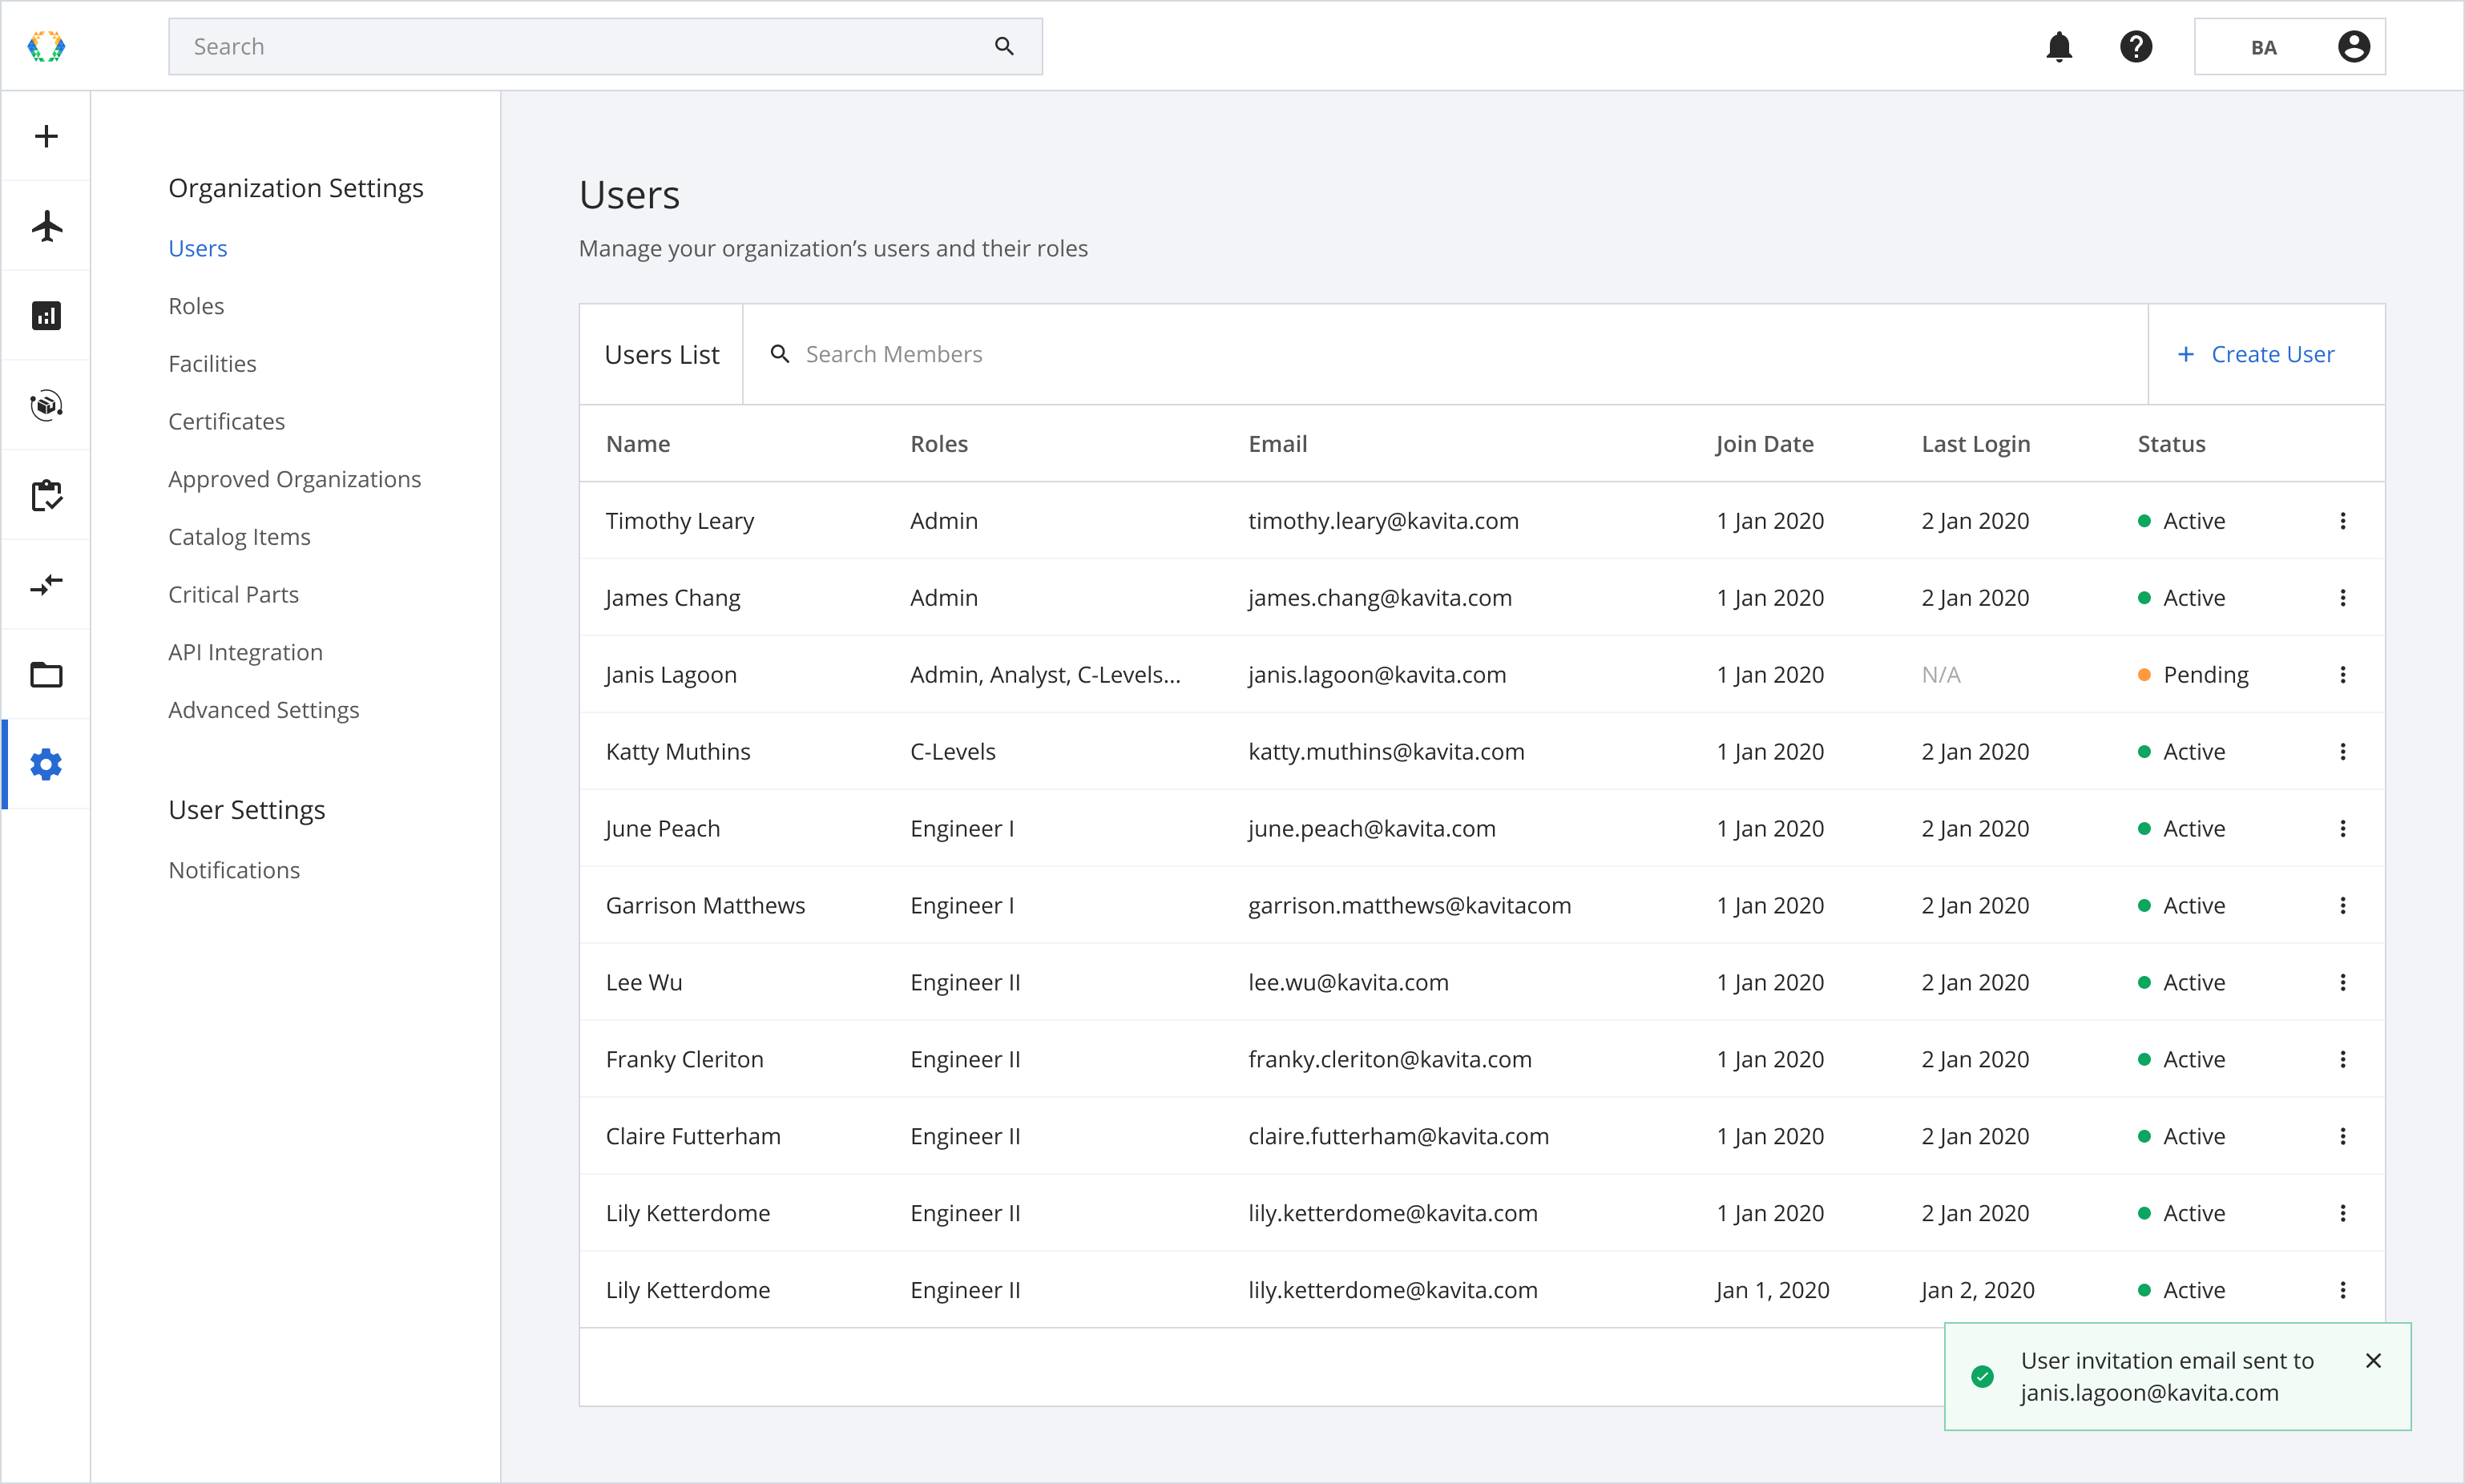
Step 6: The new user will receive the invitation email to log in to the platform.
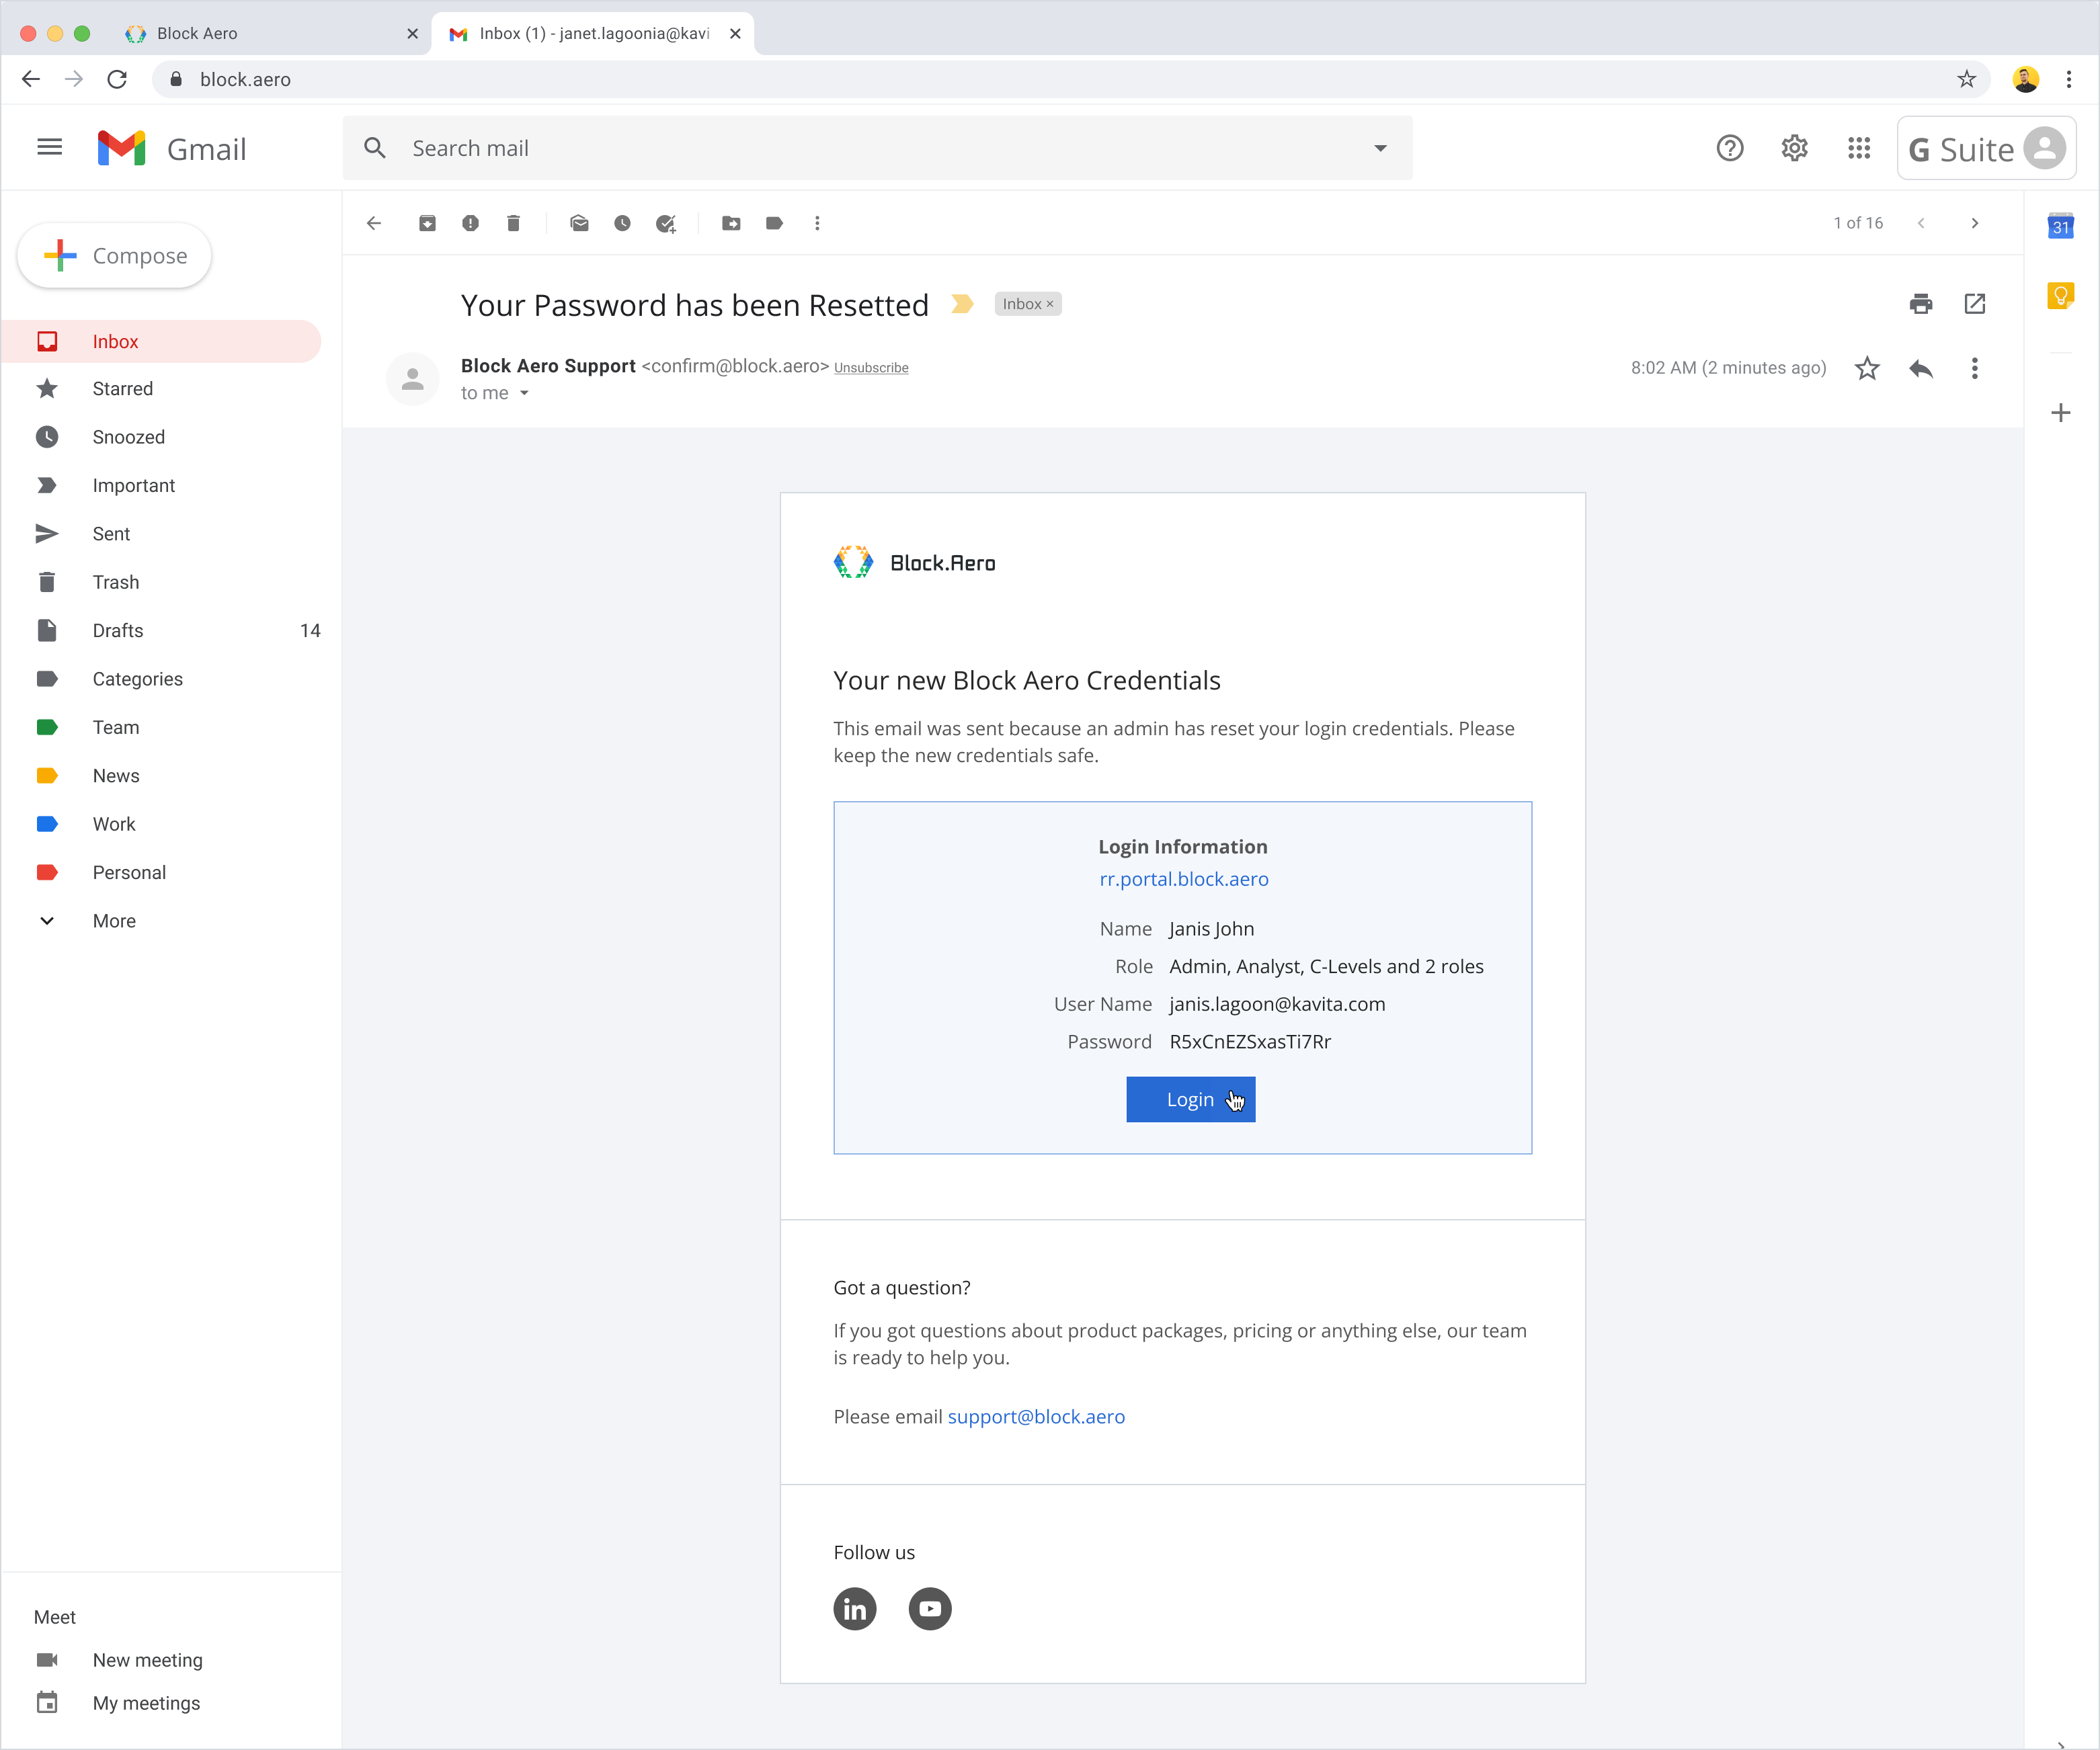
Step 7: The new user will be redirected to the login page to enter the credentials. Click 'Login' to proceed.

Step 8: The user will be prompted to change their password by default unless the 'Change password on next login' option is disabled.

Step 9: Once the password has been entered, click 'Change Password'.

Step 10: Once the password is successfully updated, you will be redirected back to the Login page to log in with your new password.

Step 11: Enter your login credentials to use Block Aero!

Edit Users
Step 1: From the users list, click ⁝ button to edit the users details.
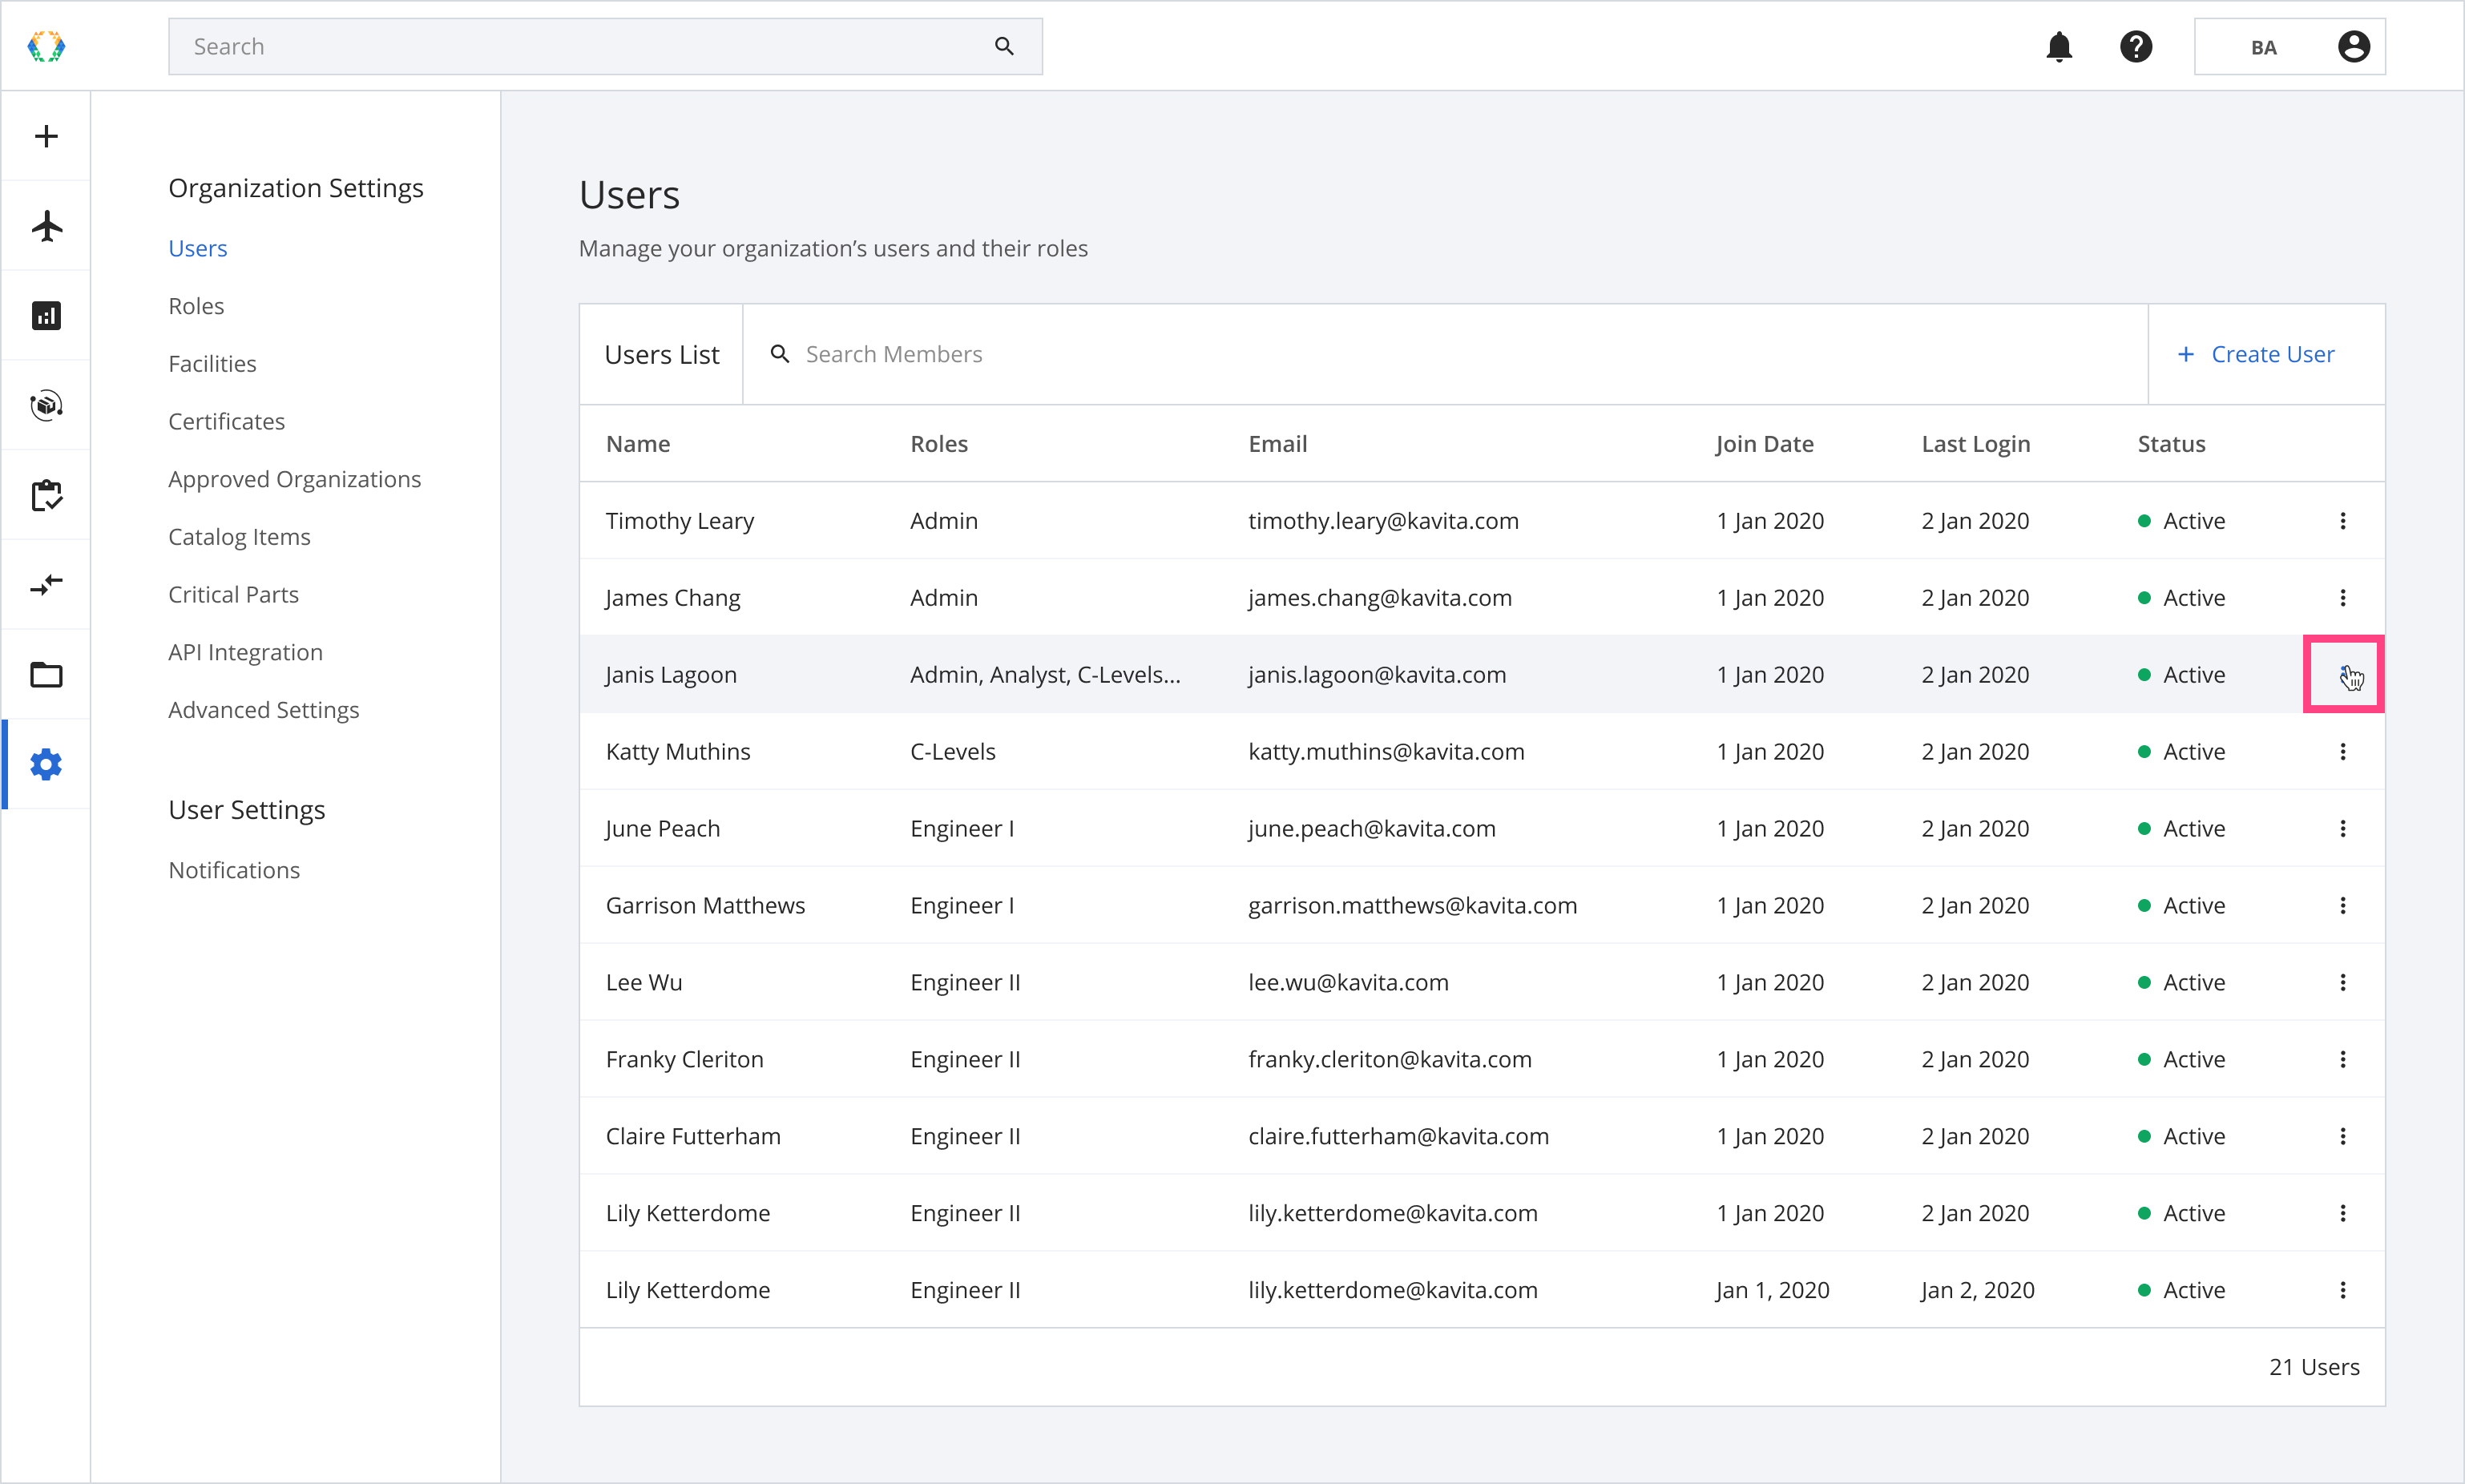
Step 2: Click 'Edit'.
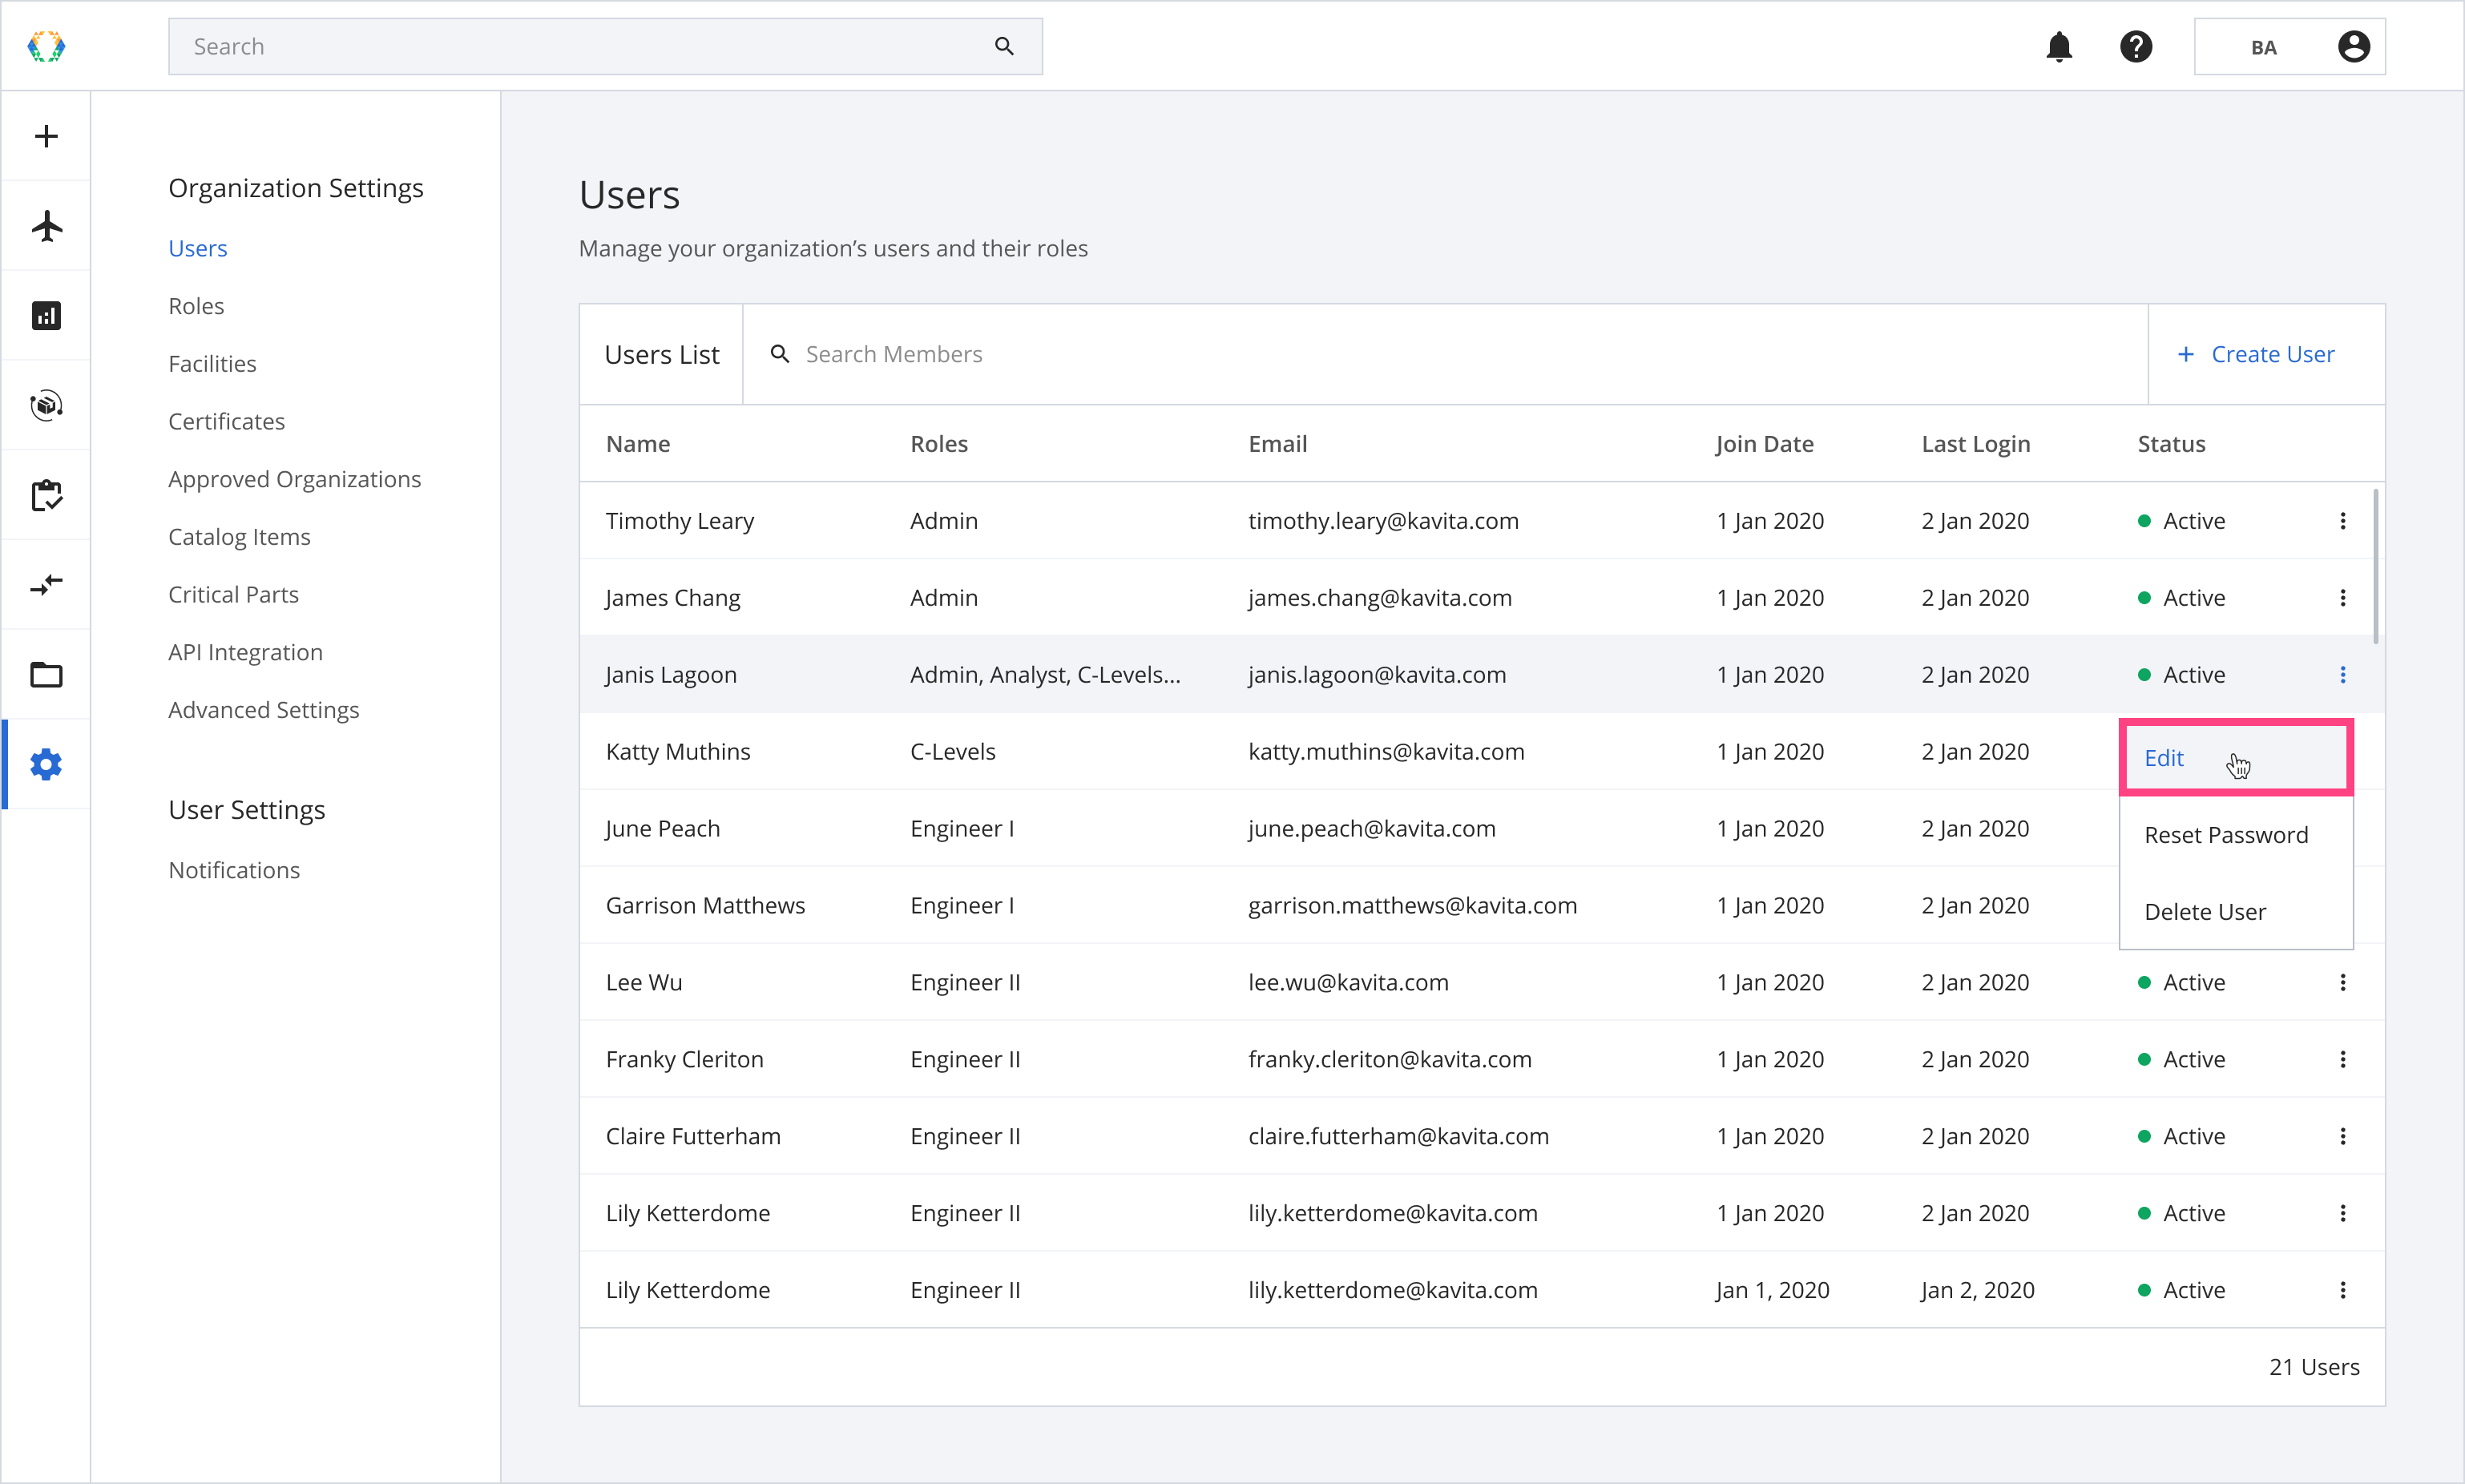
Step 3: Provide details to edit the user.
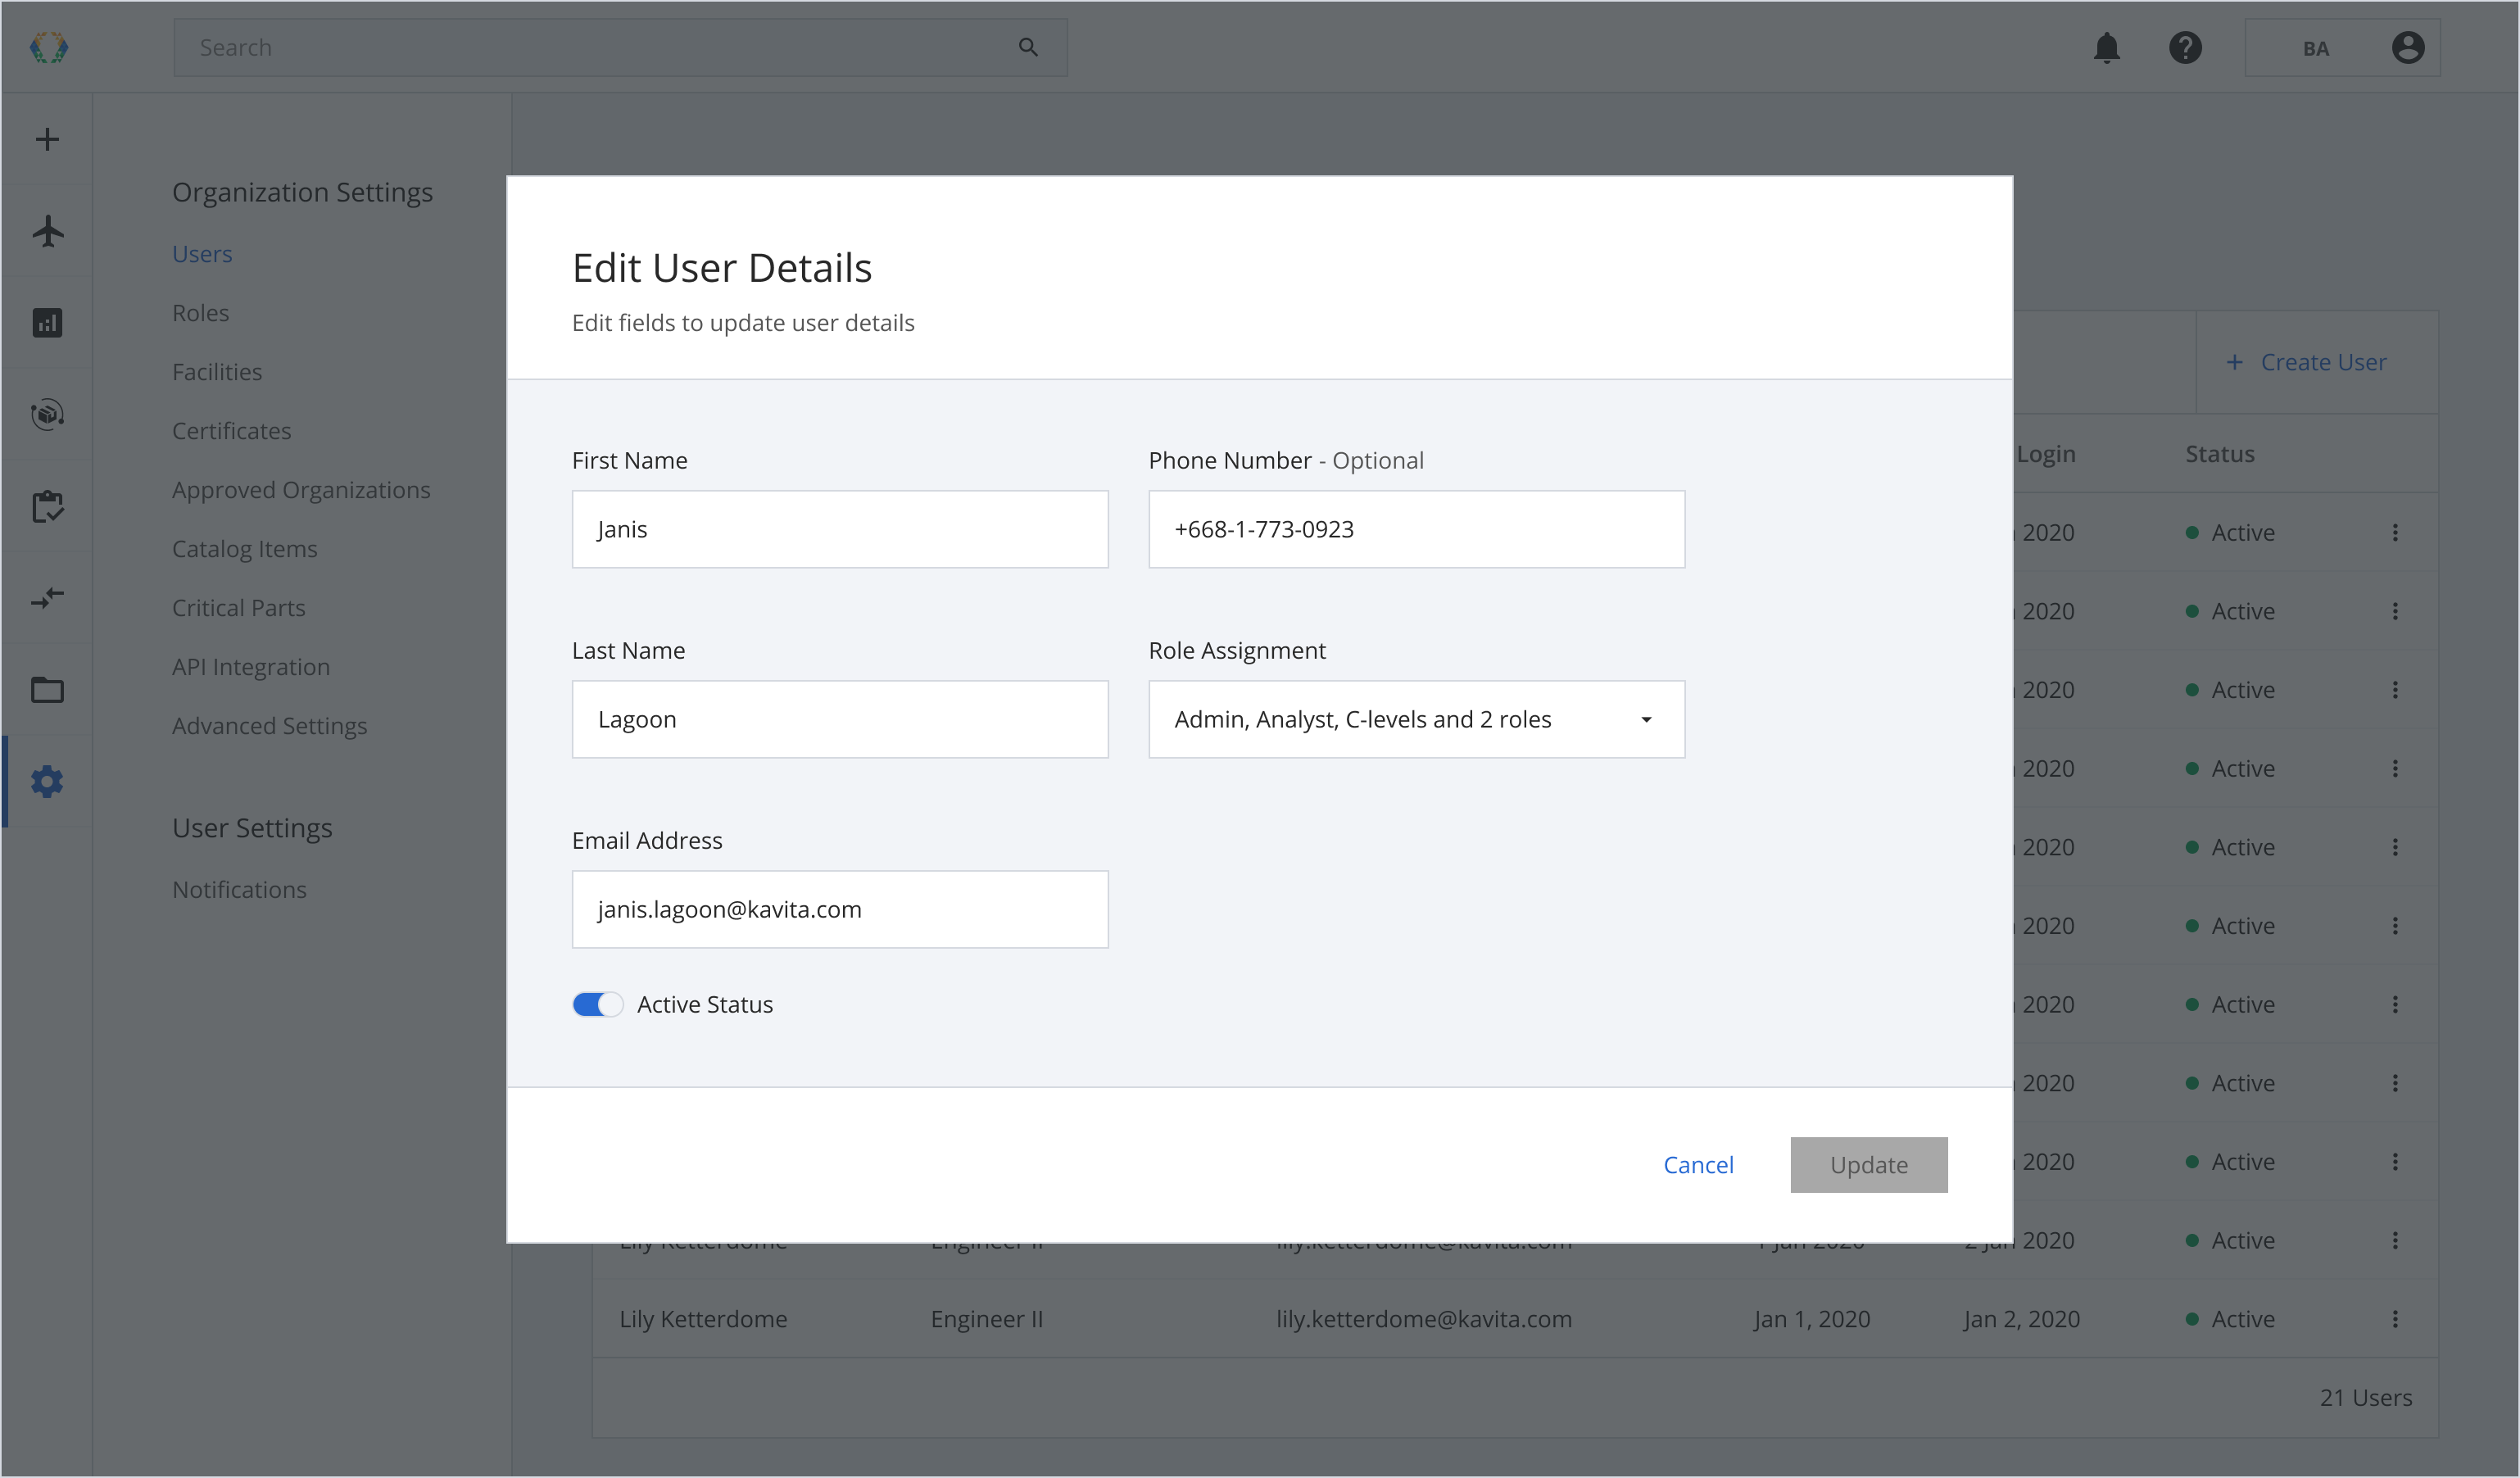
Step 4: Click 'Update'.
Once a member's “Active Status” is disabled, the member will not be able to login to the platform.The organization admin have to turn it back on for the member to login again.
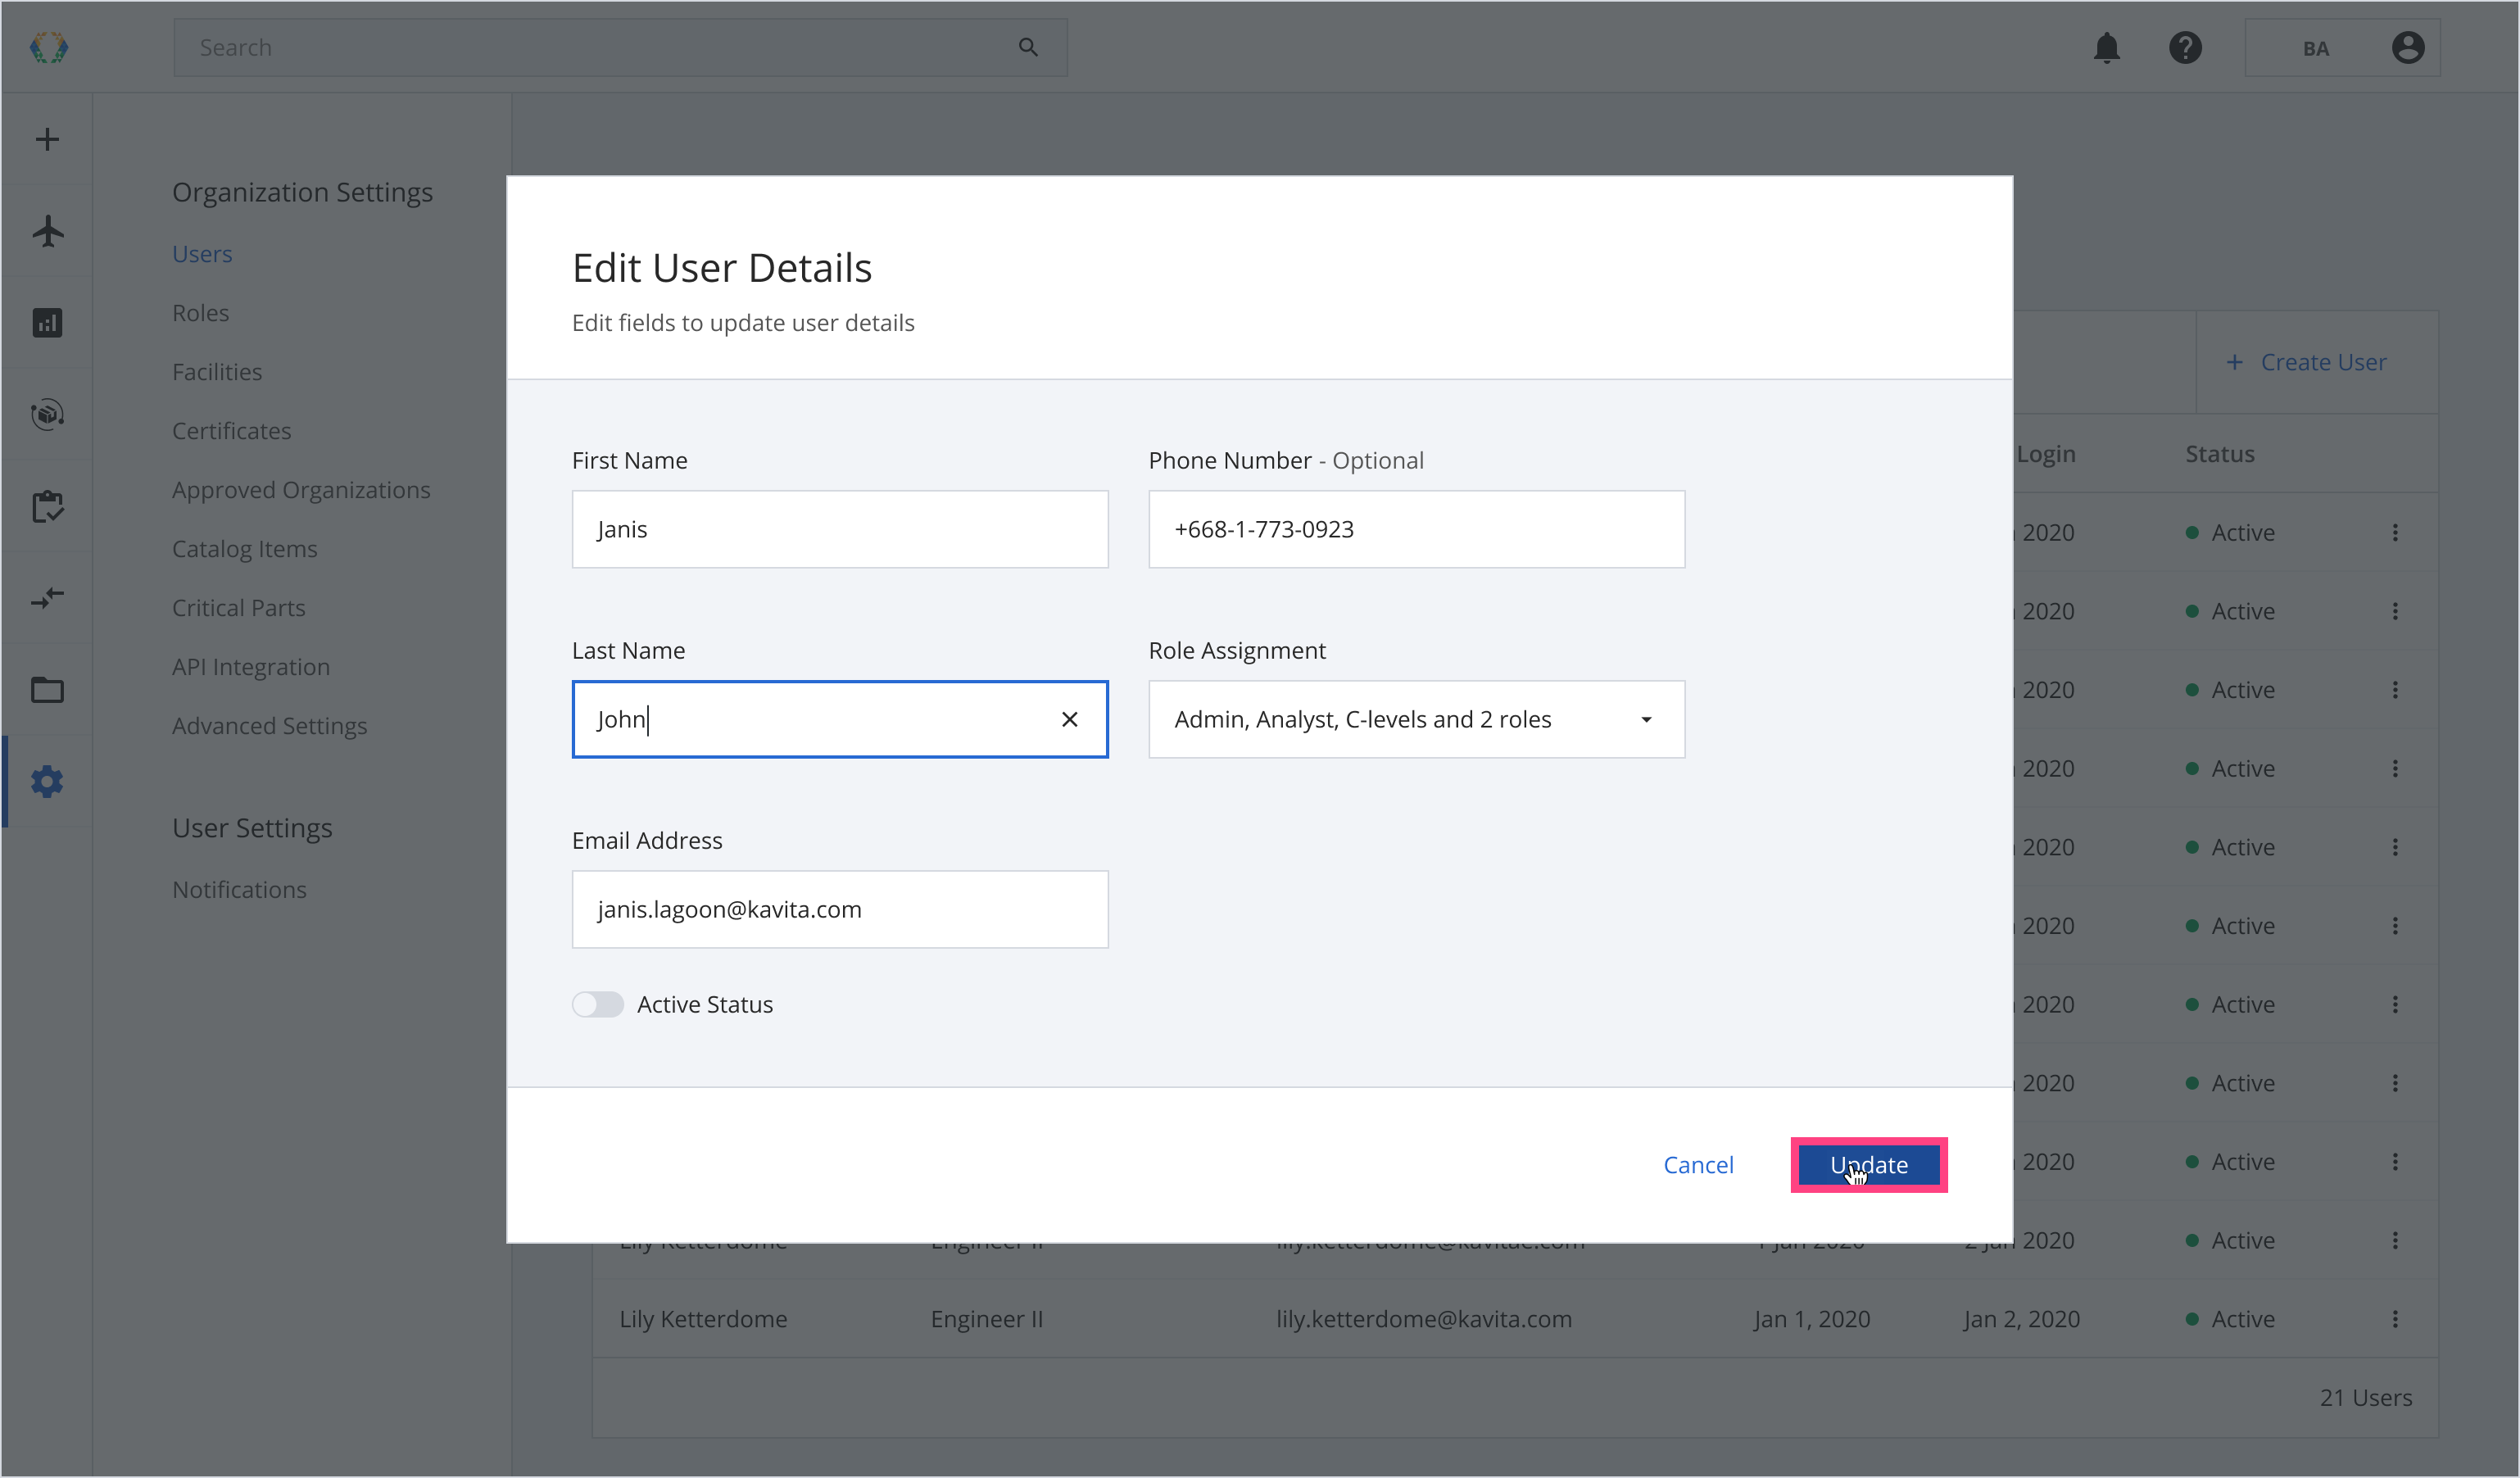
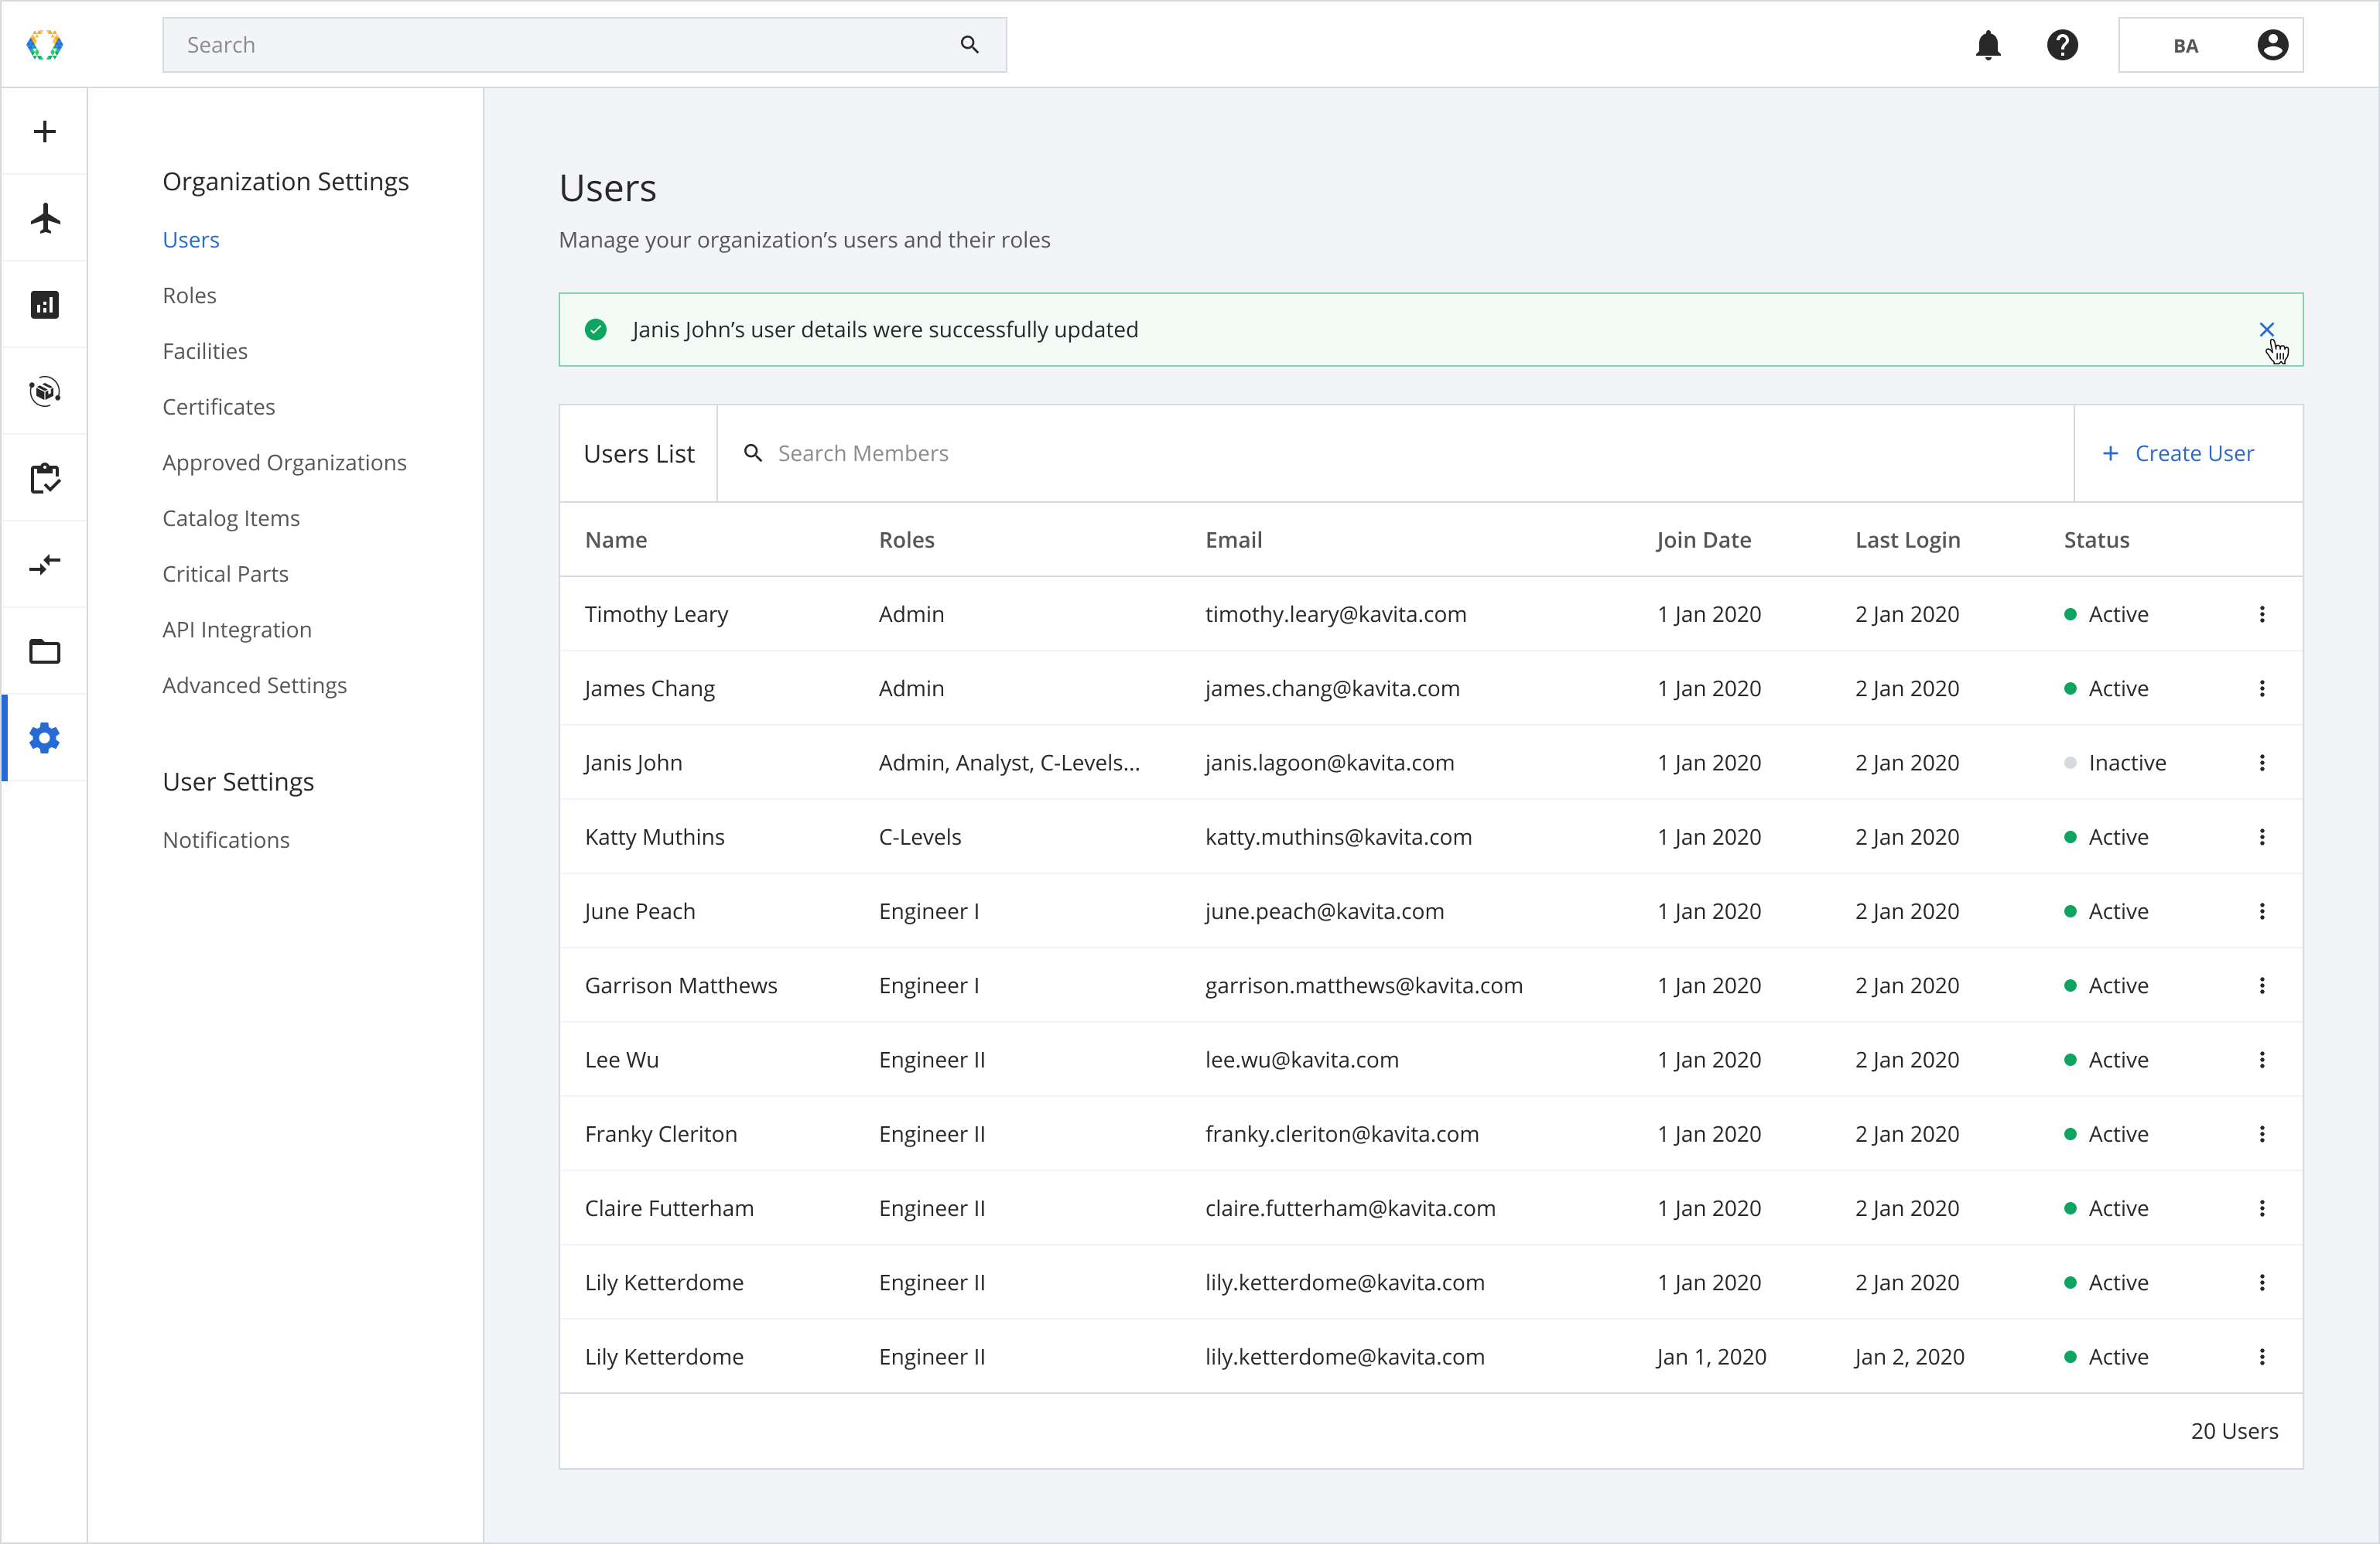
Once the user's details are updated, a green banner will appear at the top of the users list.
Reset Password
Admin can reset password on behalf of the user through the Organization Settings.
Step 1: From the users list, find the user whose password has to be reset. Click ⁝ to see the options menu, then click 'Reset Password'.
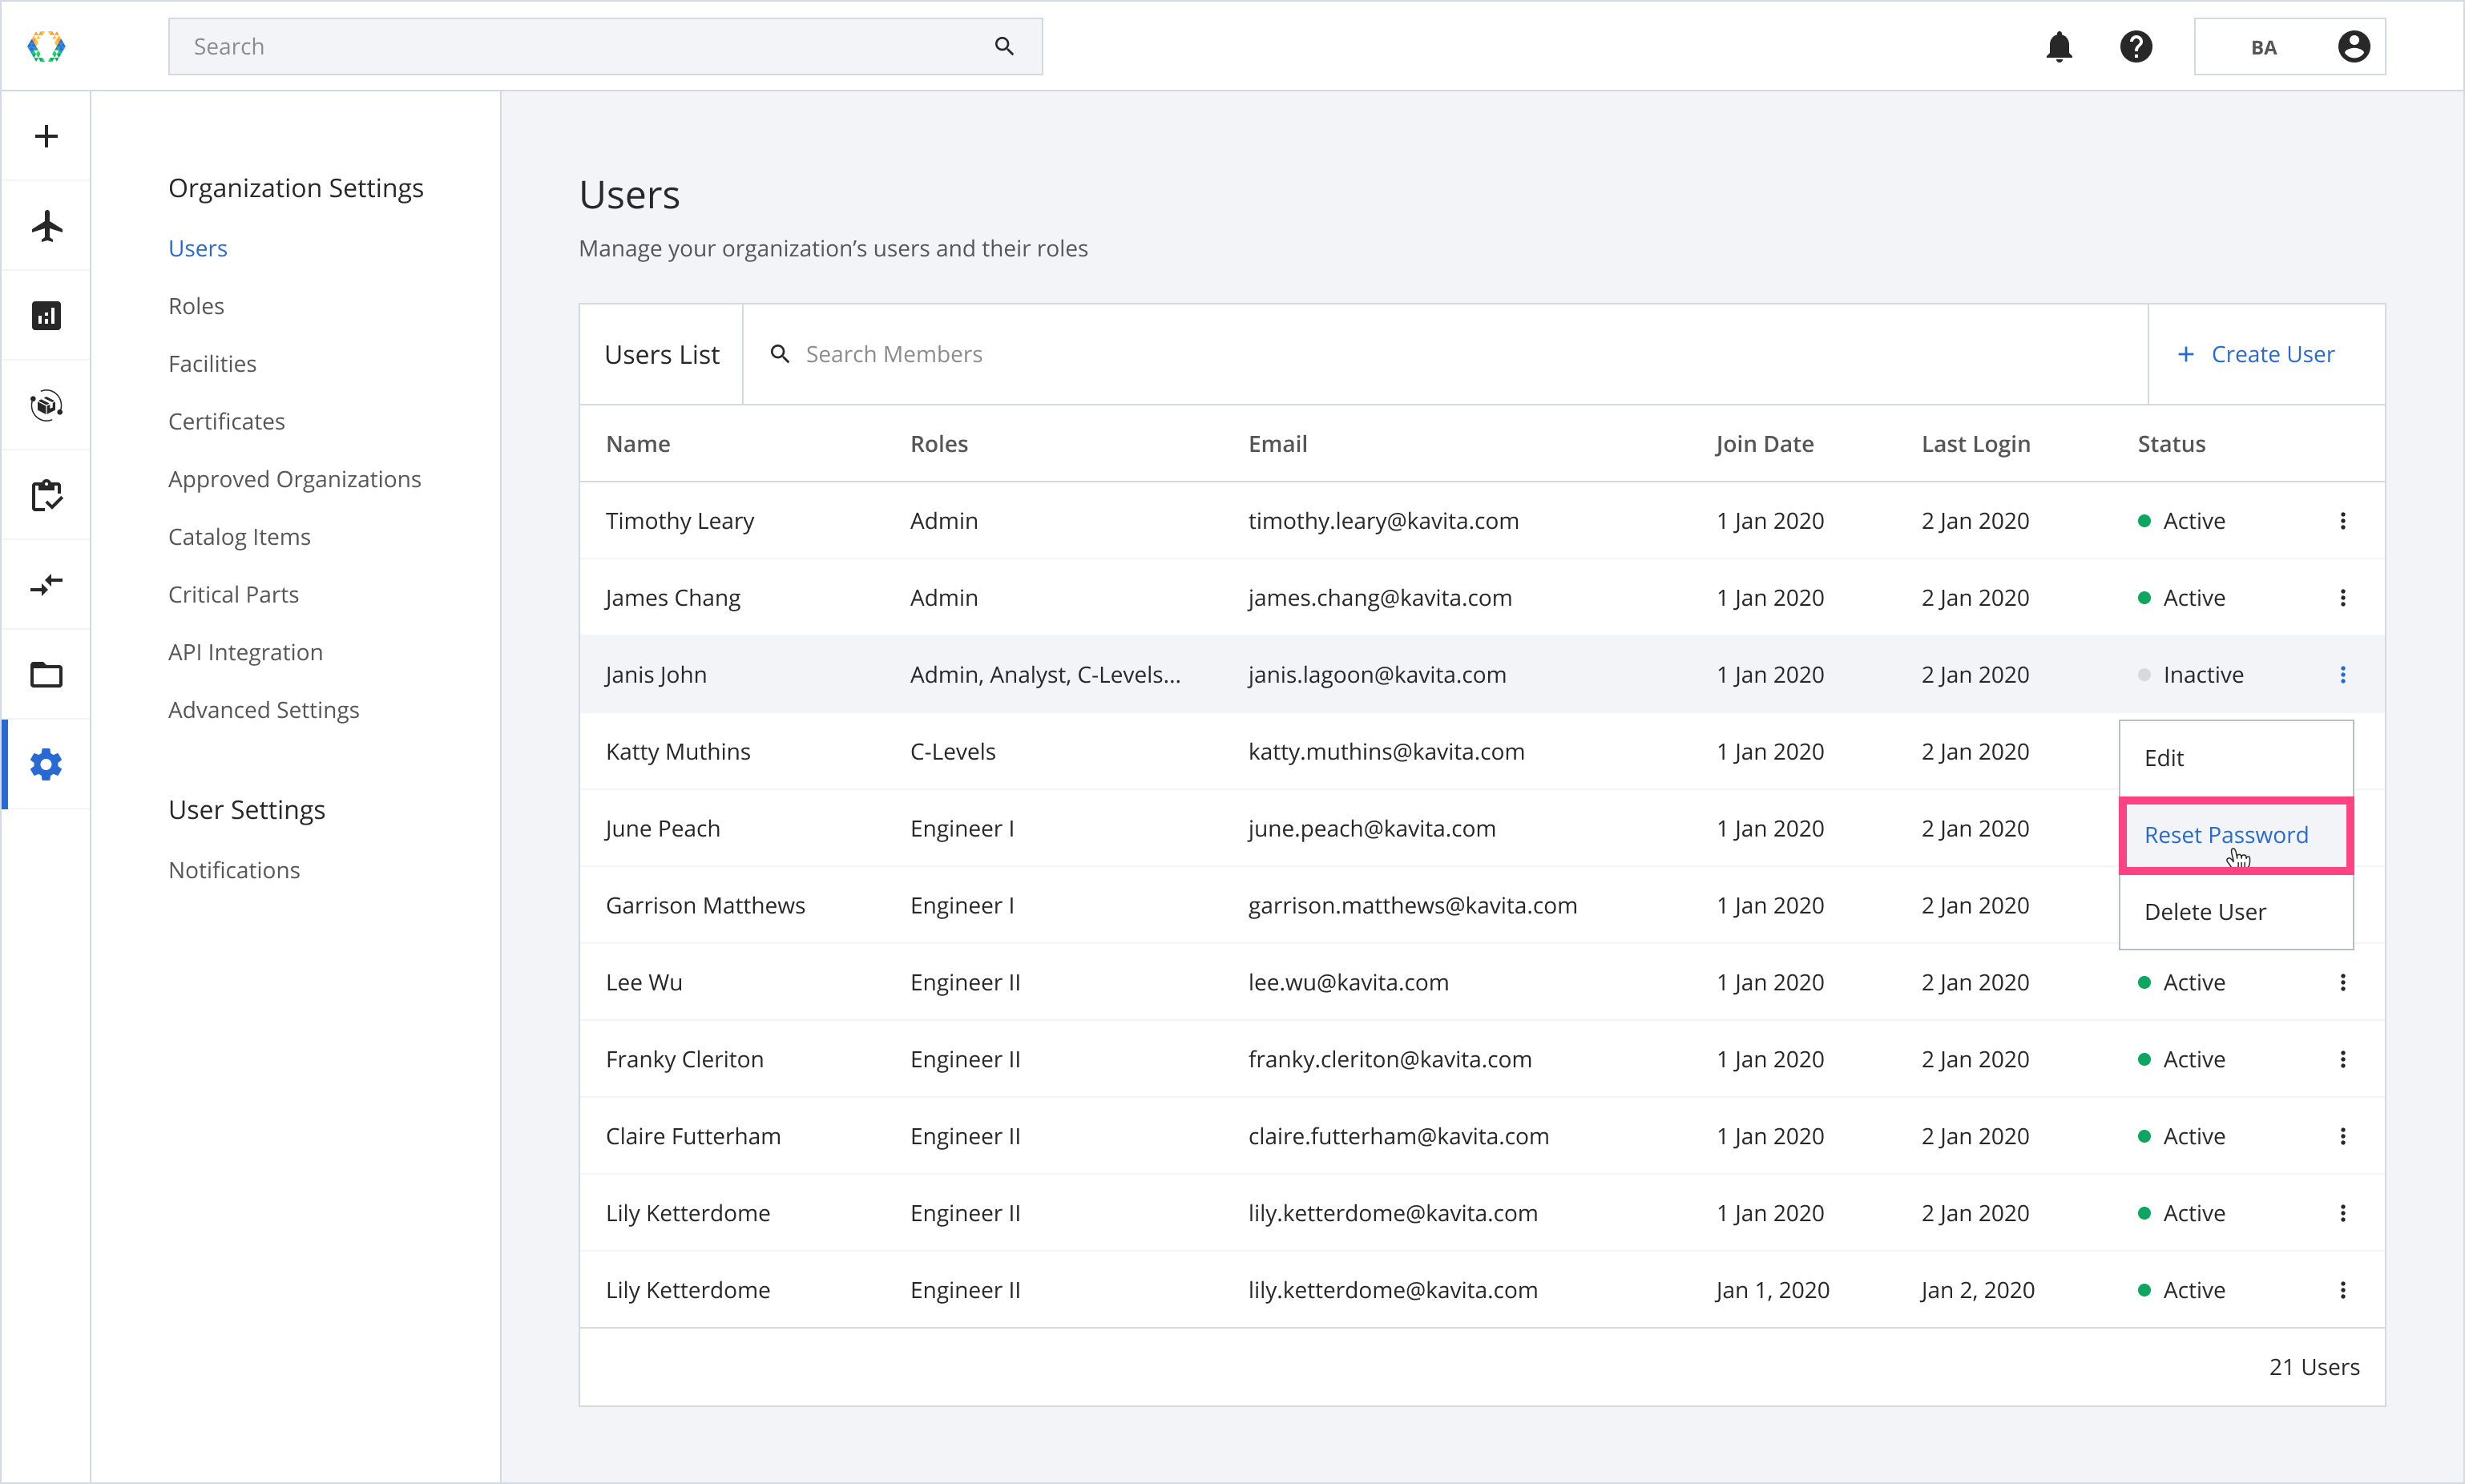
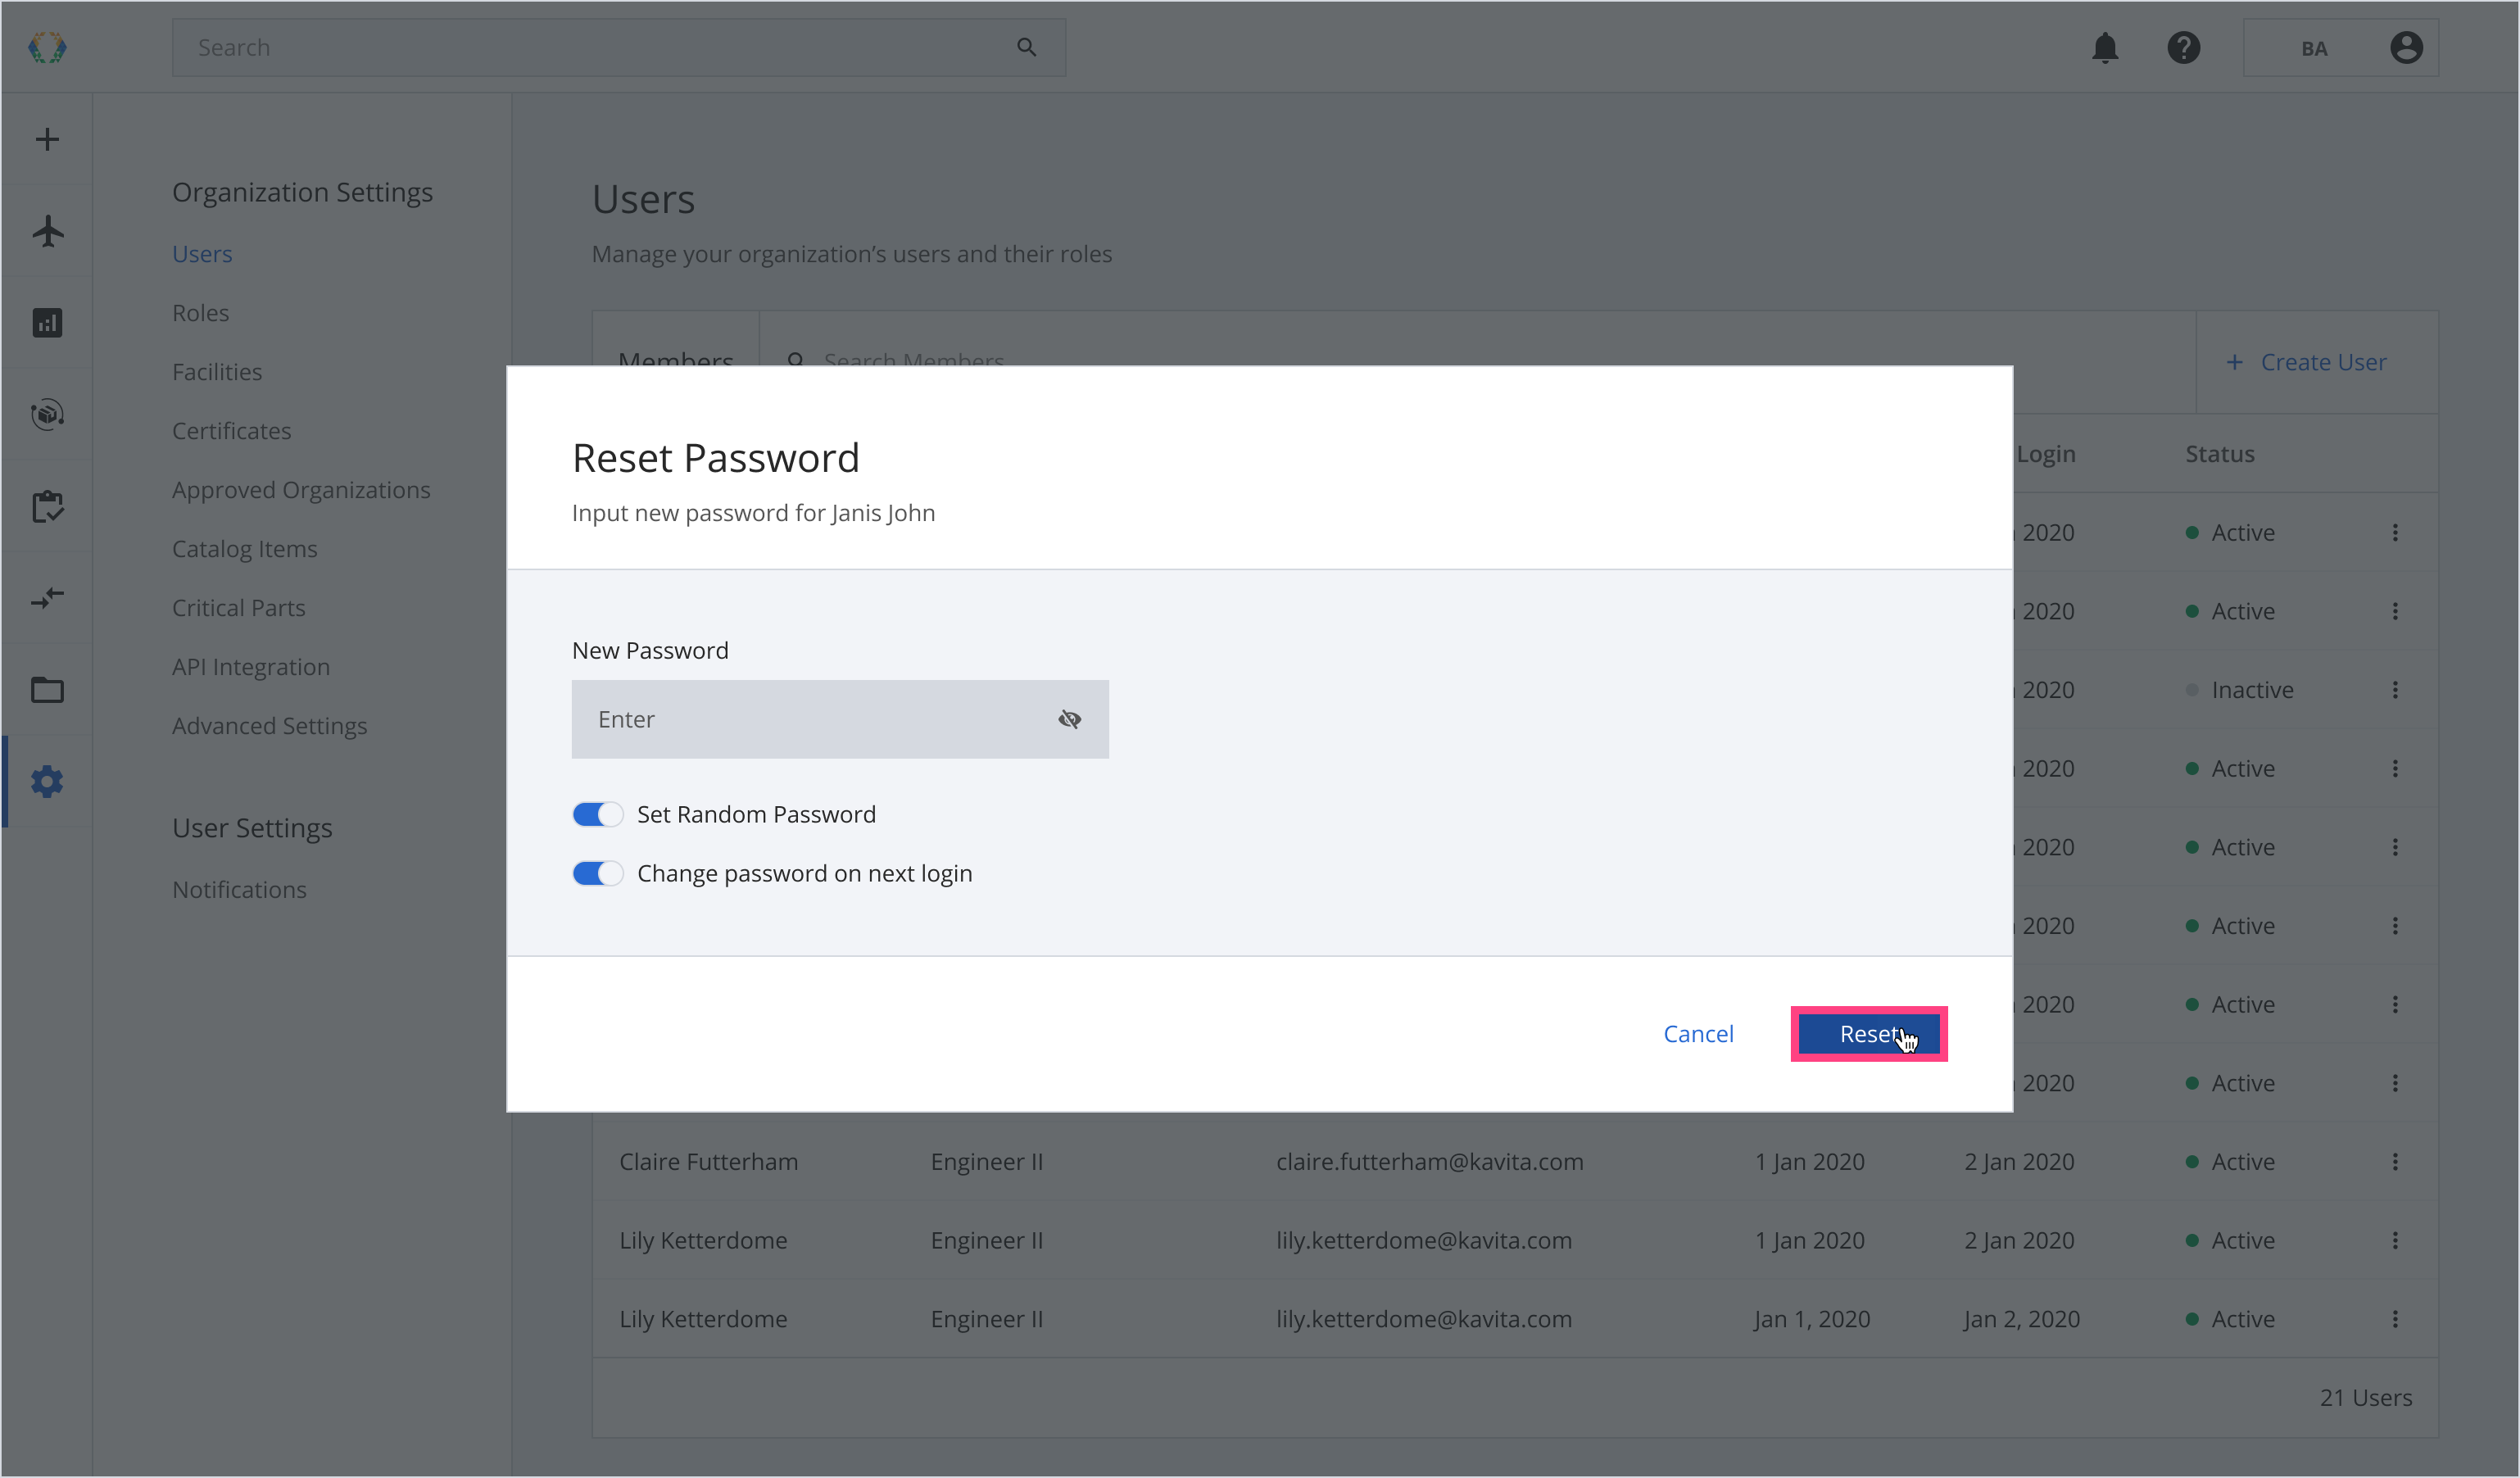
Step 2: A confirmation message will appear, click on 'Reset' to confirm the action.
The option to 'Set Random Password' and 'Change password on next login' is enabled by default. You can turn off this setting if desired.
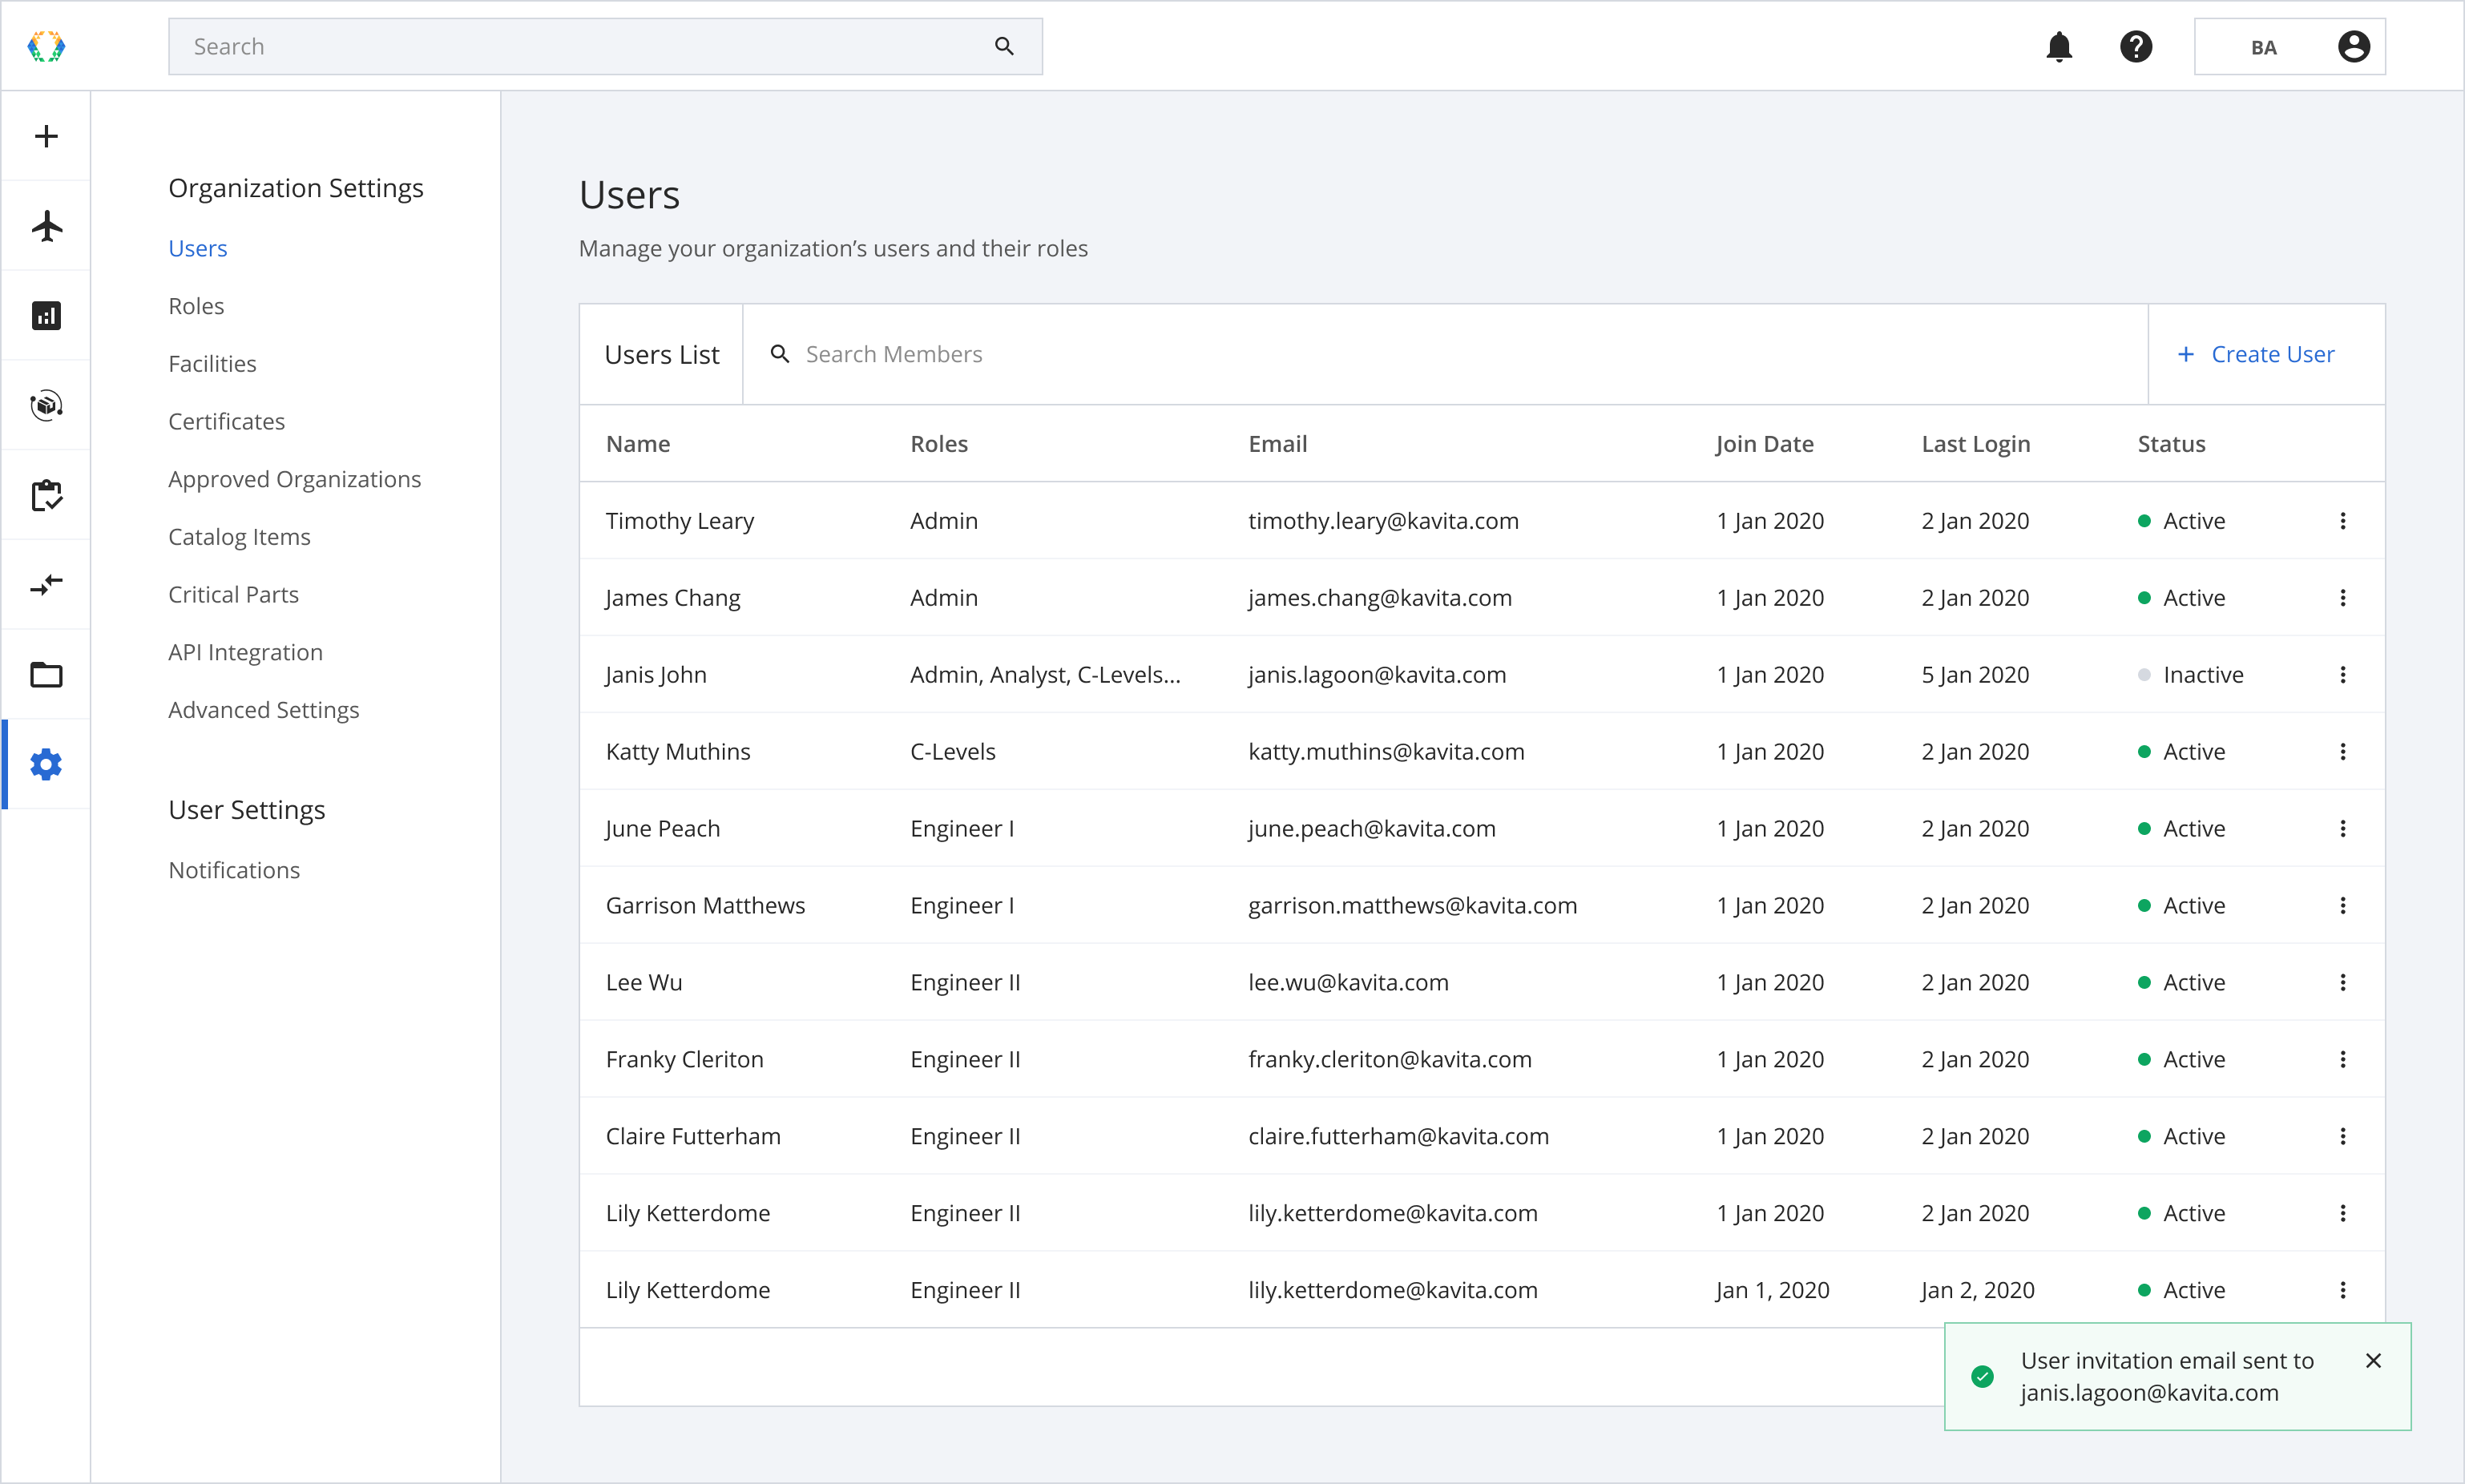
Step 3: Once the user's password has been reset, a green message will appear at the bottom of the screen.
Step 4: The user will receive the prompt to reset their password in their email inbox. Click 'Login' to be redirected to the platform to reset your password.
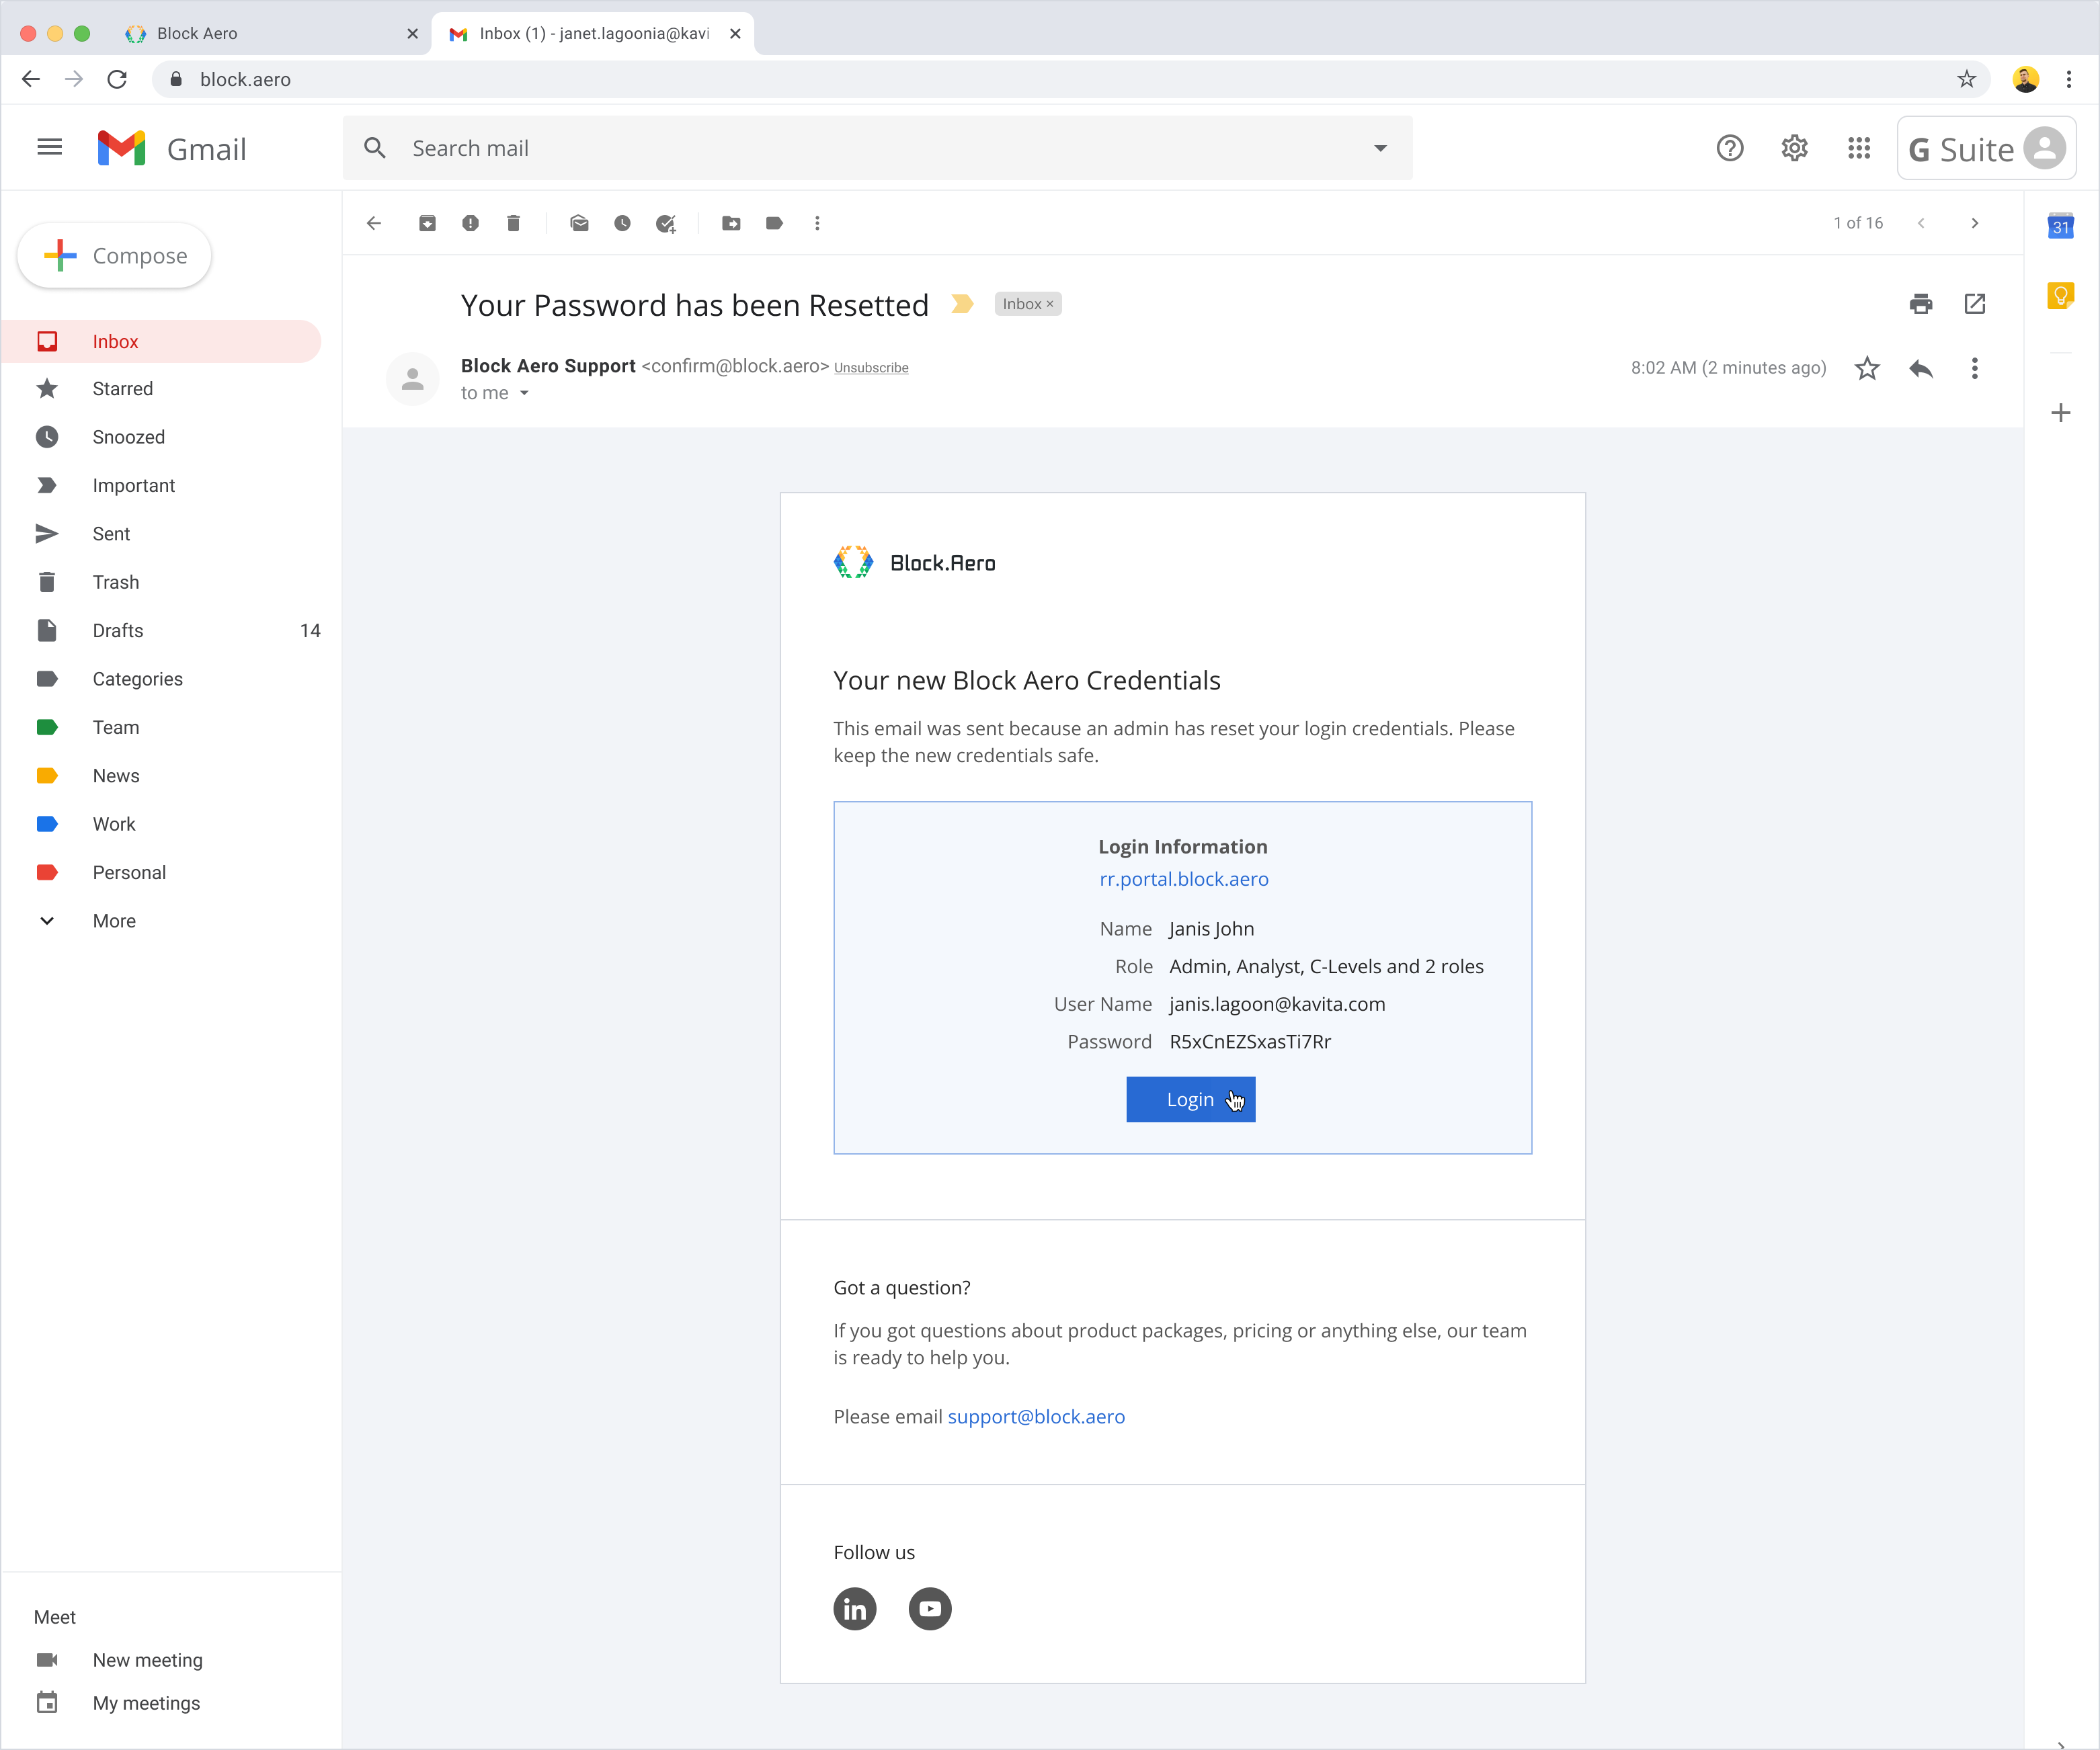
Step 5: At the login page, enter the login information provided in the email and click 'Login'.

Step 6: The user will be prompted to change their password by default unless the option is disabled.

Step 7: Once the password has been entered, click 'Change Password'.

Step 8: Once the password is successfully updated, you will be redirected to the Login page to log in with your new password.

Step 9: Enter your new login credentials to use Block Aero!

Delete User
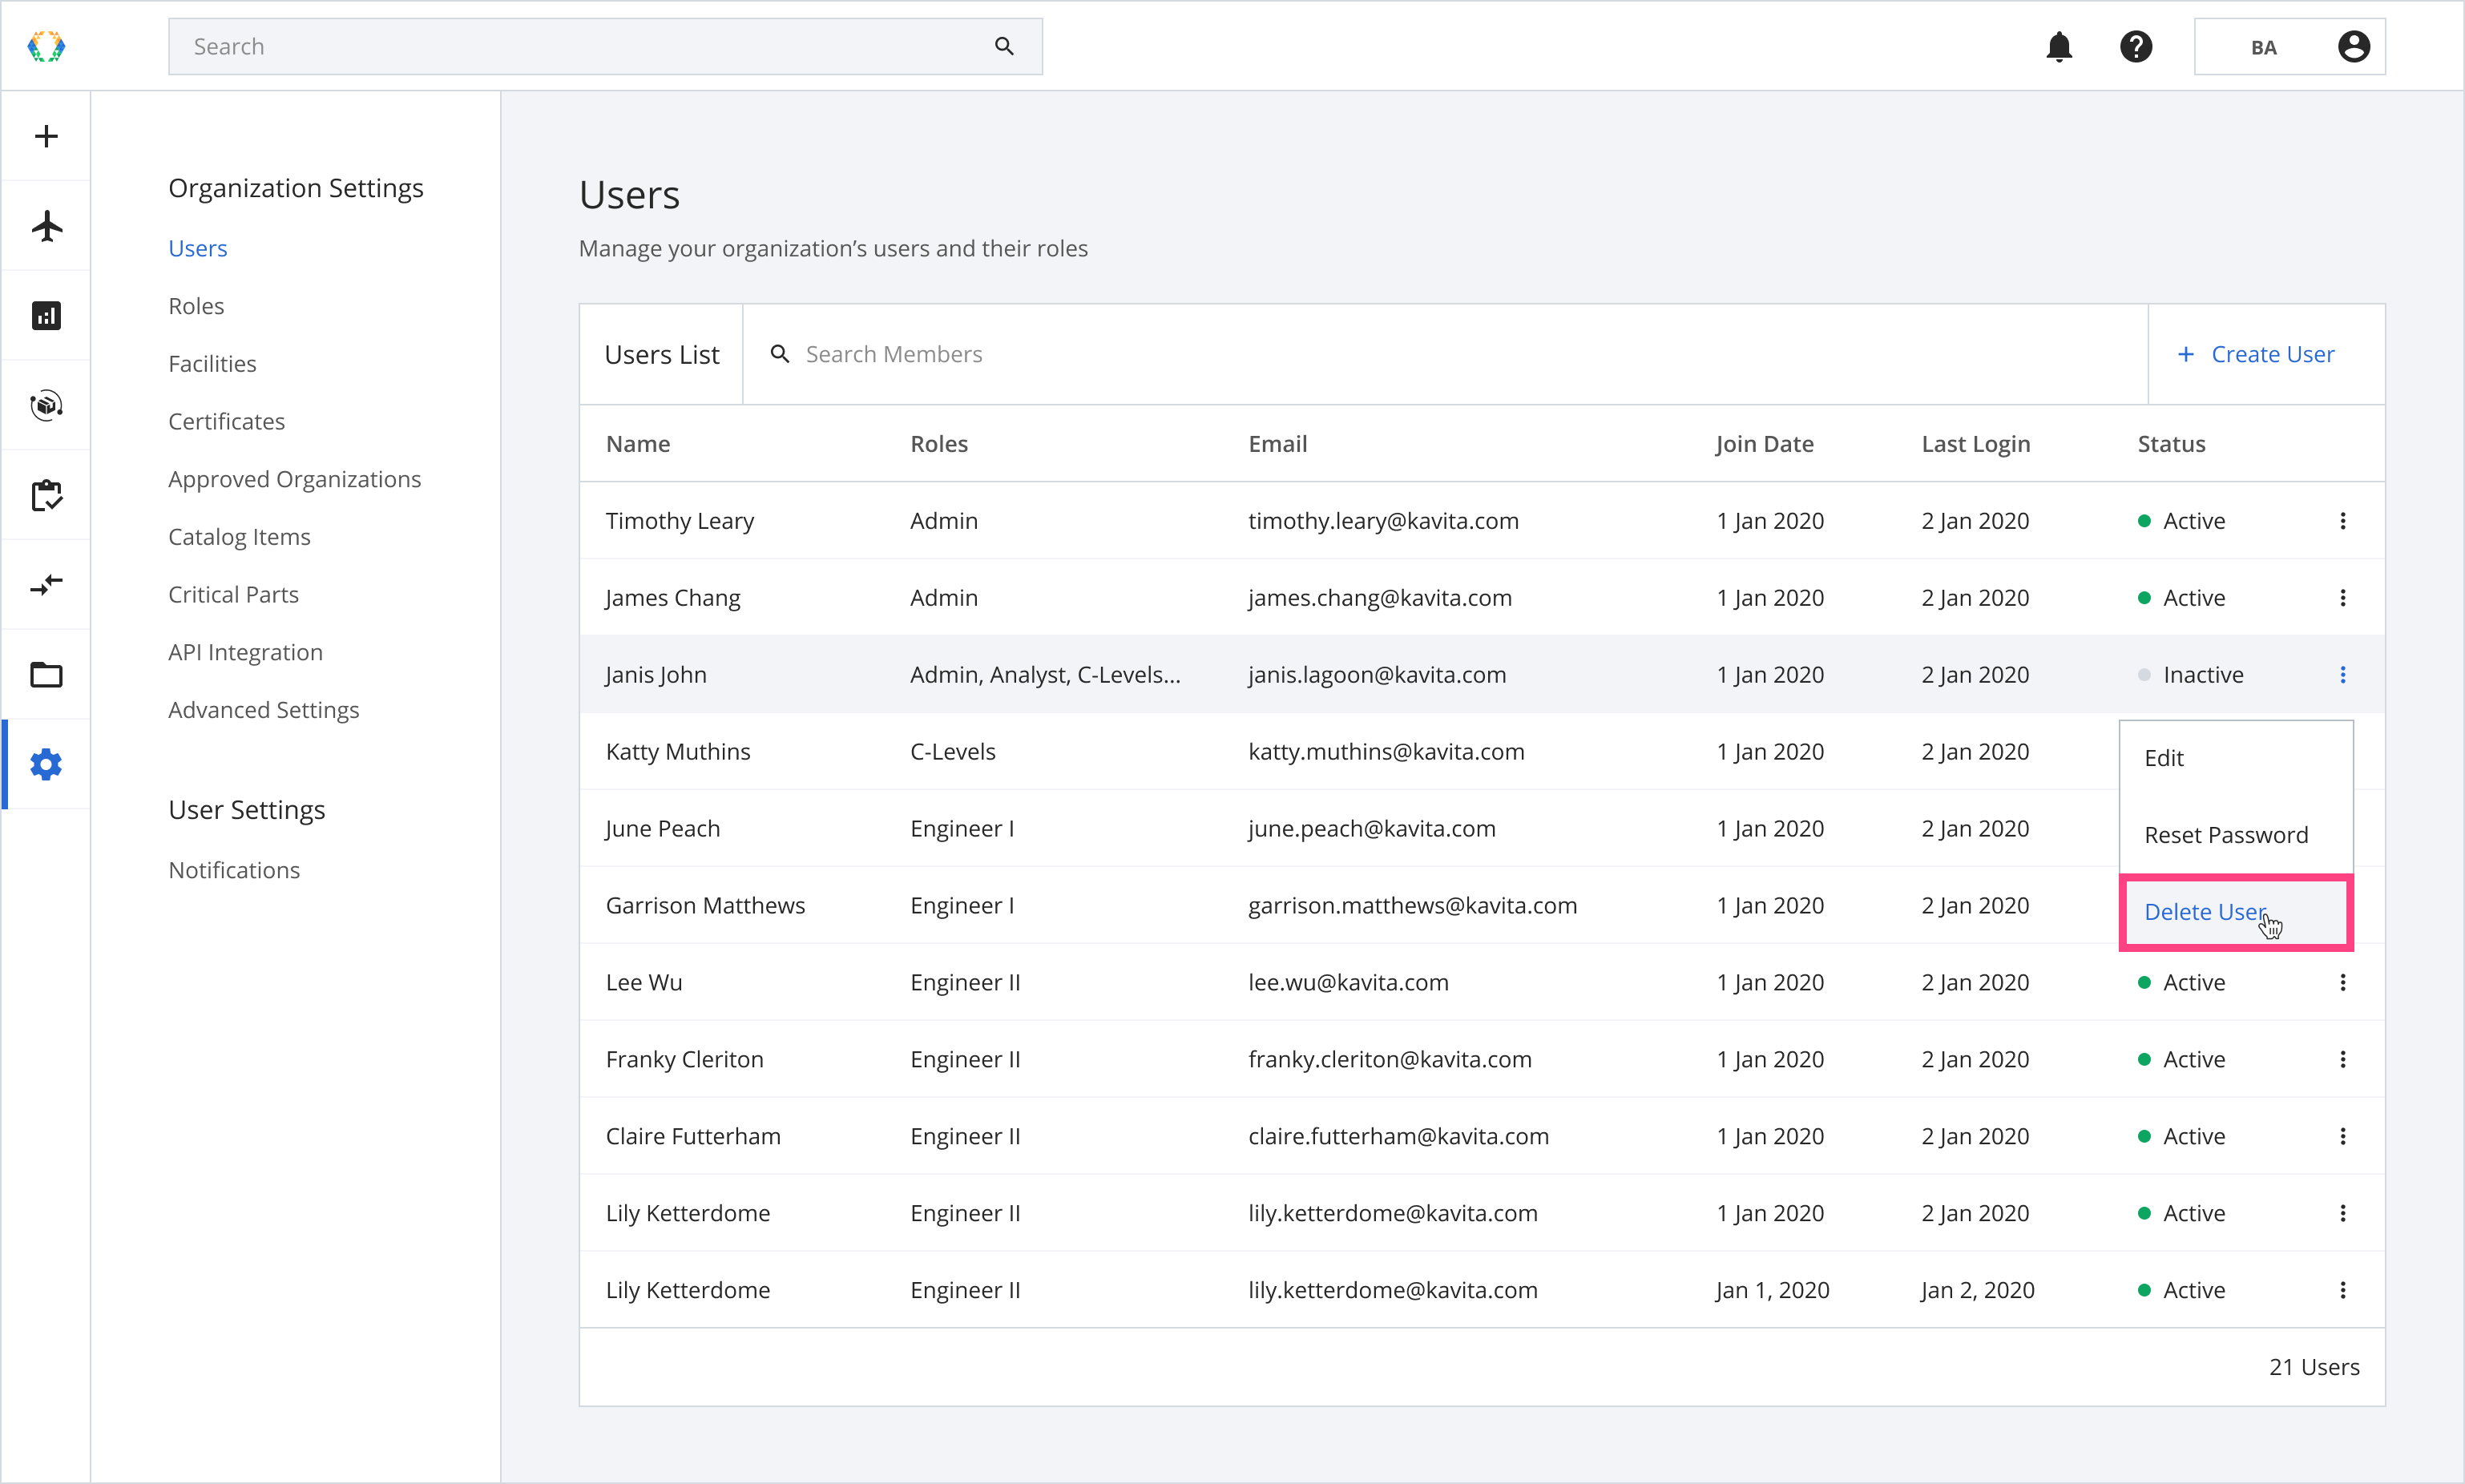
Step 1: From the users list, find the user whose account you want to delete. Click ⁝ to see the options menu, then click 'Delete User'.
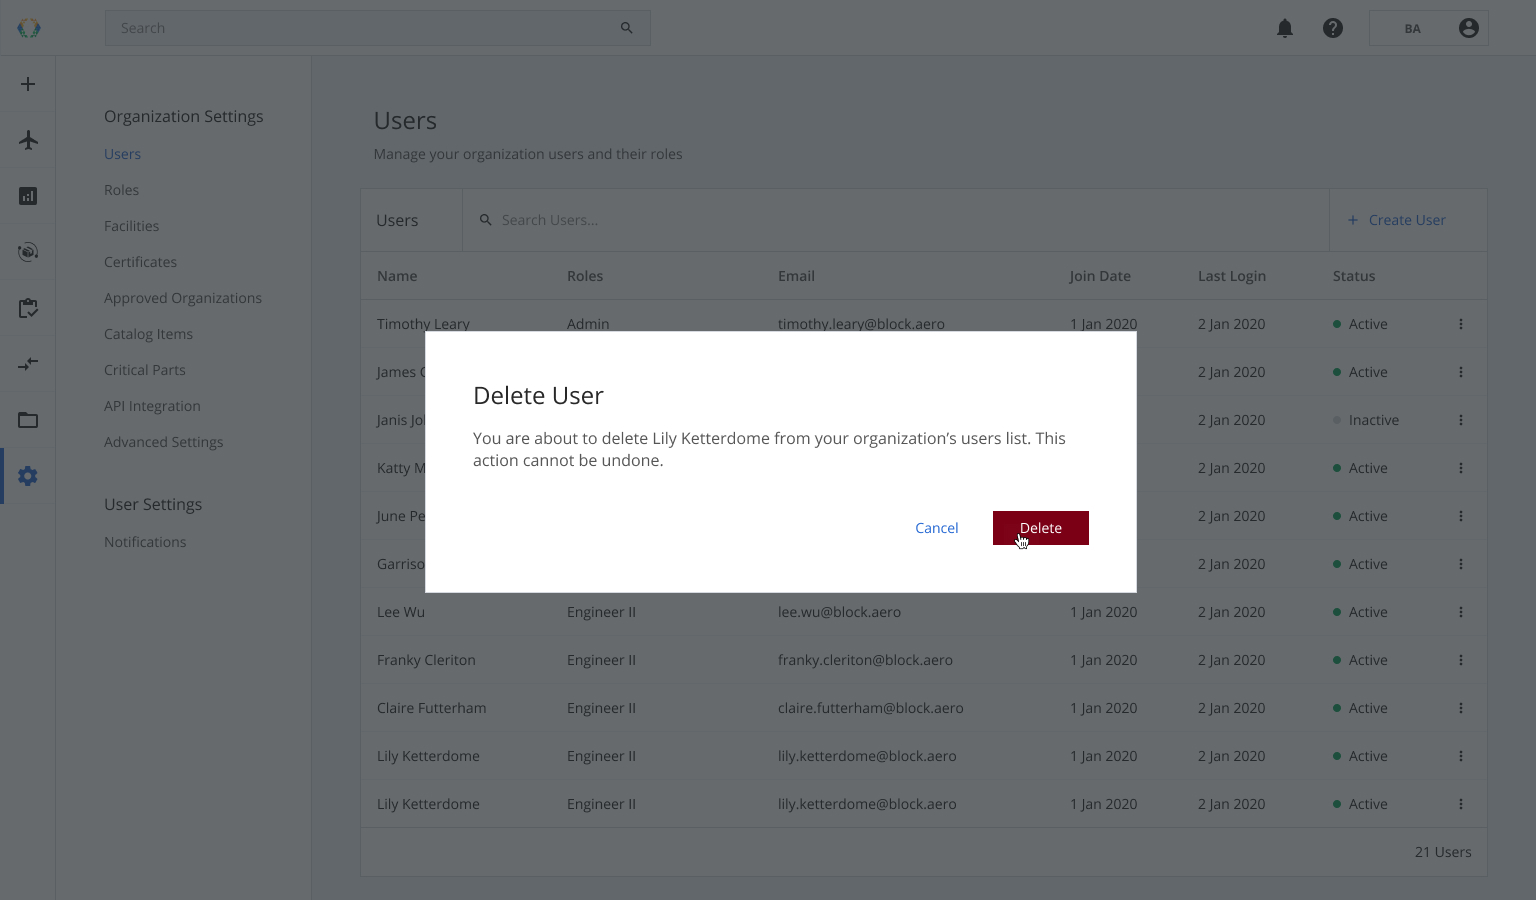
Step 2: A confirmation message will appear, click ' Delete'.
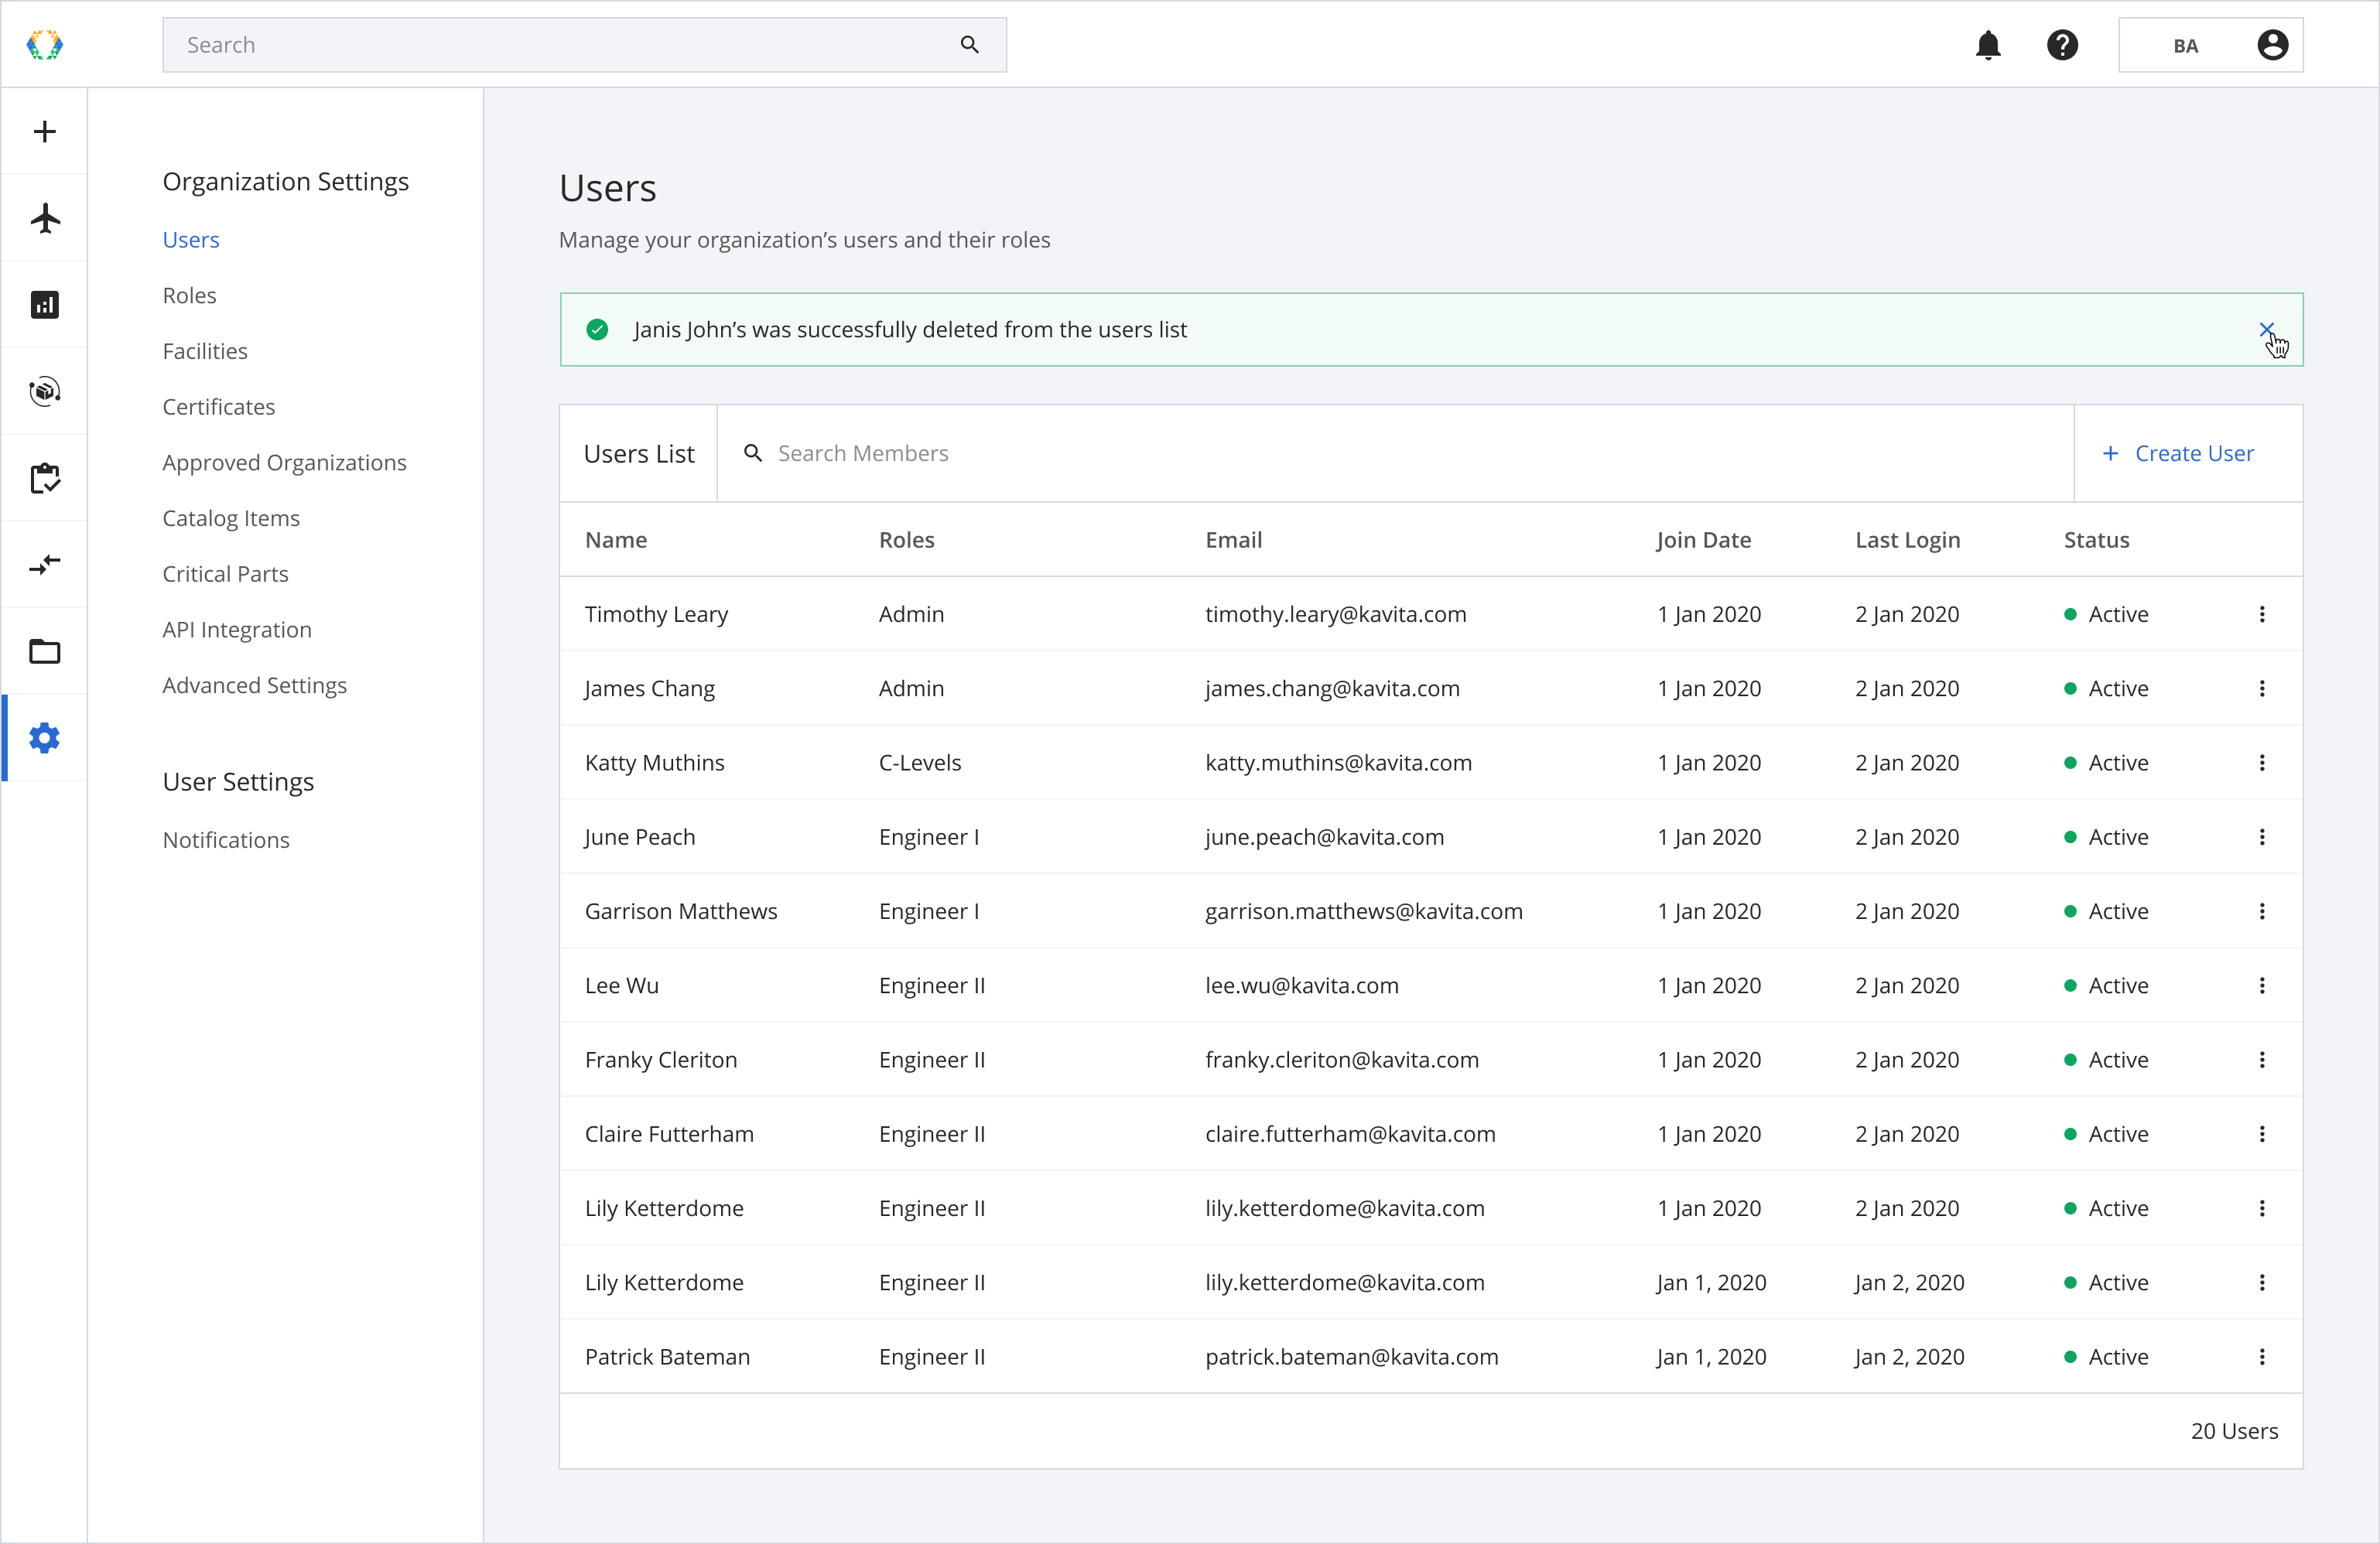
Once the user's account is deleted, a green banner will appear at the top of the users list.
Updated 12 months ago