File Manager
Getting Started
To manage your files, click on the file icon at the navigation bar on the left of the screen. The File Manager is a list of your documents that are stored off-chain. You can access these files on the platform once you have uploaded them. The File Manager allows you to assign documents to the assets that are digitized on Block Aero!
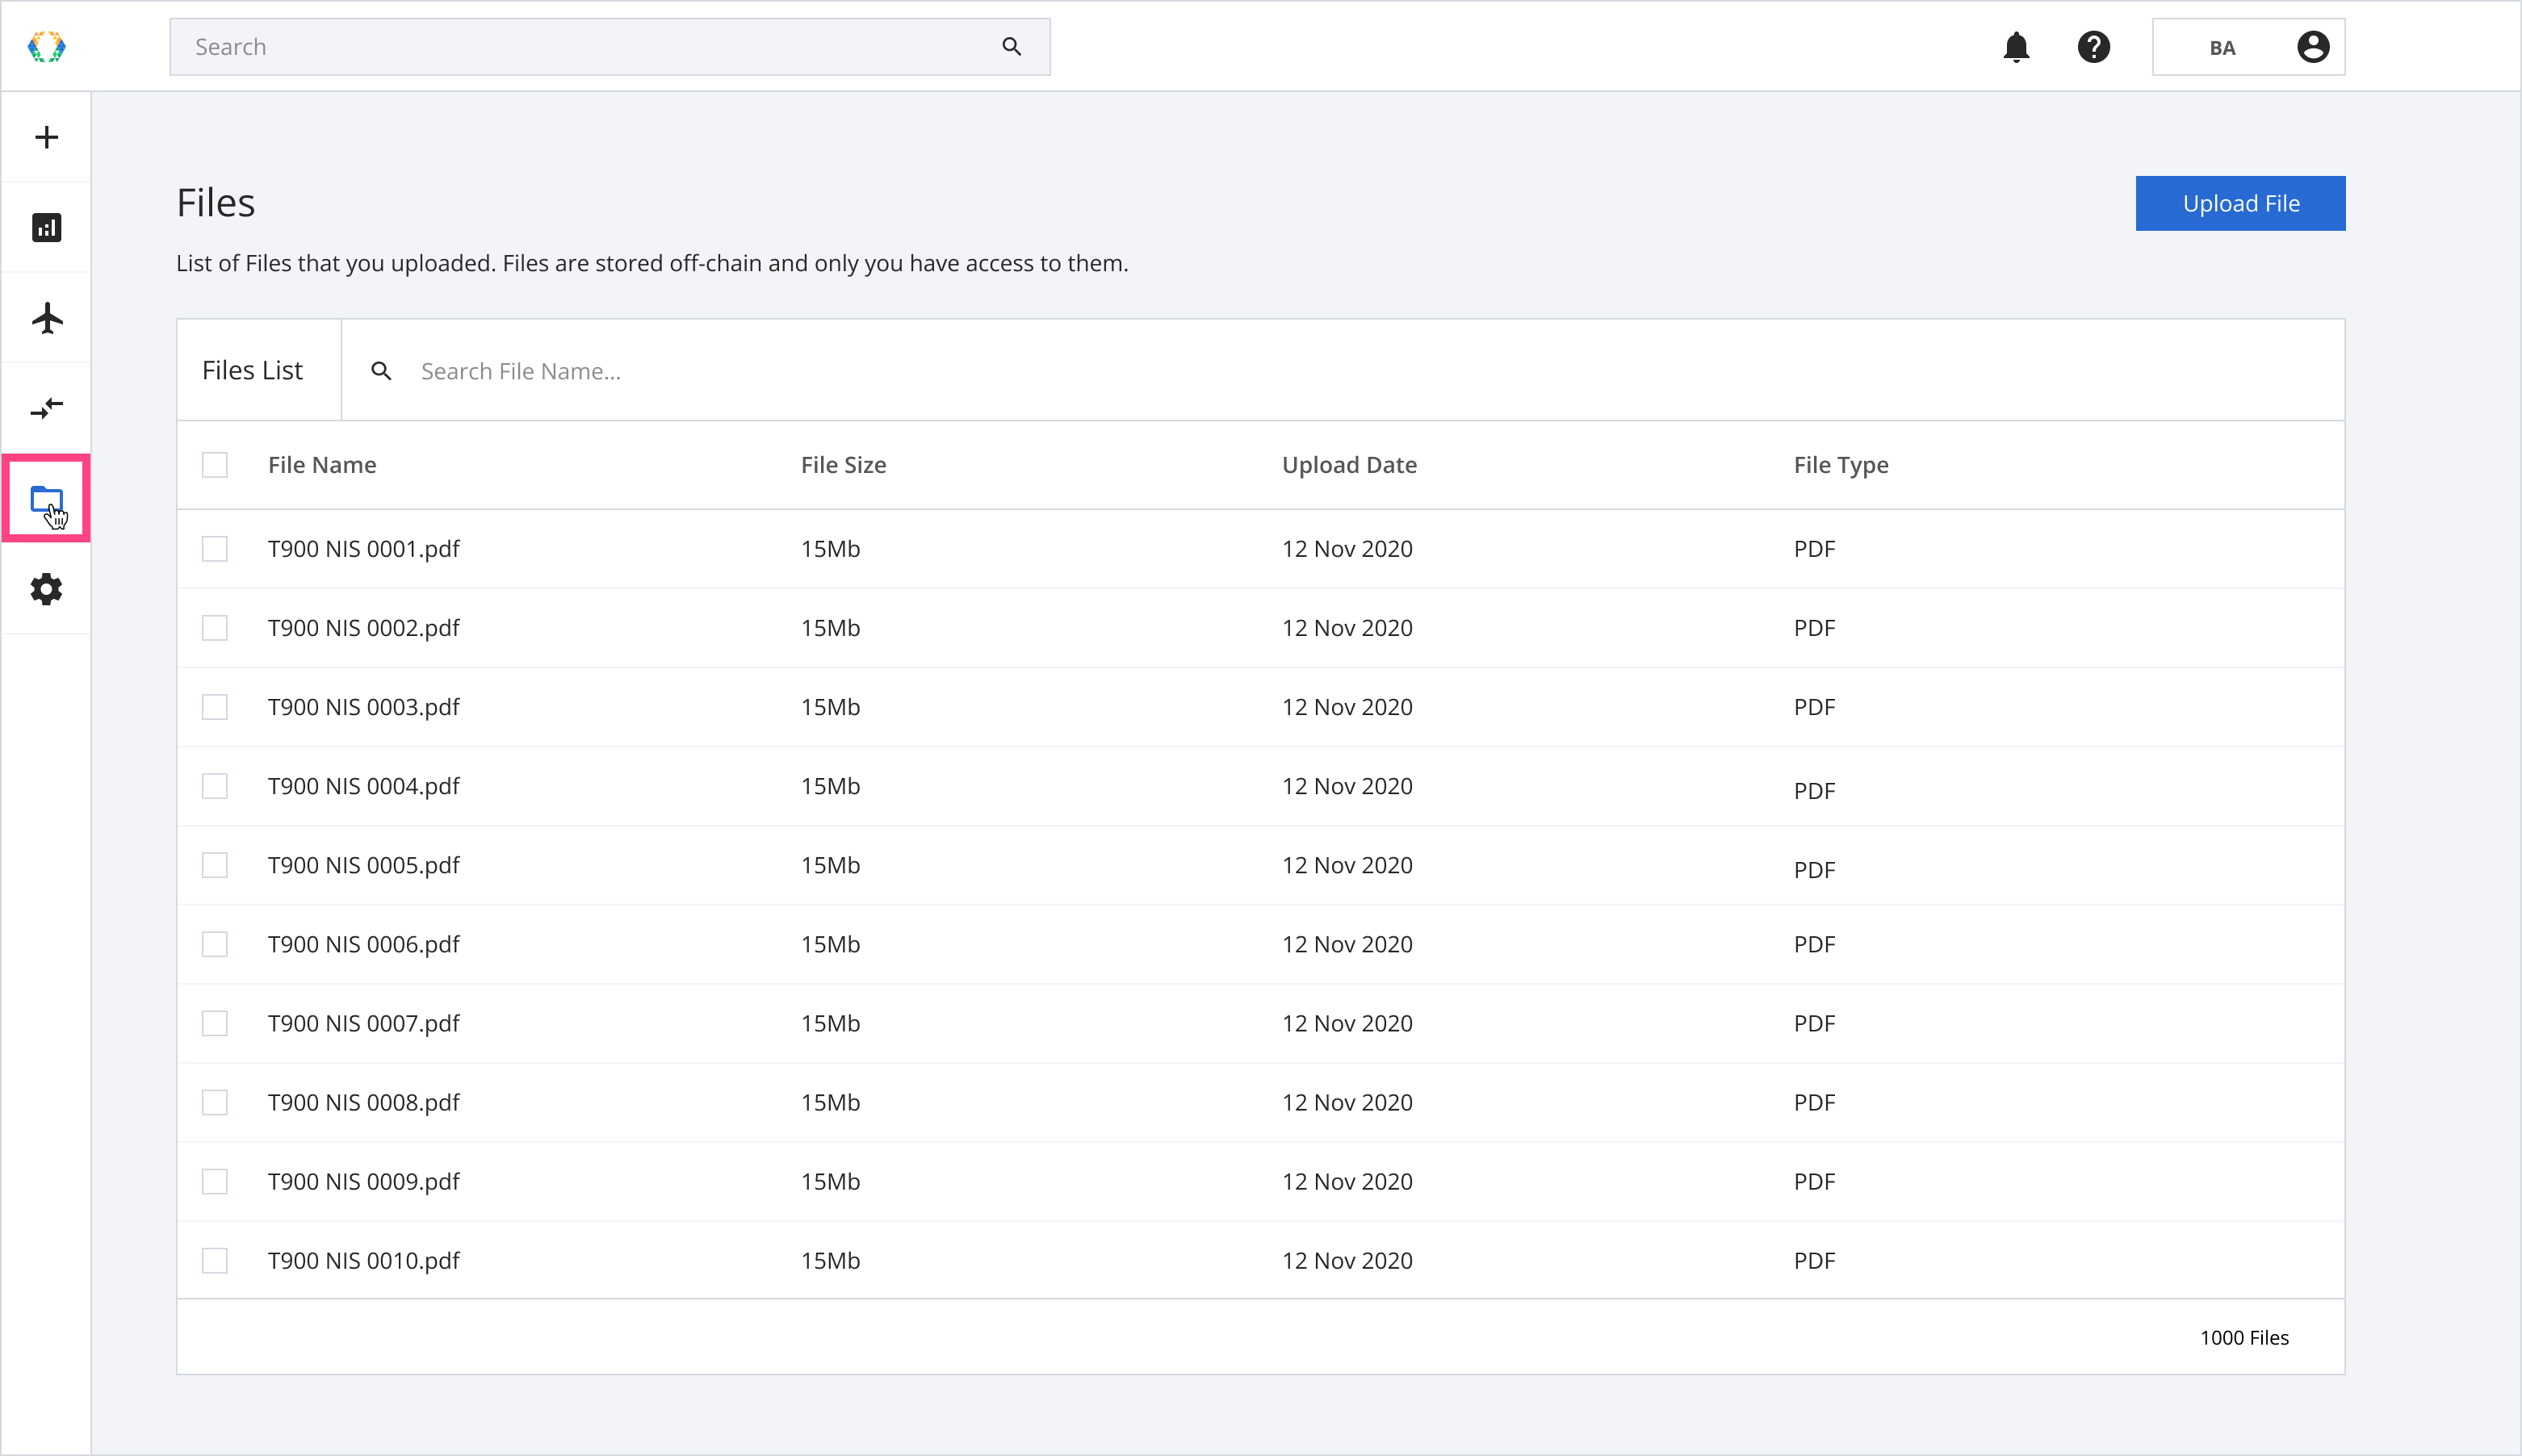
Files module
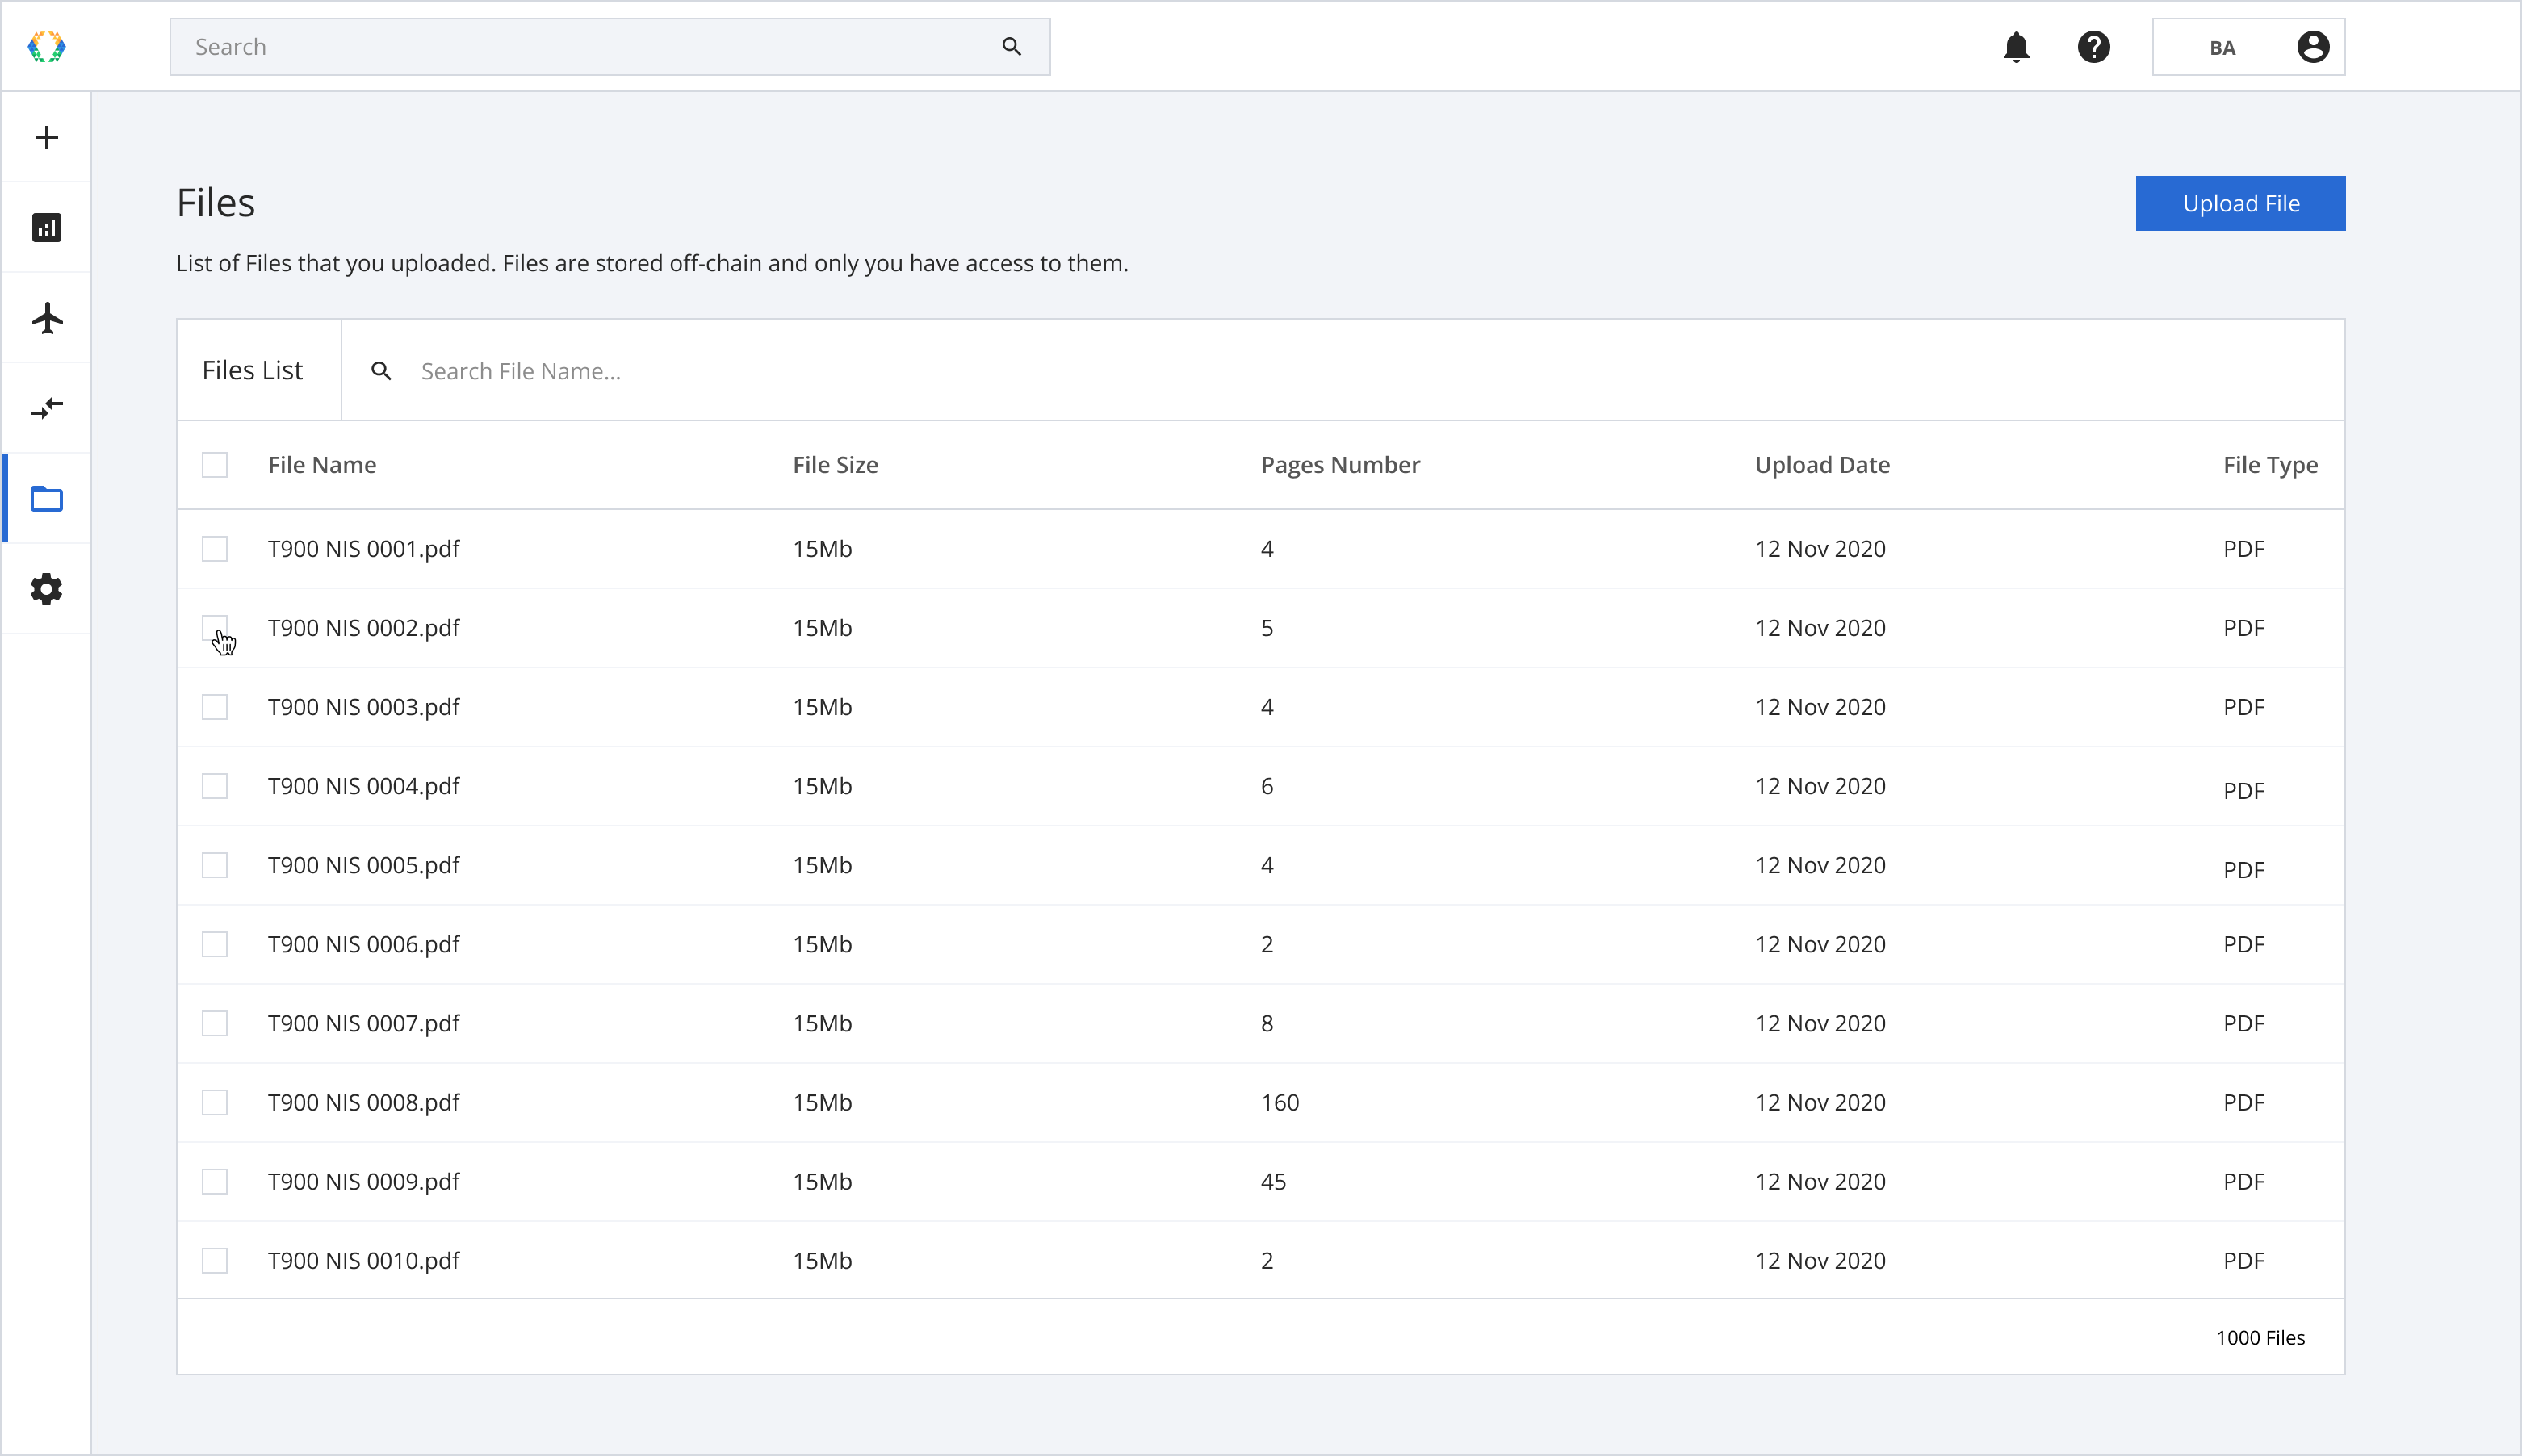
Files Manager Layout
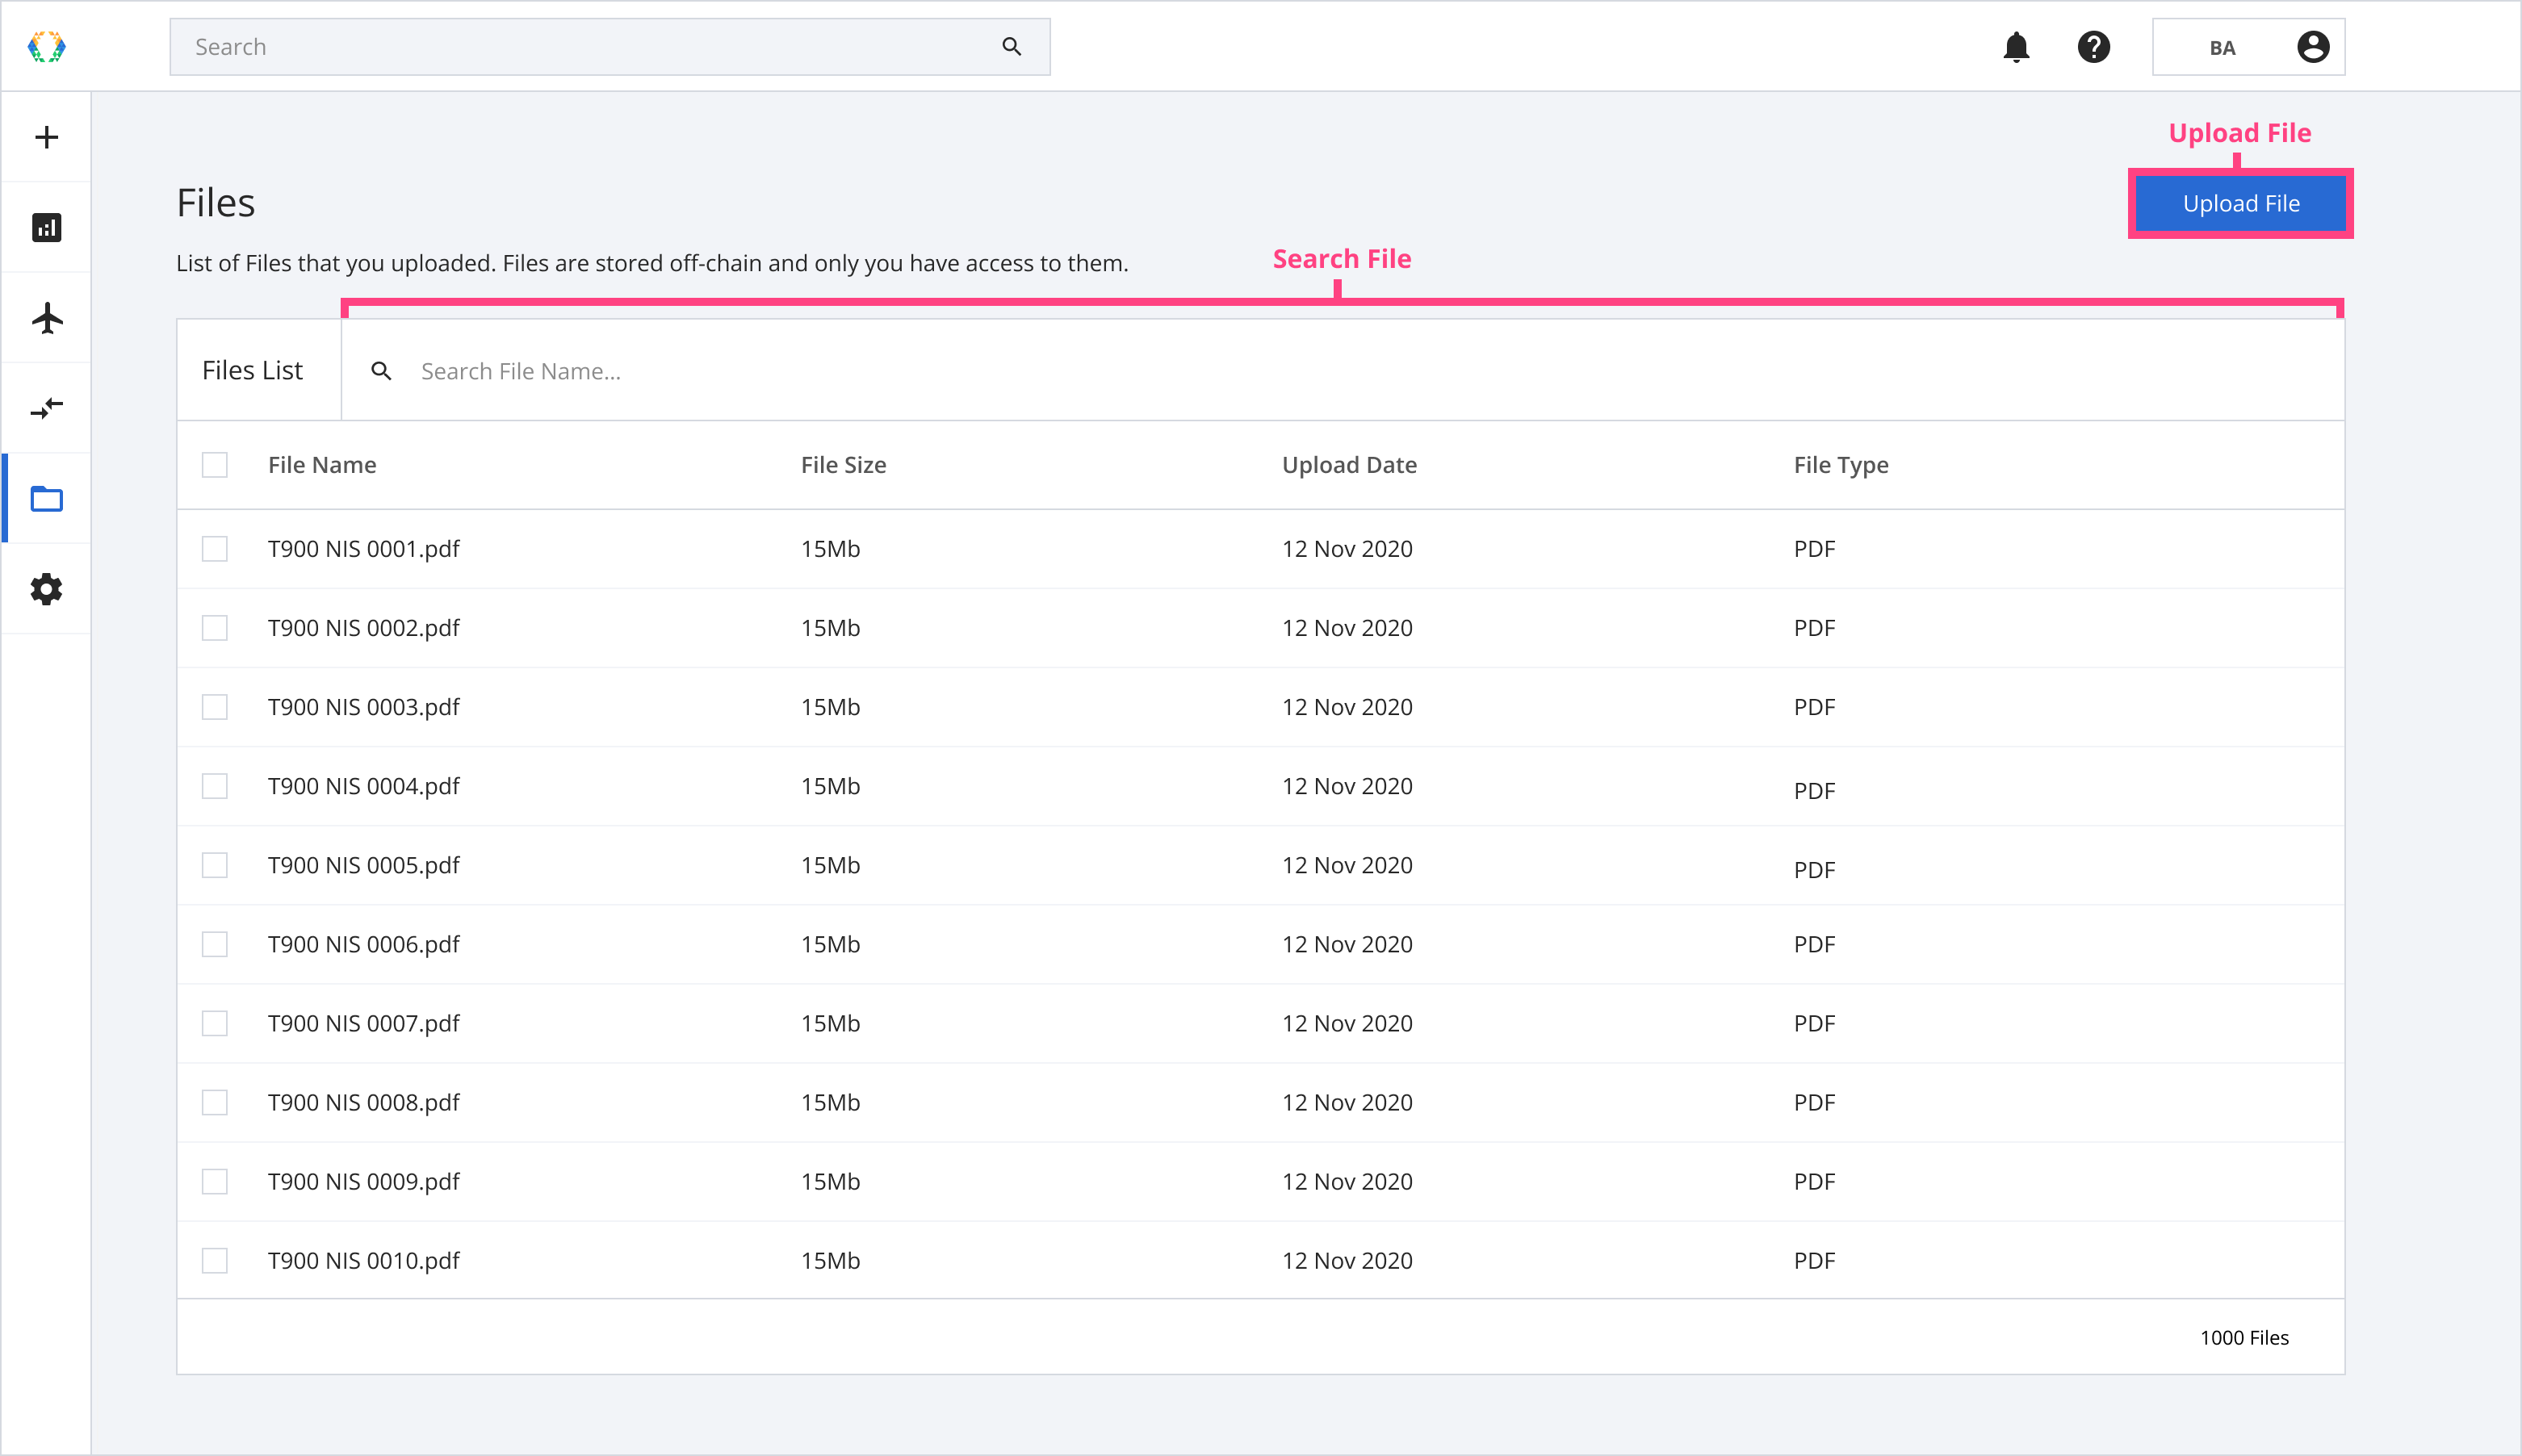
File manager layout
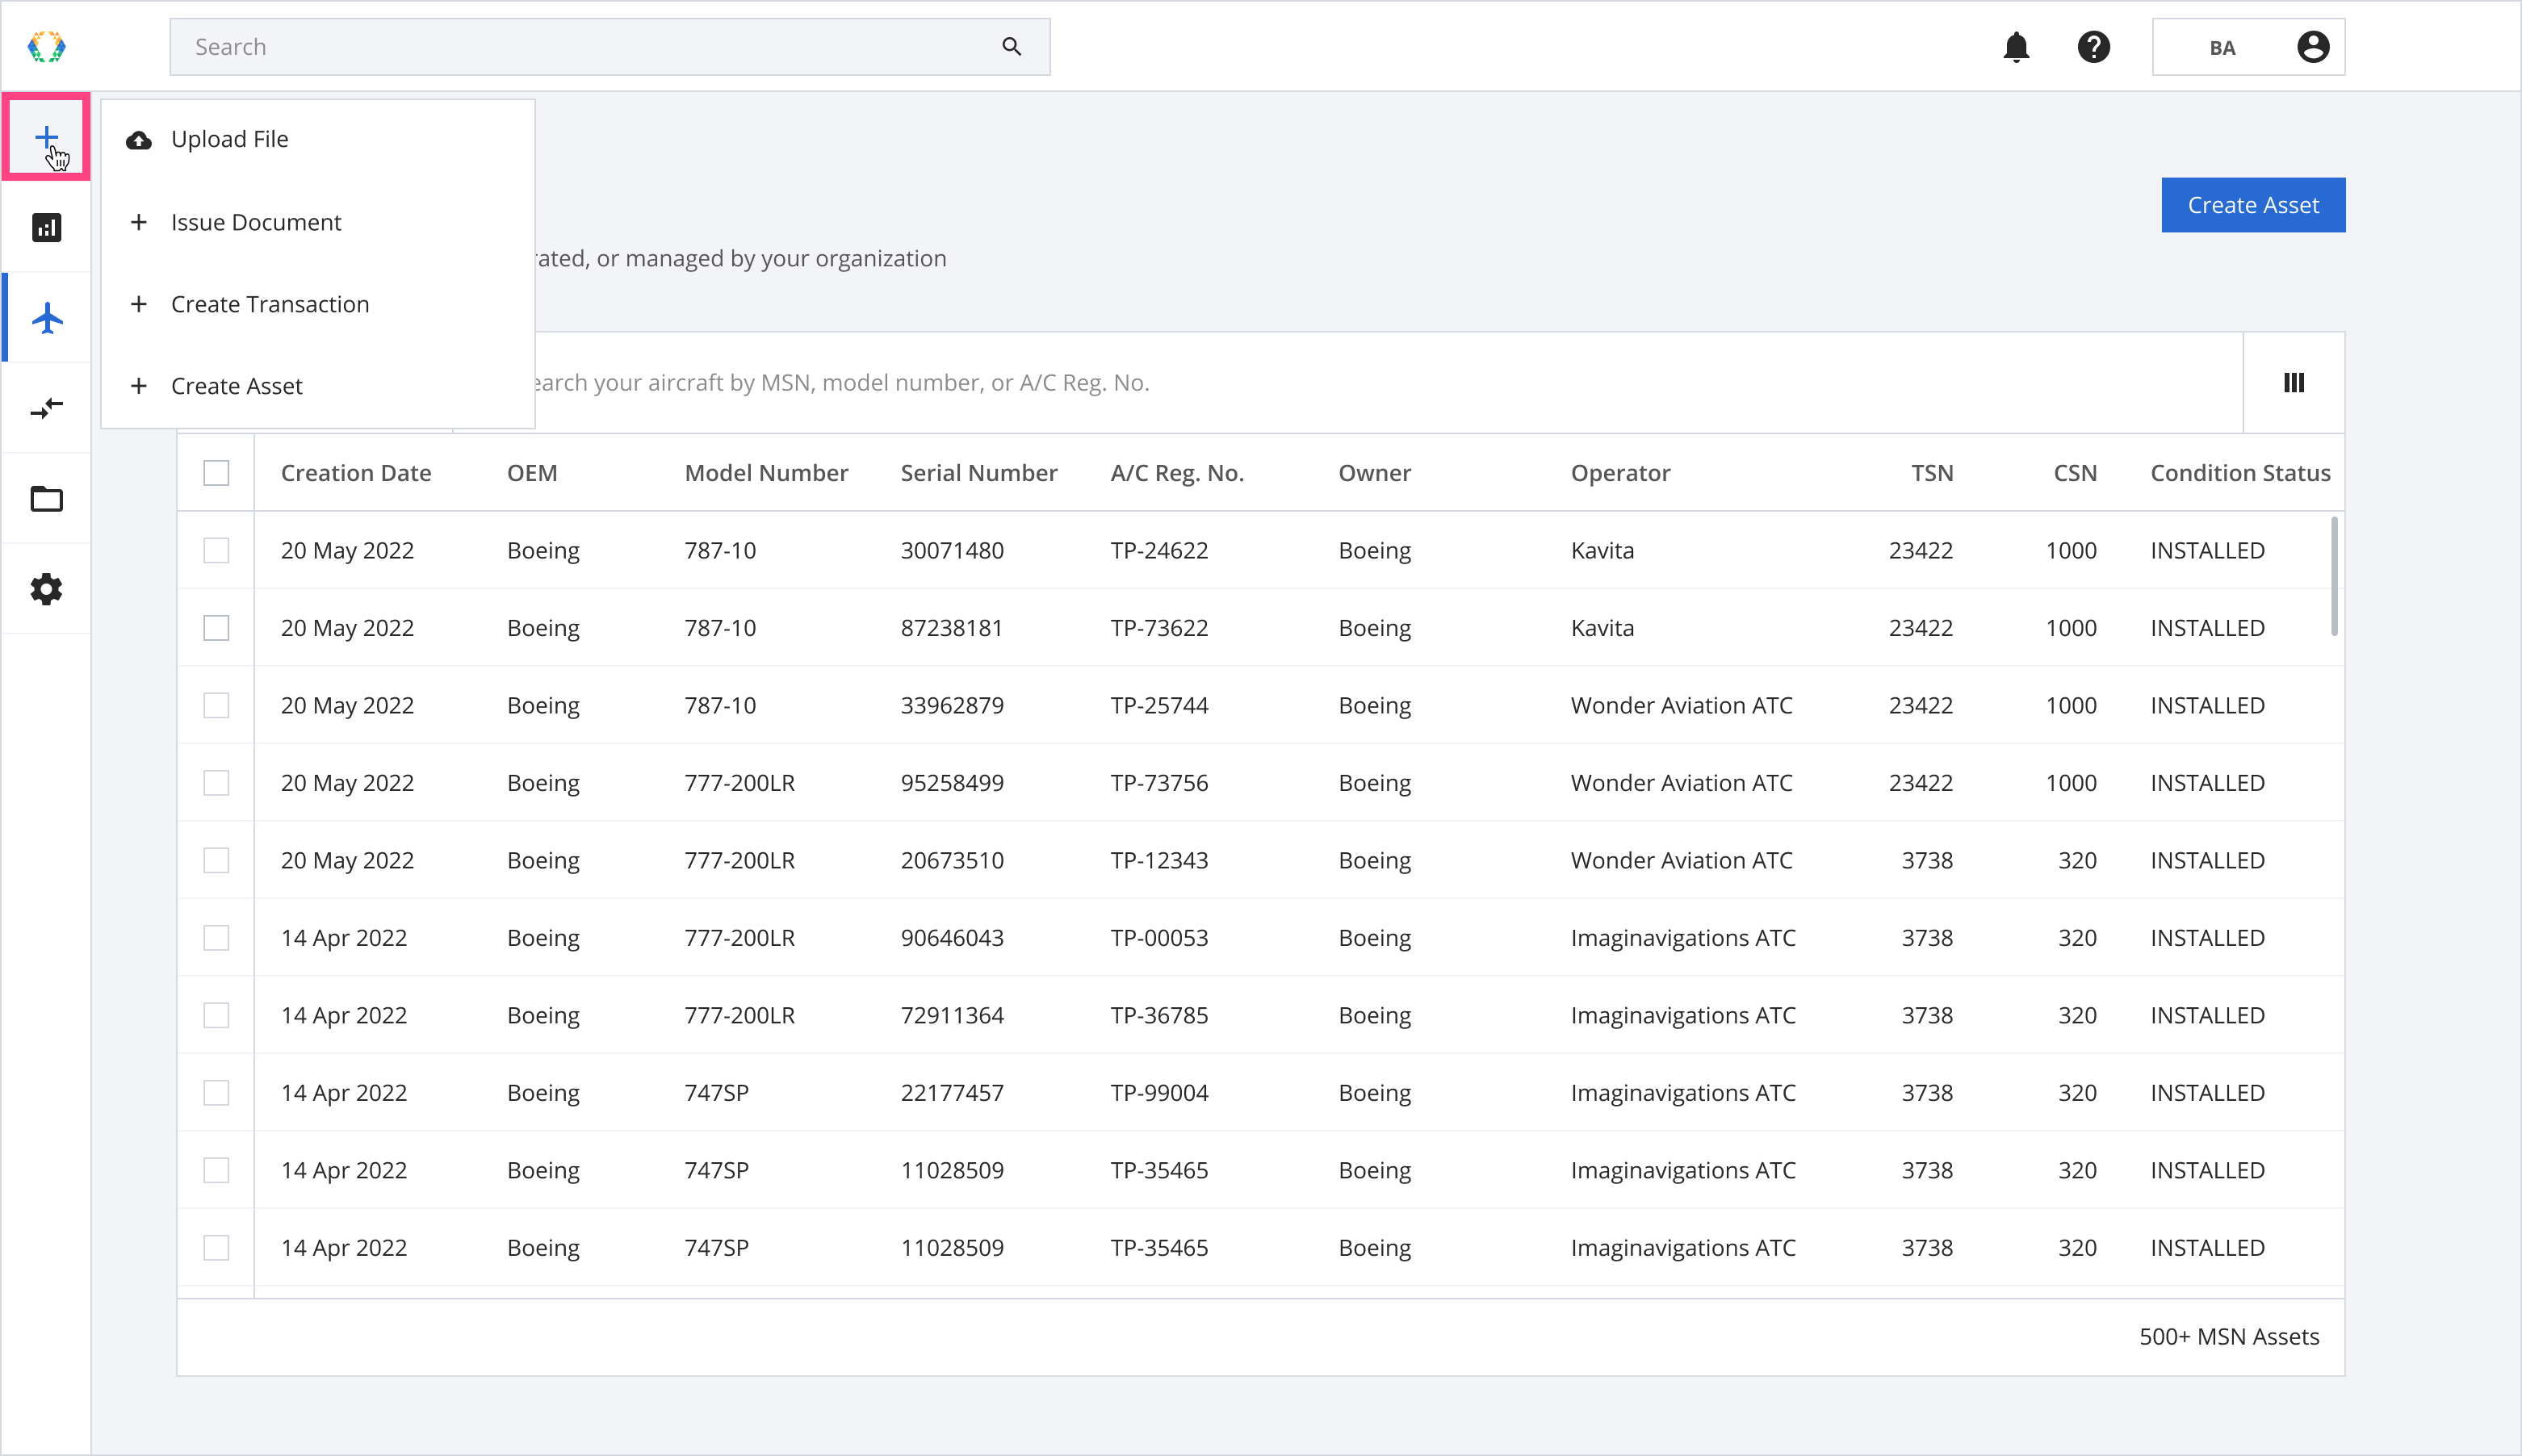
Upload File
Step 1: Select “Upload File” from the list.
Upload File
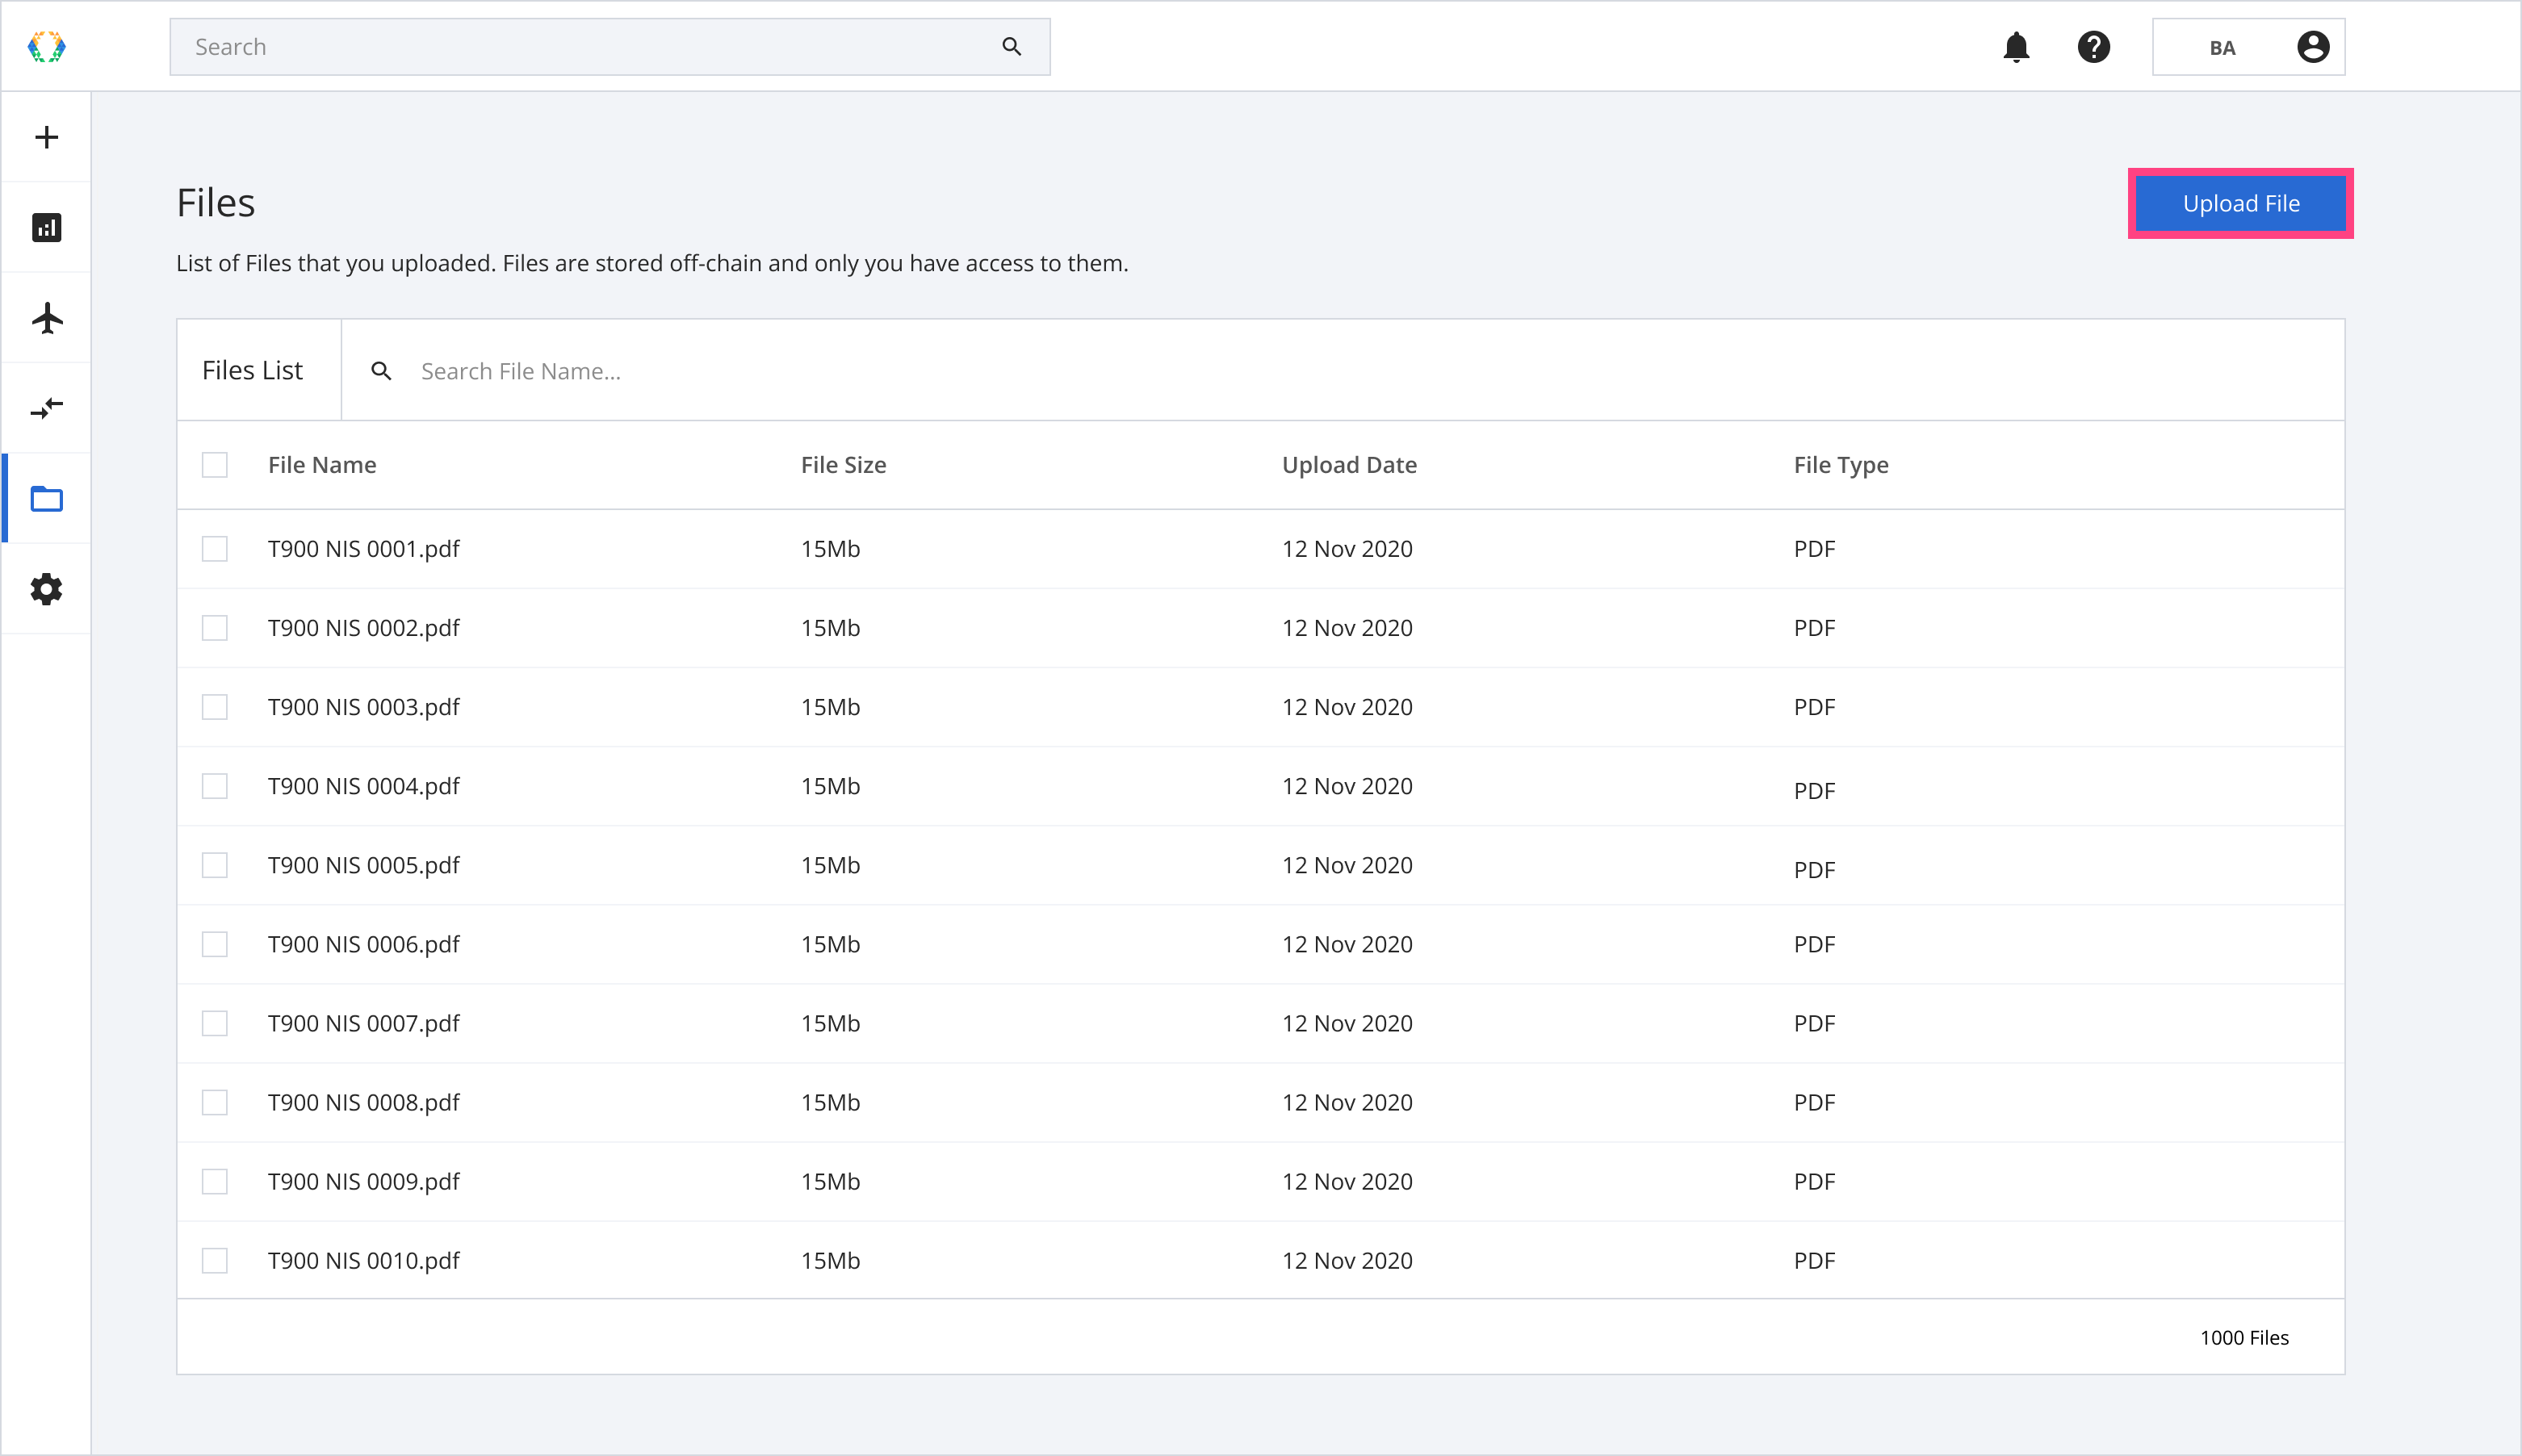
Alternatively, you can also upload files directly in the File Manager module. Click the "Upload File" button that is located at the top right corner of the screen.
Upload File
Step 2: Select a document from your Local Drive and click “Open”.
Supported File Types
- .XLS/XLSX
- .CSV
- .DOC/DOCX
- .JPG
- .GIF
- .PNG
- .BMP
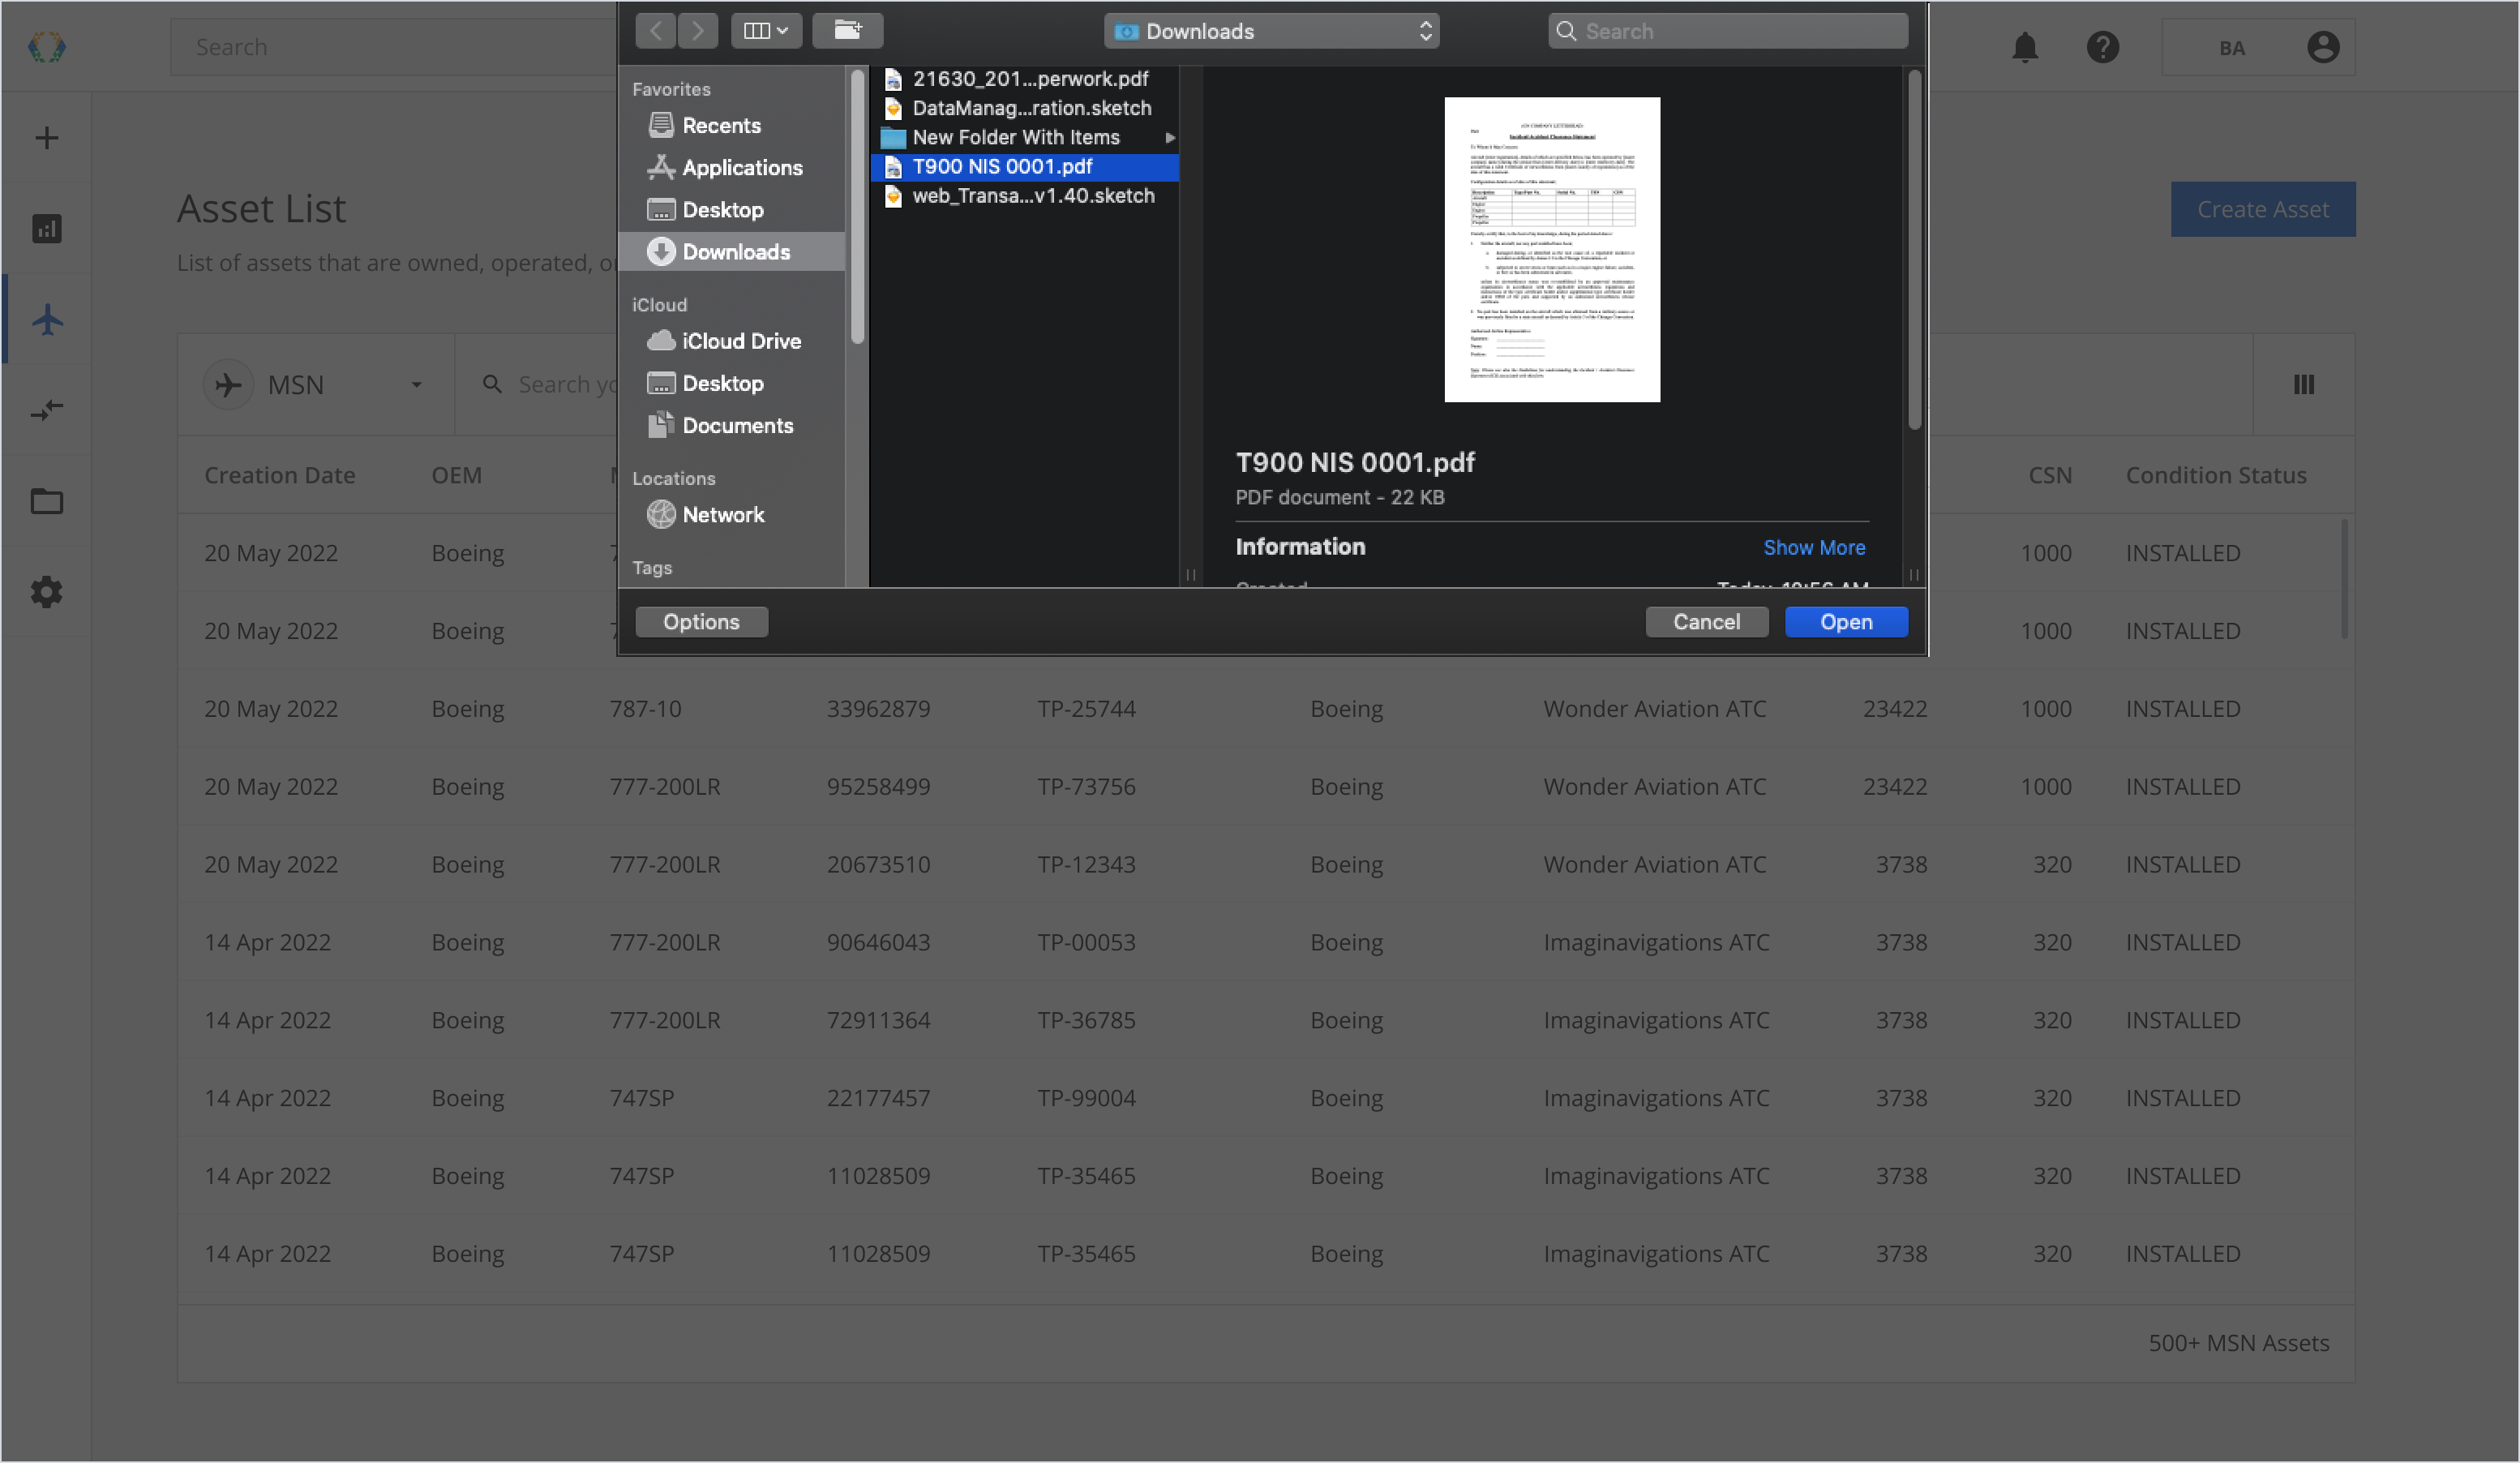
Select document
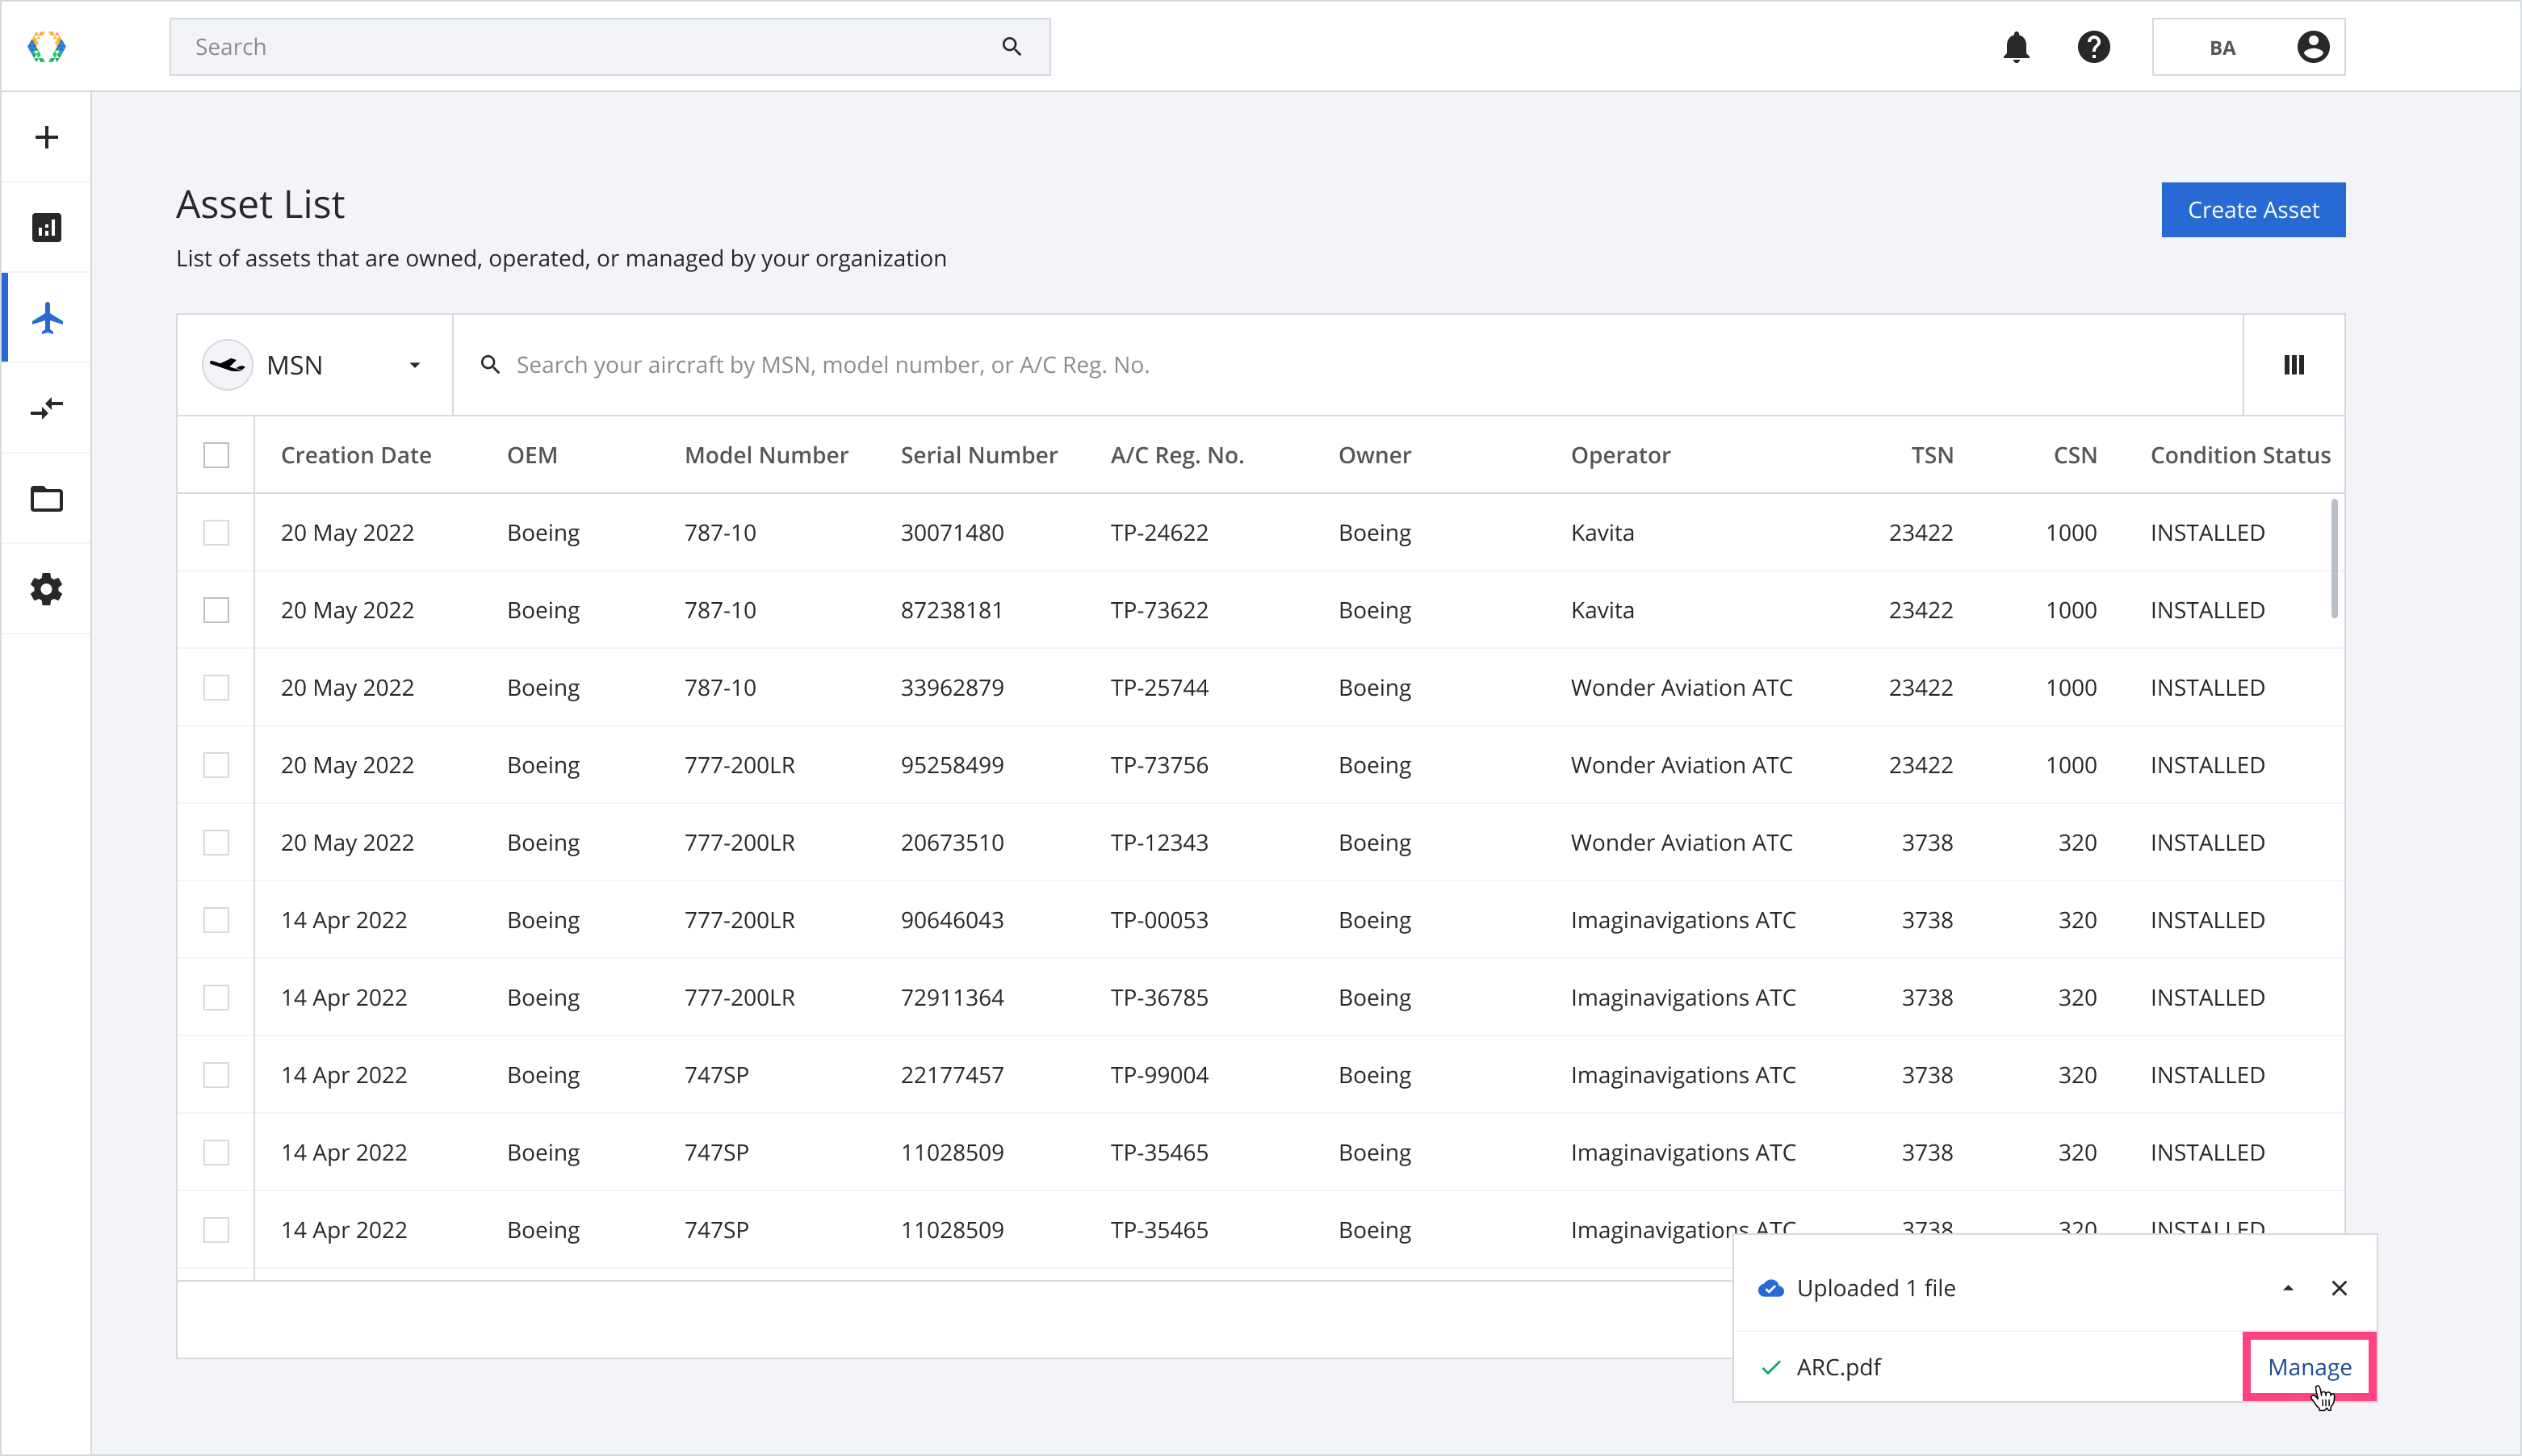
Step 3: After your file is uploaded, you will get the message on the bottom right corner of the screen. Click “Manage” to add details of your uploaded document.
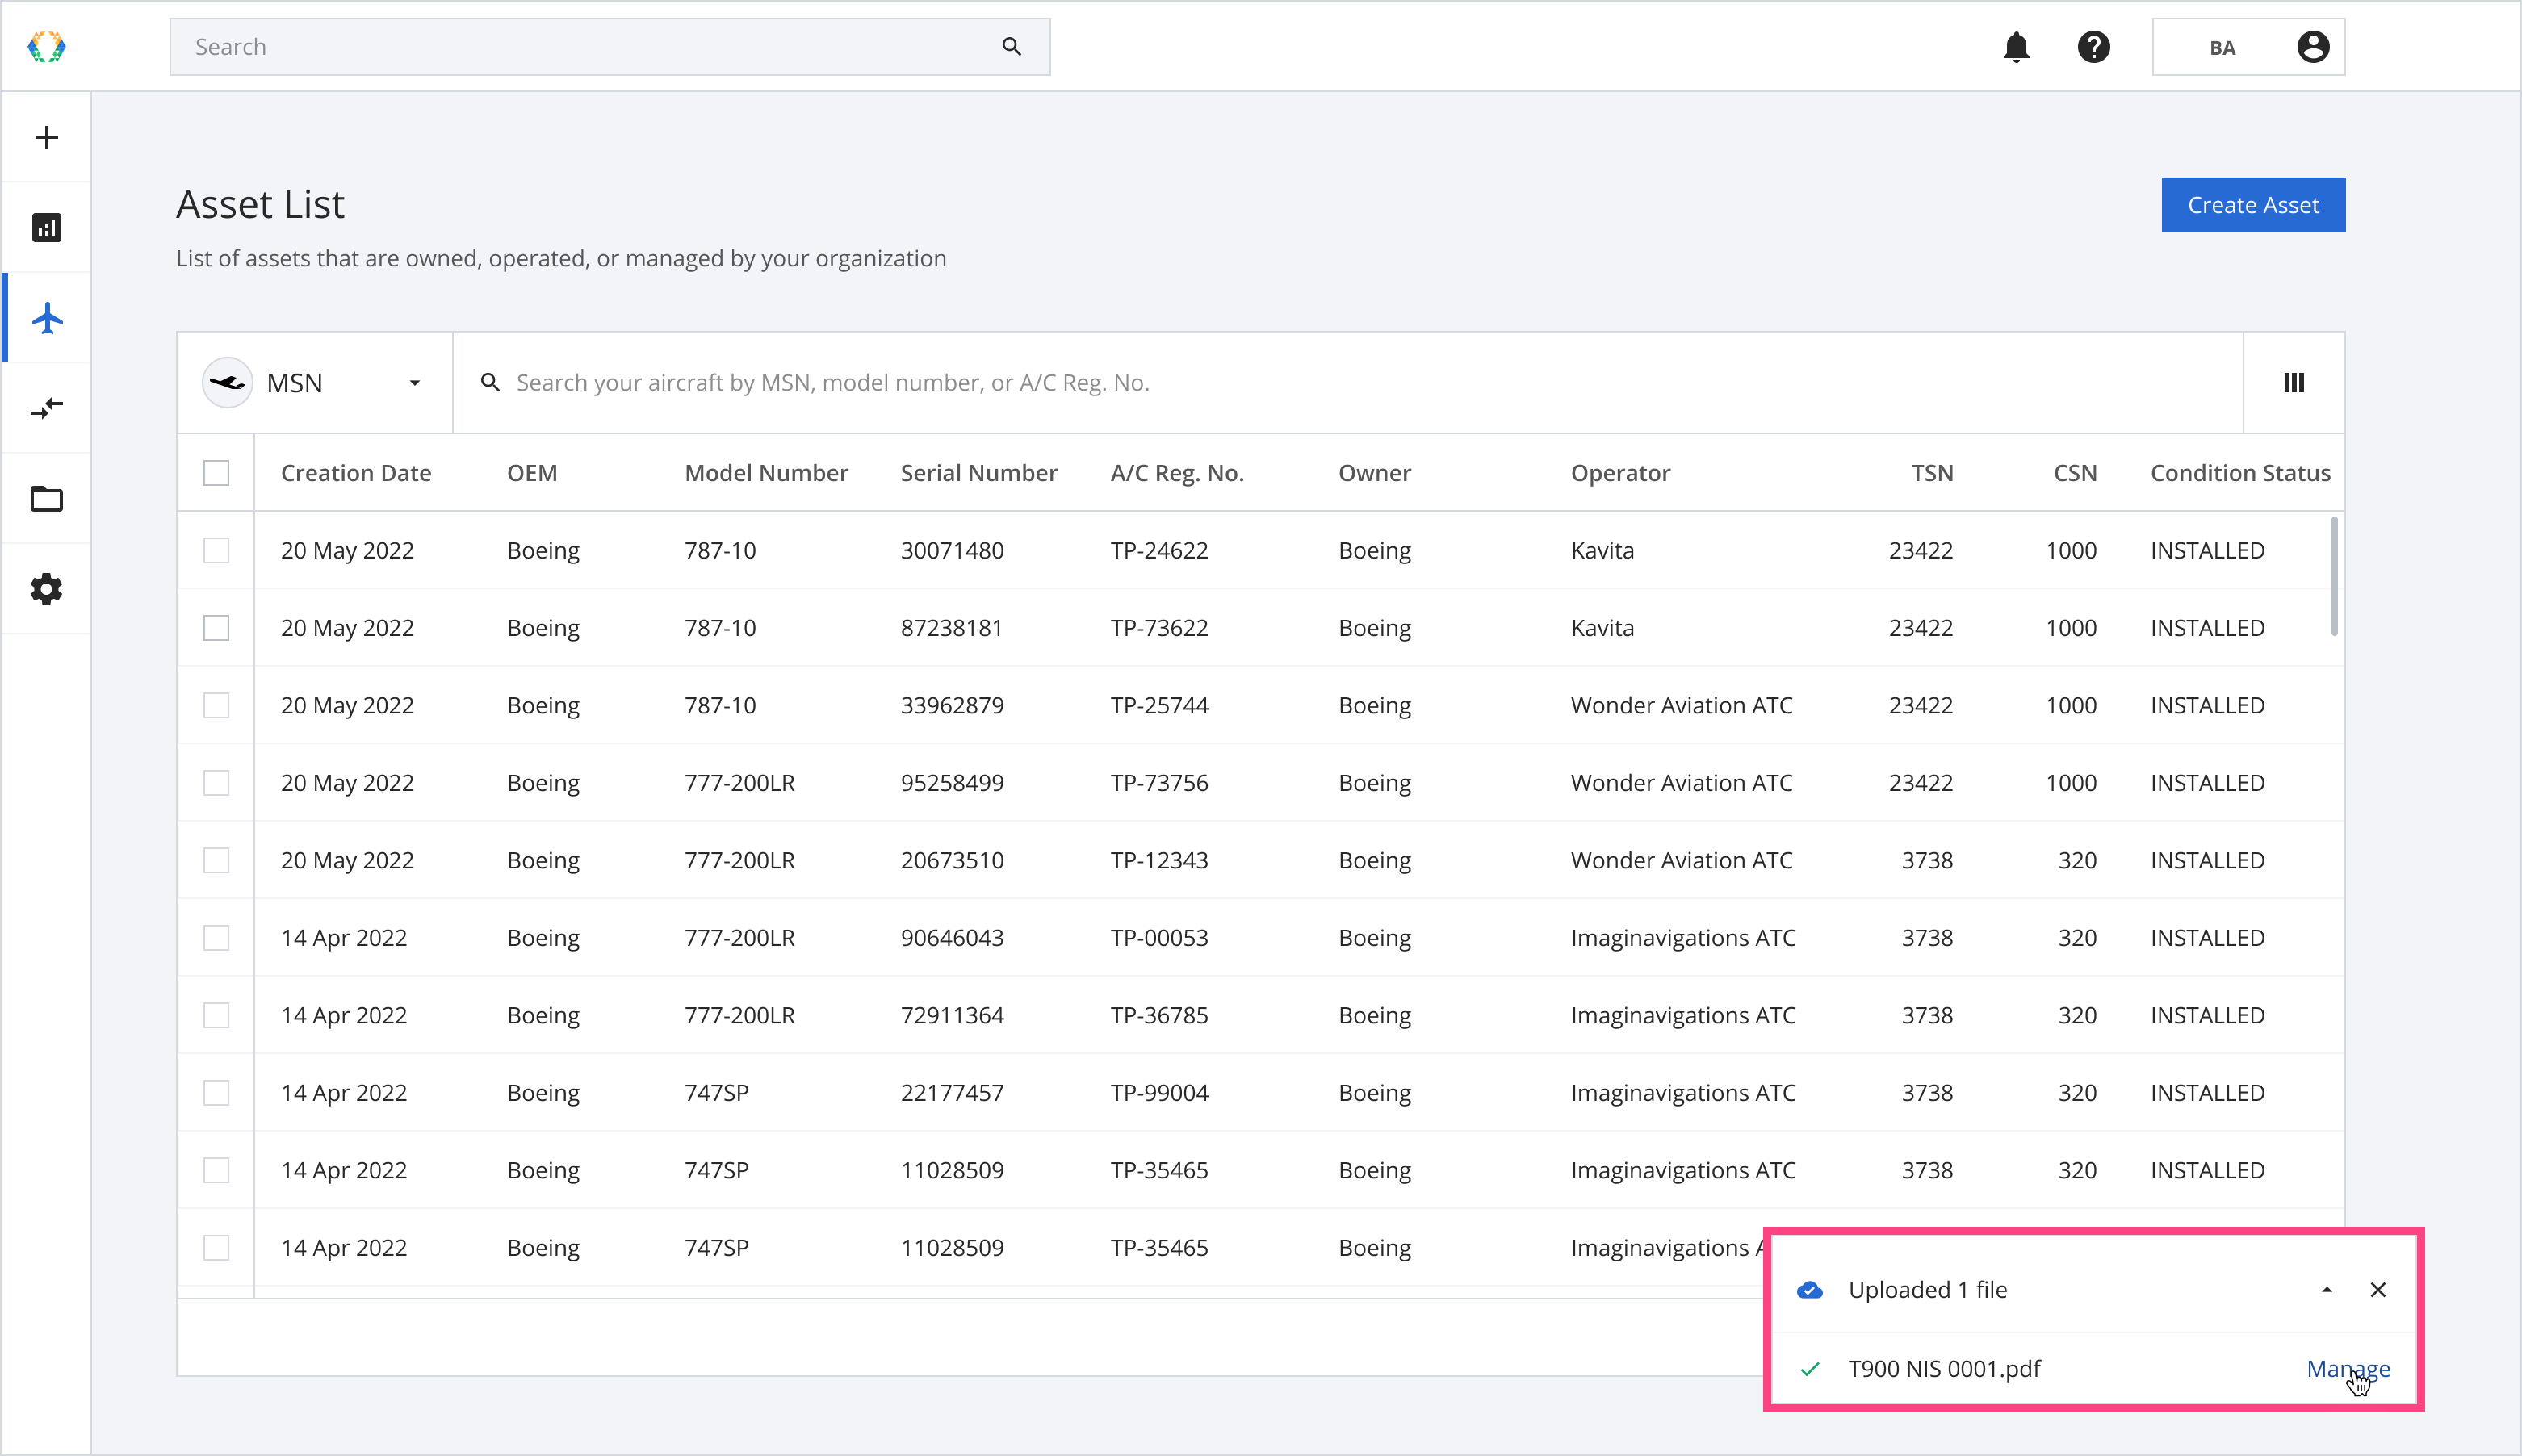
File uploaded
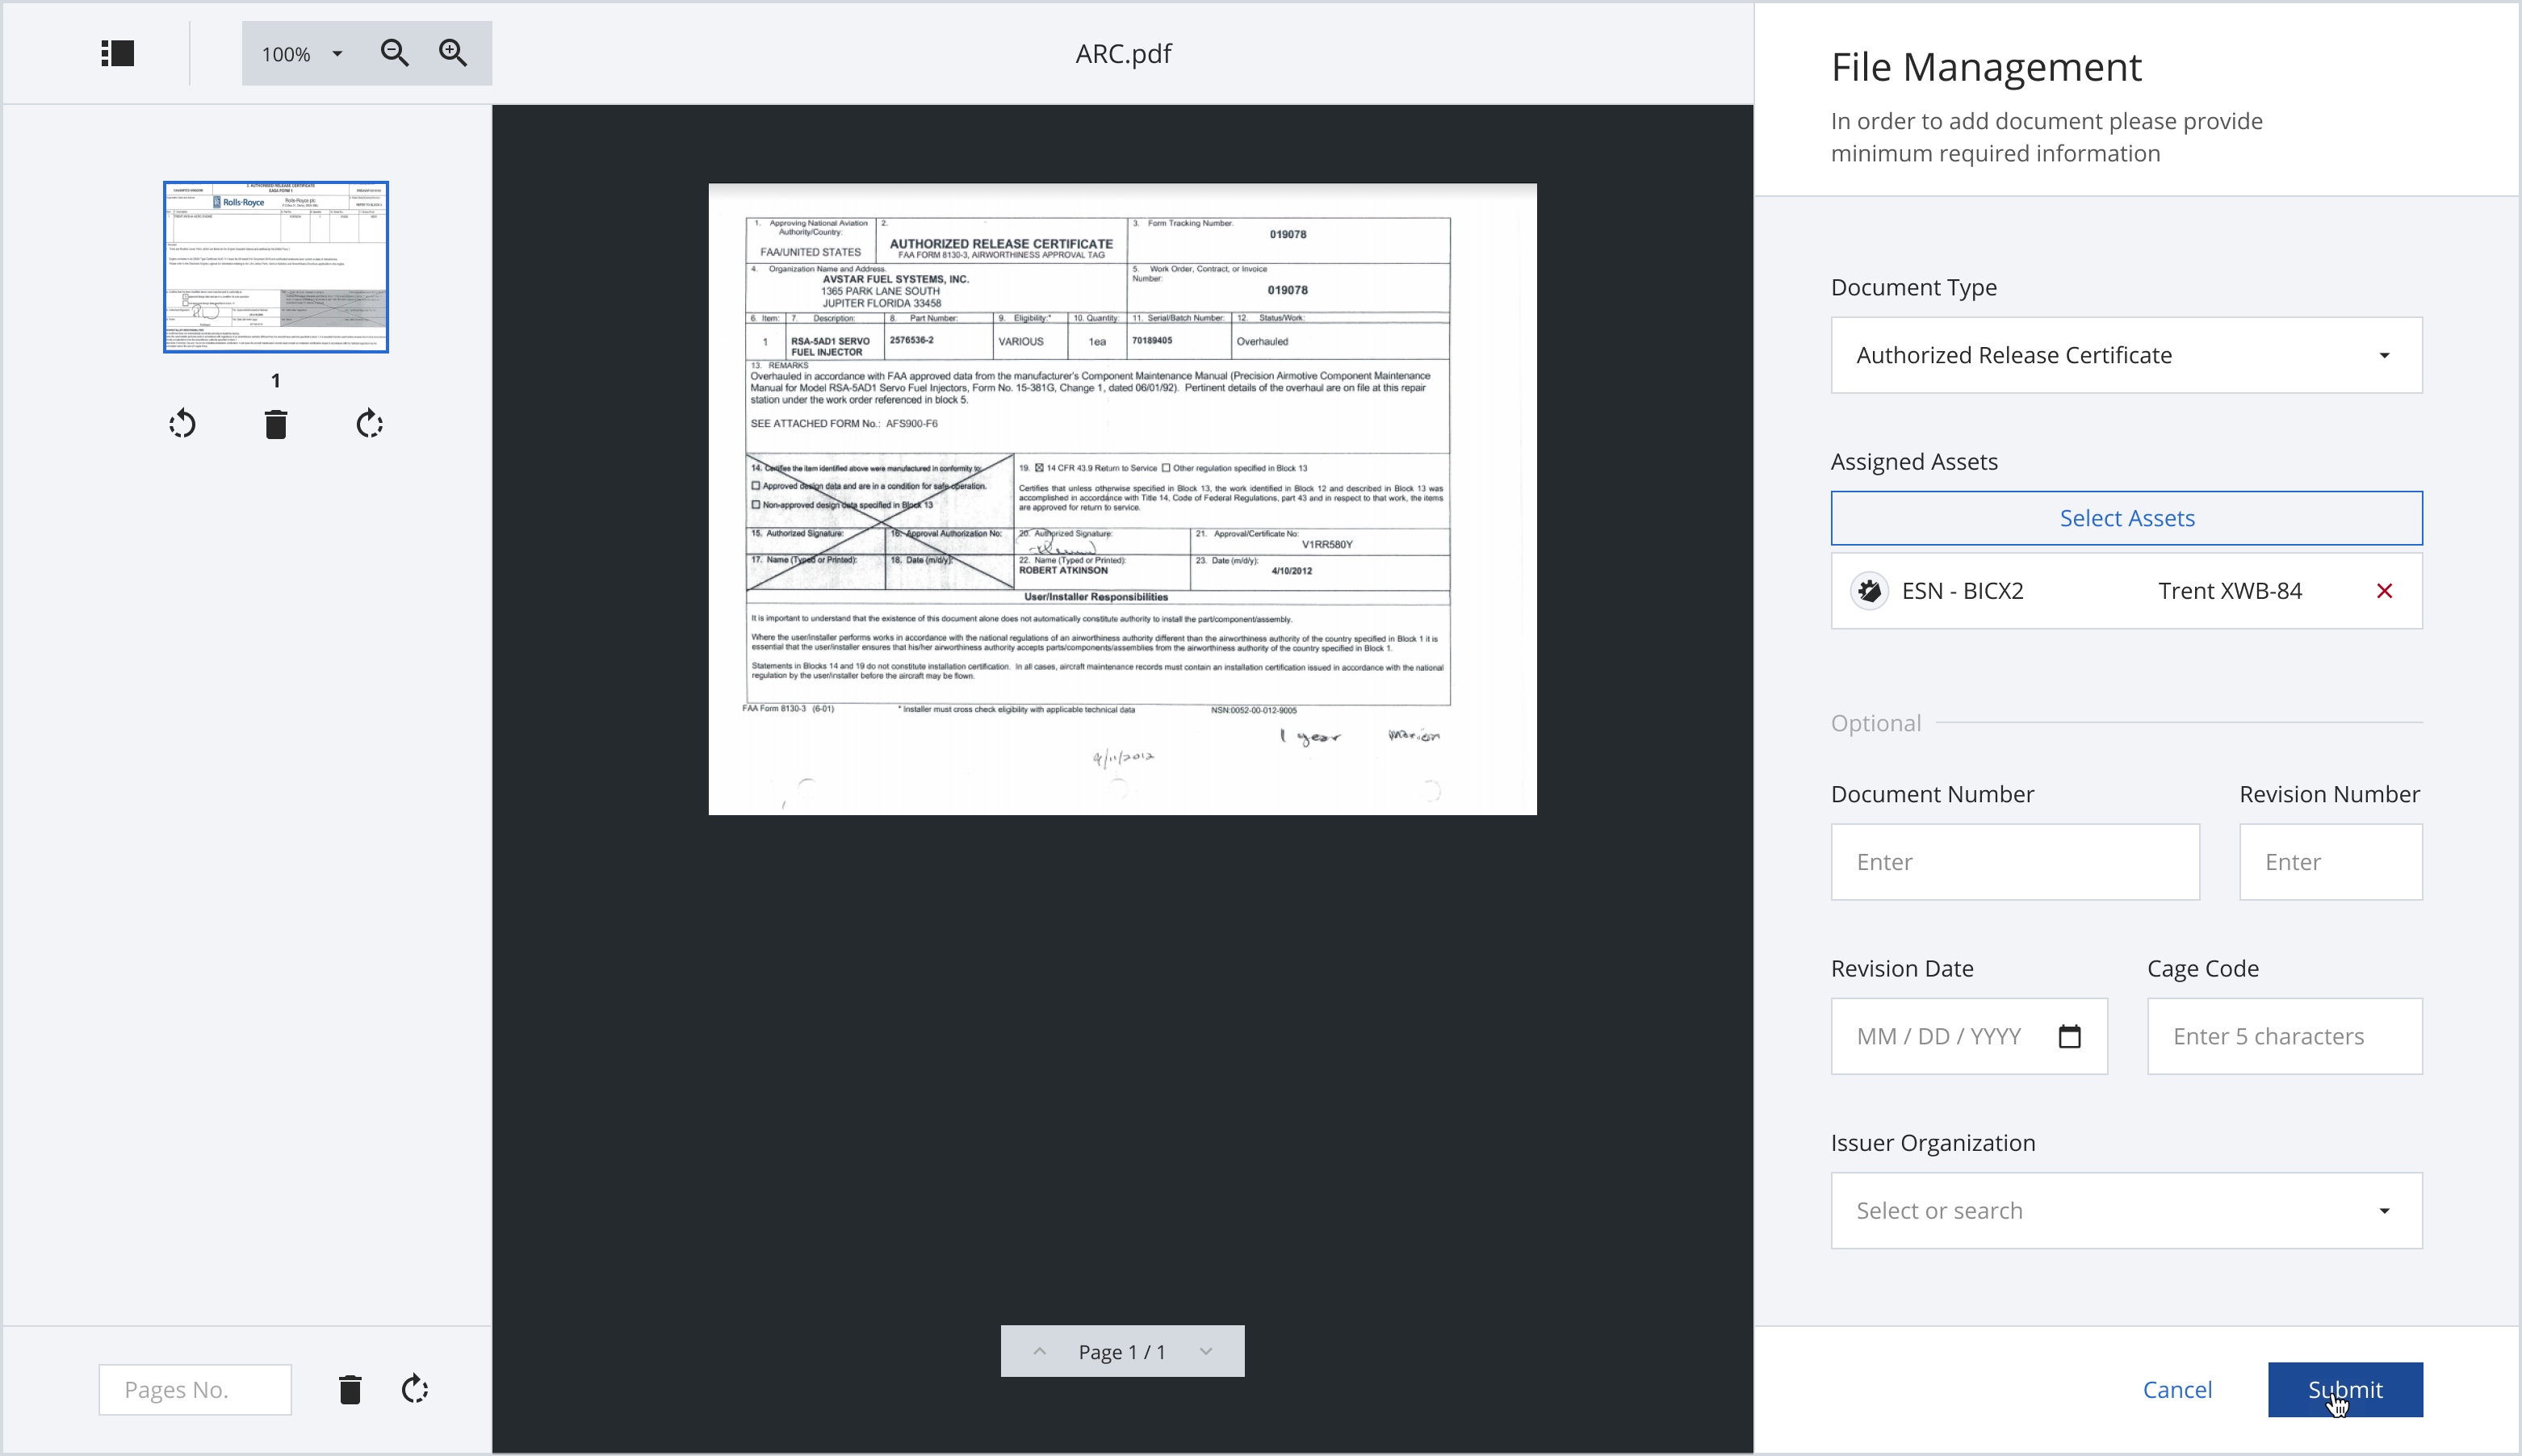
Step 4: Once you click “Manage”, you will be redirected to the File Management window.
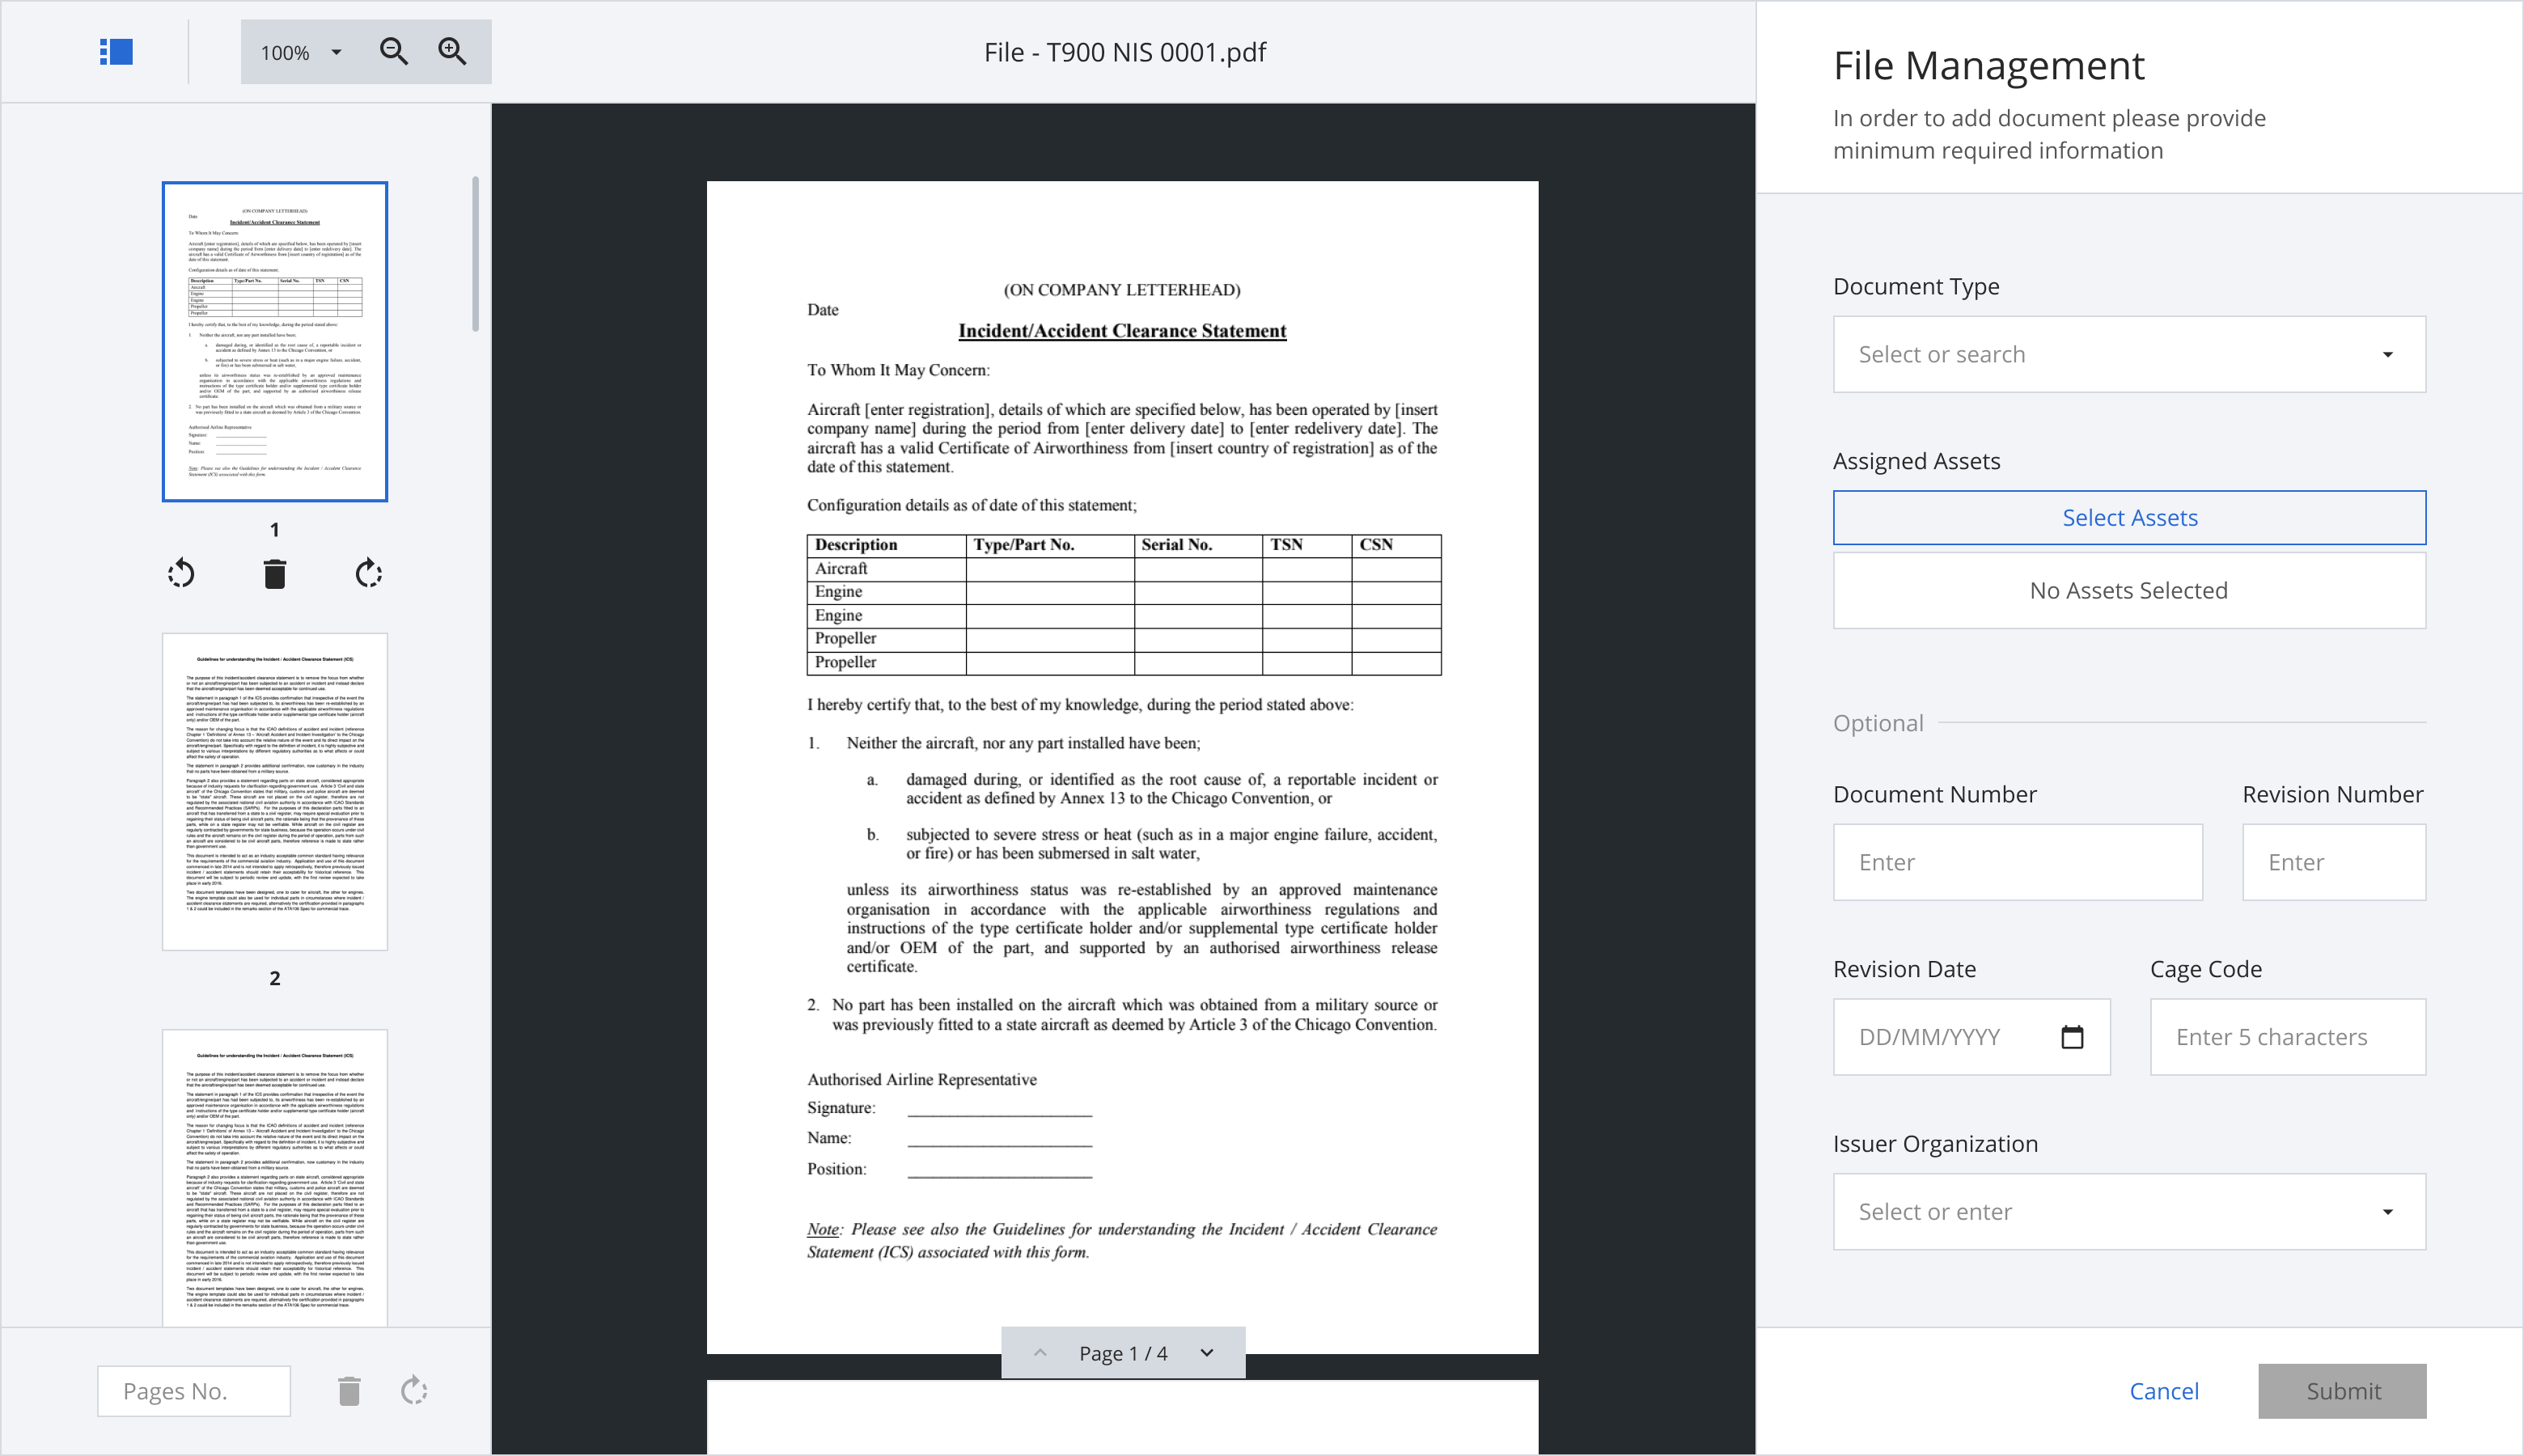
File Management
Step 5: Select the Document Type of your document from the dropdown list.
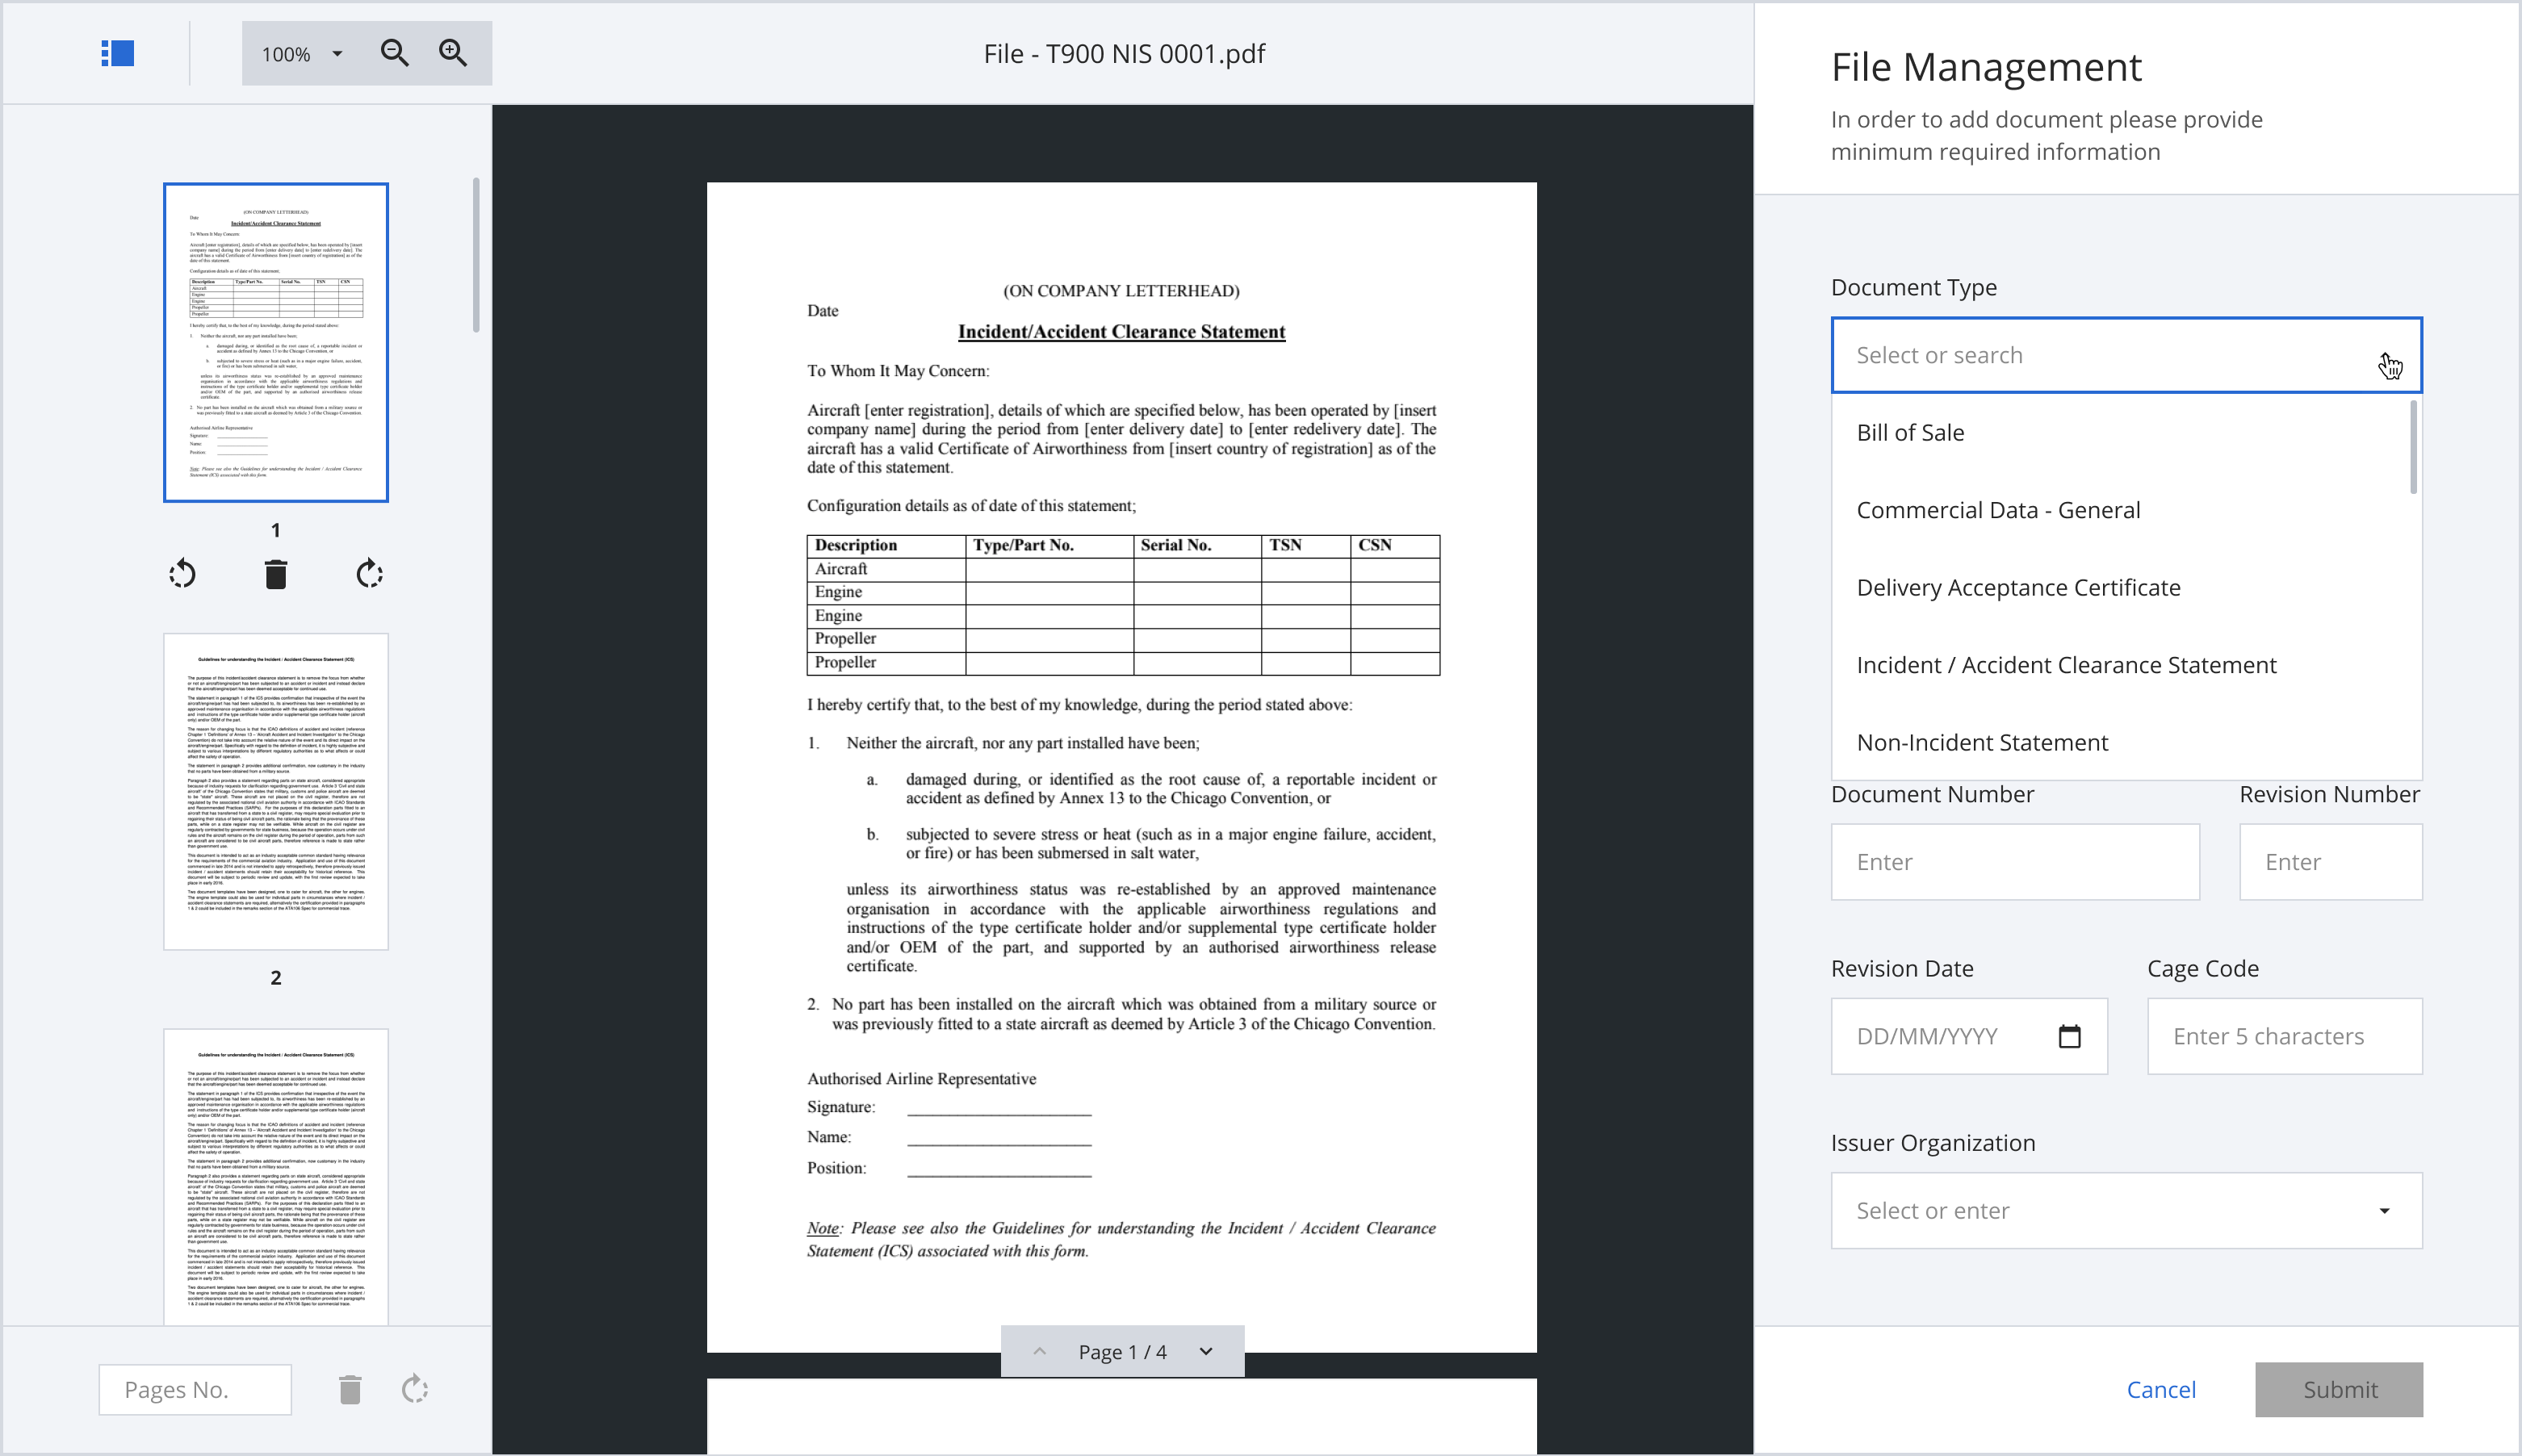
Select document type
Step 6: Under Assigned Assets, click “Select Assets”.

Select assets
Step 7: The “Select Assets” pop-up window will appear for you to select the Assigned Assets of the document.
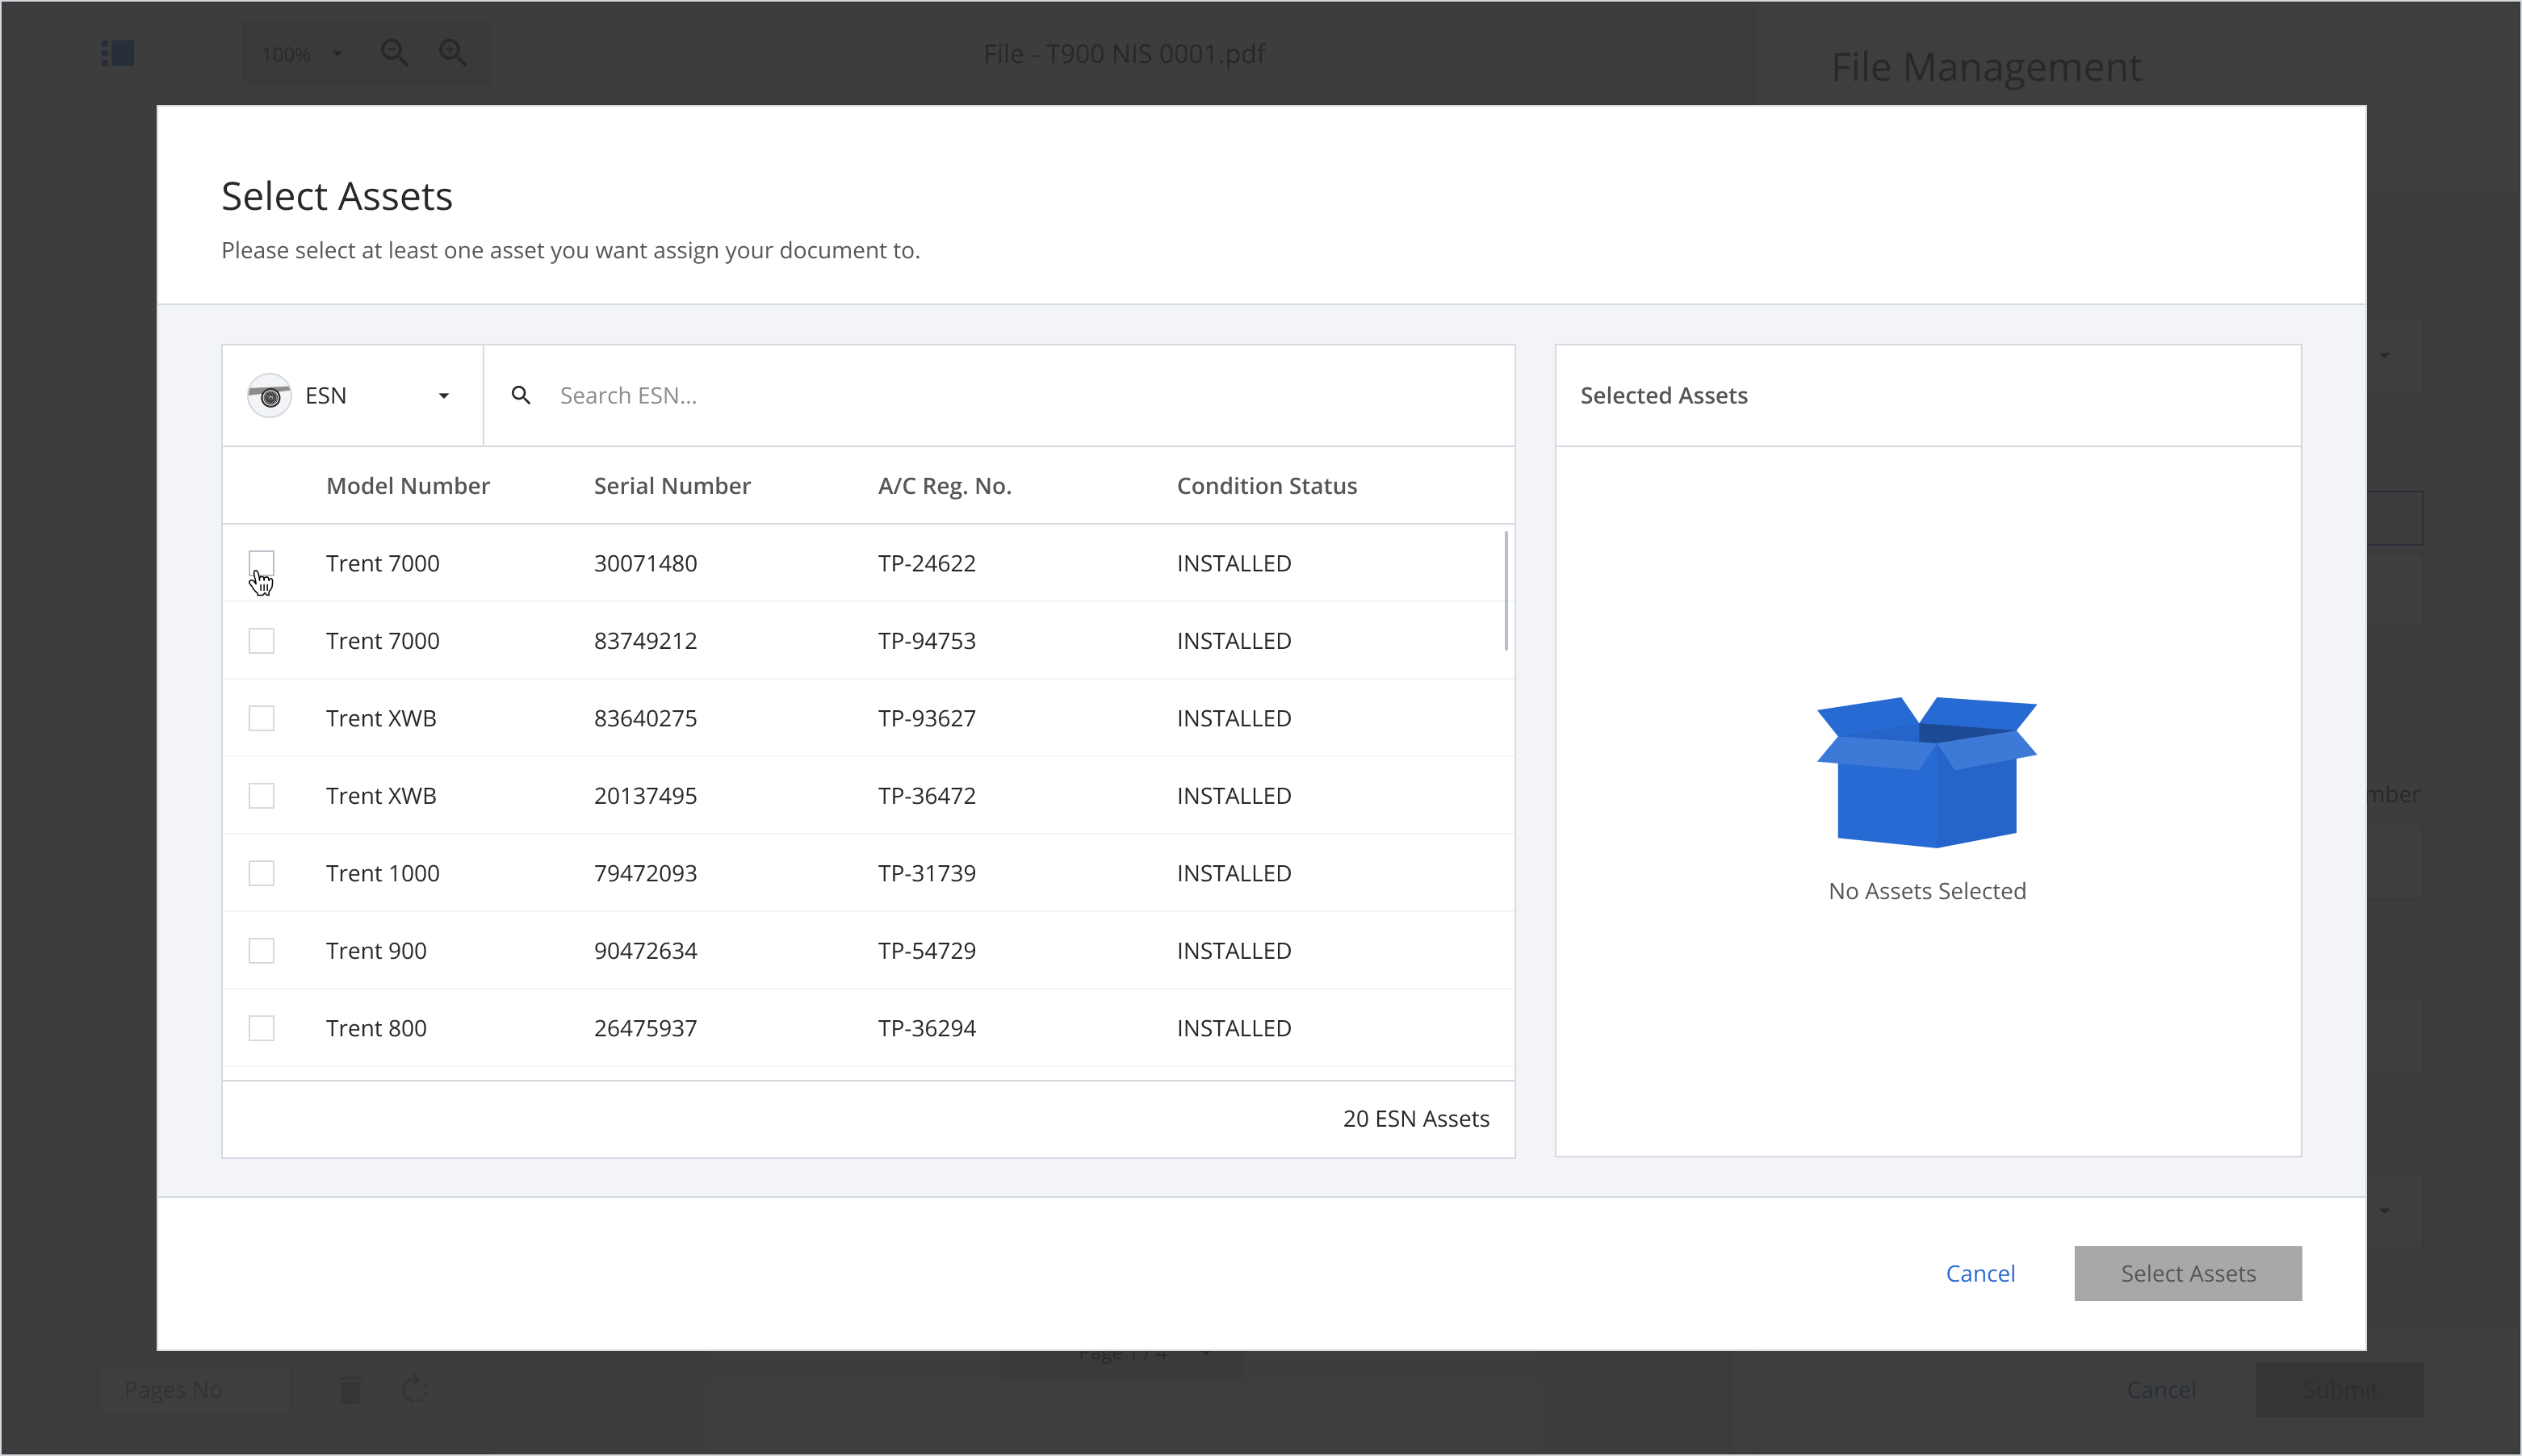
Select assets pop-up
Step 8: The assets you select from the Asset List will appear on the right panel under “Selected Assets”. You can click on ✕or uncheck the checkbox to remove the selected assets.
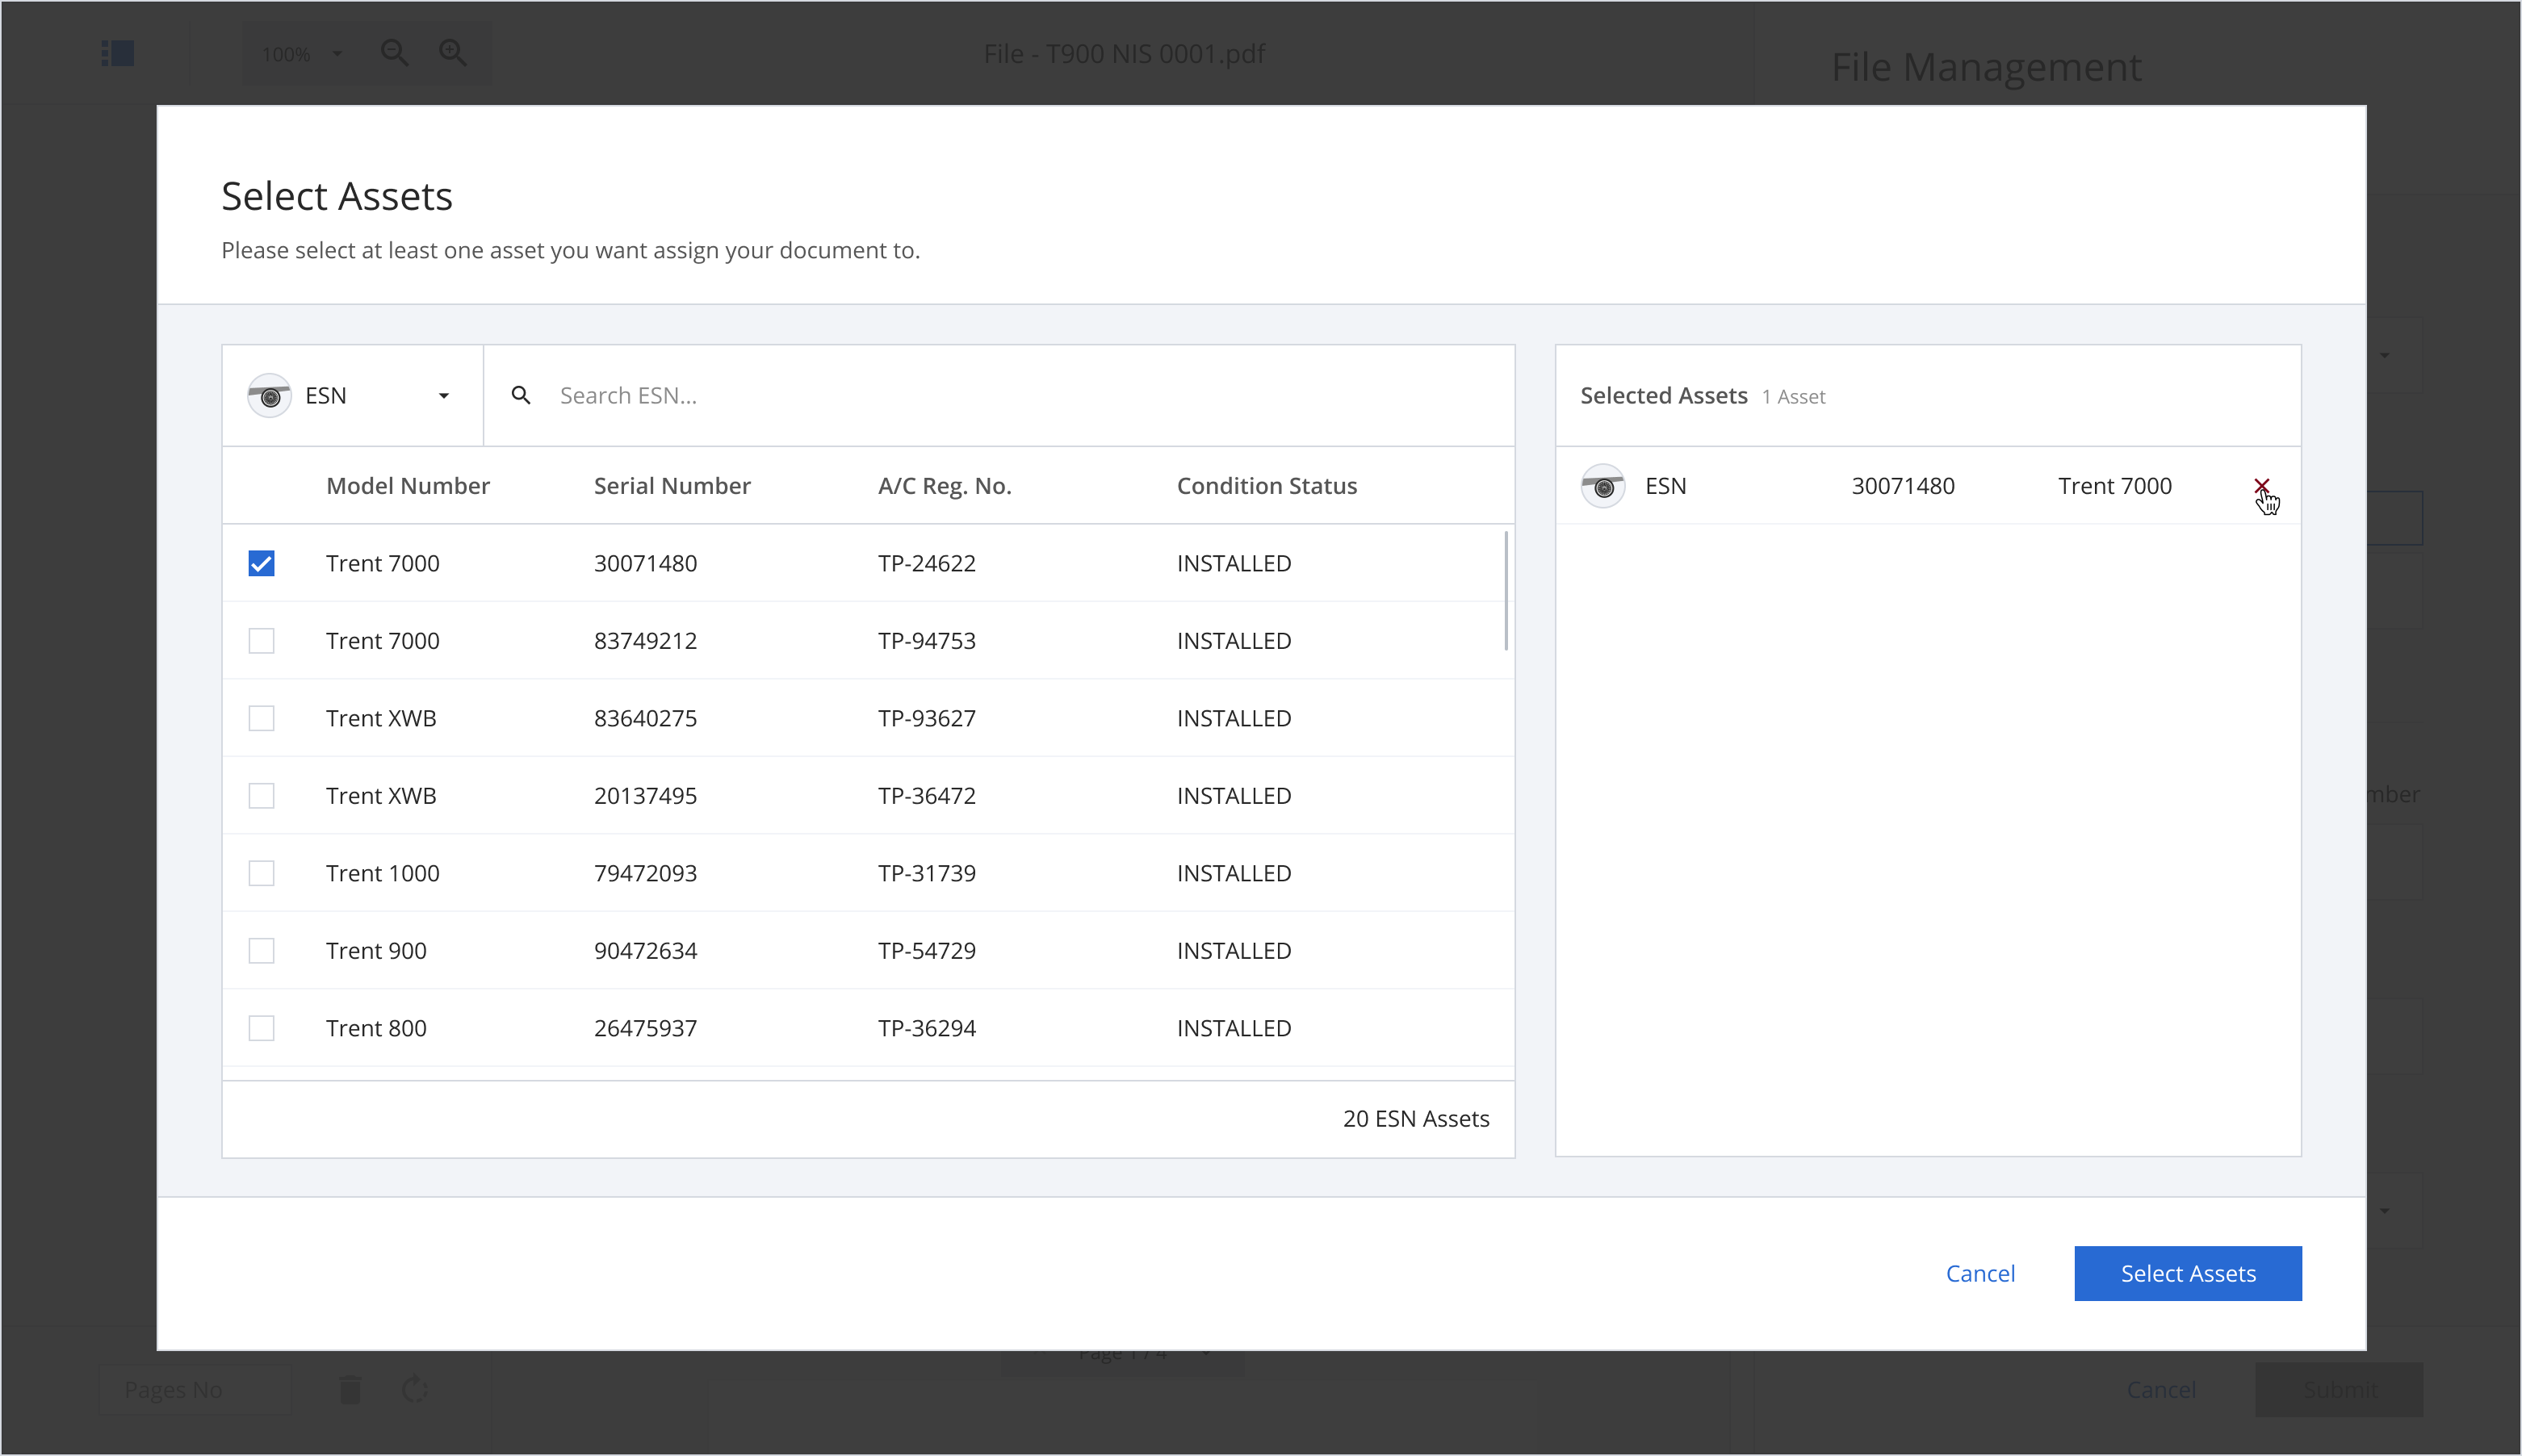
Selected Assets
Step 9: Click “Select Assets” to confirm.
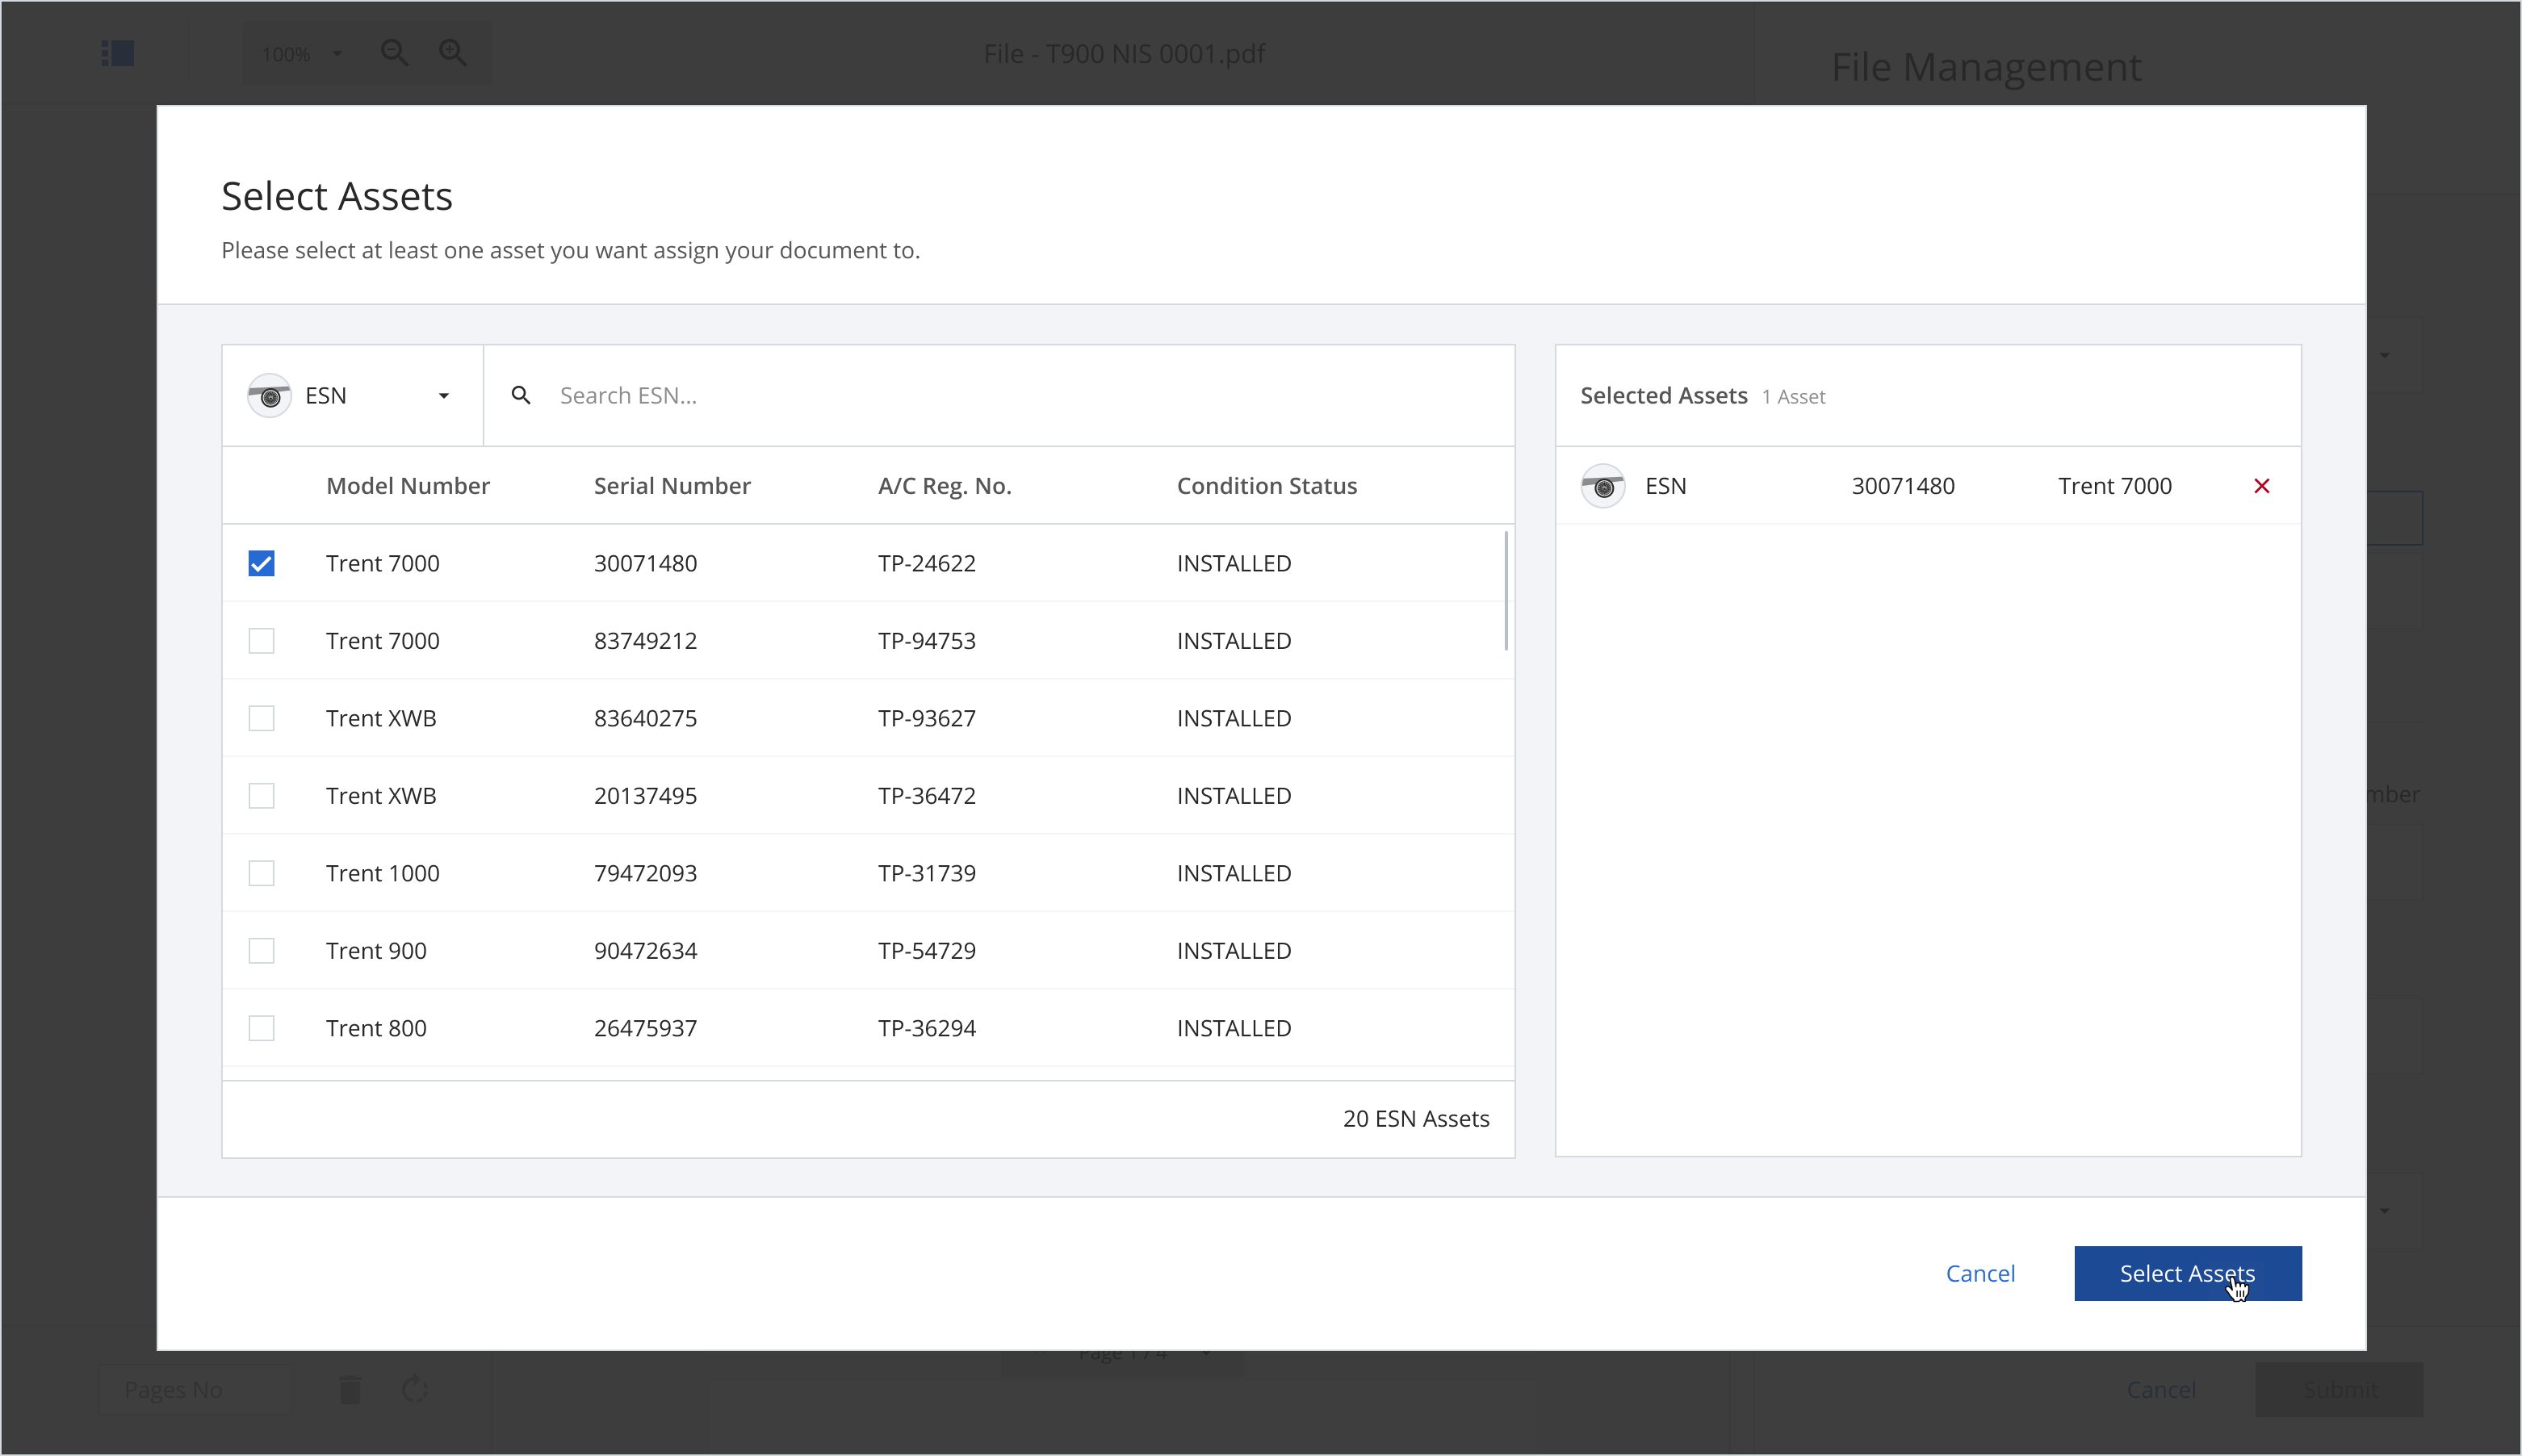
Select Assets
Step 10: You will return to the File Management window. You can choose to fill up the optional fields to add more details about the document.
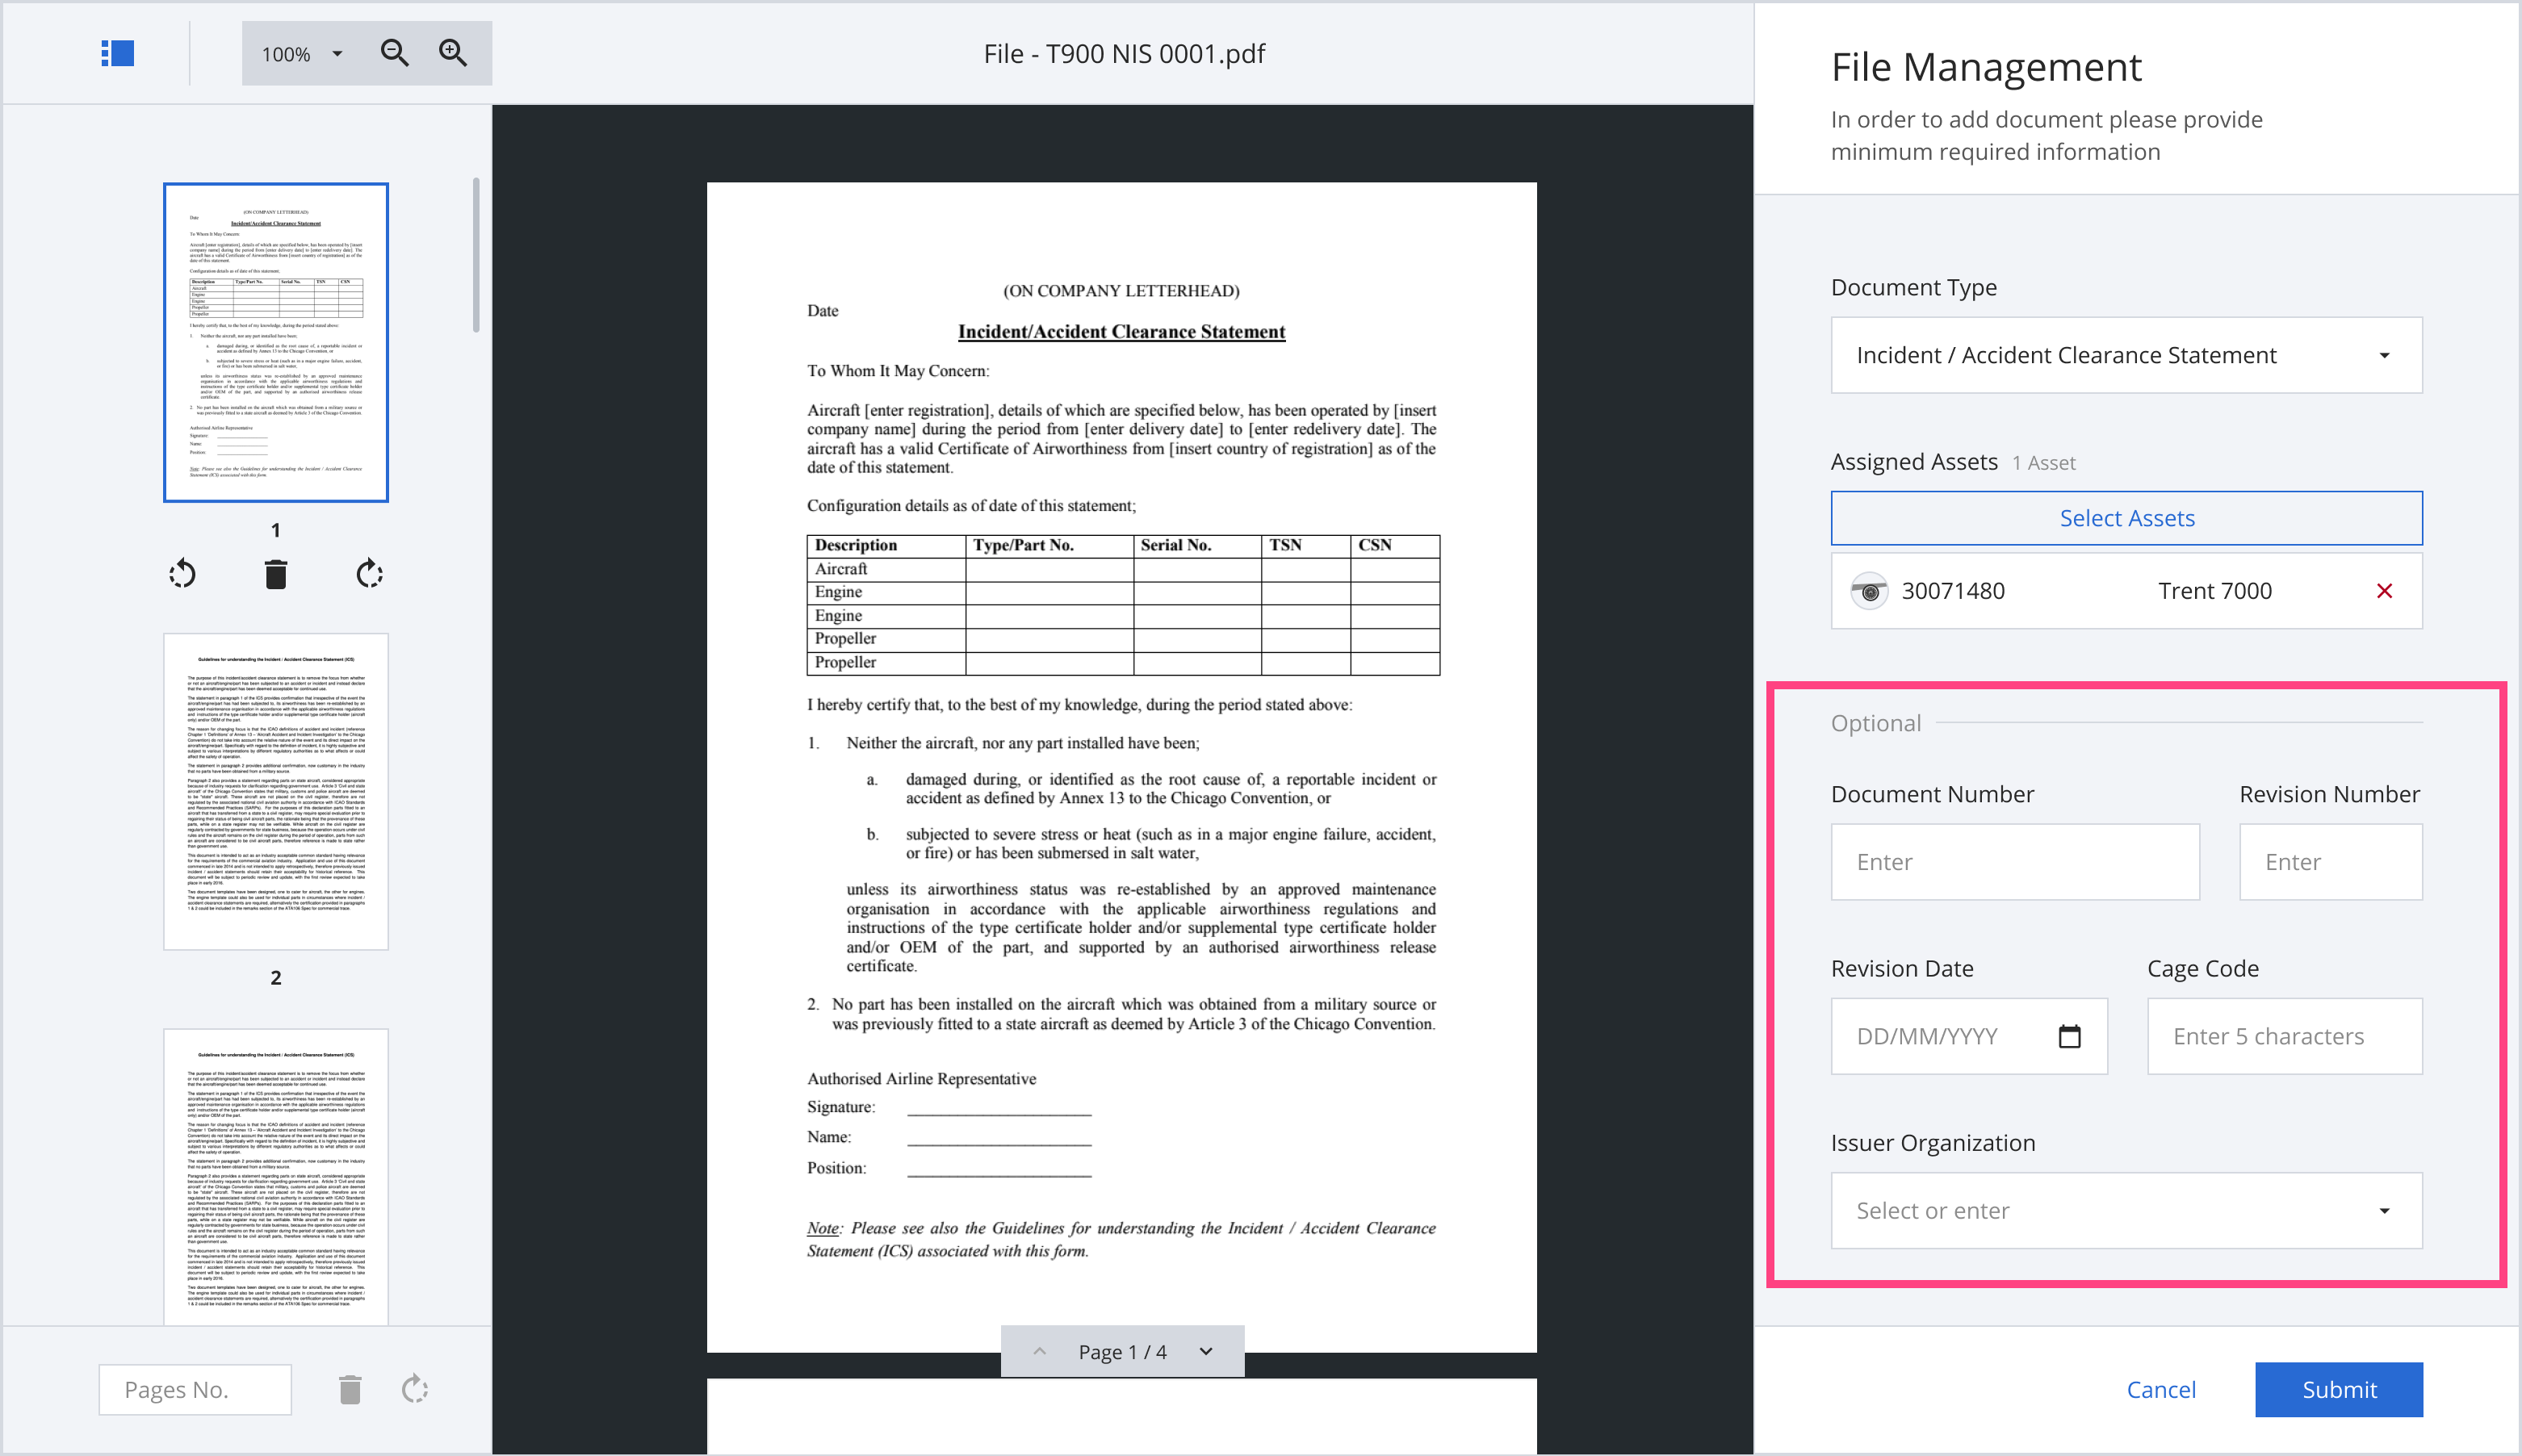
Document Metadata
| Document Metadata (Optional Fields) |
|---|
| Document Number |
| Revision Number |
| Revision Date |
| Cage Code |
| Issuer Organization |
Step 11: Click “Submit” to confirm the document assignment to the selected assets.
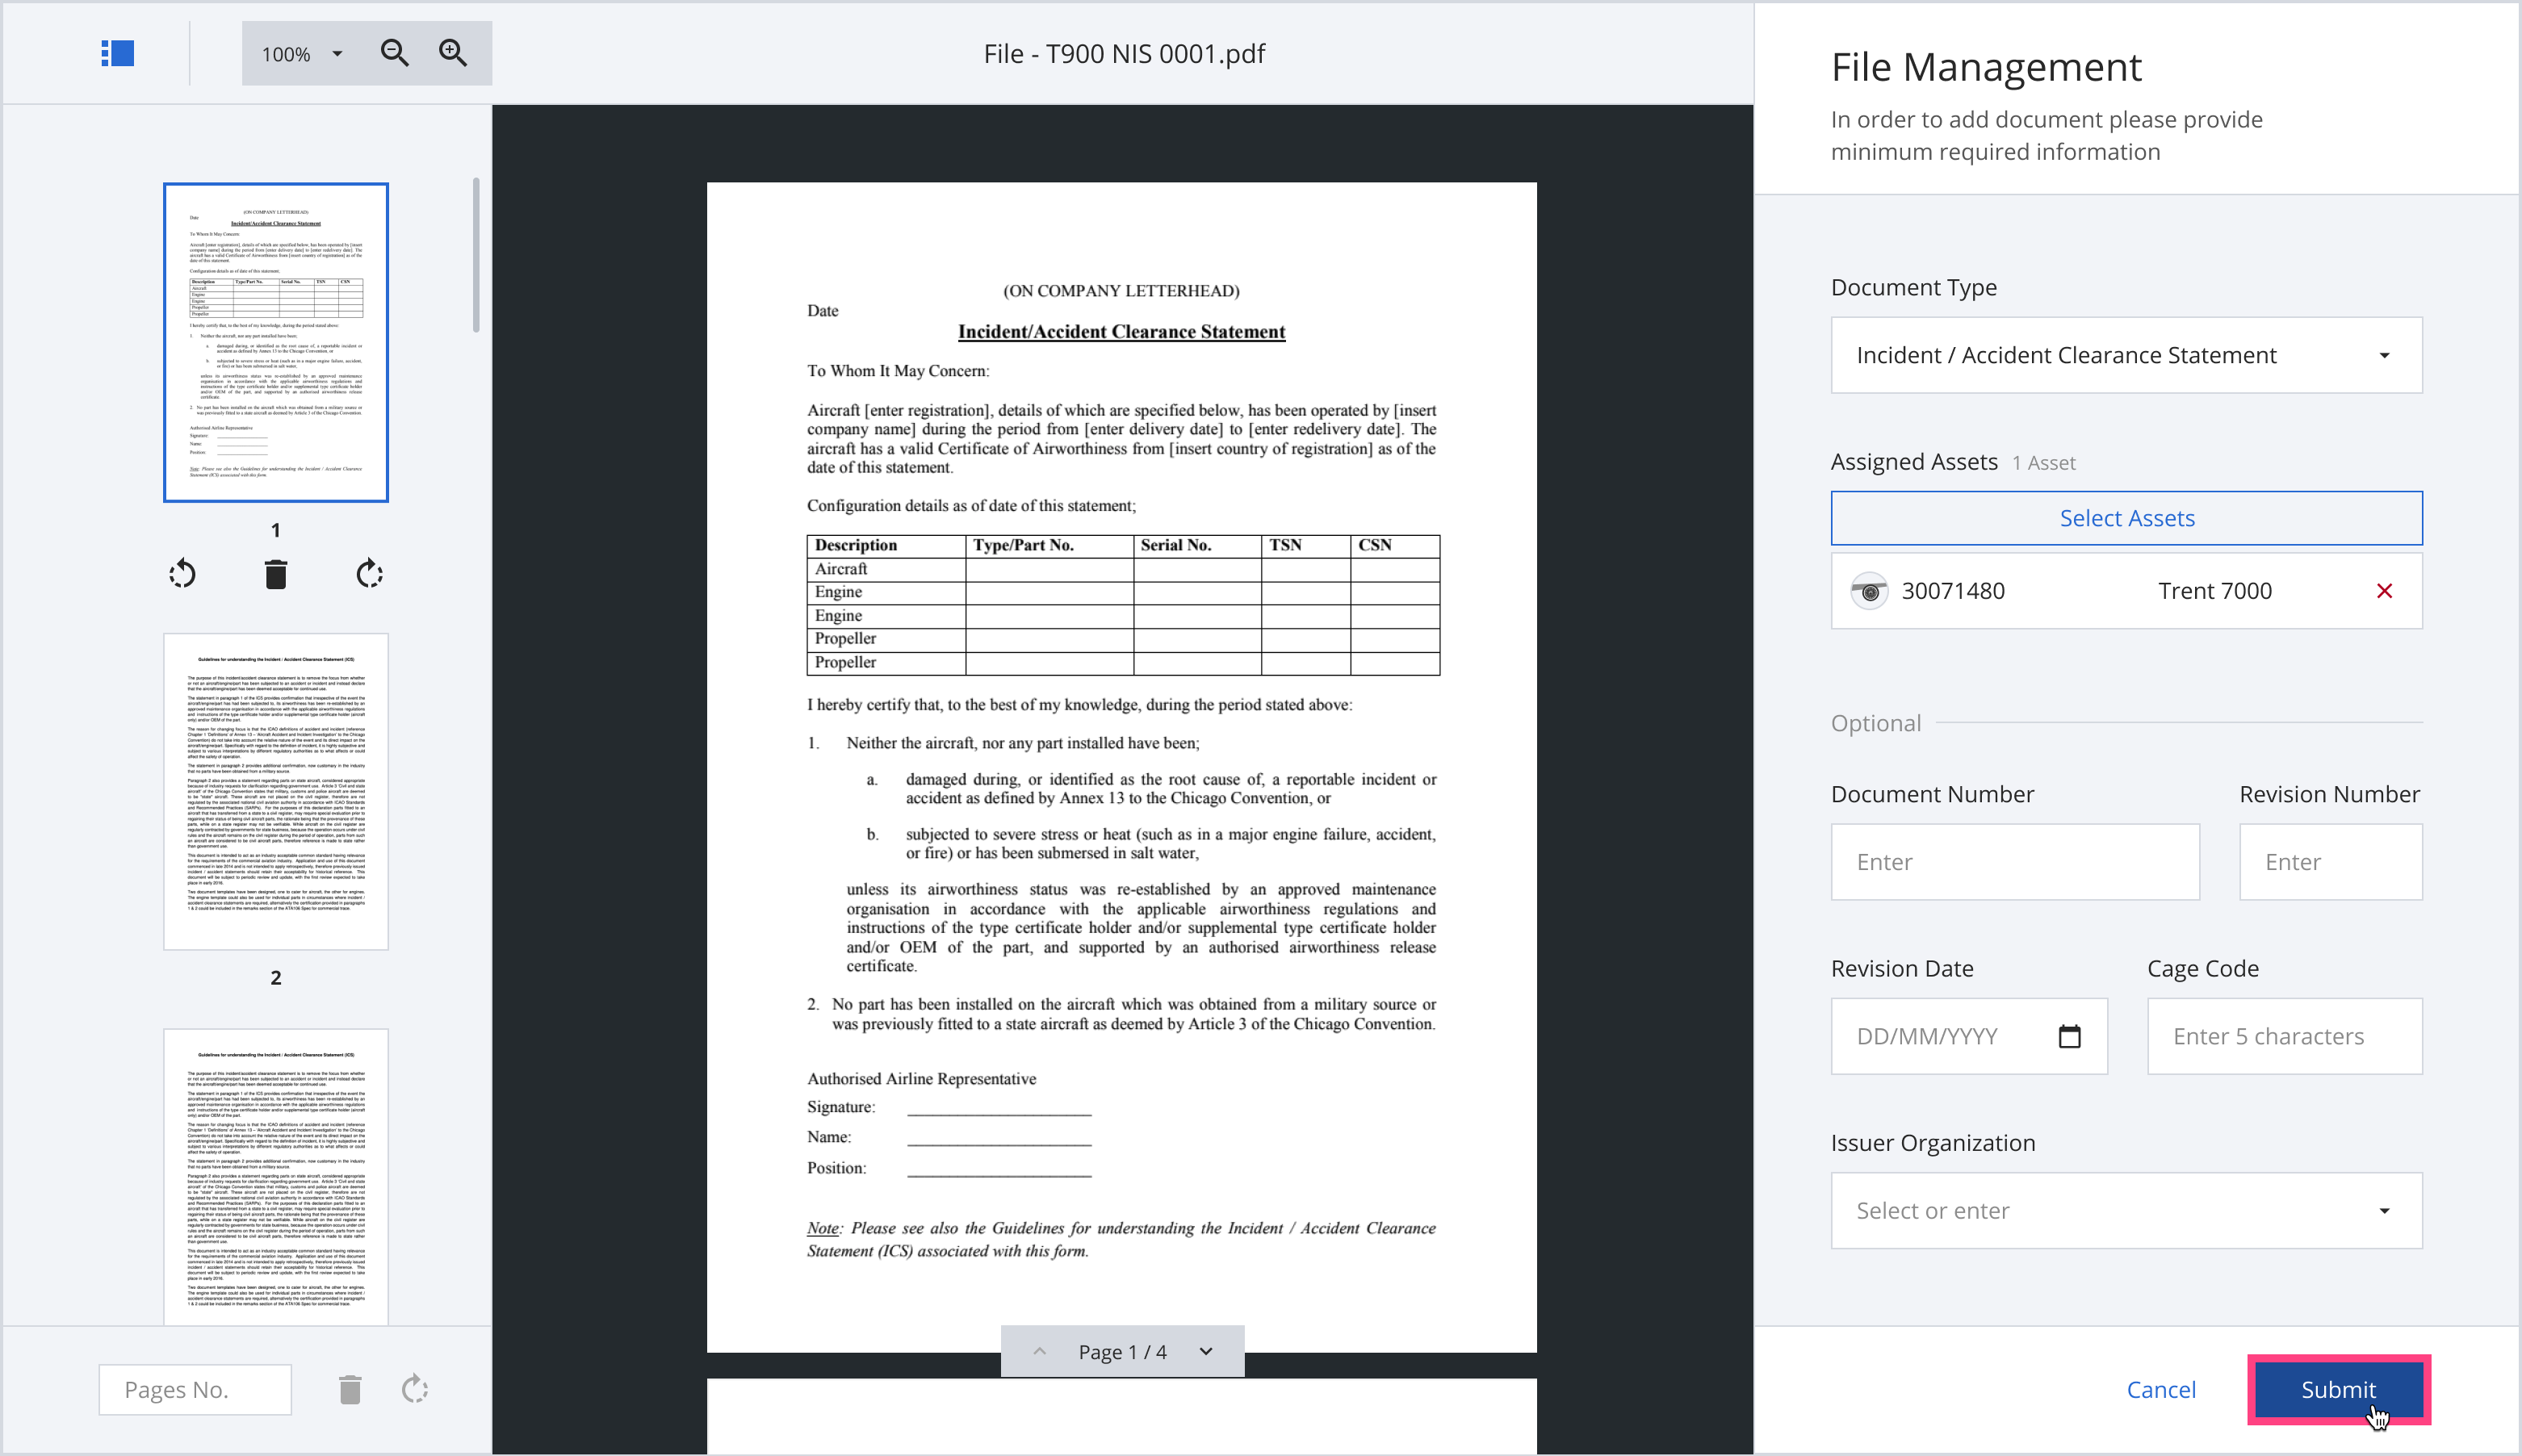
Submit document
Step 12: A green message will appear at the bottom right of the screen to indicate that your document has been successfully added. Click “View Document” to view the document.
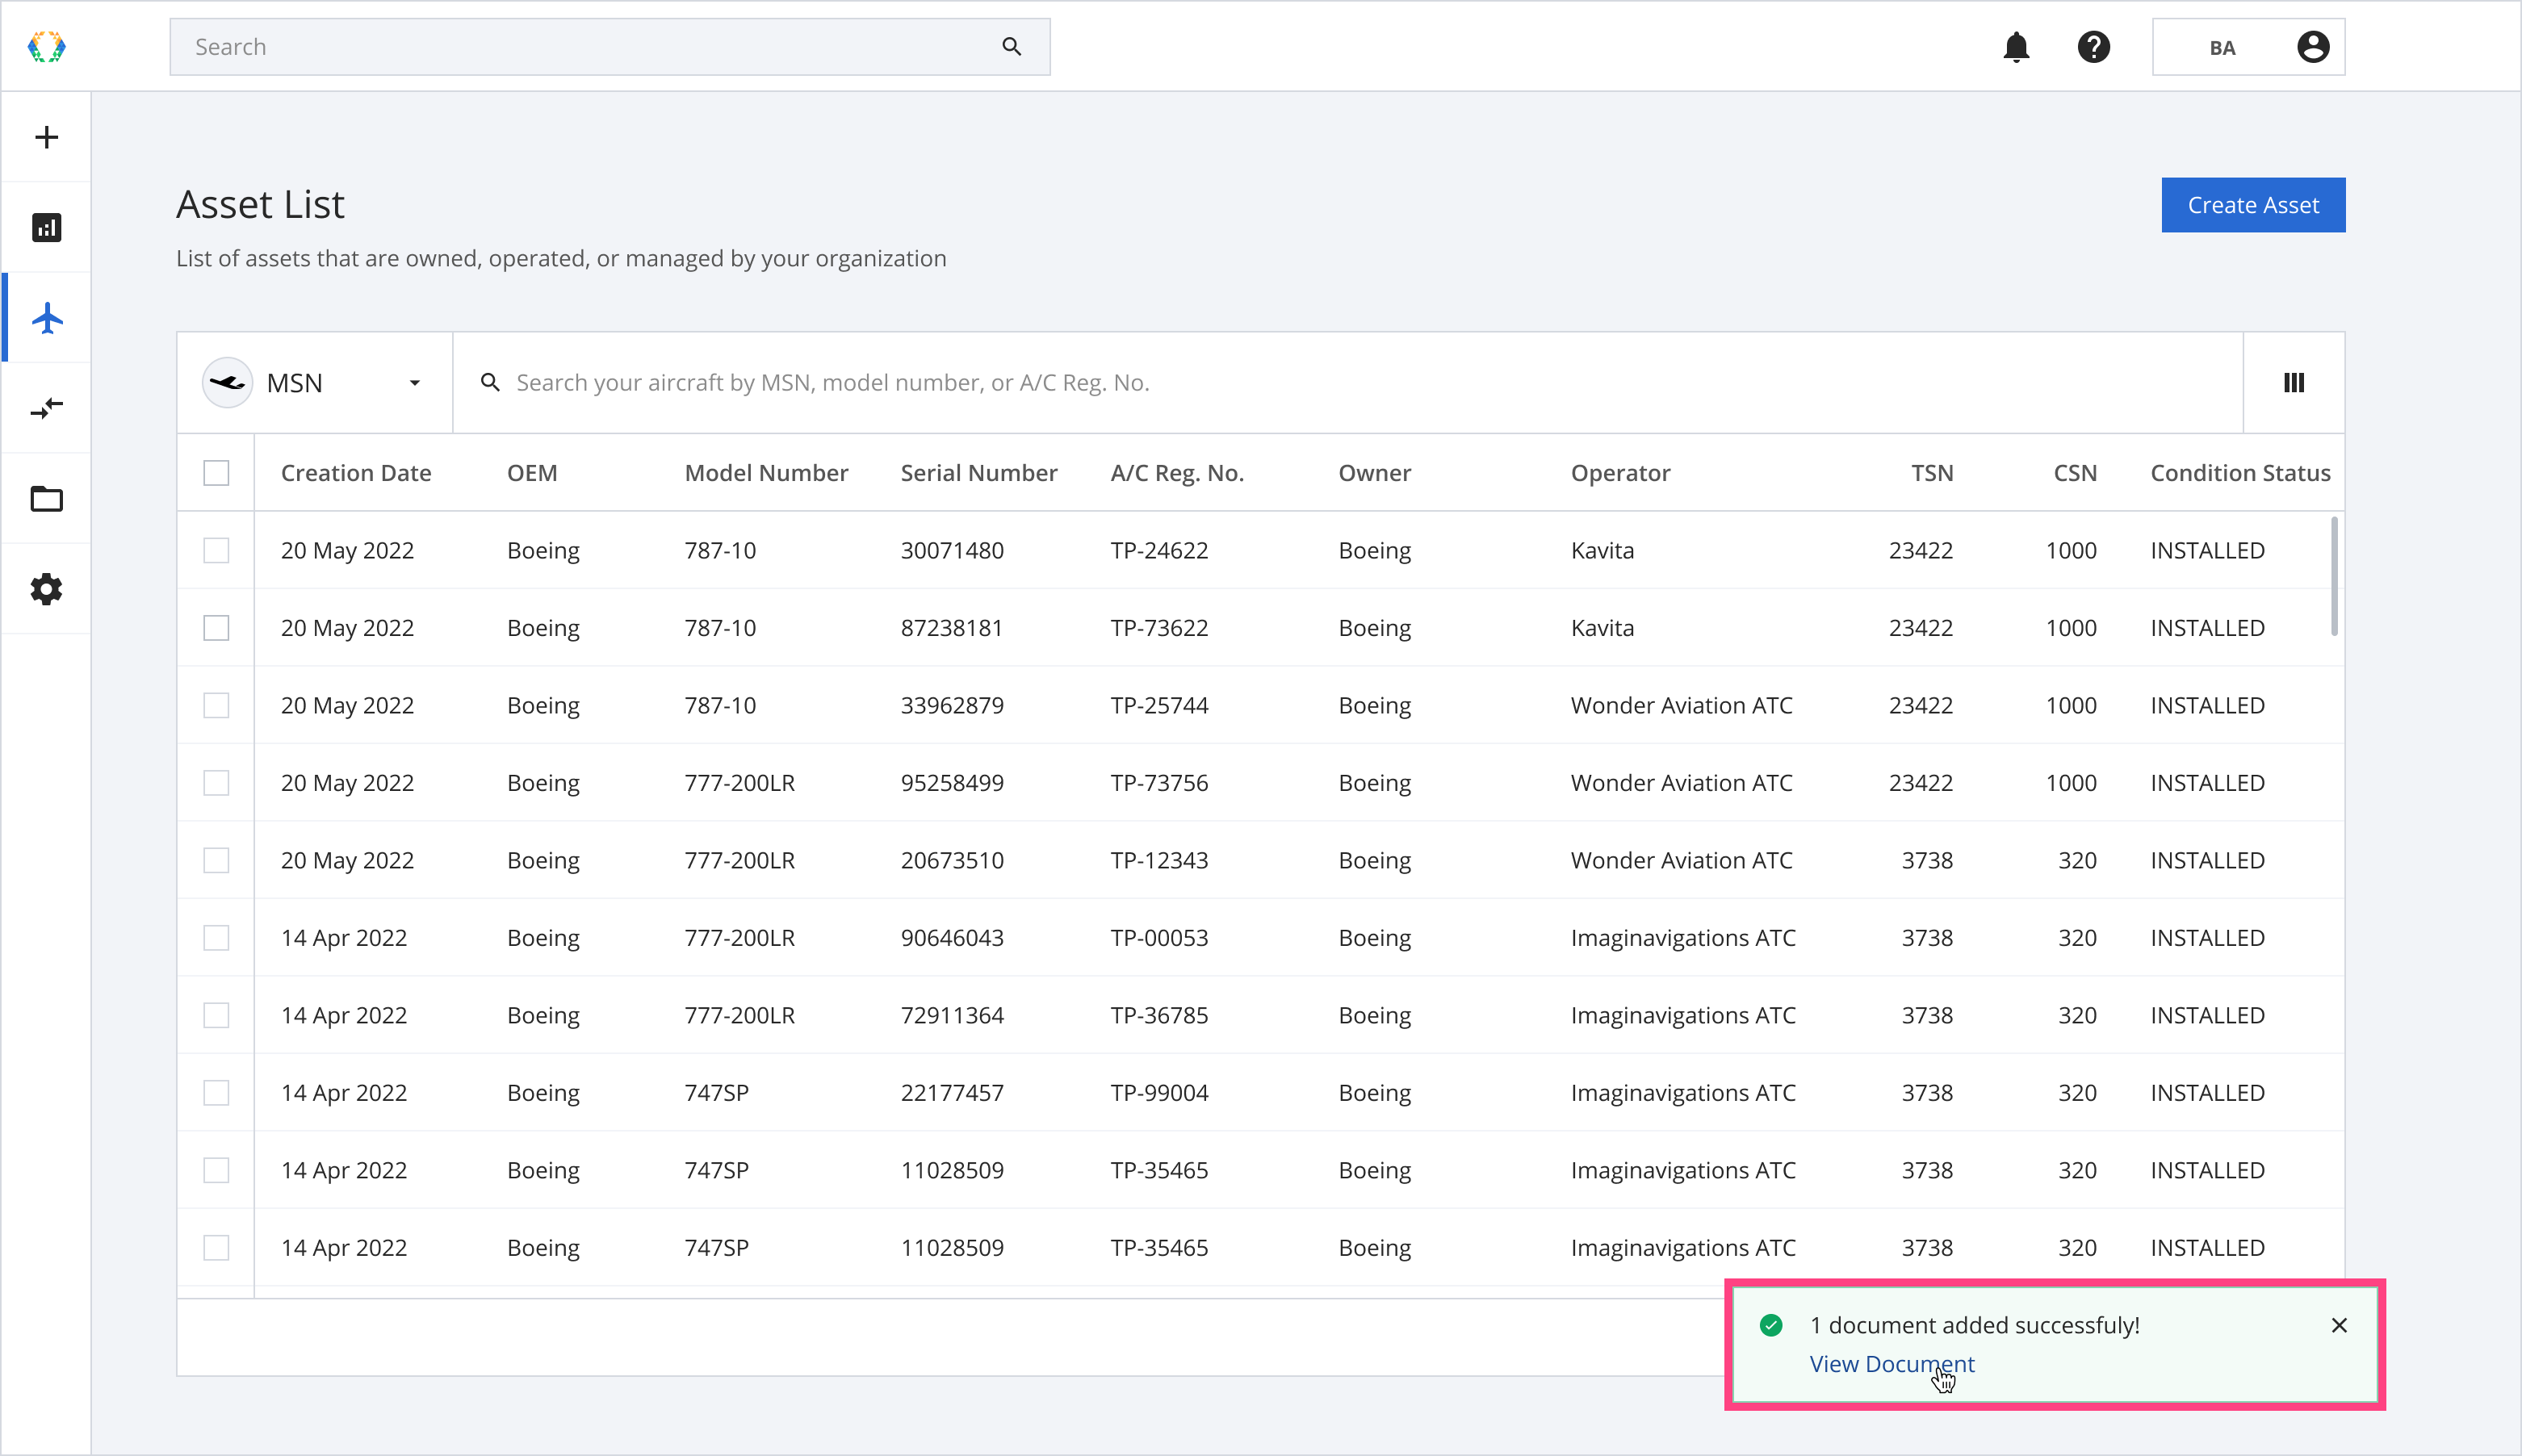
Document added successfully
Step 13: You can view your document as well as its details.
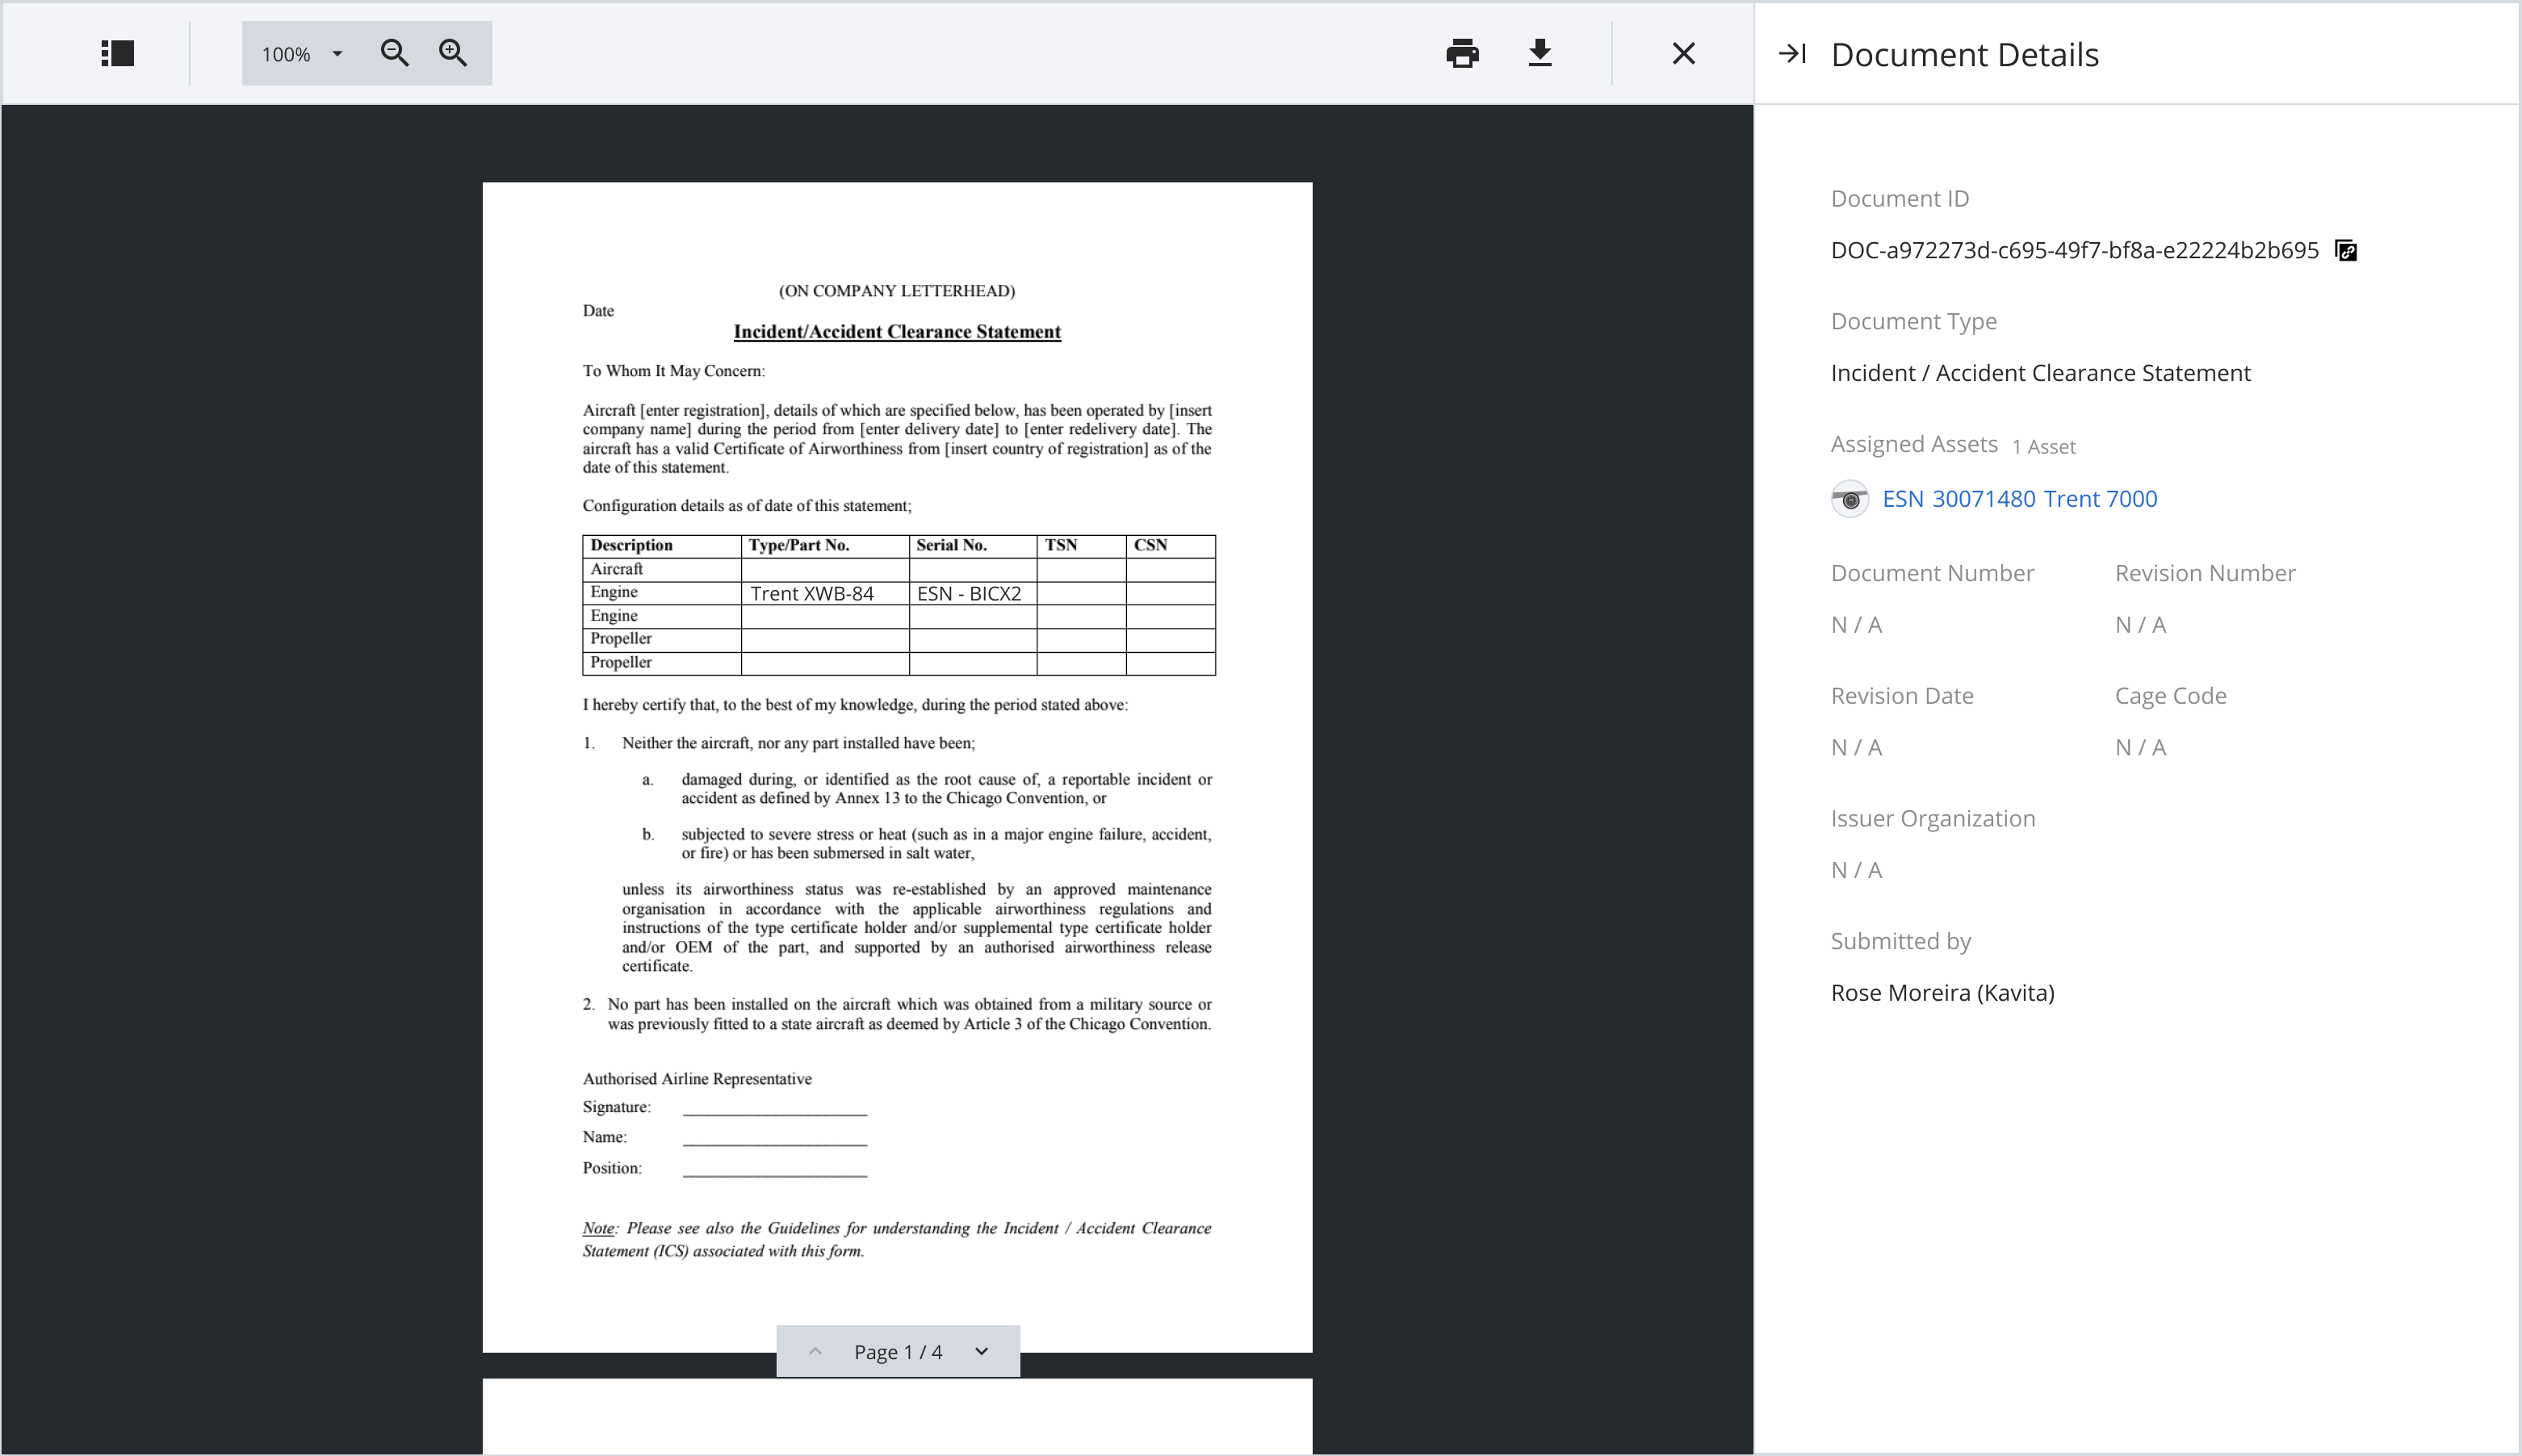
Document details
Manage Files
Delete File
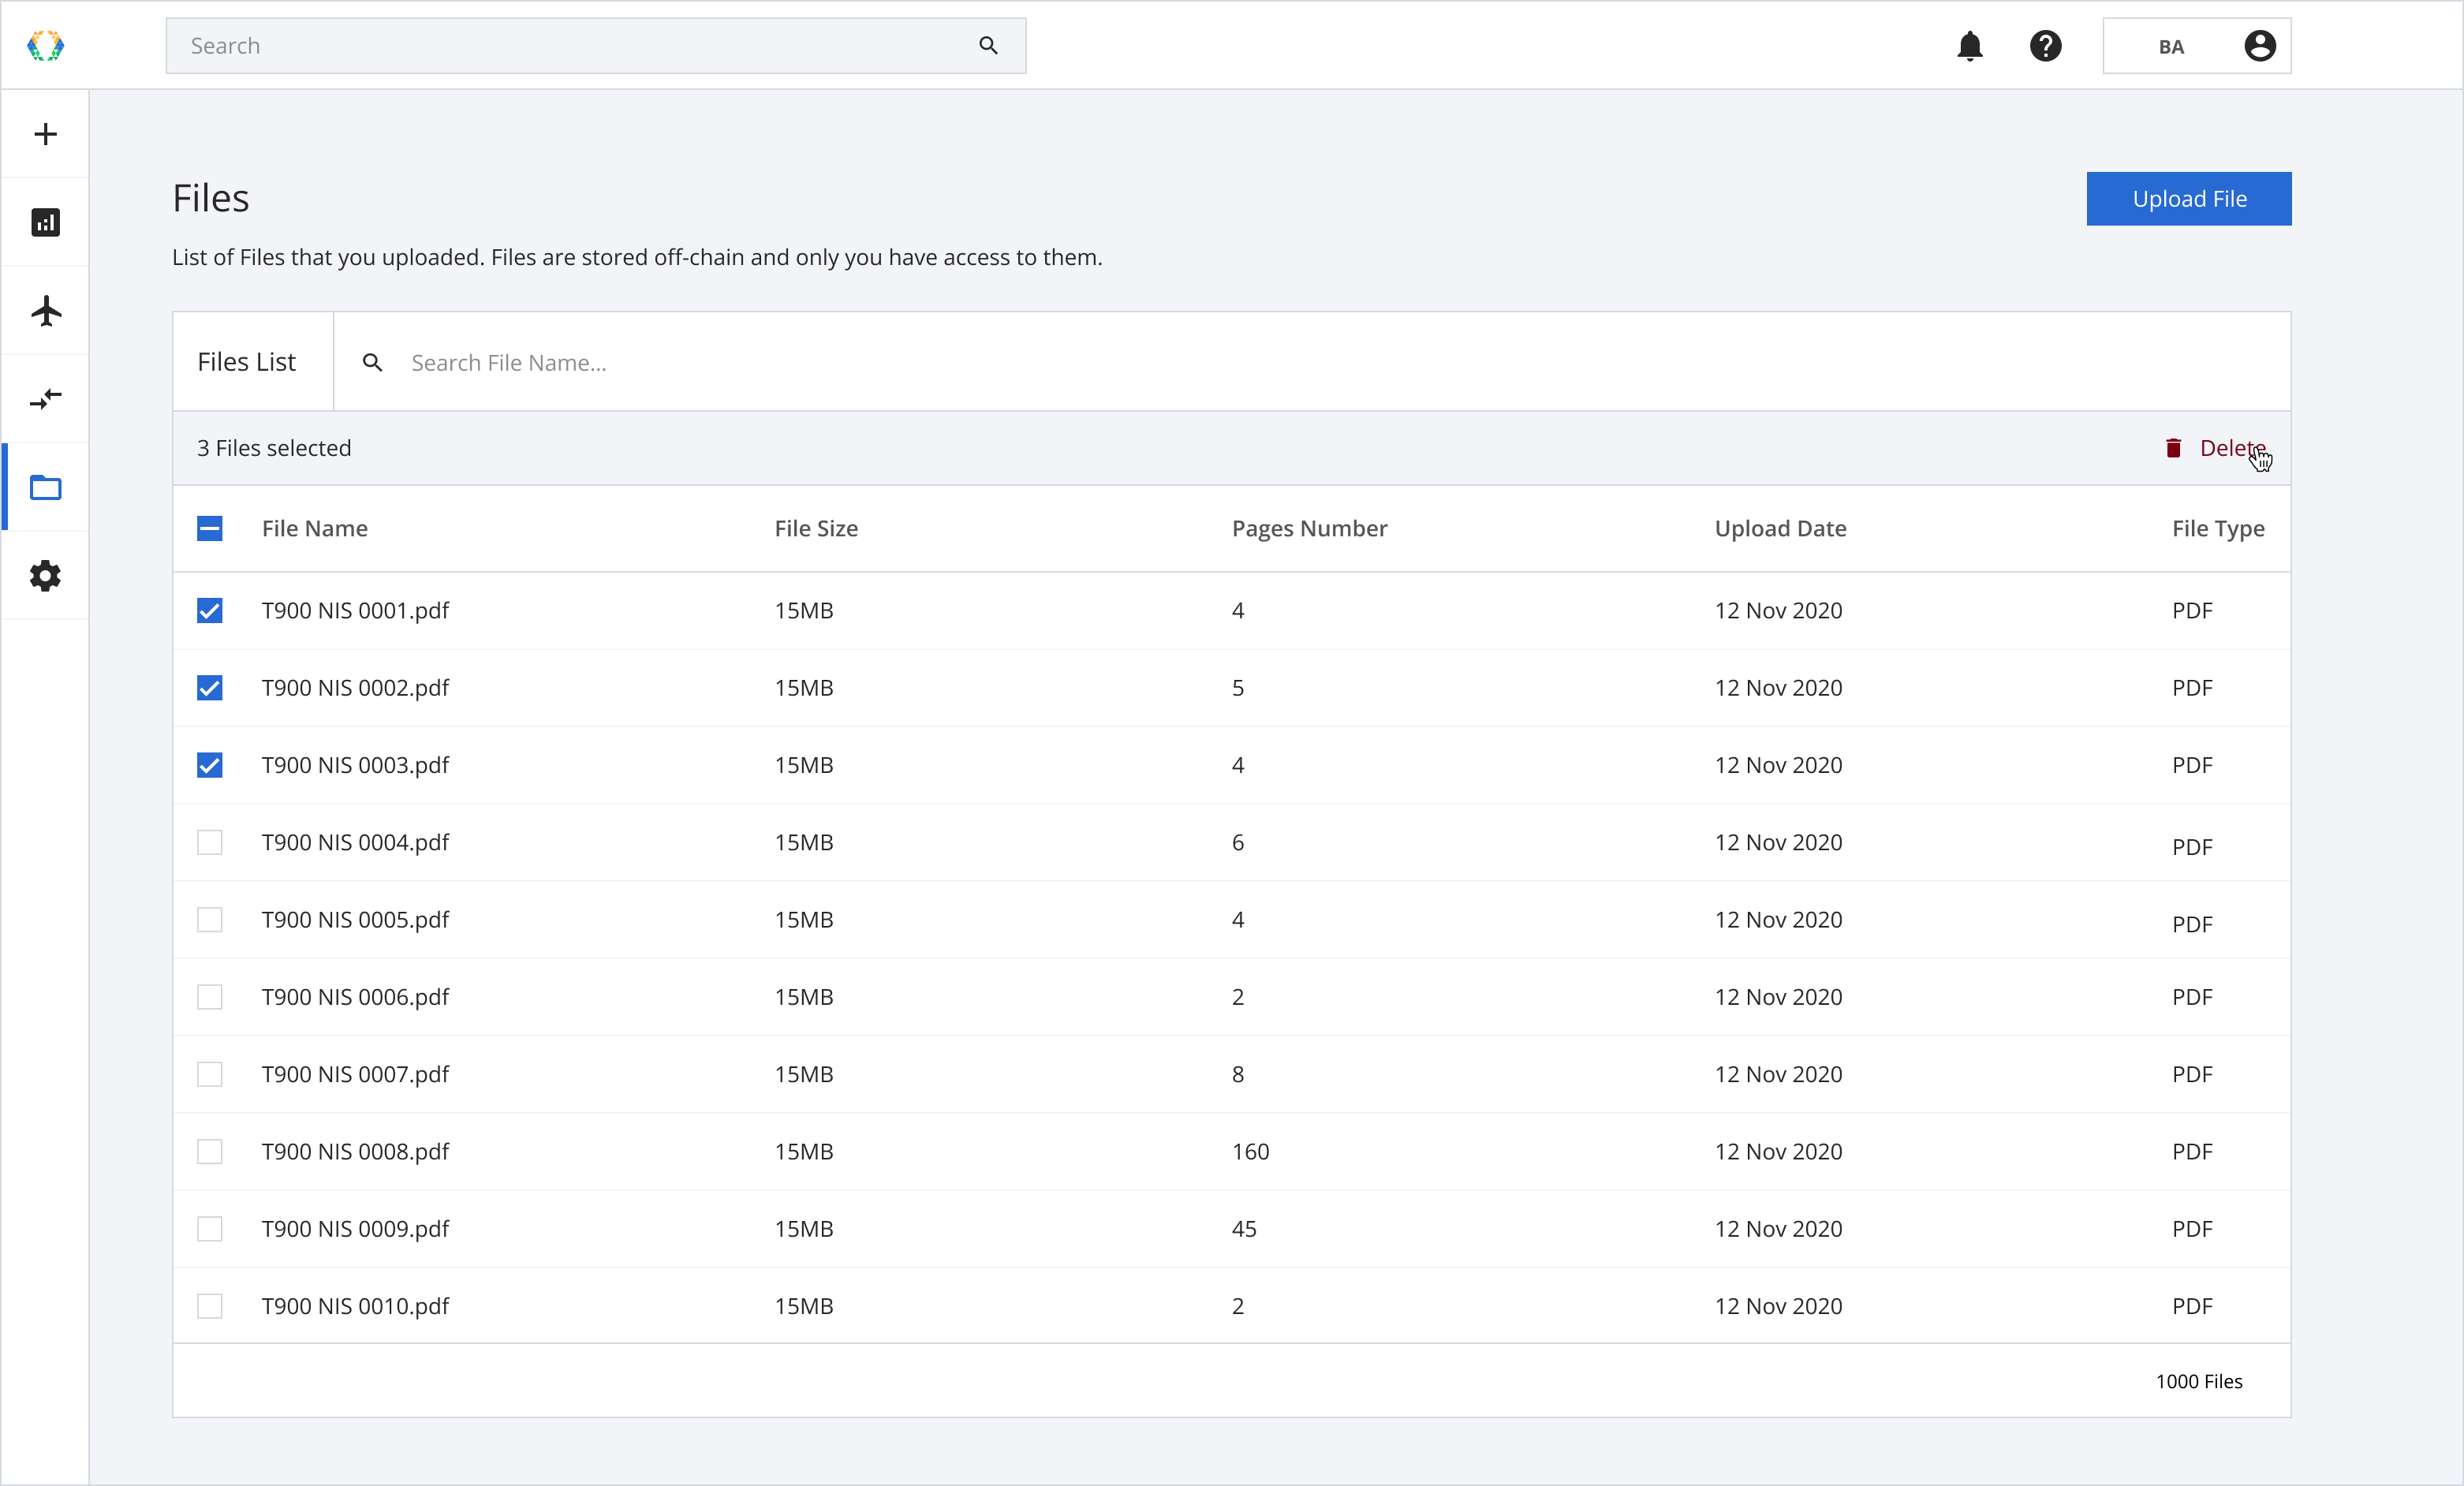
Step 1: Select the file using the checkbox on the leftmost column of the Files List.
Delete files
Step 2: Once the files are selected, the “Delete” button will appear on the top right corner of the Files List. Click “Delete” to remove the files from the platform storage.
Delete files
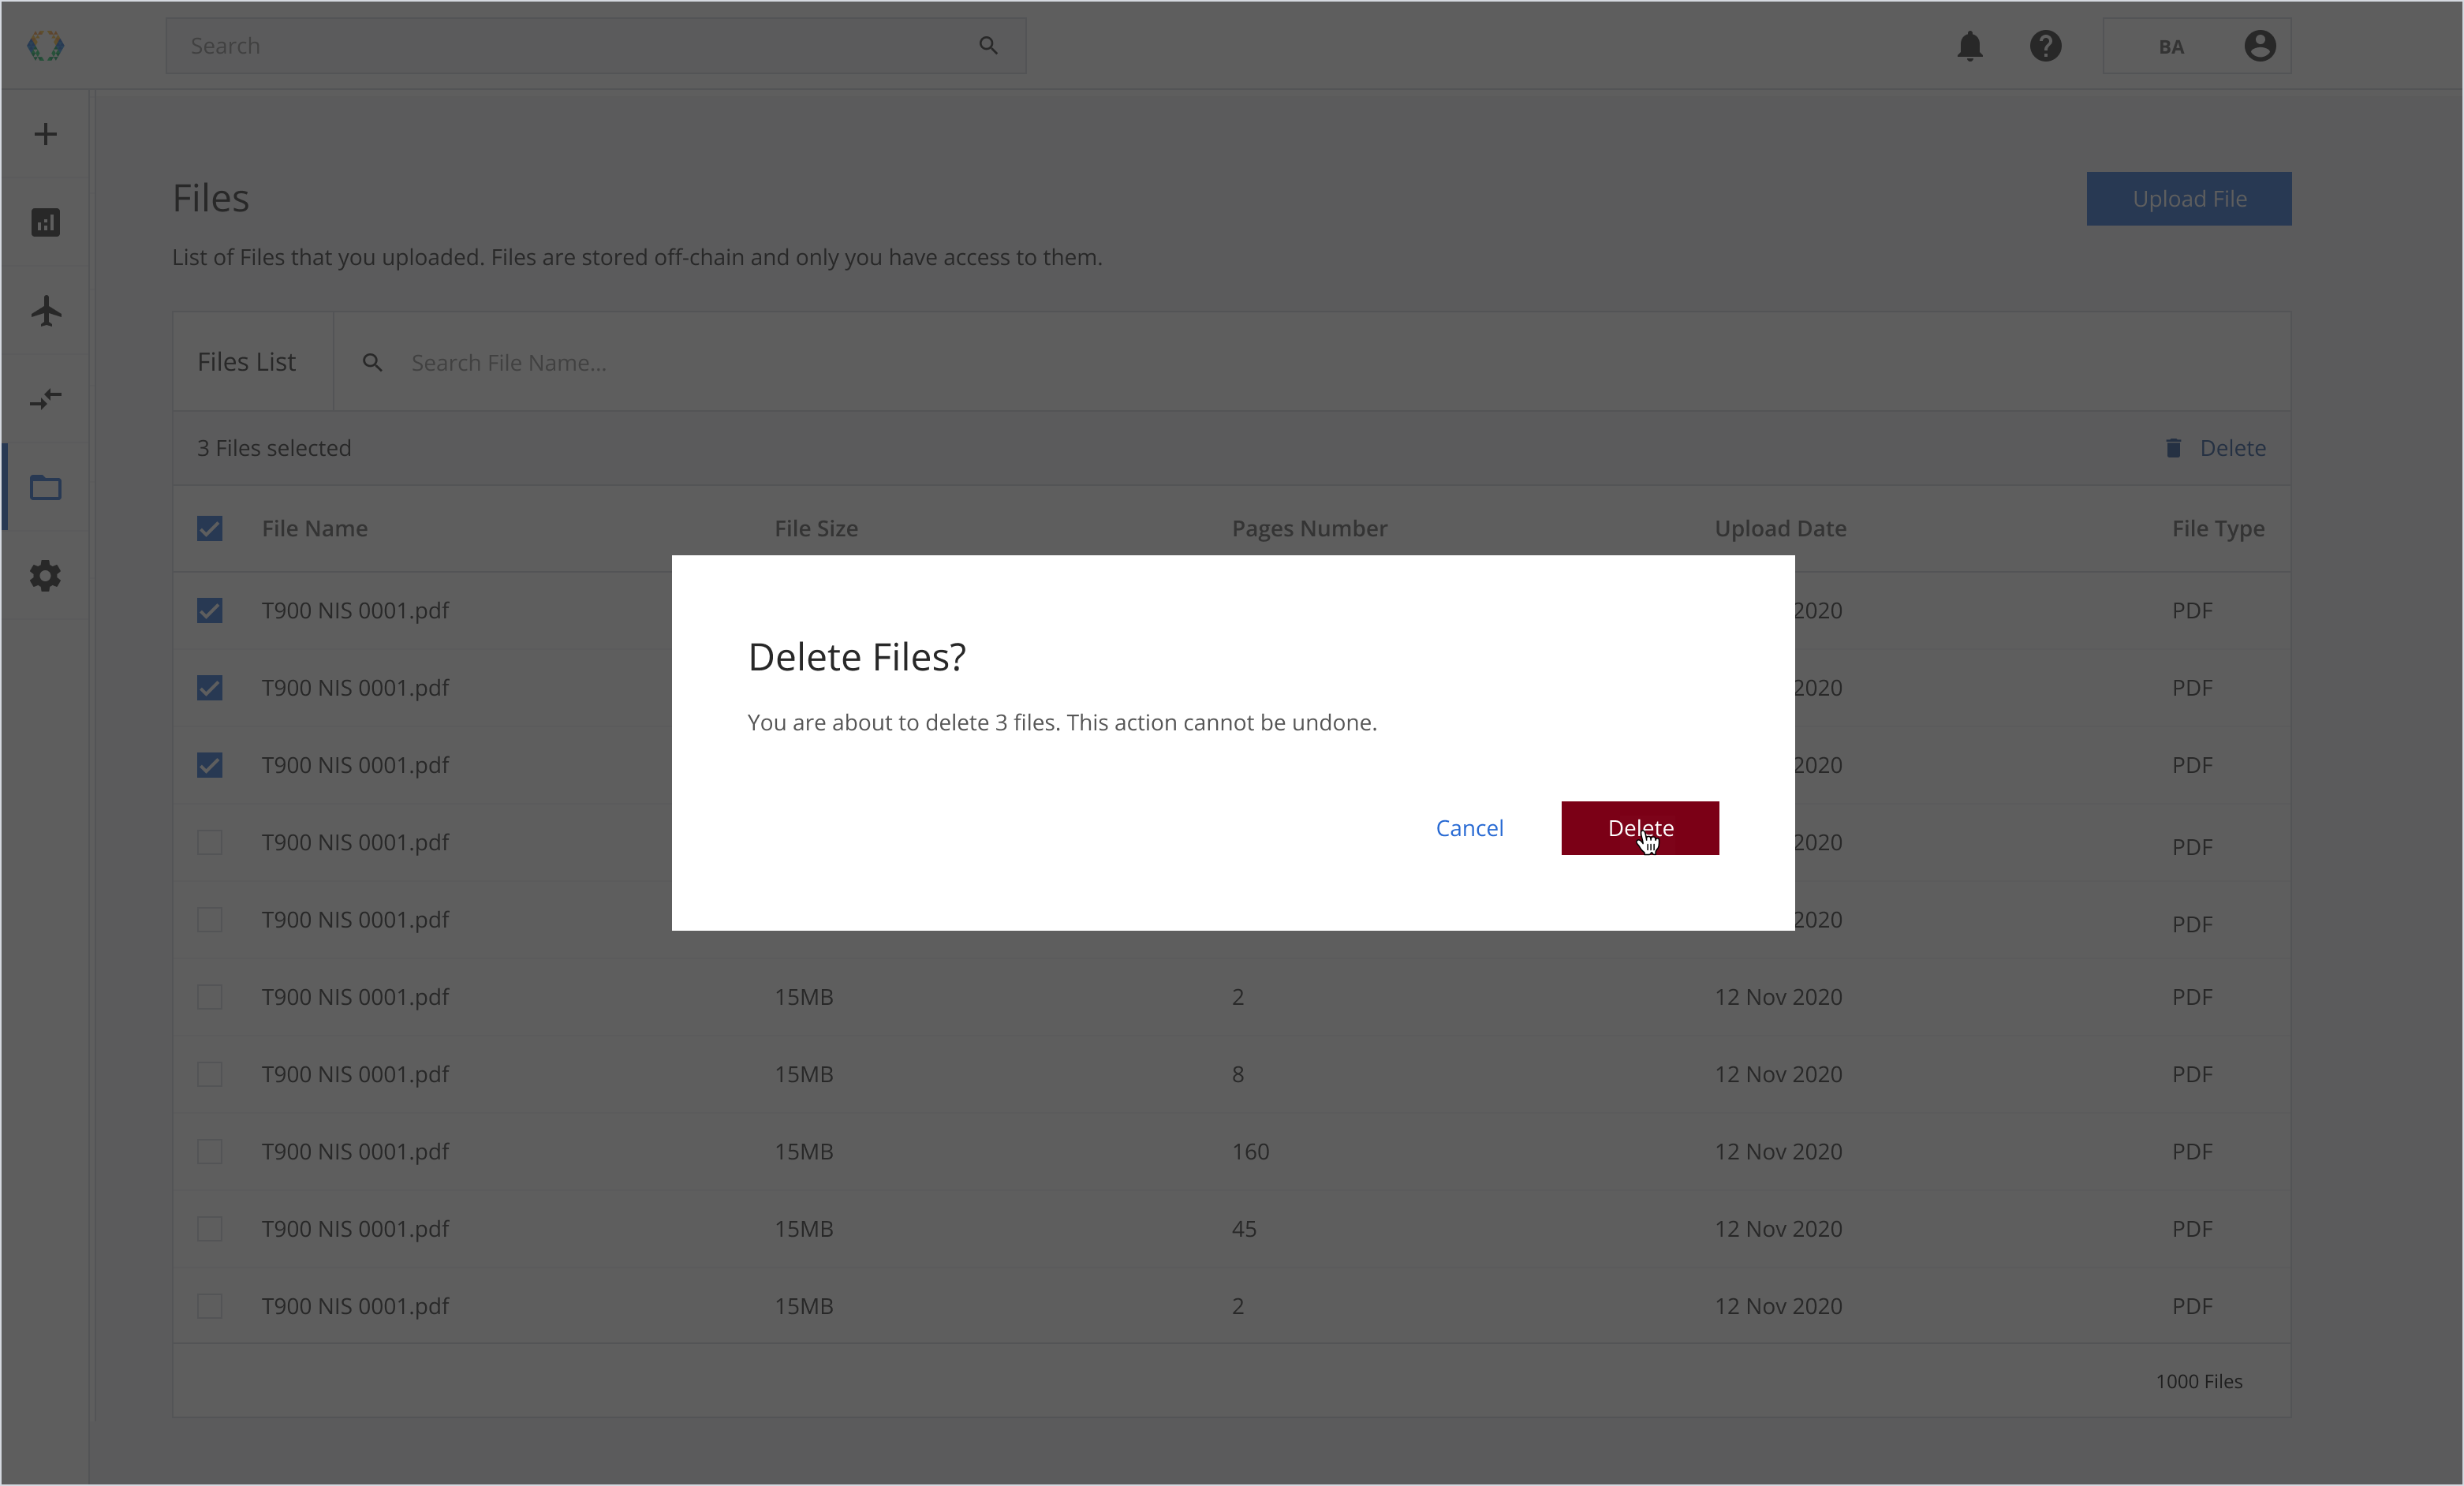
Step 3: A pop-up will appear on the screen. Click “Delete” to confirm your action.
Delete files
Step 4: Your files will be deleted and removed from the Files List.

Files successfully removed
Create Data Block for ARC issued from external sources on Block Aero
You can also create an on-chain digital record for your existing ARC from the off-chain storage.
Step 1: Select your ARC that you uploaded from the Files List or the message at the bottom right corner.
Select ARC
Step 2: Select your document type as Authorized Release Certificate and your assigned assets, then click “Submit”.
Assigning ARC
Step 3: A pop-up will appear to create a data block for your ARC to enhance the on-chain digital records of your asset profile. Click “Create Data Block” to start your digitization process for your externally issued ARC.
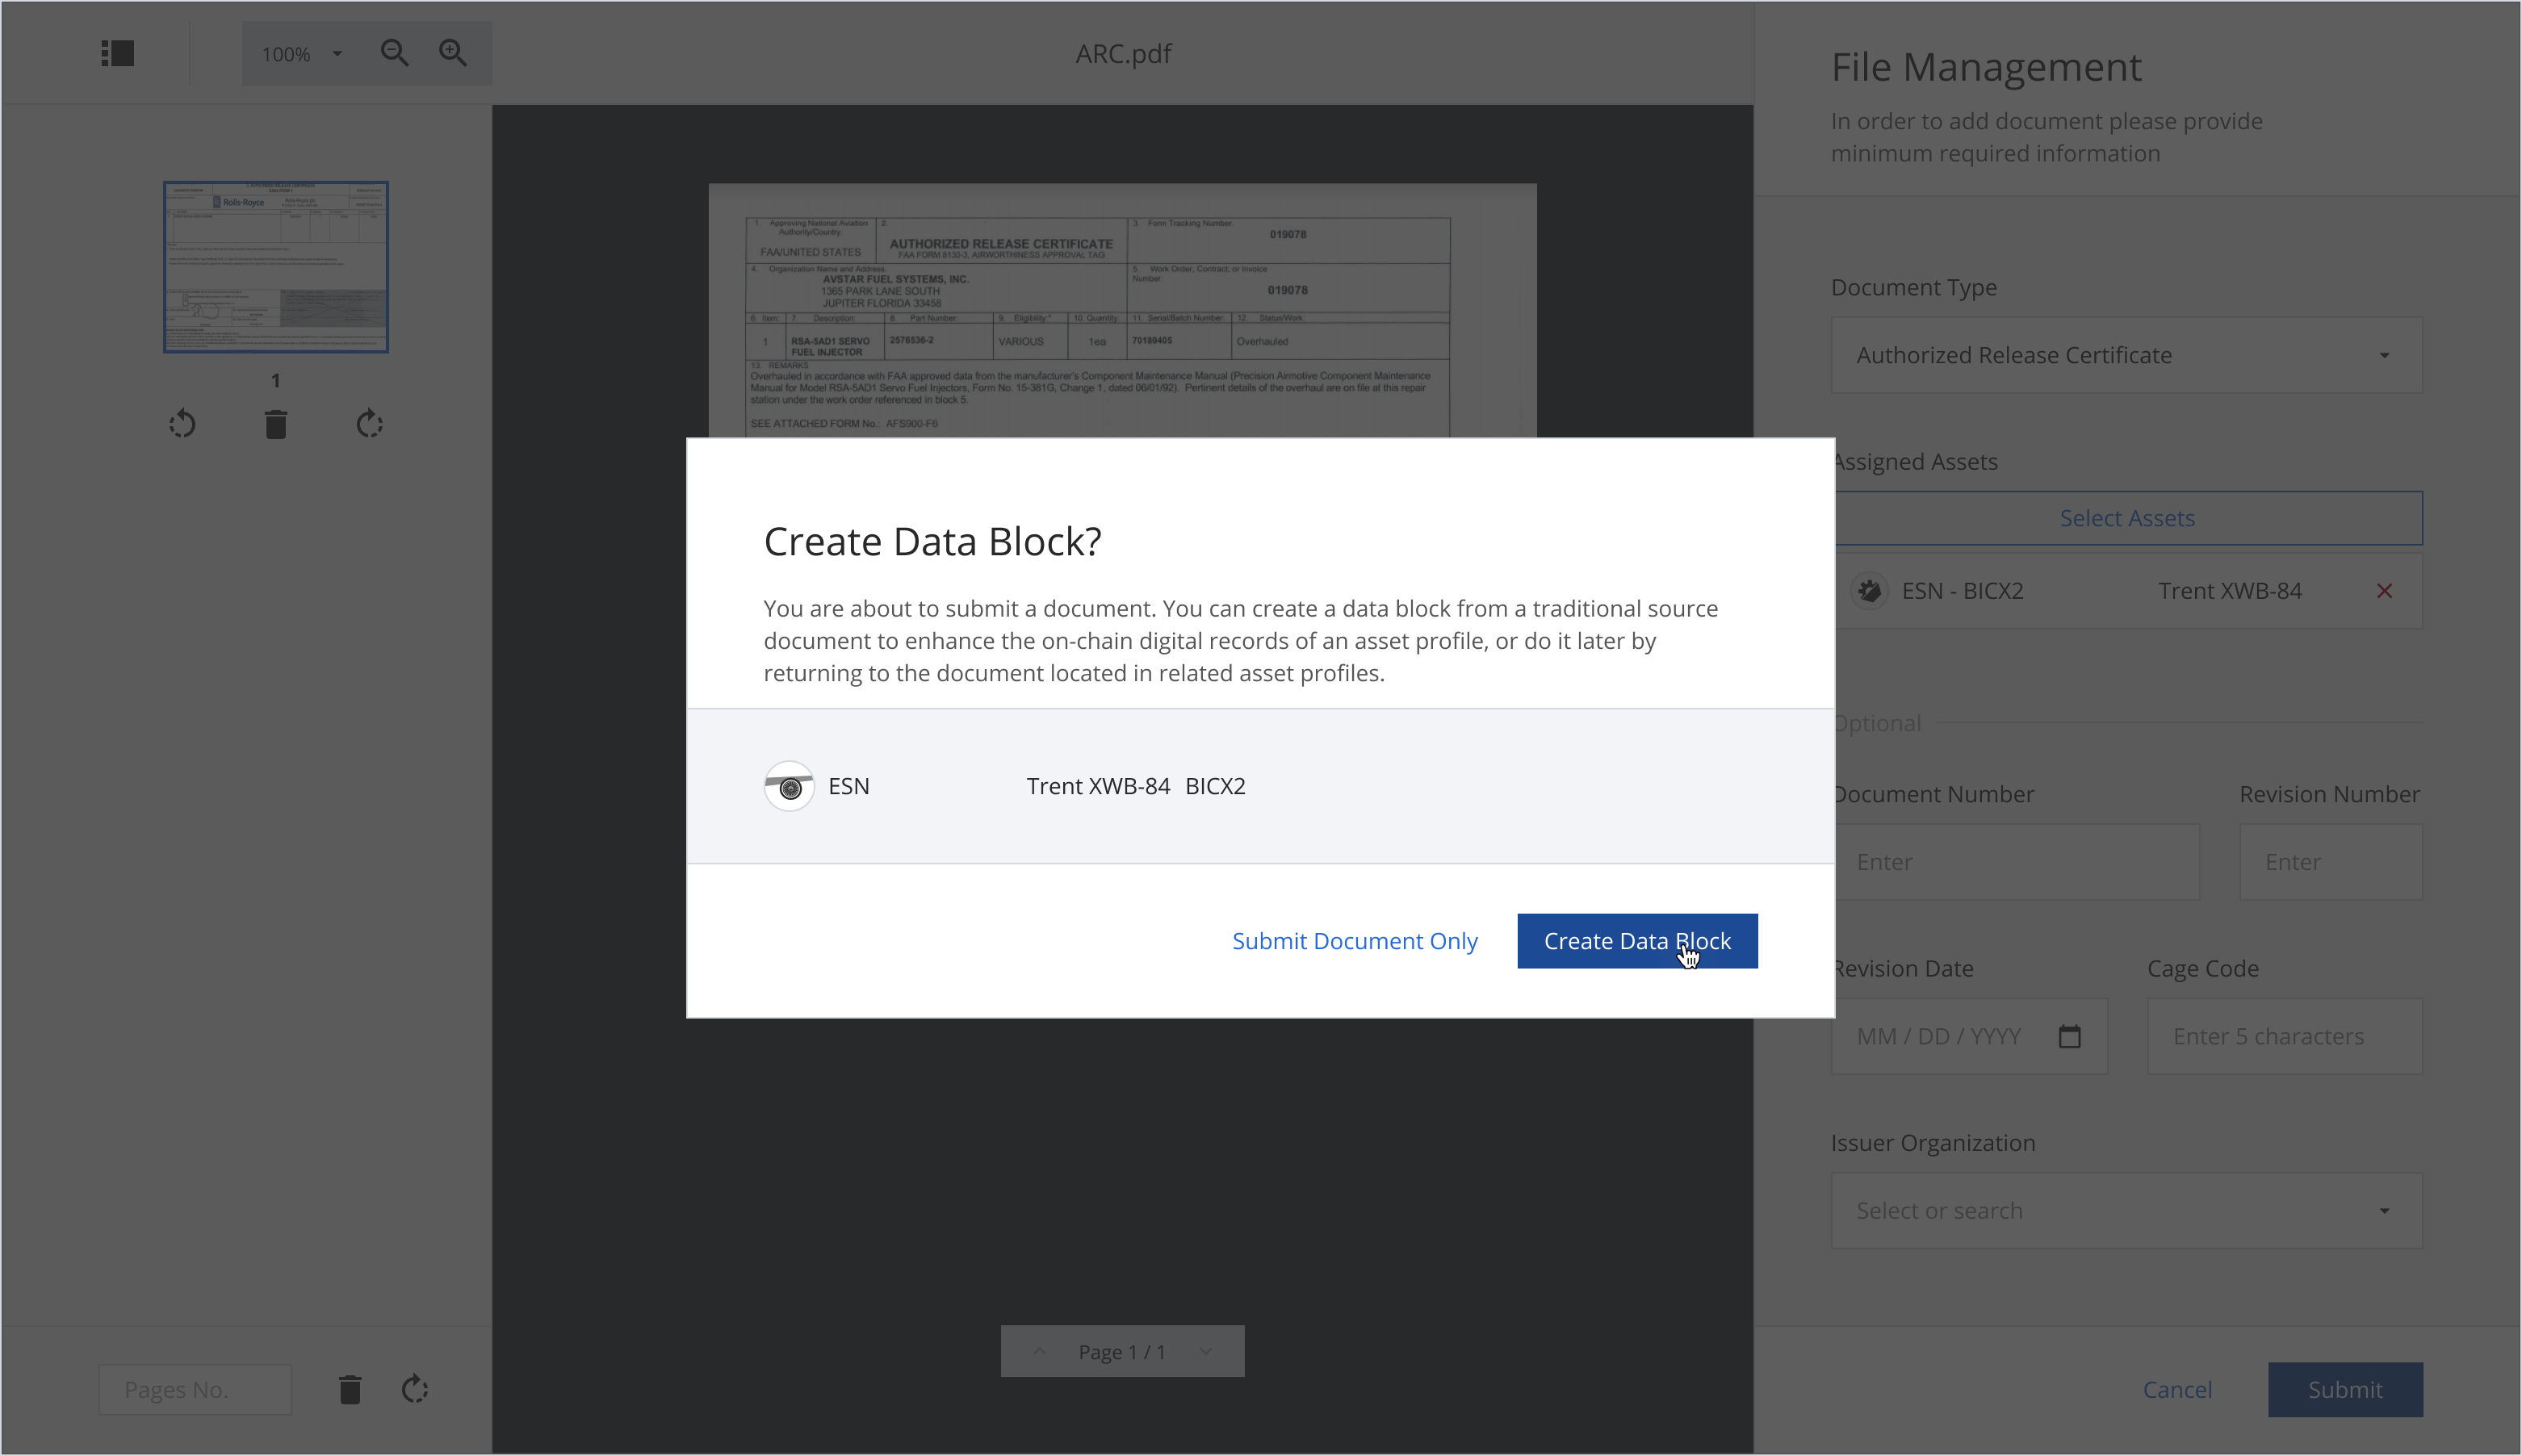
Create Data Block
Step 4: Select the data block subtype for your ARC.
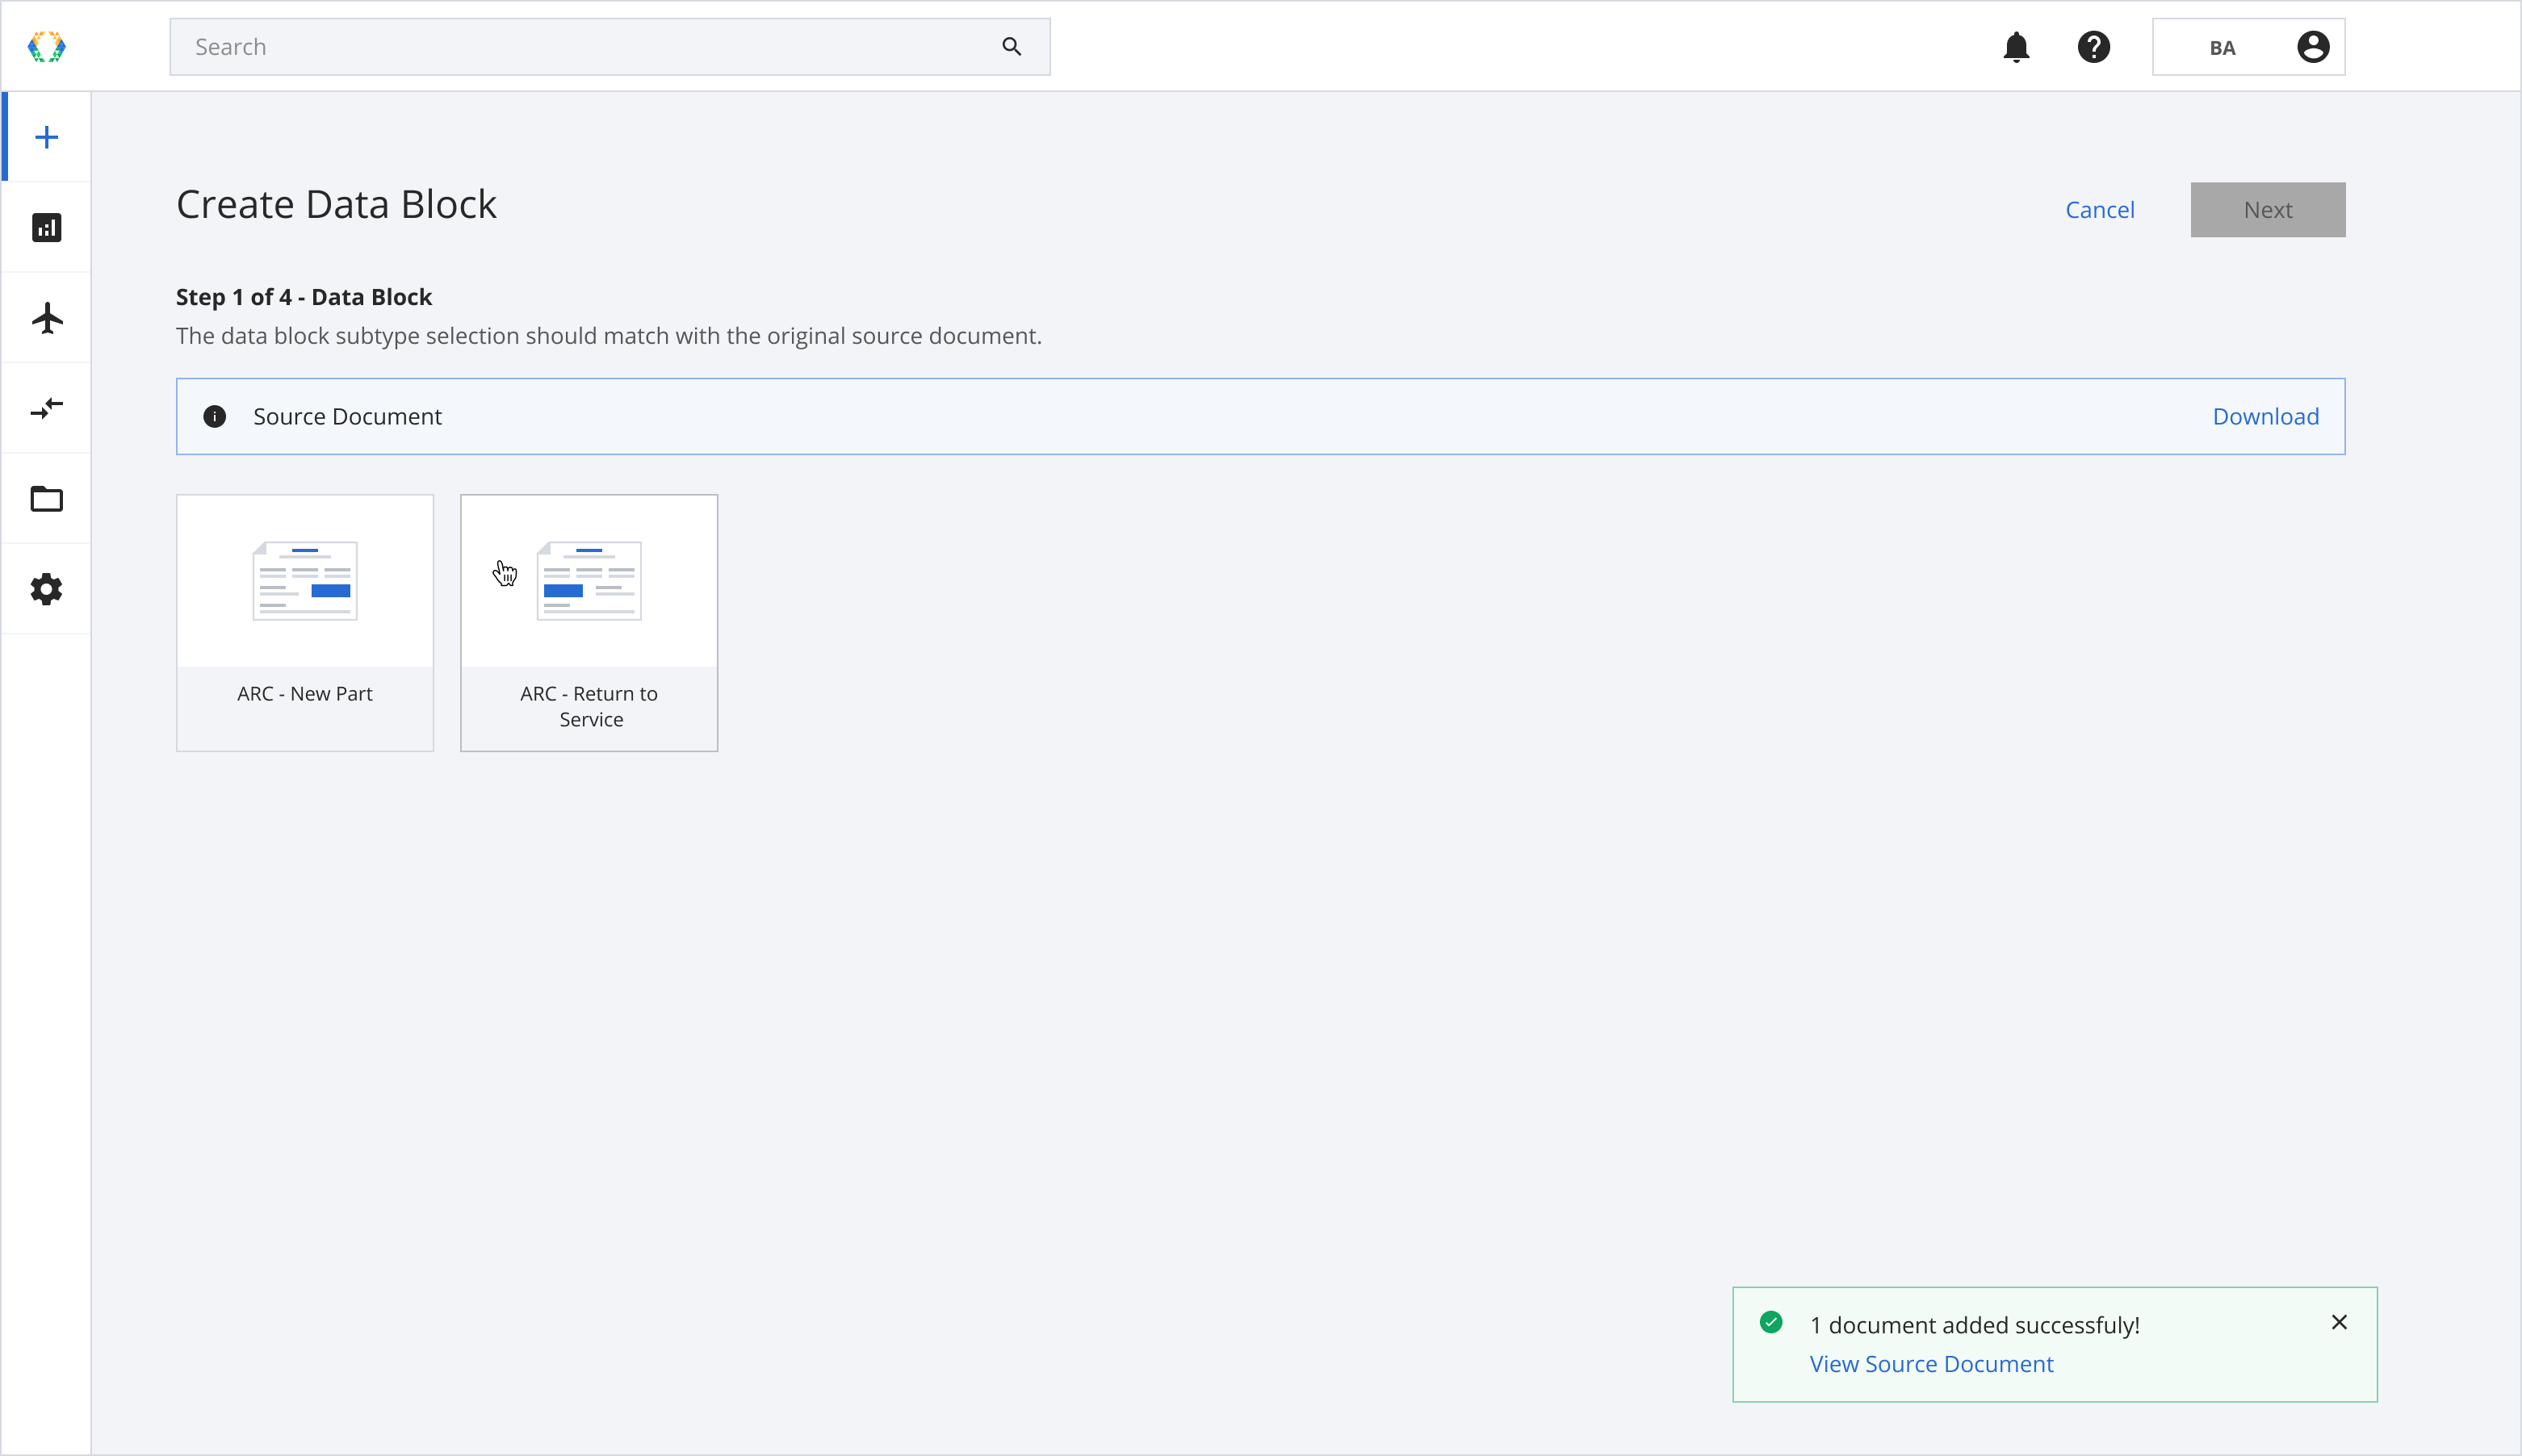
Select document type
Step 5: Click “Next” when your selection is complete.
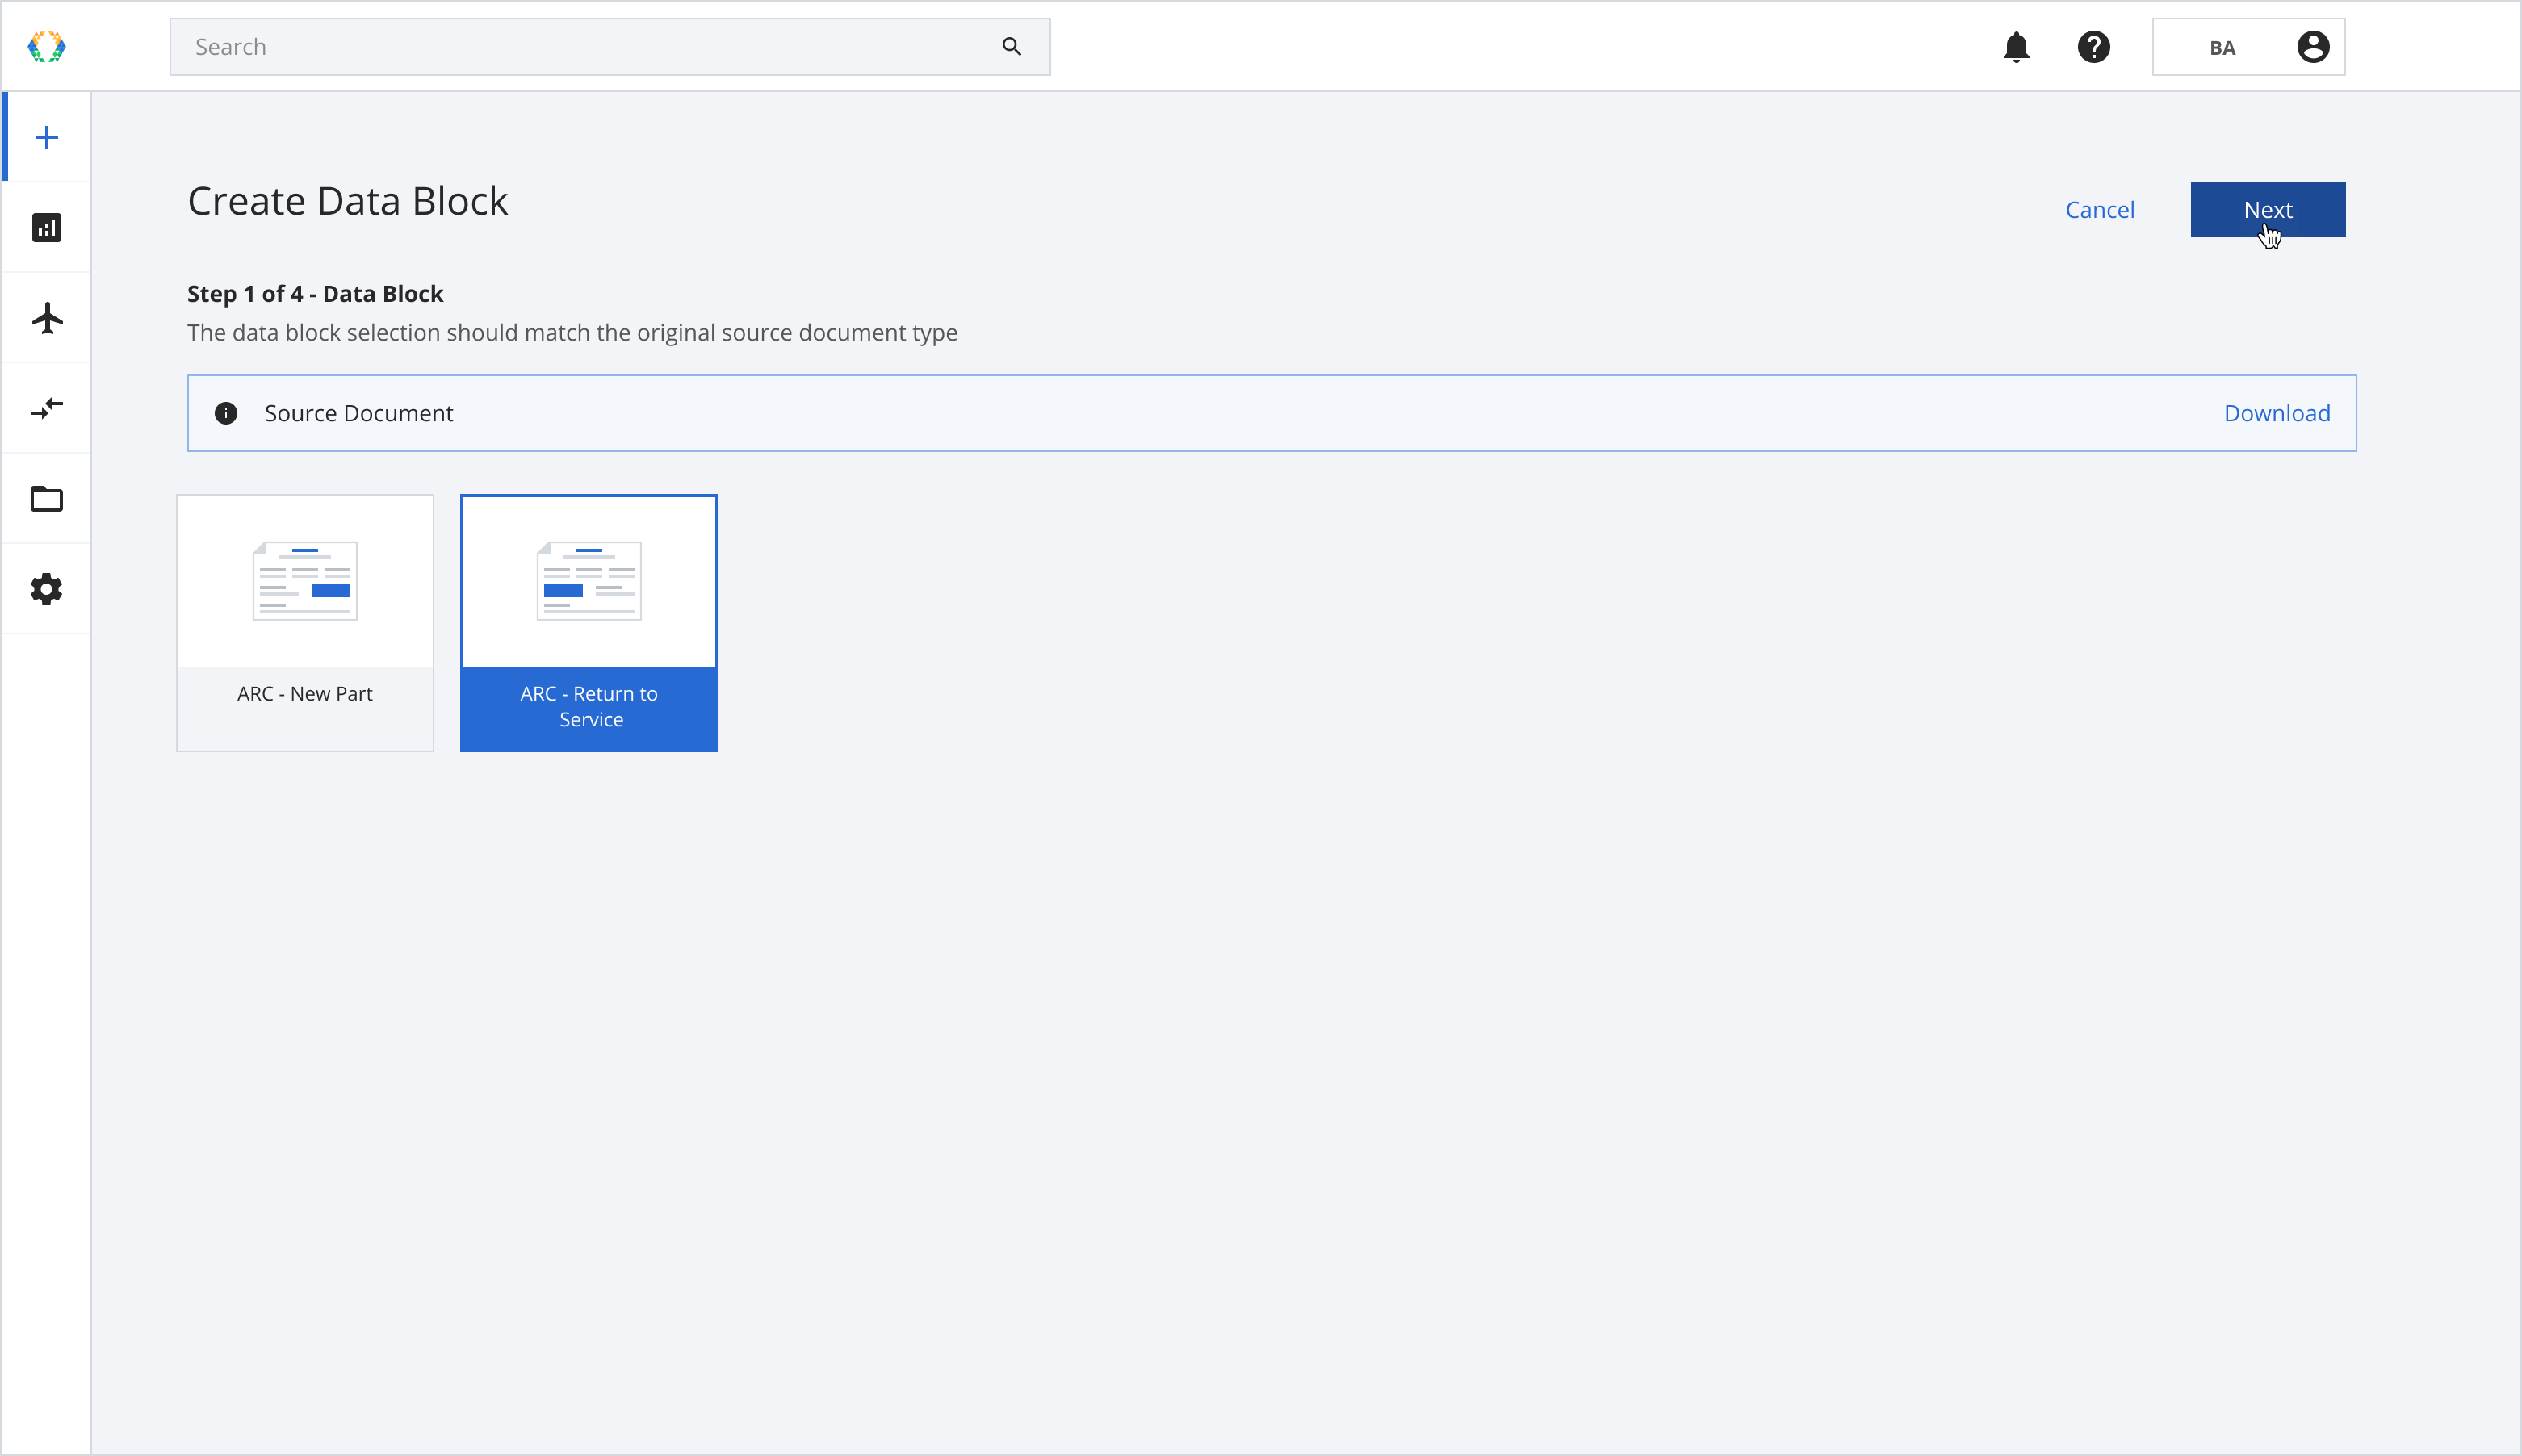
Select document type
Step 6: Click “Next” to confirm your asset selection.
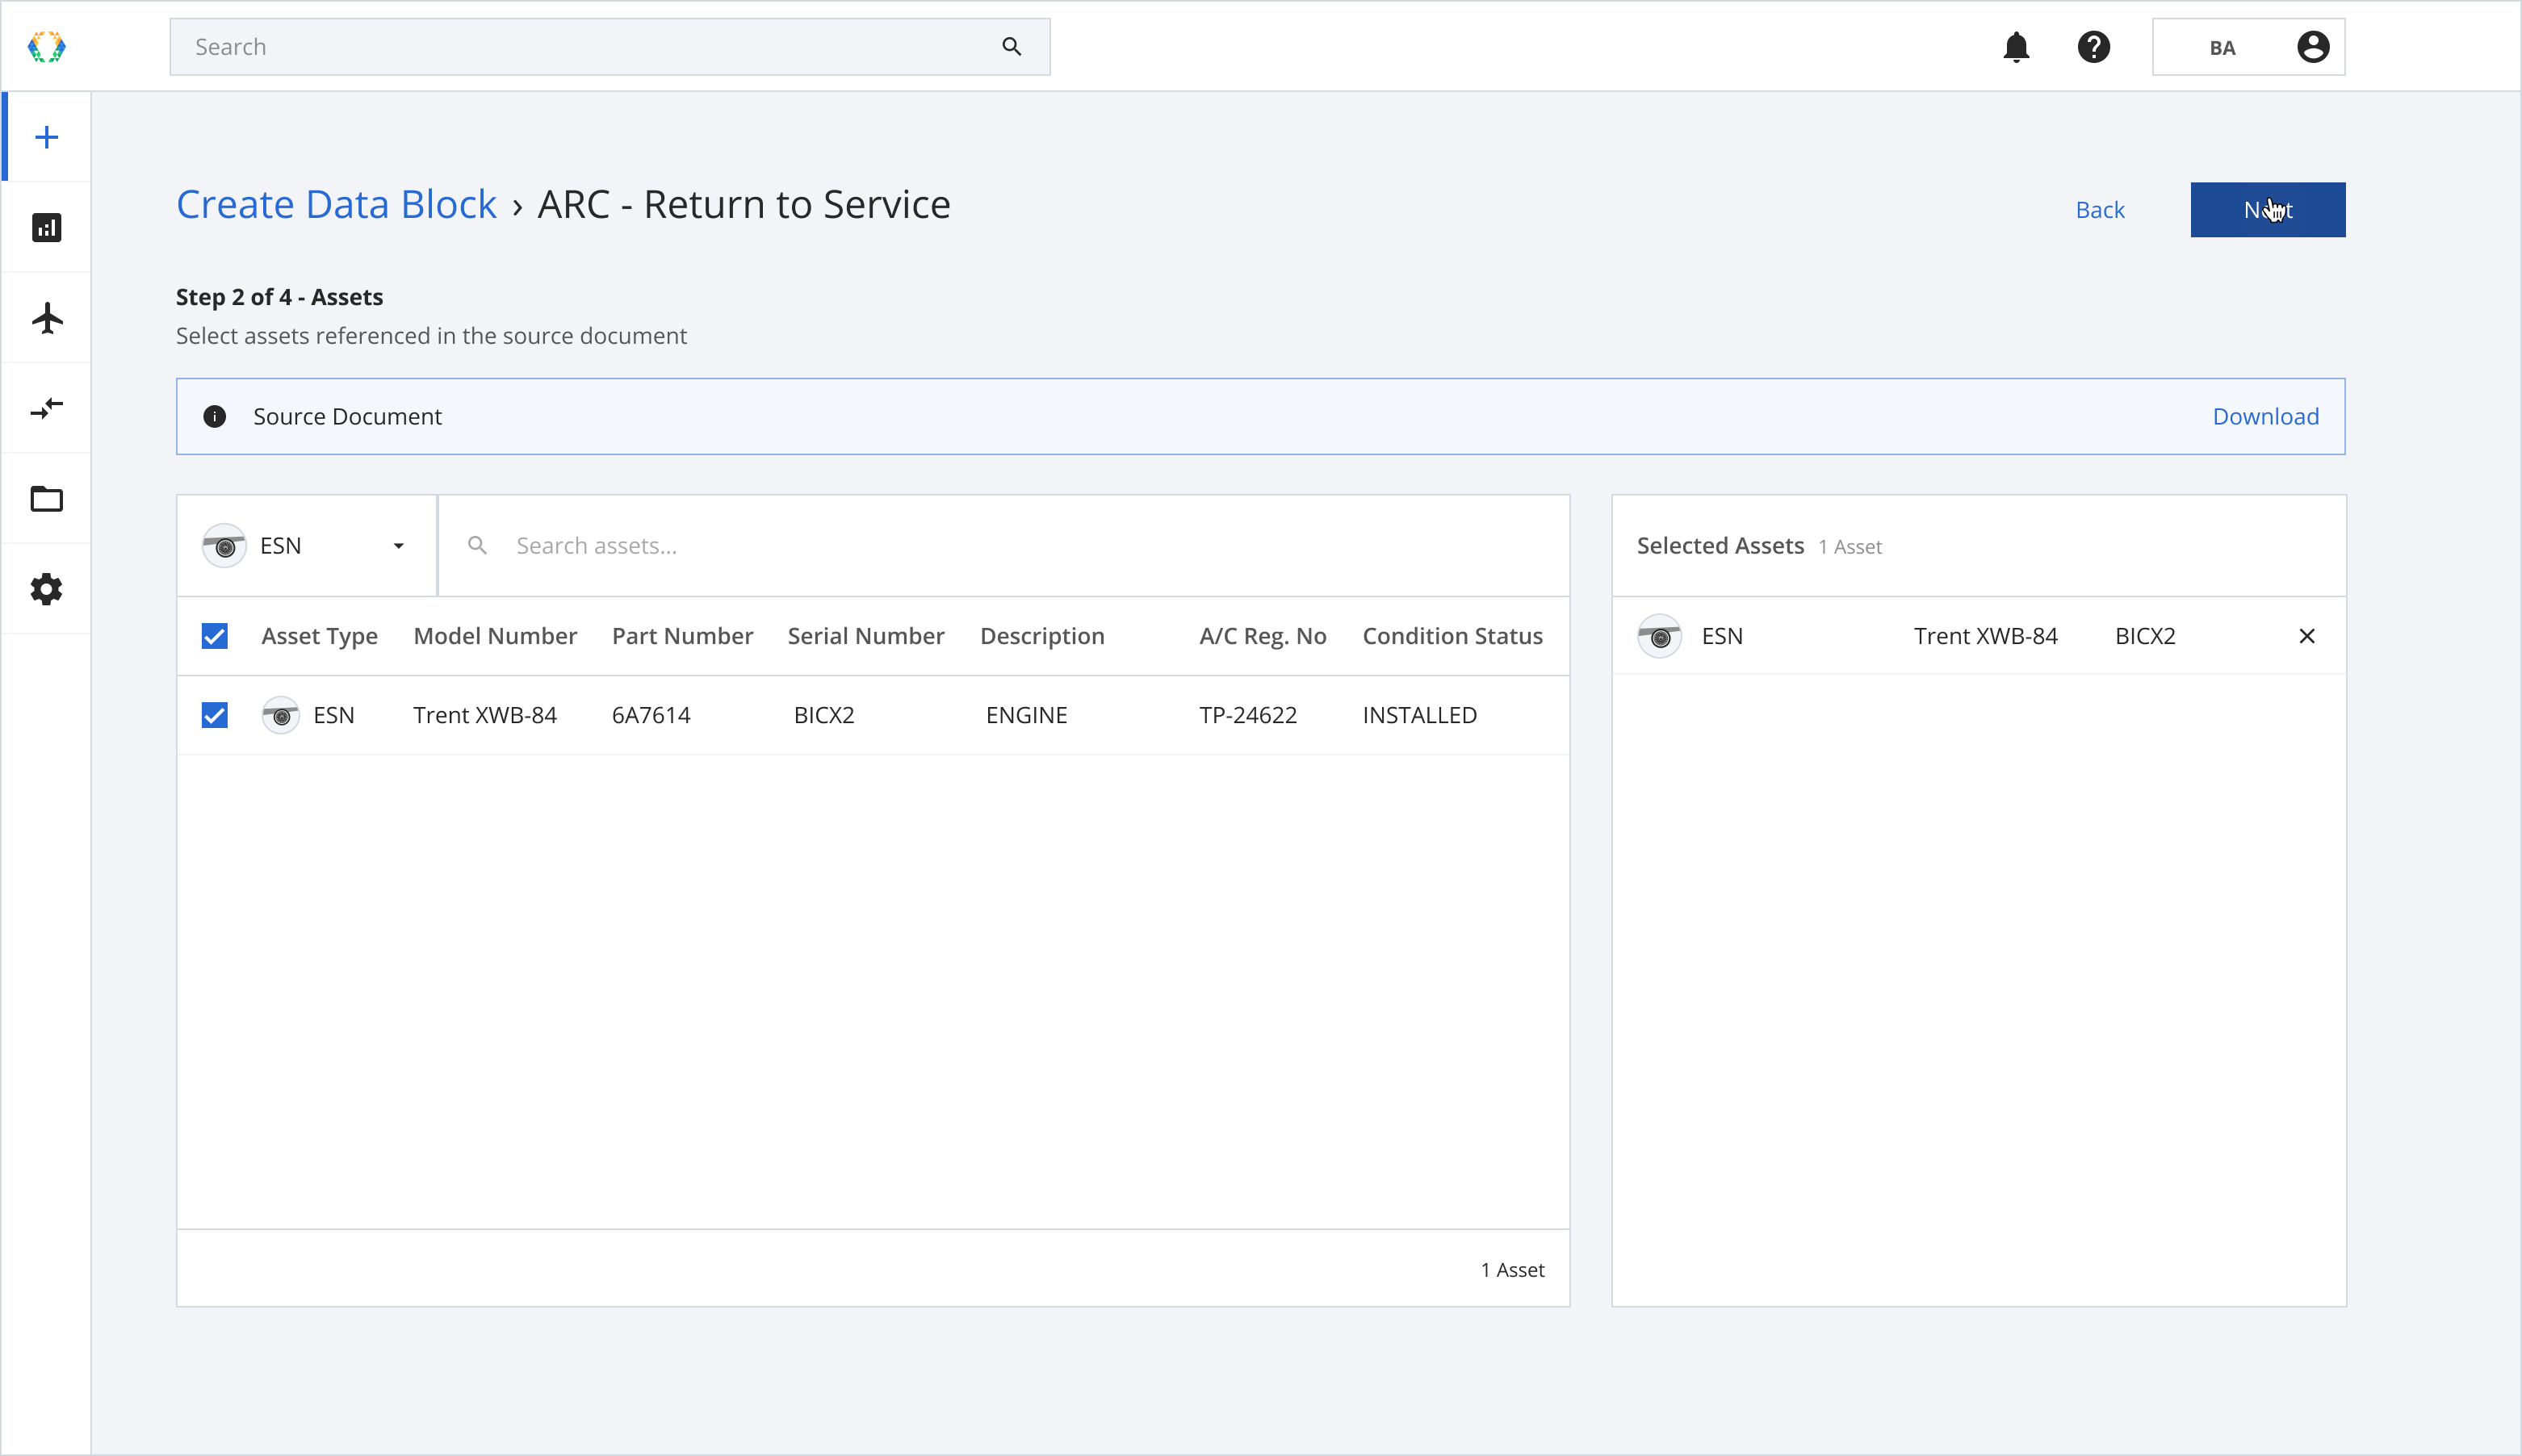
Select referenced asset
Step 7: You can manually add the authorization information or select from the existing organization certificates list. Click "Next".
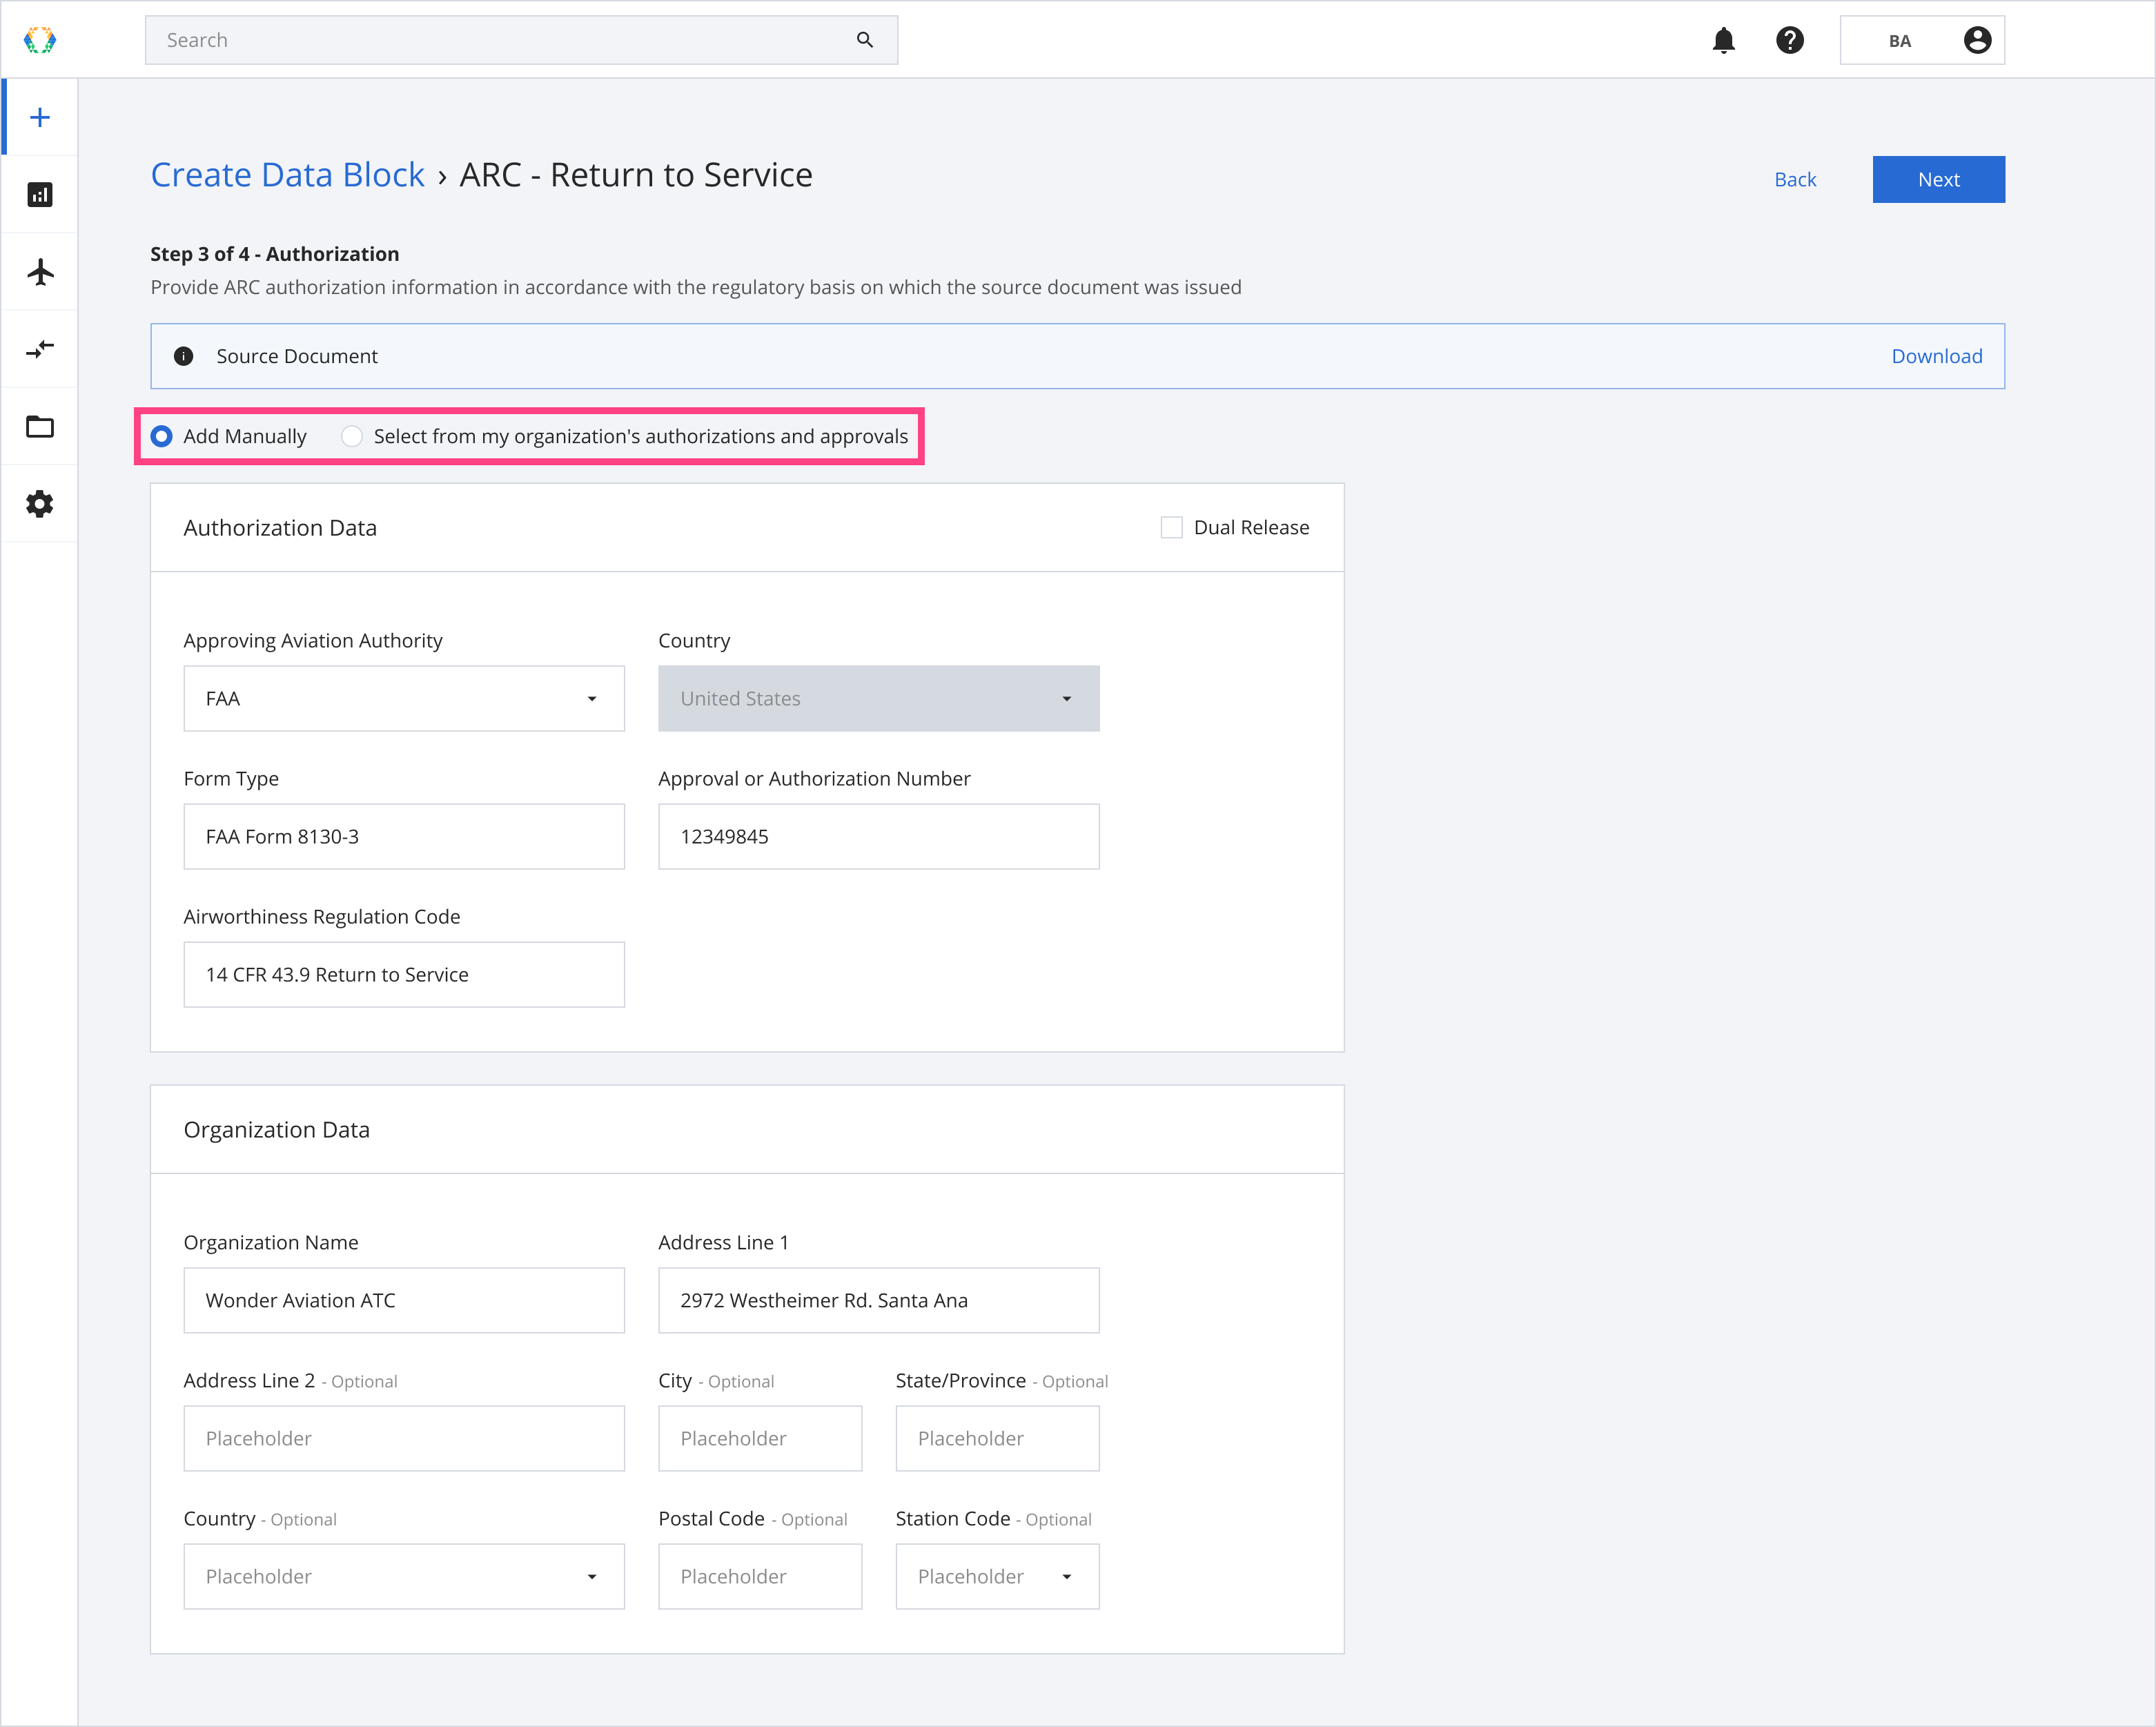
Add authorization information manually
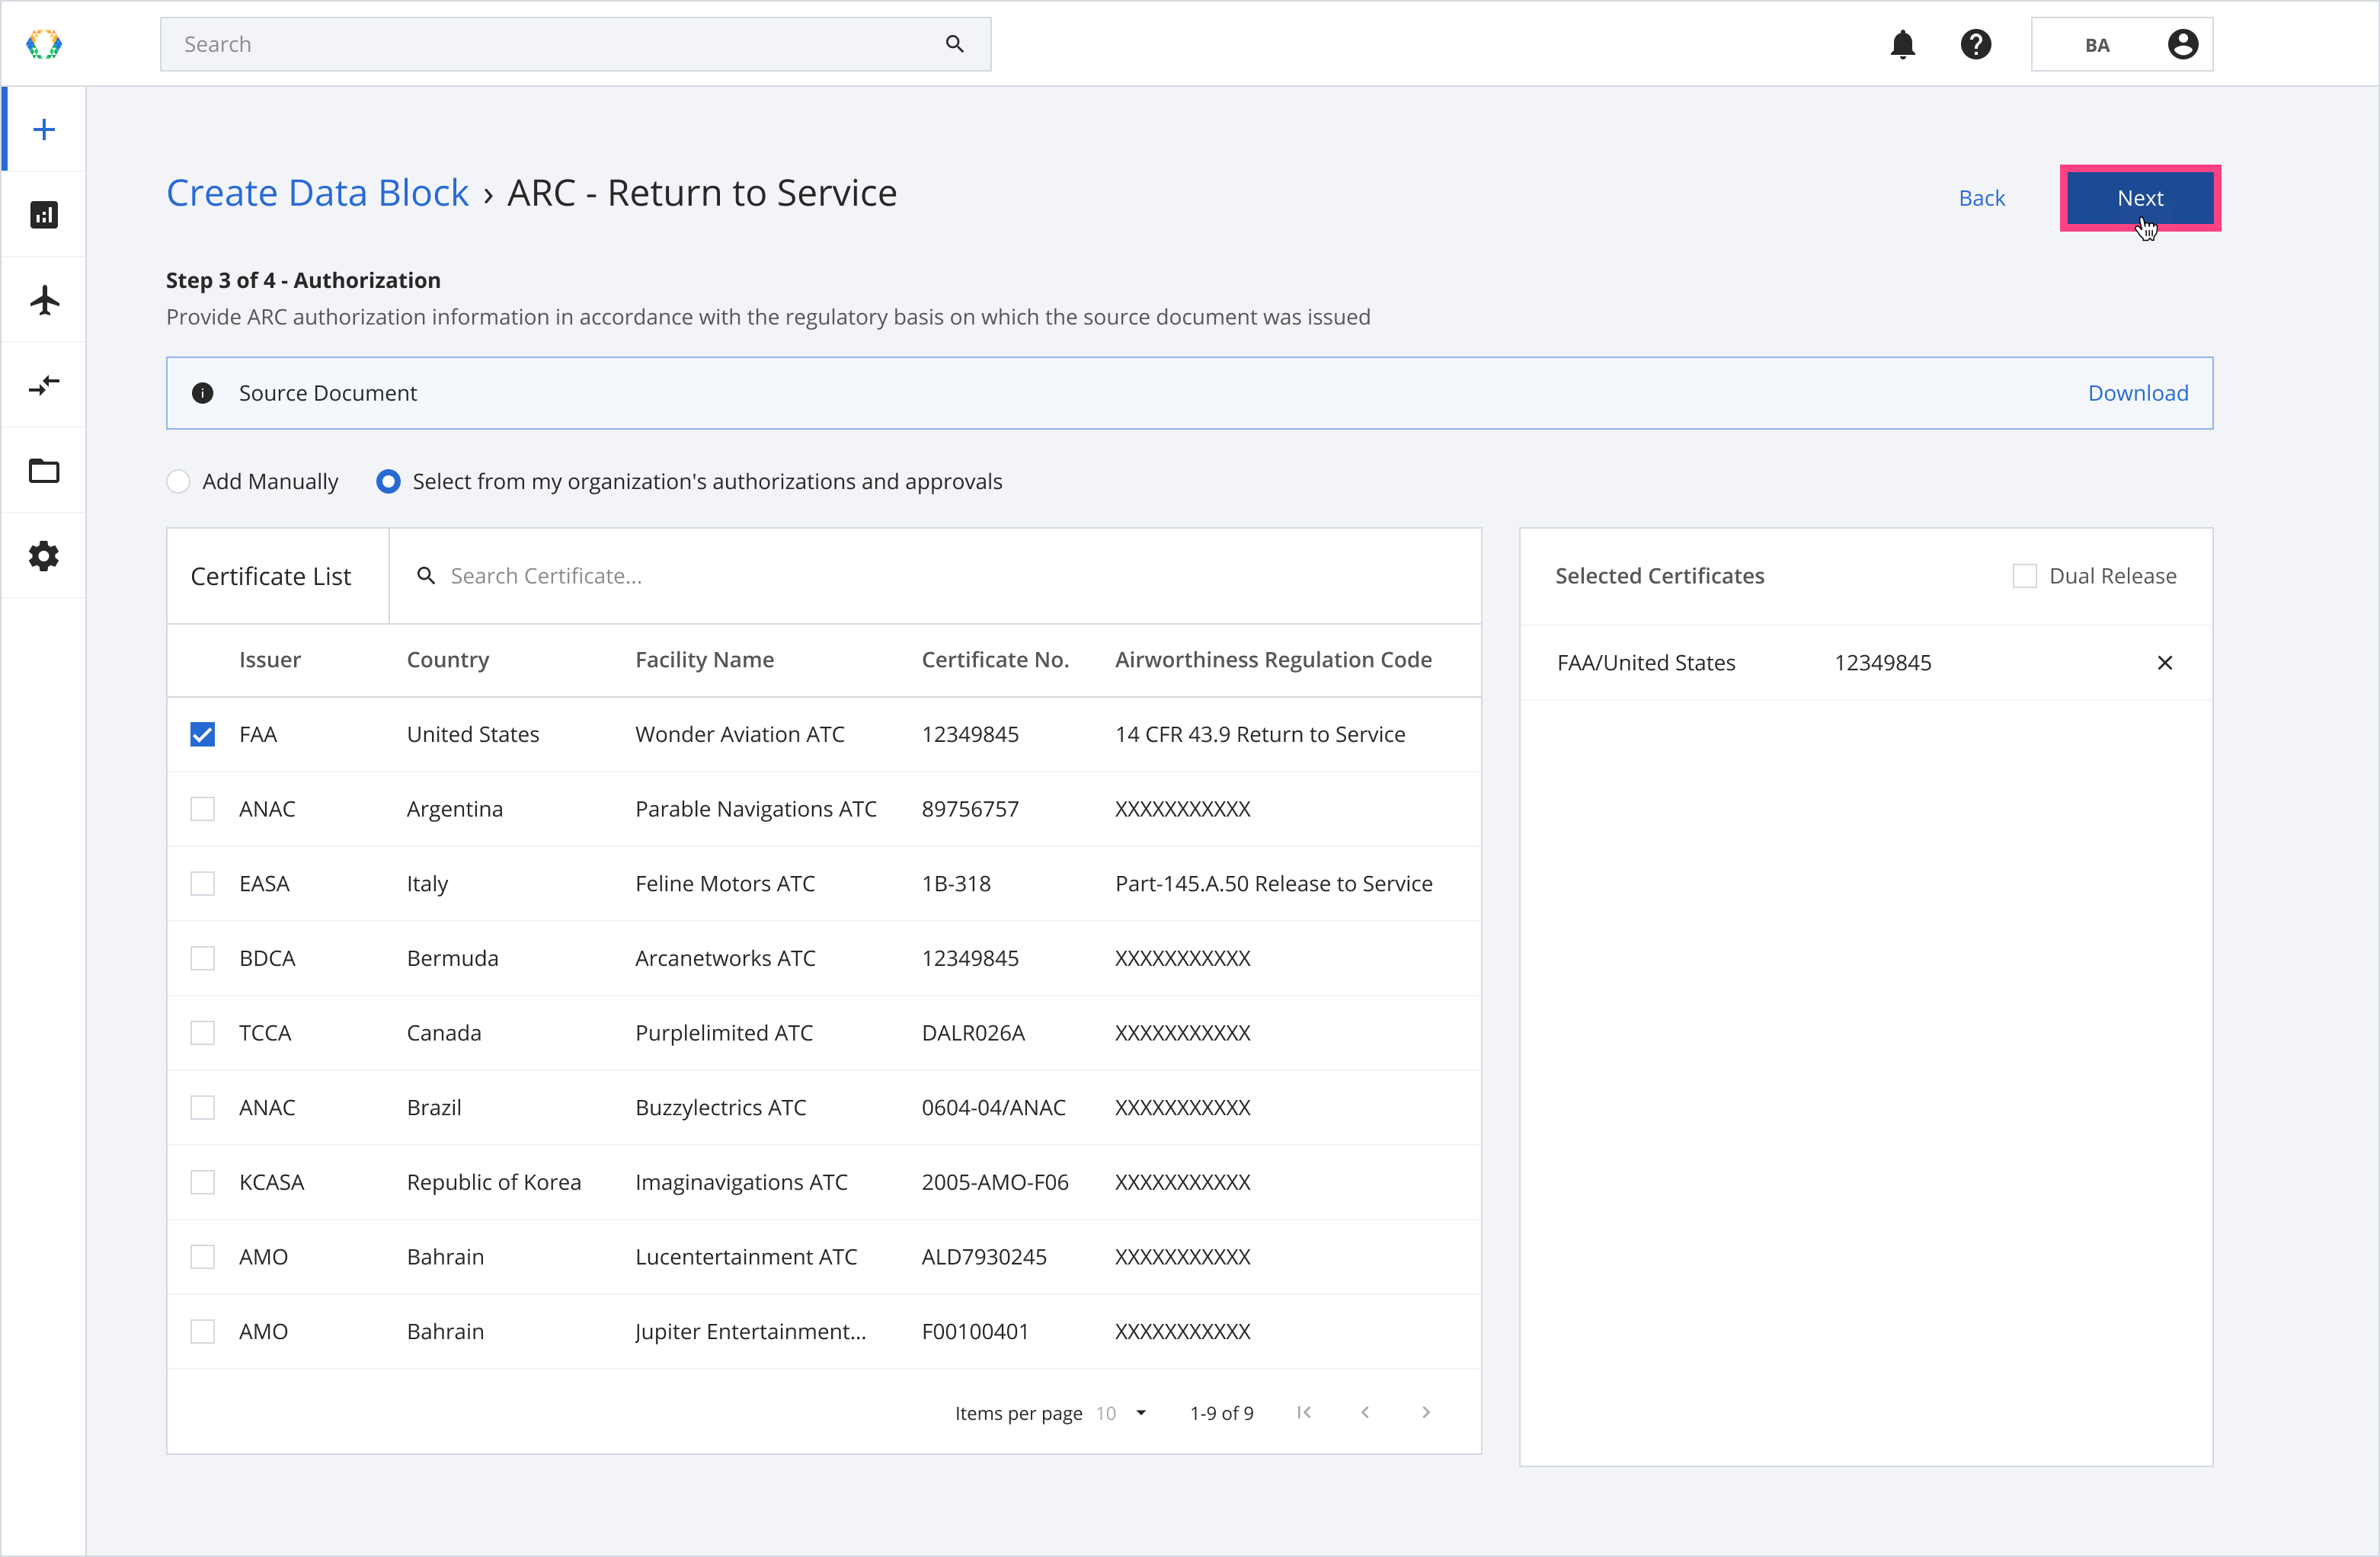
Add authorization information from the existing list
Step 8: Enter the details of the asset, work performed and method of compliance for each certificate.
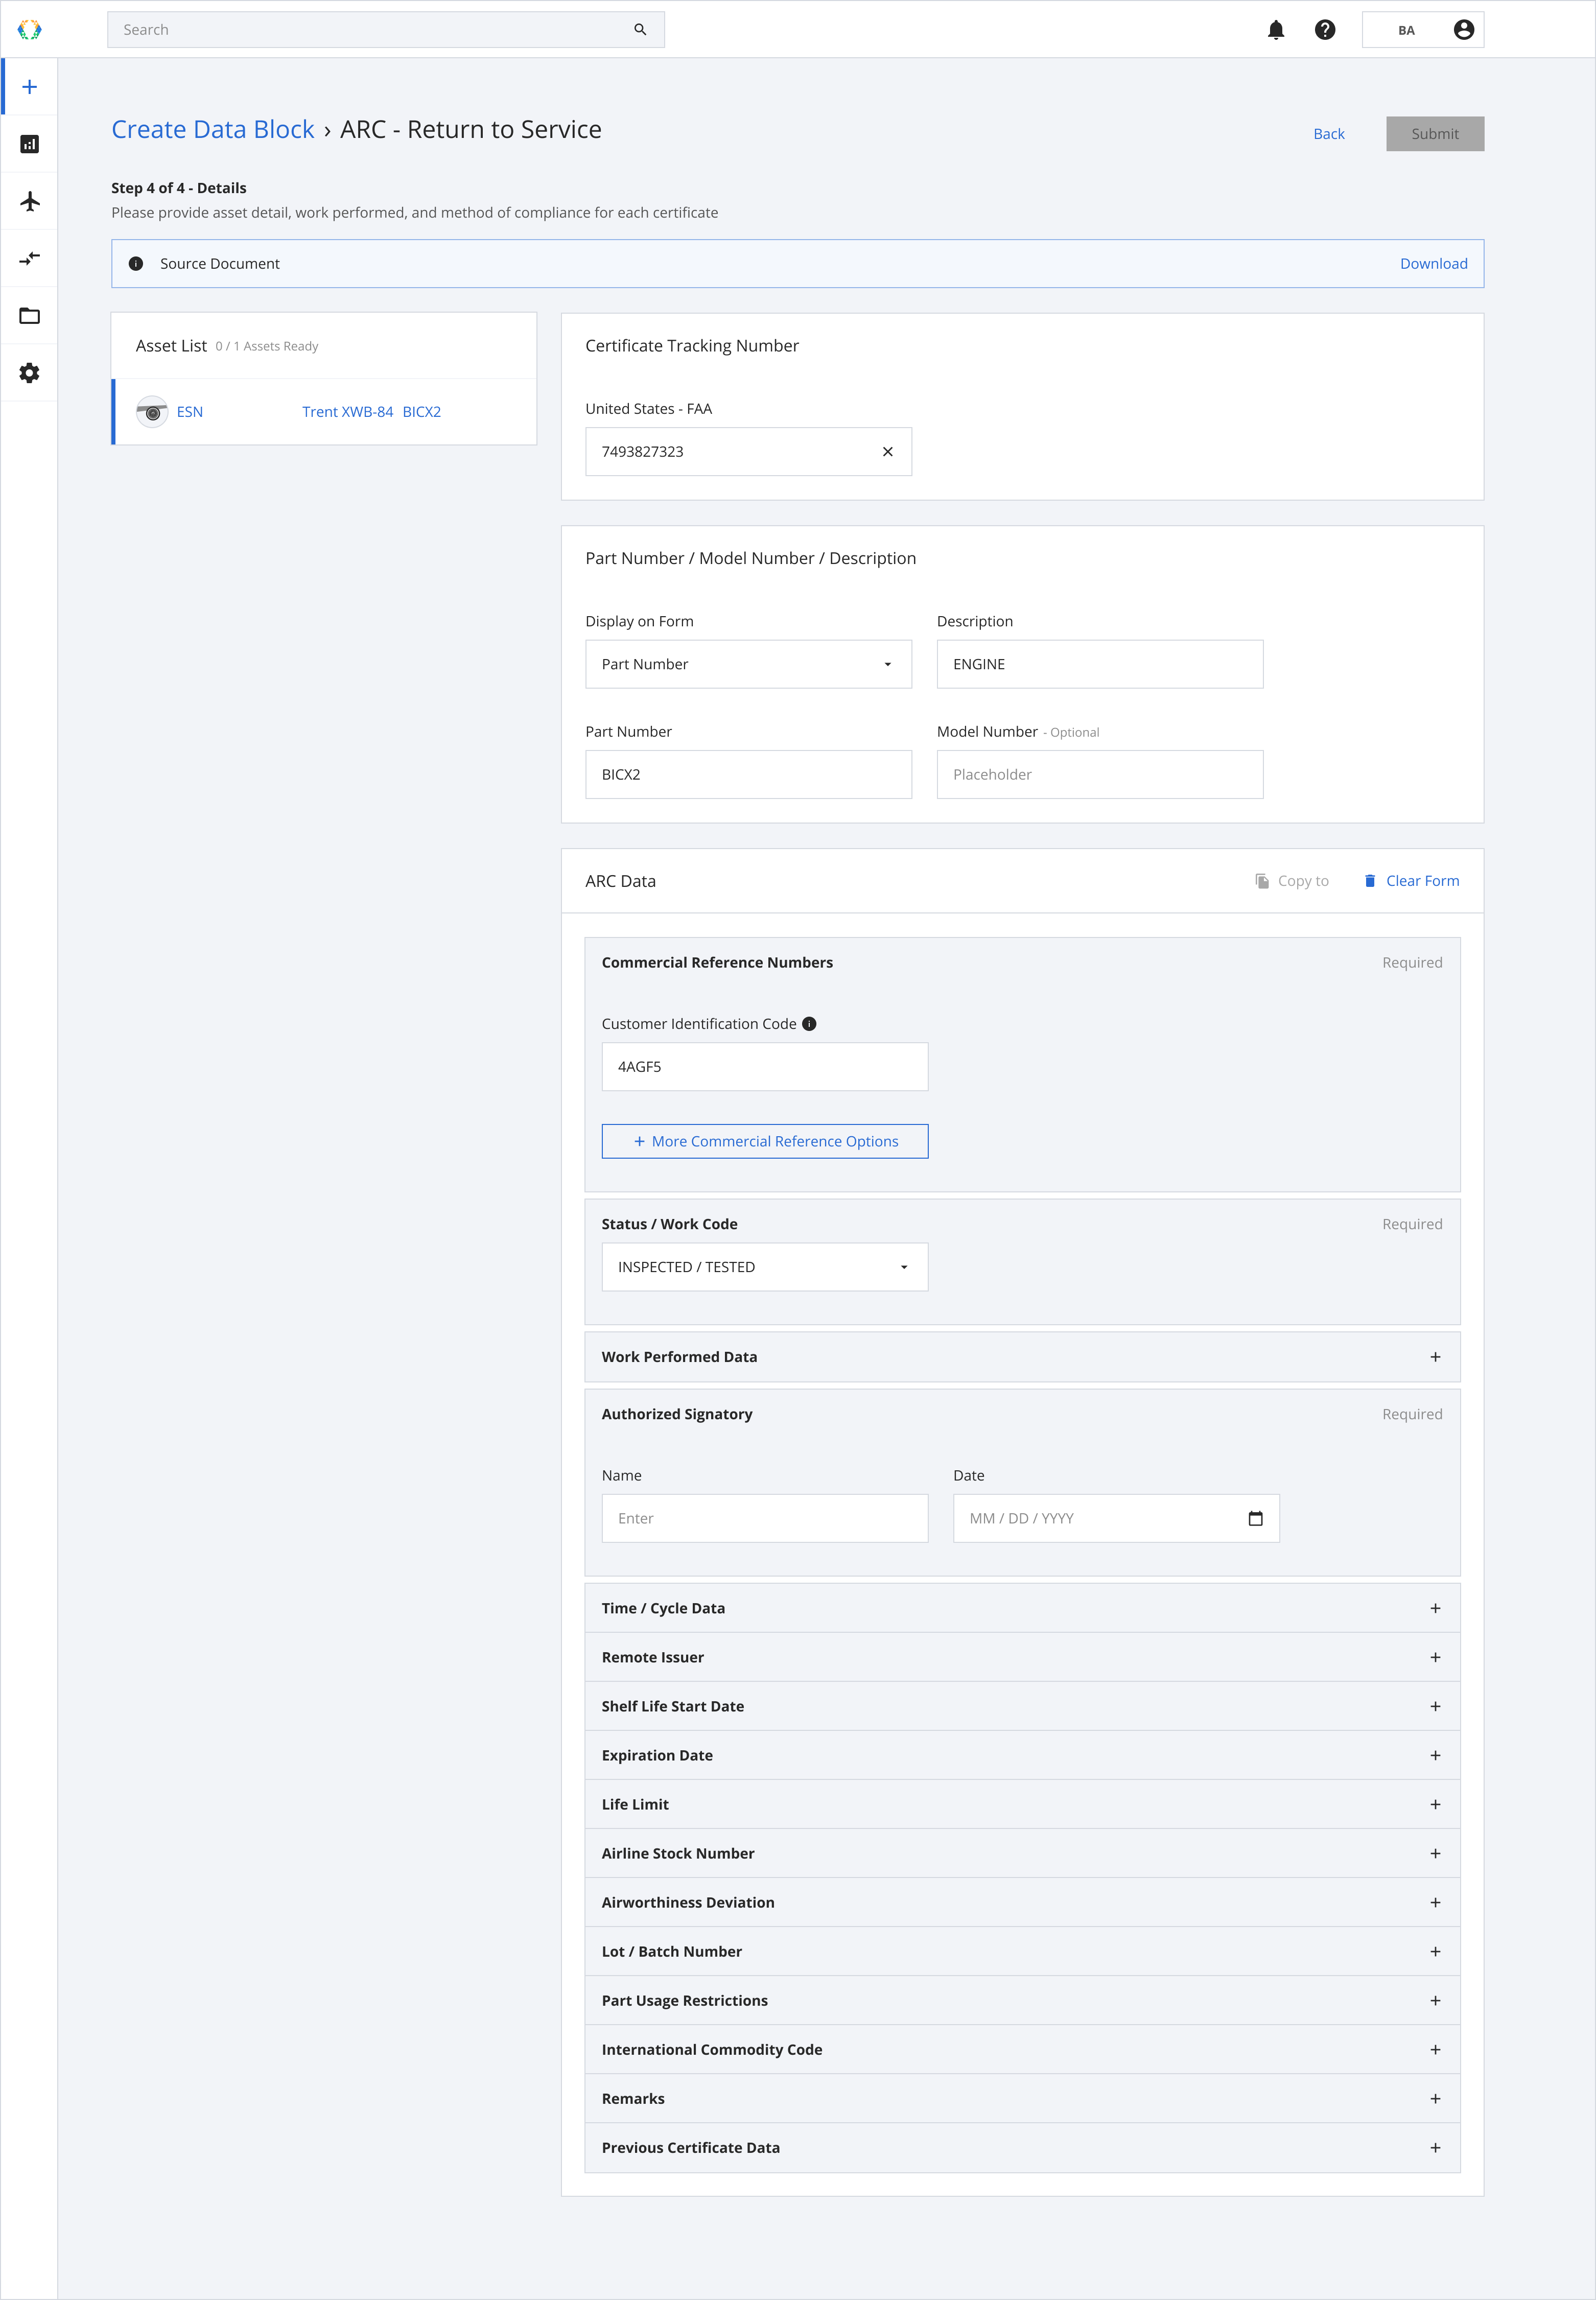
Enter details
Step 9: Once the details are entered, click “Submit”.
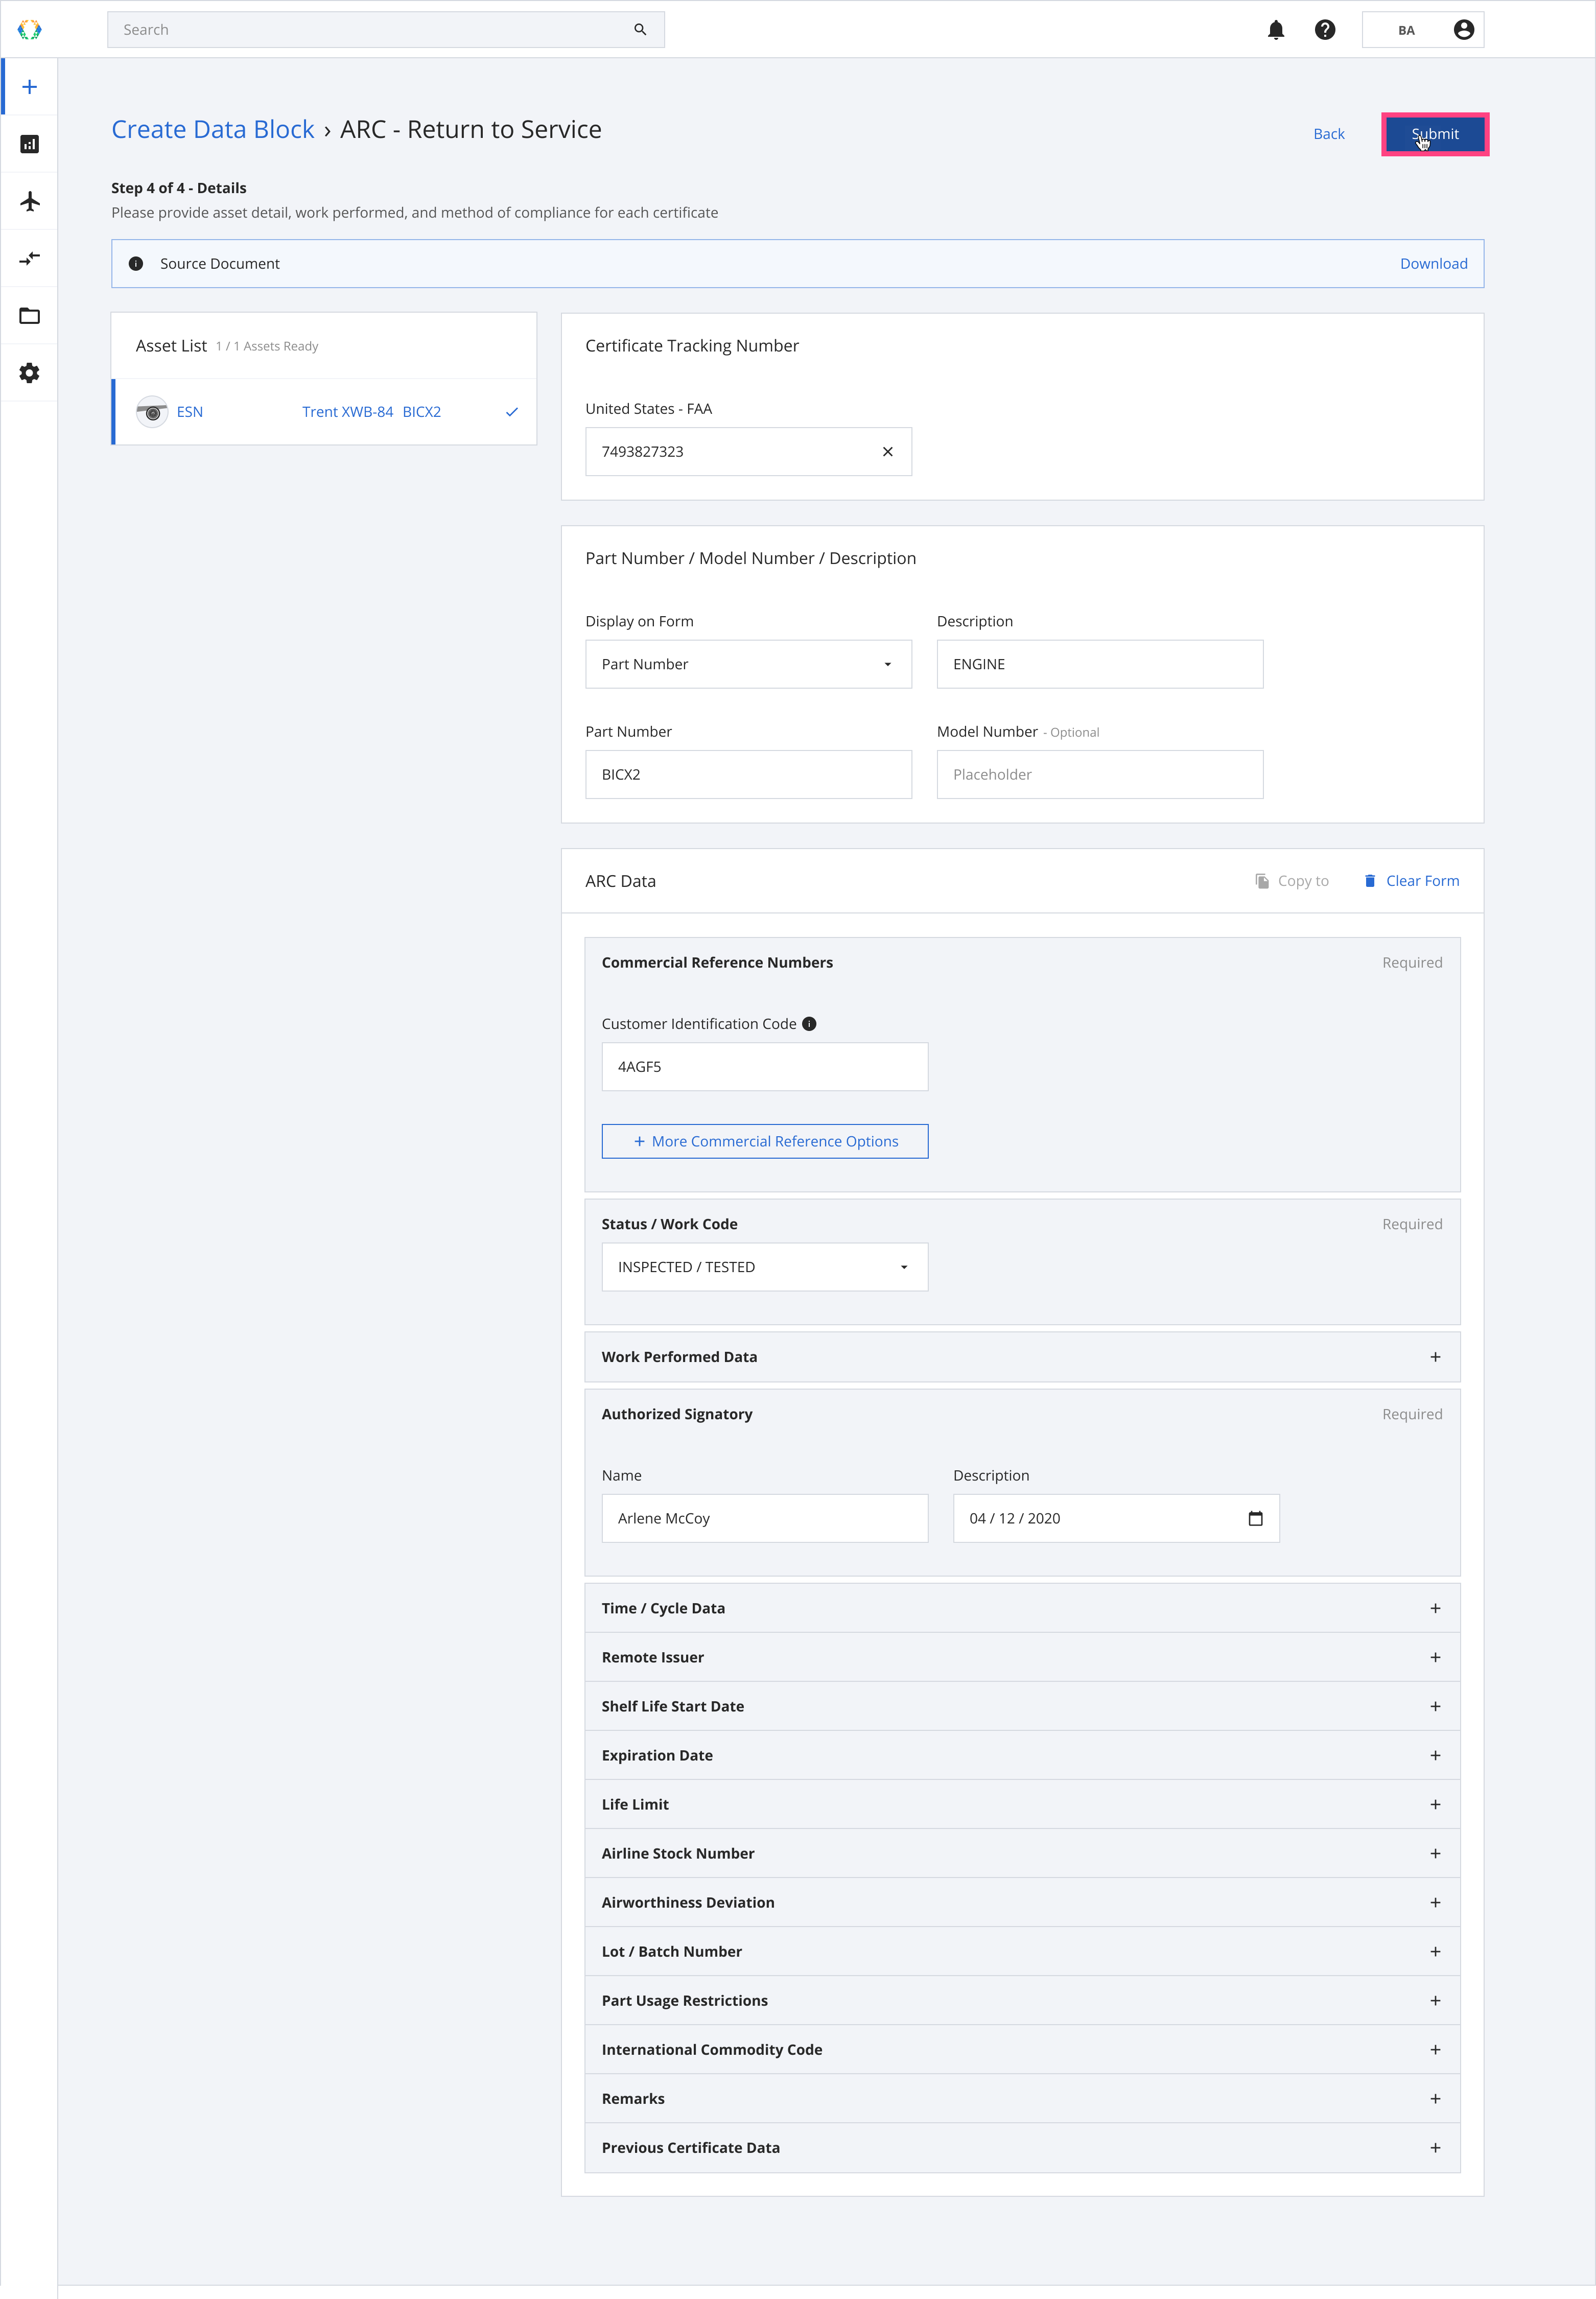
Submit details
Step 10: A pop-up will appear to confirm the data block creation for your ARC. Click “Create”.
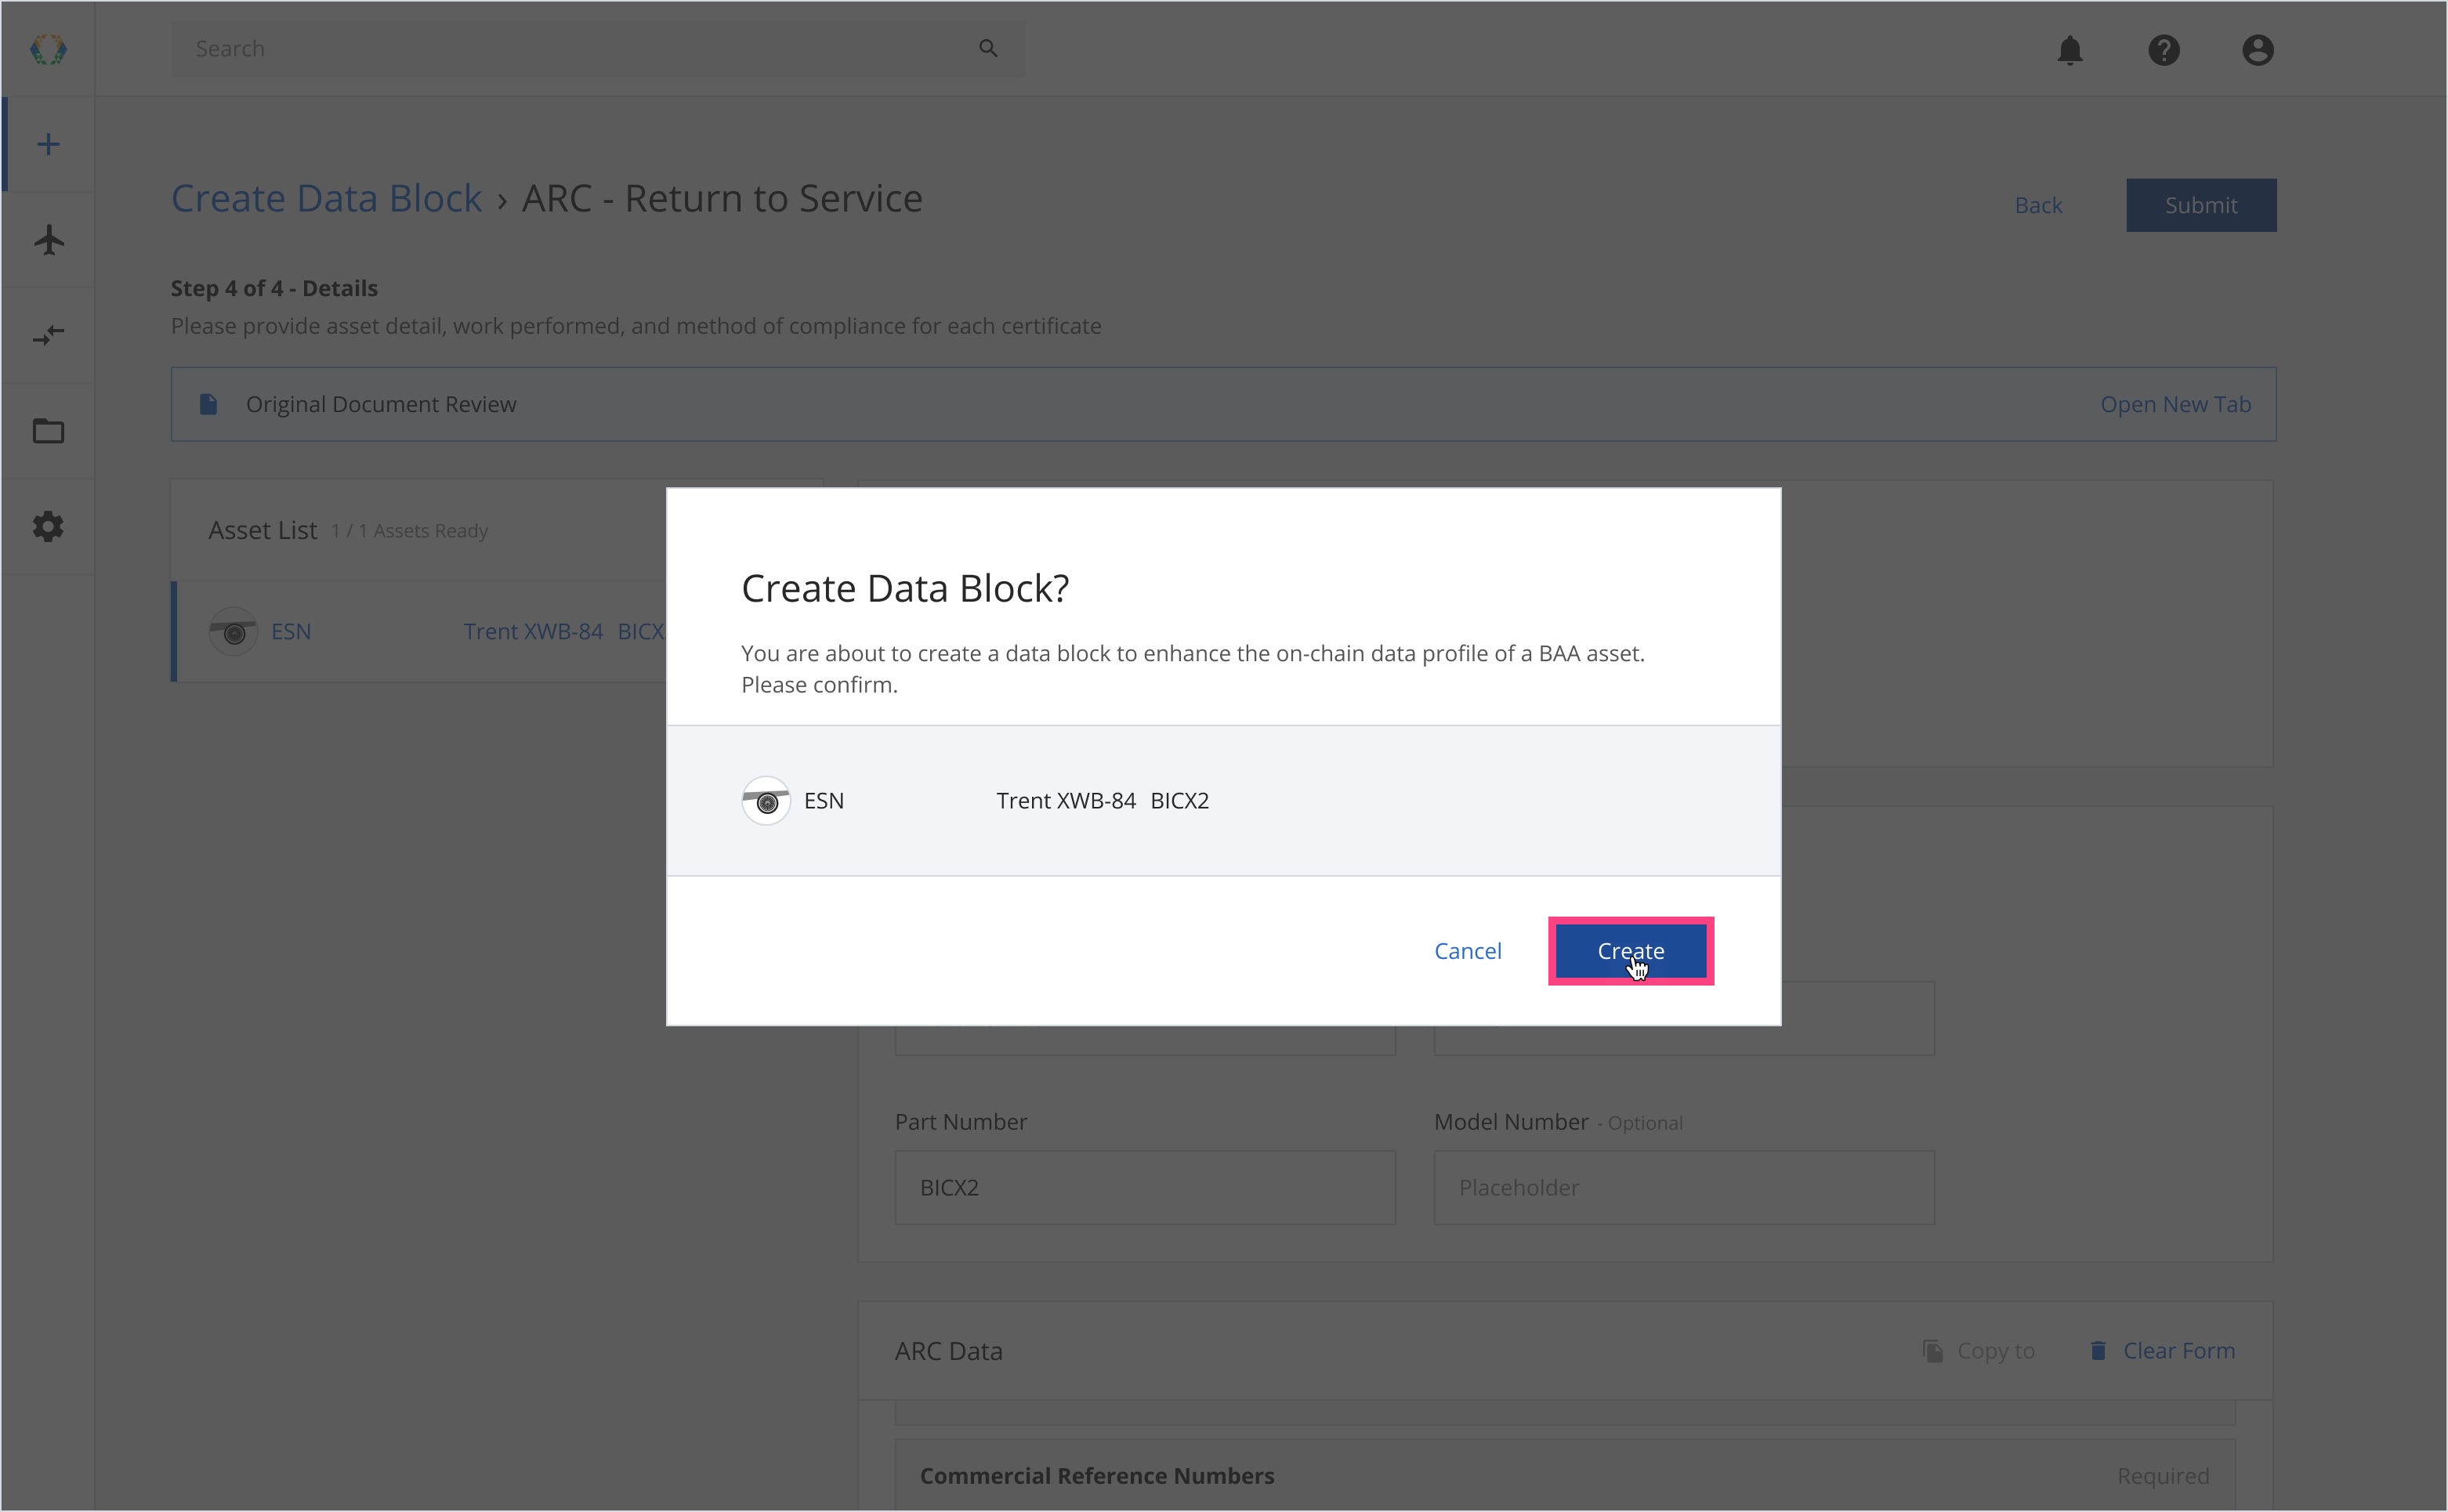
Create data block
Step 11: A green message will appear at the bottom right corner of the screen to indicate that the data block has been successfully created. Click “View Source Document” to view the ARC.
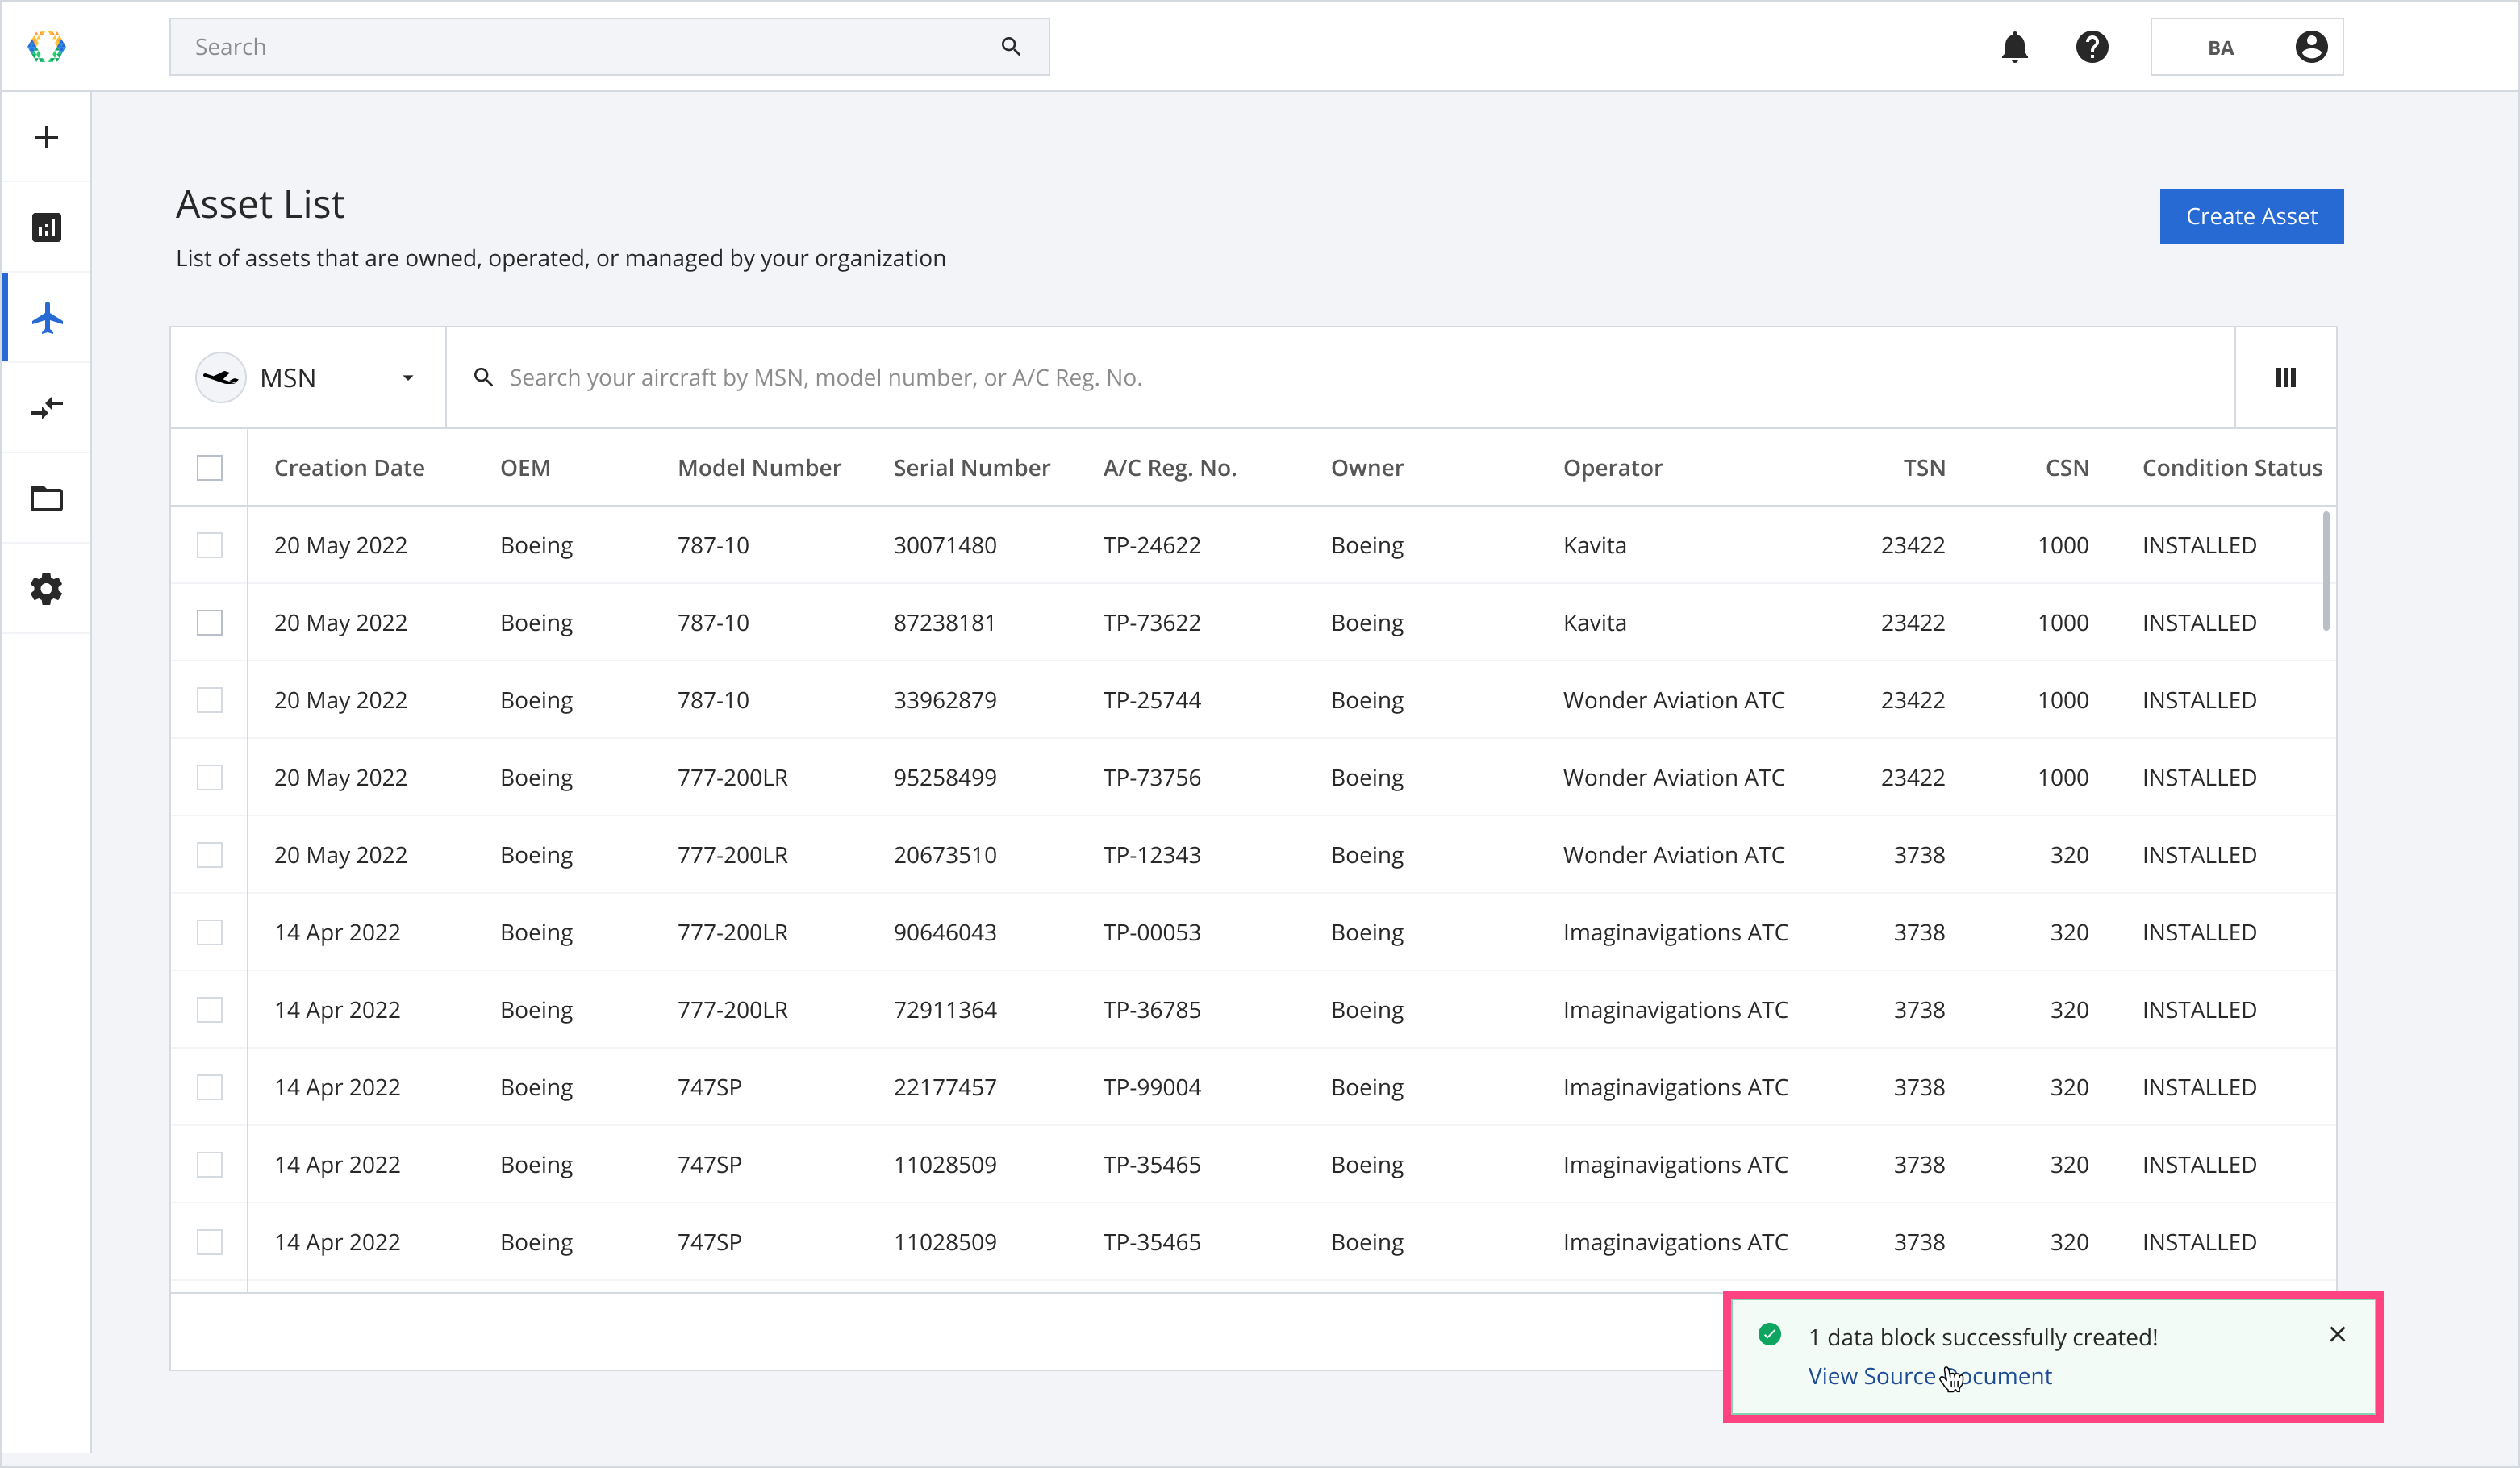
Data block successfully created
Step 12: You can now view your ARC as well as the document details including the created data block.
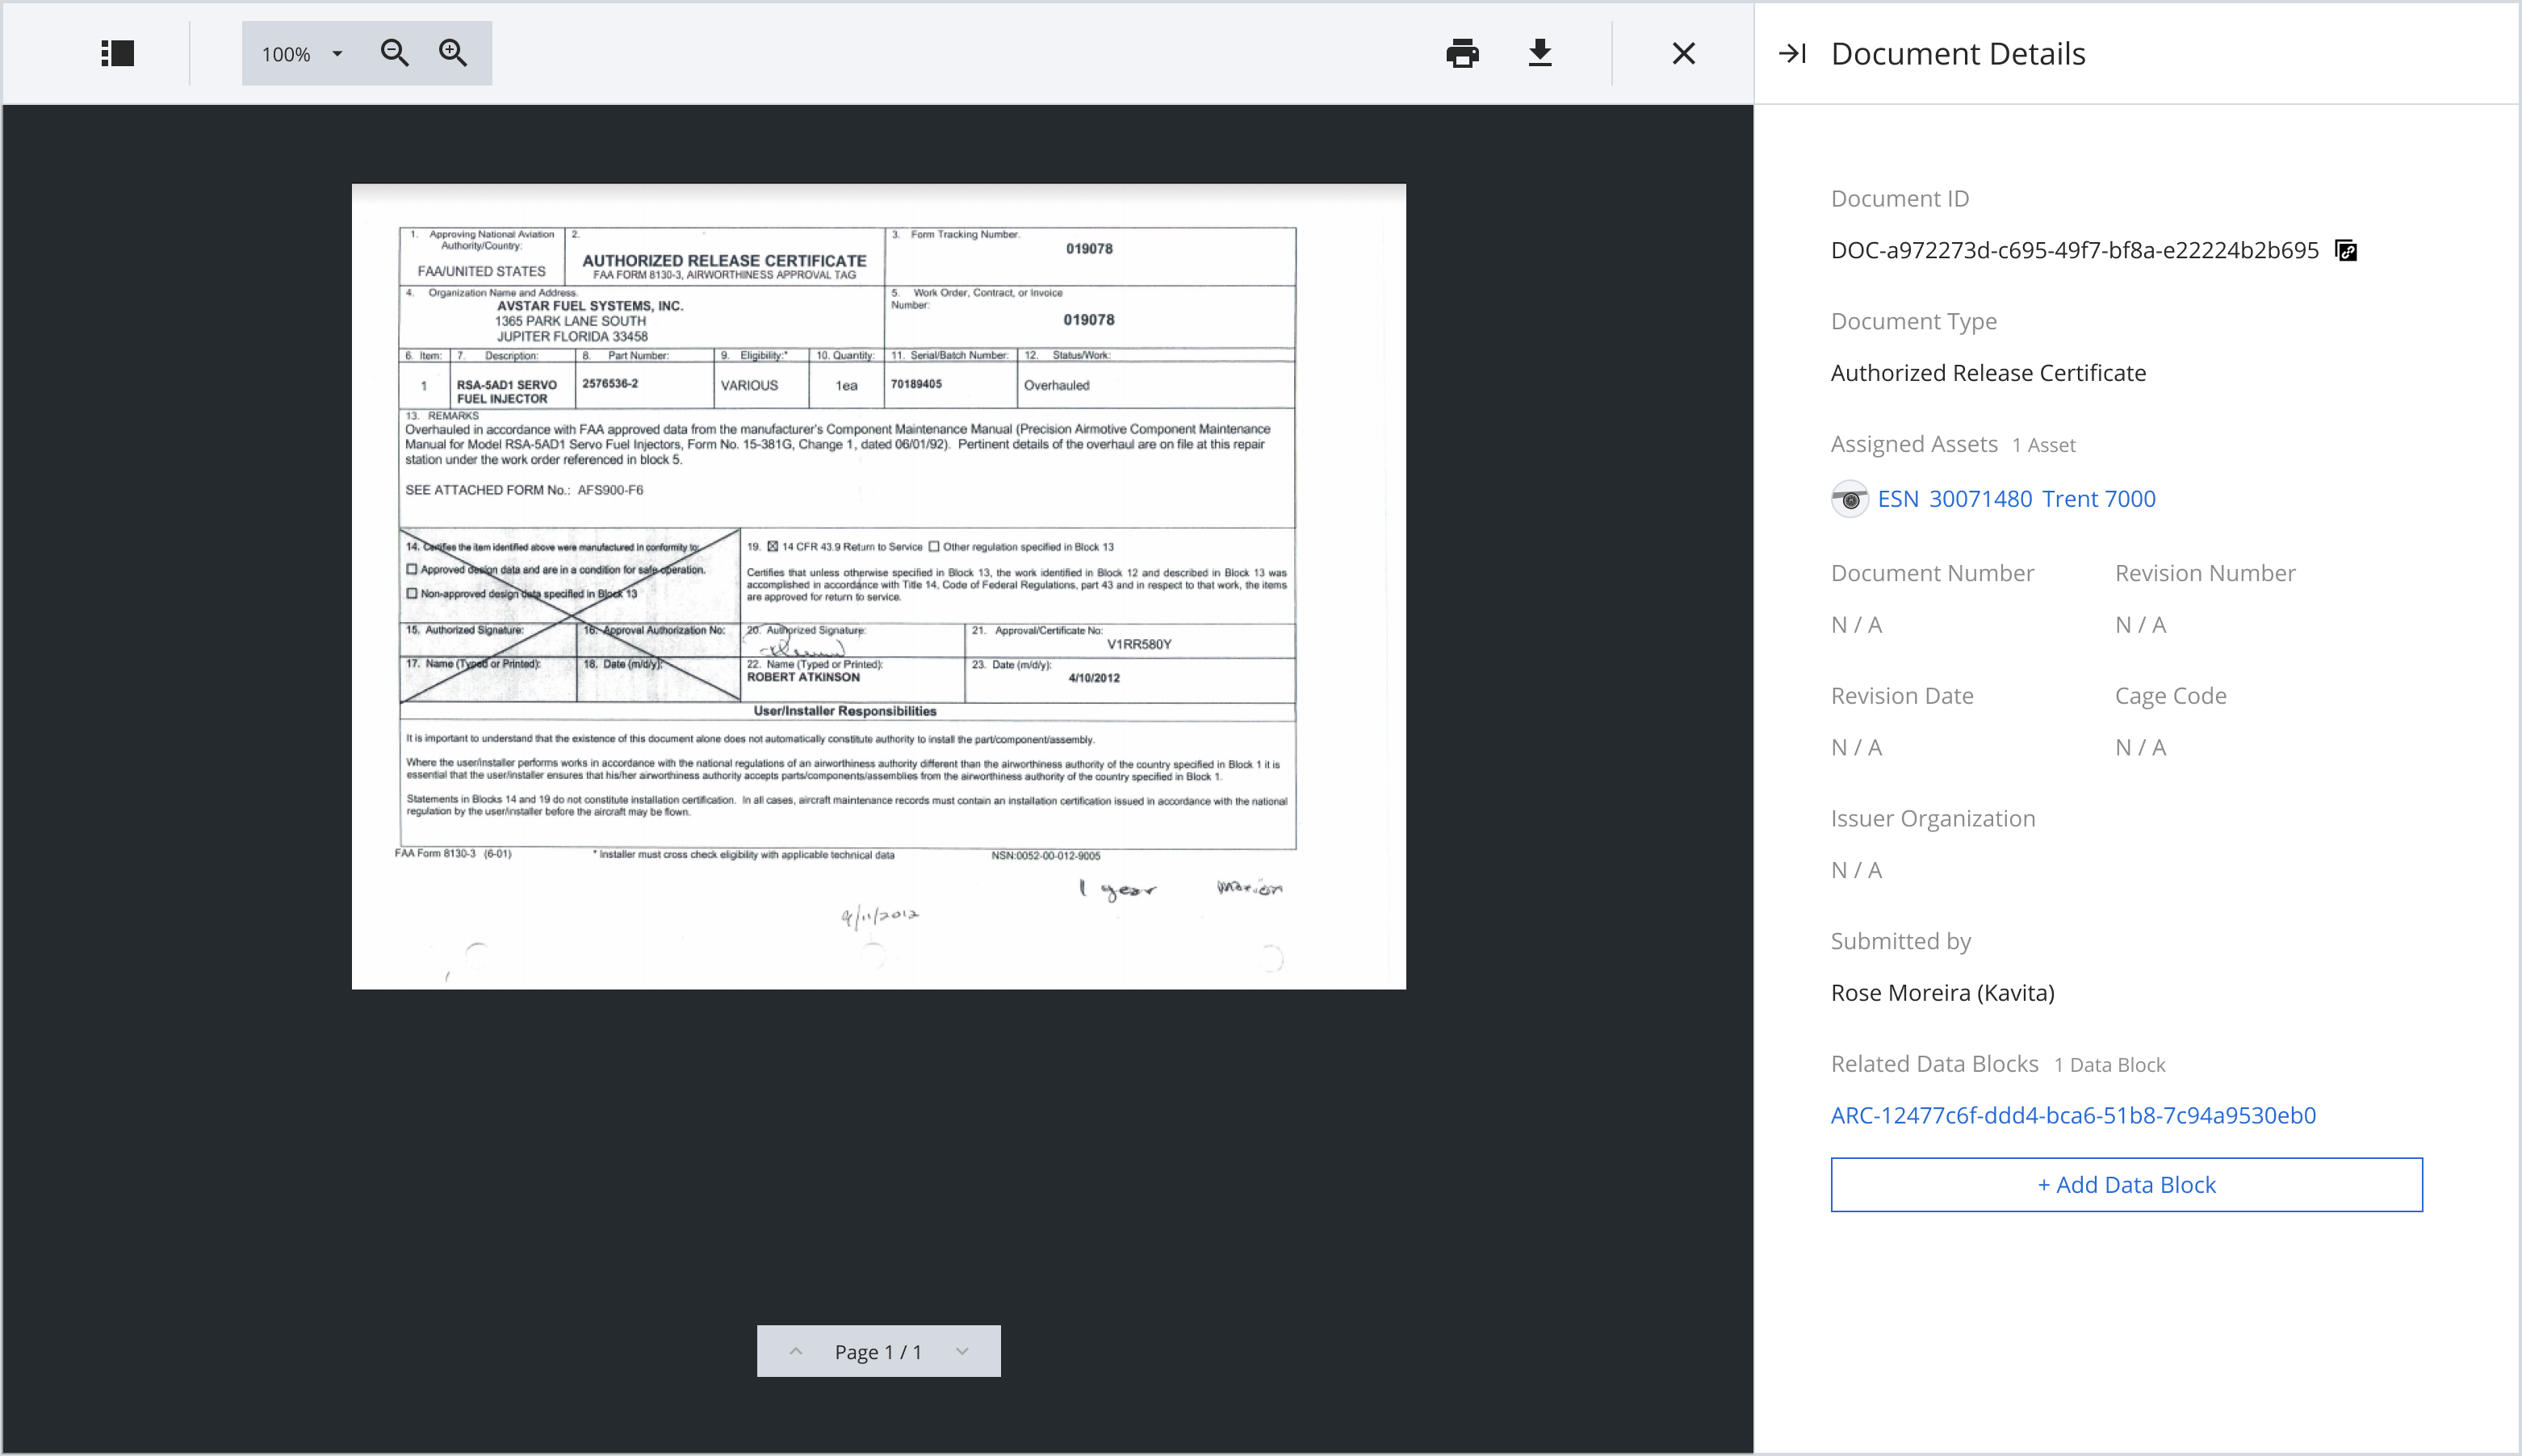
View ARC