Global Filters
Getting Started
The Global Filter Bar allows you to filter the repair orders across the MRO Manager module. It helps to visualize your dashboard and the other tabs with the customised filters.
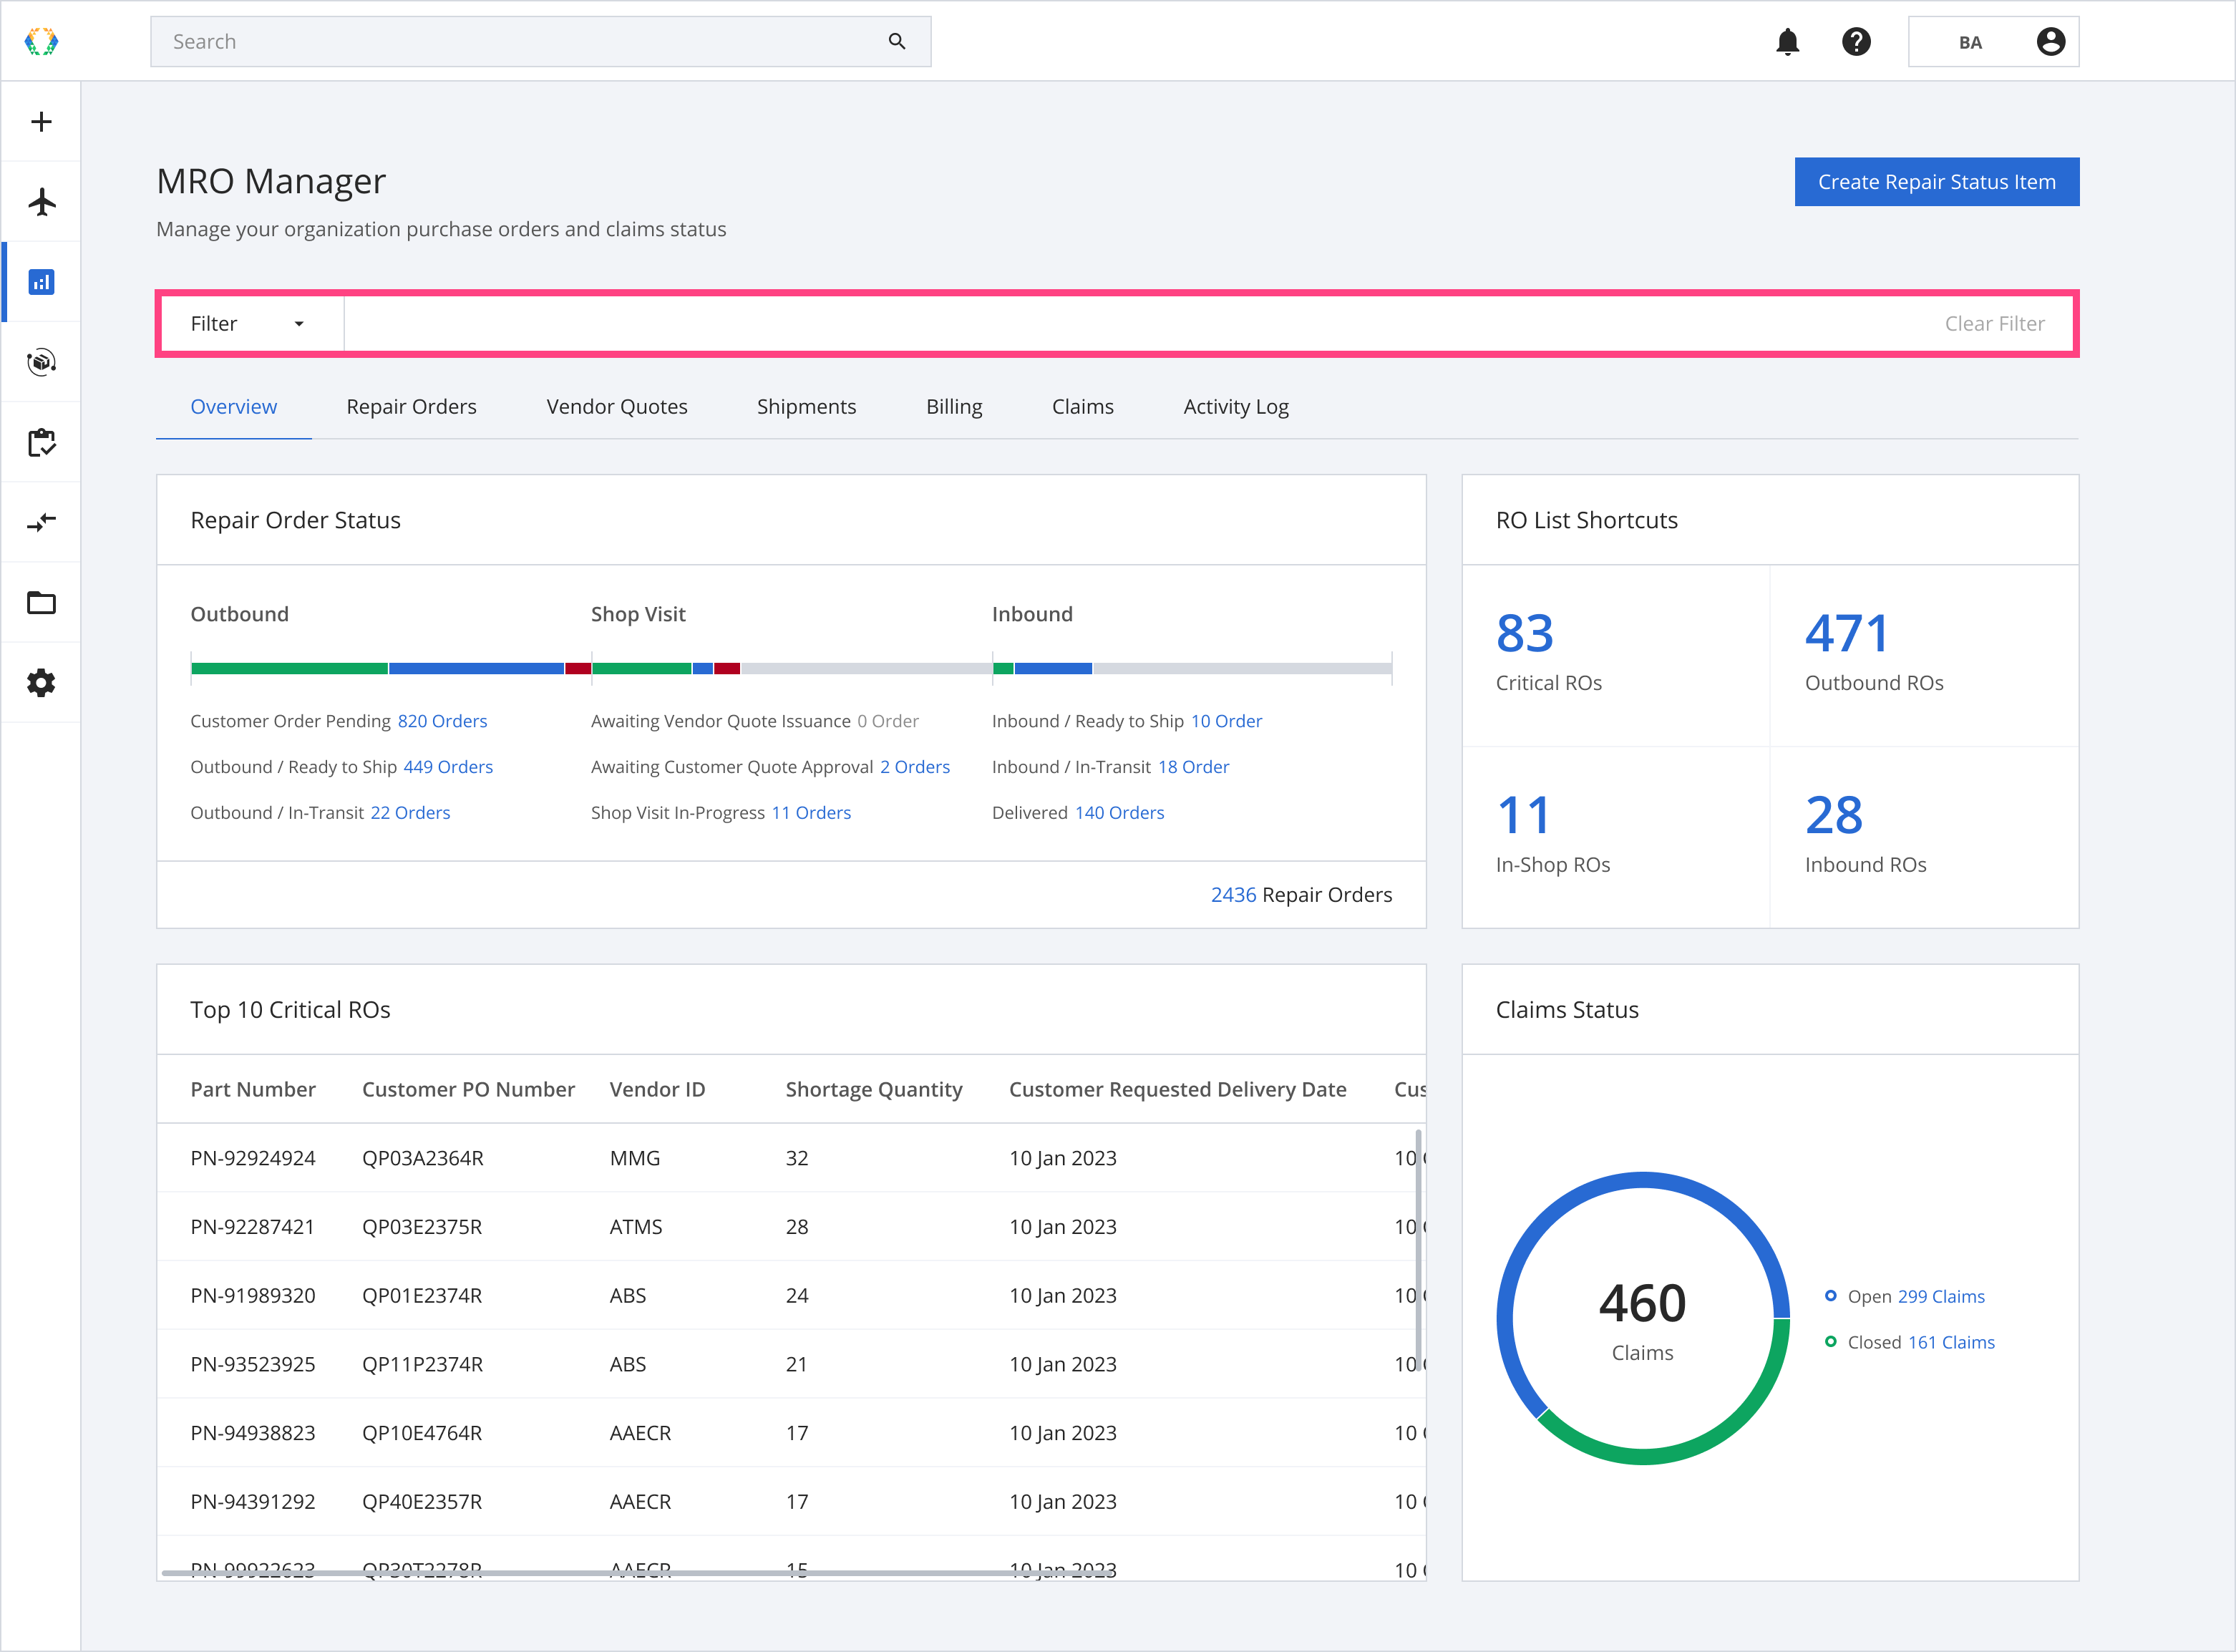
Filter Bar Operations
Step 1: Click 'Filter' to expand the filters menu.
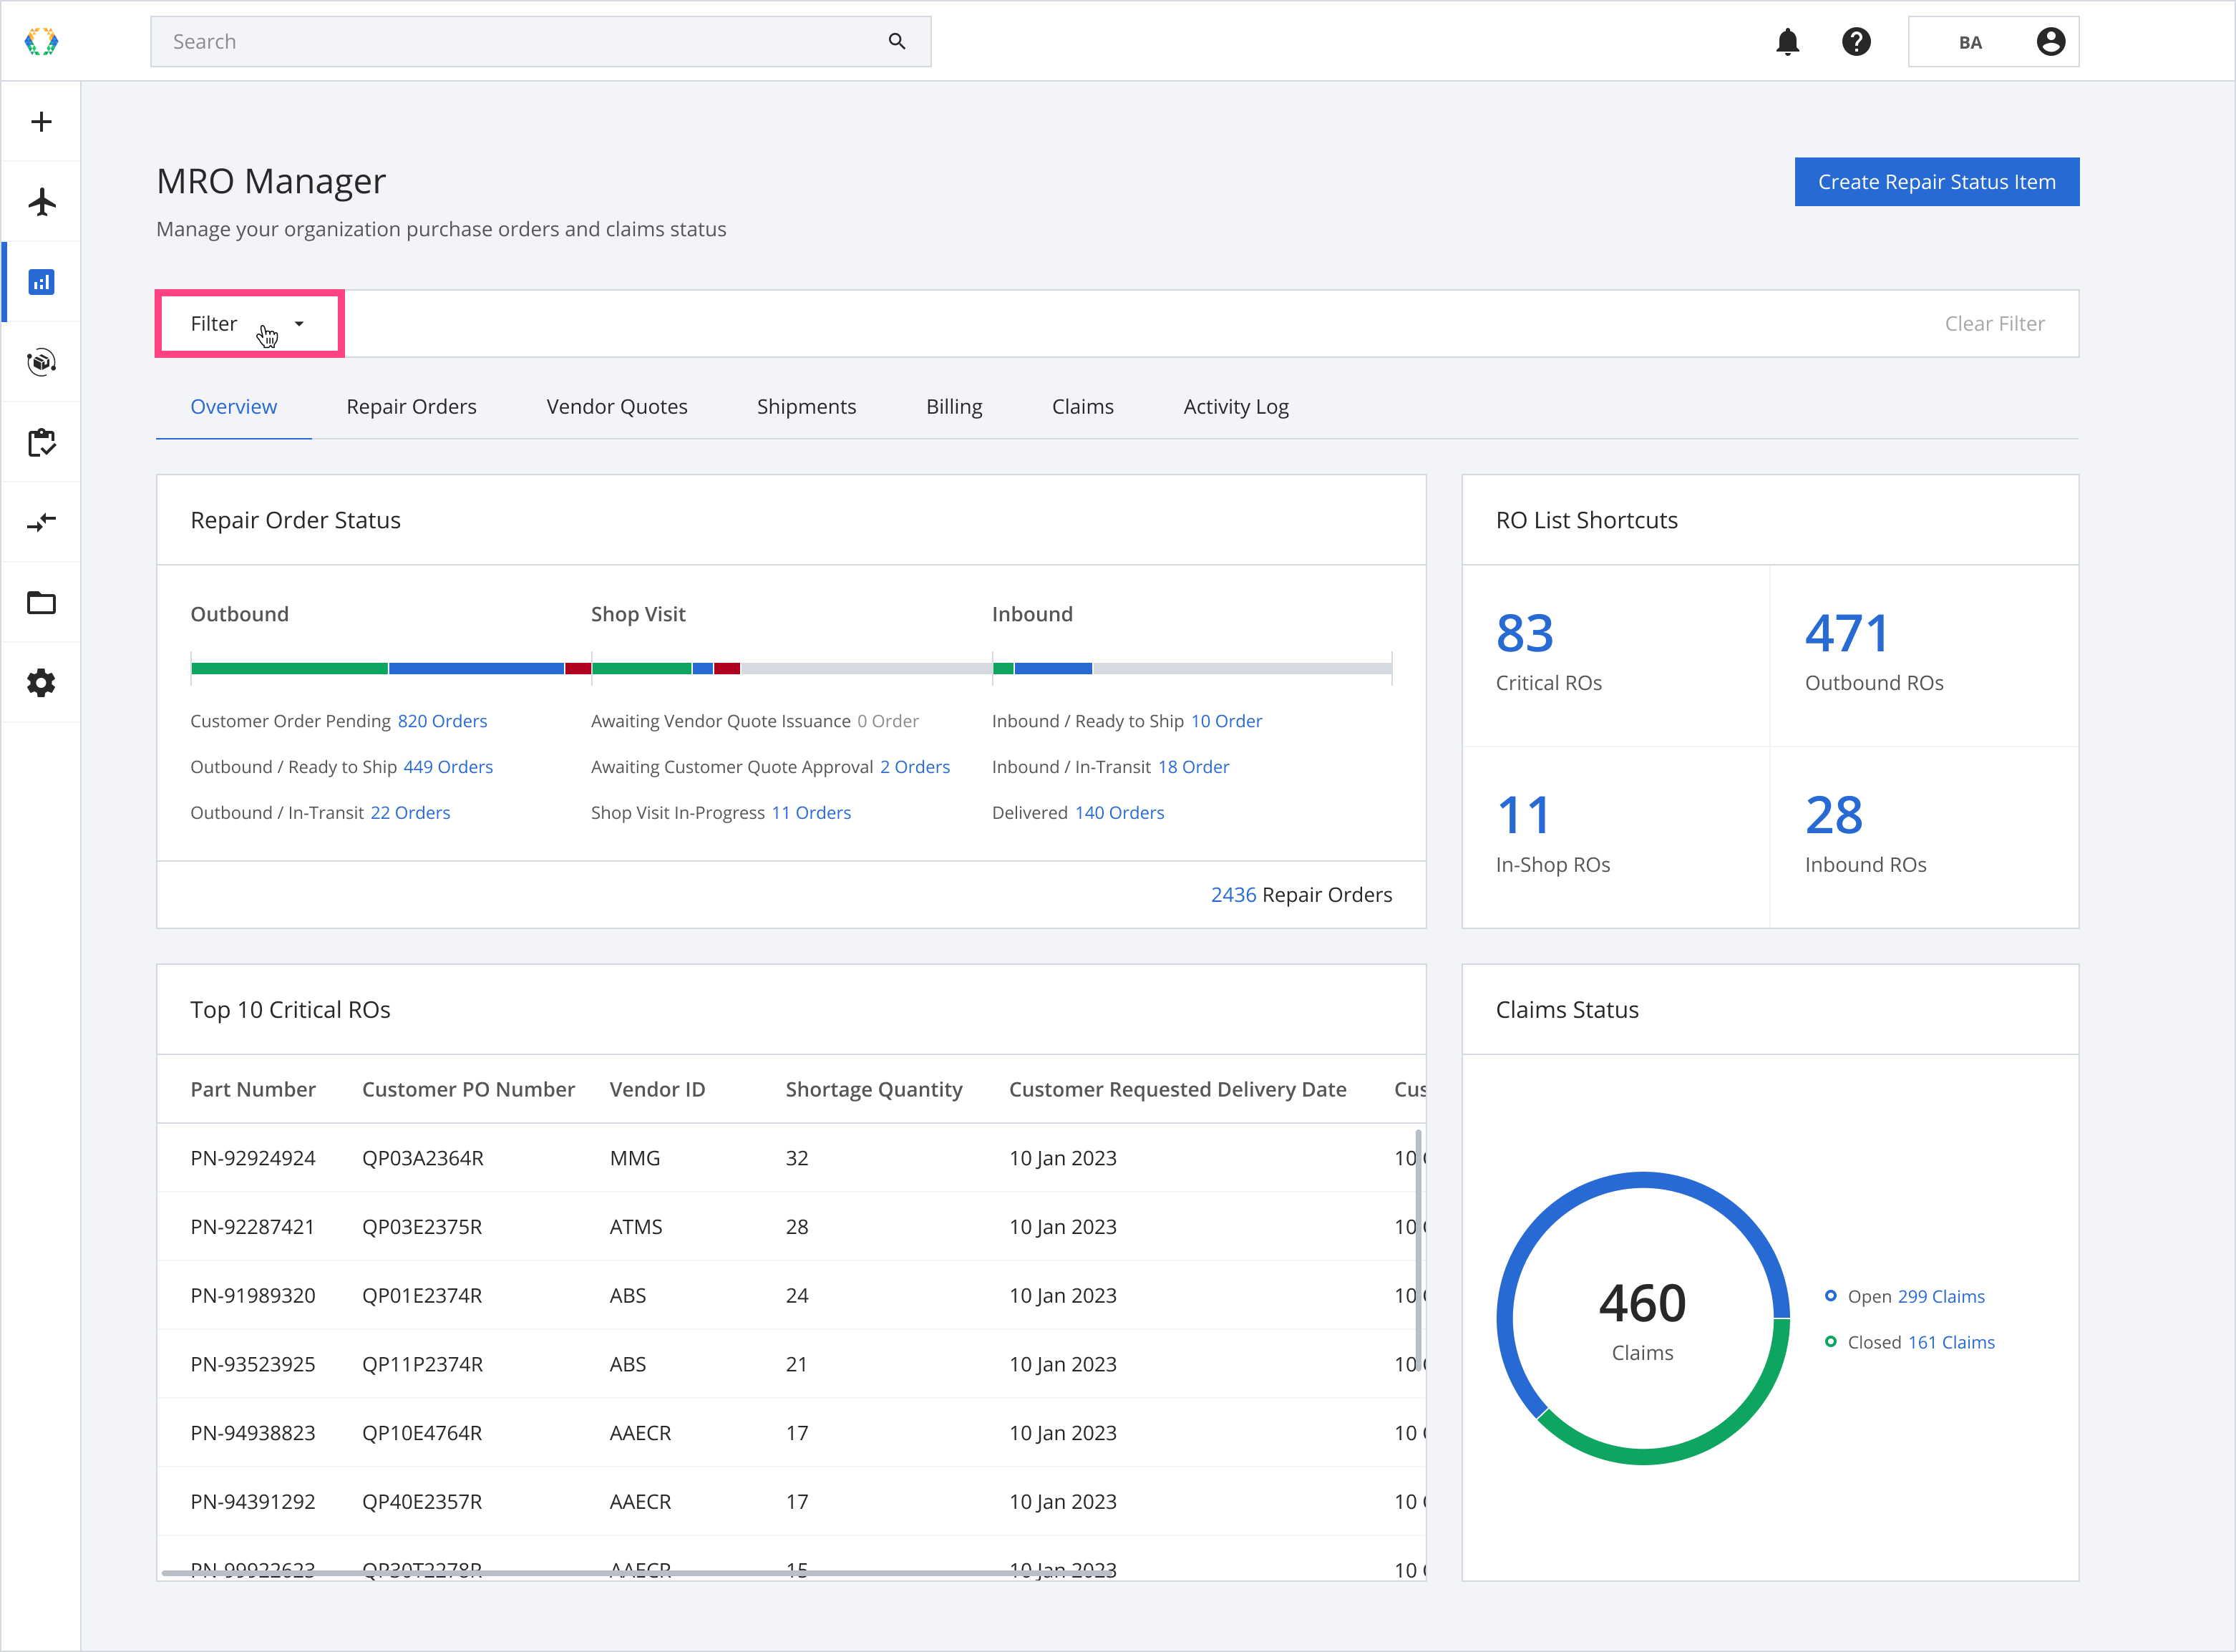
Step 2: Select the filter you want to apply.
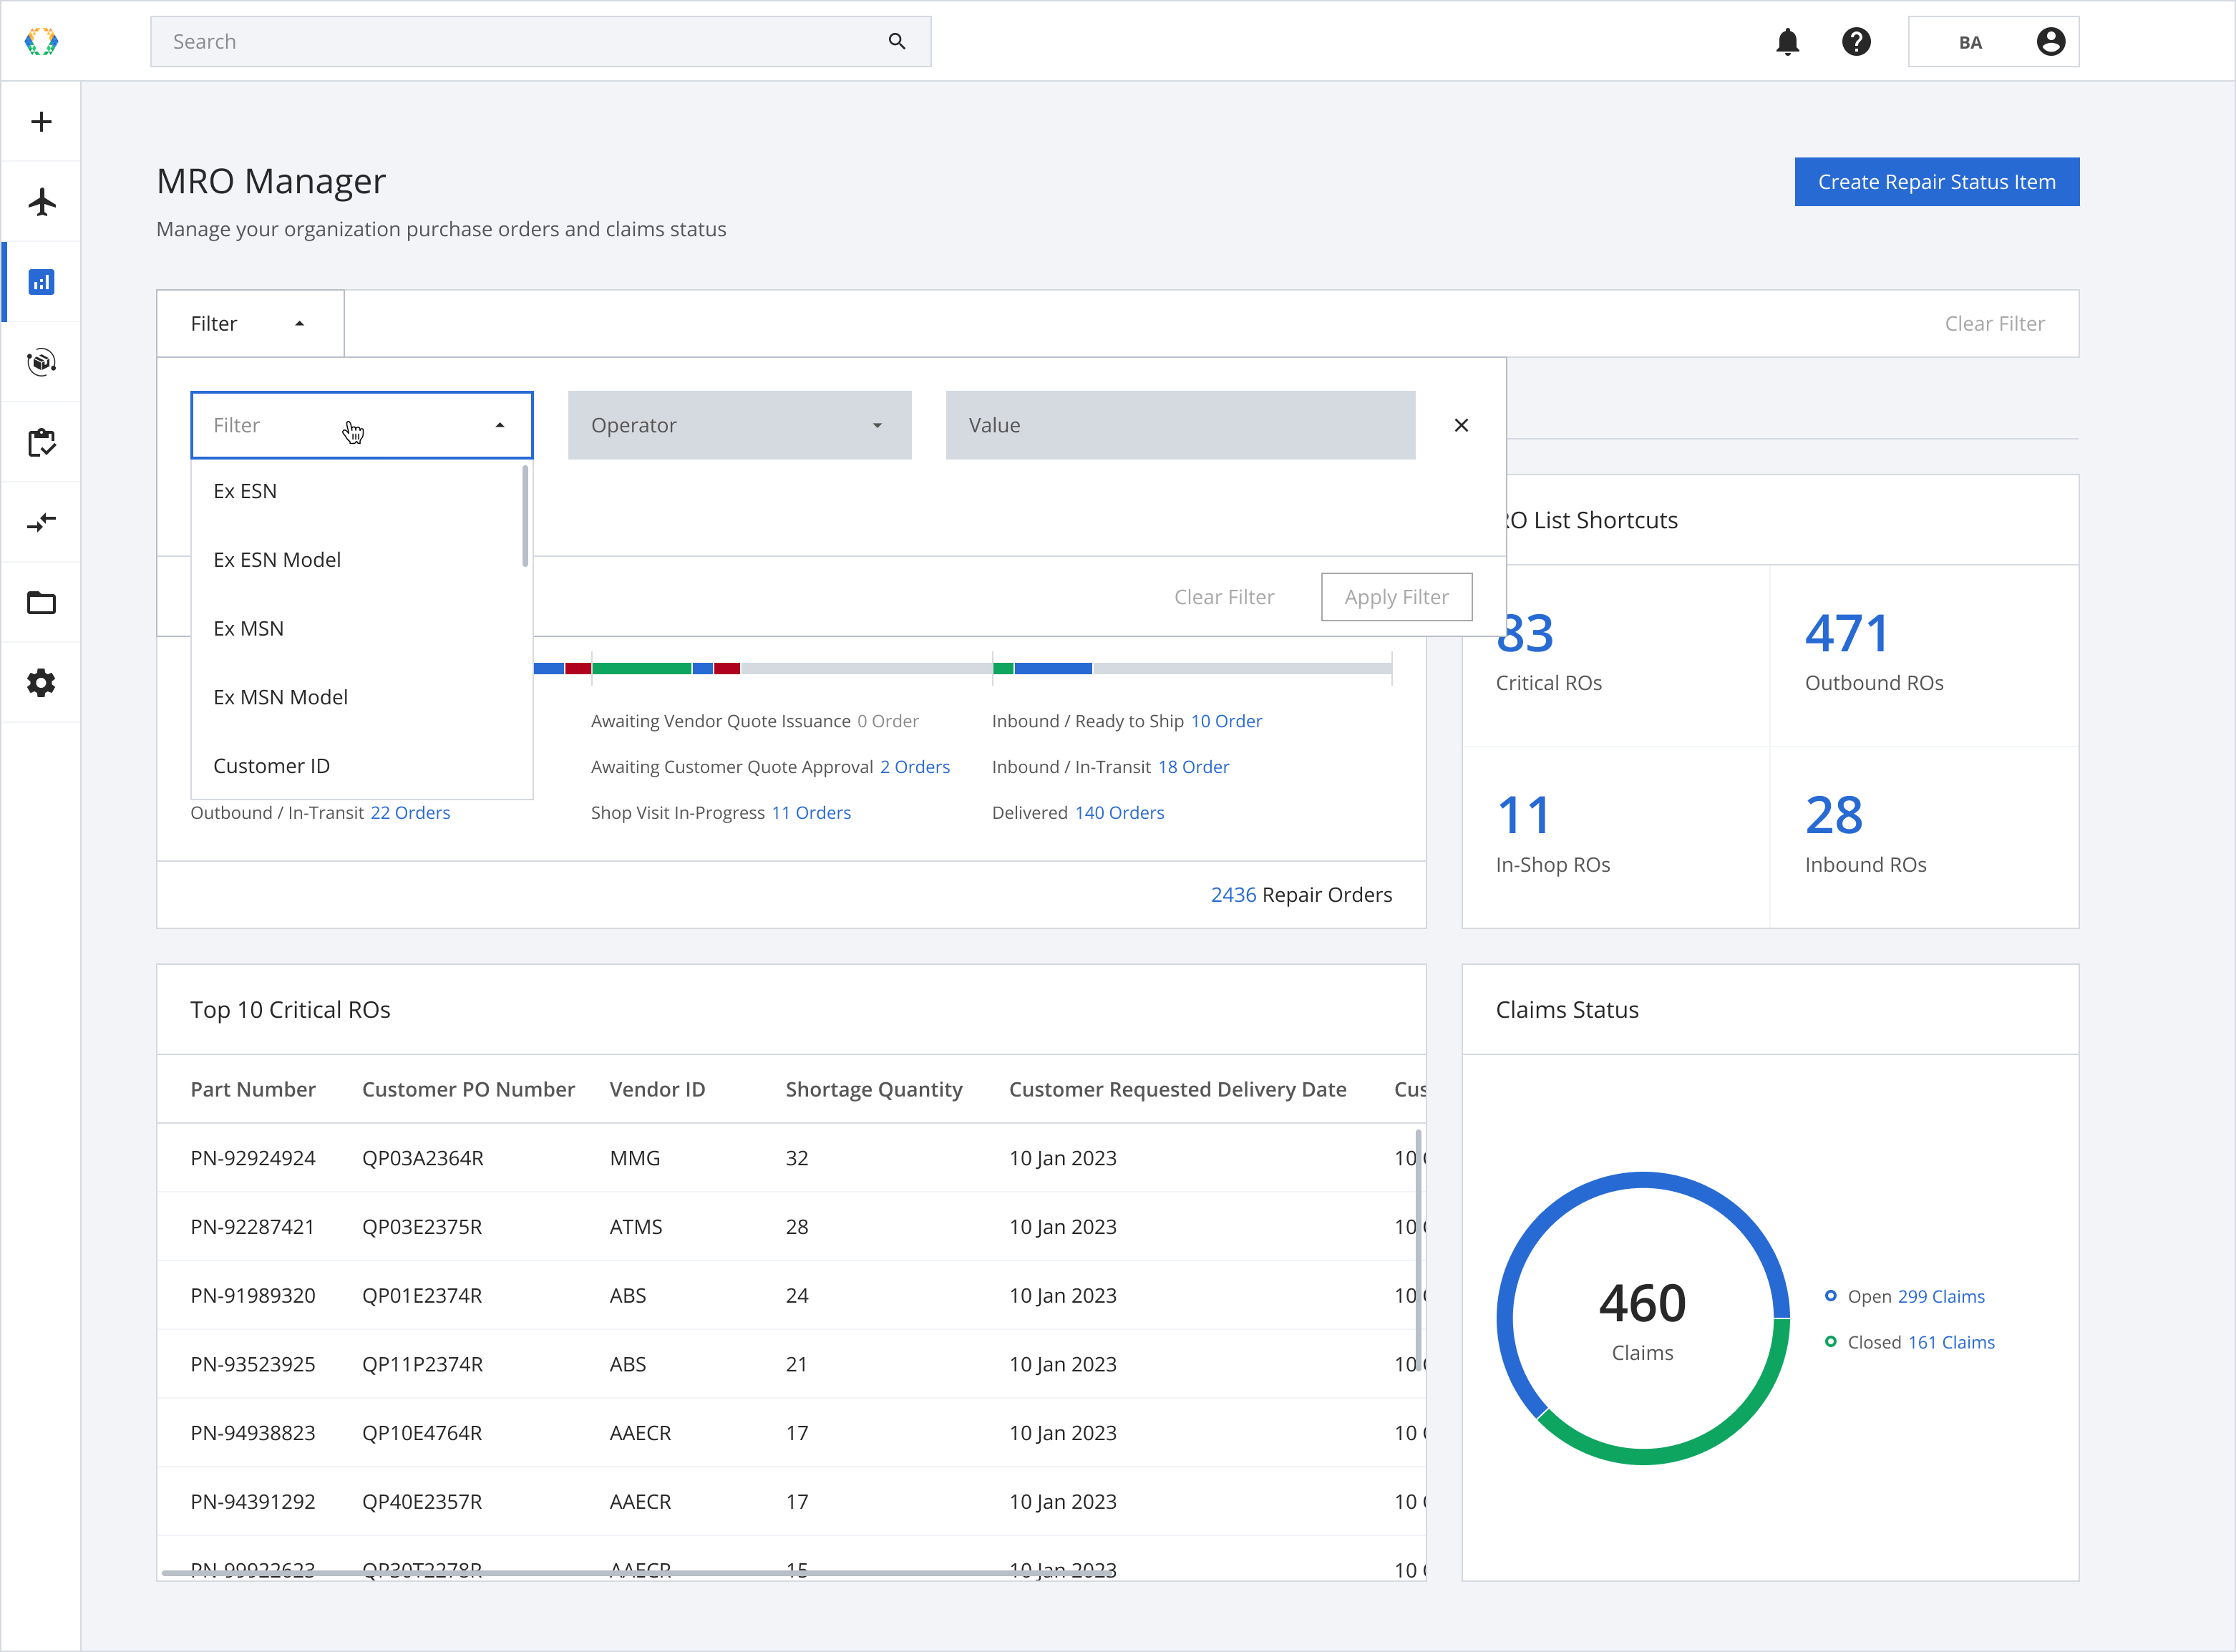
Step 3: Once you have selected the desired filter, you can select the condition in the 'Operator' dropdown menu. The 'Contains' operator is set by default.
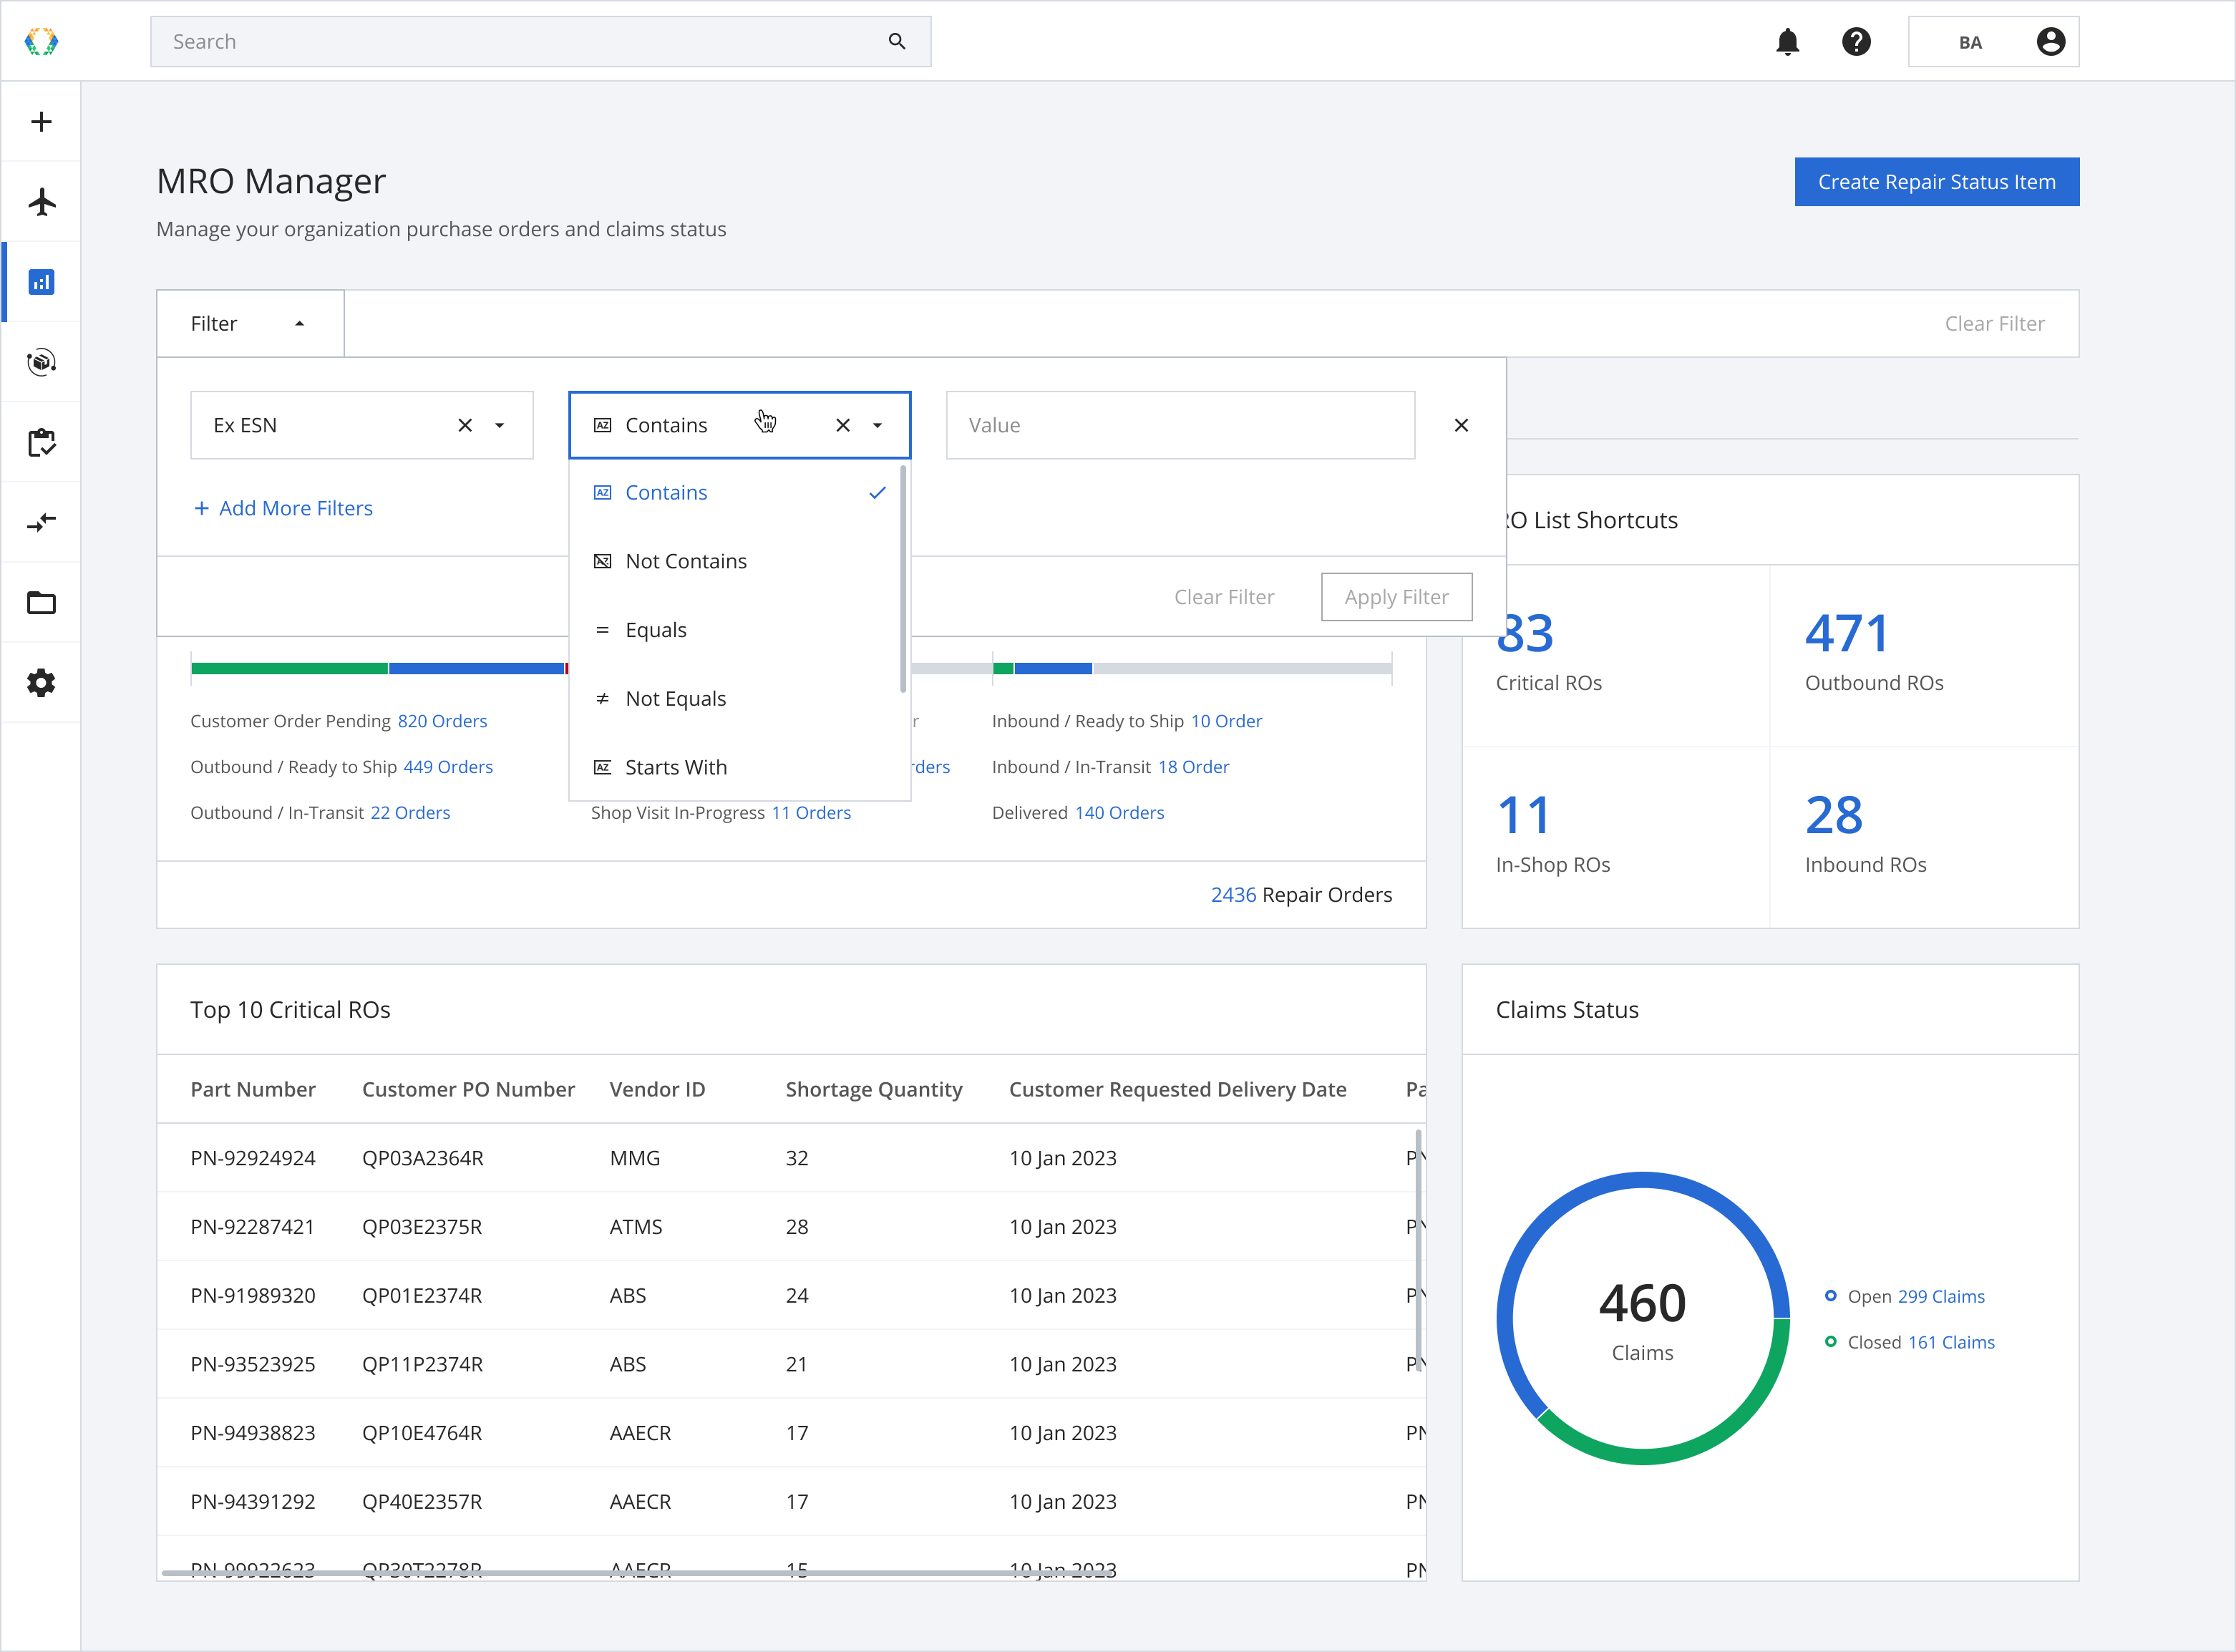
Step 4: You can then select 'Value' in the dropdown menu. The results are shown based on existing repair orders data.
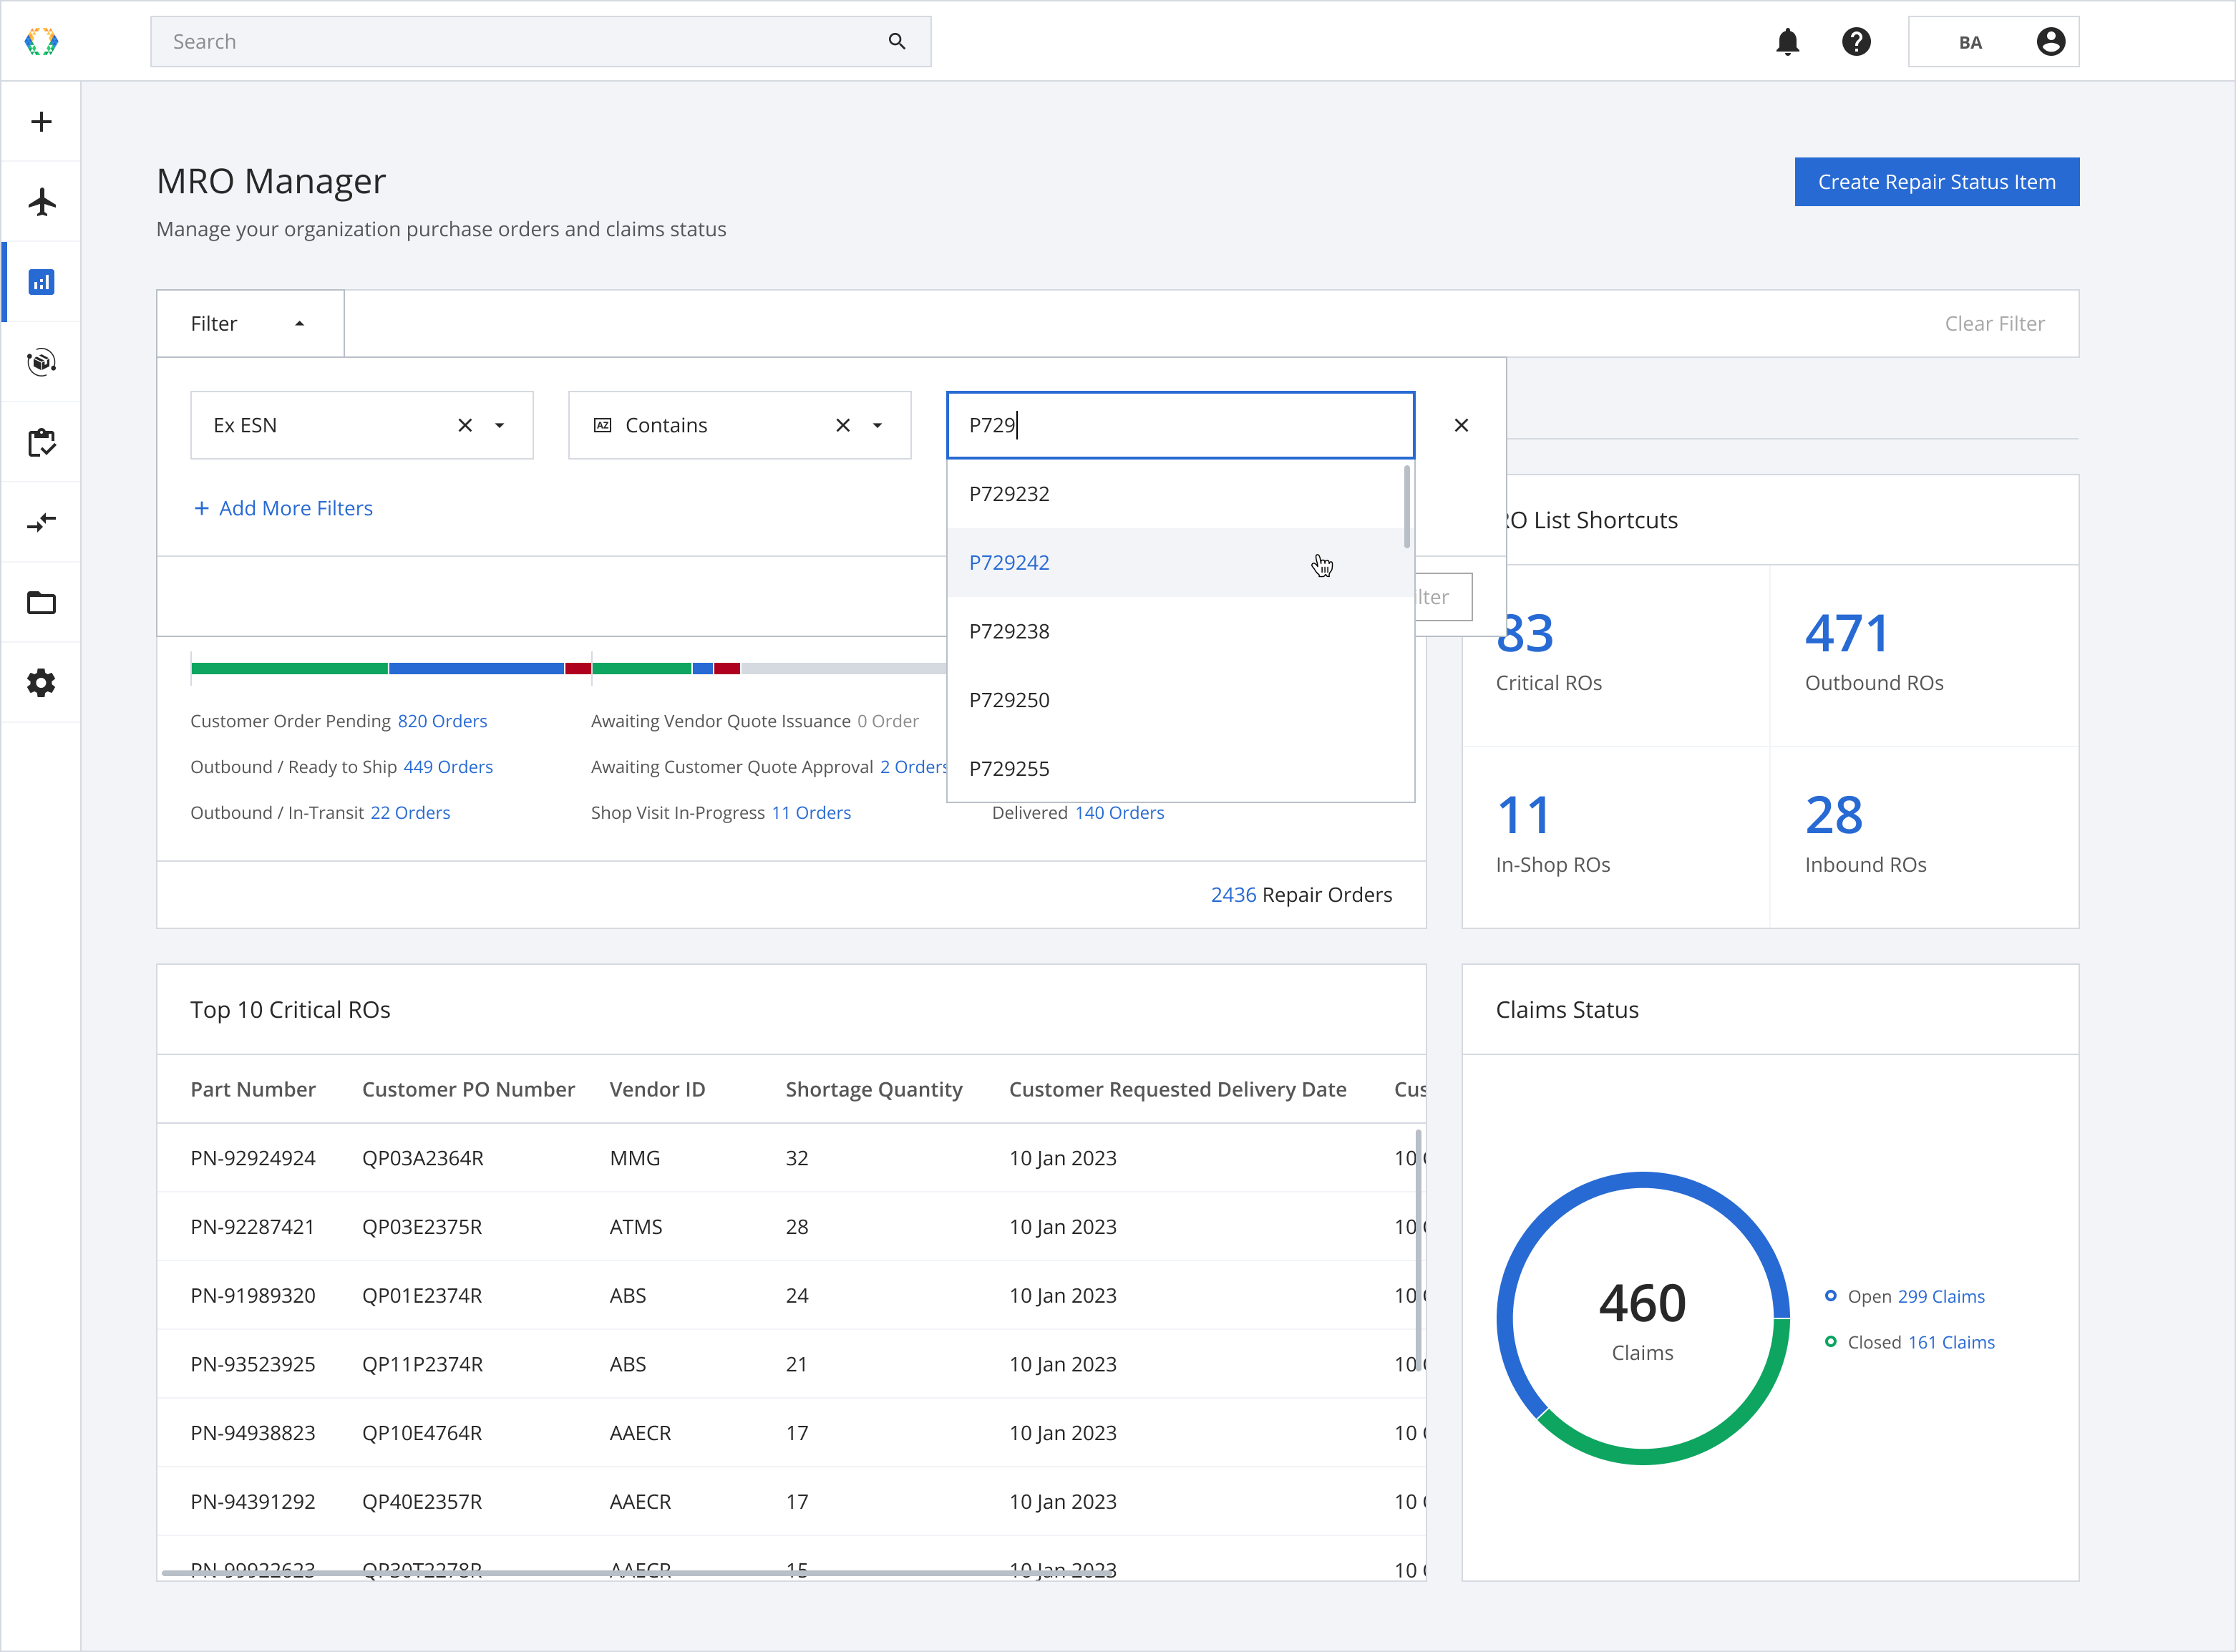
Step 5: Click 'Apply Filter'.
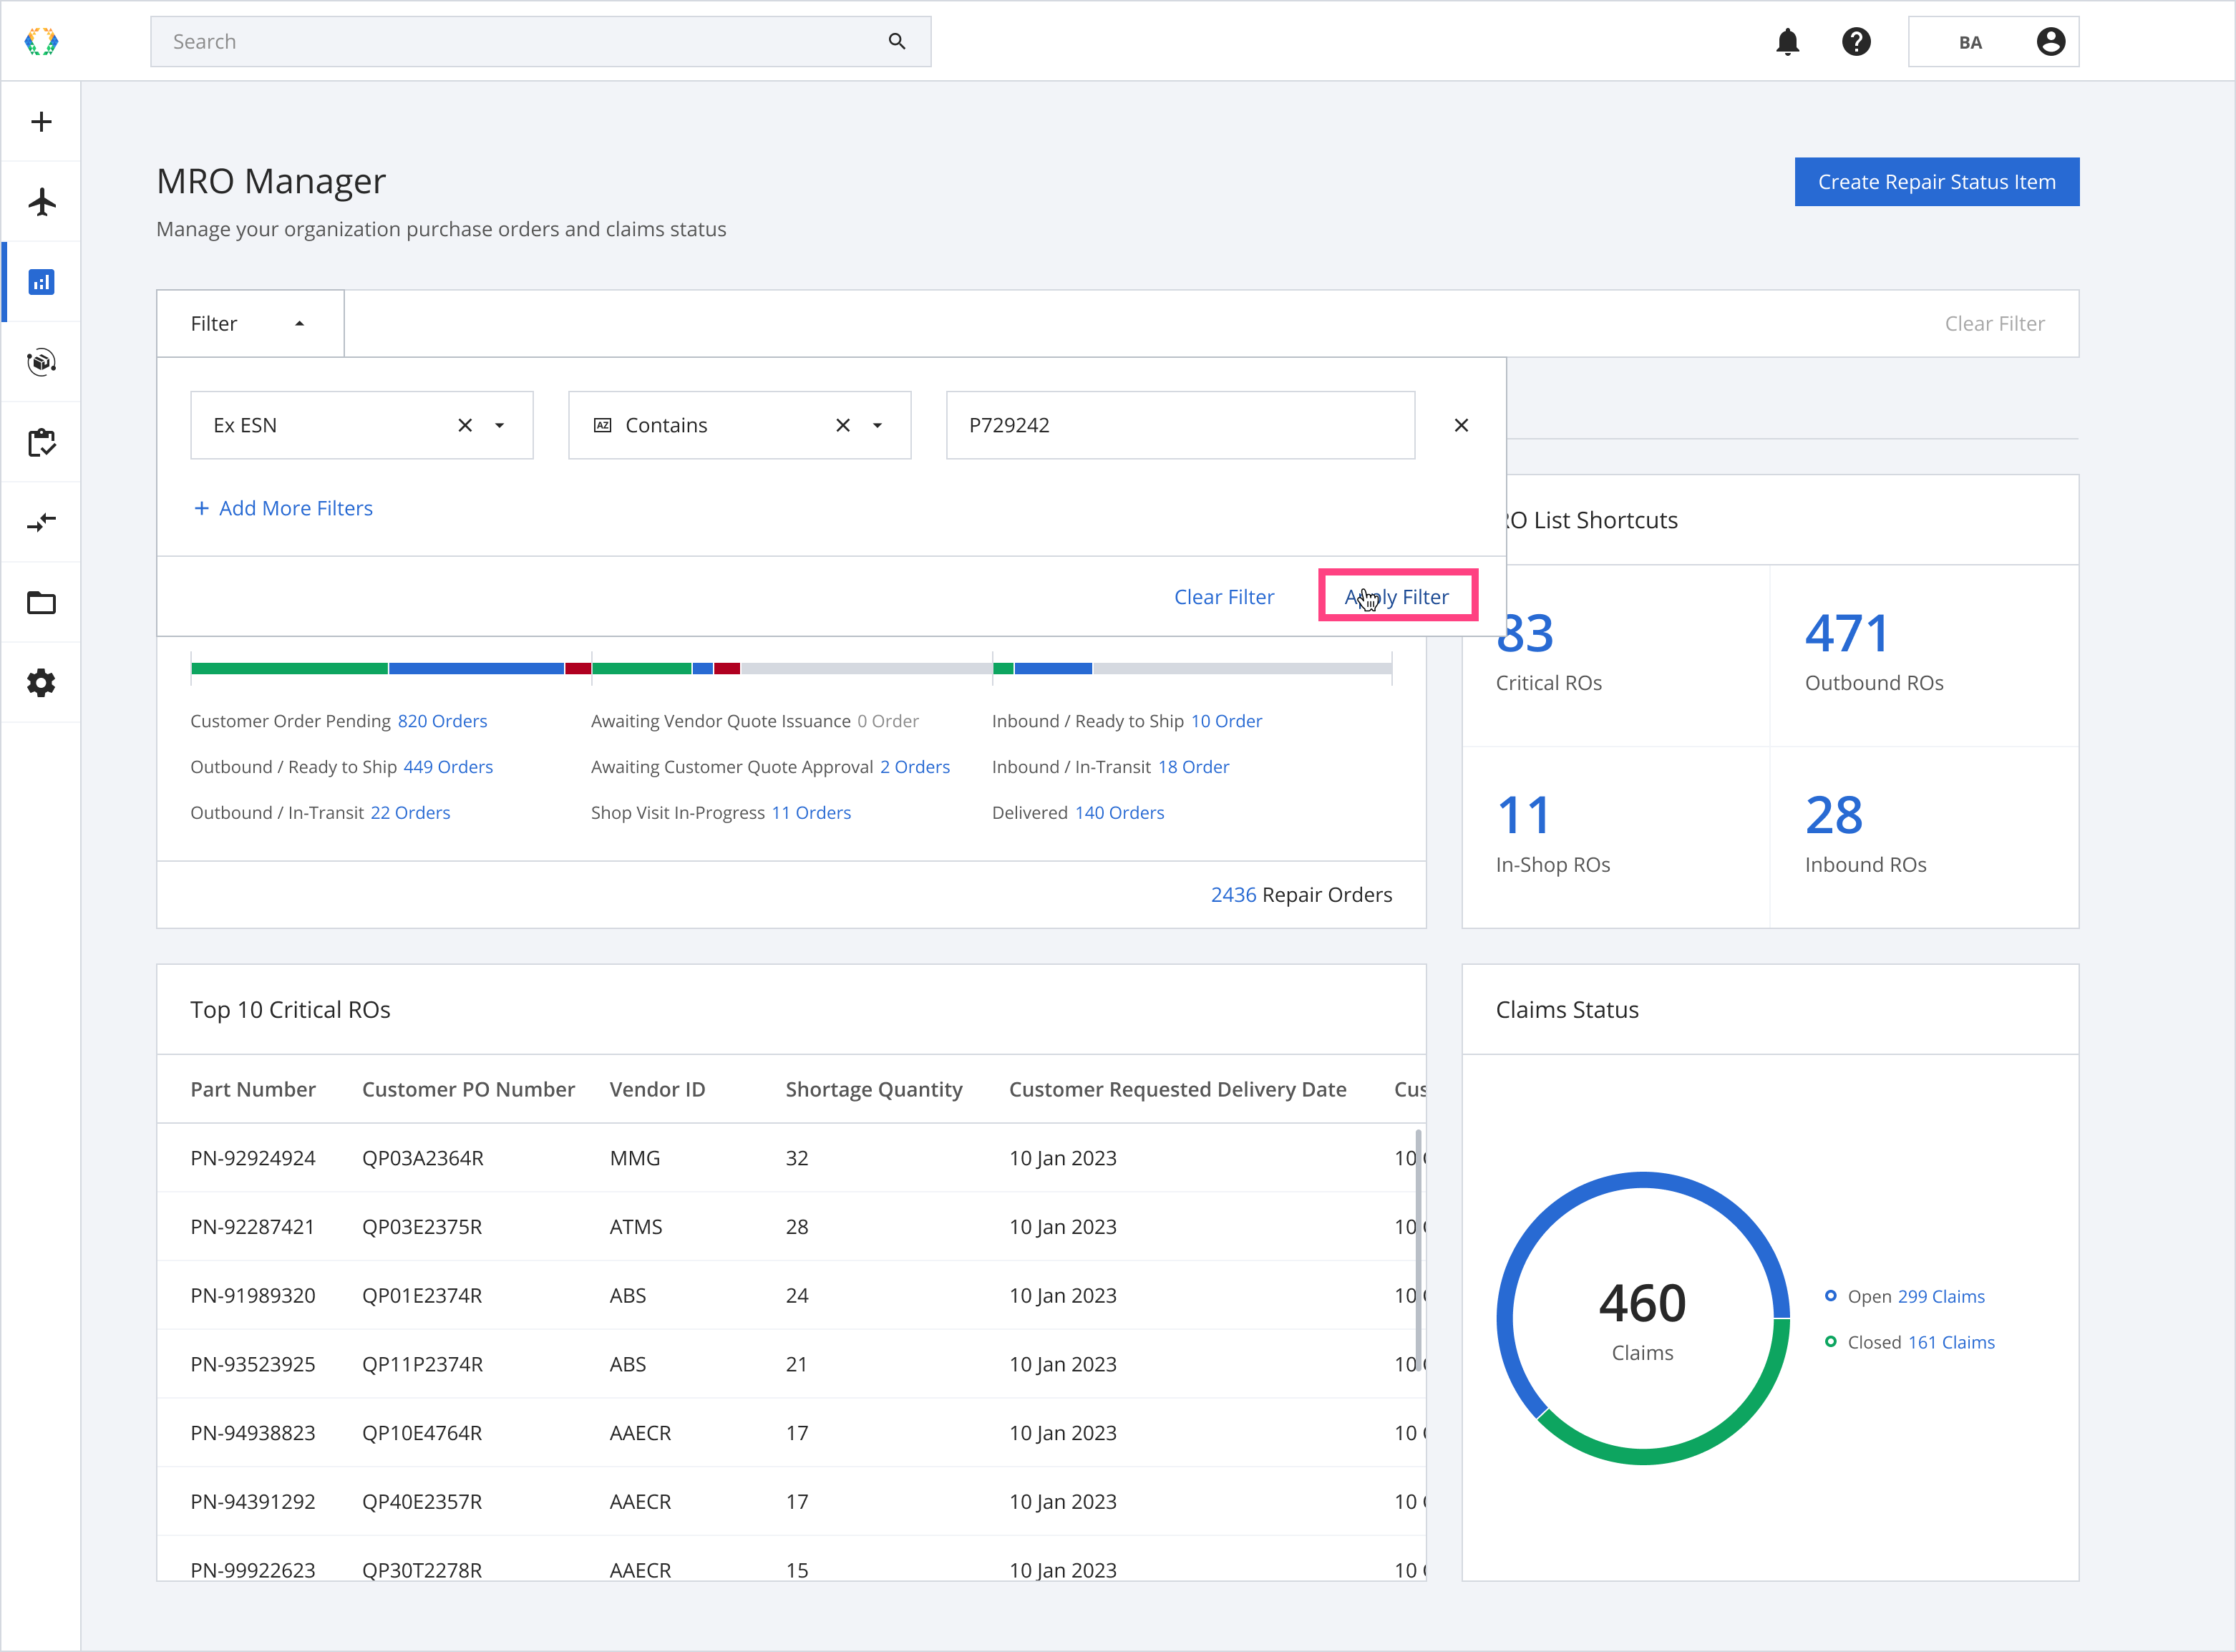
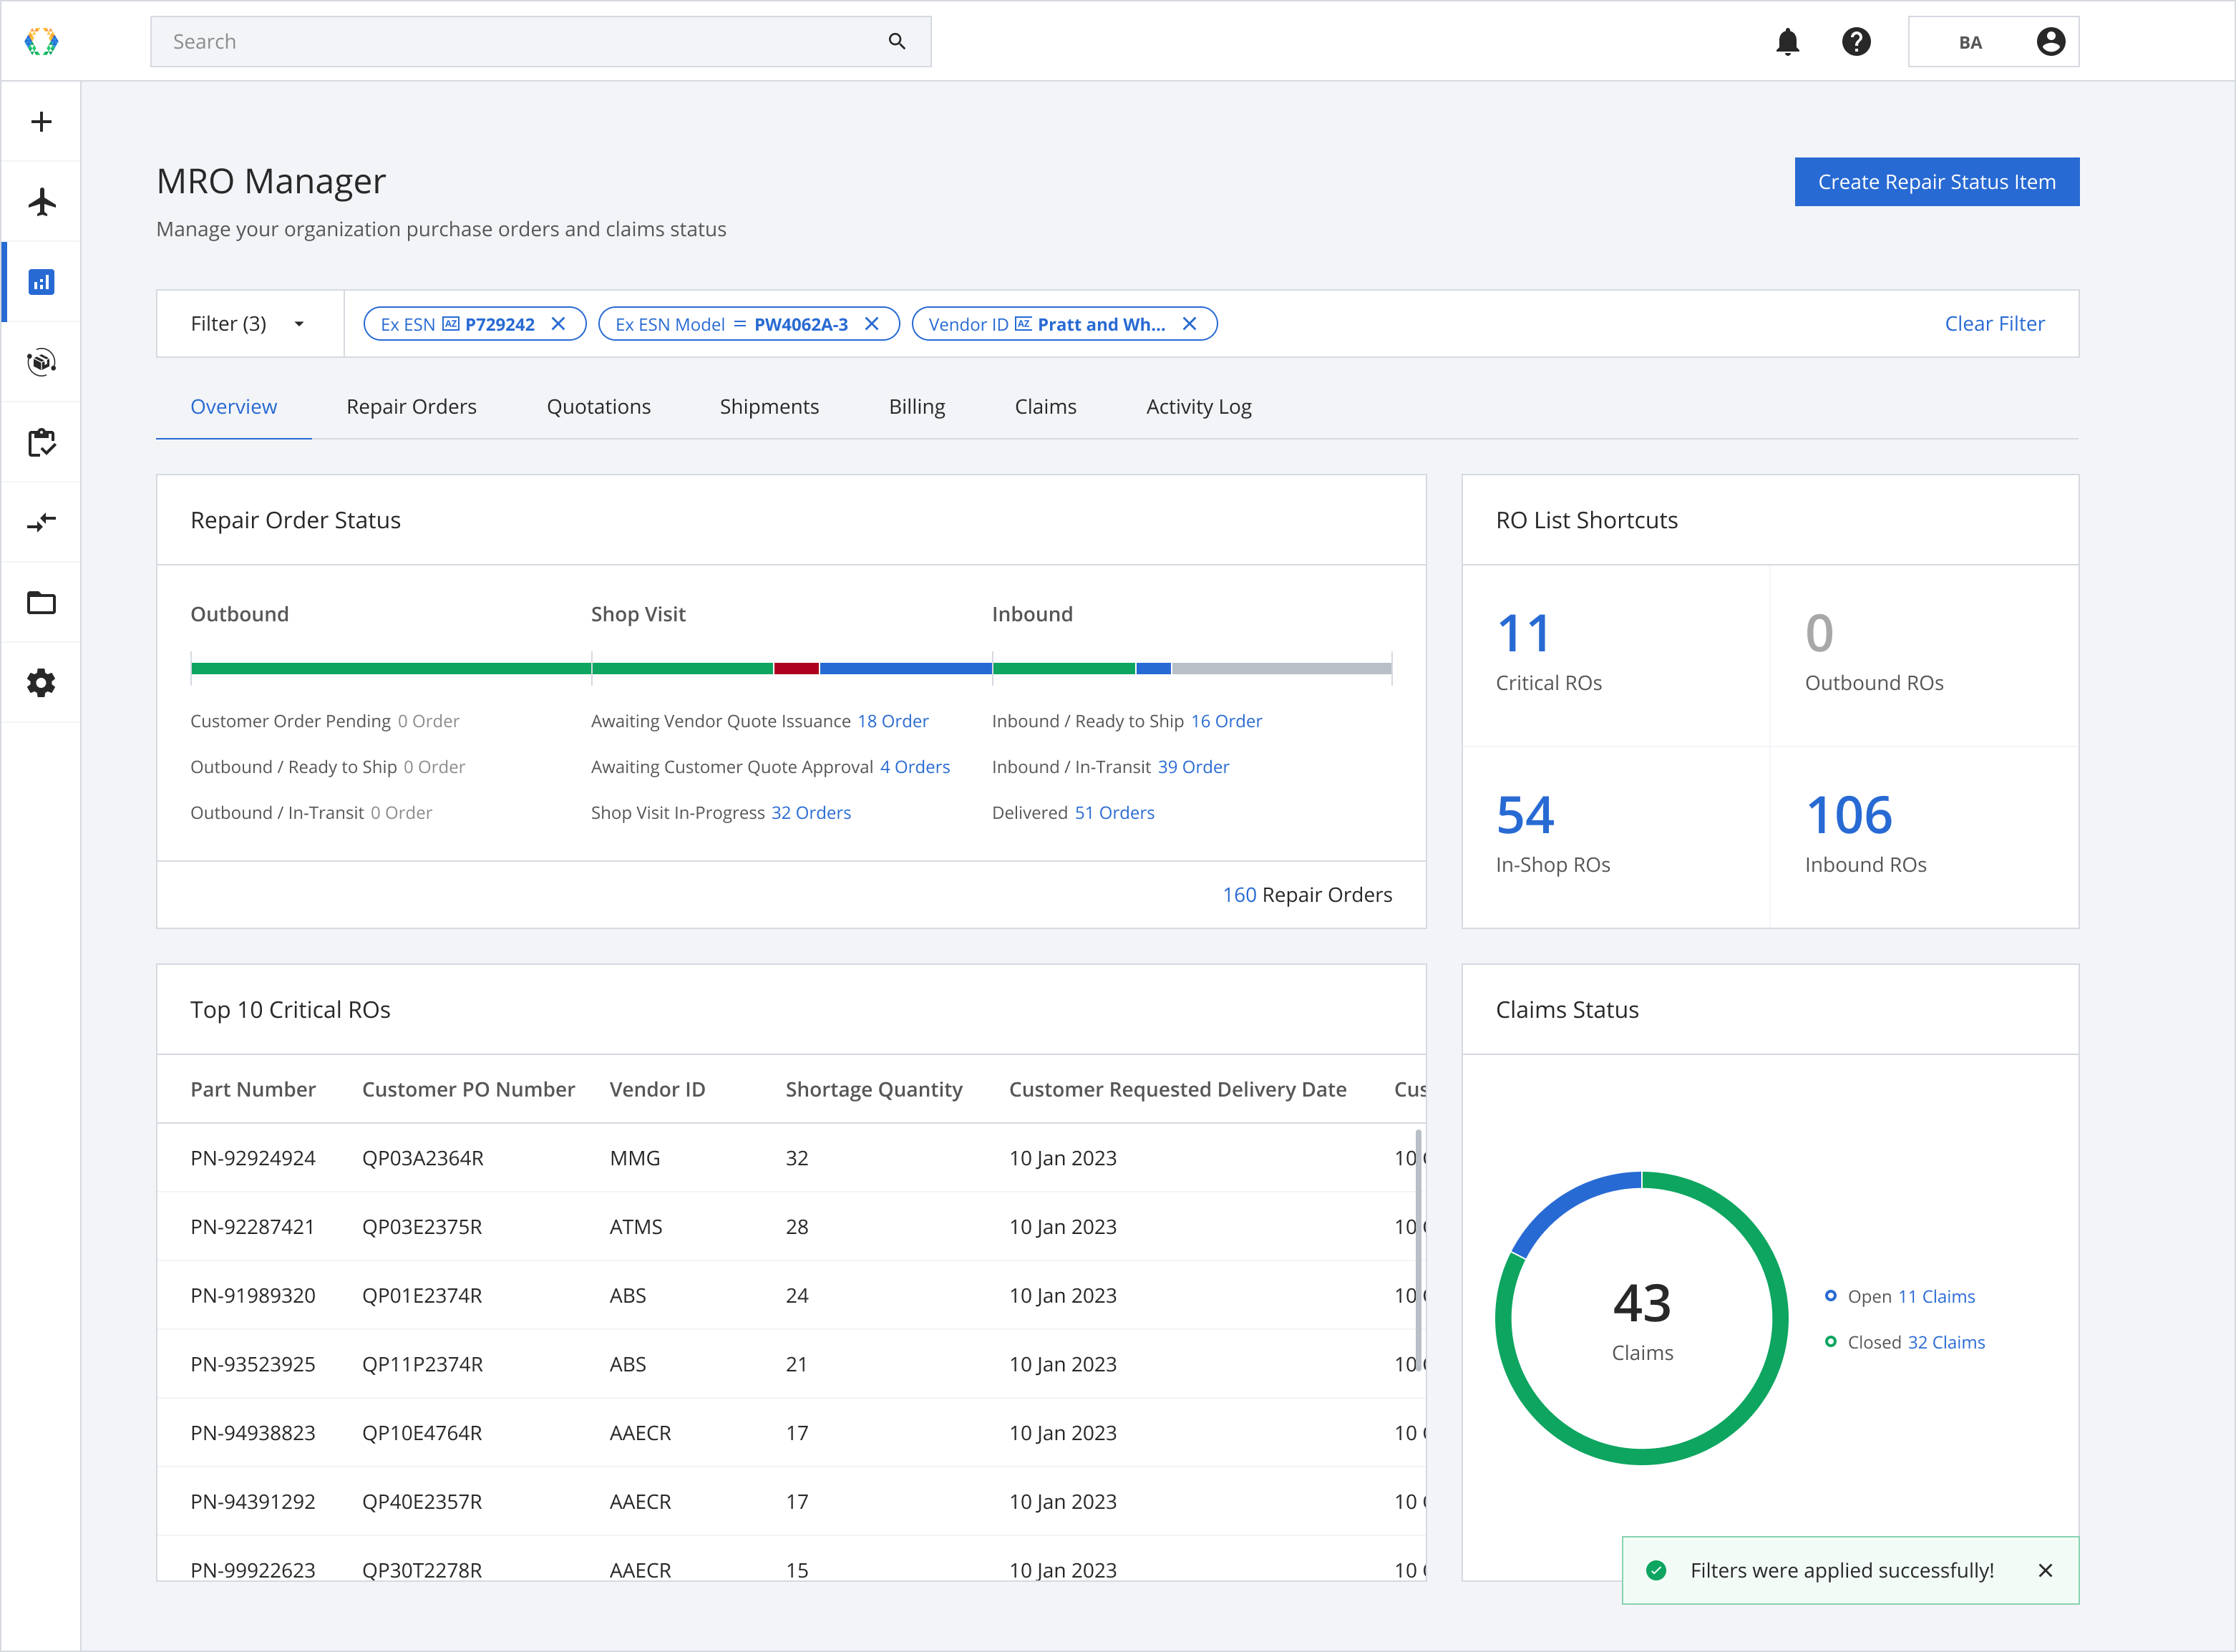
Step 6: Your applied filters will change the results shown across the entire MRO Manager module, and the applied filters will be shown on the Global Filter Bar in a 'pill' shape.
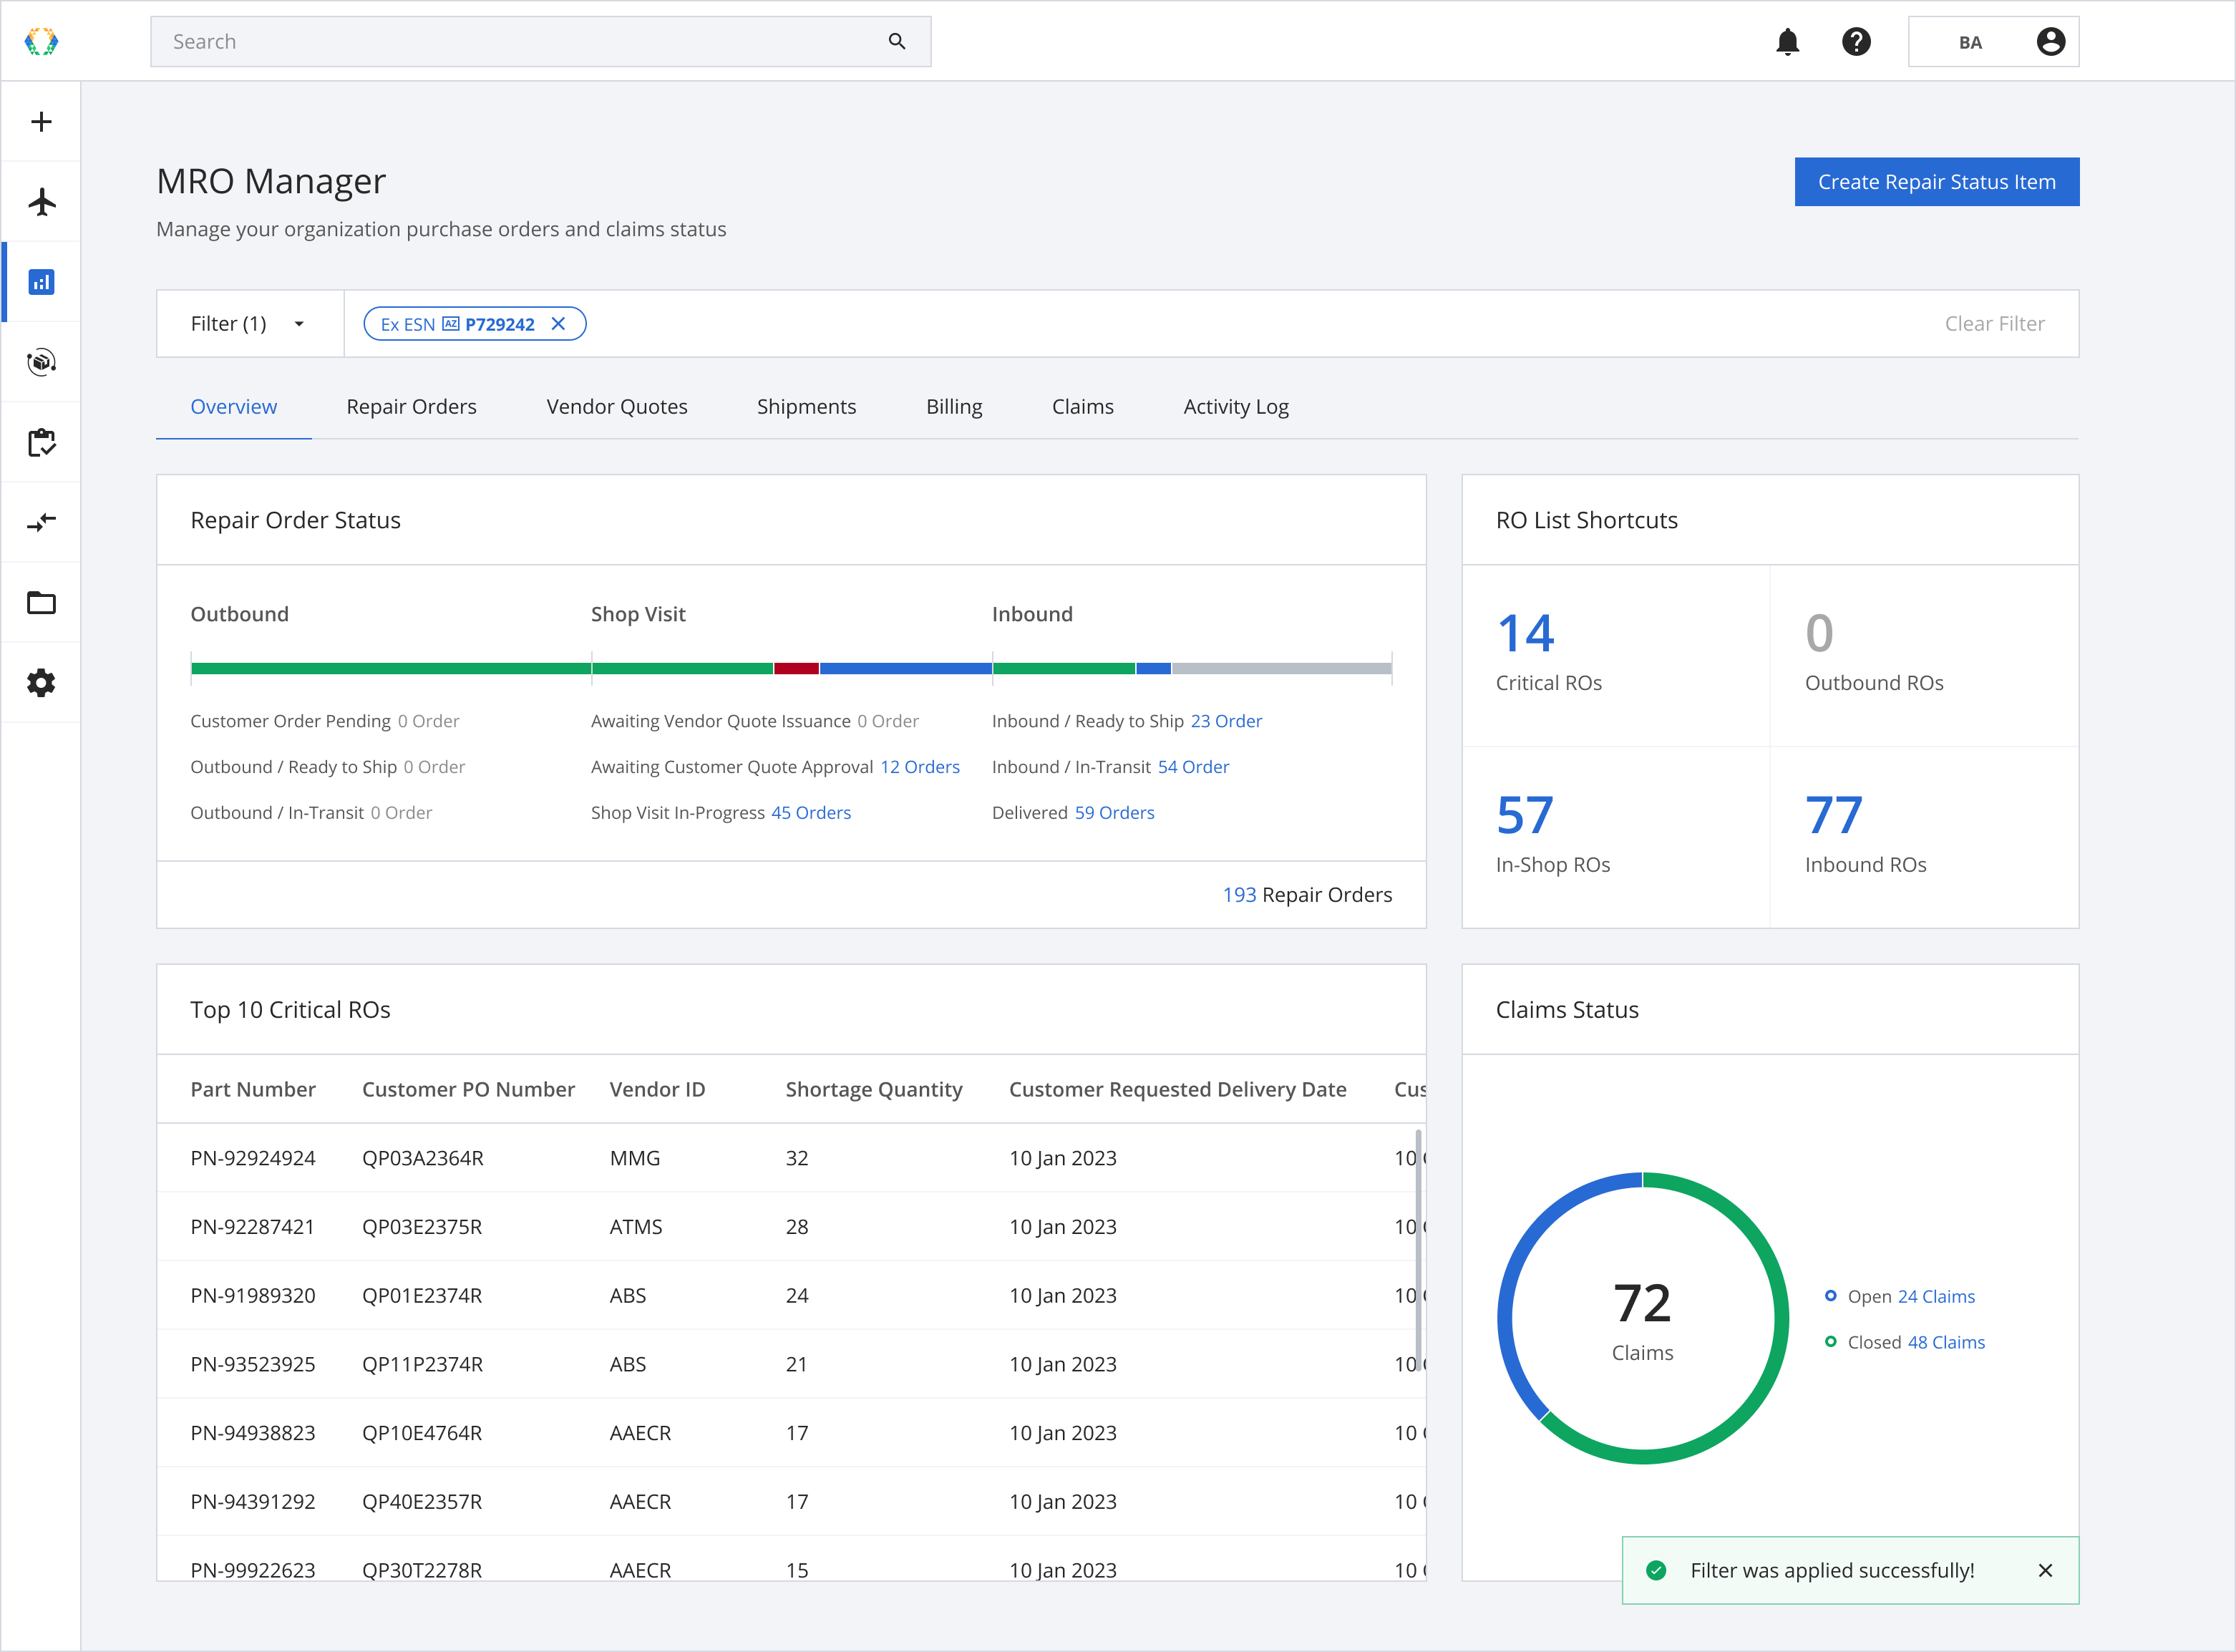
The Global Filter Bar works across all the tabs in the MRO ManagerOnce the filter is applied, all tabs in MRO Manager will show results found based on the filtered Repair Orders conditions.
Additional Features
Adding multiple filters
You can add multiple filters on the Global Filter Bar to narrow your results displayed on the MRO Manager Dashboard.
Step 1: Click 'Add More Filters'.
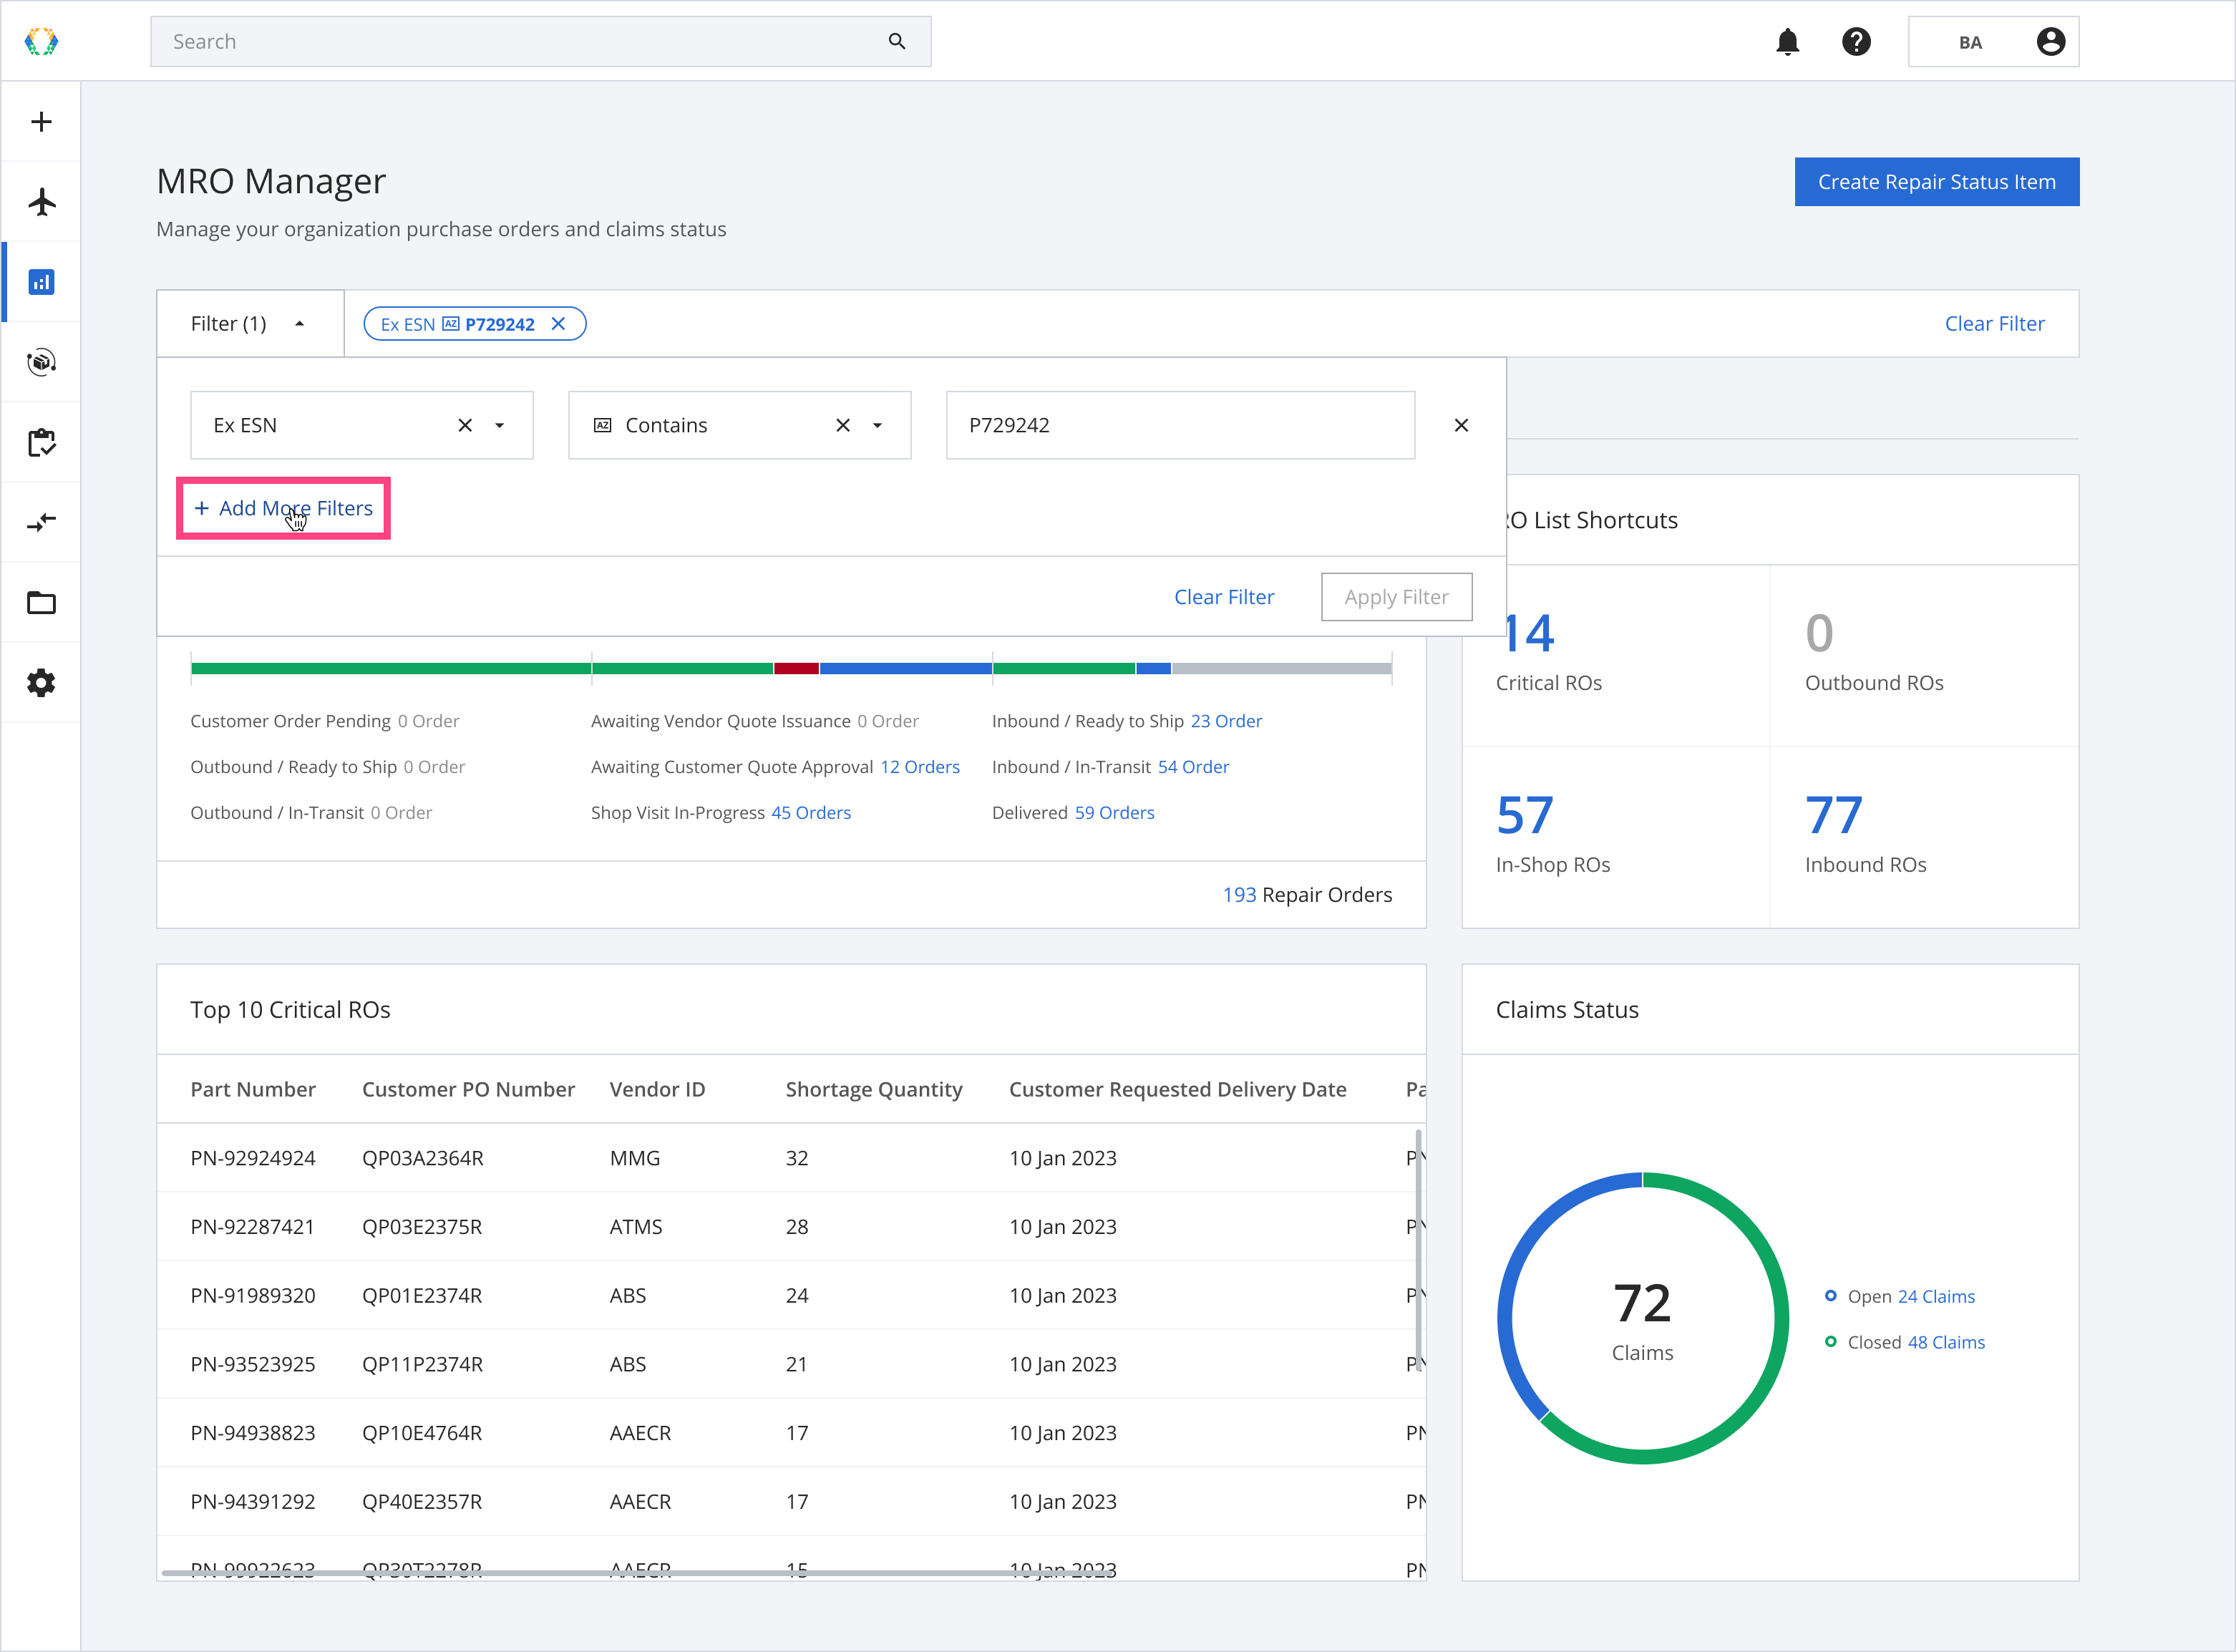
Step 2: Select parameters in the newly added fields and click 'Apply Filter'.
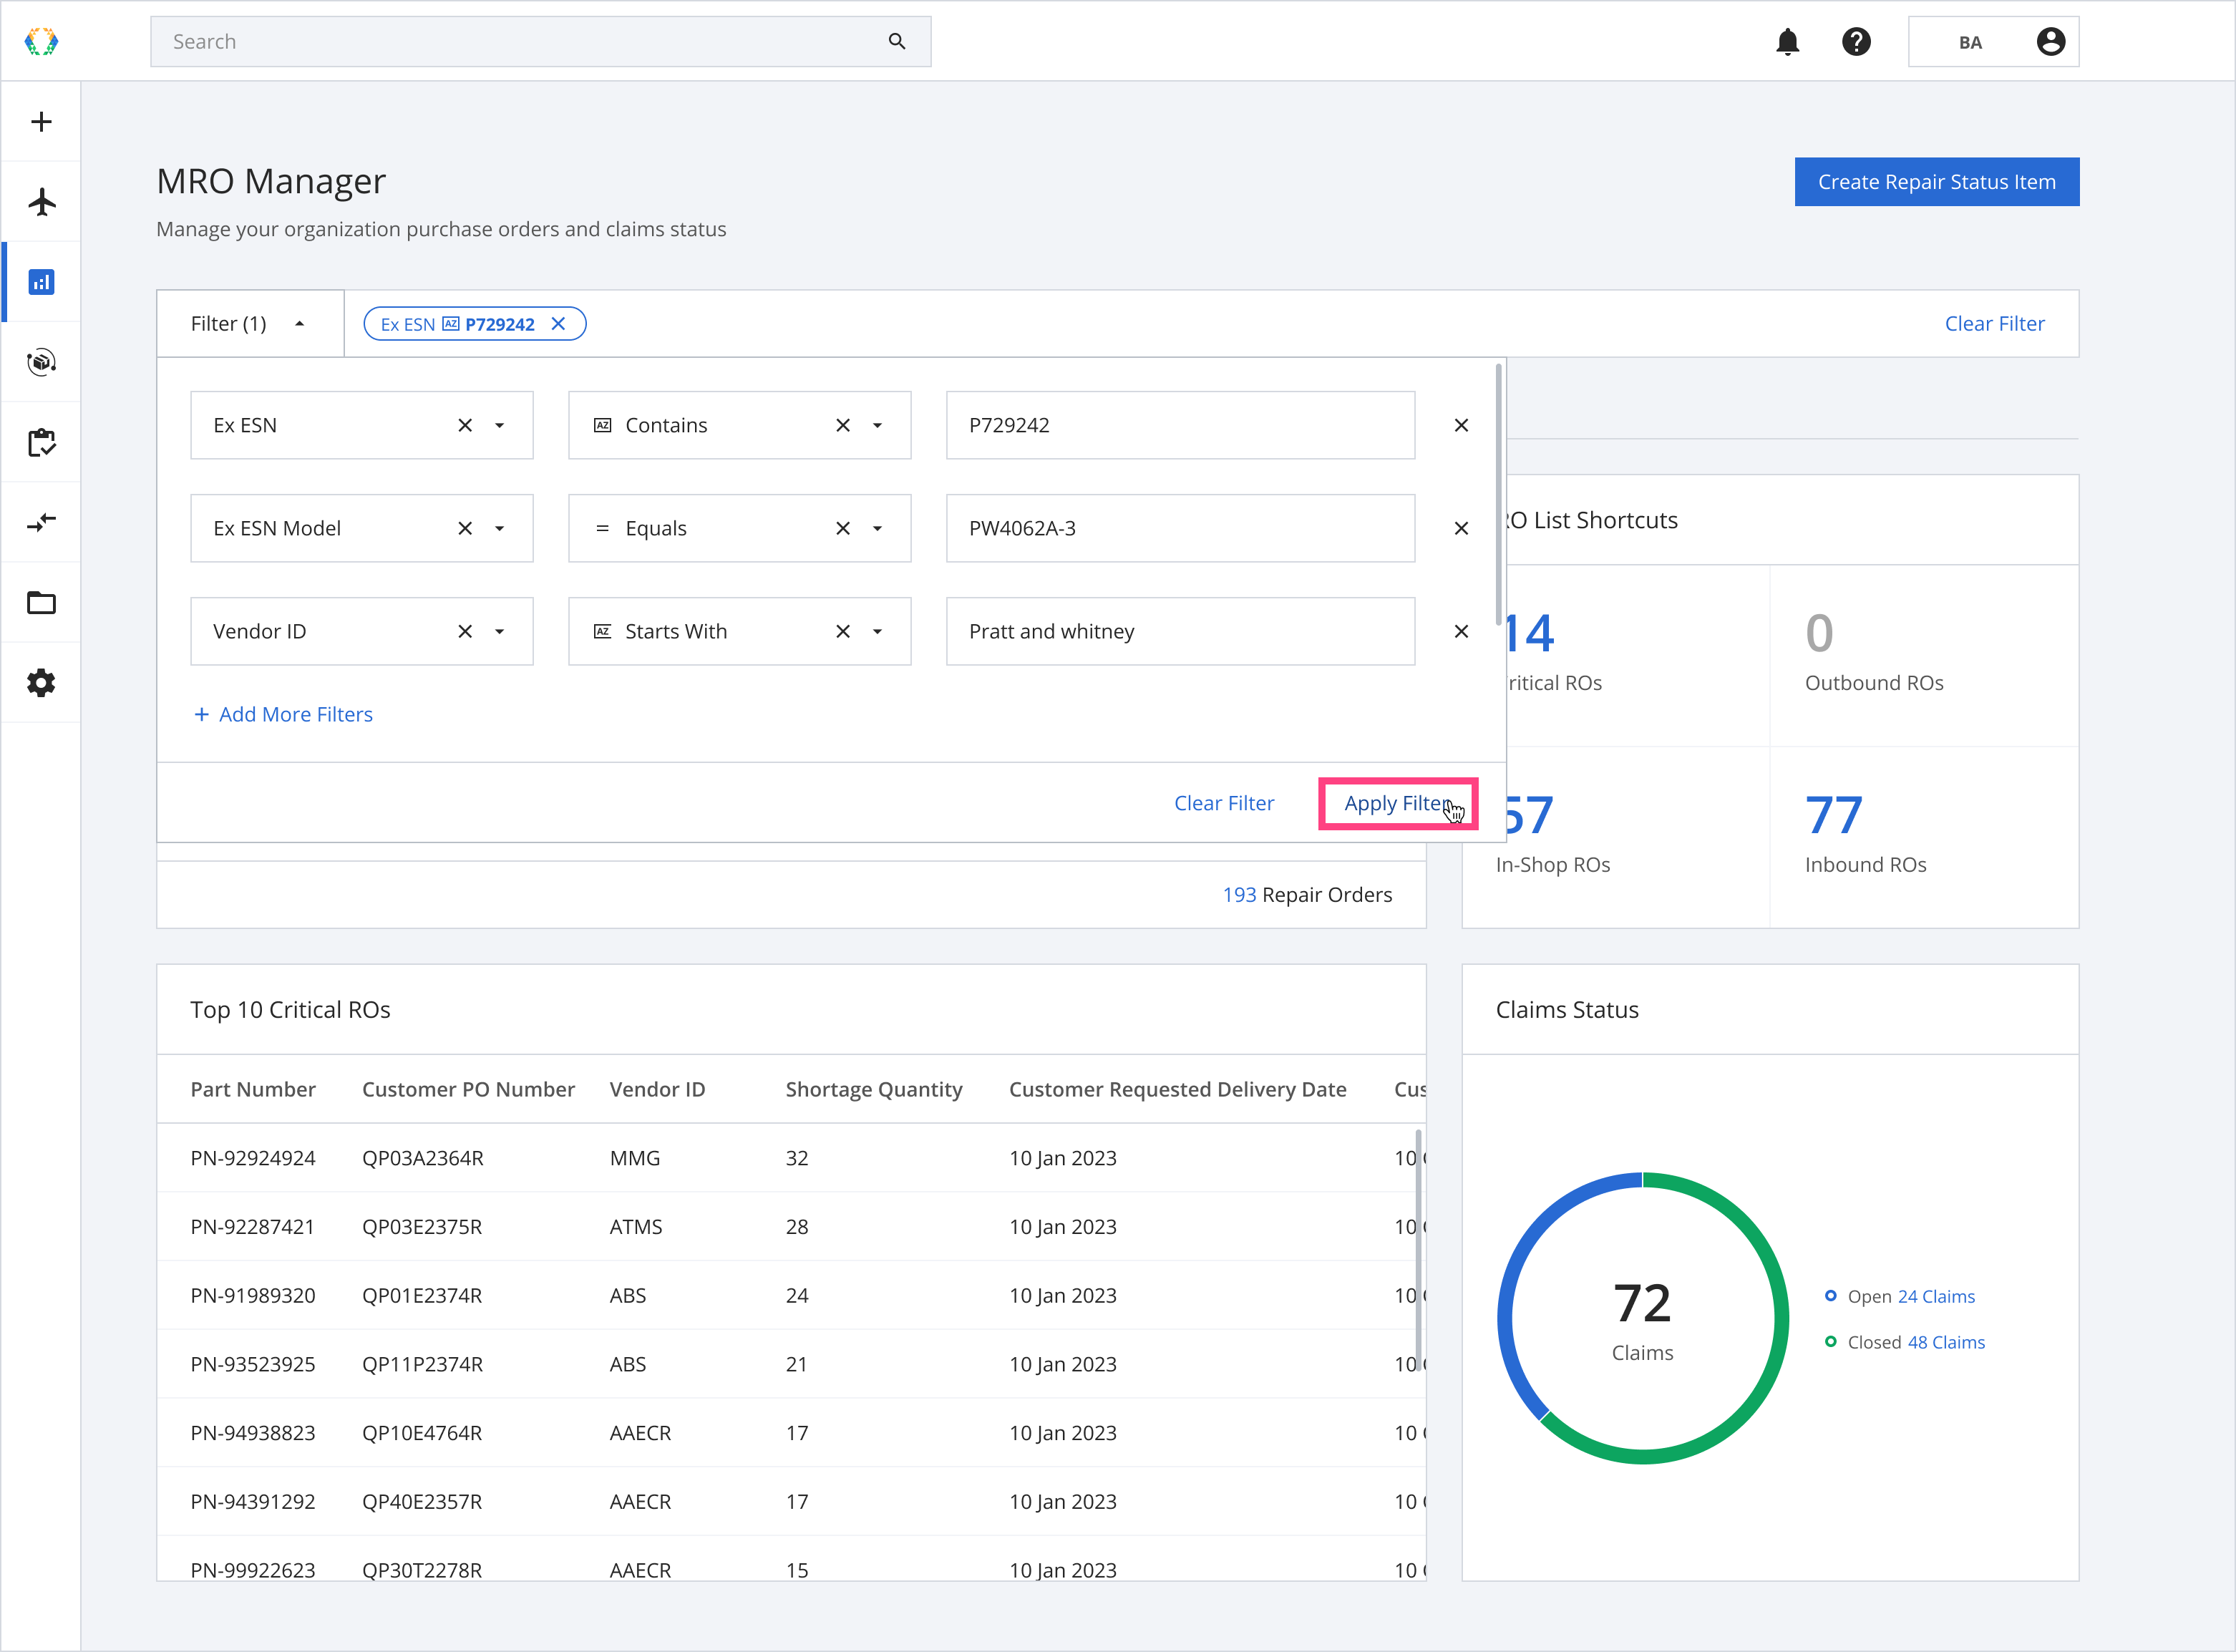
Step 3: Your applied filters will change the results shown across the entire MRO Manager module, and the applied filters will be shown on the Global Filter Bar in a 'pill' shape.
Removing filters
There are 4 ways to remove your filters.
Option 1: Remove Filter in Filter Window
Option 2: Remove a Filter (Pill)
Option 3: Clear All Filters in the Filter Window
Option 4: Clear All Filters in the Filter Bar
Option 1: Remove Filter in filter options
Step 1: Click 'Filter' to expand the filters menu.
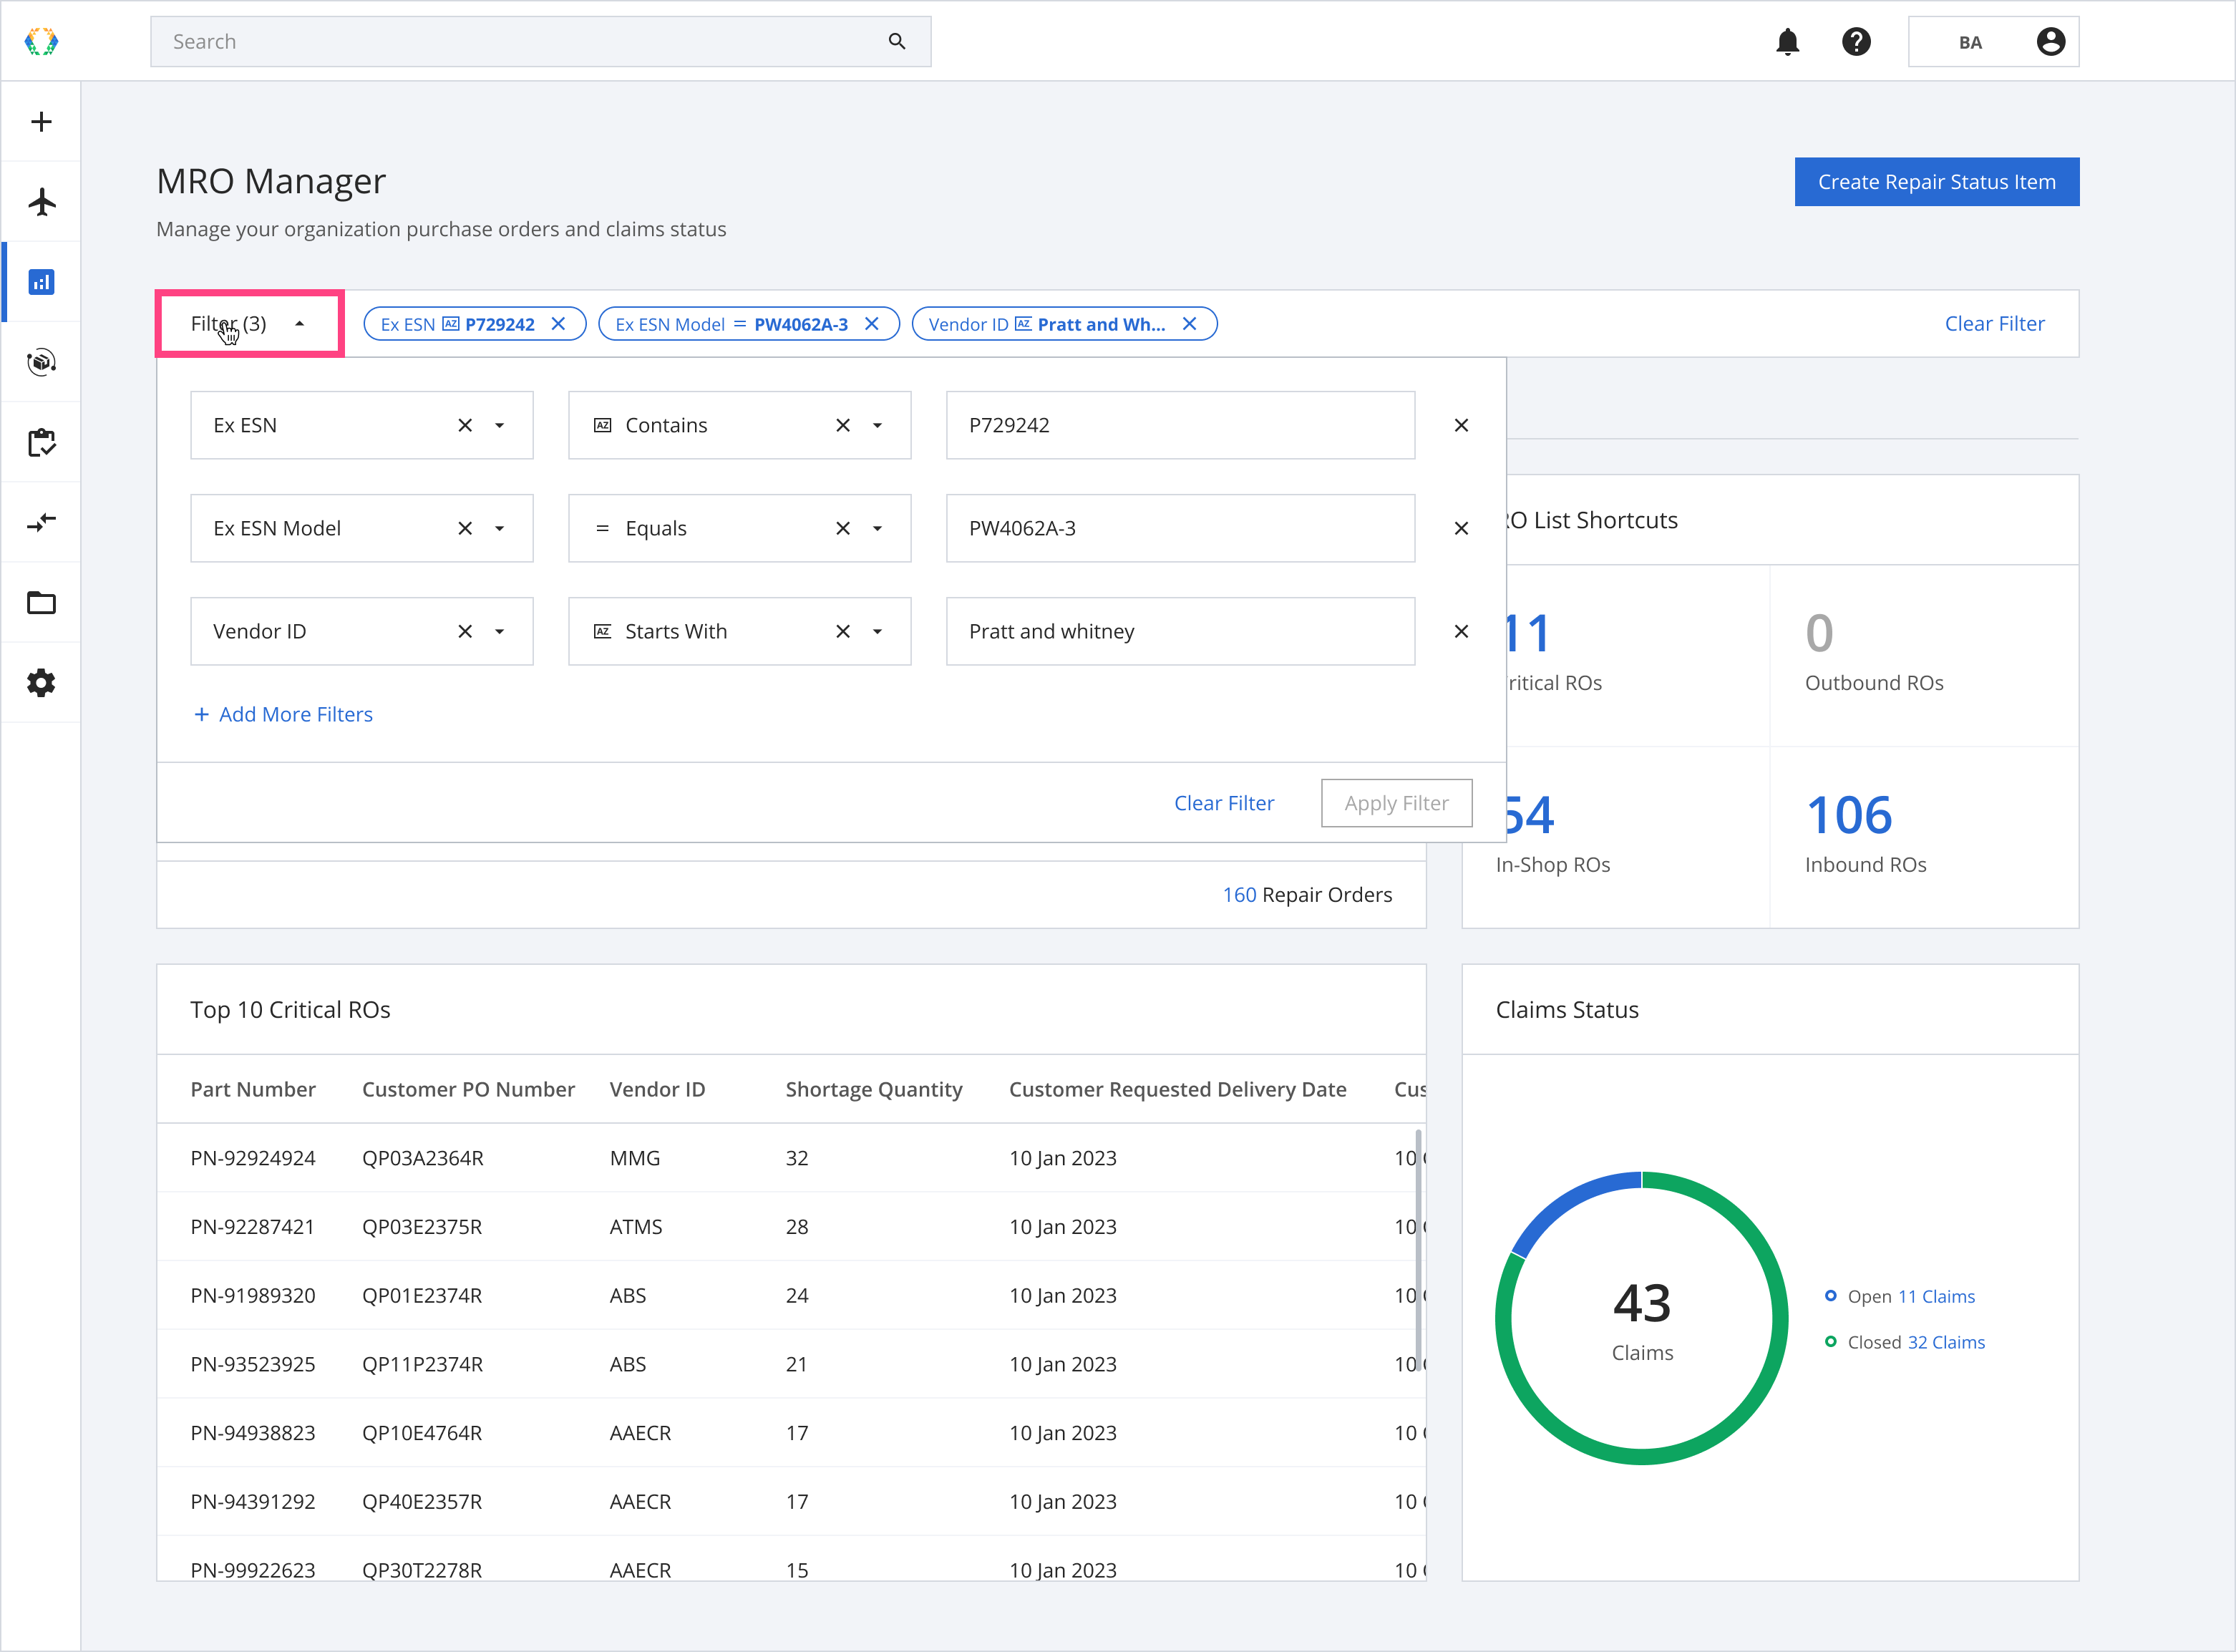
Step 2: Click “✕” to remove a filter.
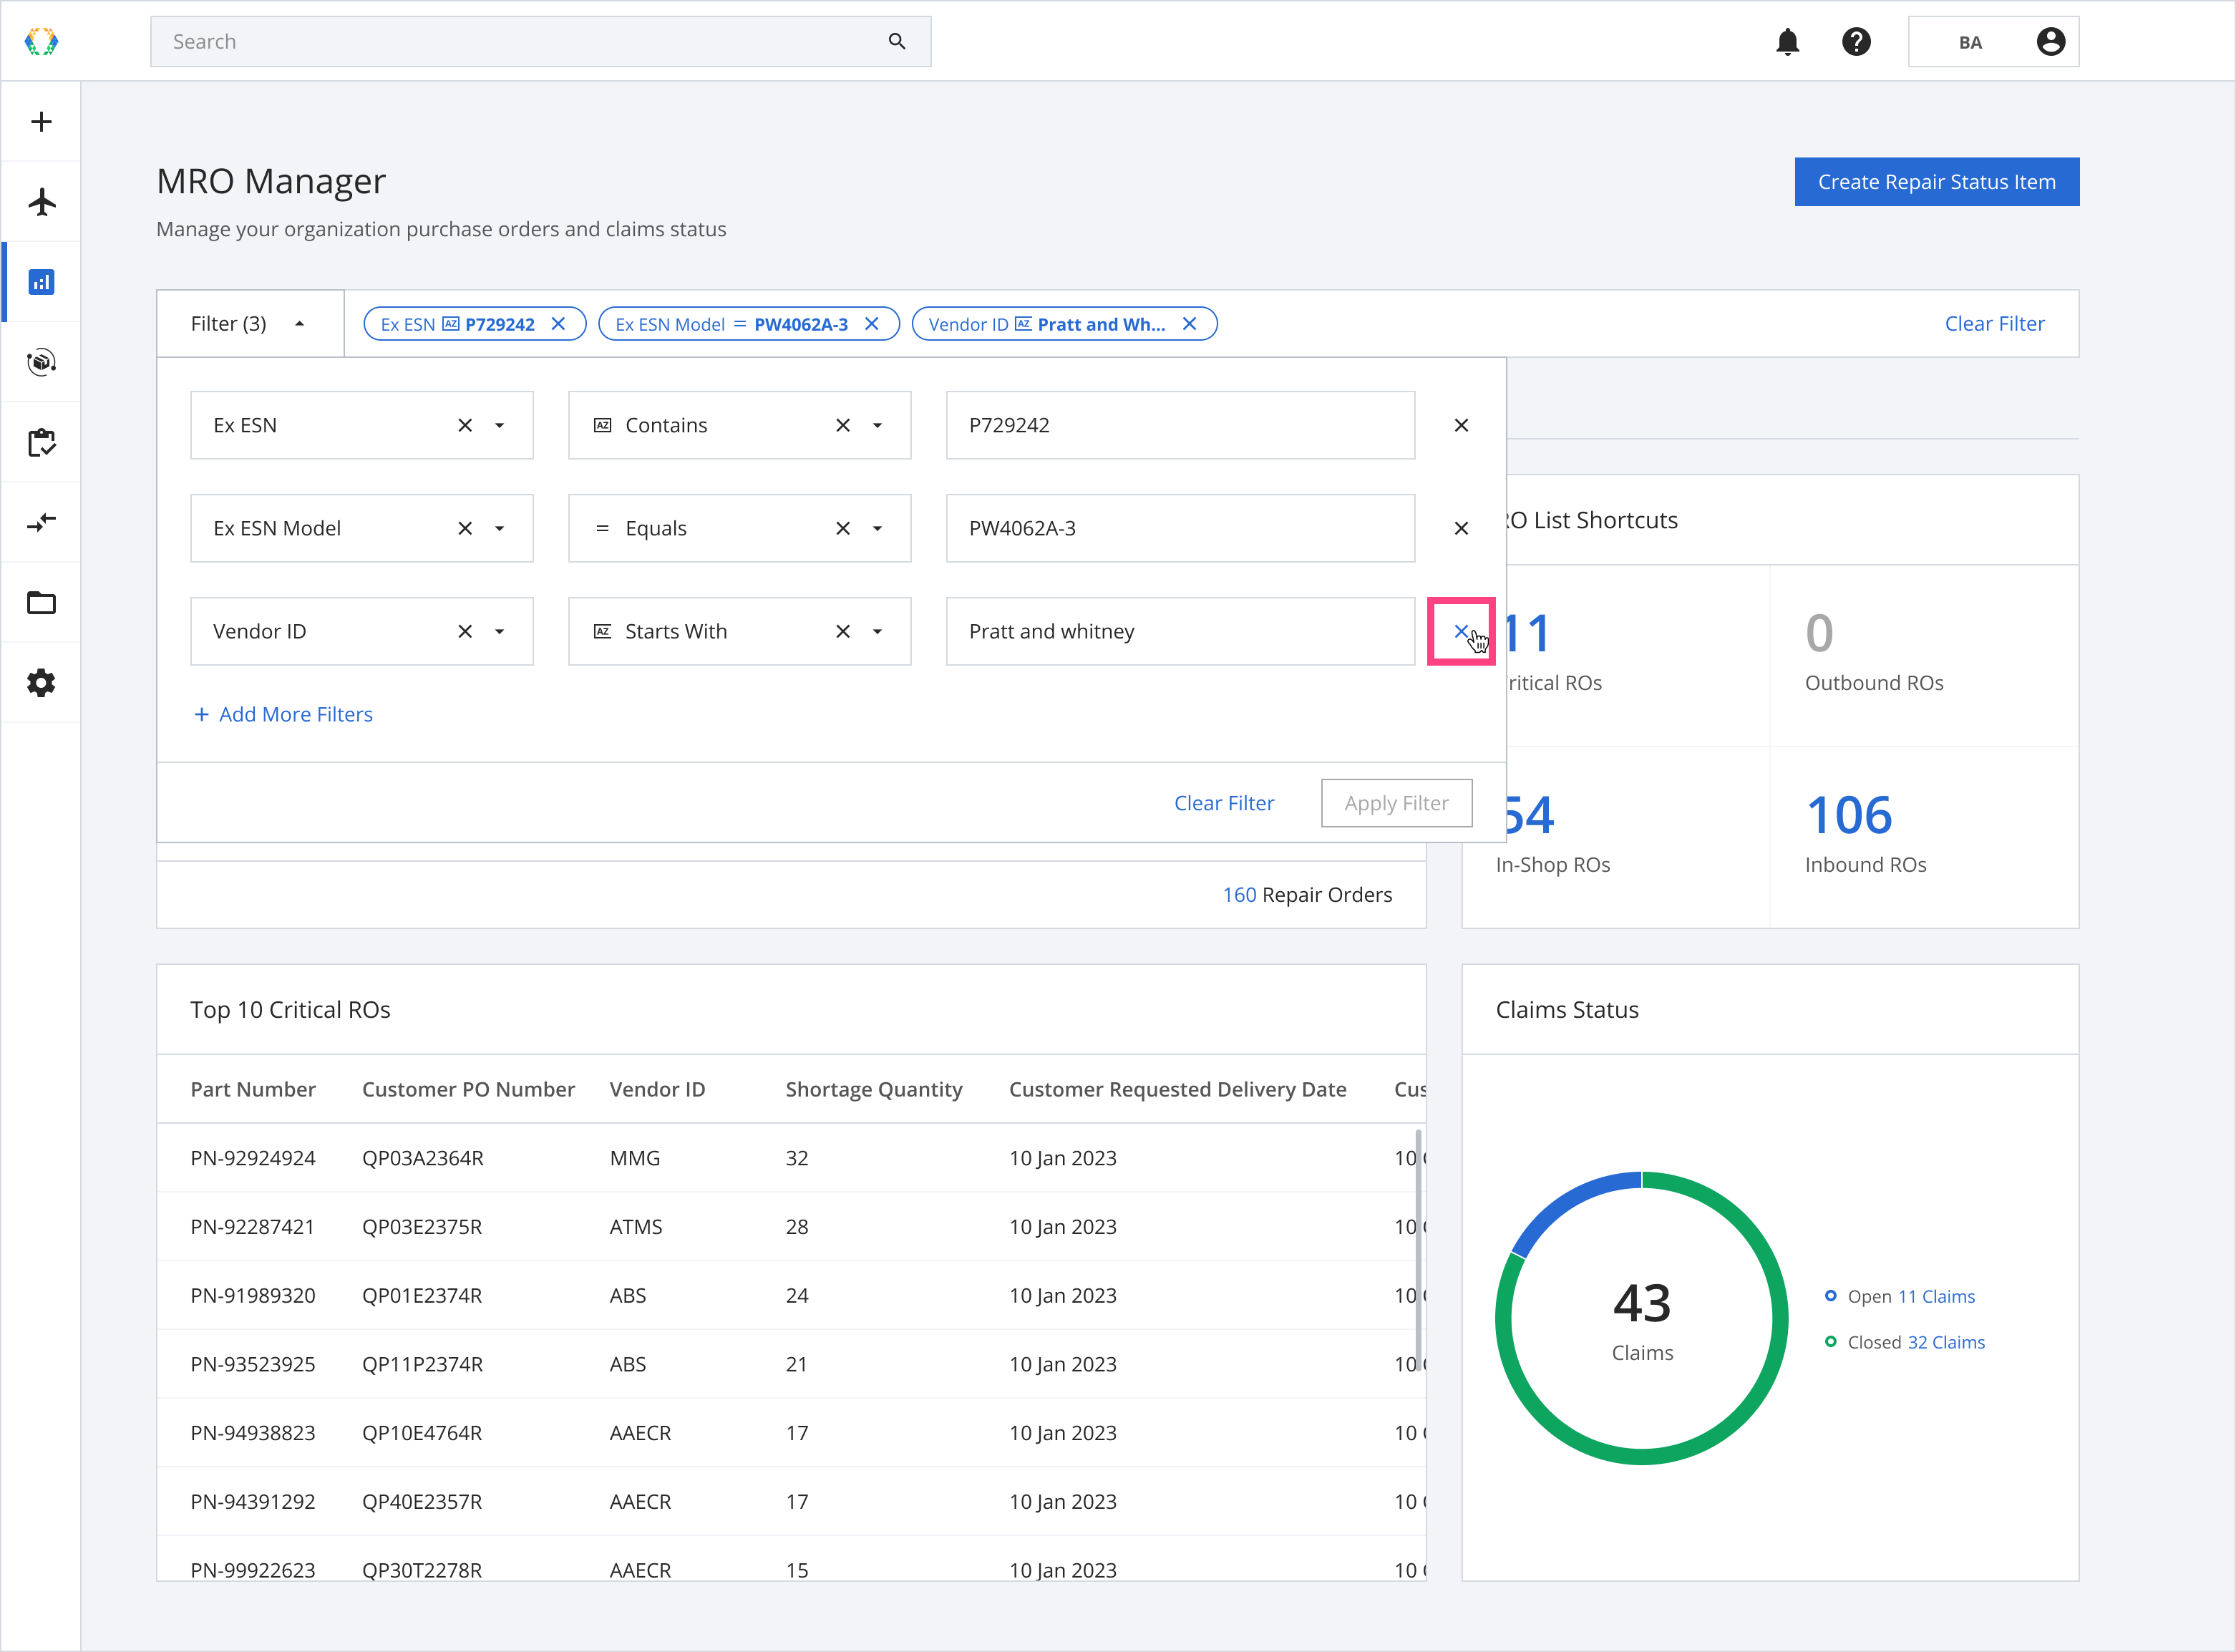
Step 3: Click 'Apply Filter' to apply the changes.
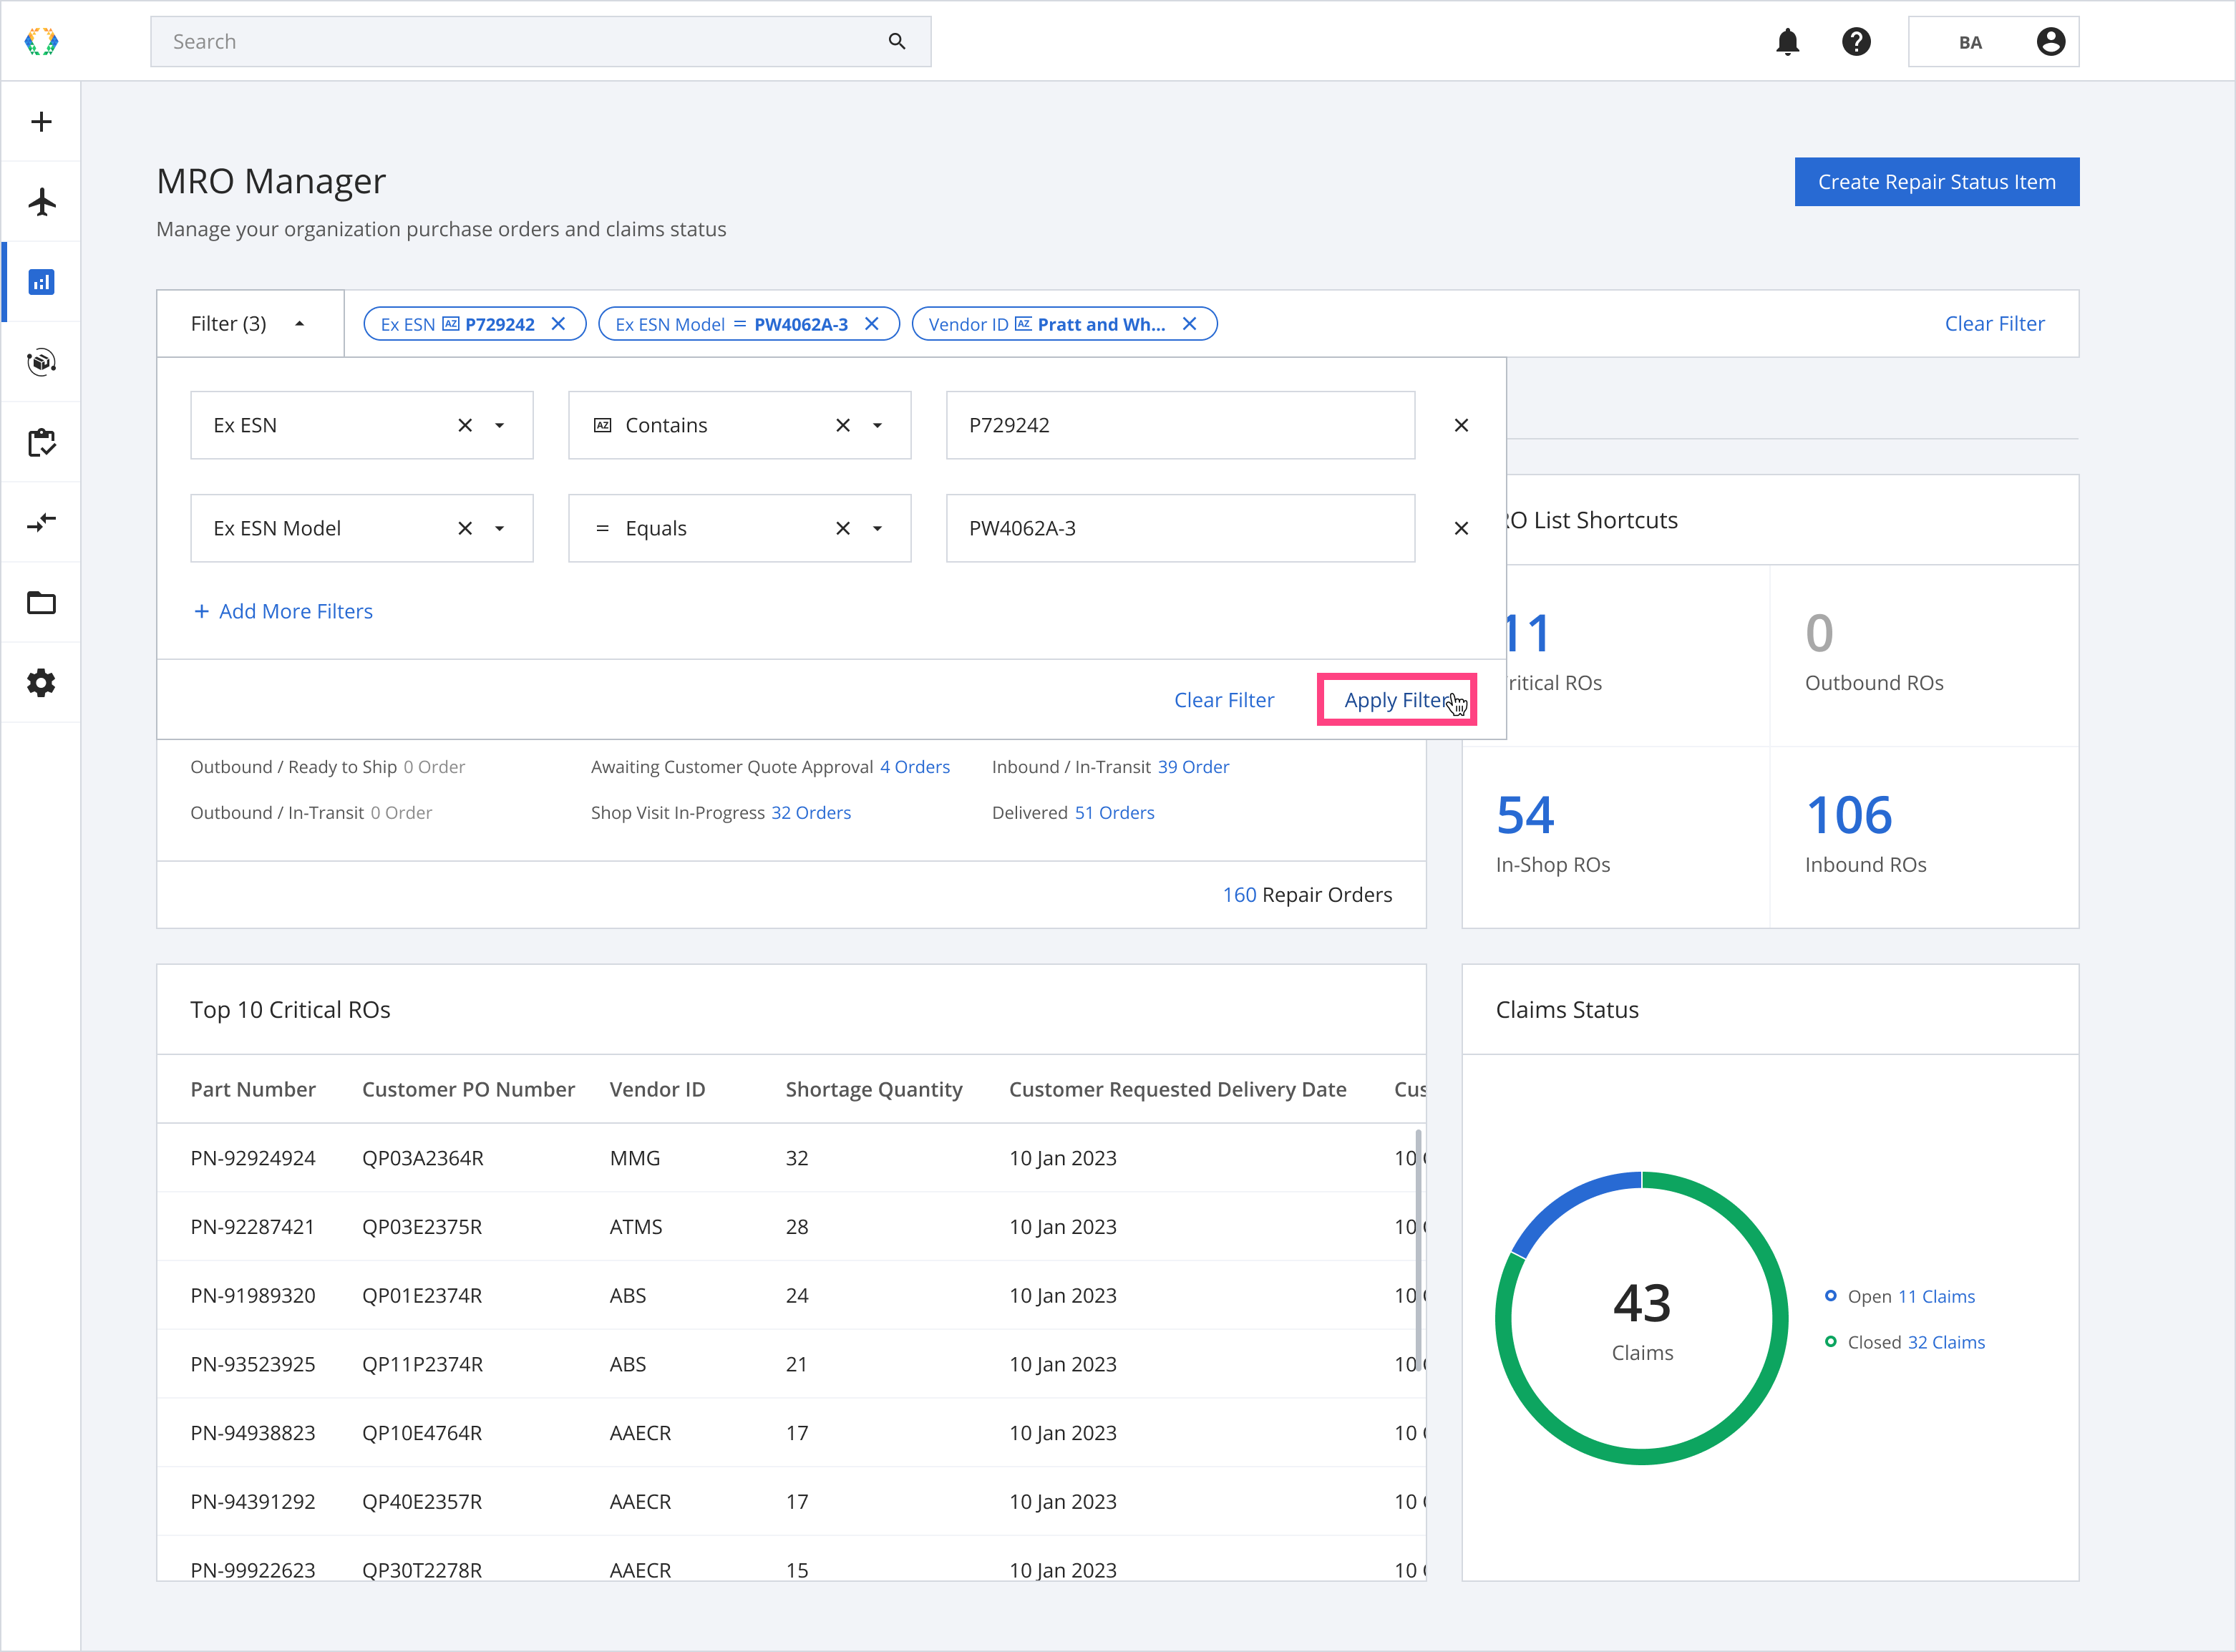
Step 4: Your applied filters will change the results shown across the entire MRO Manager module, and the applied filters will be shown on the Global Filter Bar in a 'pill' shape.
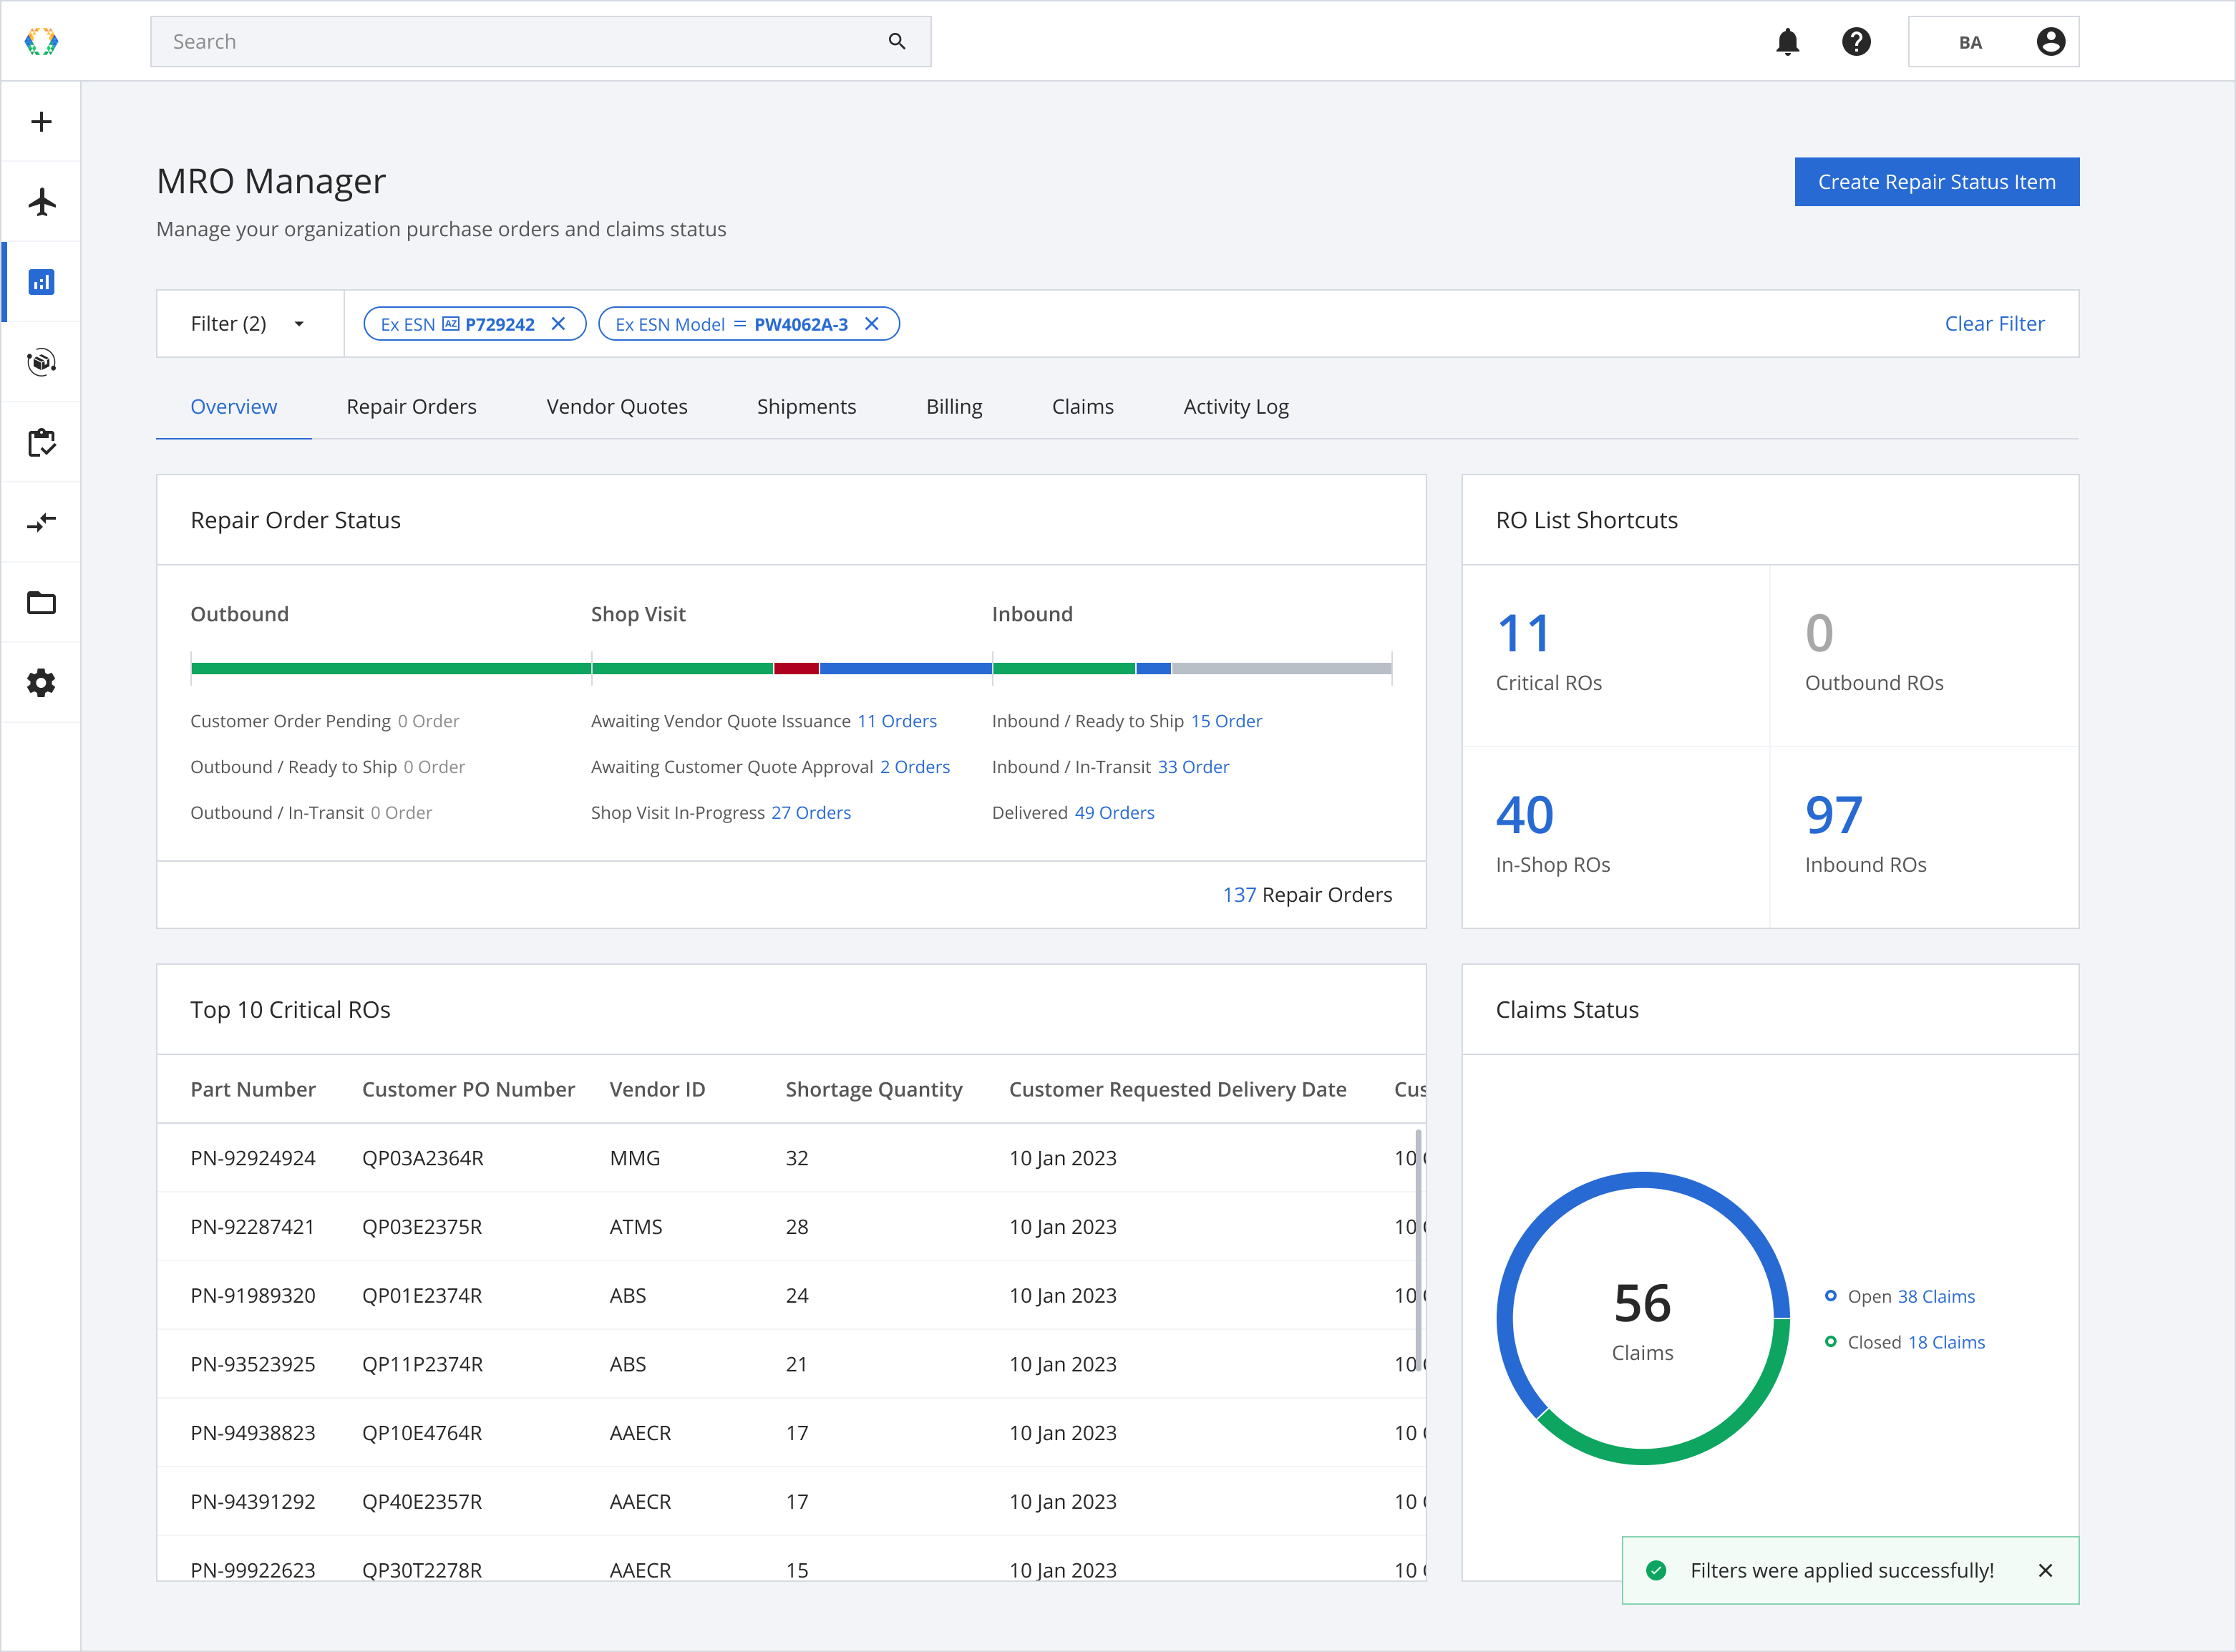
Option 2: Remove a Filter (Pill)
Step 1: Alternatively, you can remove a filter by removing a 'pill' on the Filter Bar.
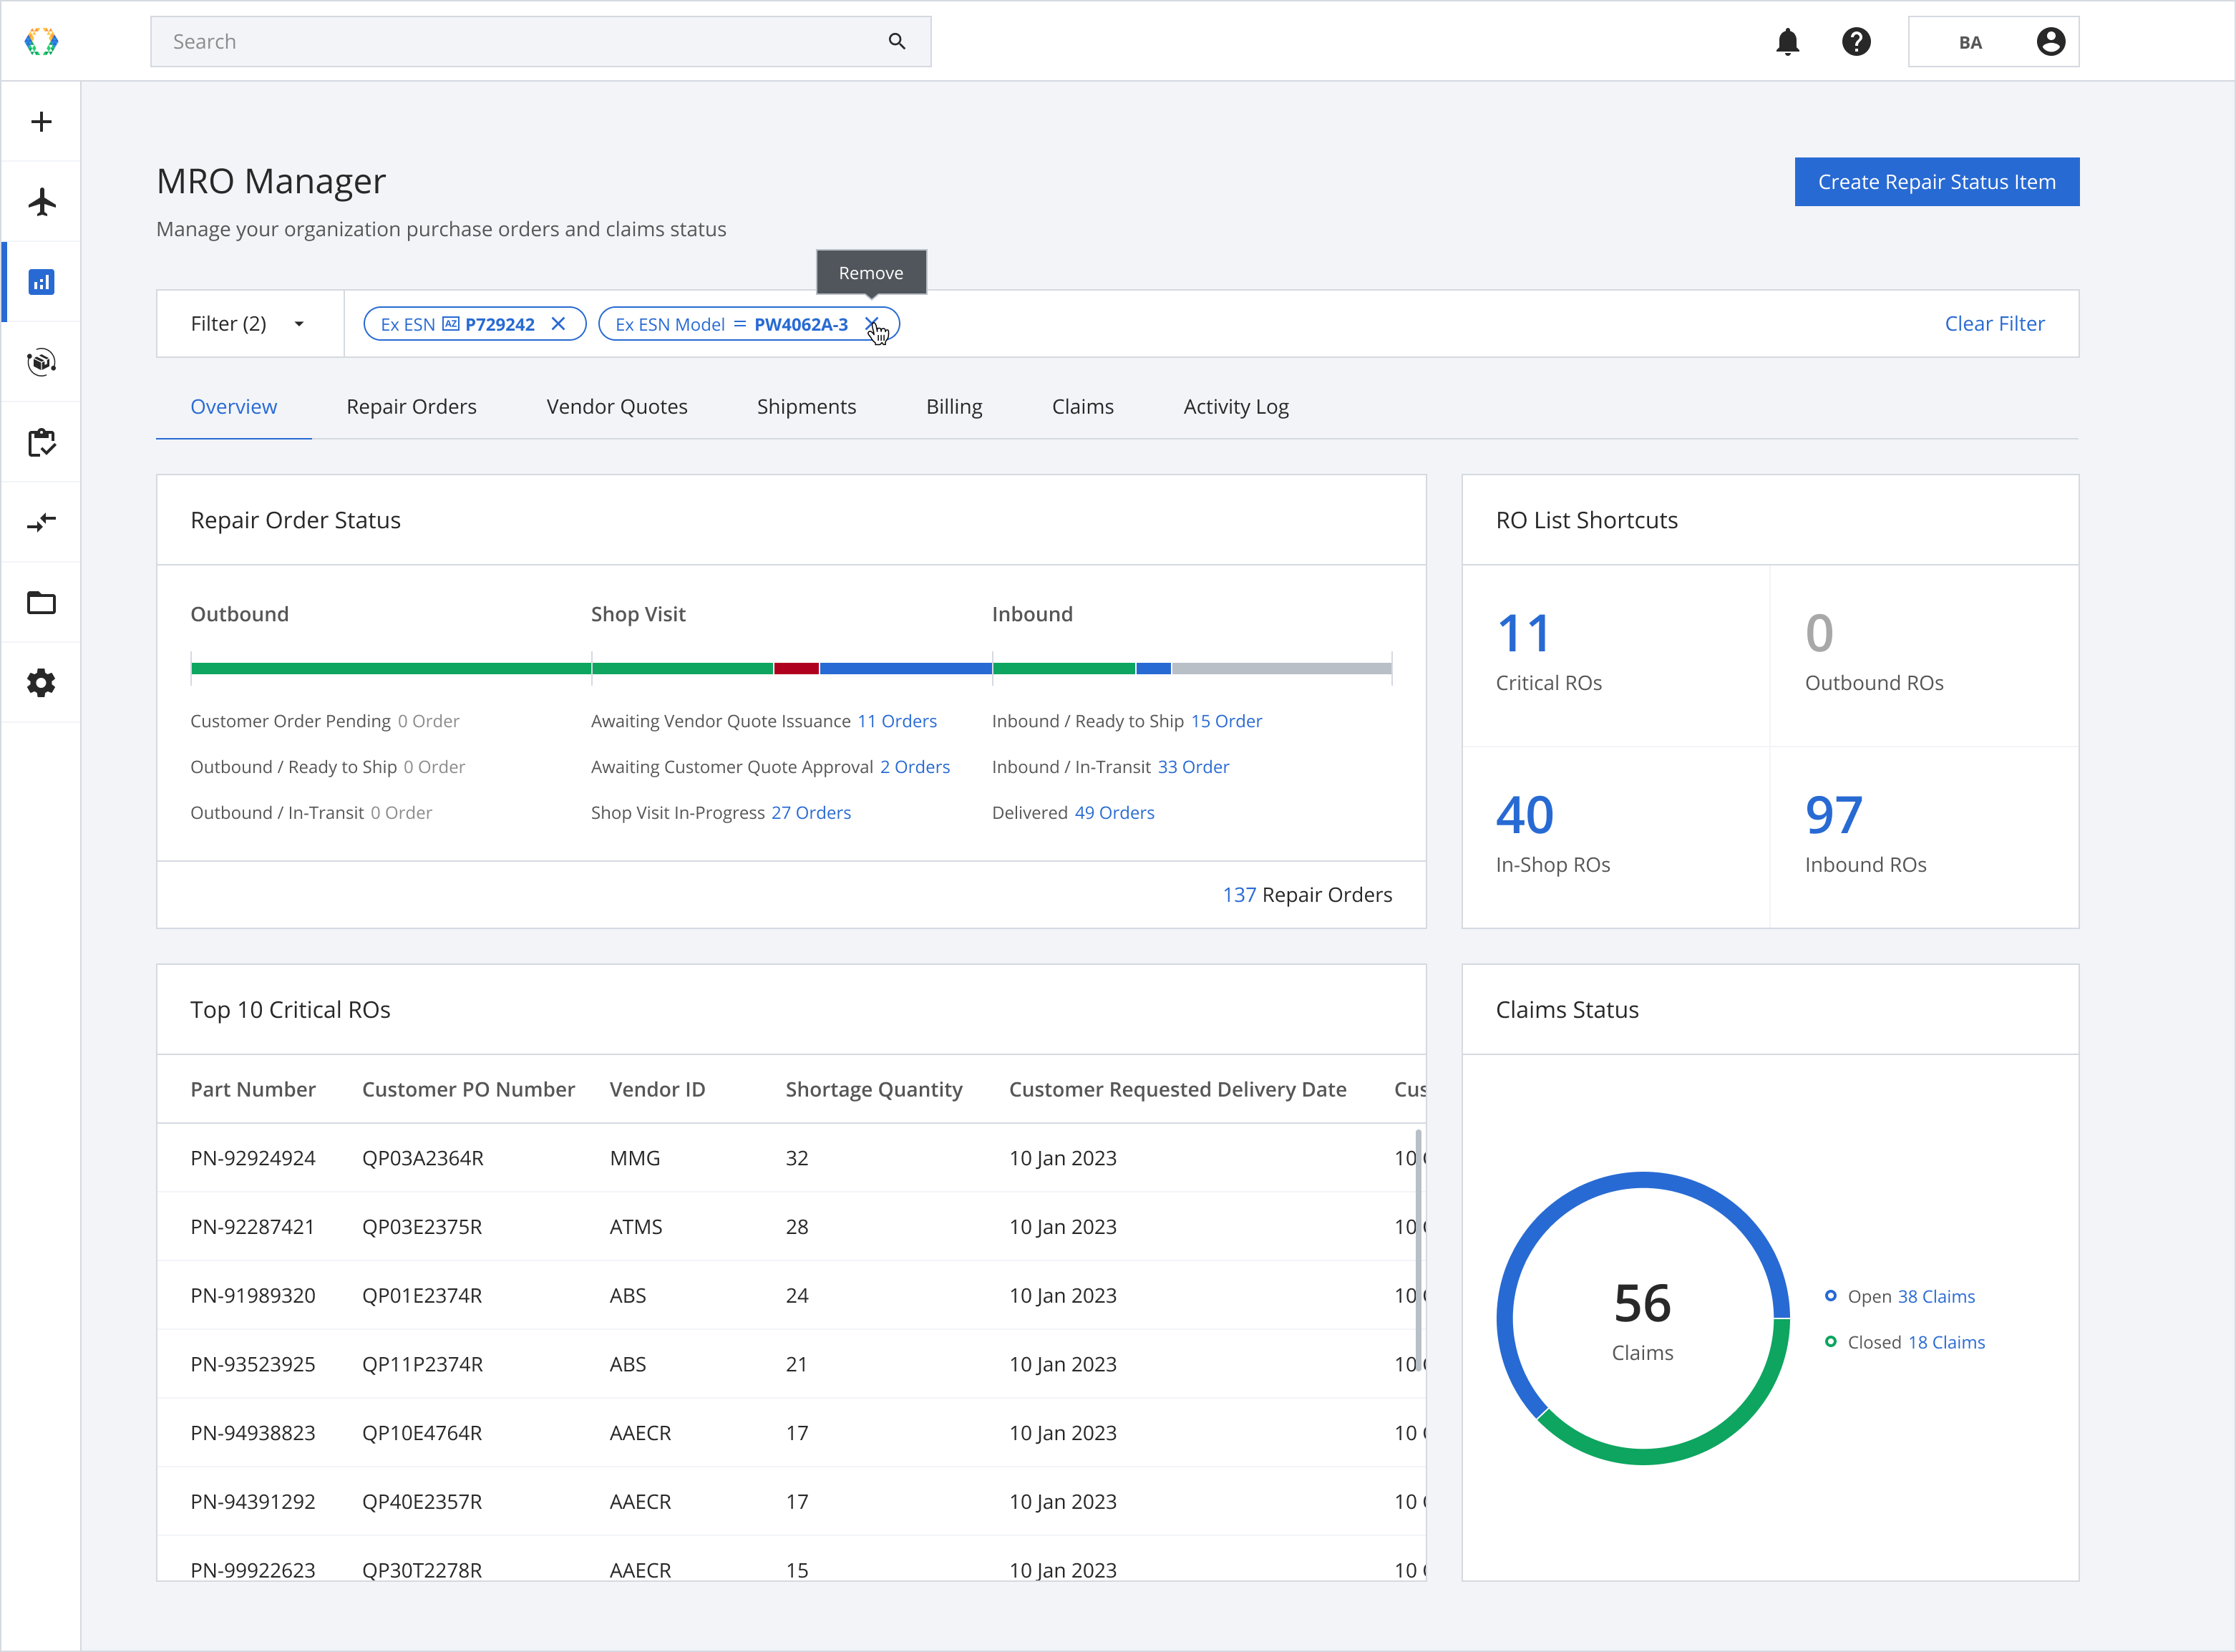
Step 2: Your applied filters will change the results shown across the entire MRO Manager module, and the applied filters will be shown on the Global Filter Bar in a 'pill' shape.
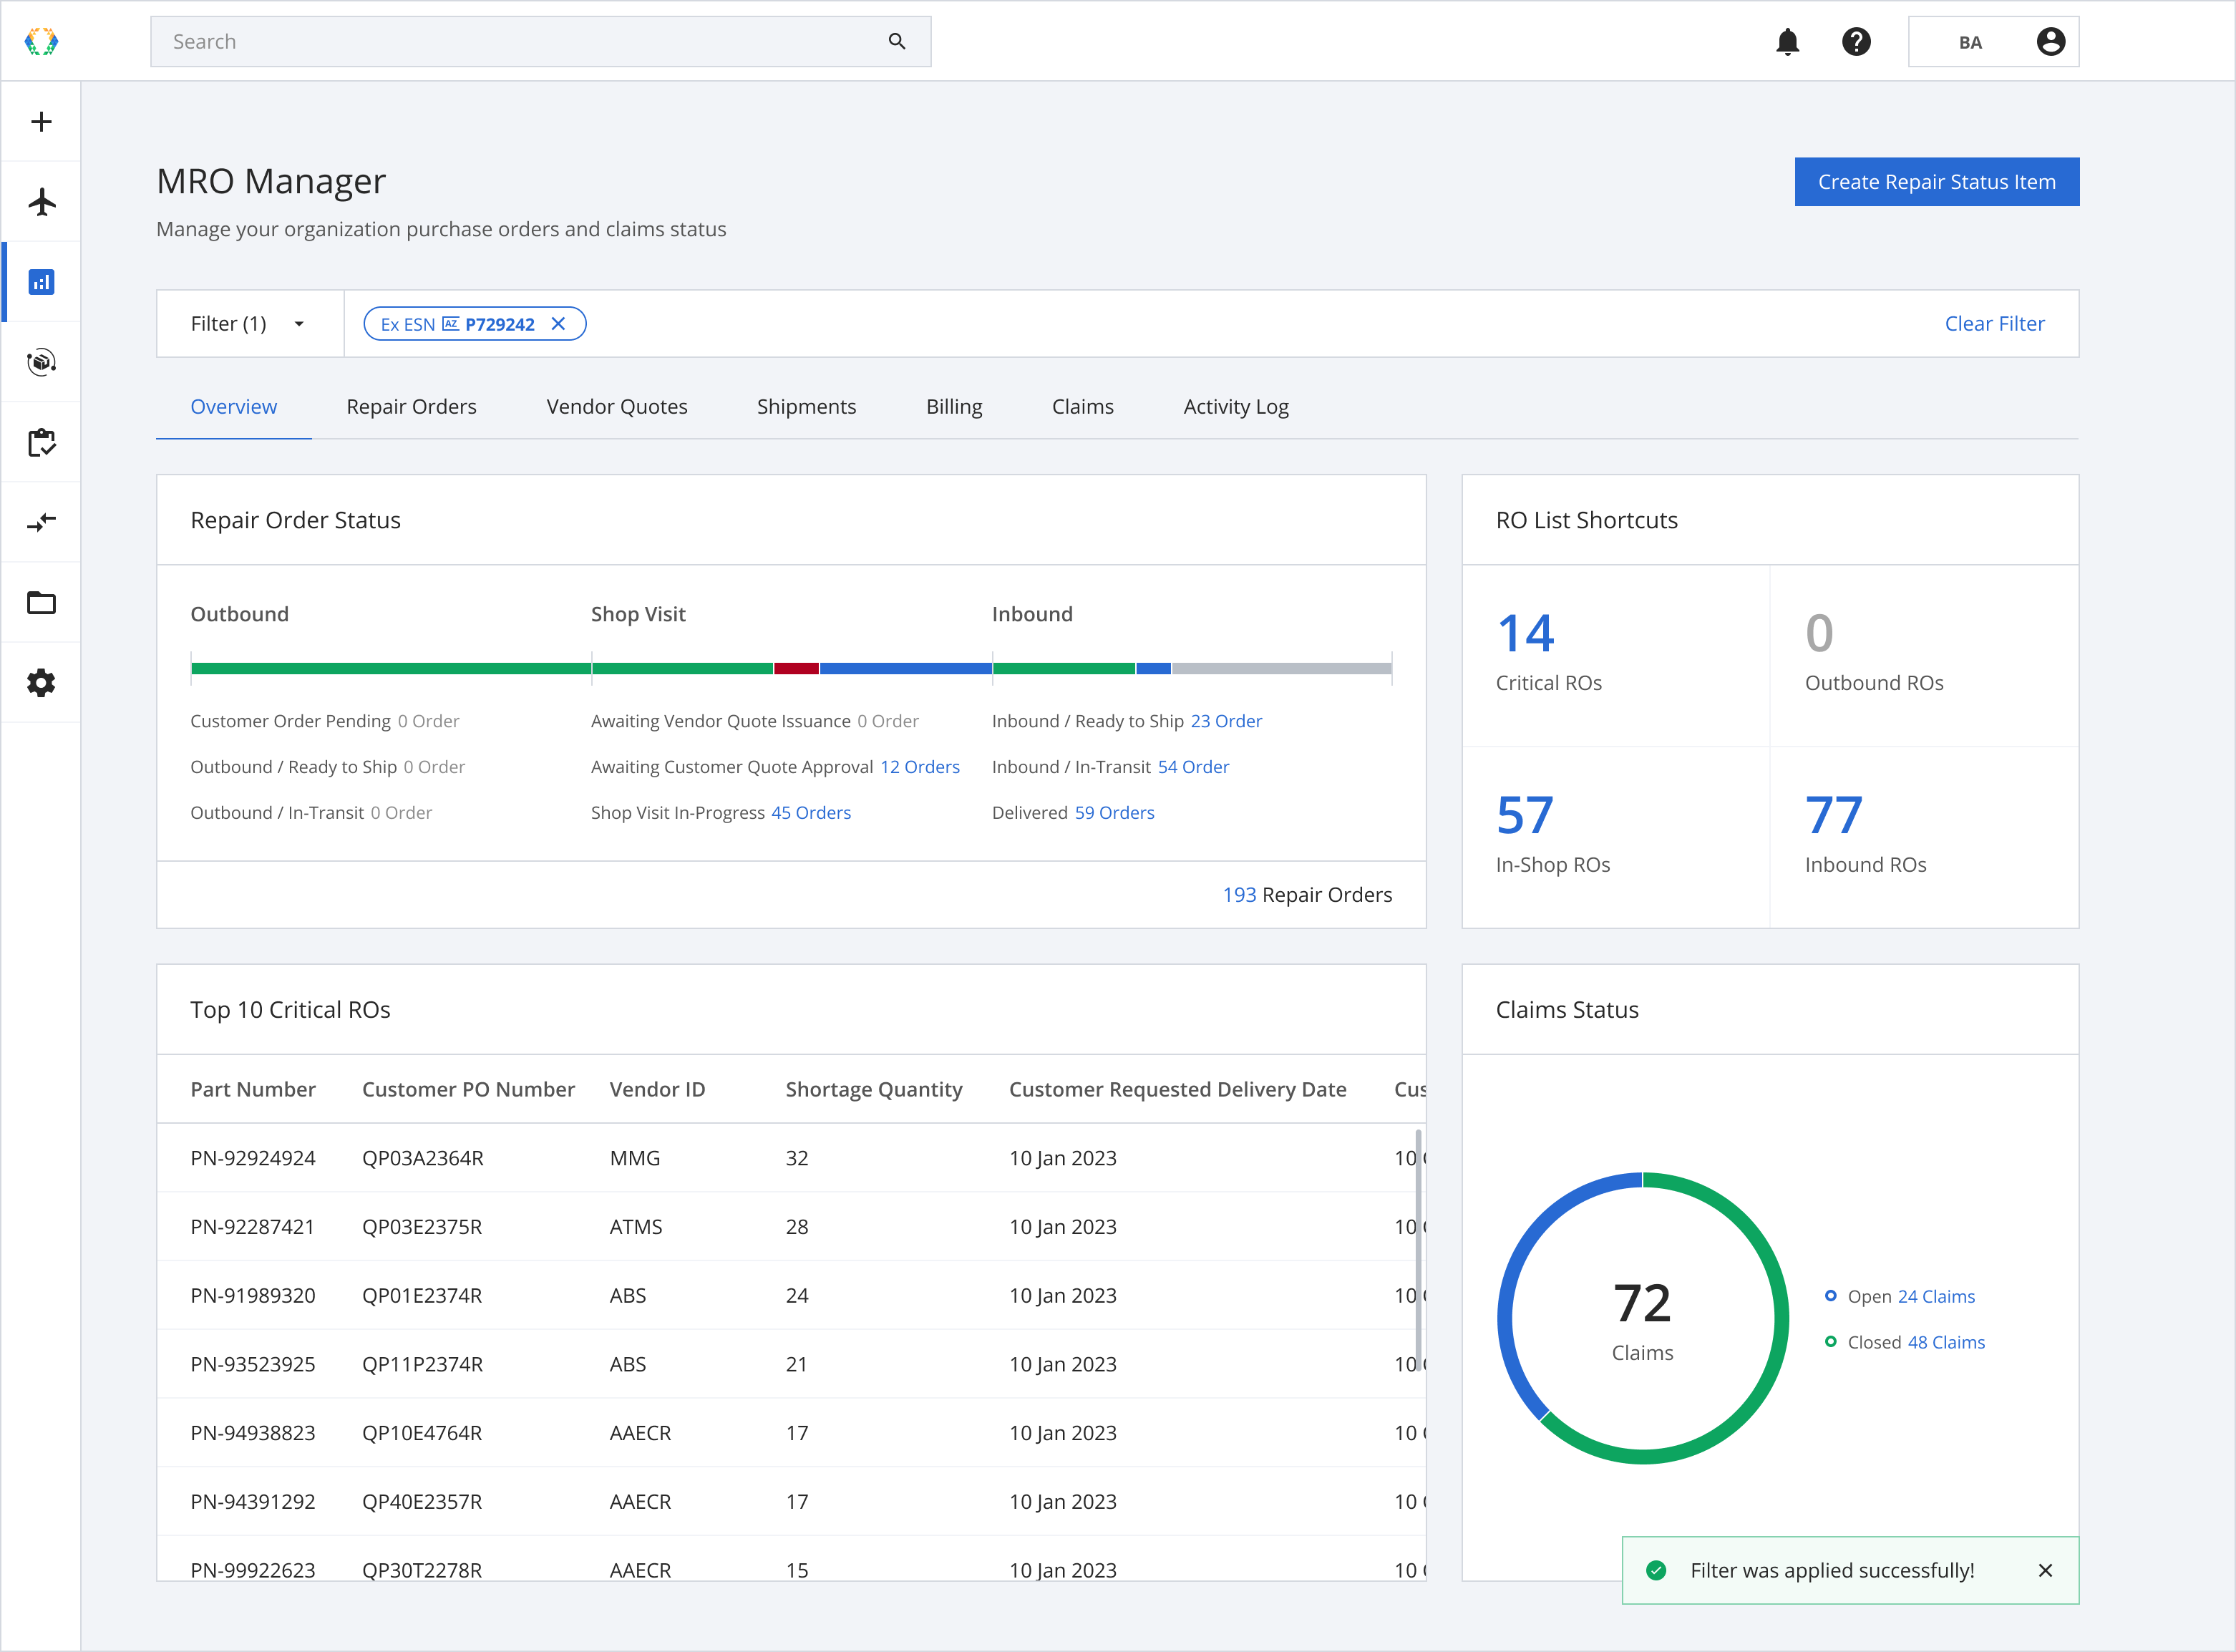
Option 3: Clear All Filters in the Filter Window
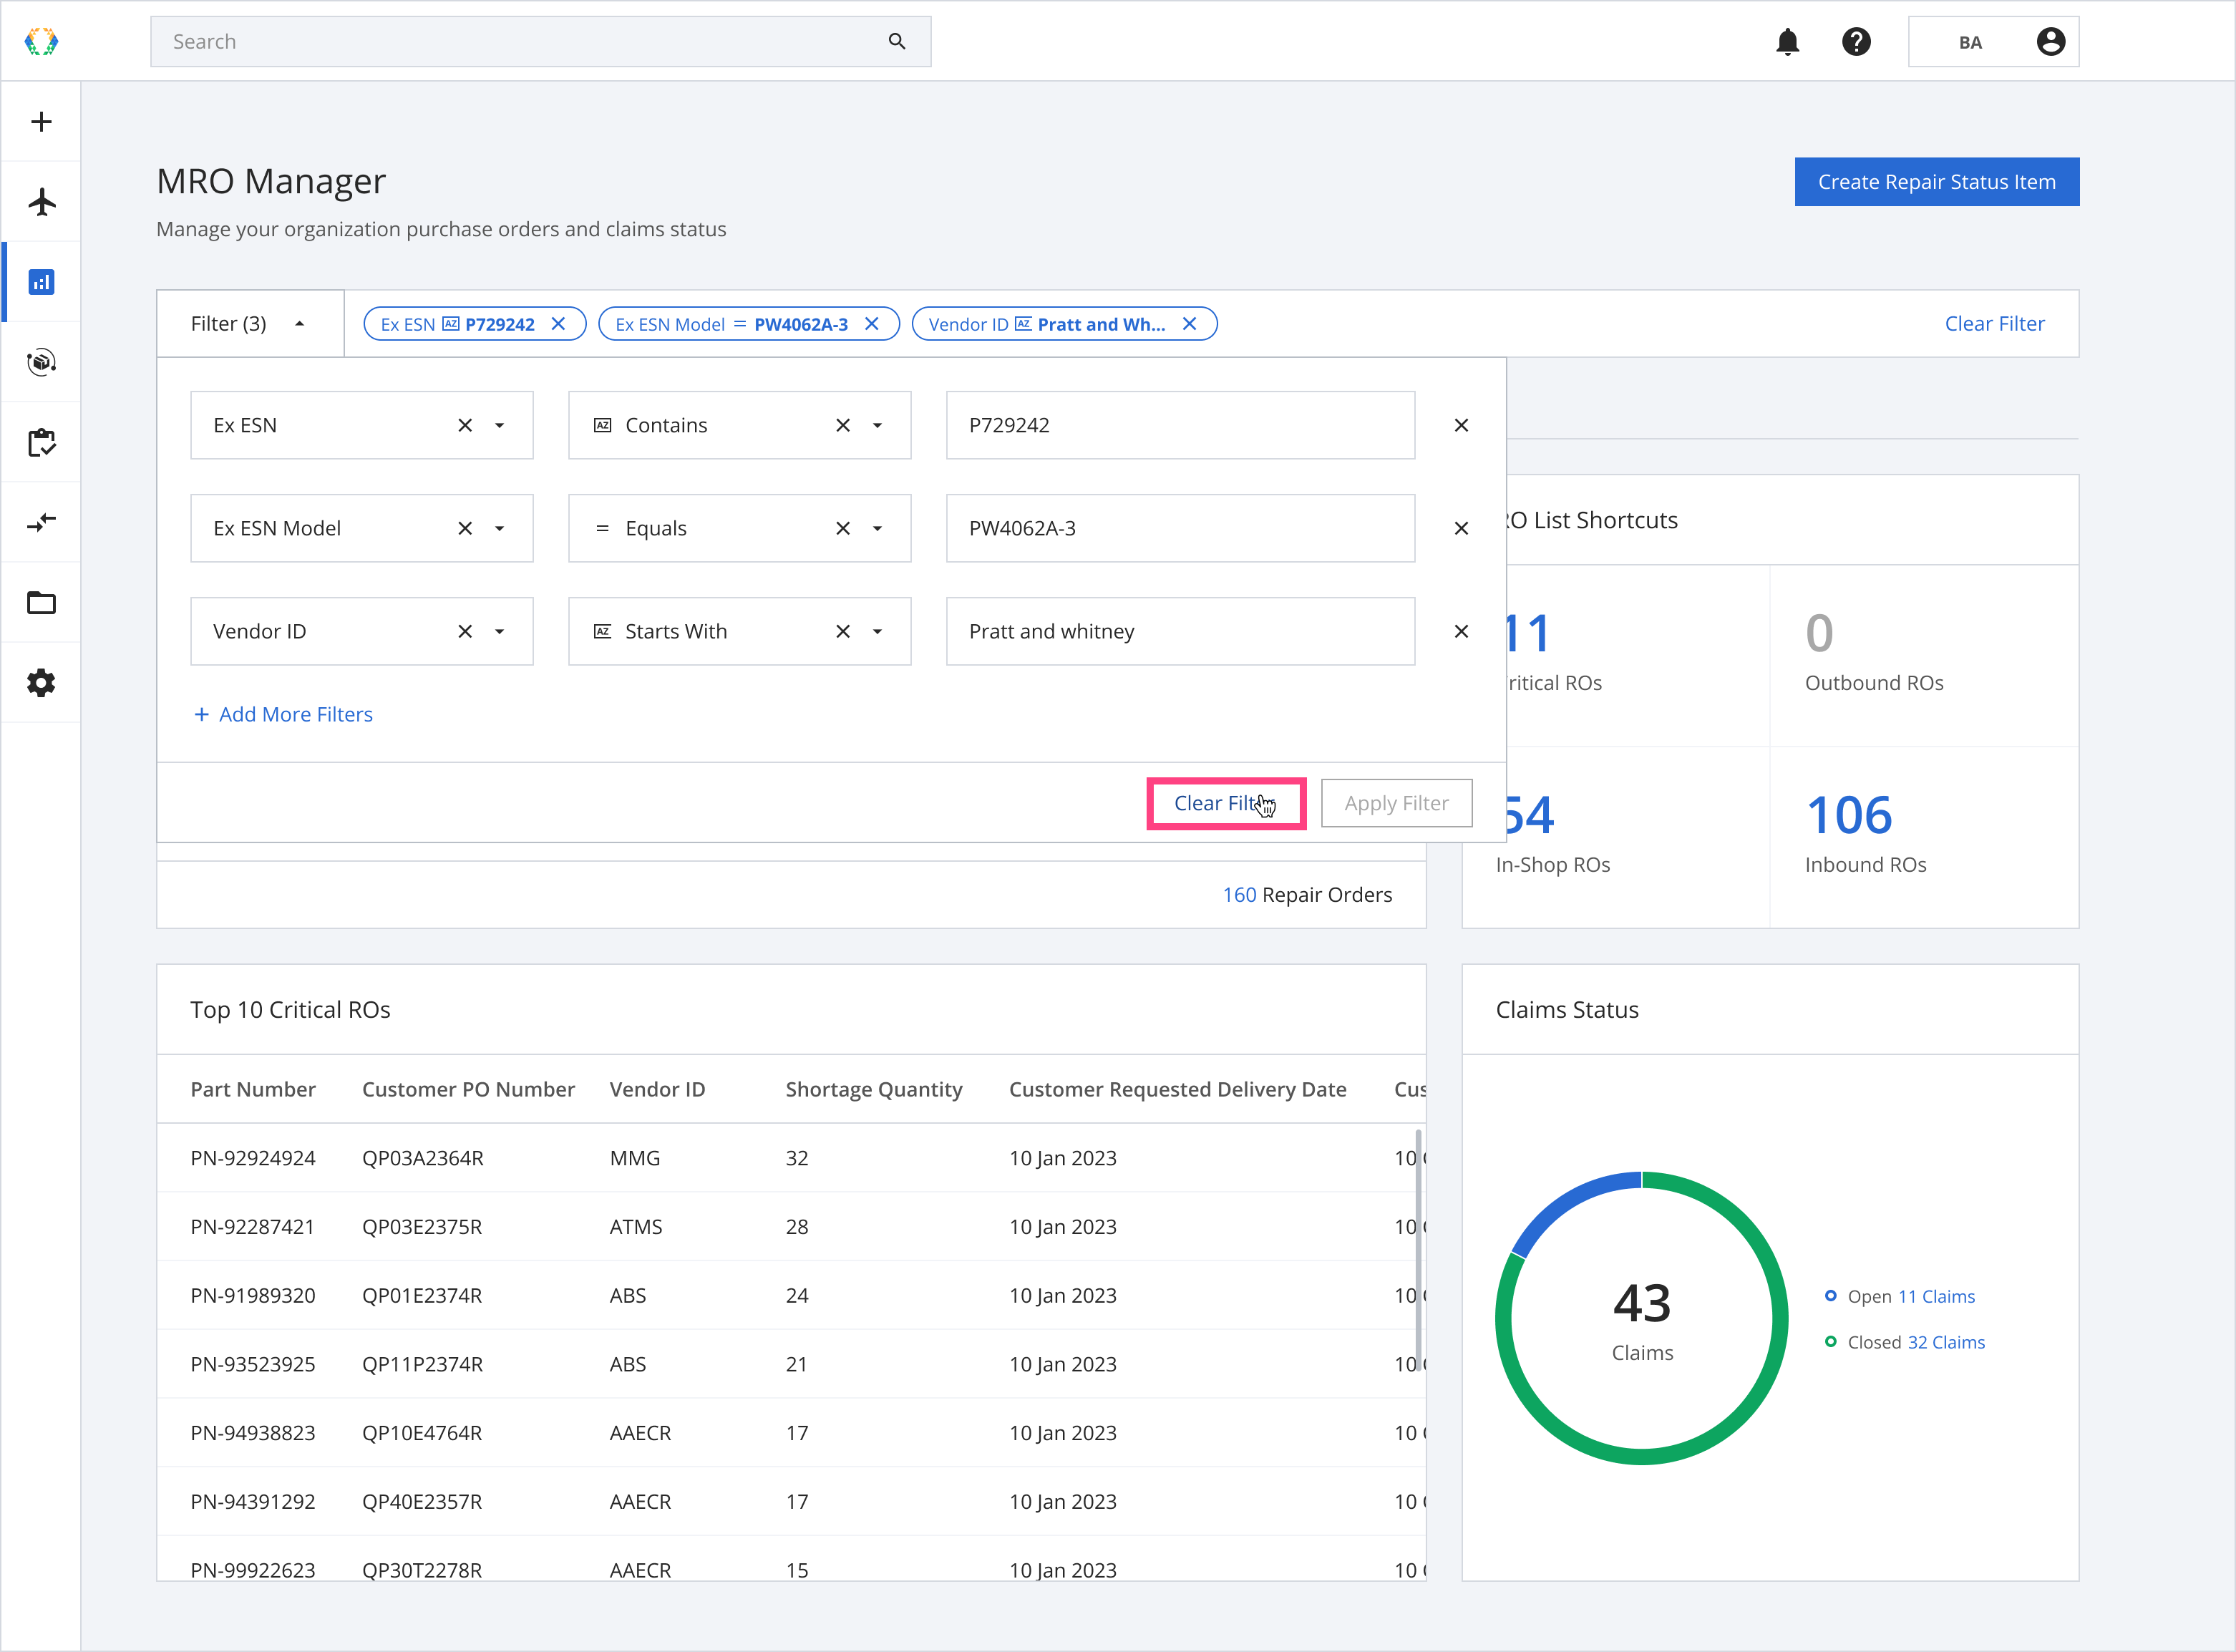
Step 1: You can clear all applied filters in the filter menu by clicking 'Clear Filter'.
This option instantly clears all of the filters.
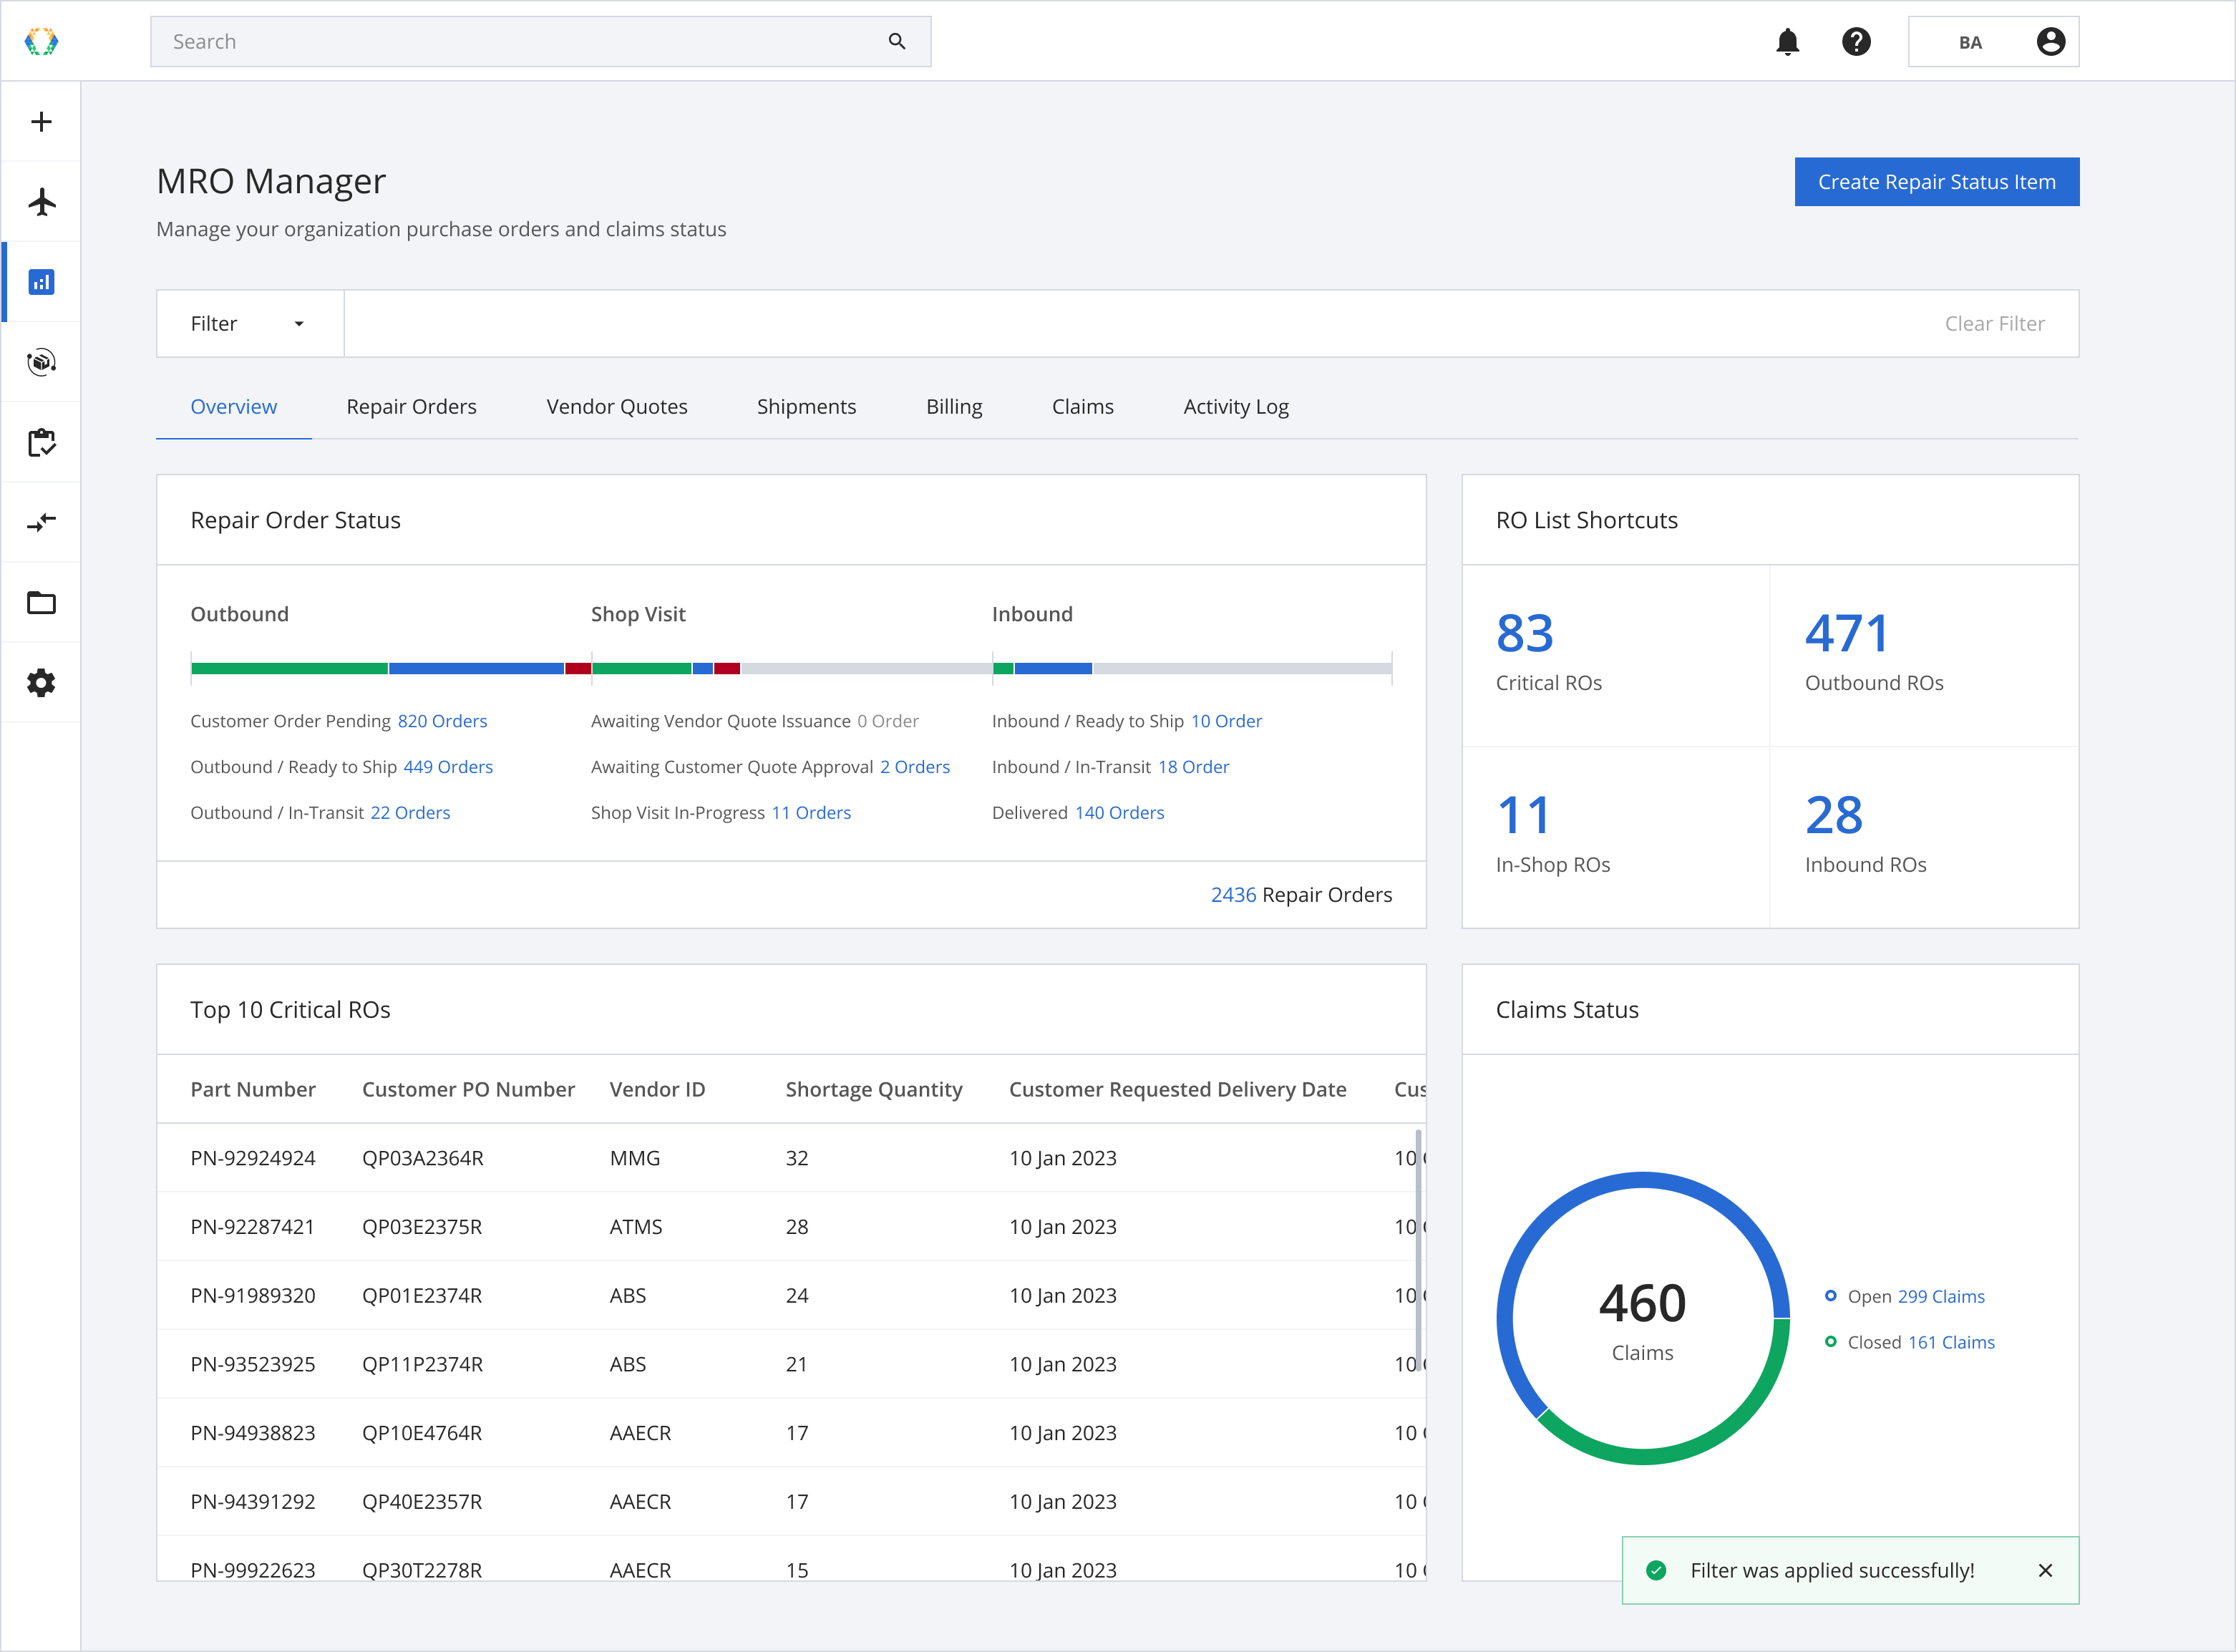
Step 2: Your applied filters will be cleared and no filters will be applied.
Option 4: Clear all filters in the Global Filter Bar
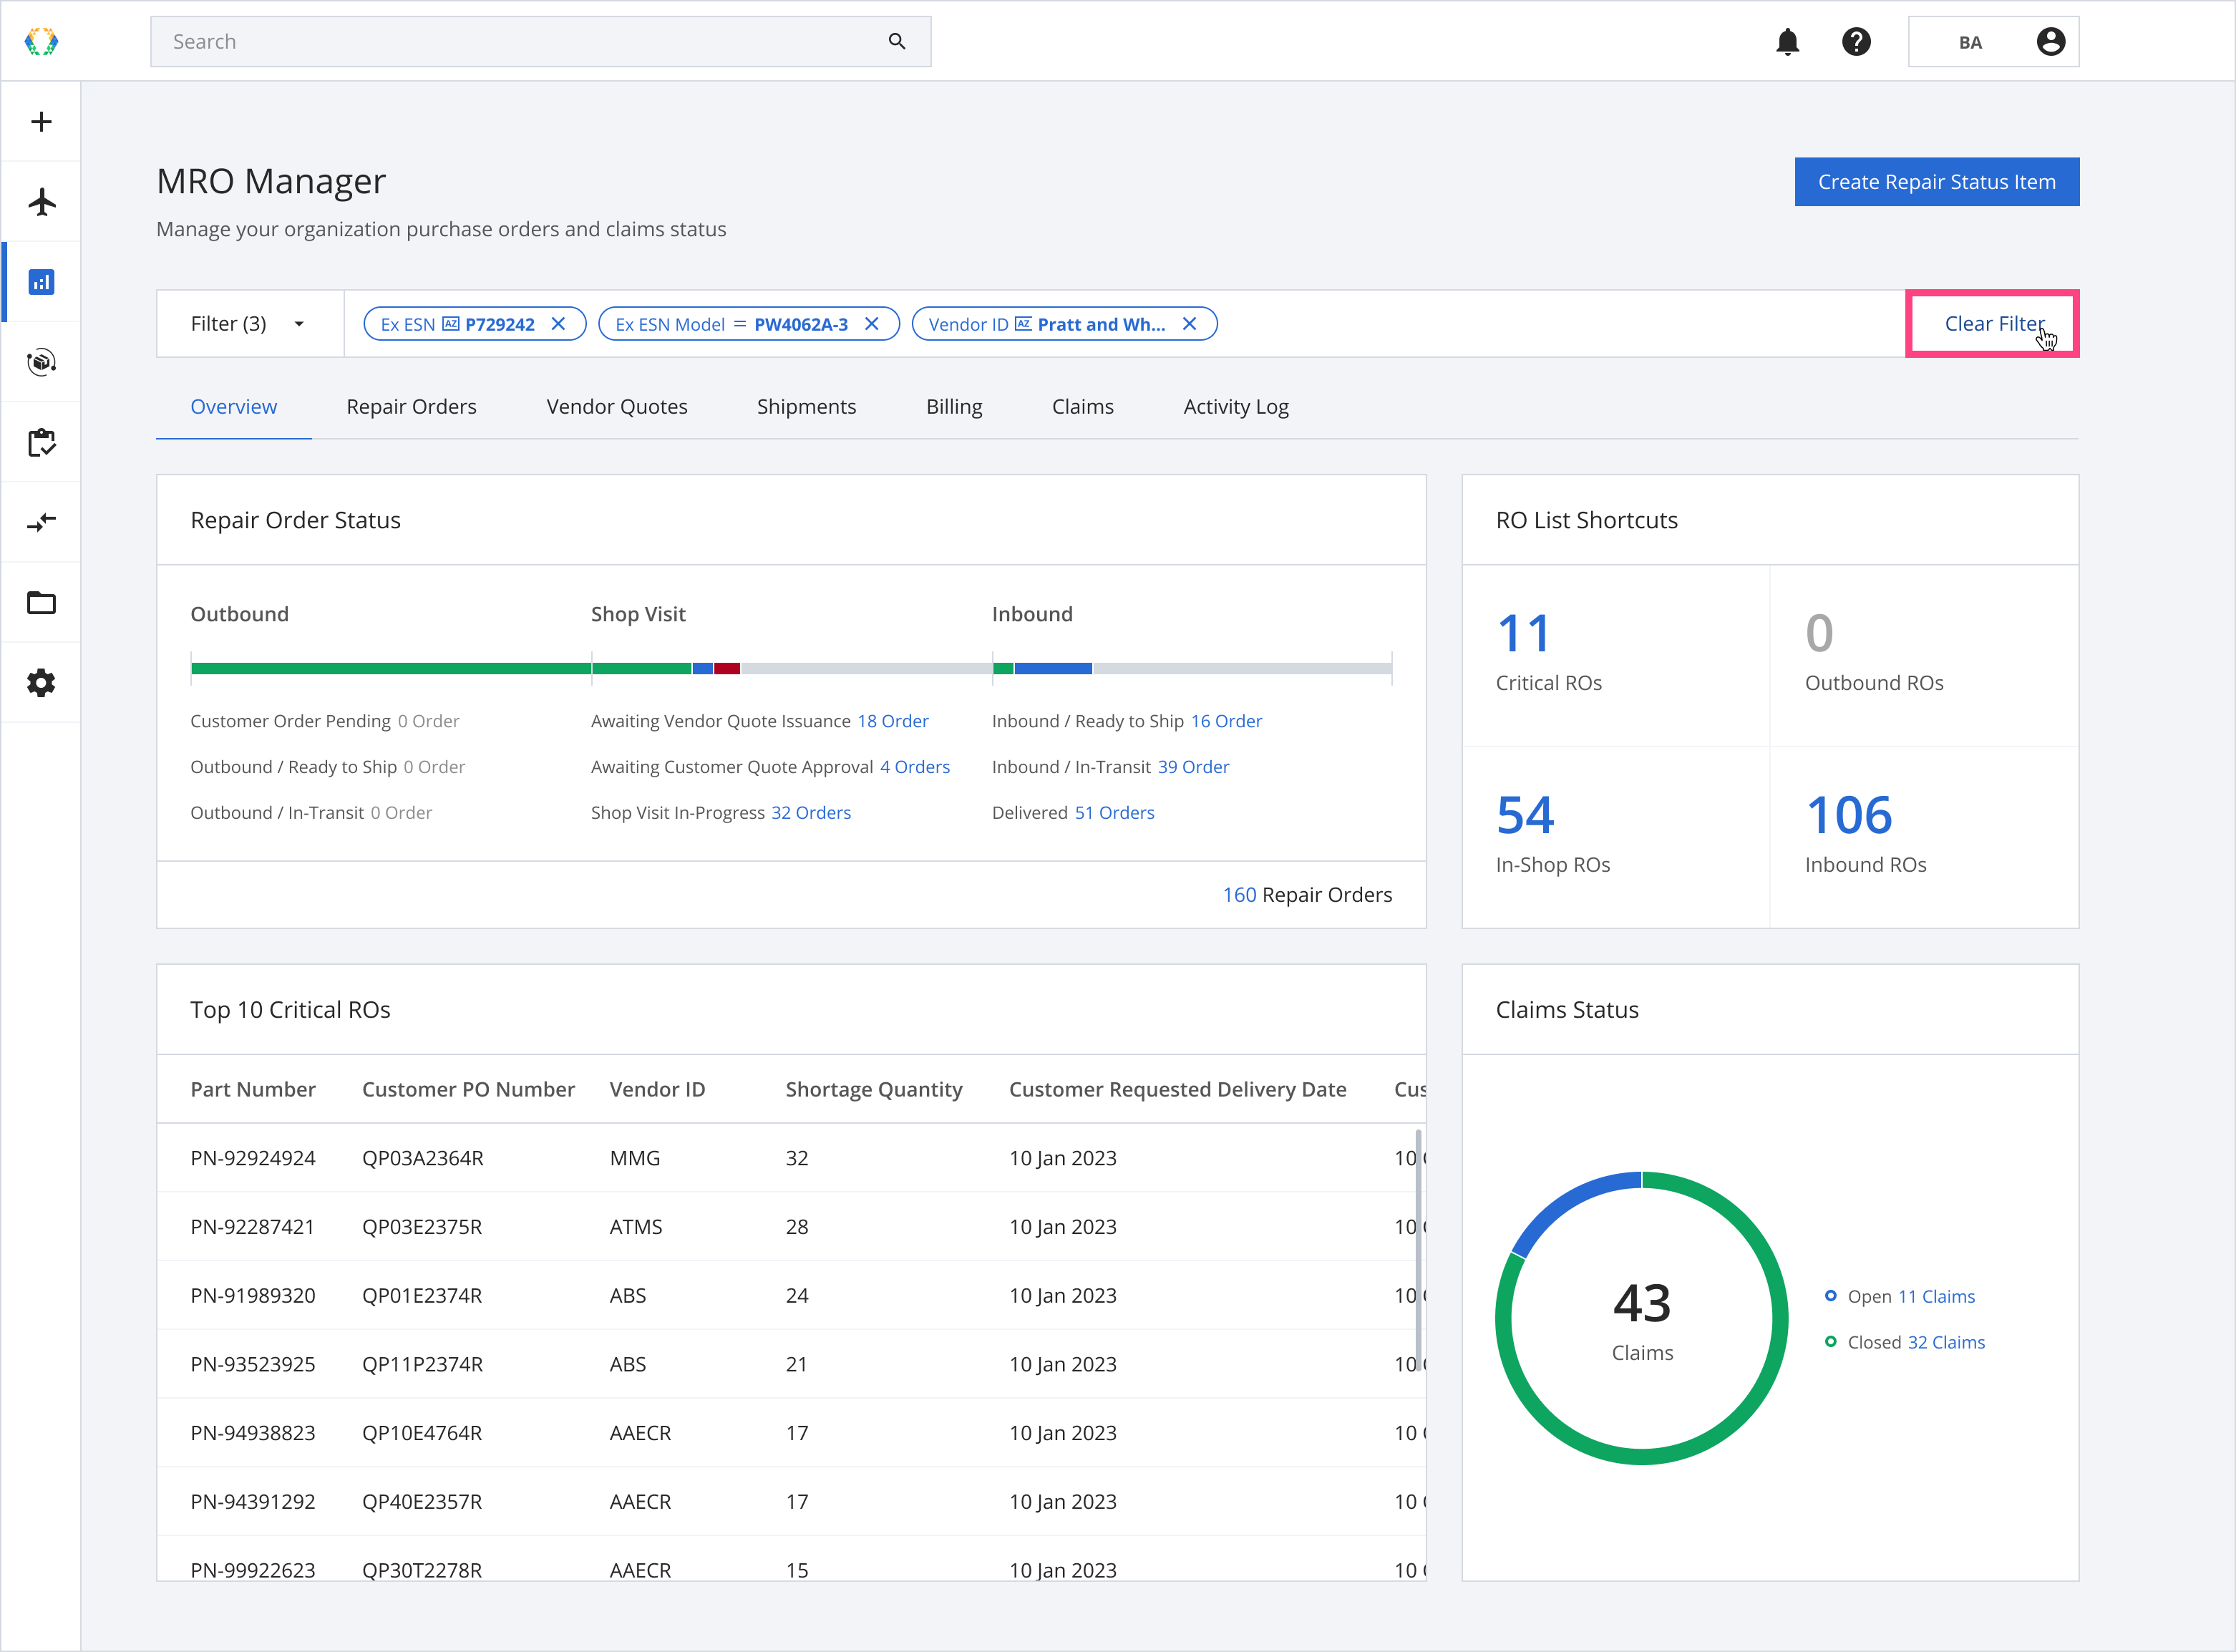
Step 1: You can clear all applied filters in the Filter Bar by clicking 'Clear Filter'.
This option instantly clears all of the filters.
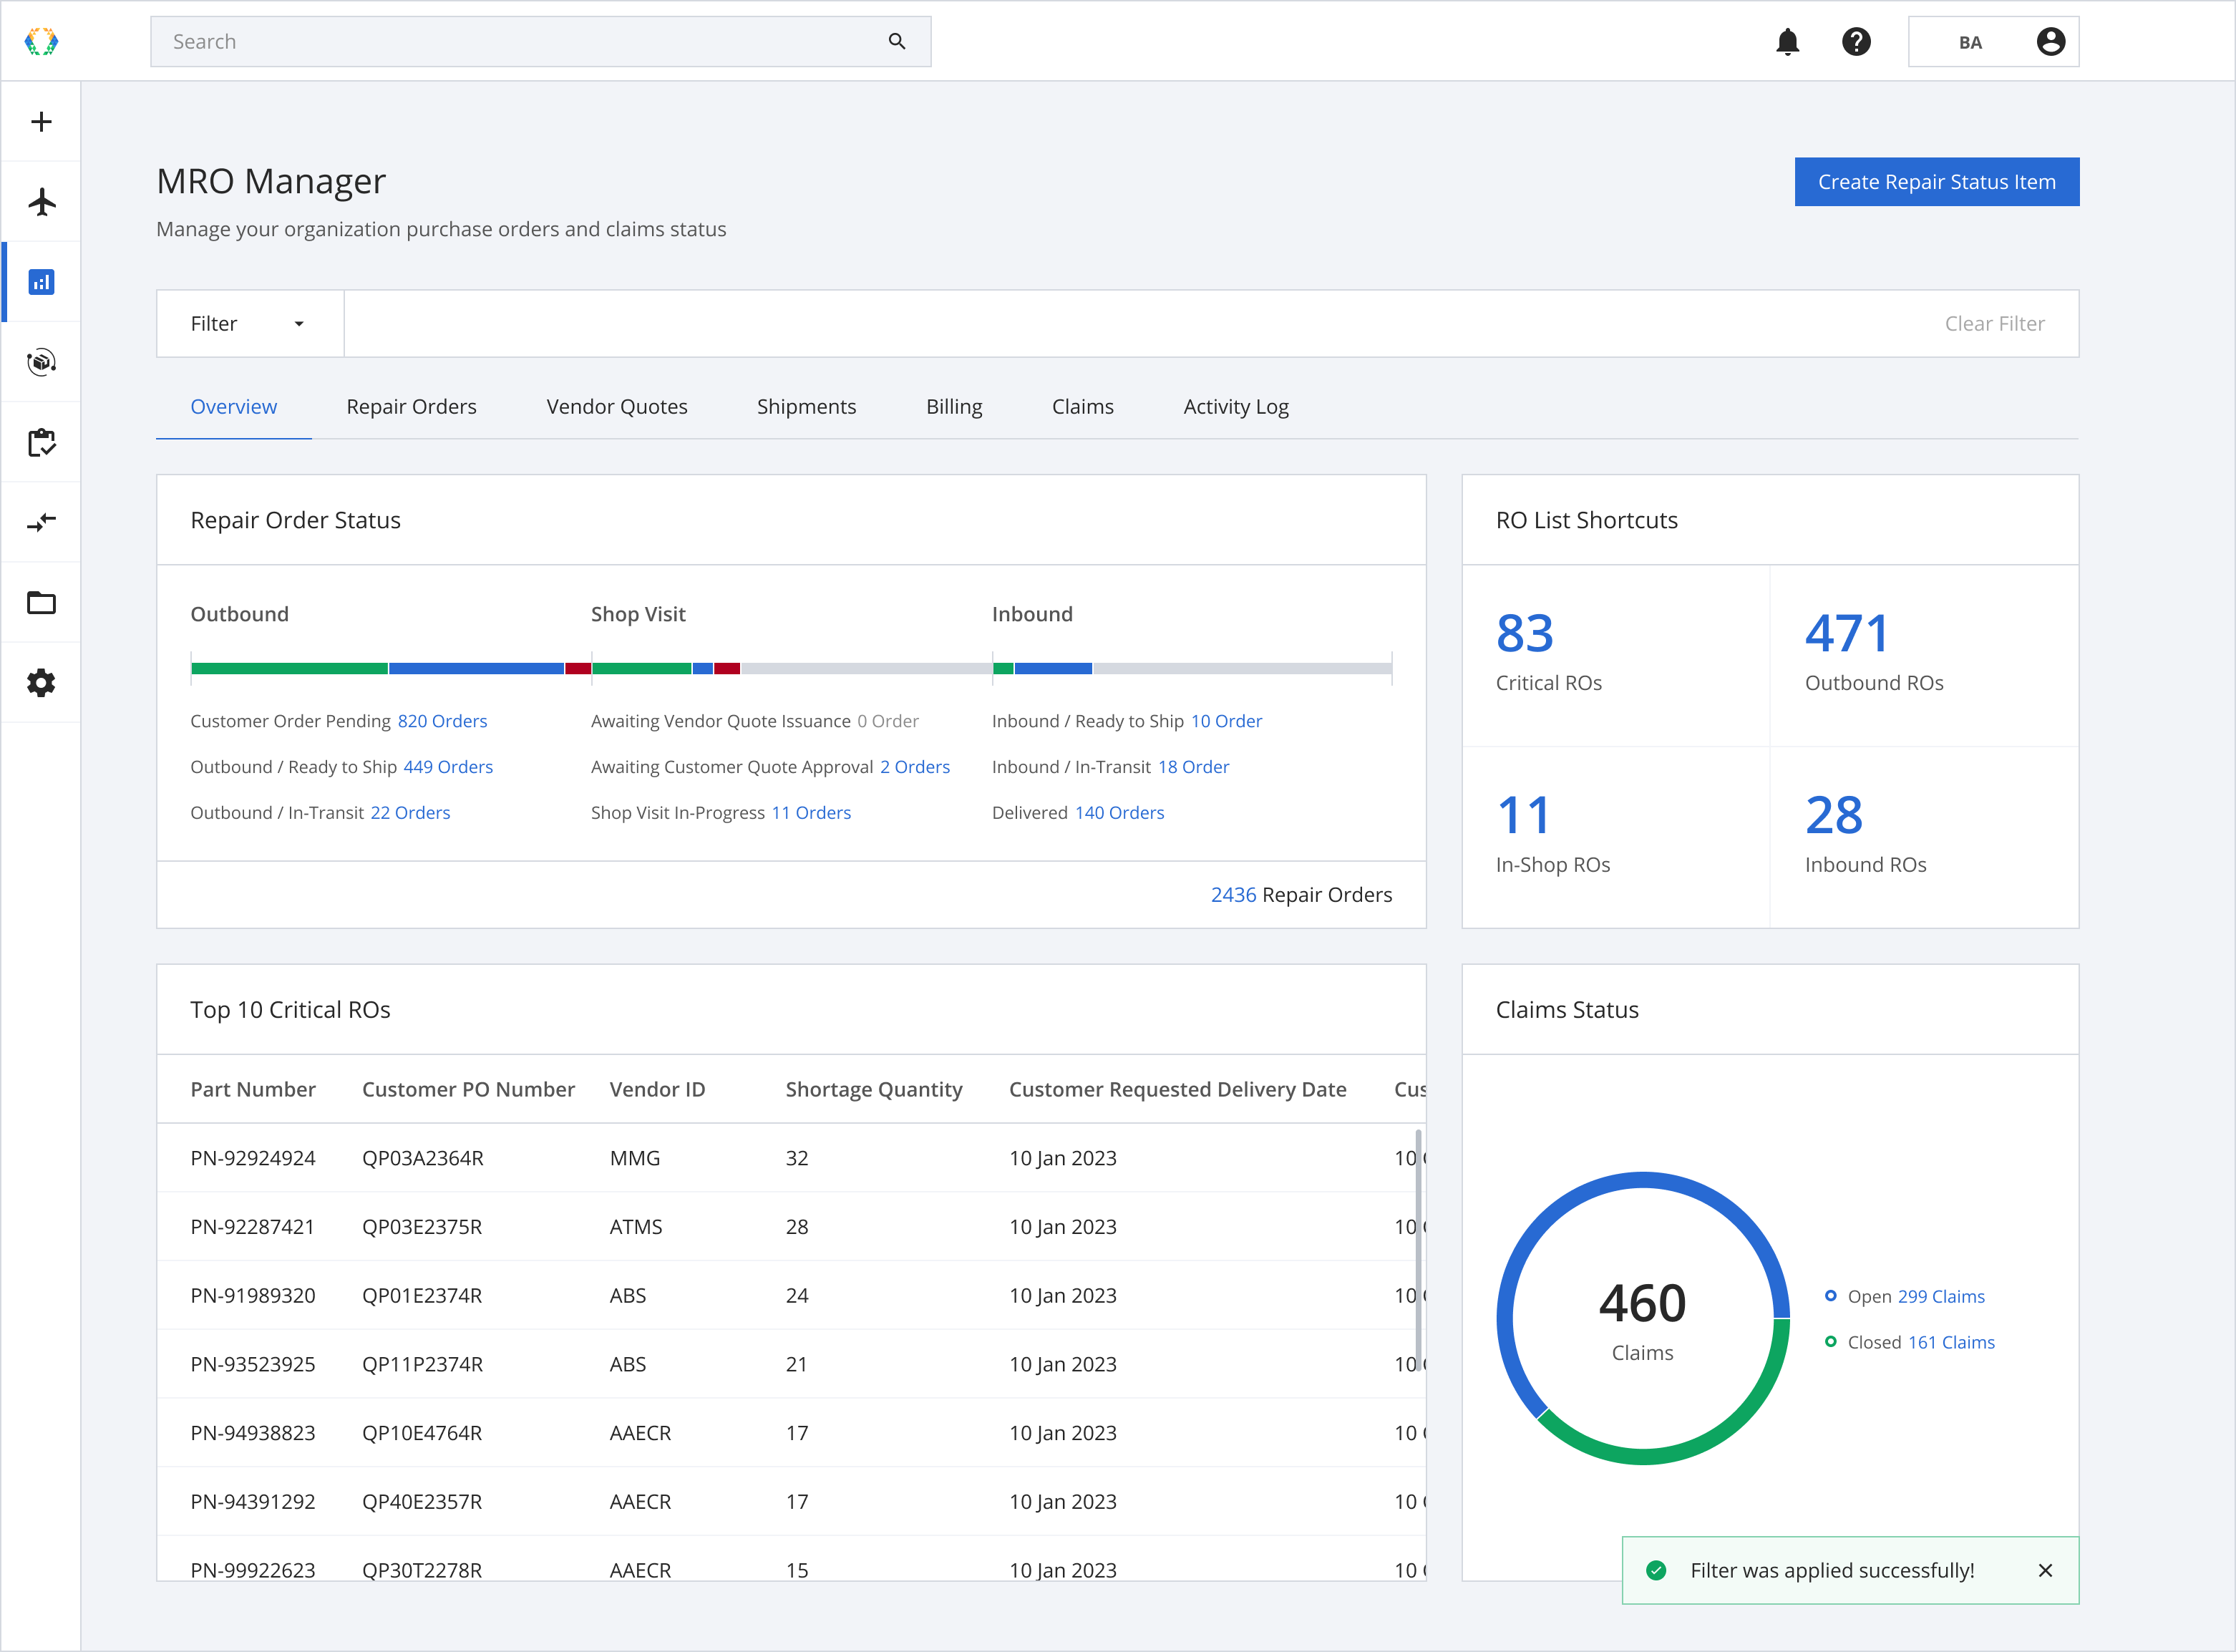
Step 2: Your applied filters will be cleared and no filters will be applied.
Updated 12 months ago