Manage Billing Records
Getting Started
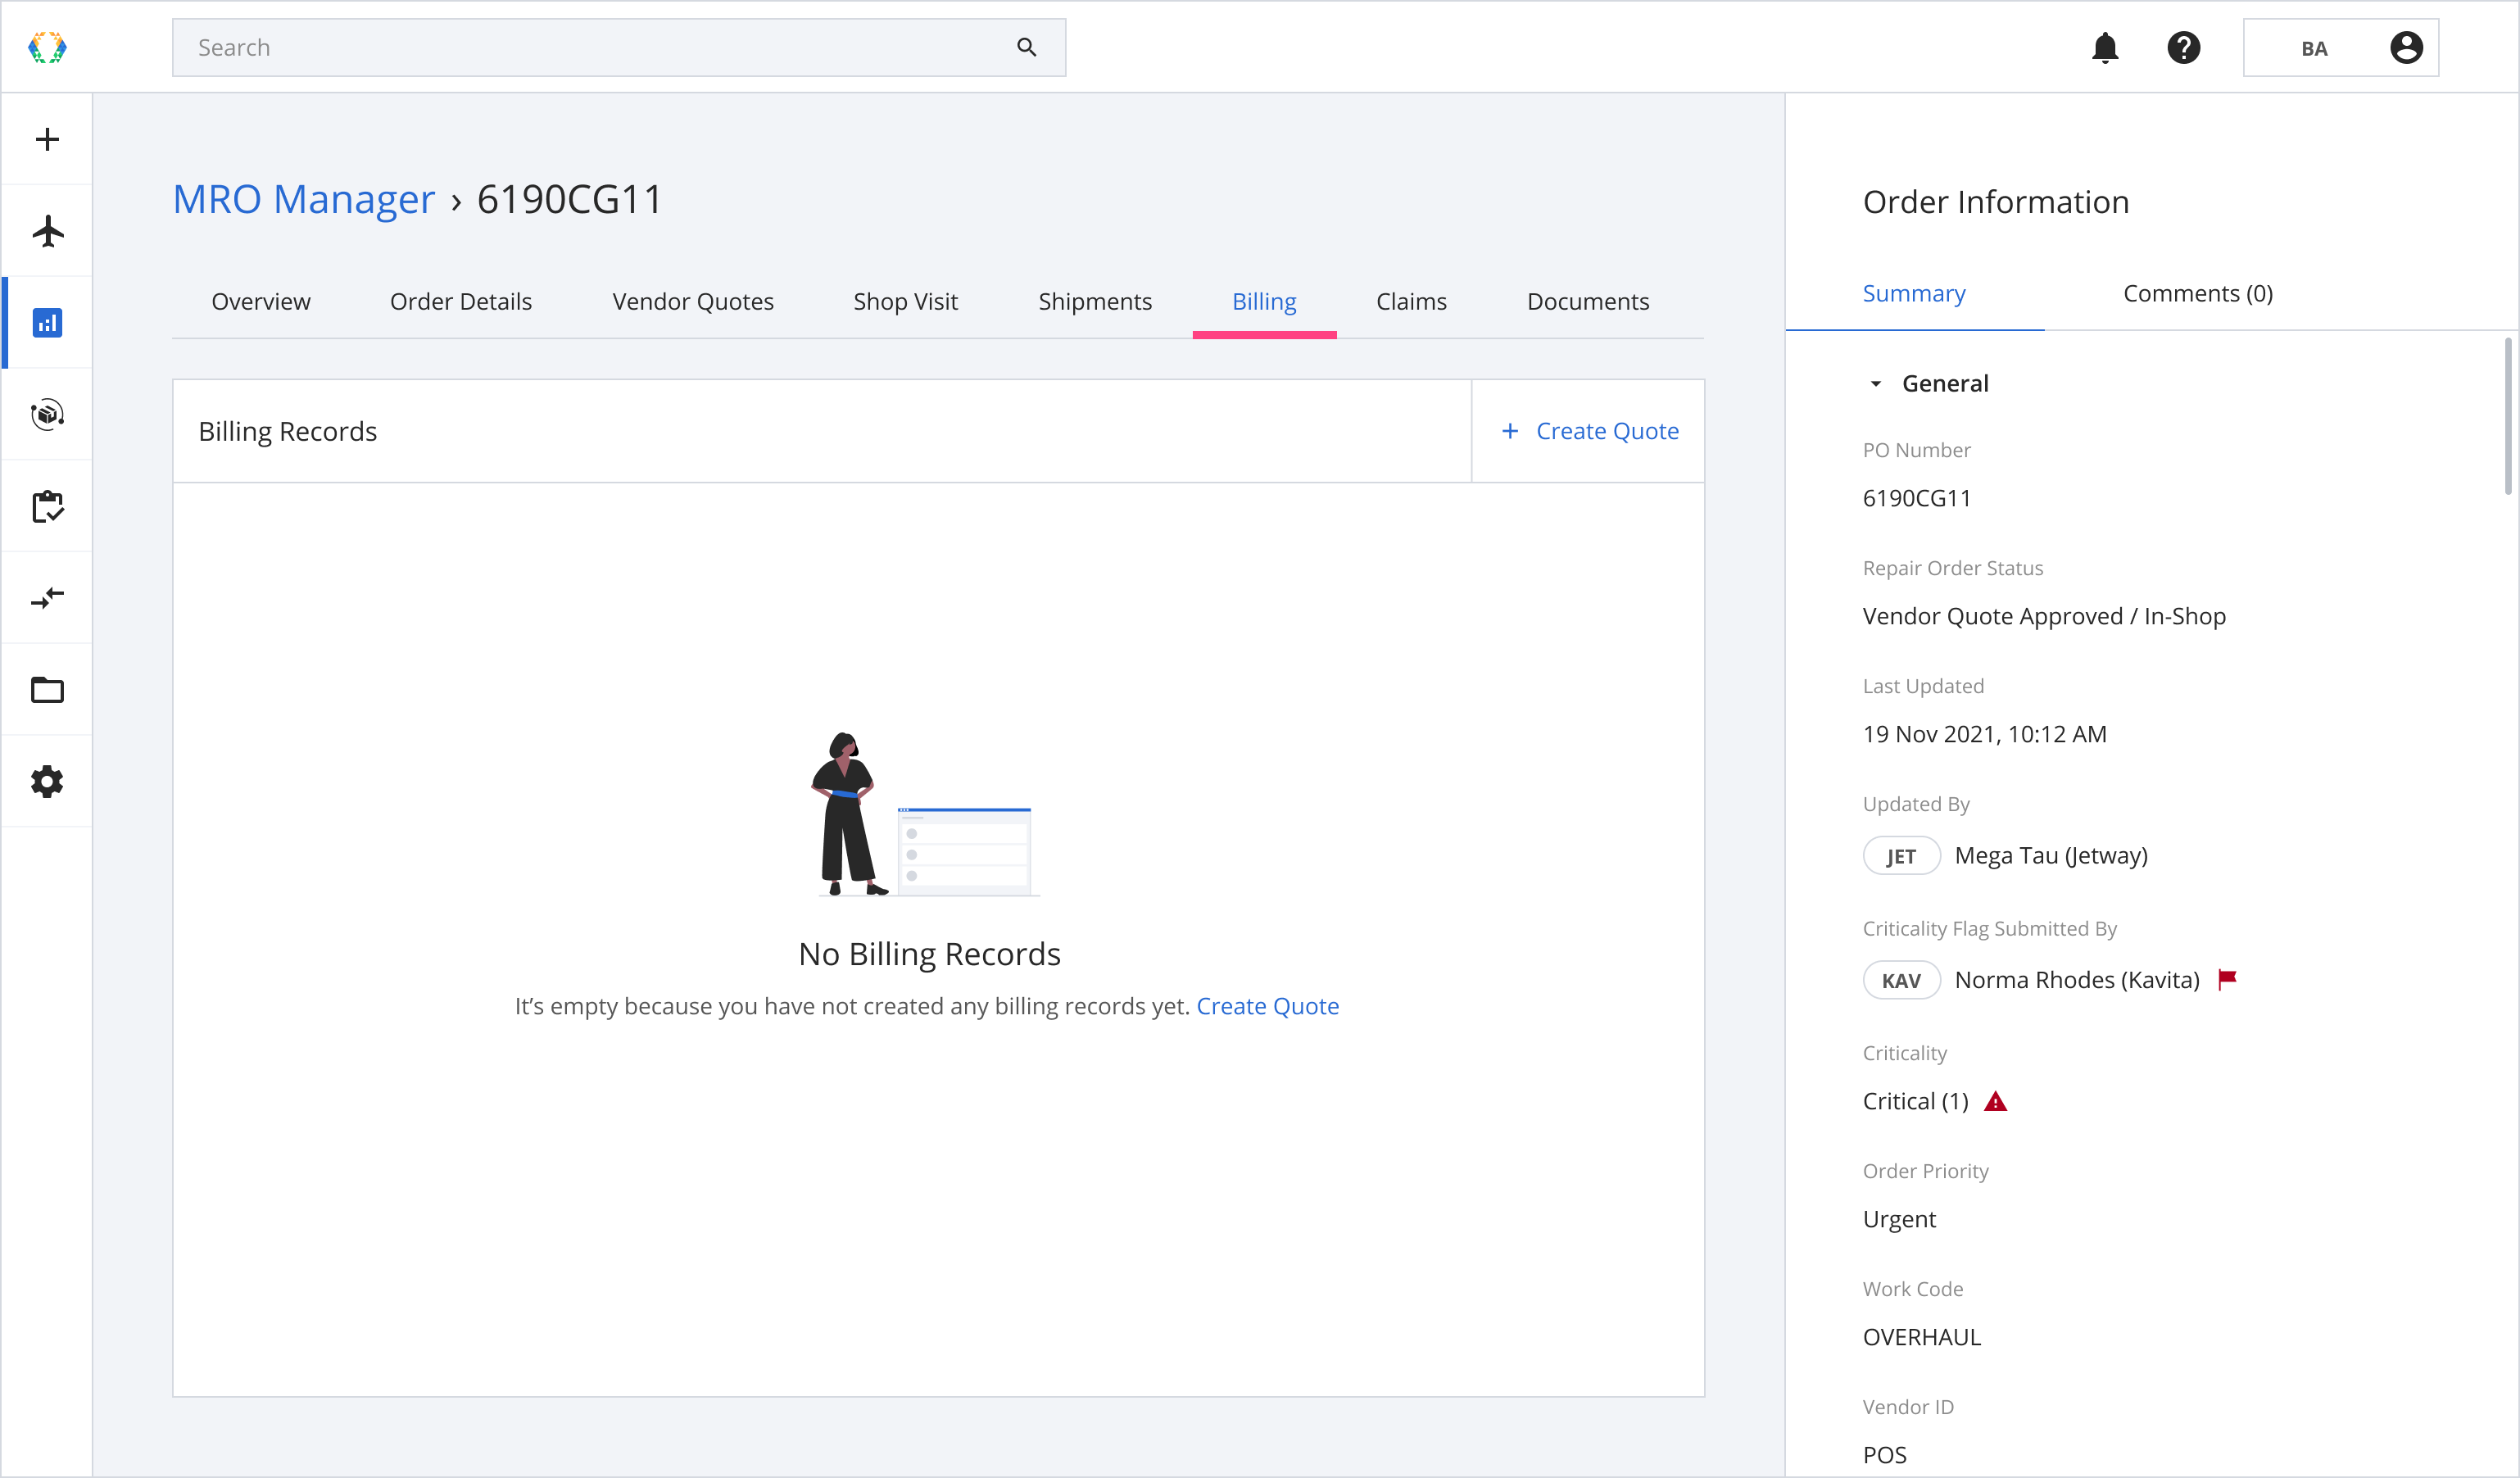
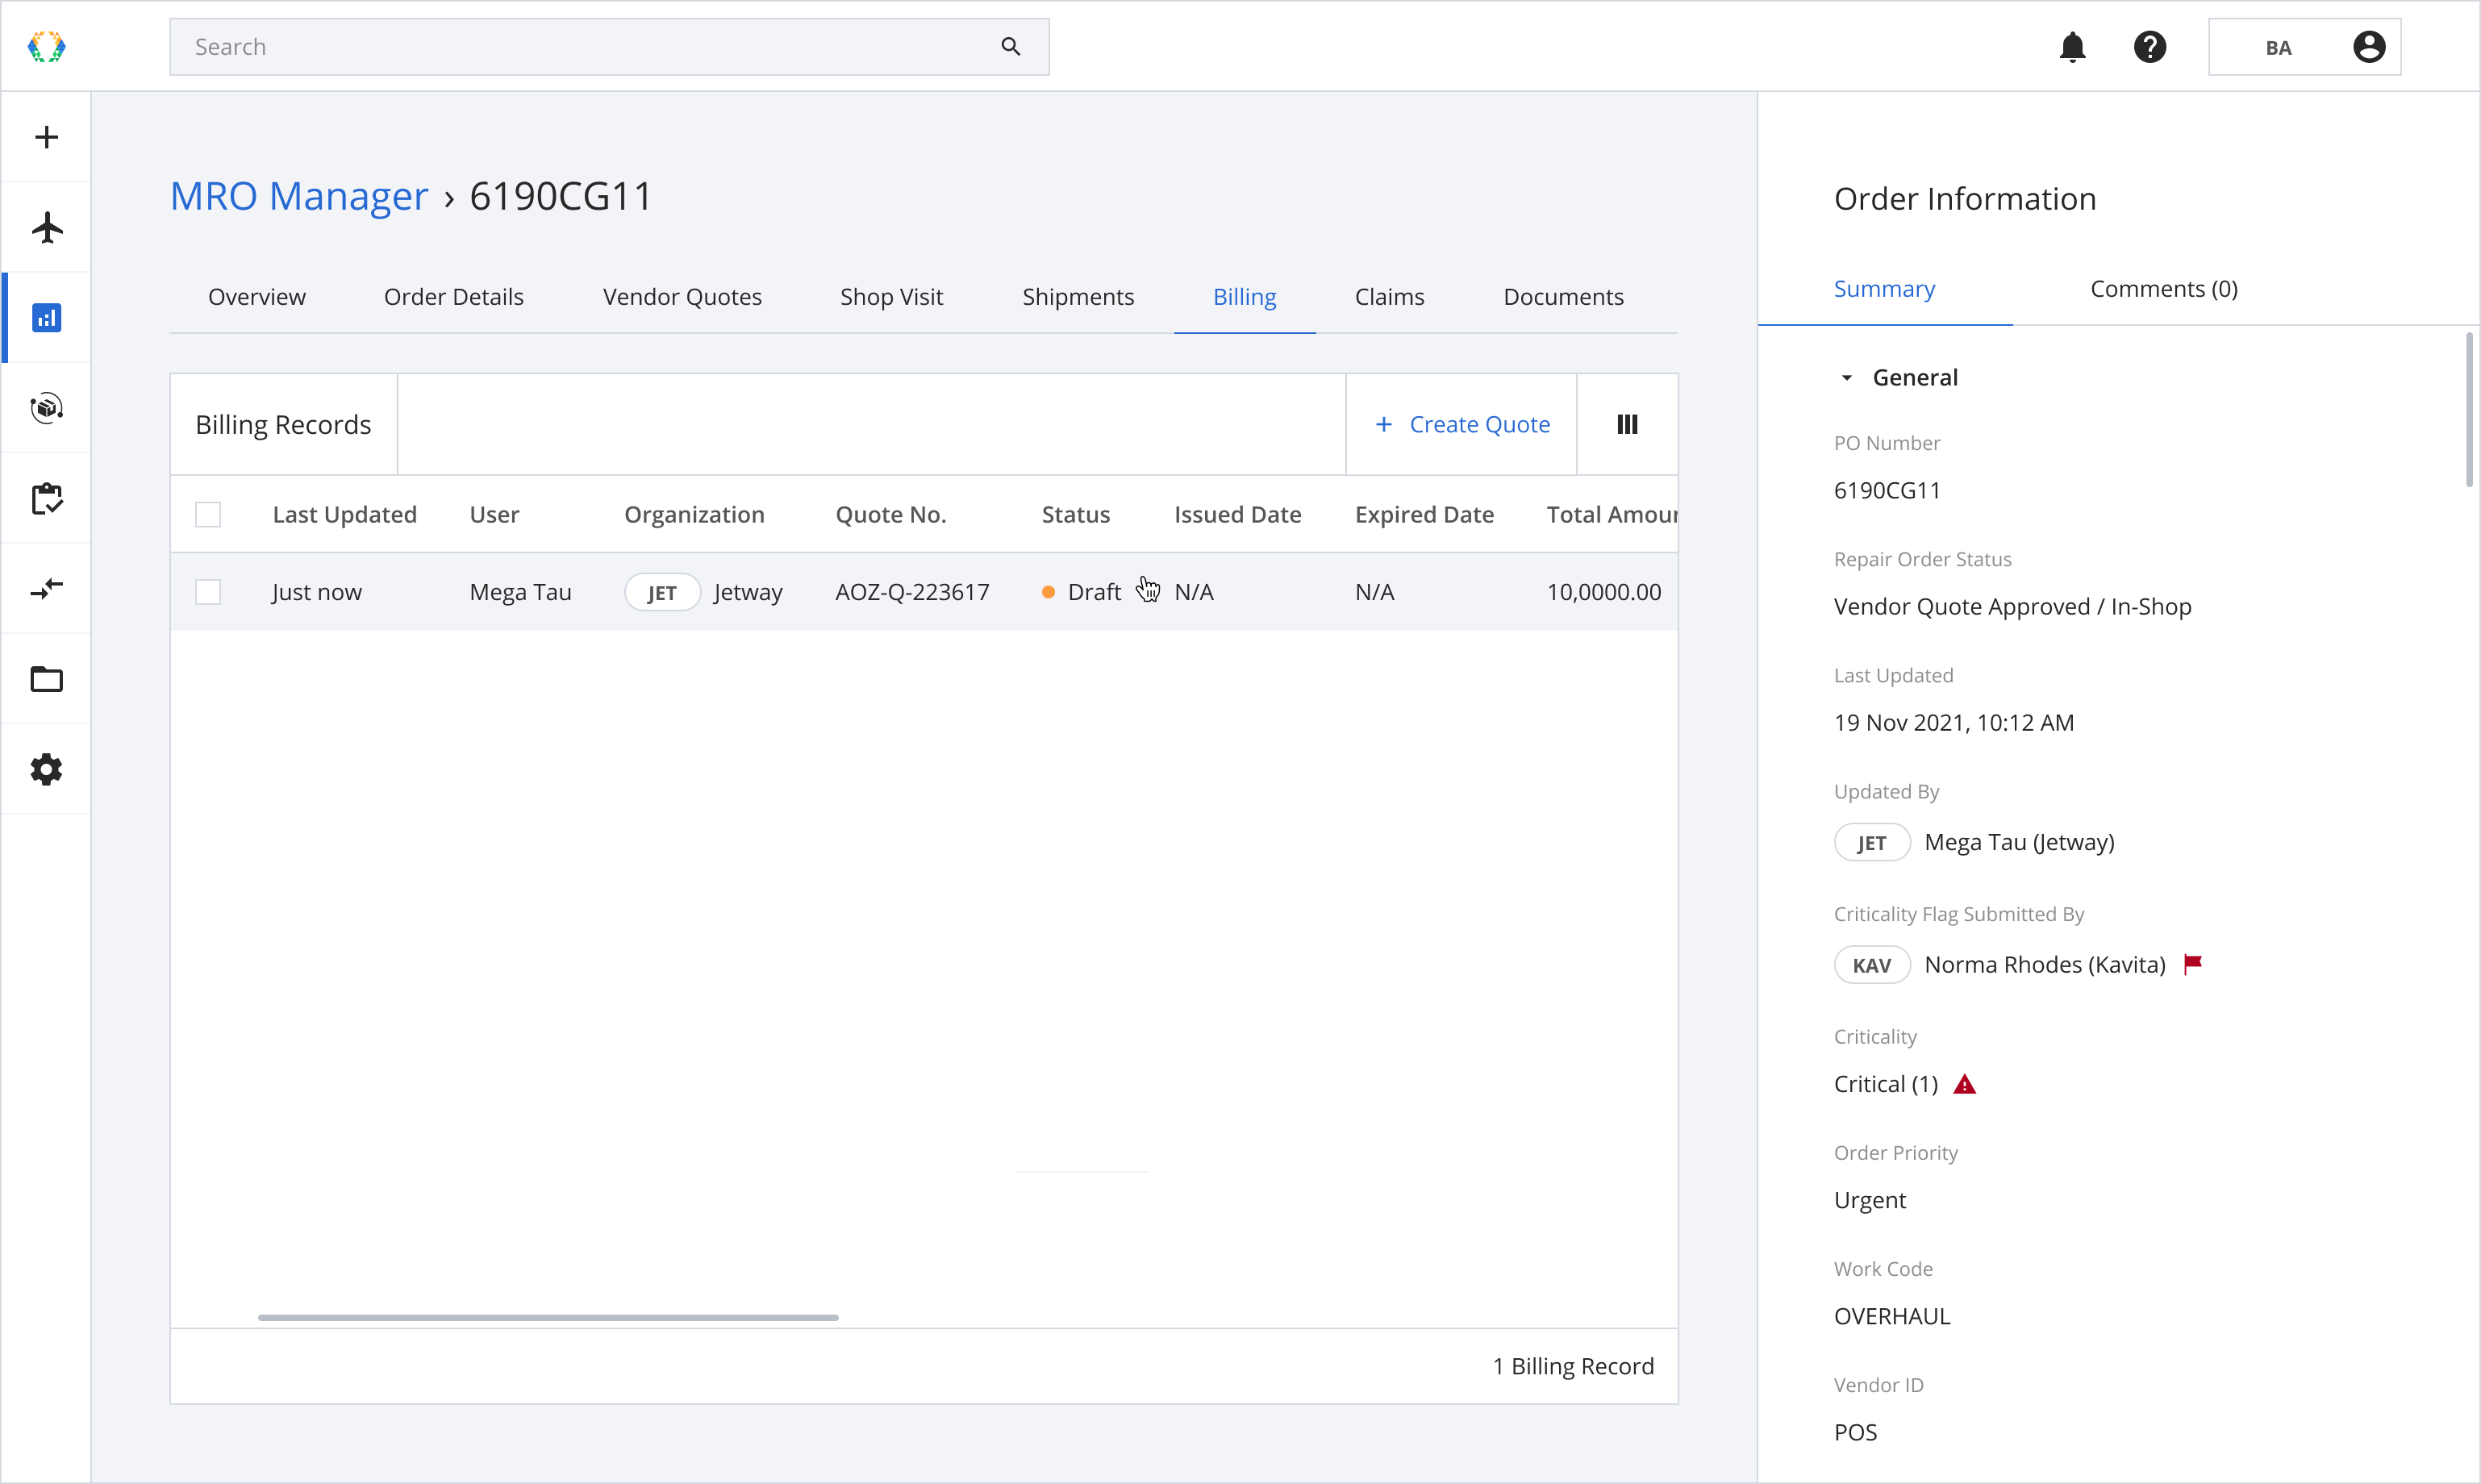
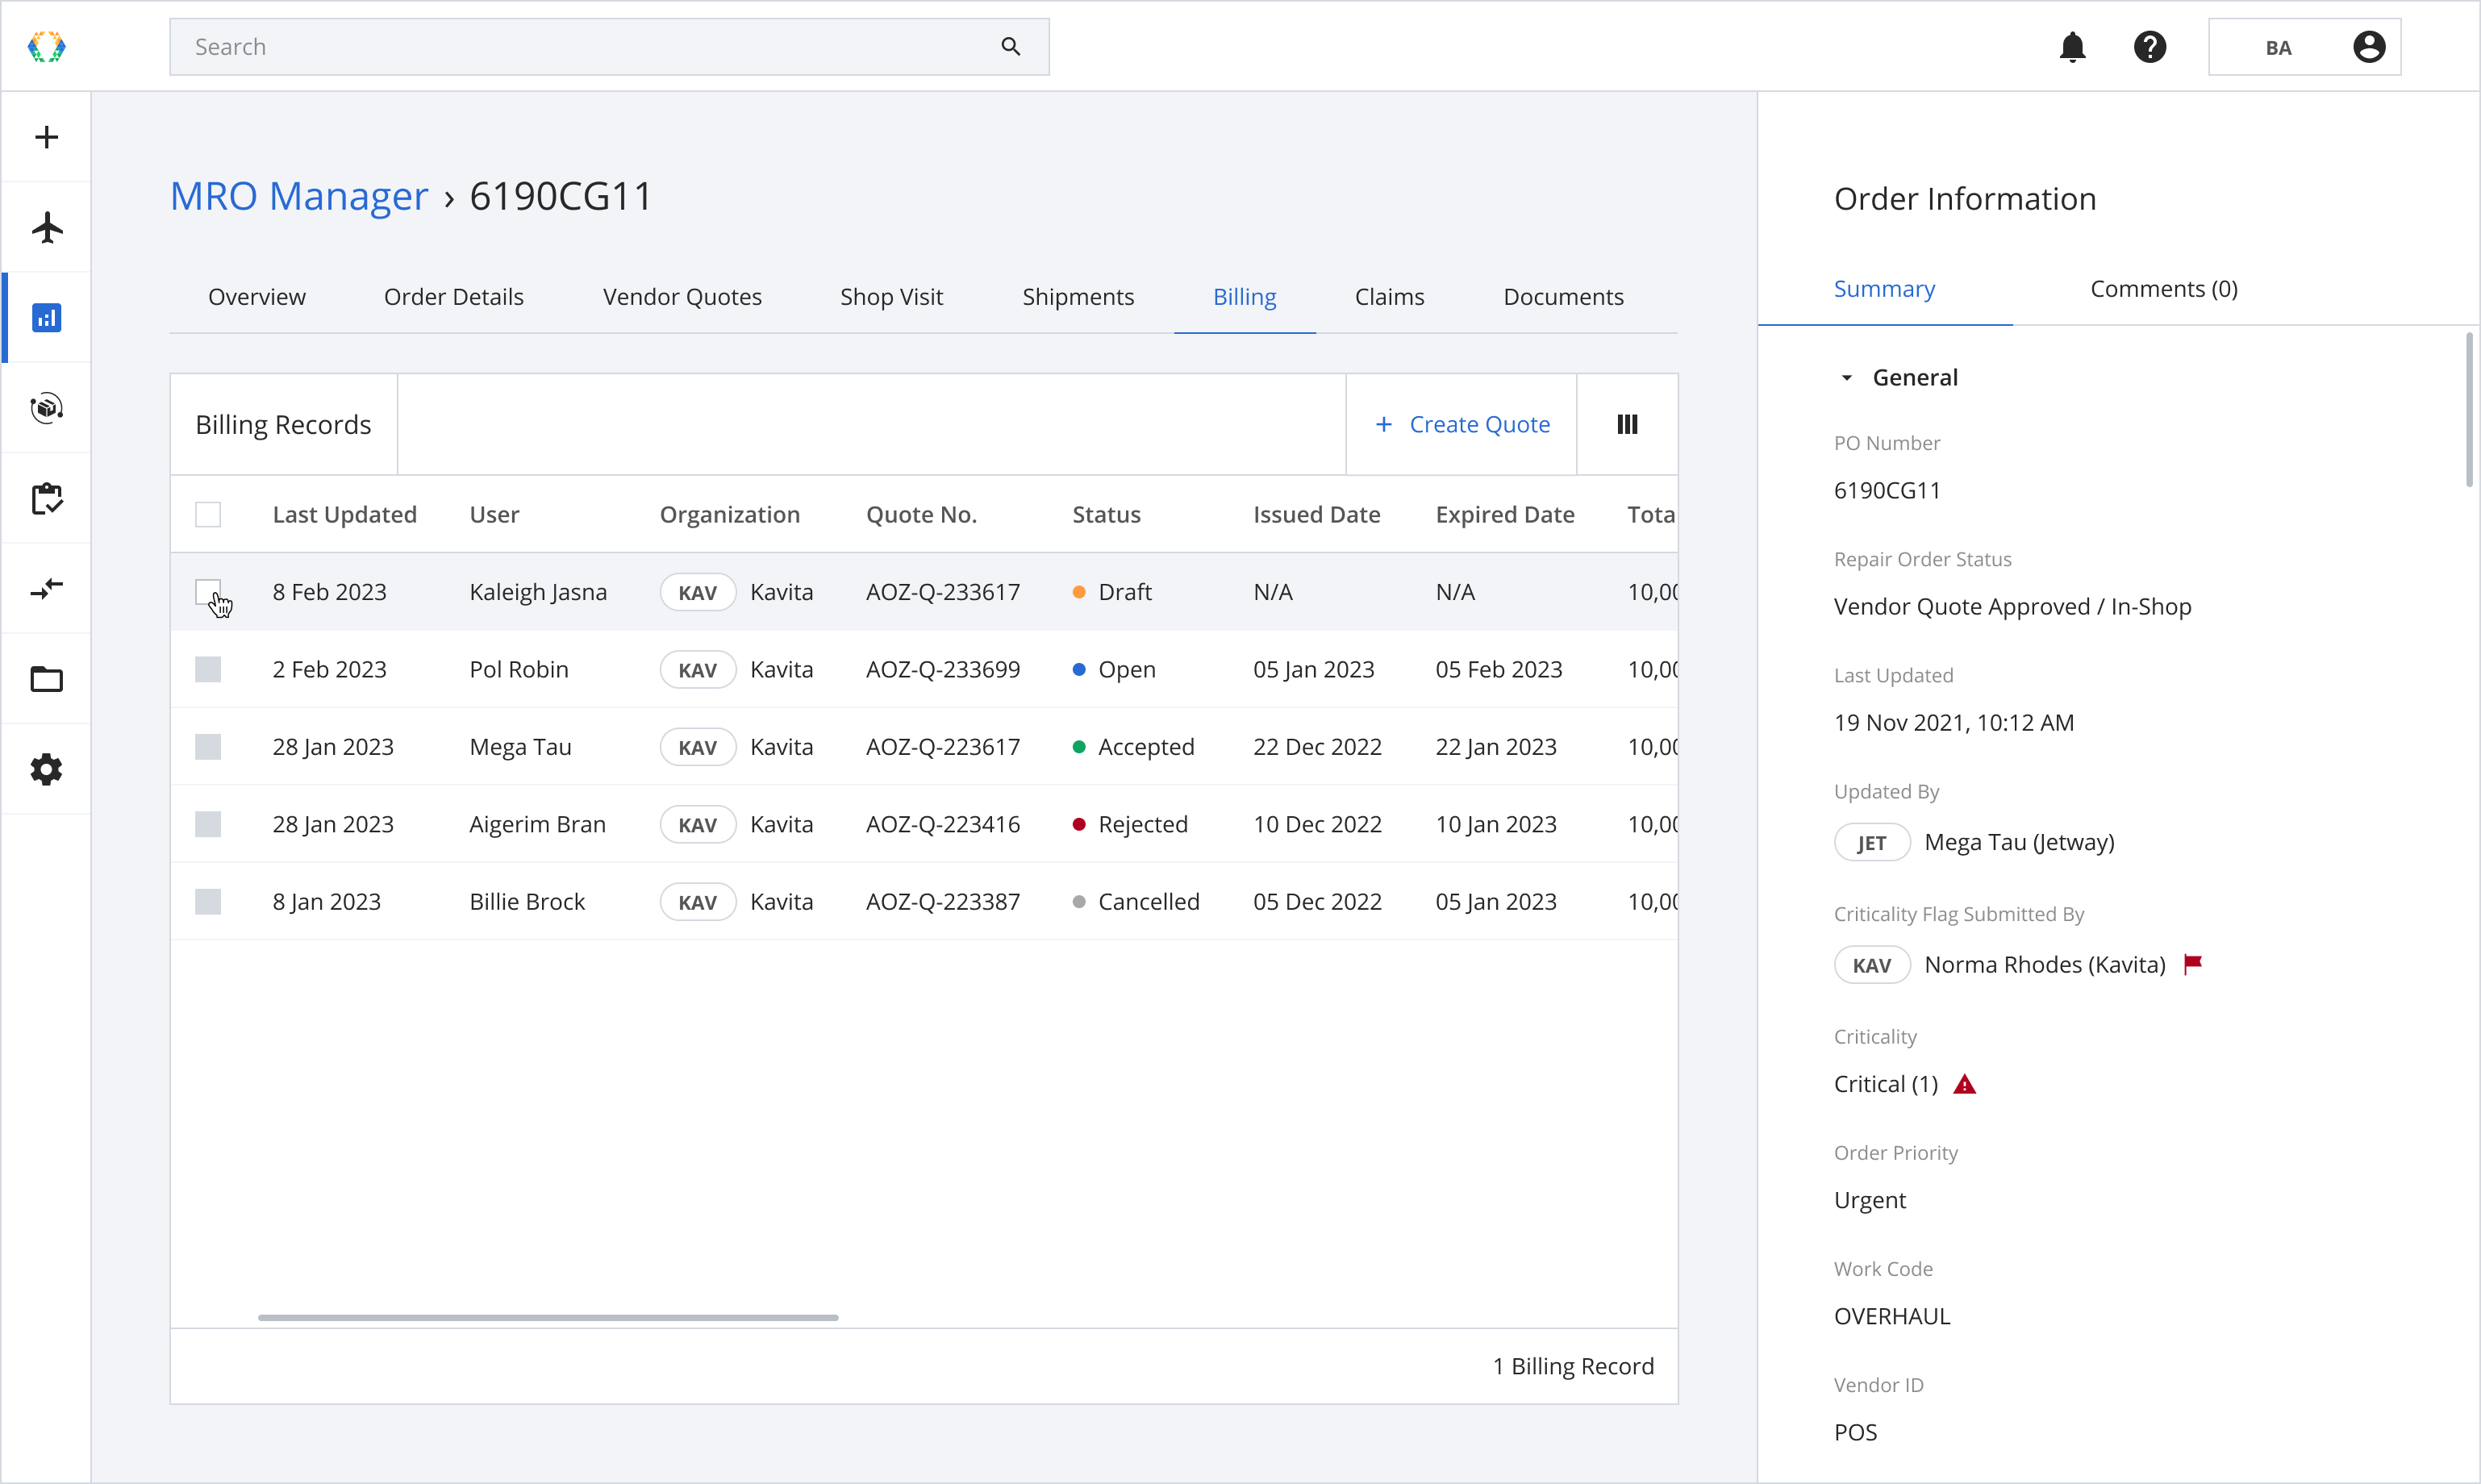
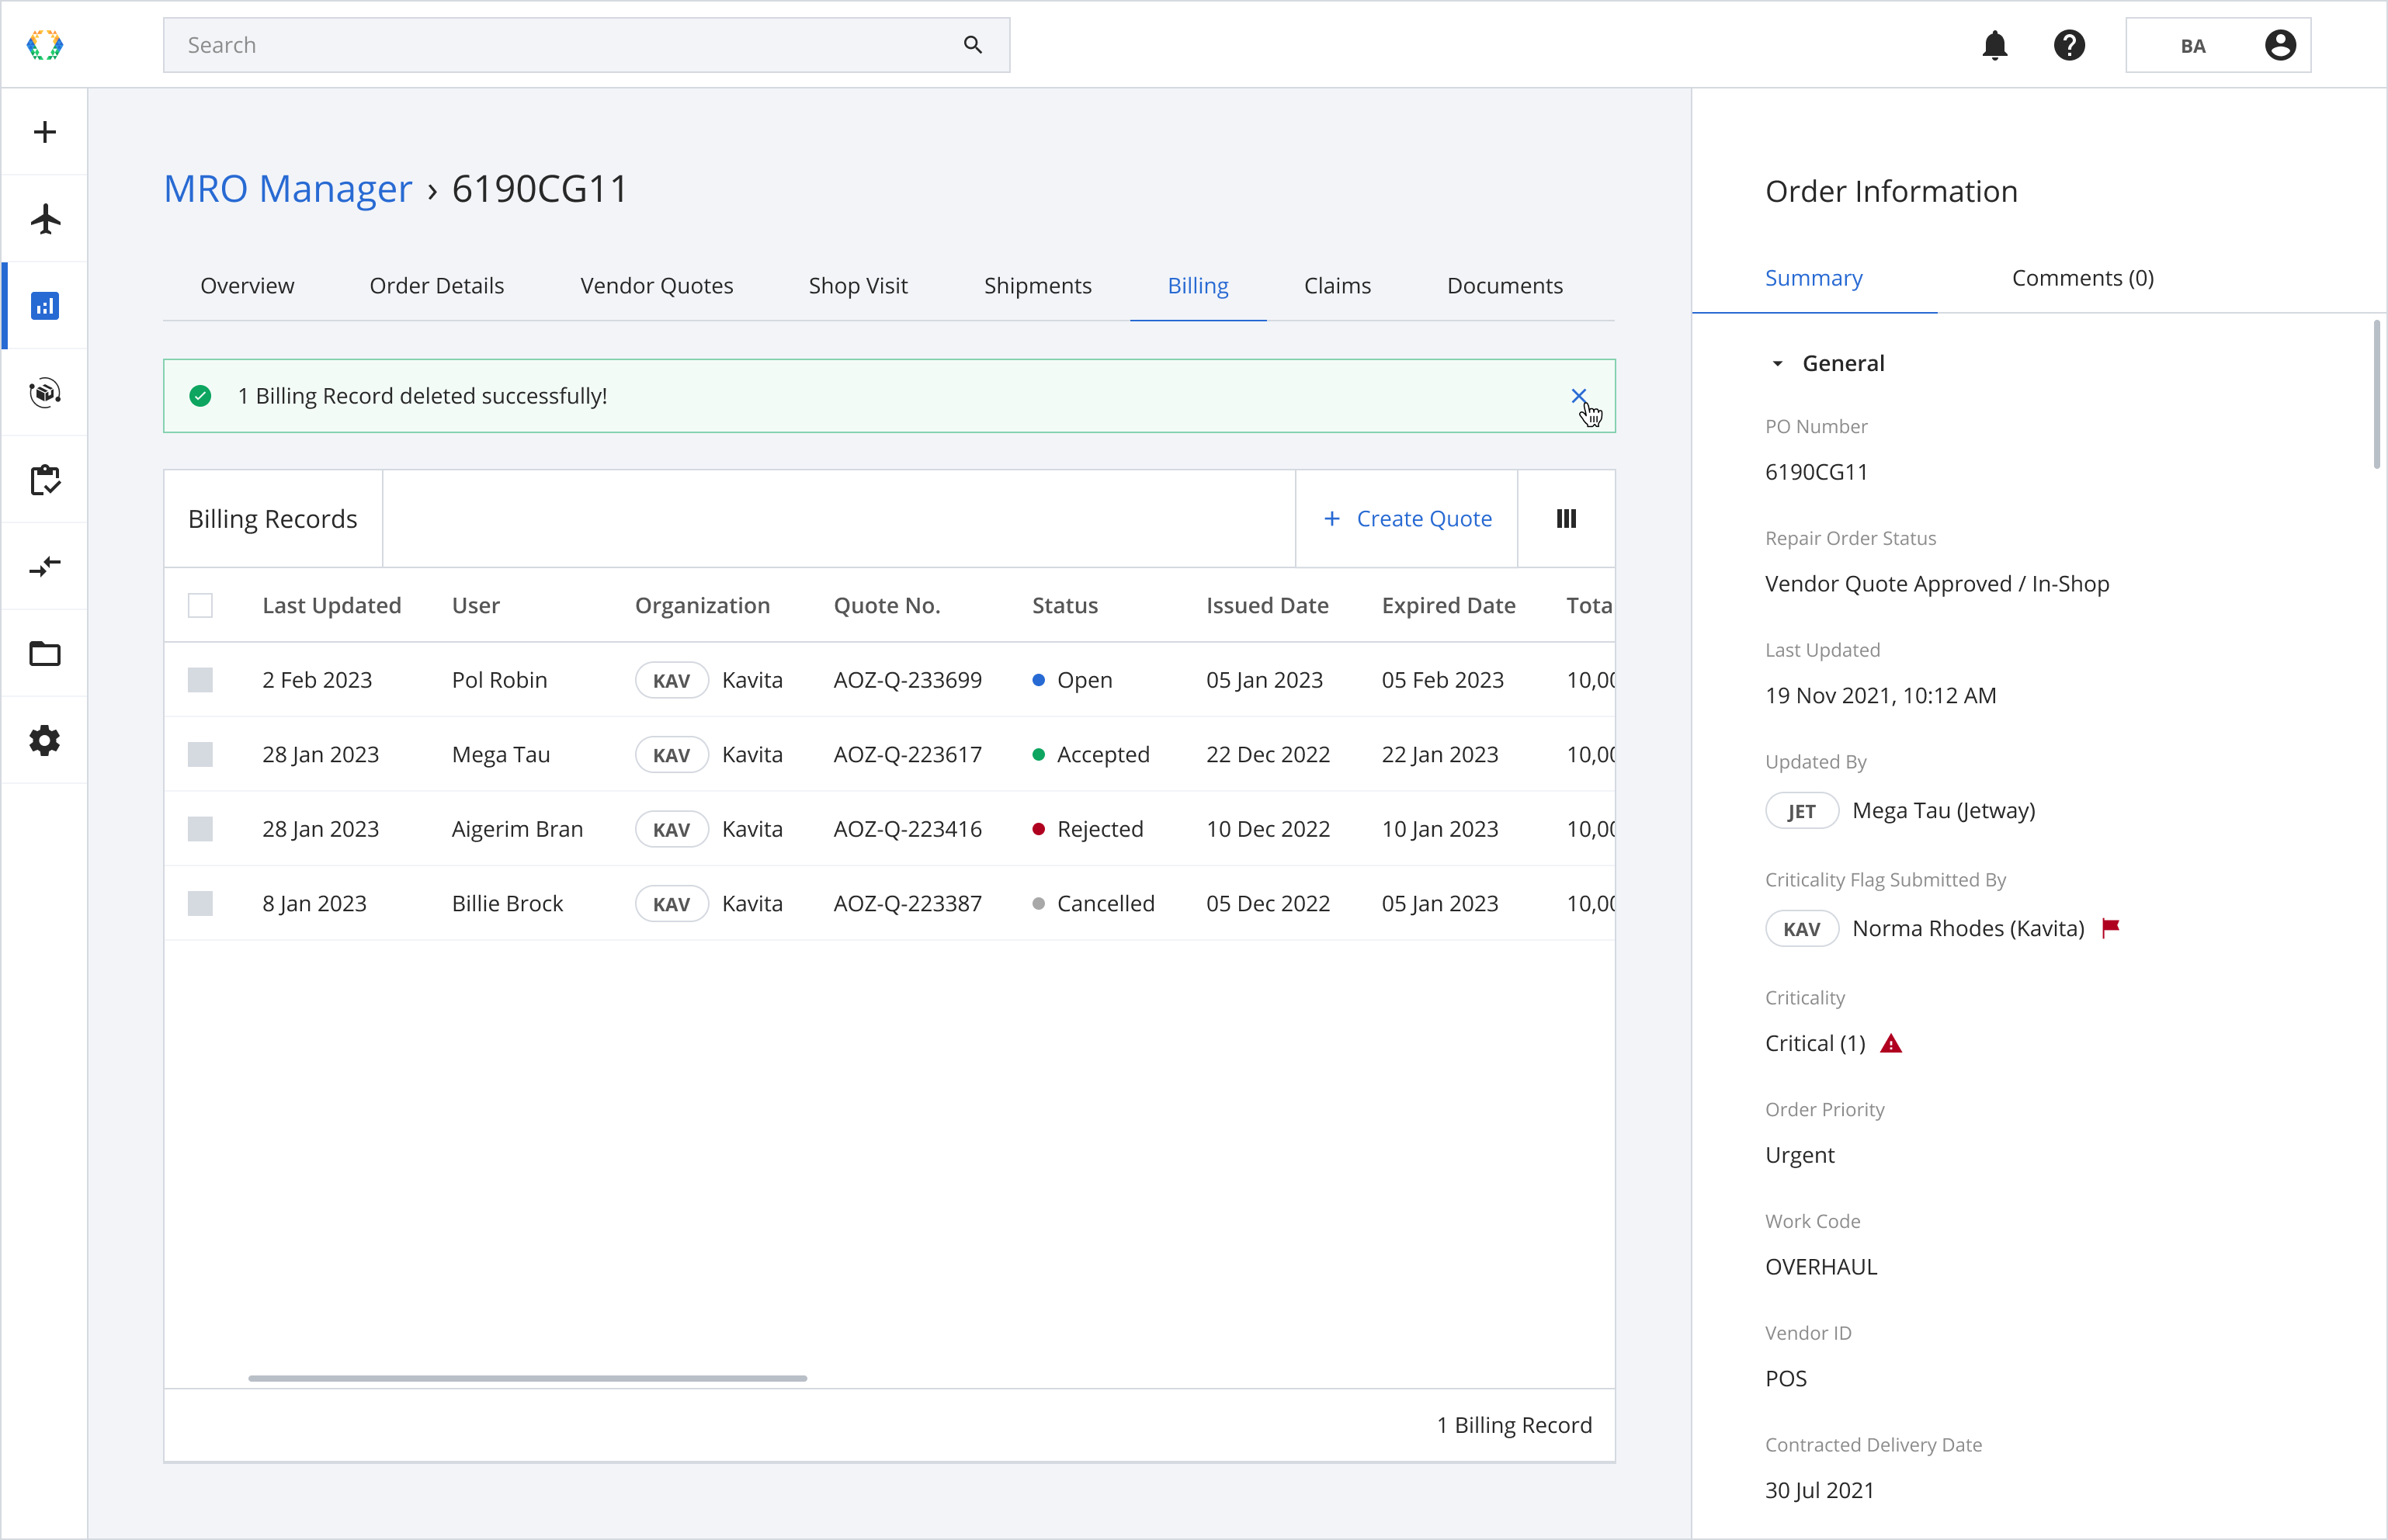
To manage your organizations billing quotes, click 'Billing' tab.
Creating Quotes
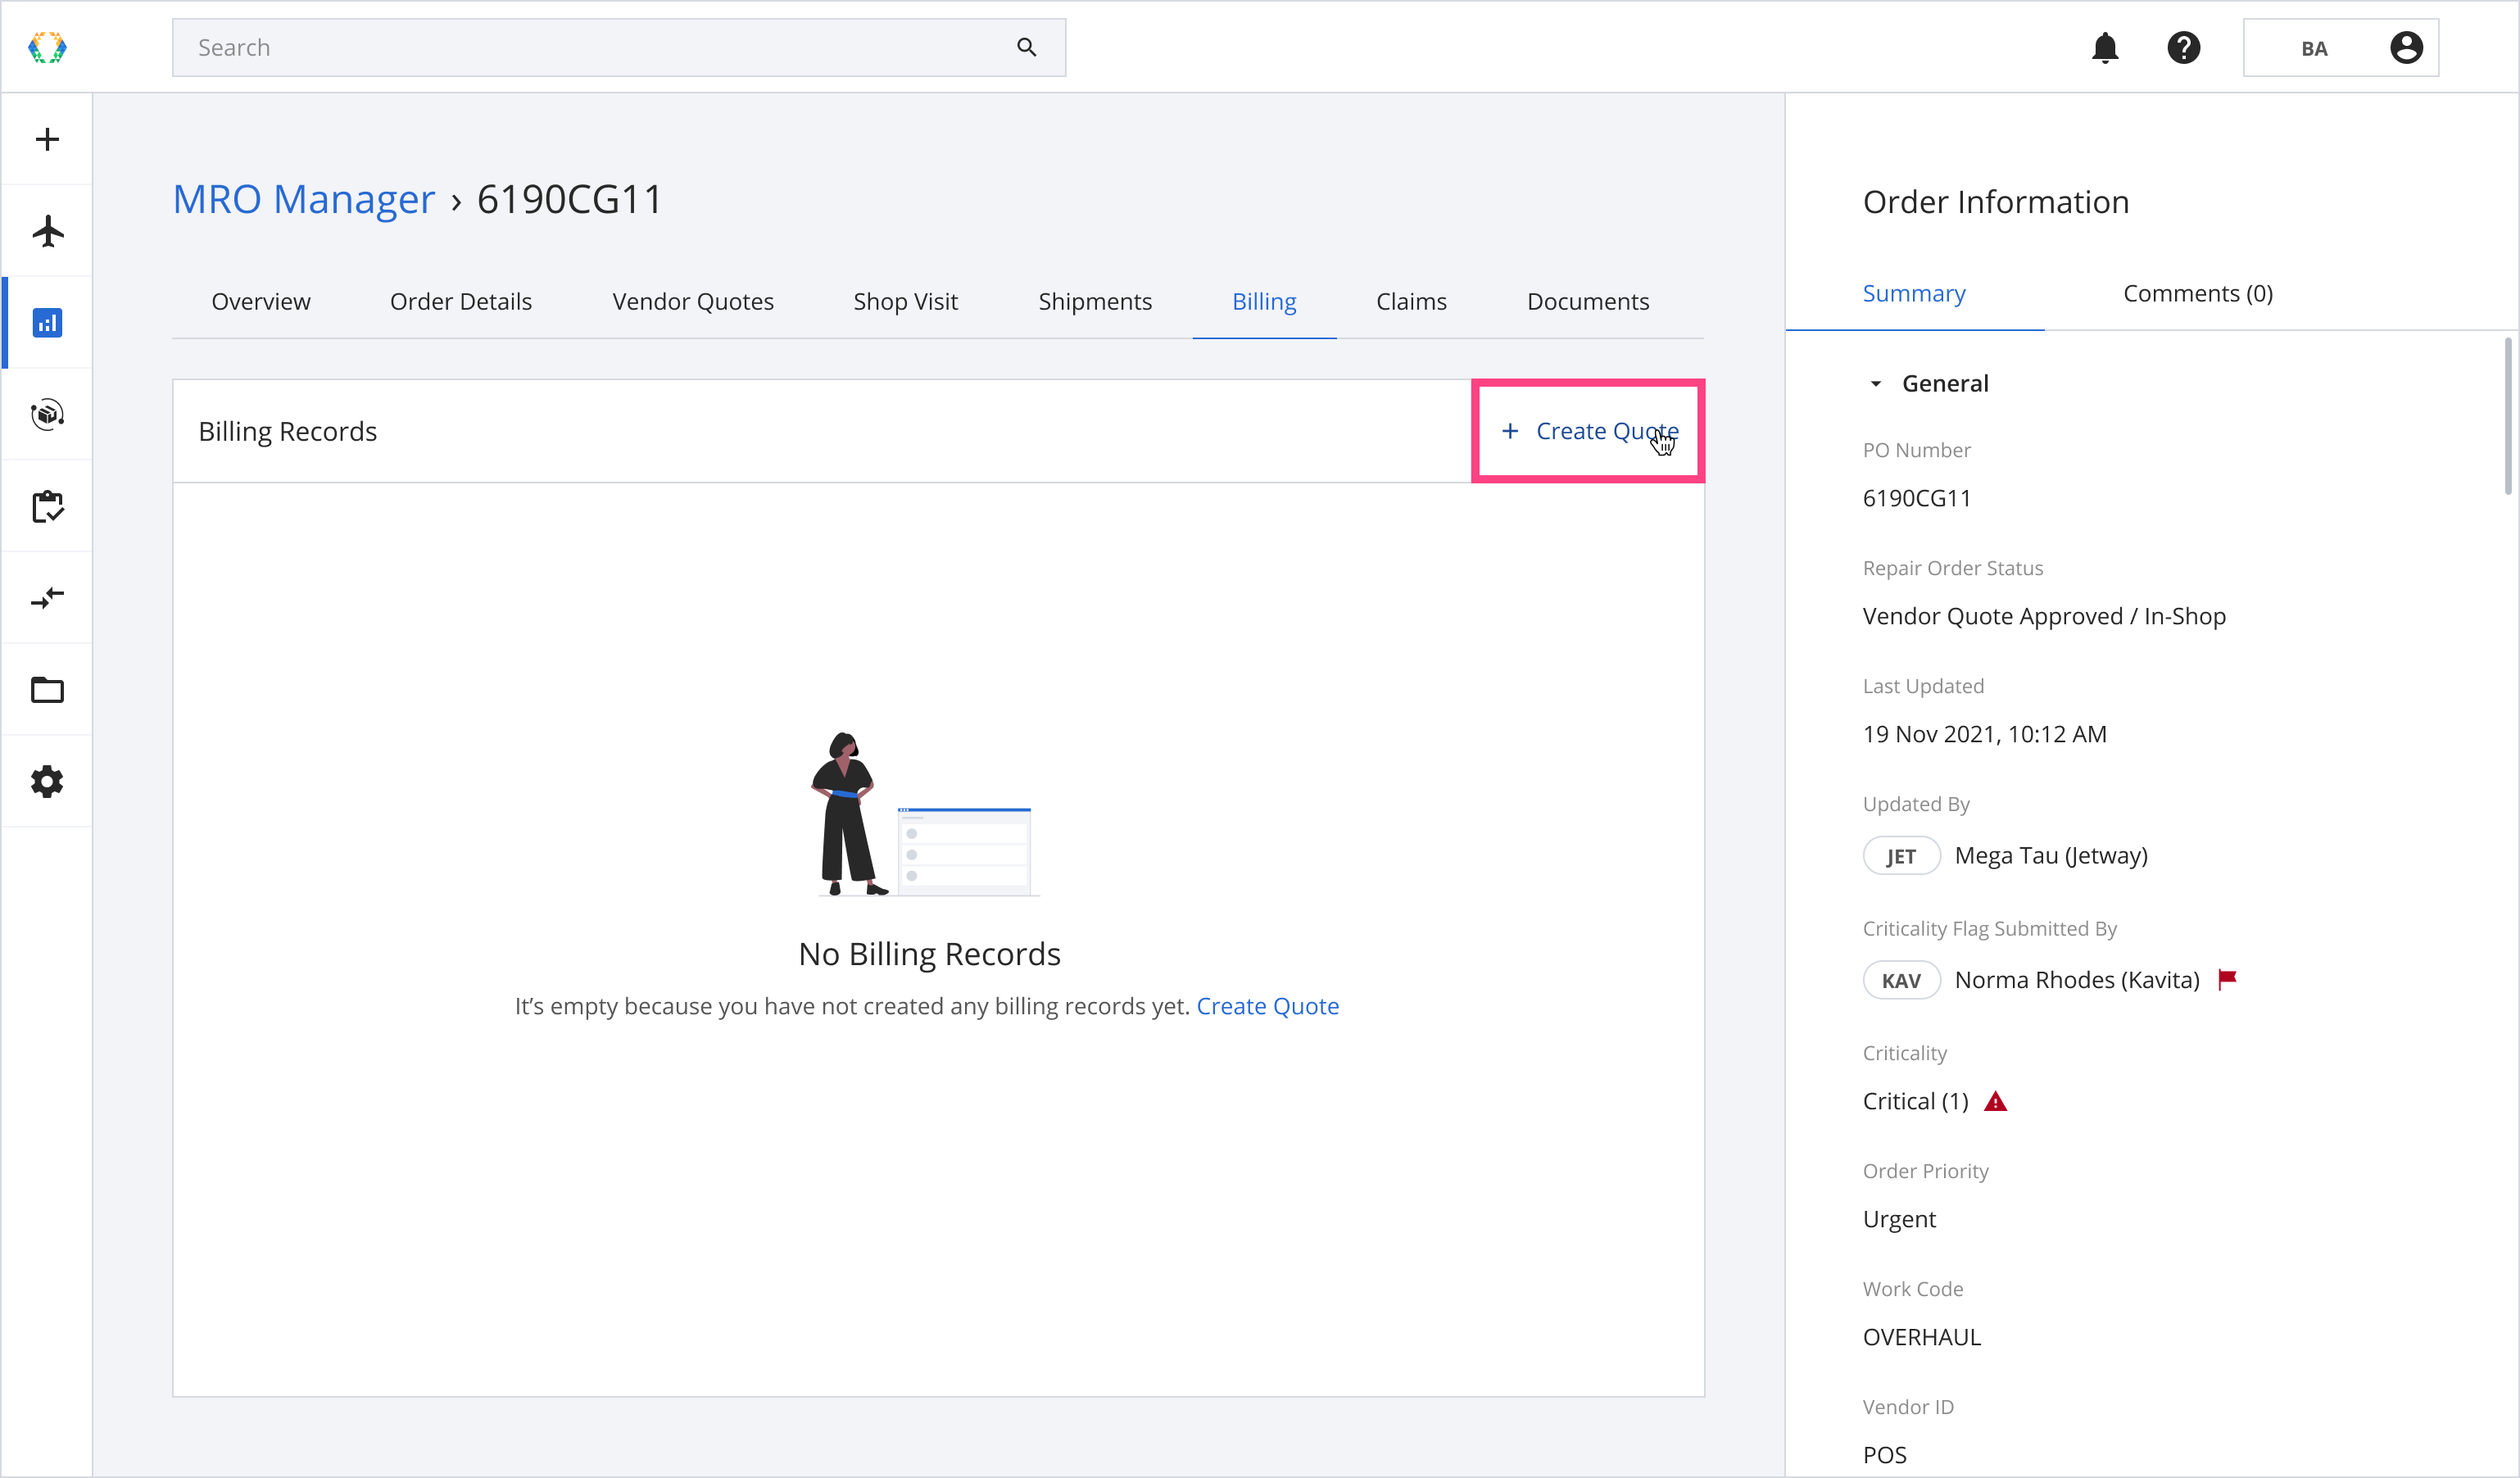
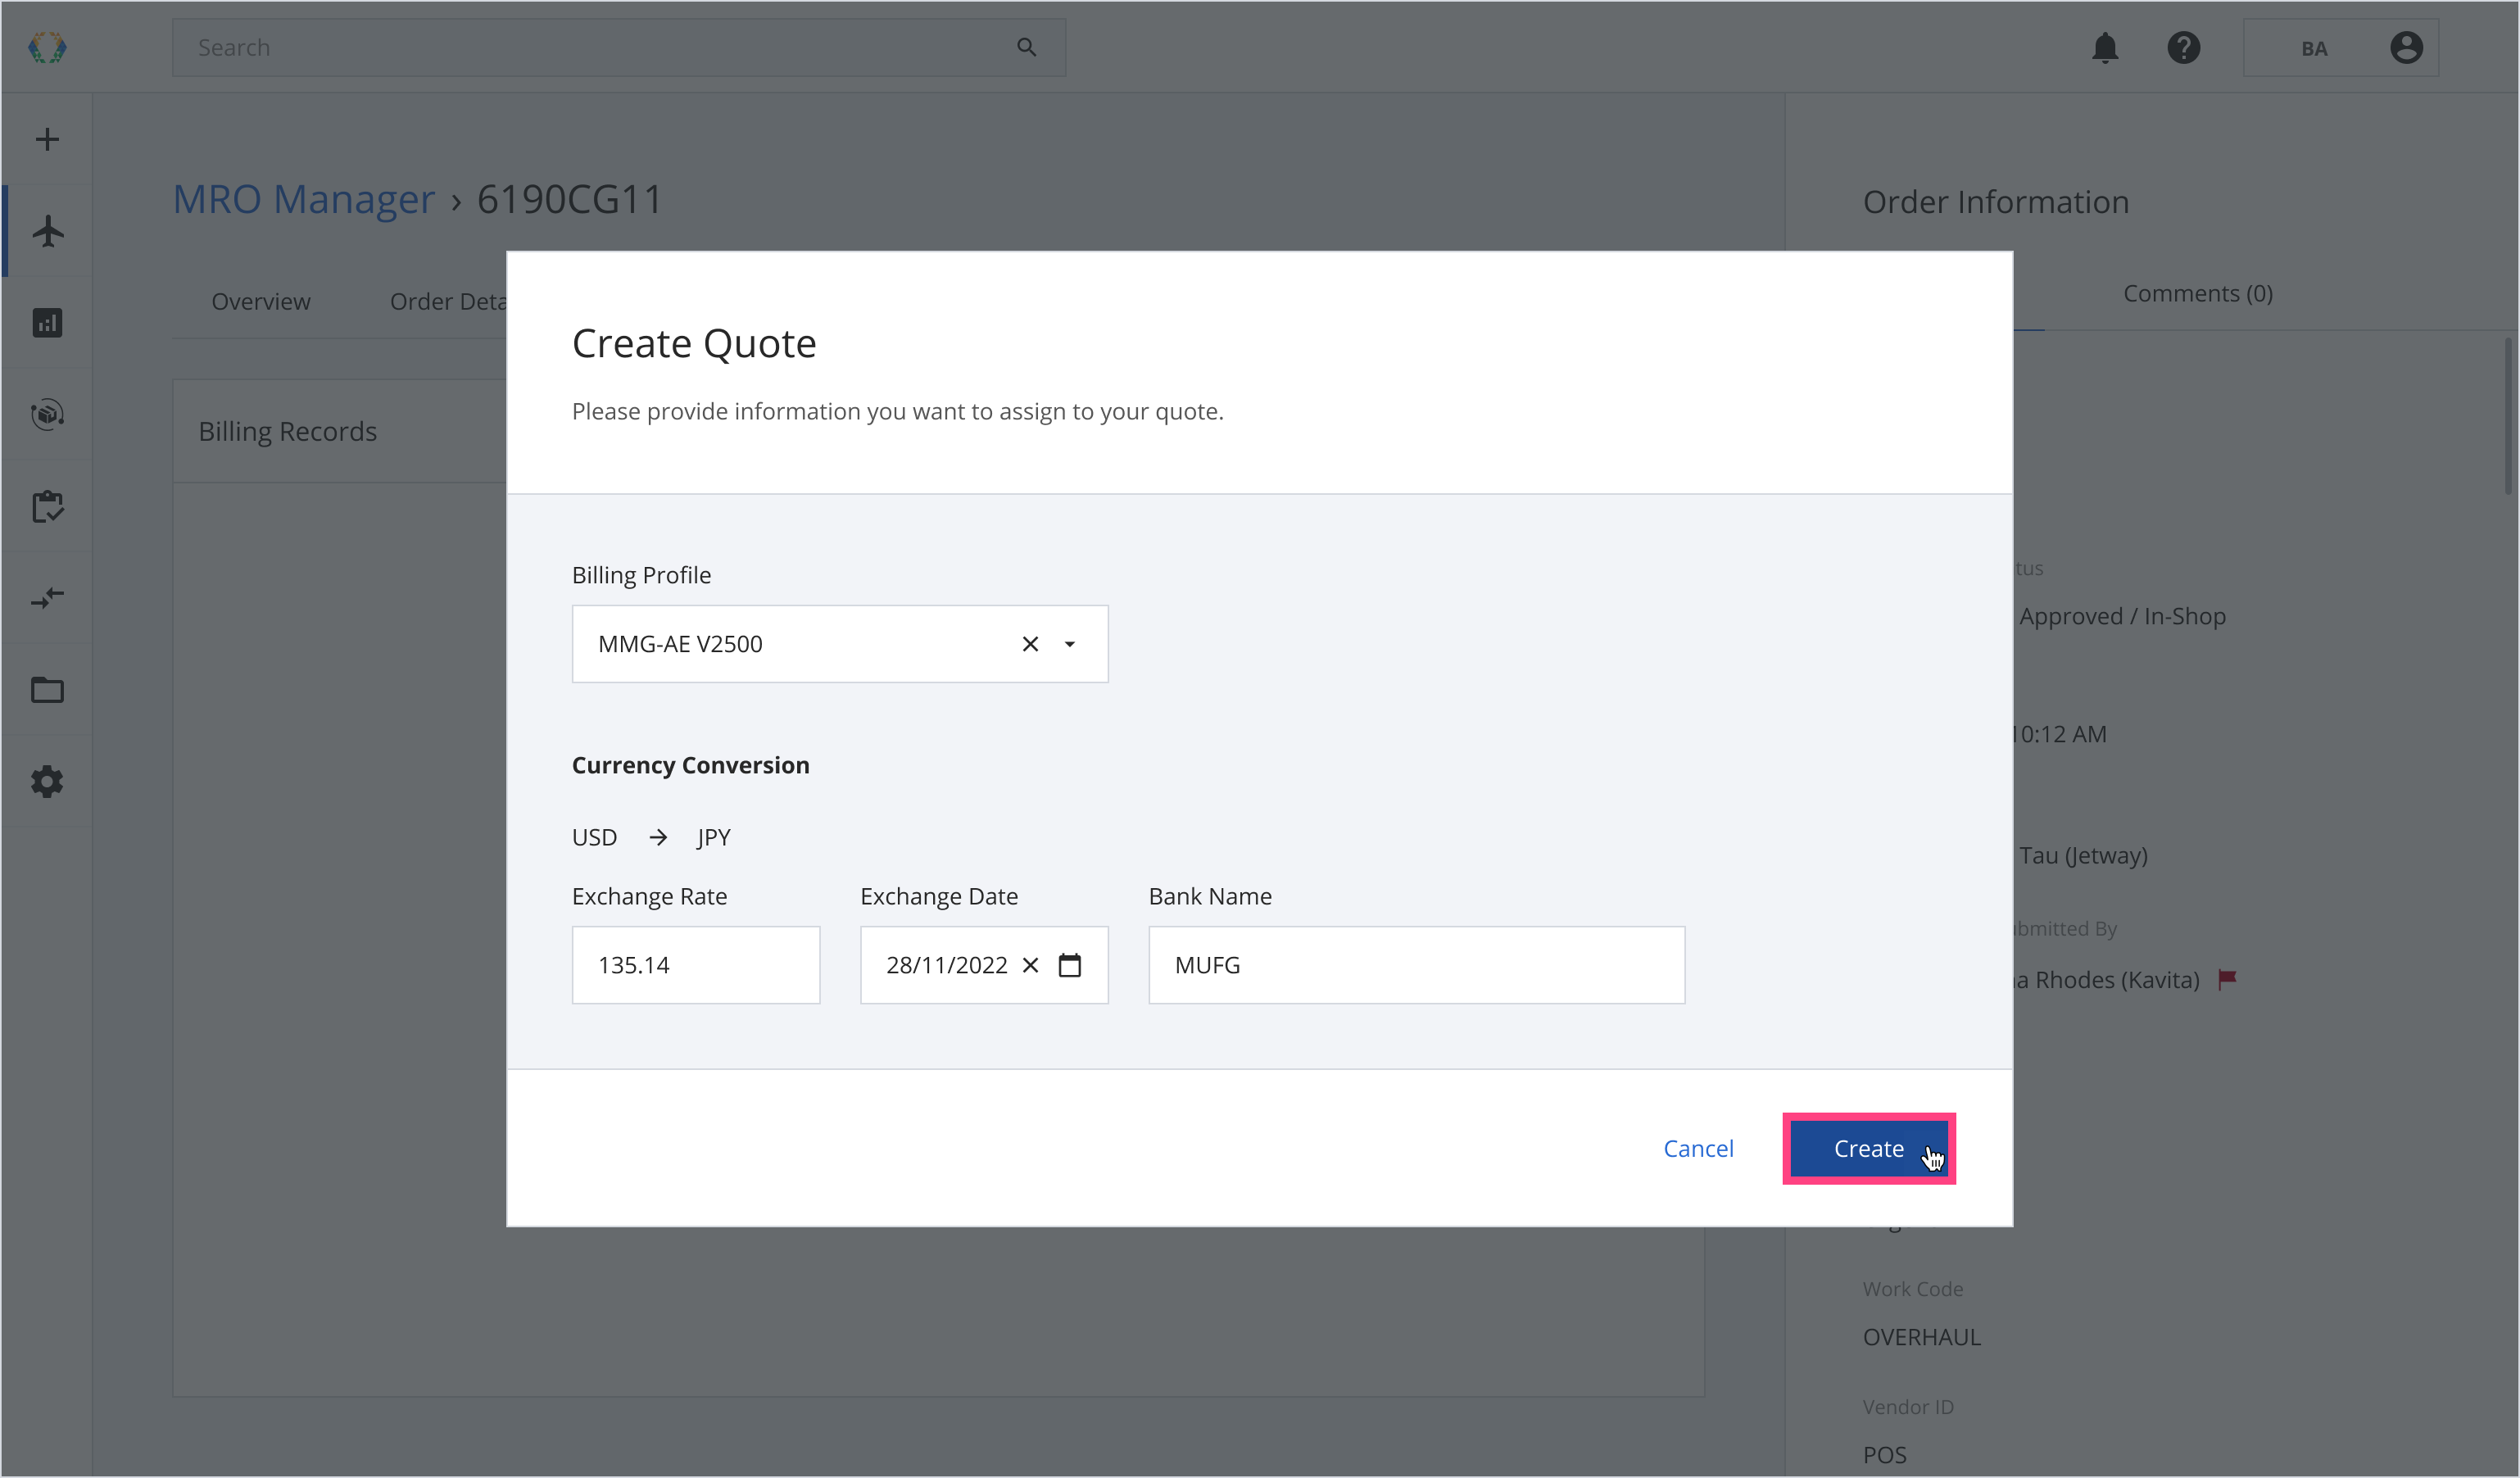
Step 1: From Billing Records, click ‘Create Quote’.
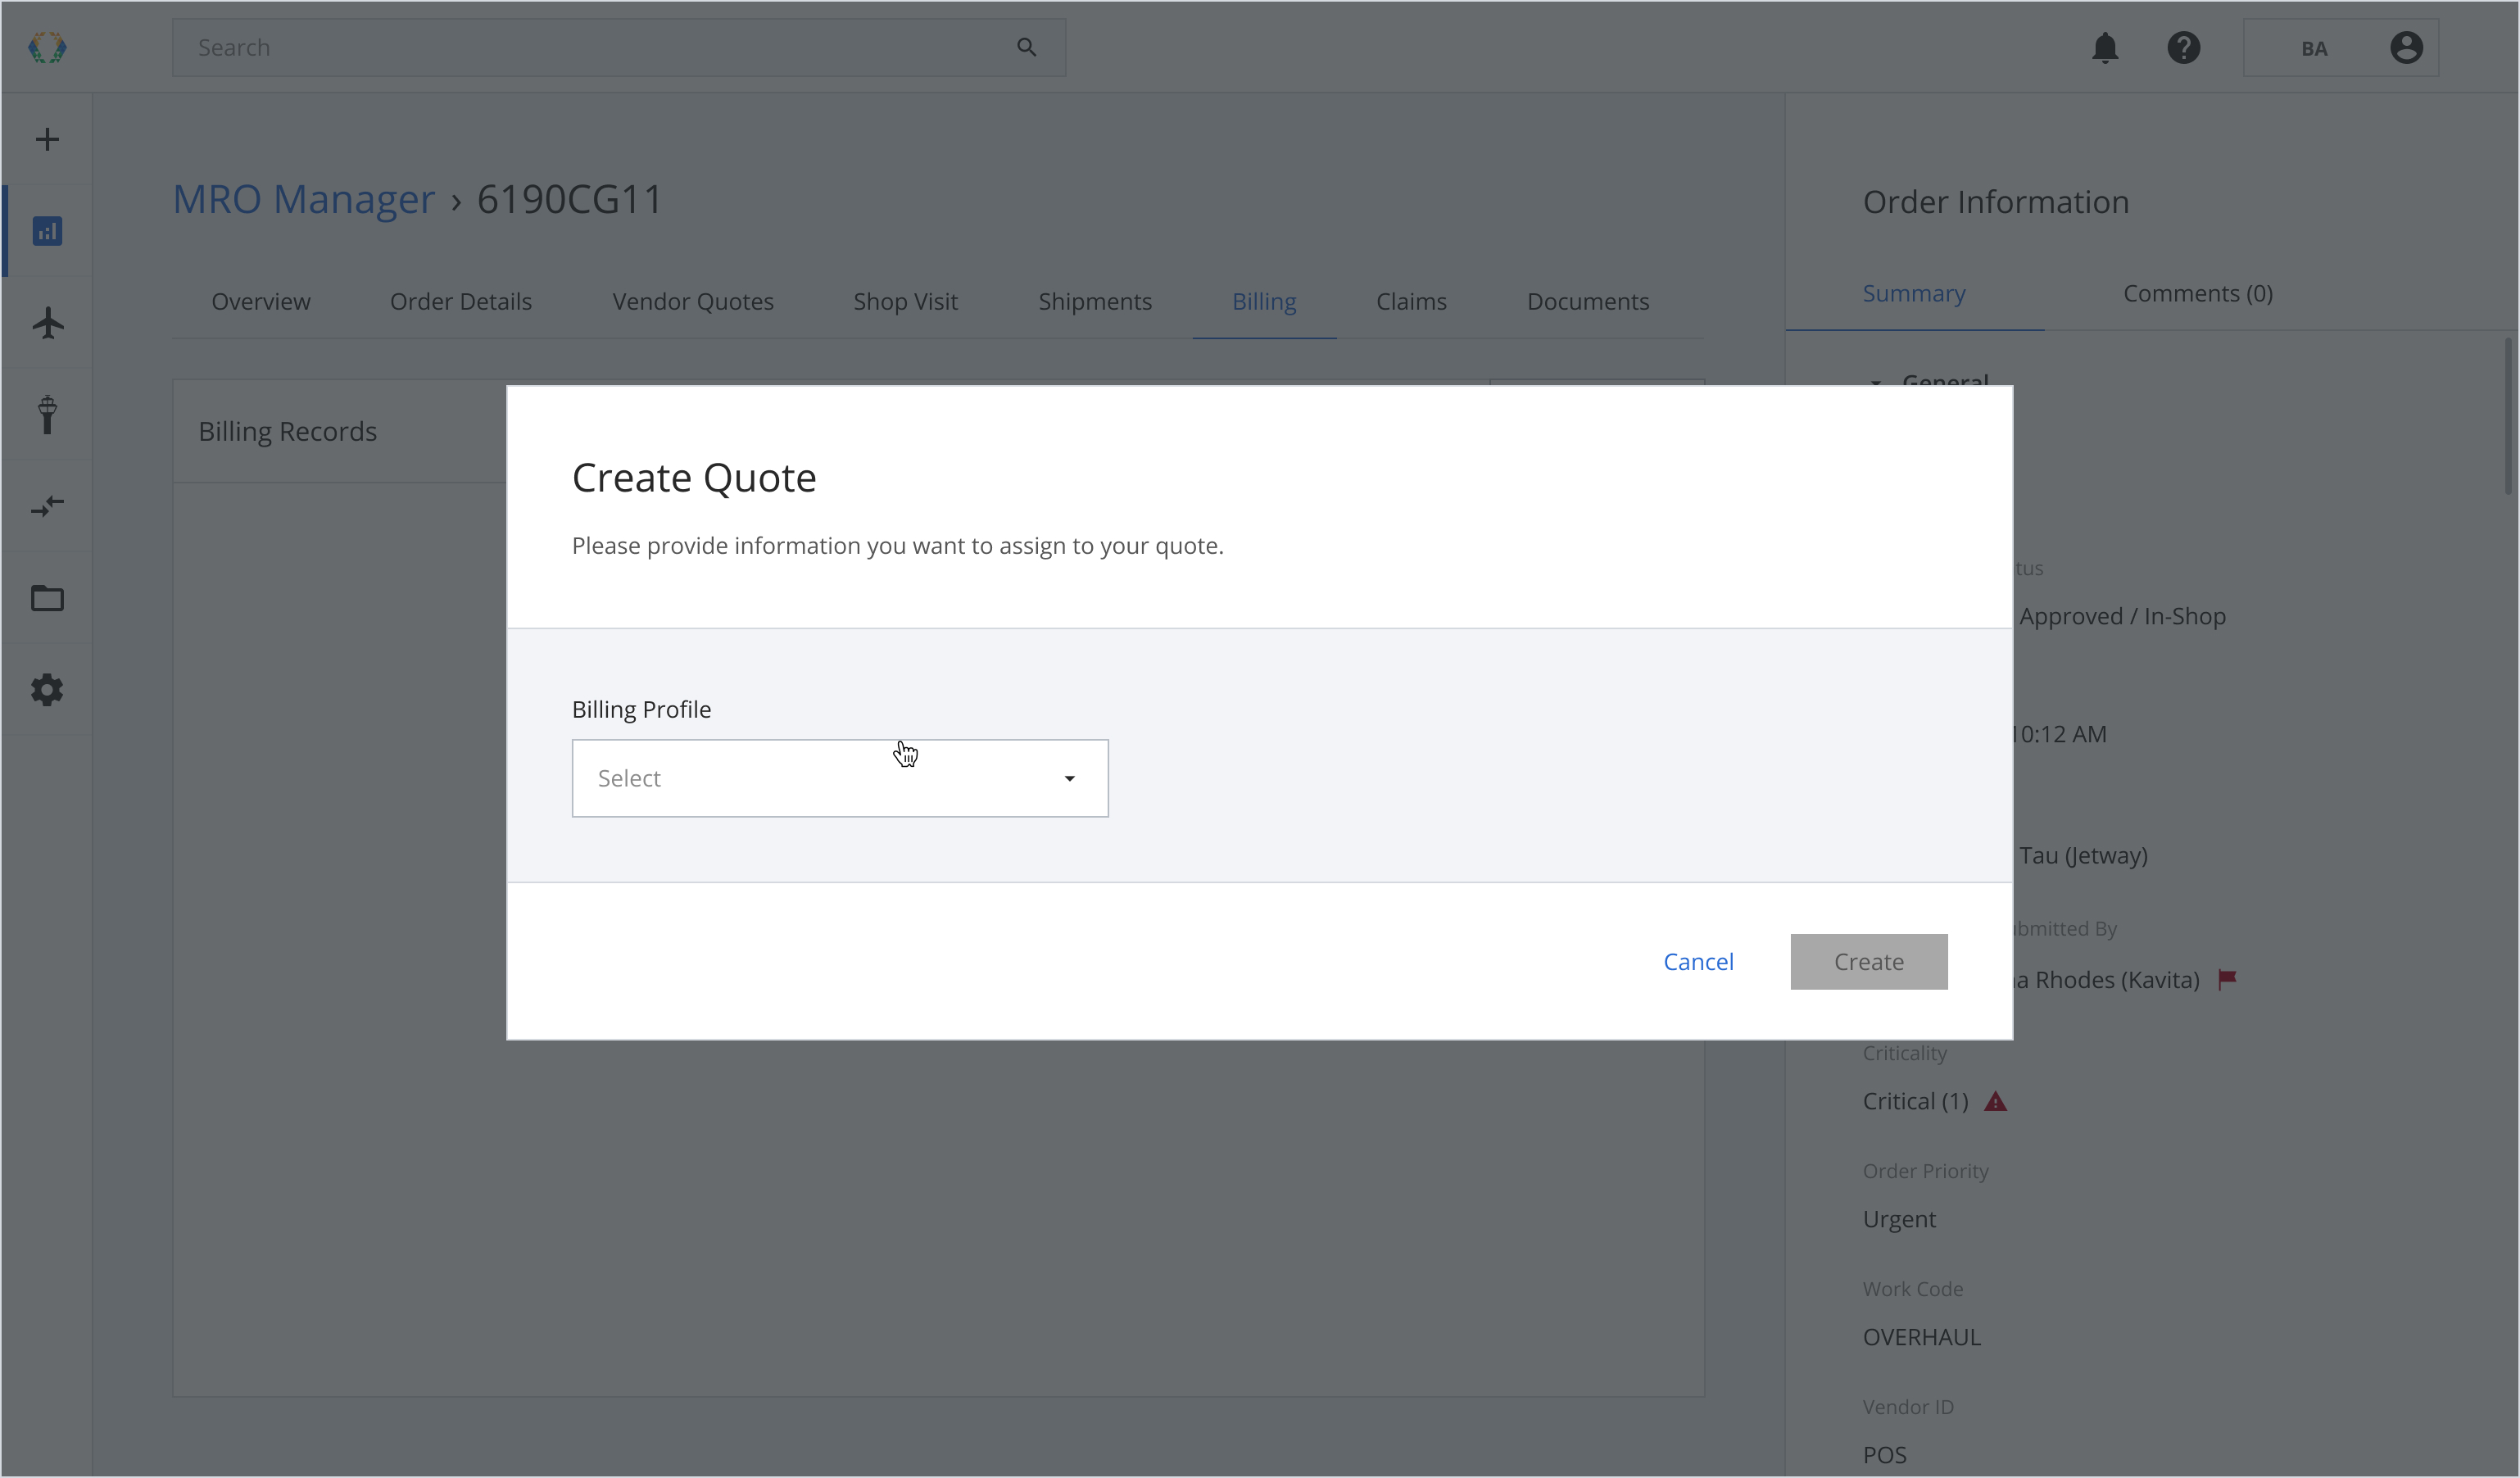
**Step 2:**Select billing profile.
Step 3: Fill in currency conversion information (if applicable).
Currency conversion is activated after selecting Billing Profile, and the source and quote currency differ. It stays disabled if the source and quote currency are the same.
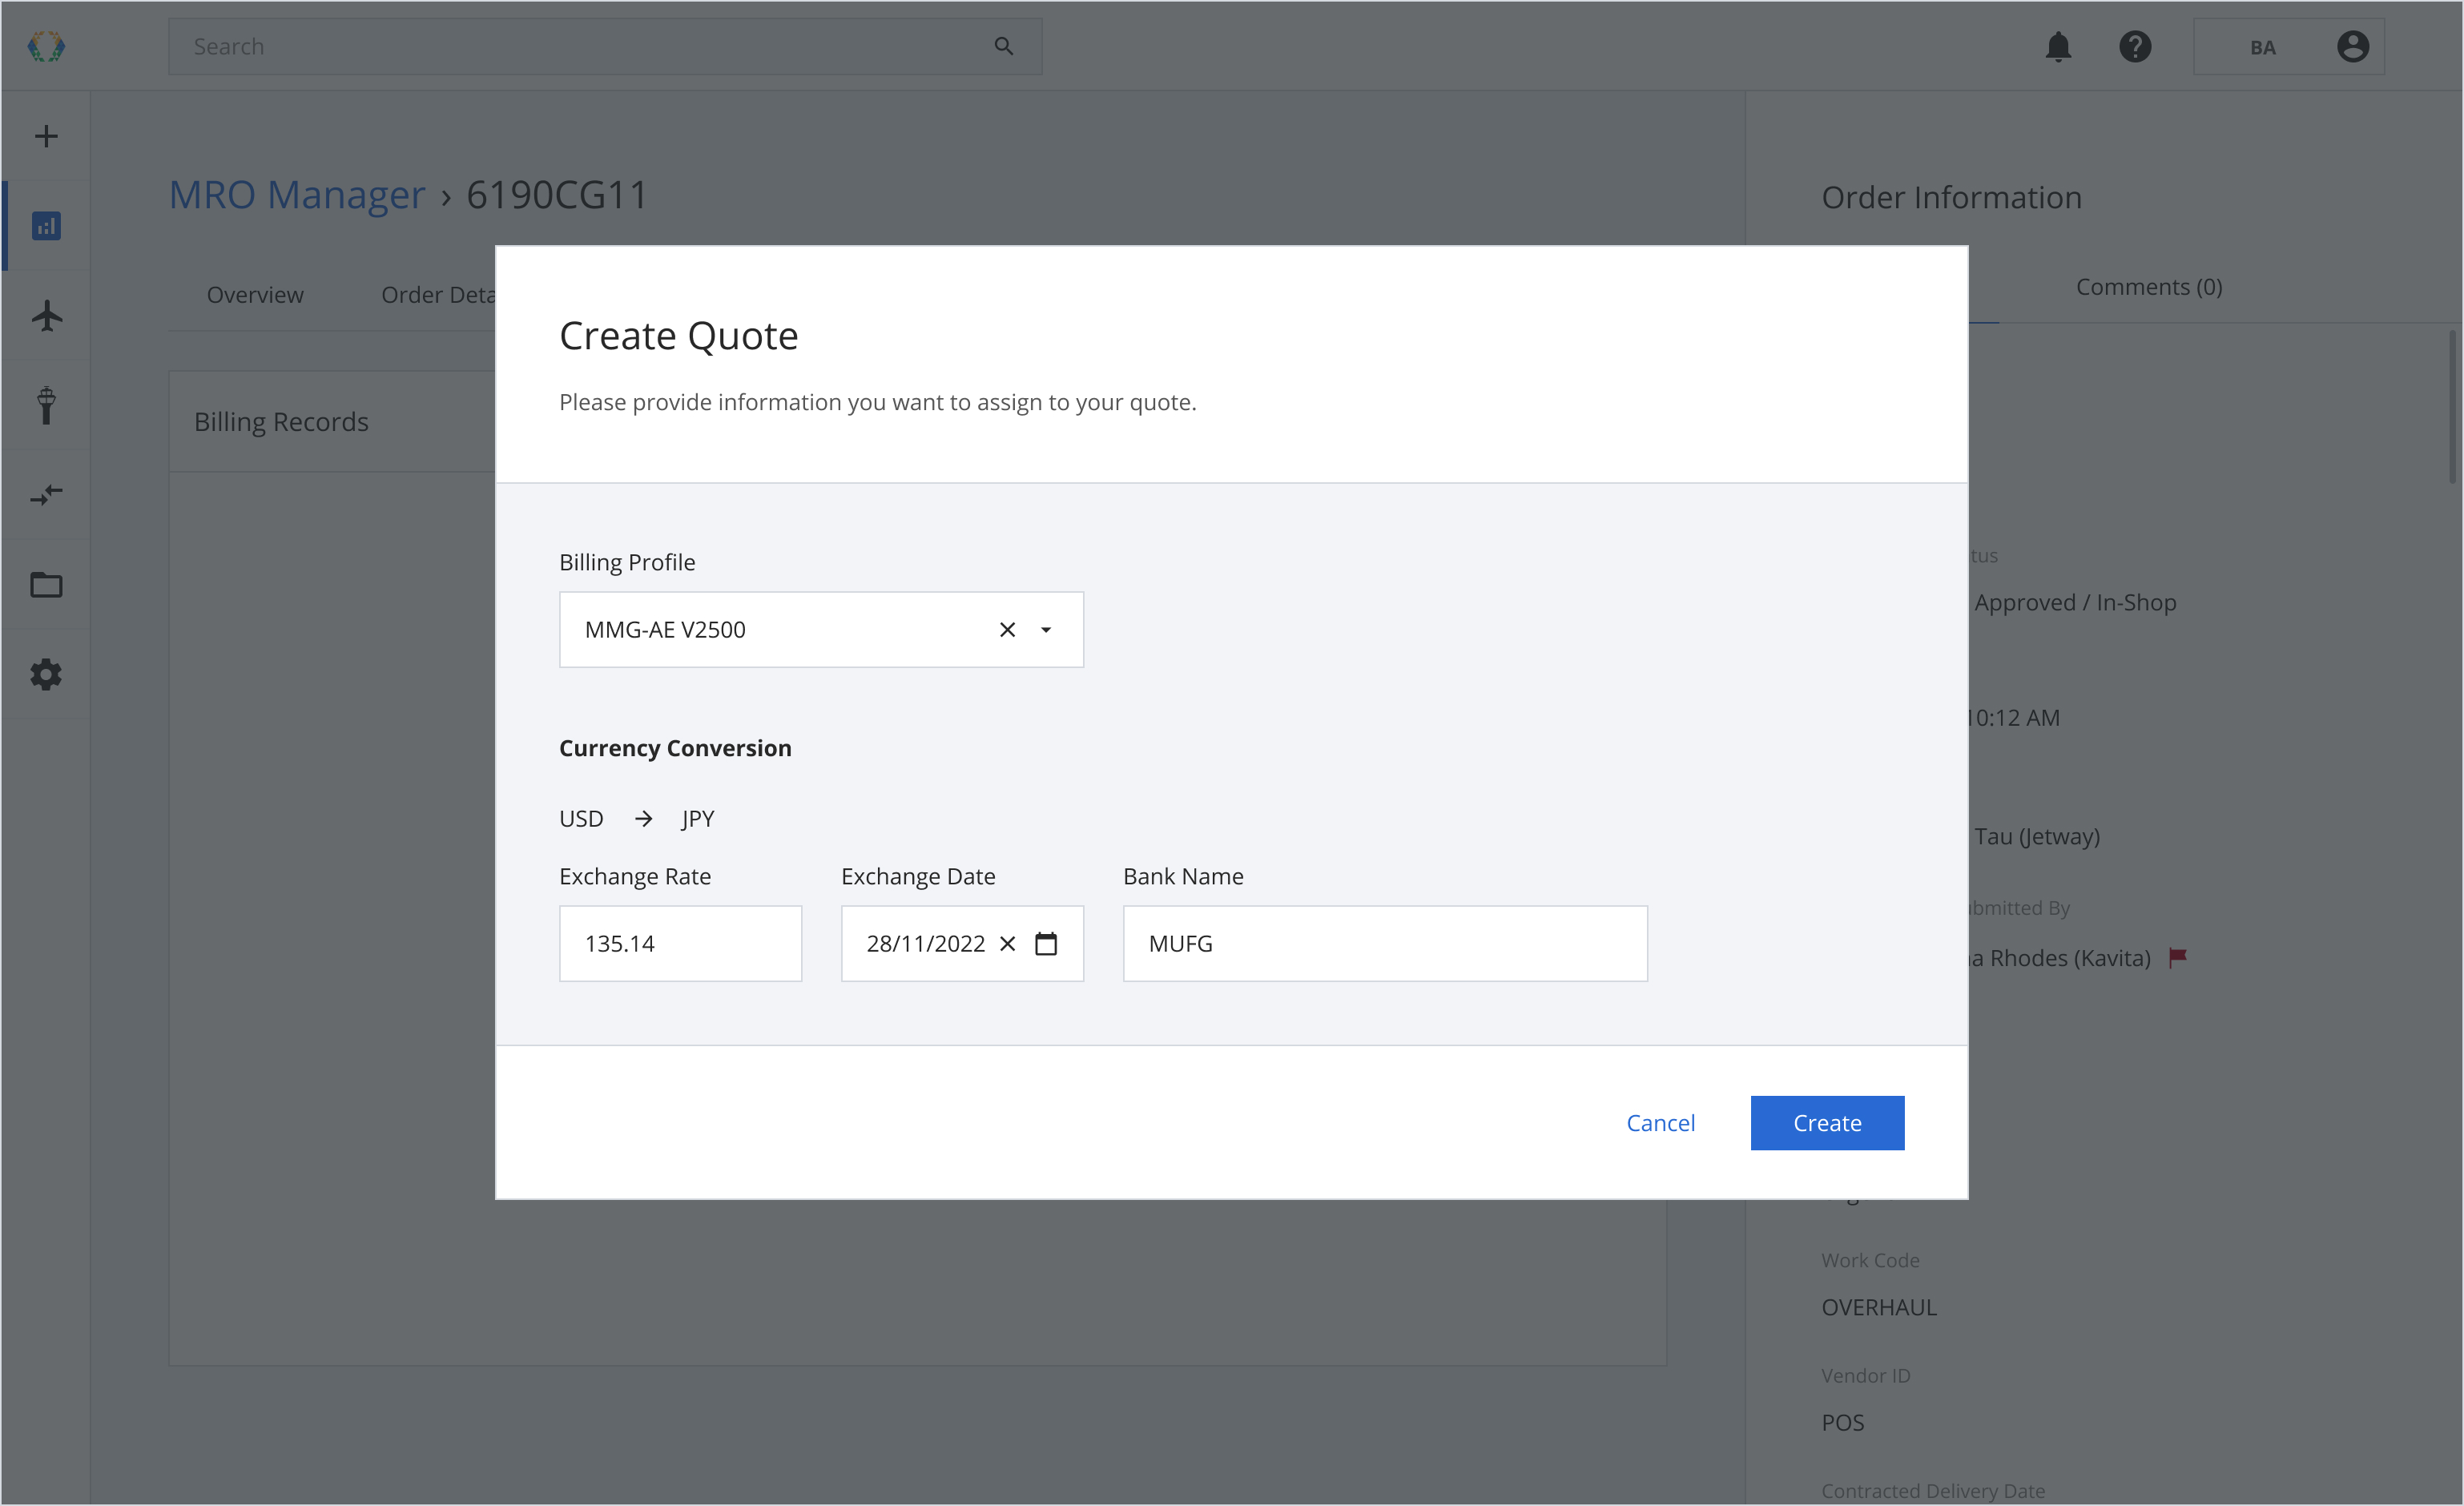
Step 4: Click ‘Create’.
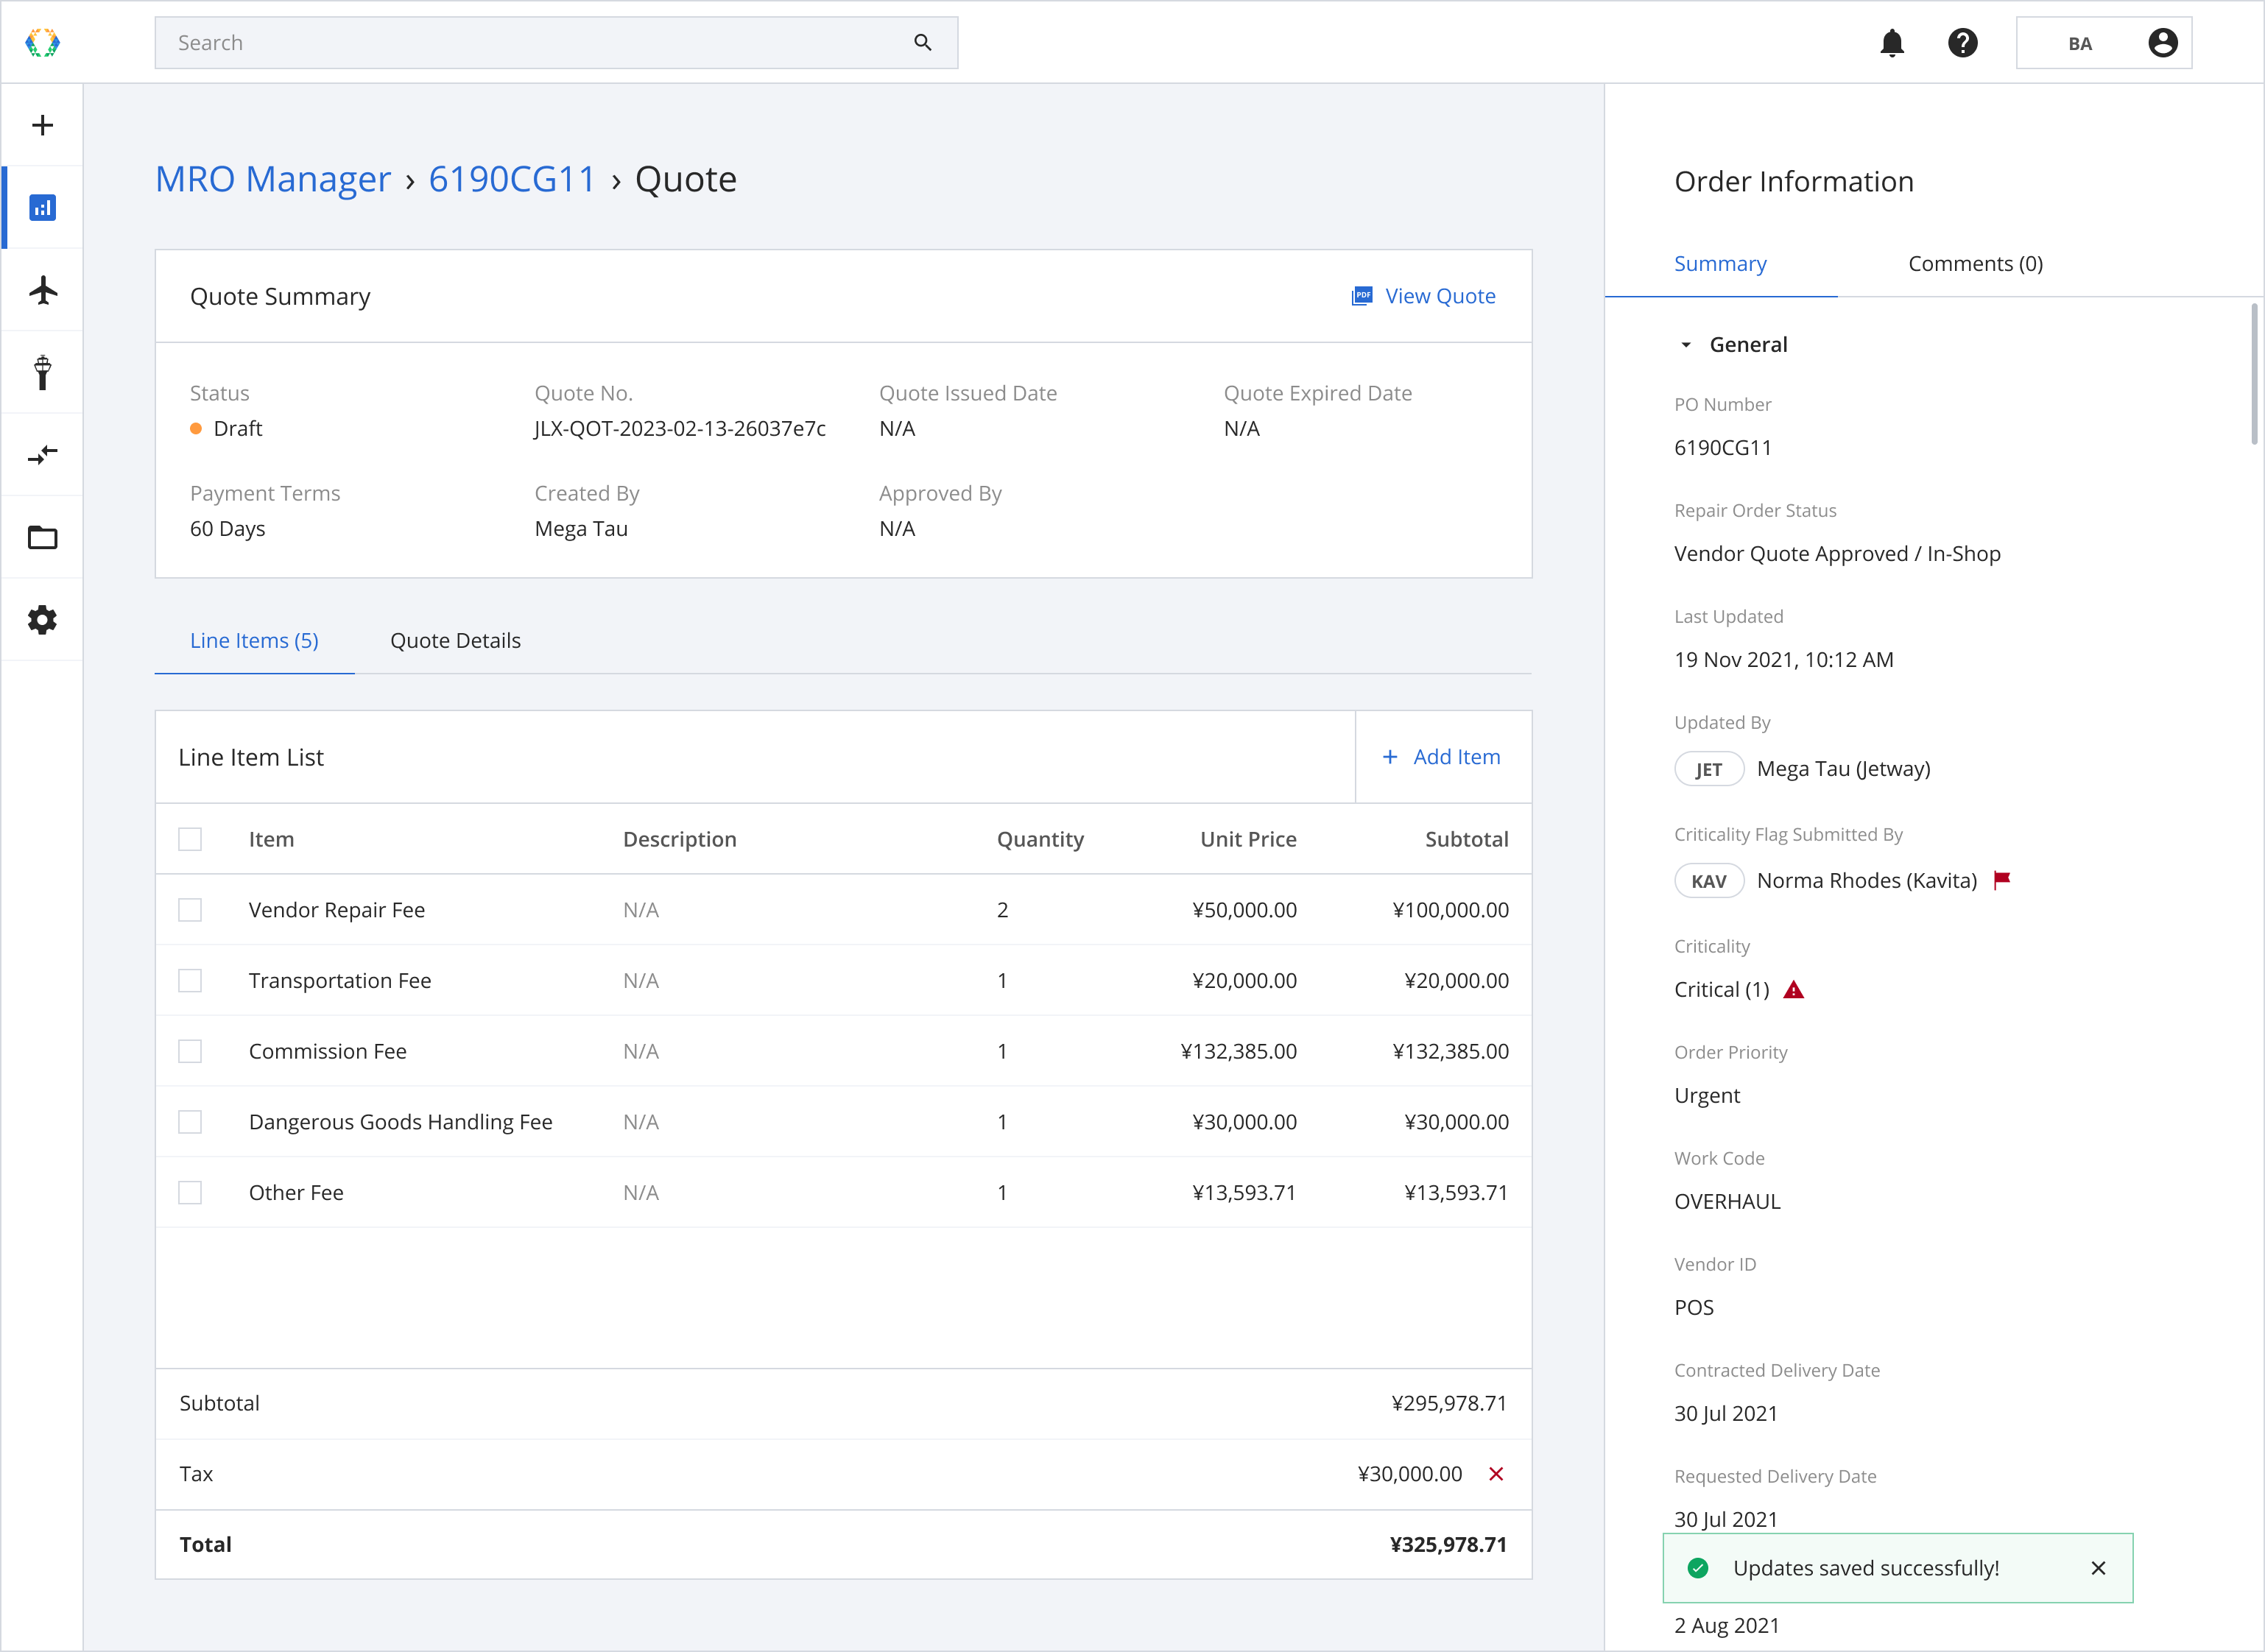
Once the quote is created successfully, a green banner will appear at the top of the billing records list.

The Quote is still in “Draft” status after Creating the Quote. Click on the Created Quote to edit/finalize your Quote details.
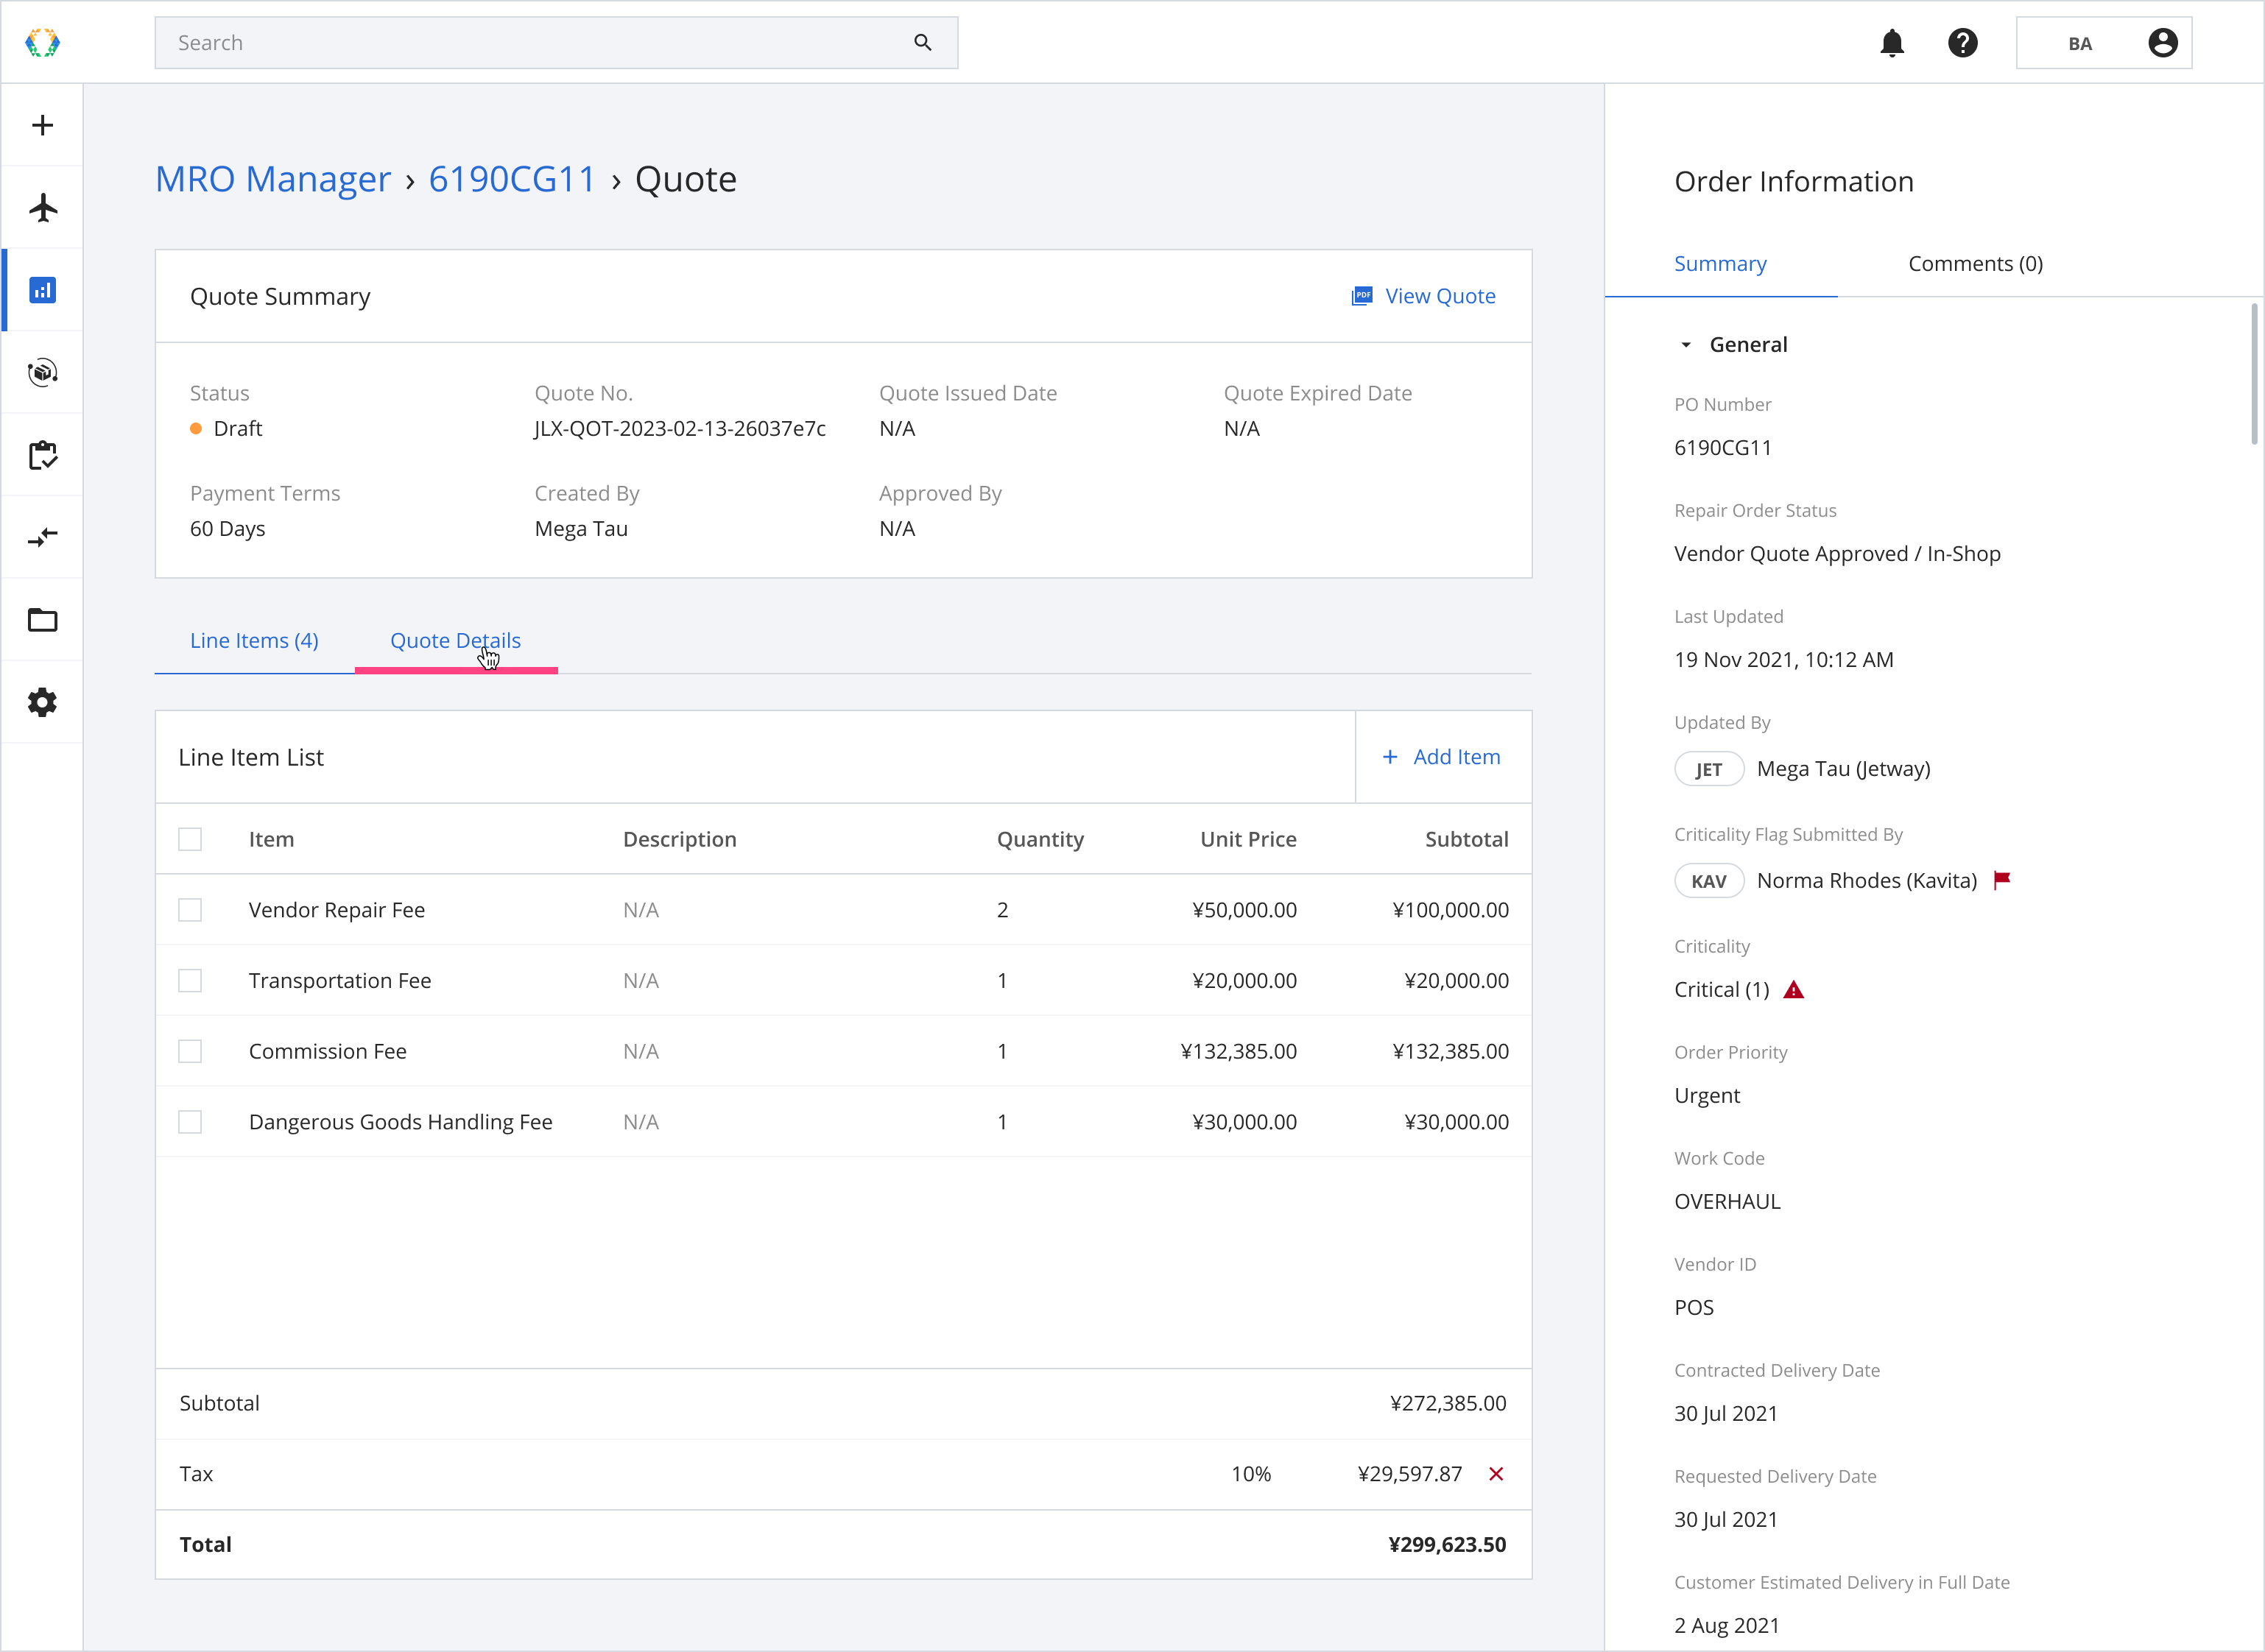
Creating Quote Items (Line Items)
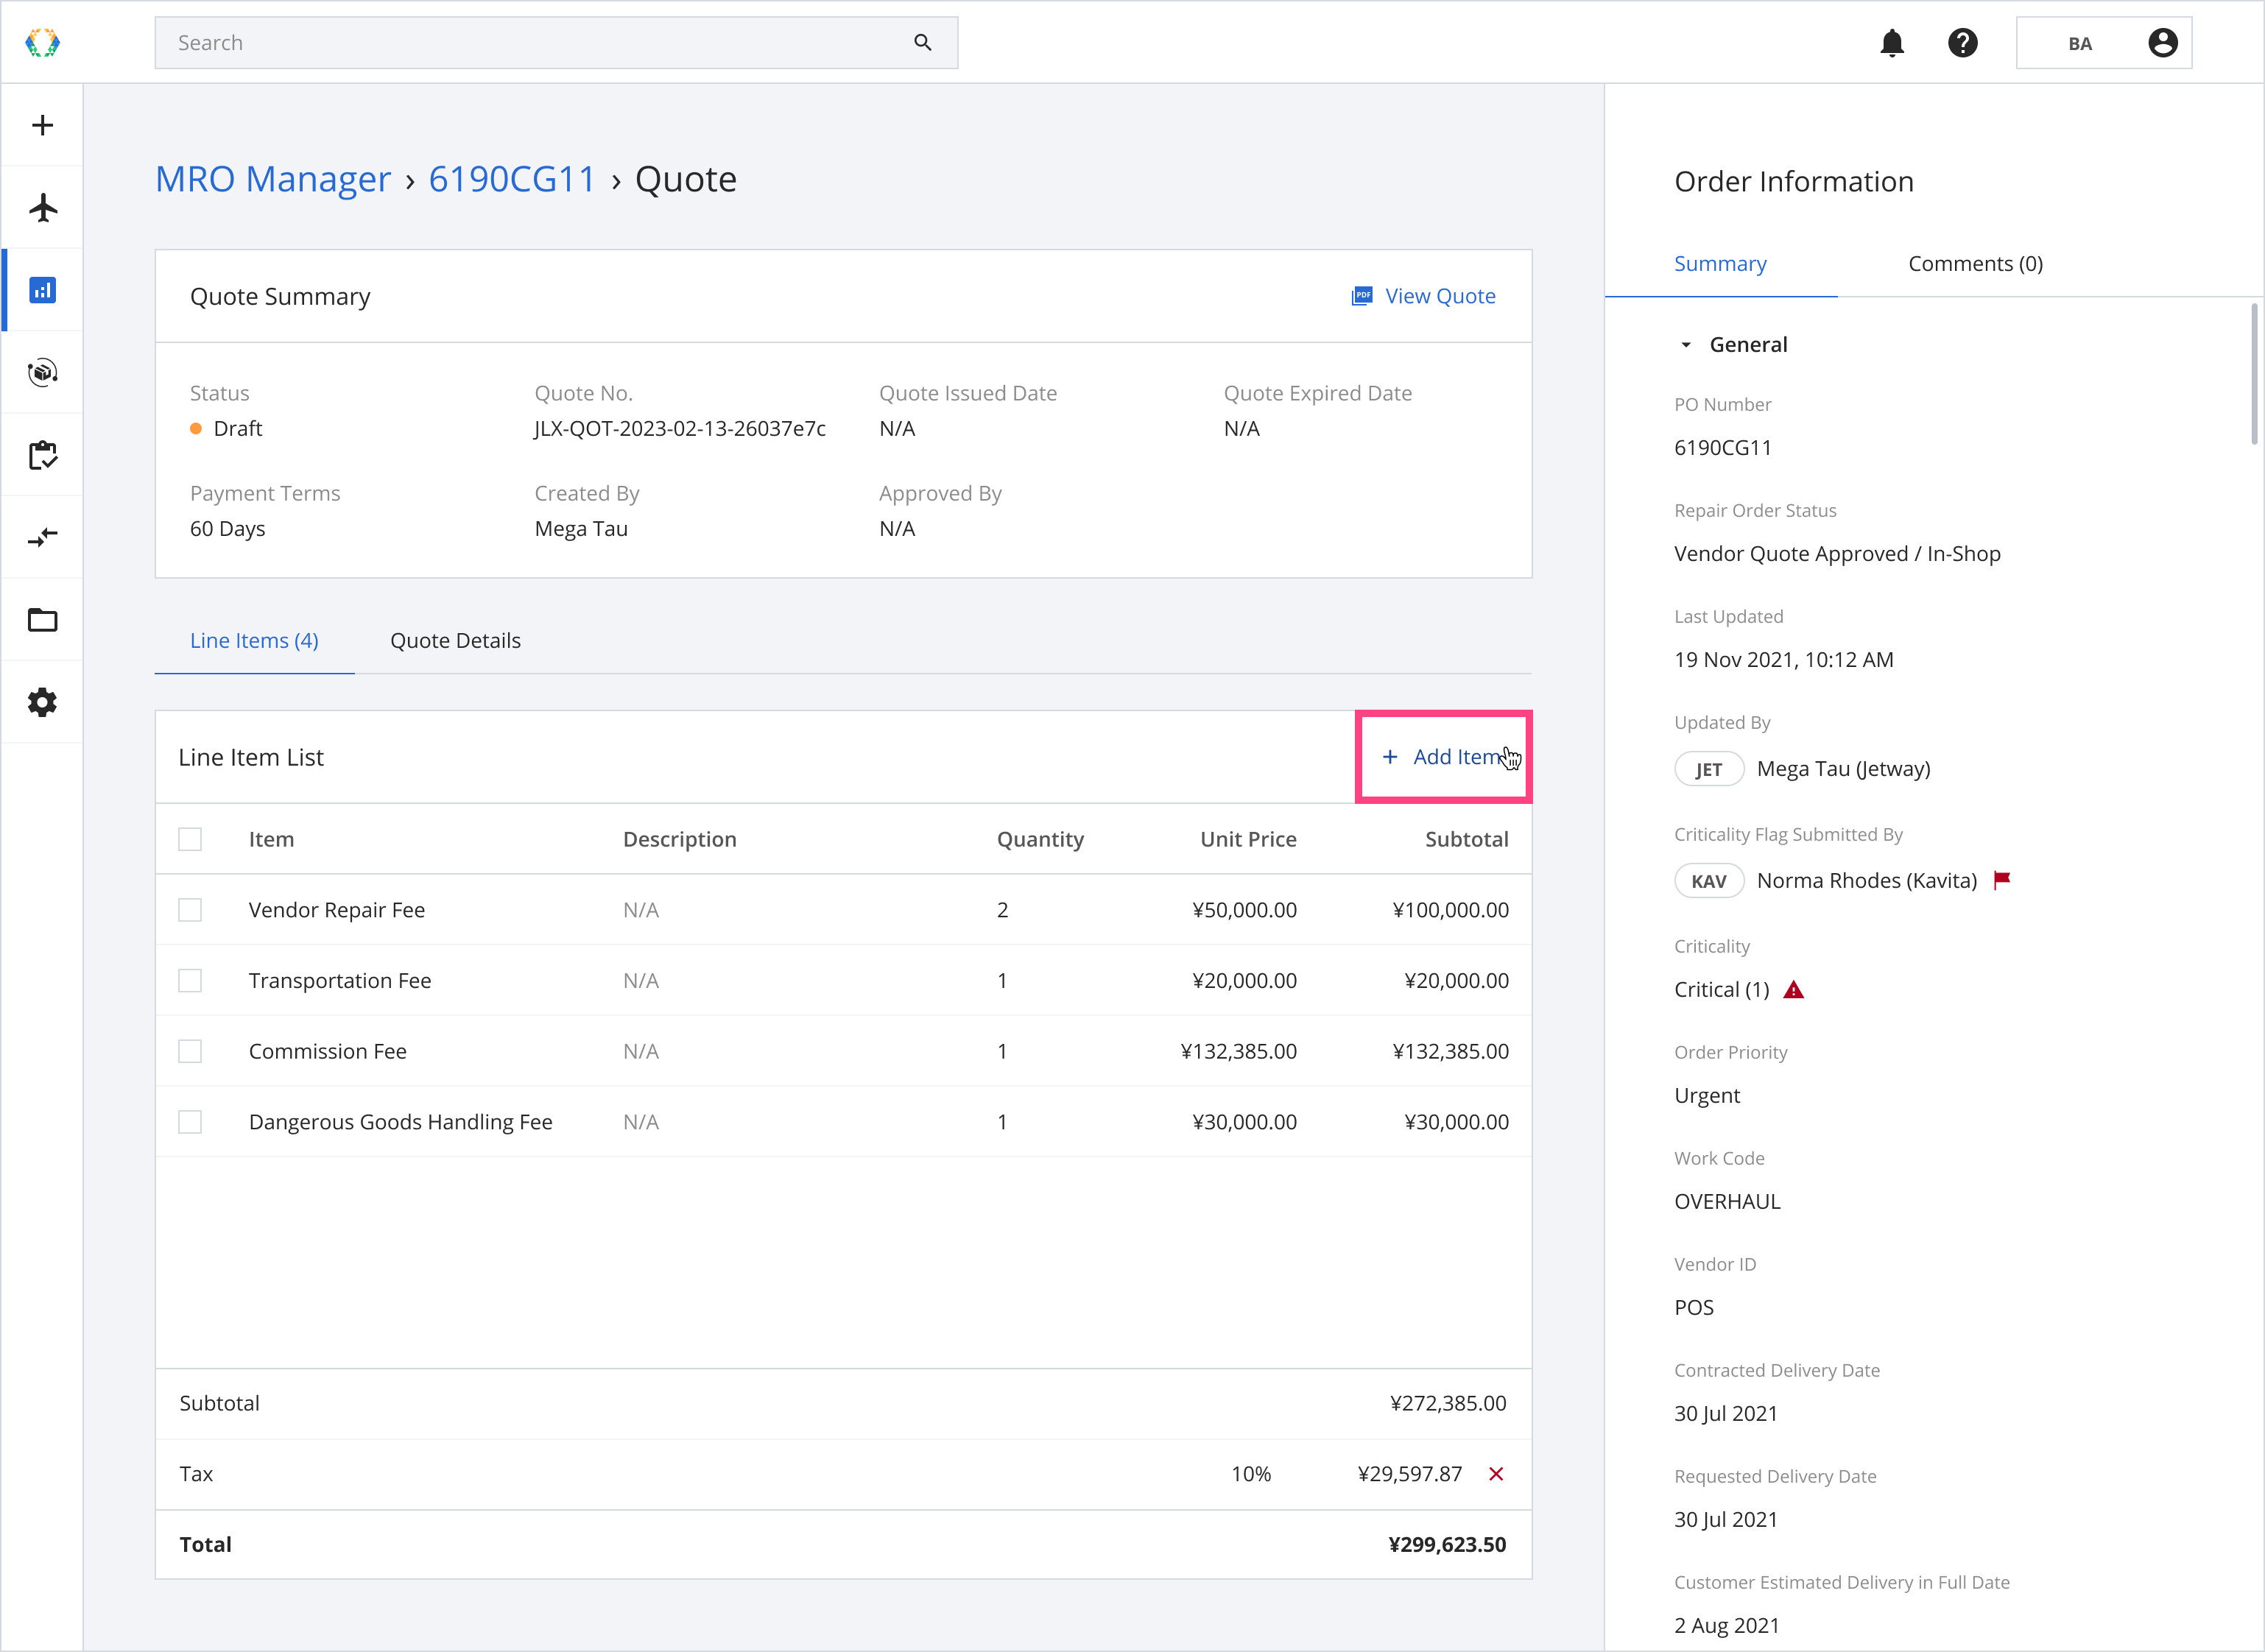
Step 1: From Billing Records, open the quote you want to add line items to.
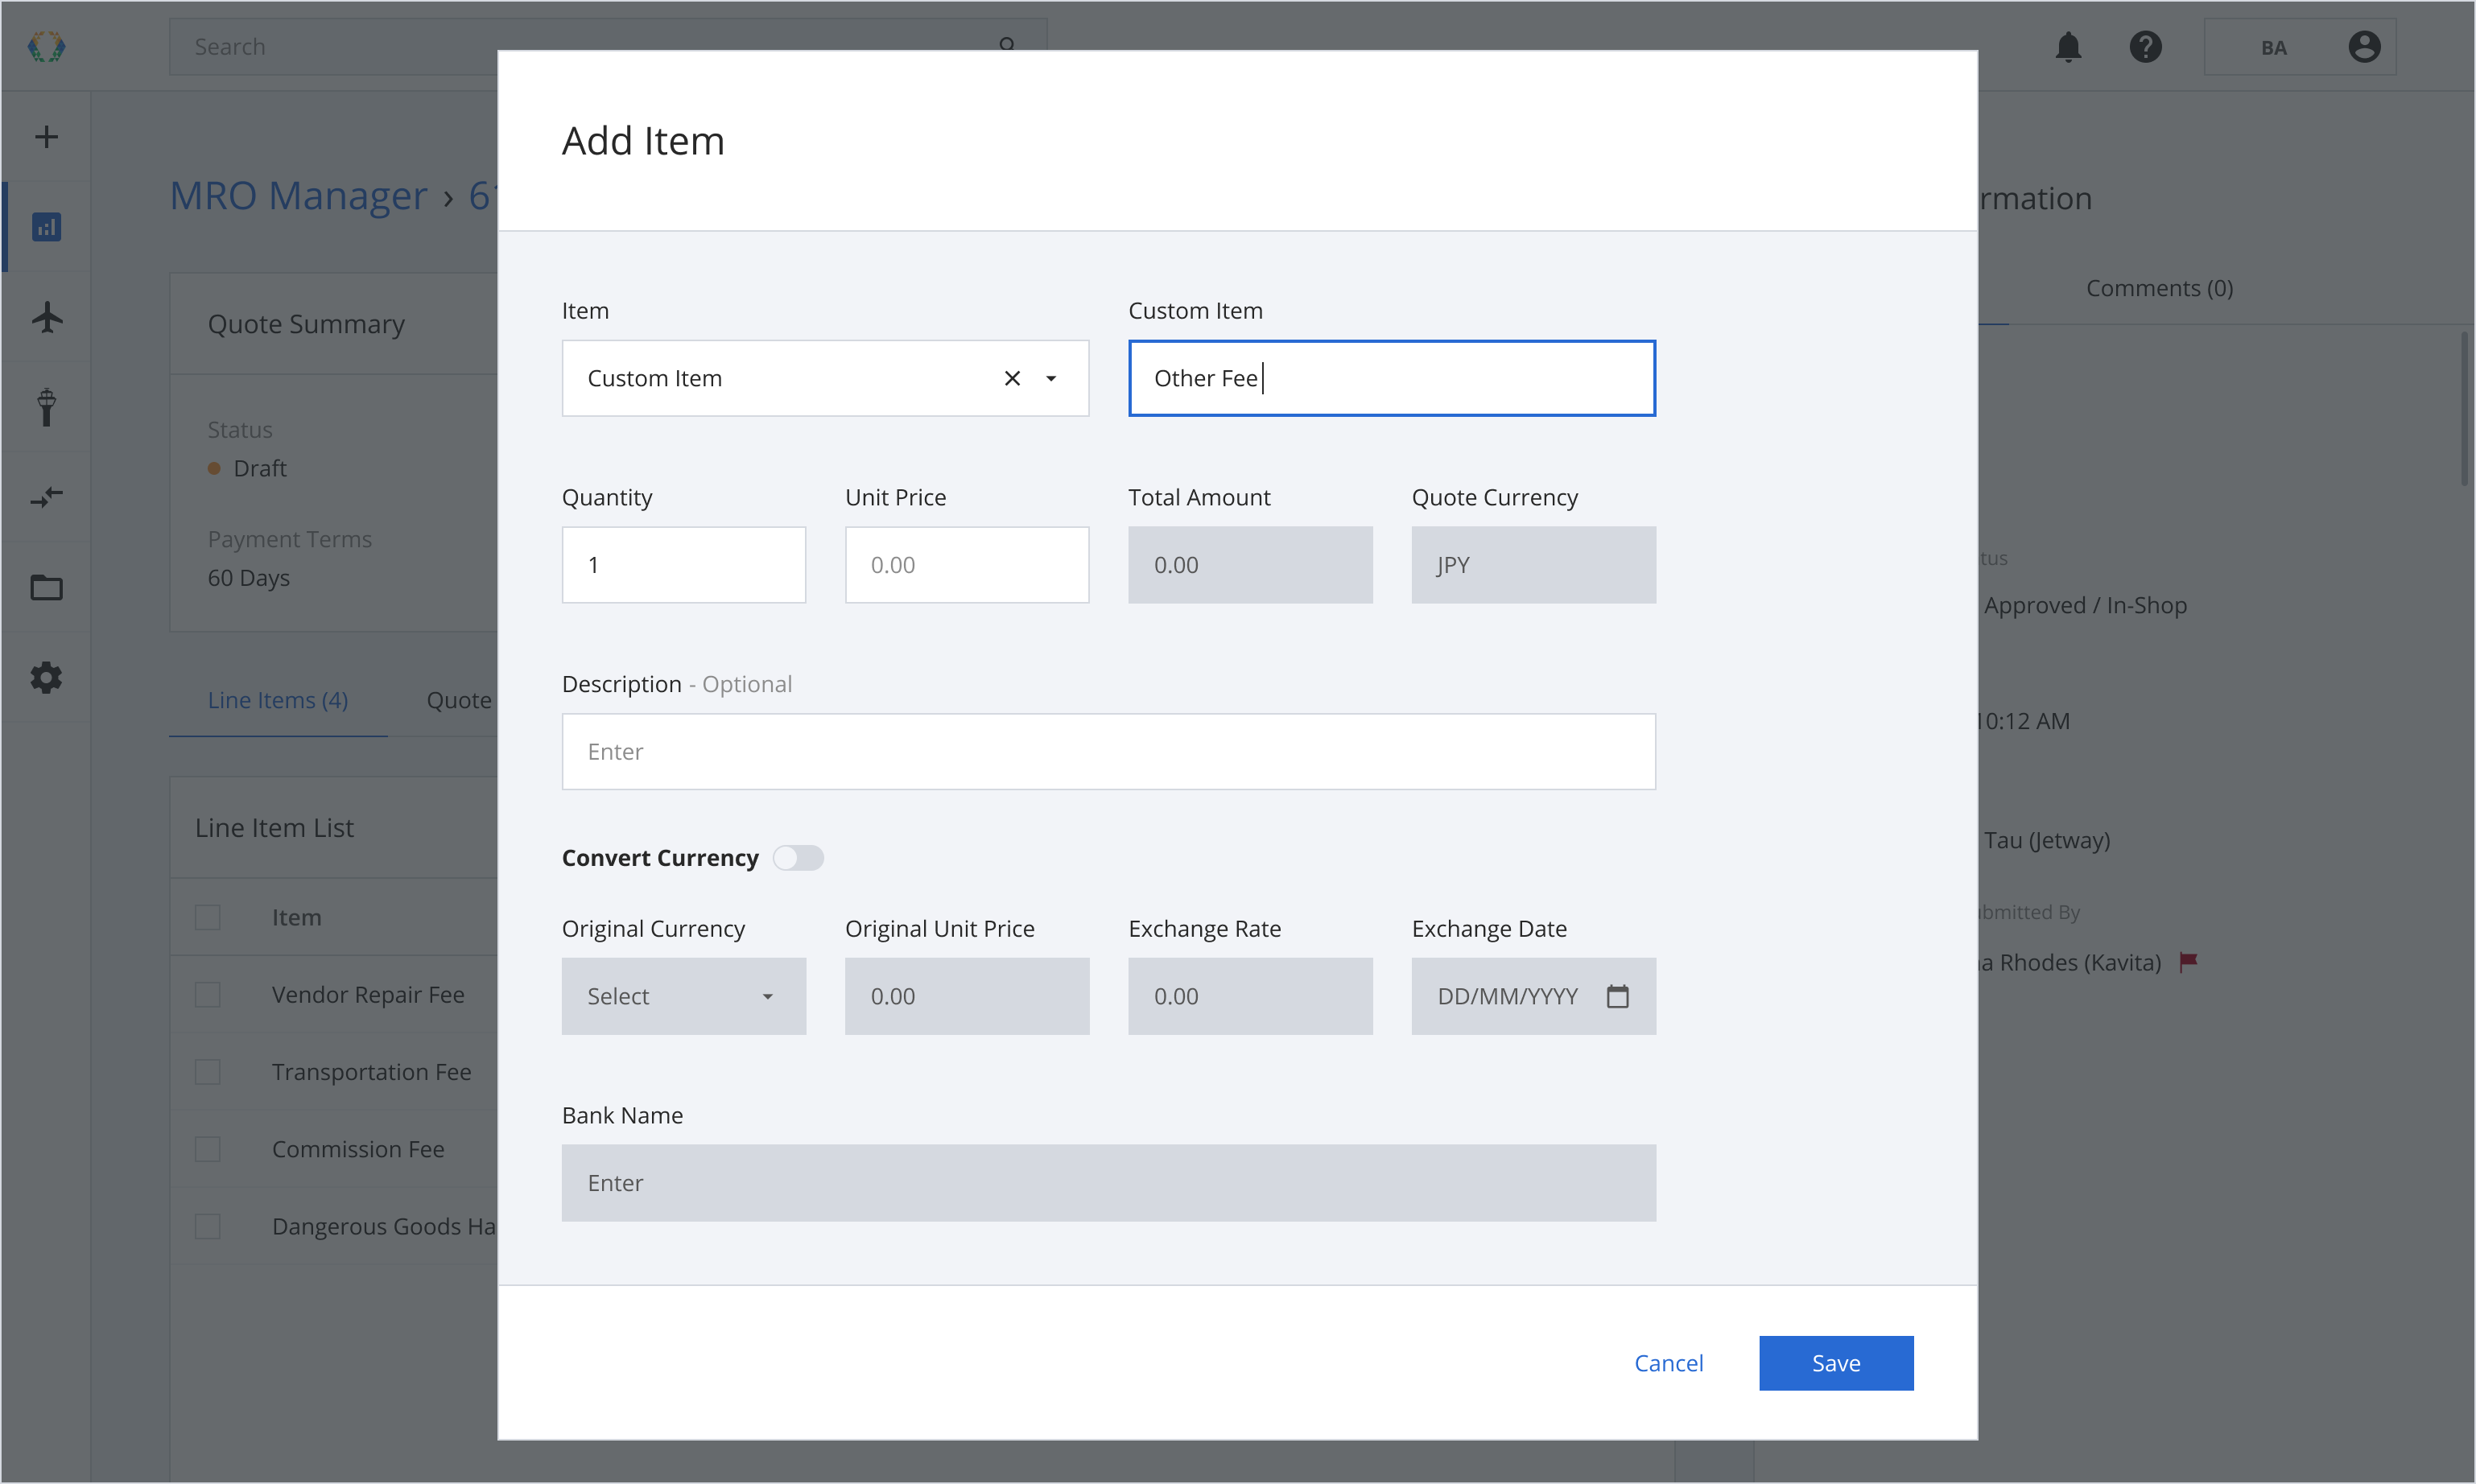
Step 2: From the Line Item List, click ‘Add Item’.
Step 3: Select Item you want to add from the dropdown list and fill in the details.
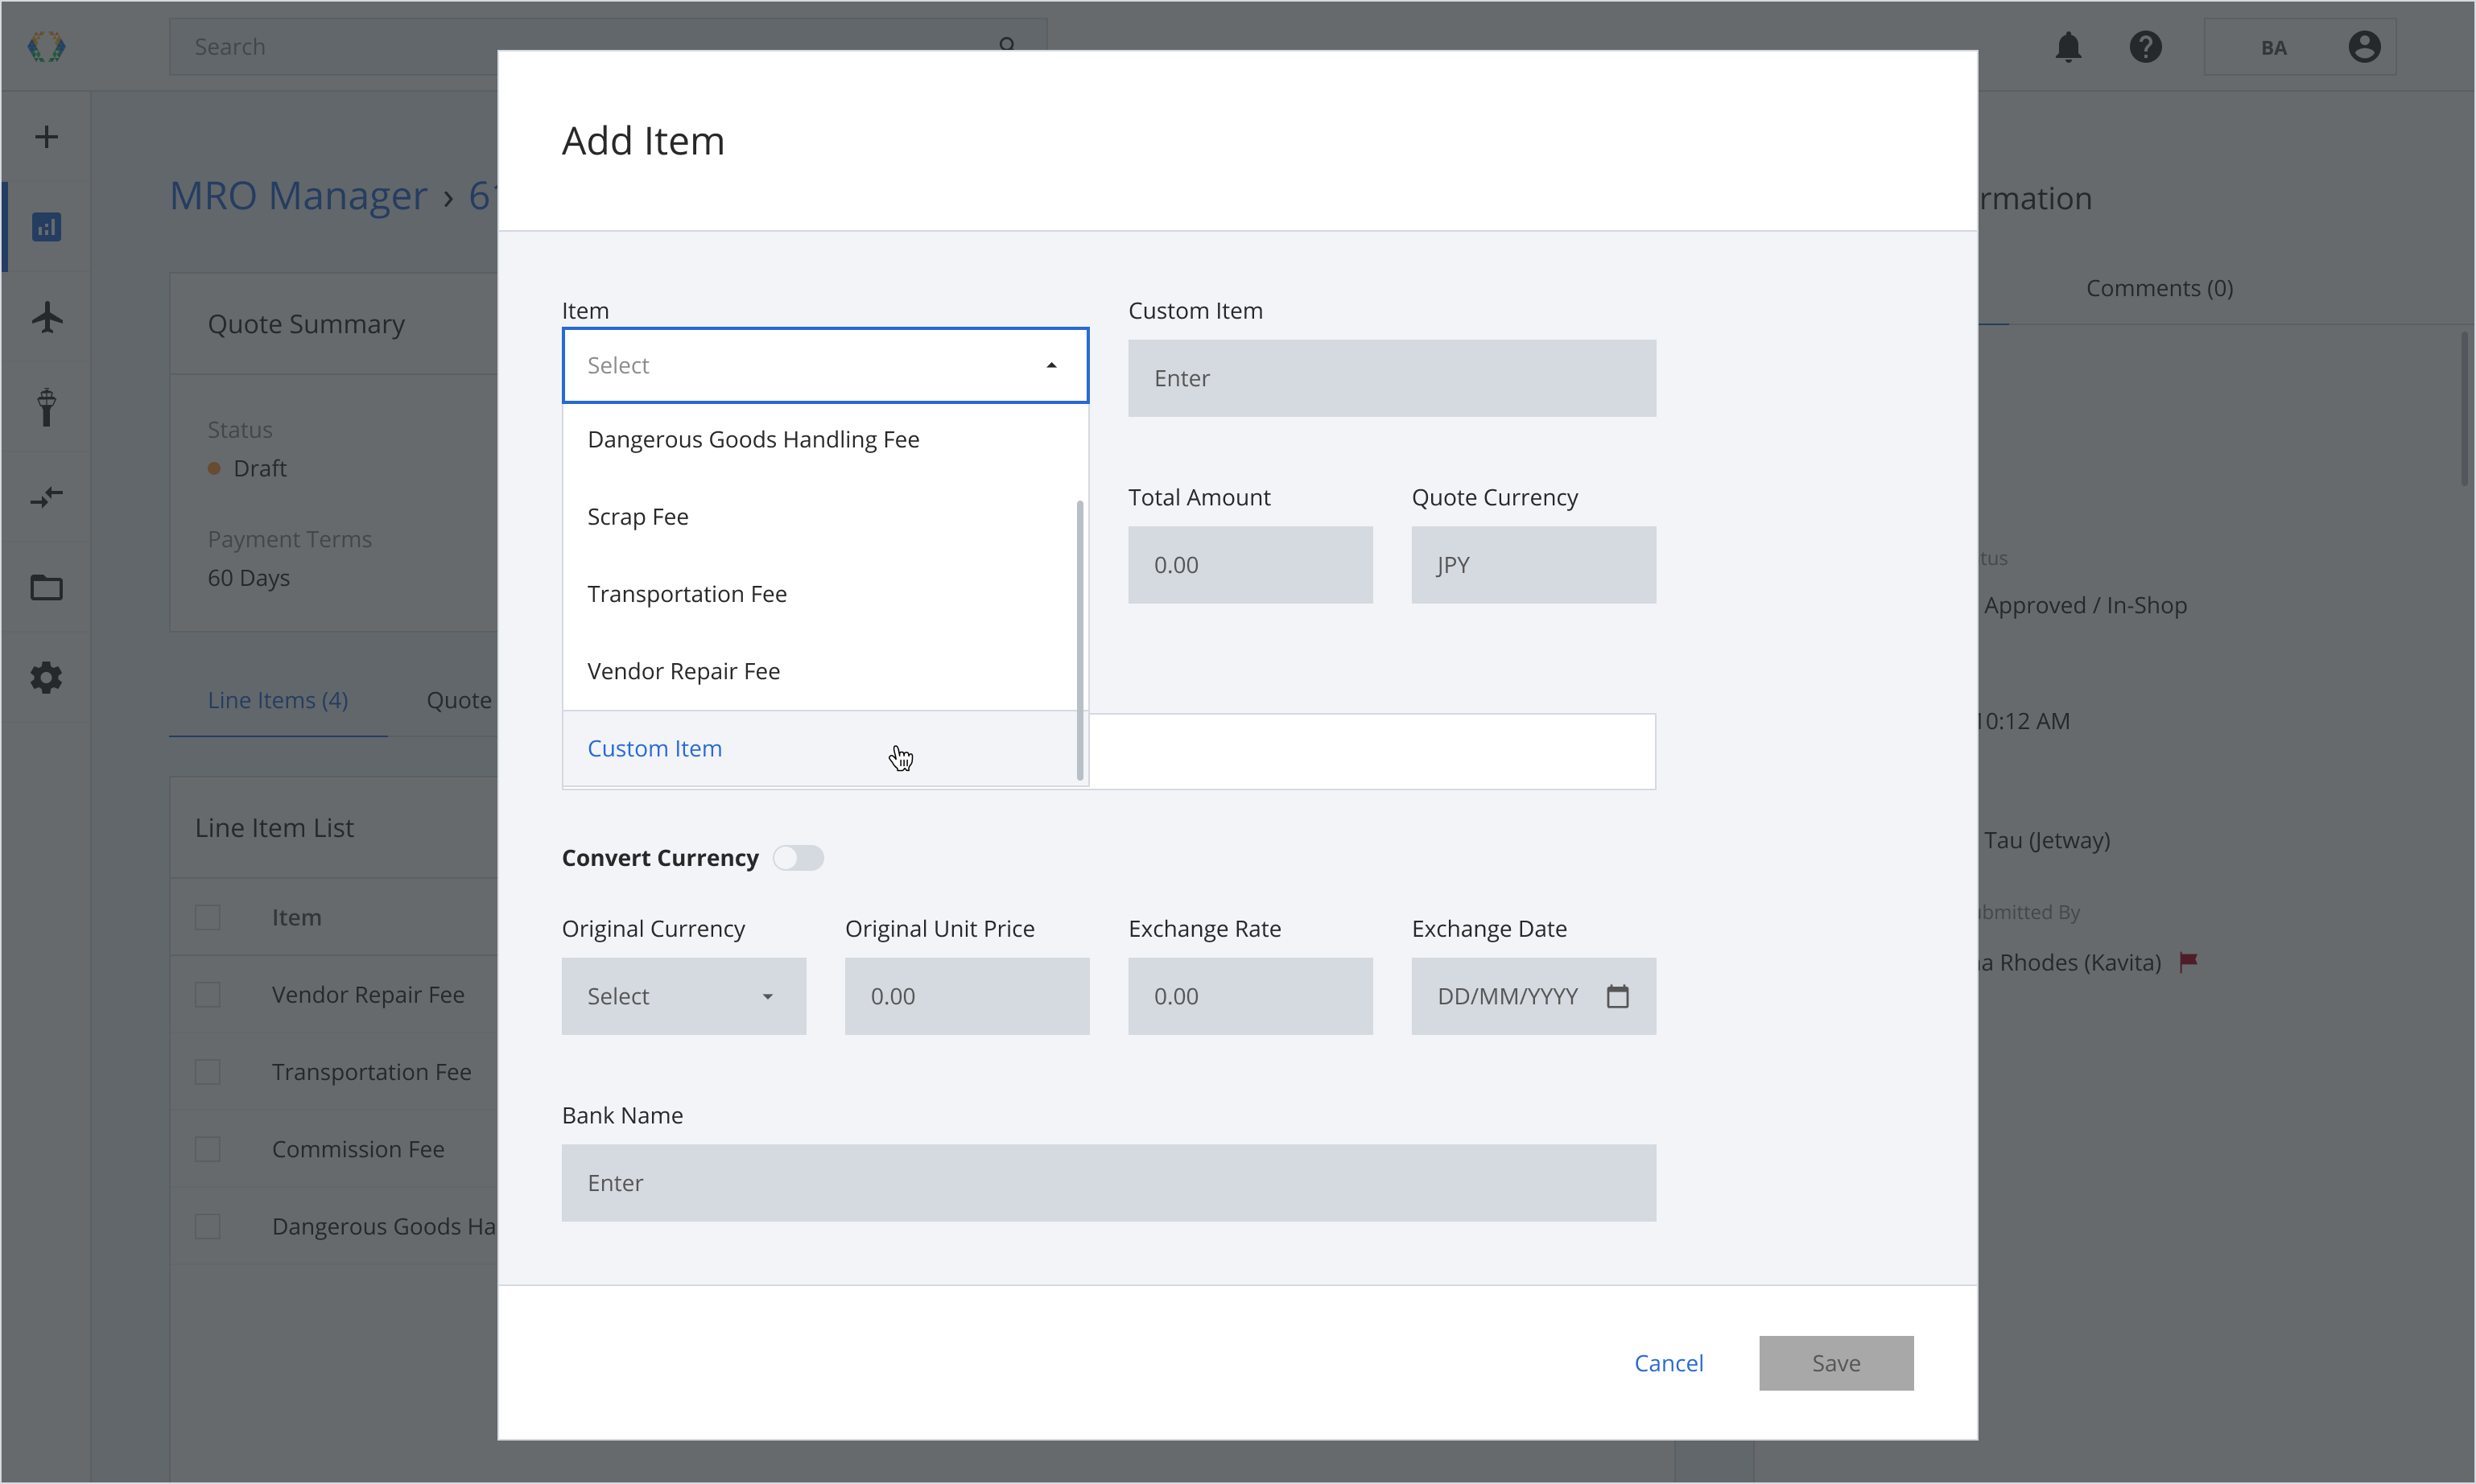
Step 4: In the case the dropdown list does not have the desired Line Item, you can select 'Custom Item' to insert your custom Line Item.
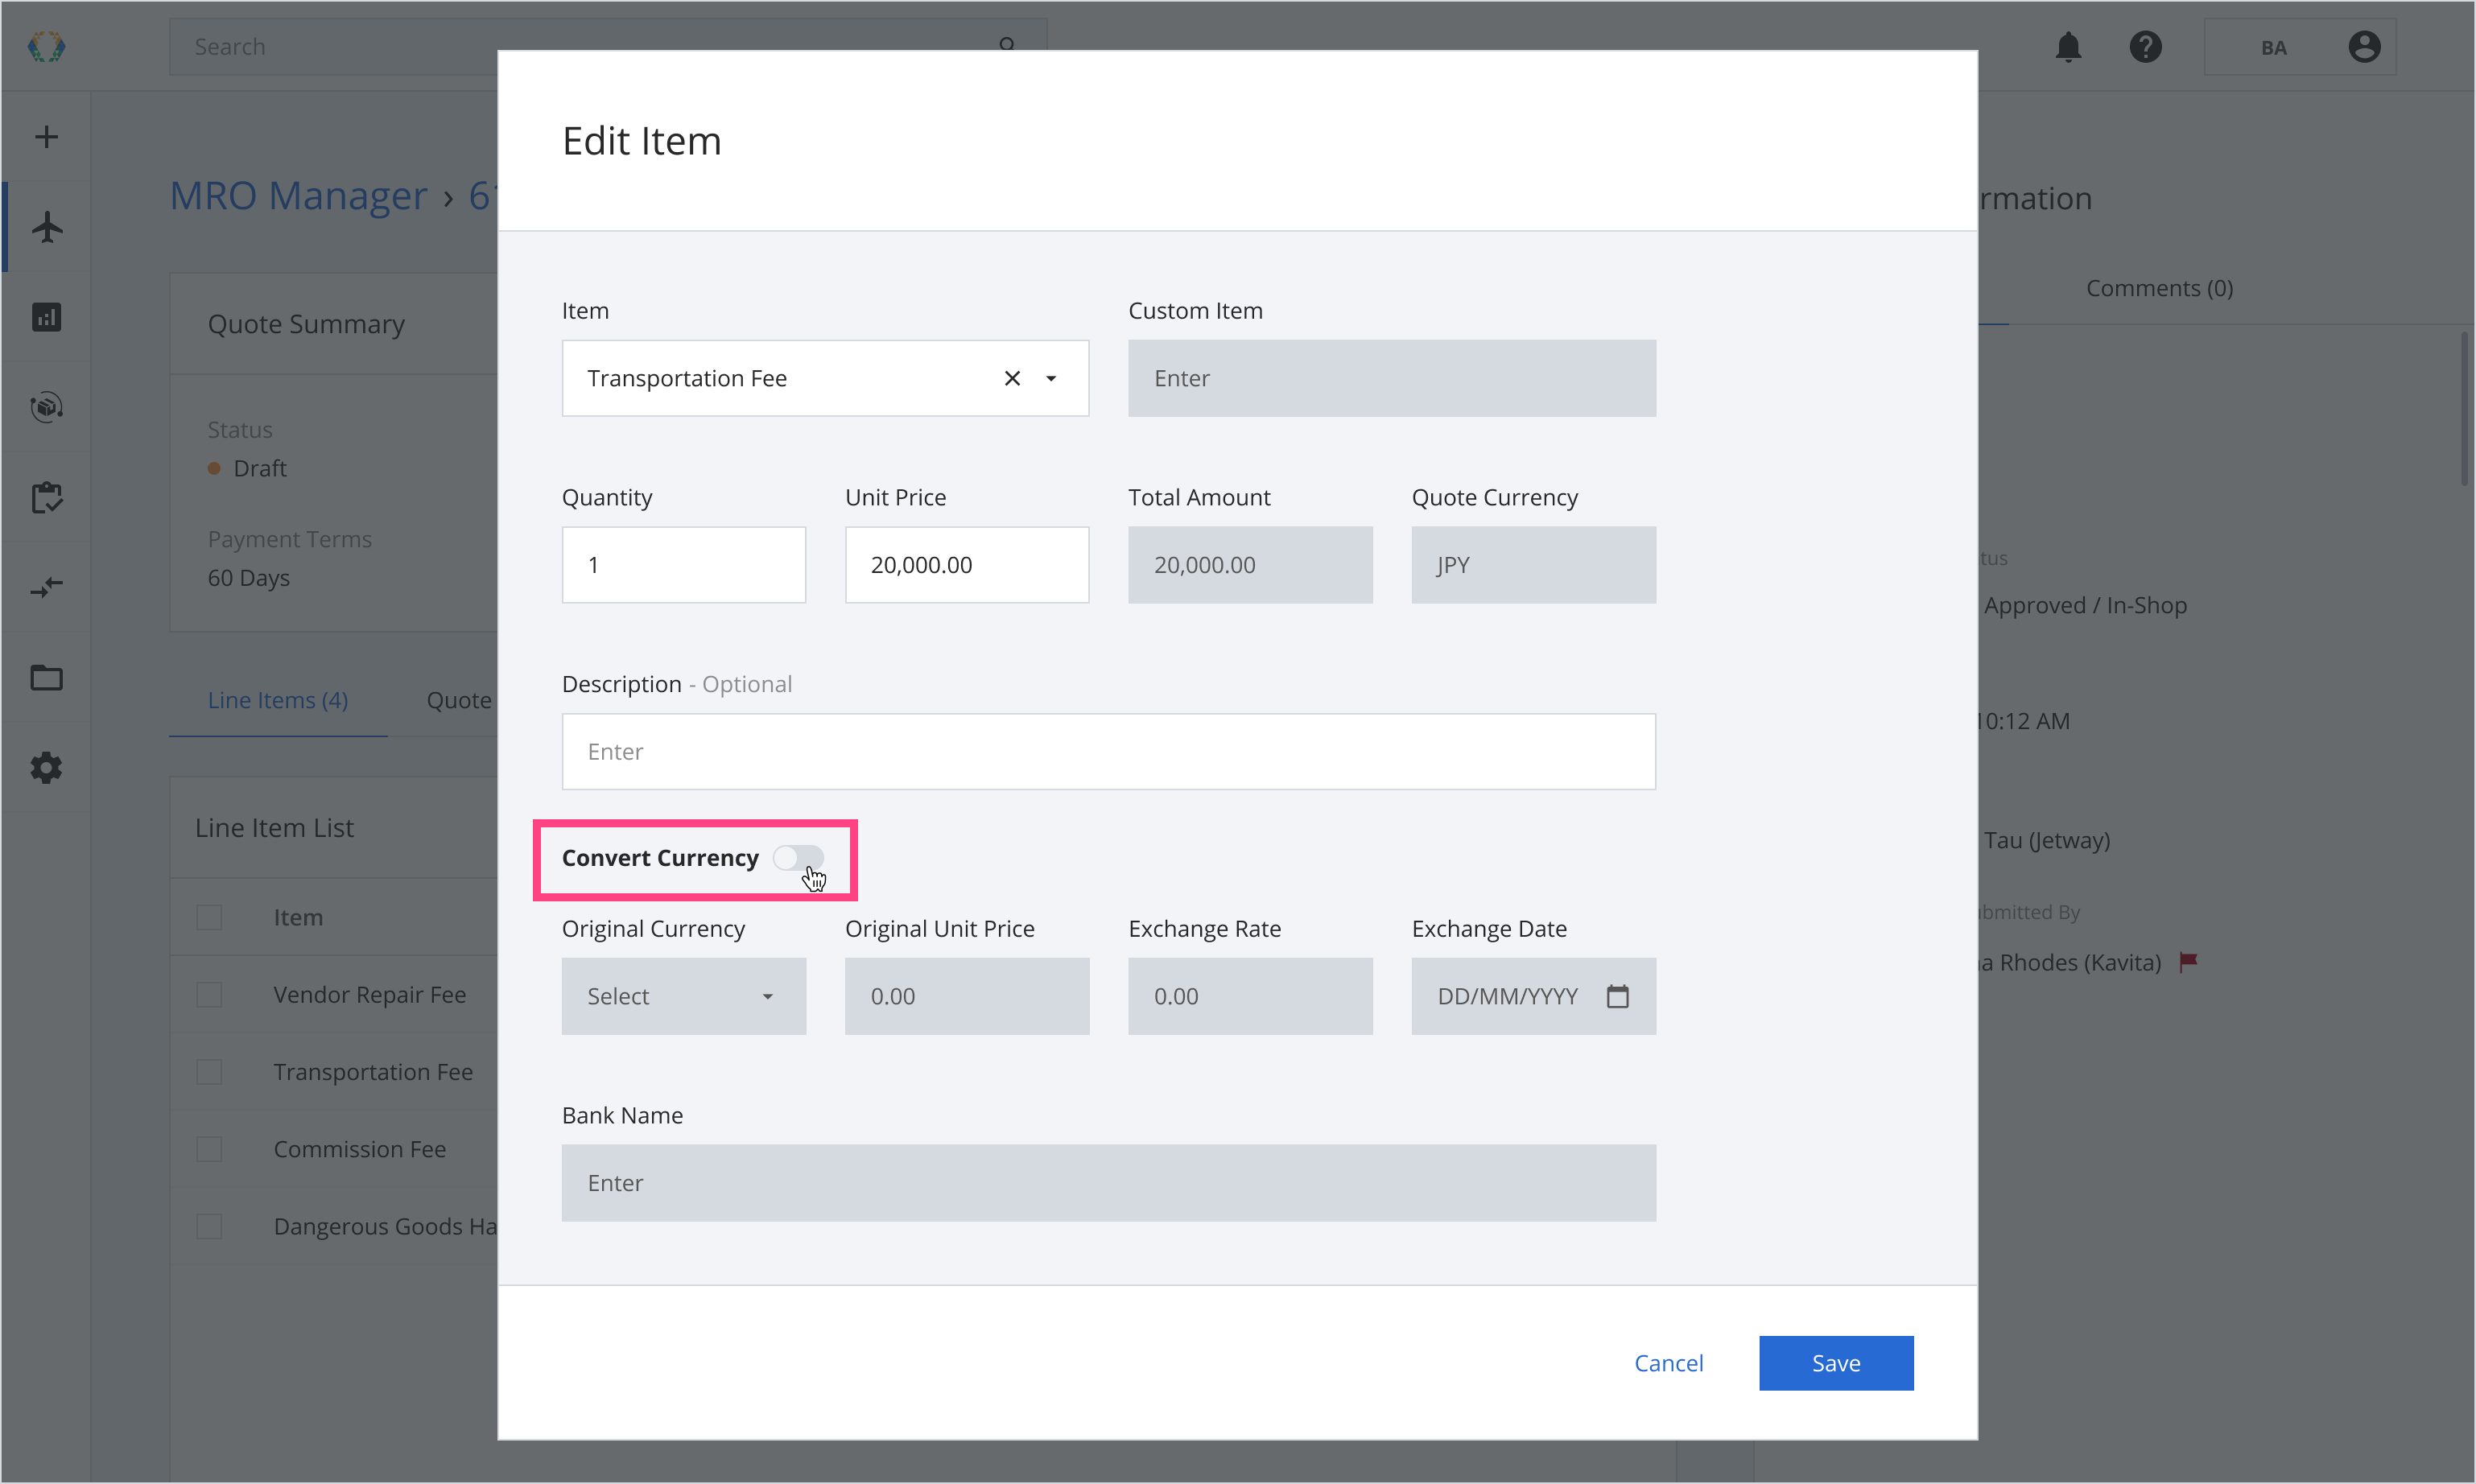
Step 5: Turn on the toggle to add currency conversion.
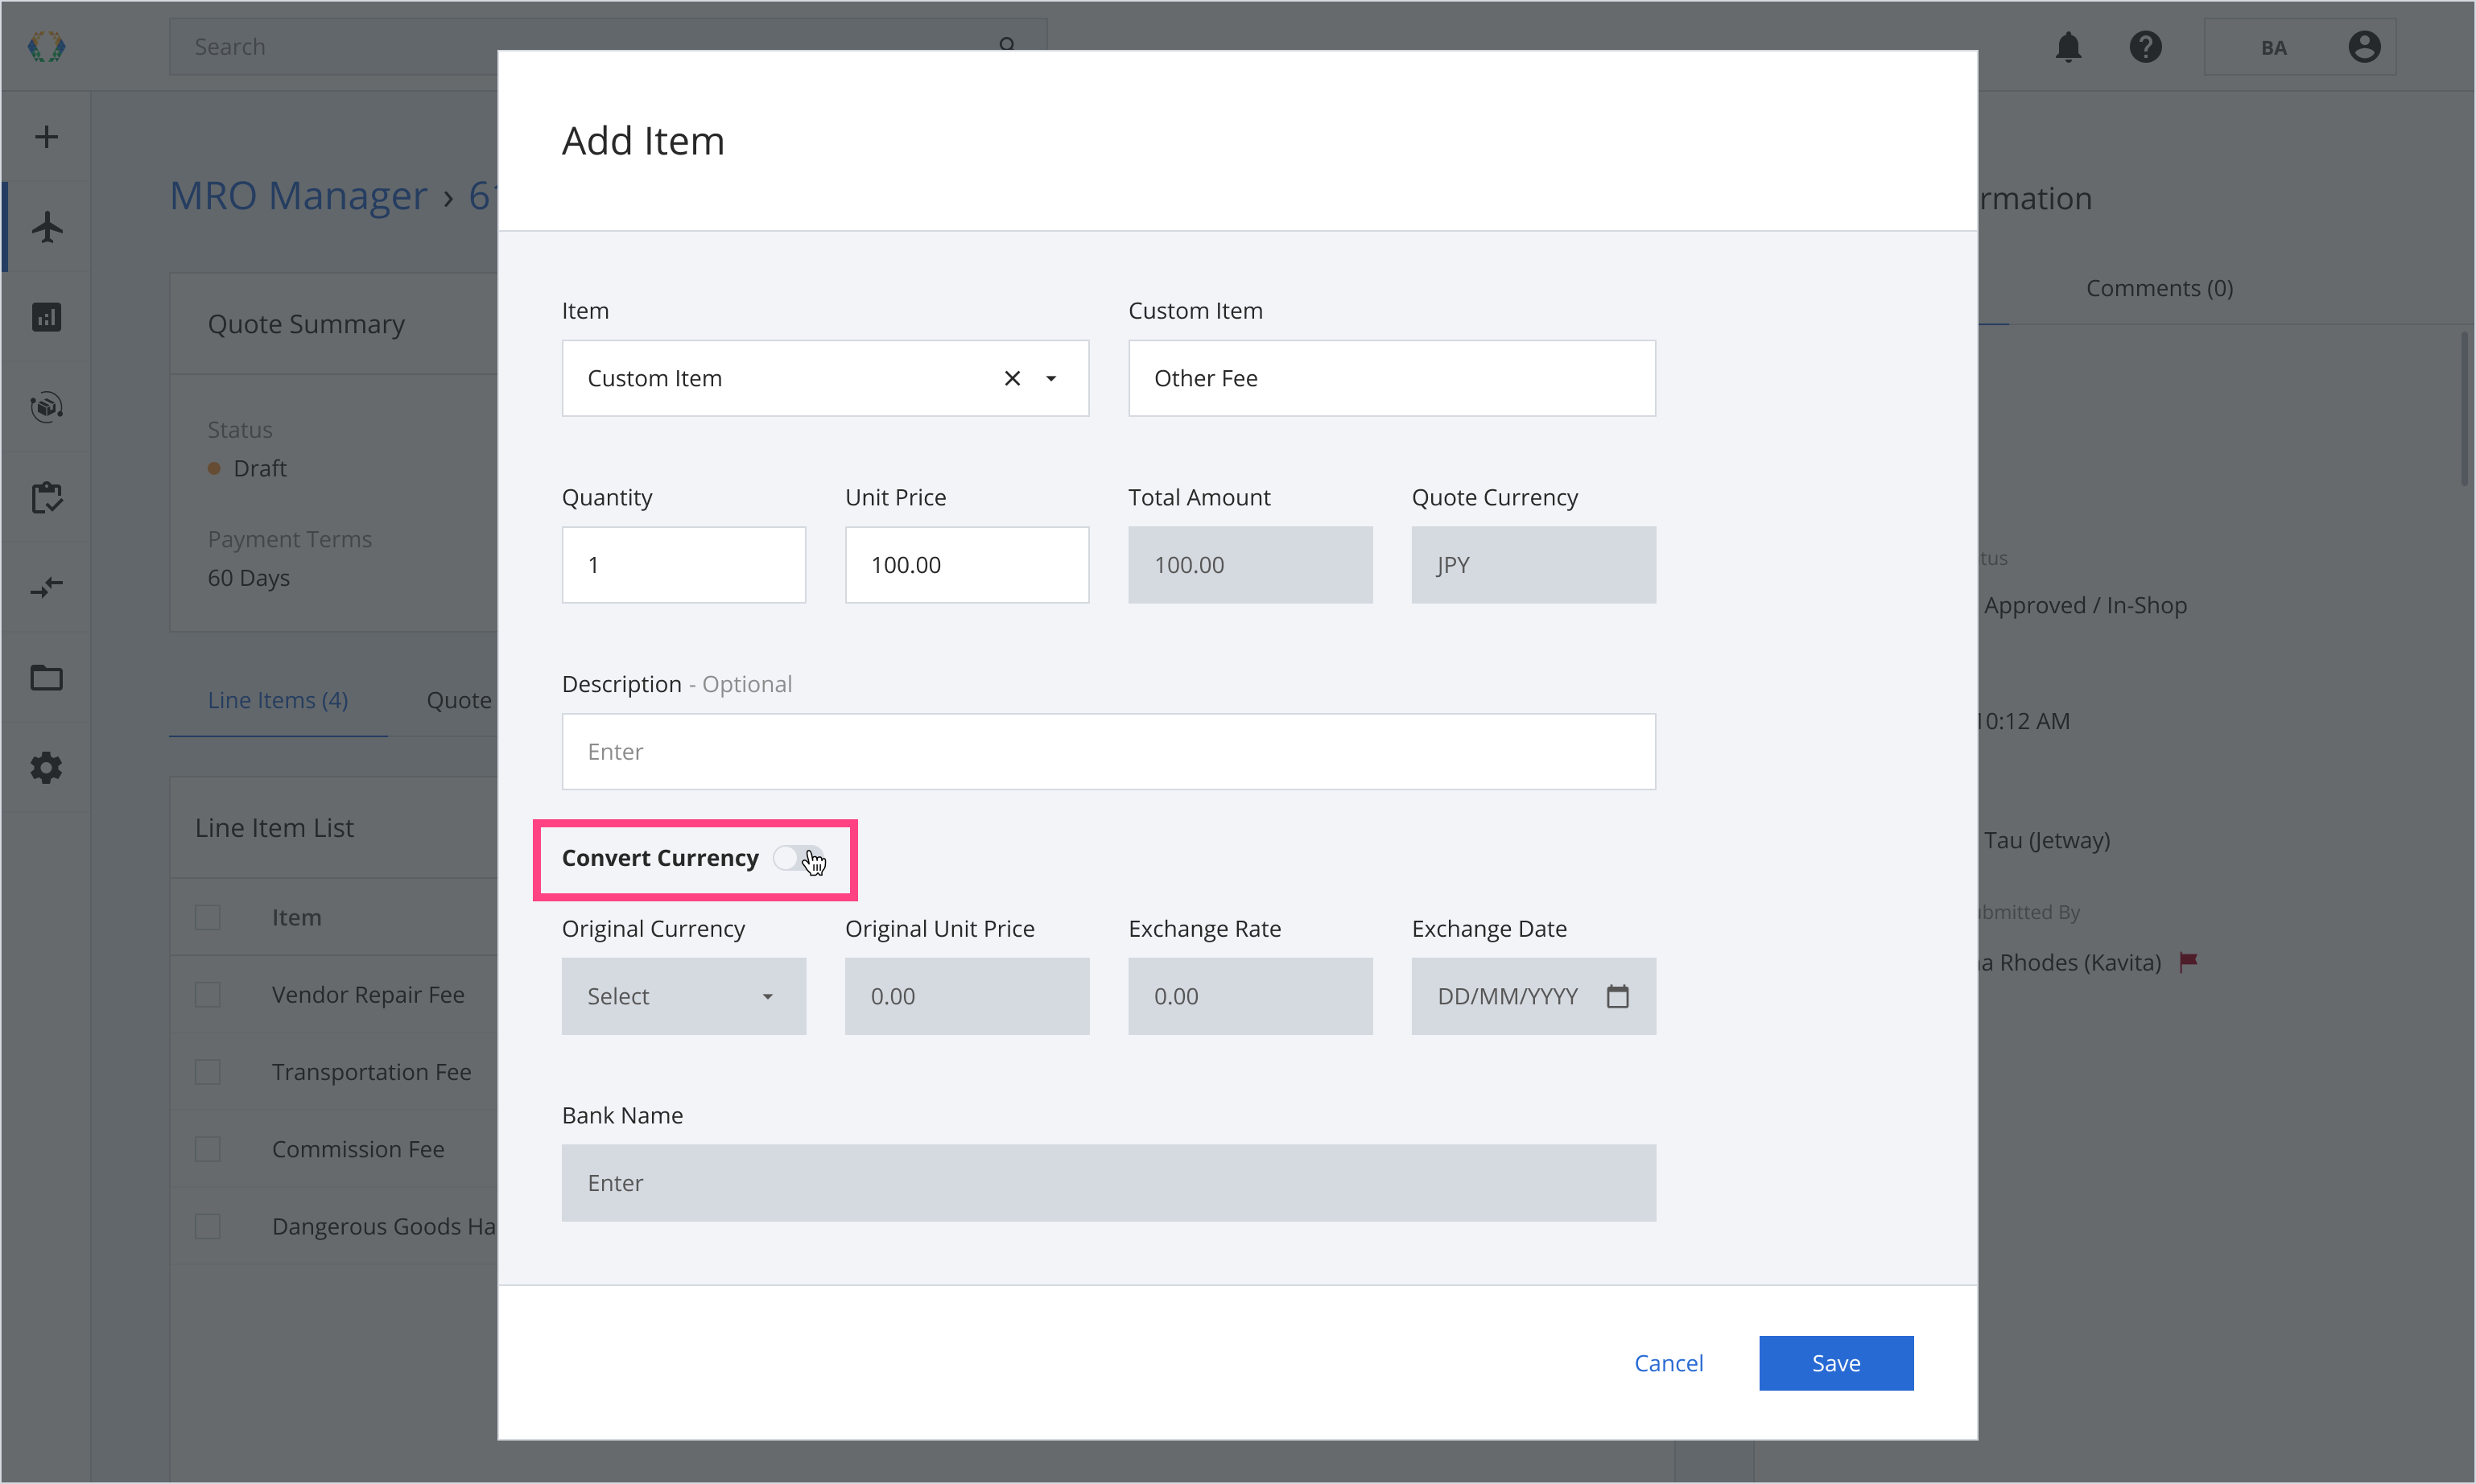
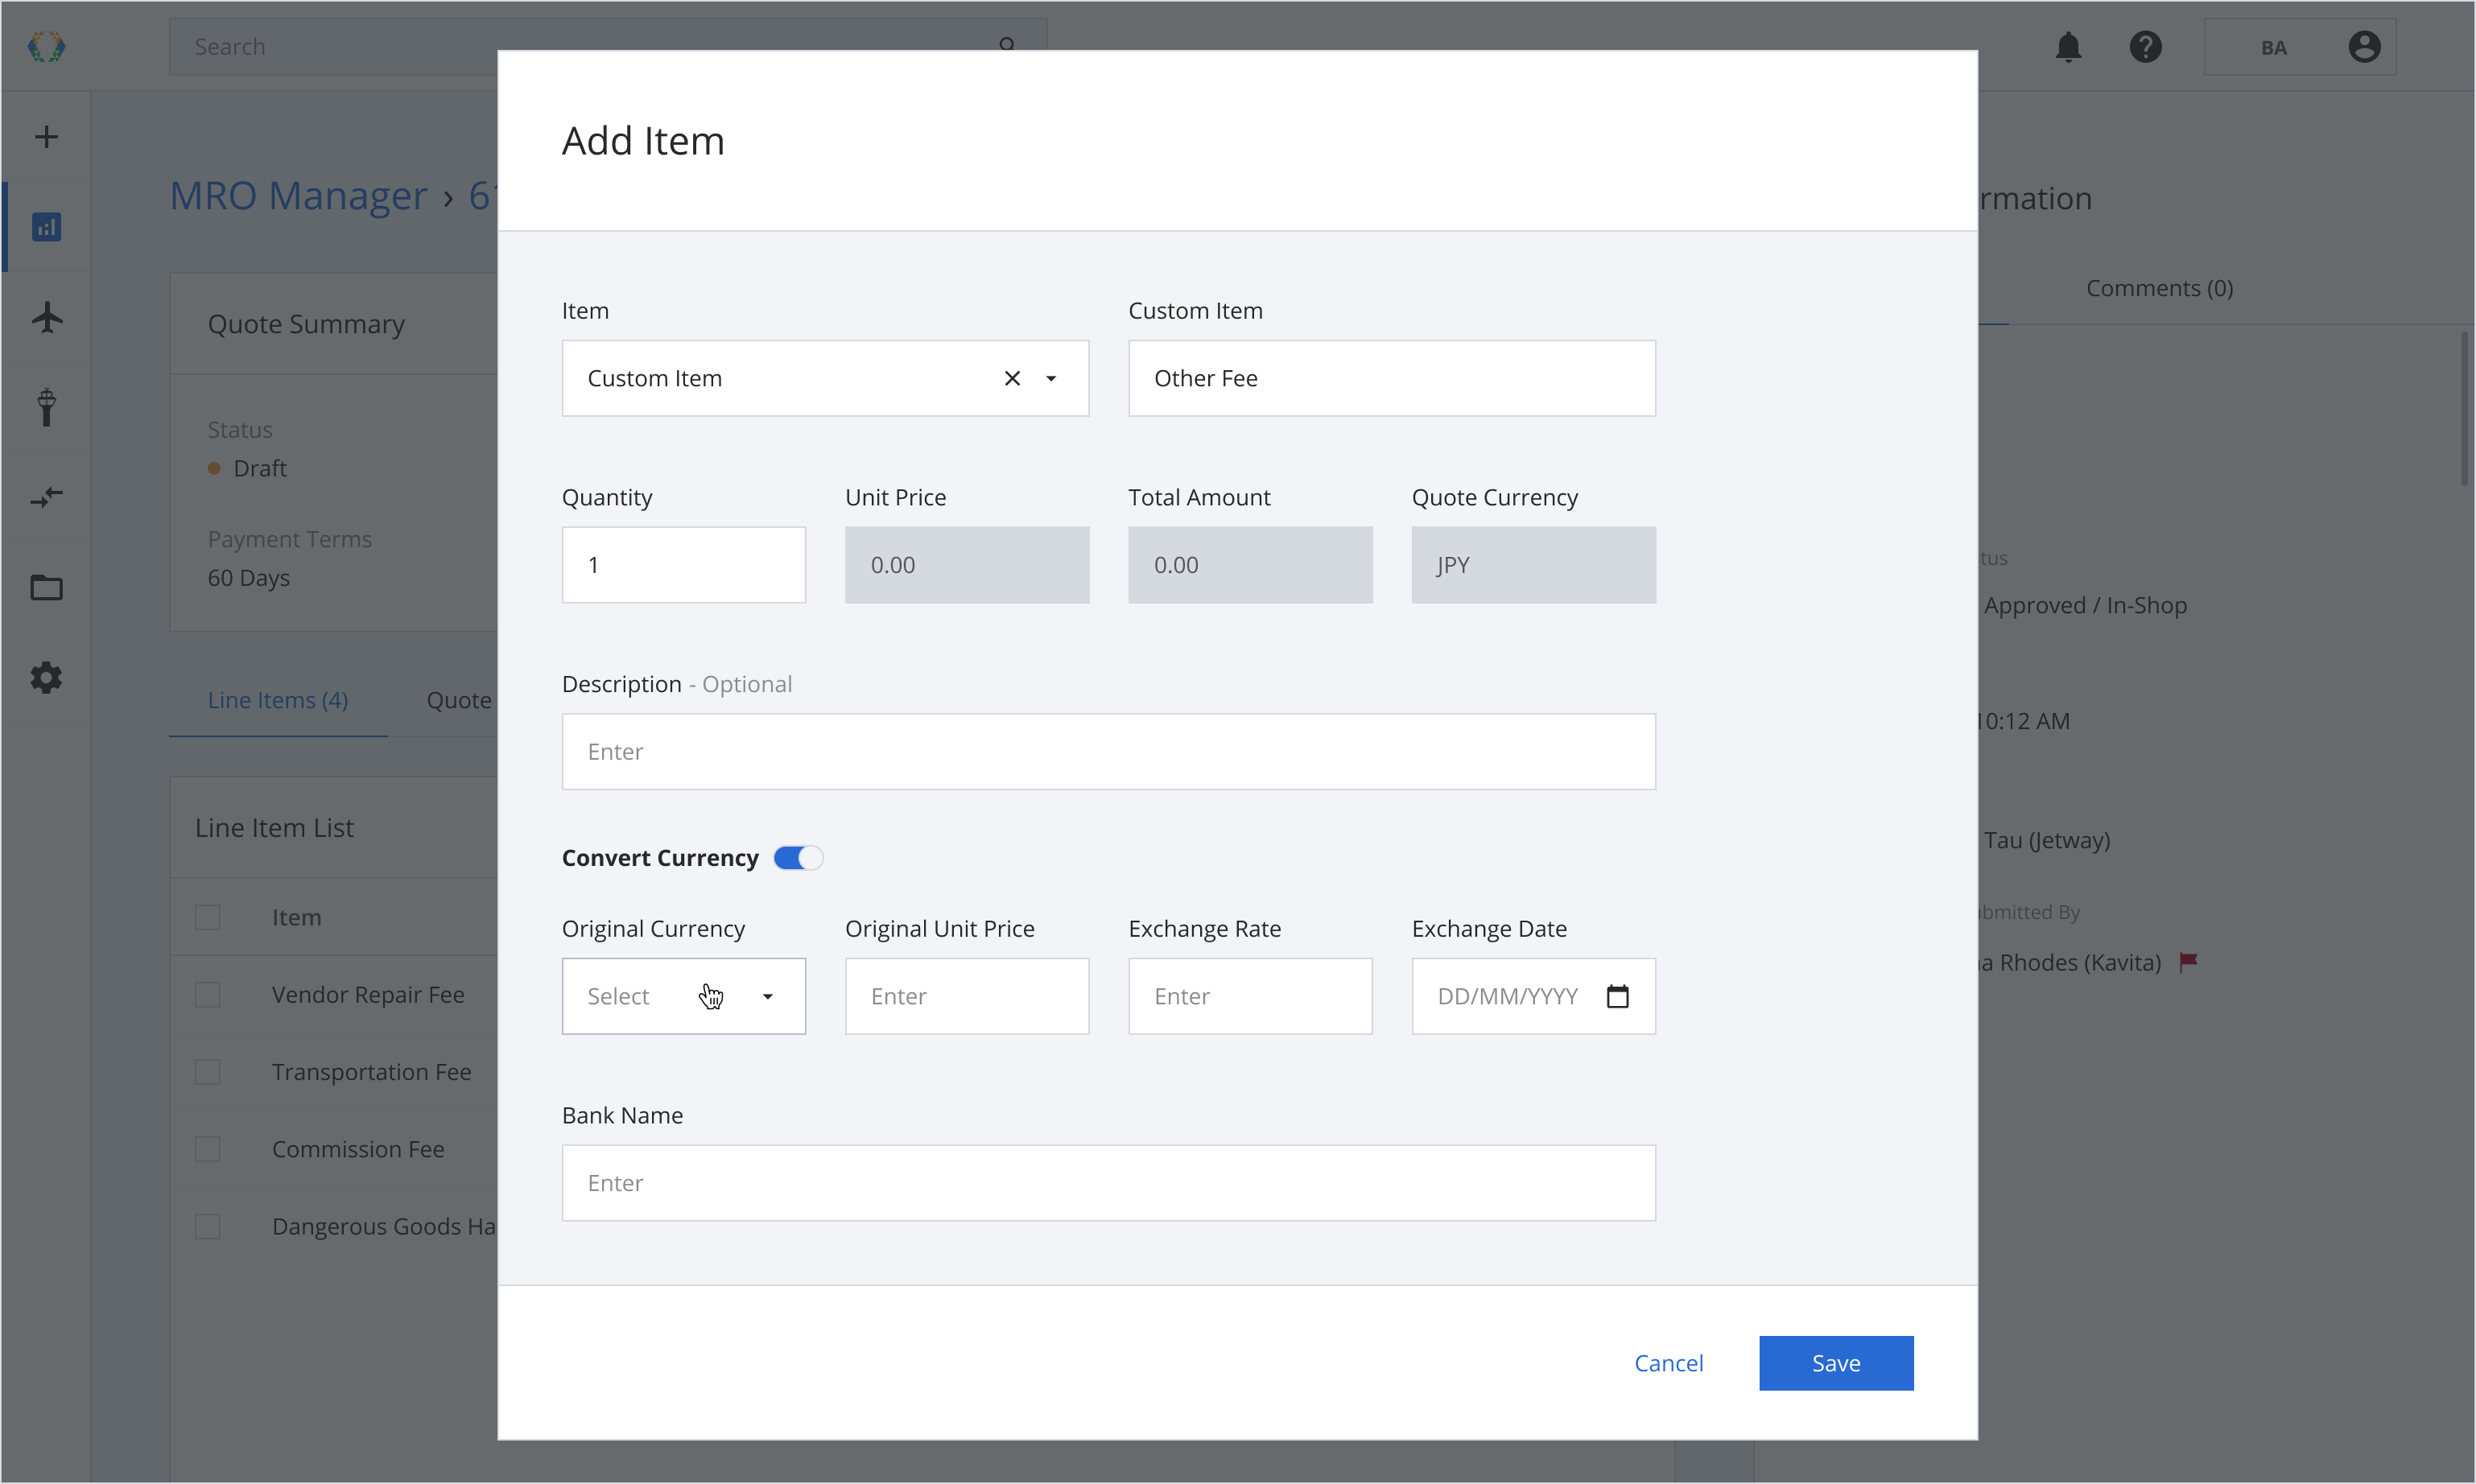
Step 6: Select the Original Currency and fill in the relevant details.
Step 7: Click ‘Save’.
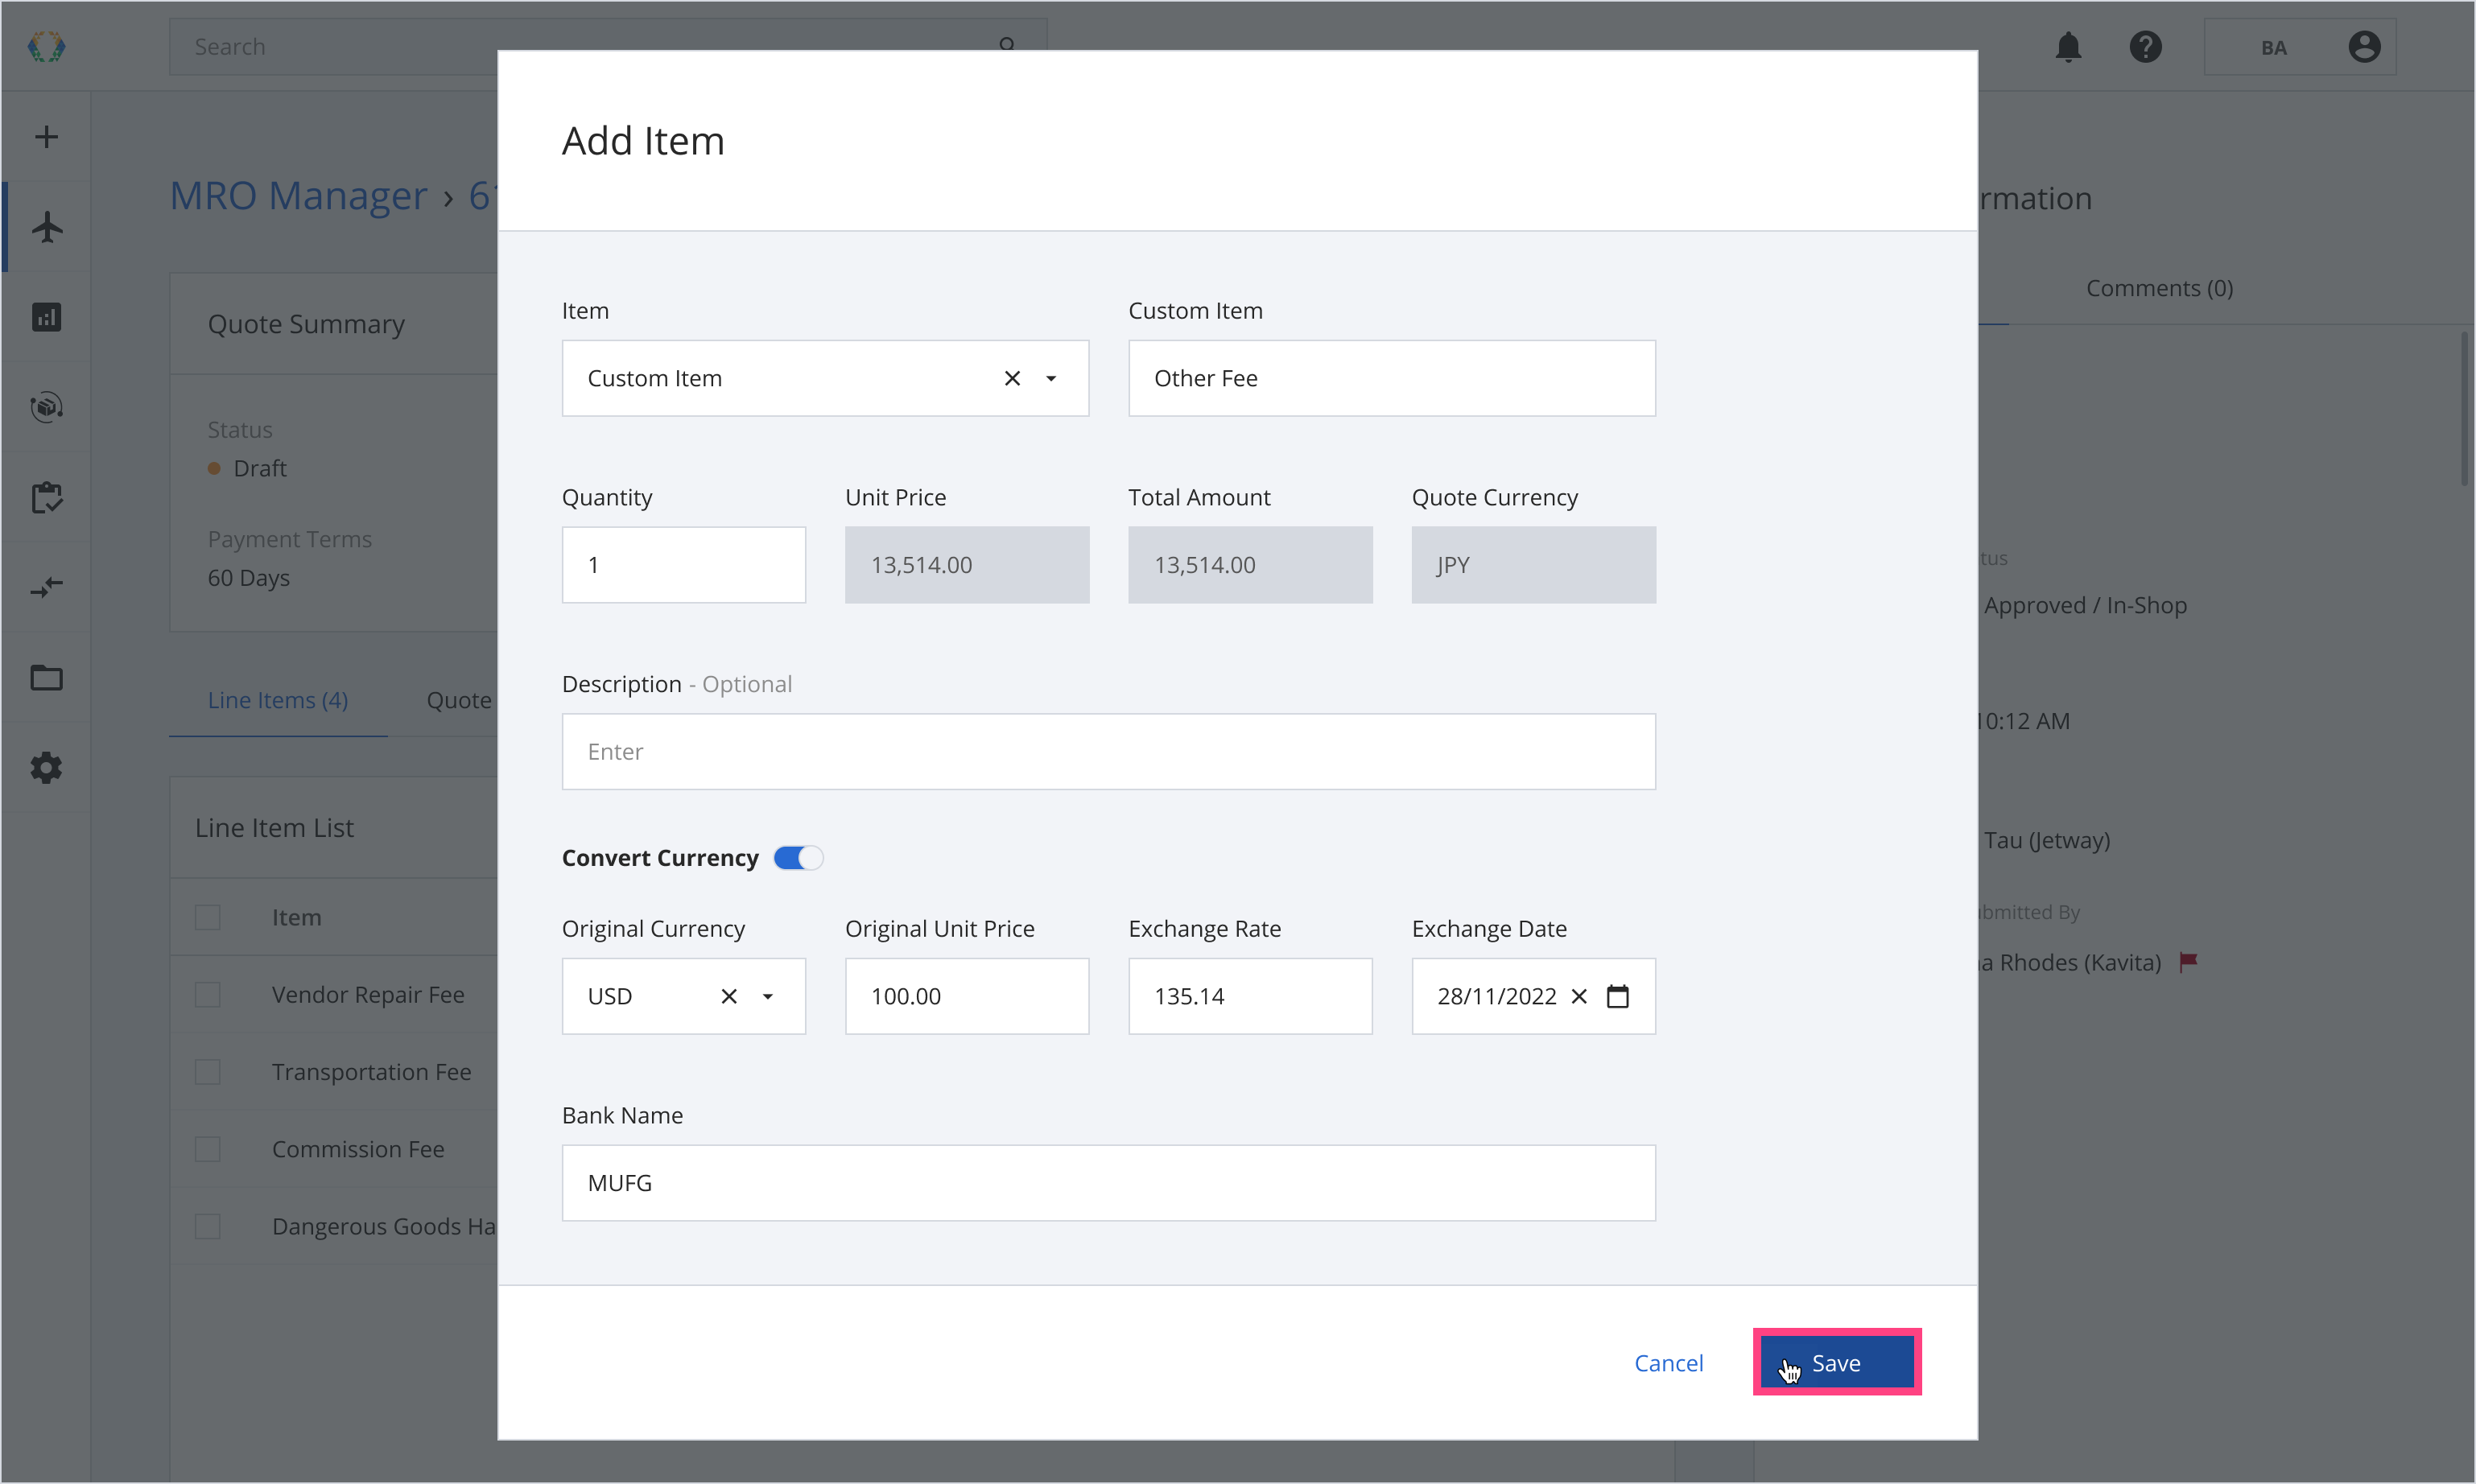
Once the line items are added successfully, a success message will appear at the bottom of the screen.
Editing Quotes
There are four different operations for you to edit your quotes.
From Billing Records, open the quote you want to edit.
Editing Quote Items (Line Items)
You will be redirected to the Quote page to edit your Line Items.
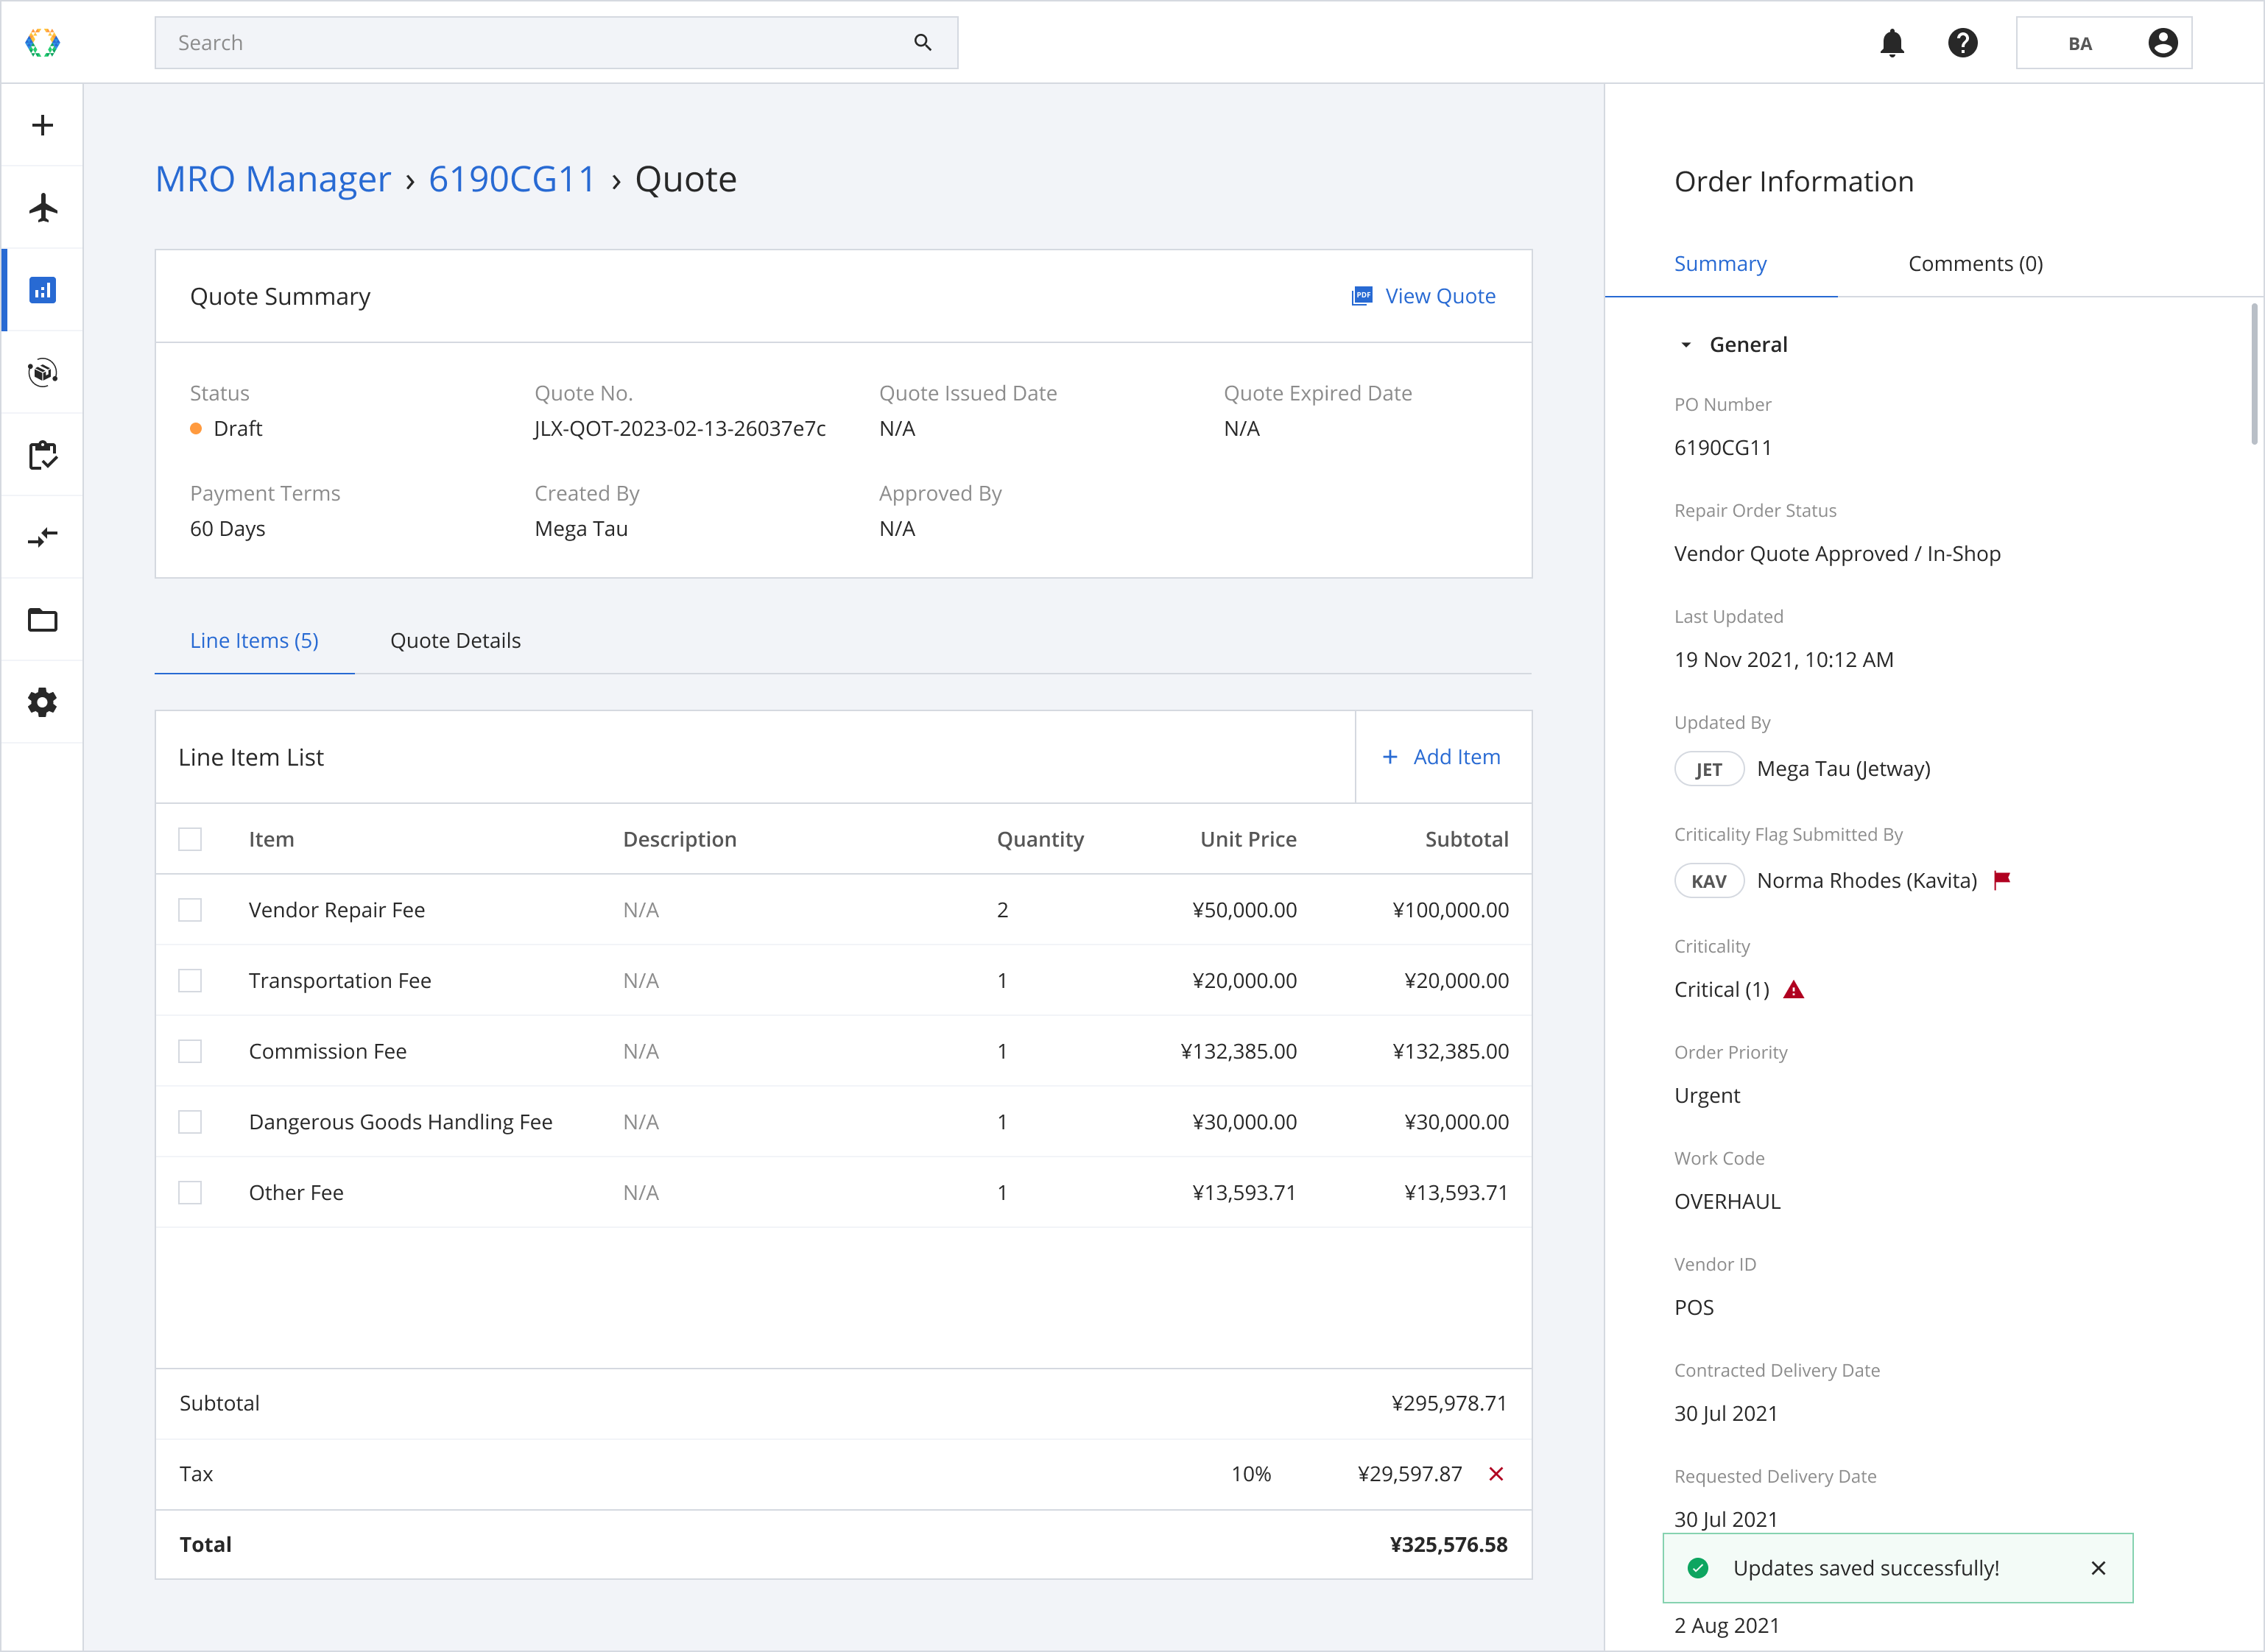
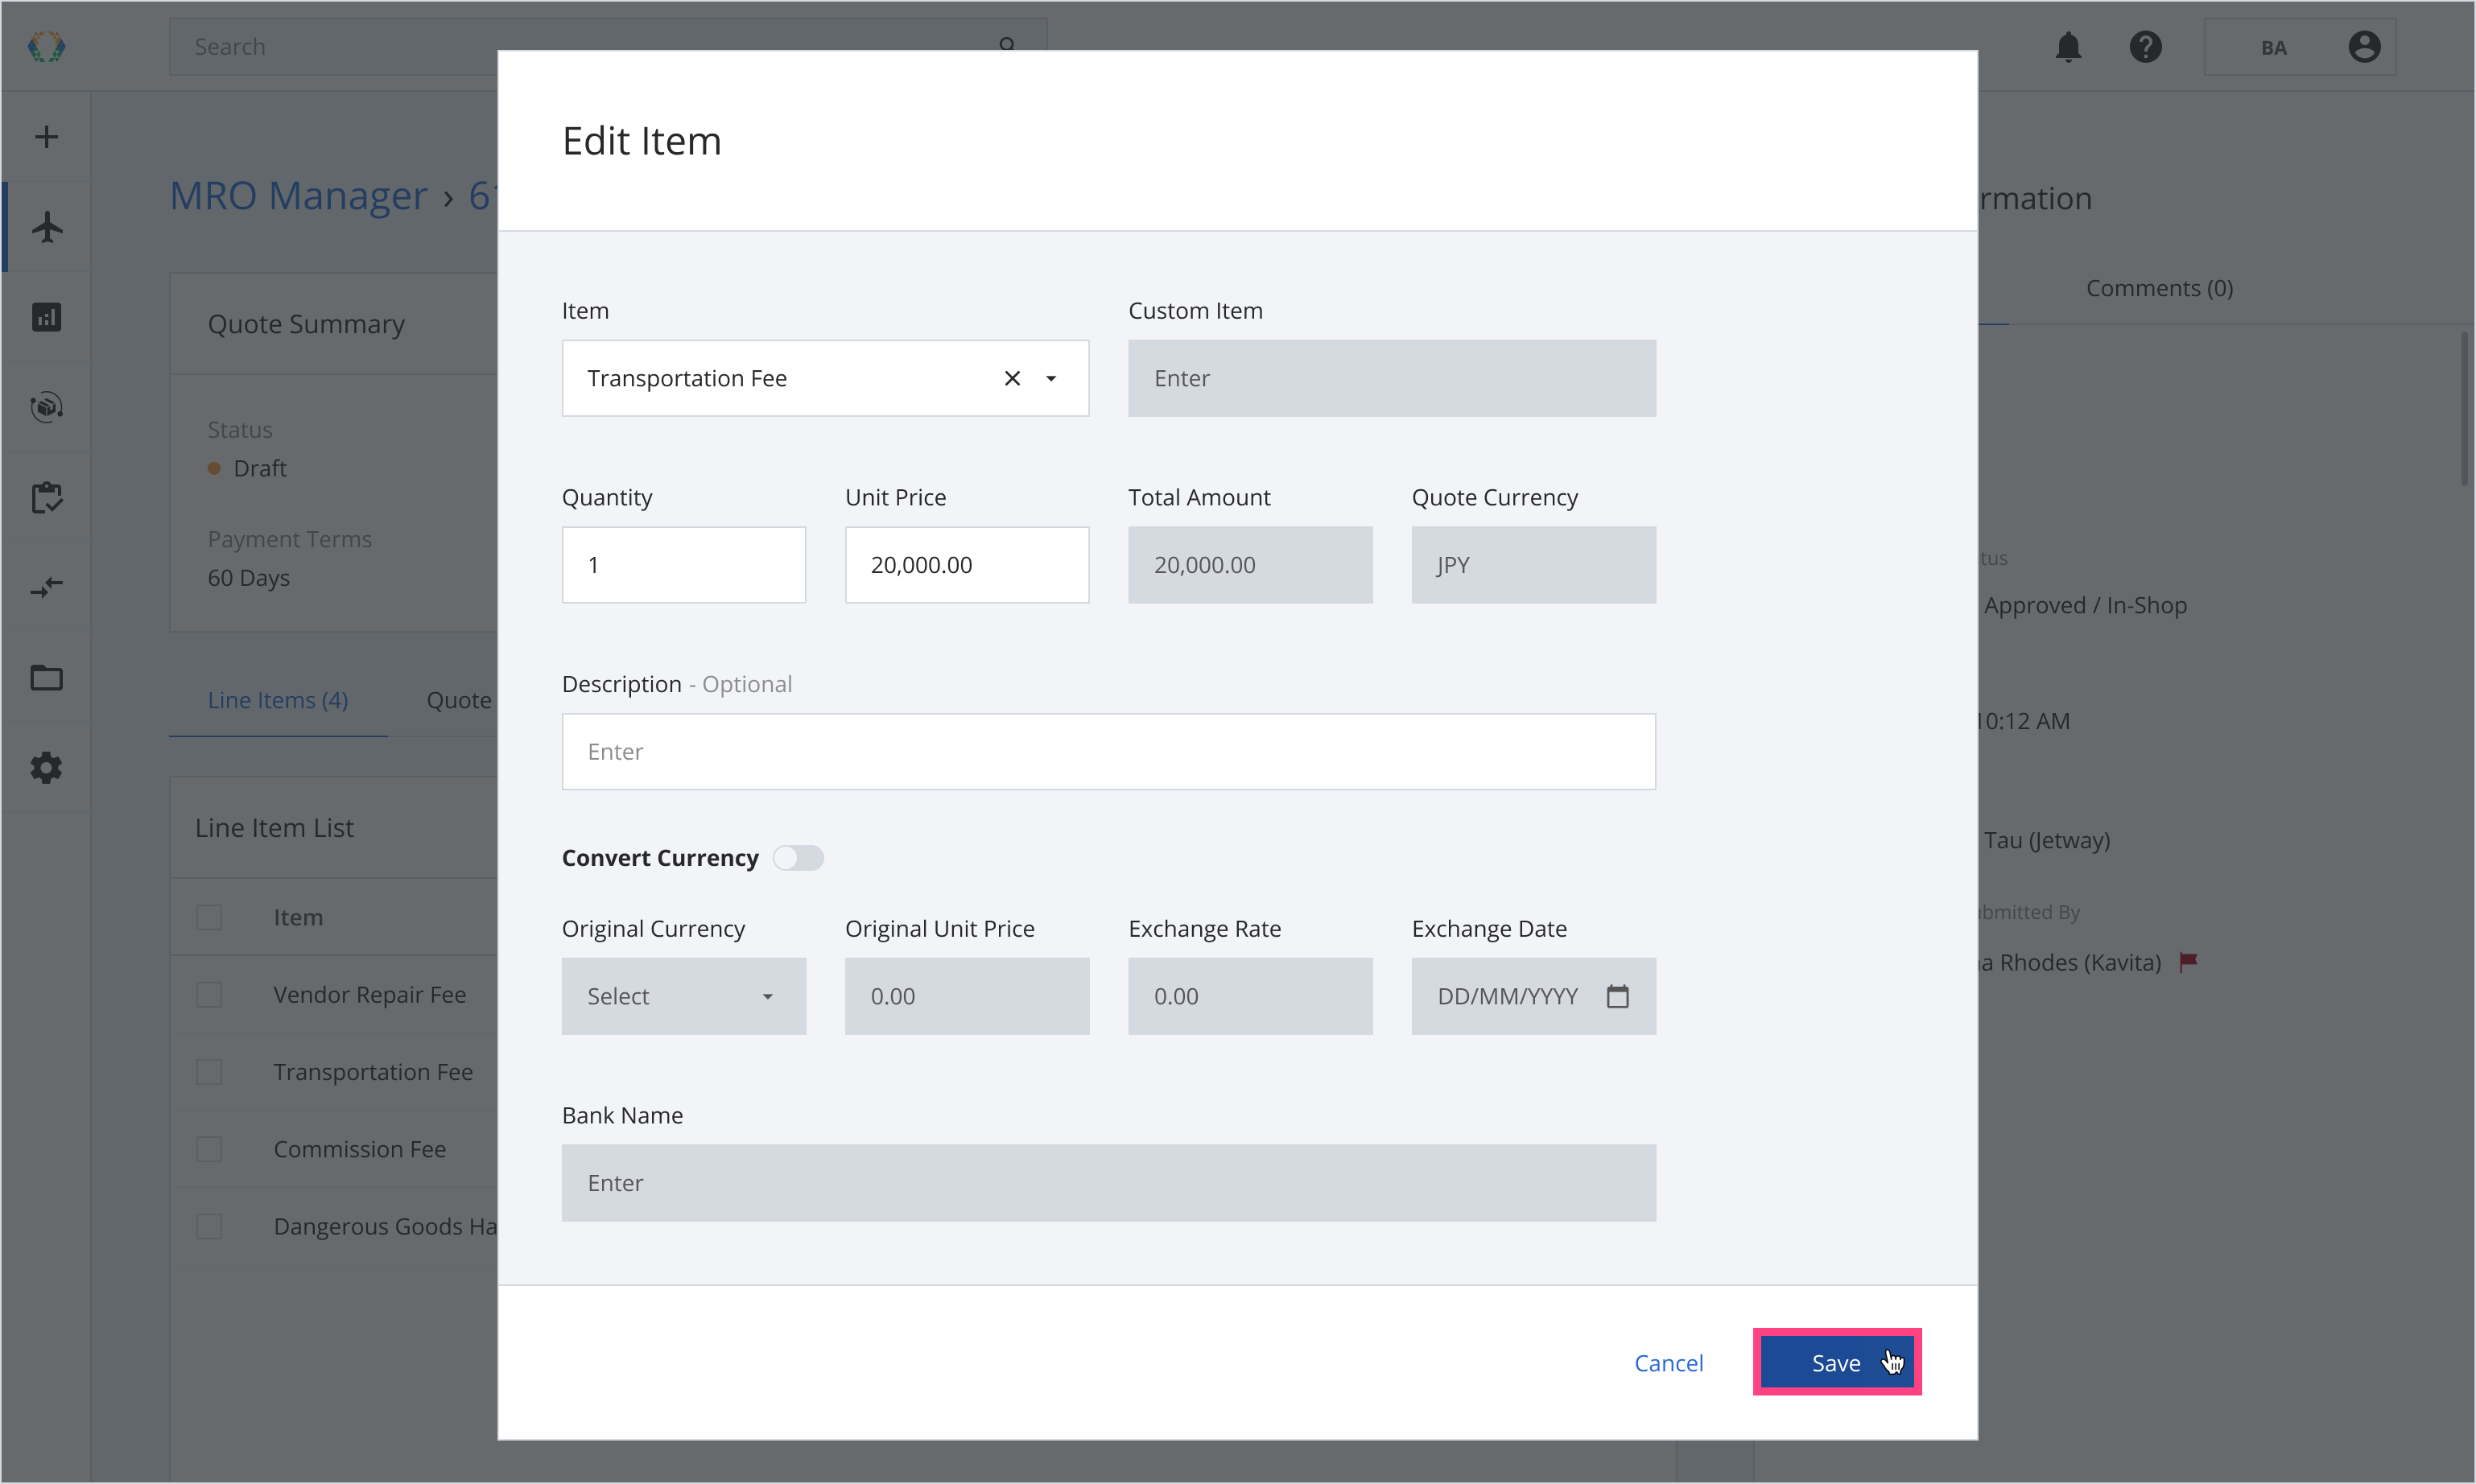
Step 1: From the Line Item List, open line item you want to edit.
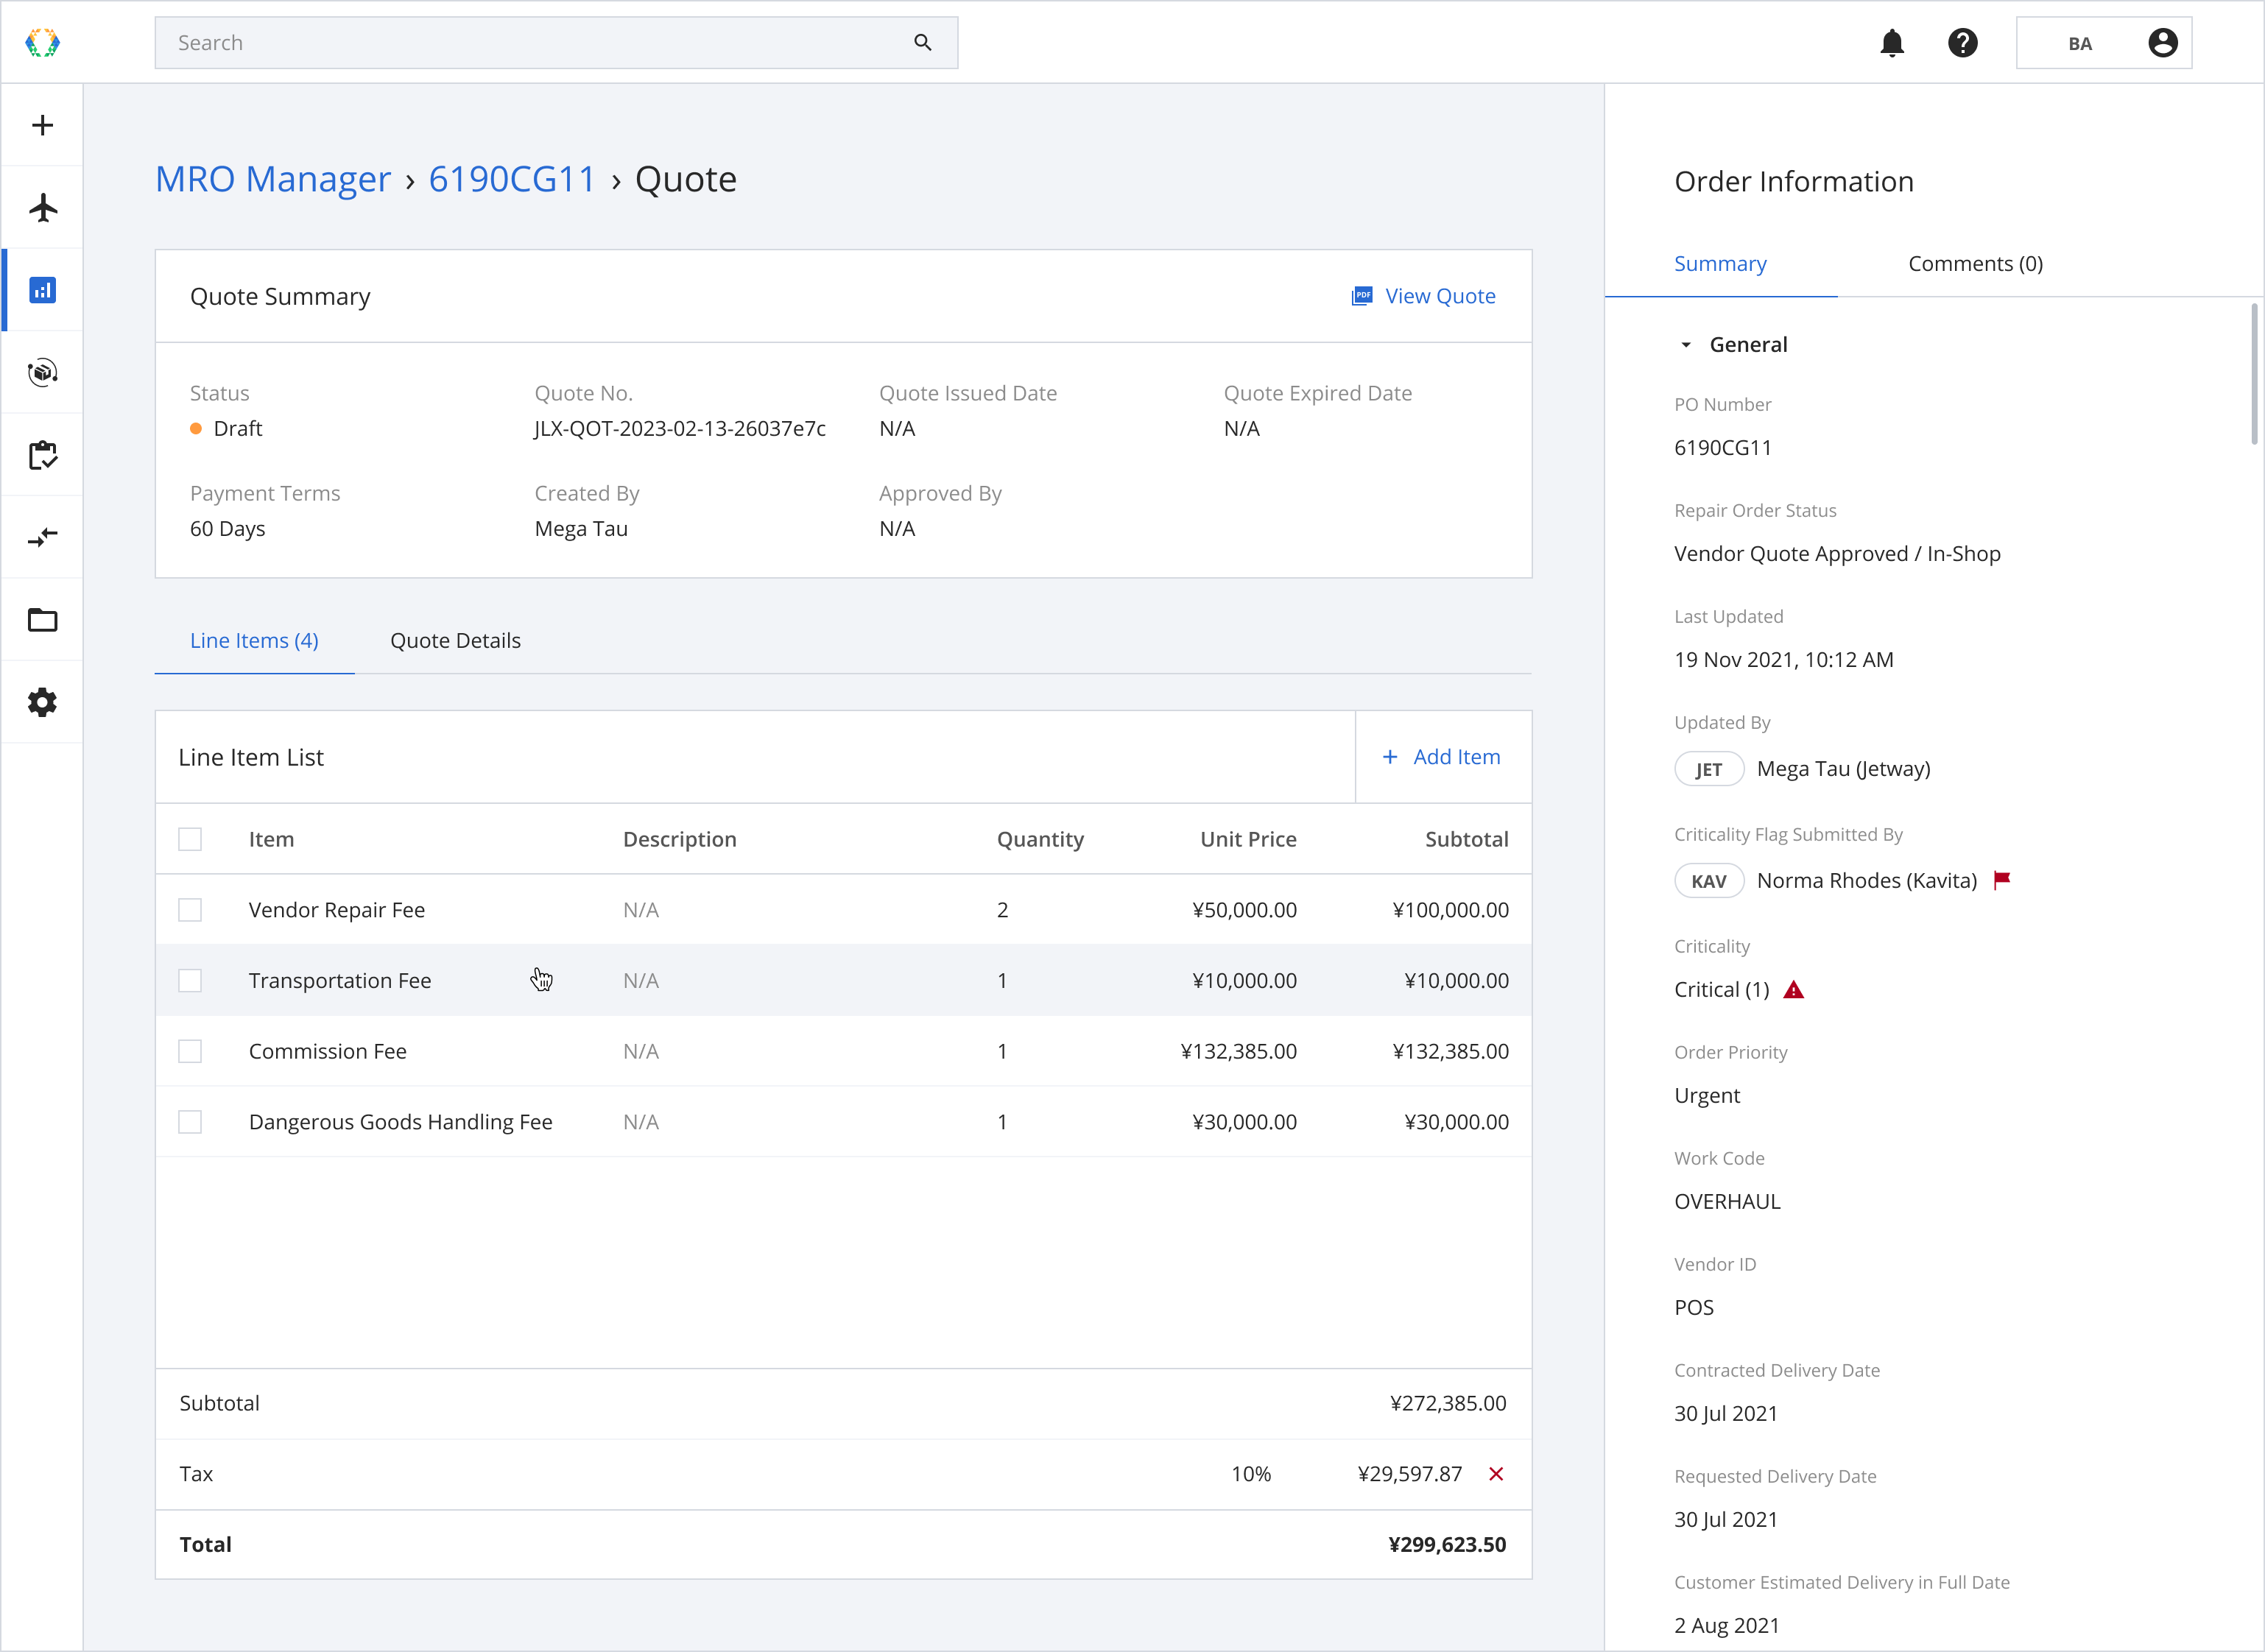
Step 2: Fill in the required information to edit your Line Item.
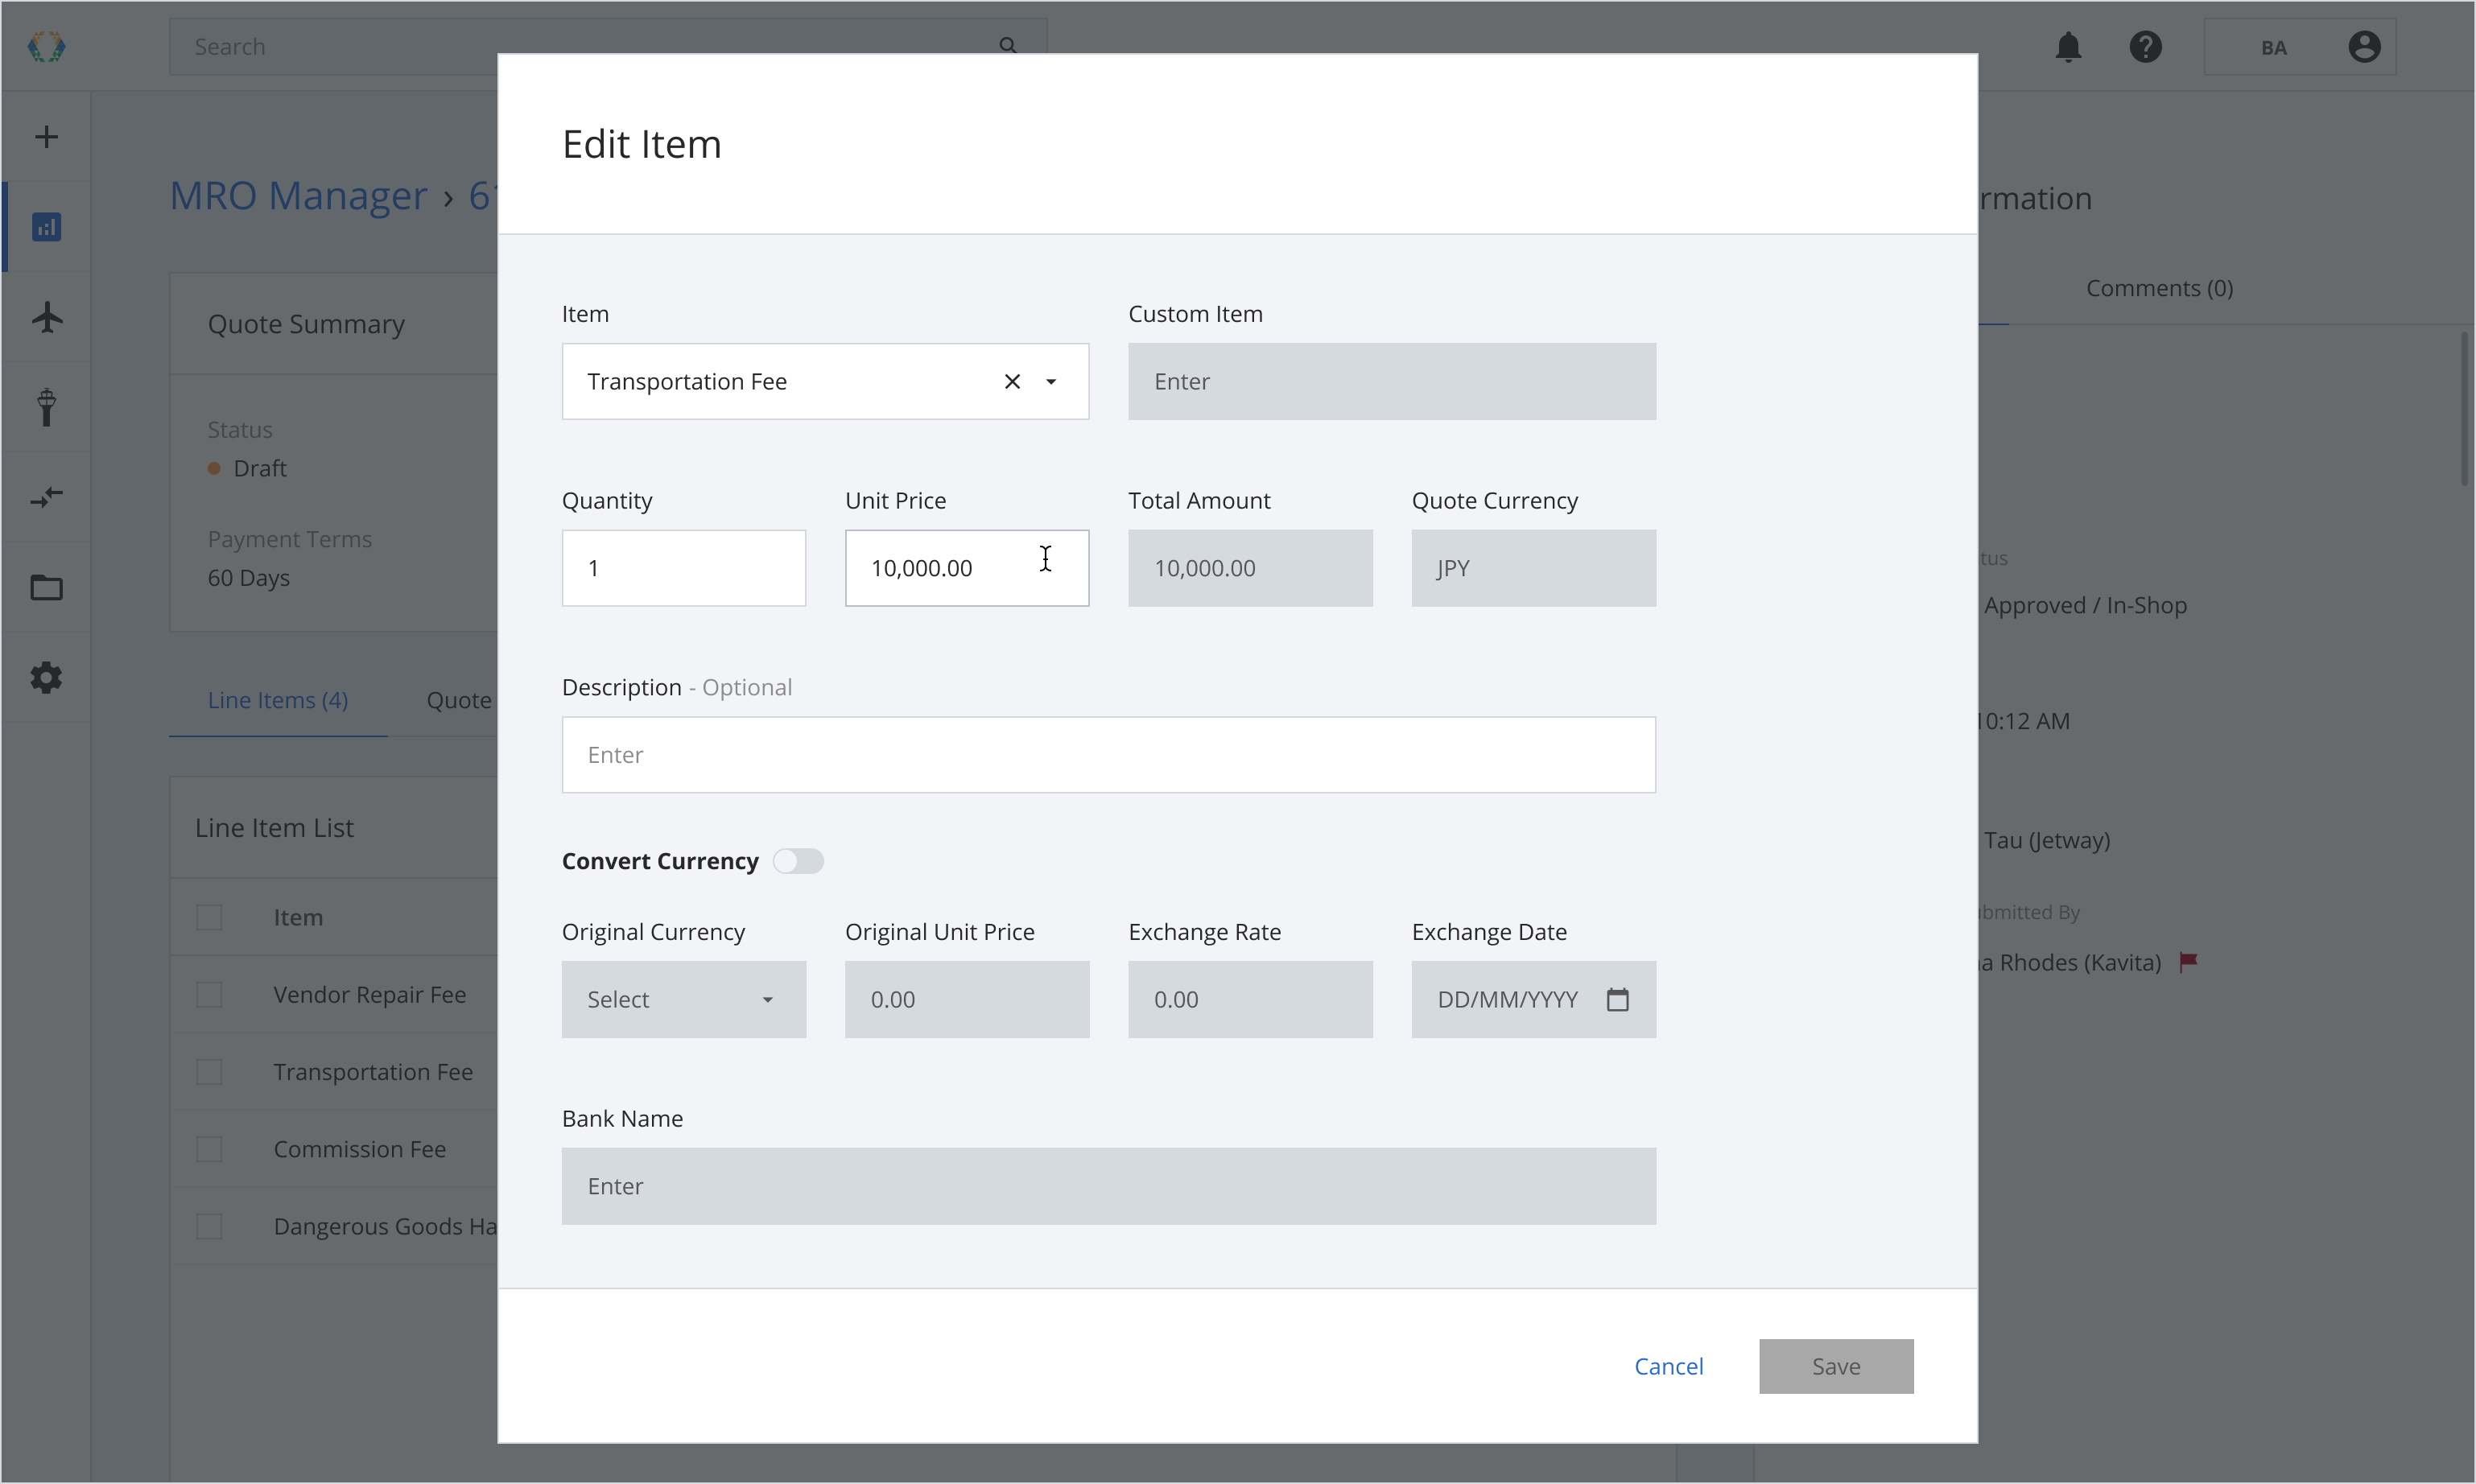
You can also enable currency conversion for the line item, if applicable.
Step 3: Click 'Save'.
Once the line items are edited successfully, a success message will appear at the bottom of the screen.

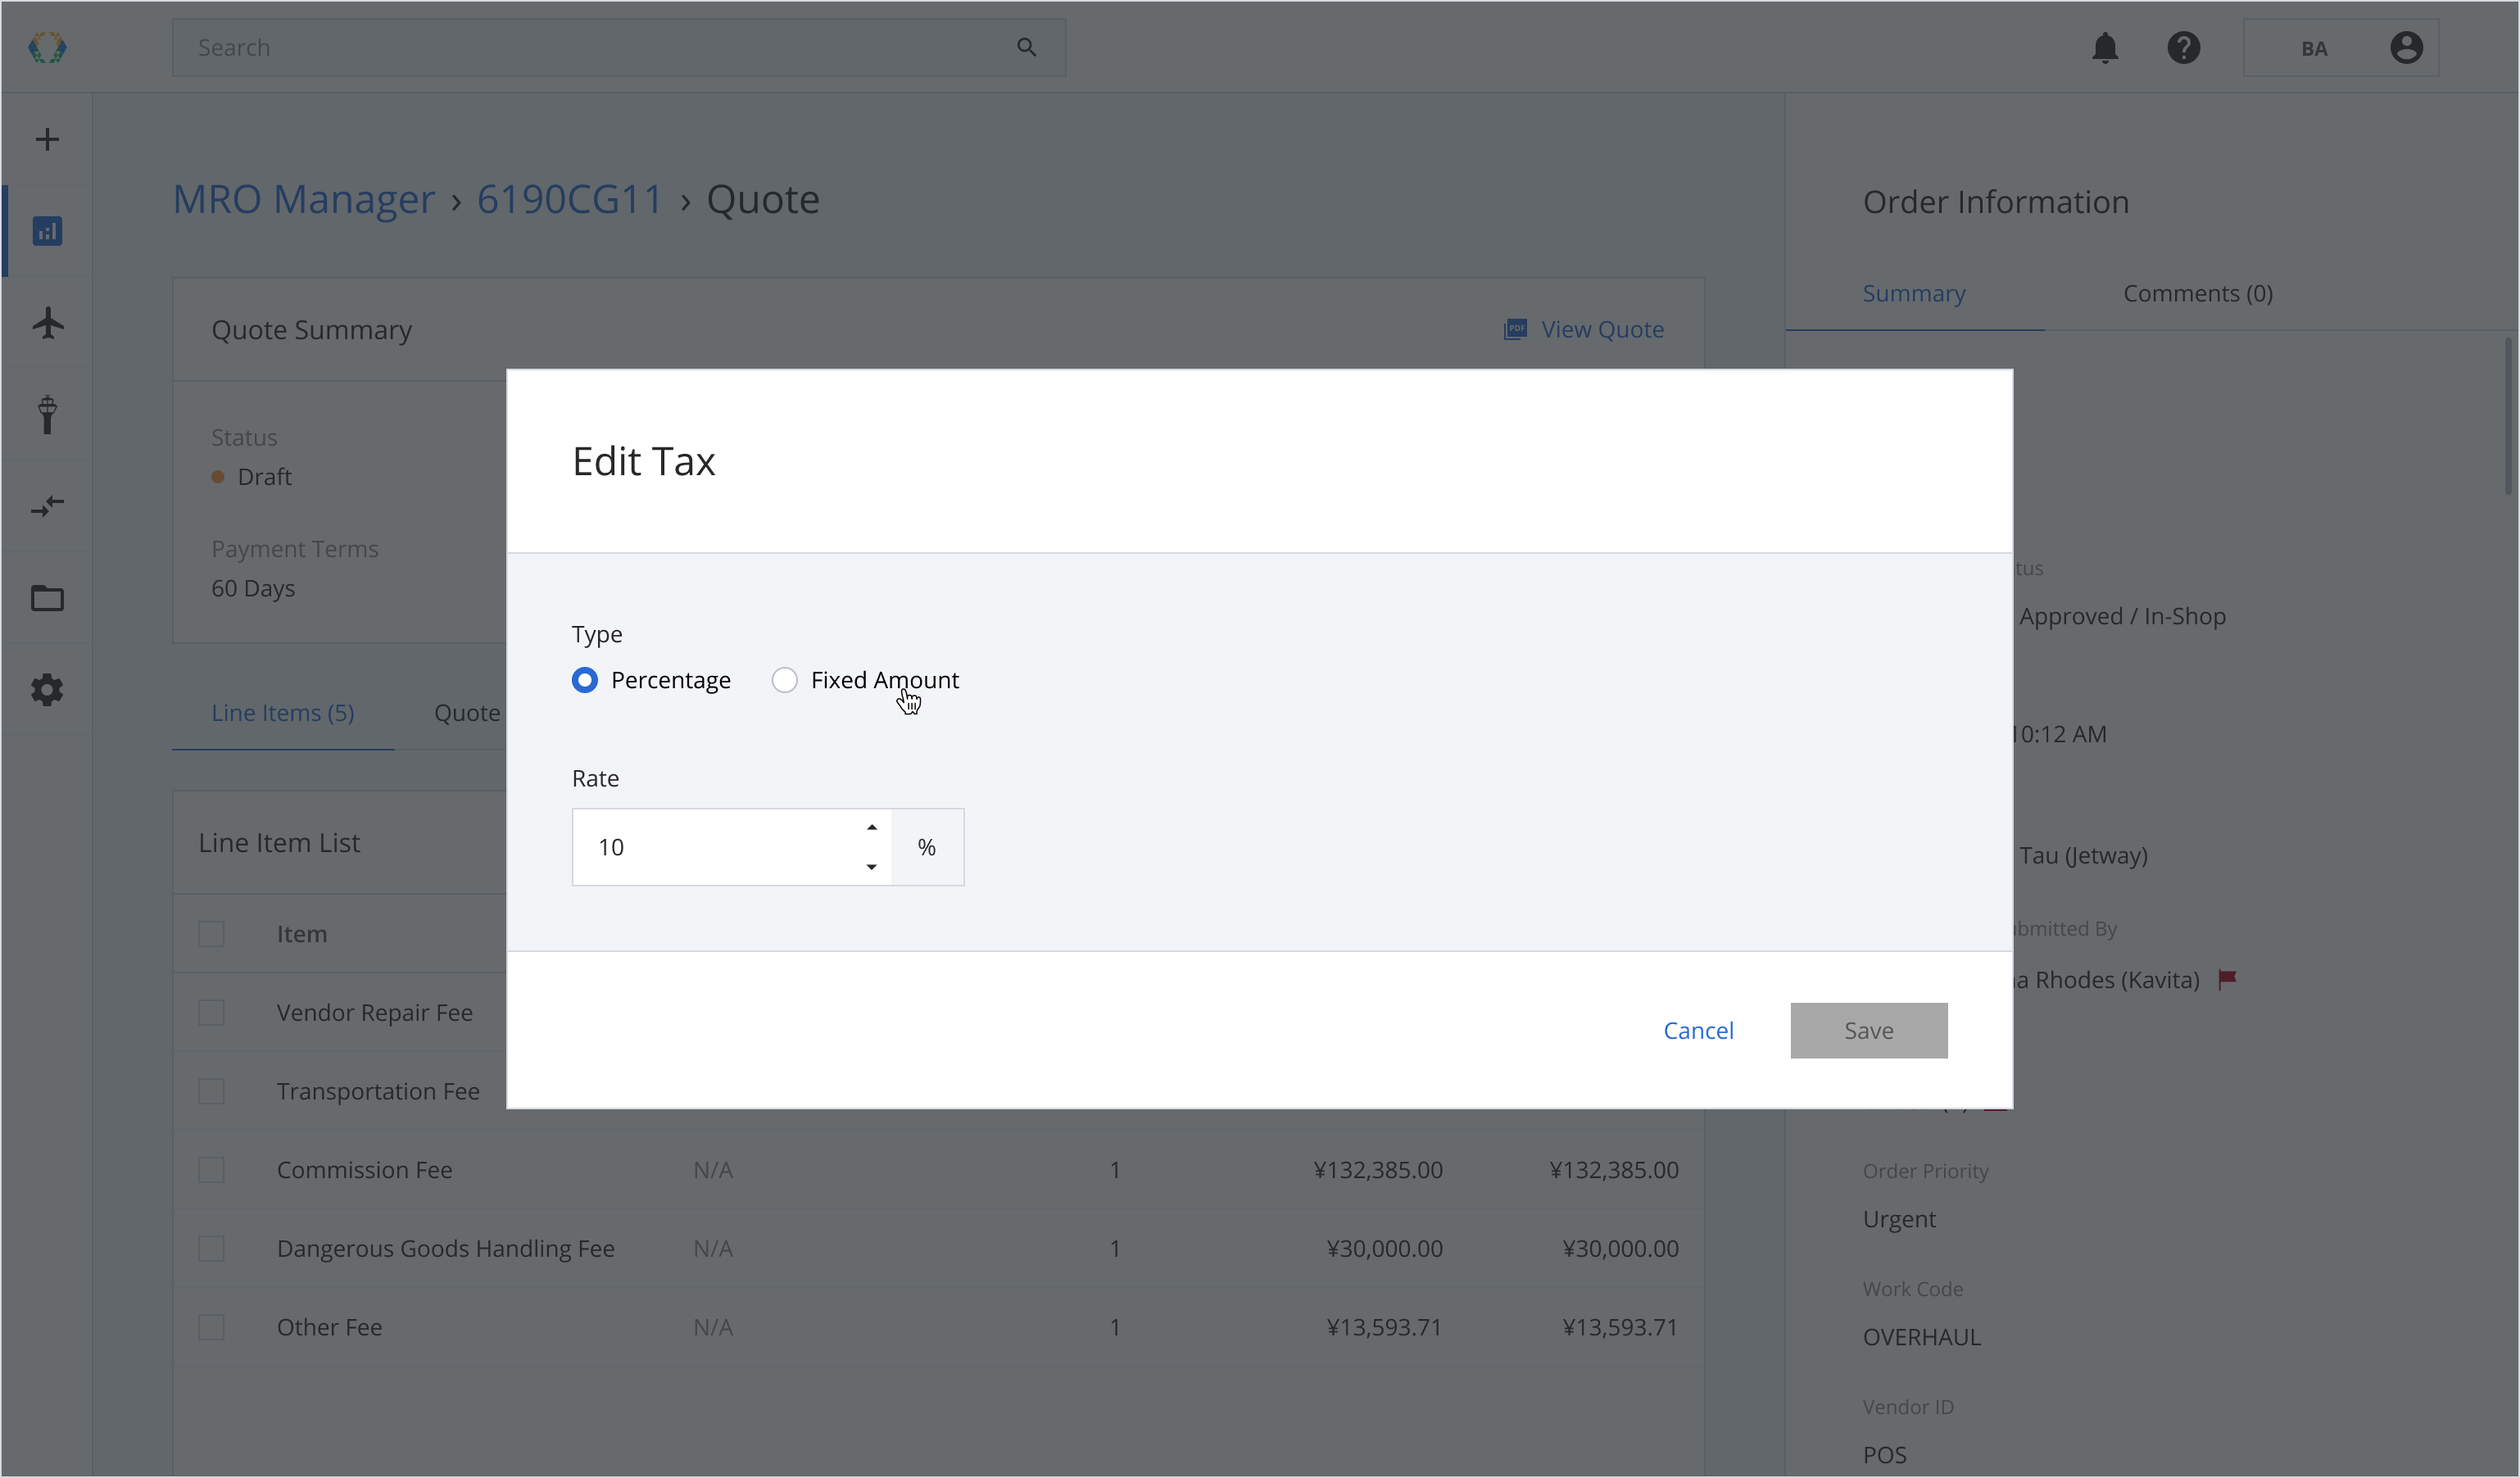
Editing Tax
Step 1: Click on the row in where 'Tax' is located.
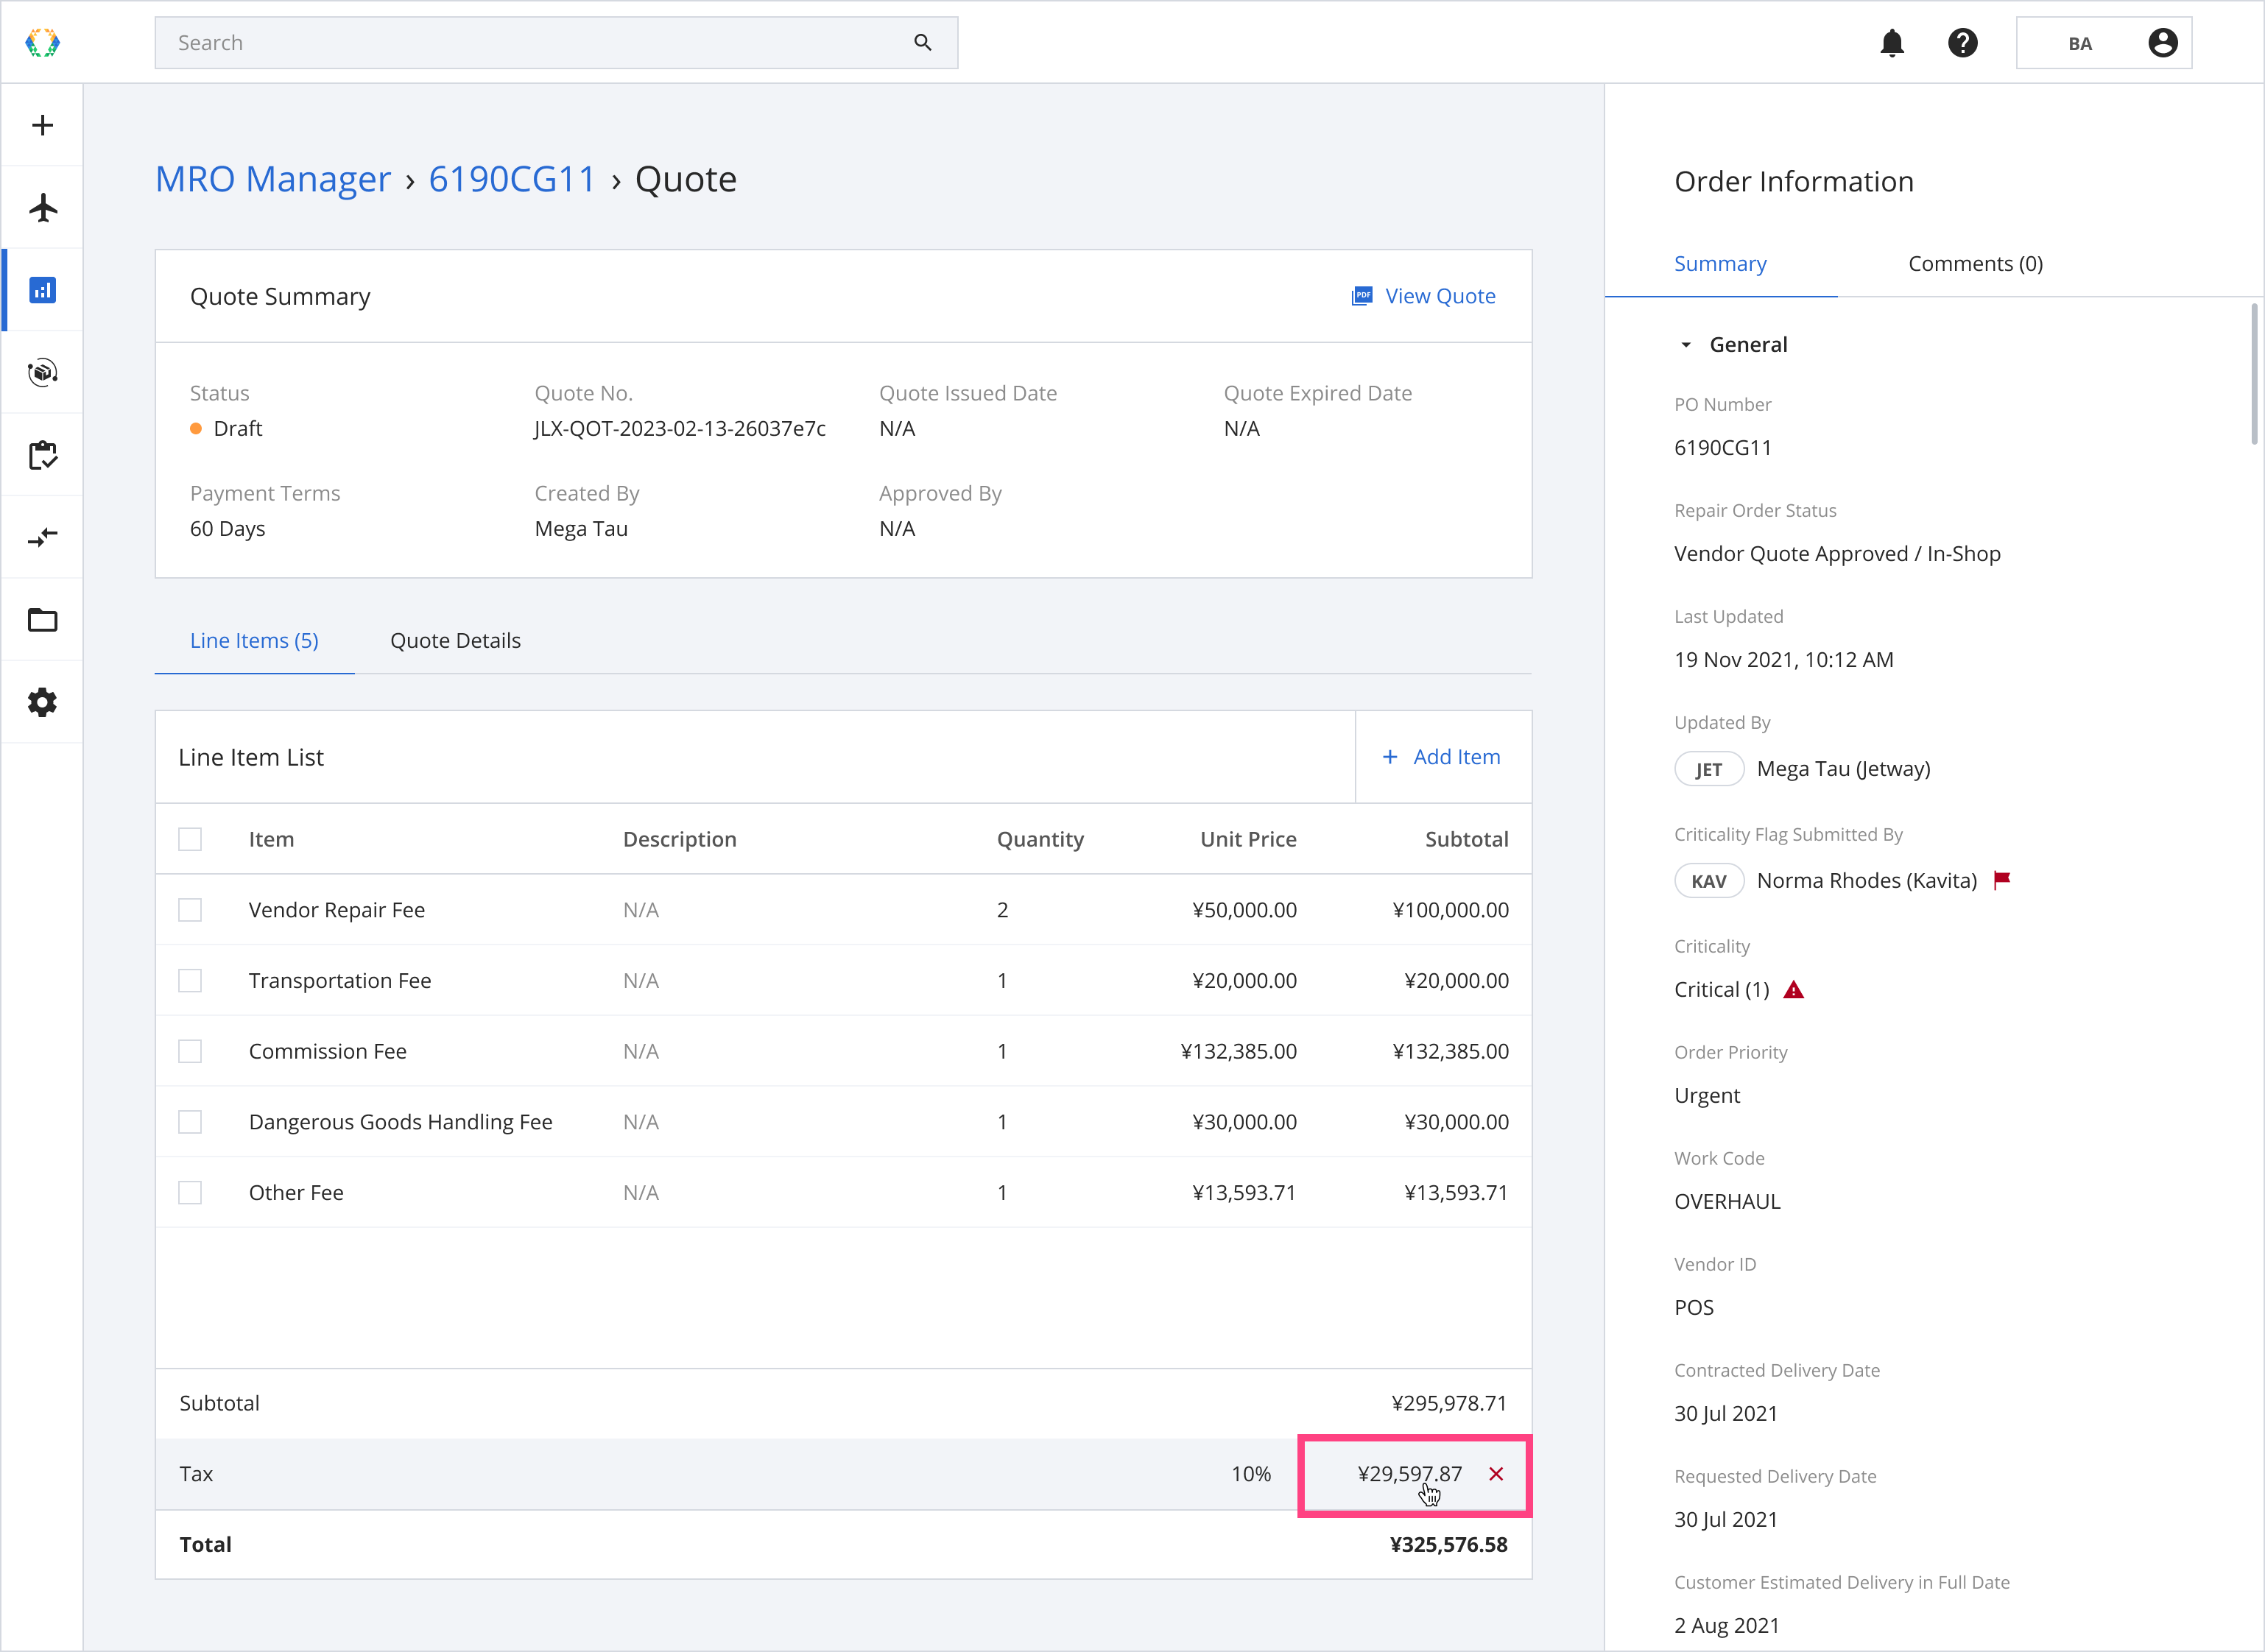
Step 2: Select tax type.

Step 3: Provide tax amount or percentage.

Step 4: Click 'Save'.
Once the tax is updated successfully, a success message will appear at the bottom of the screen.

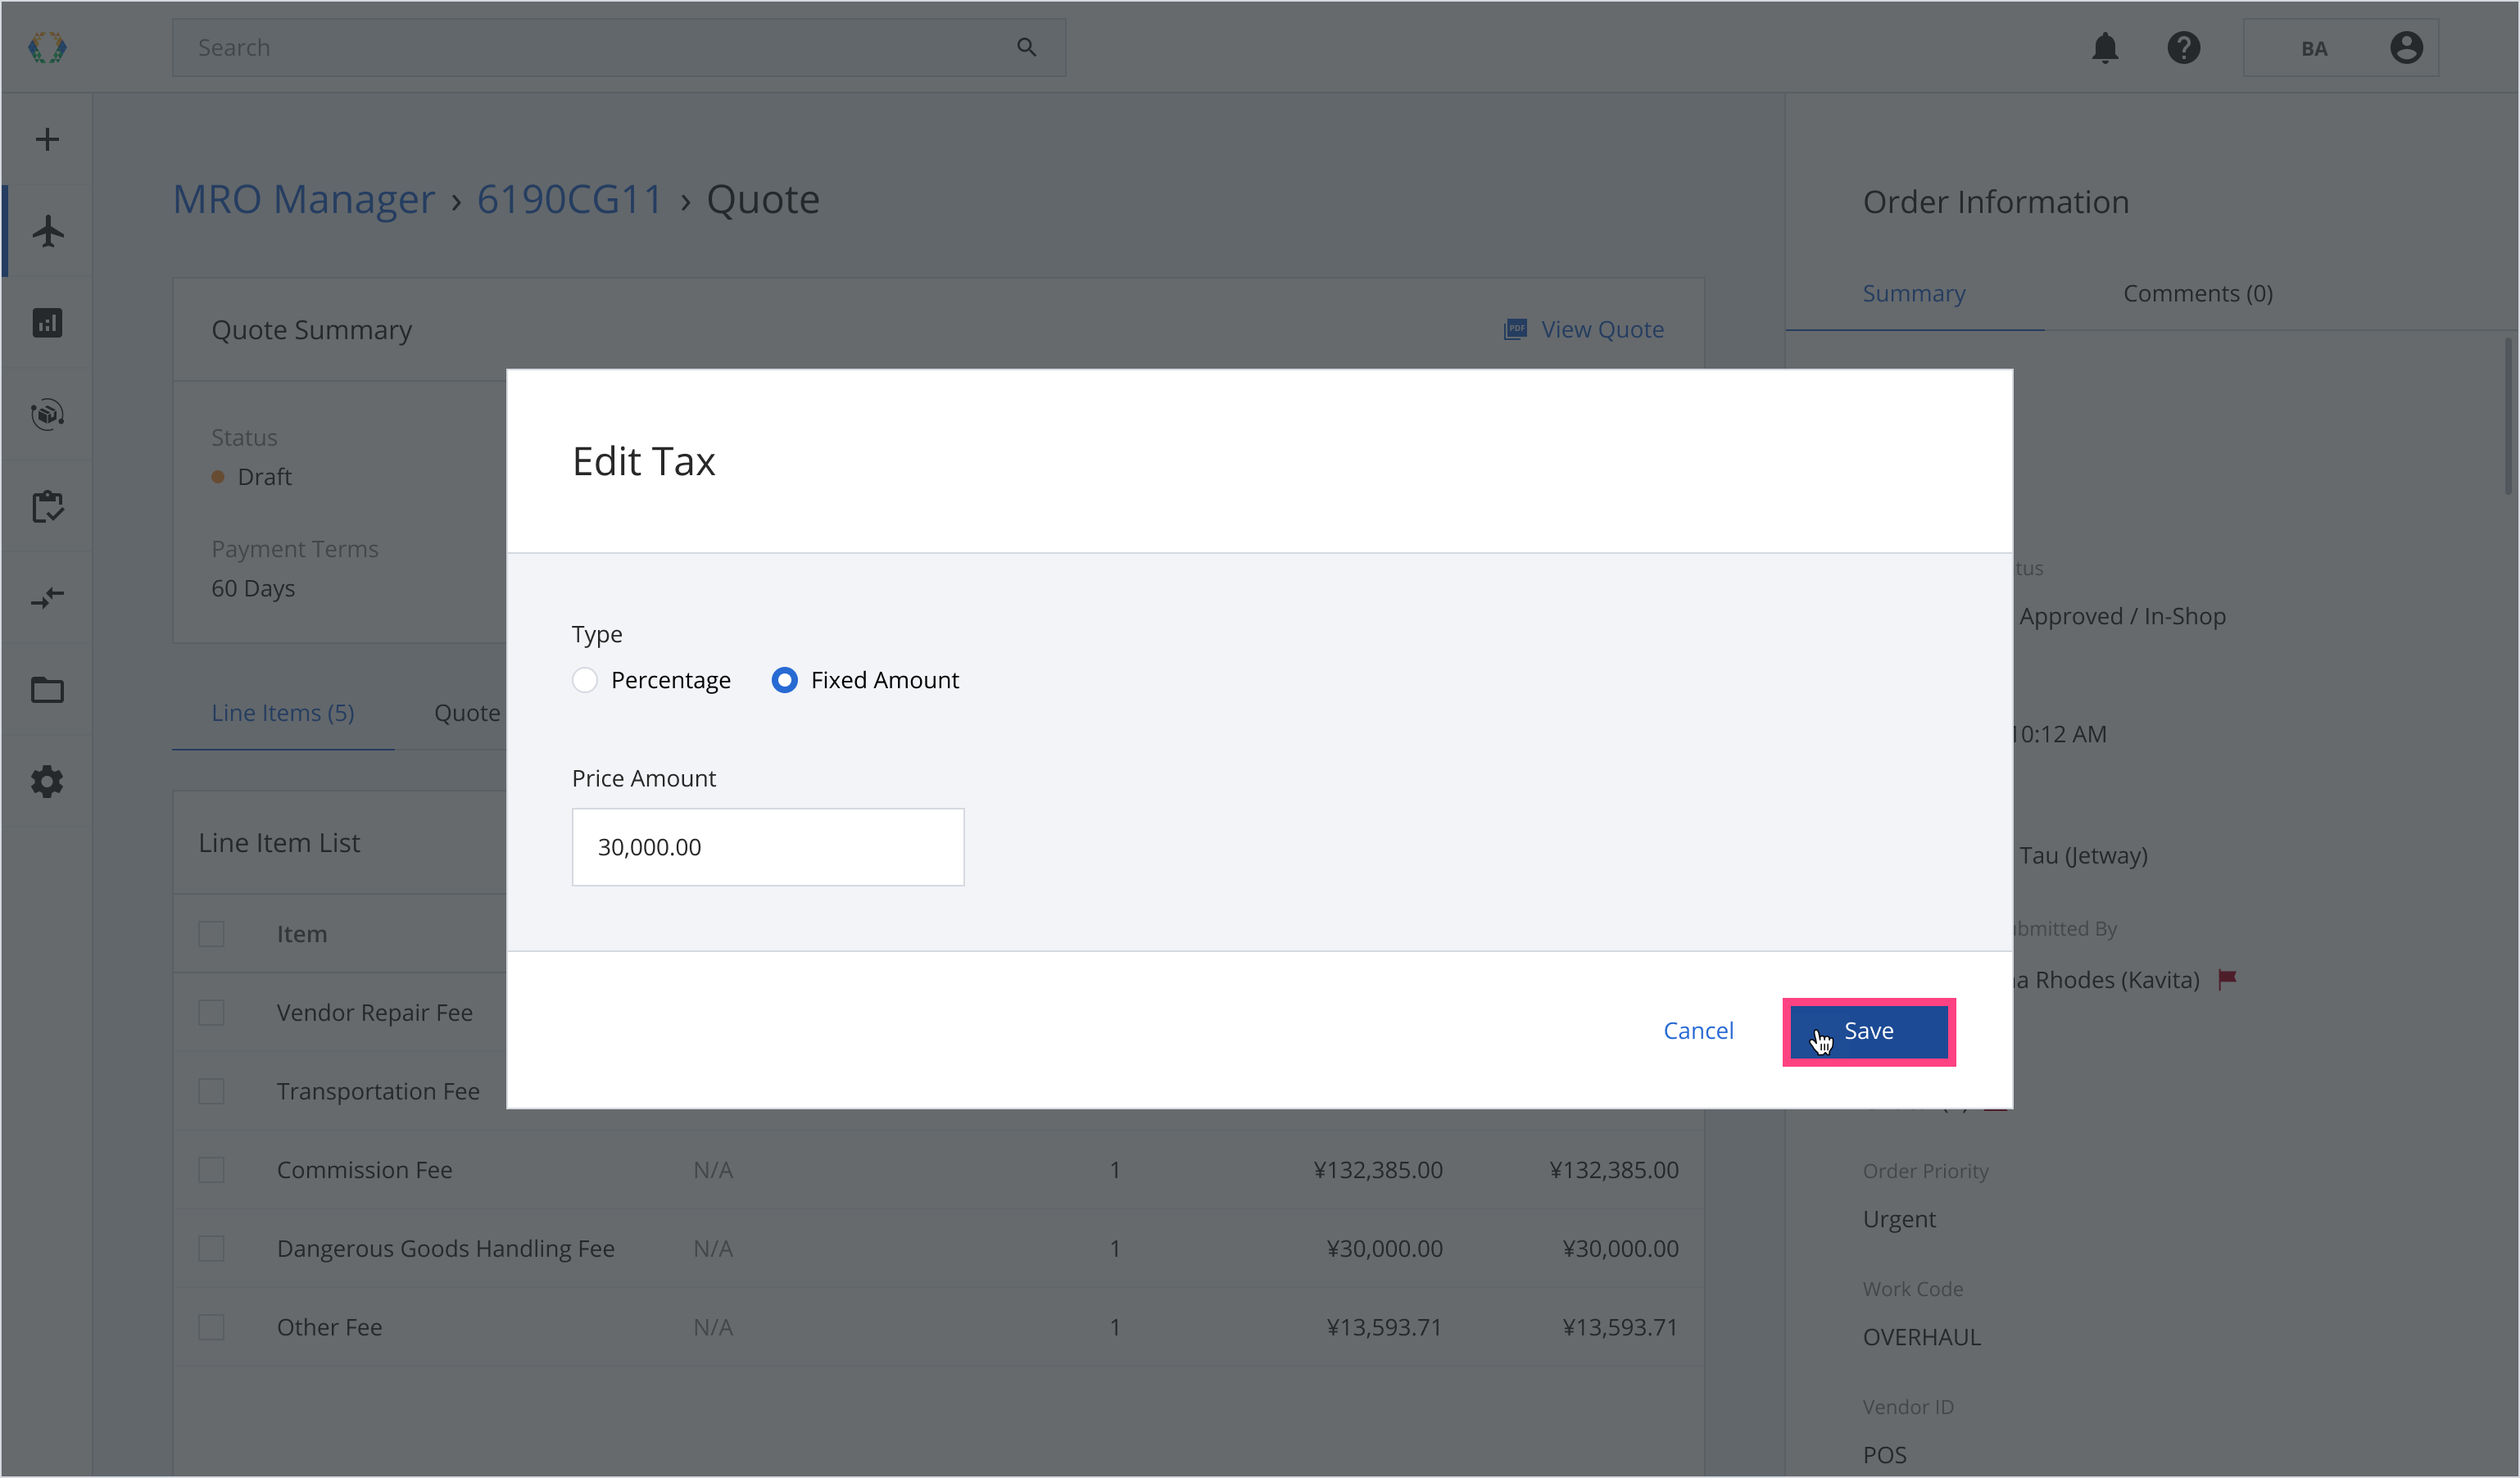
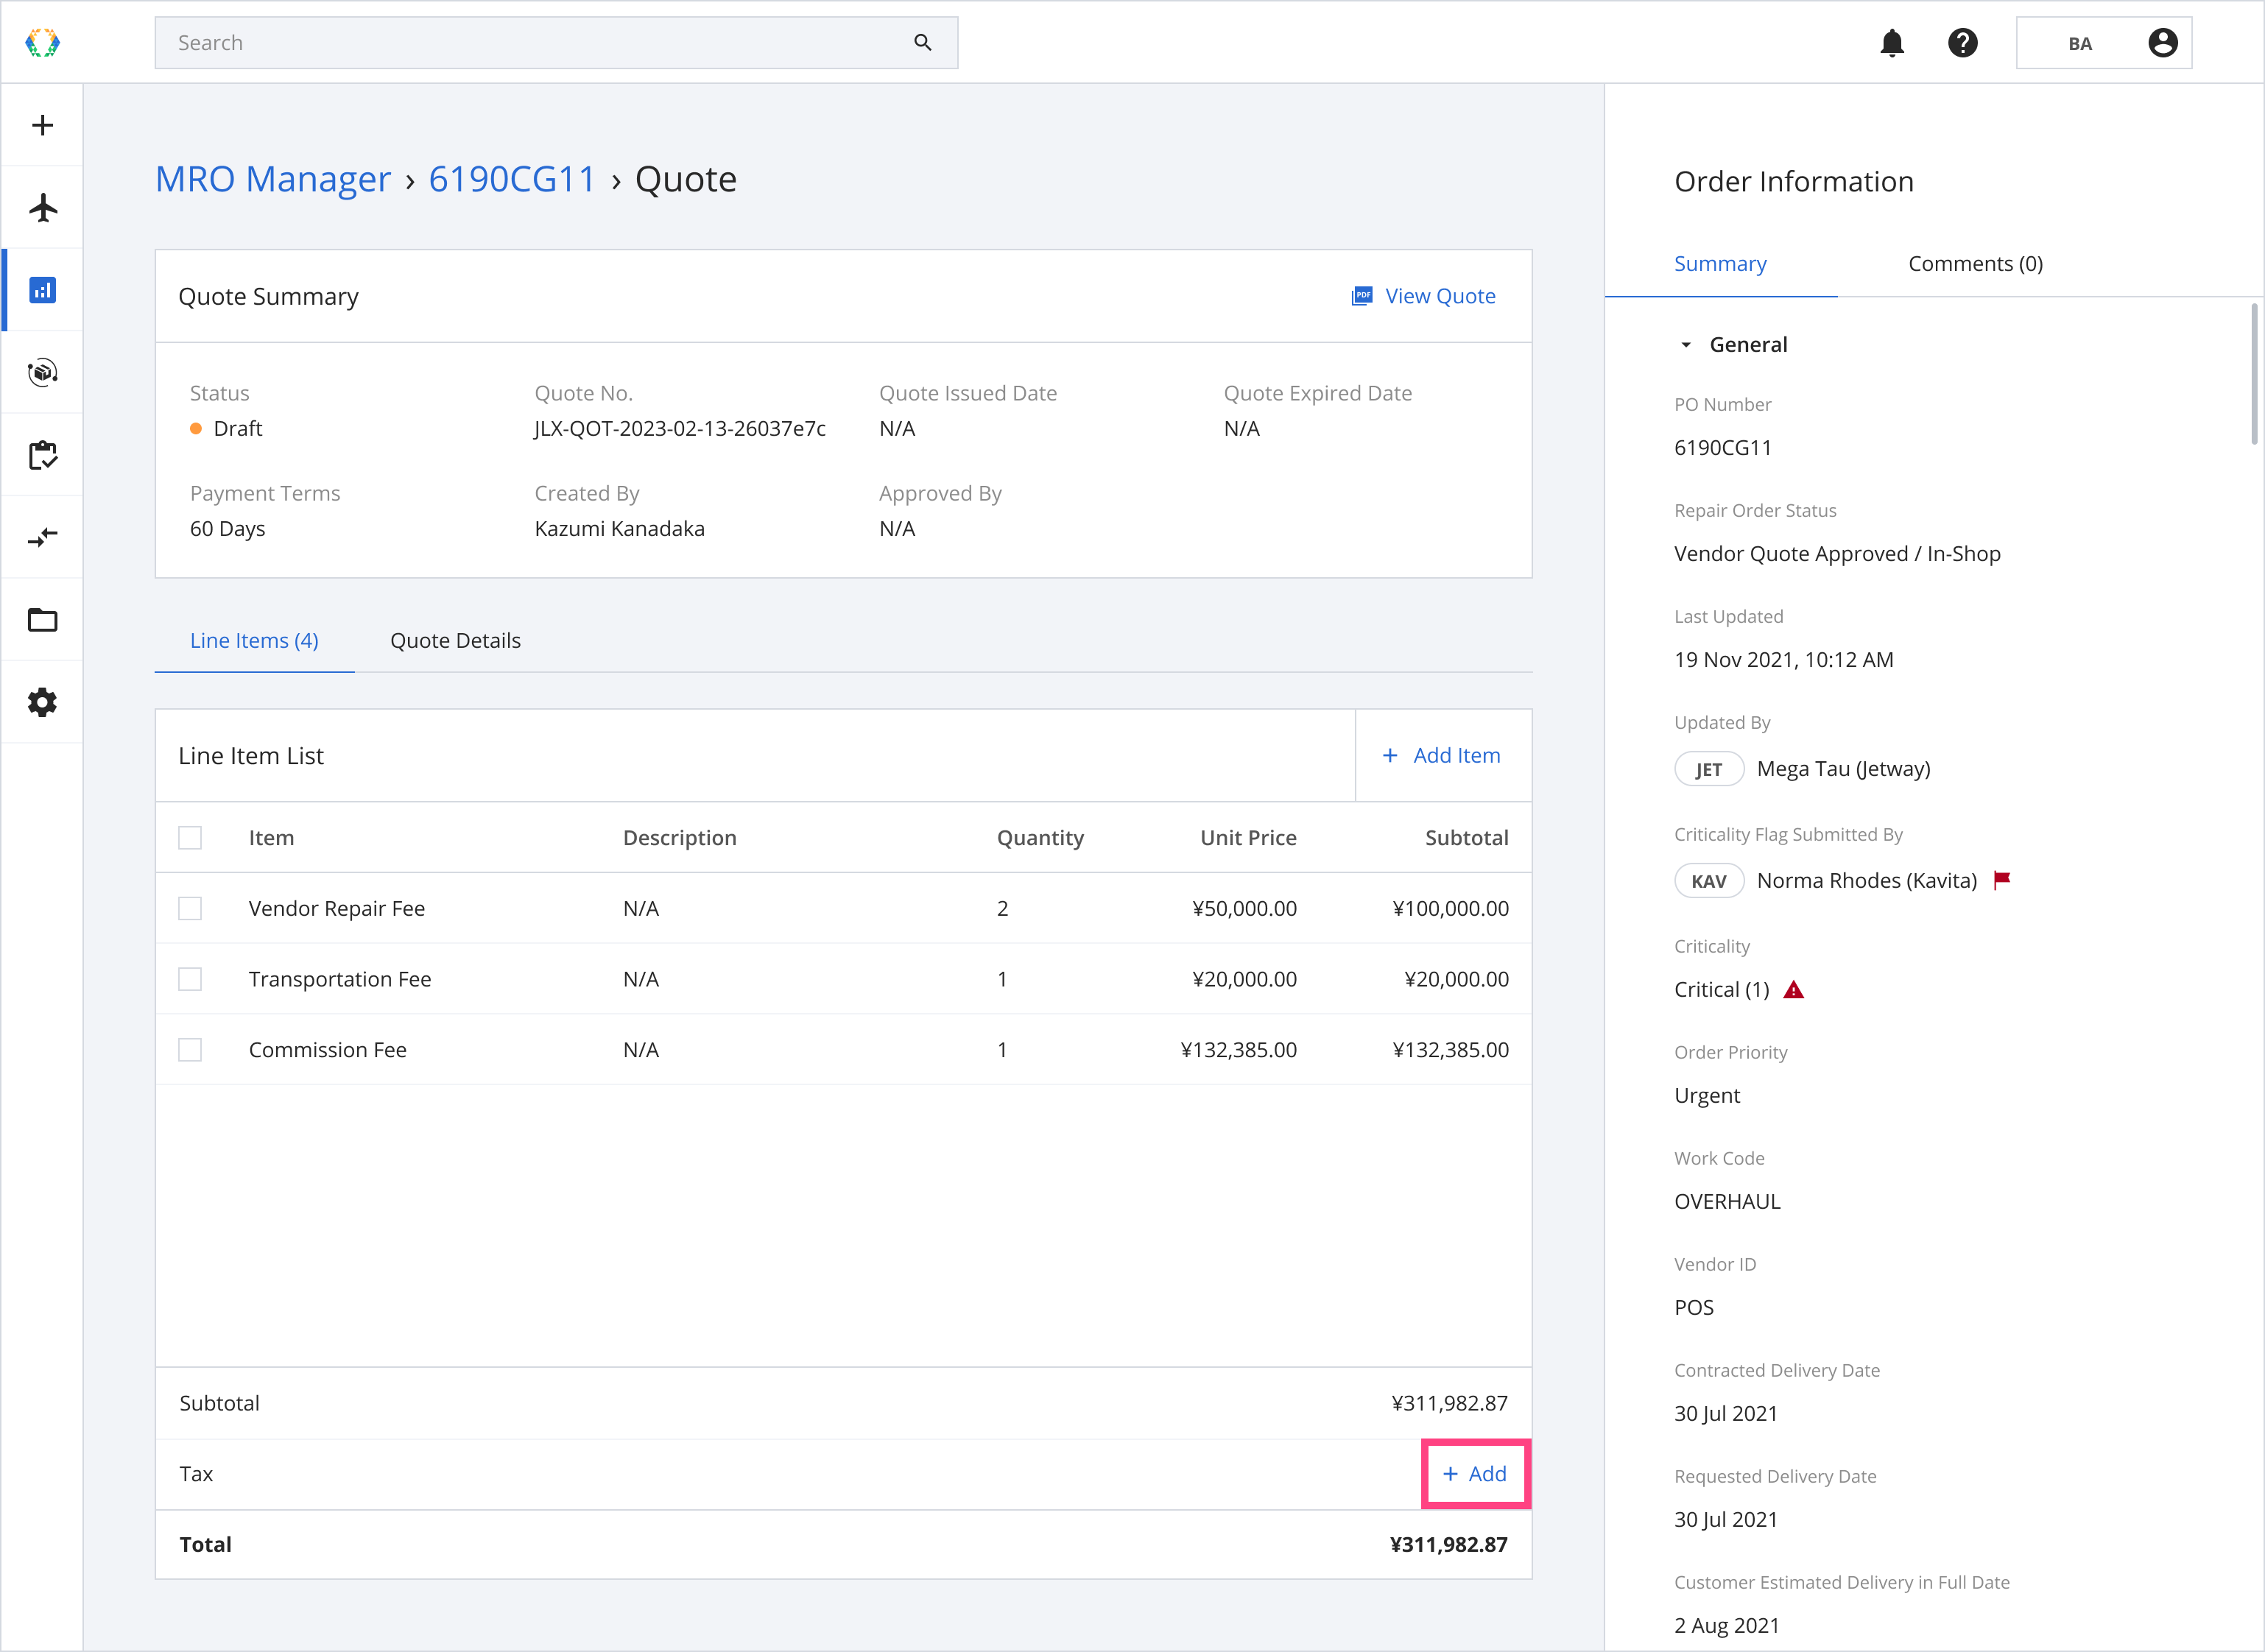
Adding Tax
Step 1: Click on the row in where 'Add' is located.
Step 2: A pop-up will allow users to edit the tax. You can choose your tax in terms of percentage or a fixed amount.
Step 3: Update the details.
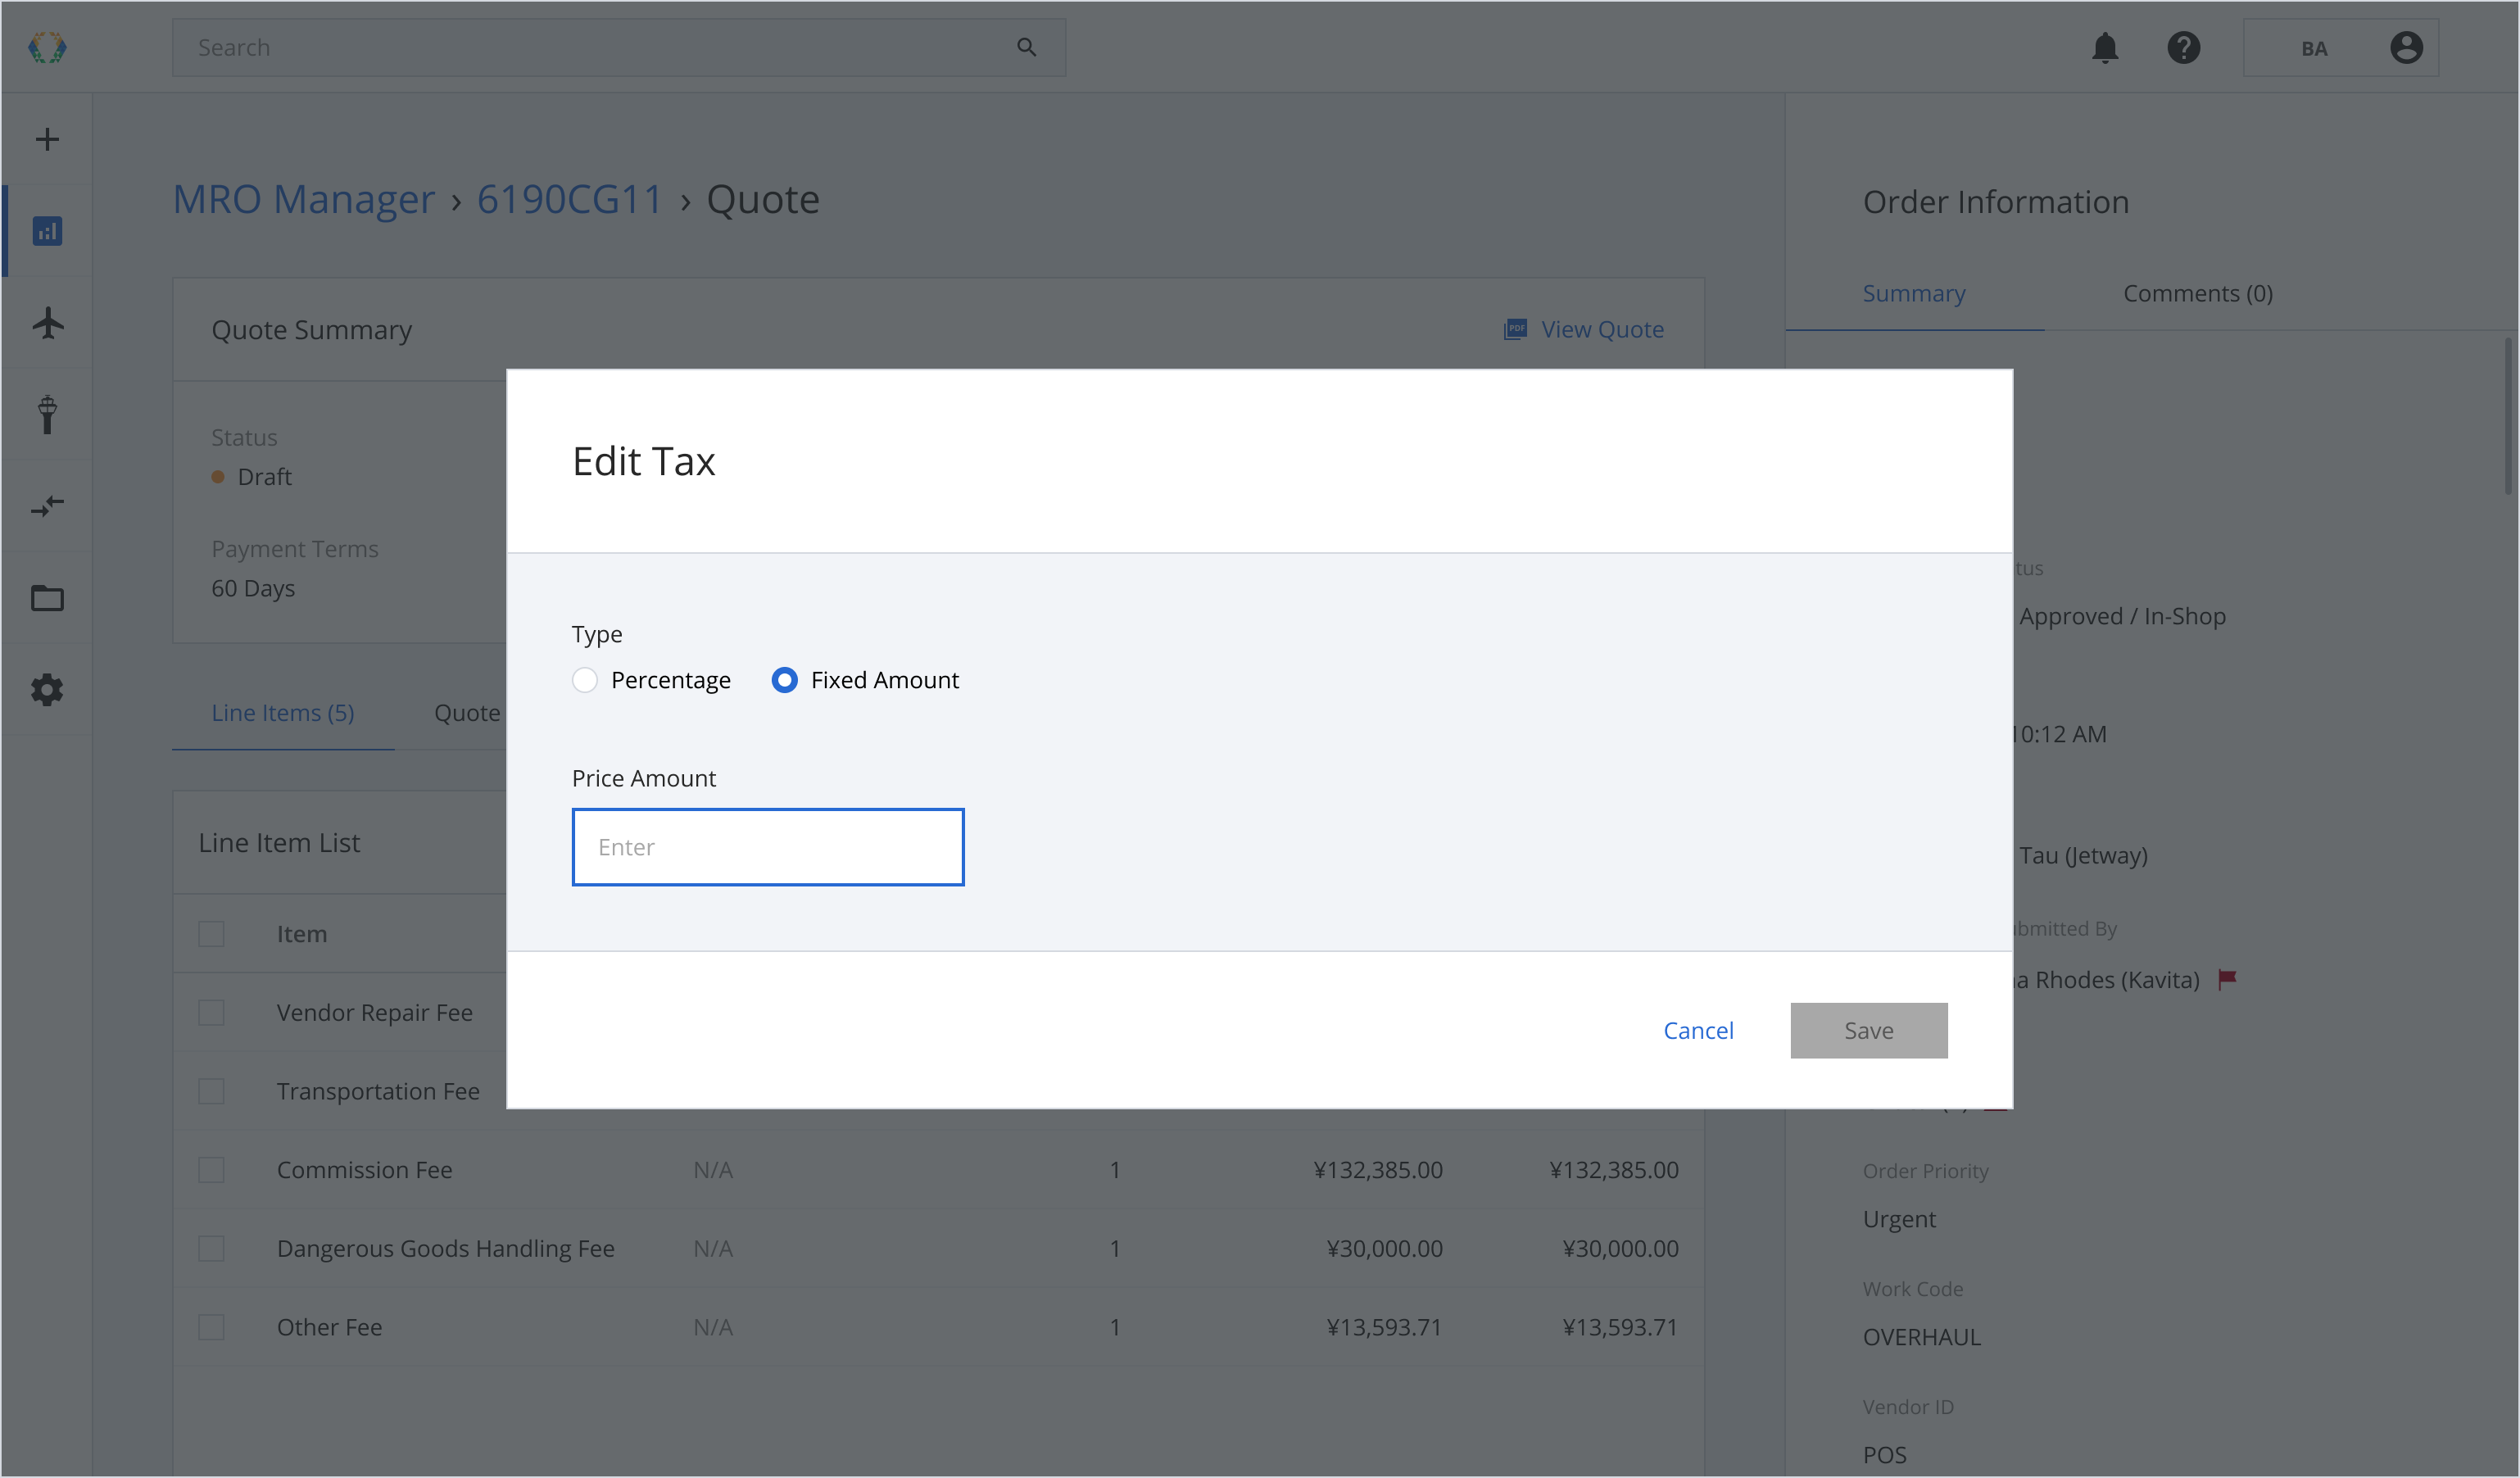
Step 4: Click 'Save'.
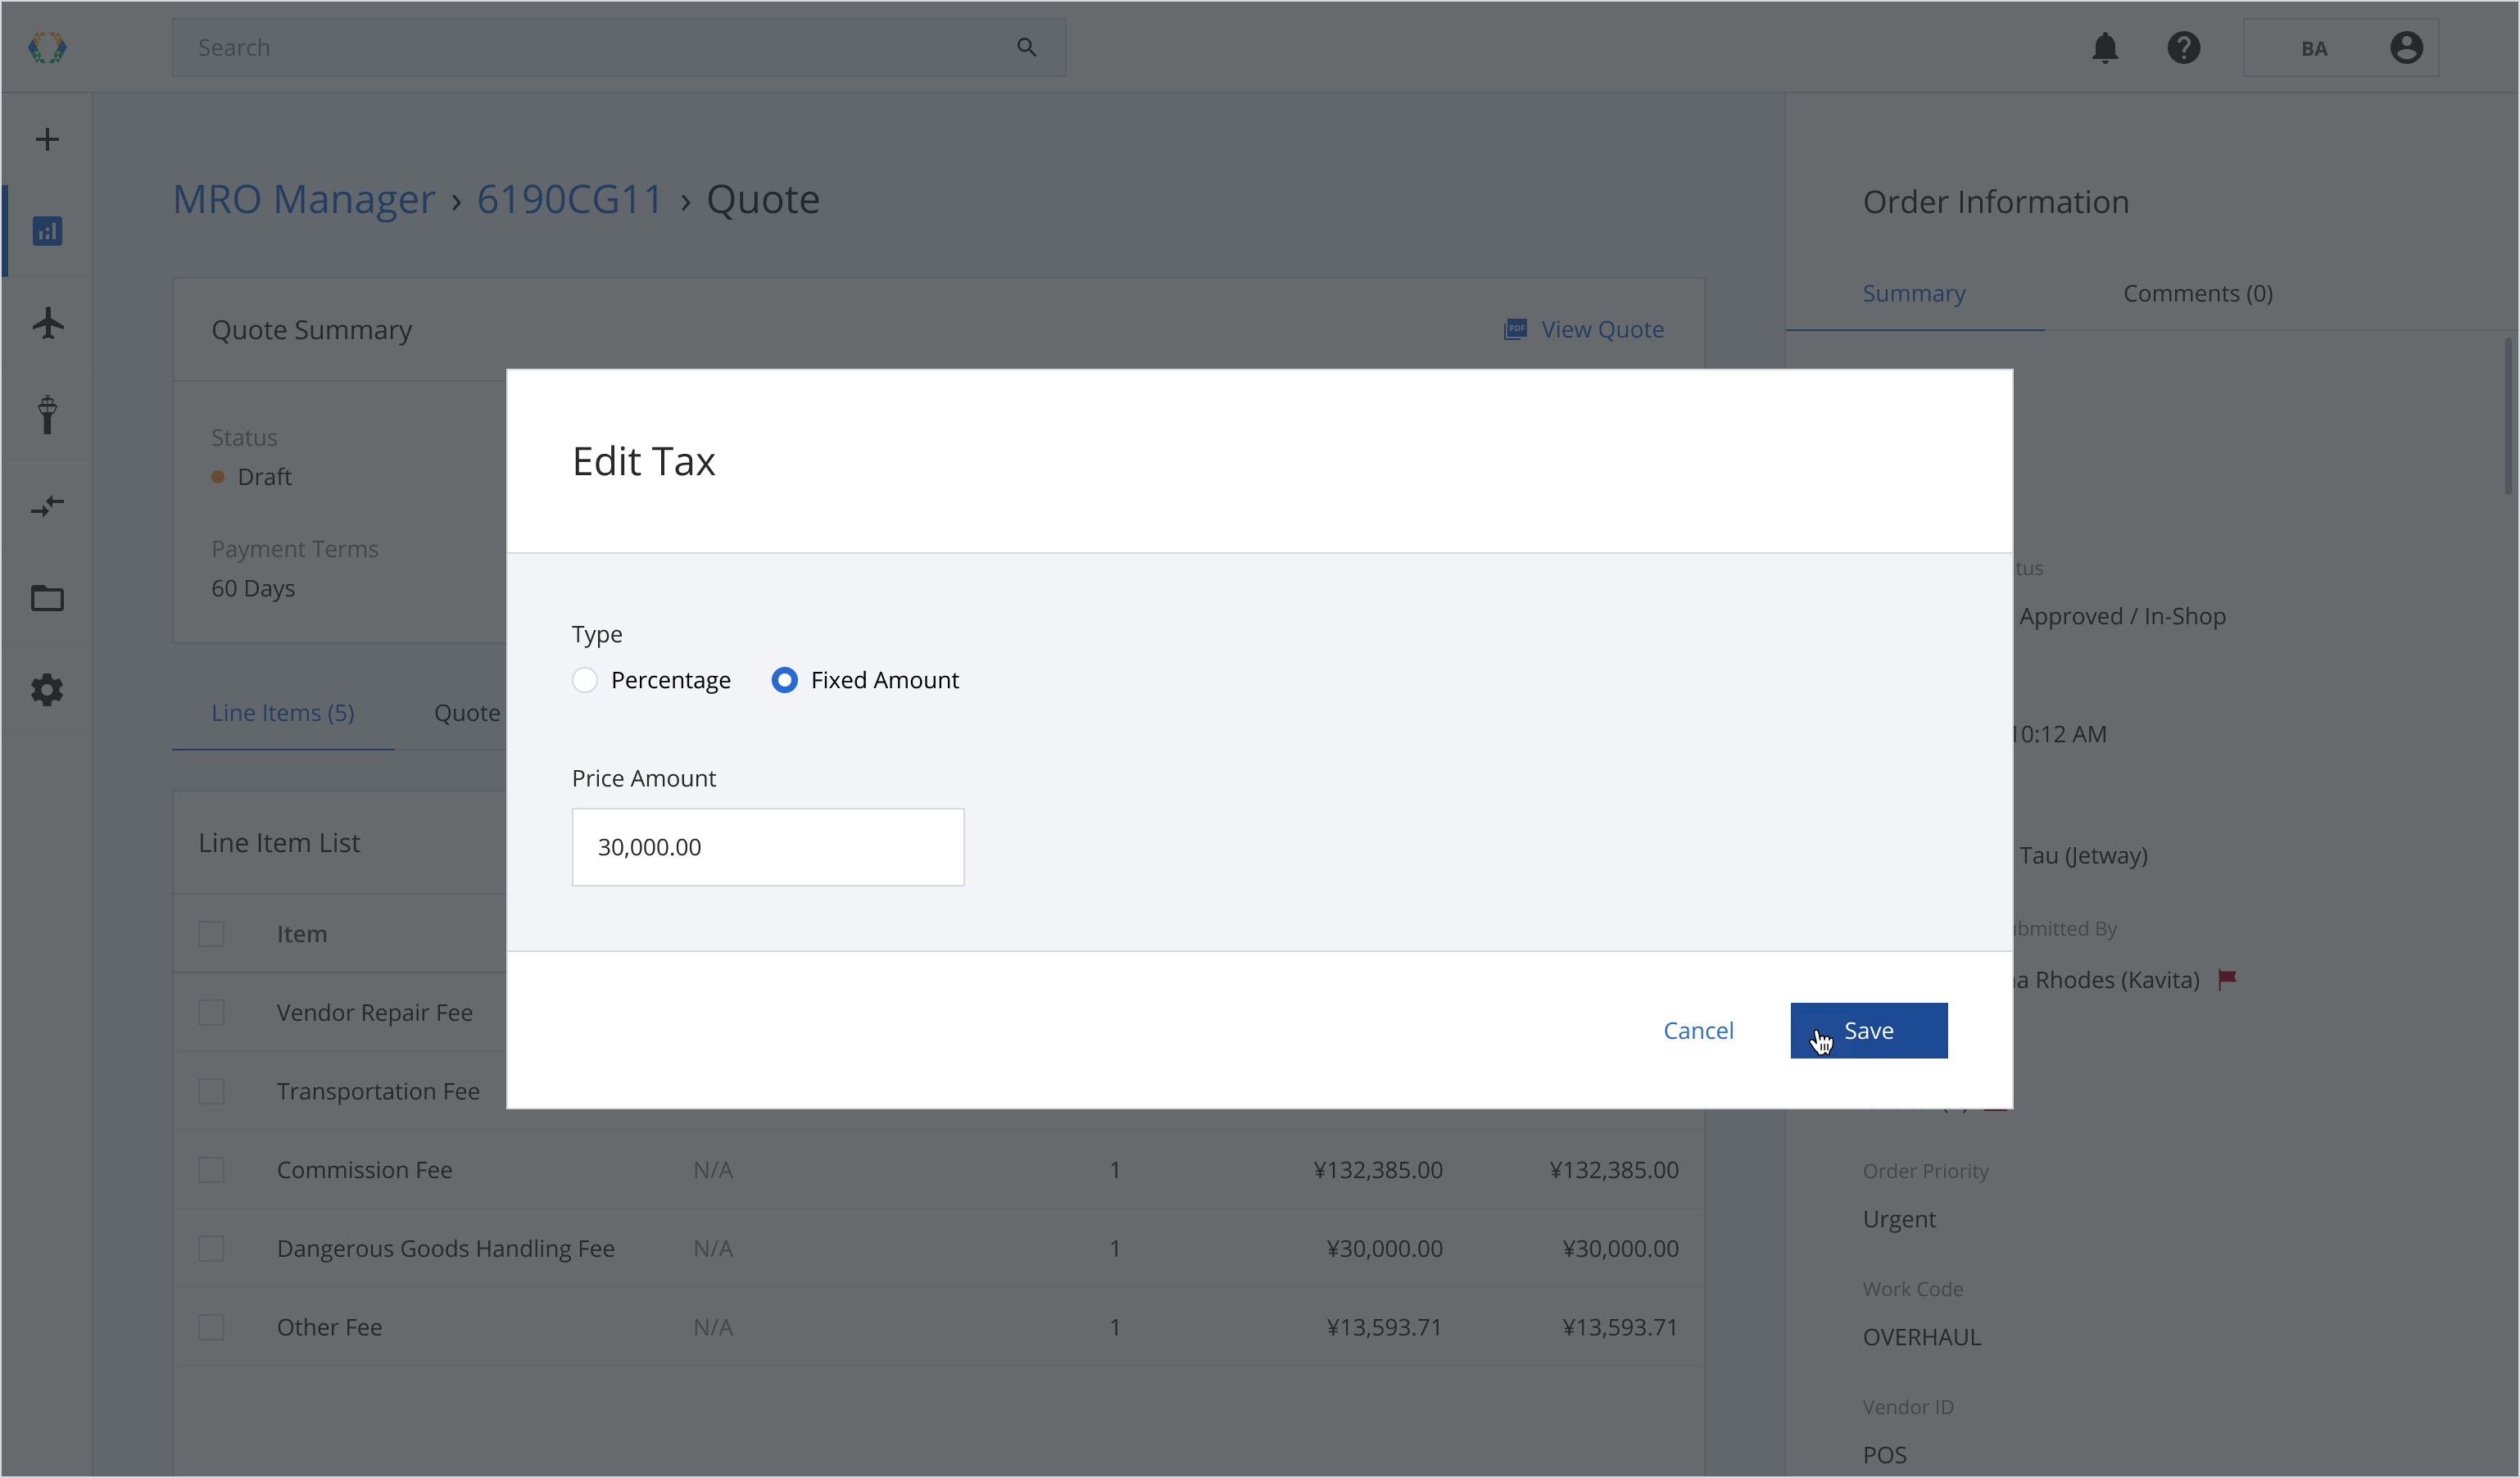
Once the tax is updated successfully, a success message will appear at the bottom of the screen.
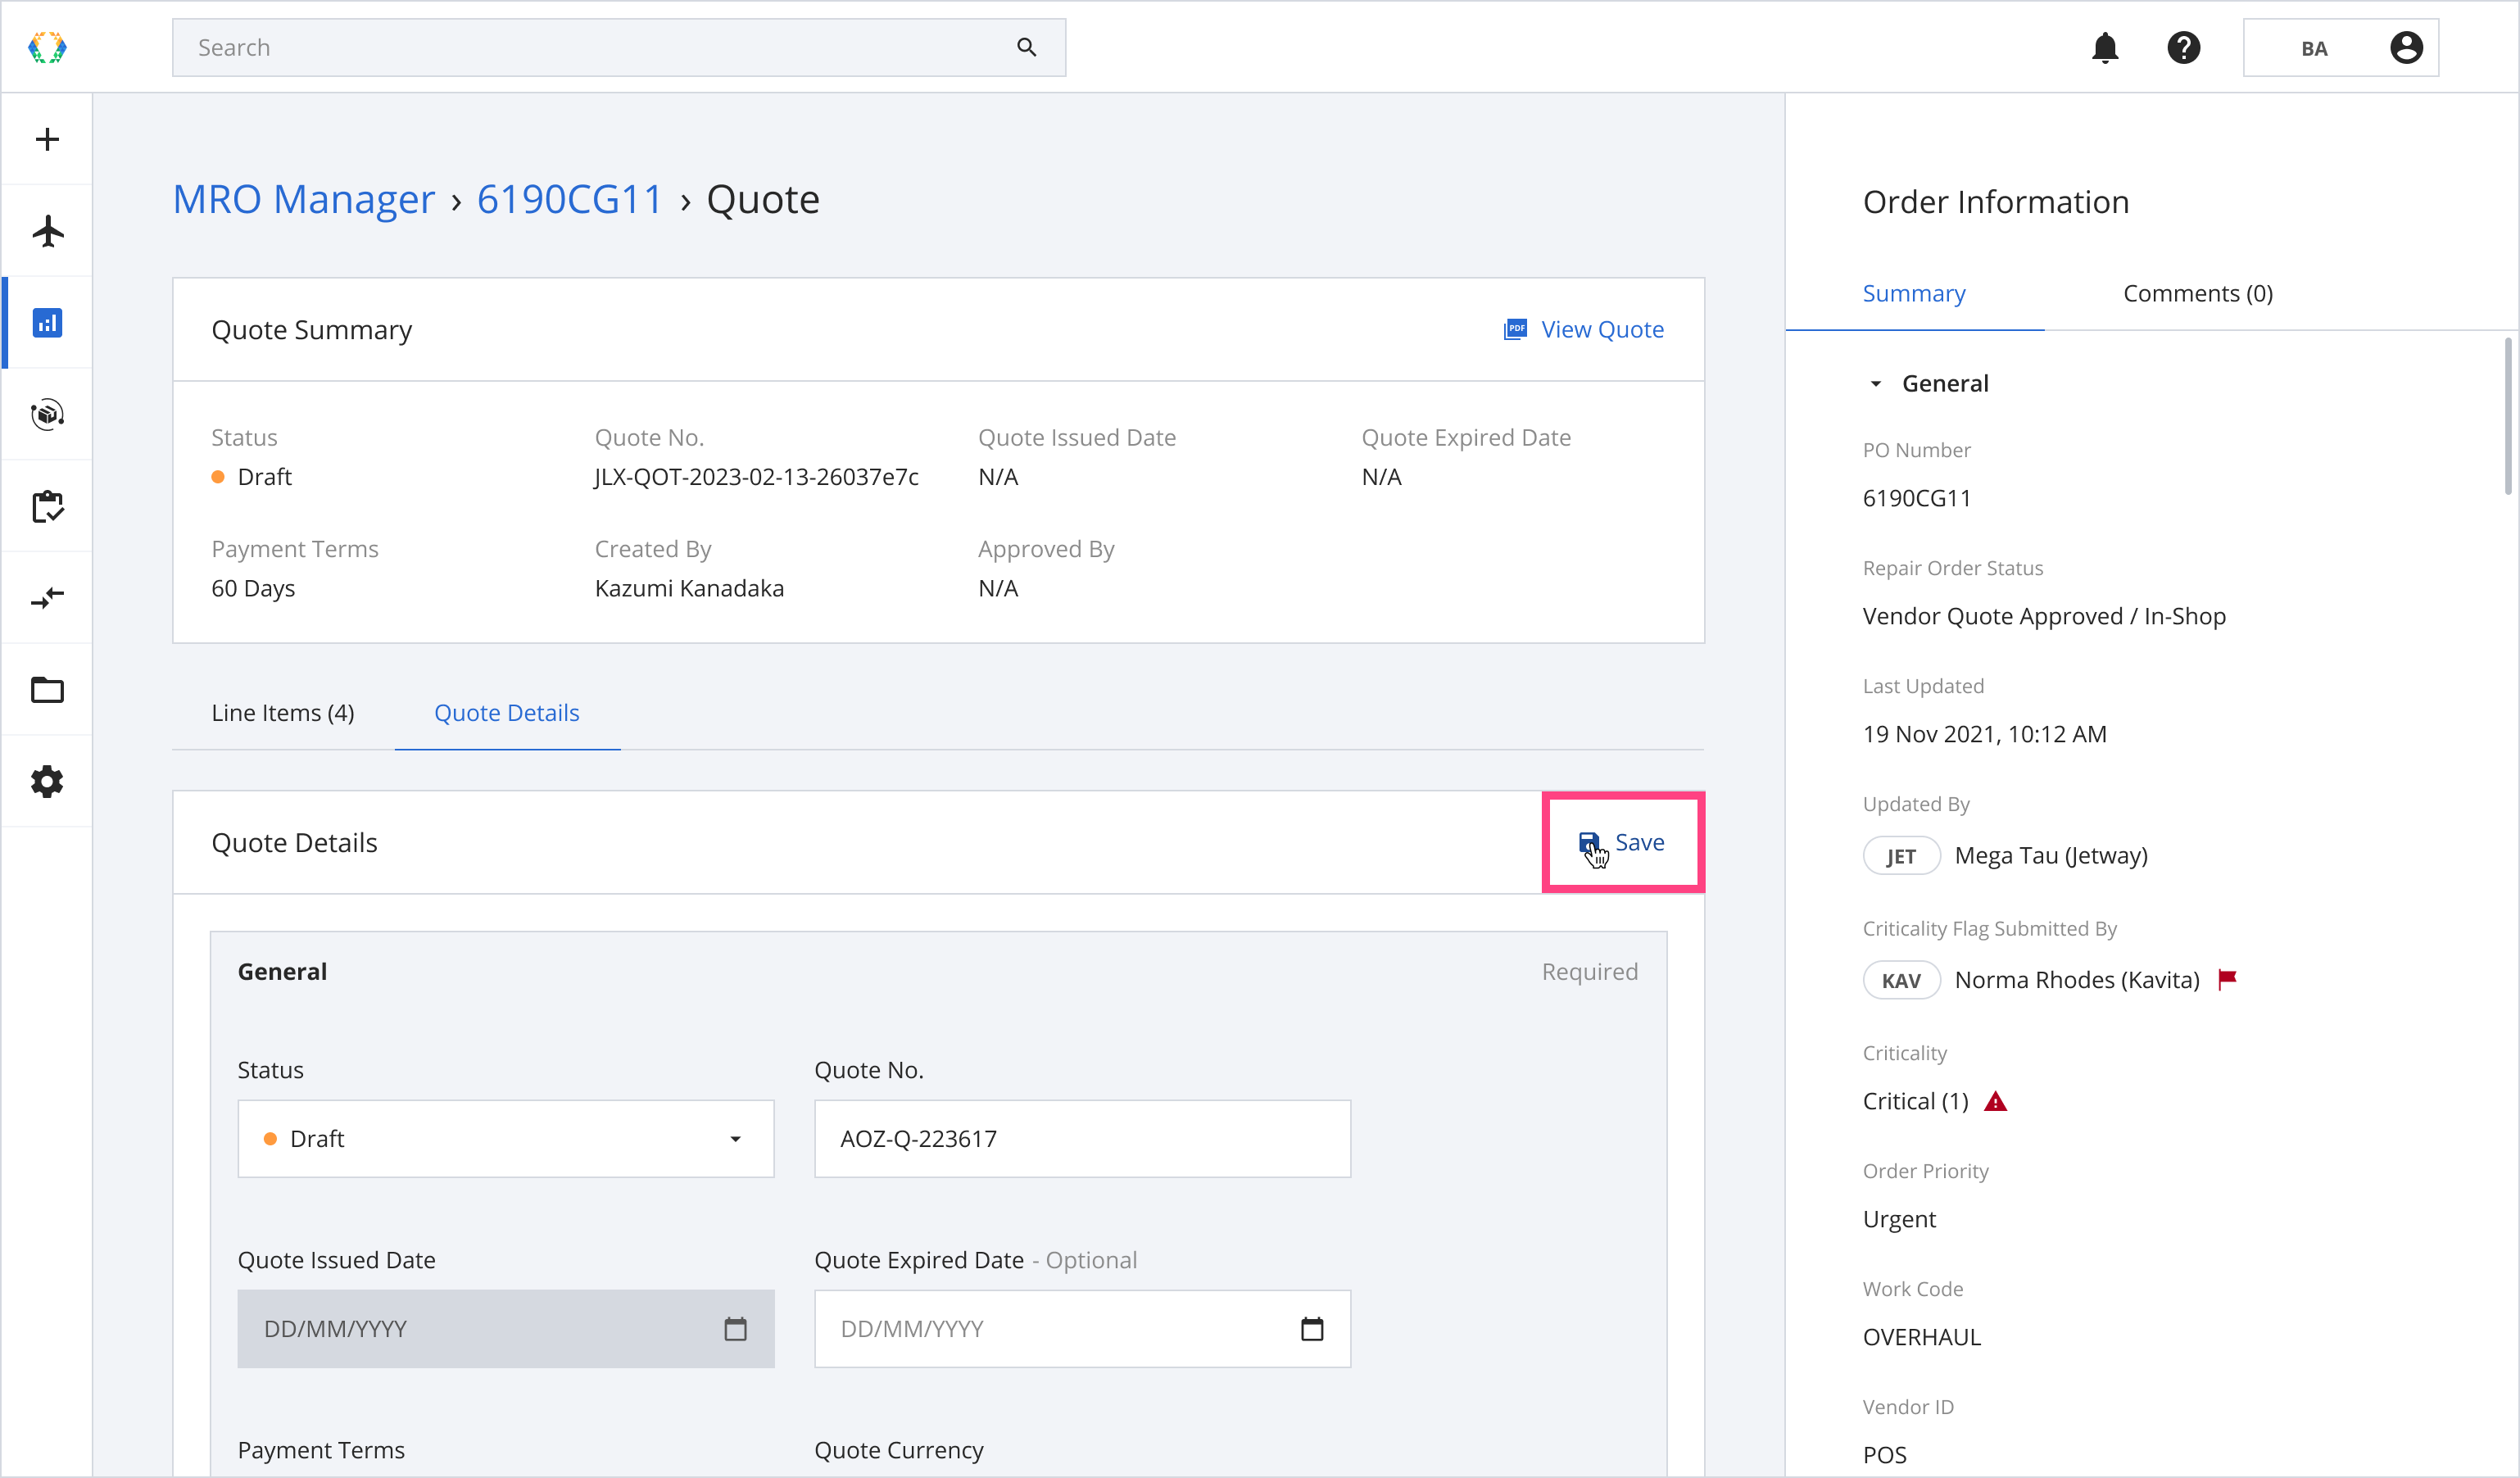
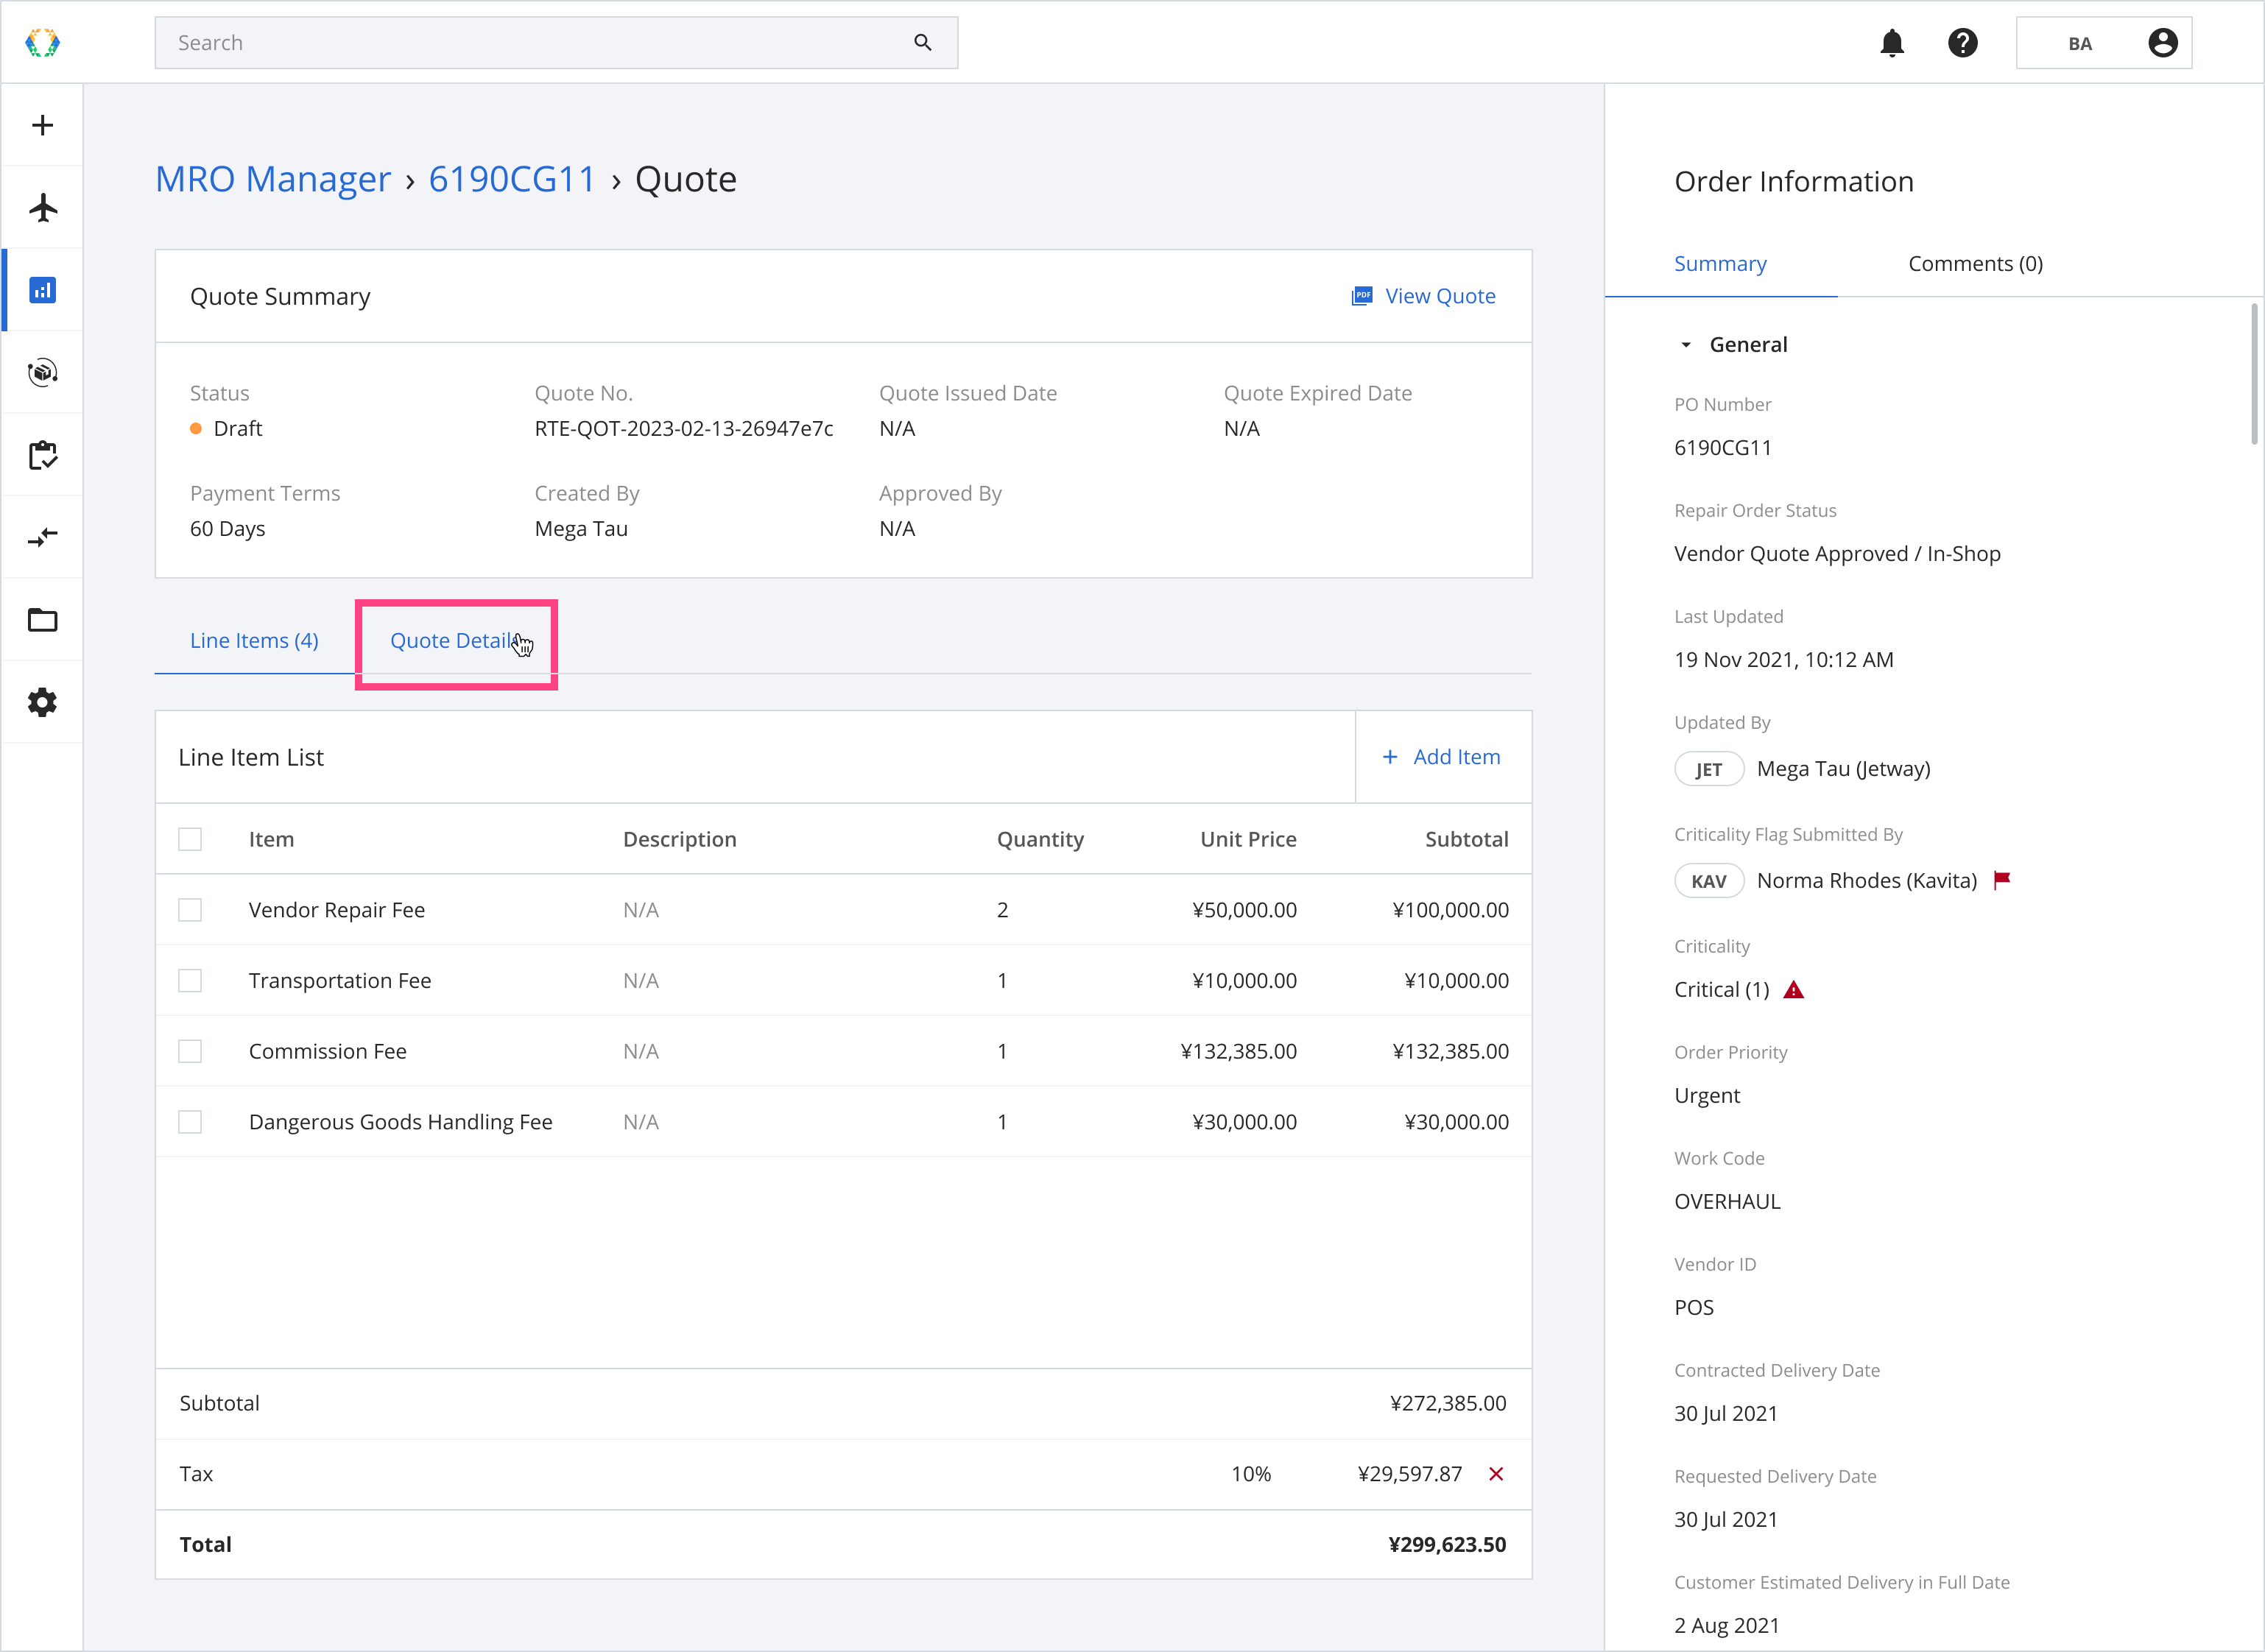
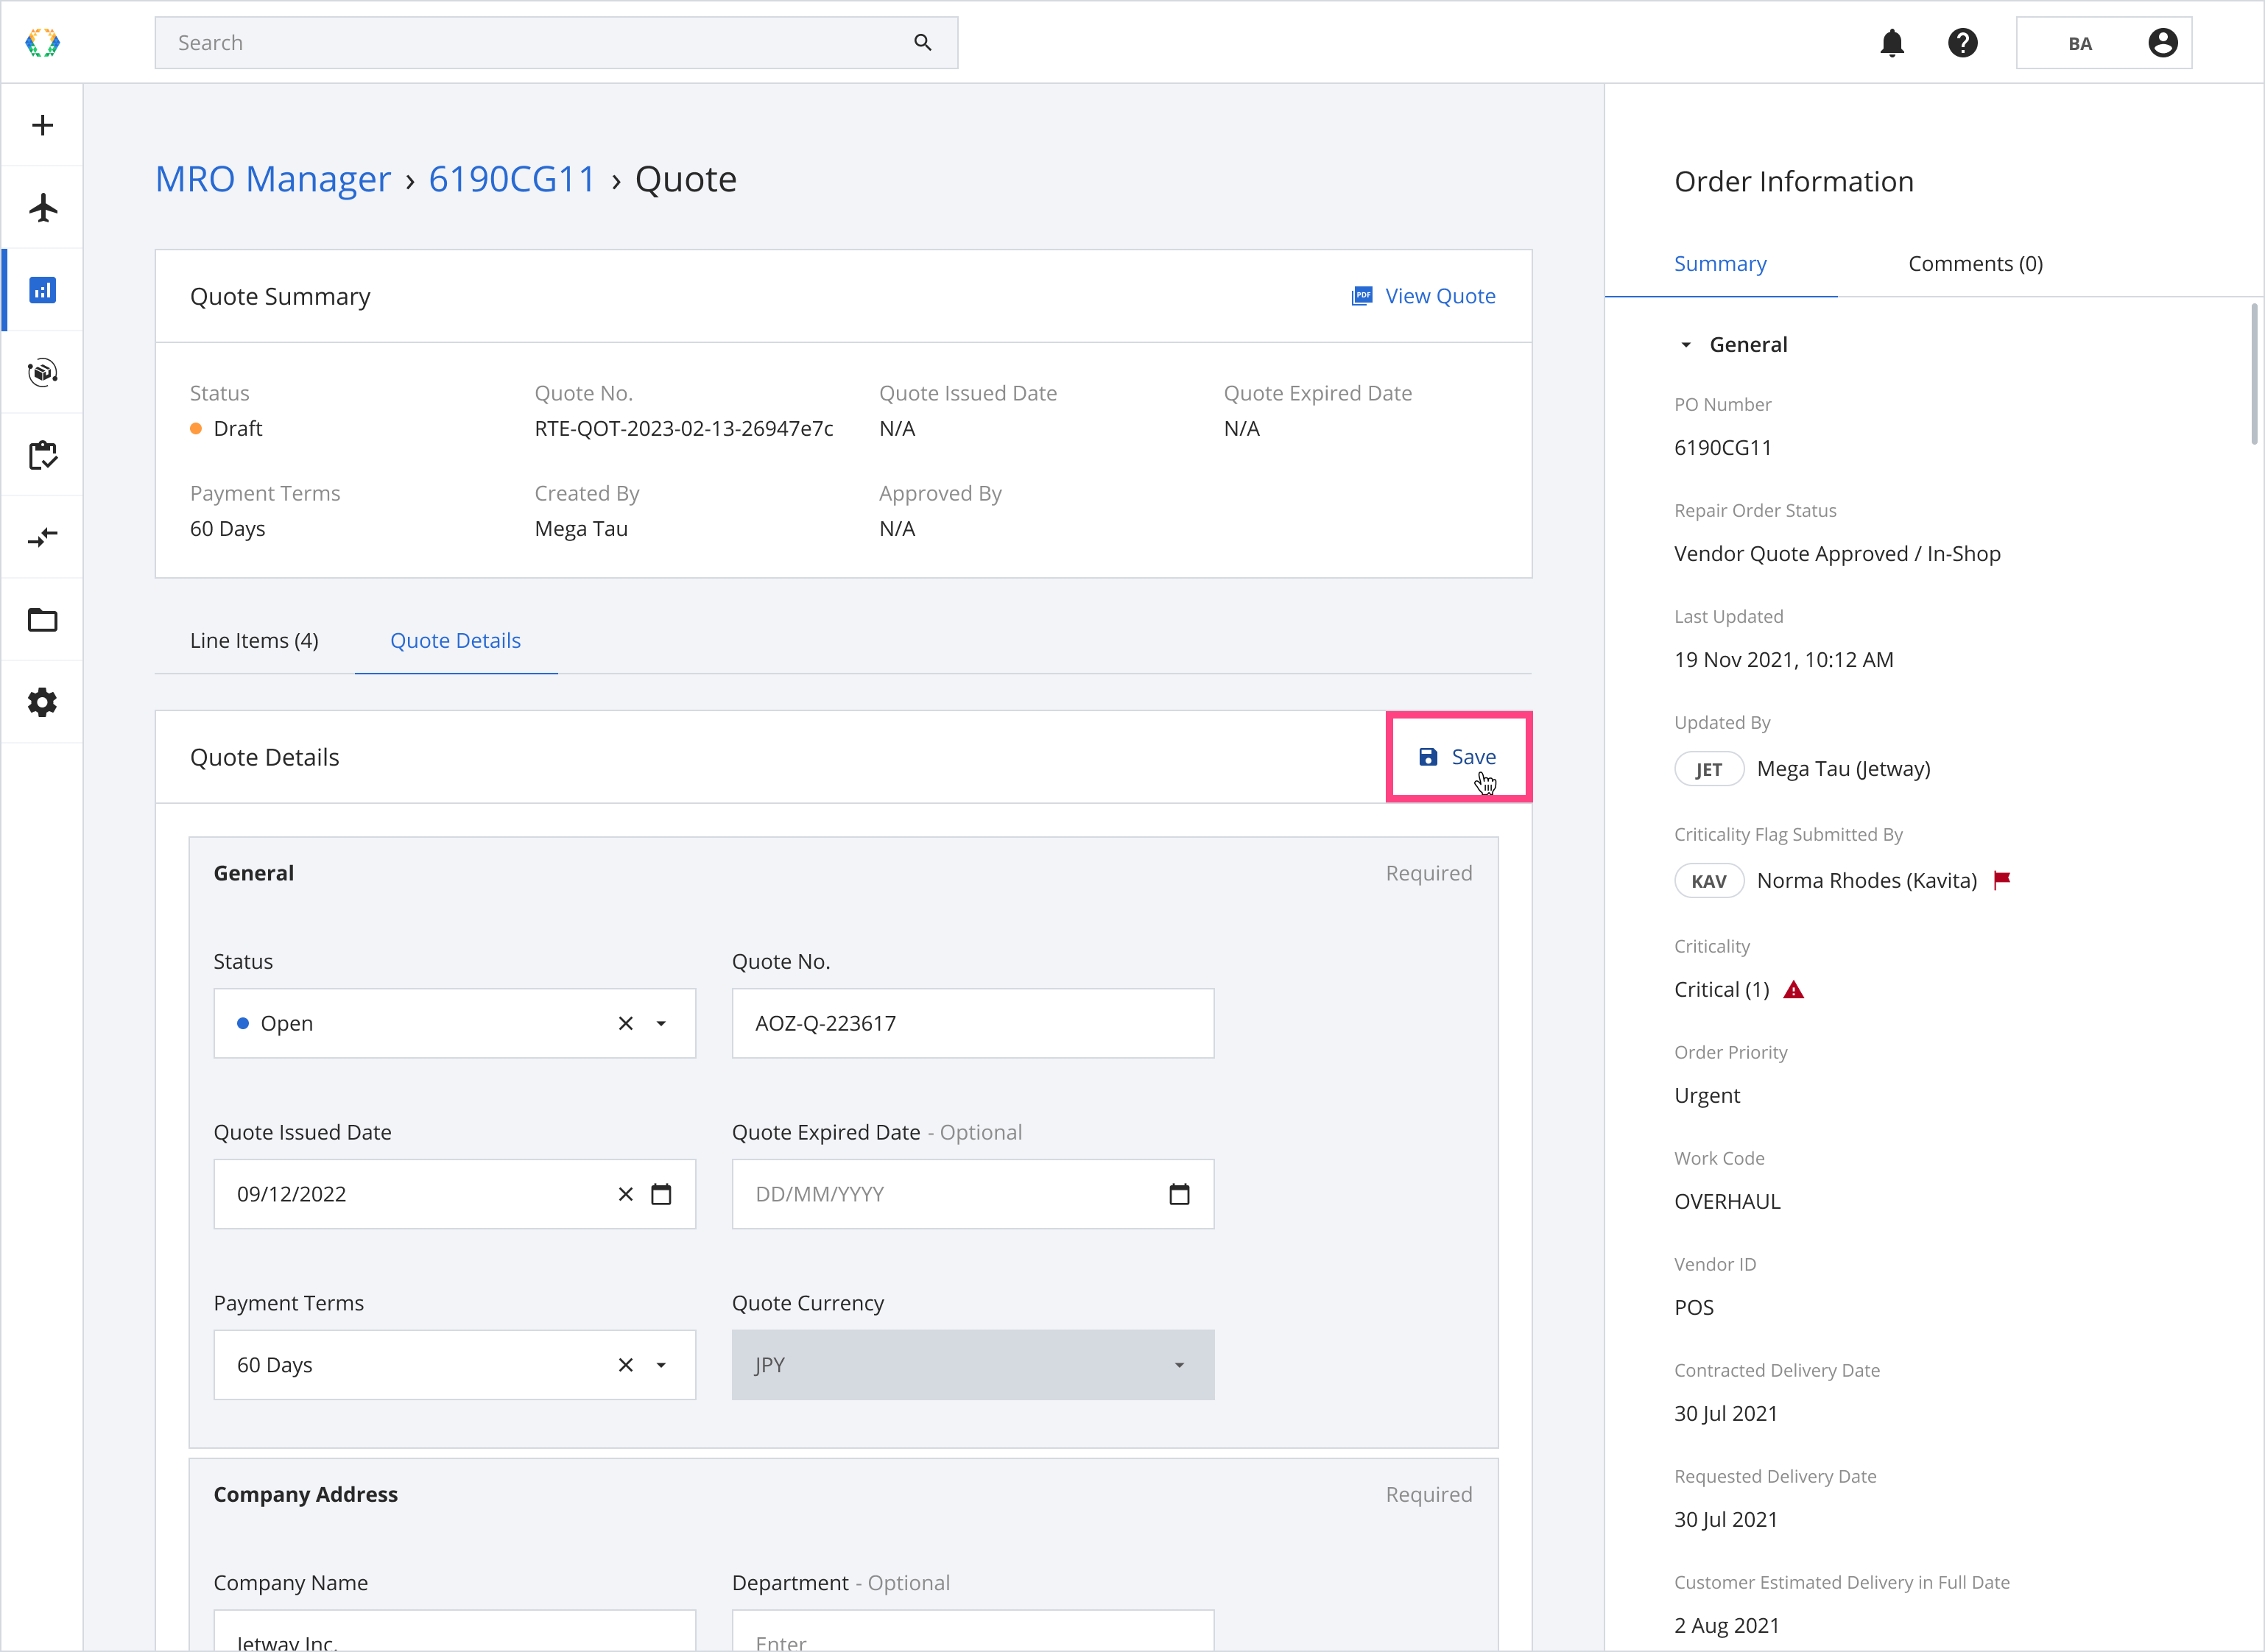
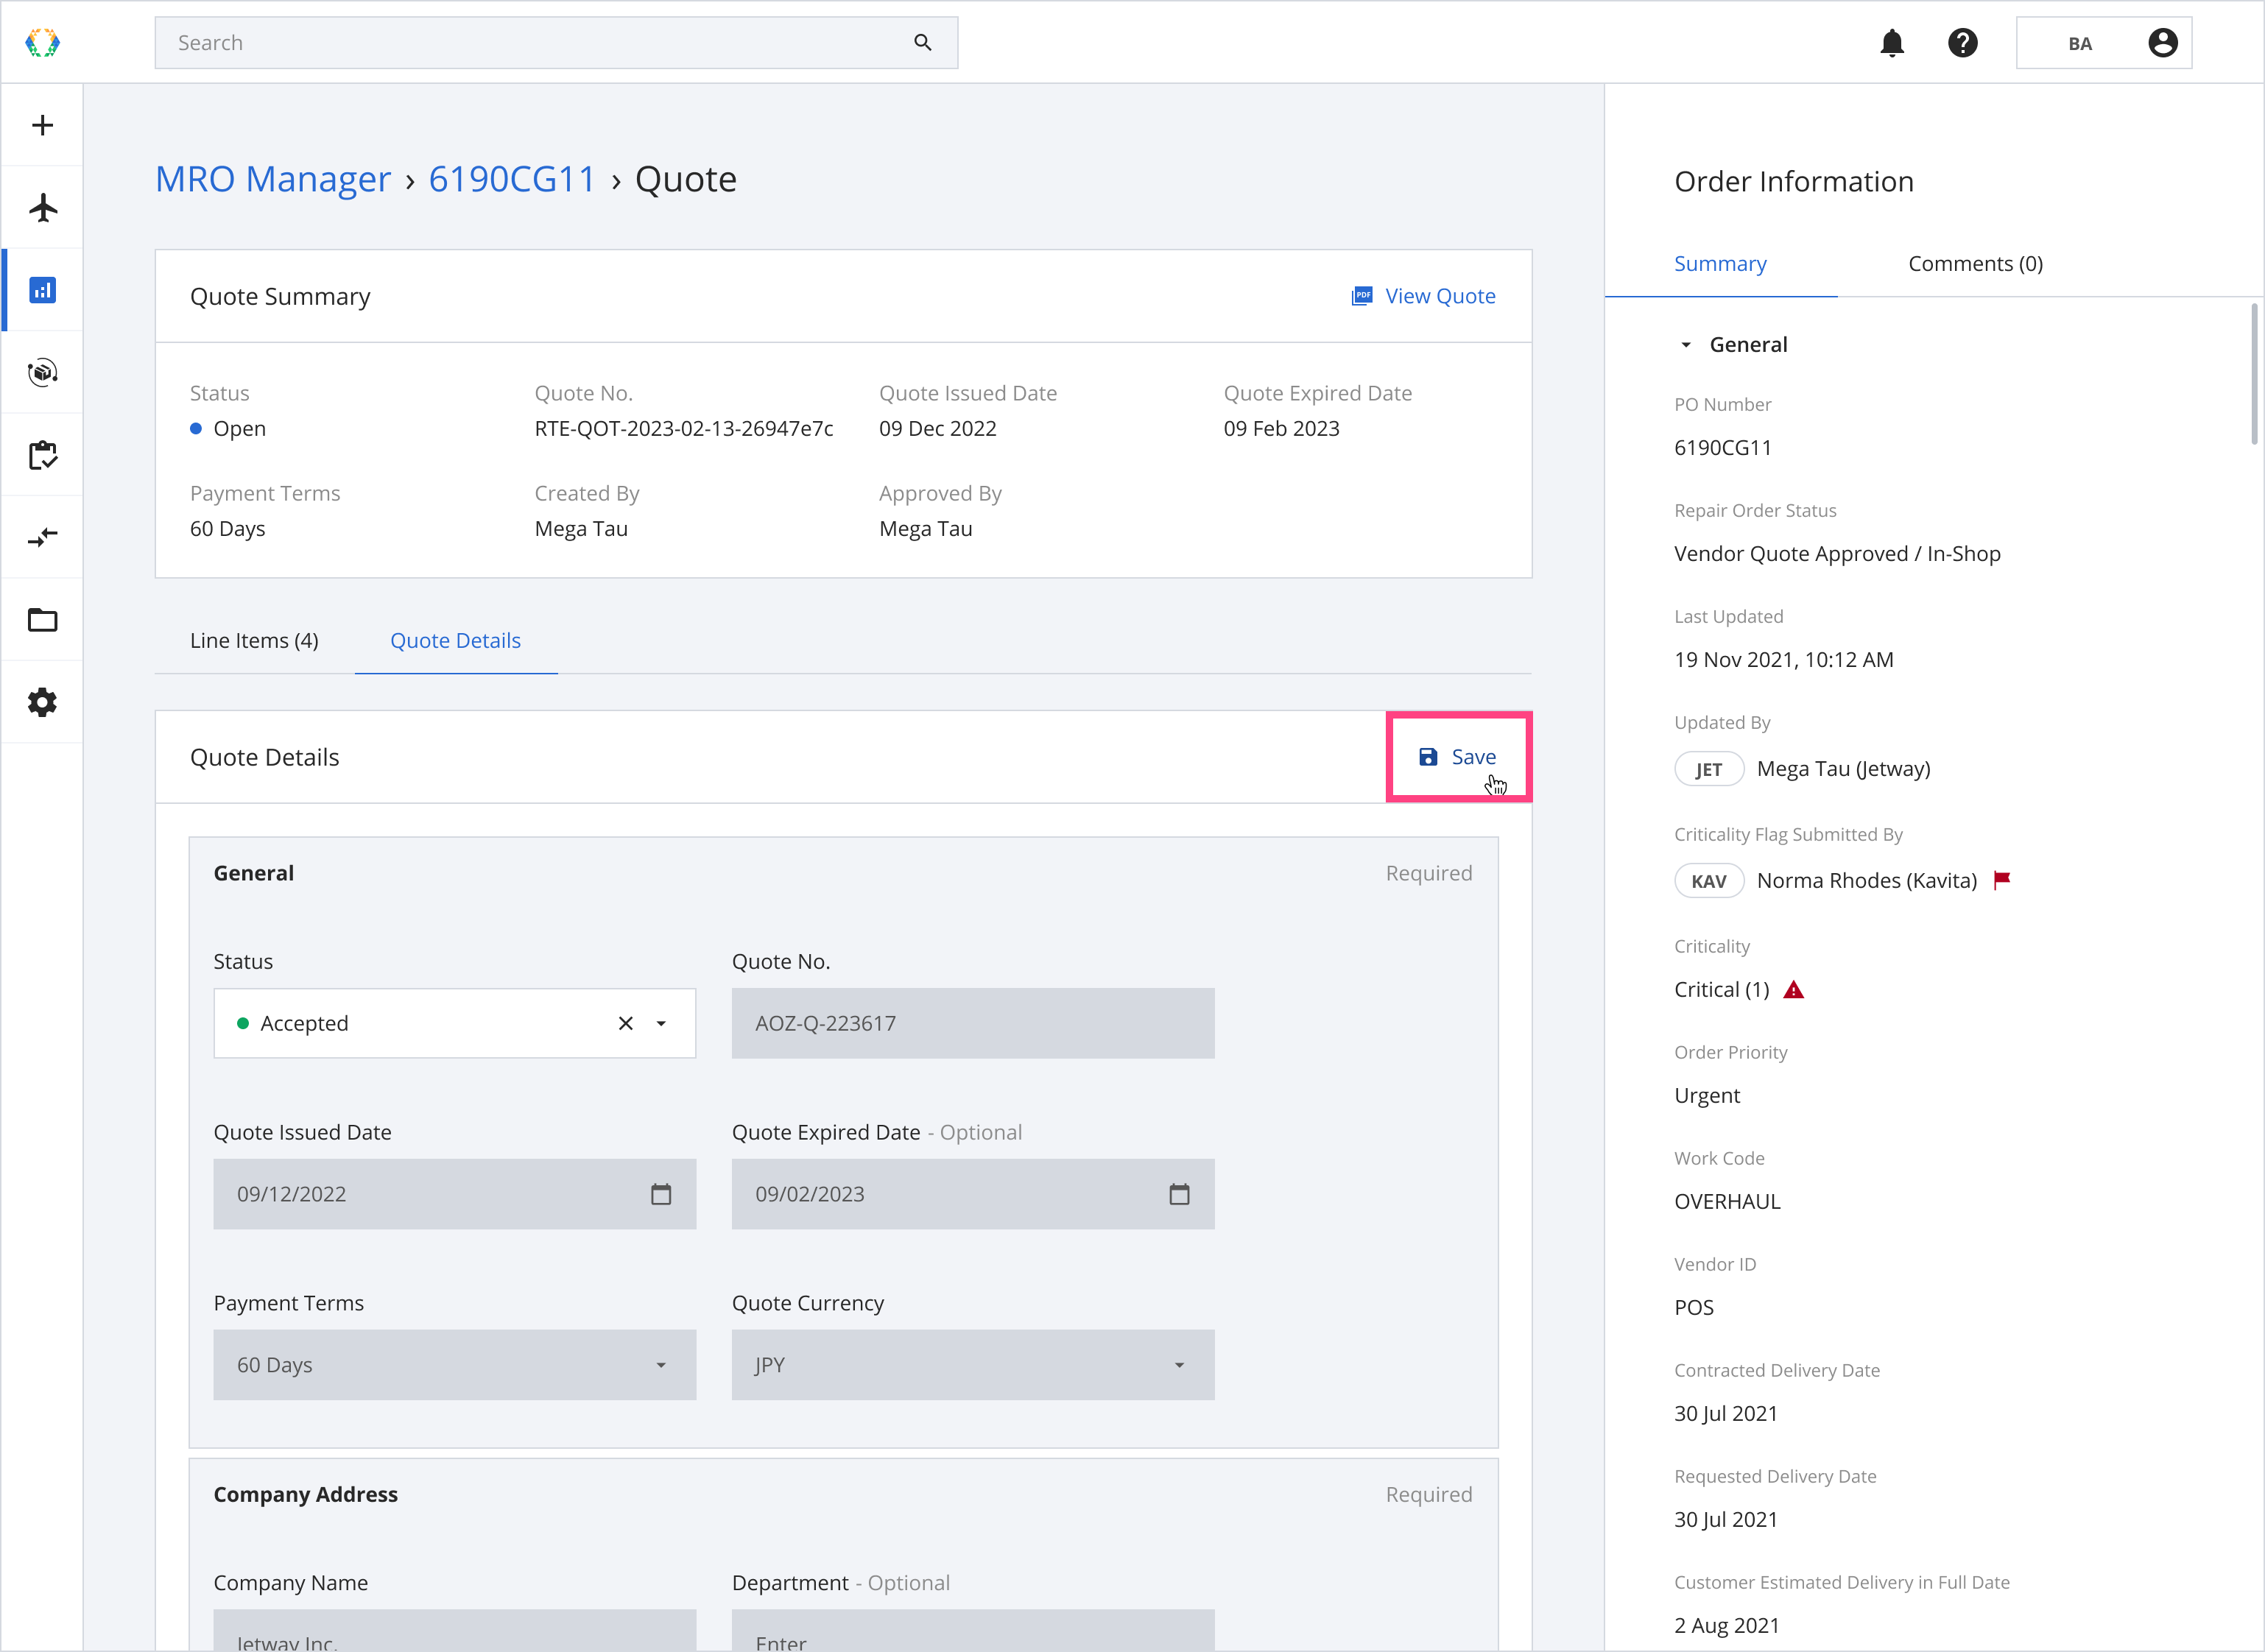
Editing Quote Details
Step 1: From the quote page tabs, Click 'Quote Details' to access your quote details.
Step 2: Update quote details.
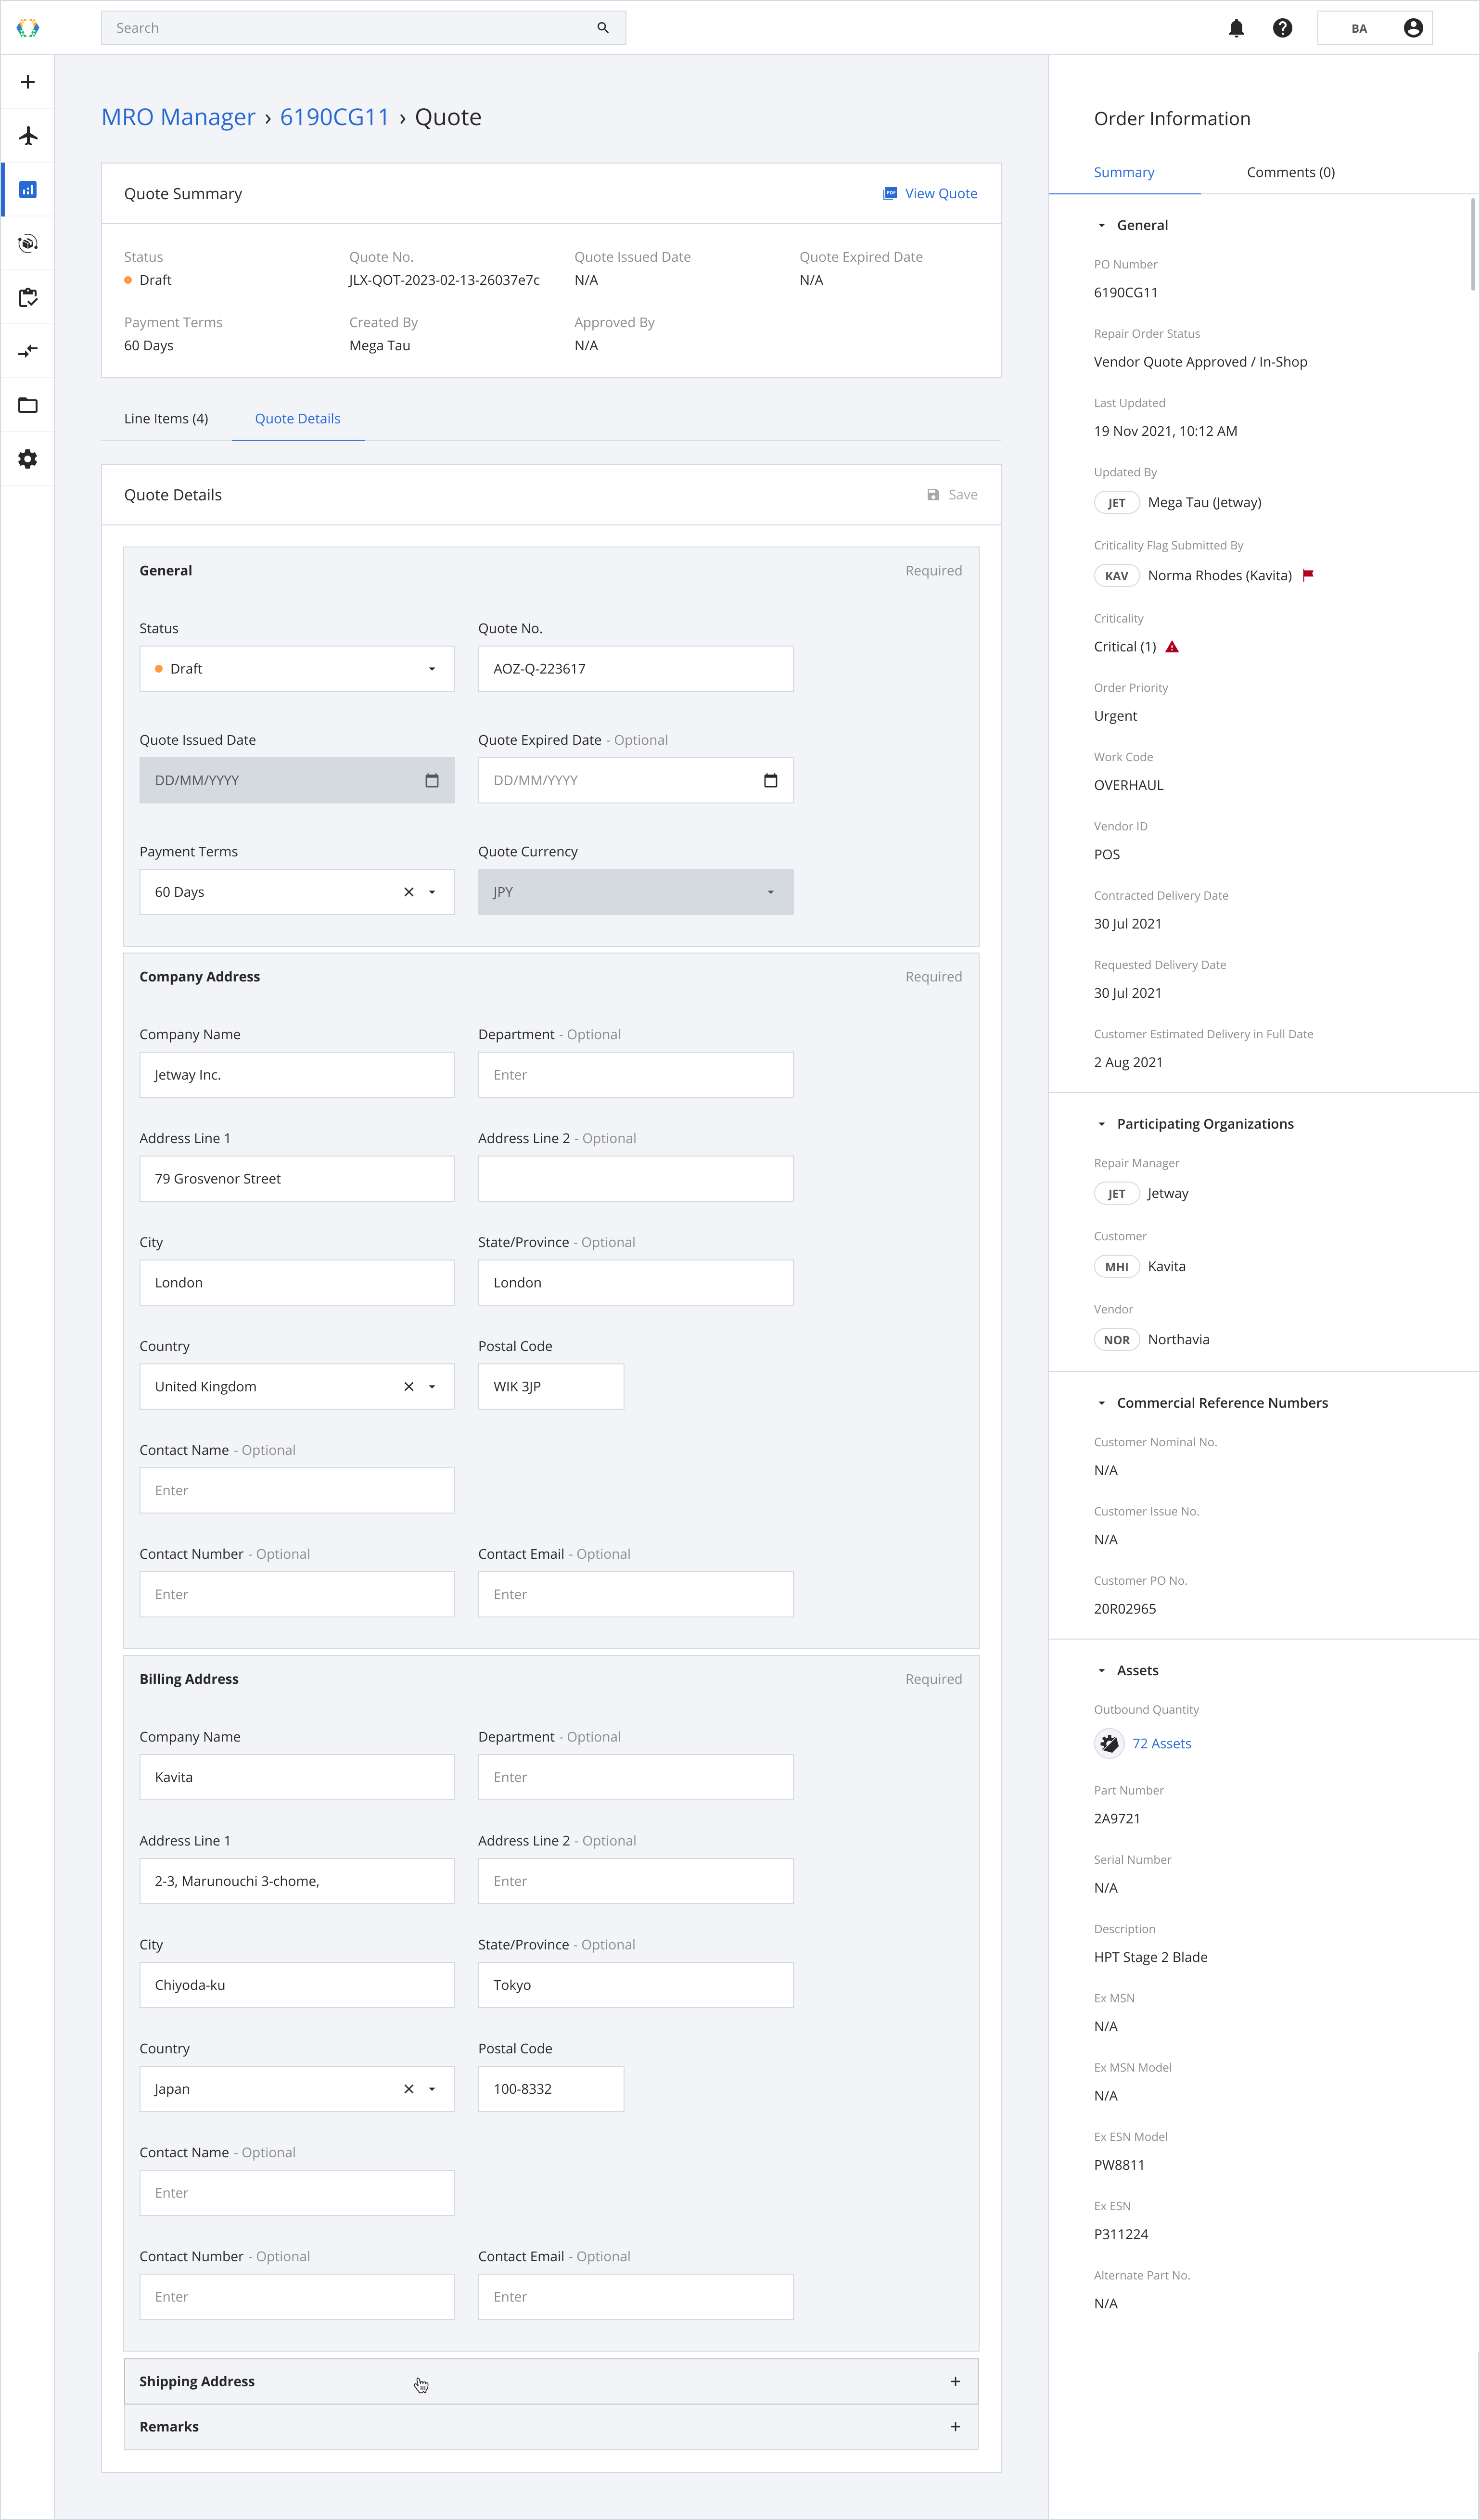
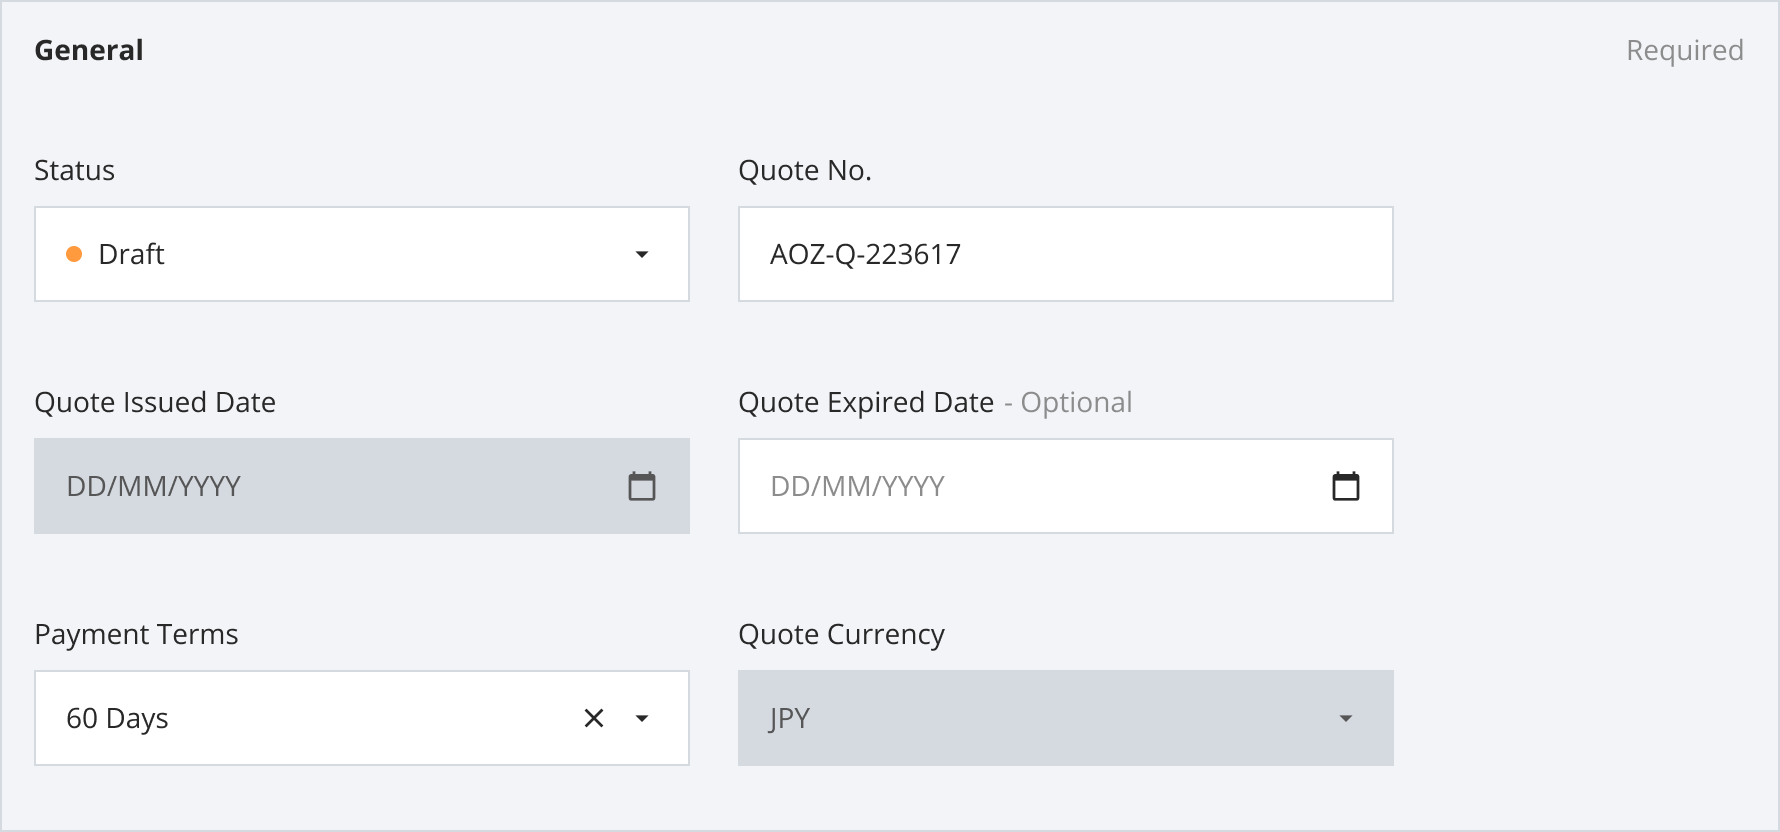
General (Required)
General information of your Quote.
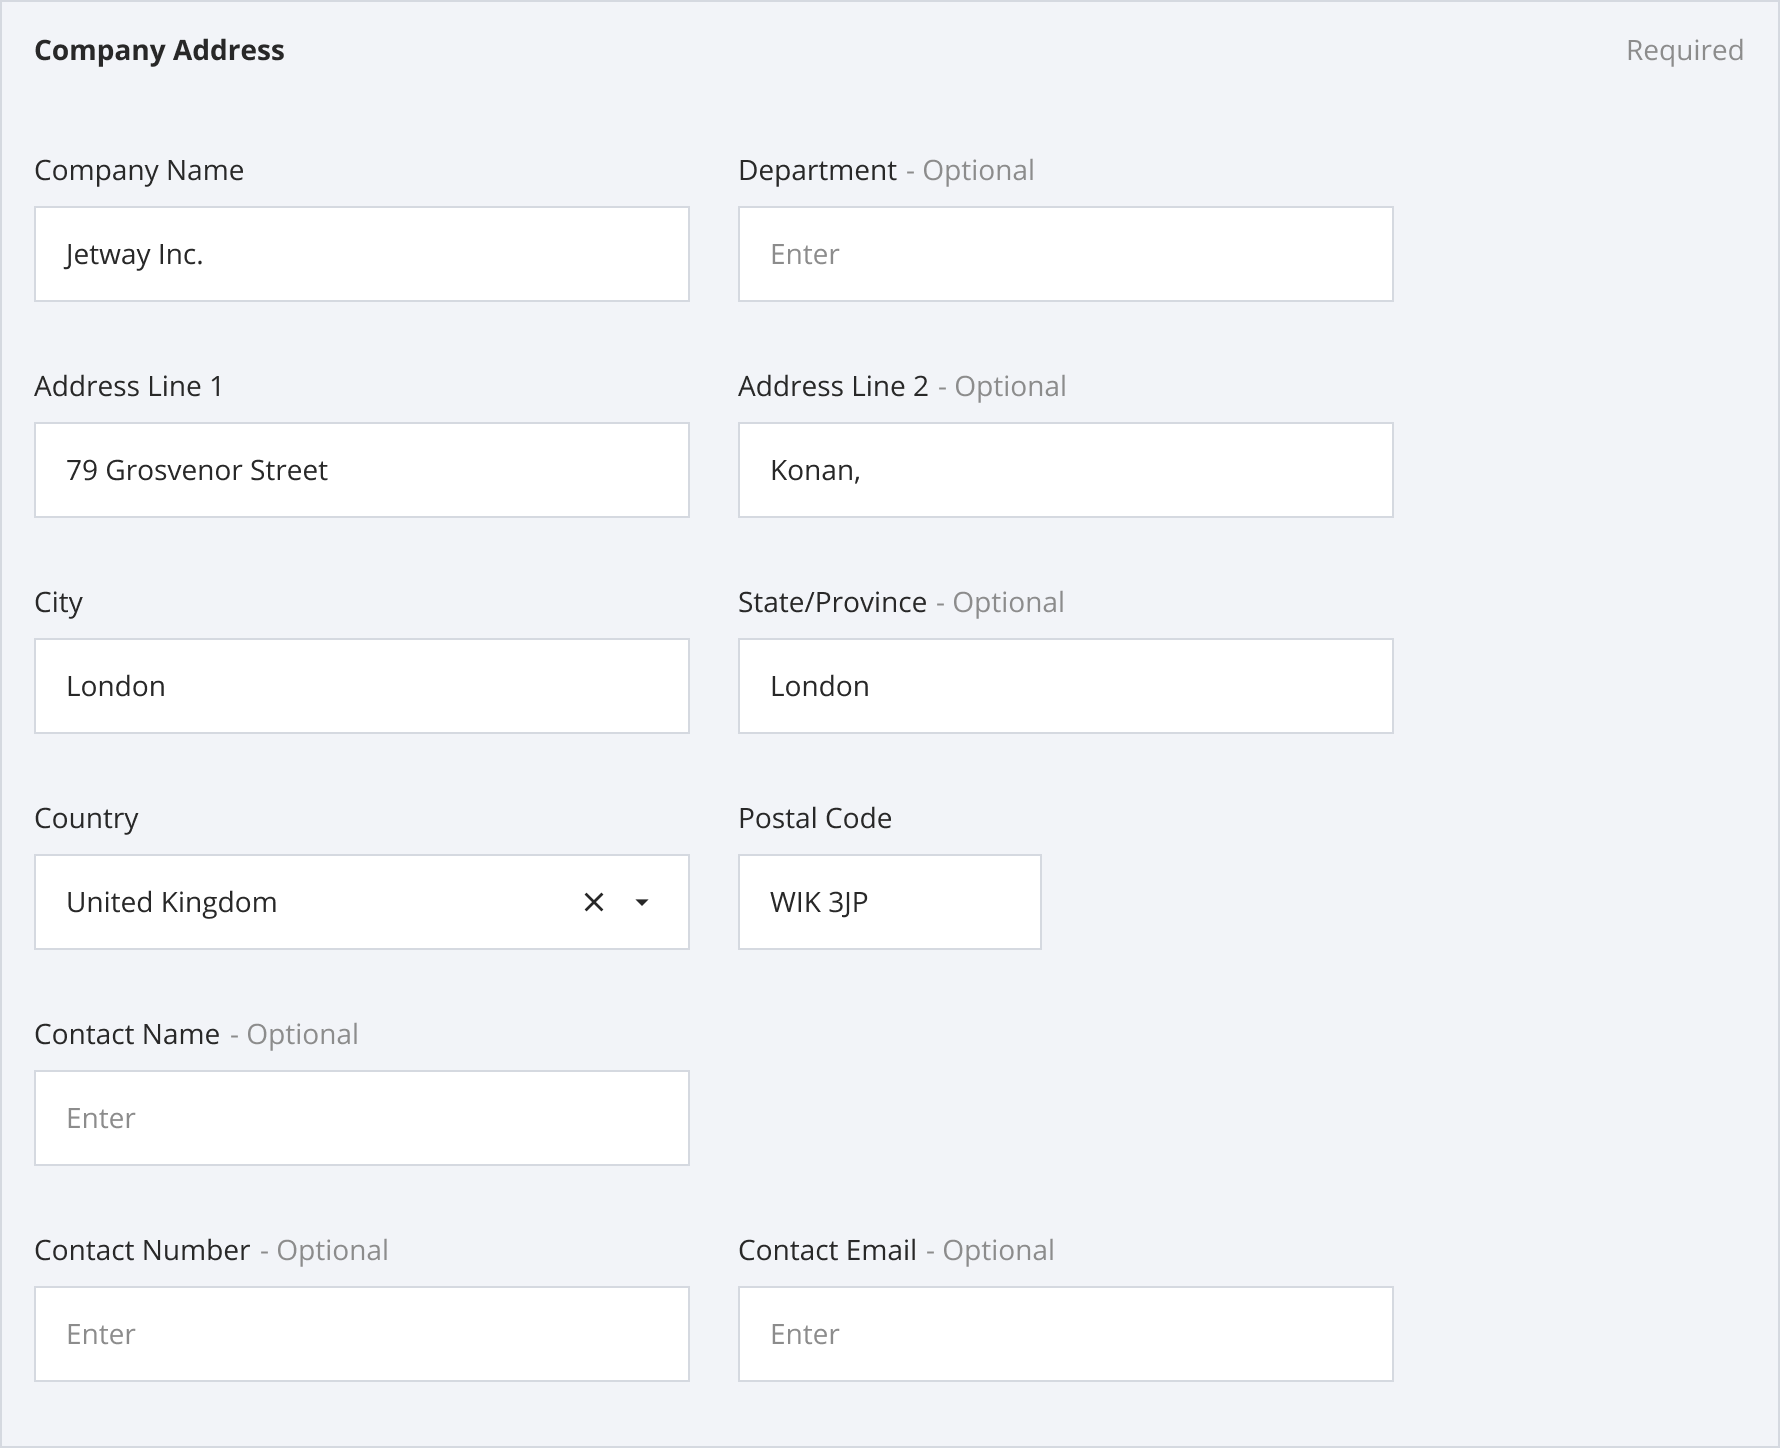
Company Address (Required)
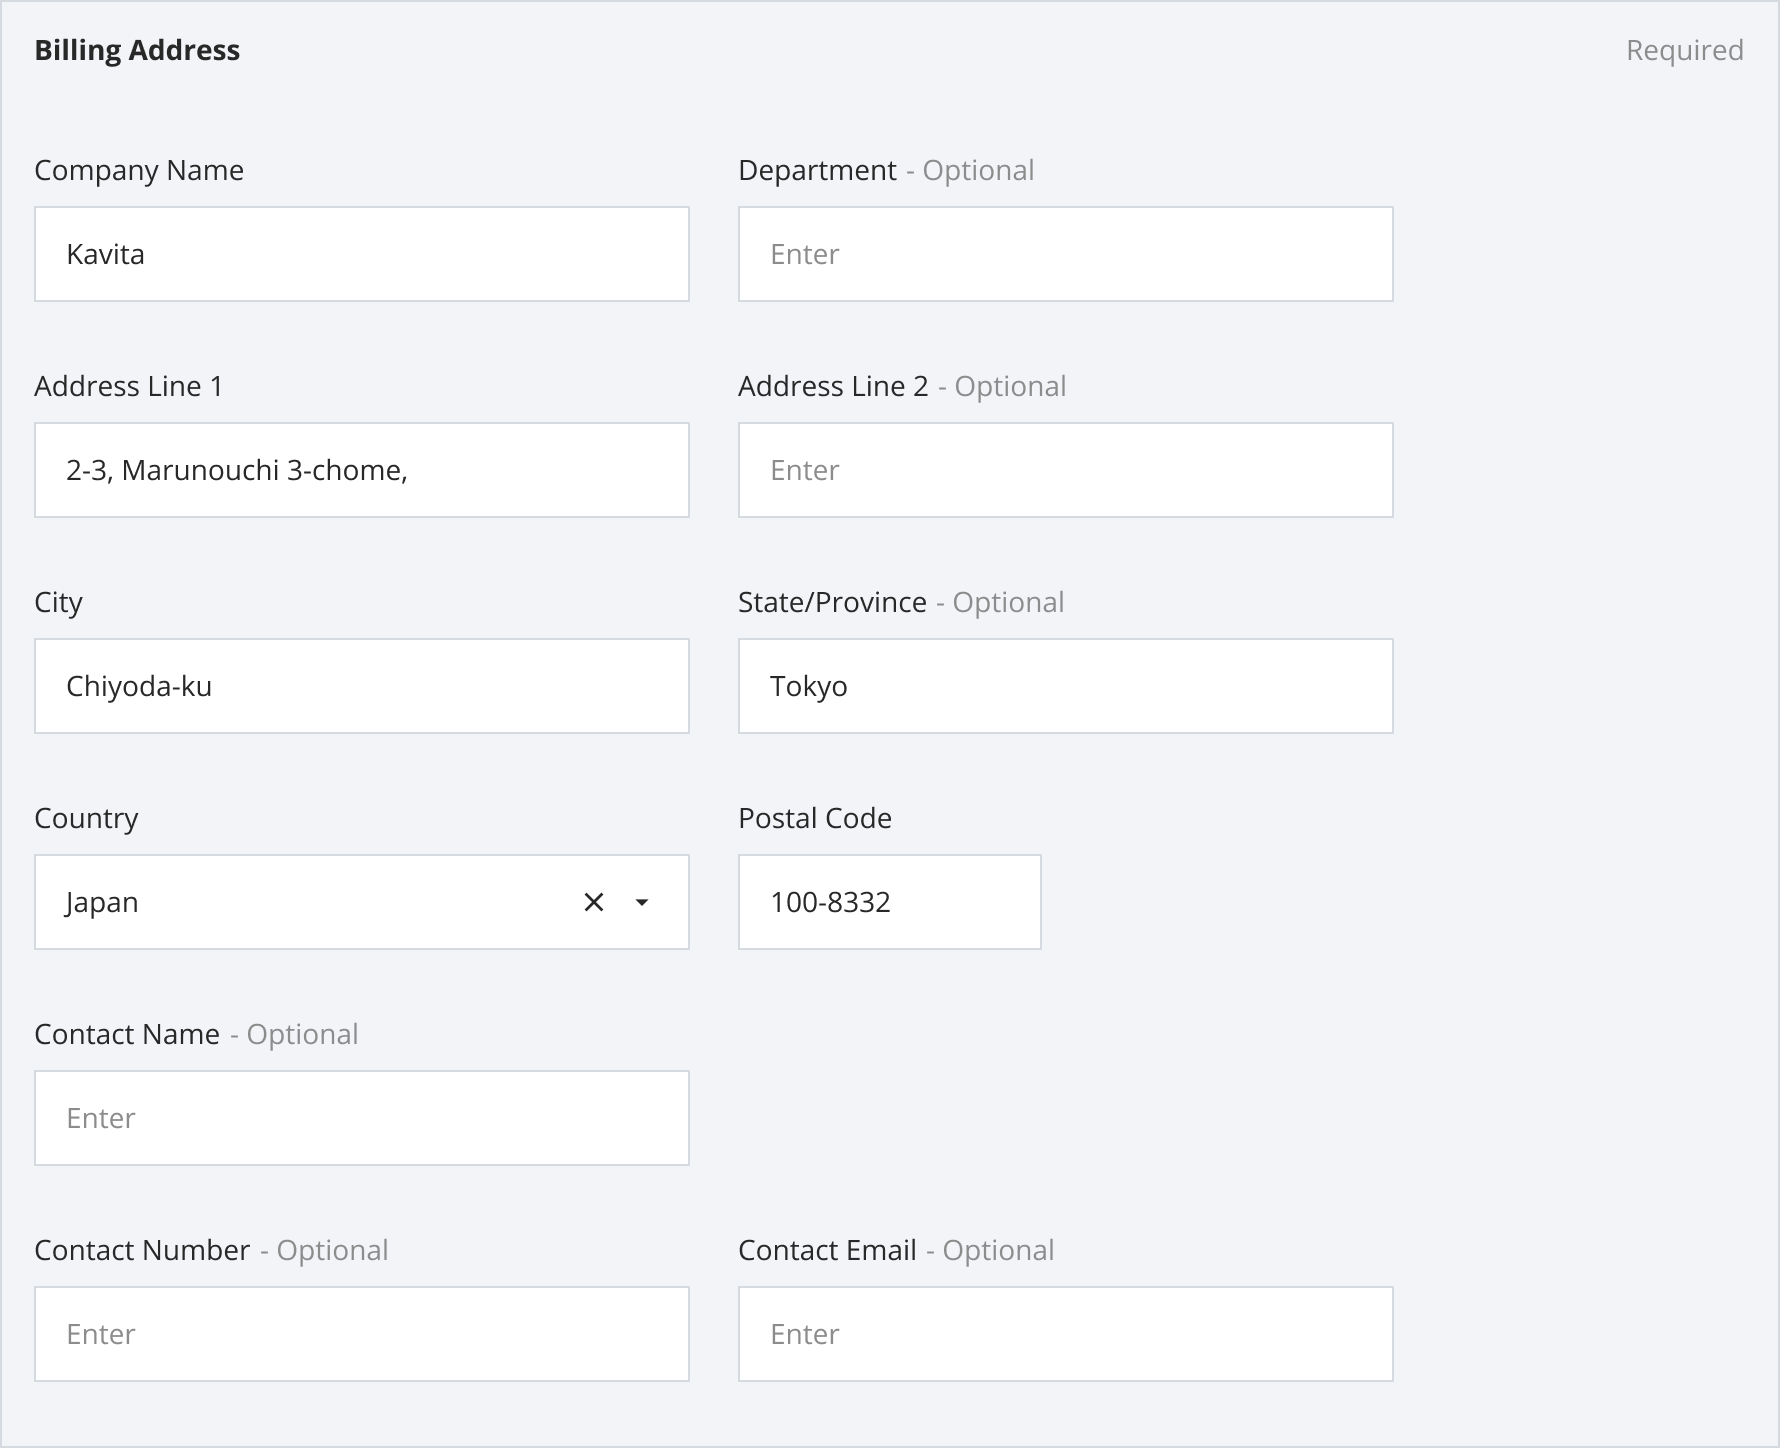
Billing Address (Required)
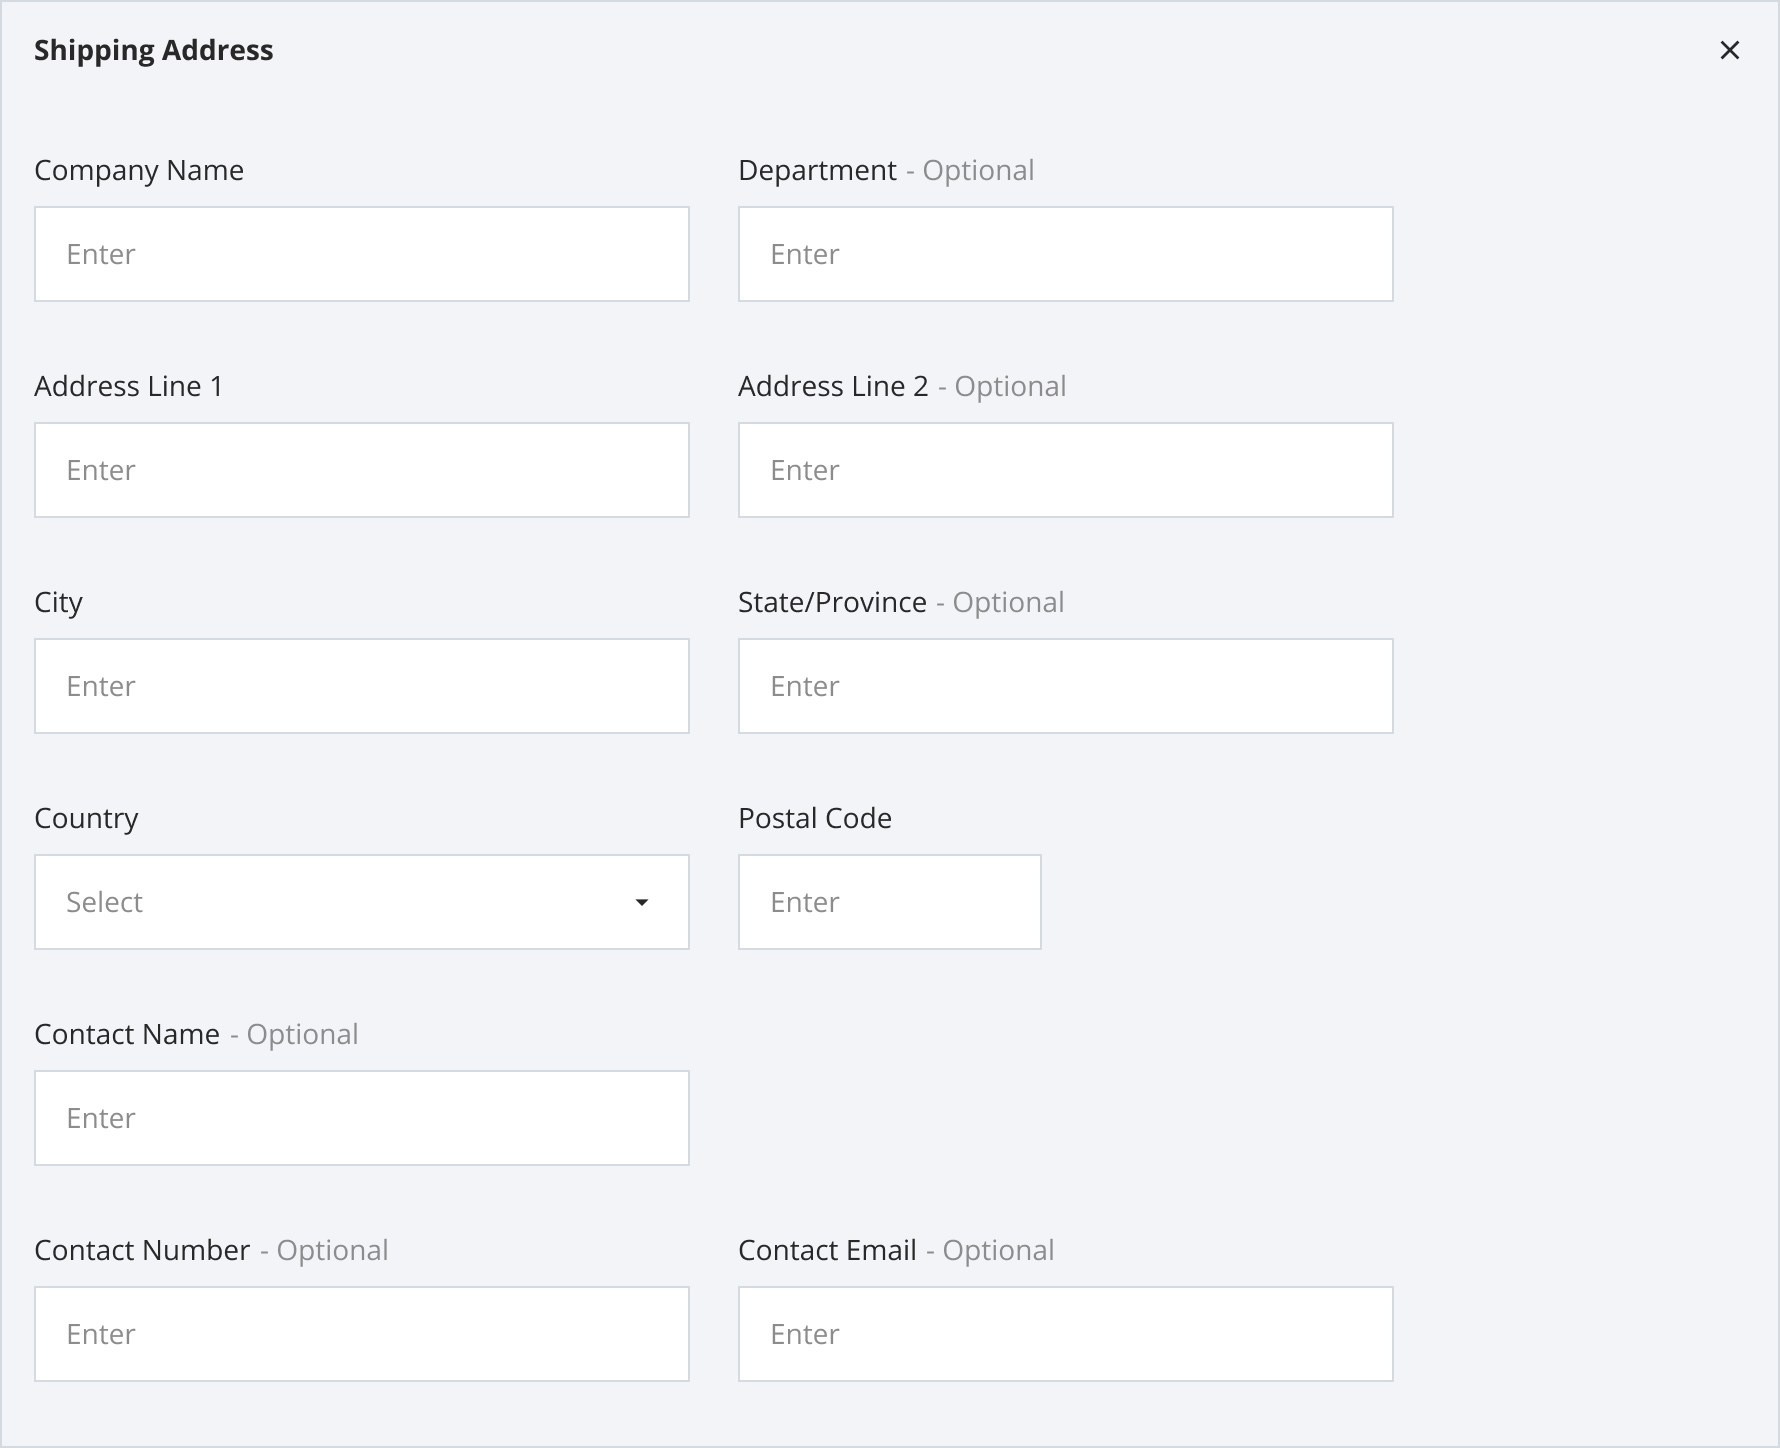
The Shipping Address and Remarks sections are optional information. You can enter additional details for your Quote in these sections. Click on the collapsed sections to expand them.
Shipping Address
If your Billing Address differs from your Shipping Address, this section can be expanded and filled.
Remarks
Any additional remarks for your Quote.

Step 3: Click 'Save'.
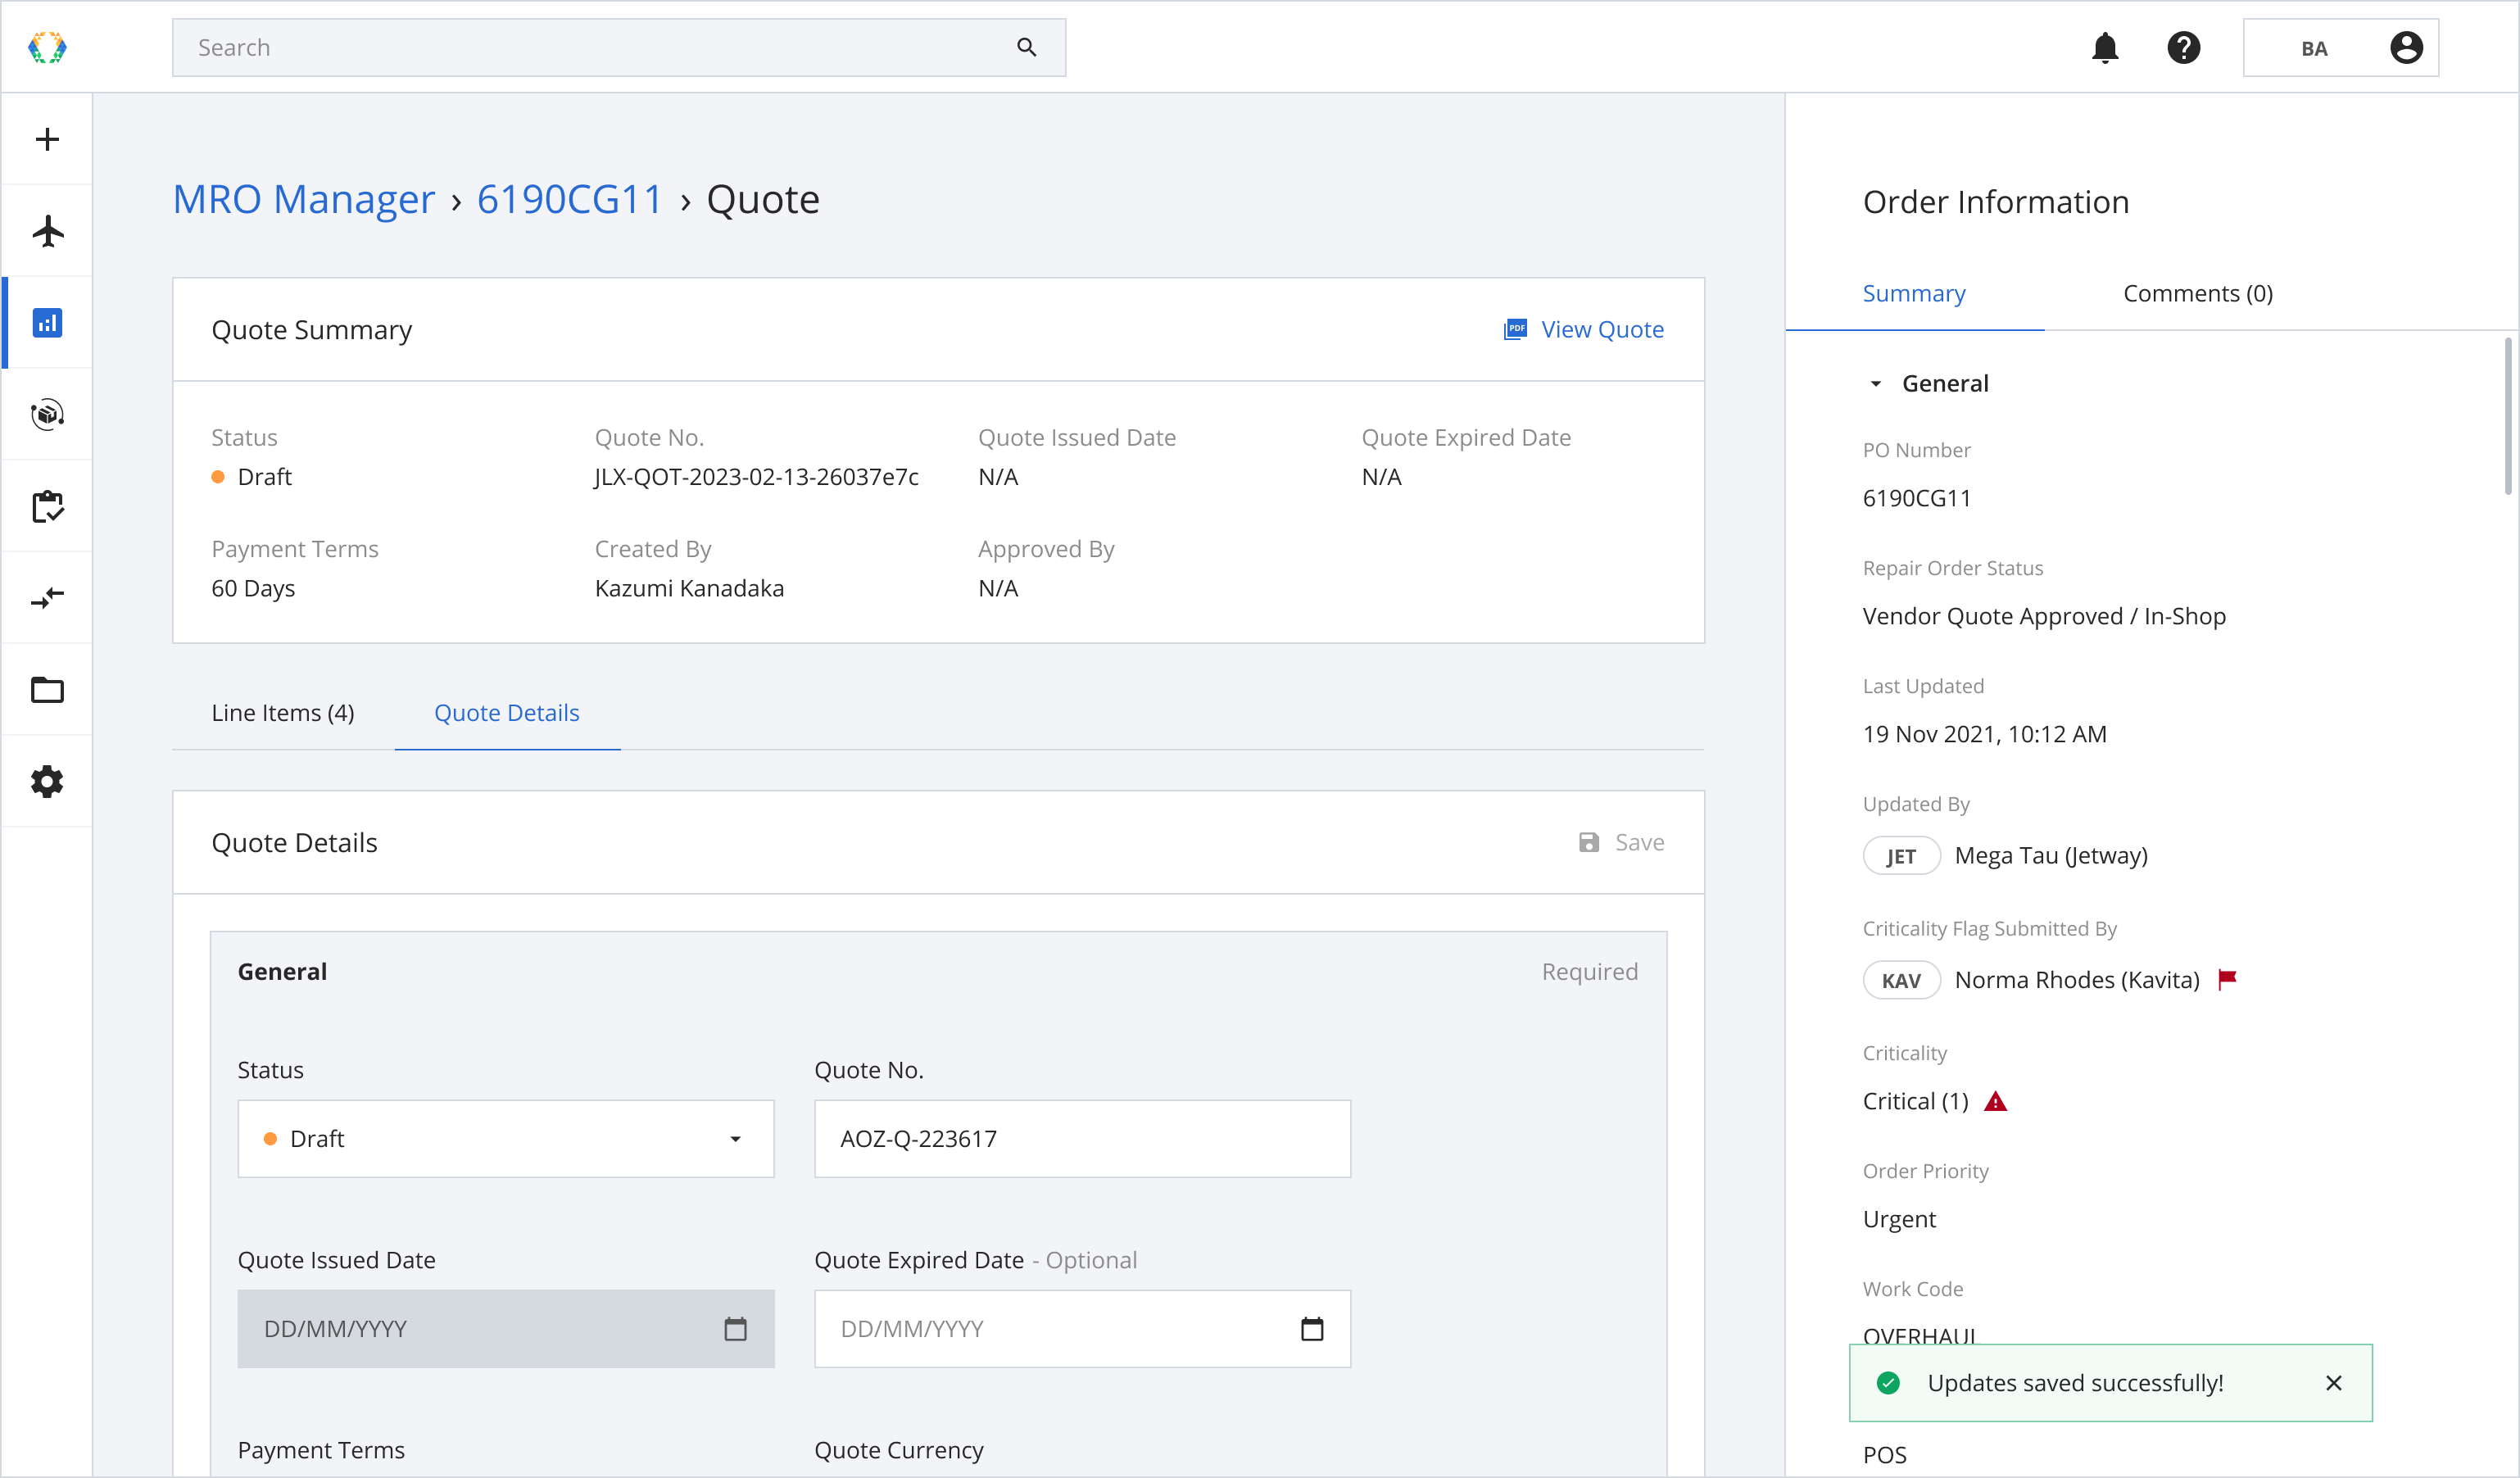
Once the quote details are updated successfully, a success message will appear at the bottom of the screen.
Viewing Quote/Quote Draft
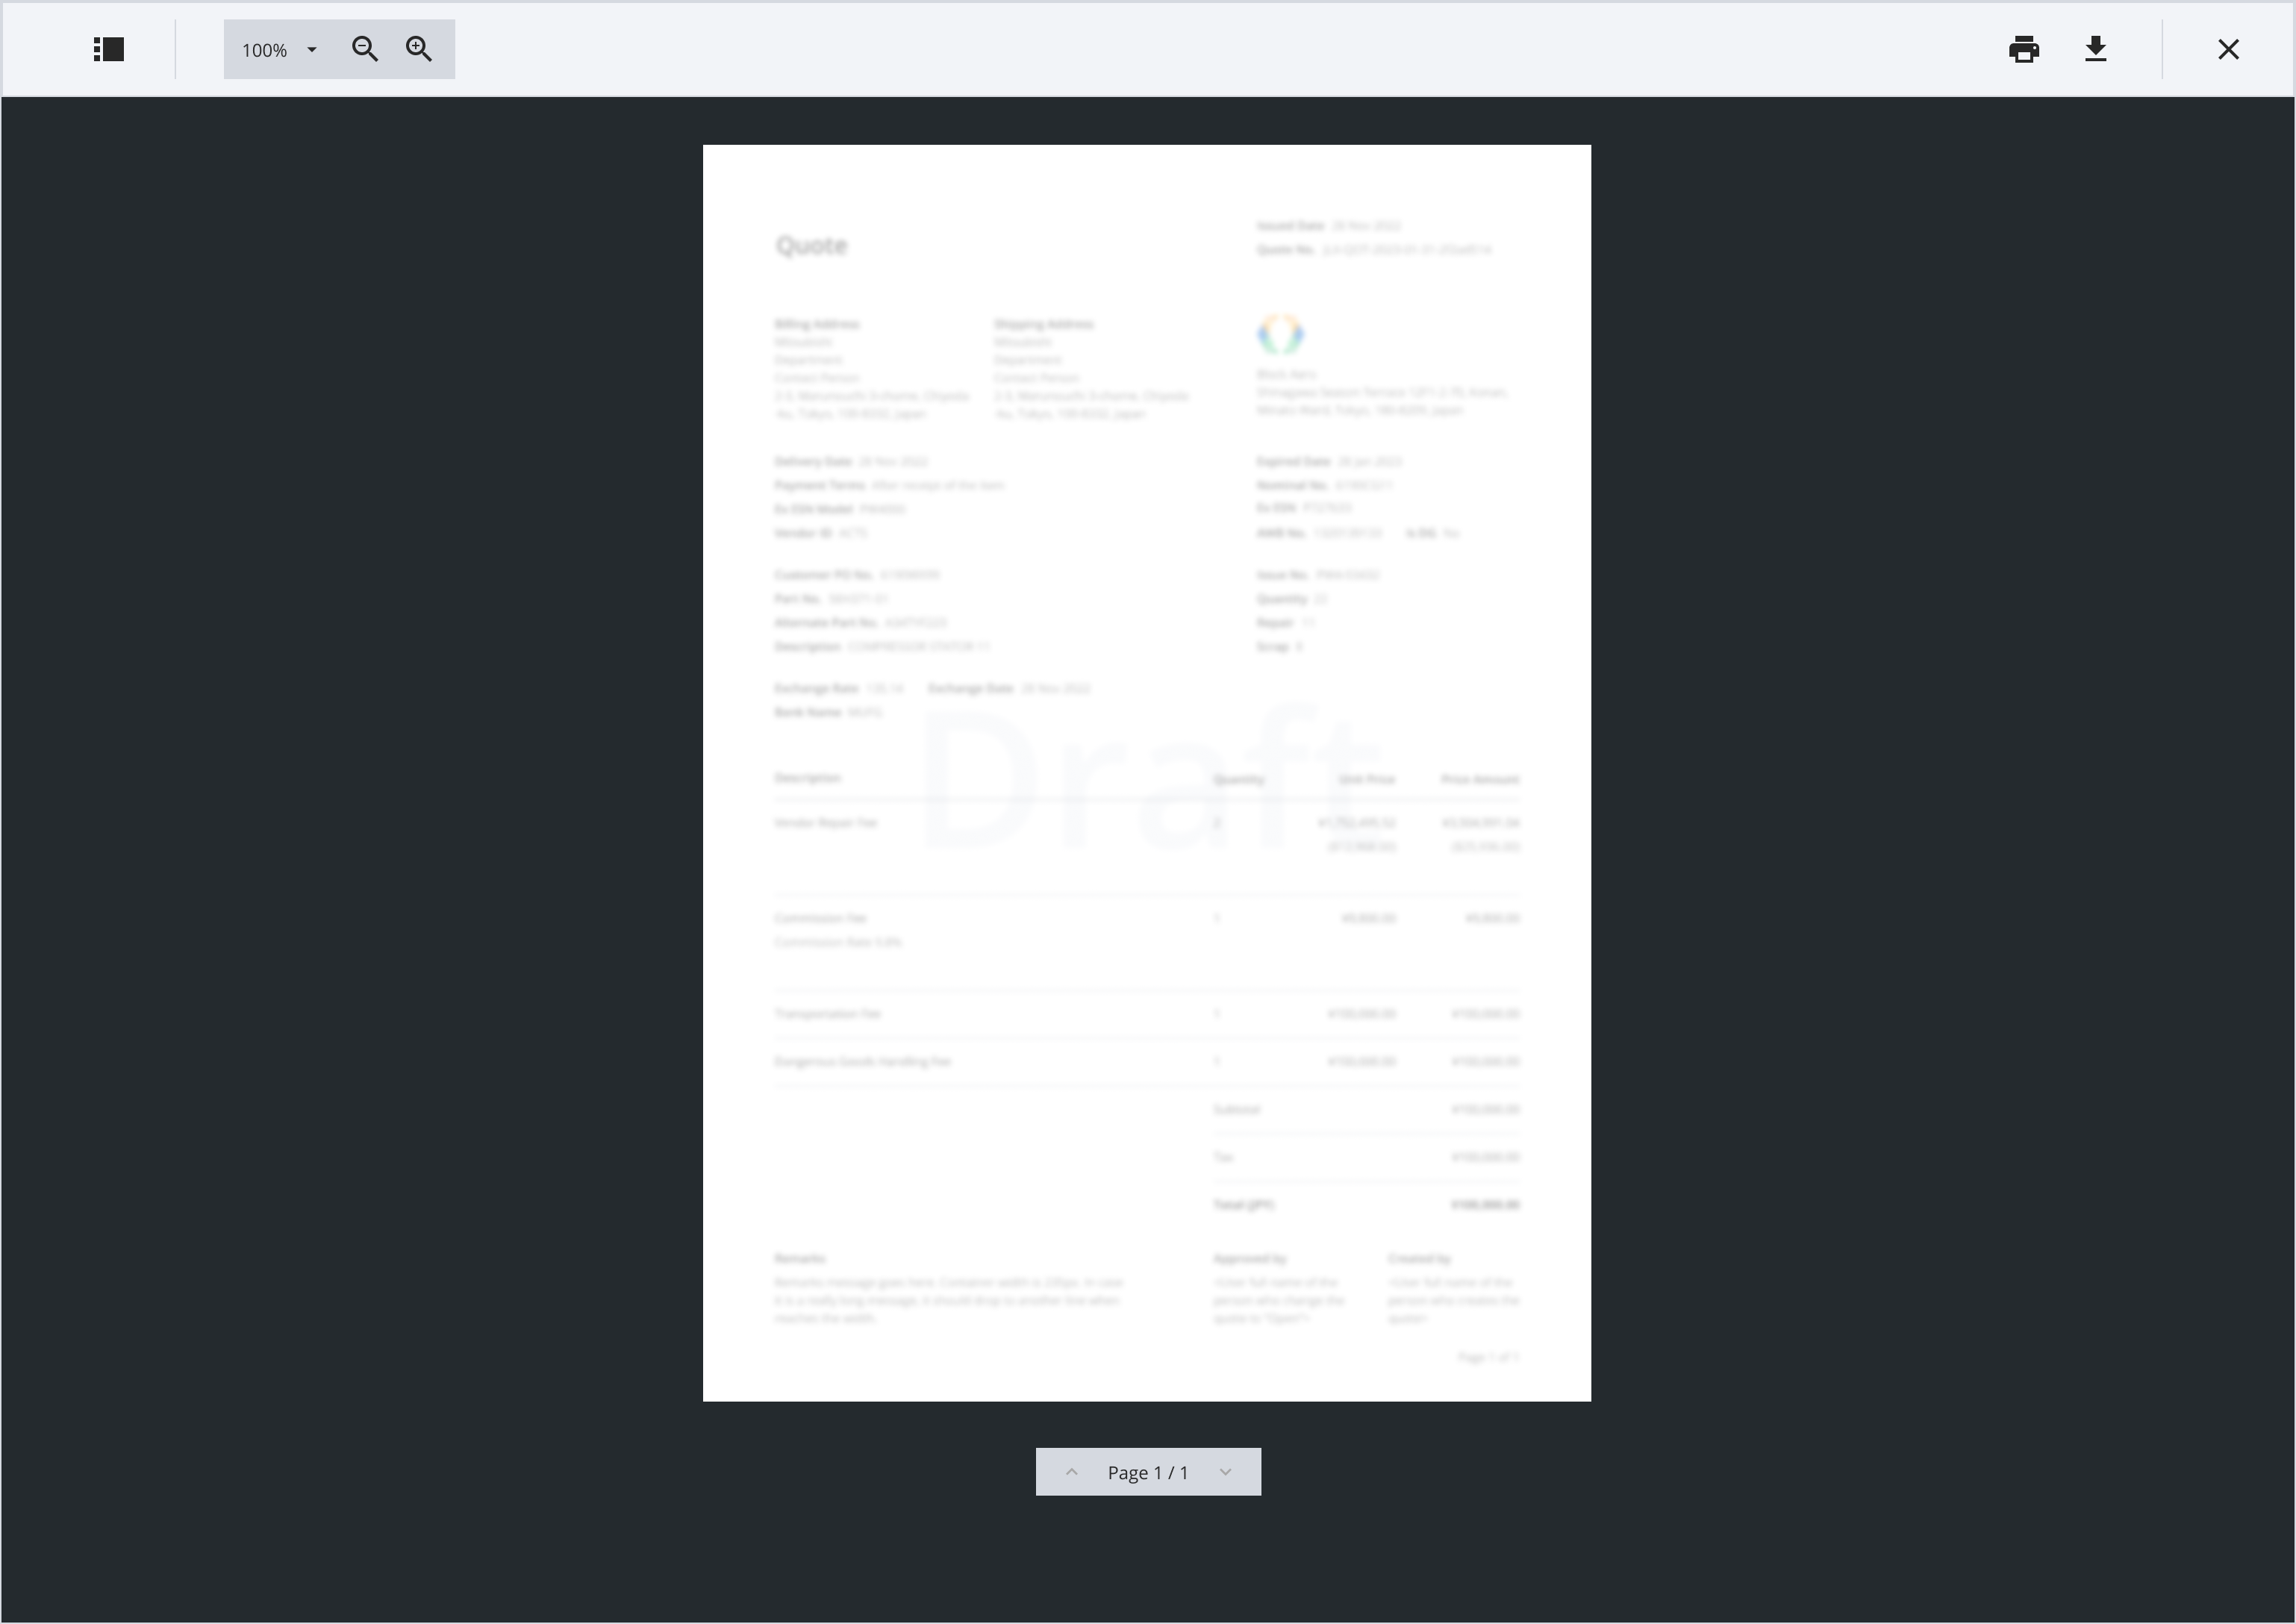
Step 1: Click 'View Quote'.
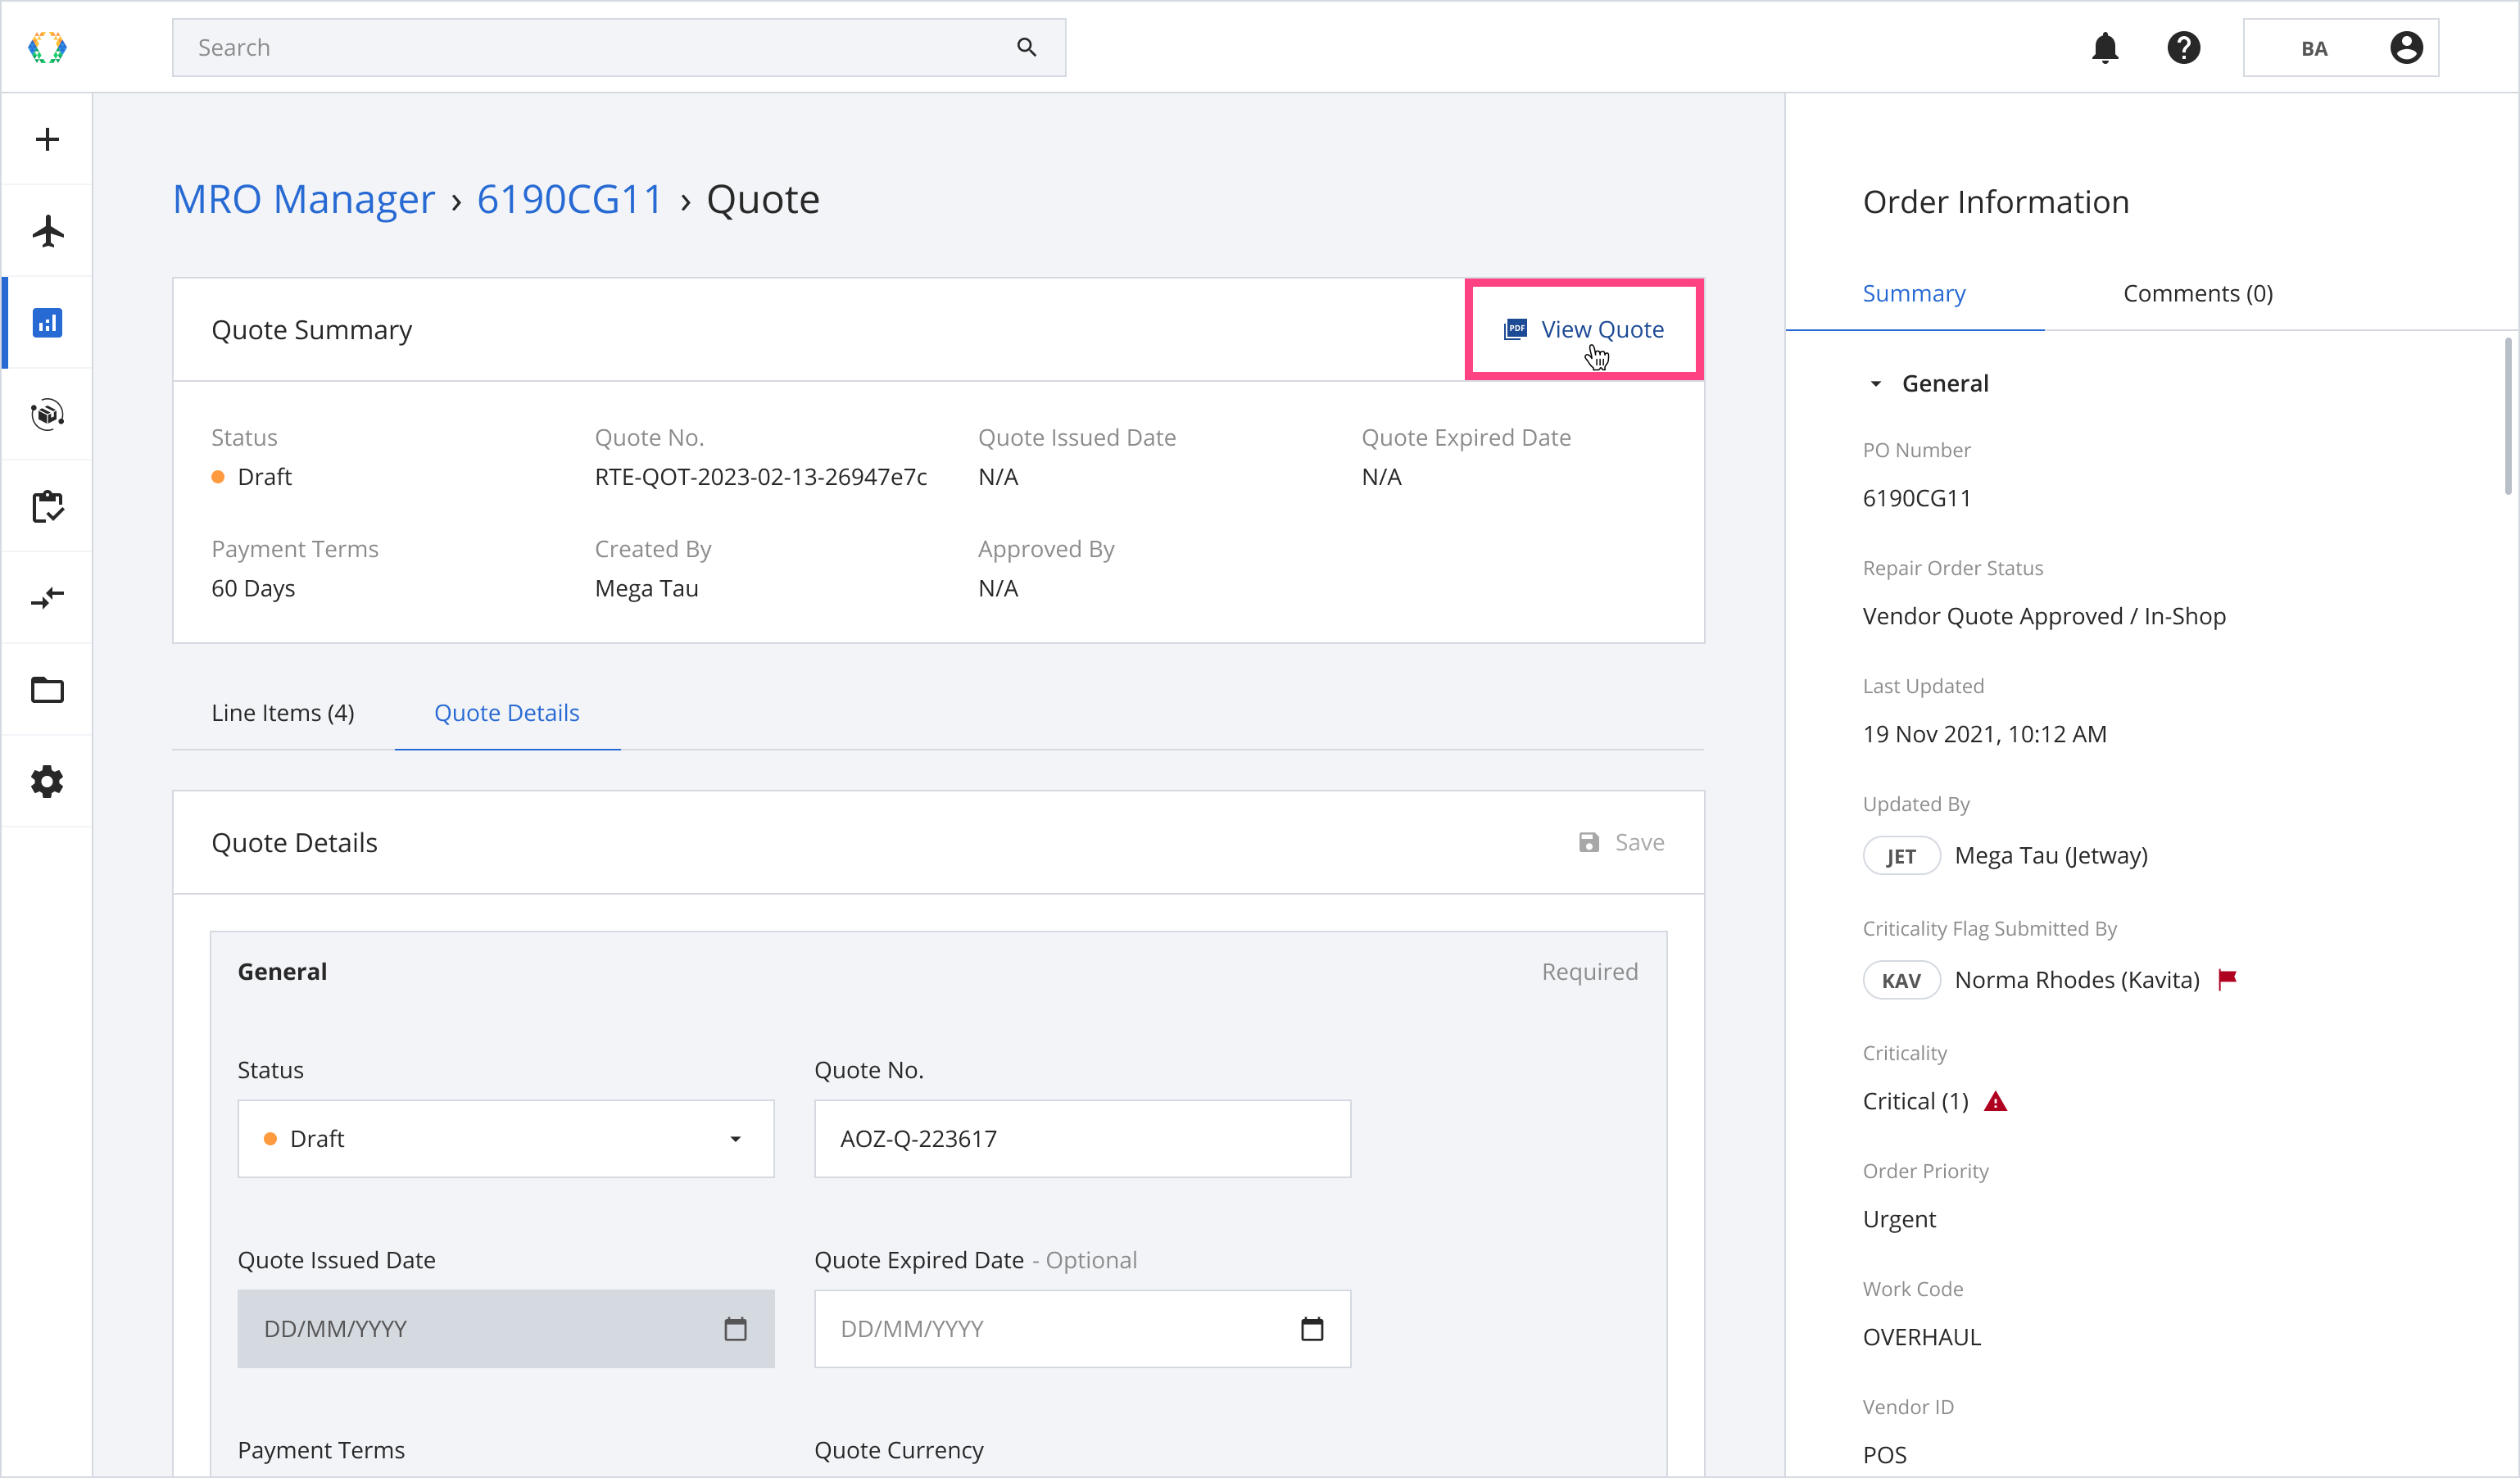
Step 2: You can view your Quote/Quote Draft on your computer.
Changing Quote Status
Your Quotes Status can be changed accordingly based on different outcomes.
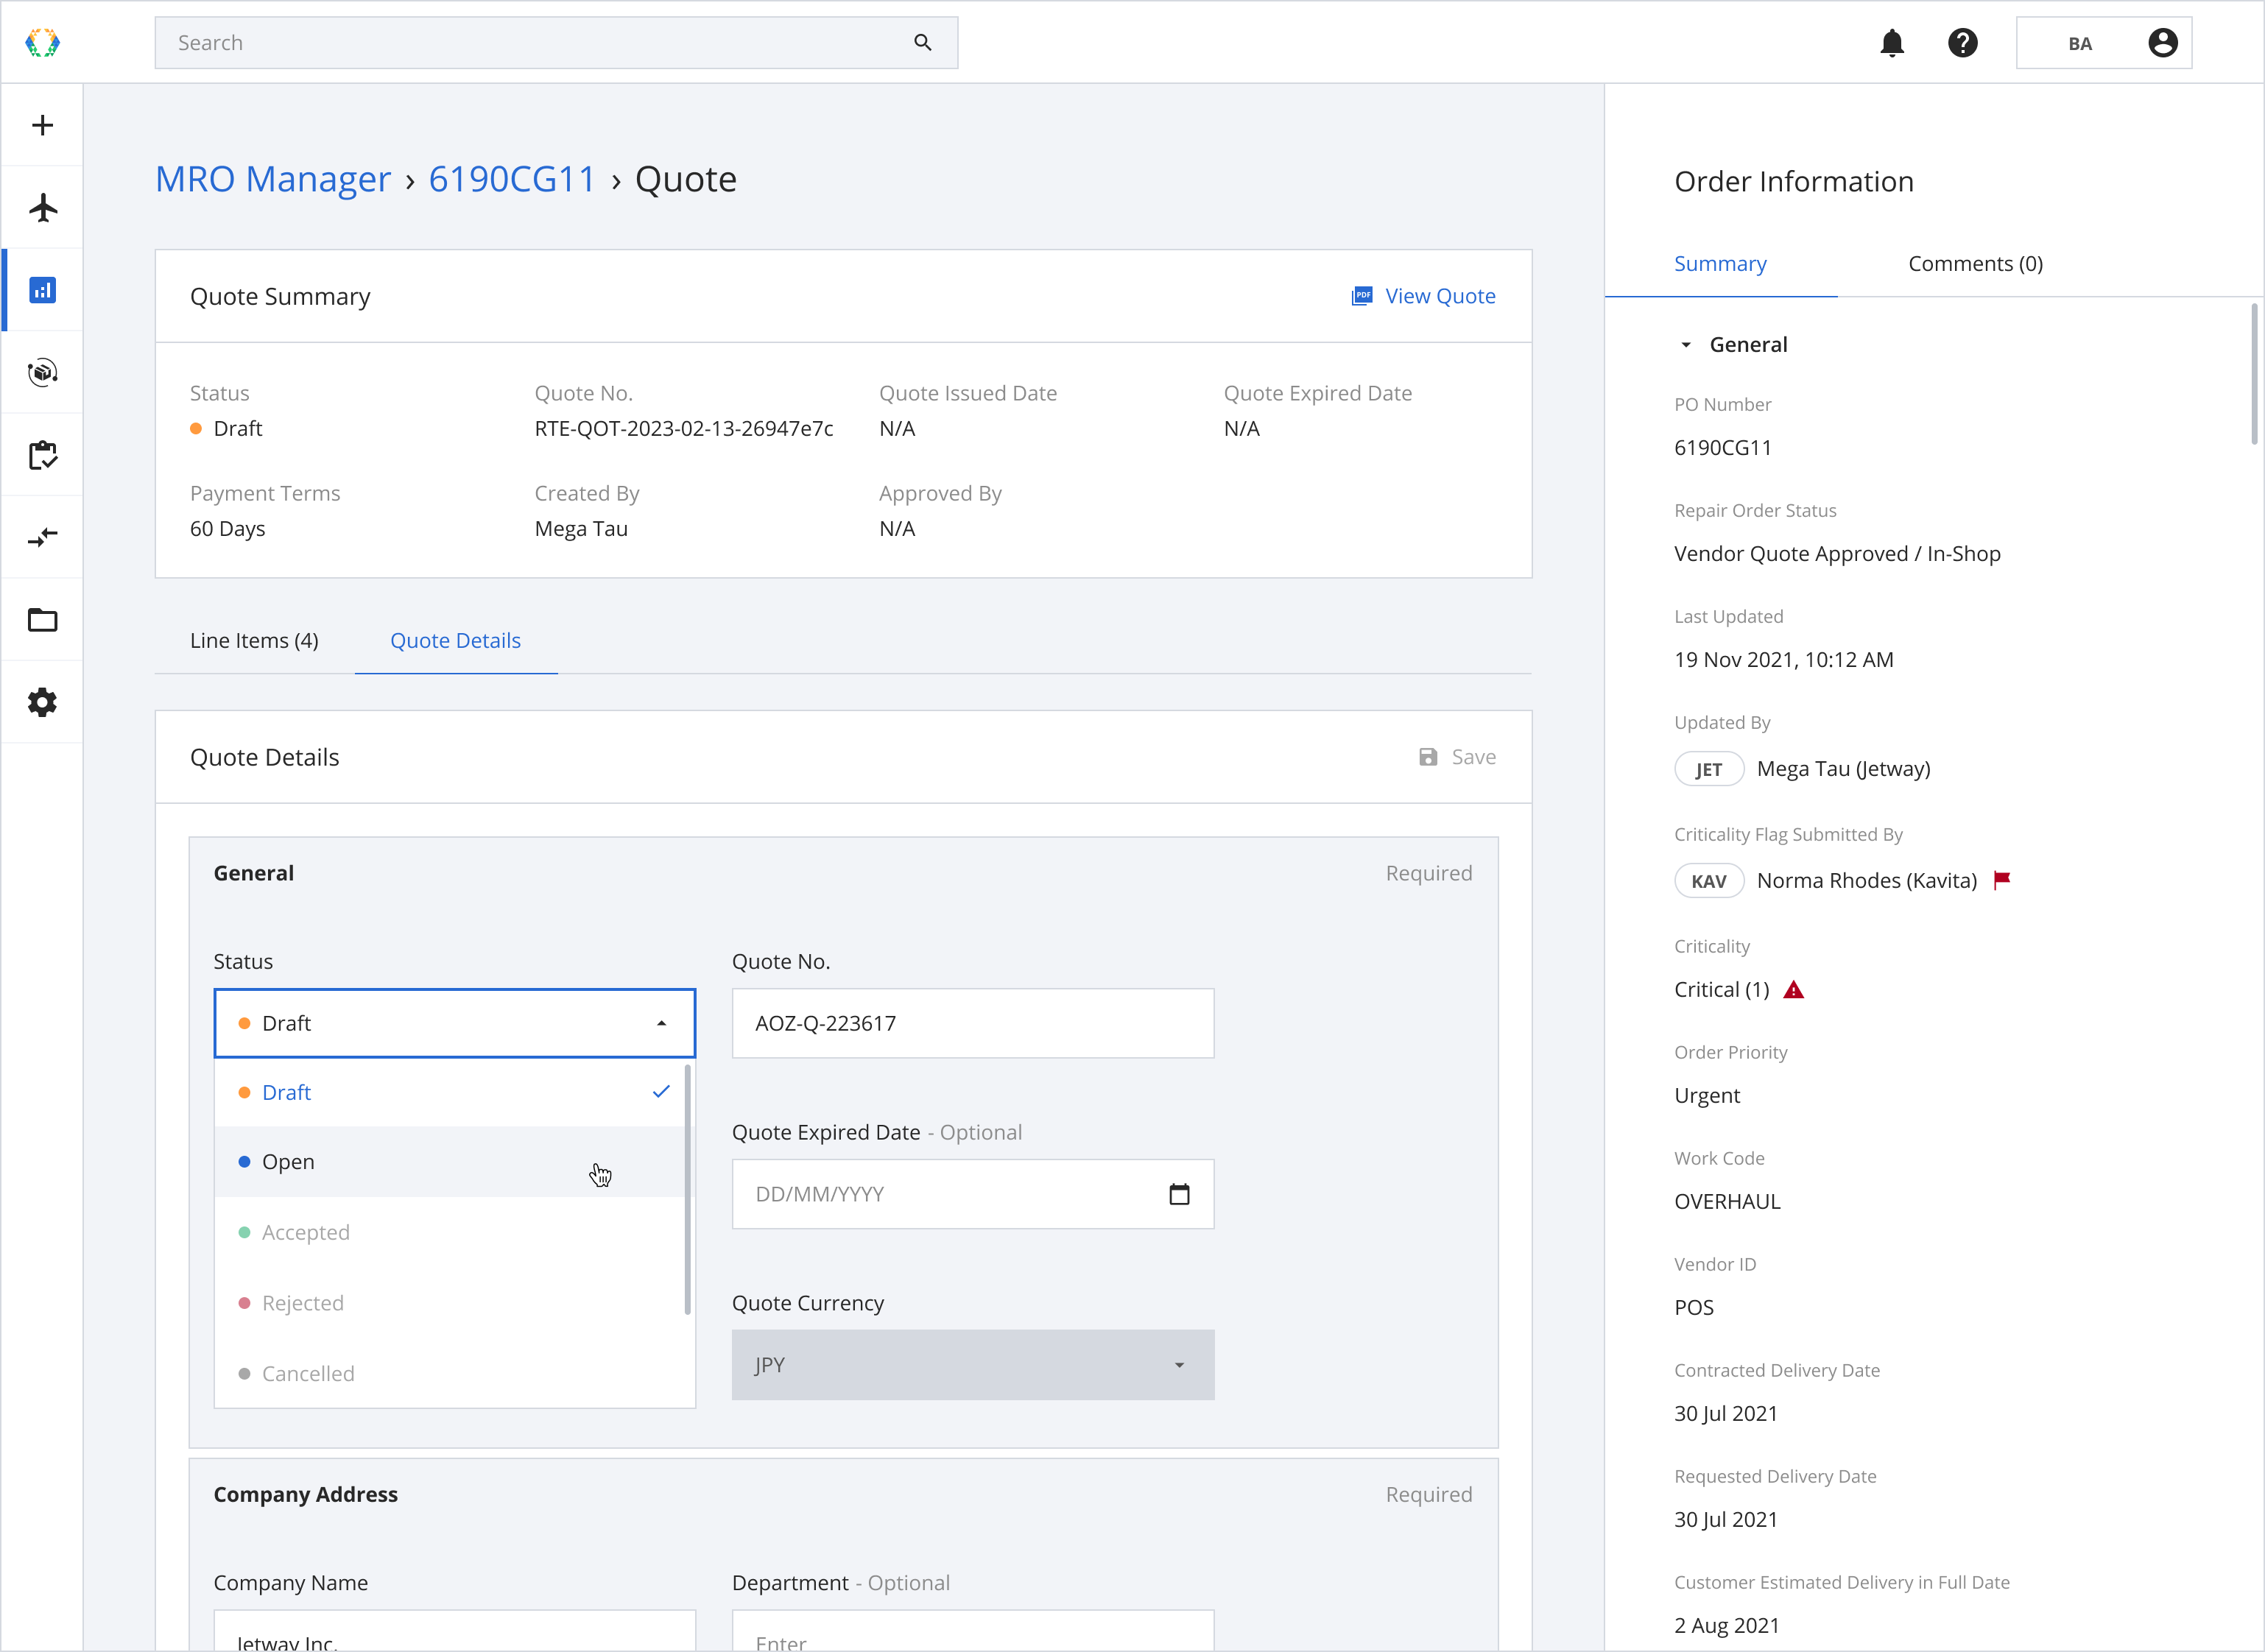
Quote Draft is ready for sending (Open)
When your quote draft is ready, you can change your Quote Status to 'Open' to share it with your customer.
Step 1: From Billing Records, open the quote draft that is ready for sending.
Step 2: Click 'Quote Details'.
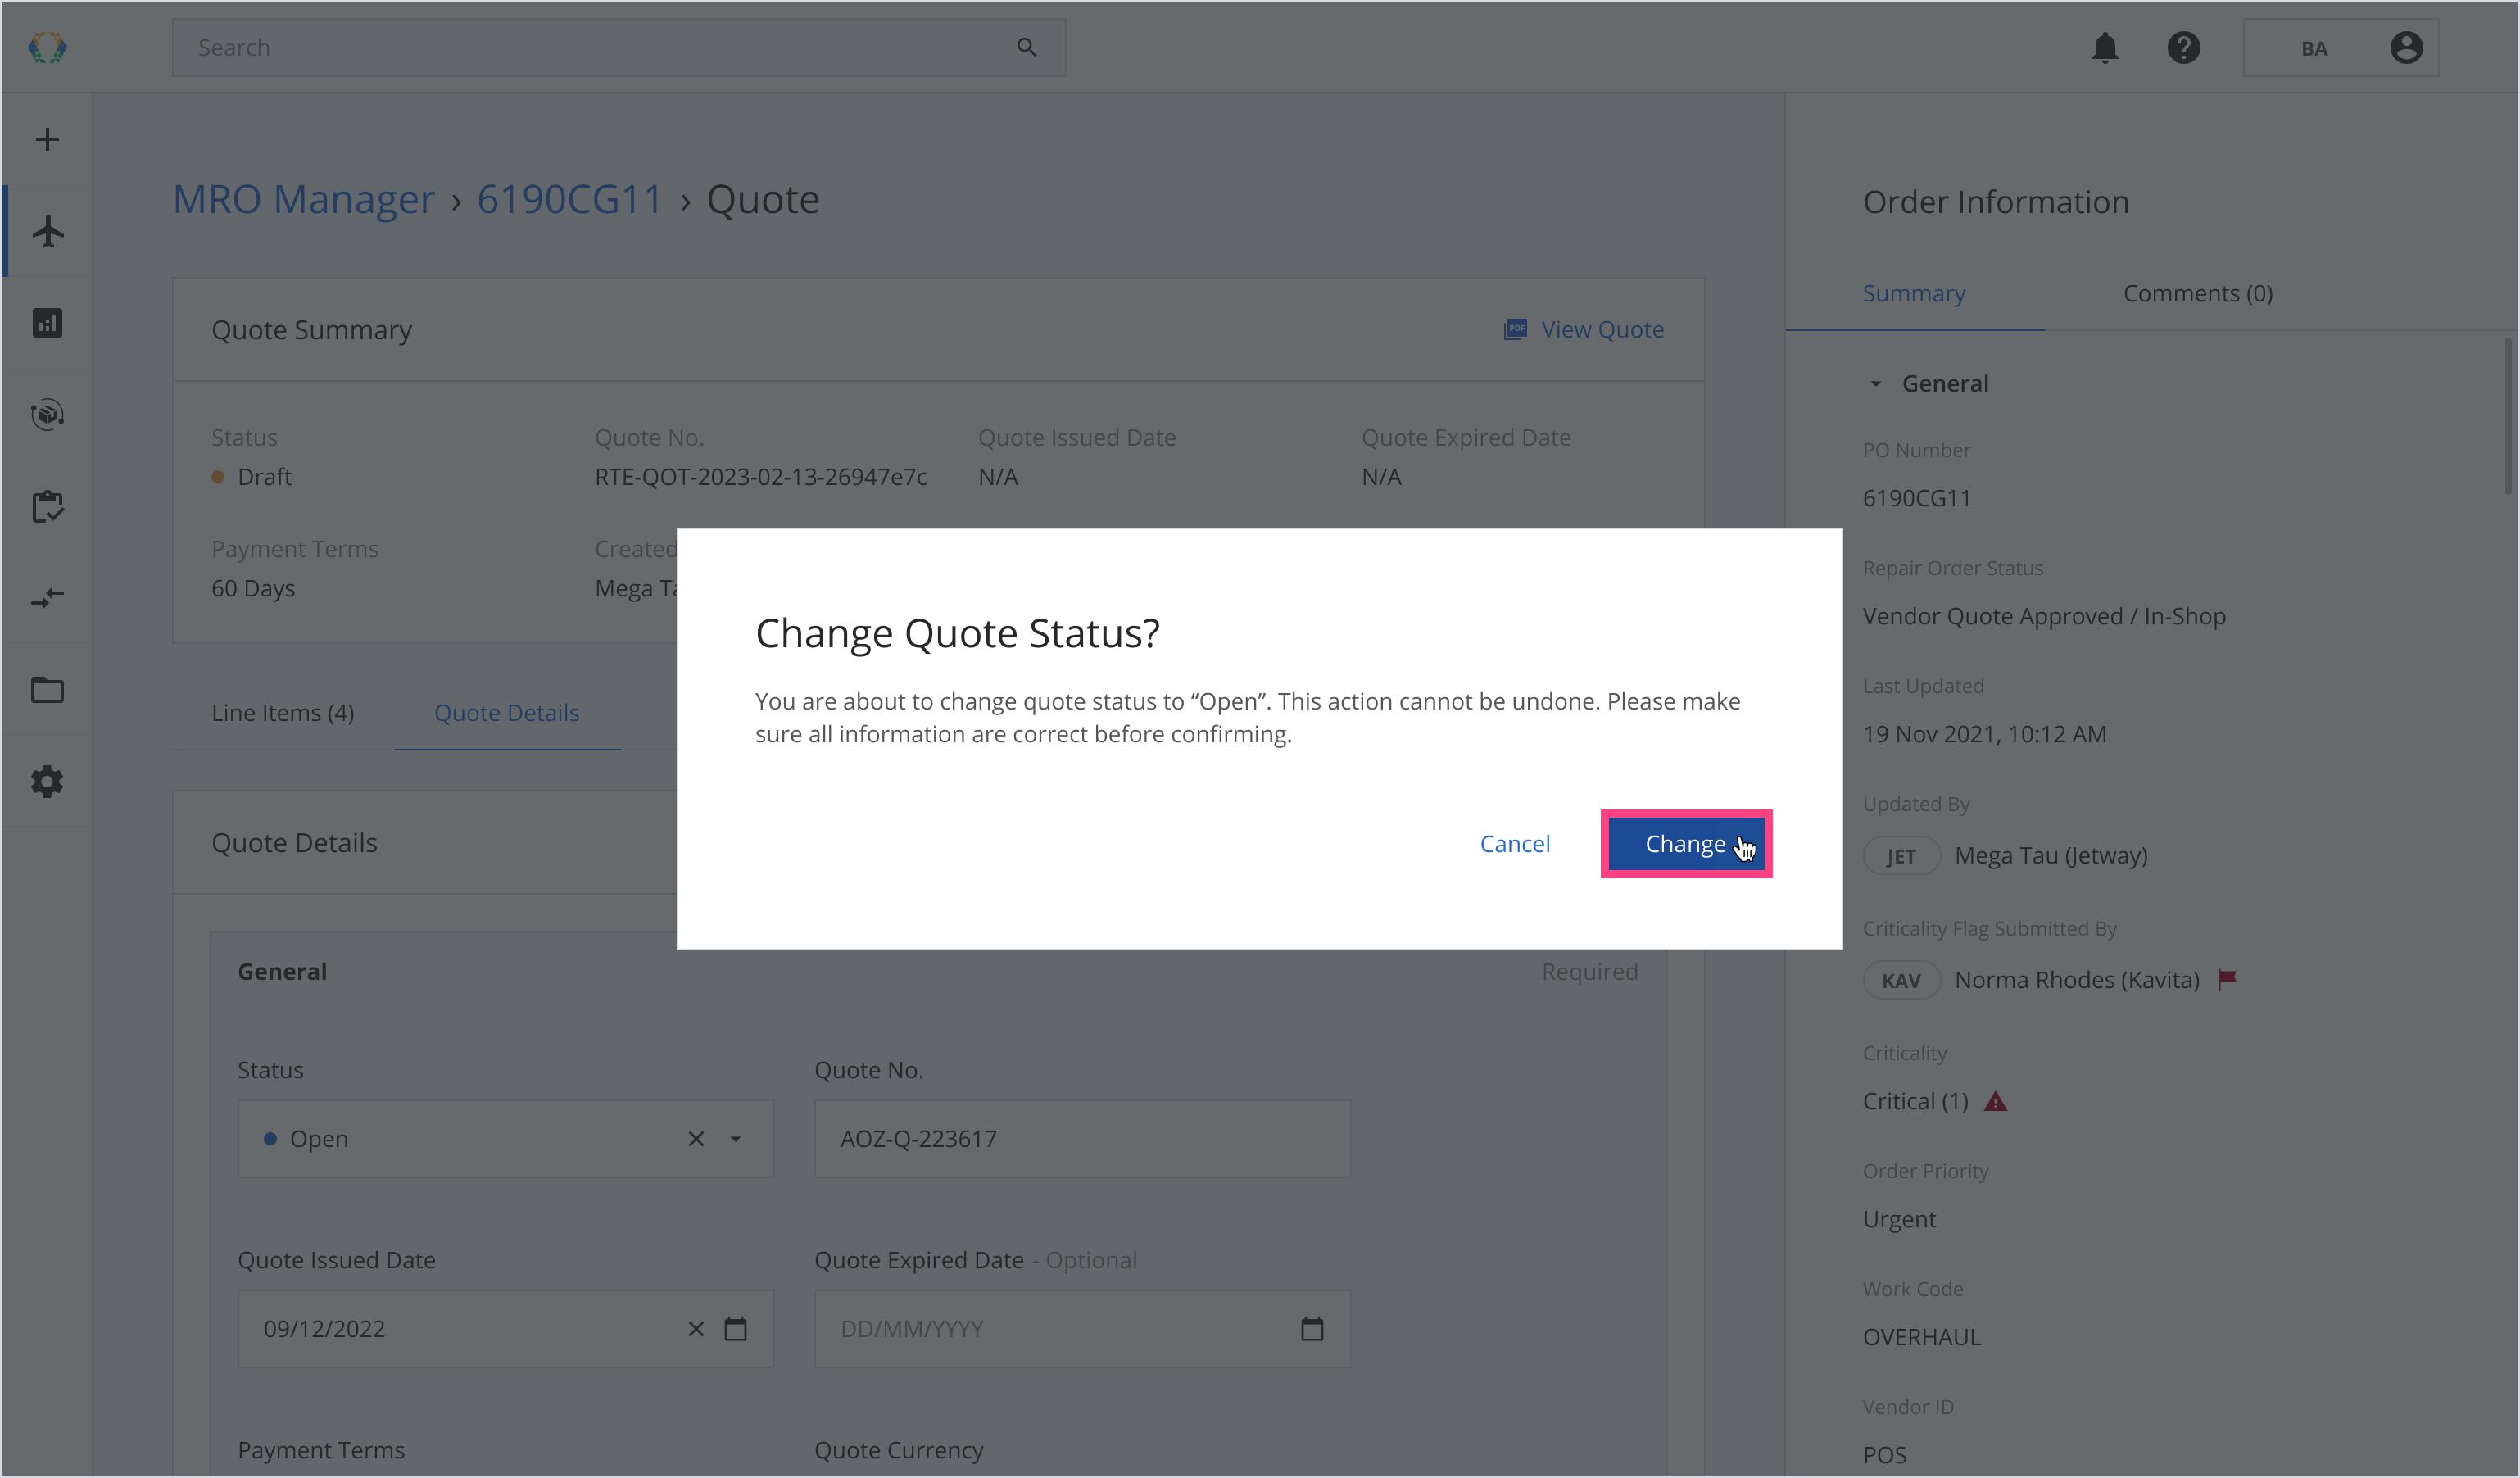
Step 3: Click on 'Status' and select 'Open'.
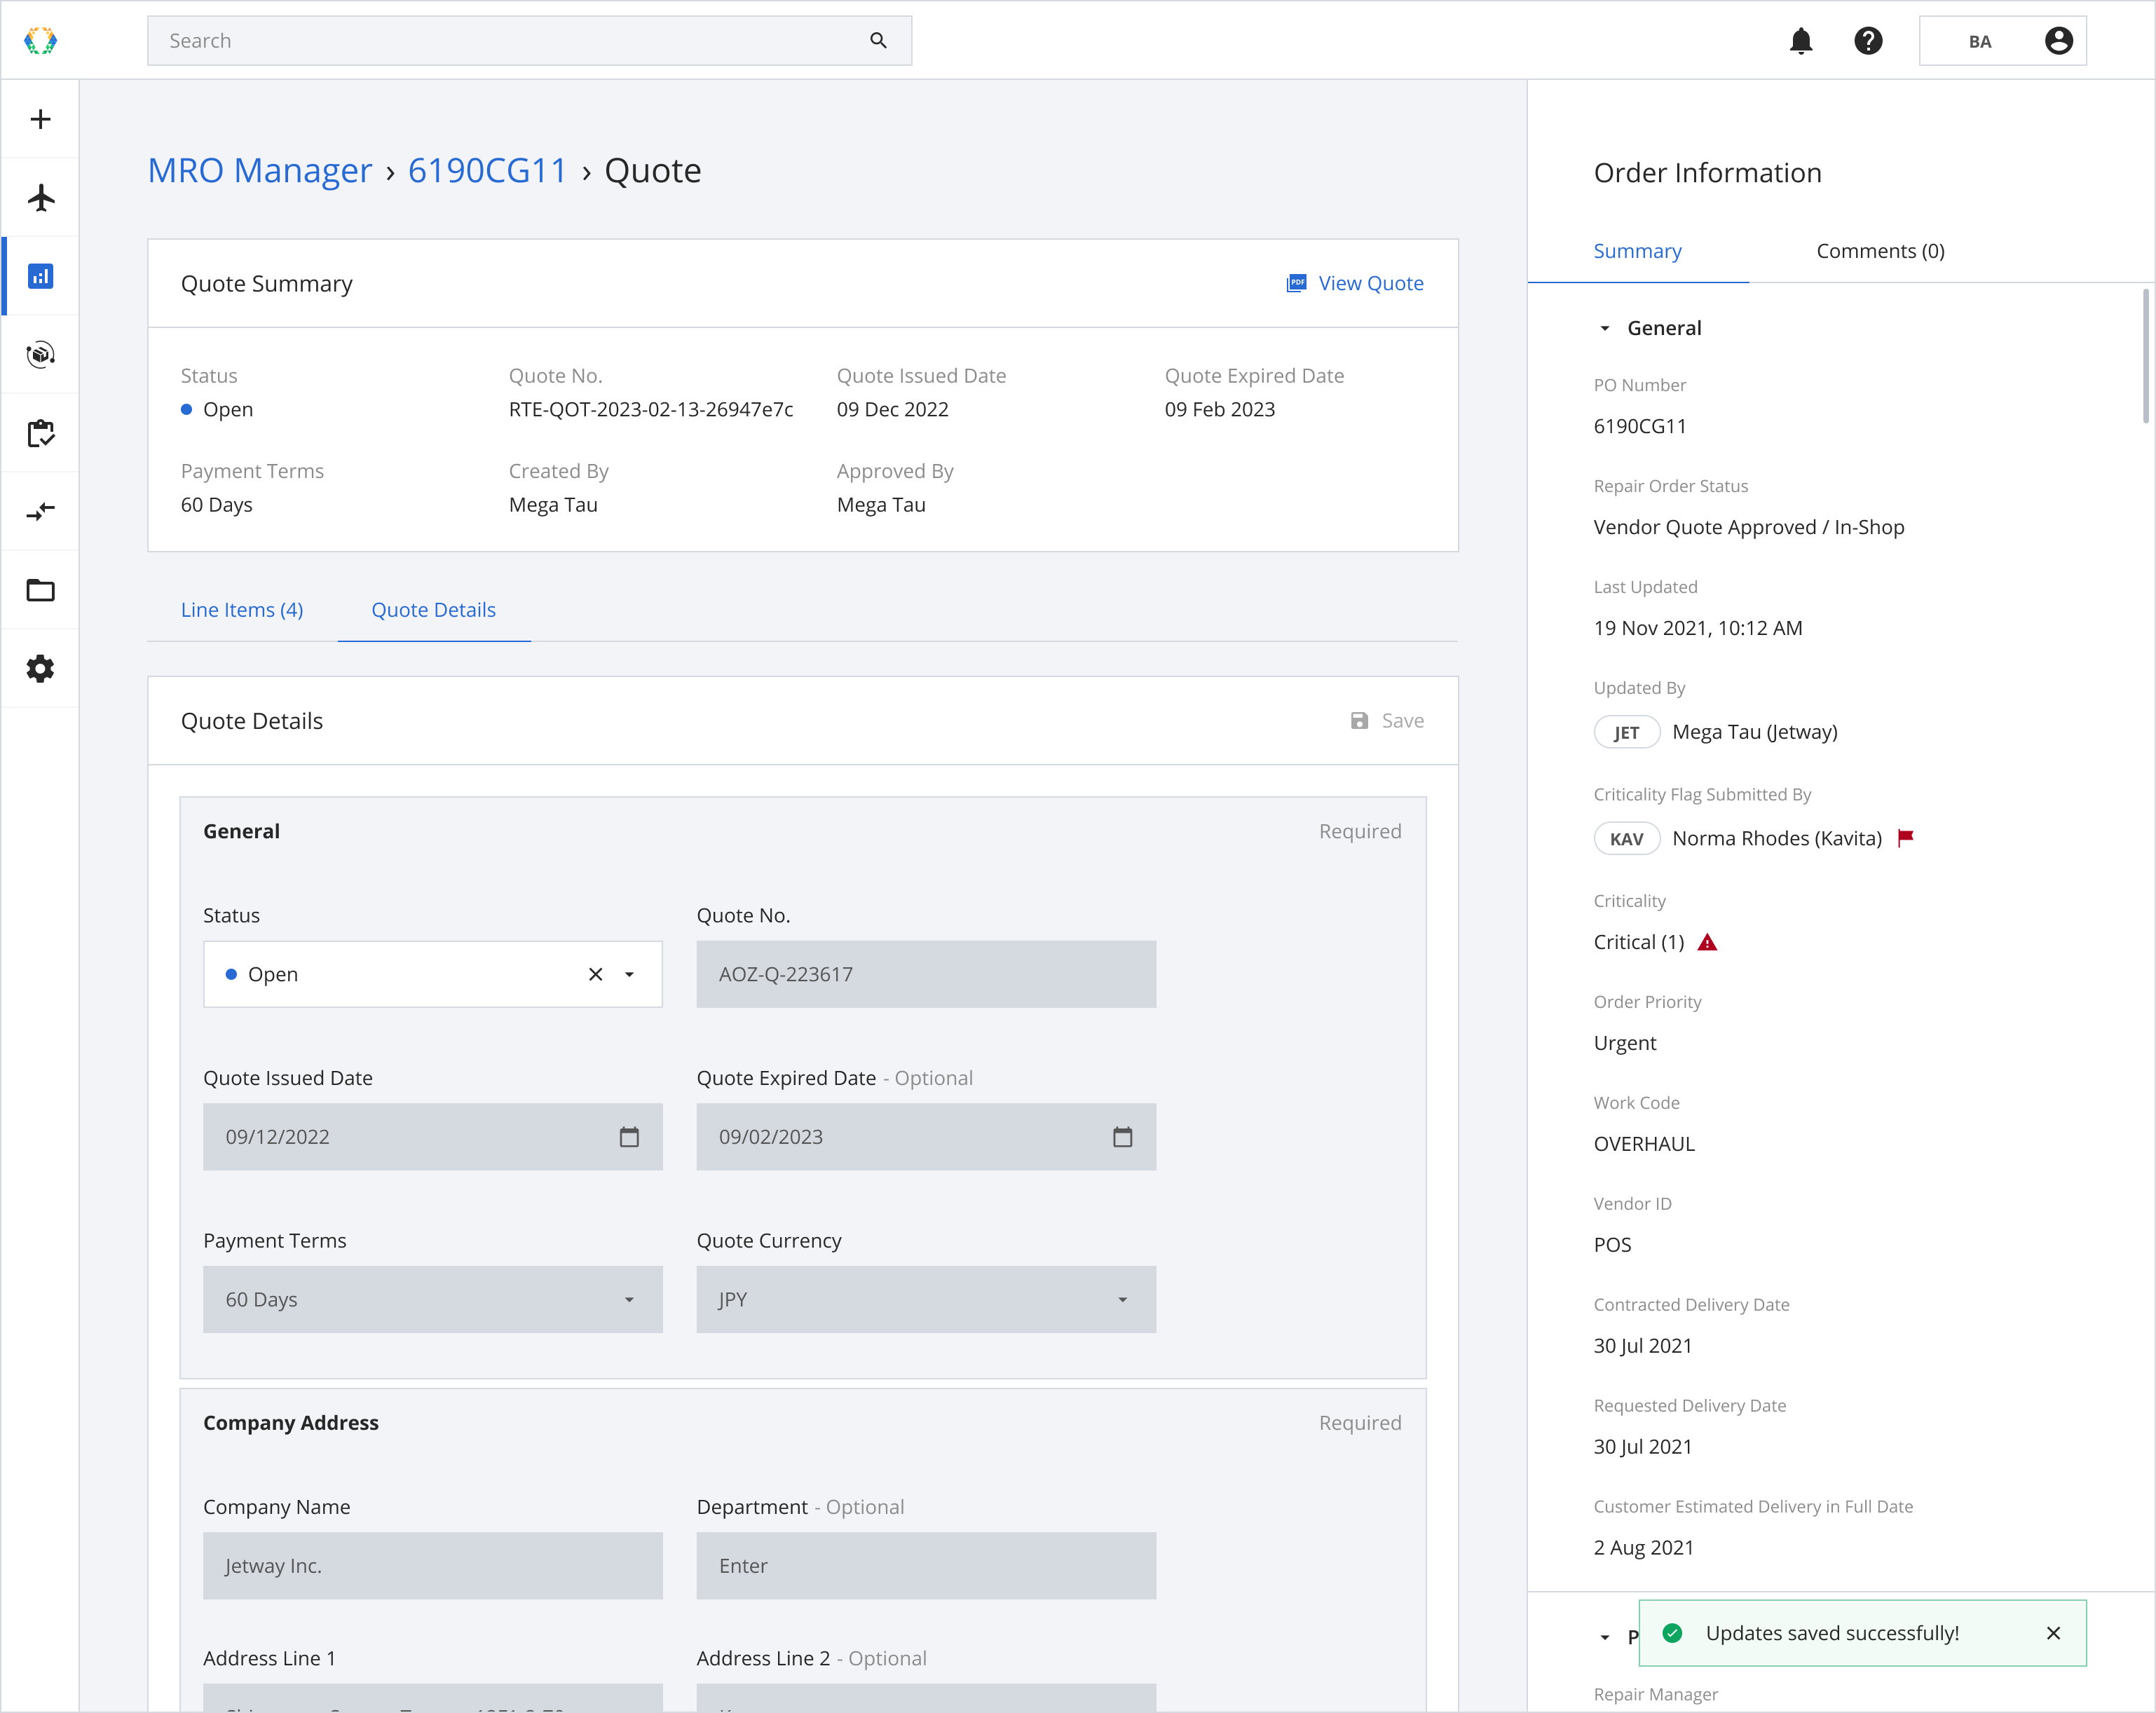
When “Open” is selected, Quote Issued Date is enabled and auto-assigned date to today
Step 4: Click 'Save'.
Step 5: A confirmation message will appear, click 'Change'.
Once Quote Status is changed to “Open”. The action cannot be undone.
Once the quote status is updated successfully, a success message will appear at the bottom of the screen.
When the Quote is “Open”, all fields are disabled. Except for the status, contact names, numbers and emails. The Quote Issued Date in Quote Summary also updated accordingly.
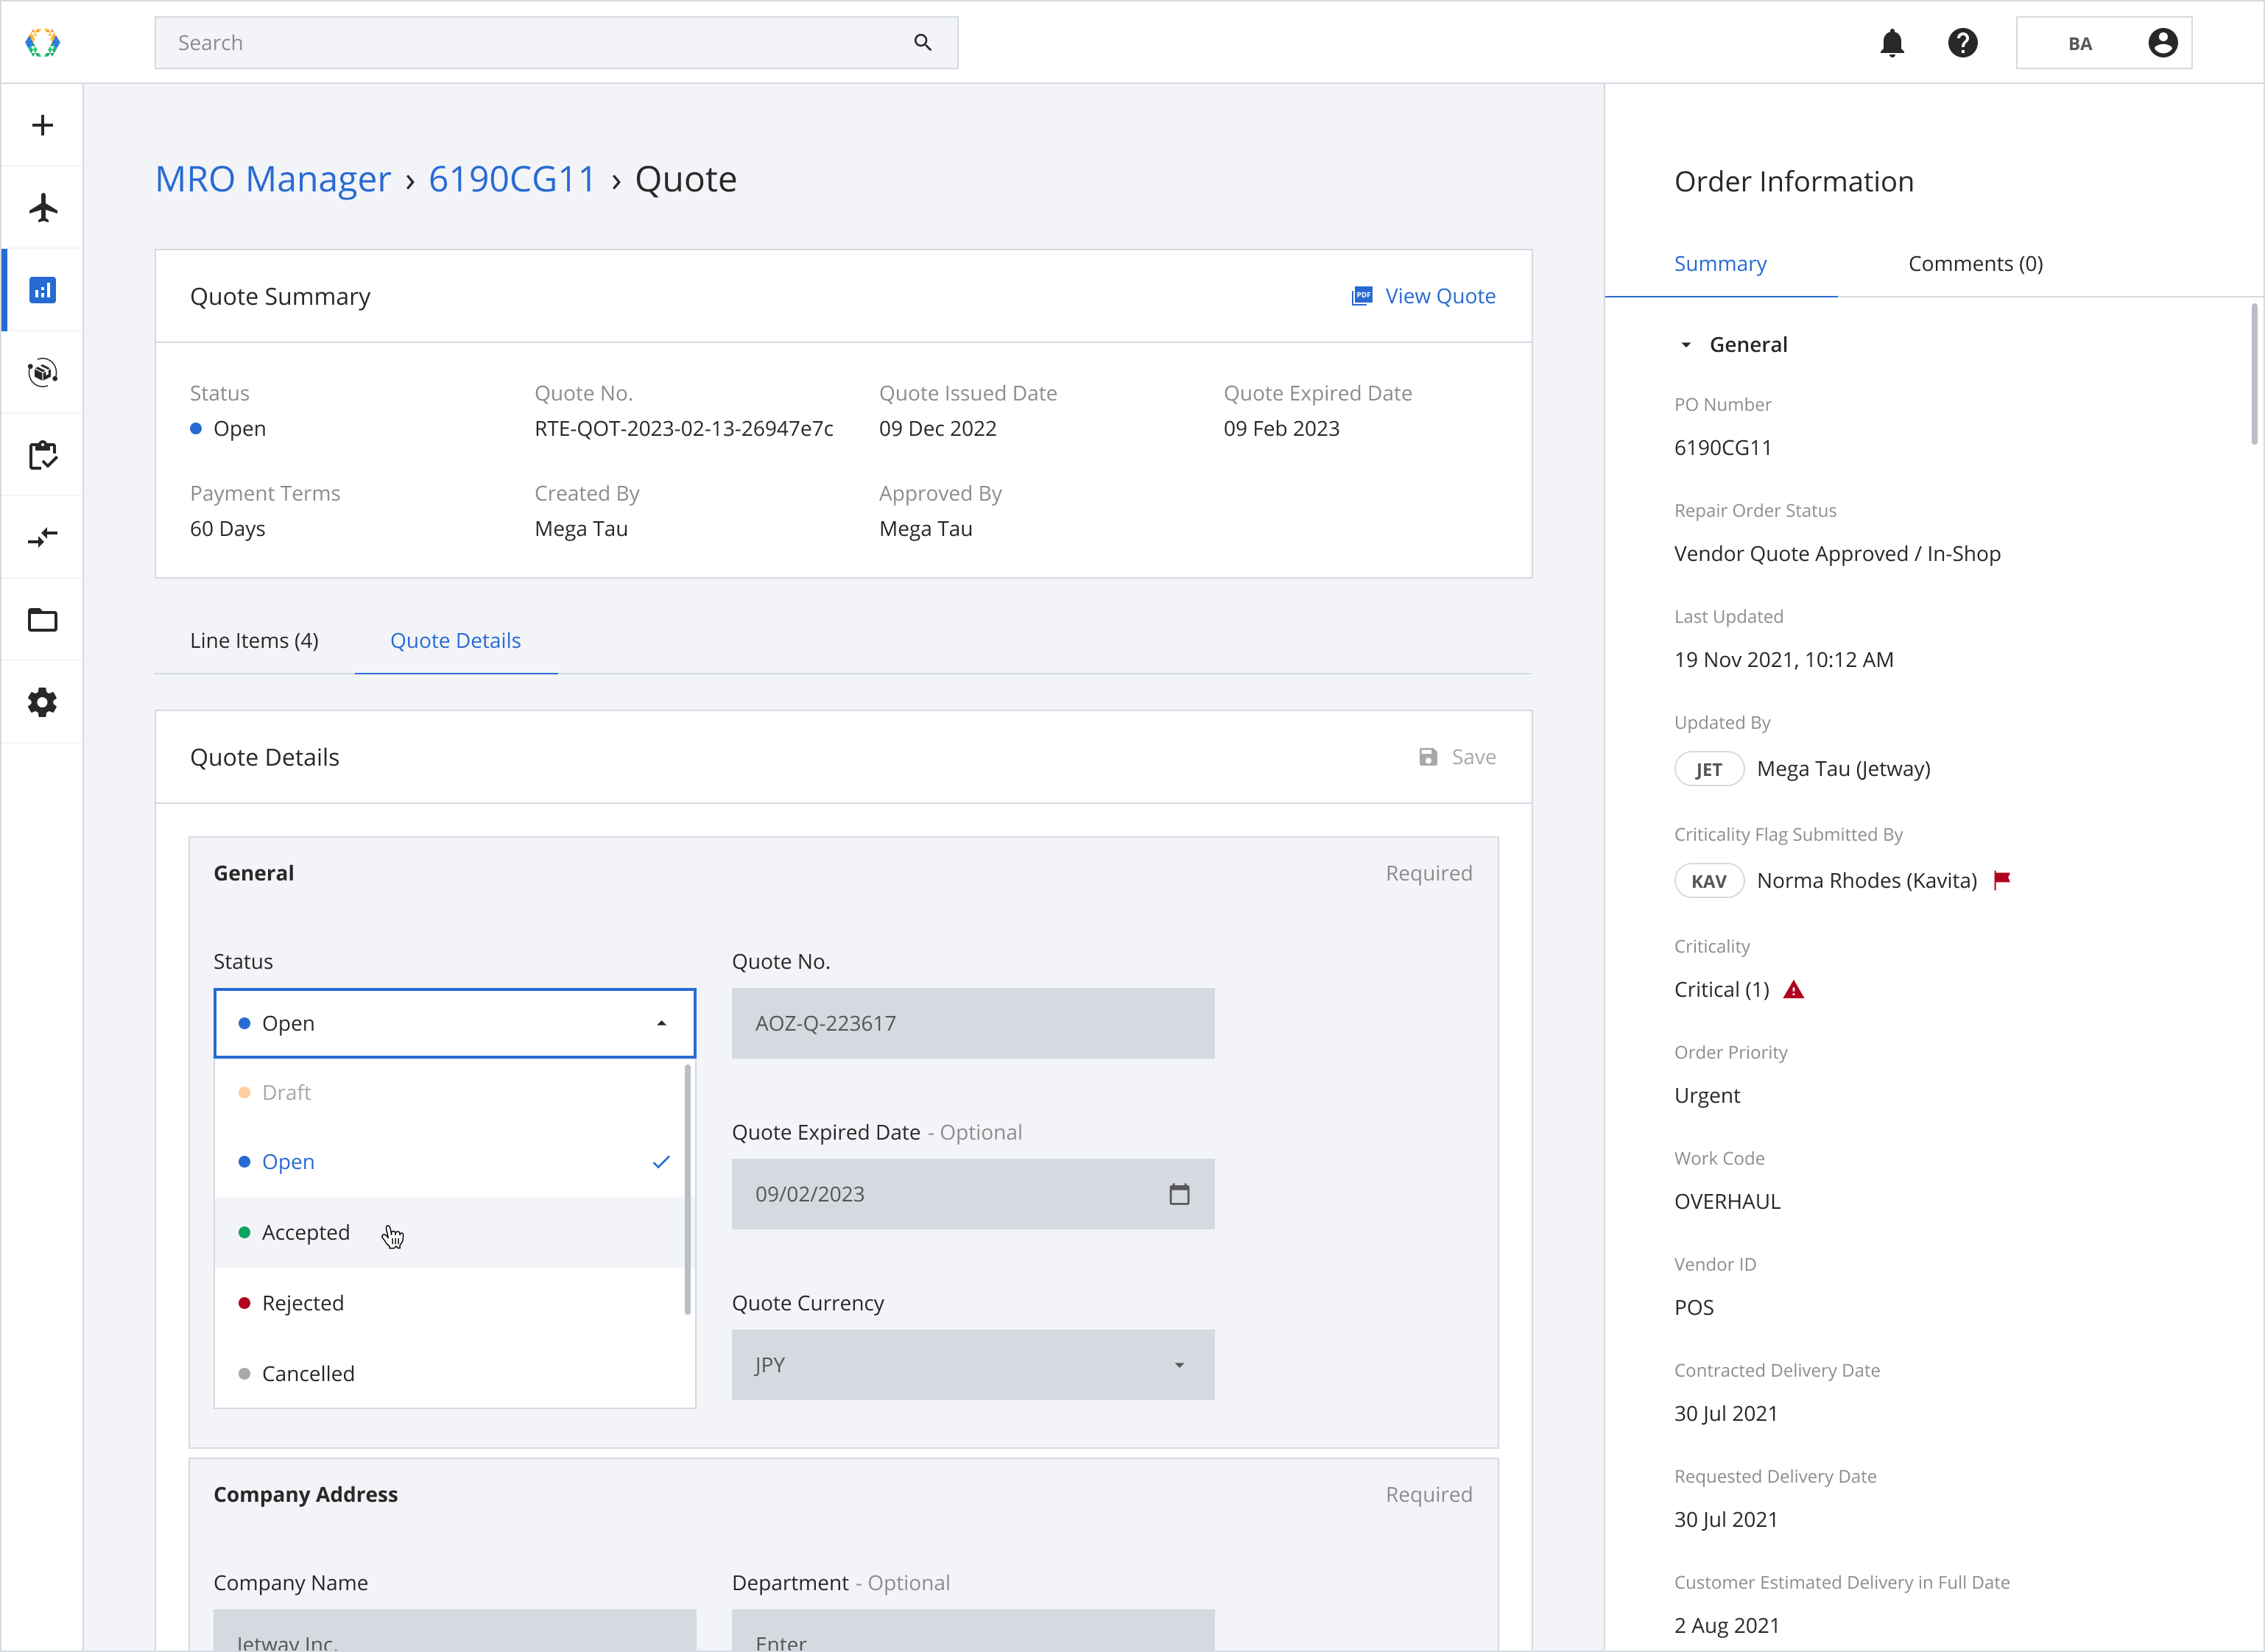
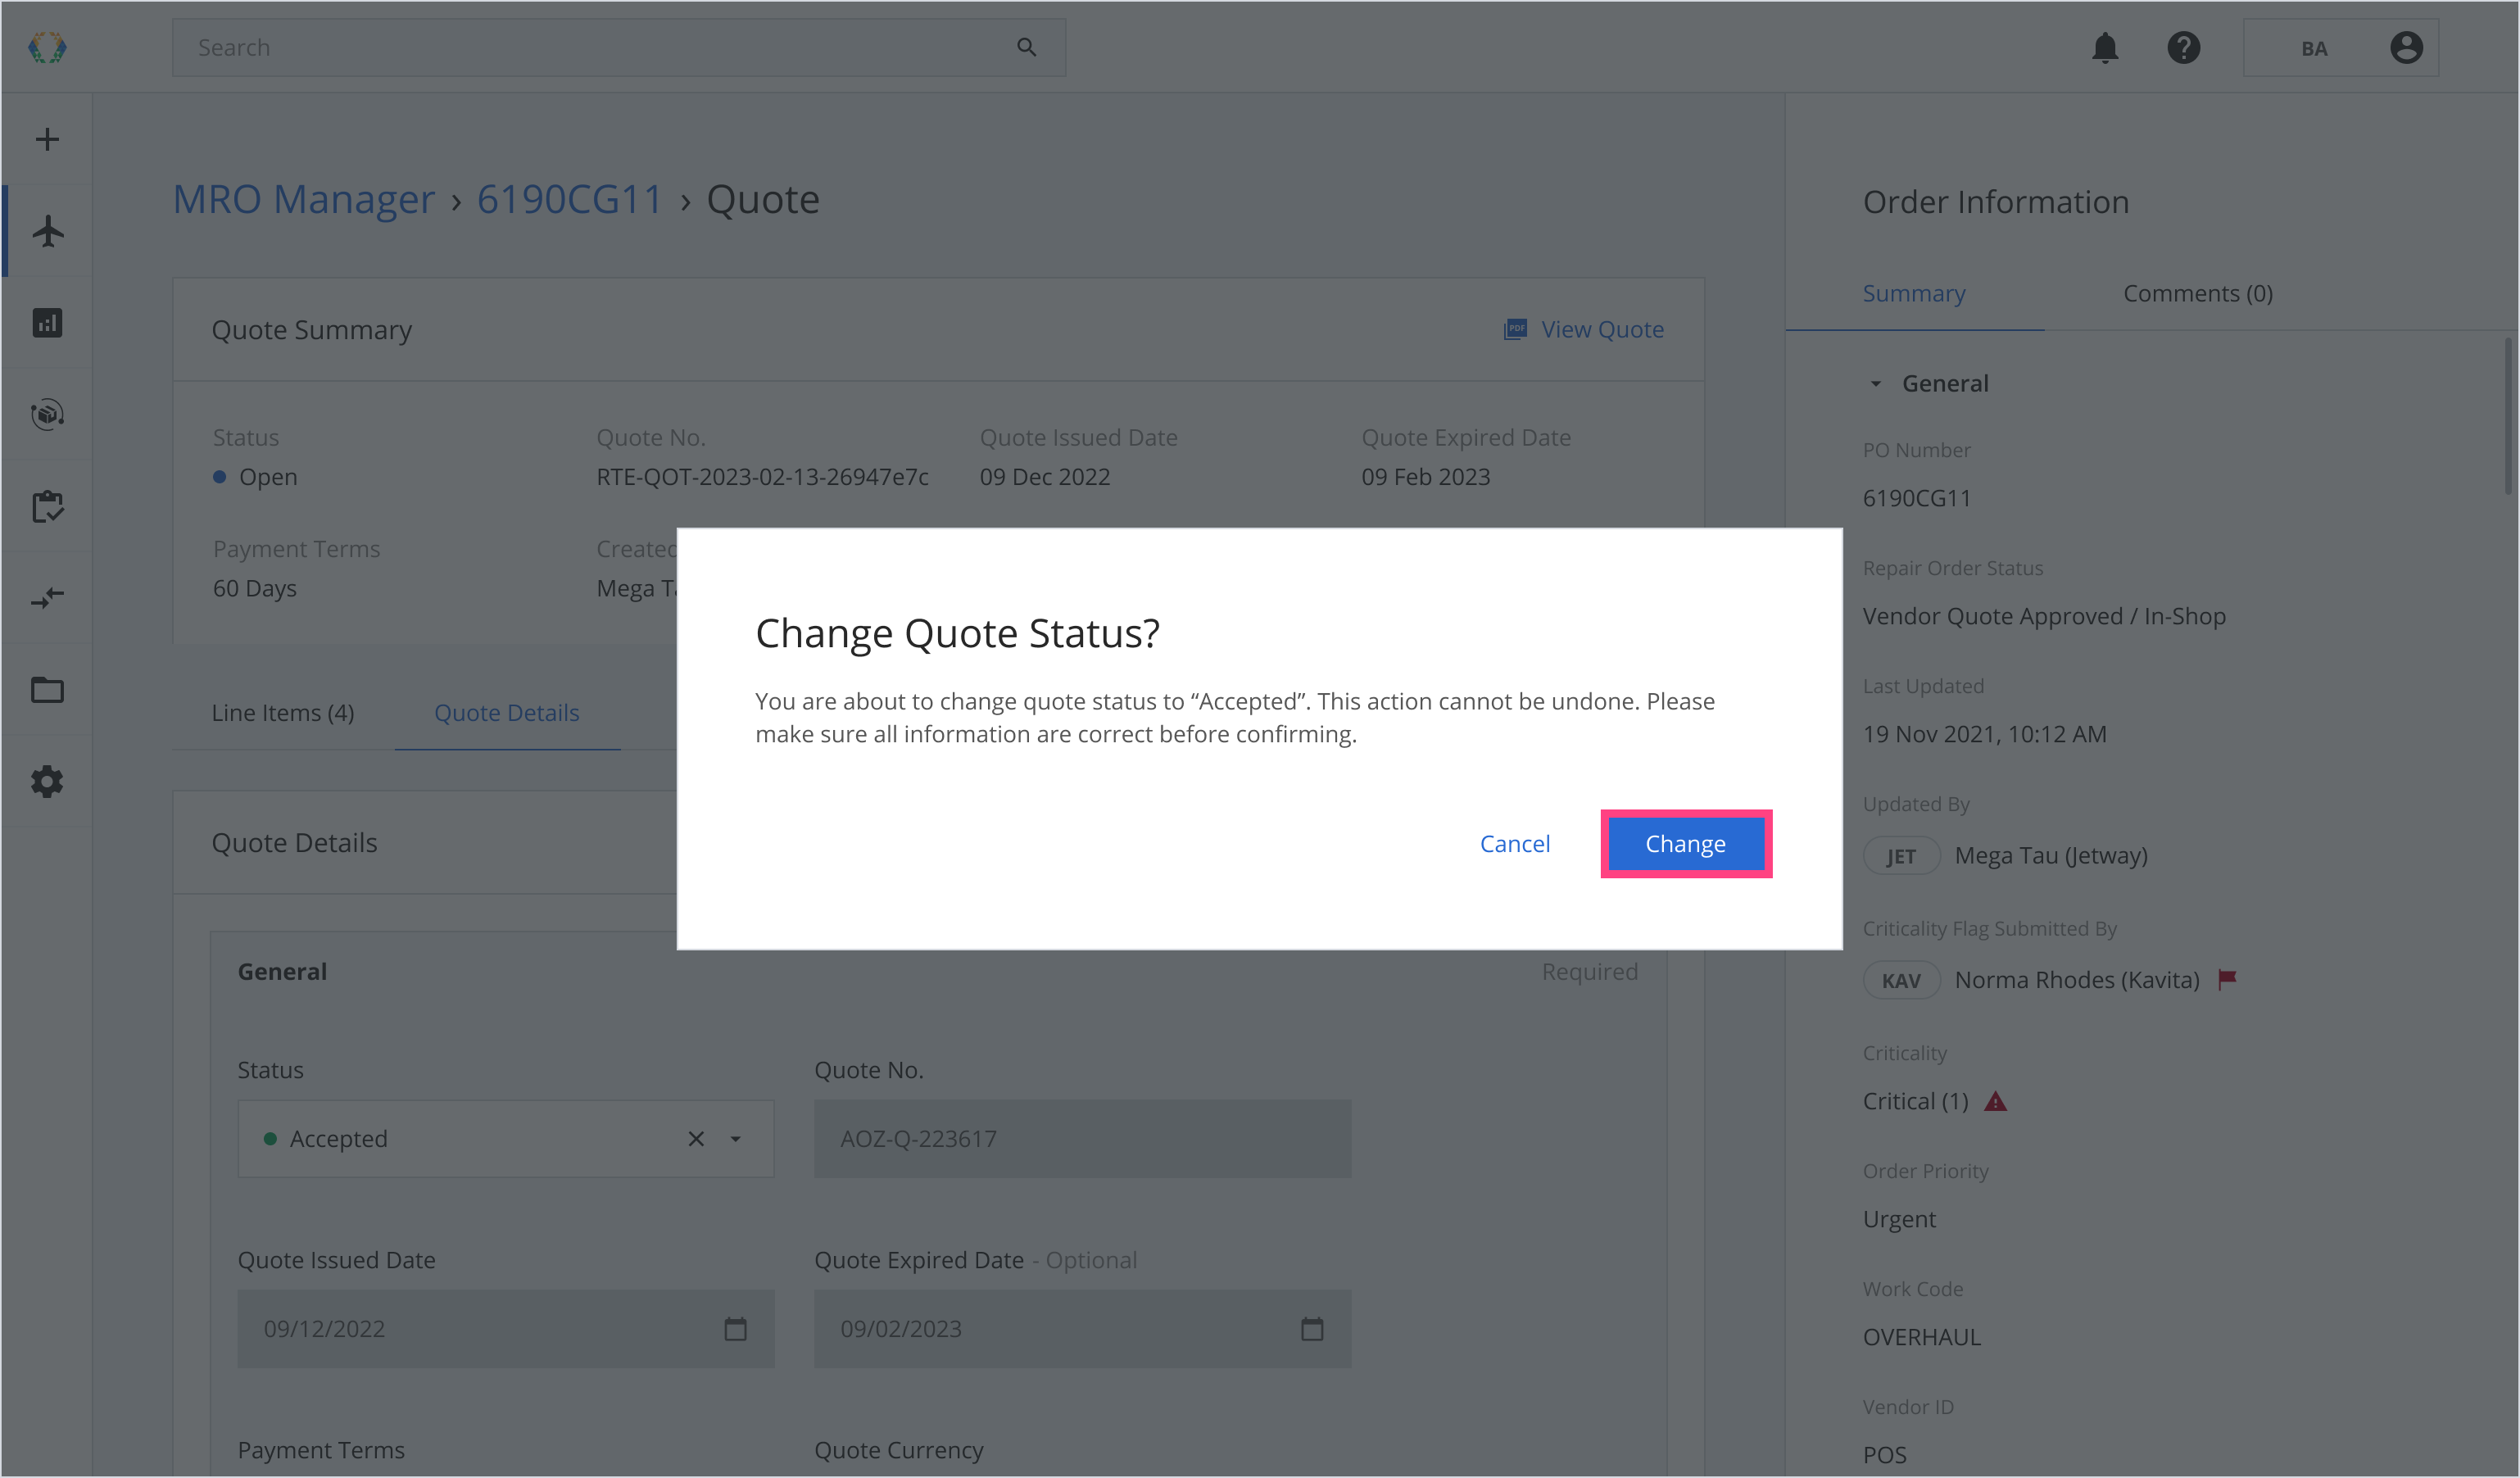
Open Quote is Accepted/Rejected/Cancelled/Expired
When the Quote Status is changed to Accepted/Rejected/Cancelled/Expired, the Billing Process will conclude, and the Quote will no longer be editable.
Step 1: Click on 'Status' to expand the dropdown list and select.
Step 2: Click 'Save'.
Step 3: A confirmation message will appear, click 'Change'.
Please make sure all information is correct before confirming. This action cannot be undone.
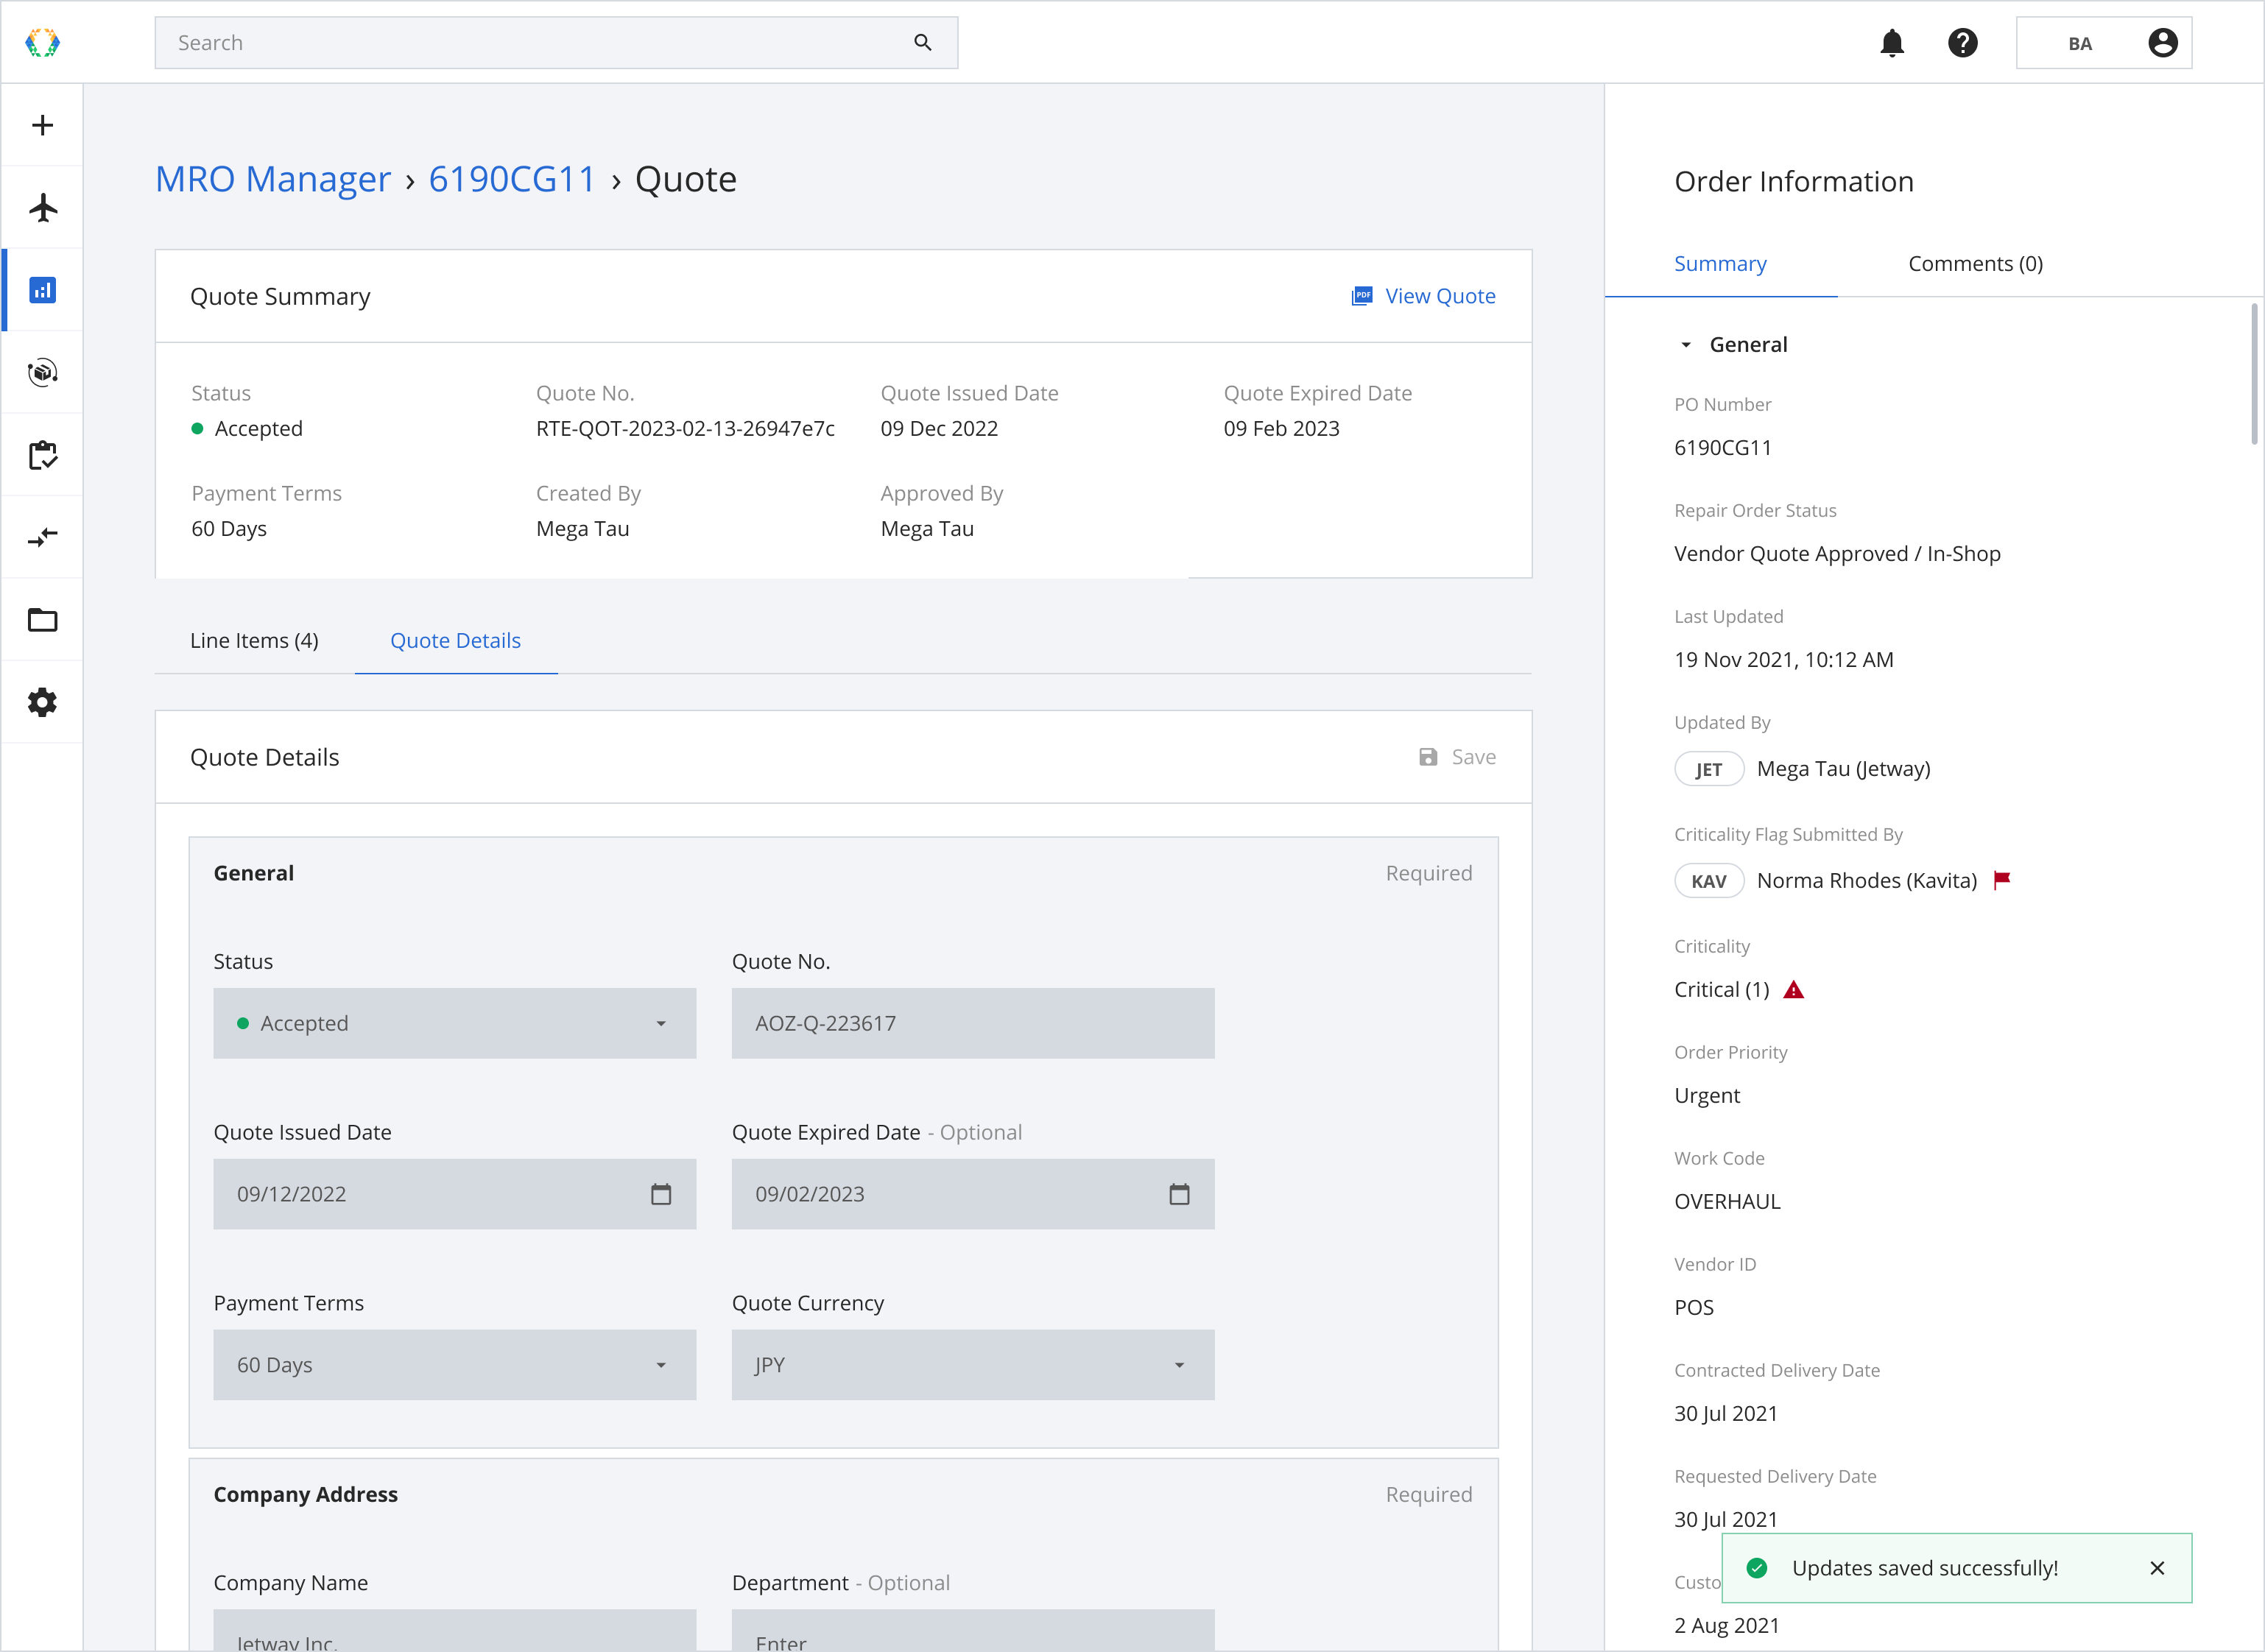
Once the quote status is updated successfully, a success message will appear at the bottom of the screen.
When the Quote is “Accepted/Rejected/Cancelled/Expired”, all fields are disabled. The user cannot change to other statuses.
Removing Quotes
There are three different operations for you to remove your quote-related items.
- Removing Quote Items (Line Items)
- Removing Tax
- Deleting Quote
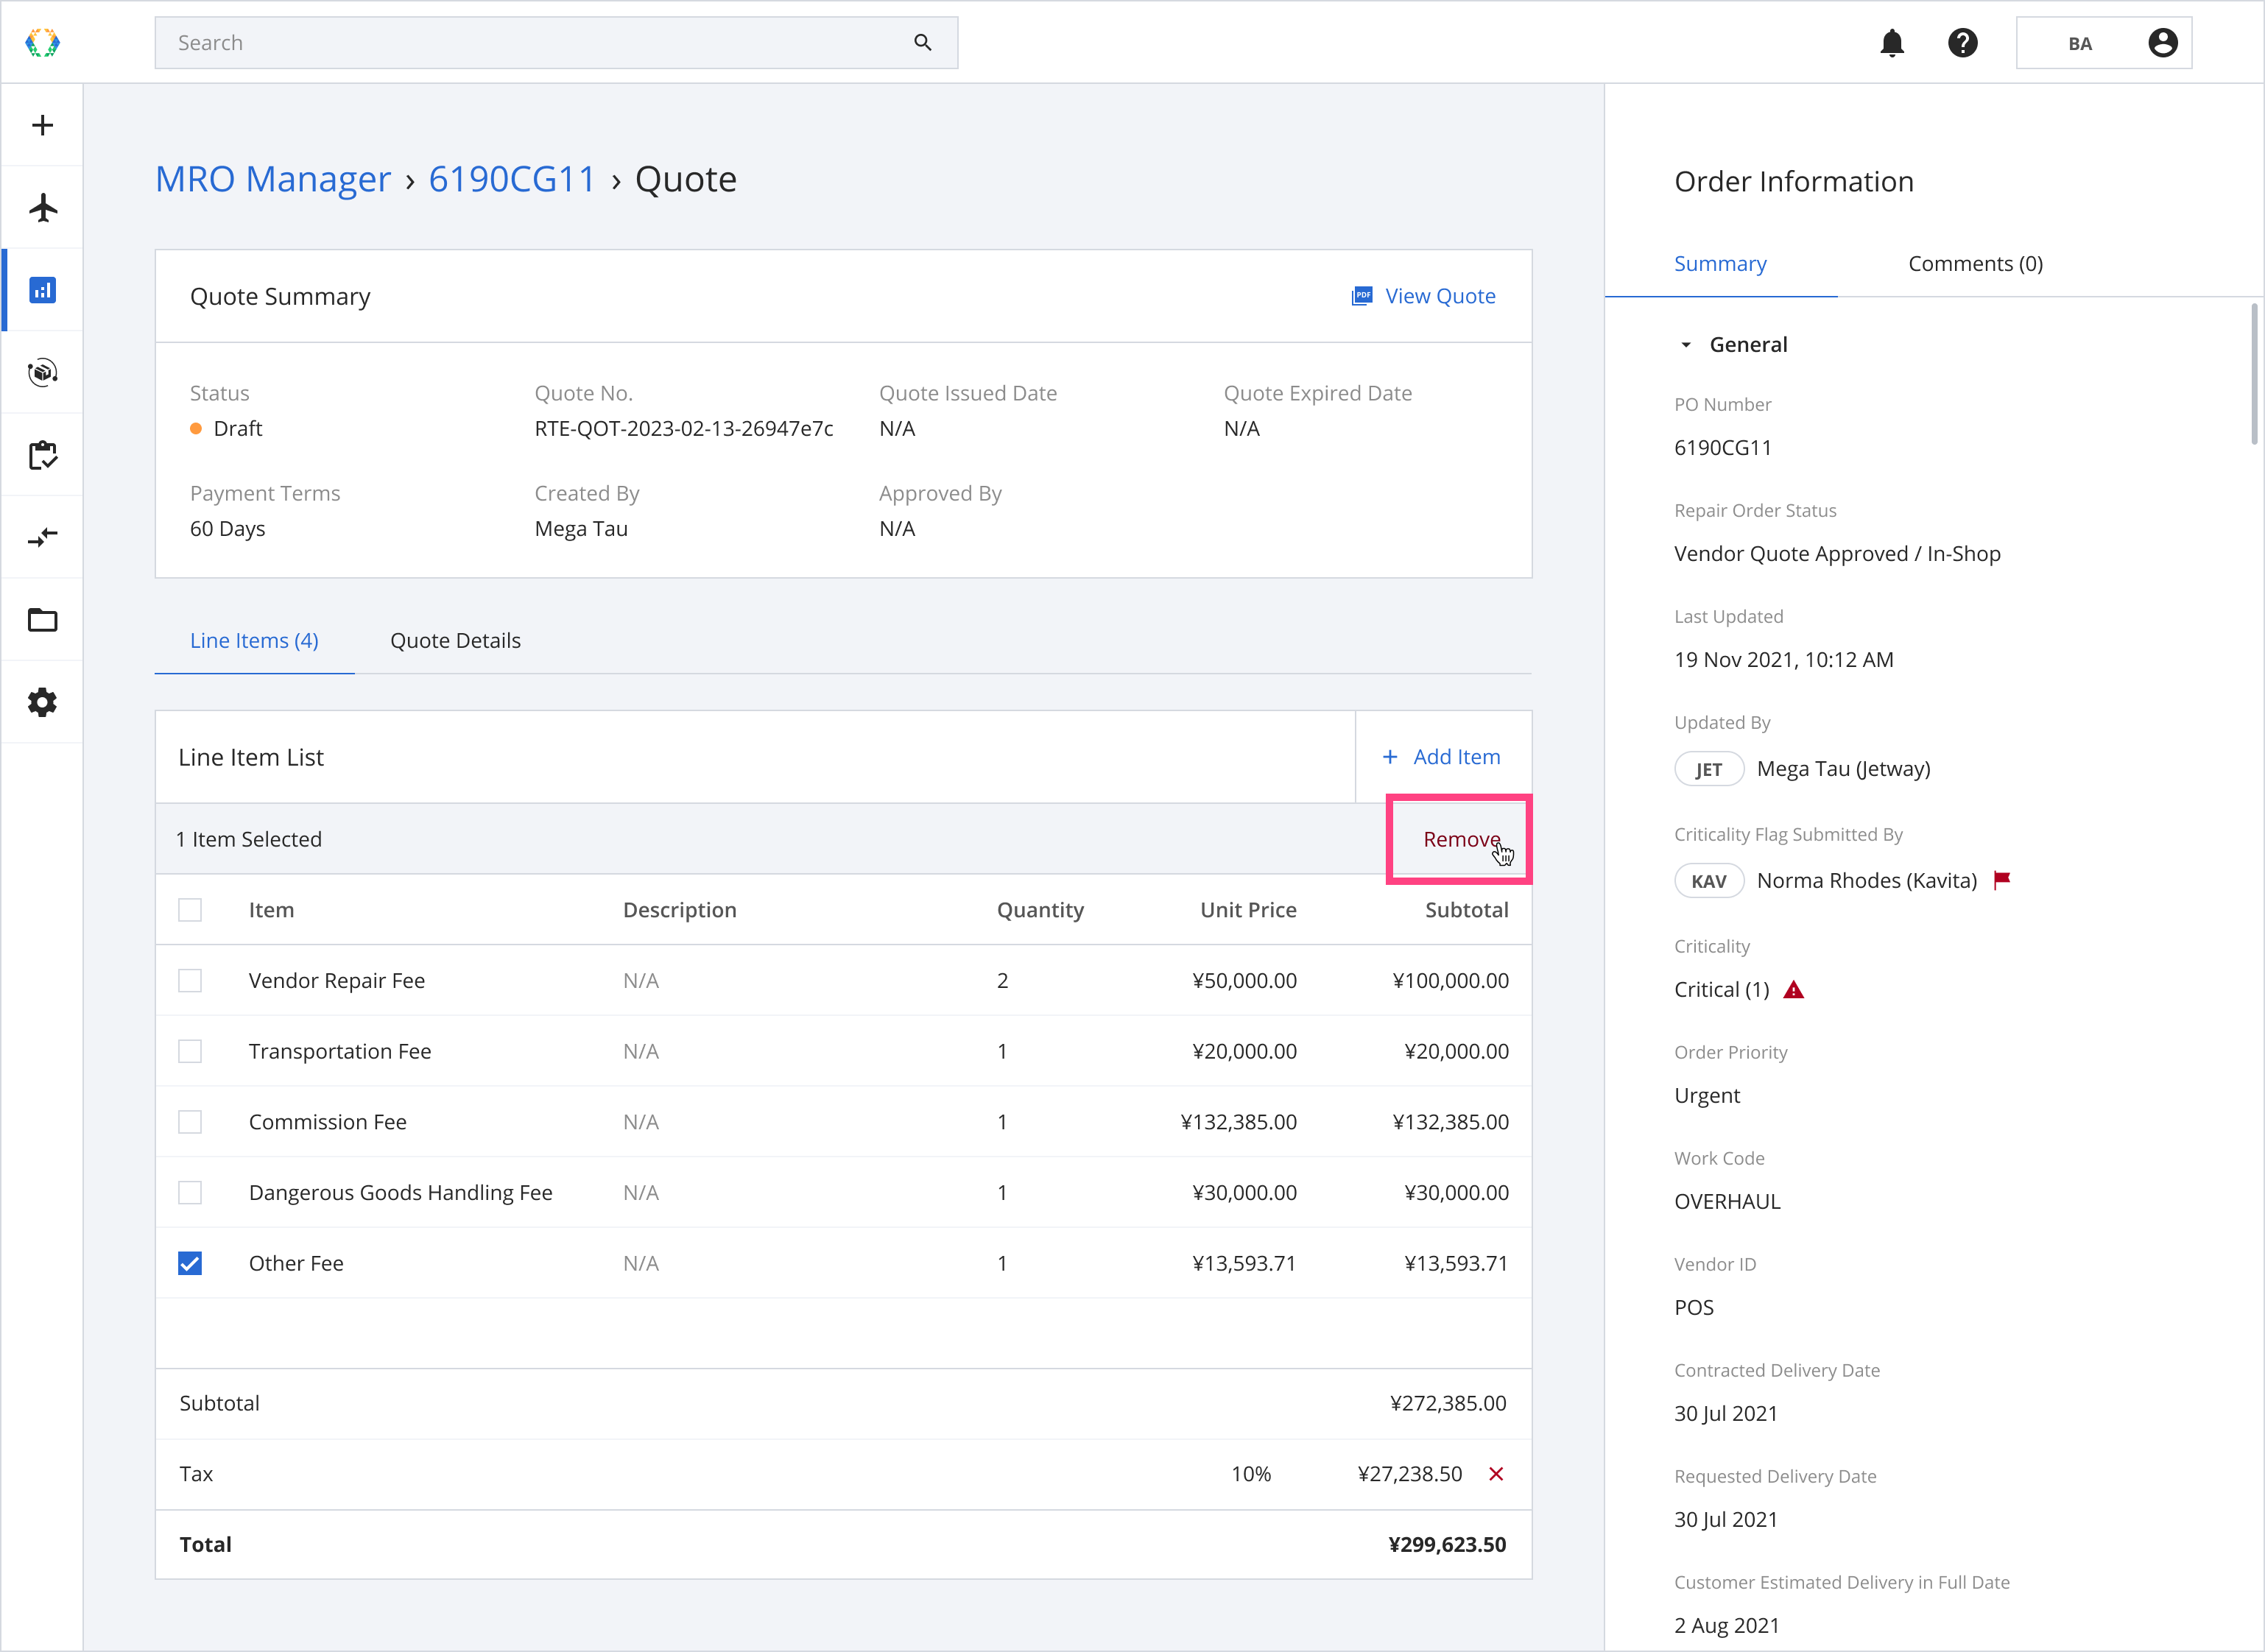
Removing Quote Items (Line Items)
Step 1: From the Line Item List, select the line item you want to remove.
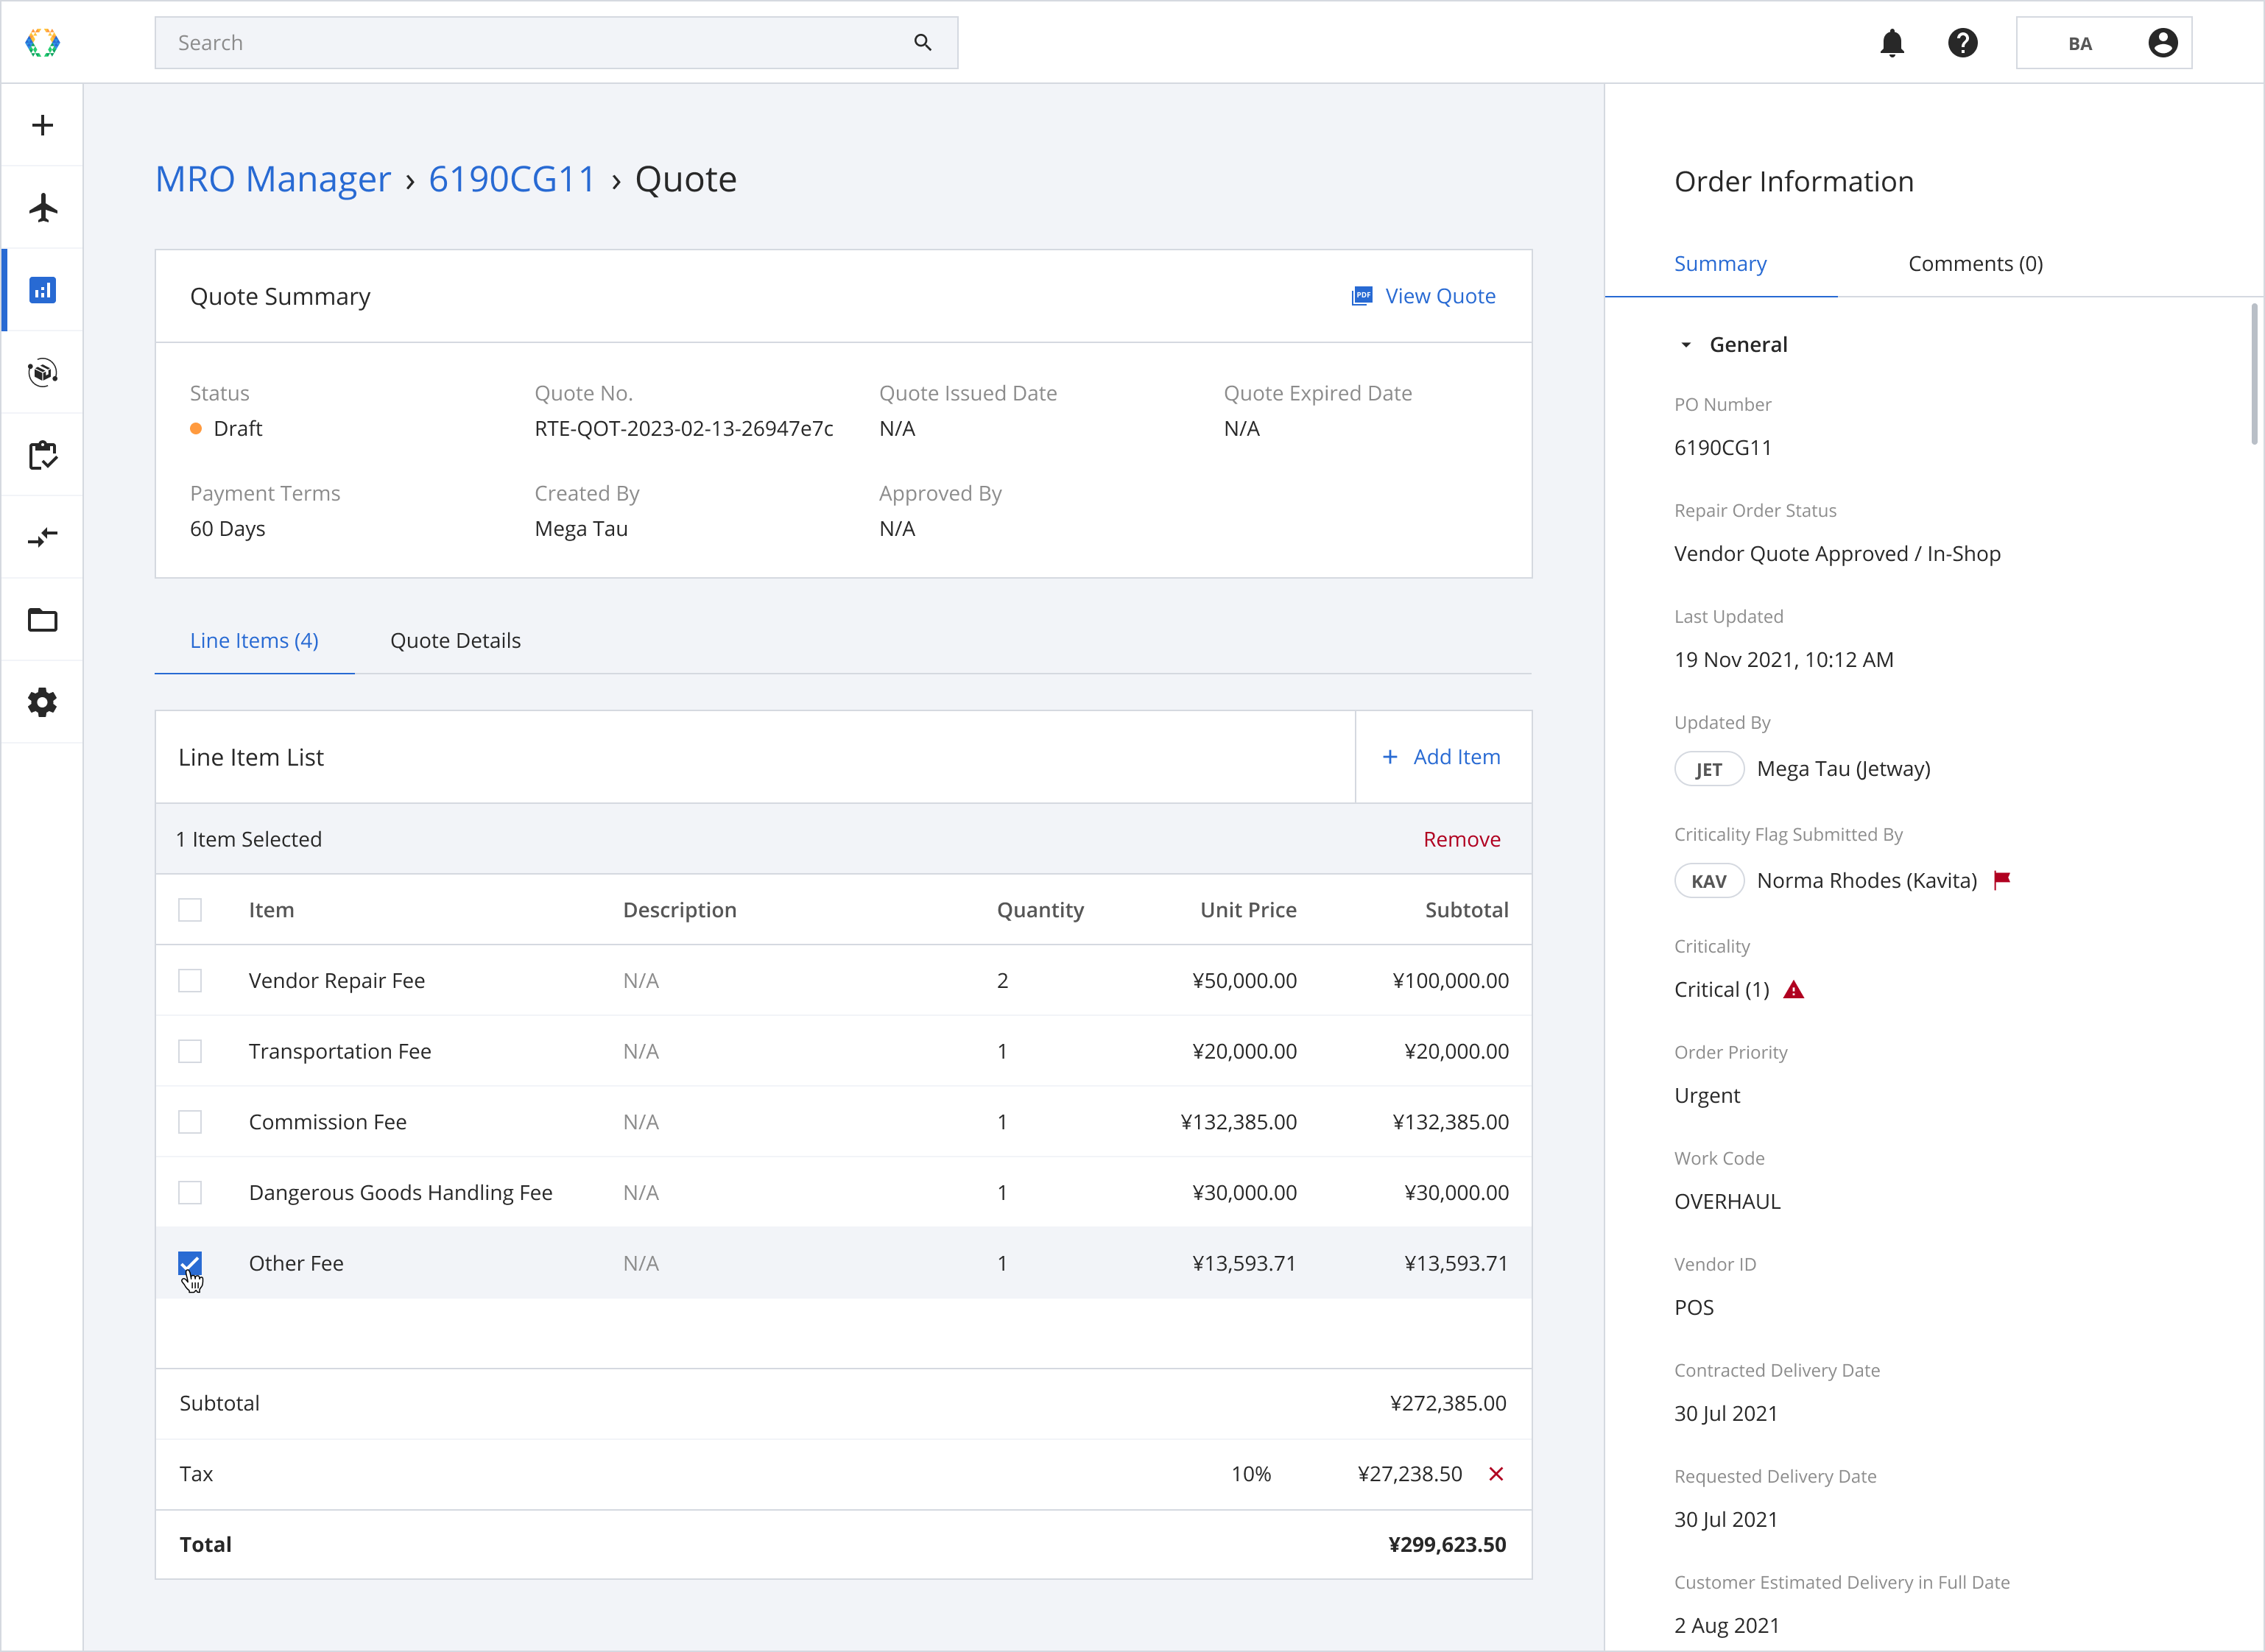
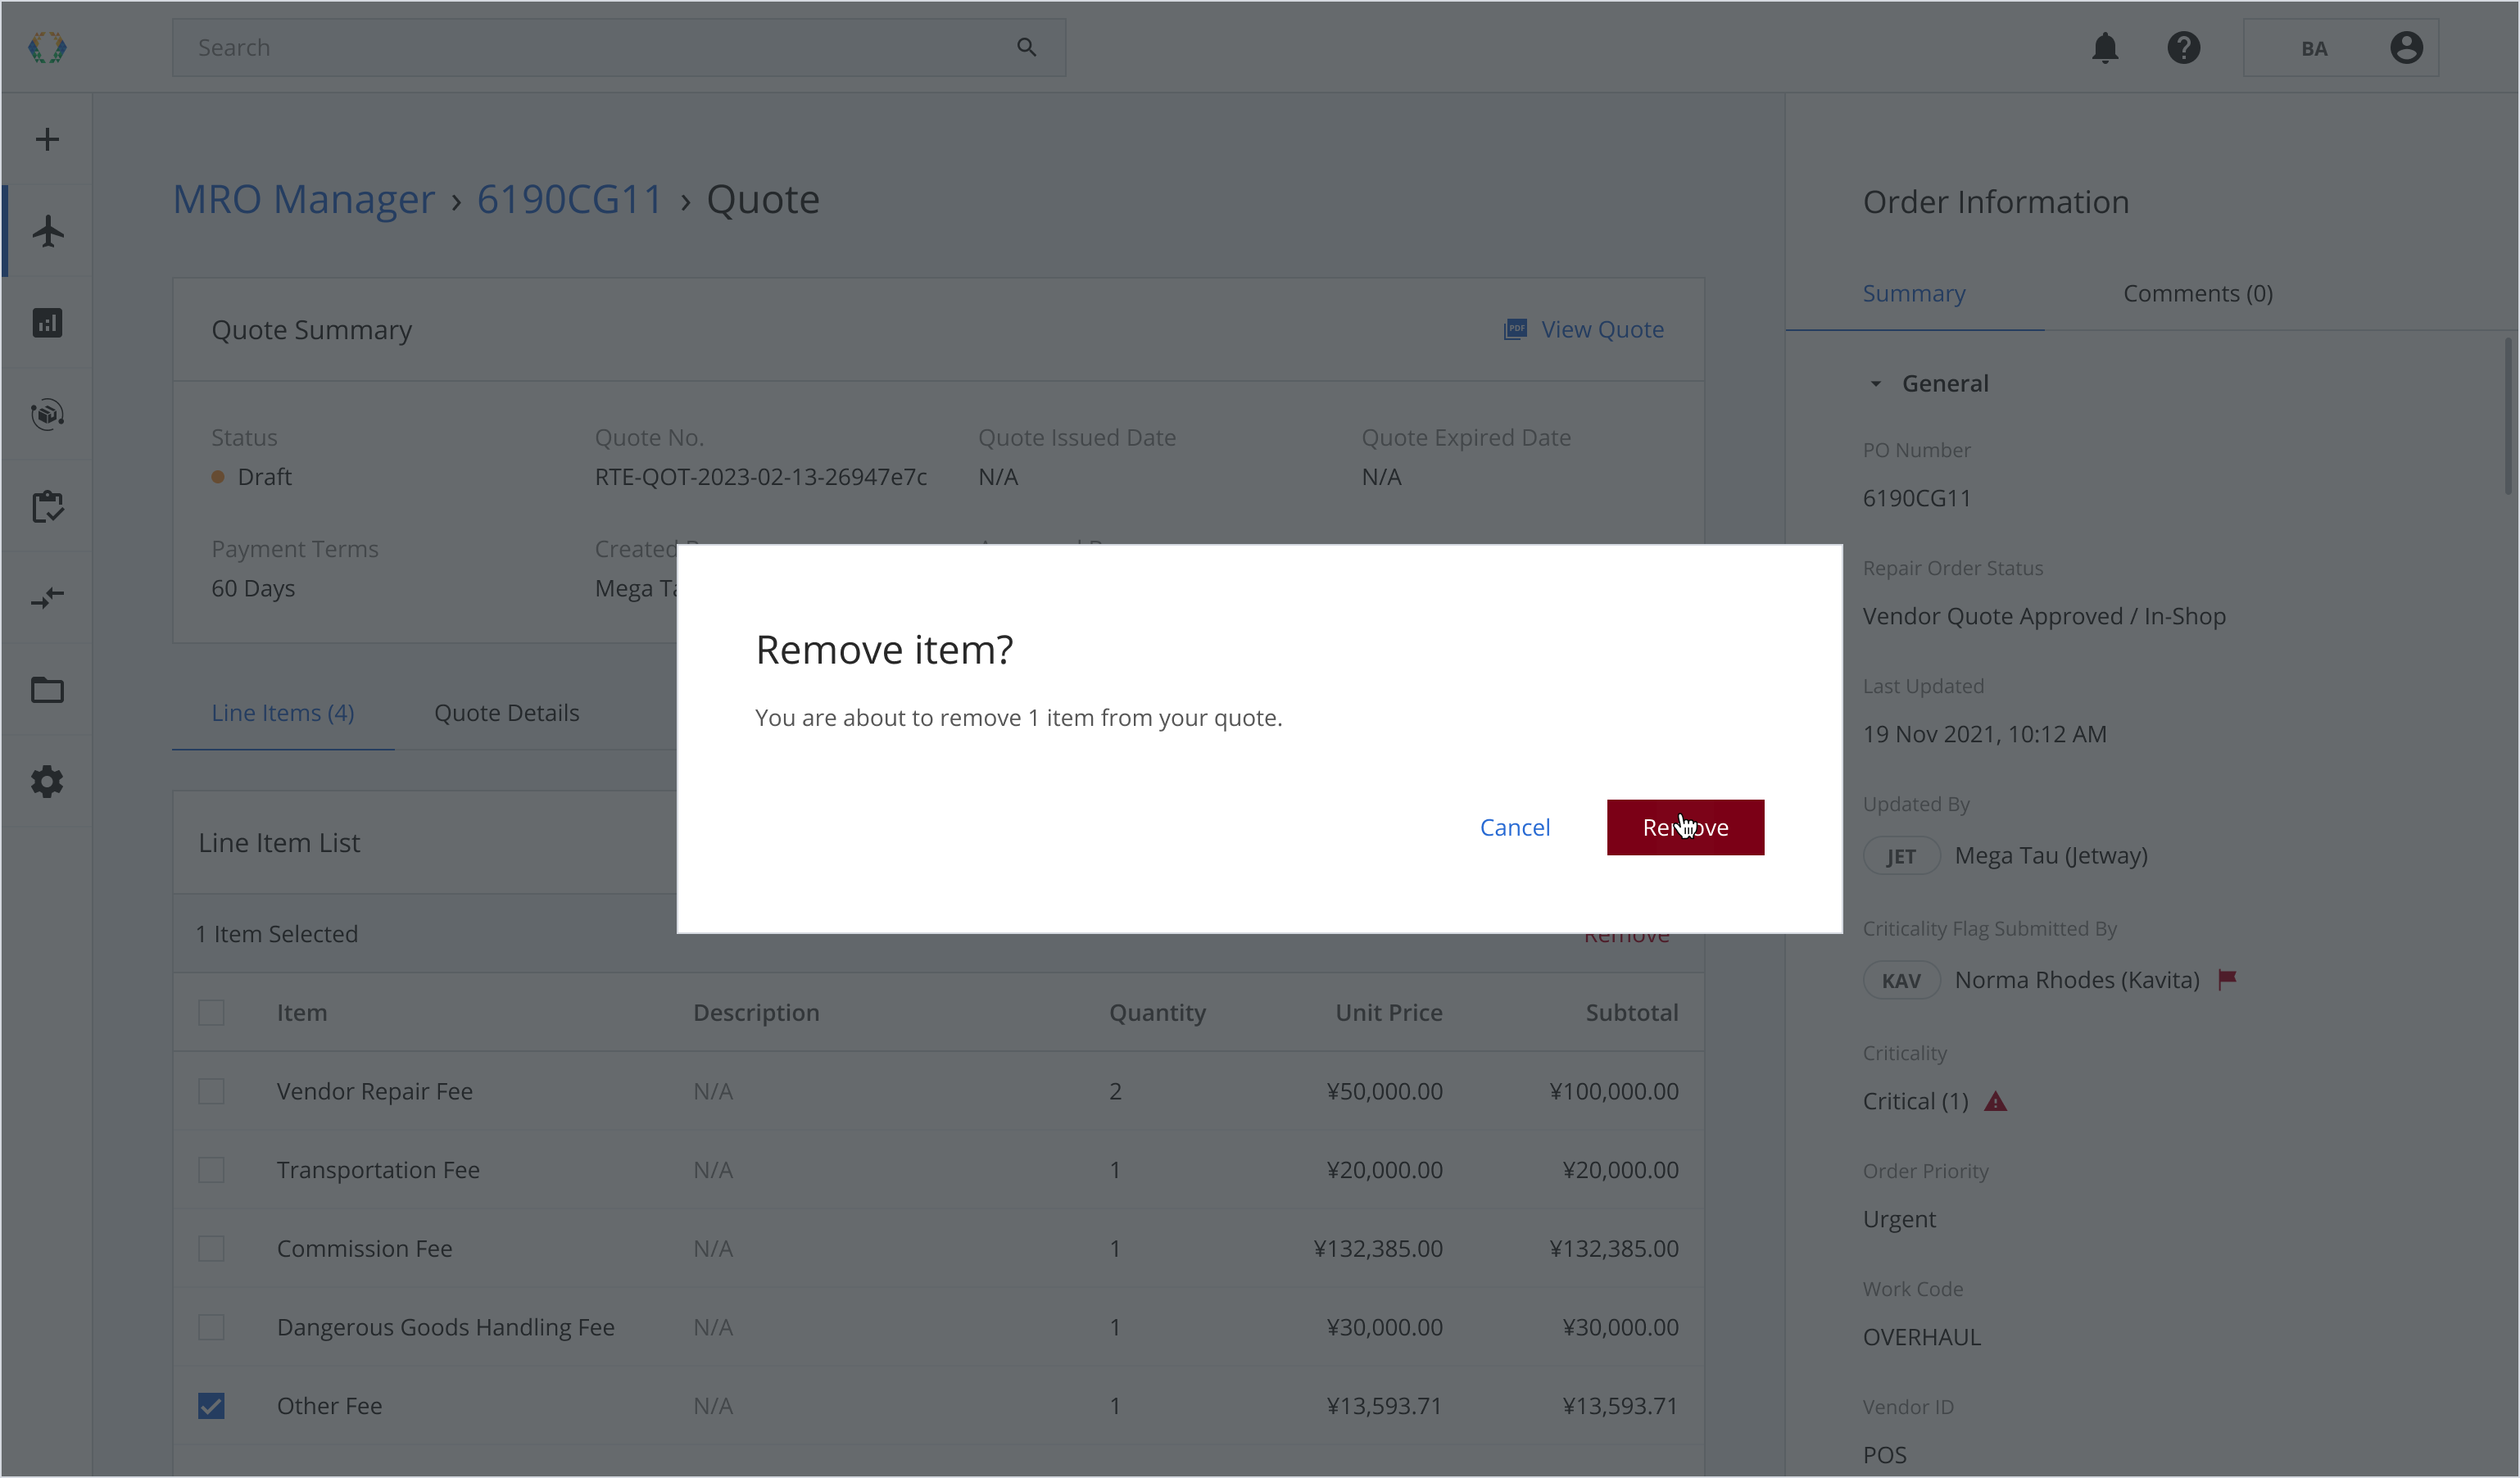
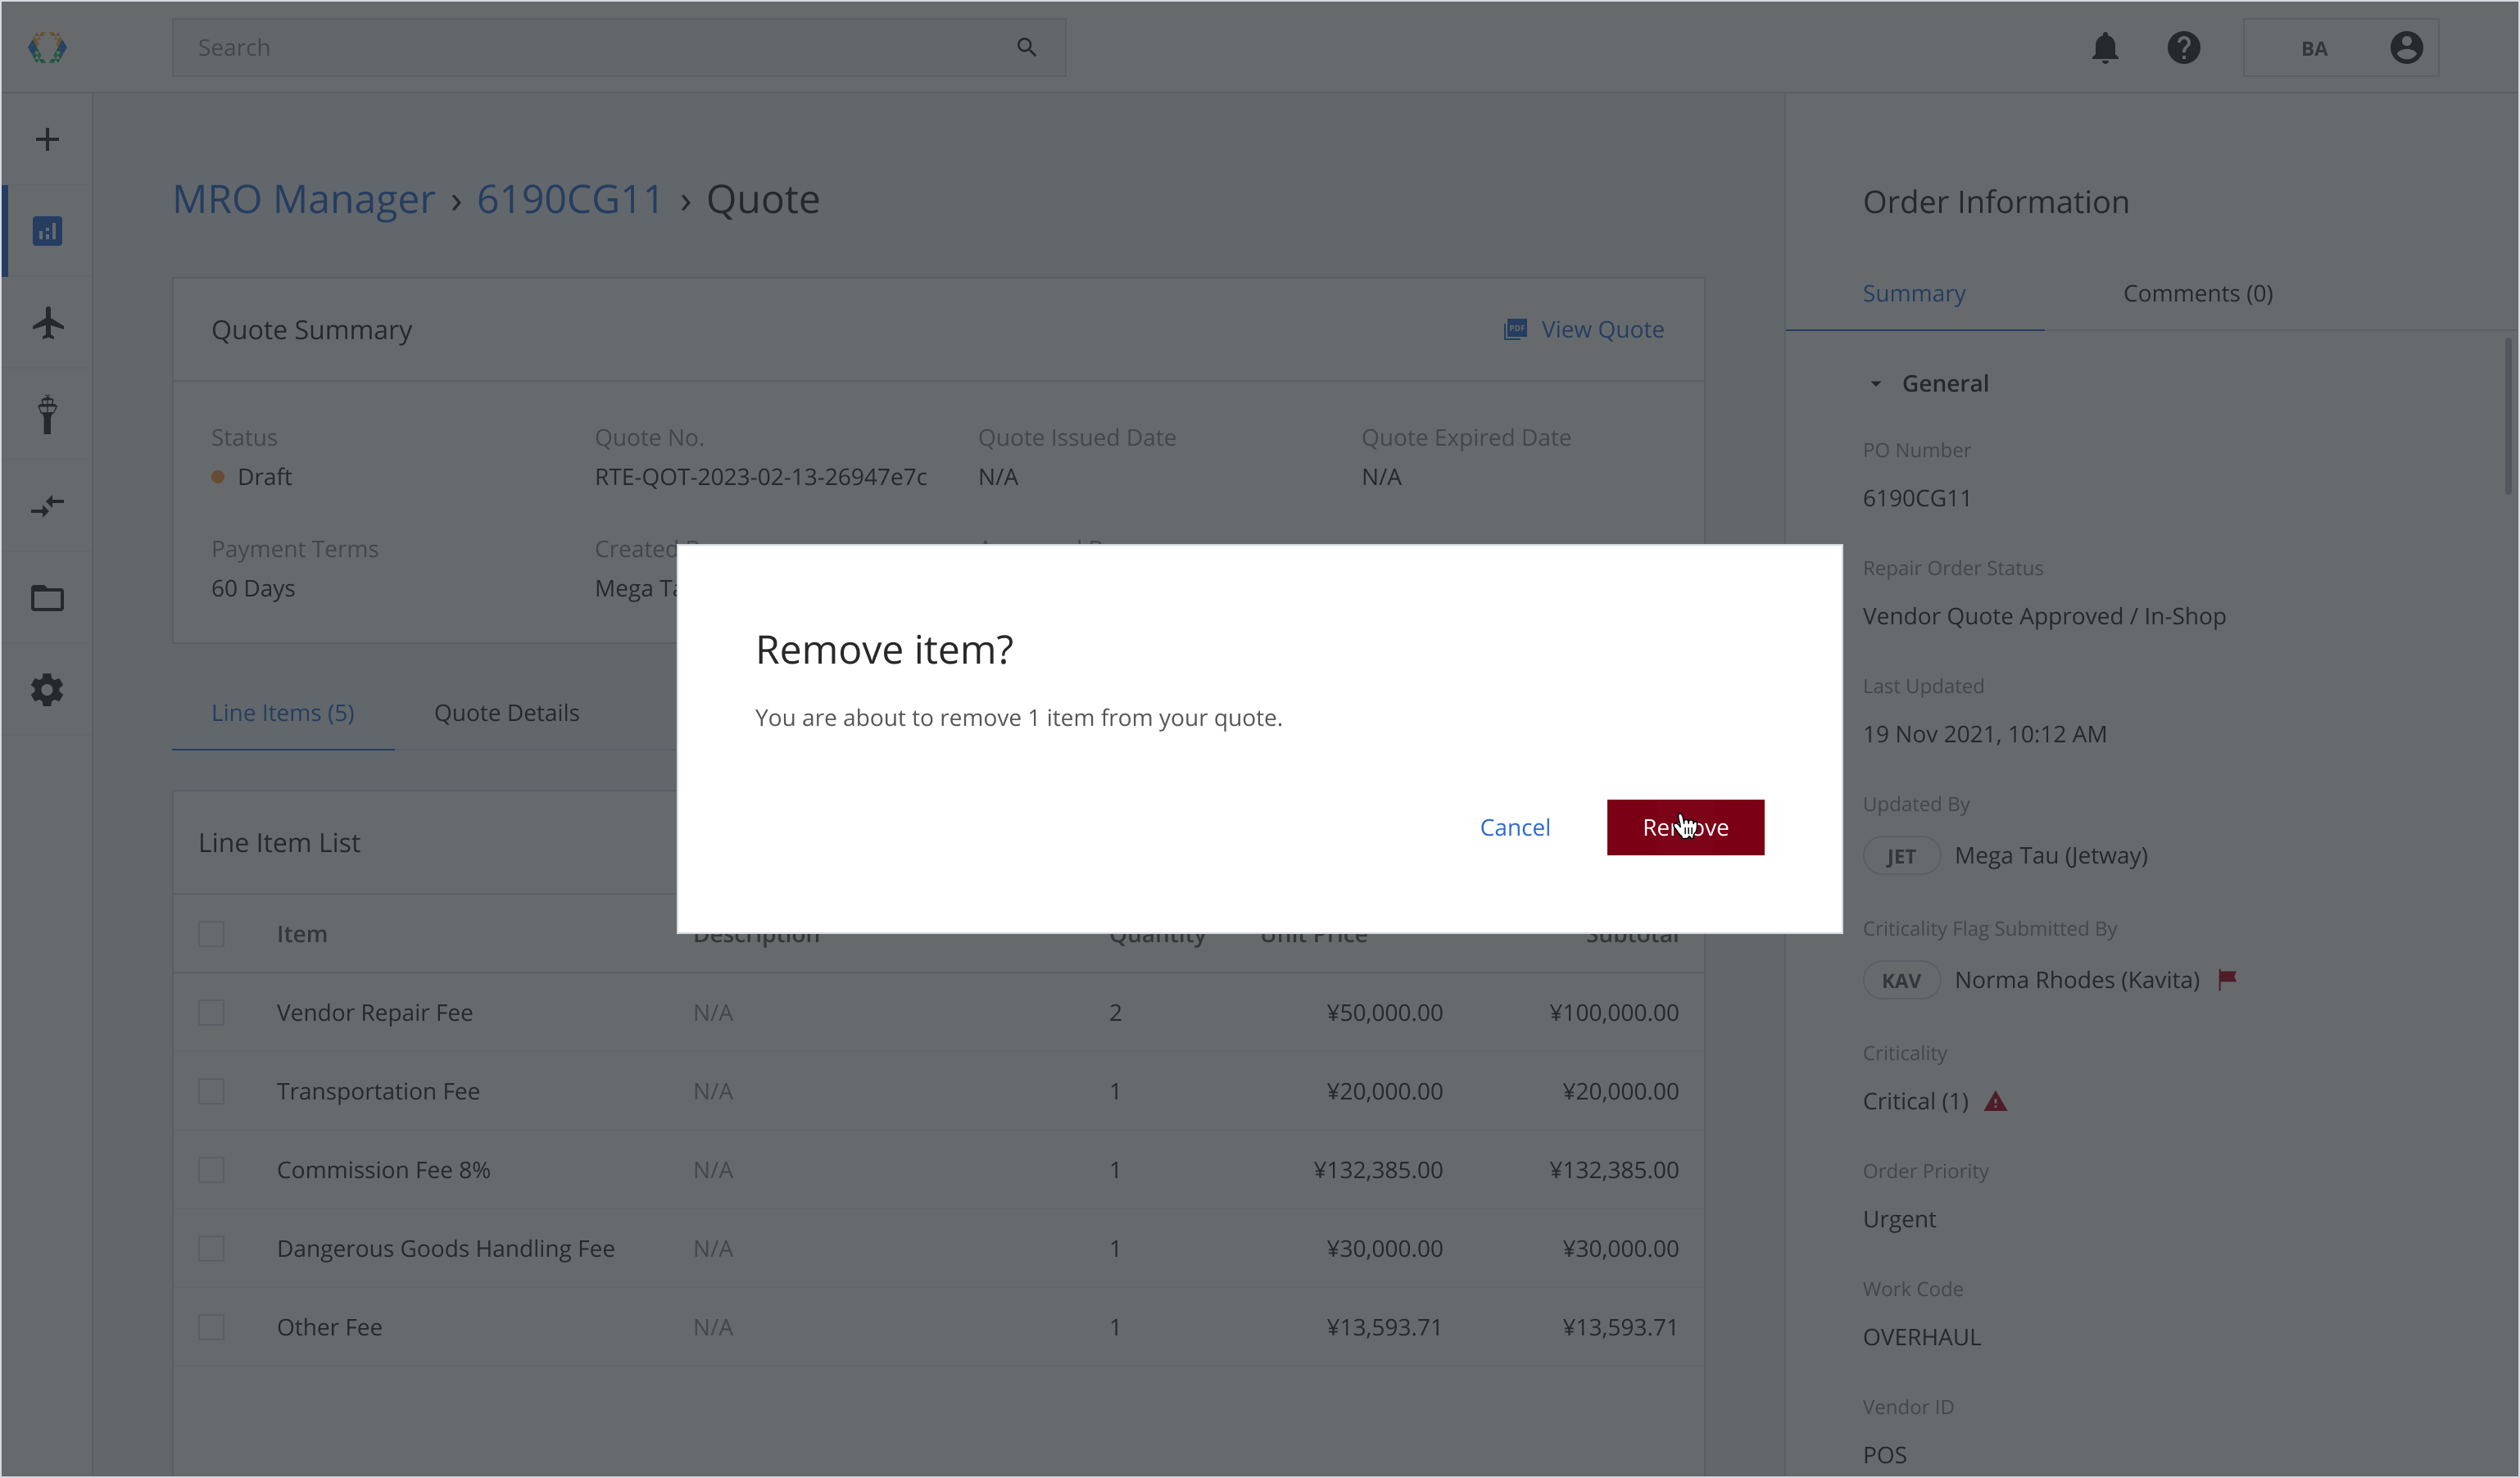
Step 2: Click ‘Remove’.
Step 3: A confirmation message will appear, click ‘Remove’.
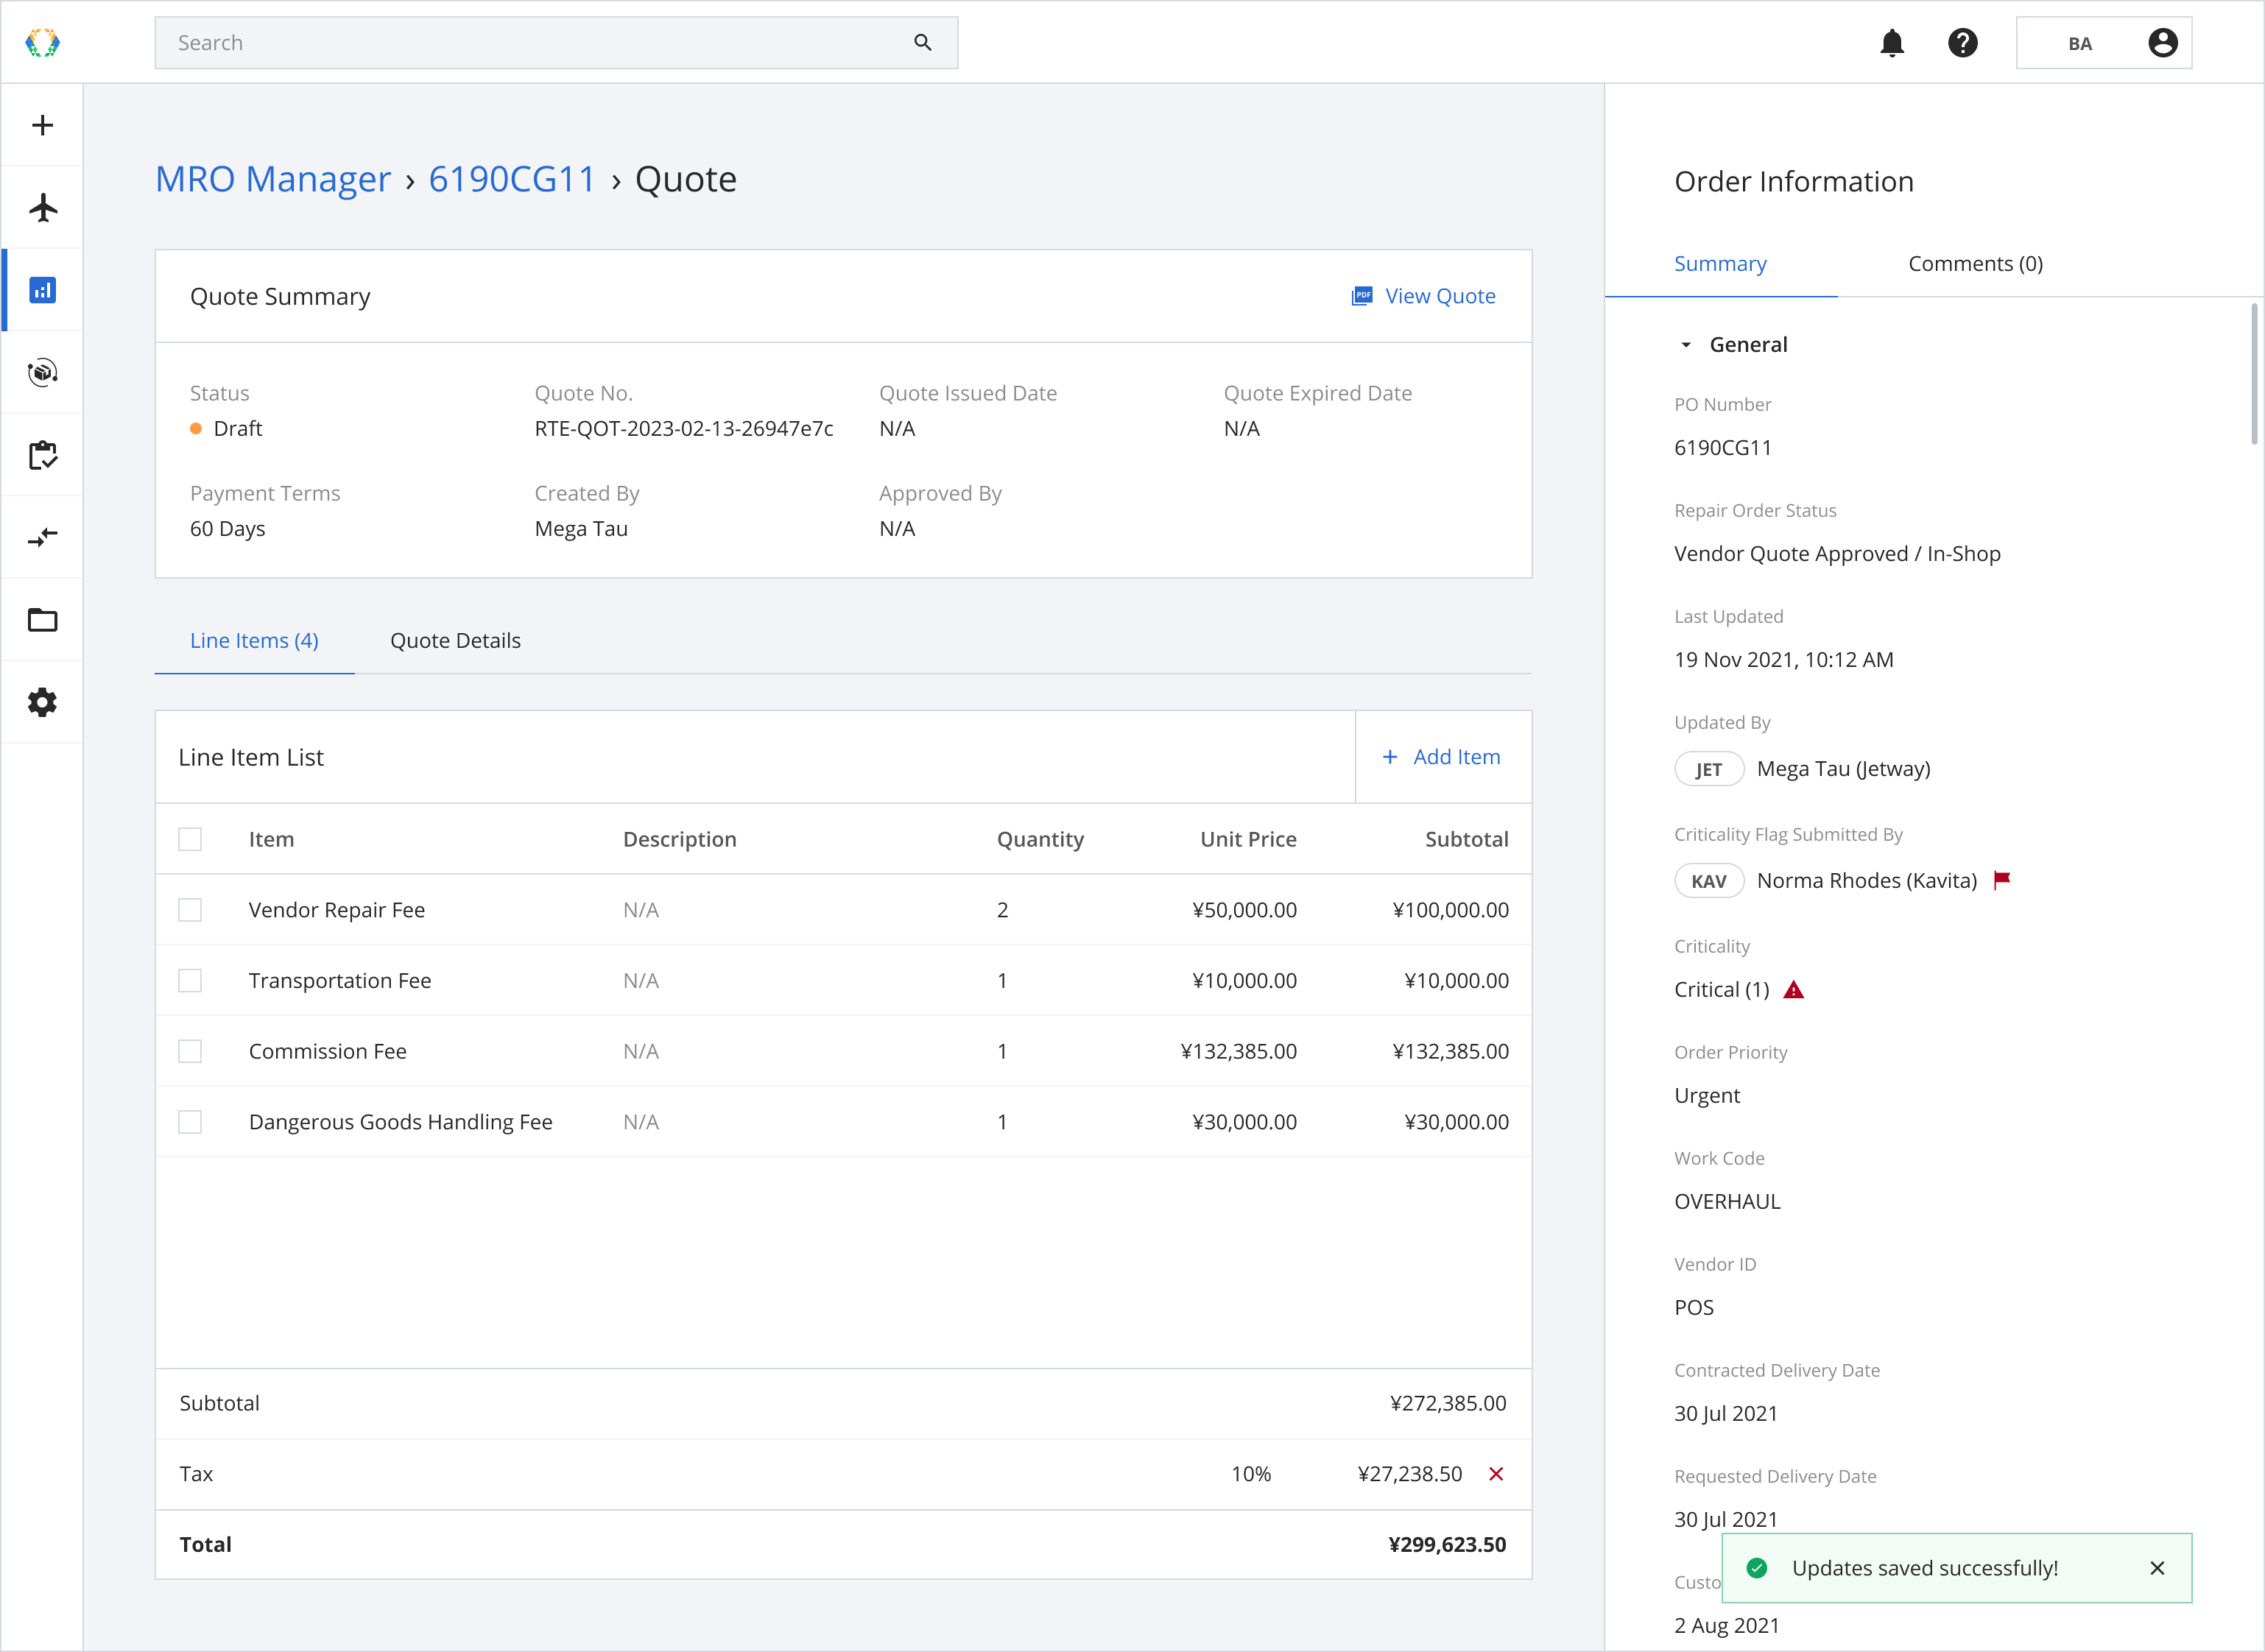
Once the line item is removed successfully, a success message will appear at the bottom of the screen.
Removing Tax
Step 1: Click the ‘X’ next to the tax field

Step 2: A confirmation message will appear, click ‘Remove’.
Once the tax is removed successfully, a success message will appear at the bottom of the screen.

Deleting Quote
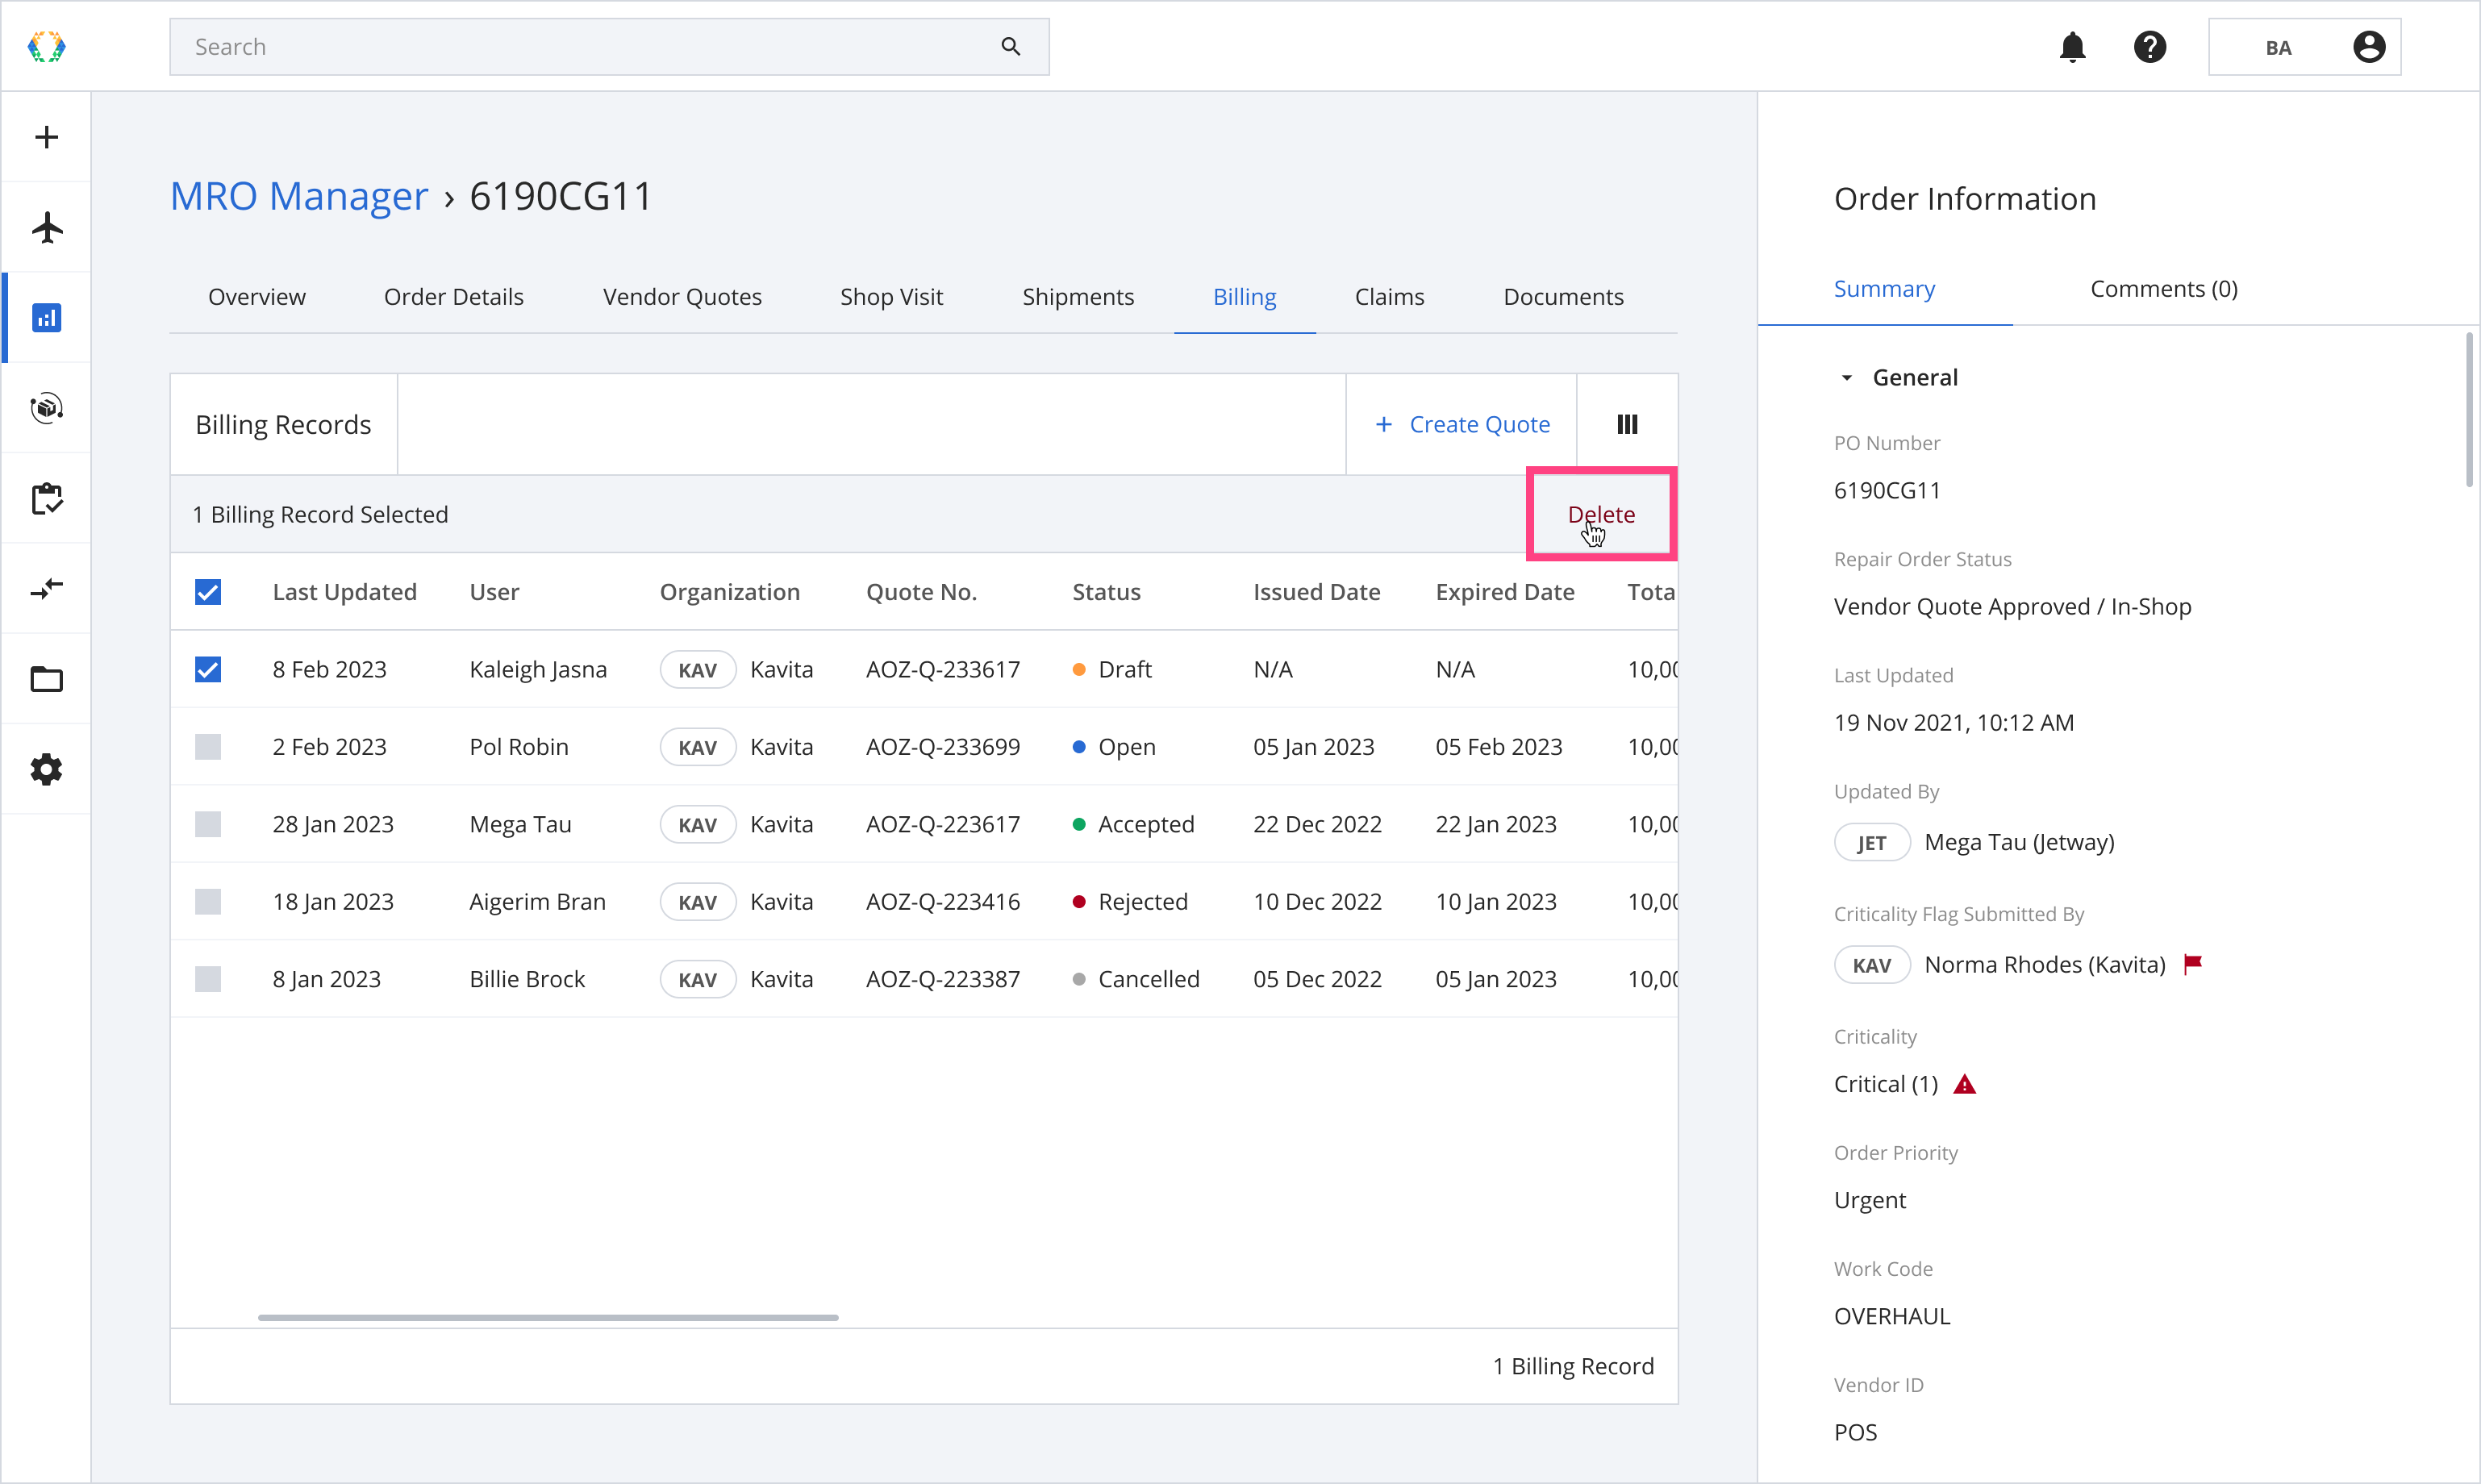
Step 1: From Billing Records, select the quote you want to delete.
Only Draft Quote can be deleted
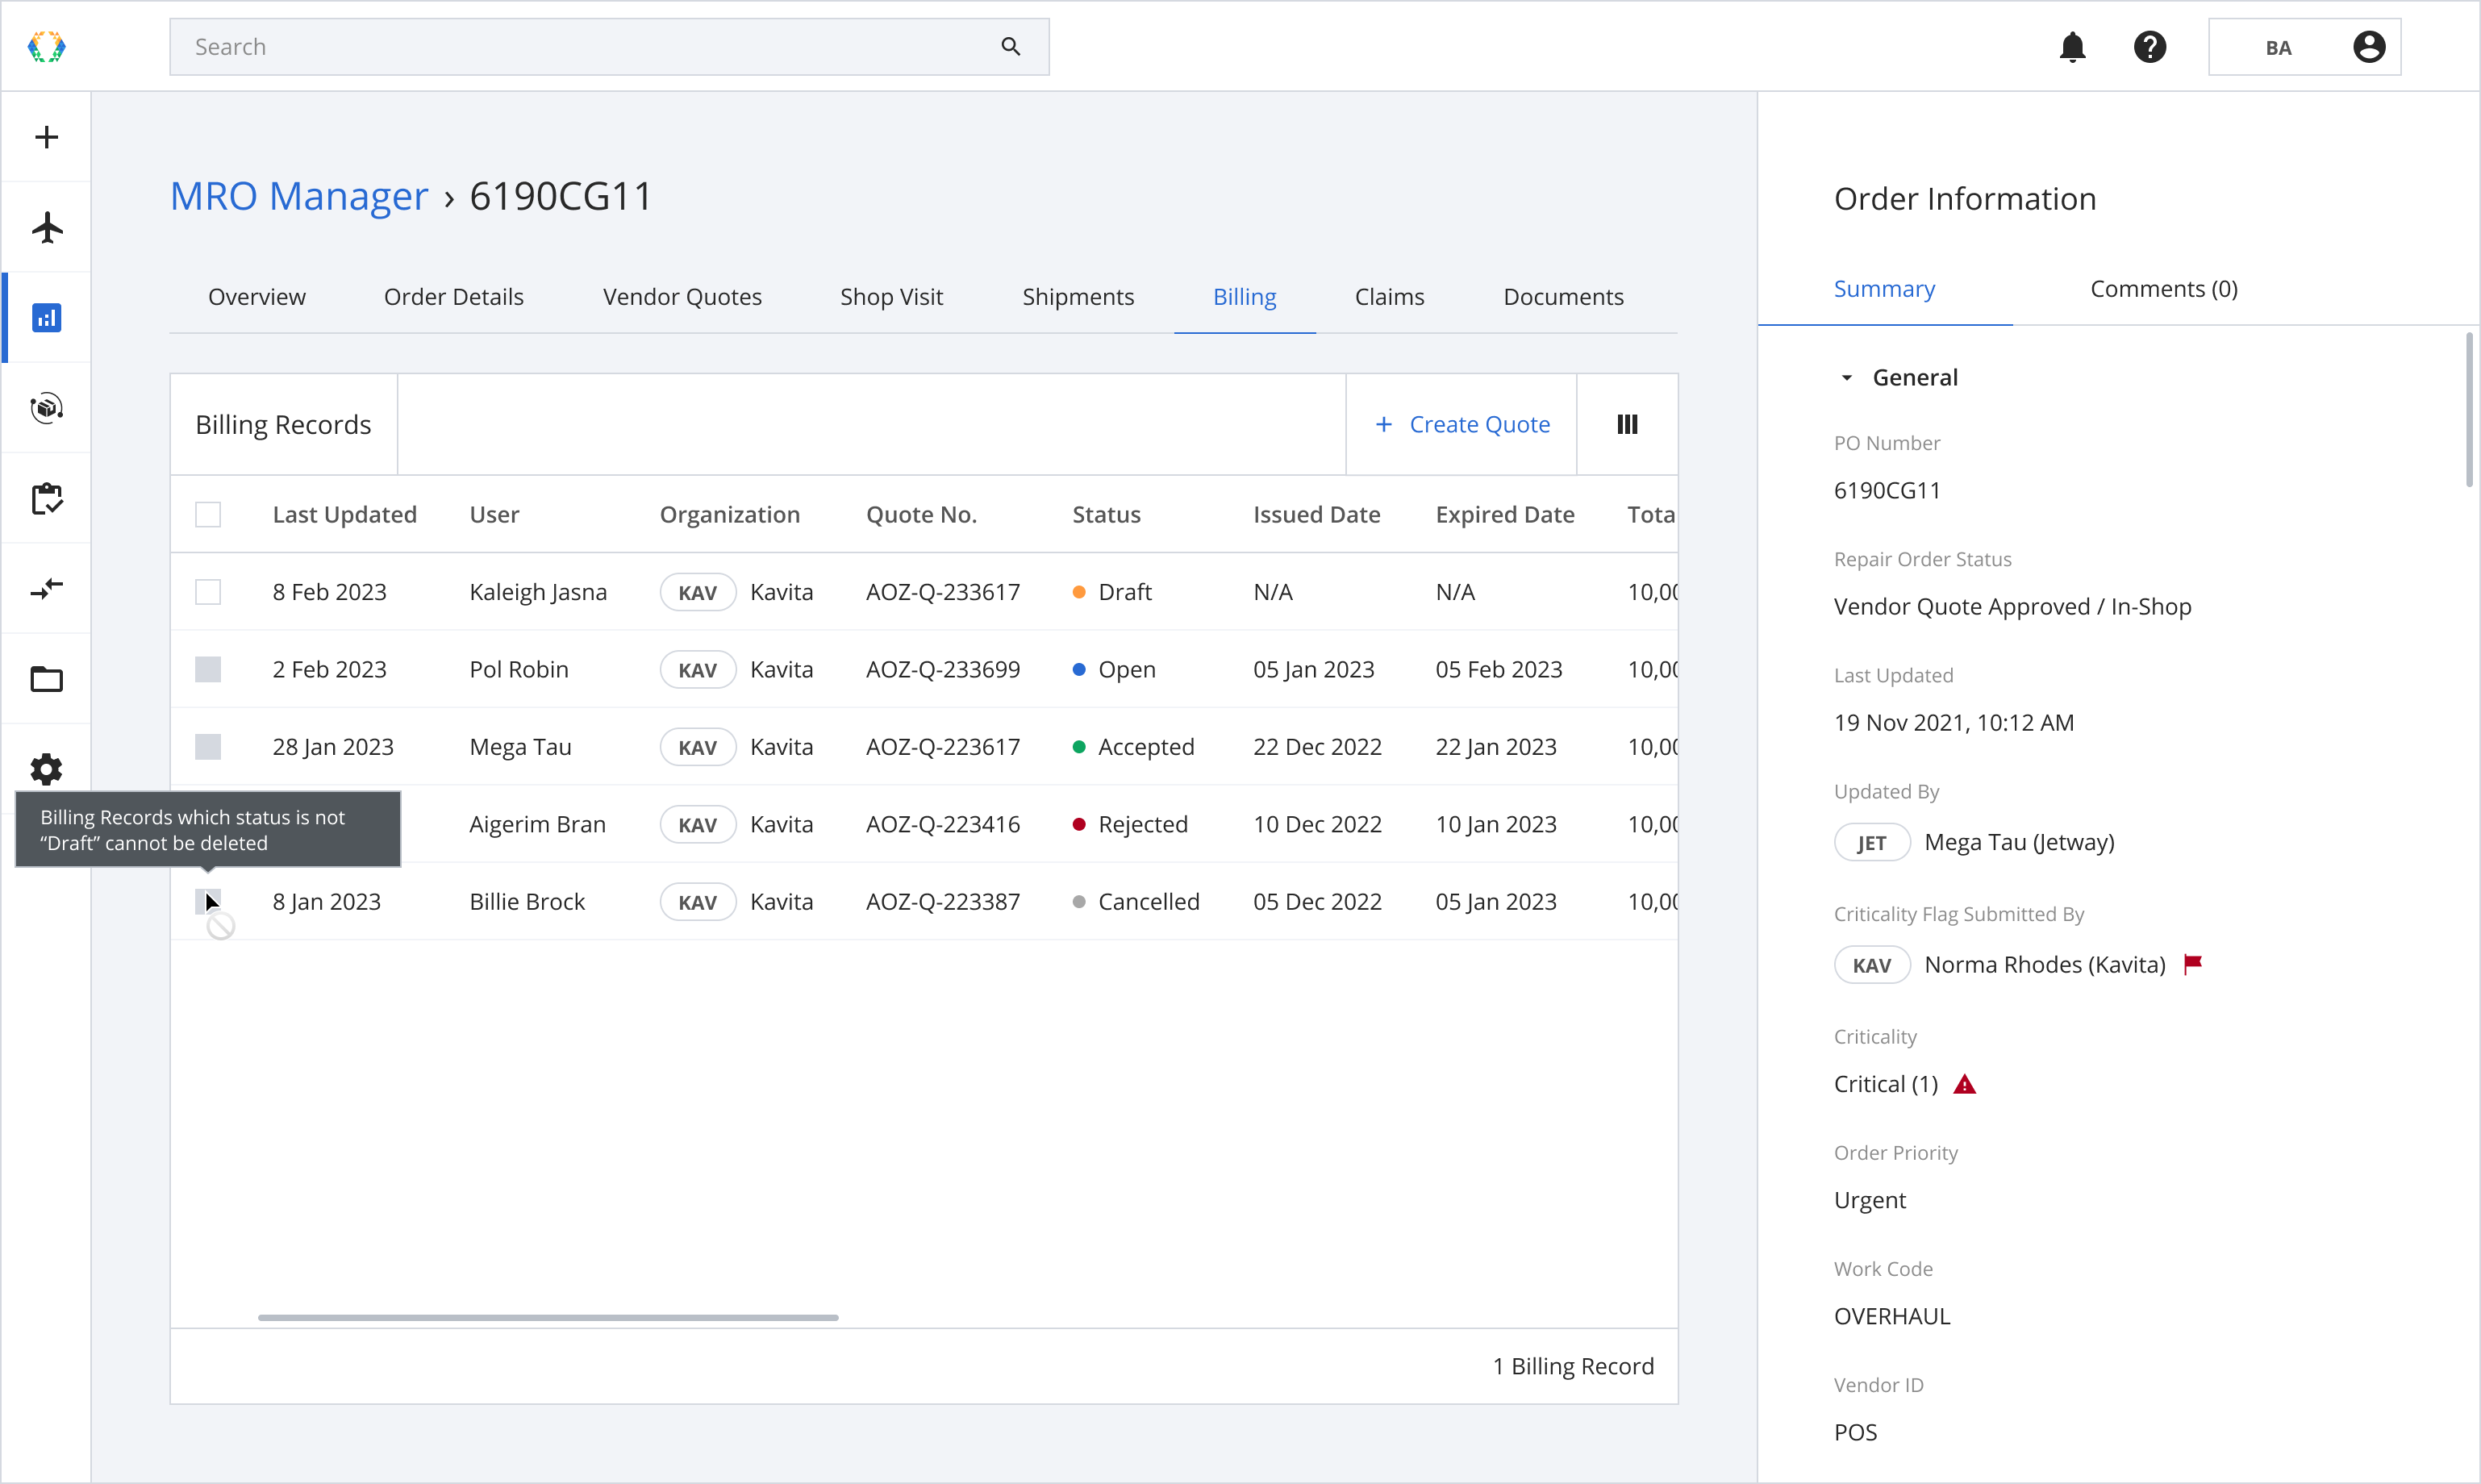
Step 2: Click ‘Delete’.
Step 3: A confirmation message will appear, click ‘Delete’.
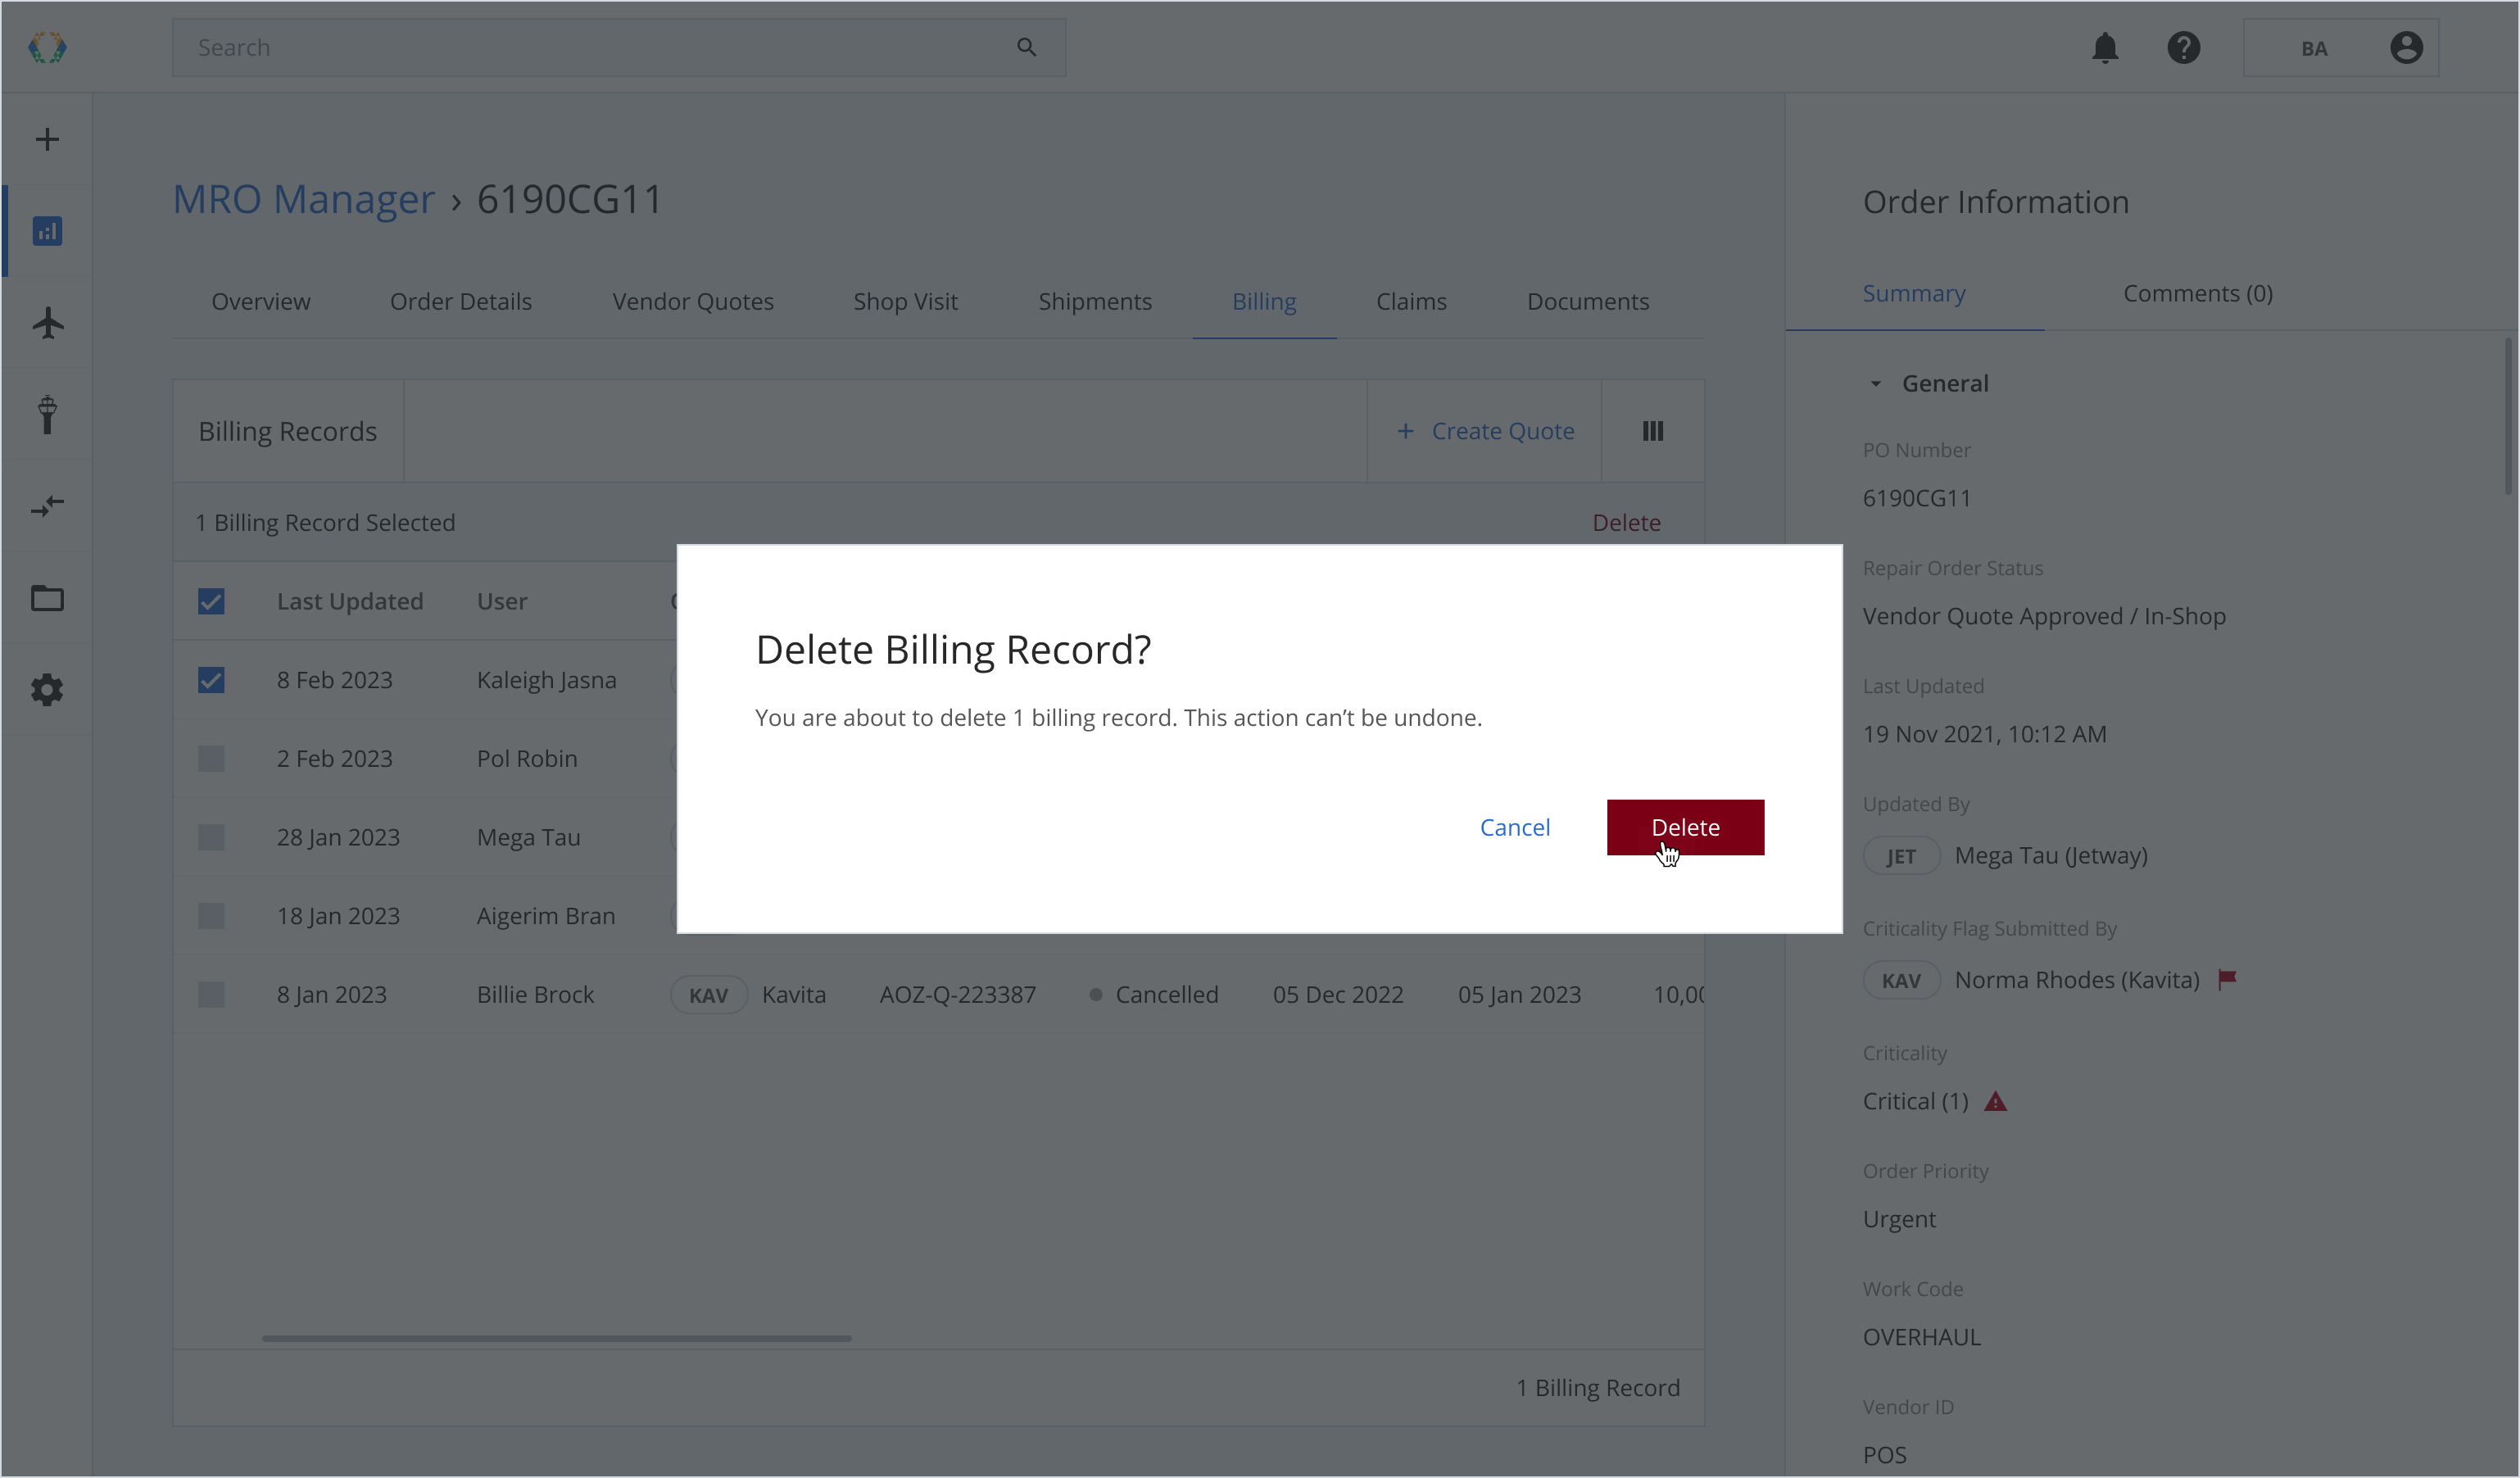
Once the quote is deleted successfully, a green banner will appear at the top of the billing records list.
Updated over 1 year ago