Modify Outbound Quantity
Getting Started
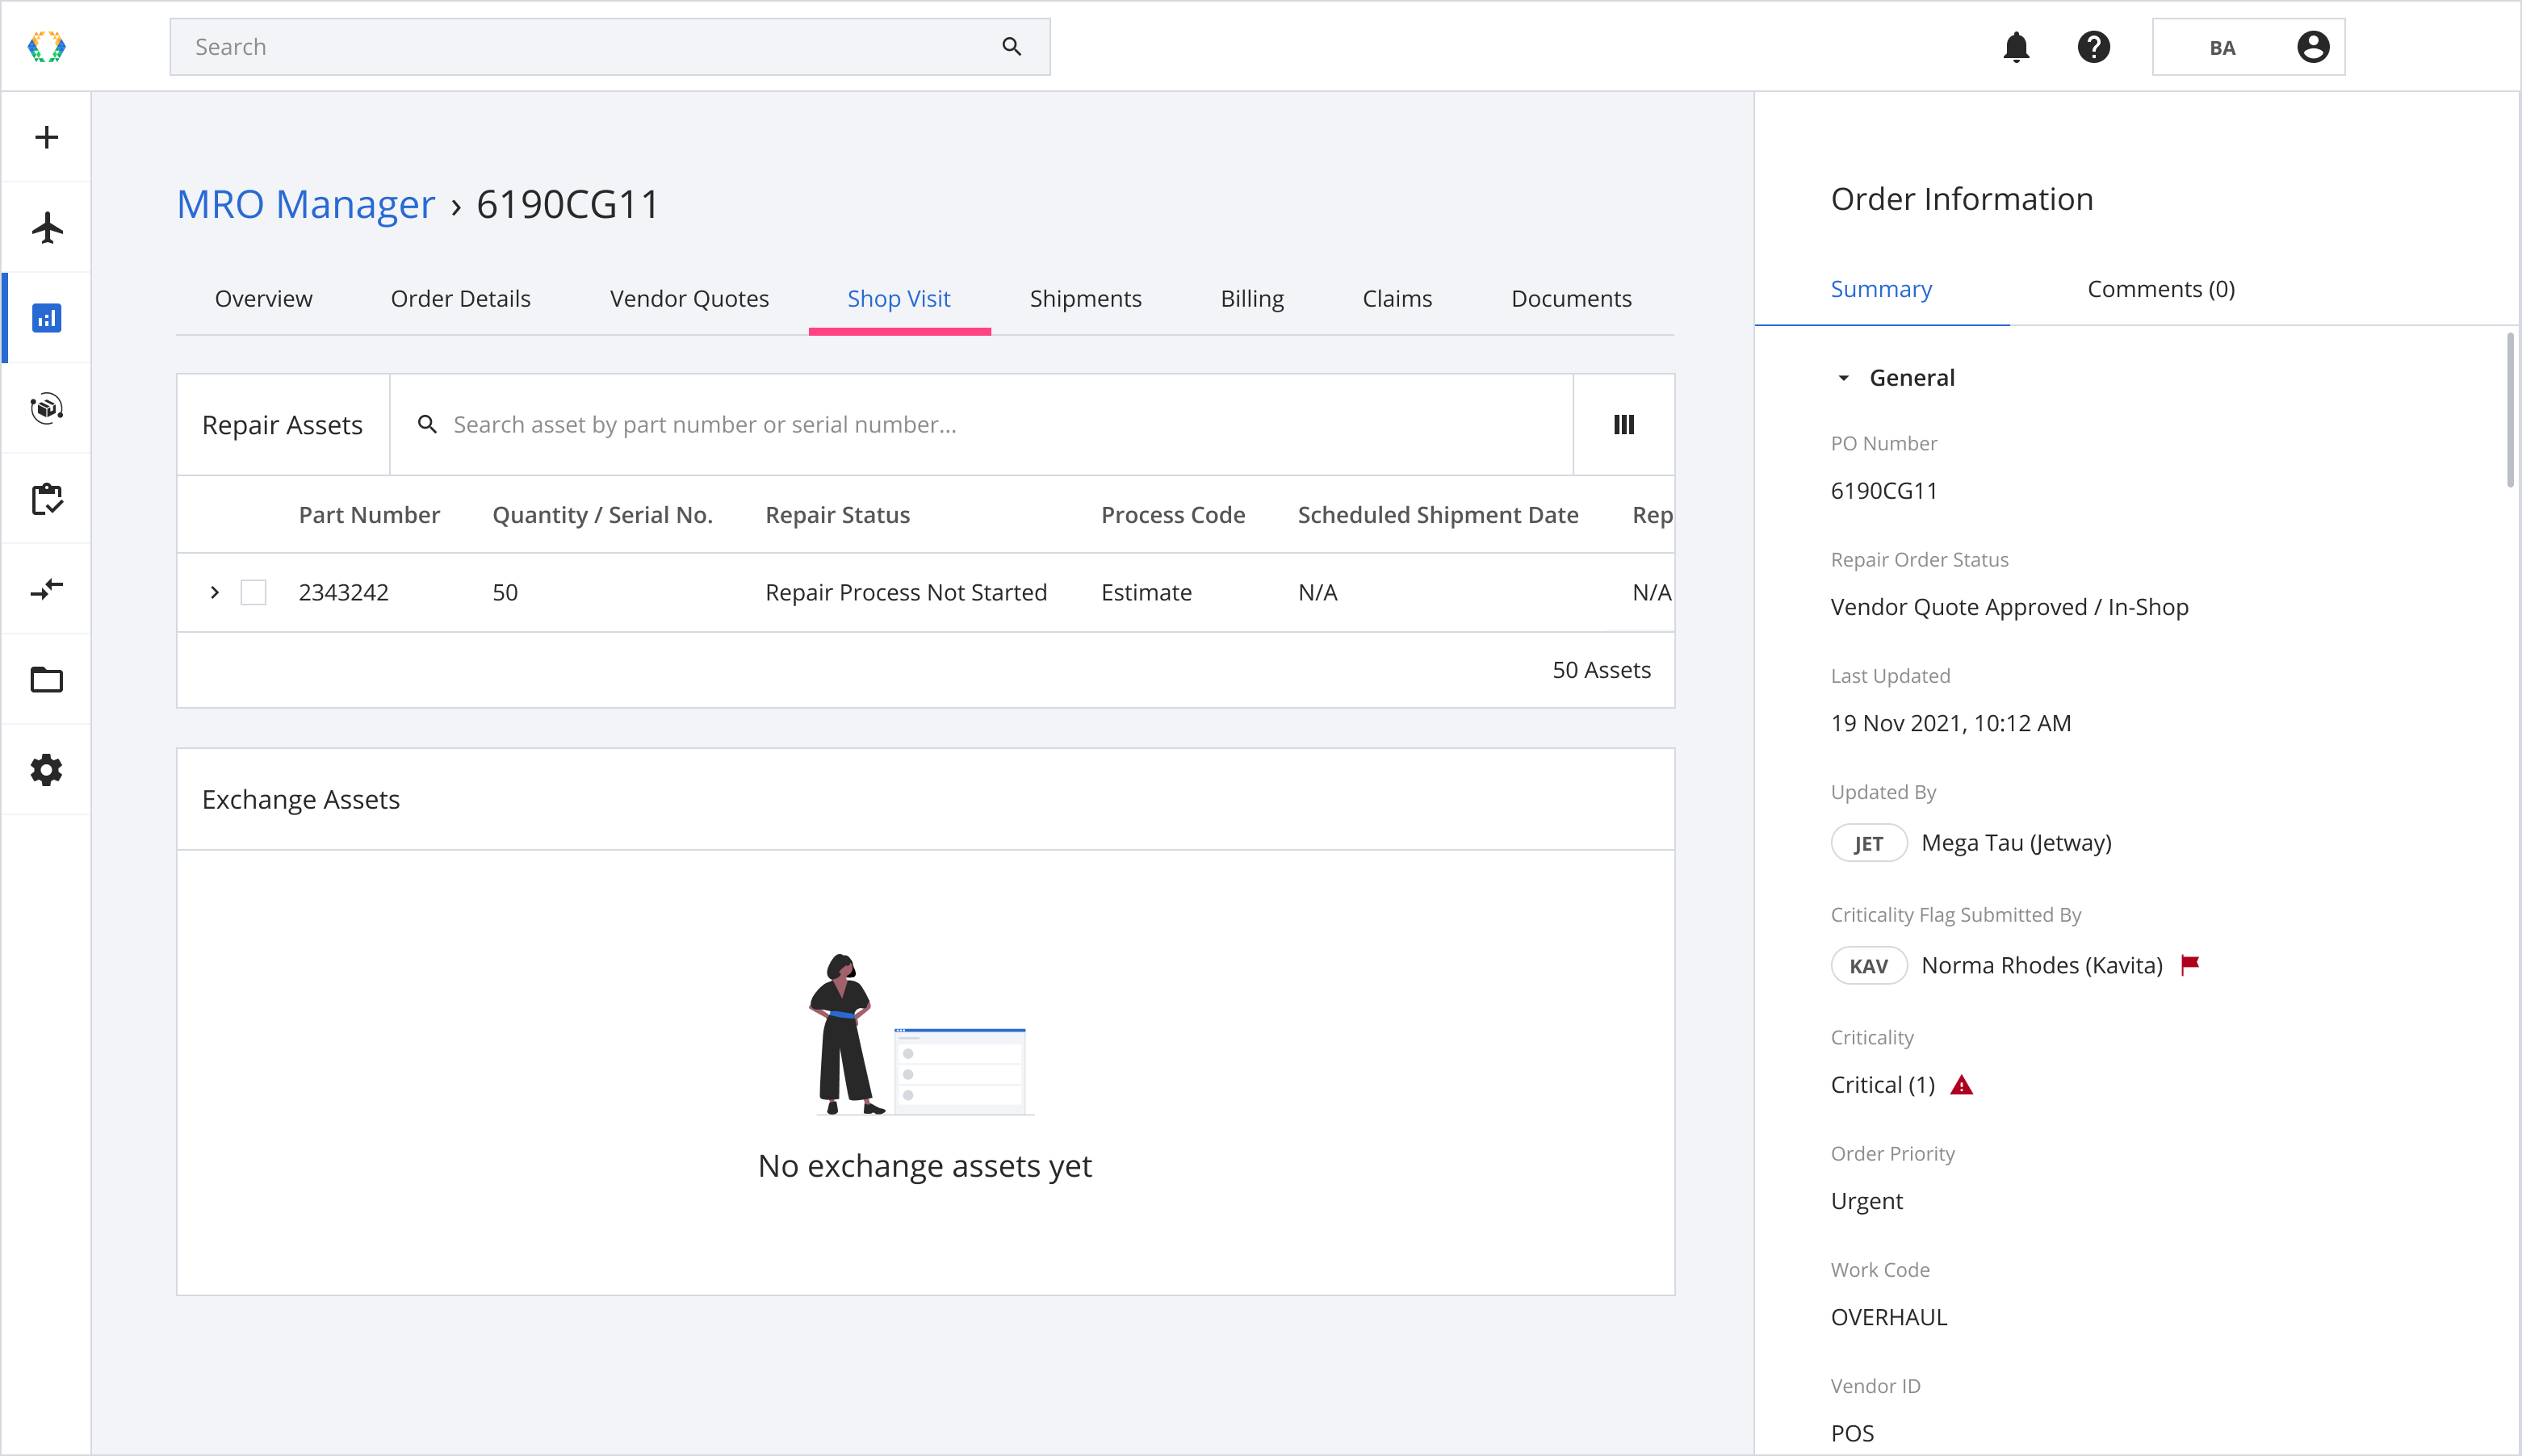
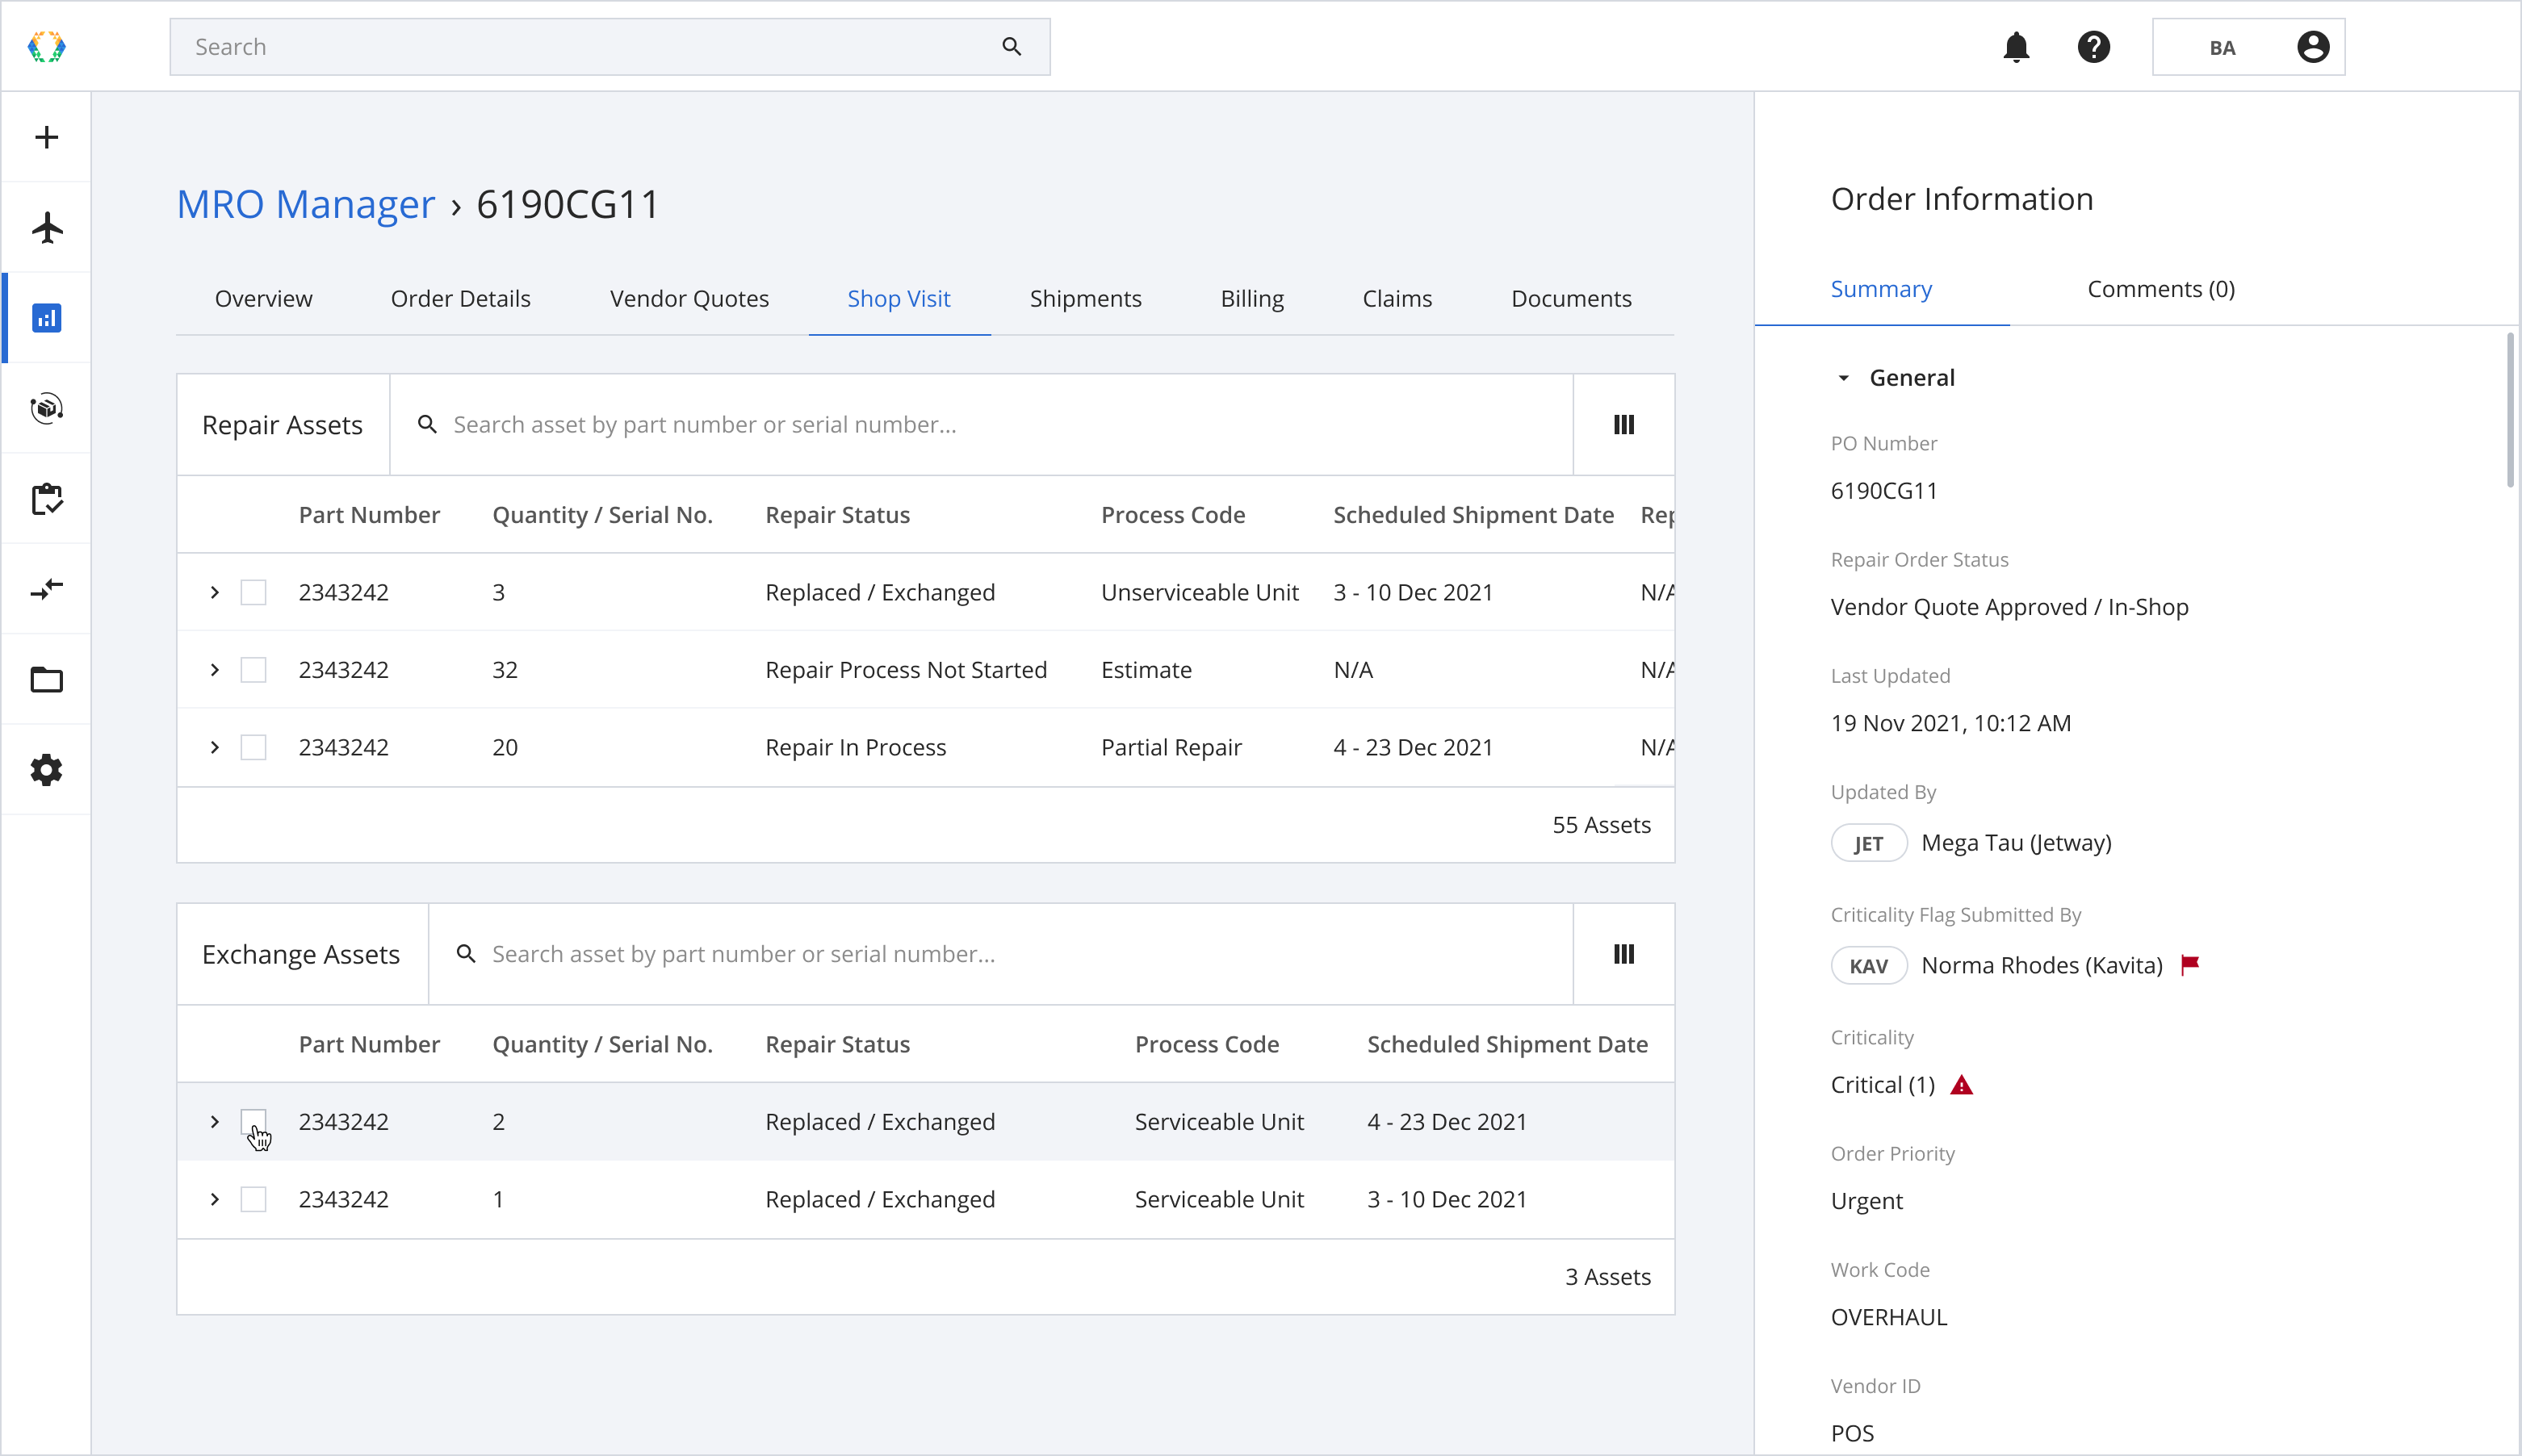
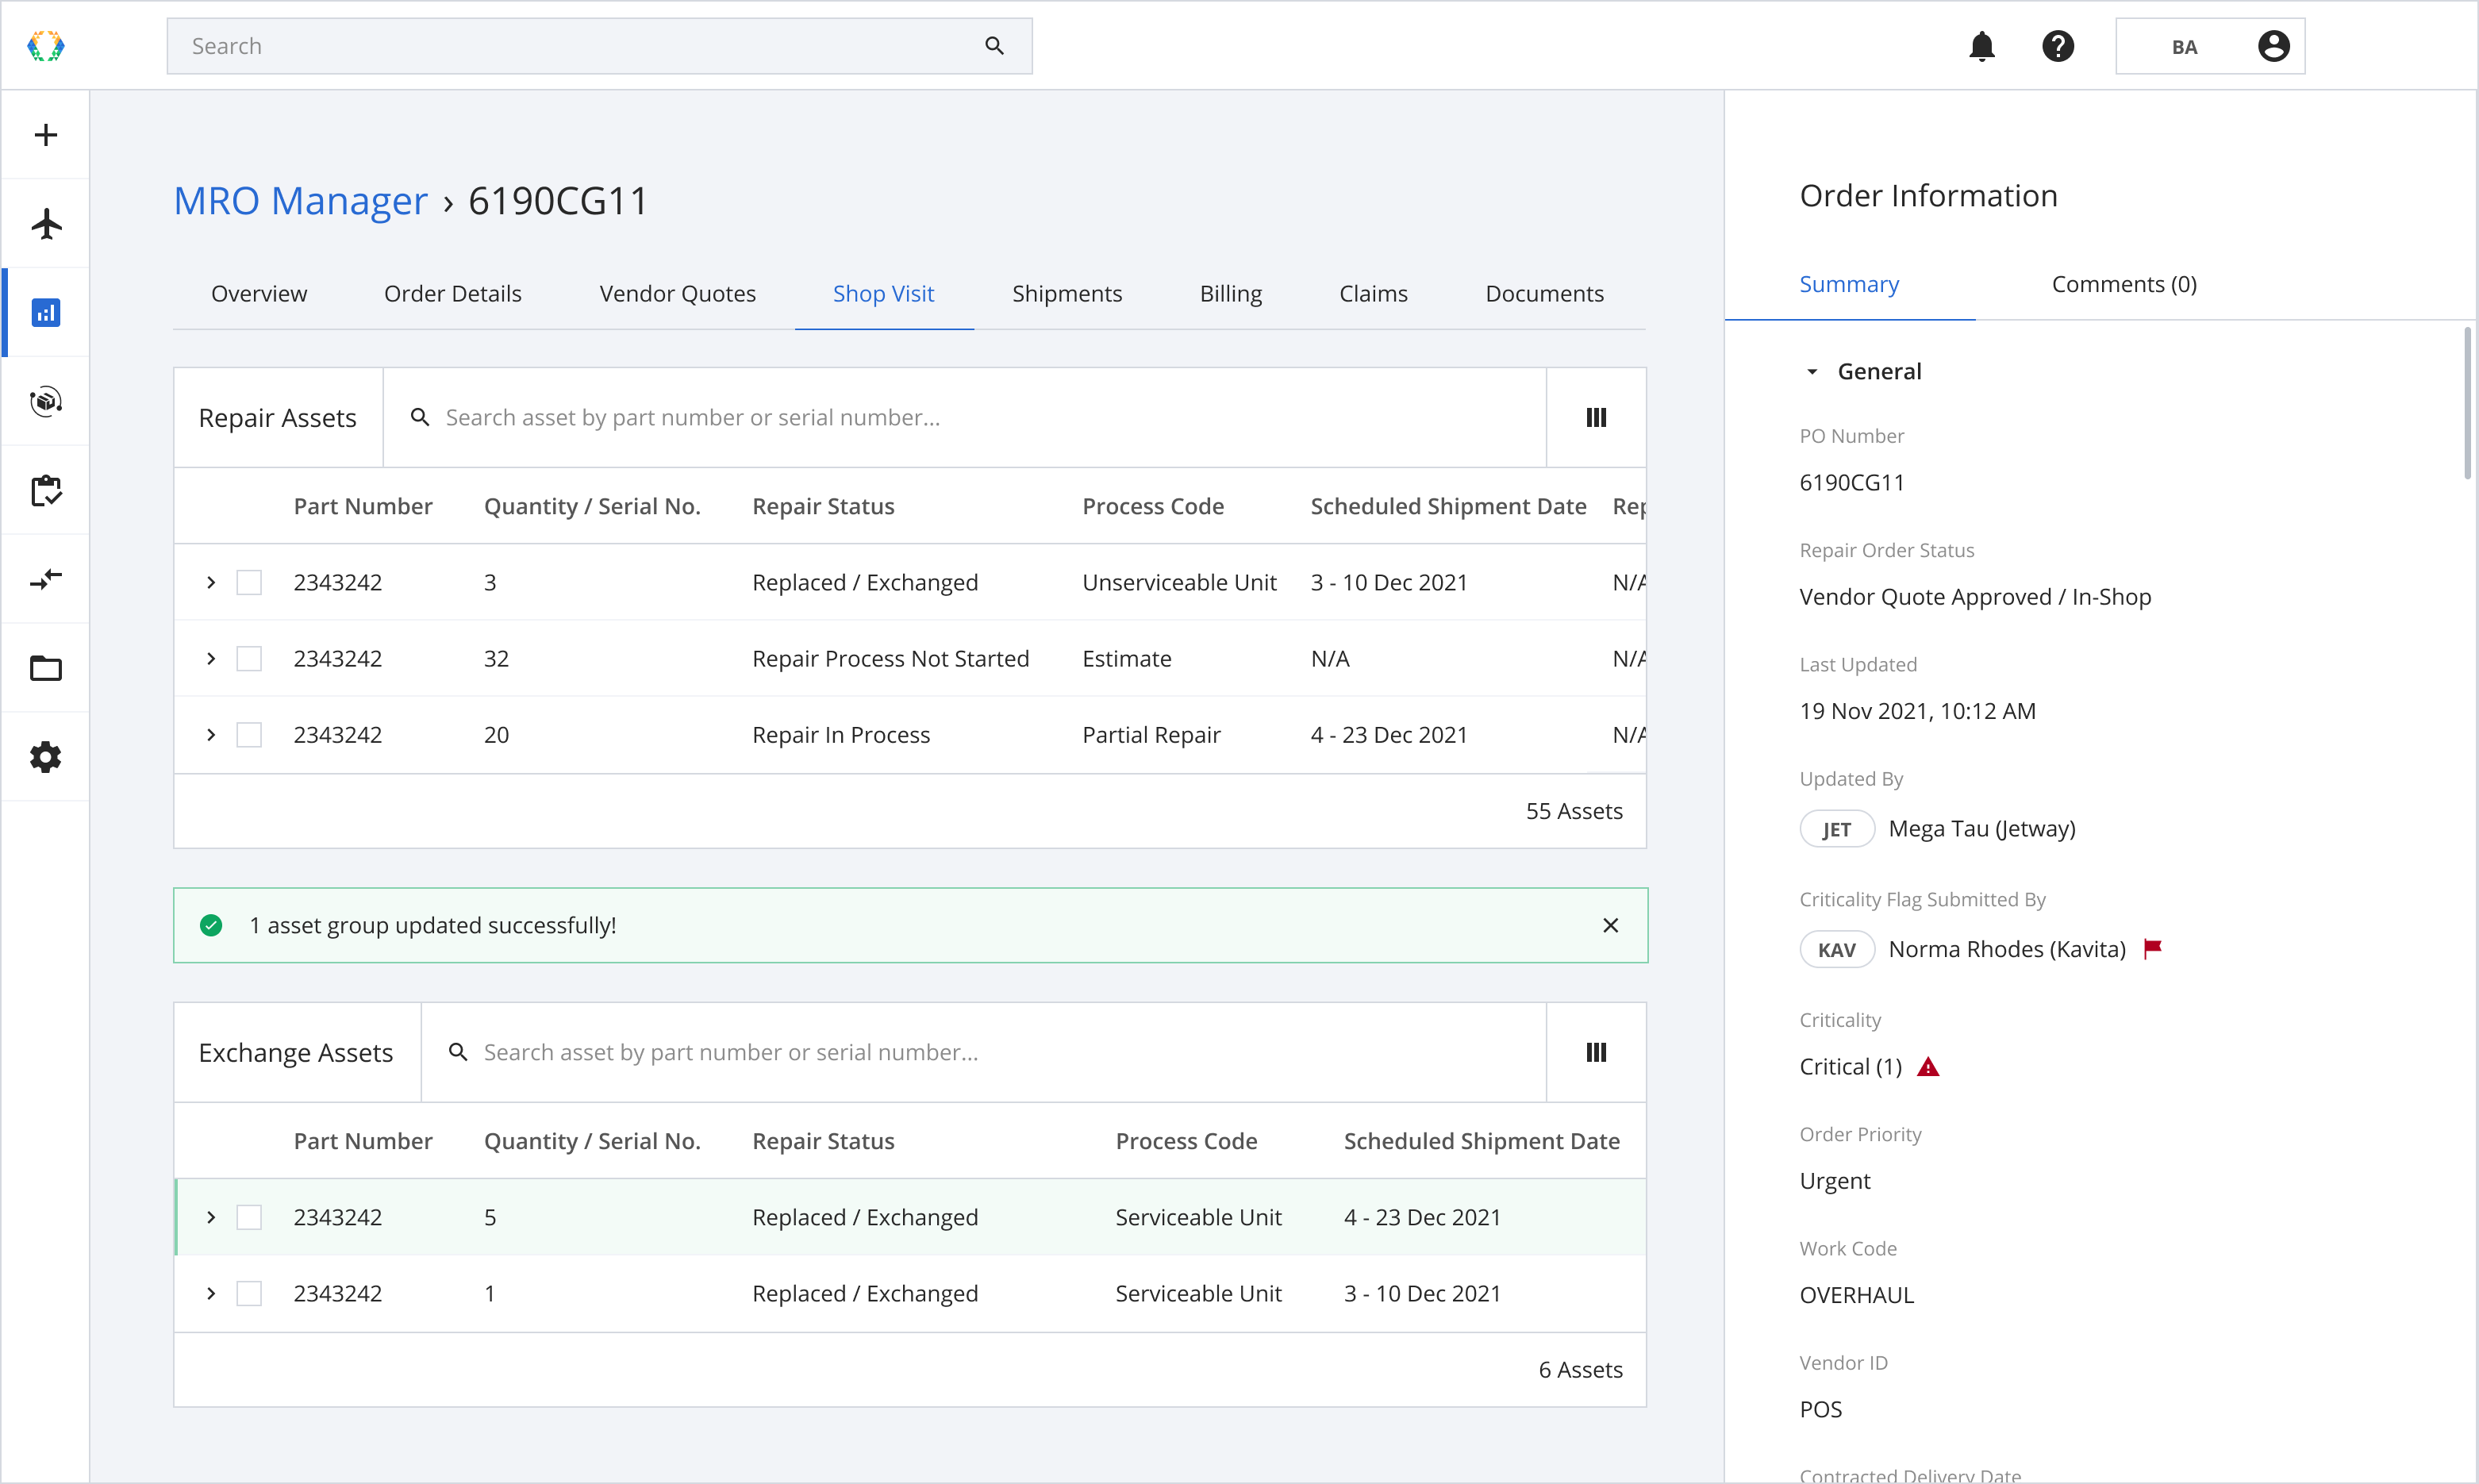
To manage outbound quantity of your repair/exchange assets, click 'Shop Visit' tab.
Modifying Outbound Quantity of Repair Assets
Step 1: From Repair Assets, select repair assets you want to modify outbound quantity.
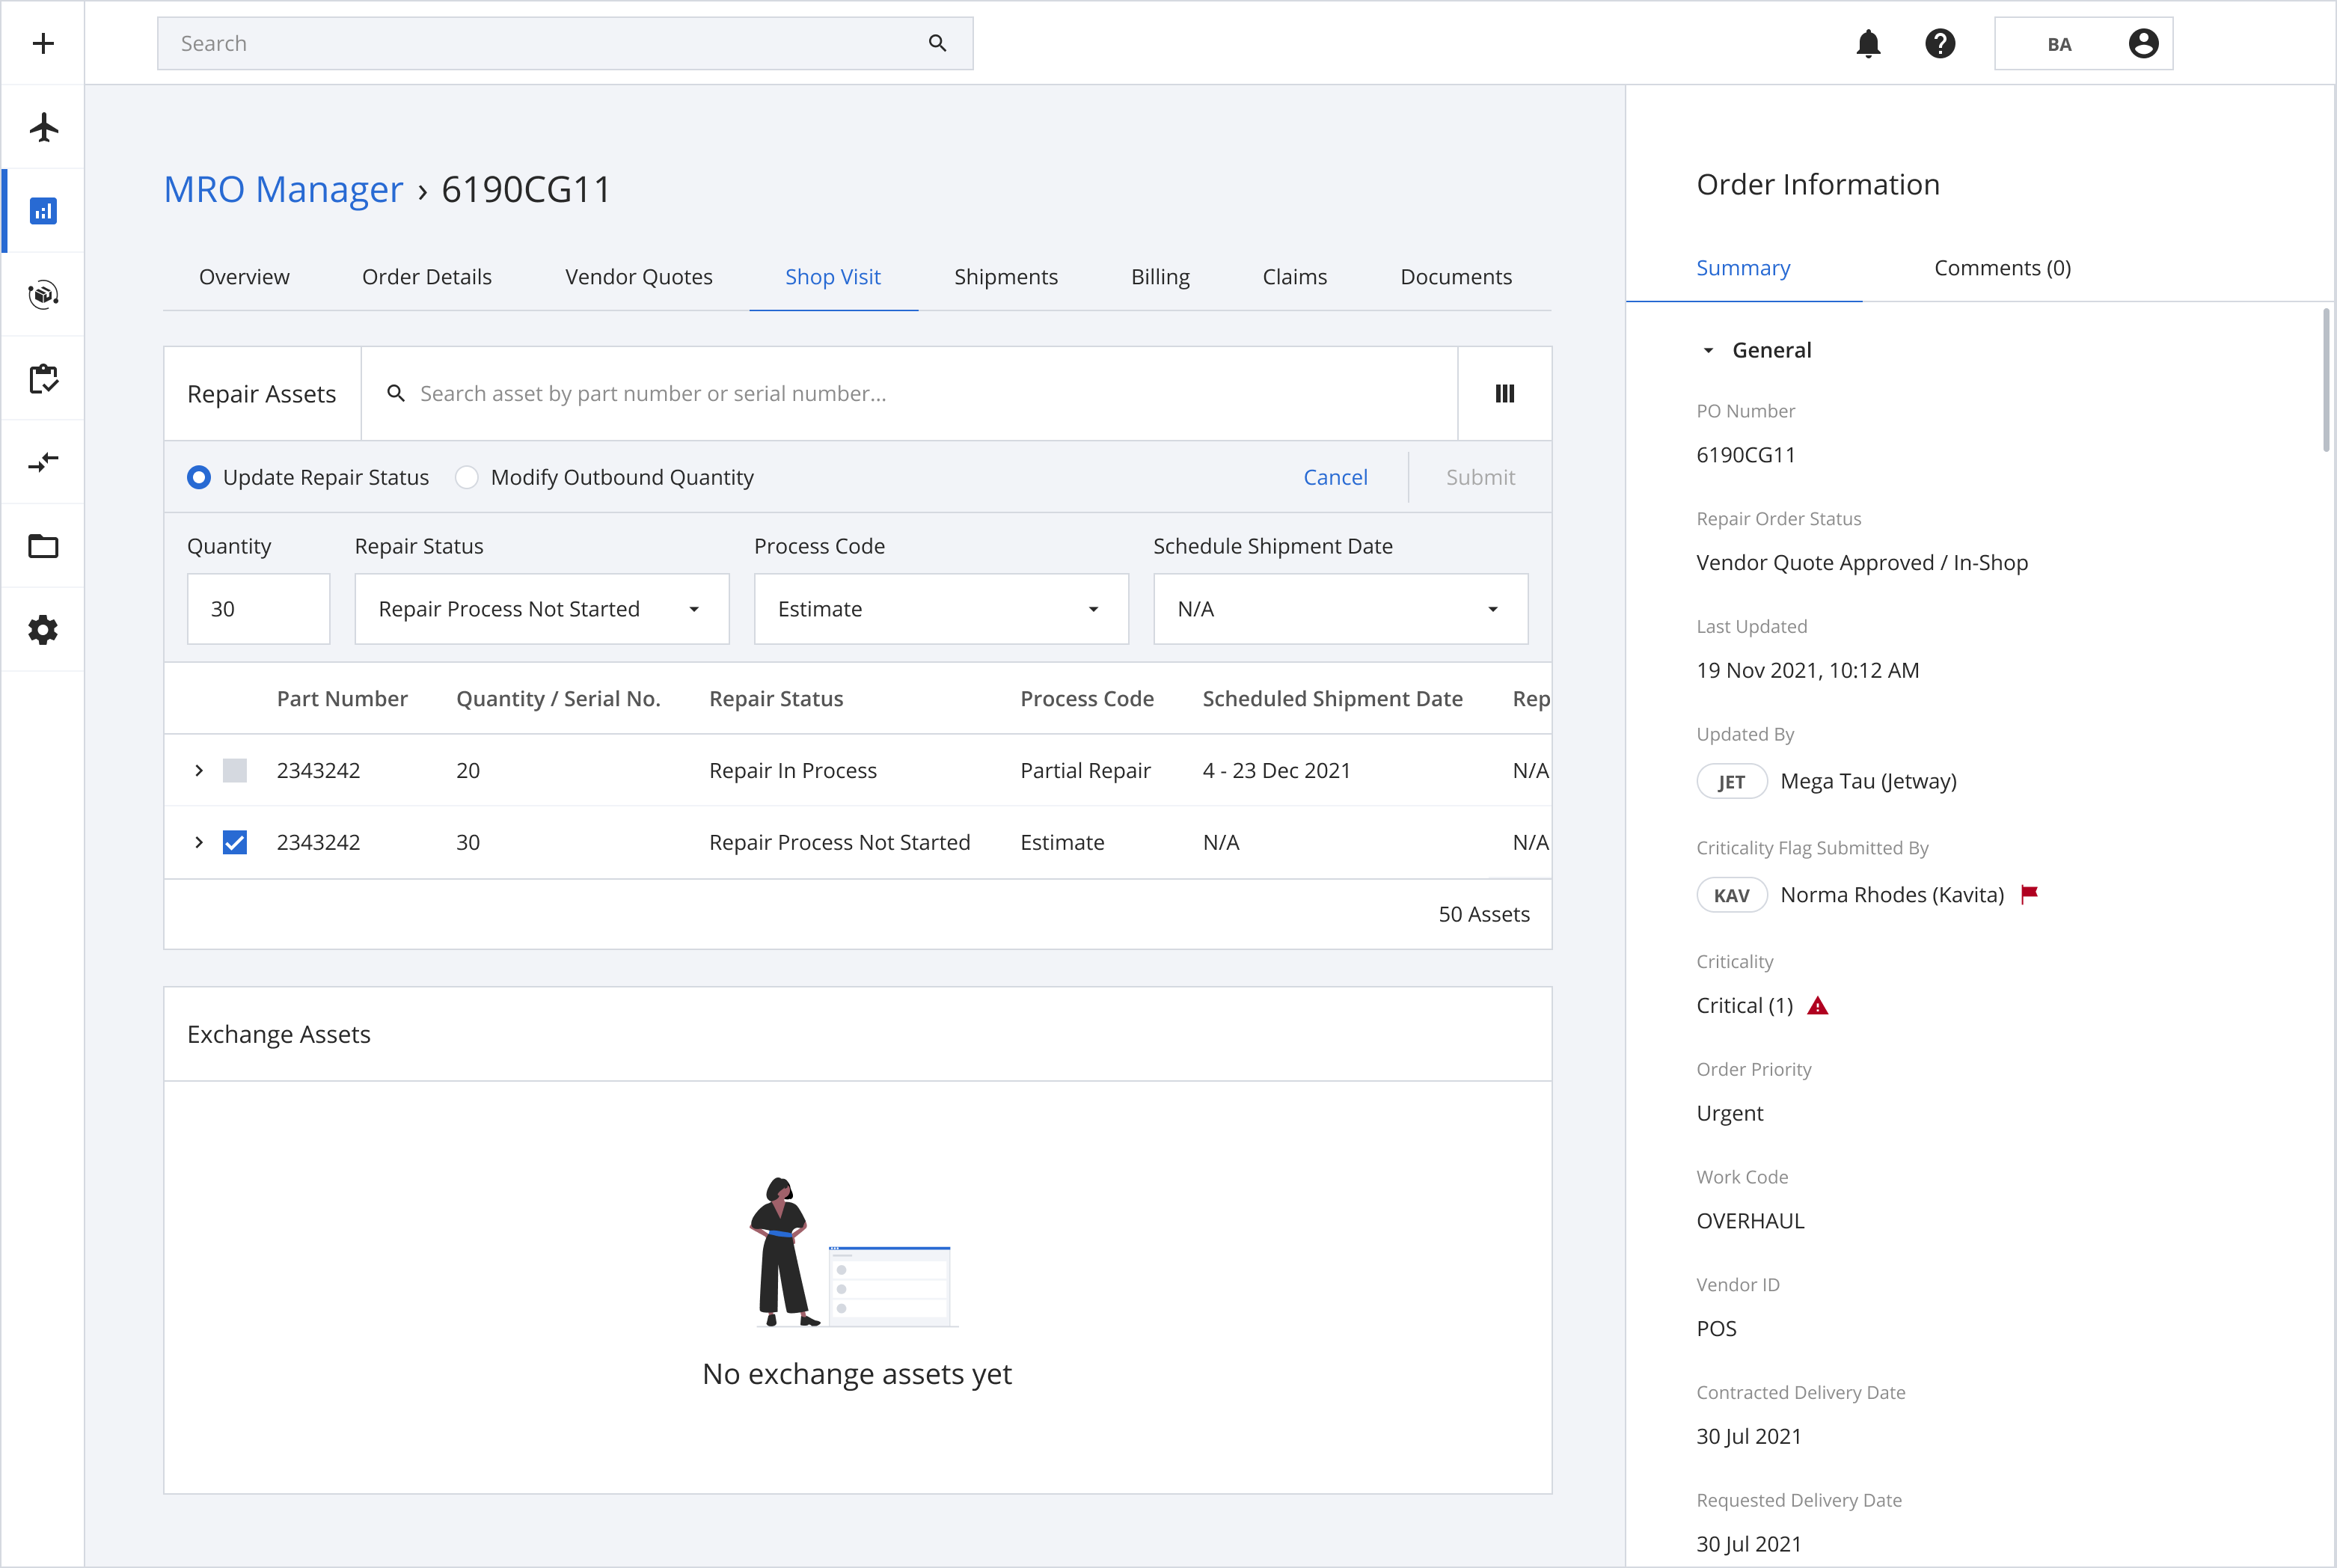
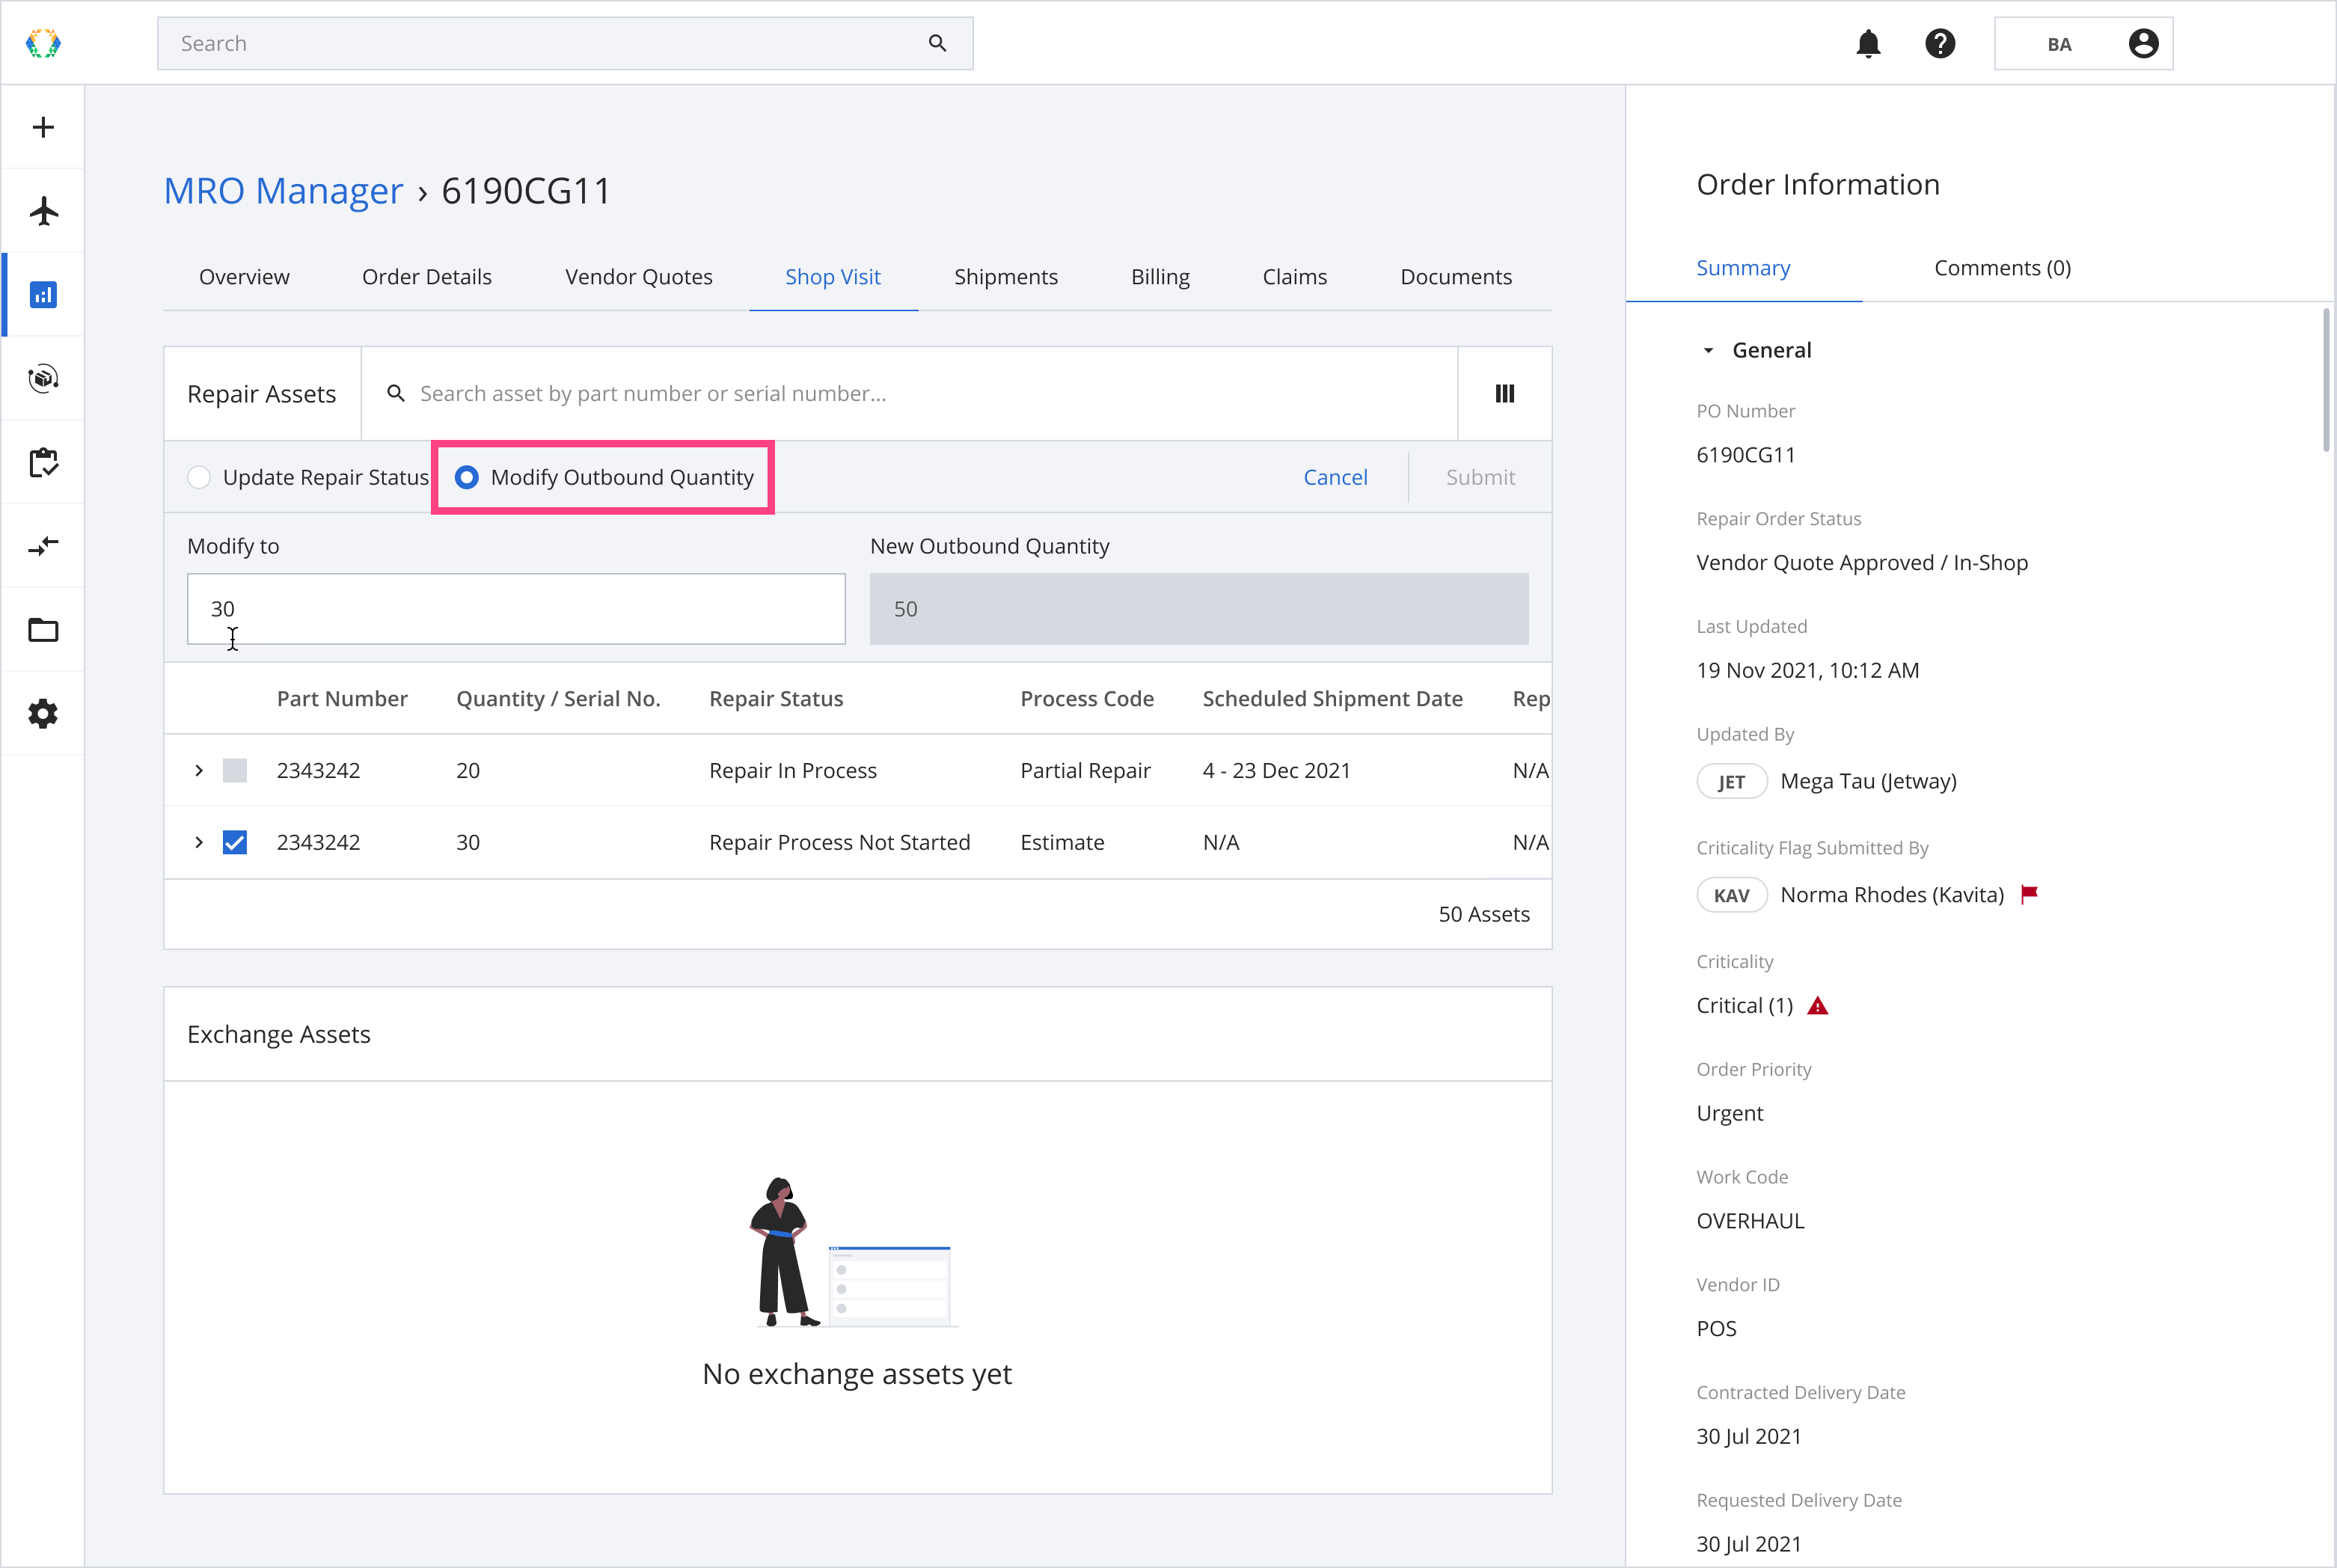
Step 2: Select 'Modify Outbound Quantity'.
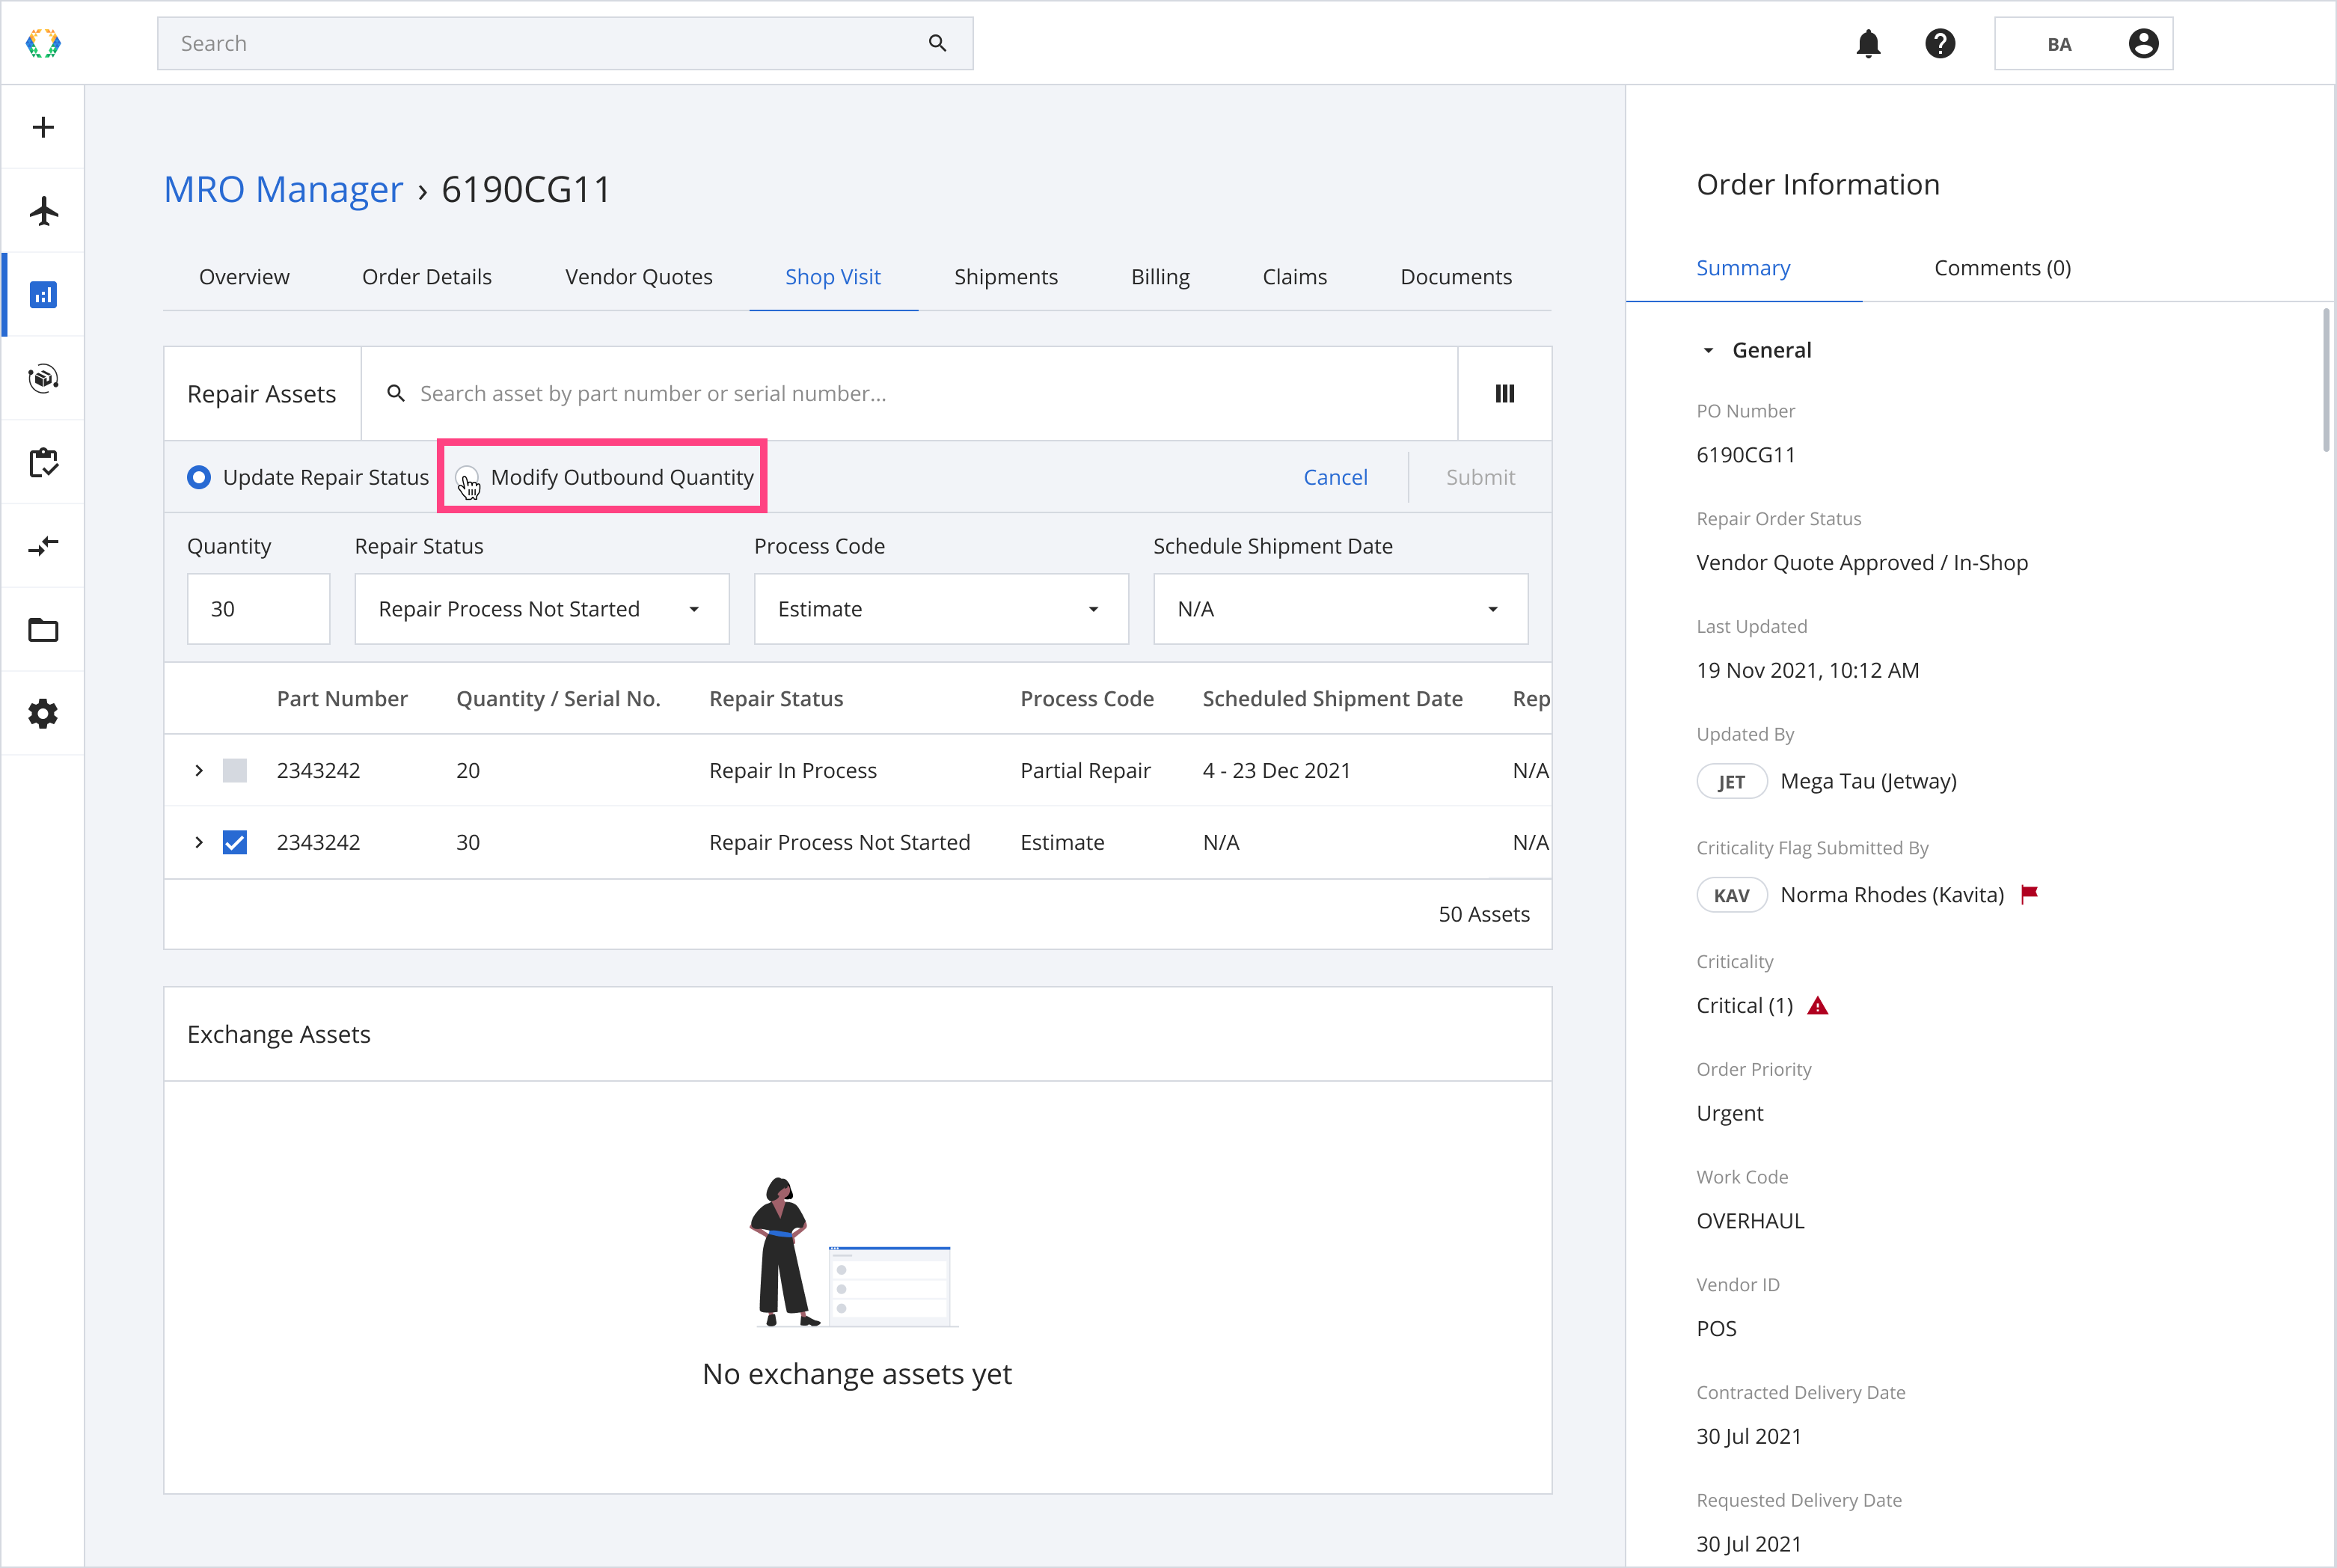
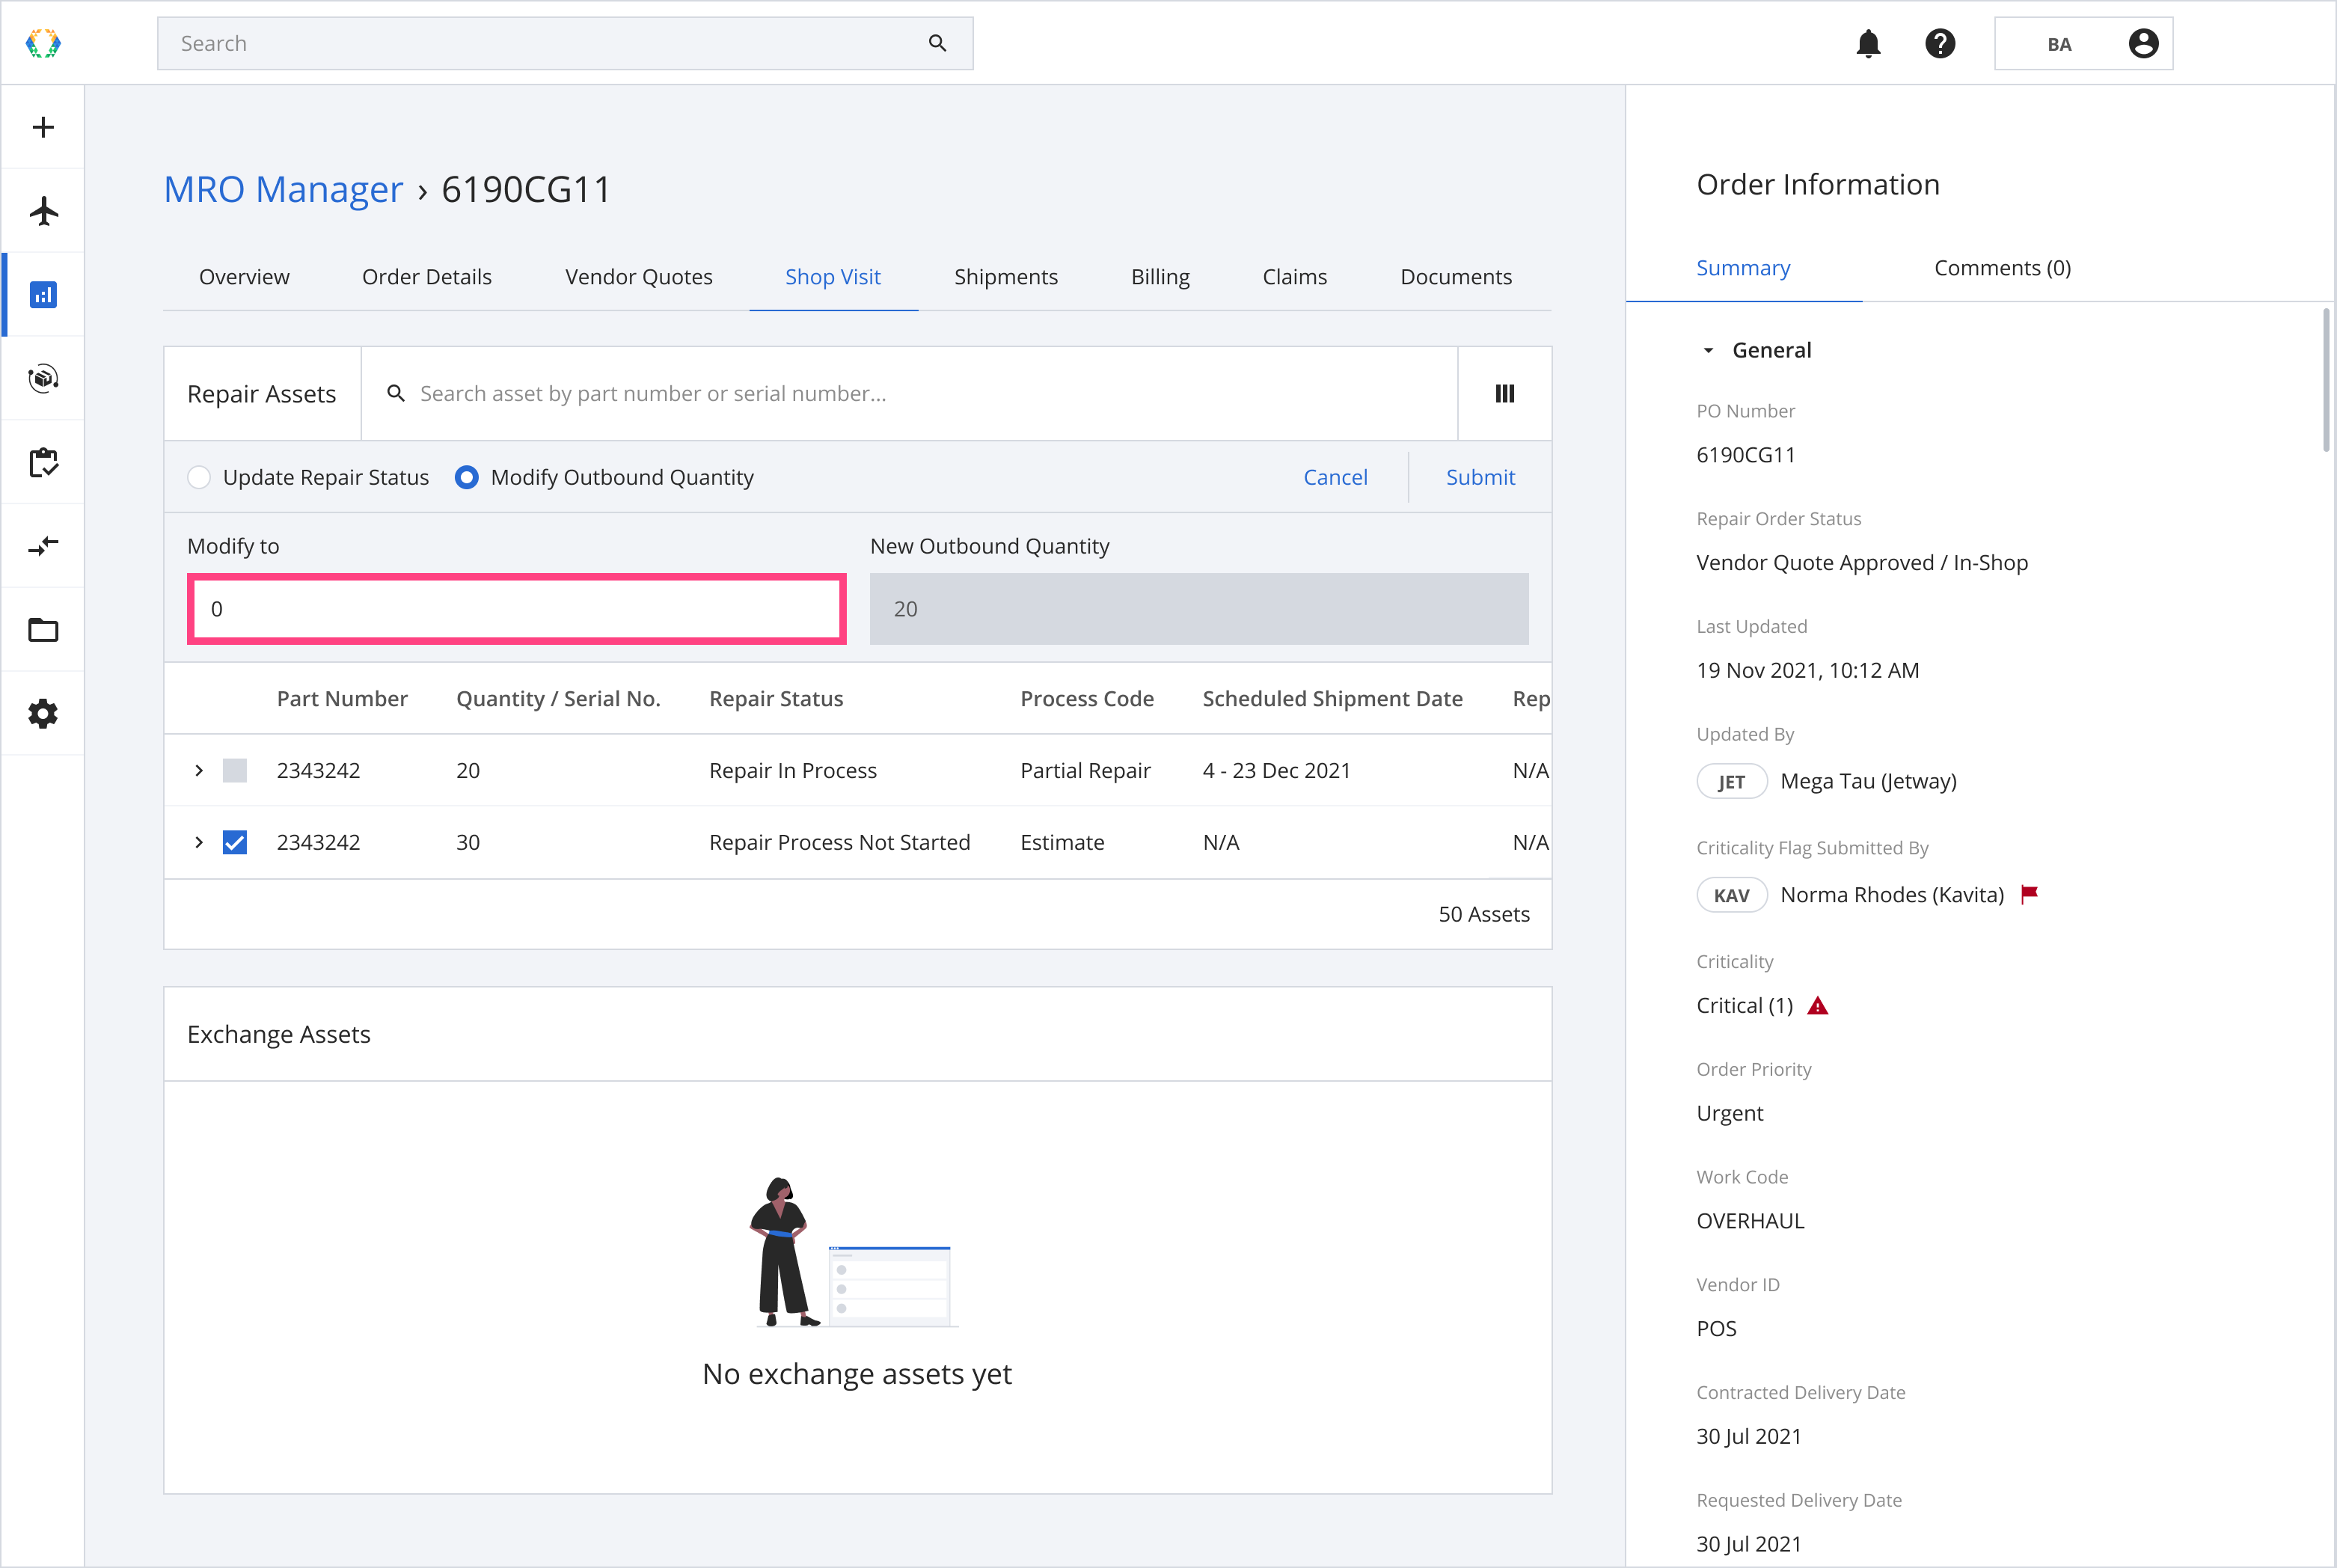
Step 3: Input your new modified quantity into the 'Modify to' field.

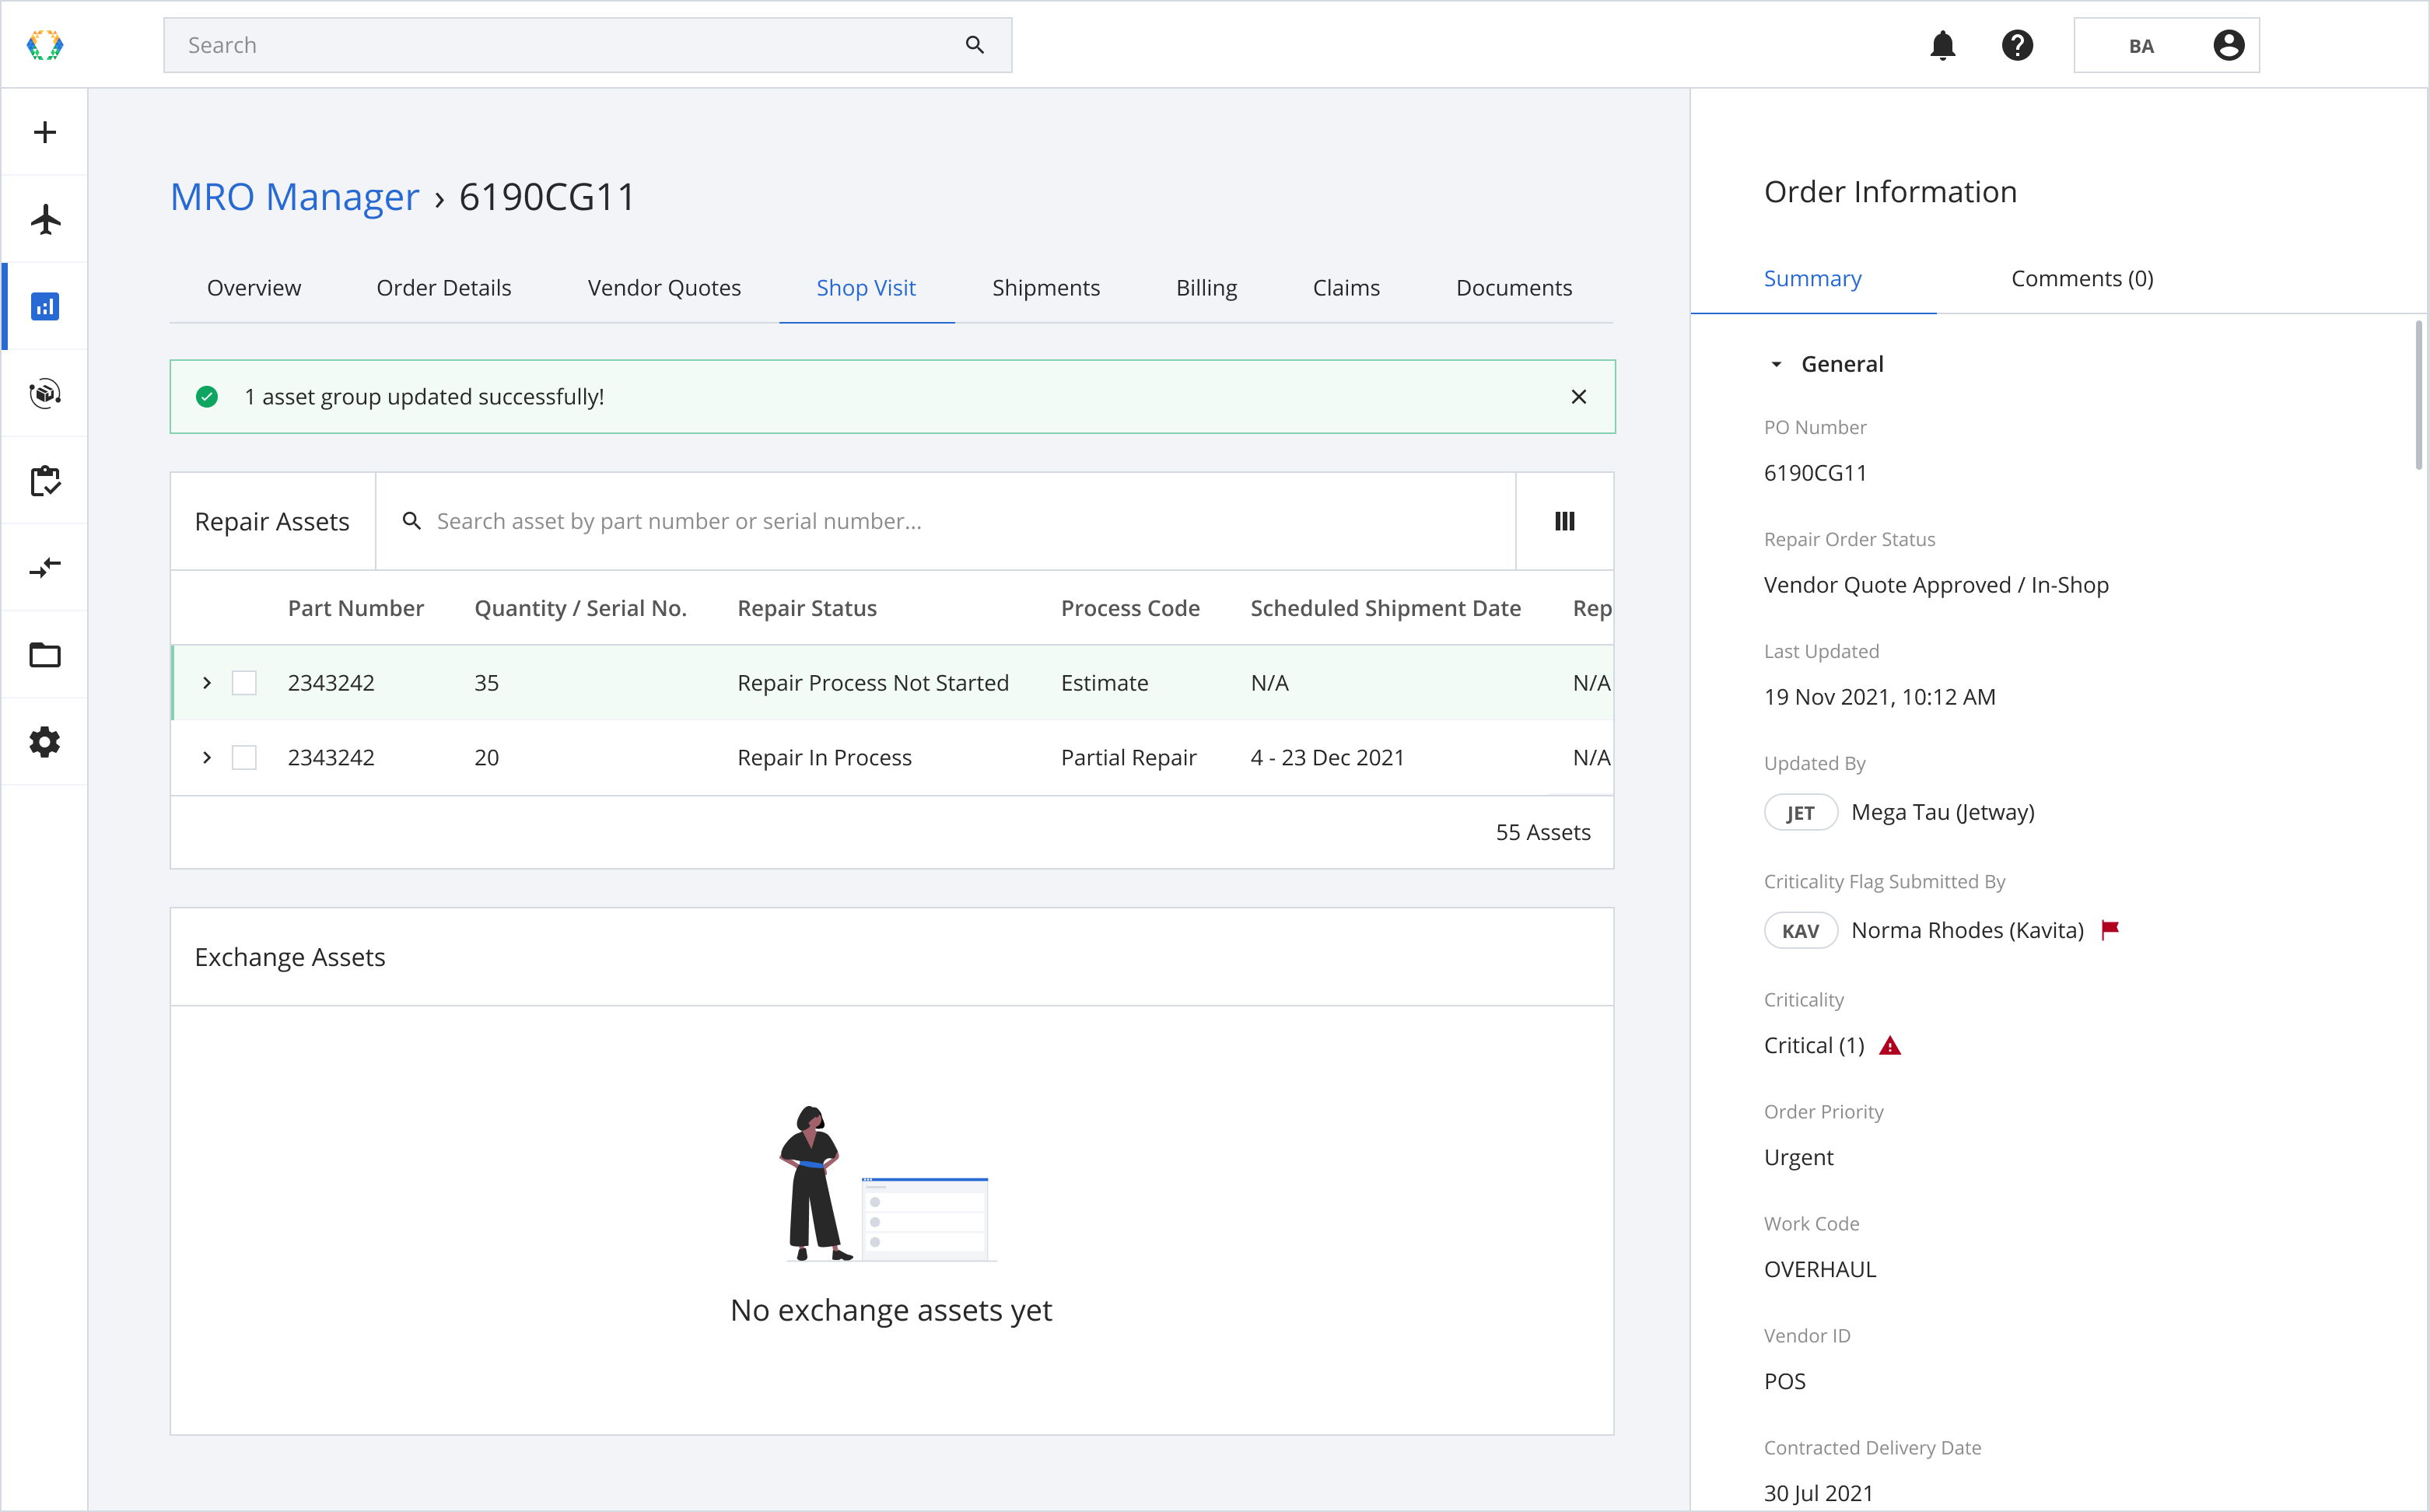
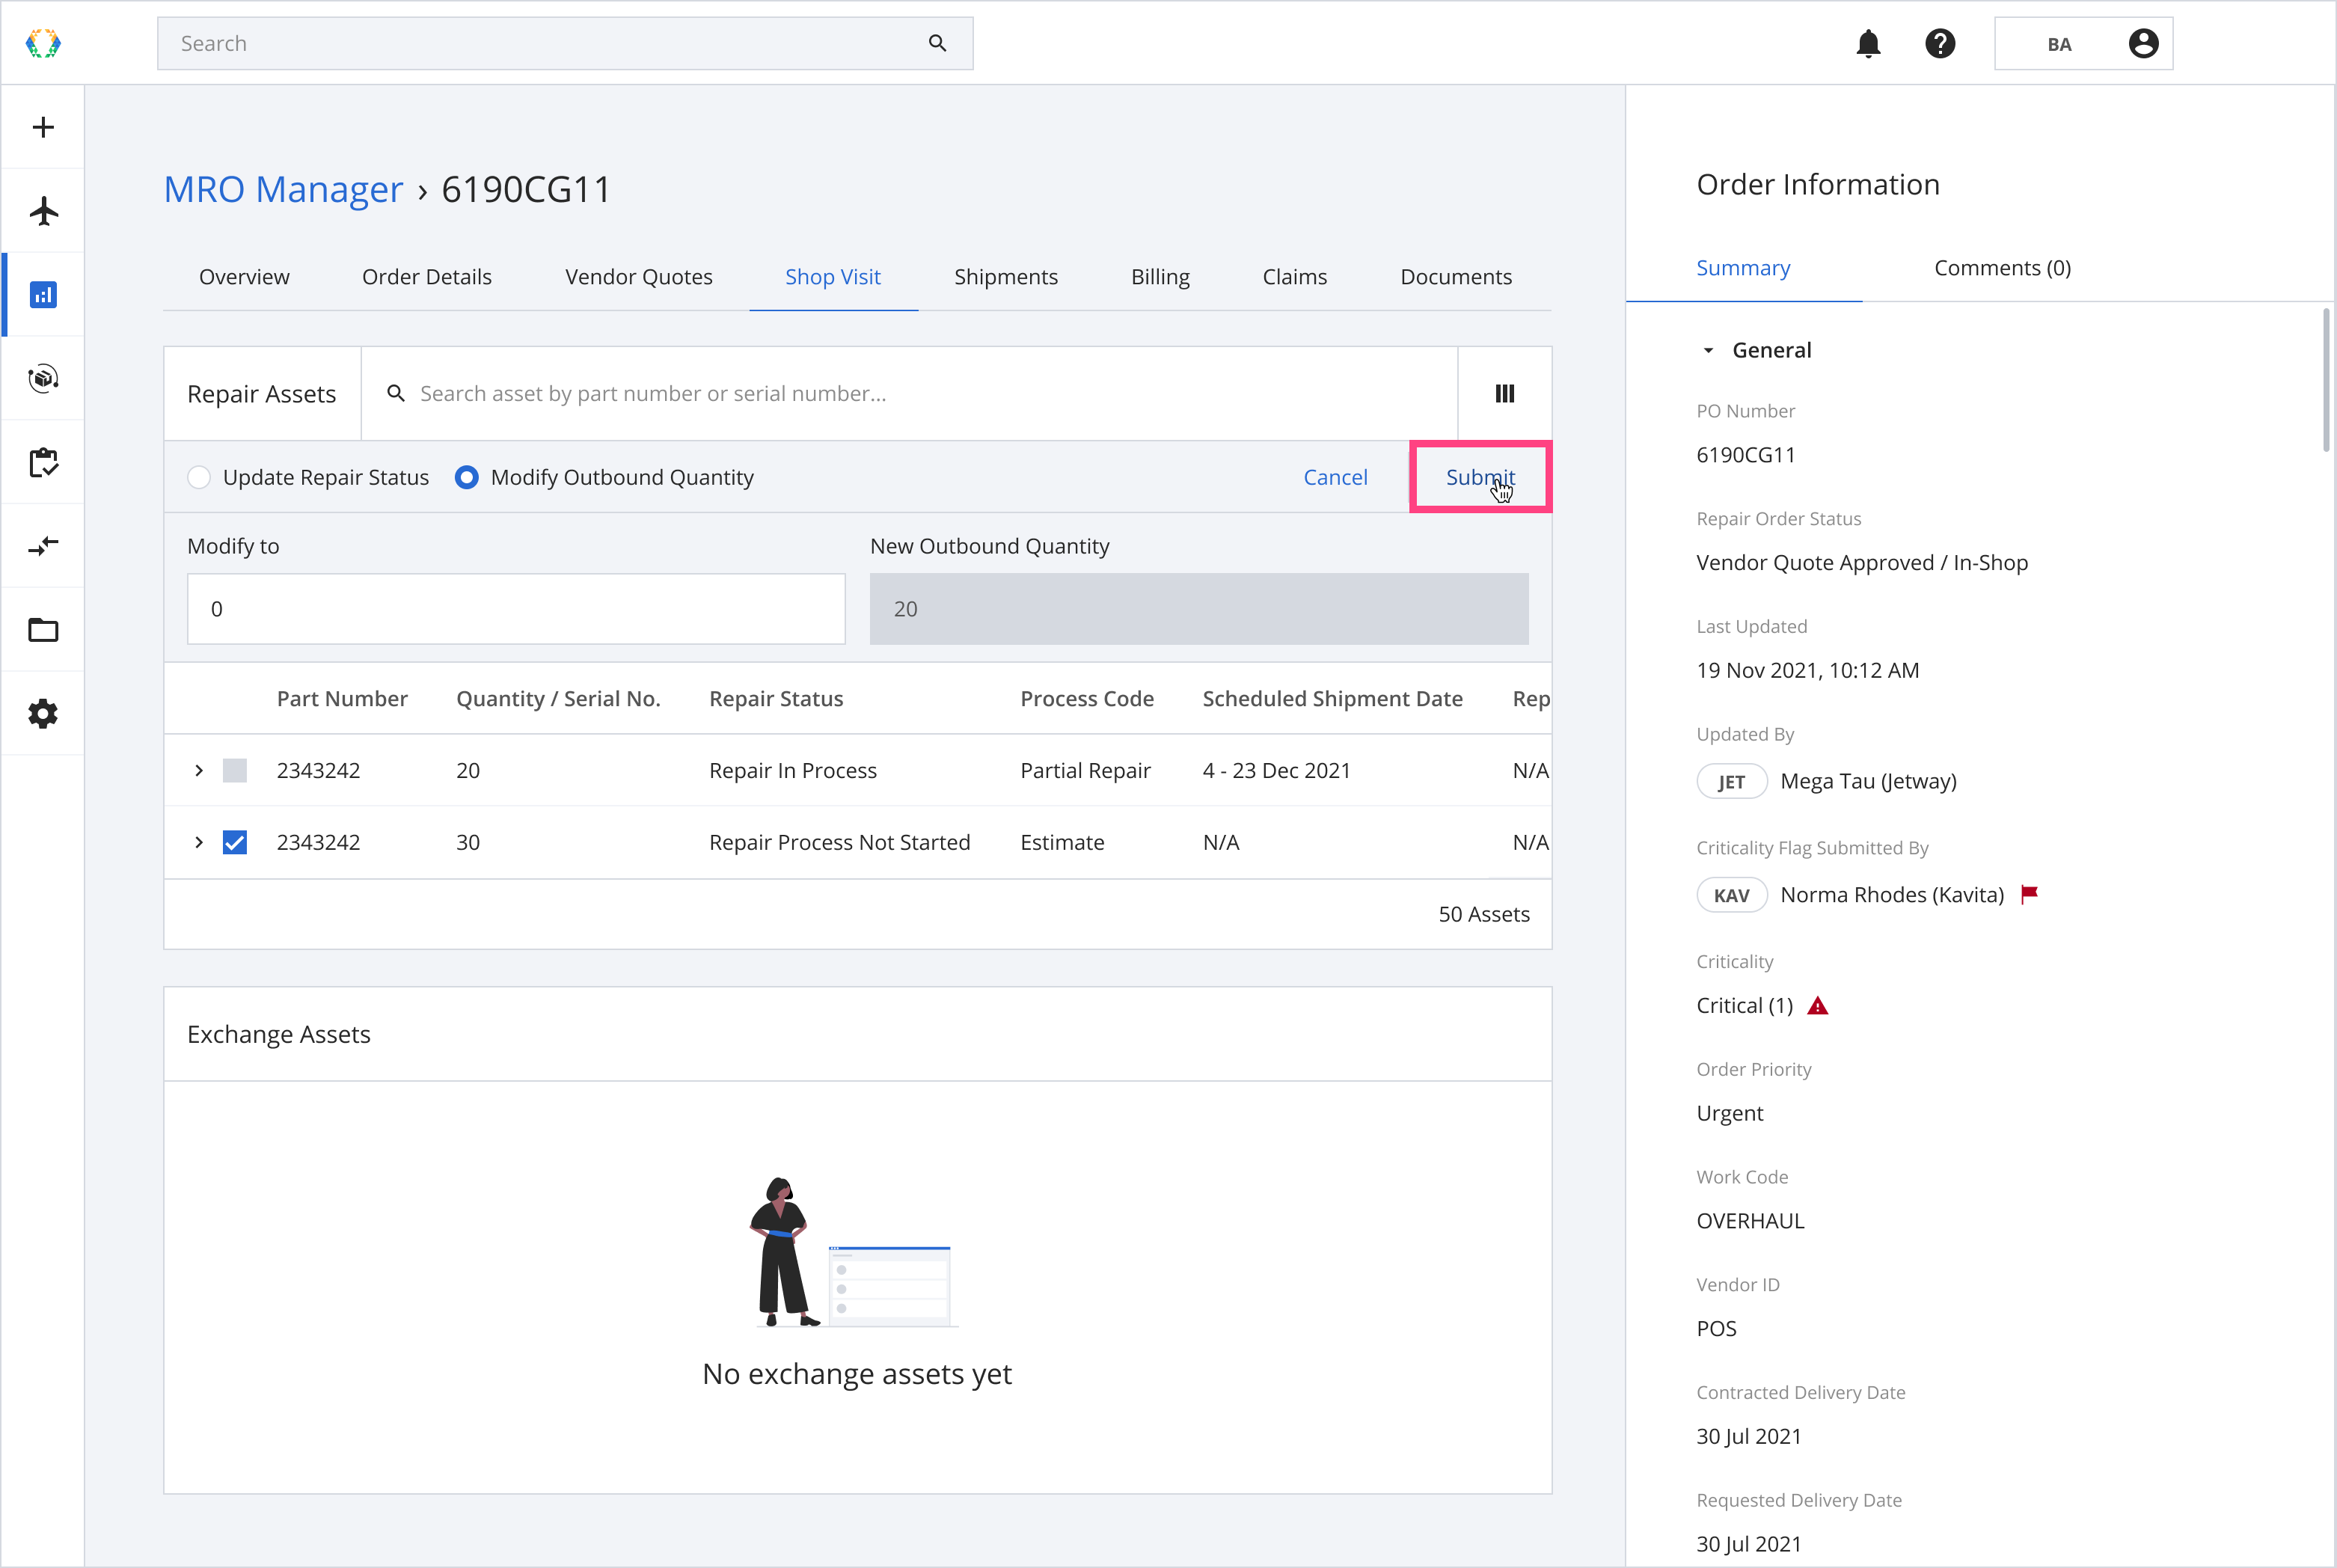
Step 4: Click 'Submit'.

Once your repair assets outbound quantity is updated successfully, a green banner will appear at the top of the repair assets list.
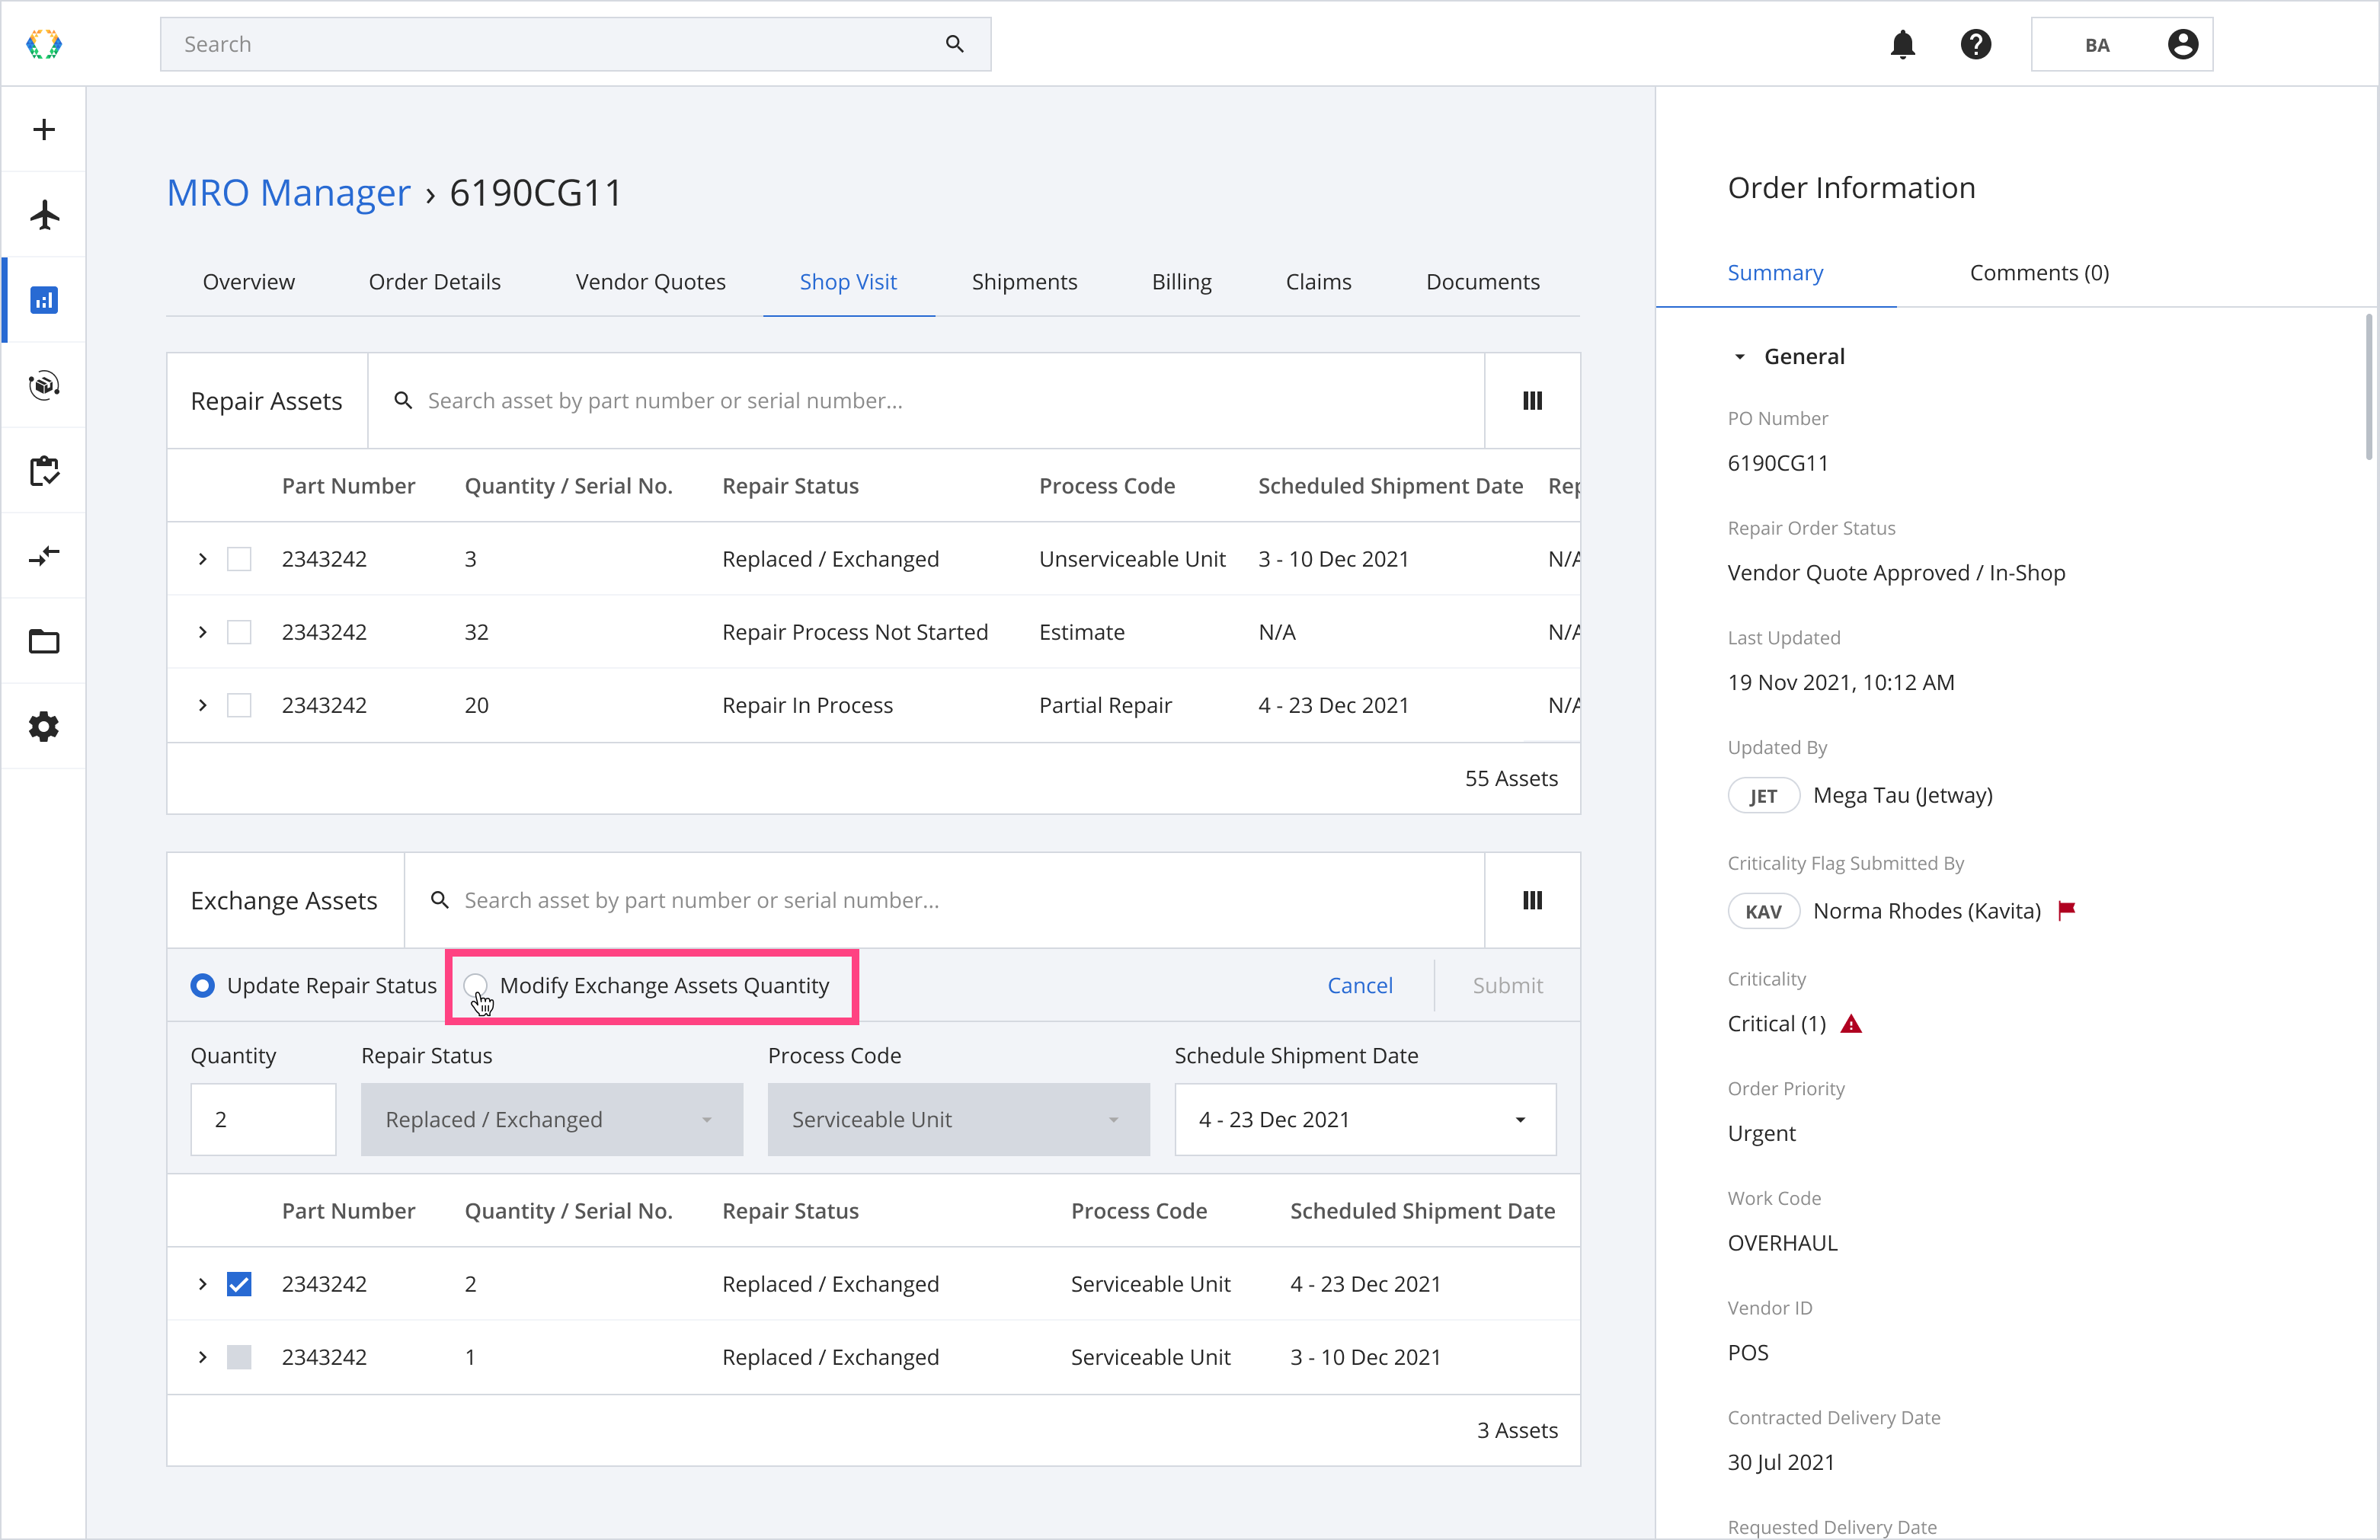
Modifying Exchange Assets Quantity
Step 1: From Exchange Assets, select assets you want to modify quantity.
Step 2: Click 'Modify Exchange Assets Quantity'.
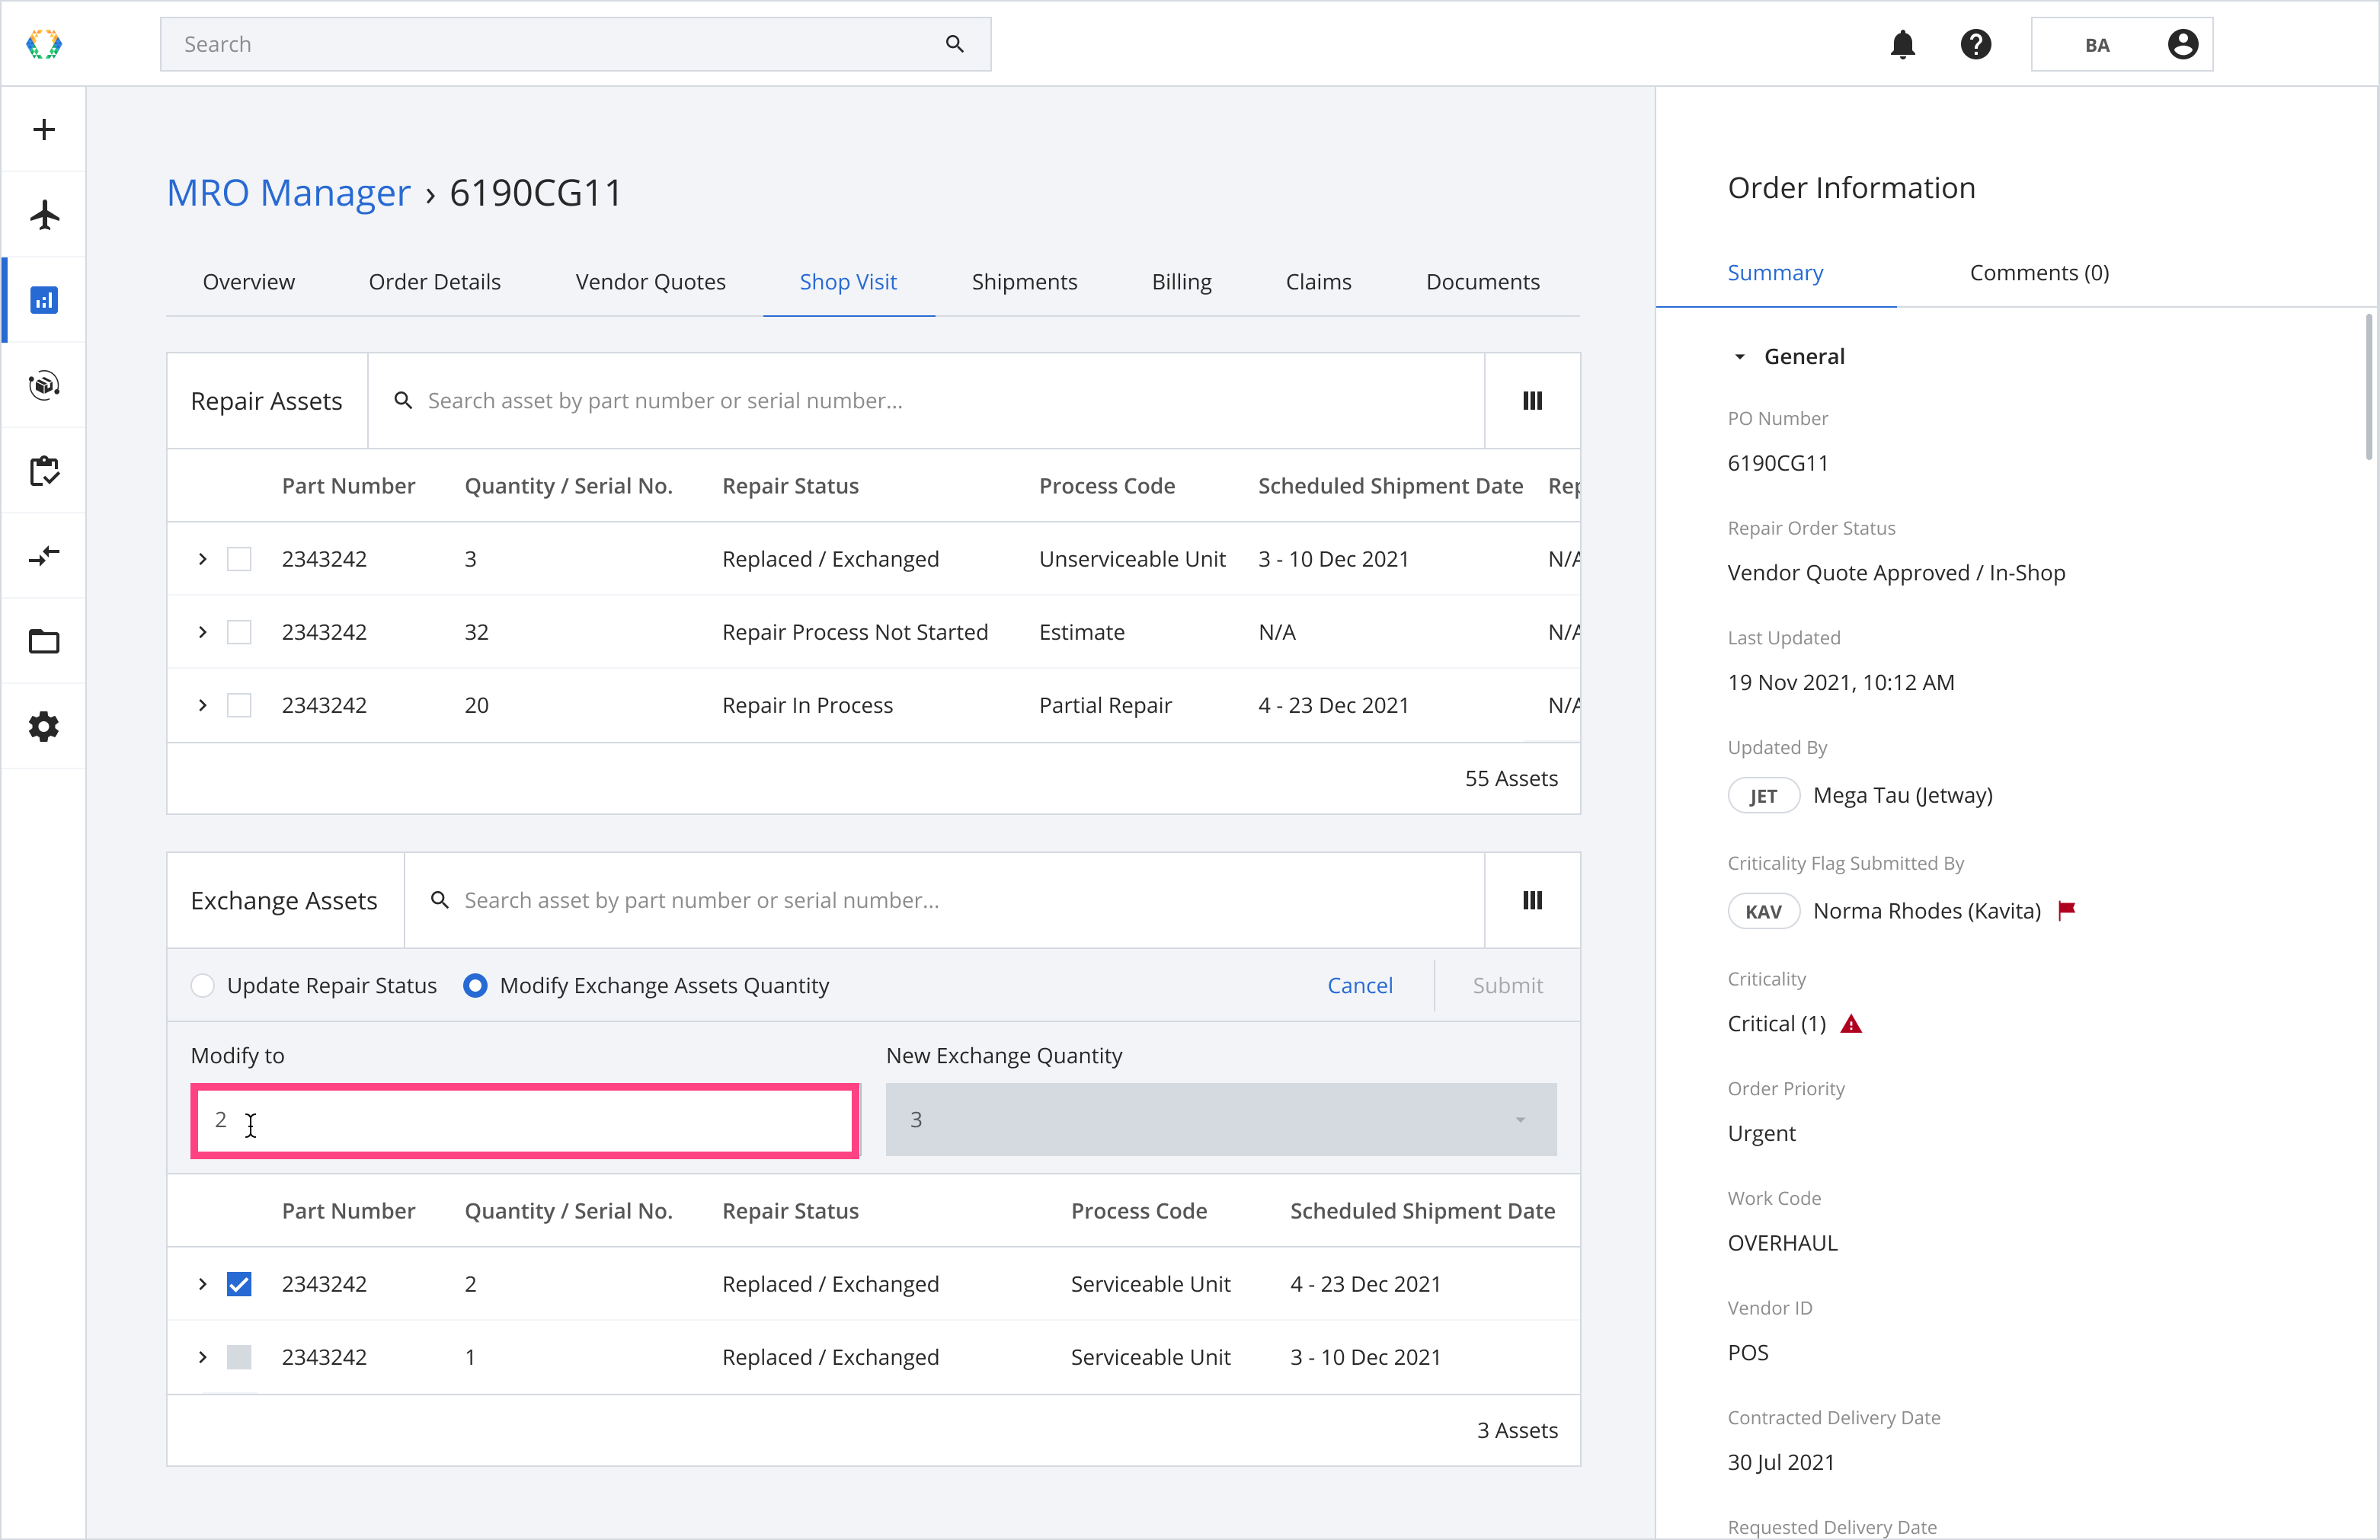
Step 3: In the 'Modify to' field, fill in the new Quantity. The total Exchange Quantity after your modification will be shown in the right field.
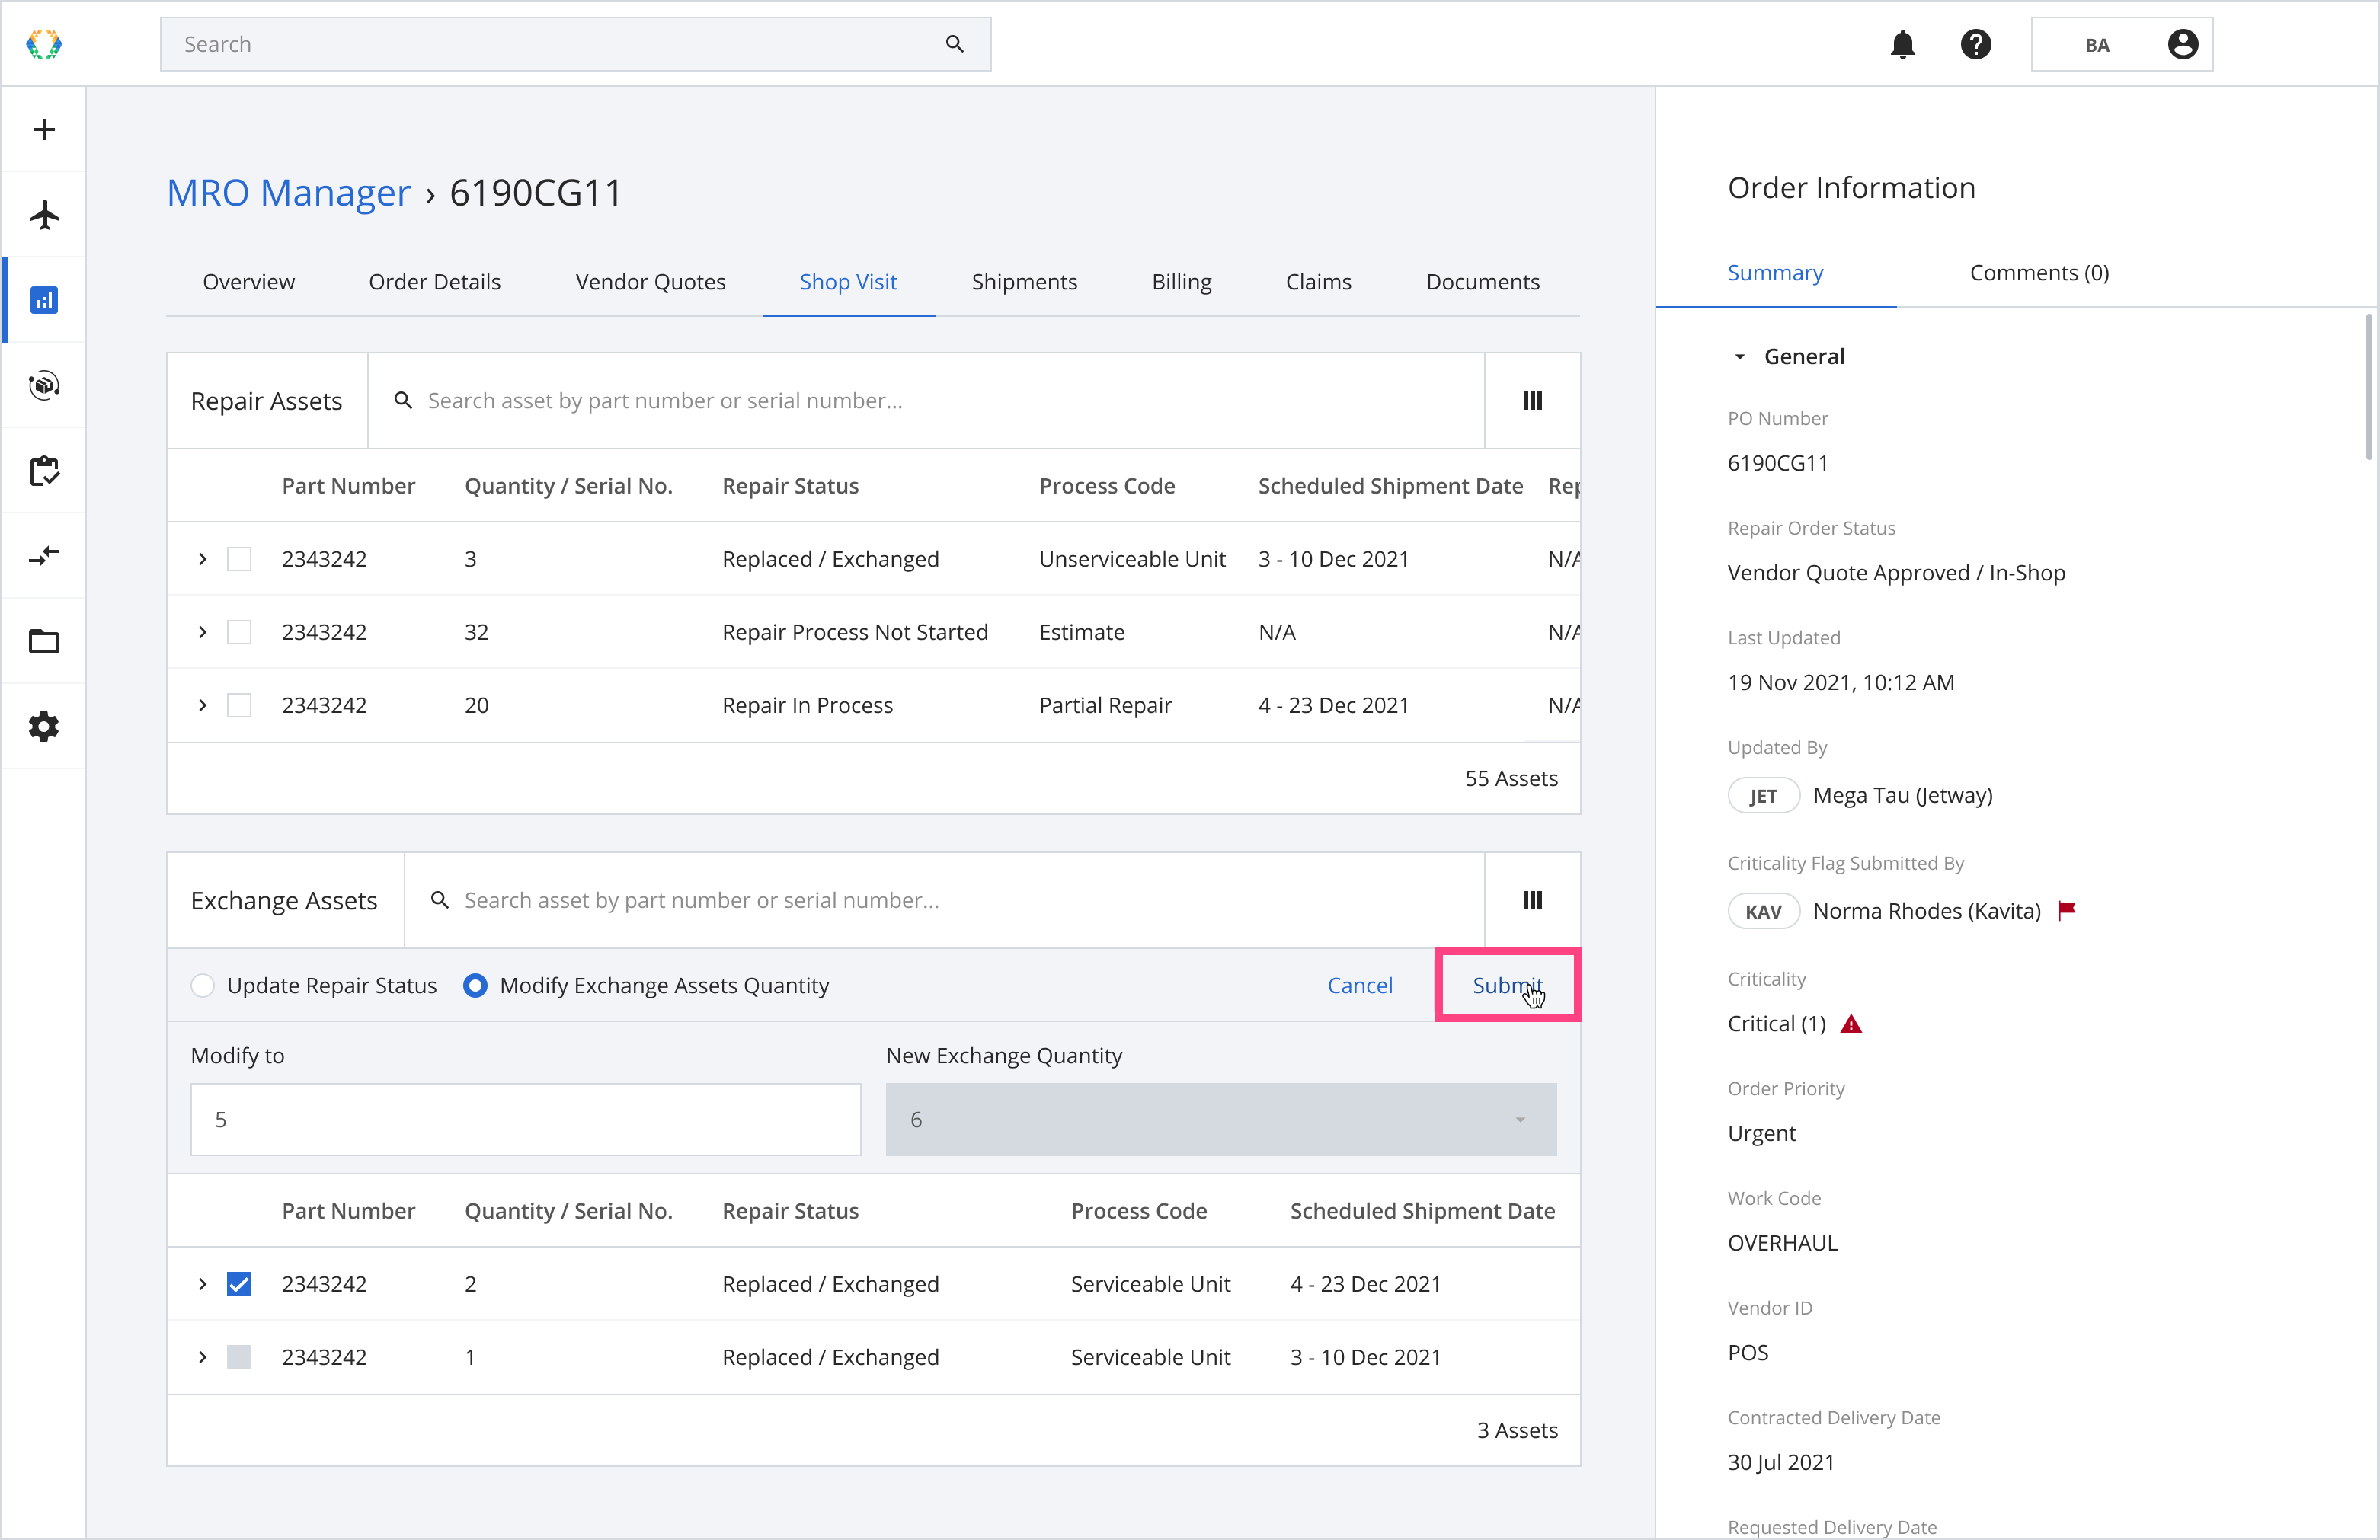
Step 4: Click 'Submit'.
Once the exchange assets outbound quantity is updated successfully, a green banner will appear at the top of the exchange assets list.
Removing Repair/Exchange Assets
Step 1: From Repair Assets, select assets you want to remove.
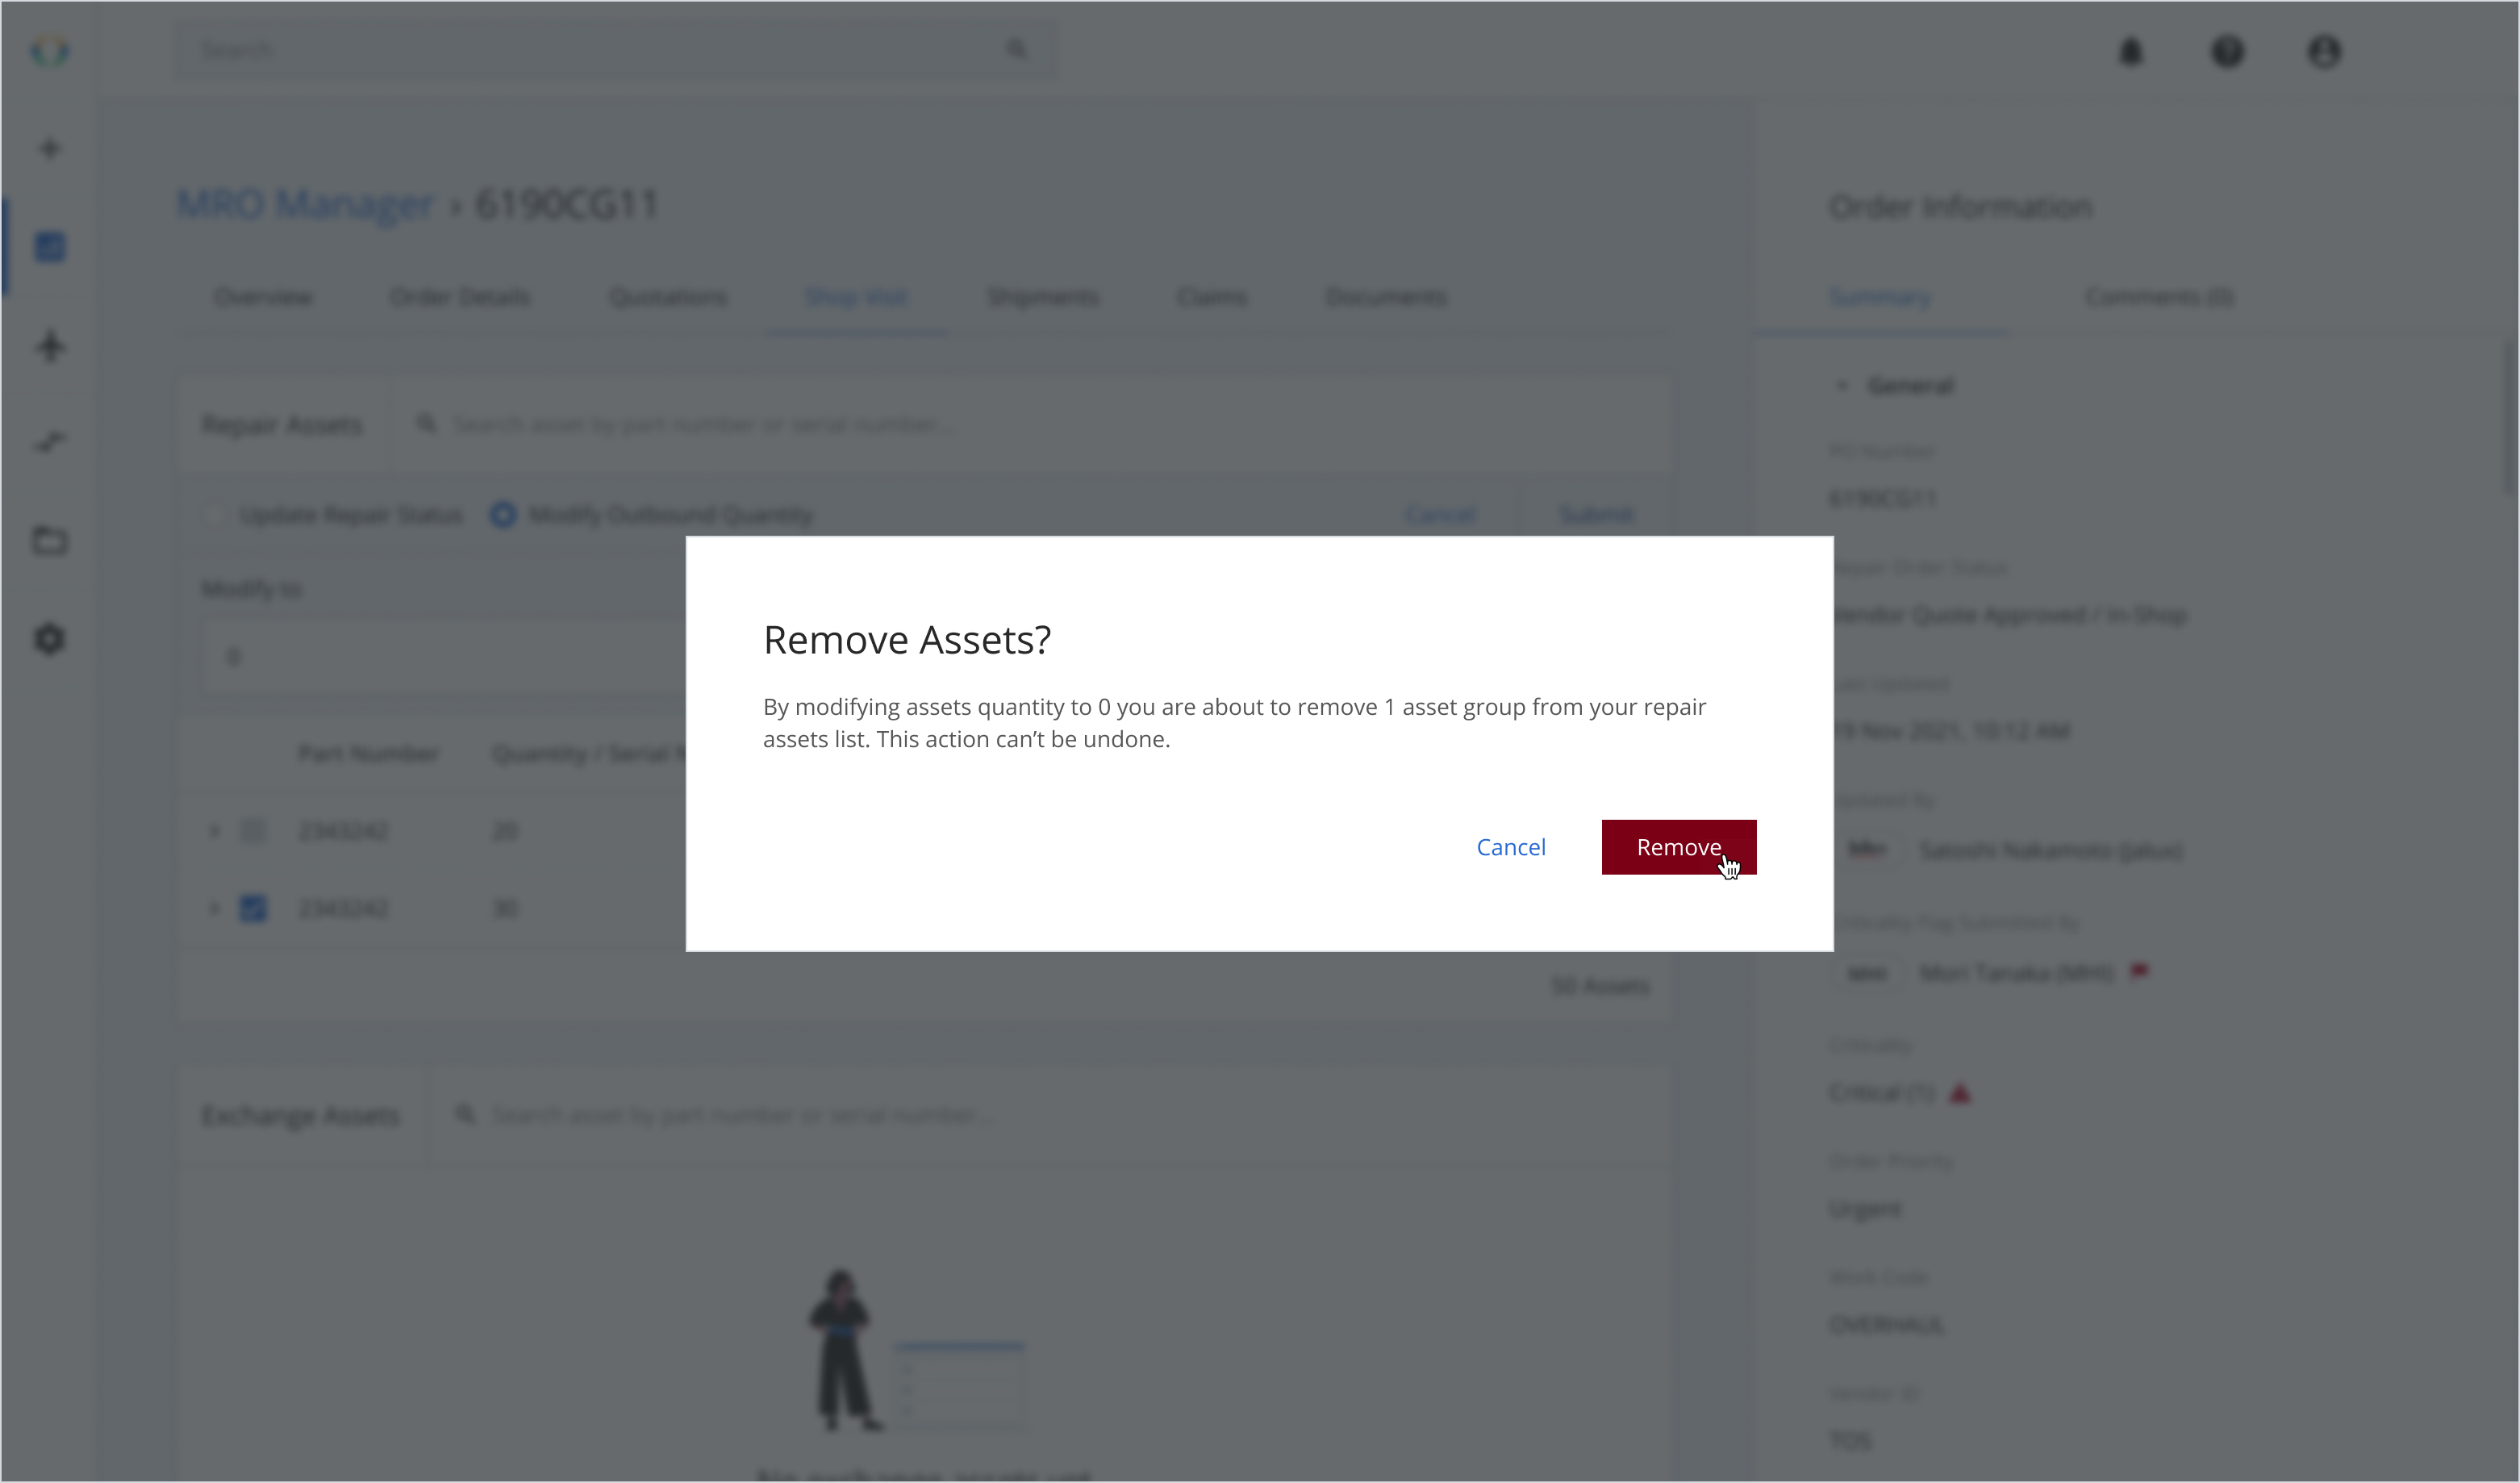
Step 2: In the field of 'Modify to', change the Quantity to 0.
Step 3: Once the Outbound Quantity is modified, click 'Submit'.
Step 4: A confirmation message will appear, click 'Remove'.
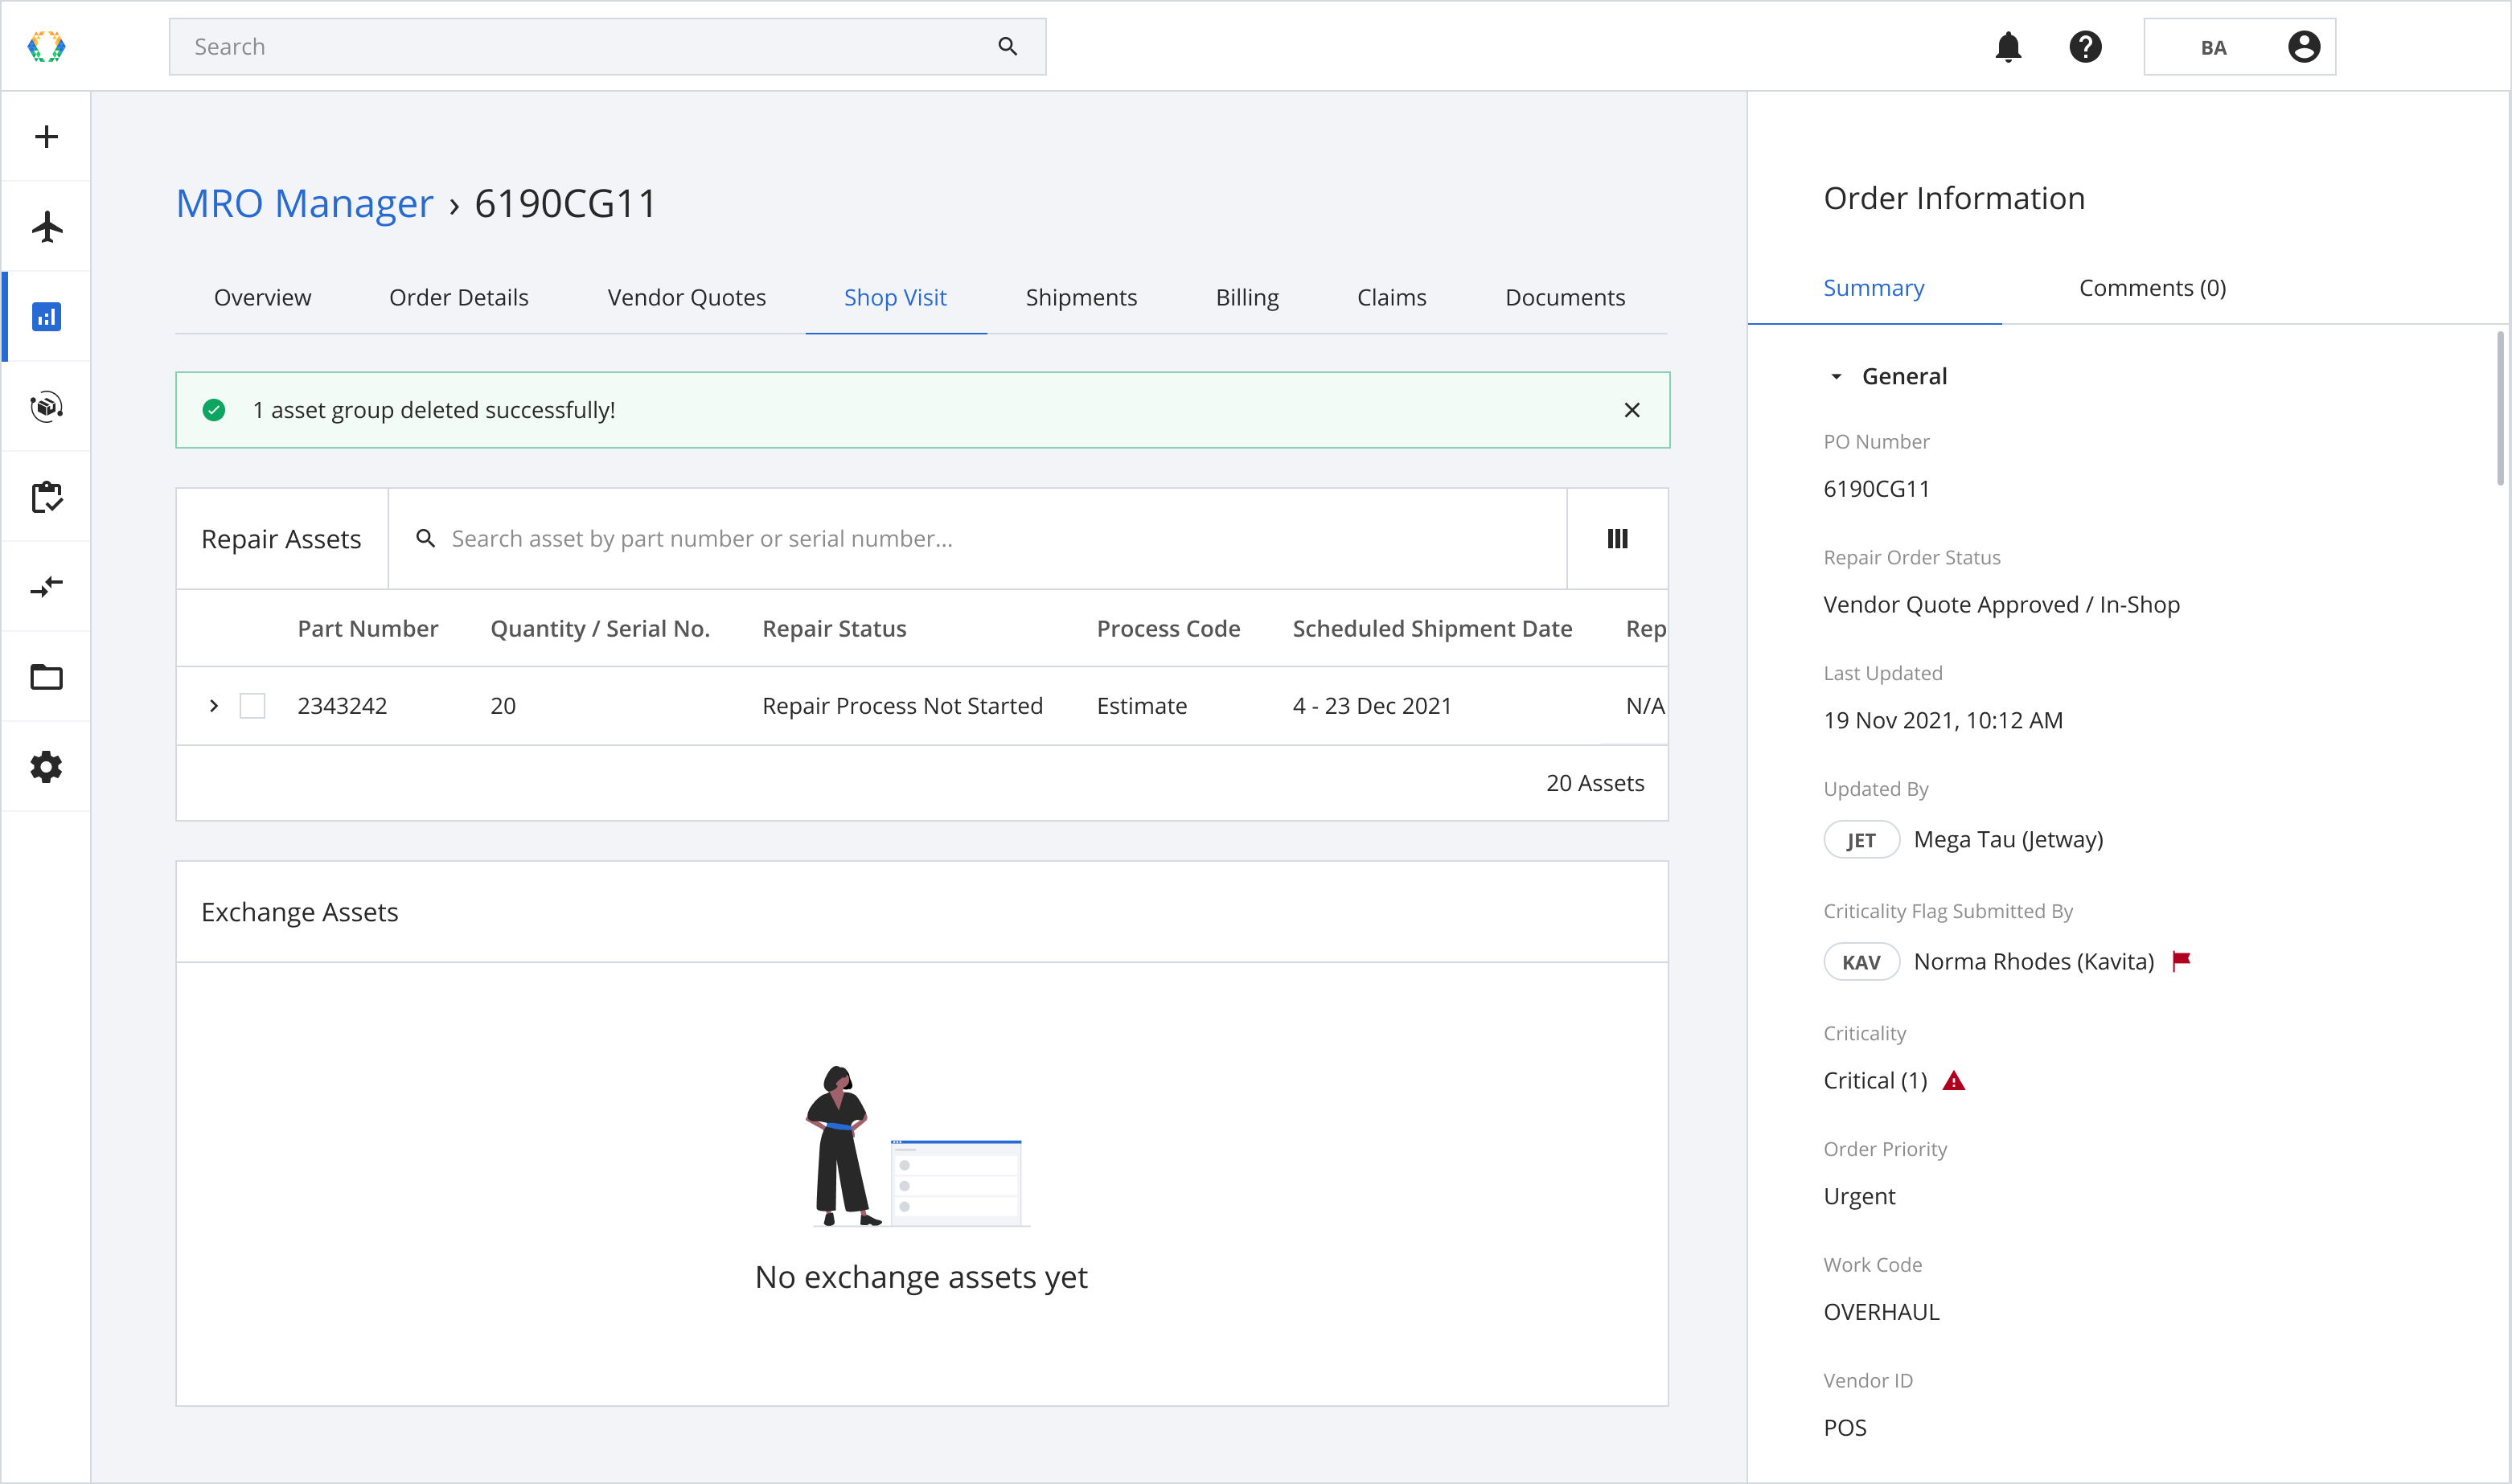
Once the assets are removed successfully, a green banner will appear at the top of the repair assets list.
The total outbound quantity of repair/exchange assets under the list cannot be 0.
Updated over 1 year ago