Manage Documents
Getting Started
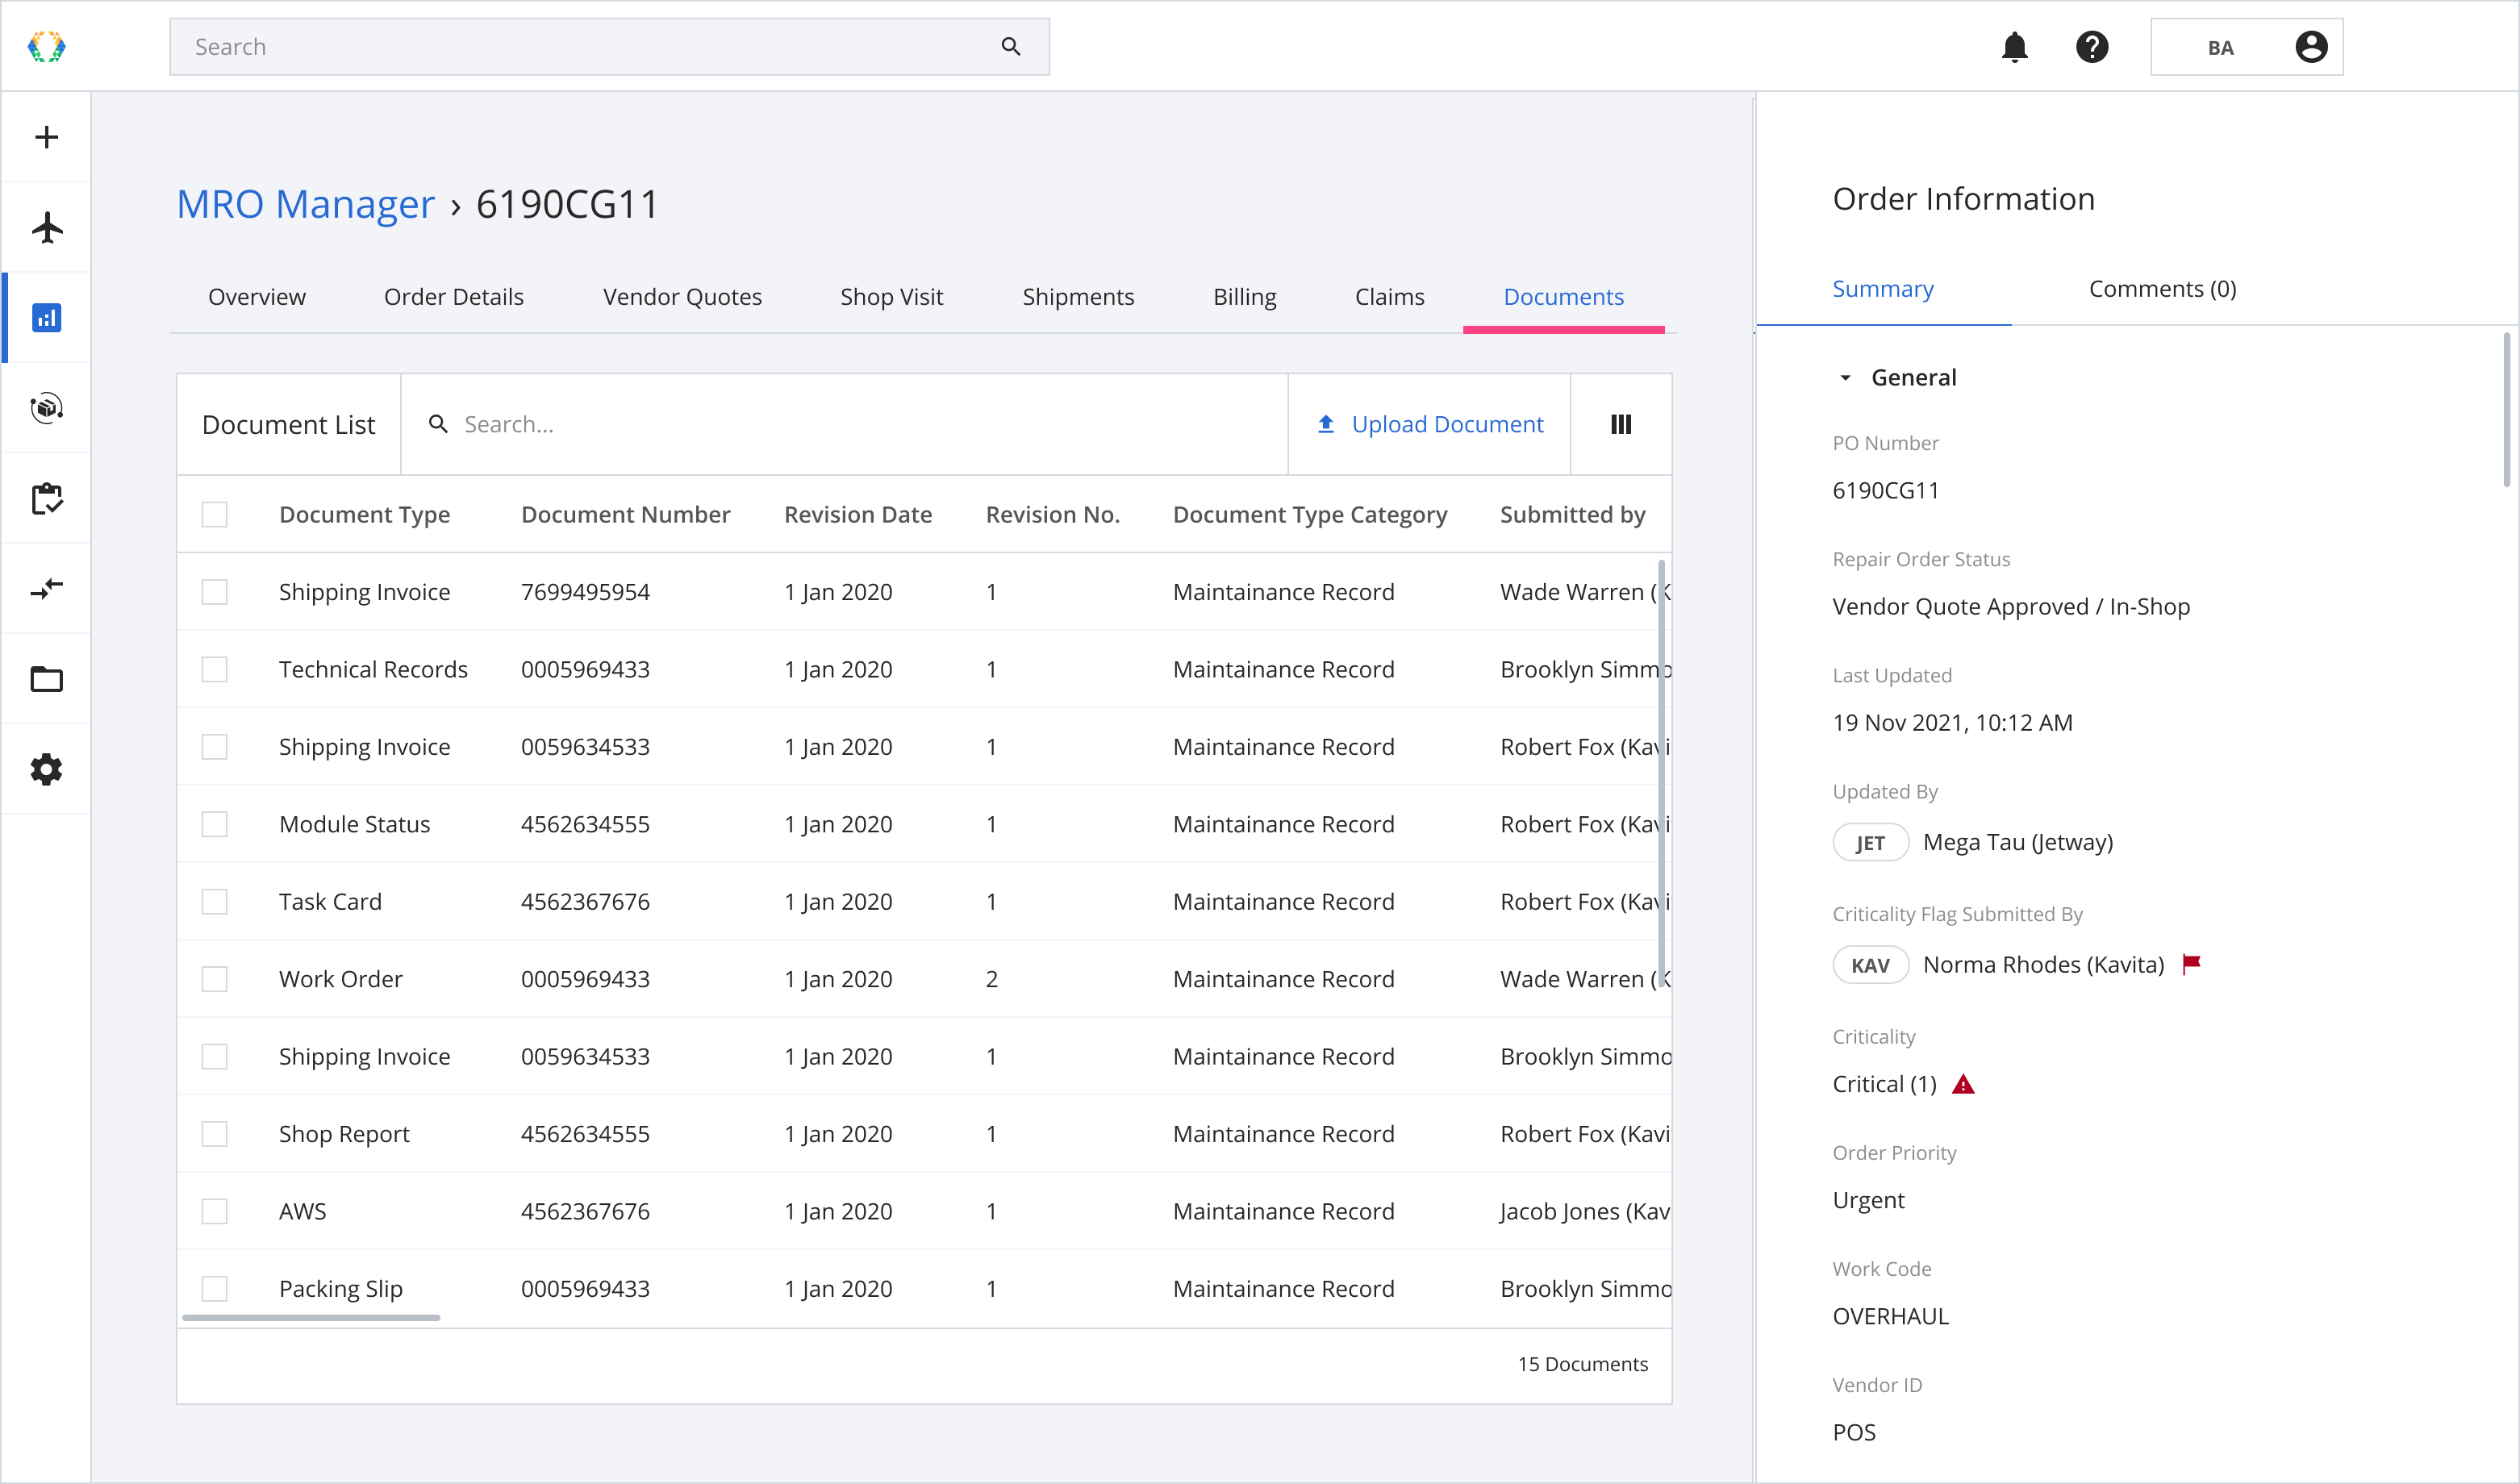
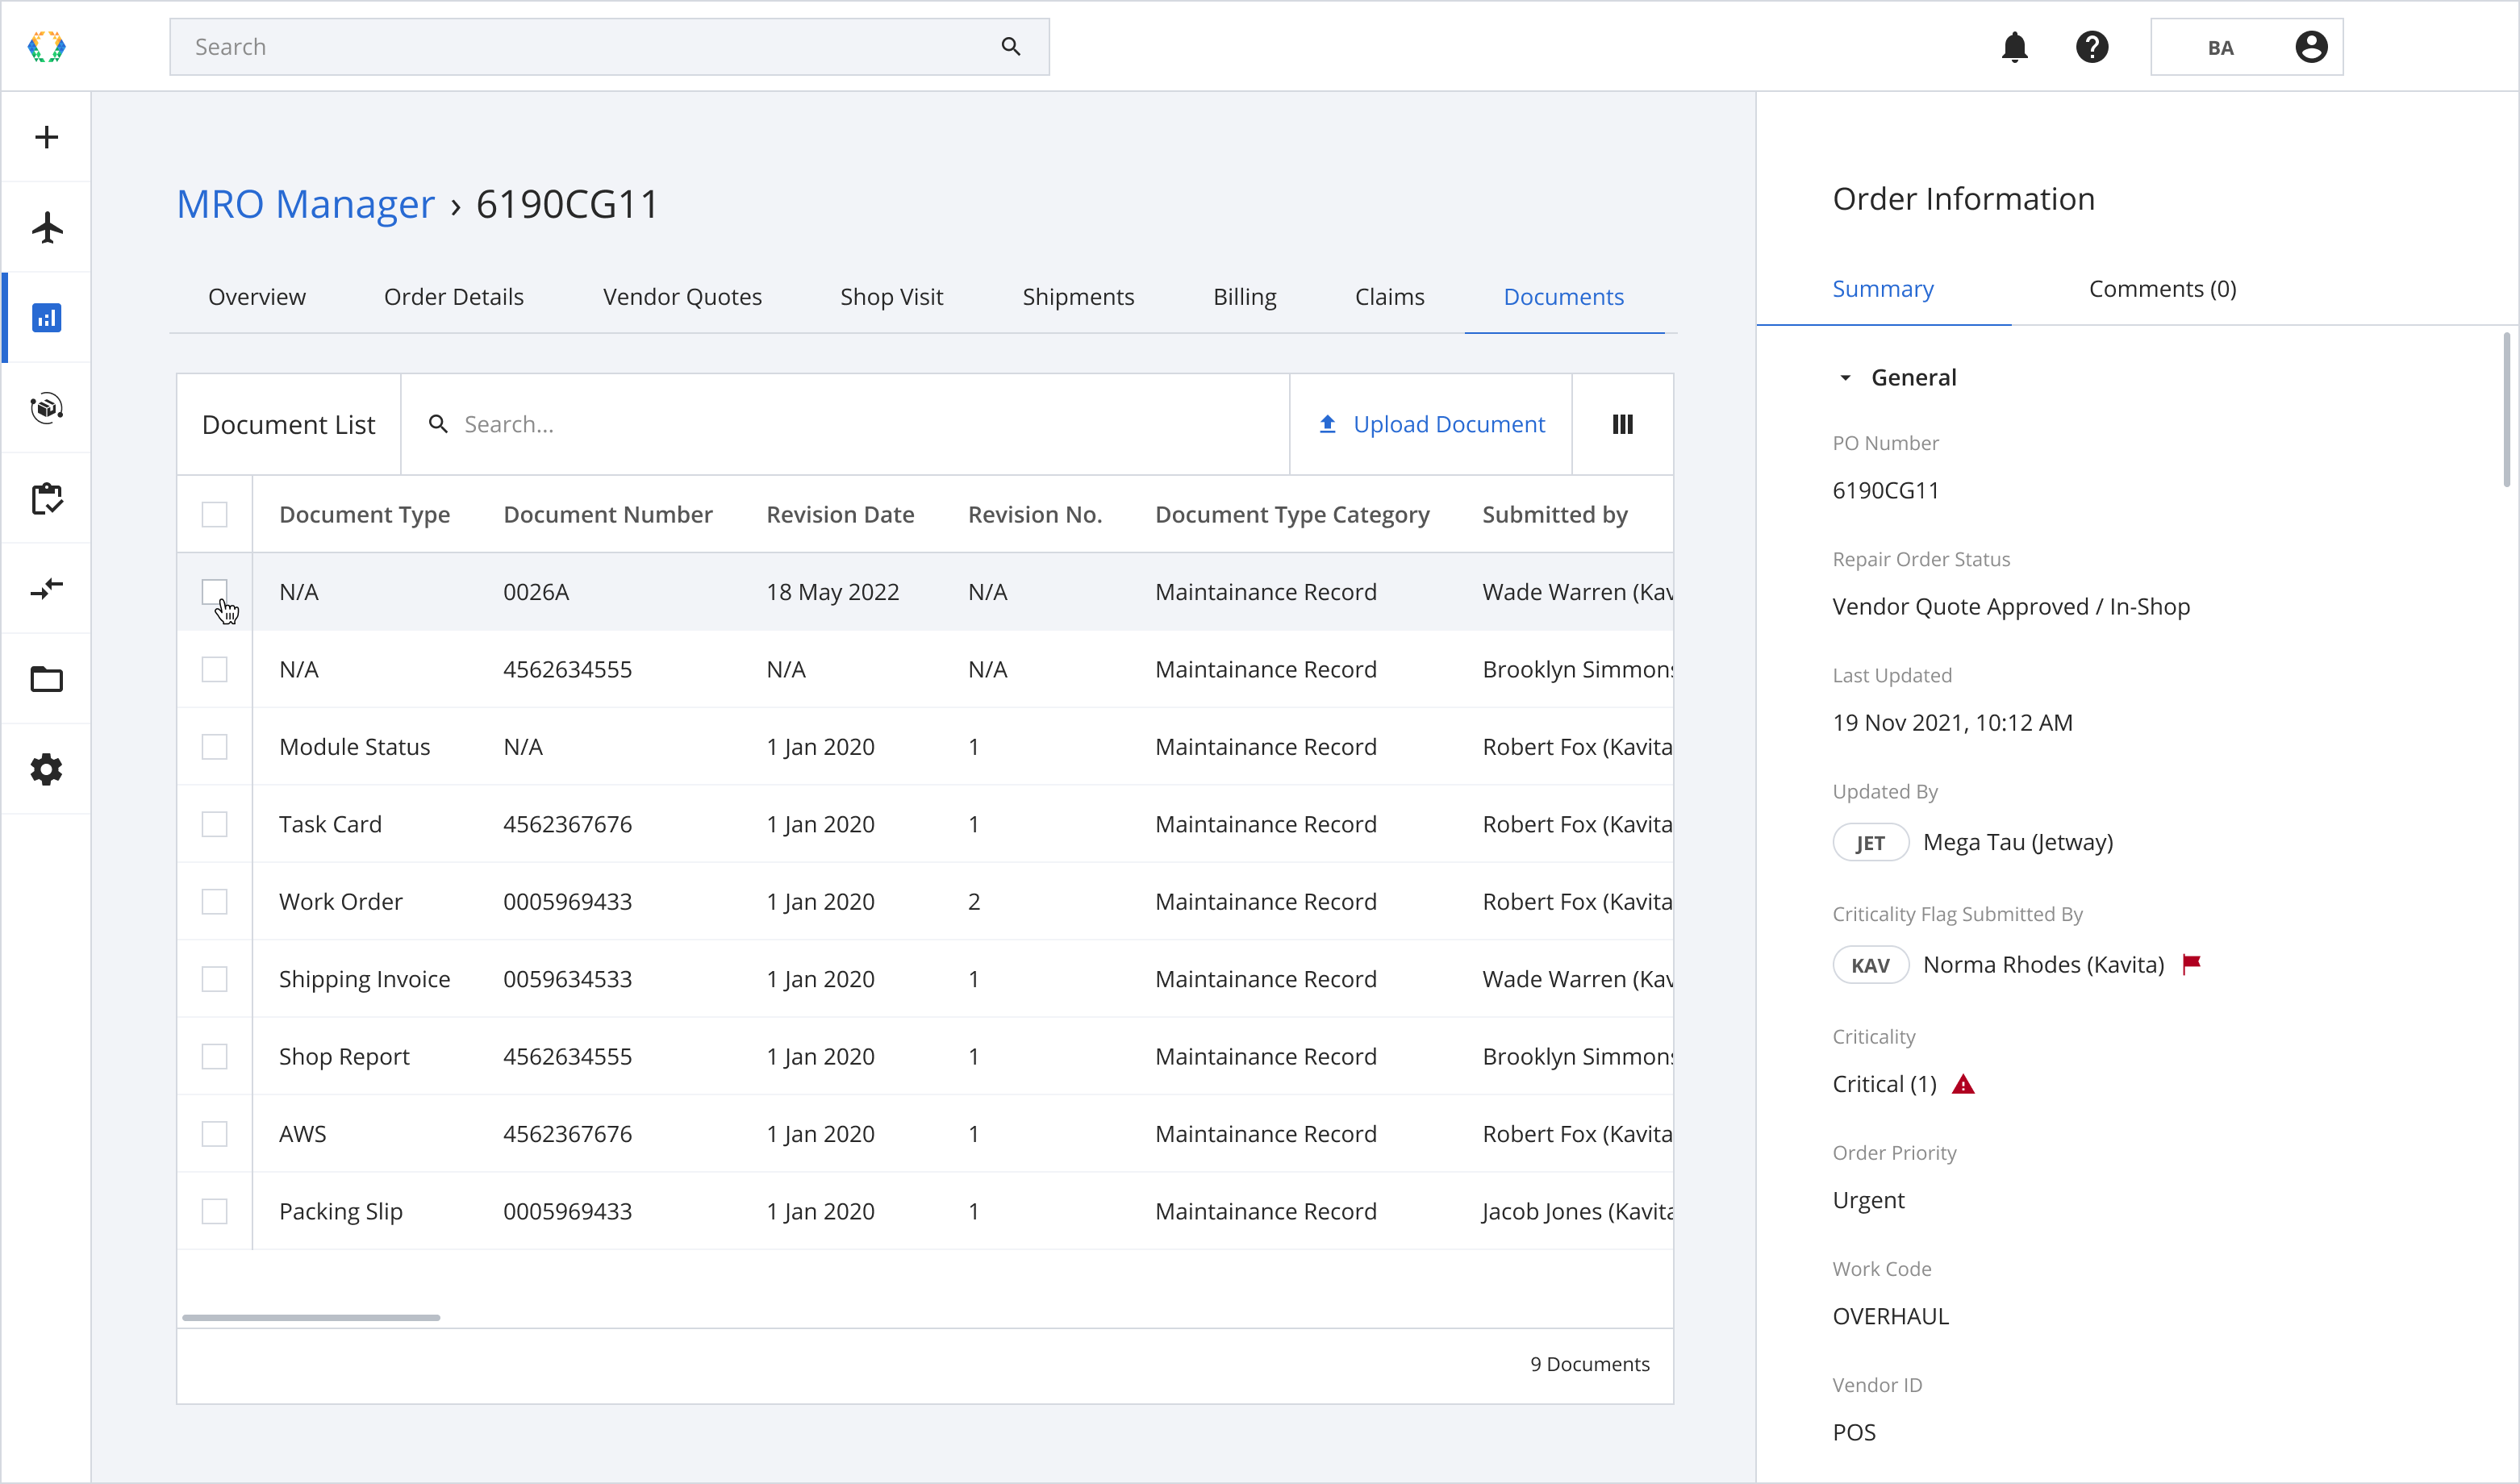
Under the Documents tab of the Repair Order Details page, you can manage the documents related to your repair order.
Uploading Documents
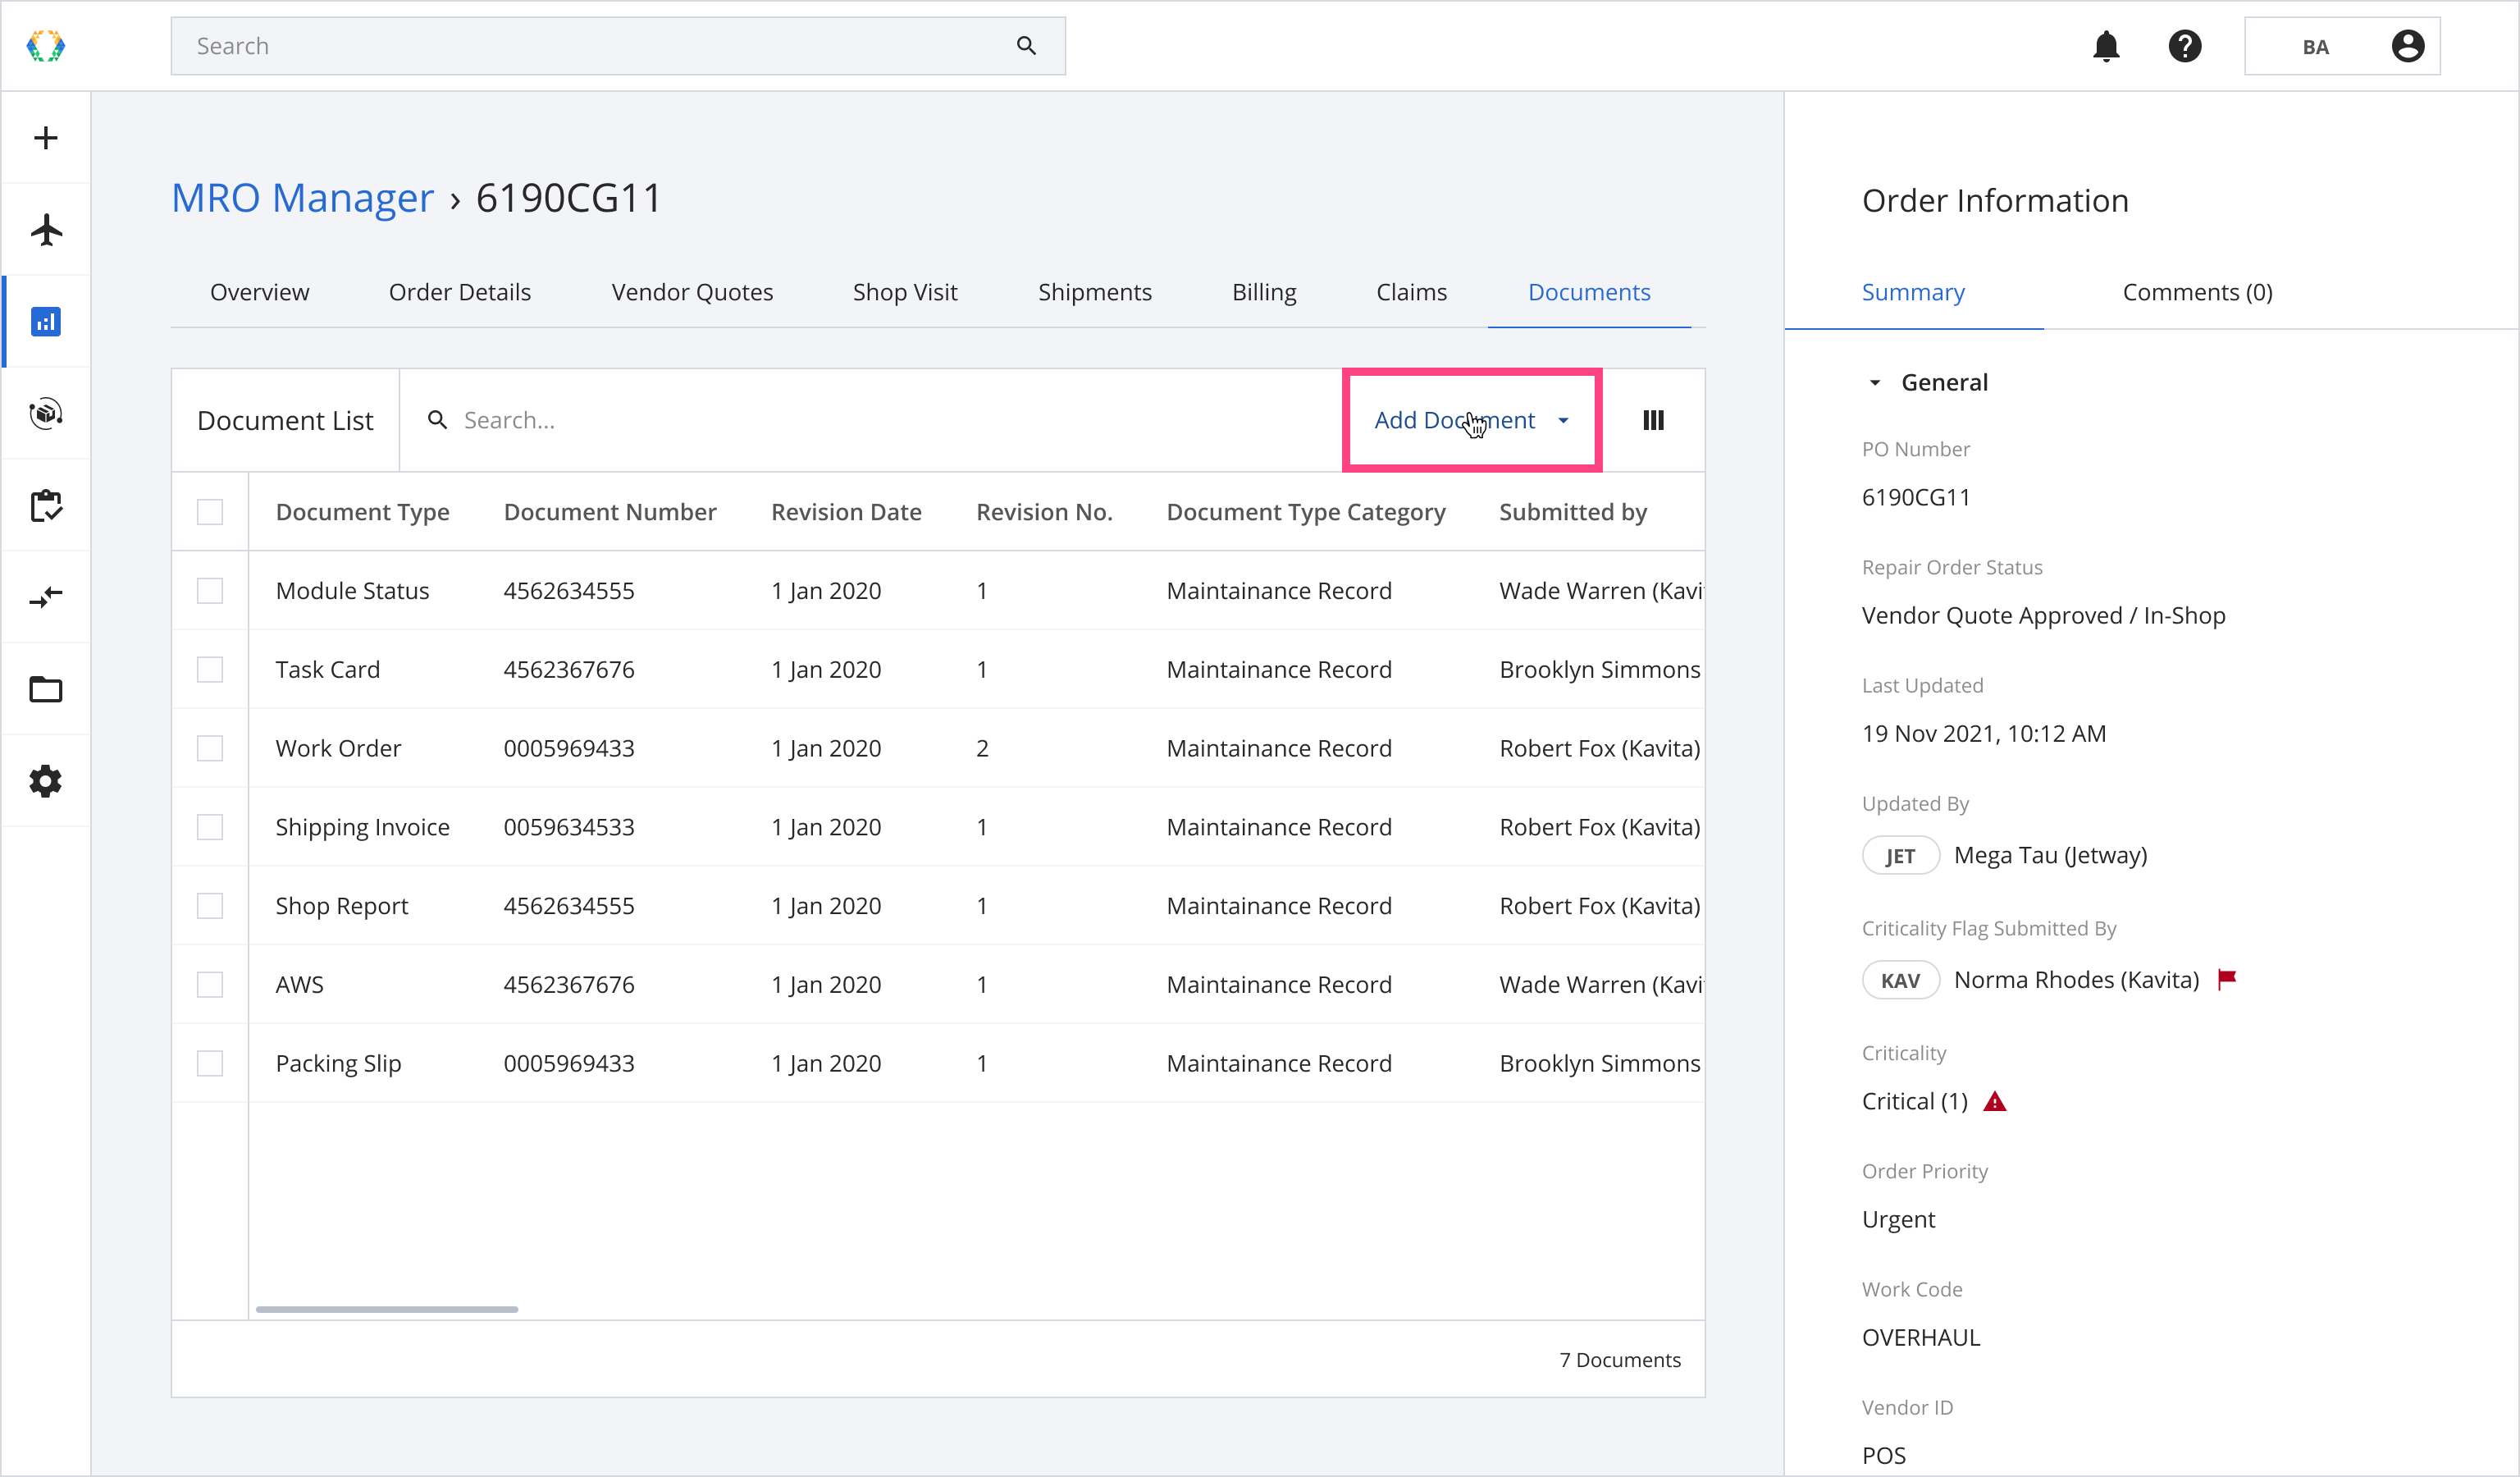
Step 1: Click 'Add Document'.
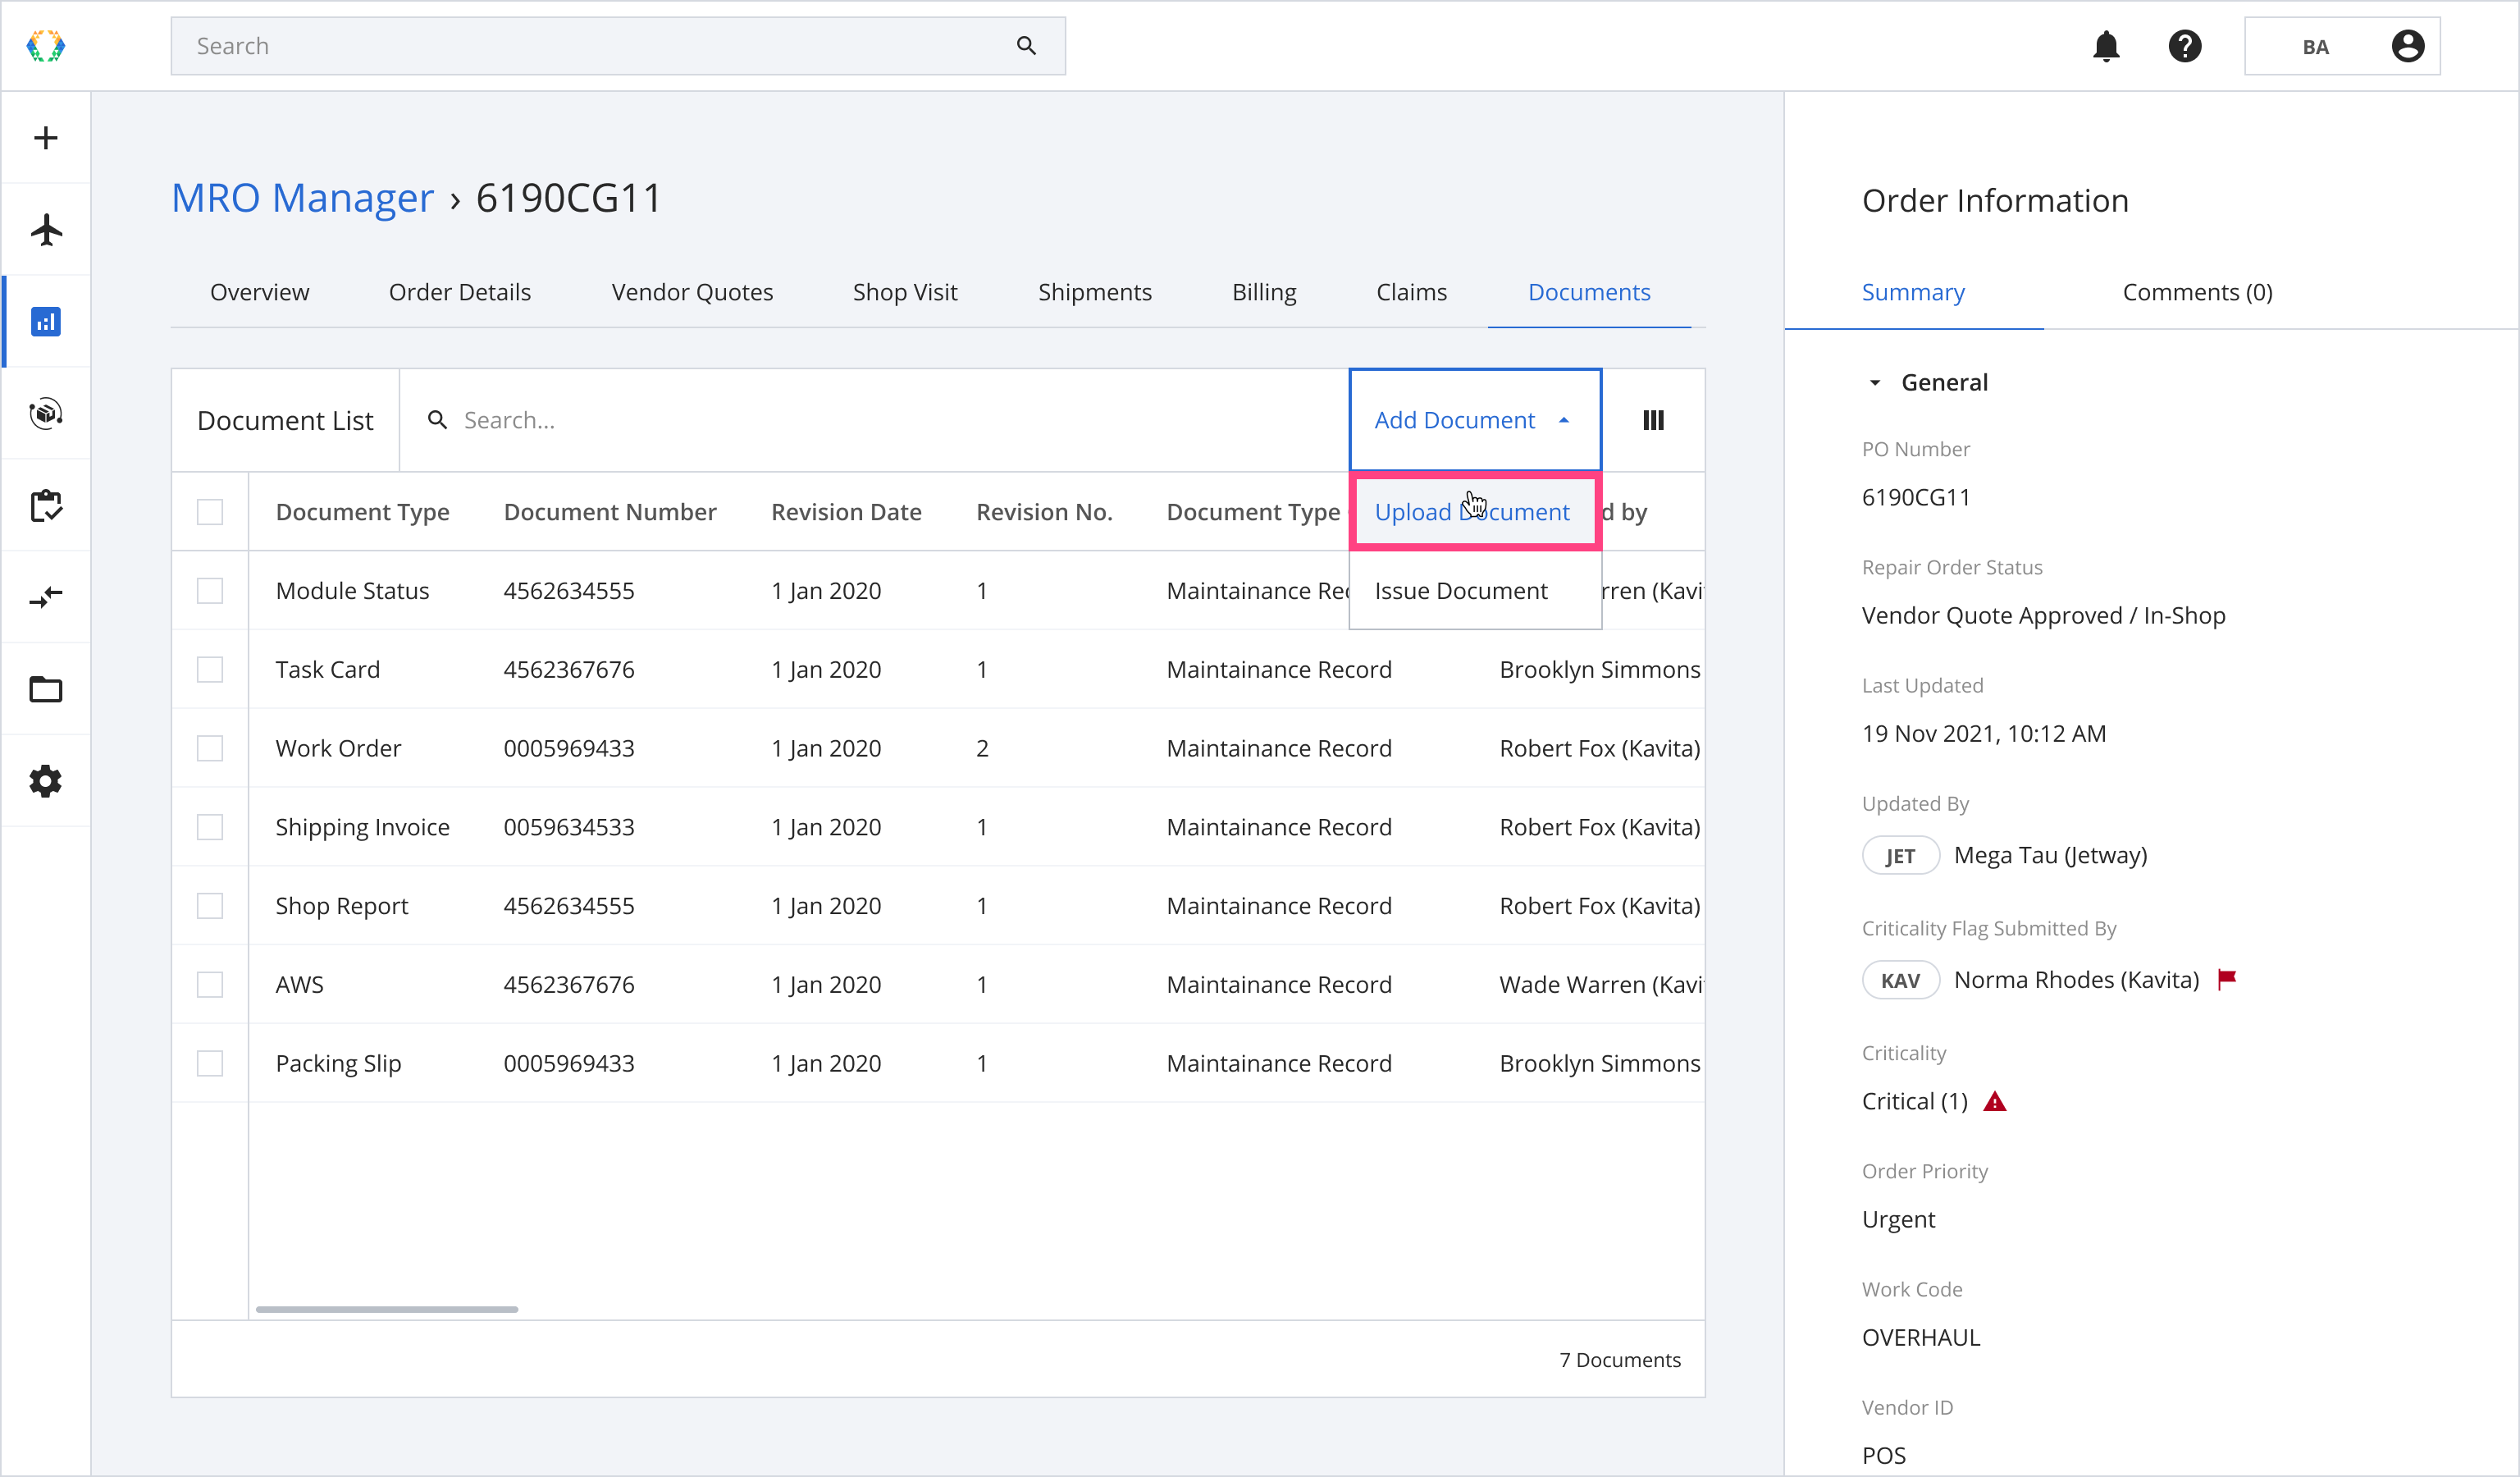
Step 2: Click 'Upload Document'.
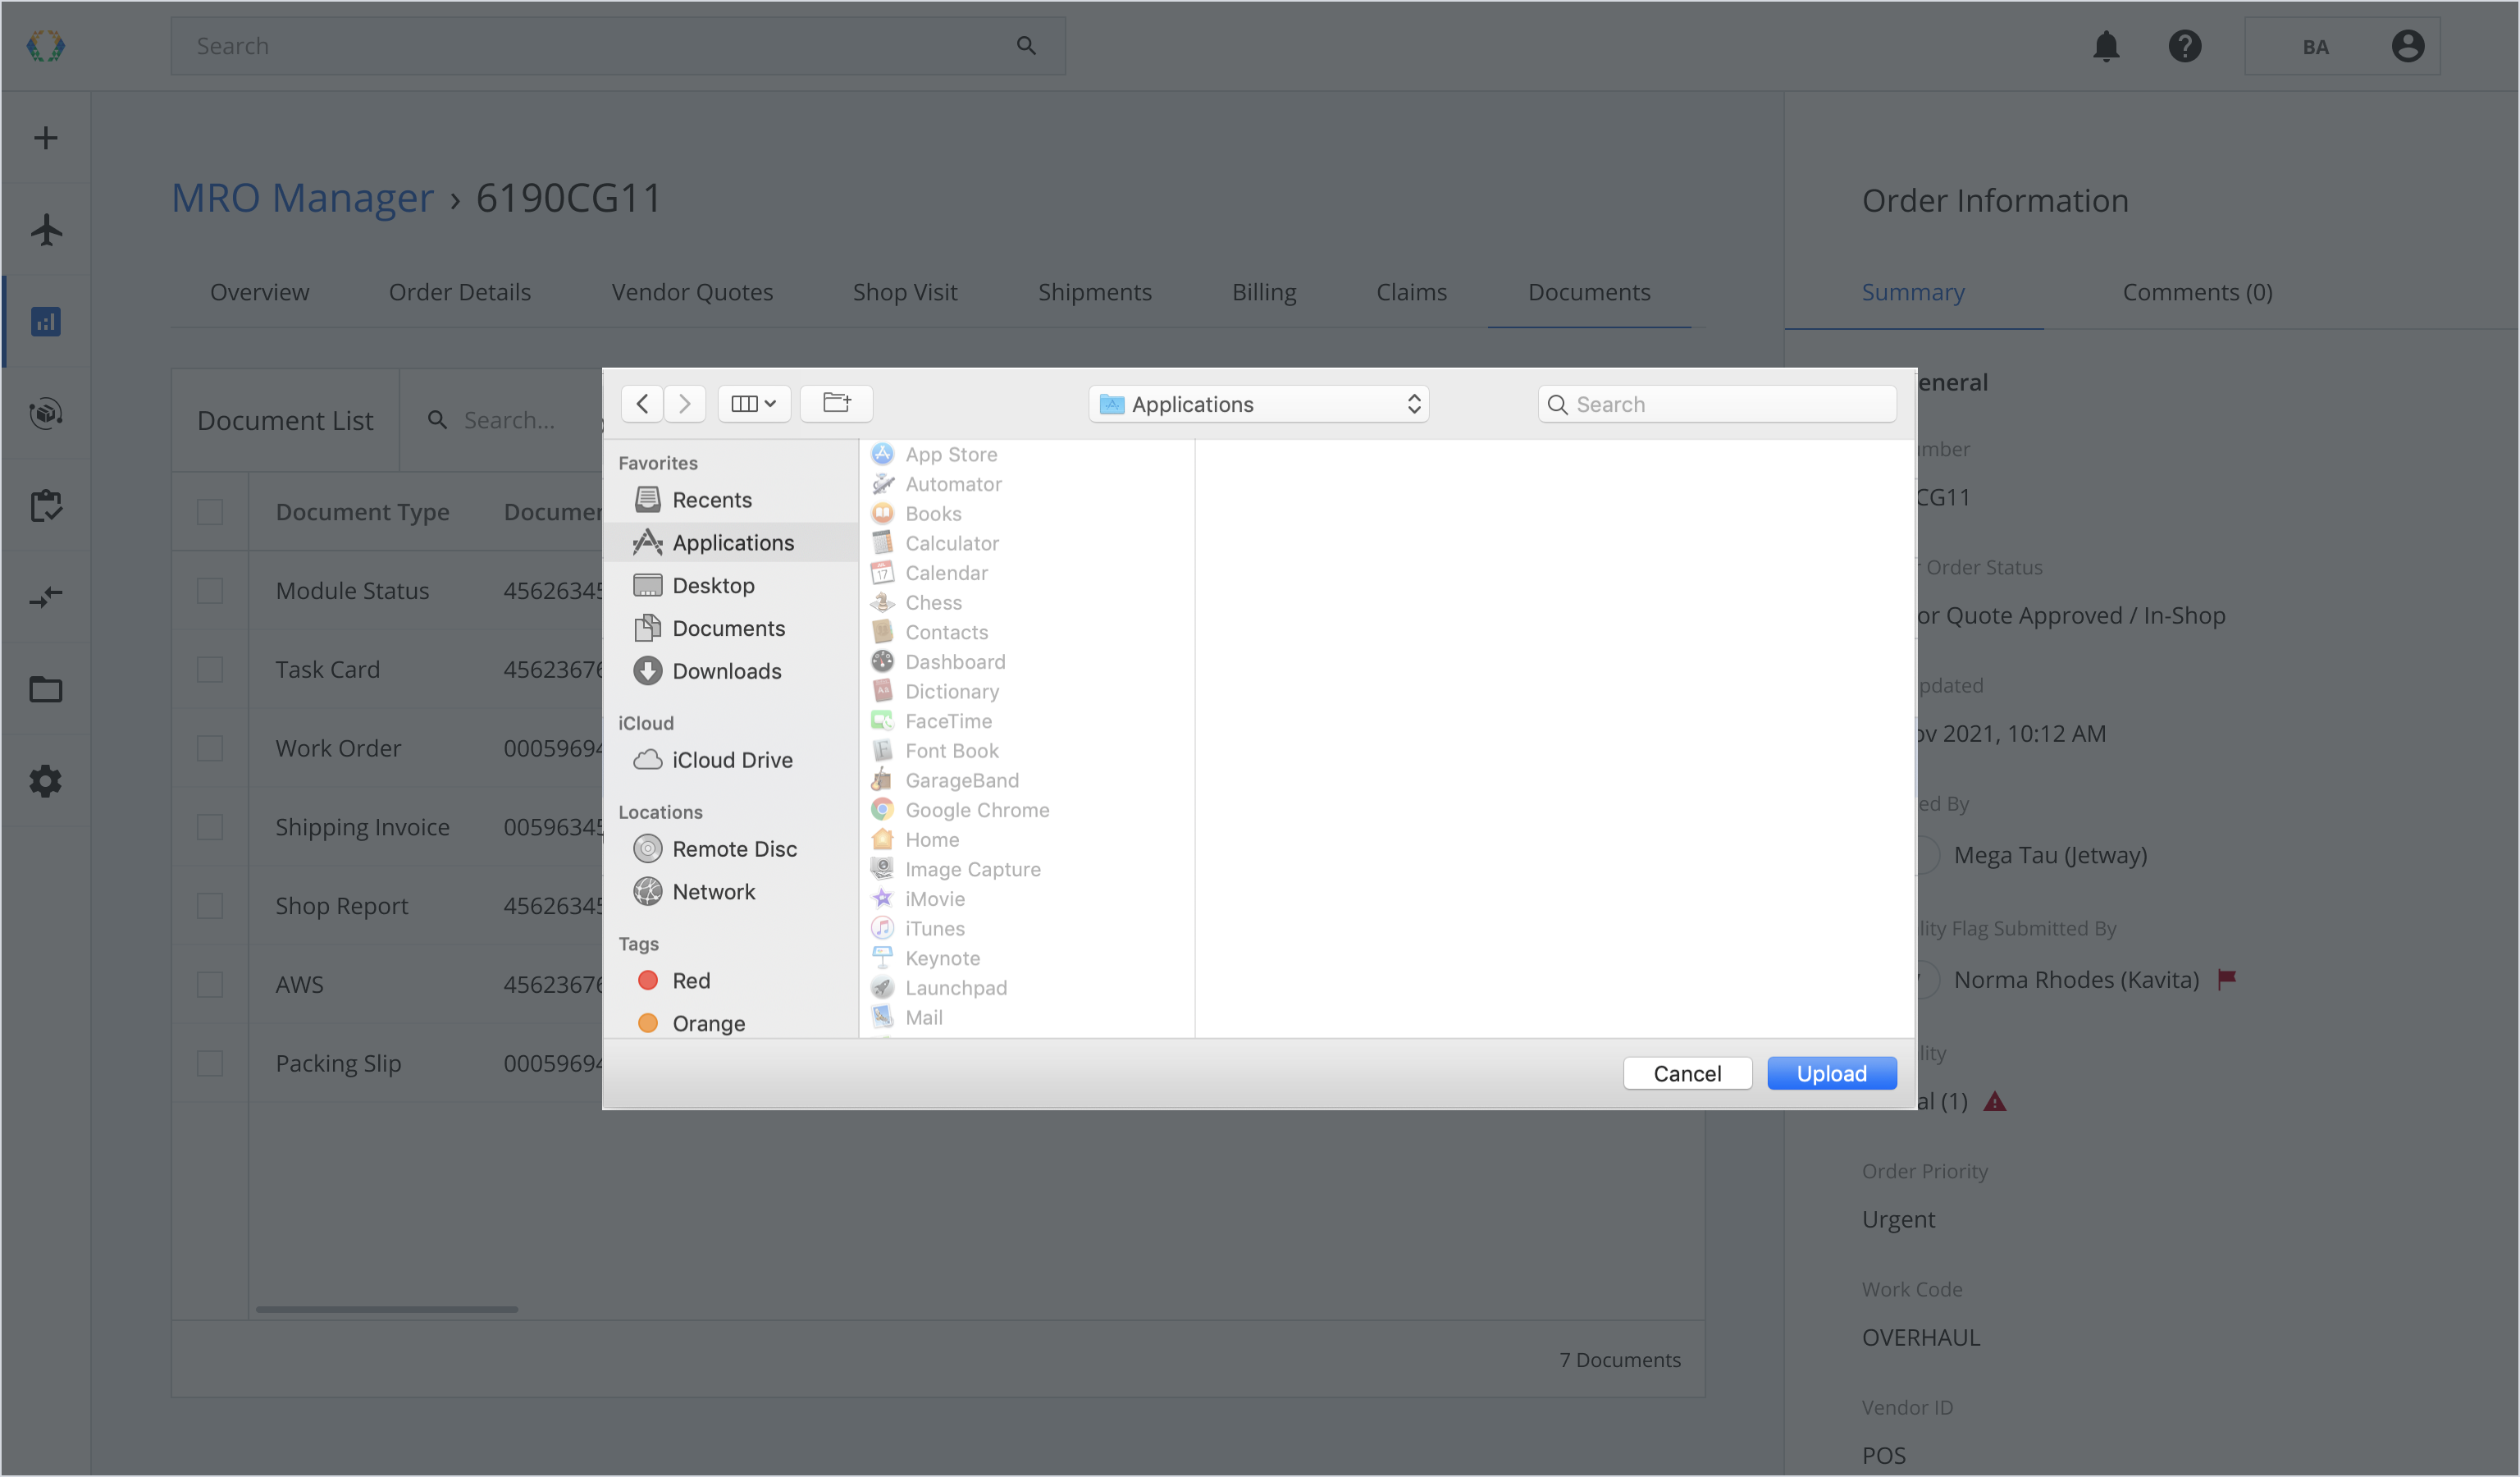
Step 3: Select document from your local computer.
You can select multiple documents holding 'Shift' to upload to the platform.
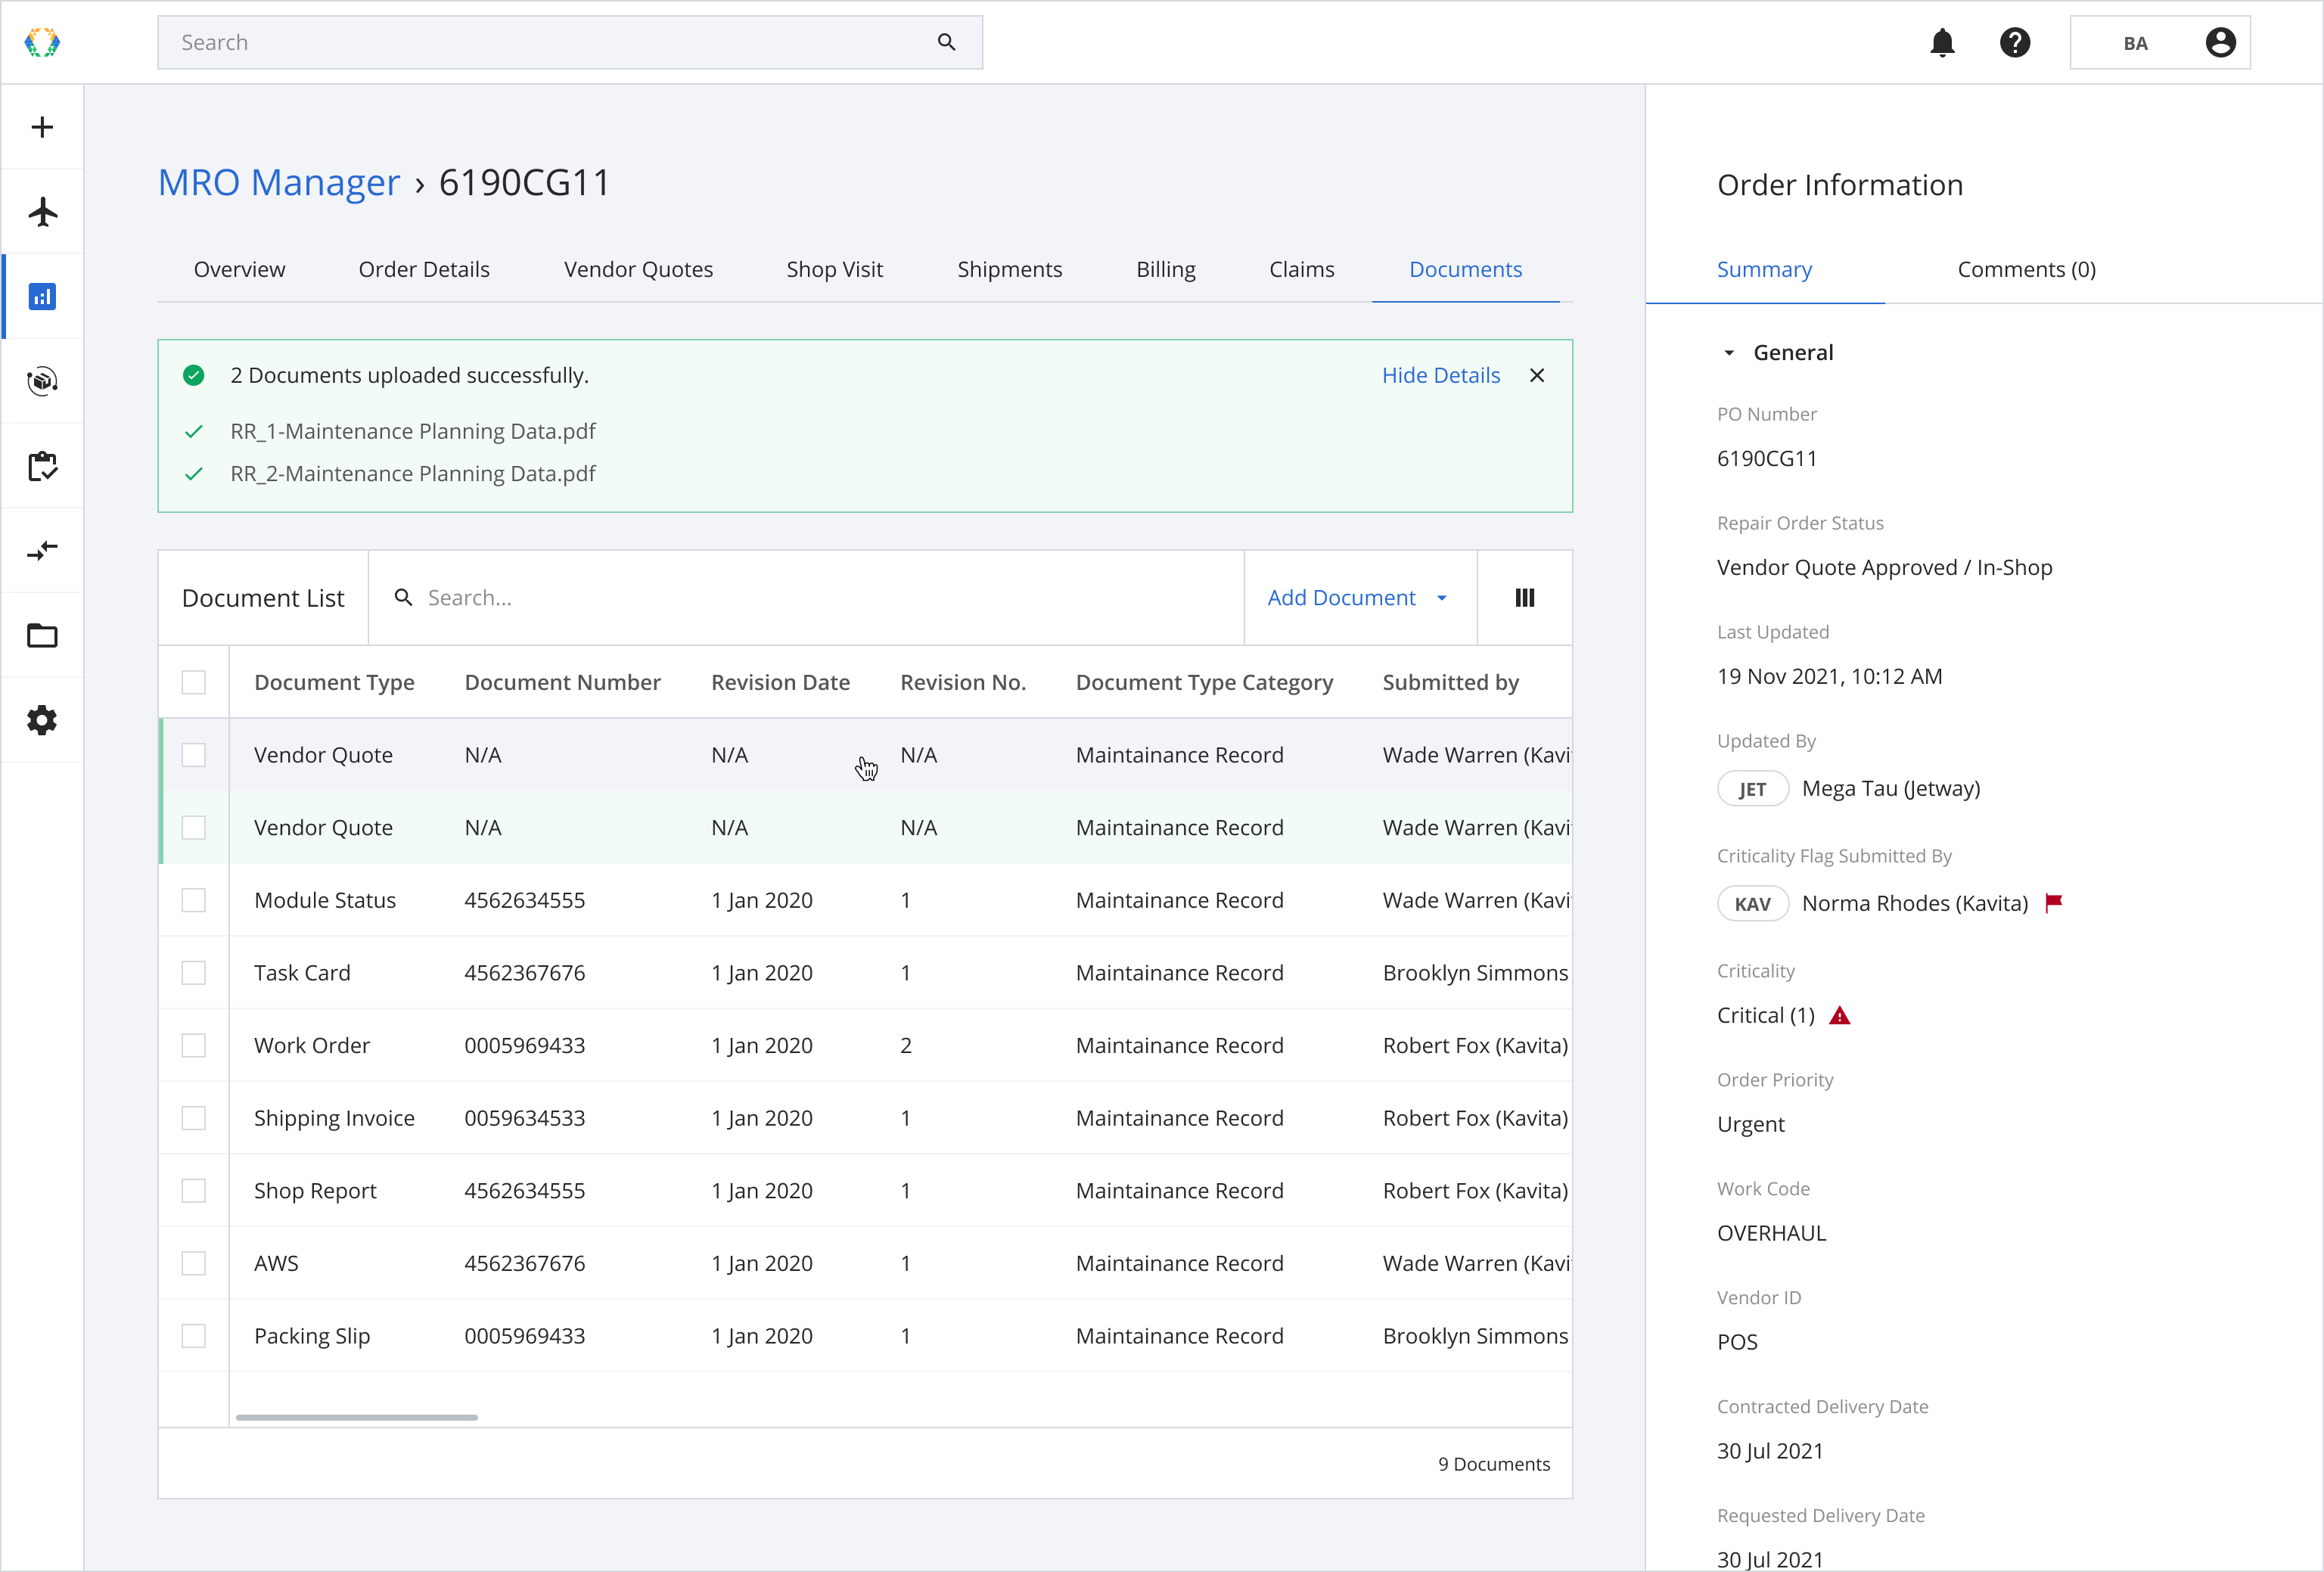
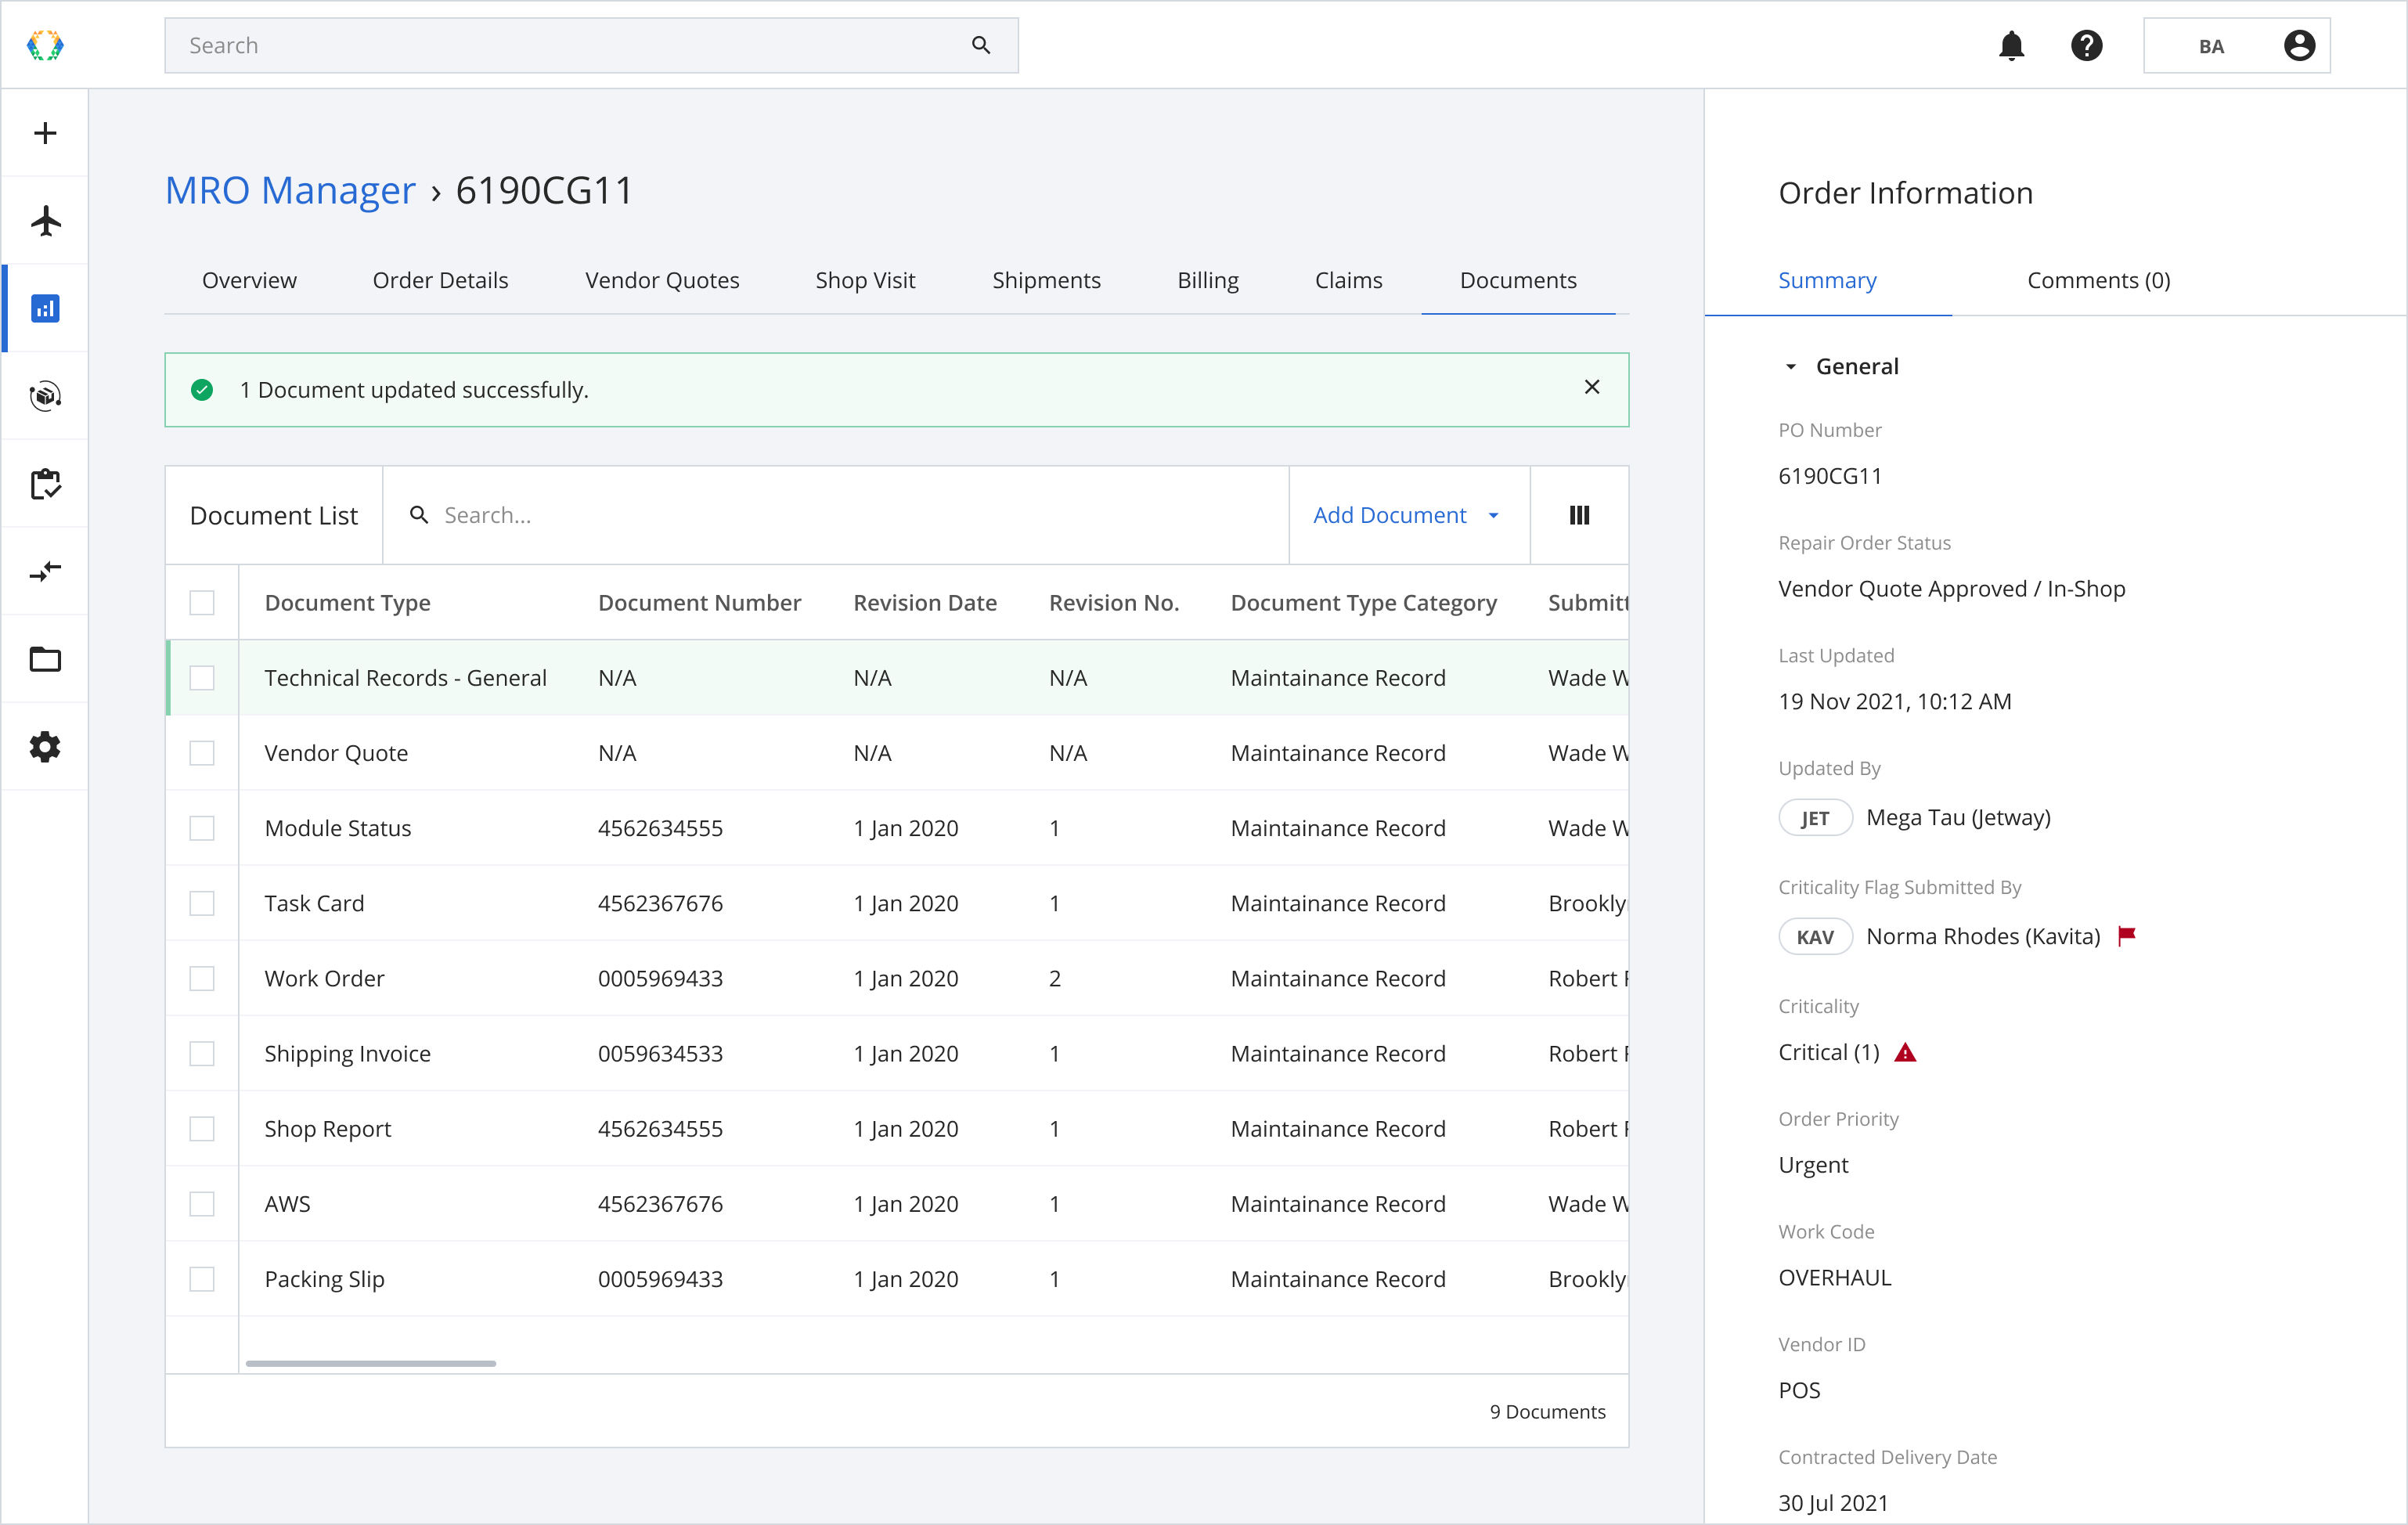
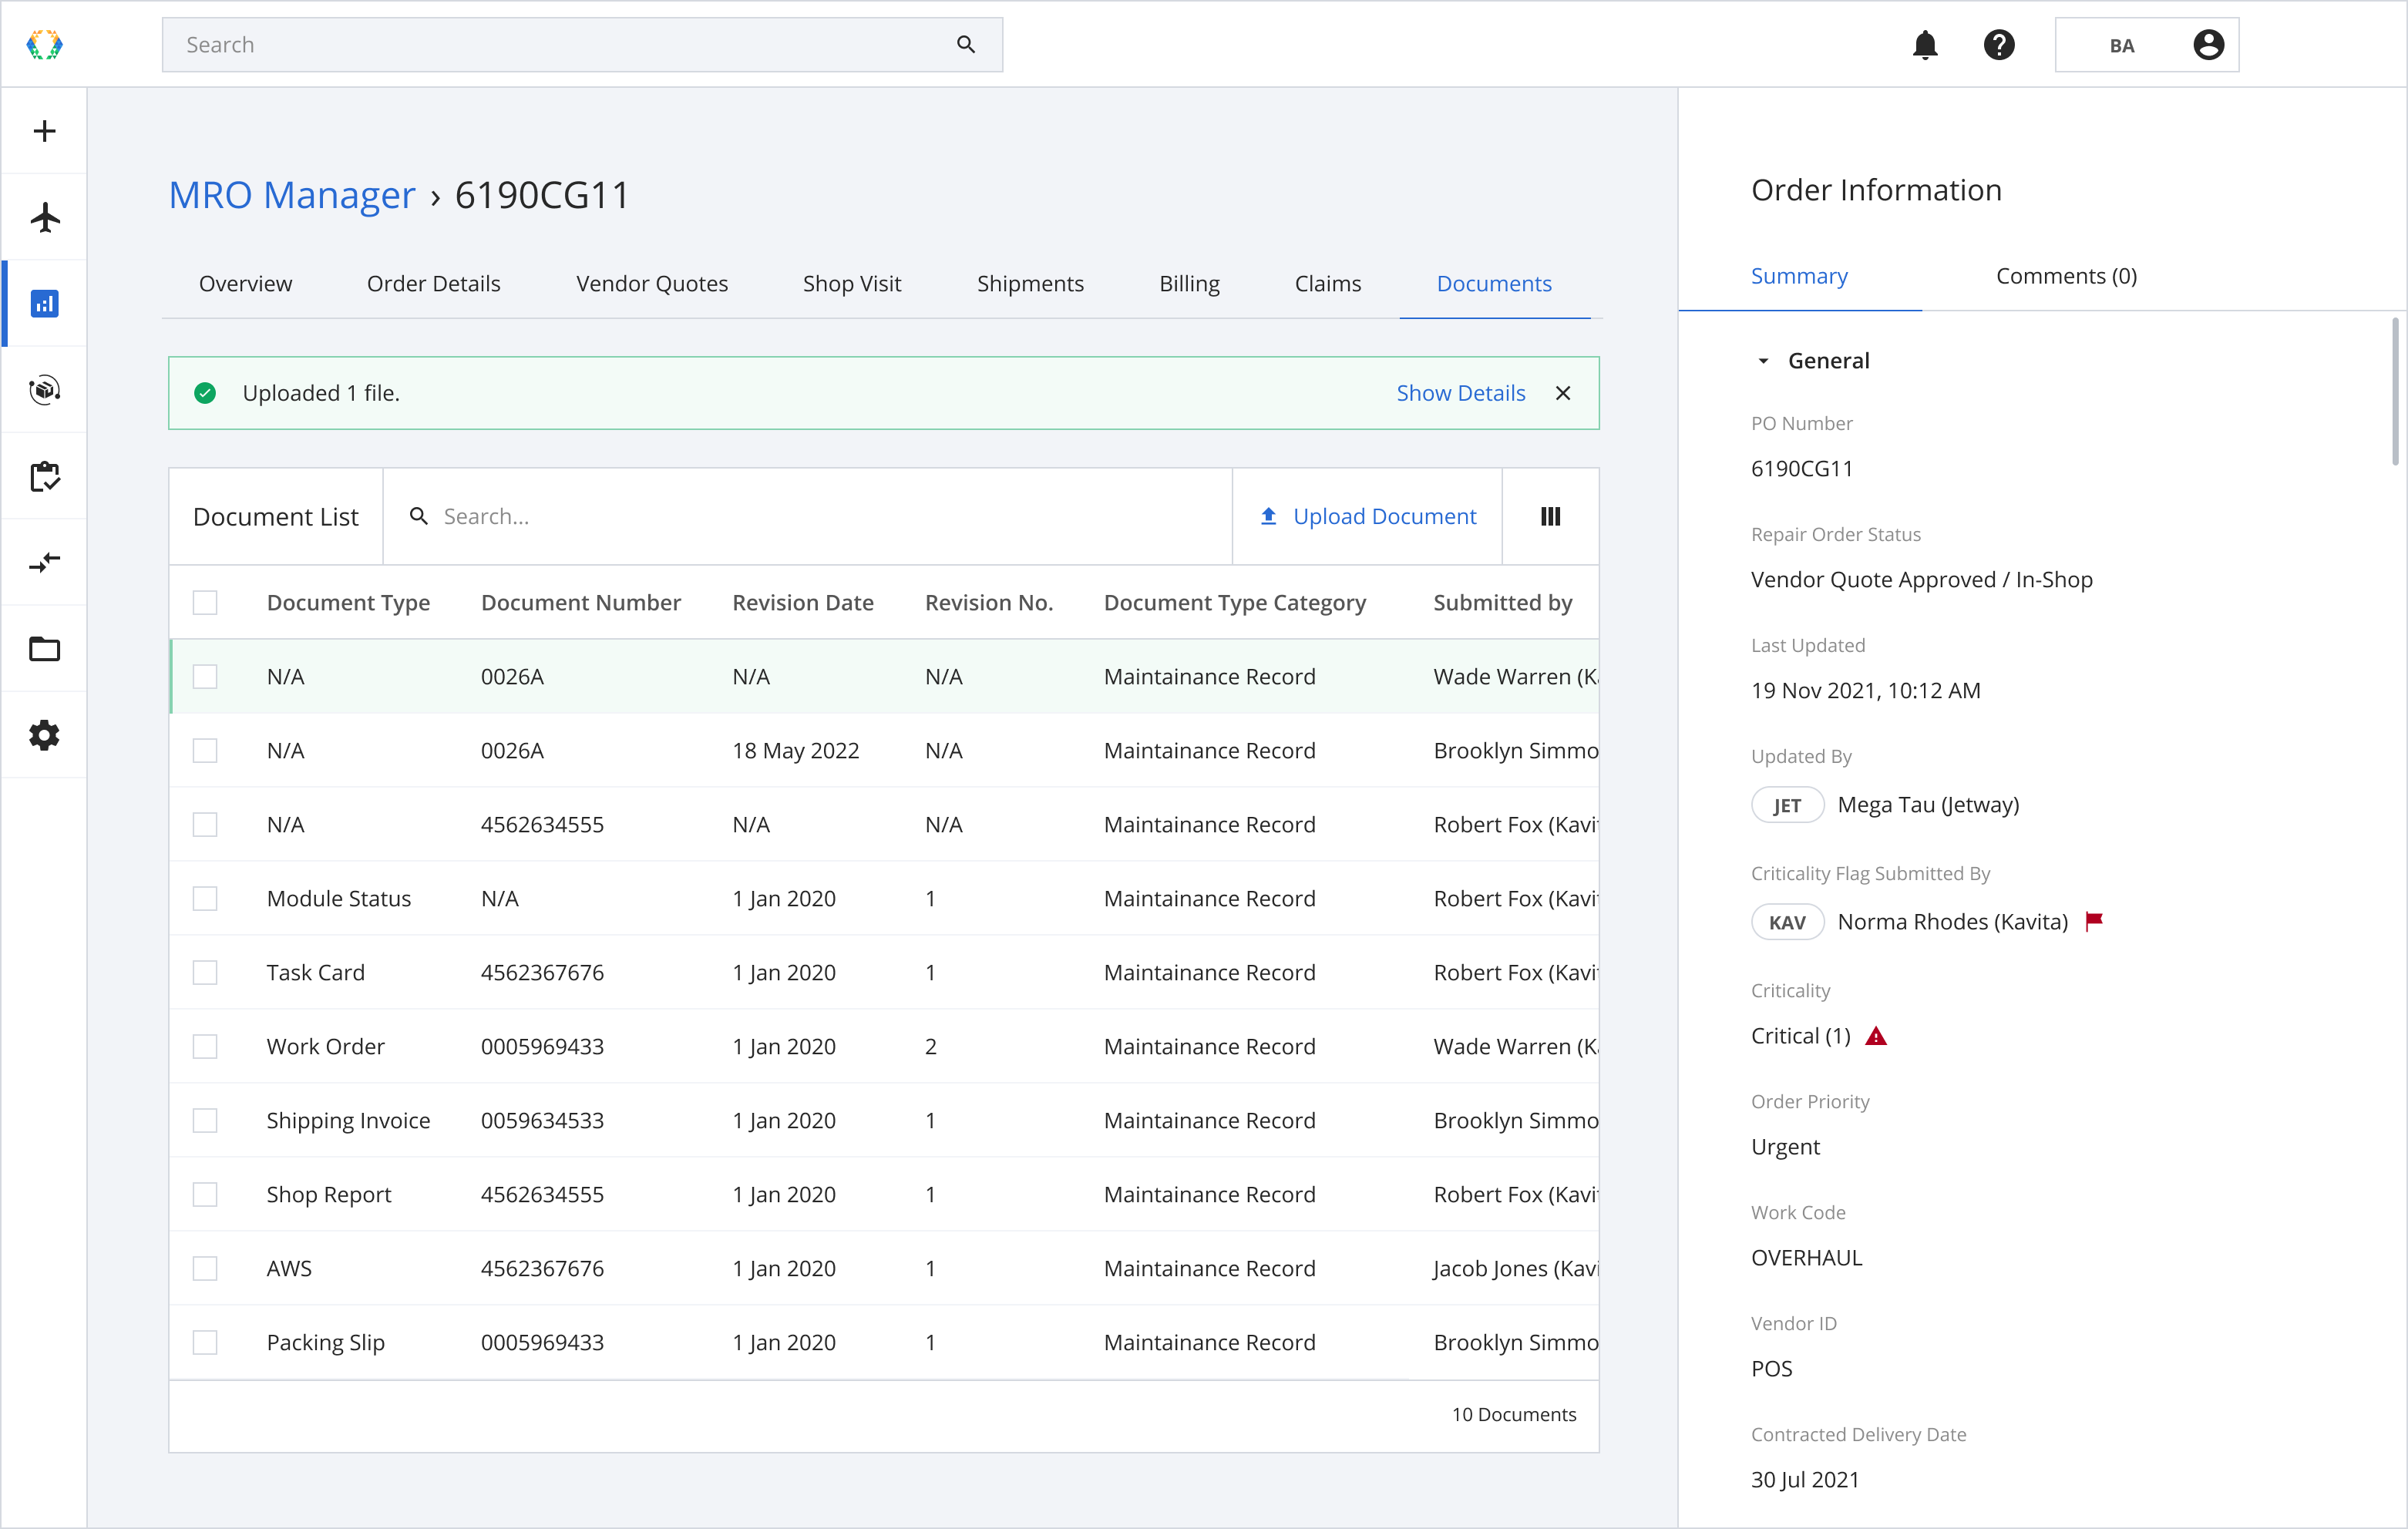
Step 4: A green banner will appear at the top of the Document List, once documents uploaded successfully.
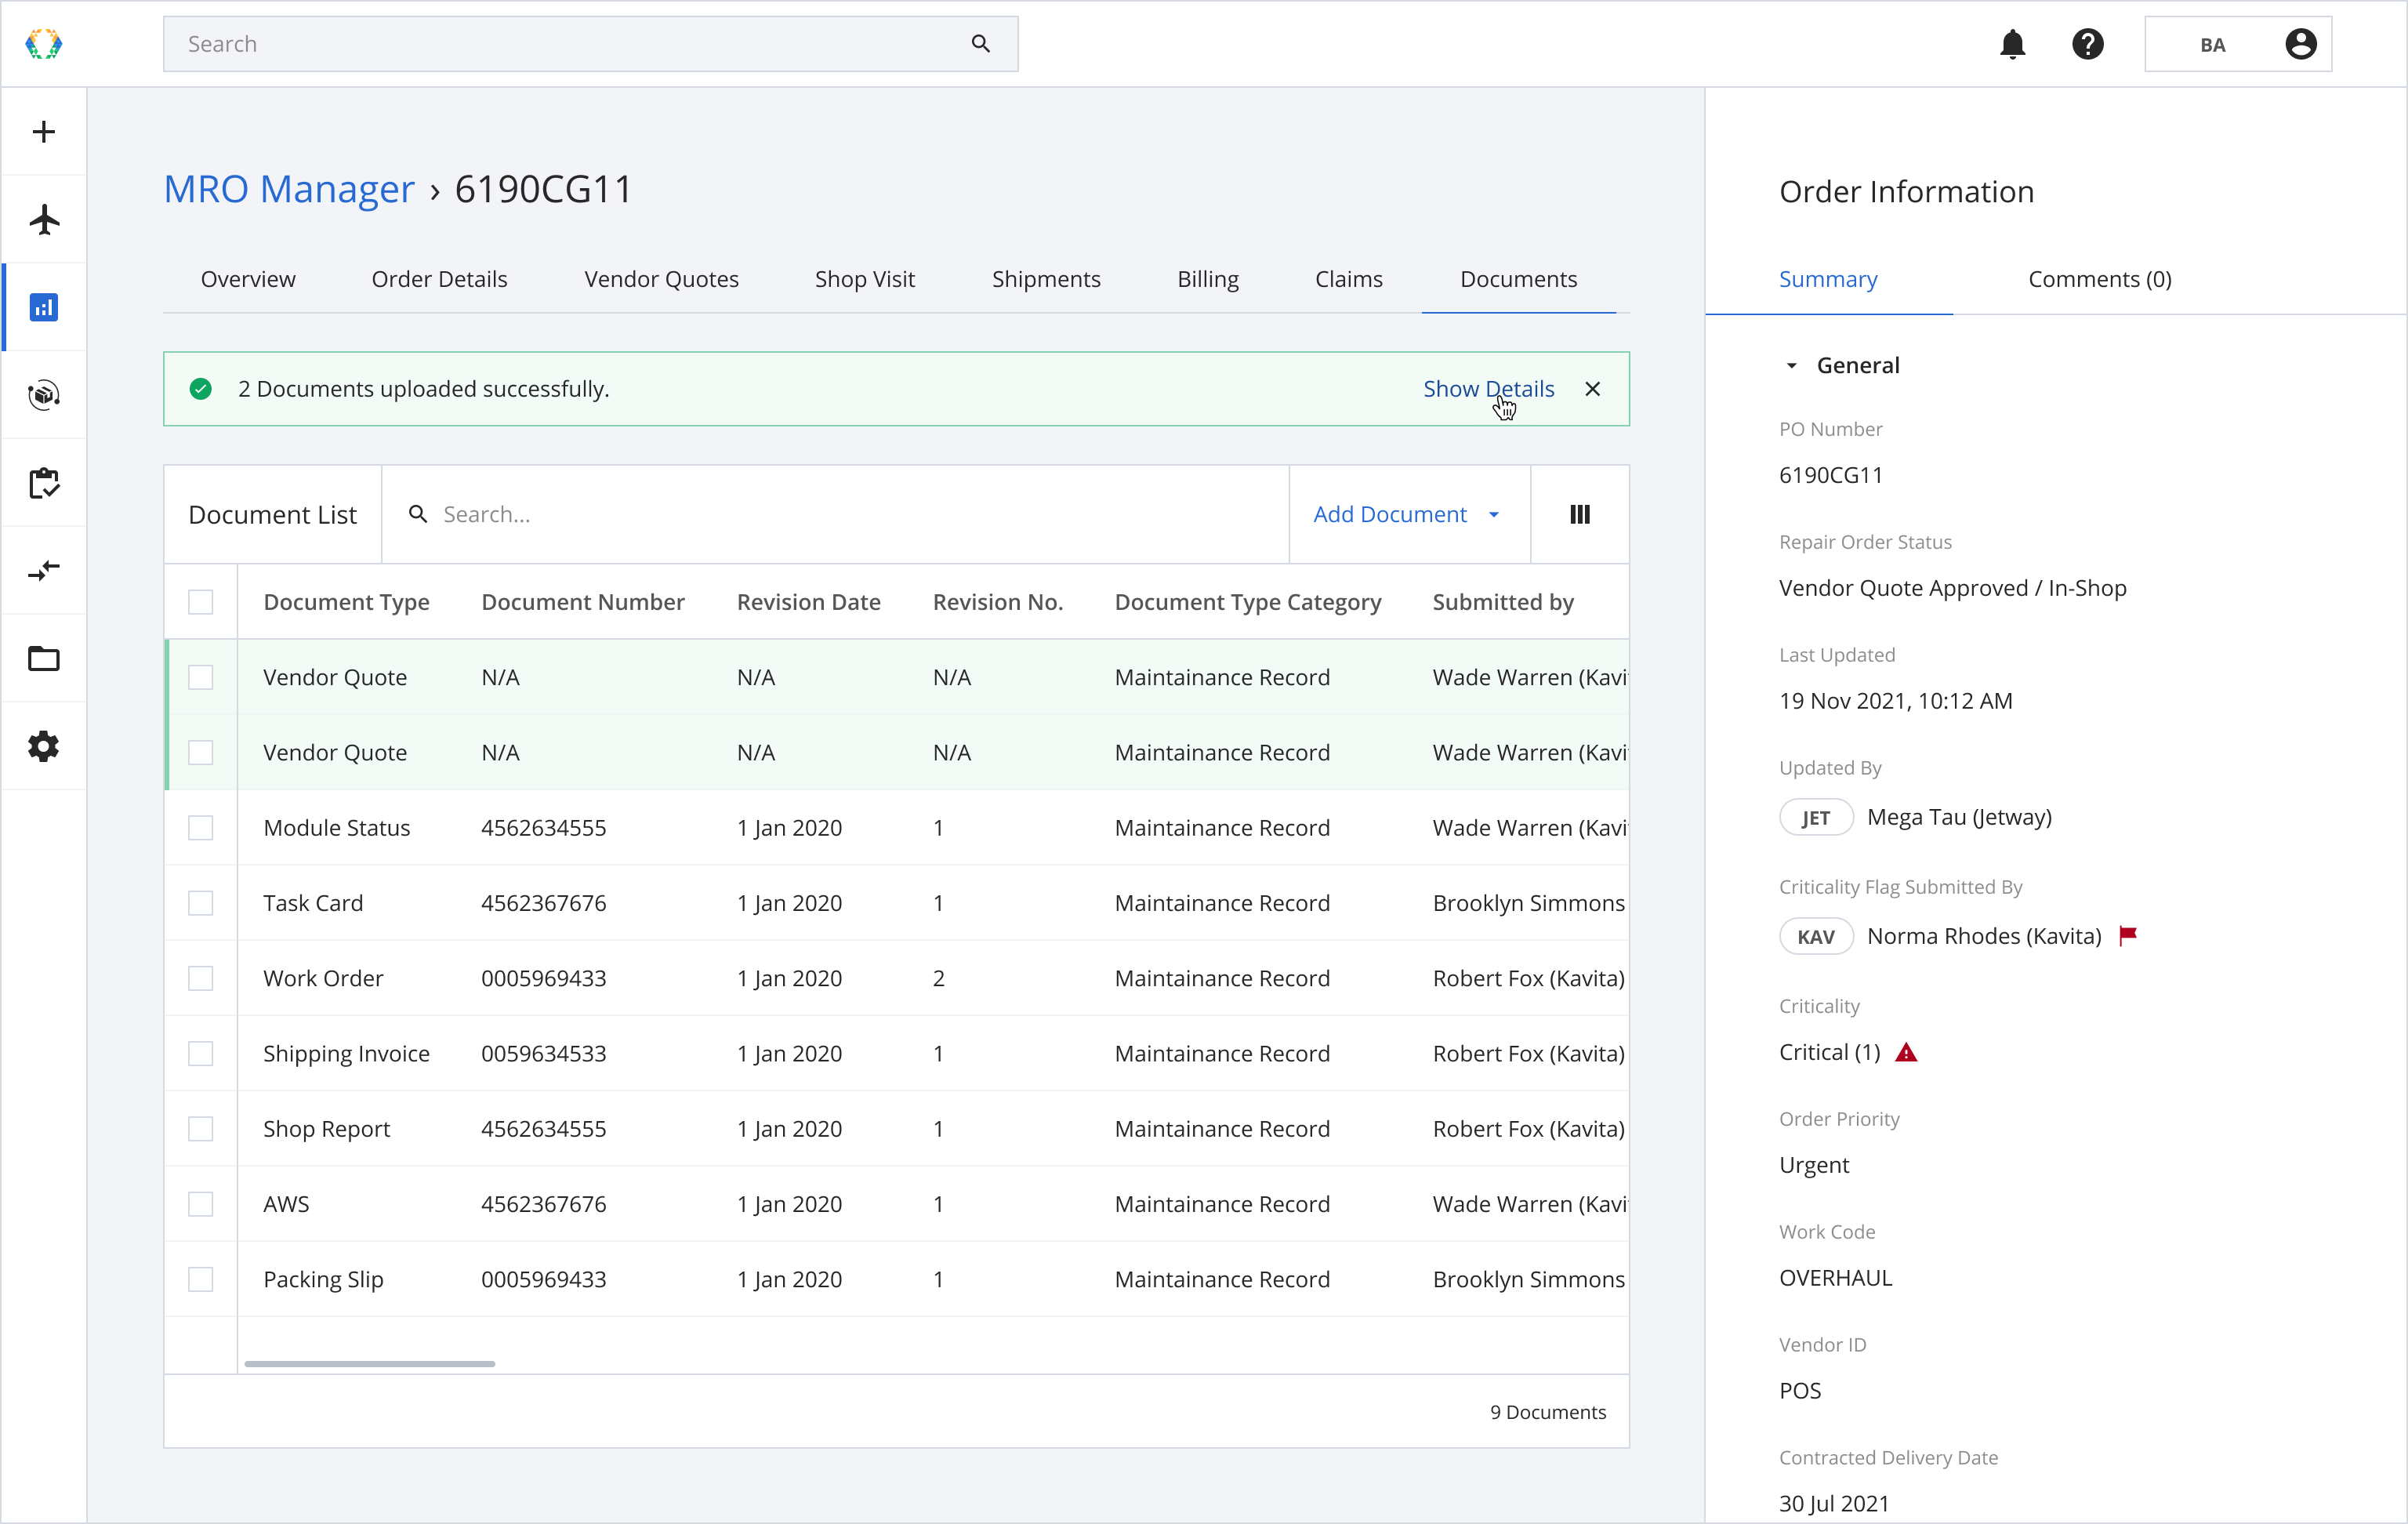
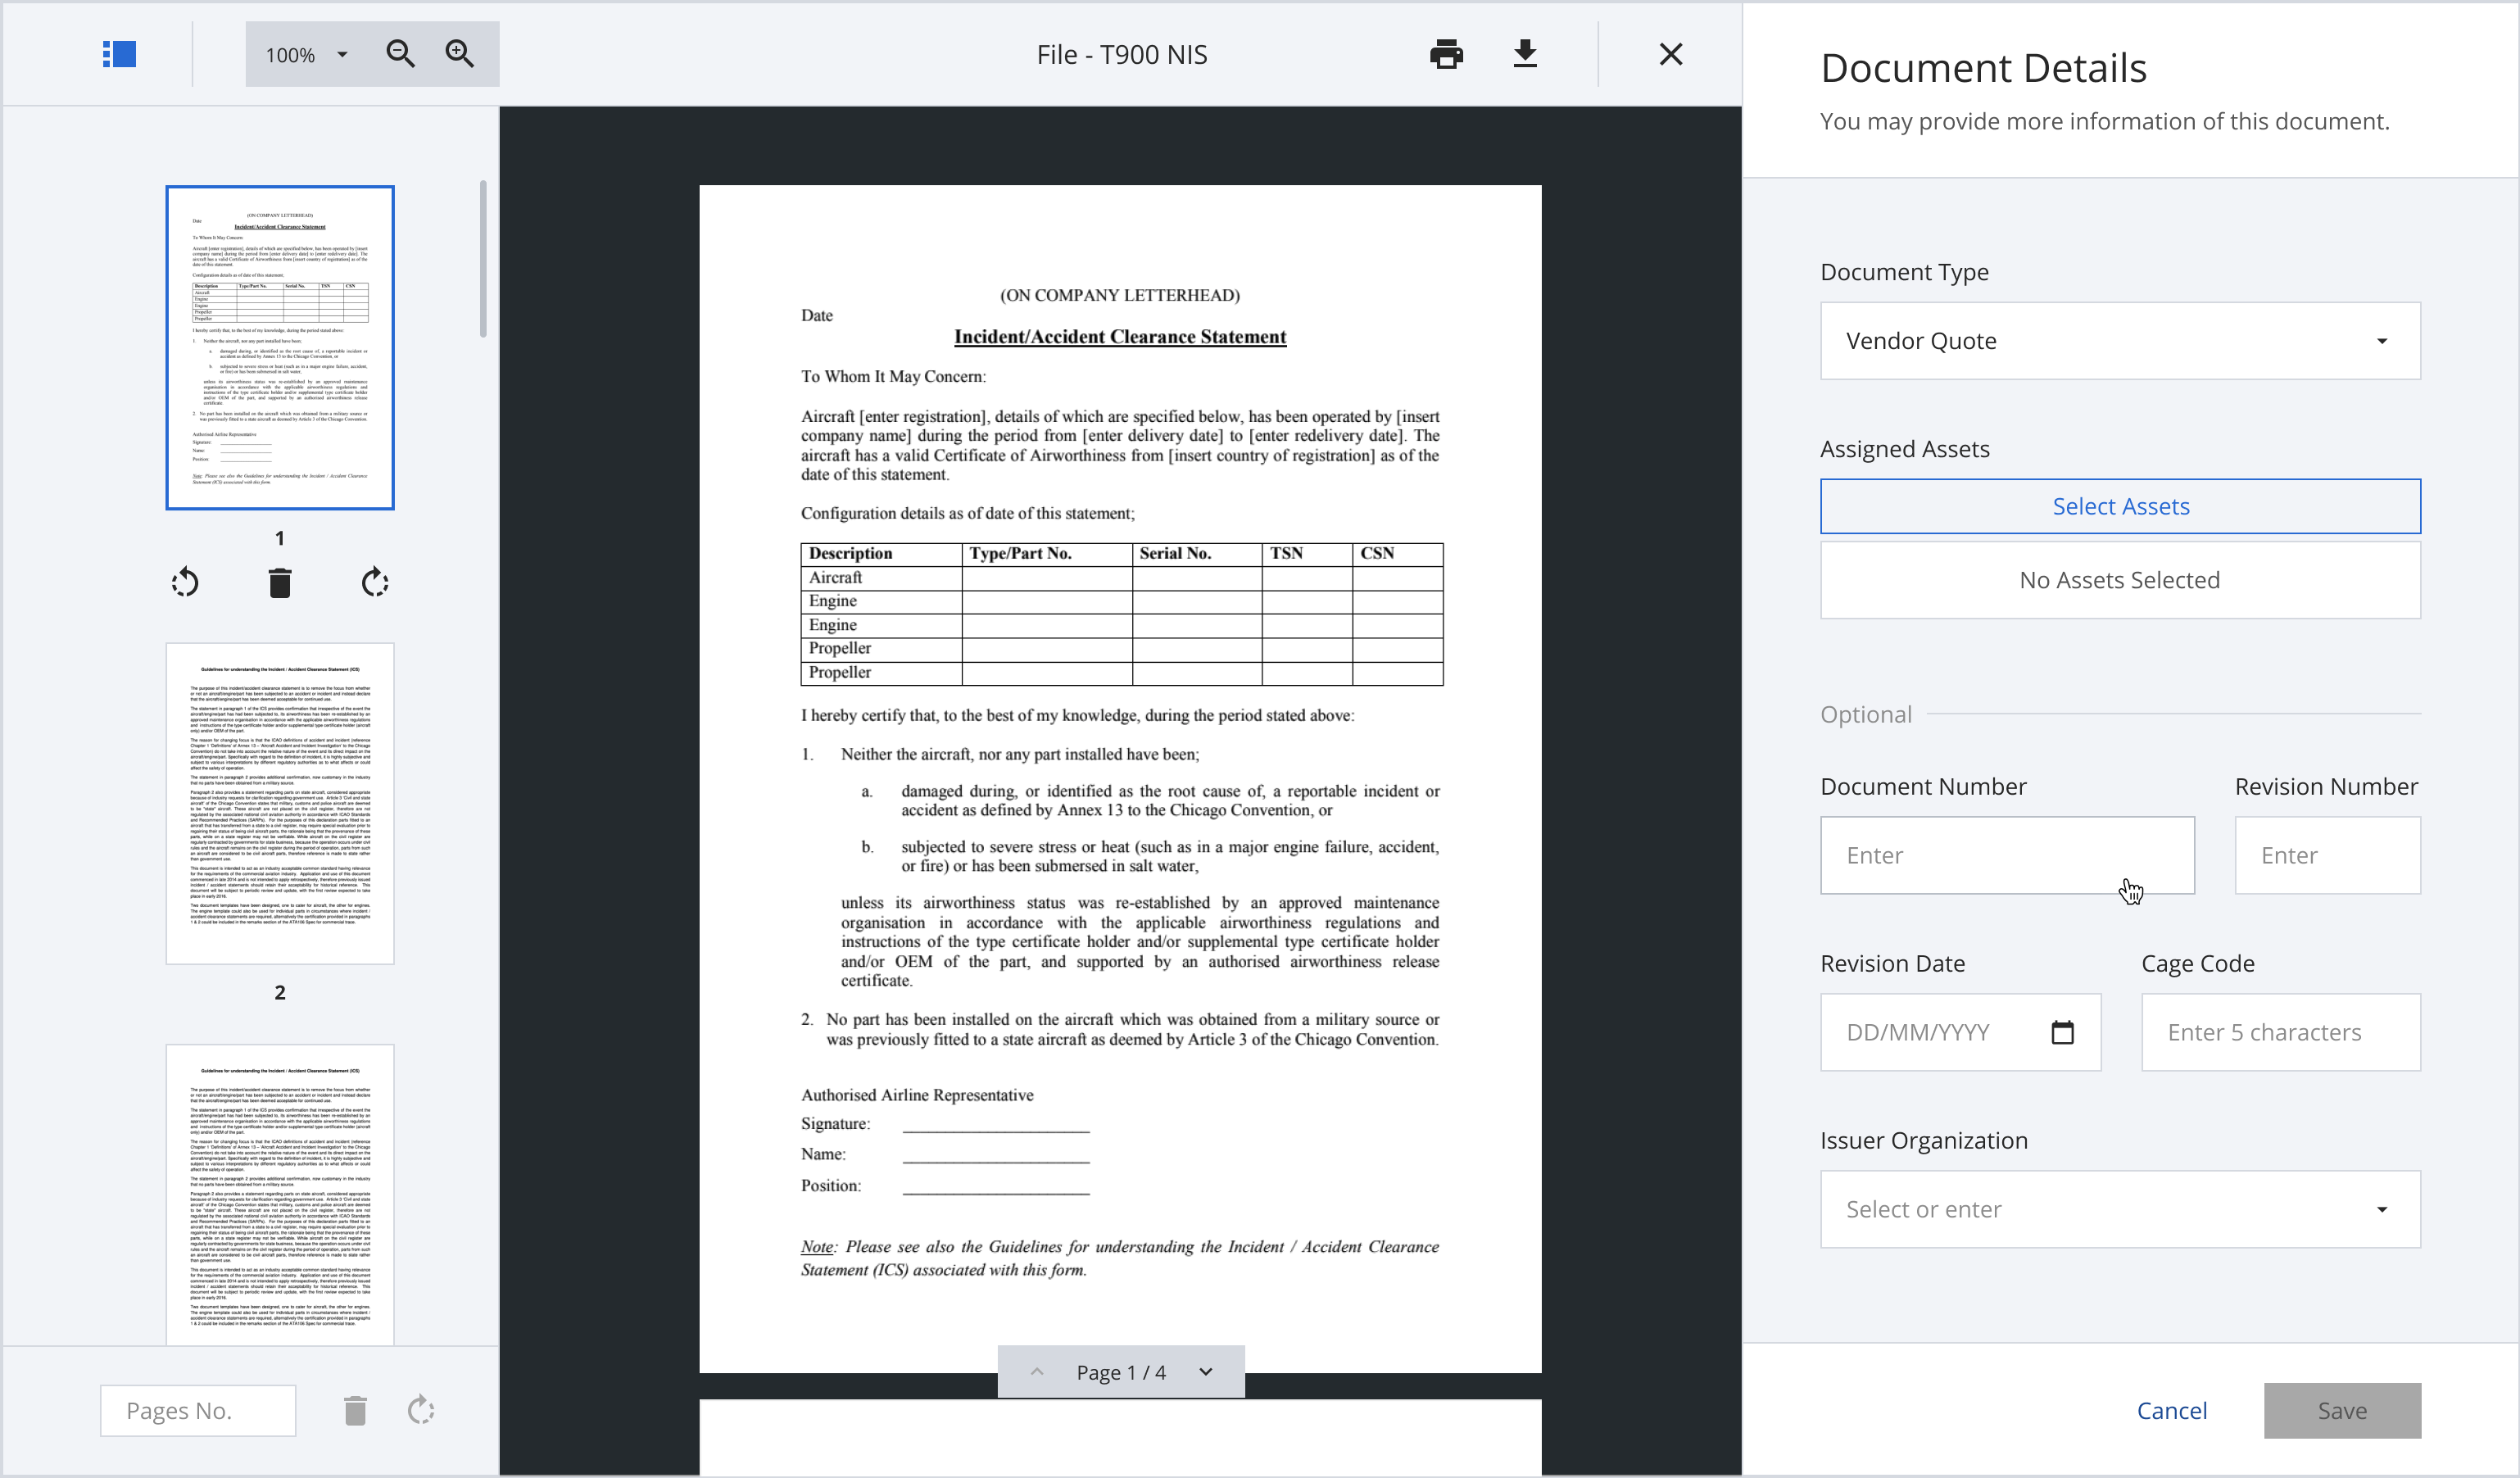
Step 5: From the Document List, open the document to view the details.
Step 6: View/edit the uploaded document details.

Issue Documents
Issue documents on-chain for the assets of your Repair Order.
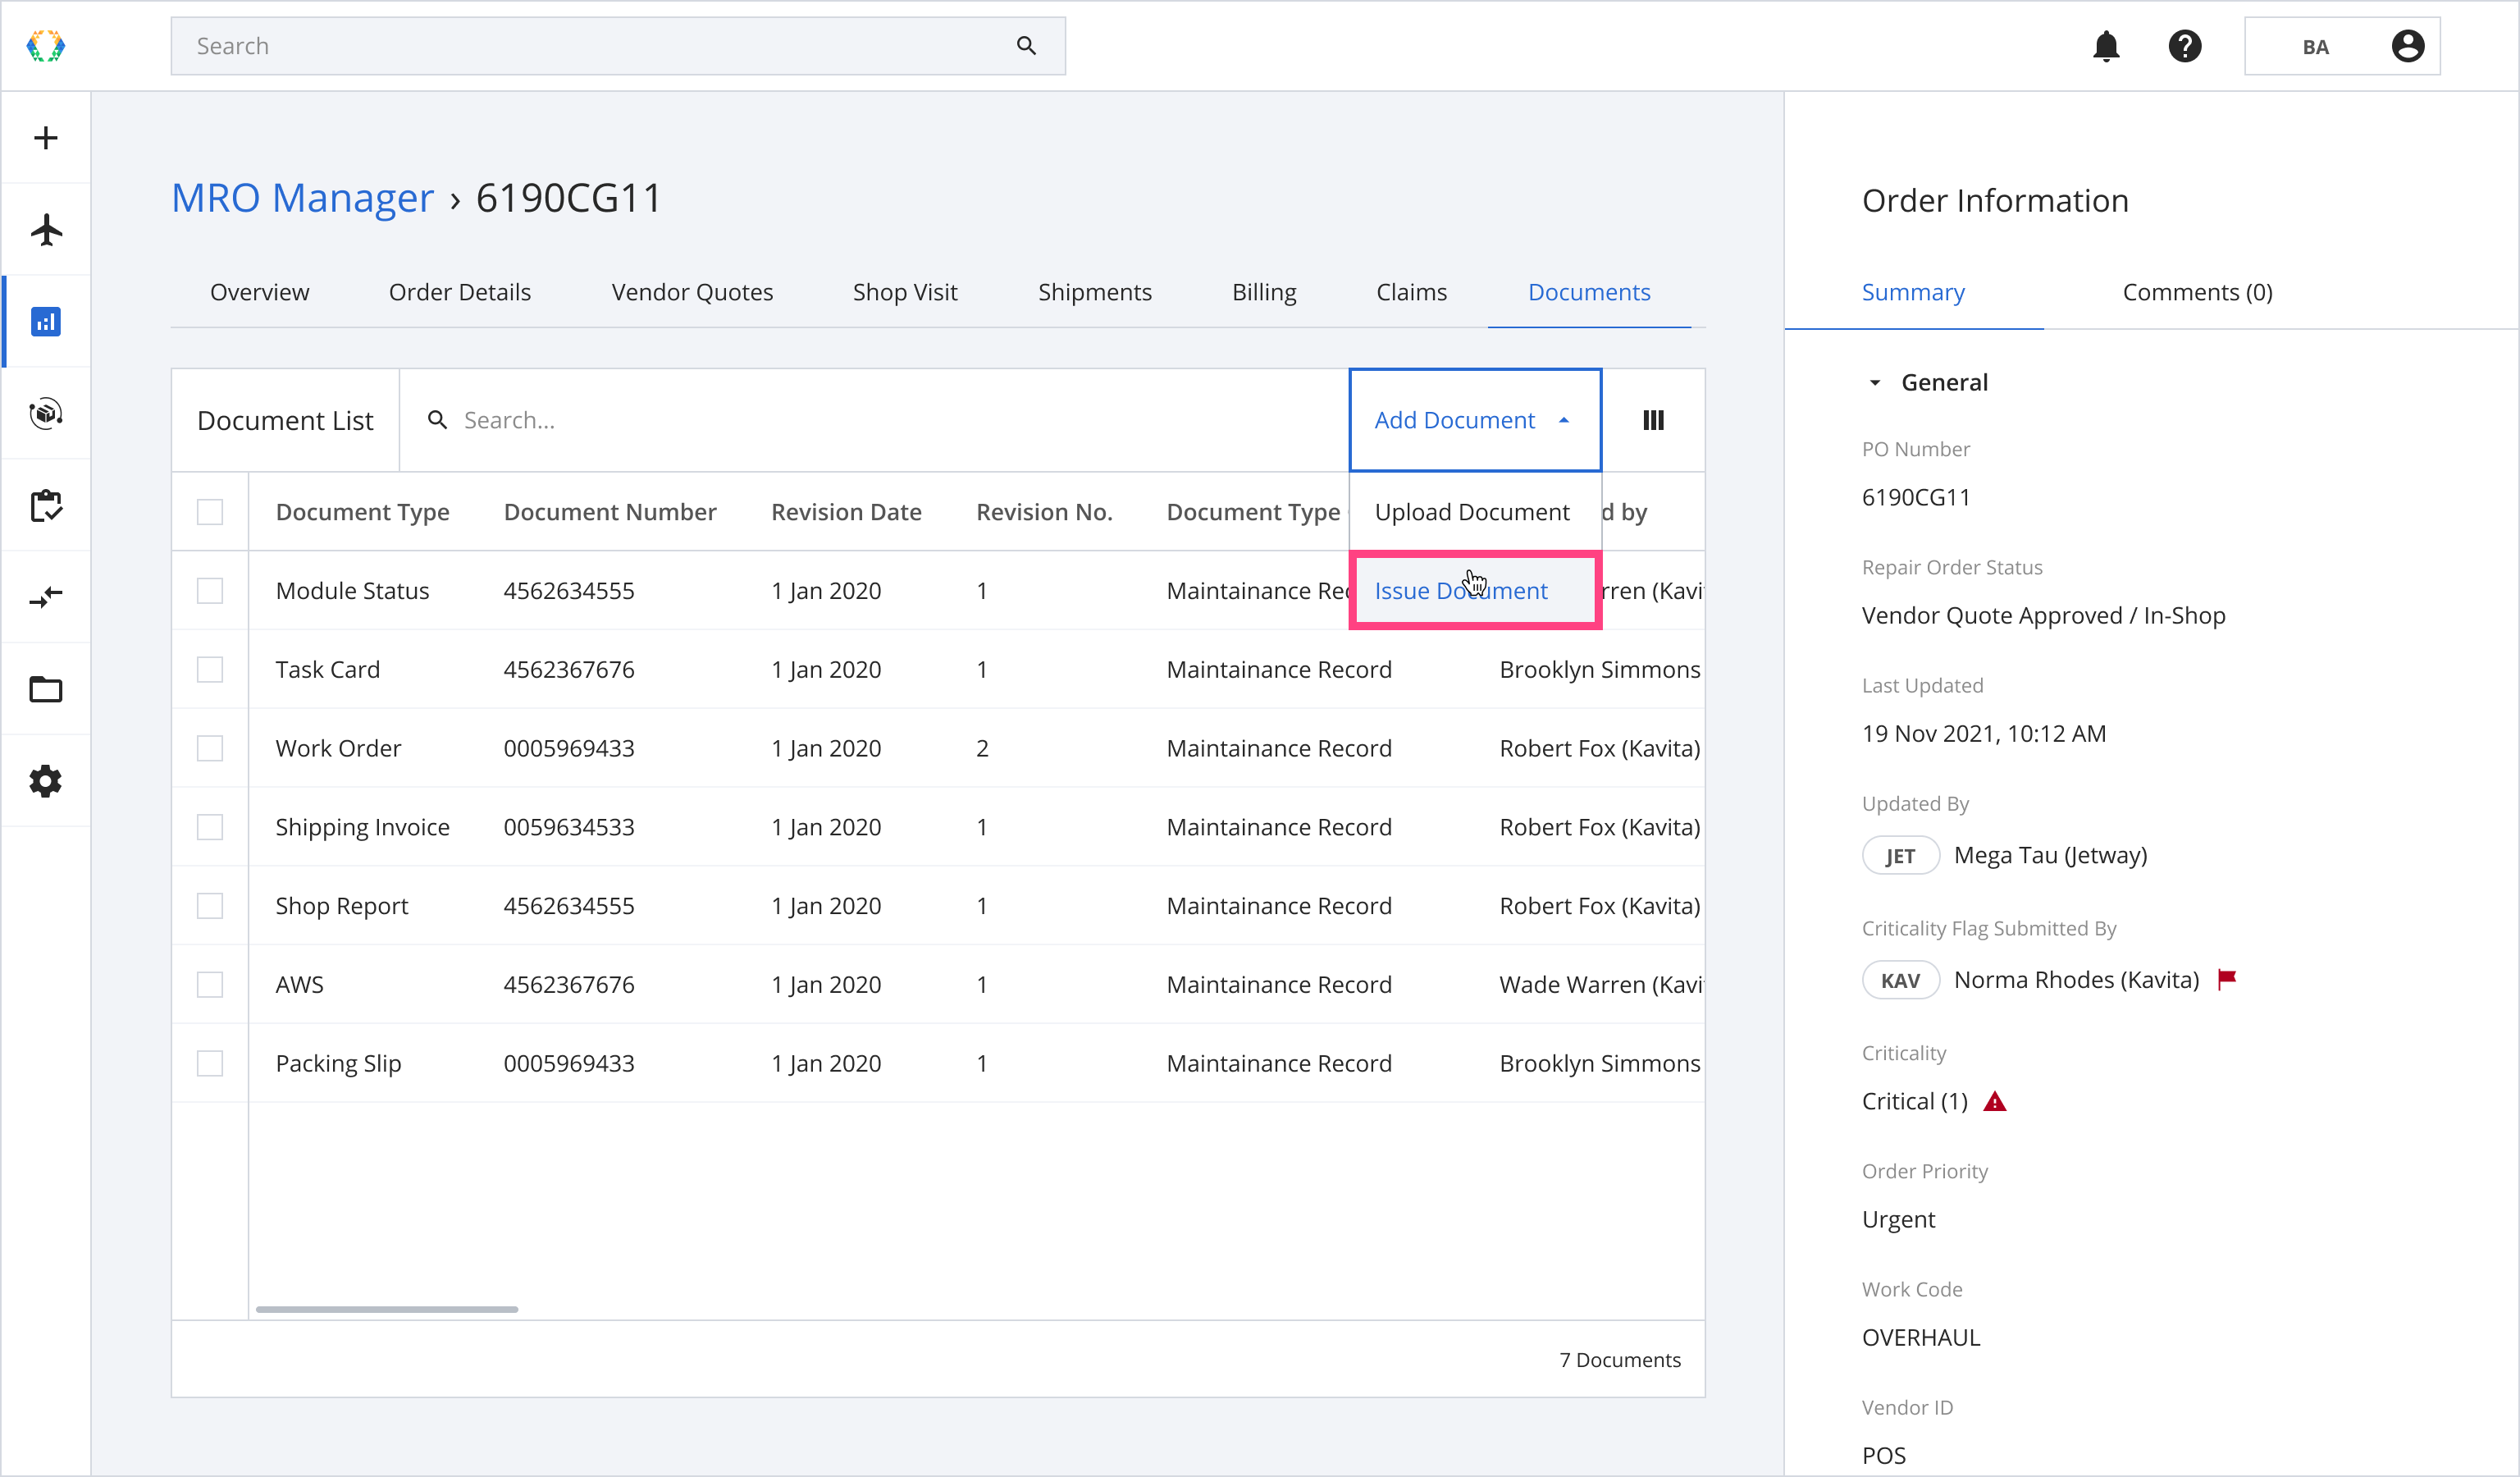
Step 1: Click 'Add Document'.
Step 2: Click 'Issue Document'.
Step 3: Select the type of document you want to add to your organization’s on-chain records and click 'Next'.
In this section, we are using Transfer Document as an example. Similar operation can be done for other types of documents.More information can be found here Issue Documents On-chain
Step 4: Select assets and click 'Next'.
Step 5: Enter the asset details, work performed and method of compliance for each transfer document.
Step 6: Click 'Next'.
Step 7: Your Transfer Document details will be generated. Click to sign for the QR code to appear and create the document on the blockchain.
Step 8: Your Transfer Document is now signed and created on-chain! Click 'See List' to view the list of issued documents.
Step 9: A green banner will appear at the top of the Documents List to indicate your Transfer Document issued successfully.
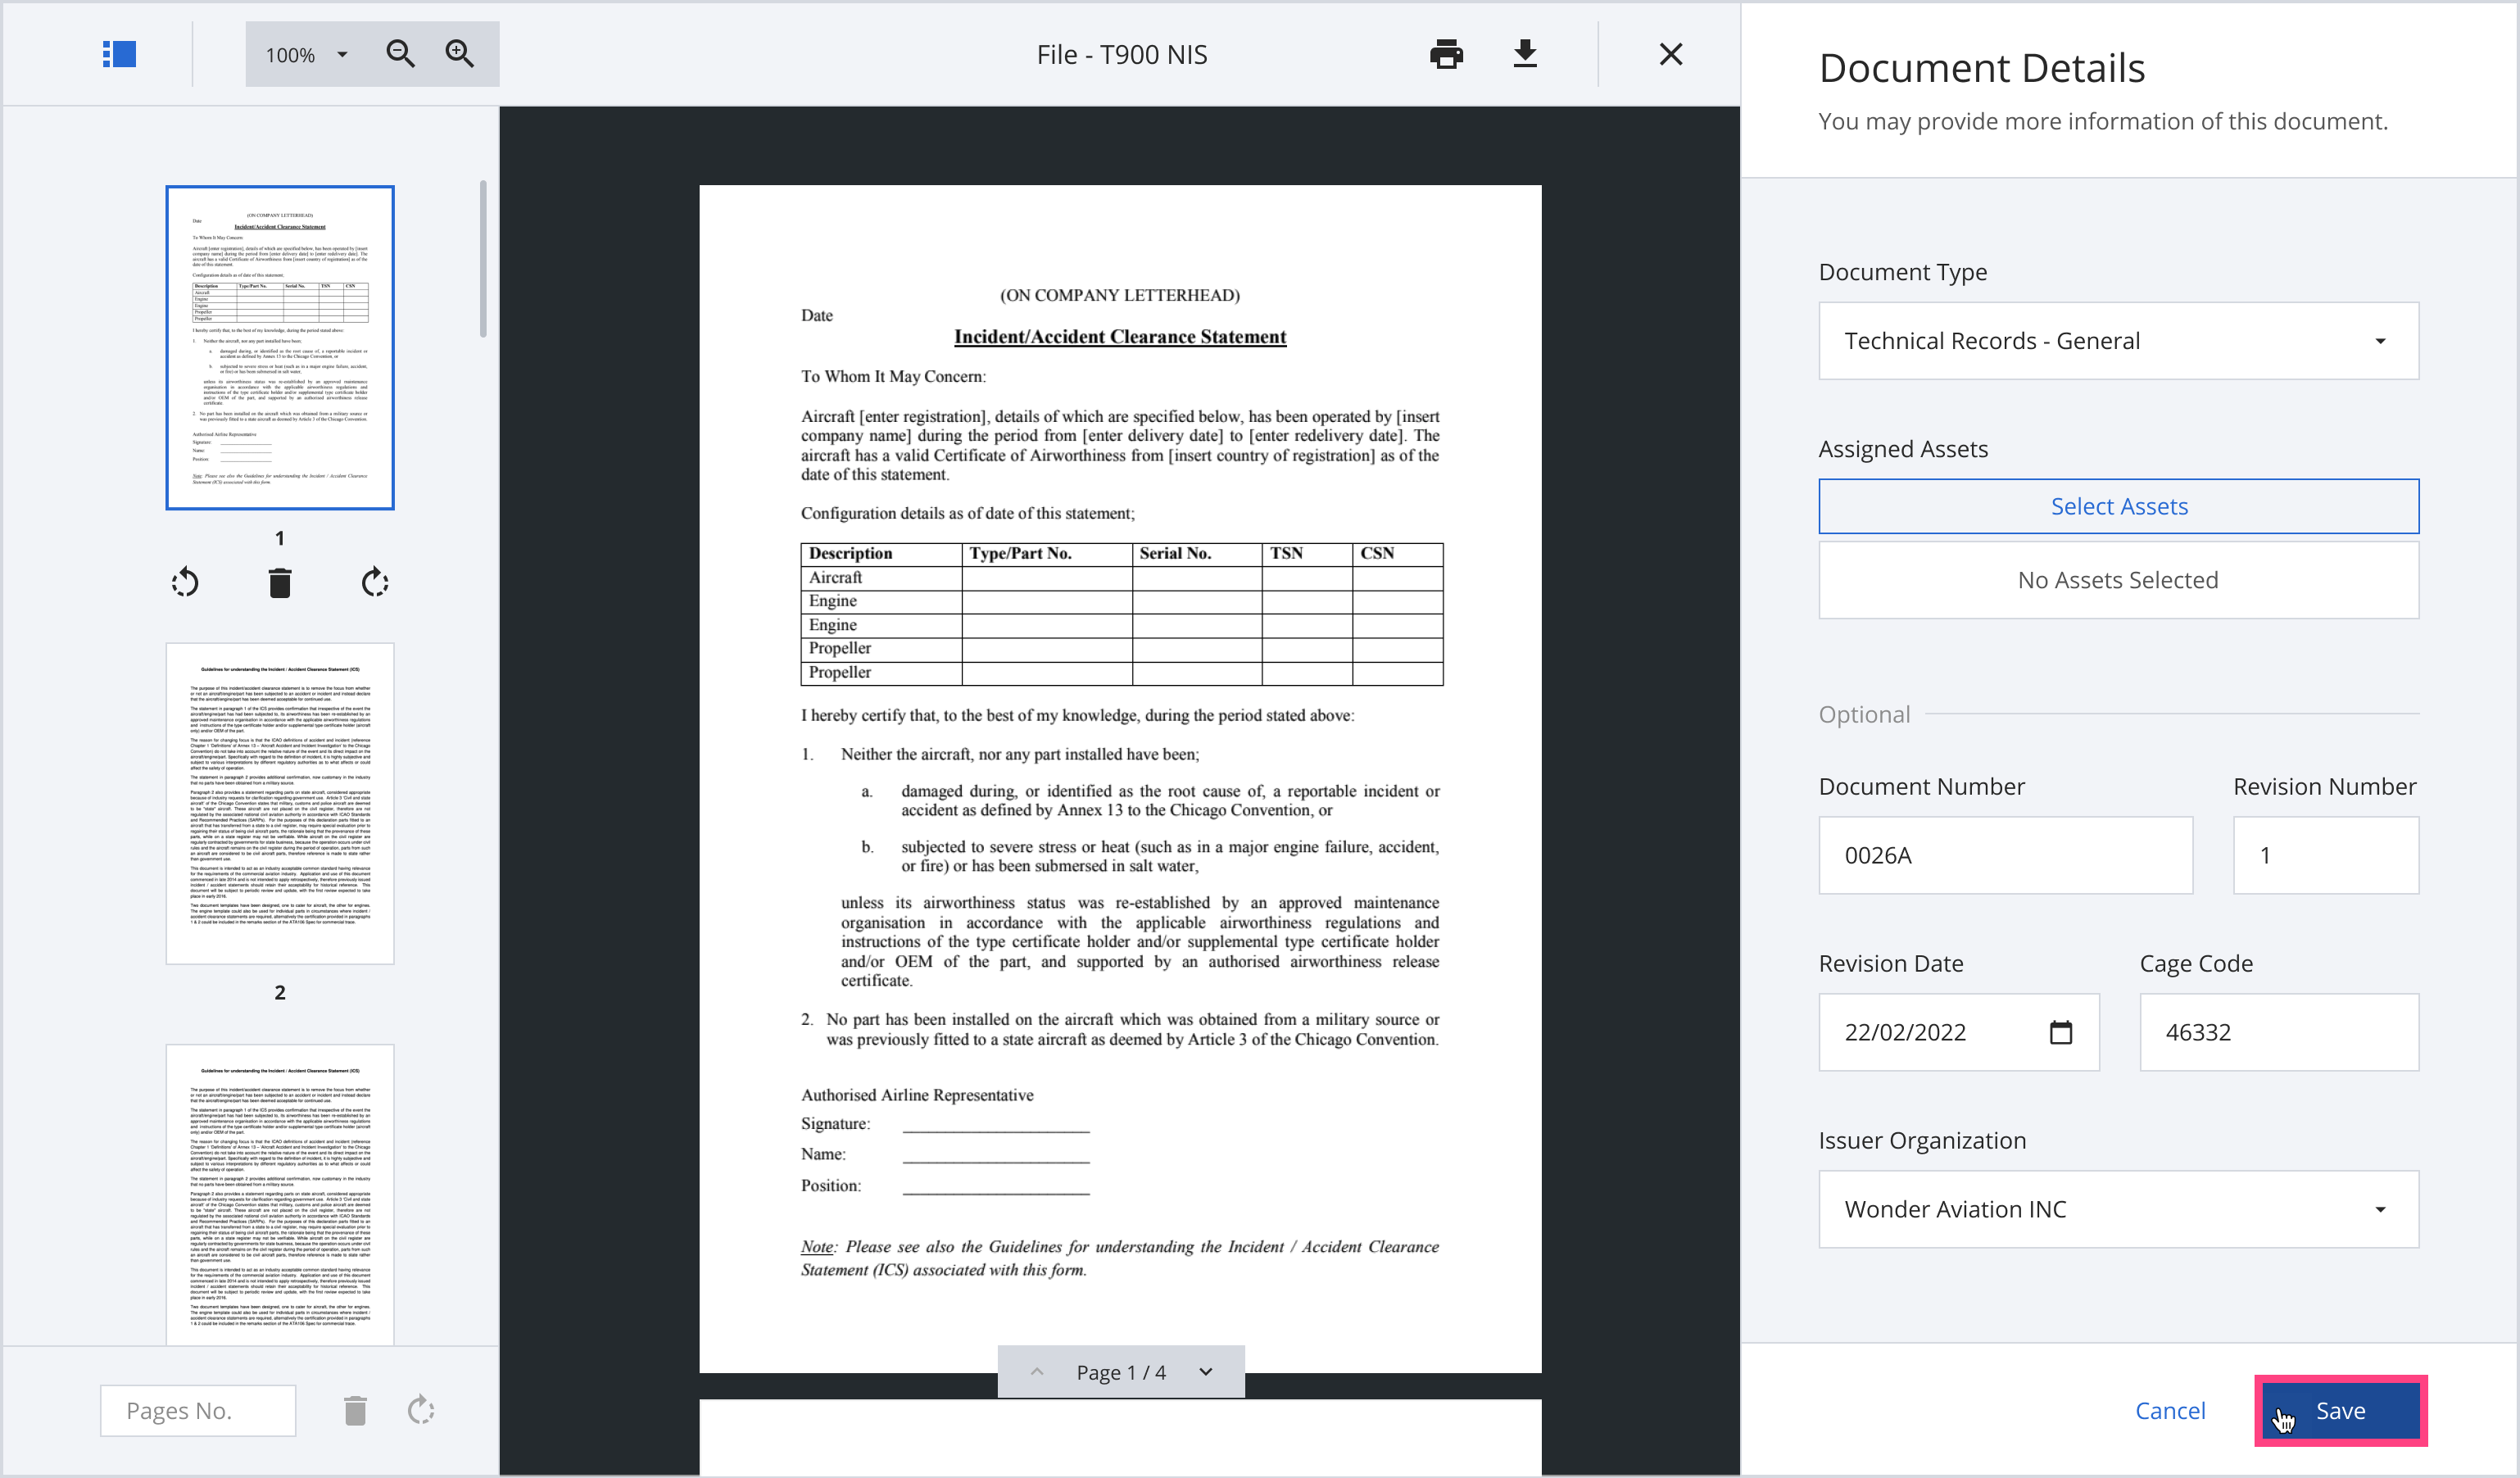
Updating Document Details
Step 1: From the Document List, open the document you want to view/update.
Step 2: Update document details.
Step 3: Click 'Save'.
Step 4: A green banner will appear at the top of the Document List when your Document details are updated successfully.
Creating a Data Block for the external ARC of your Repair Order
Step 1: From the Document List, select the ARC document you want to digitize.
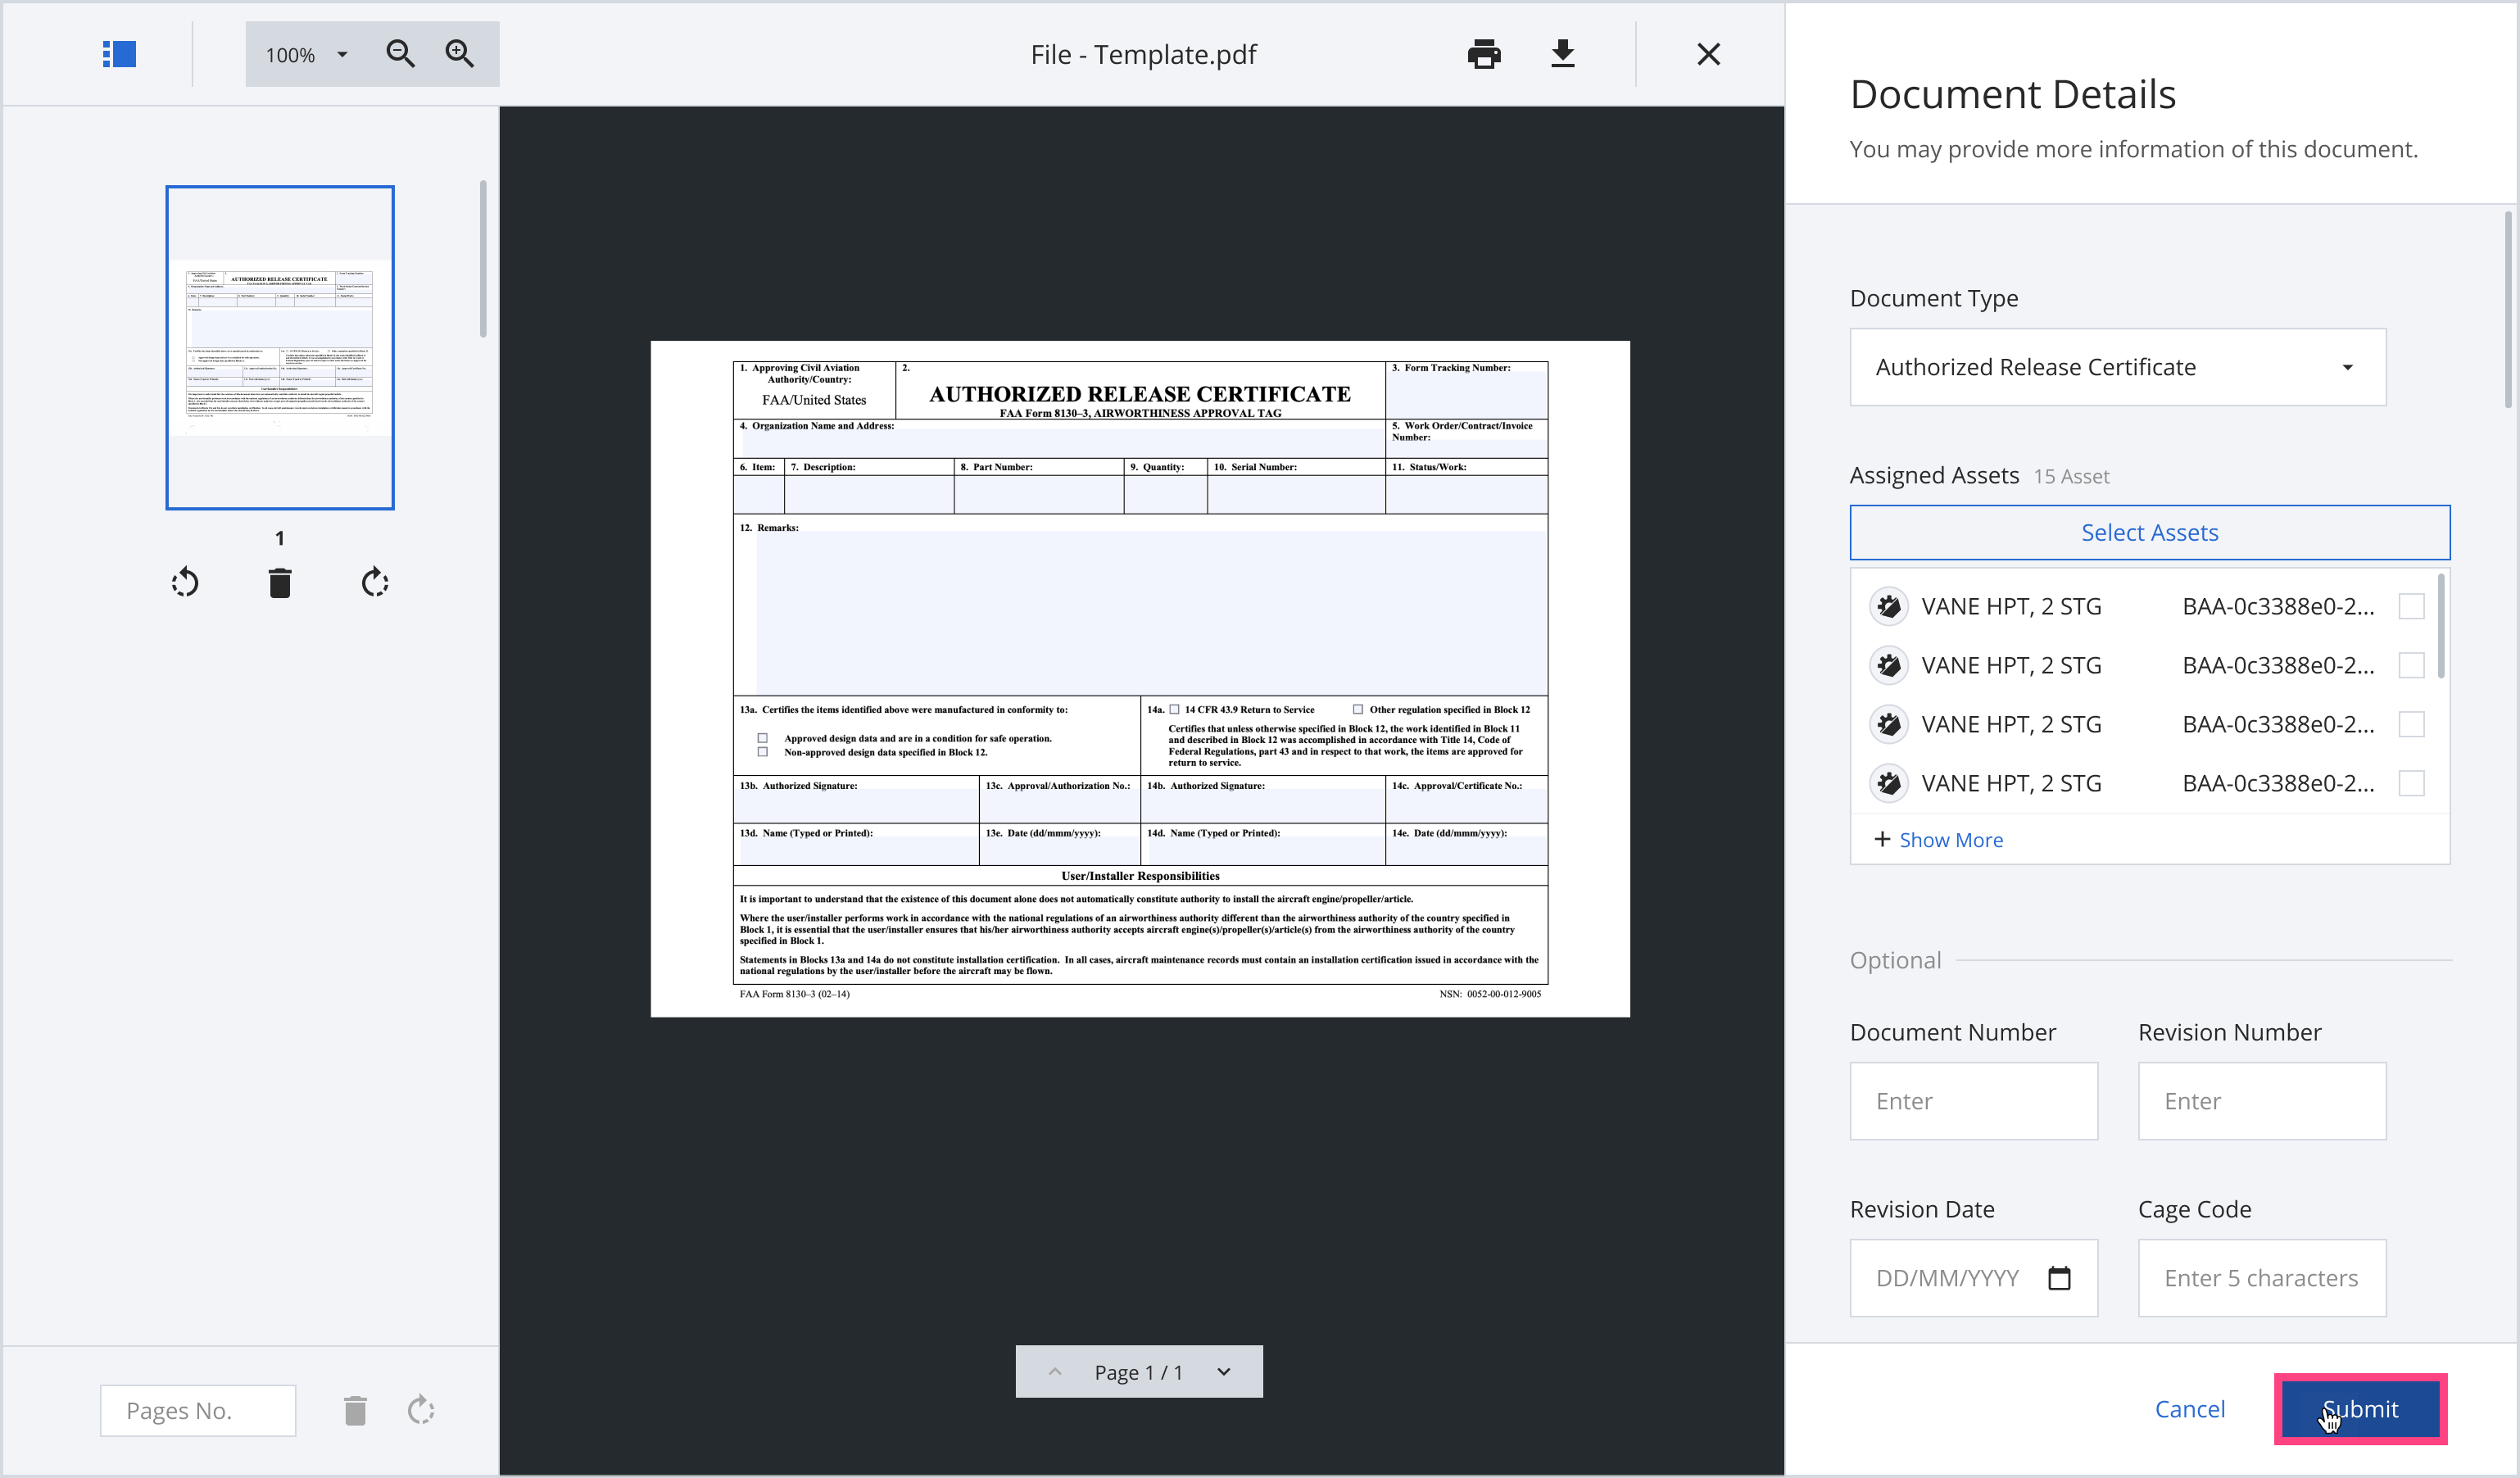
Step 2: Select your Document Type in the dropdown list to “Authorized Release Certificate”.
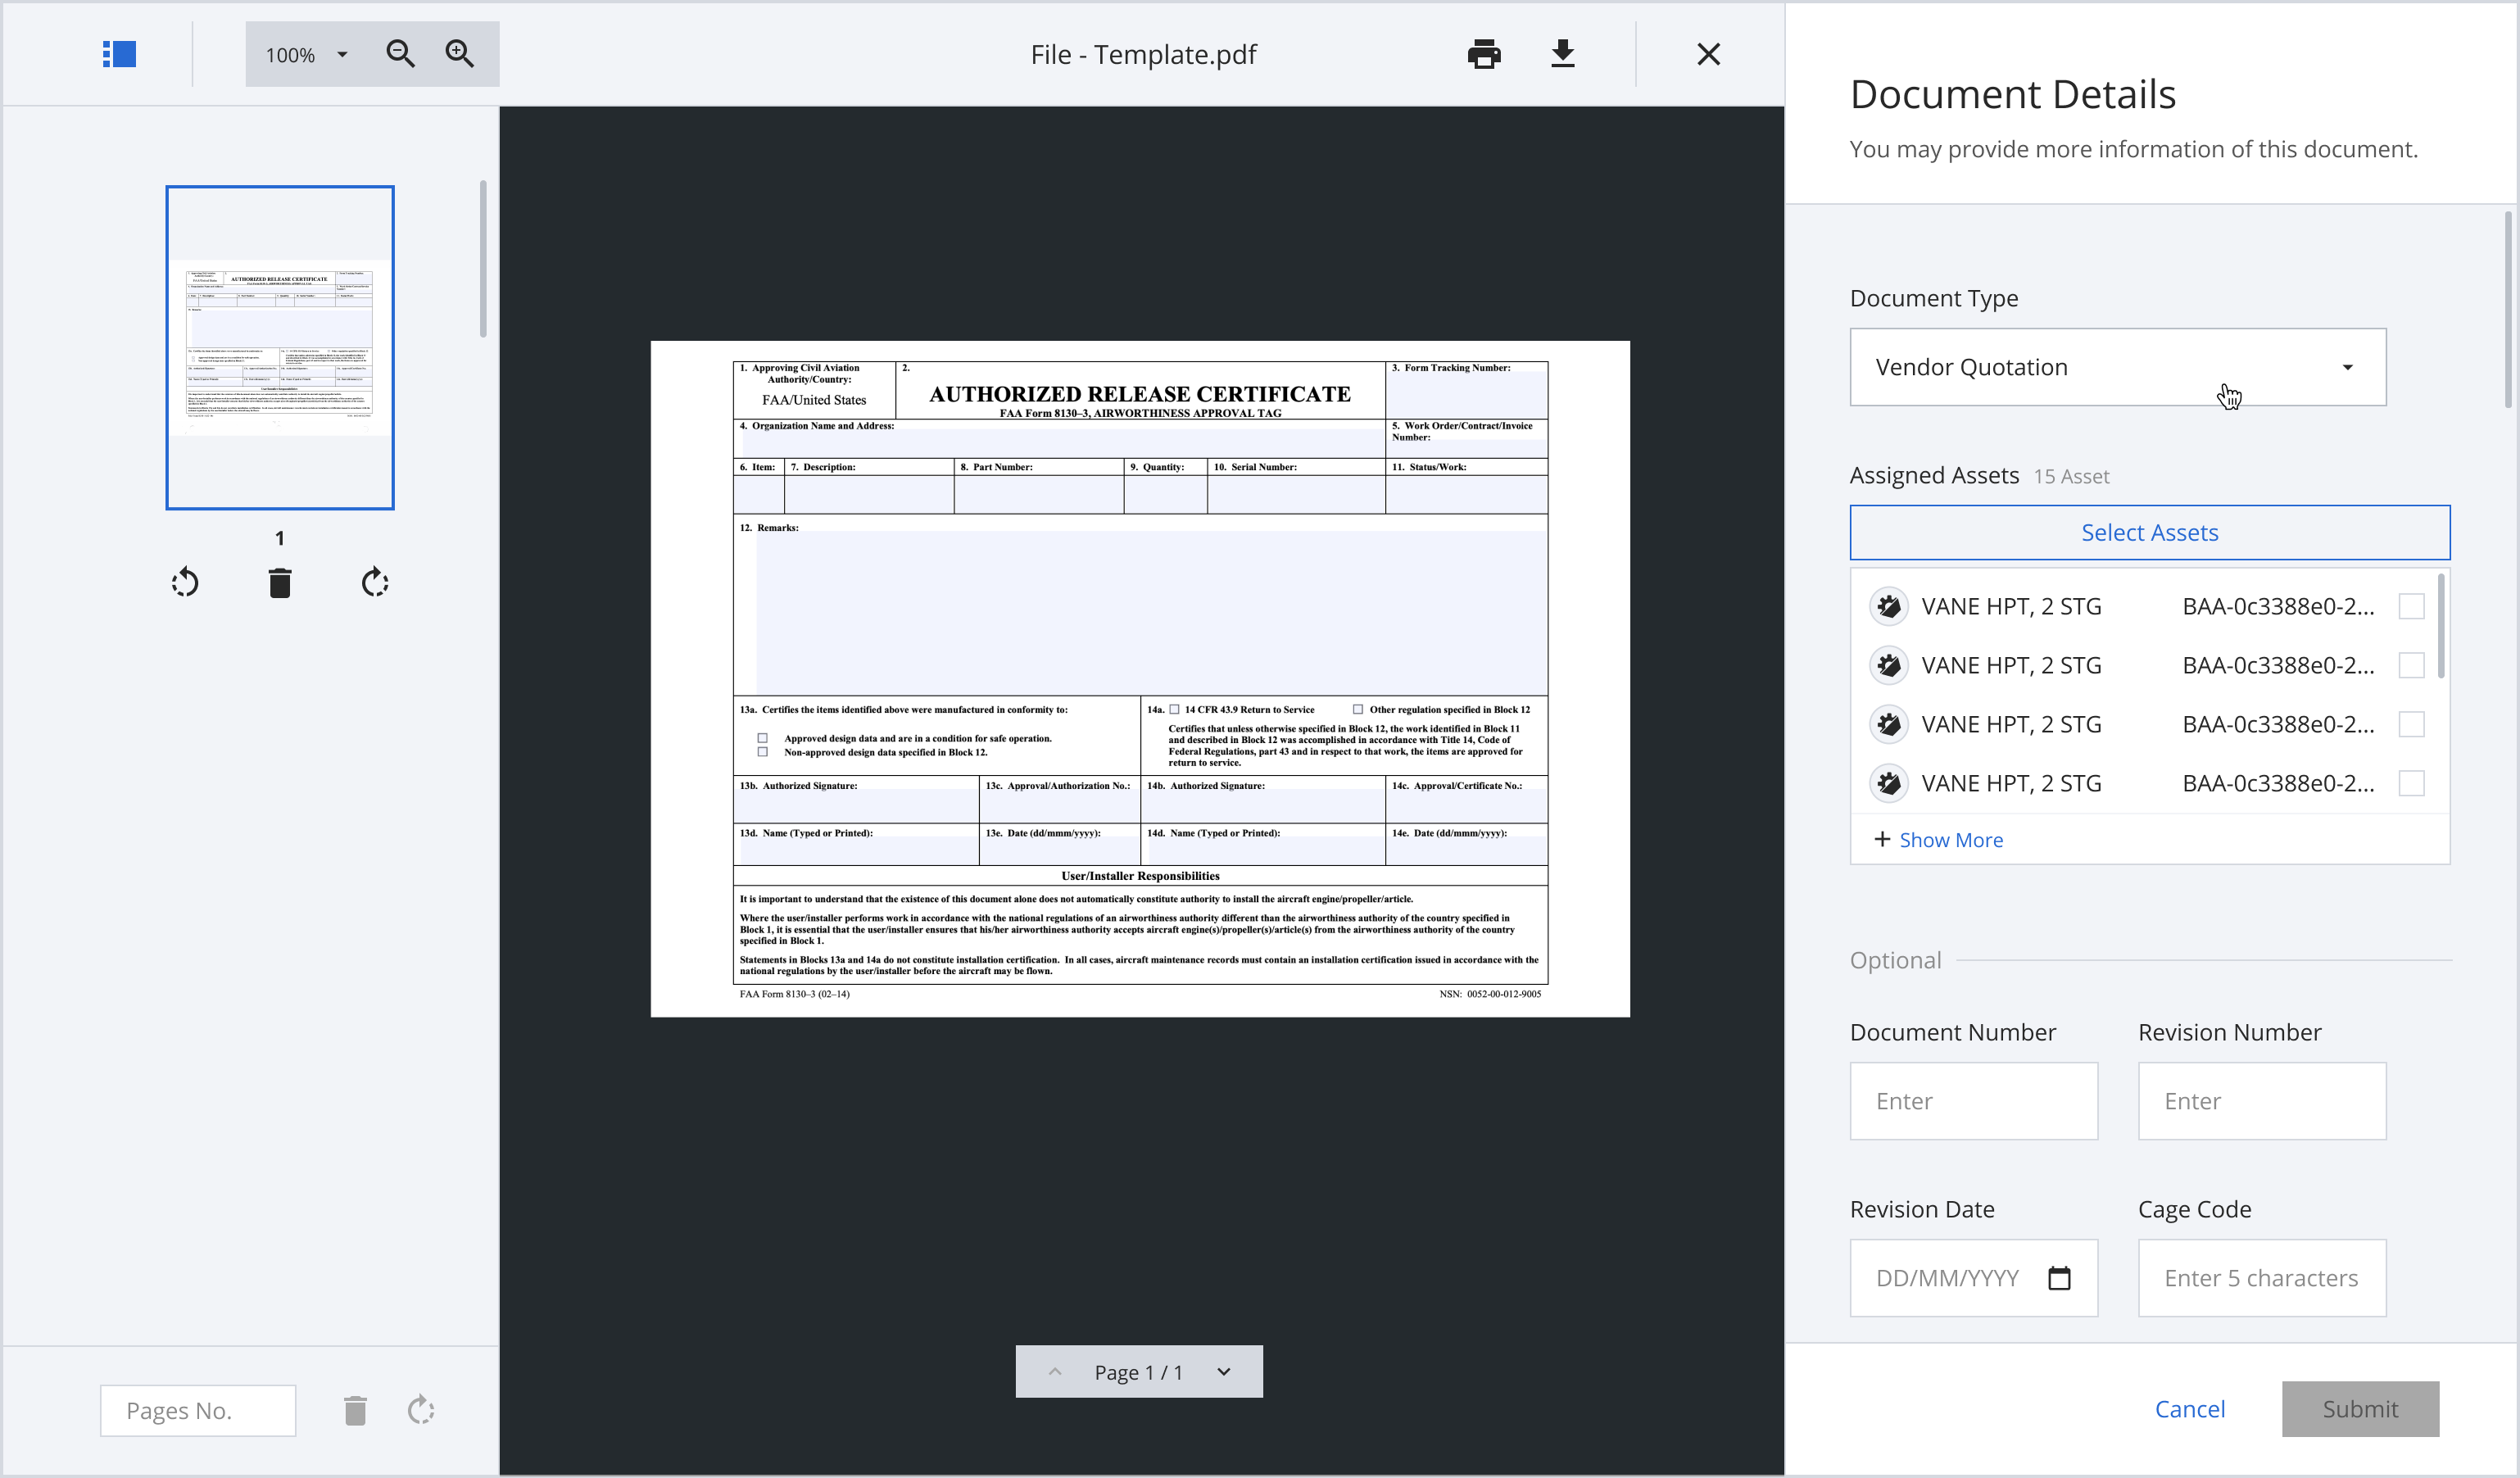
Step 3: Your assigned assets will be automatically selected for you, according to your repair order.
Click 'Submit'.
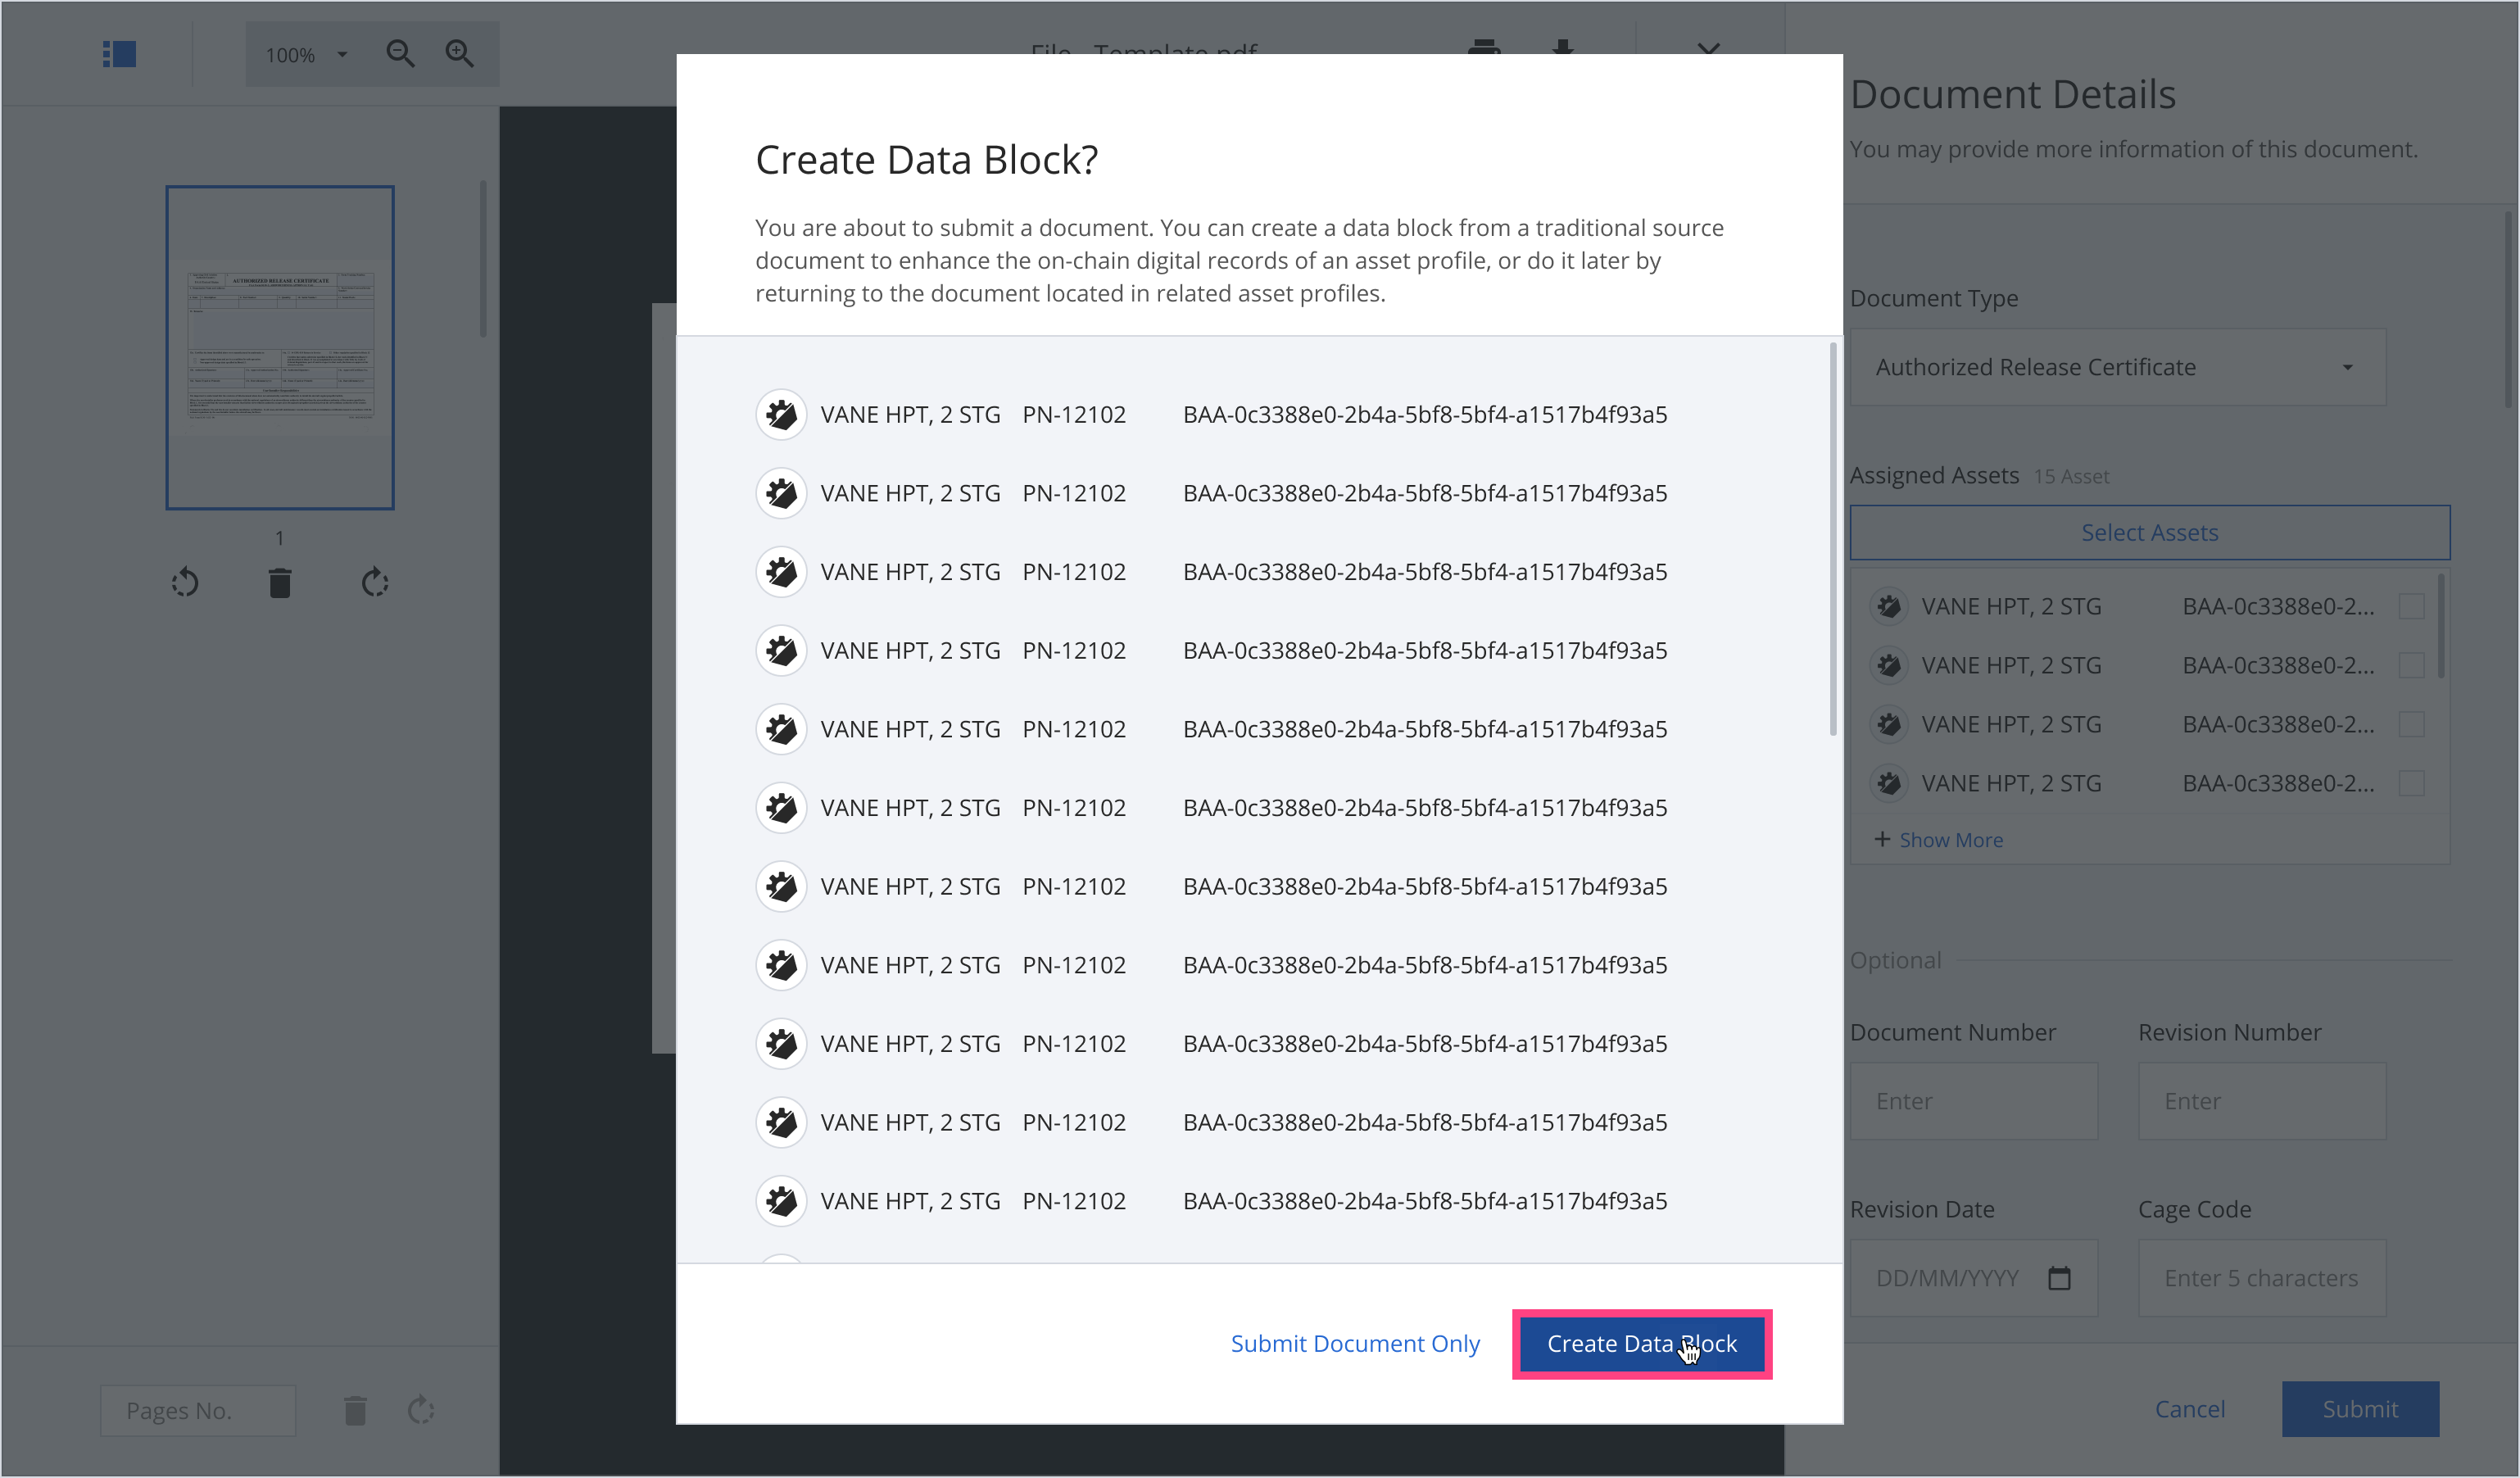
Step 4: A confirmation message will appear, click “Create Data Block”.
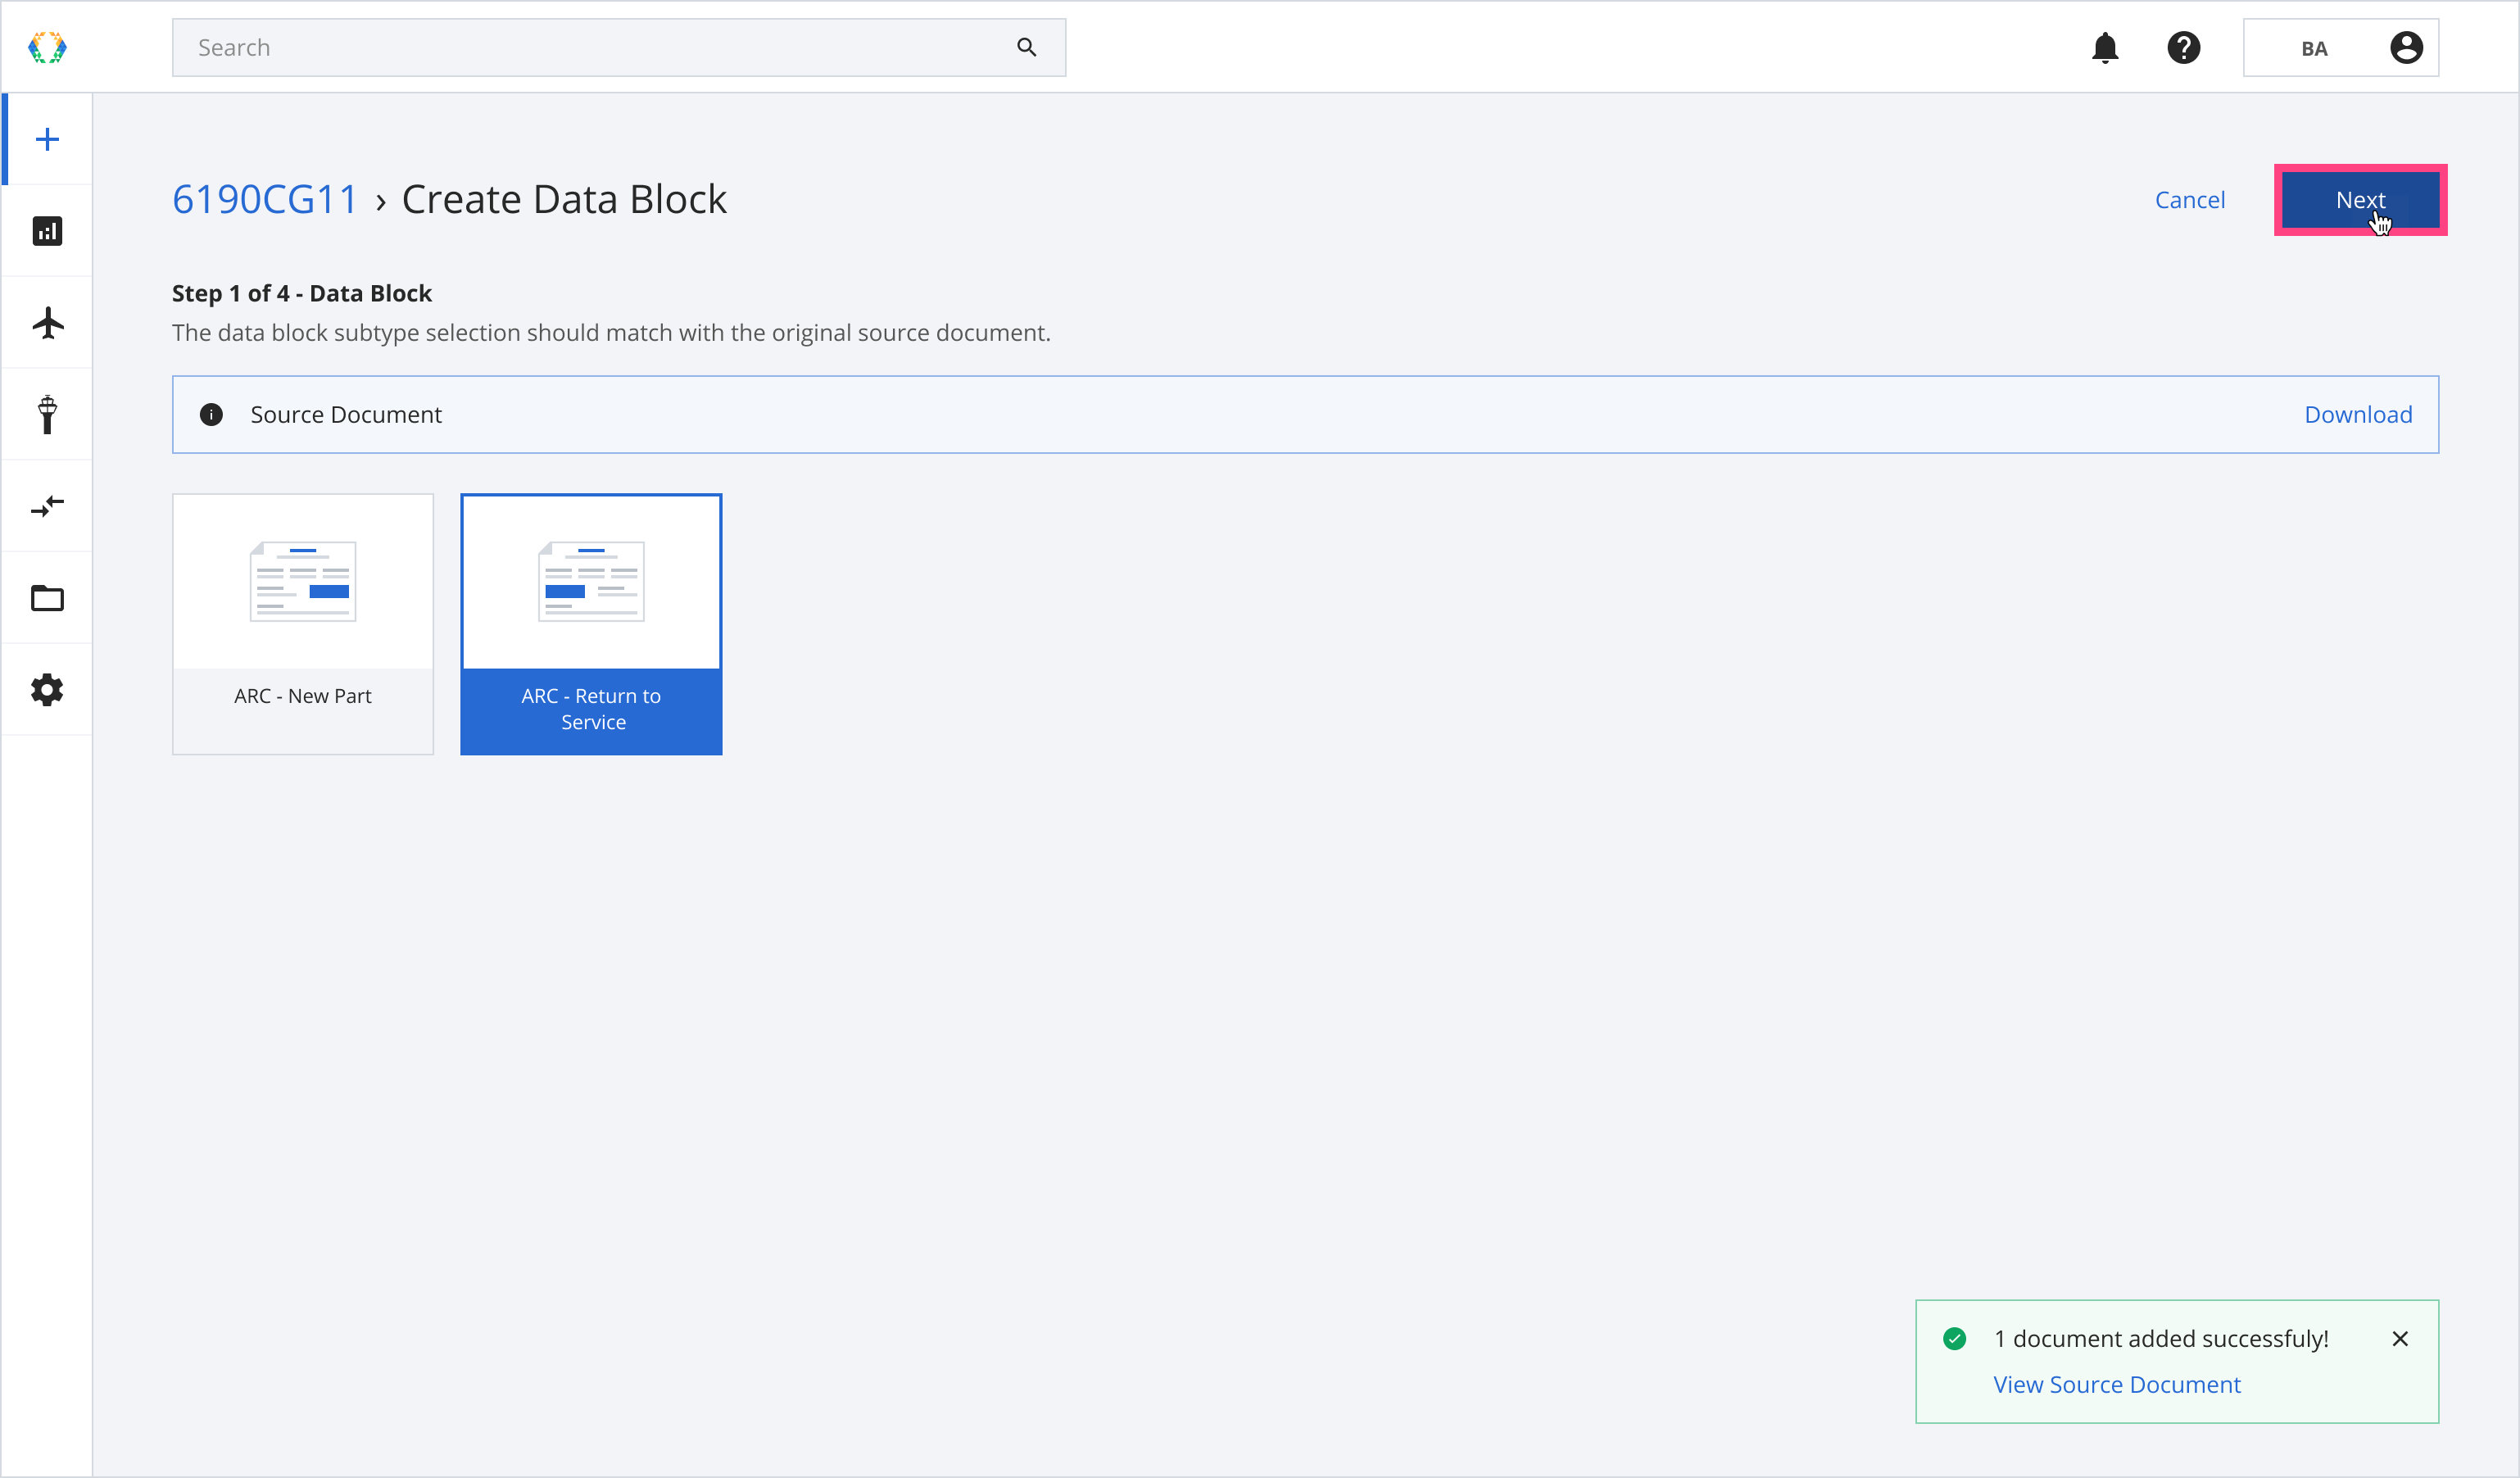
Step 5: Select the data block subtype for your ARC and click 'Next'.
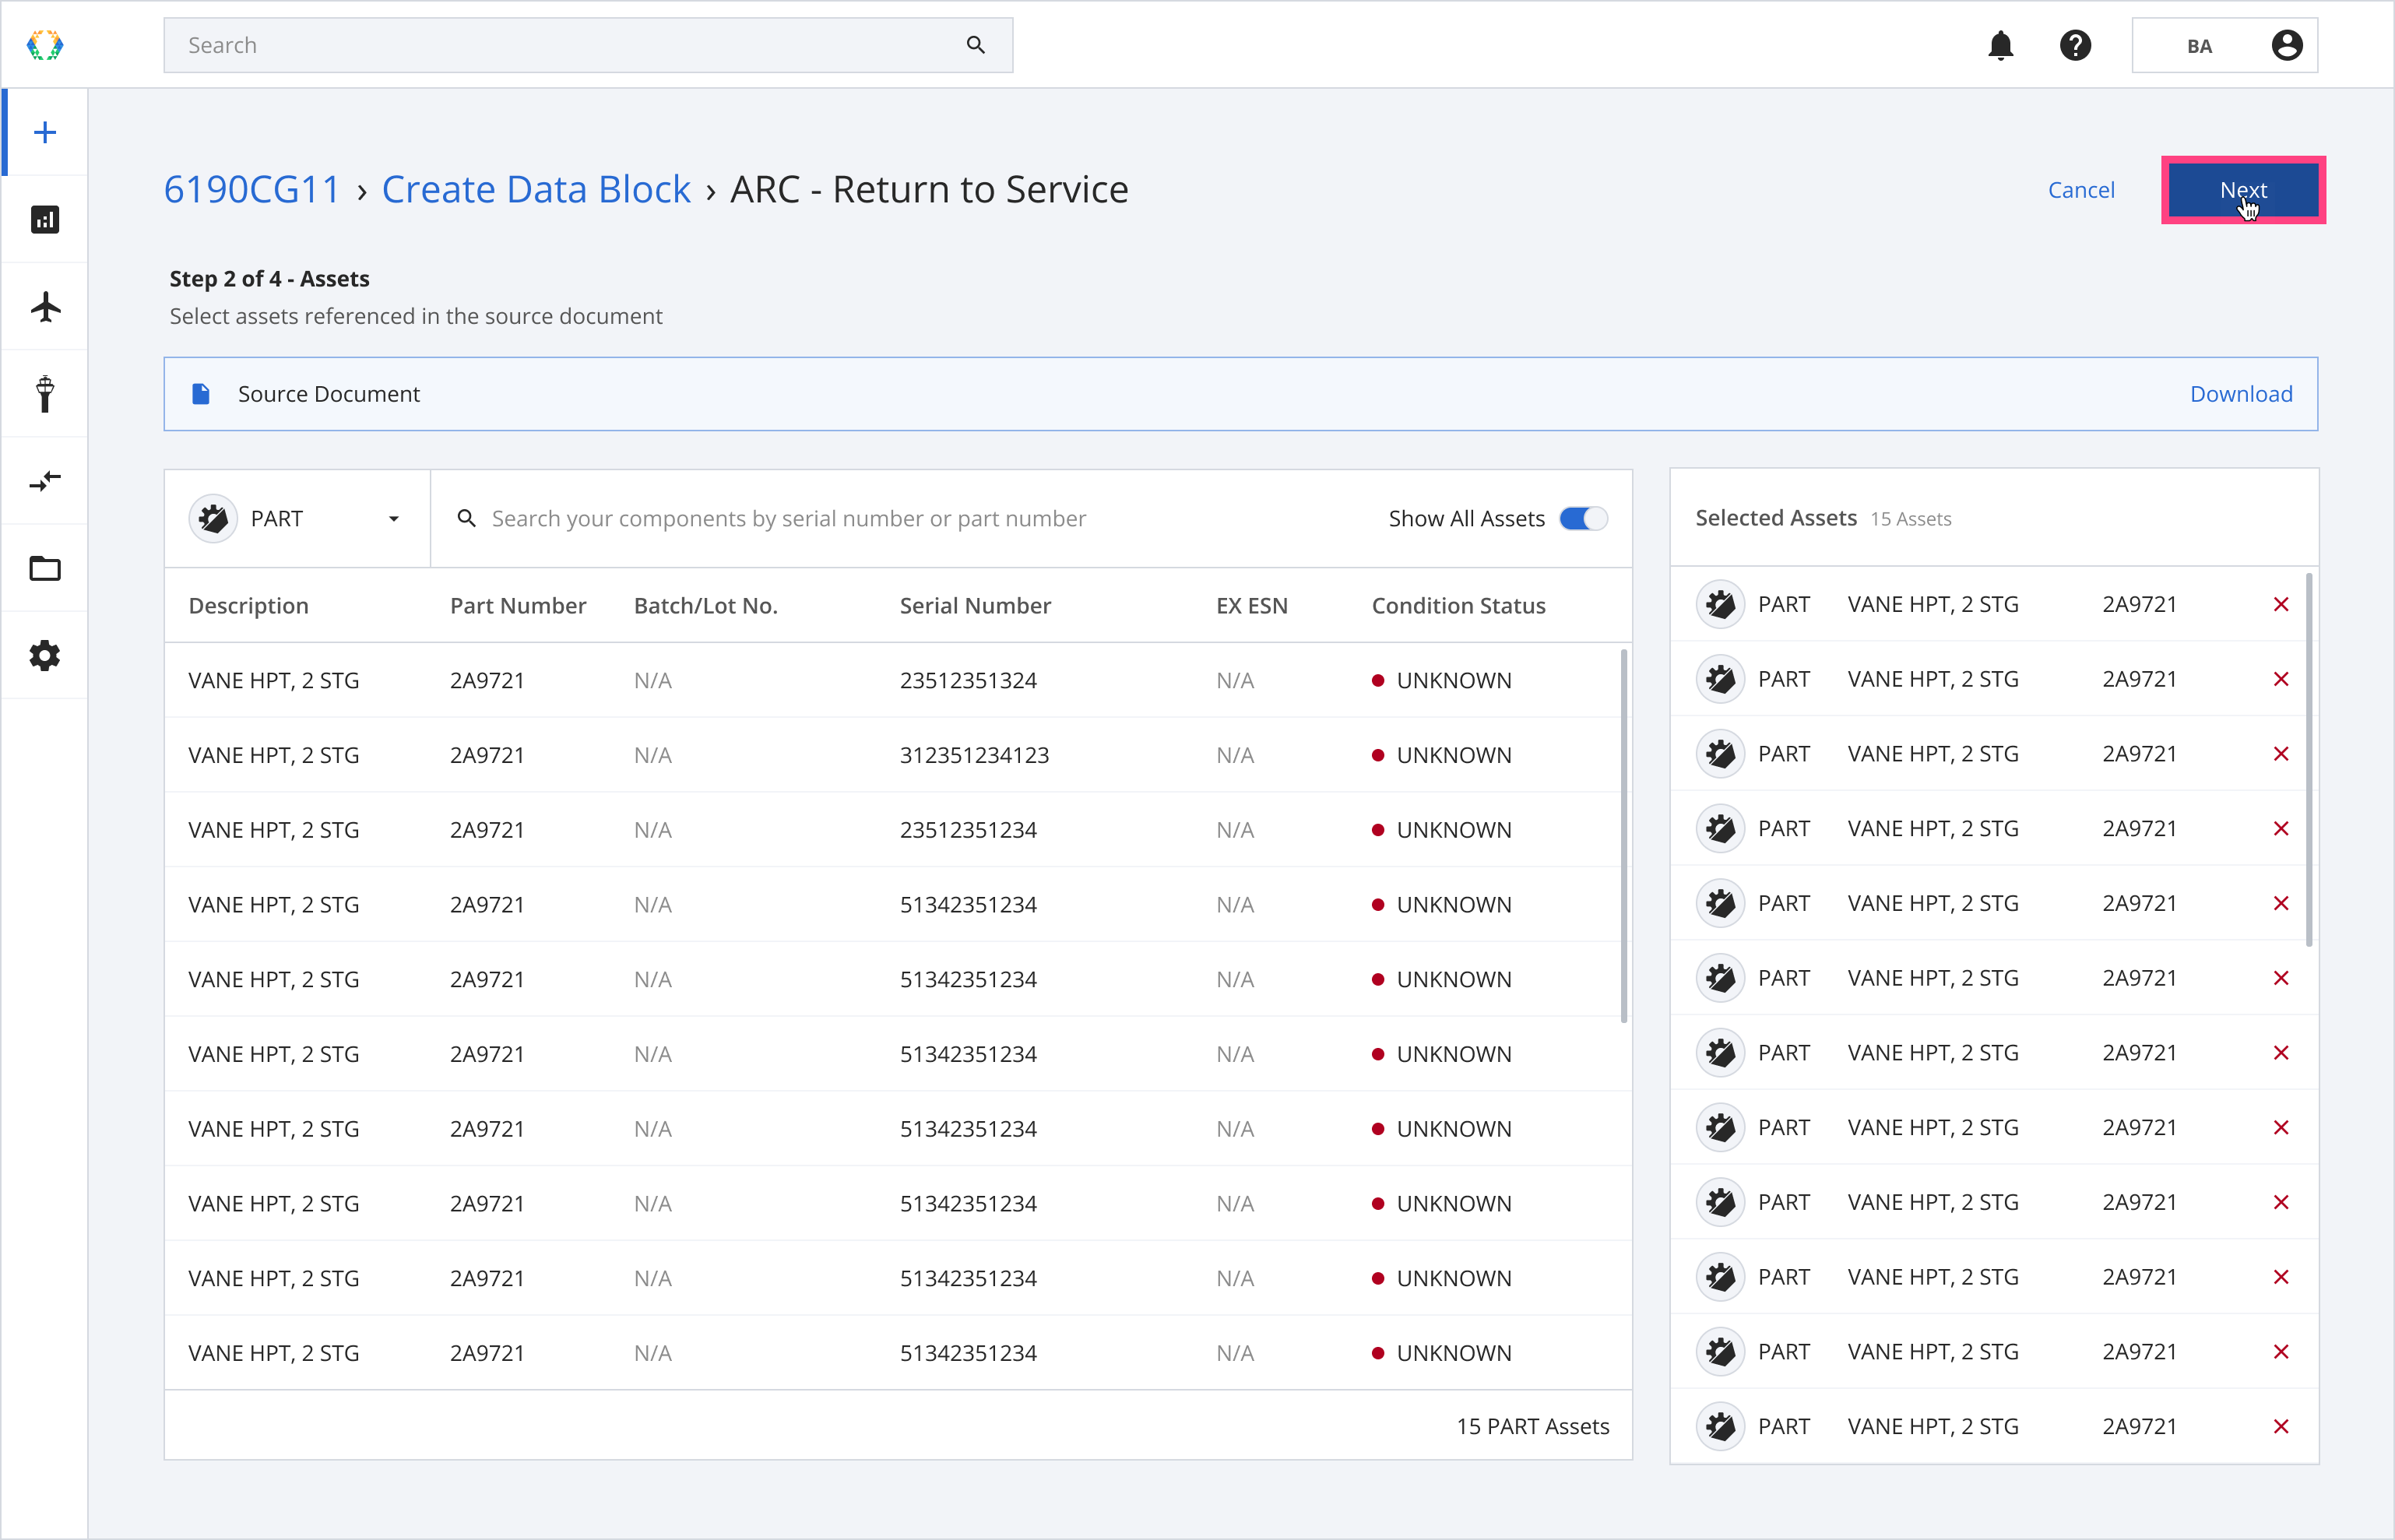
Step 6: Click 'Next' to confirm your asset selection.
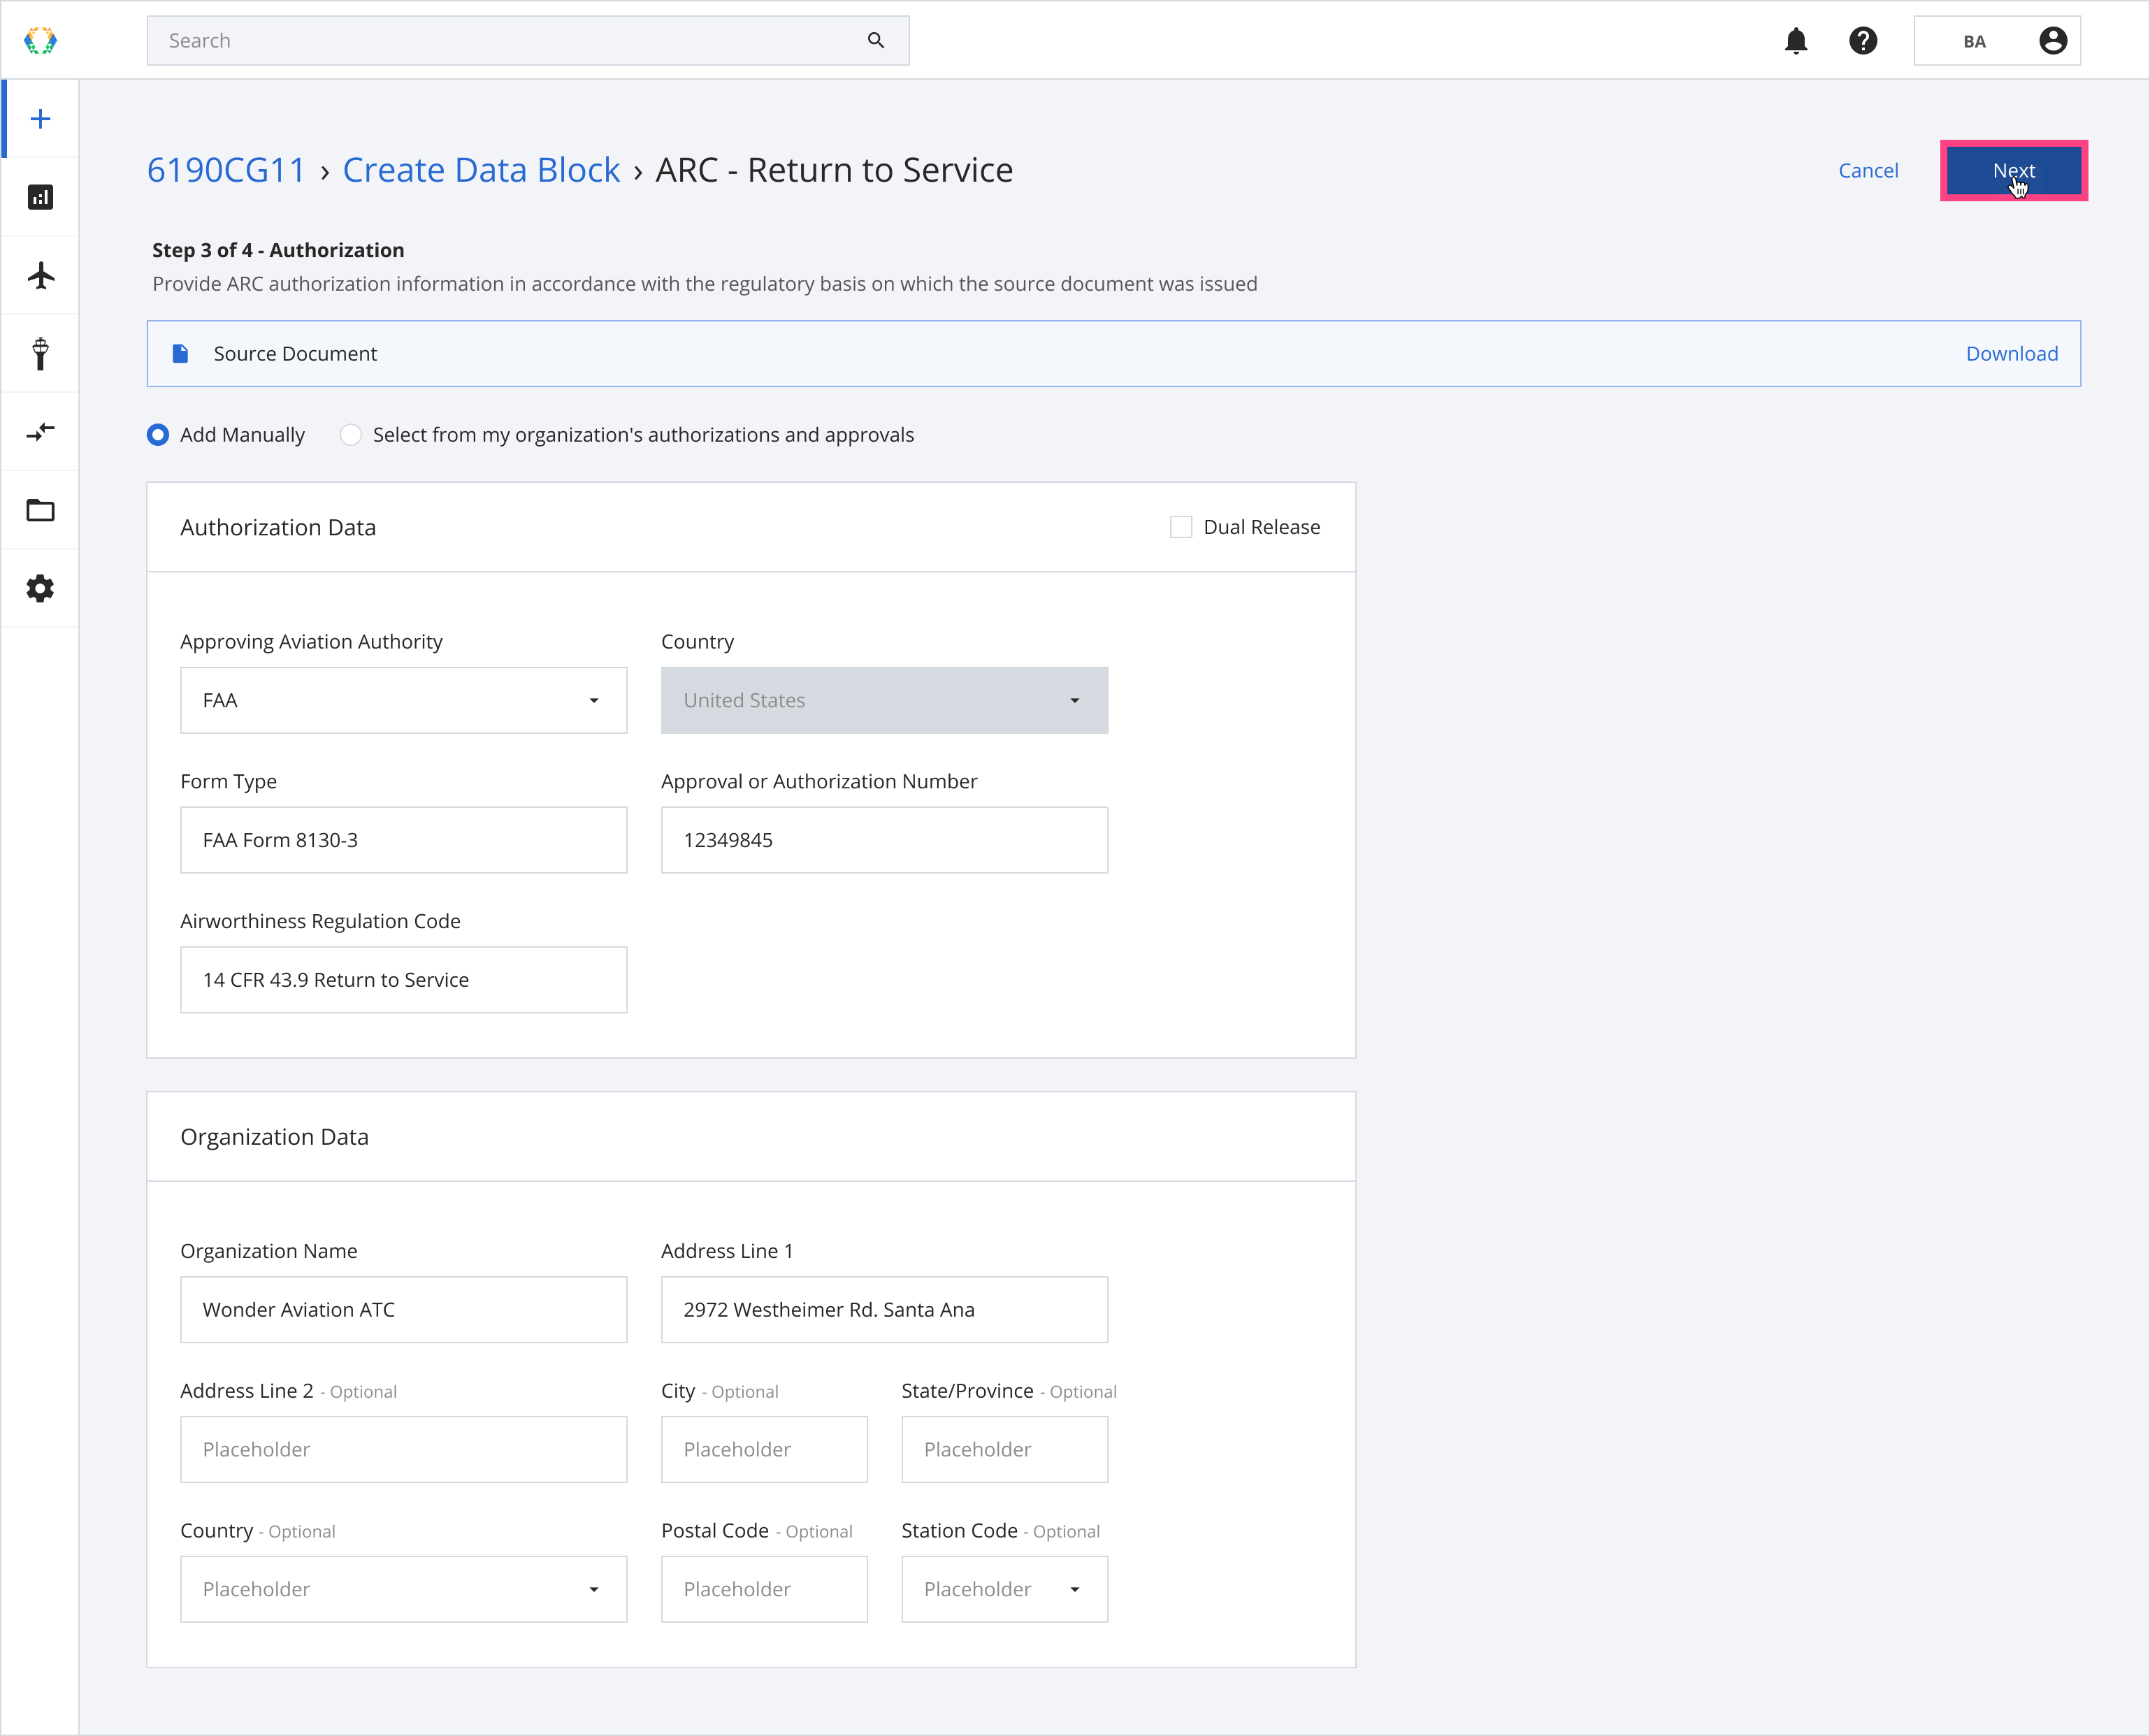
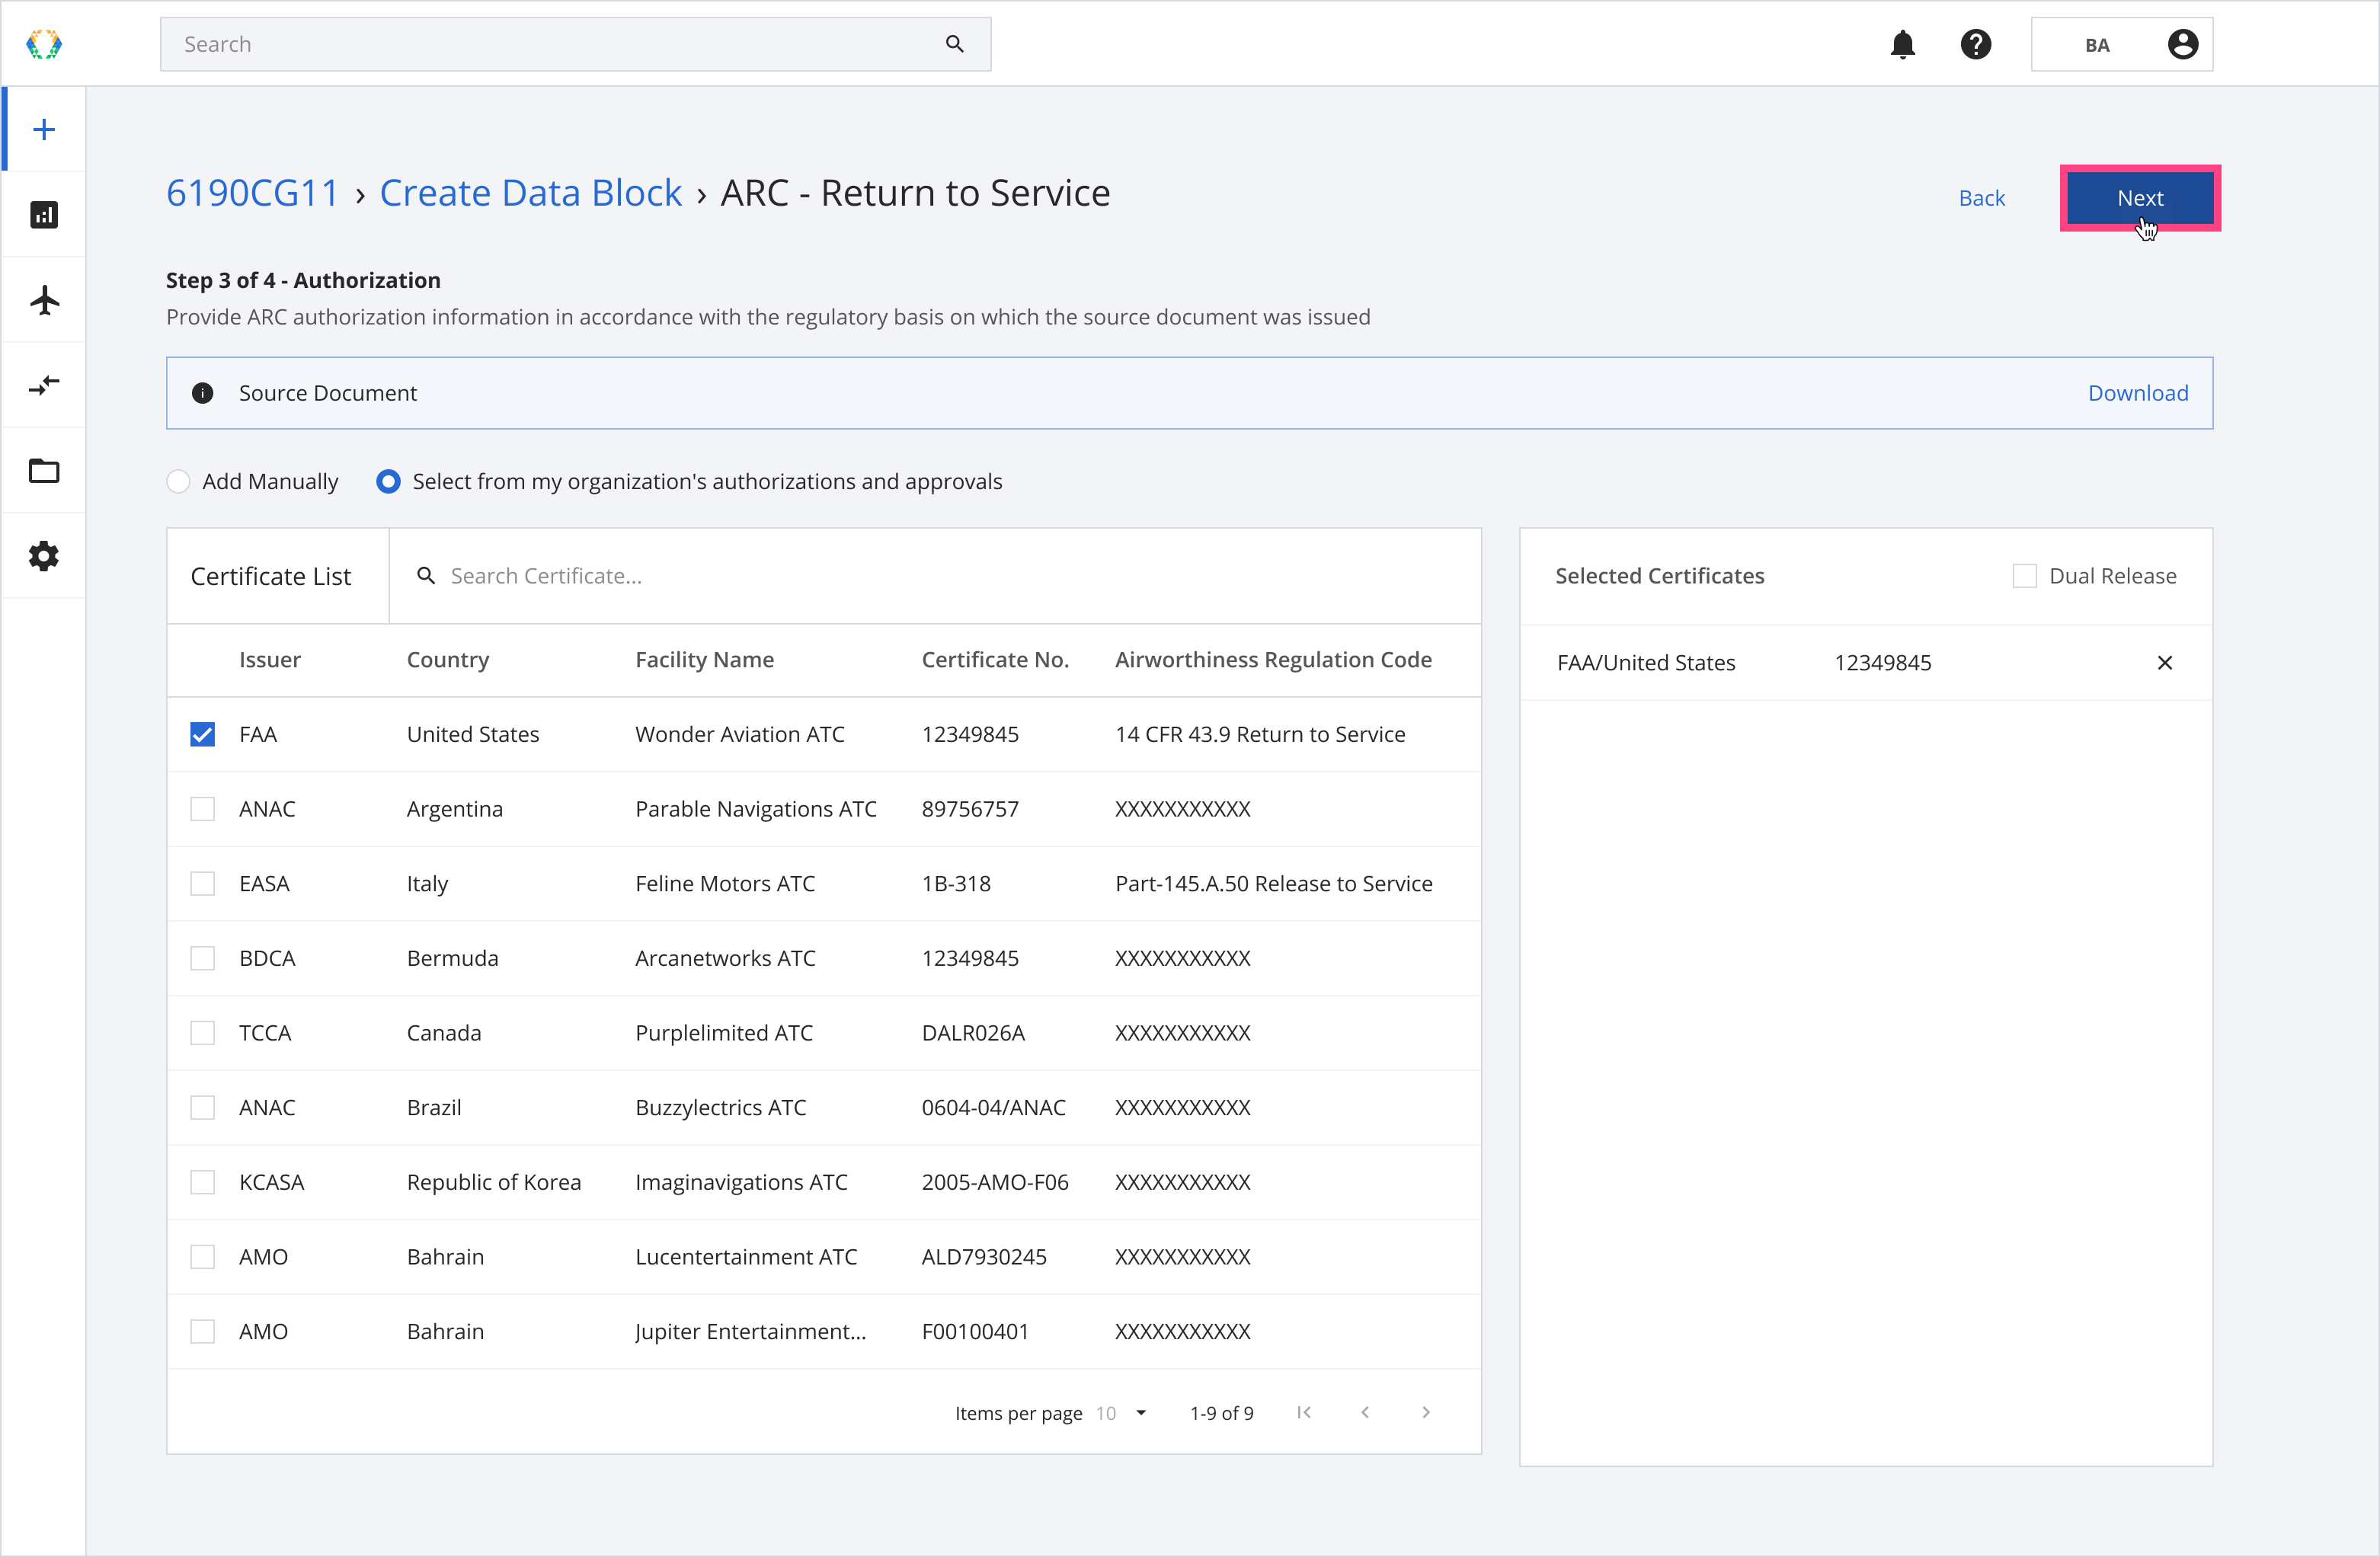
Step 7: You can manually add the authorization information or select from the existing organization certificates list. Click 'Next'.
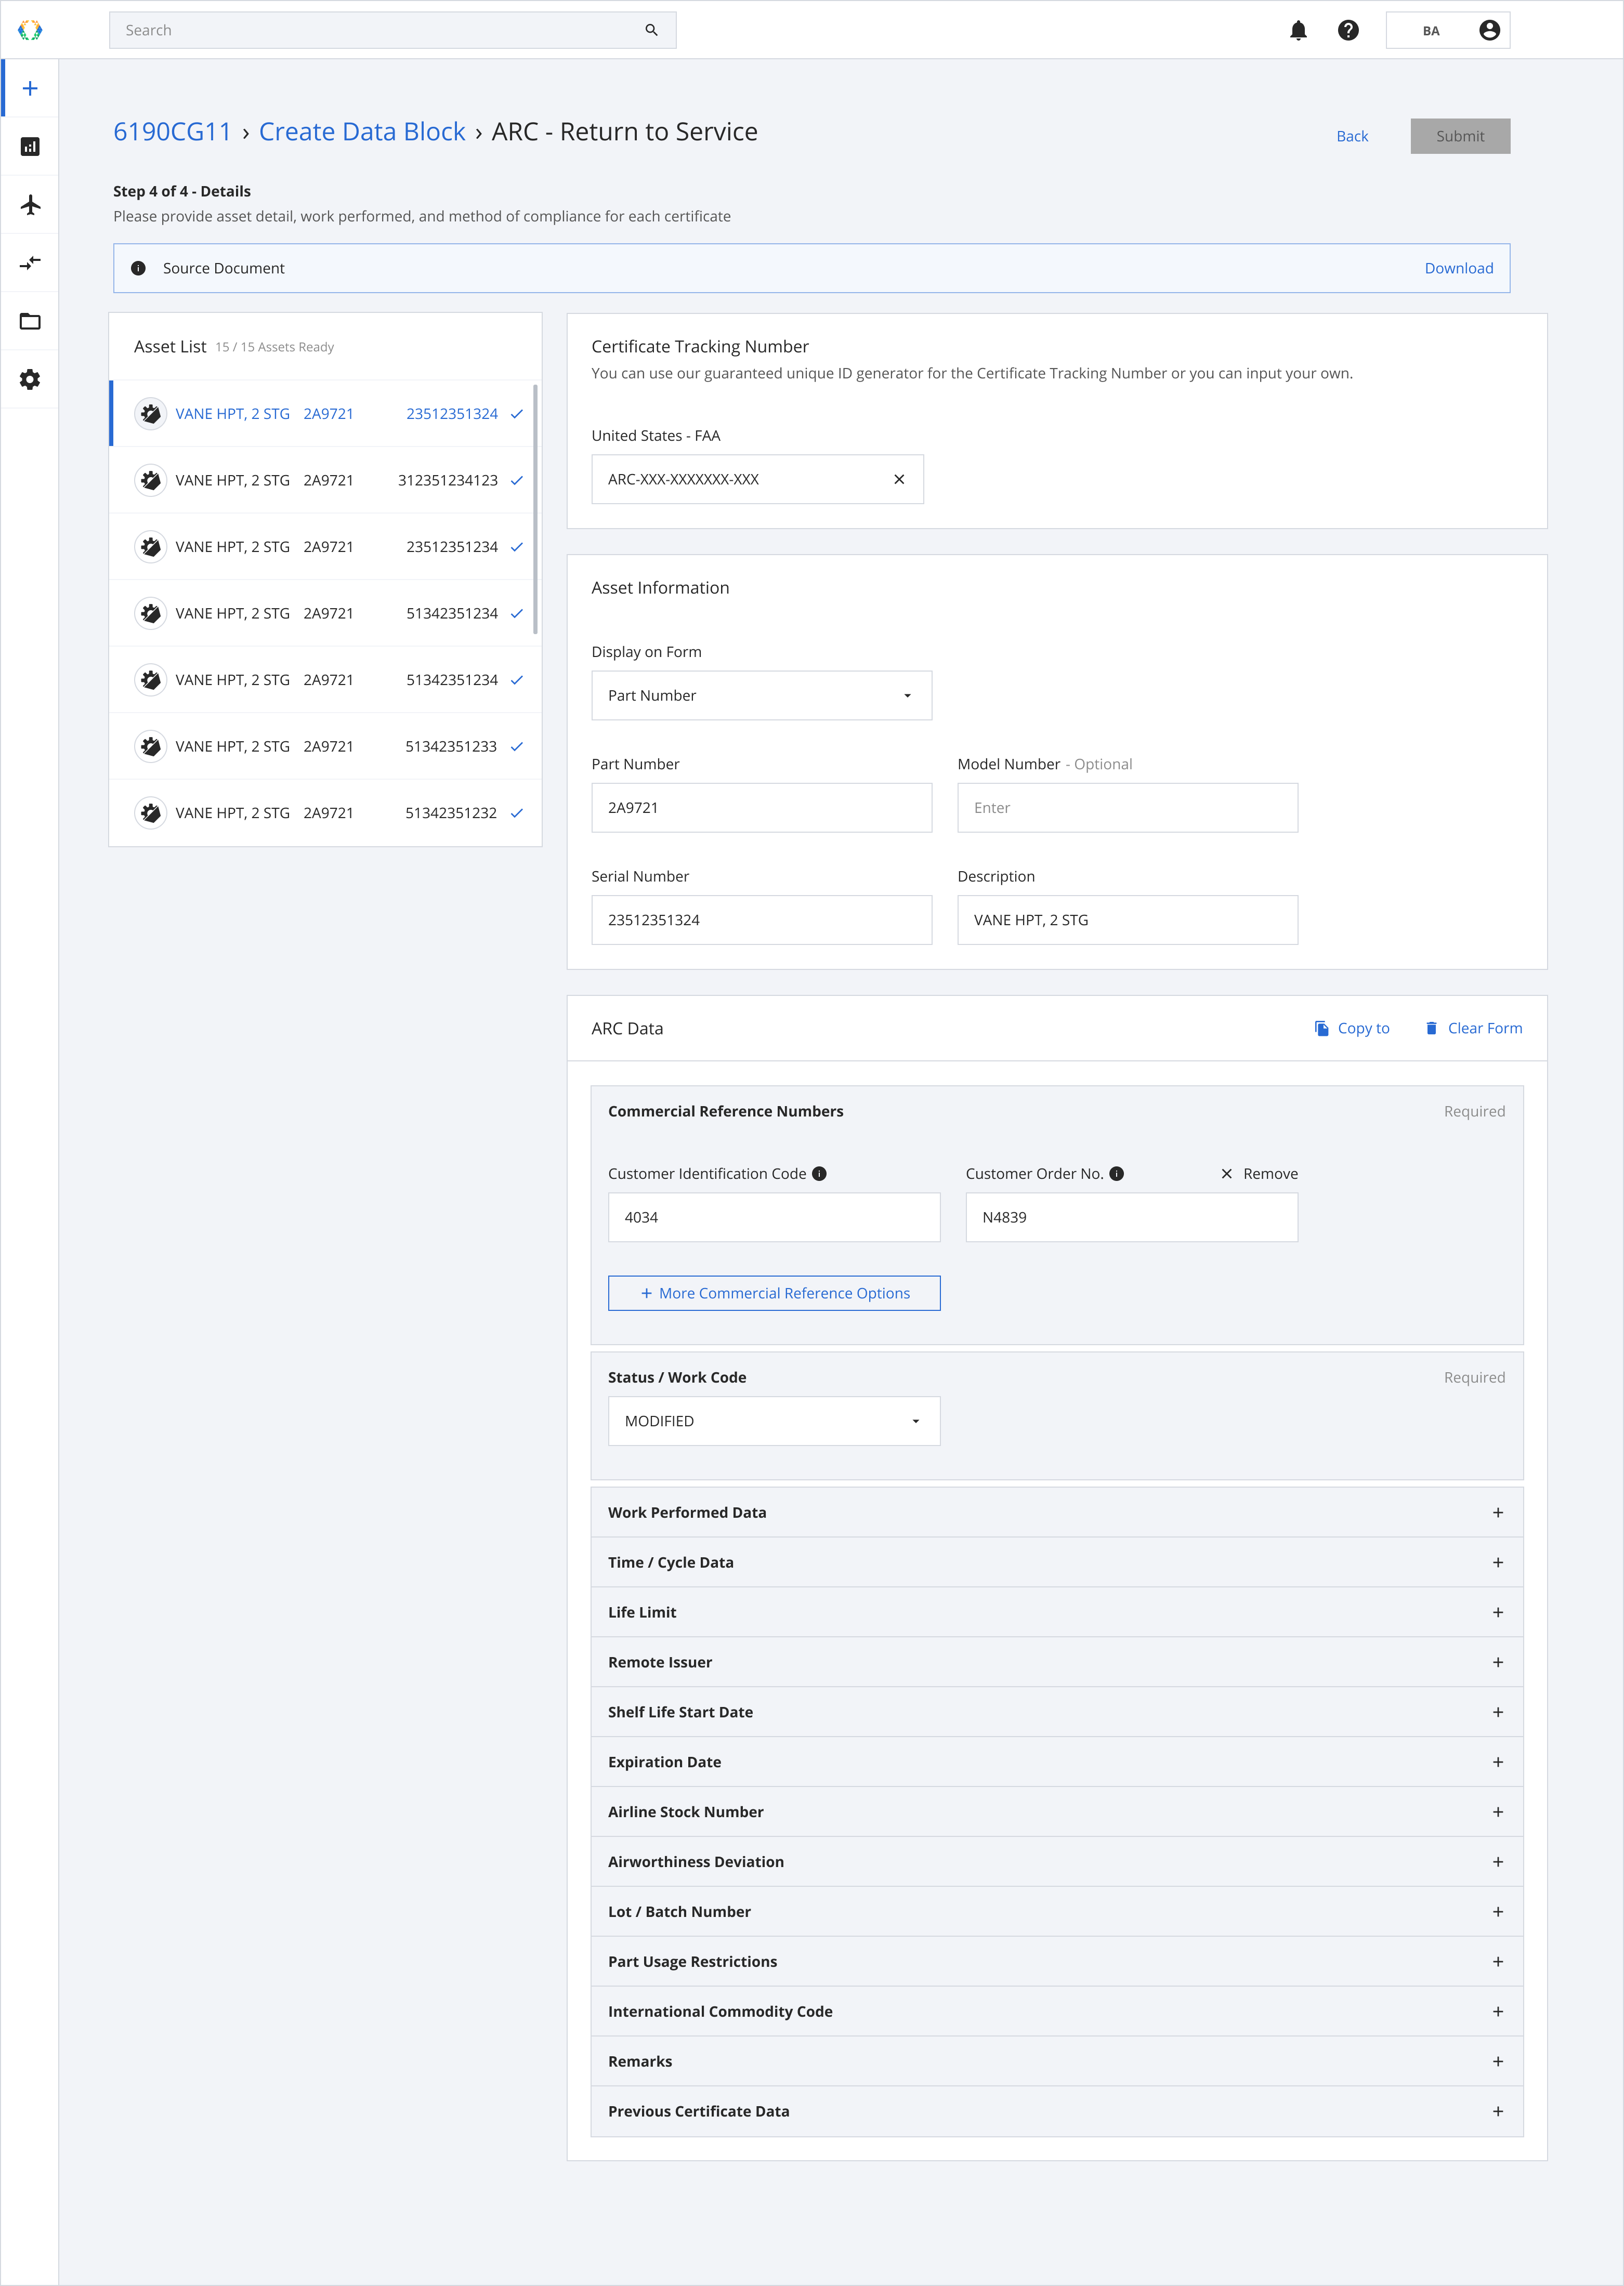
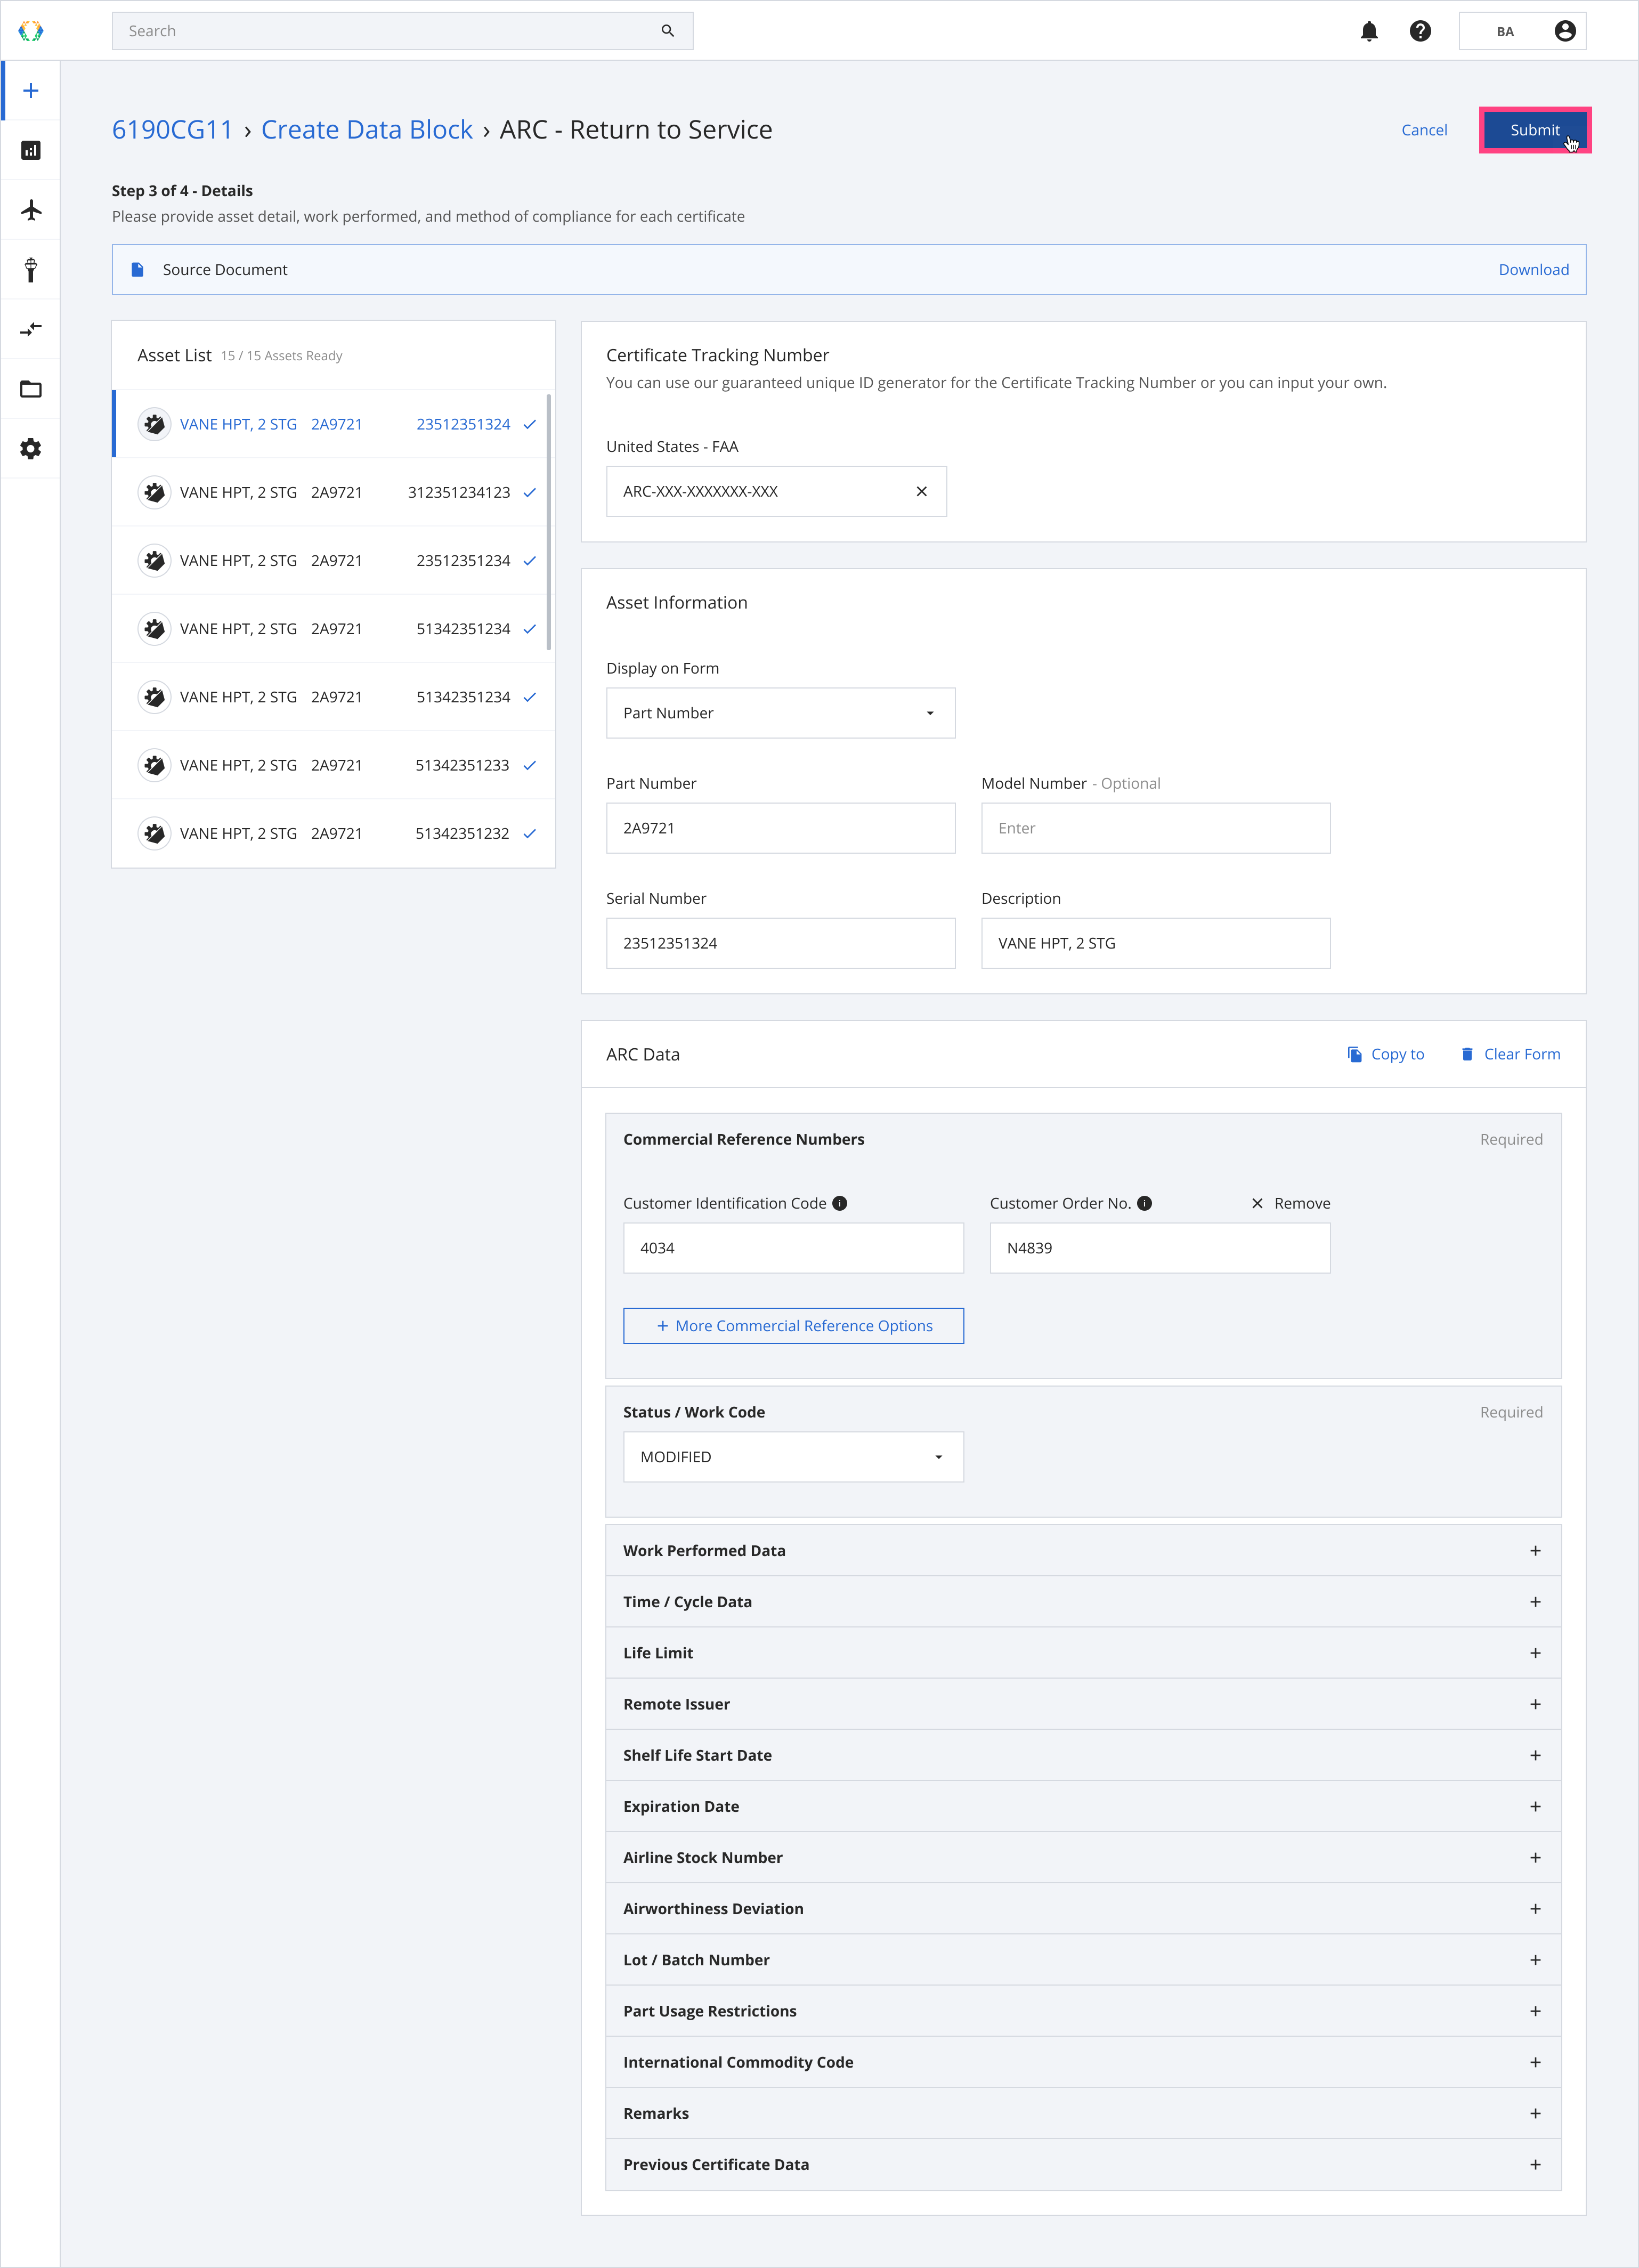
Step 8: Update the assets details, work performed and method of compliance for each certificate.
Step 9: Click 'Submit'.
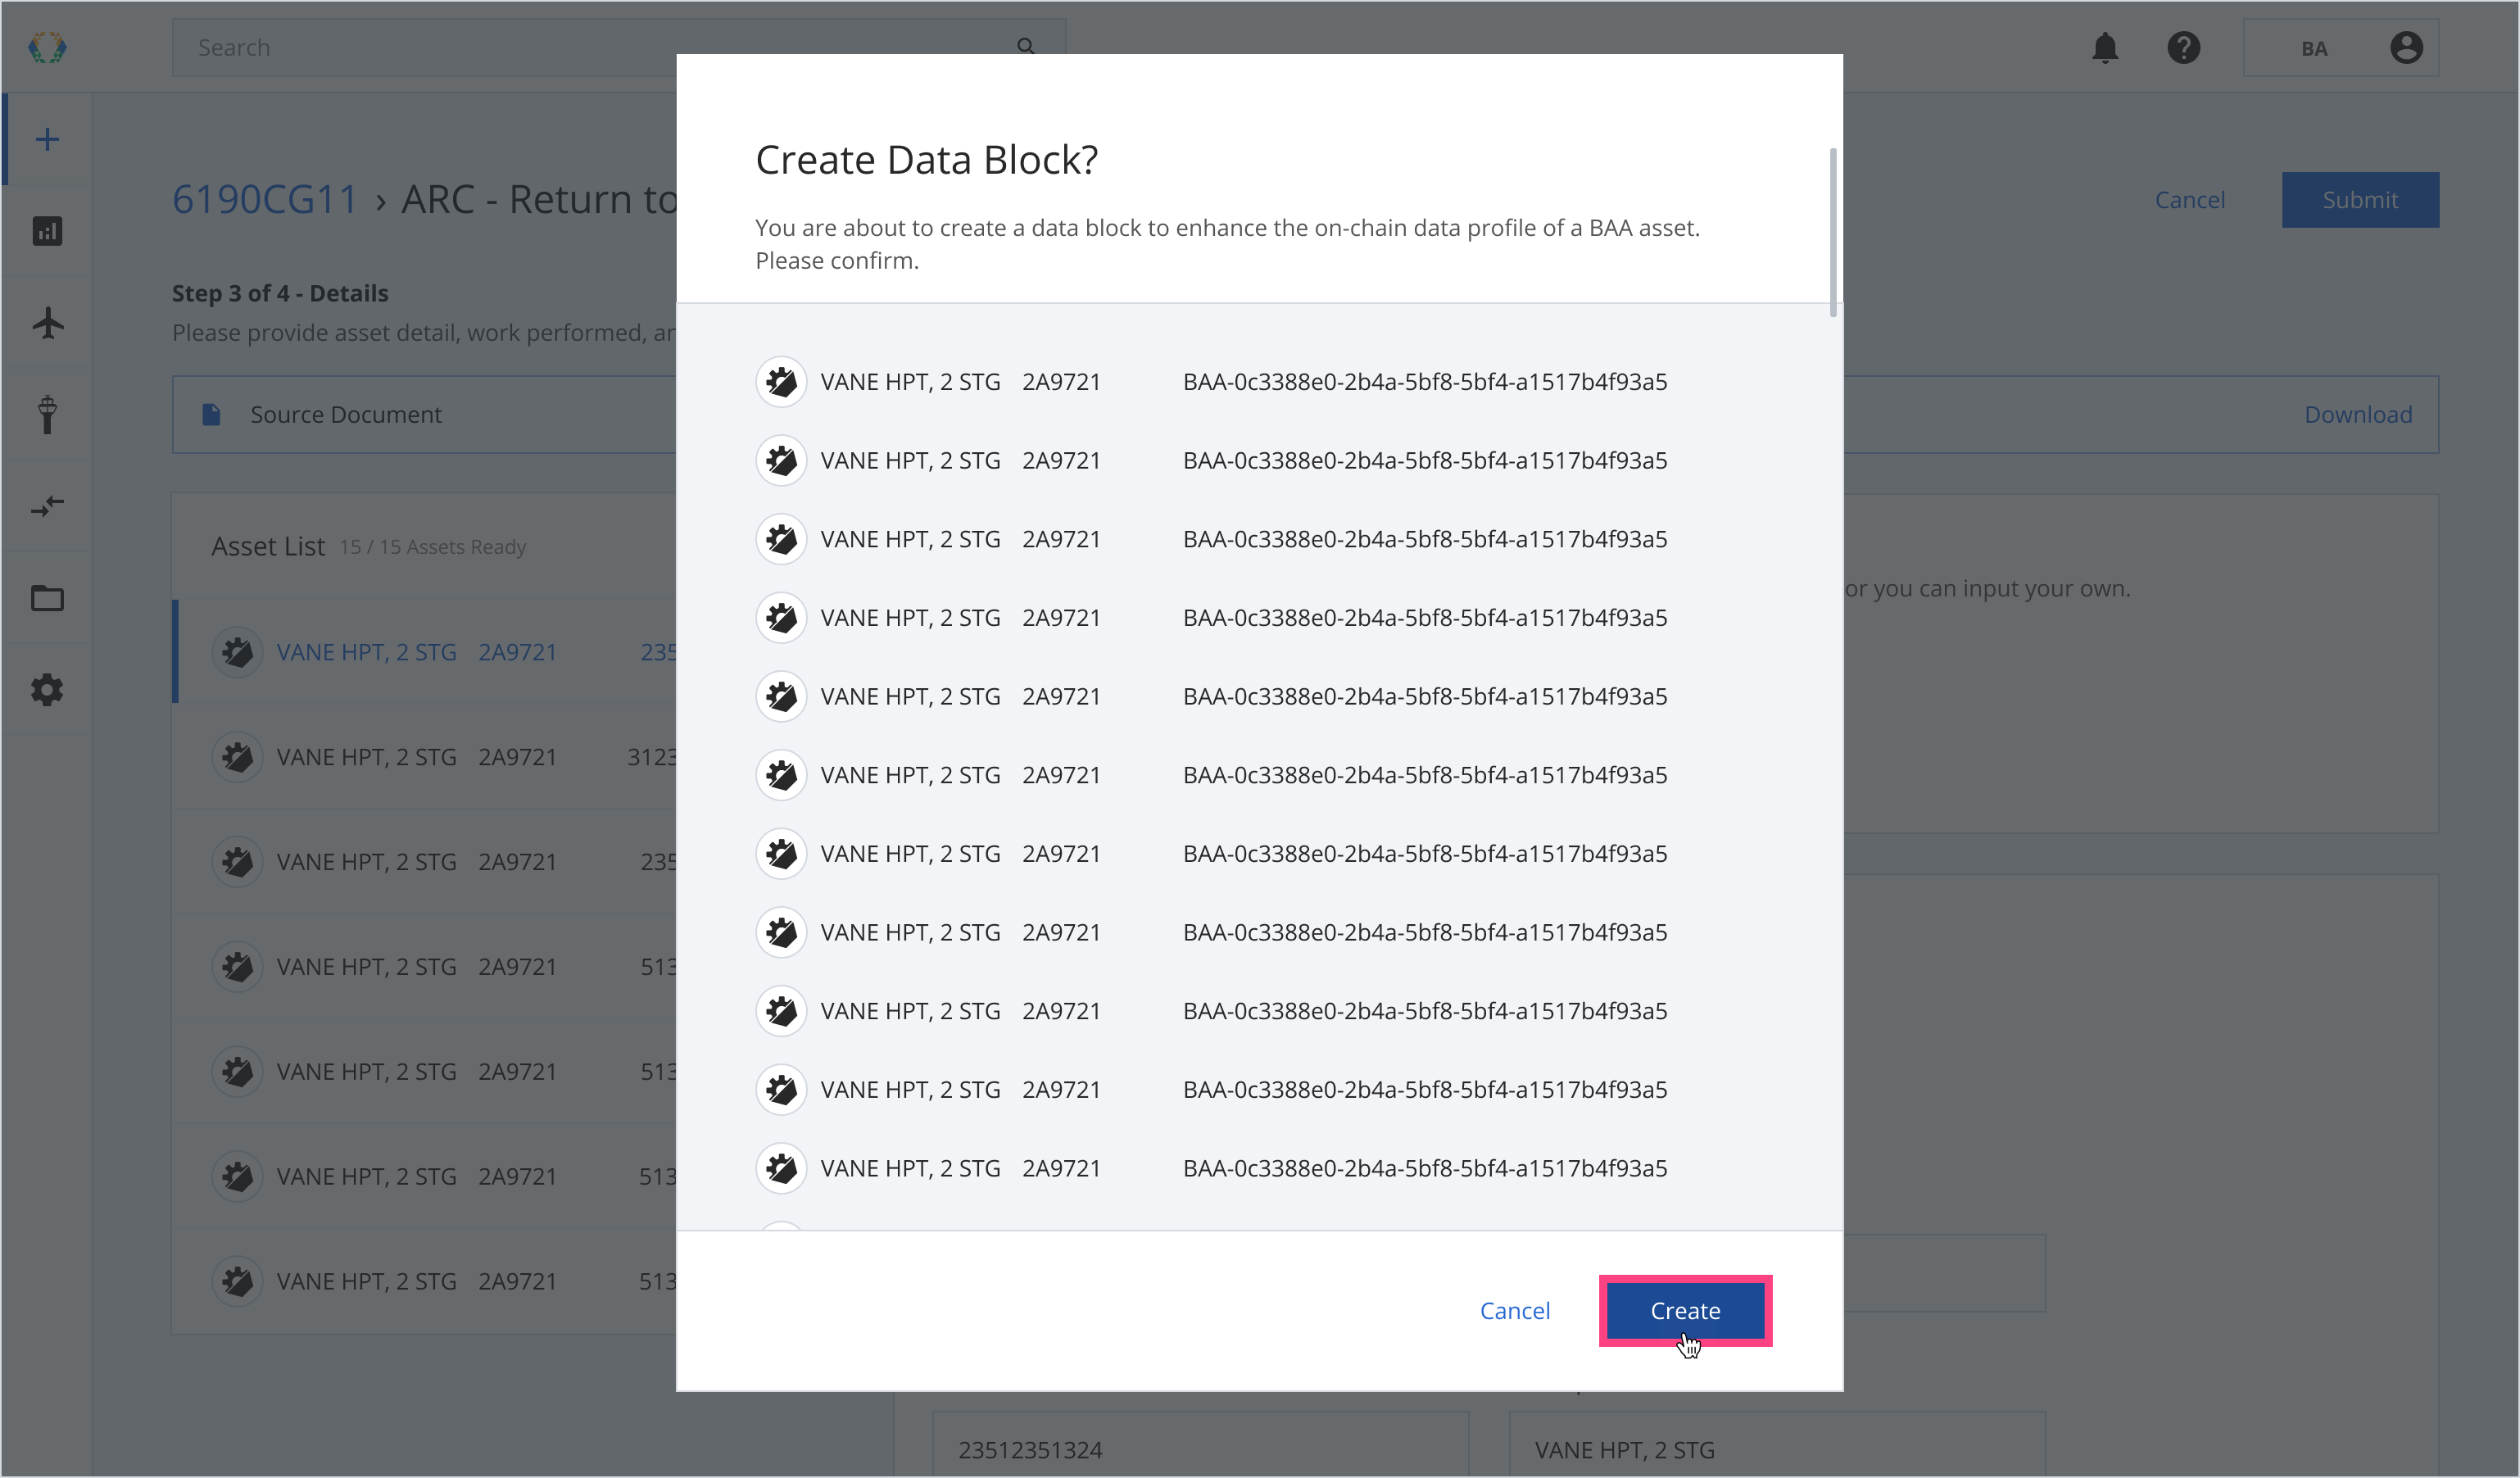
Step 10: A confirmation message will appear, to confirm the data block creation for your ARC. Click 'Create'.
Step 11: A green banner will appear above the document list indicating that the data block for your ARC created successfully.

Deleting Documents
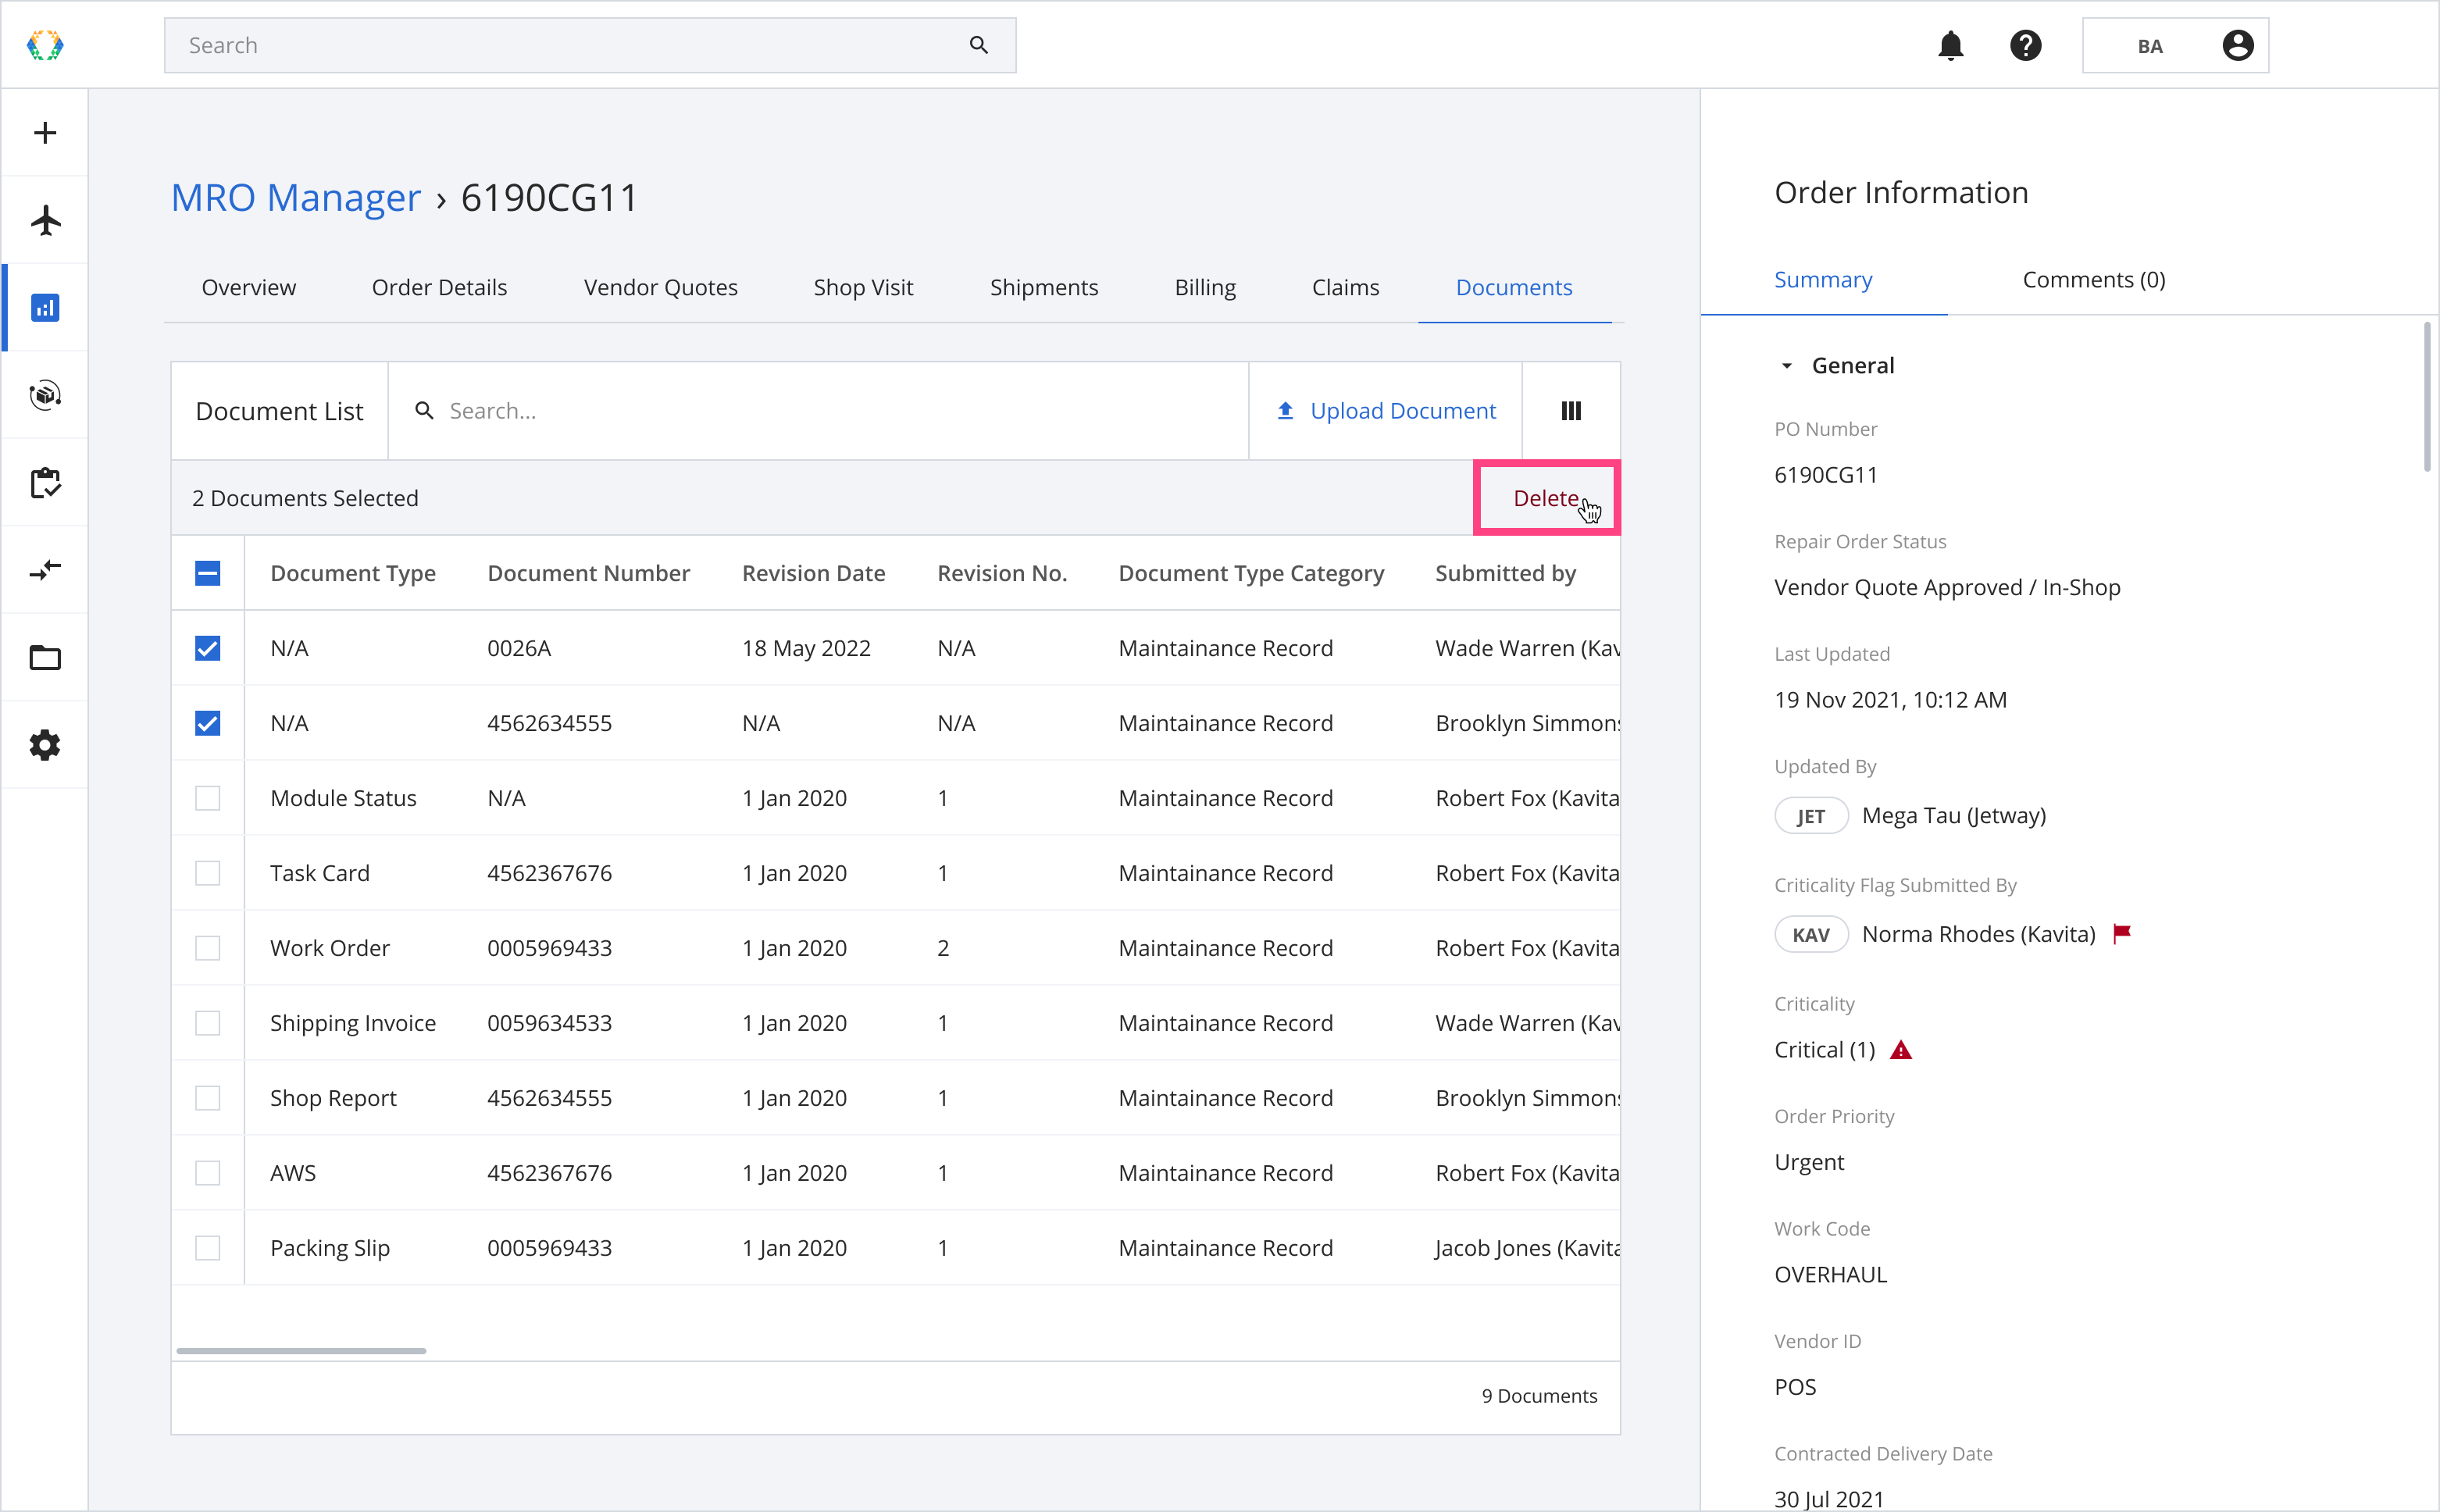
Step 1: From the Document List, select document you want to delete.
Step 2: Click 'Delete'.
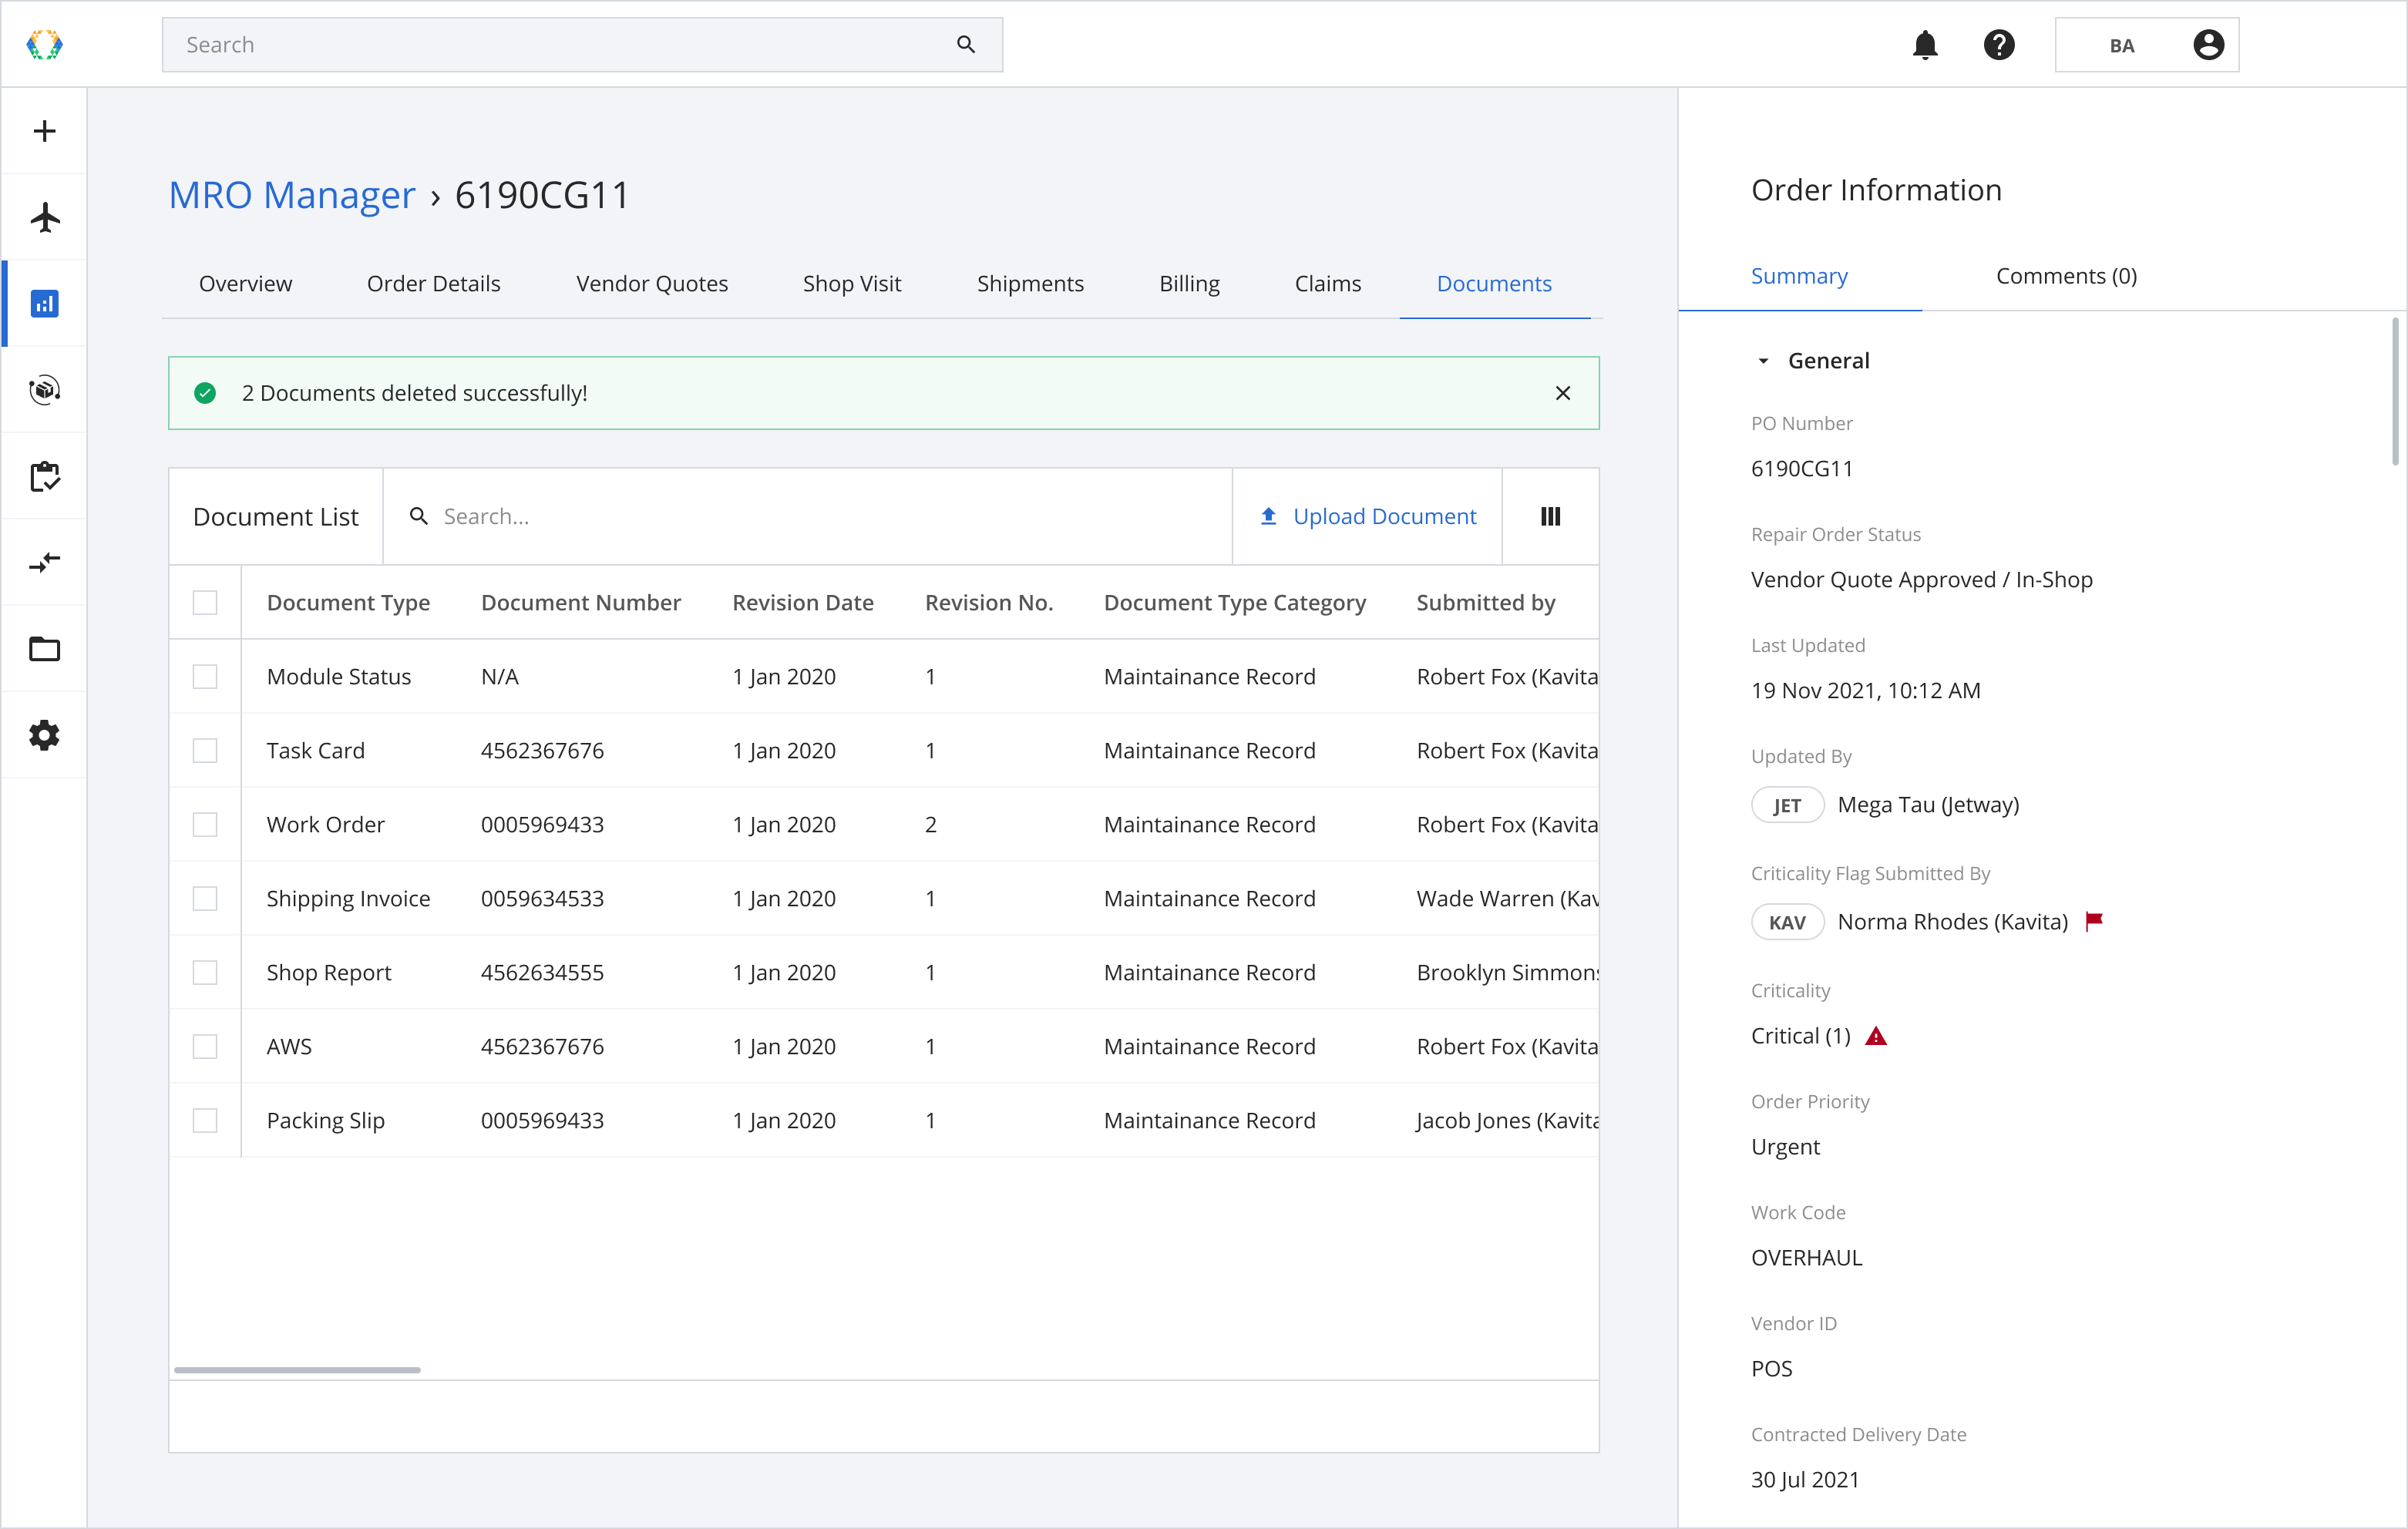
Once the Documents are deleted, they cannot be restored.
Step 3: A green banner will appear above the document list, once documents deleted.
Additional Feature
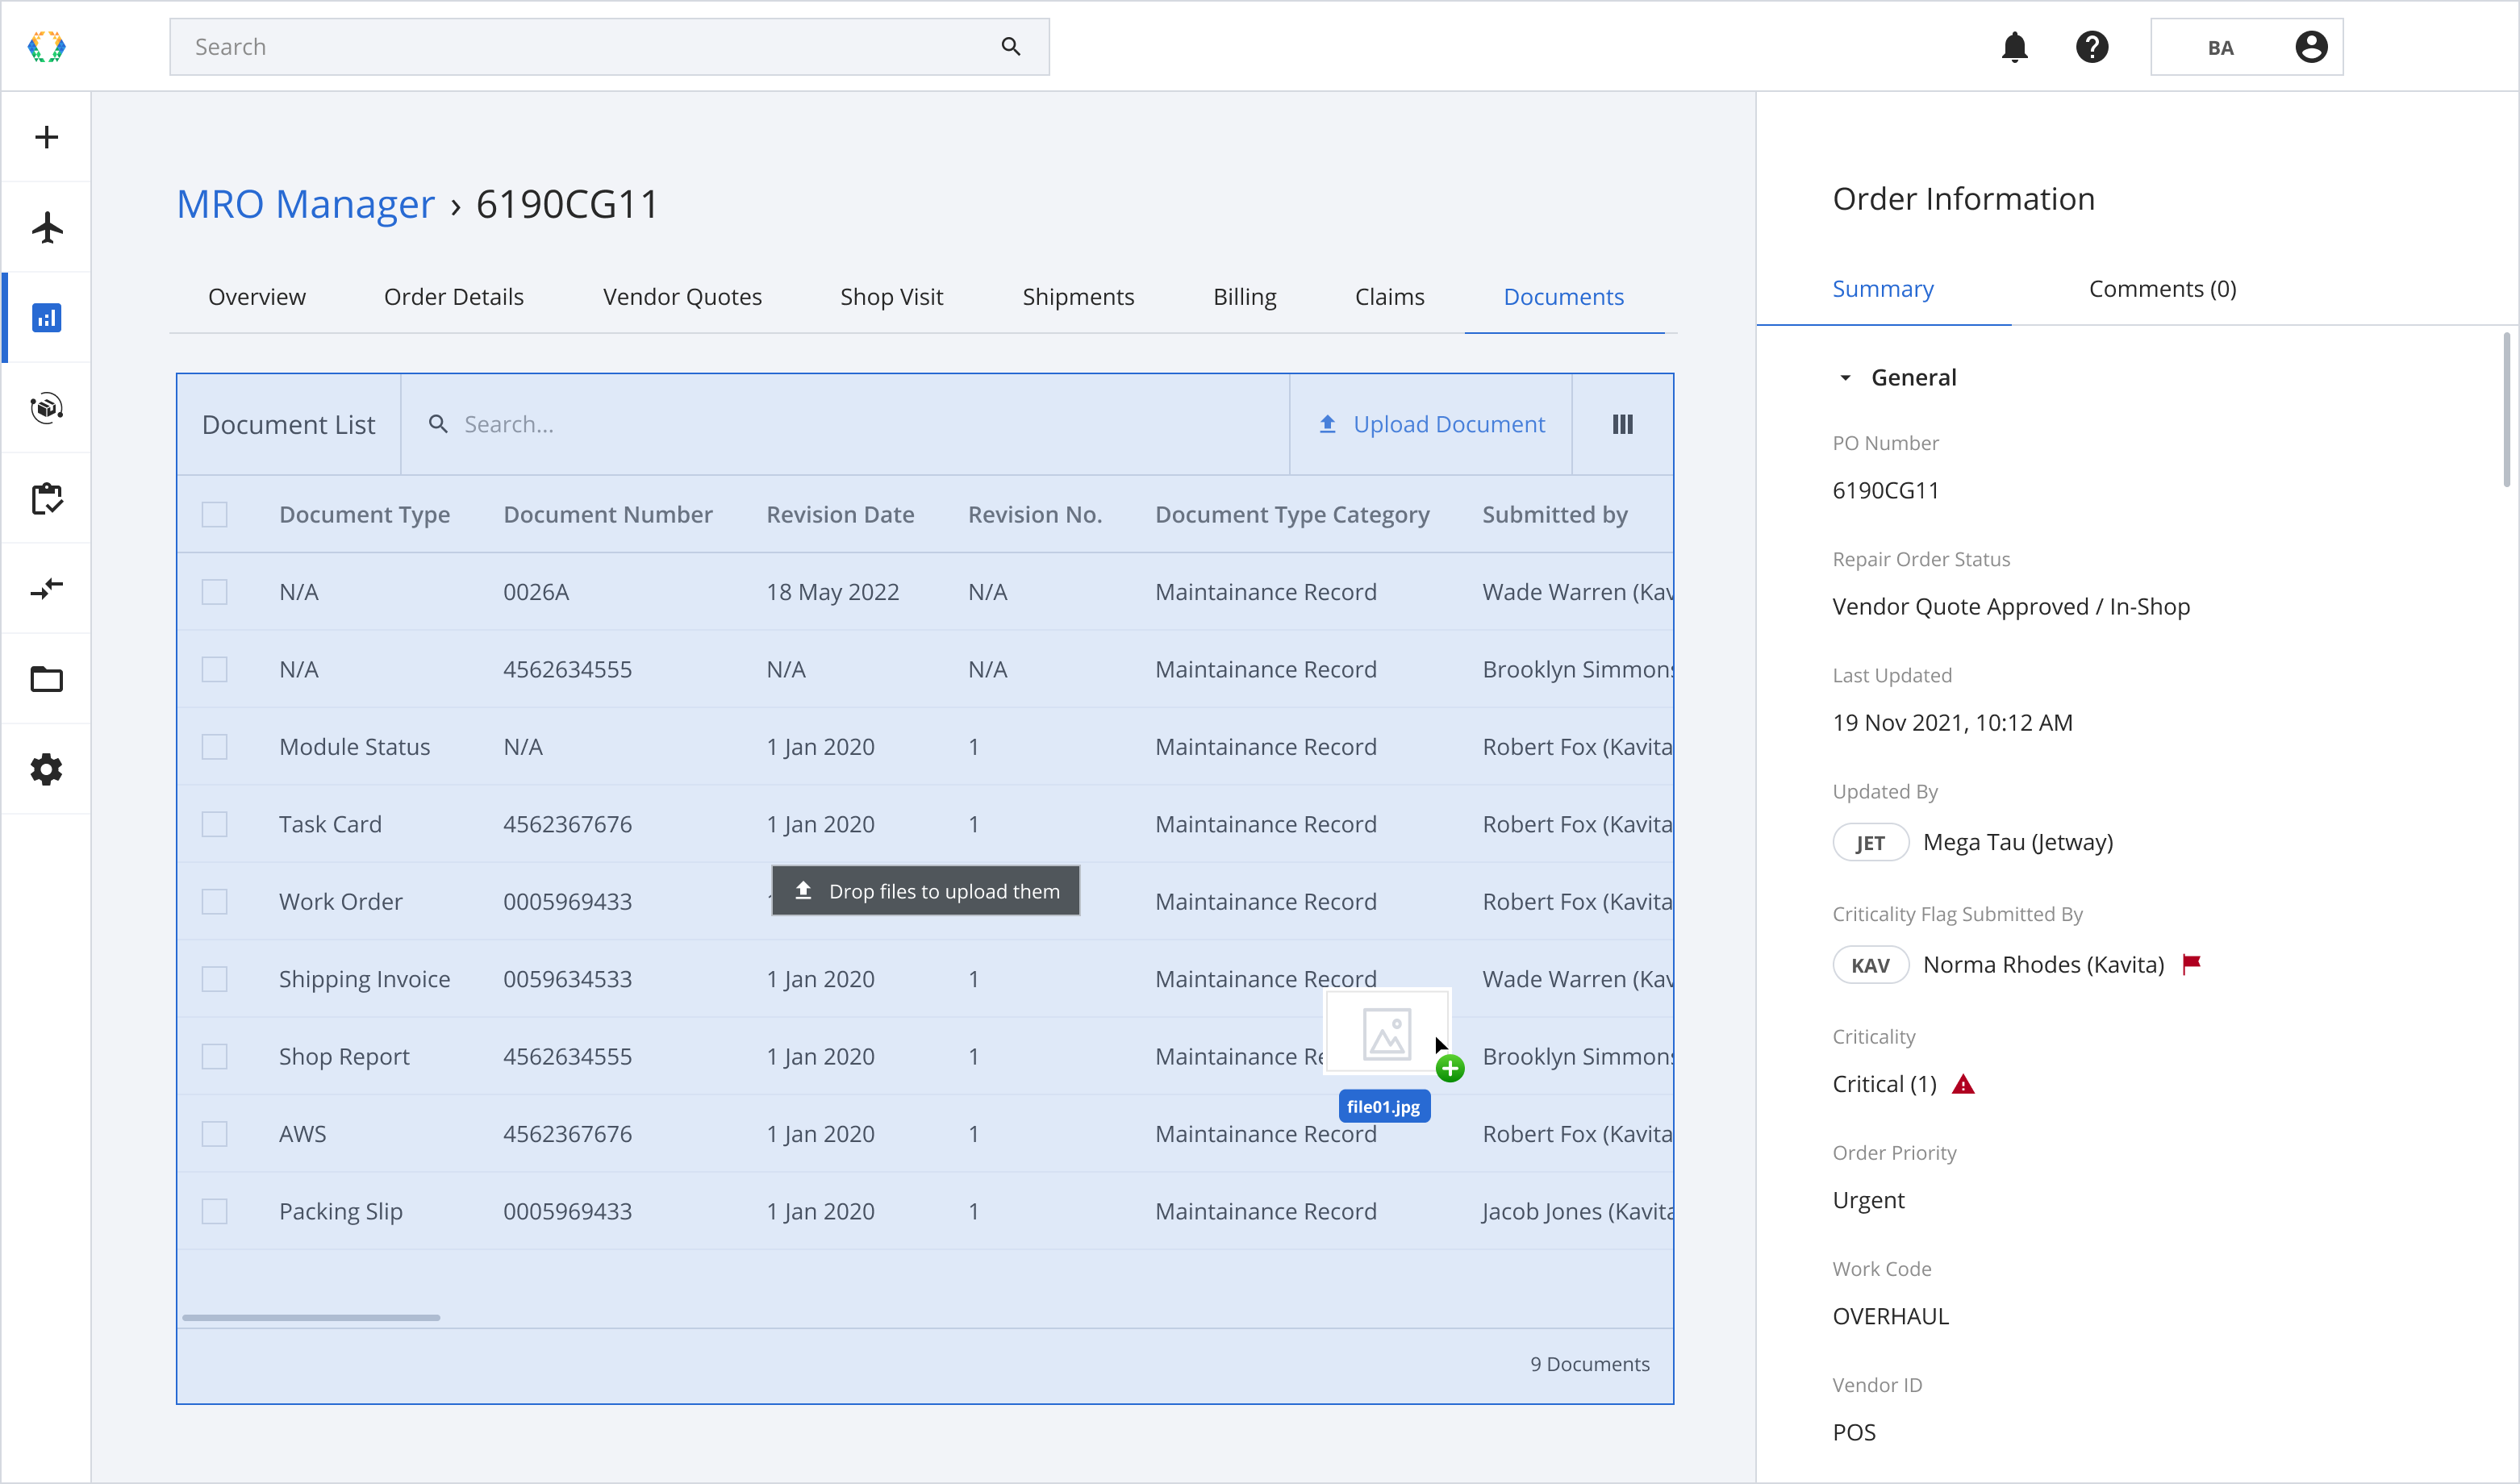
Drag and drop documents
You can also upload your Document (s) via drag and drop as a quicker alternative on the Document List.
Step 1: From your local computer, click and hold the document you want to upload to the platform and drag it to the Document List area.
Step 2: A green banner will appear at the top of the Document List when your document uploaded.
Updated over 1 year ago