Global Filters
Getting Started
The Global Filter Bar allows you to filter the entire view of the Procurement Manager module. It helps you adapt the dashboard and other tabs by applying customized filters.
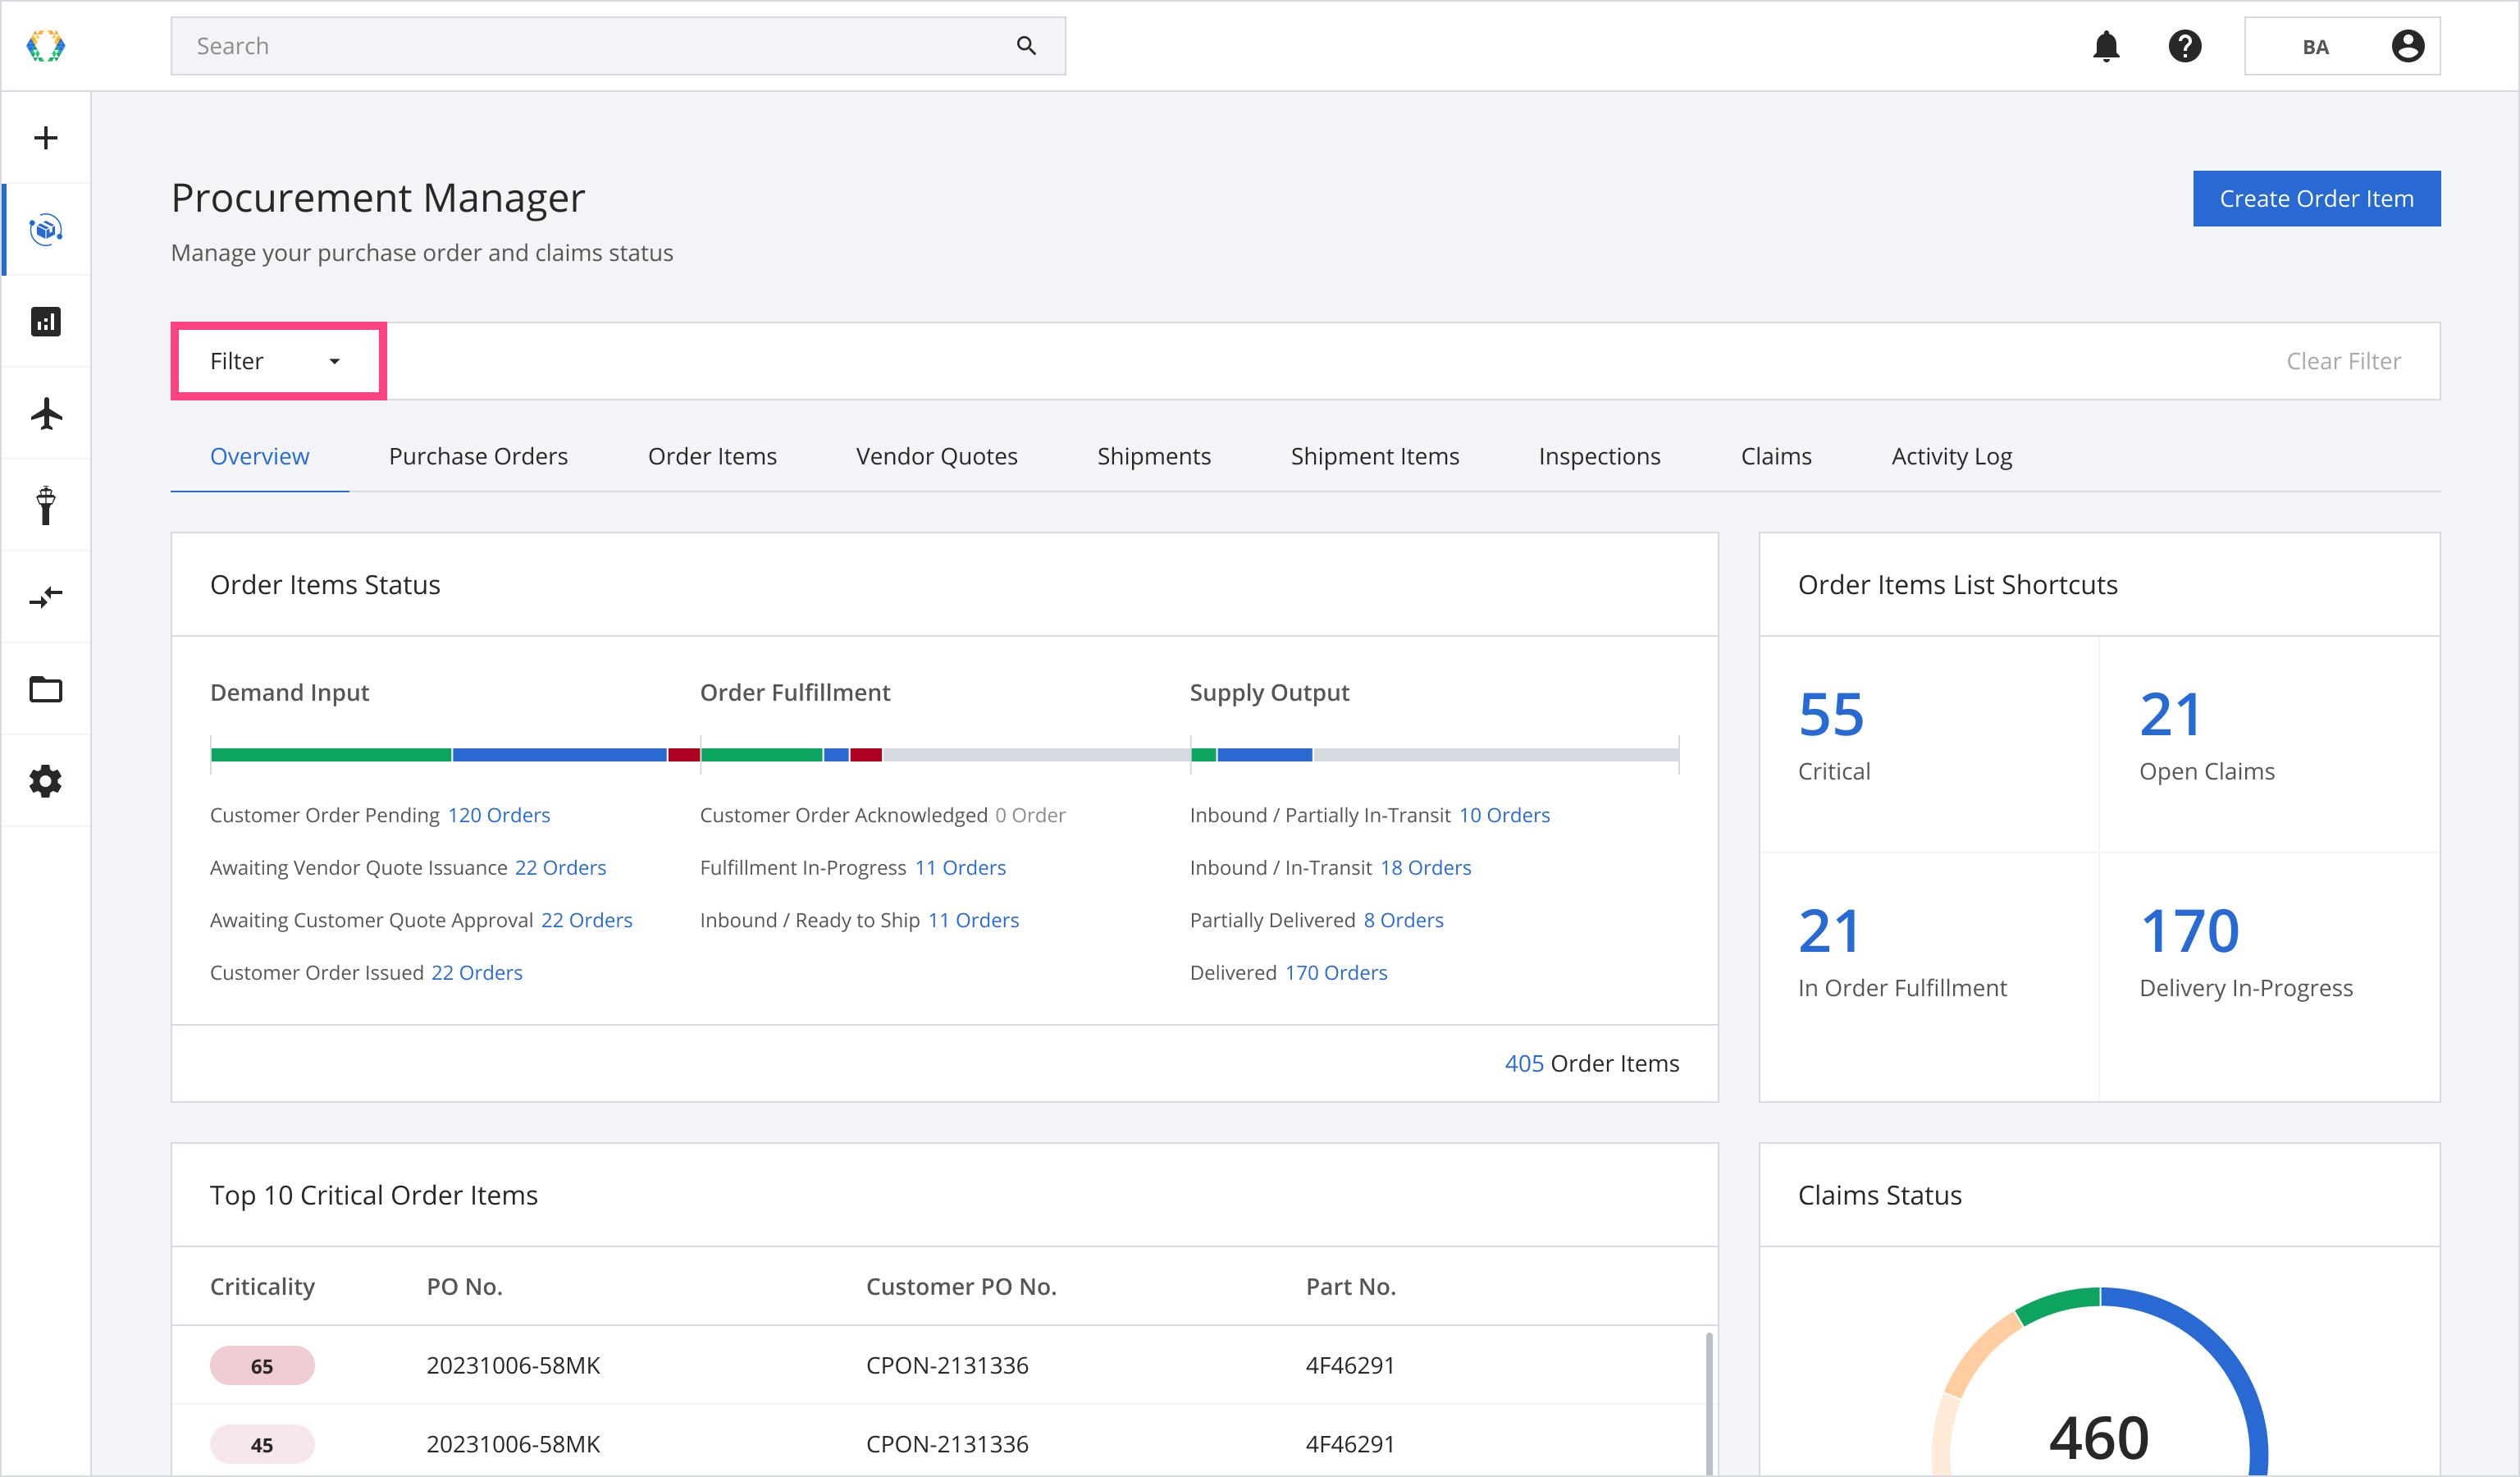
You can access the filter bar throughout the Procurement Manager module, located above the Navigation tabs.
Filter Bar Operations
Step 1: Click 'Filter' to expand the filters menu.
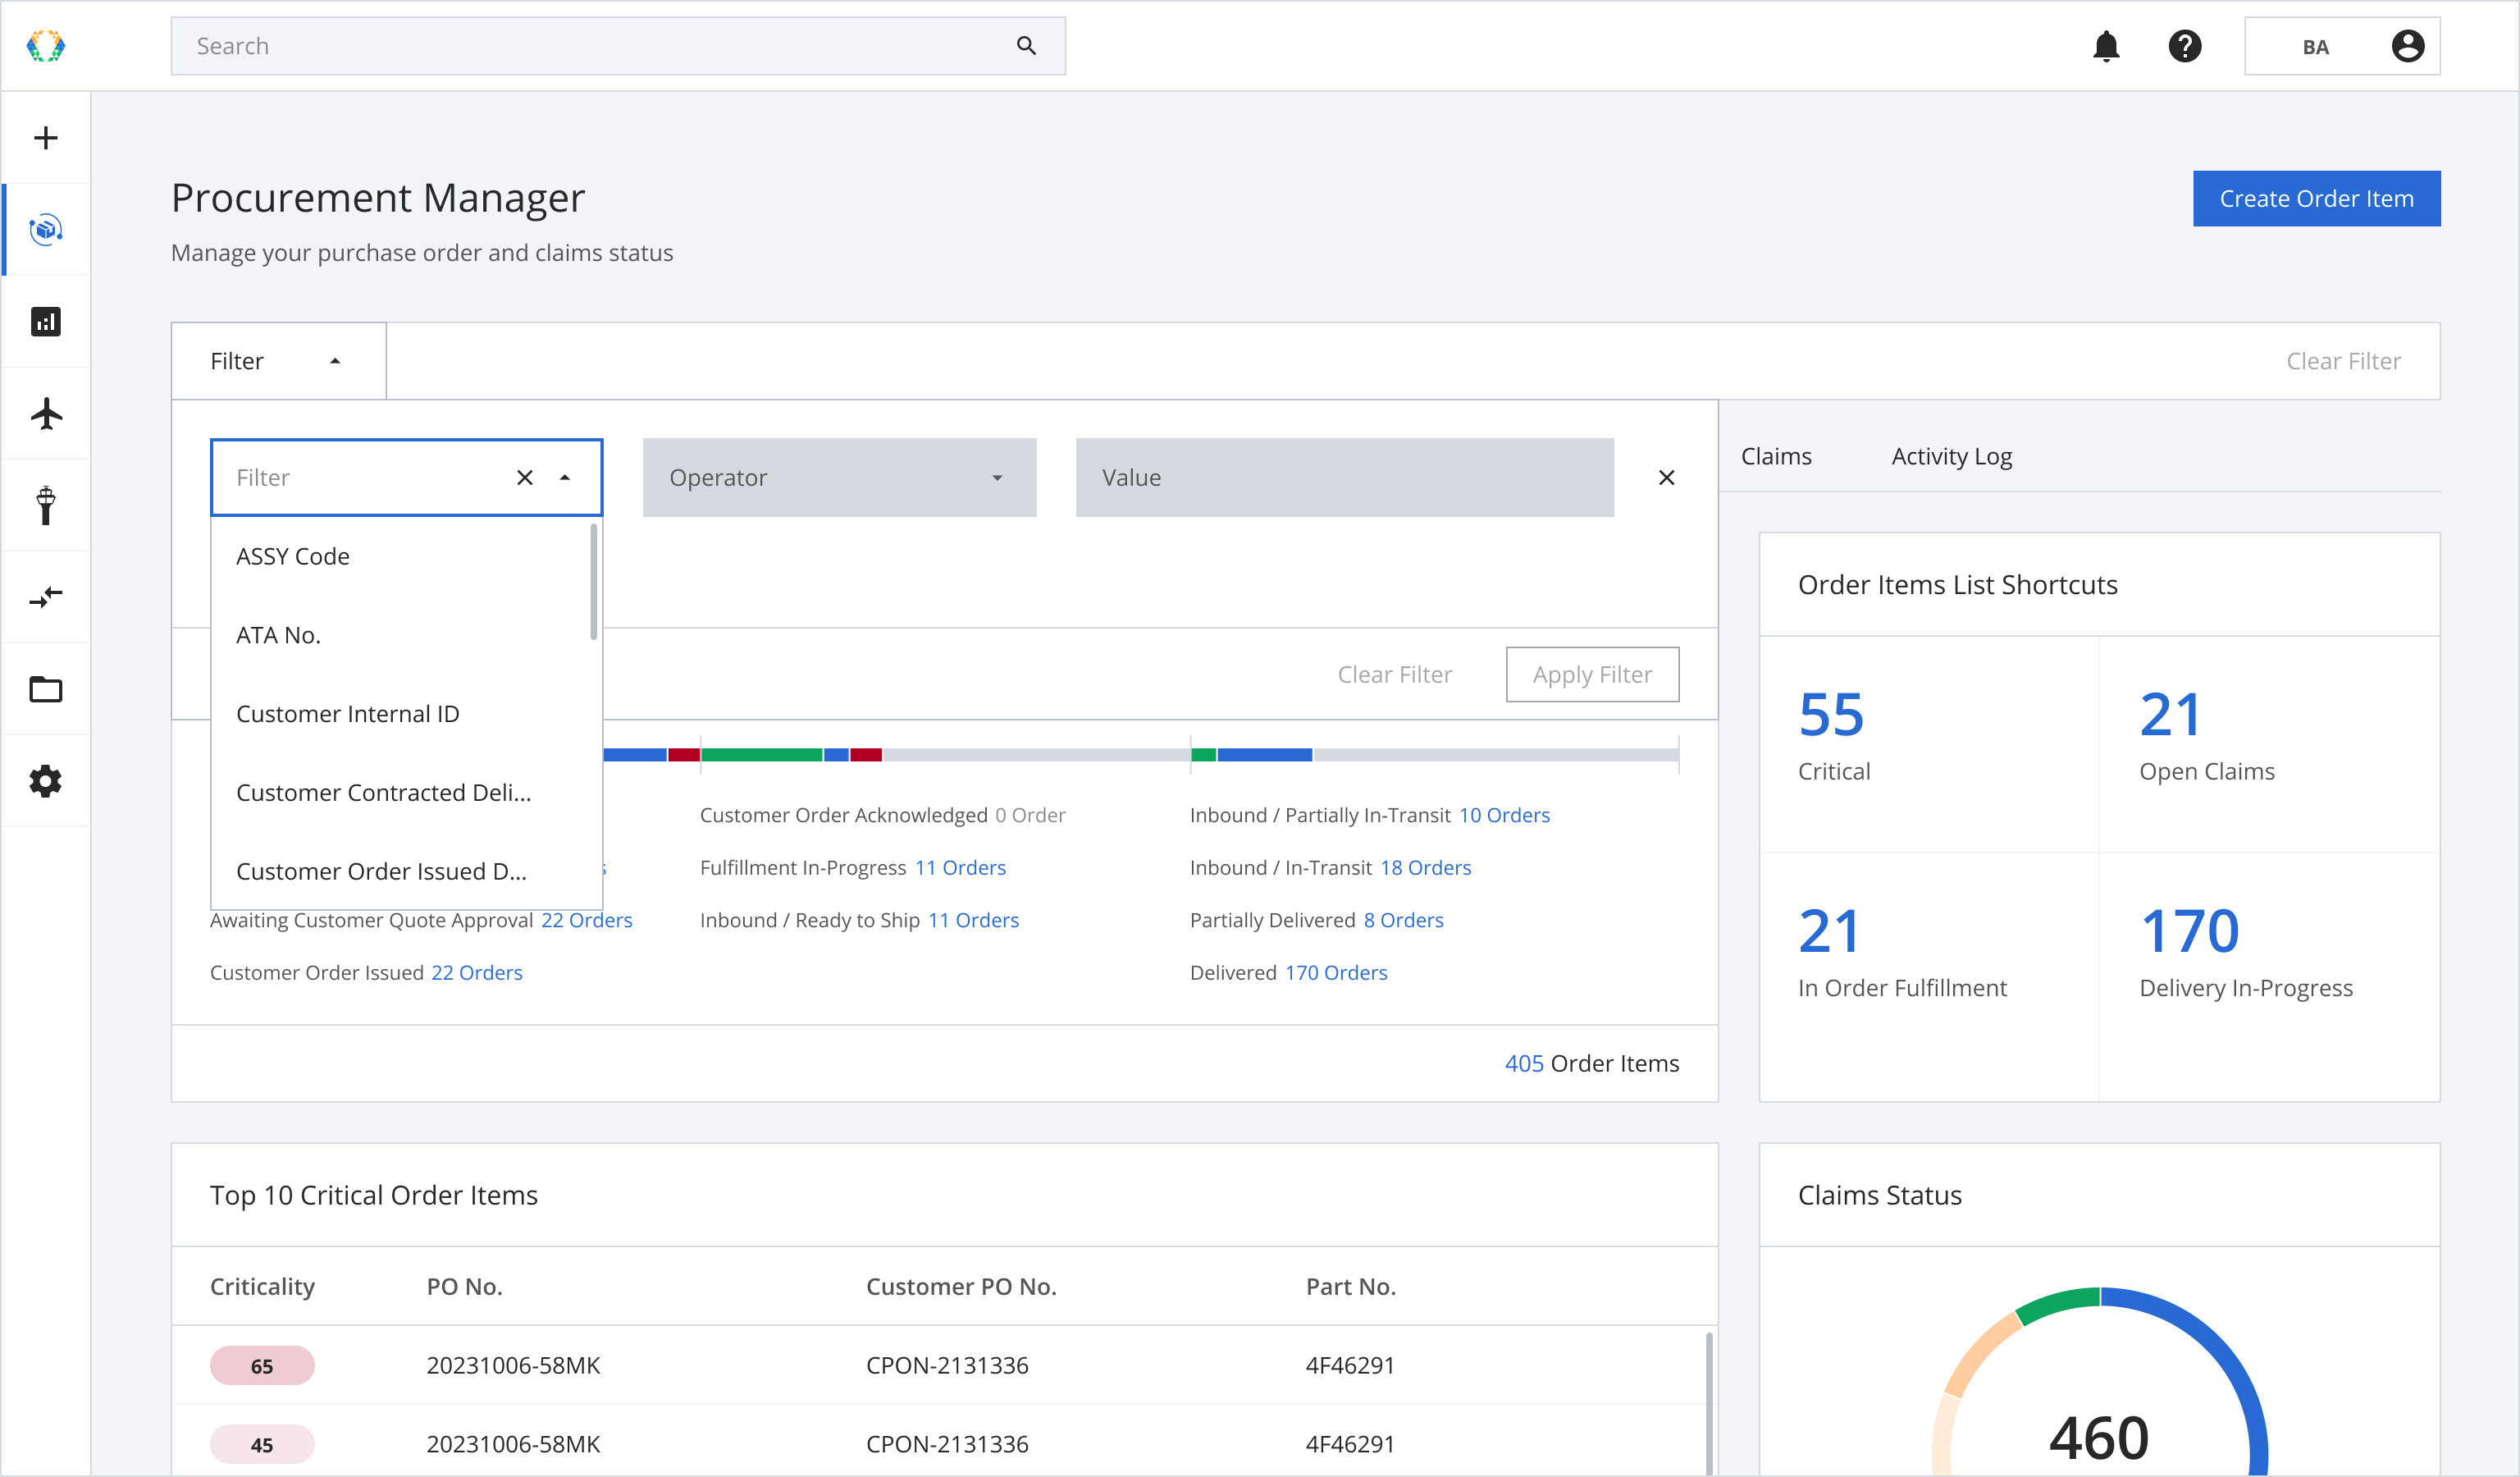
Step 2: Select the filter you want to apply in the dropdown menu.
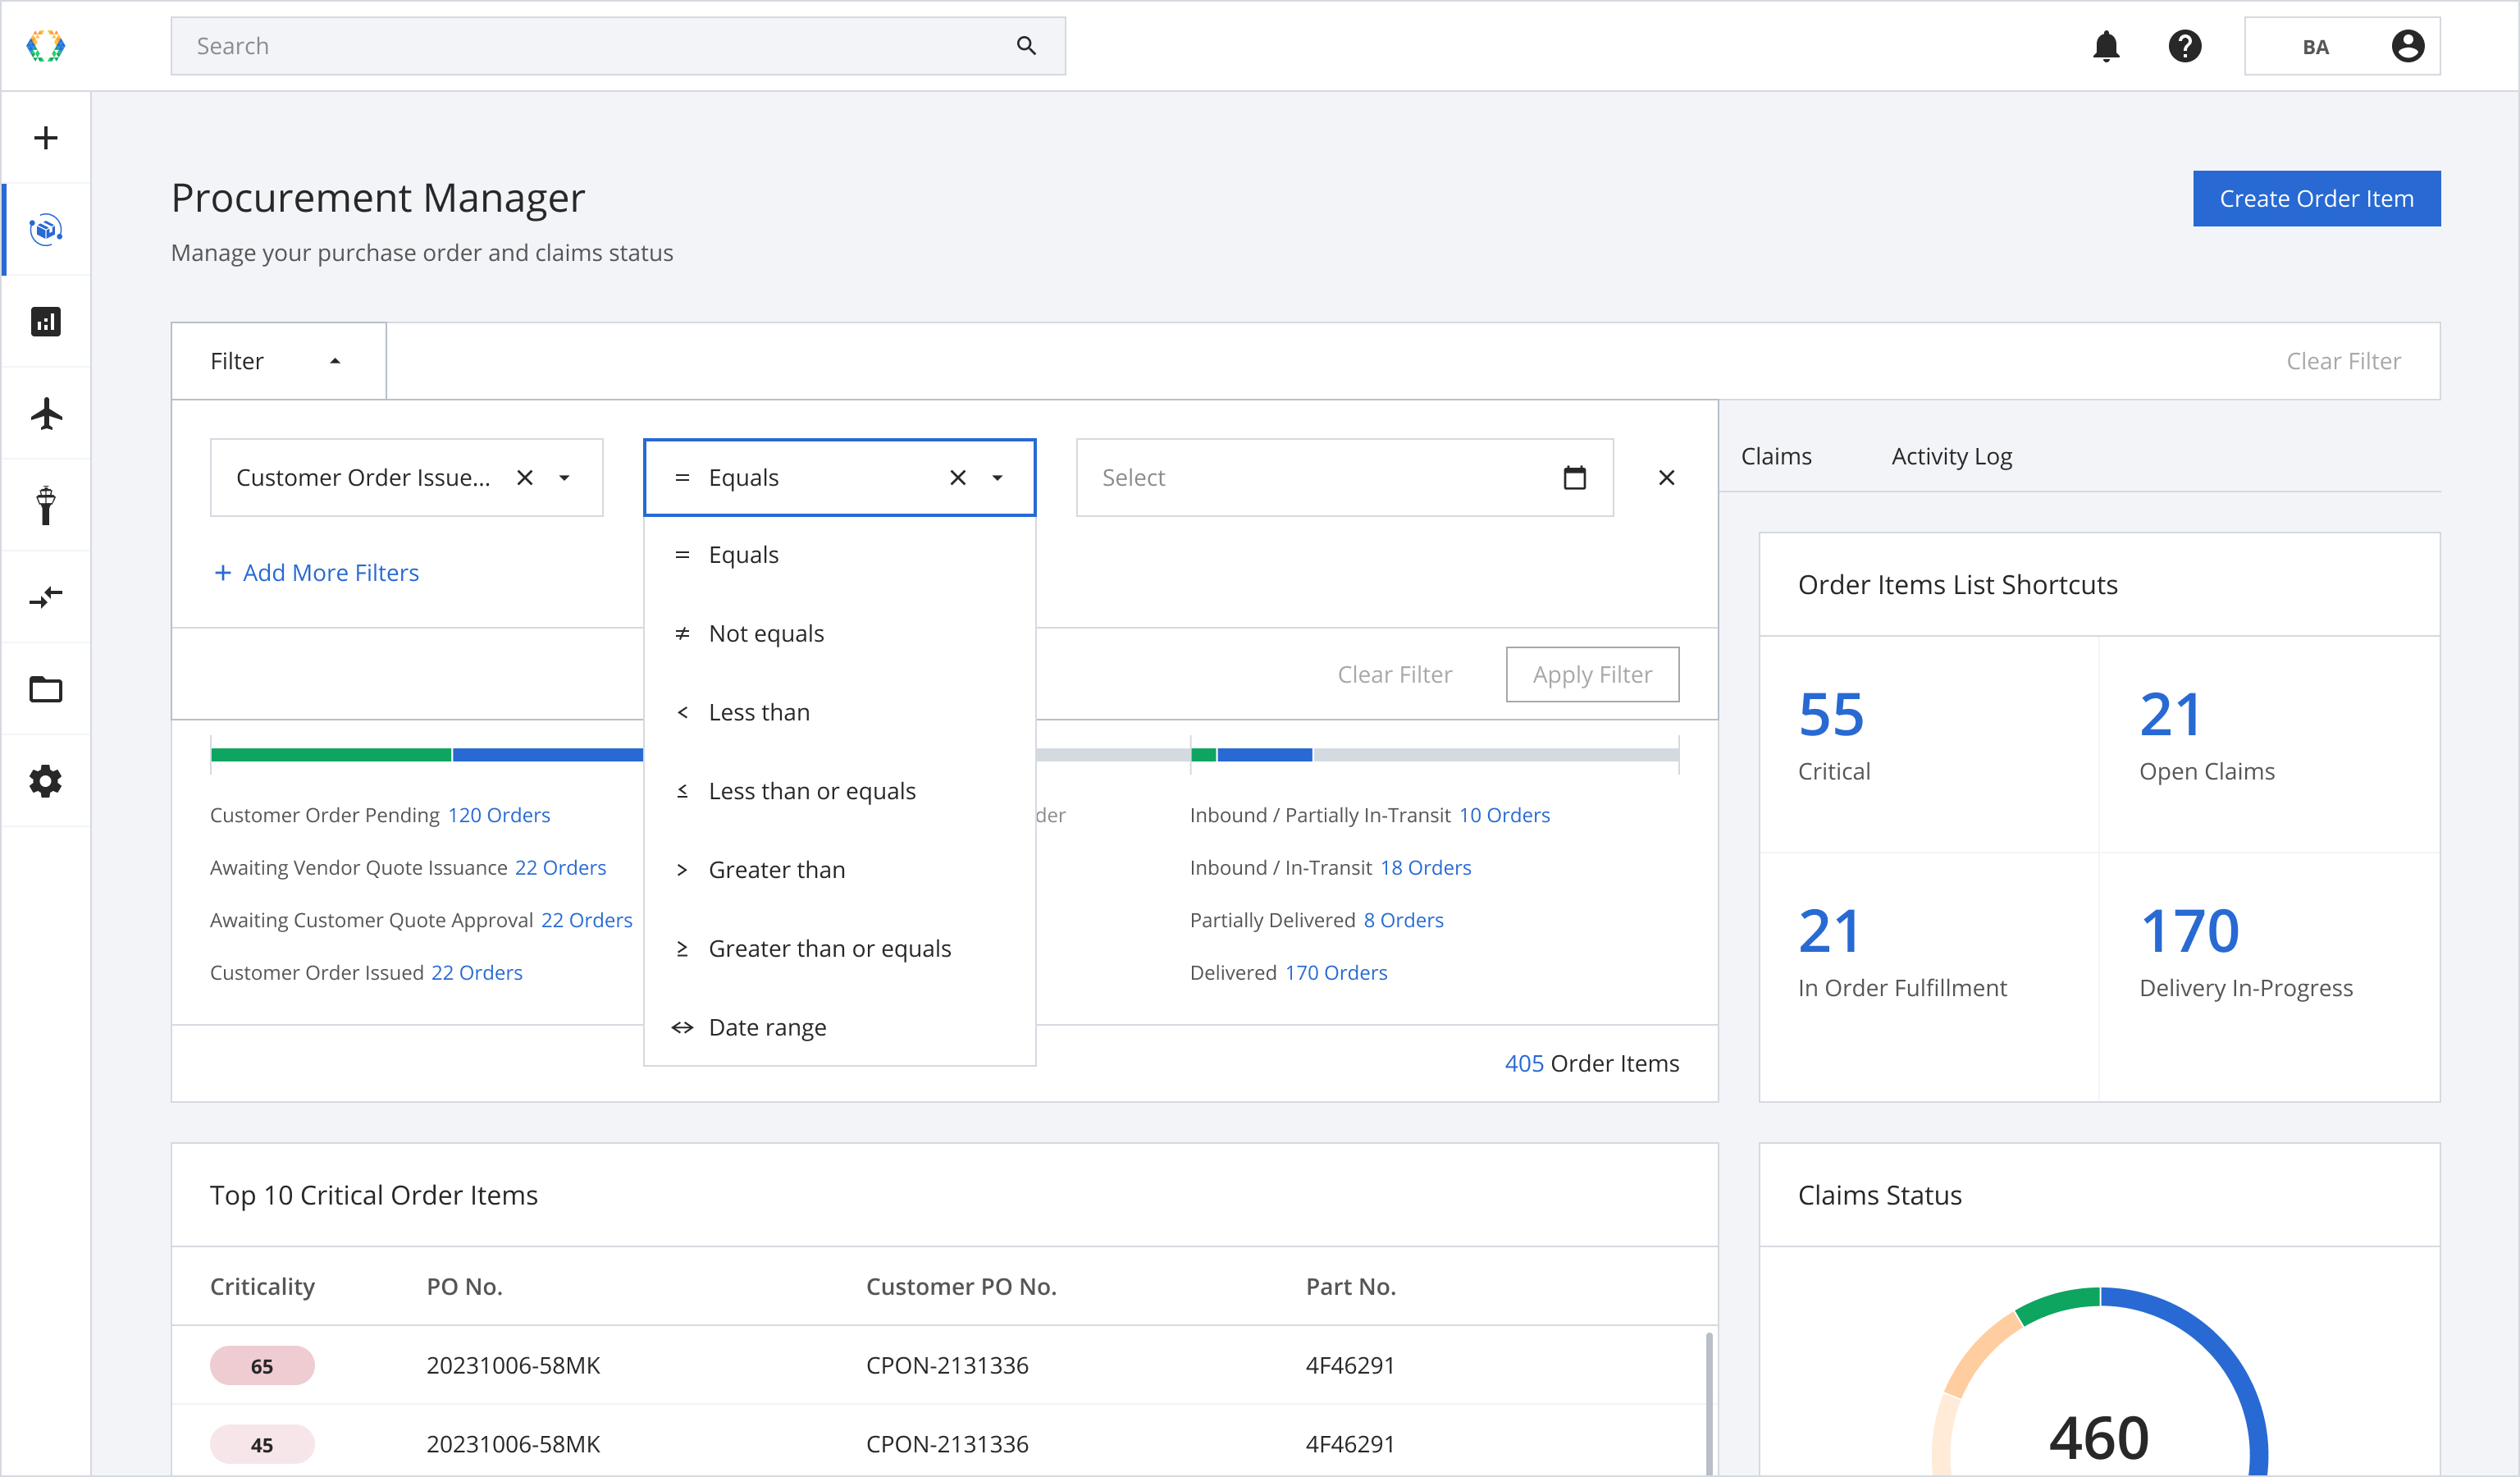
Step 3: Once you have selected the desired filter, you can choose the condition in the 'operator' dropdown menu. The 'Equals' operator is set by default if no selection is made.
Step 4: Select a parameter. For example Date range.
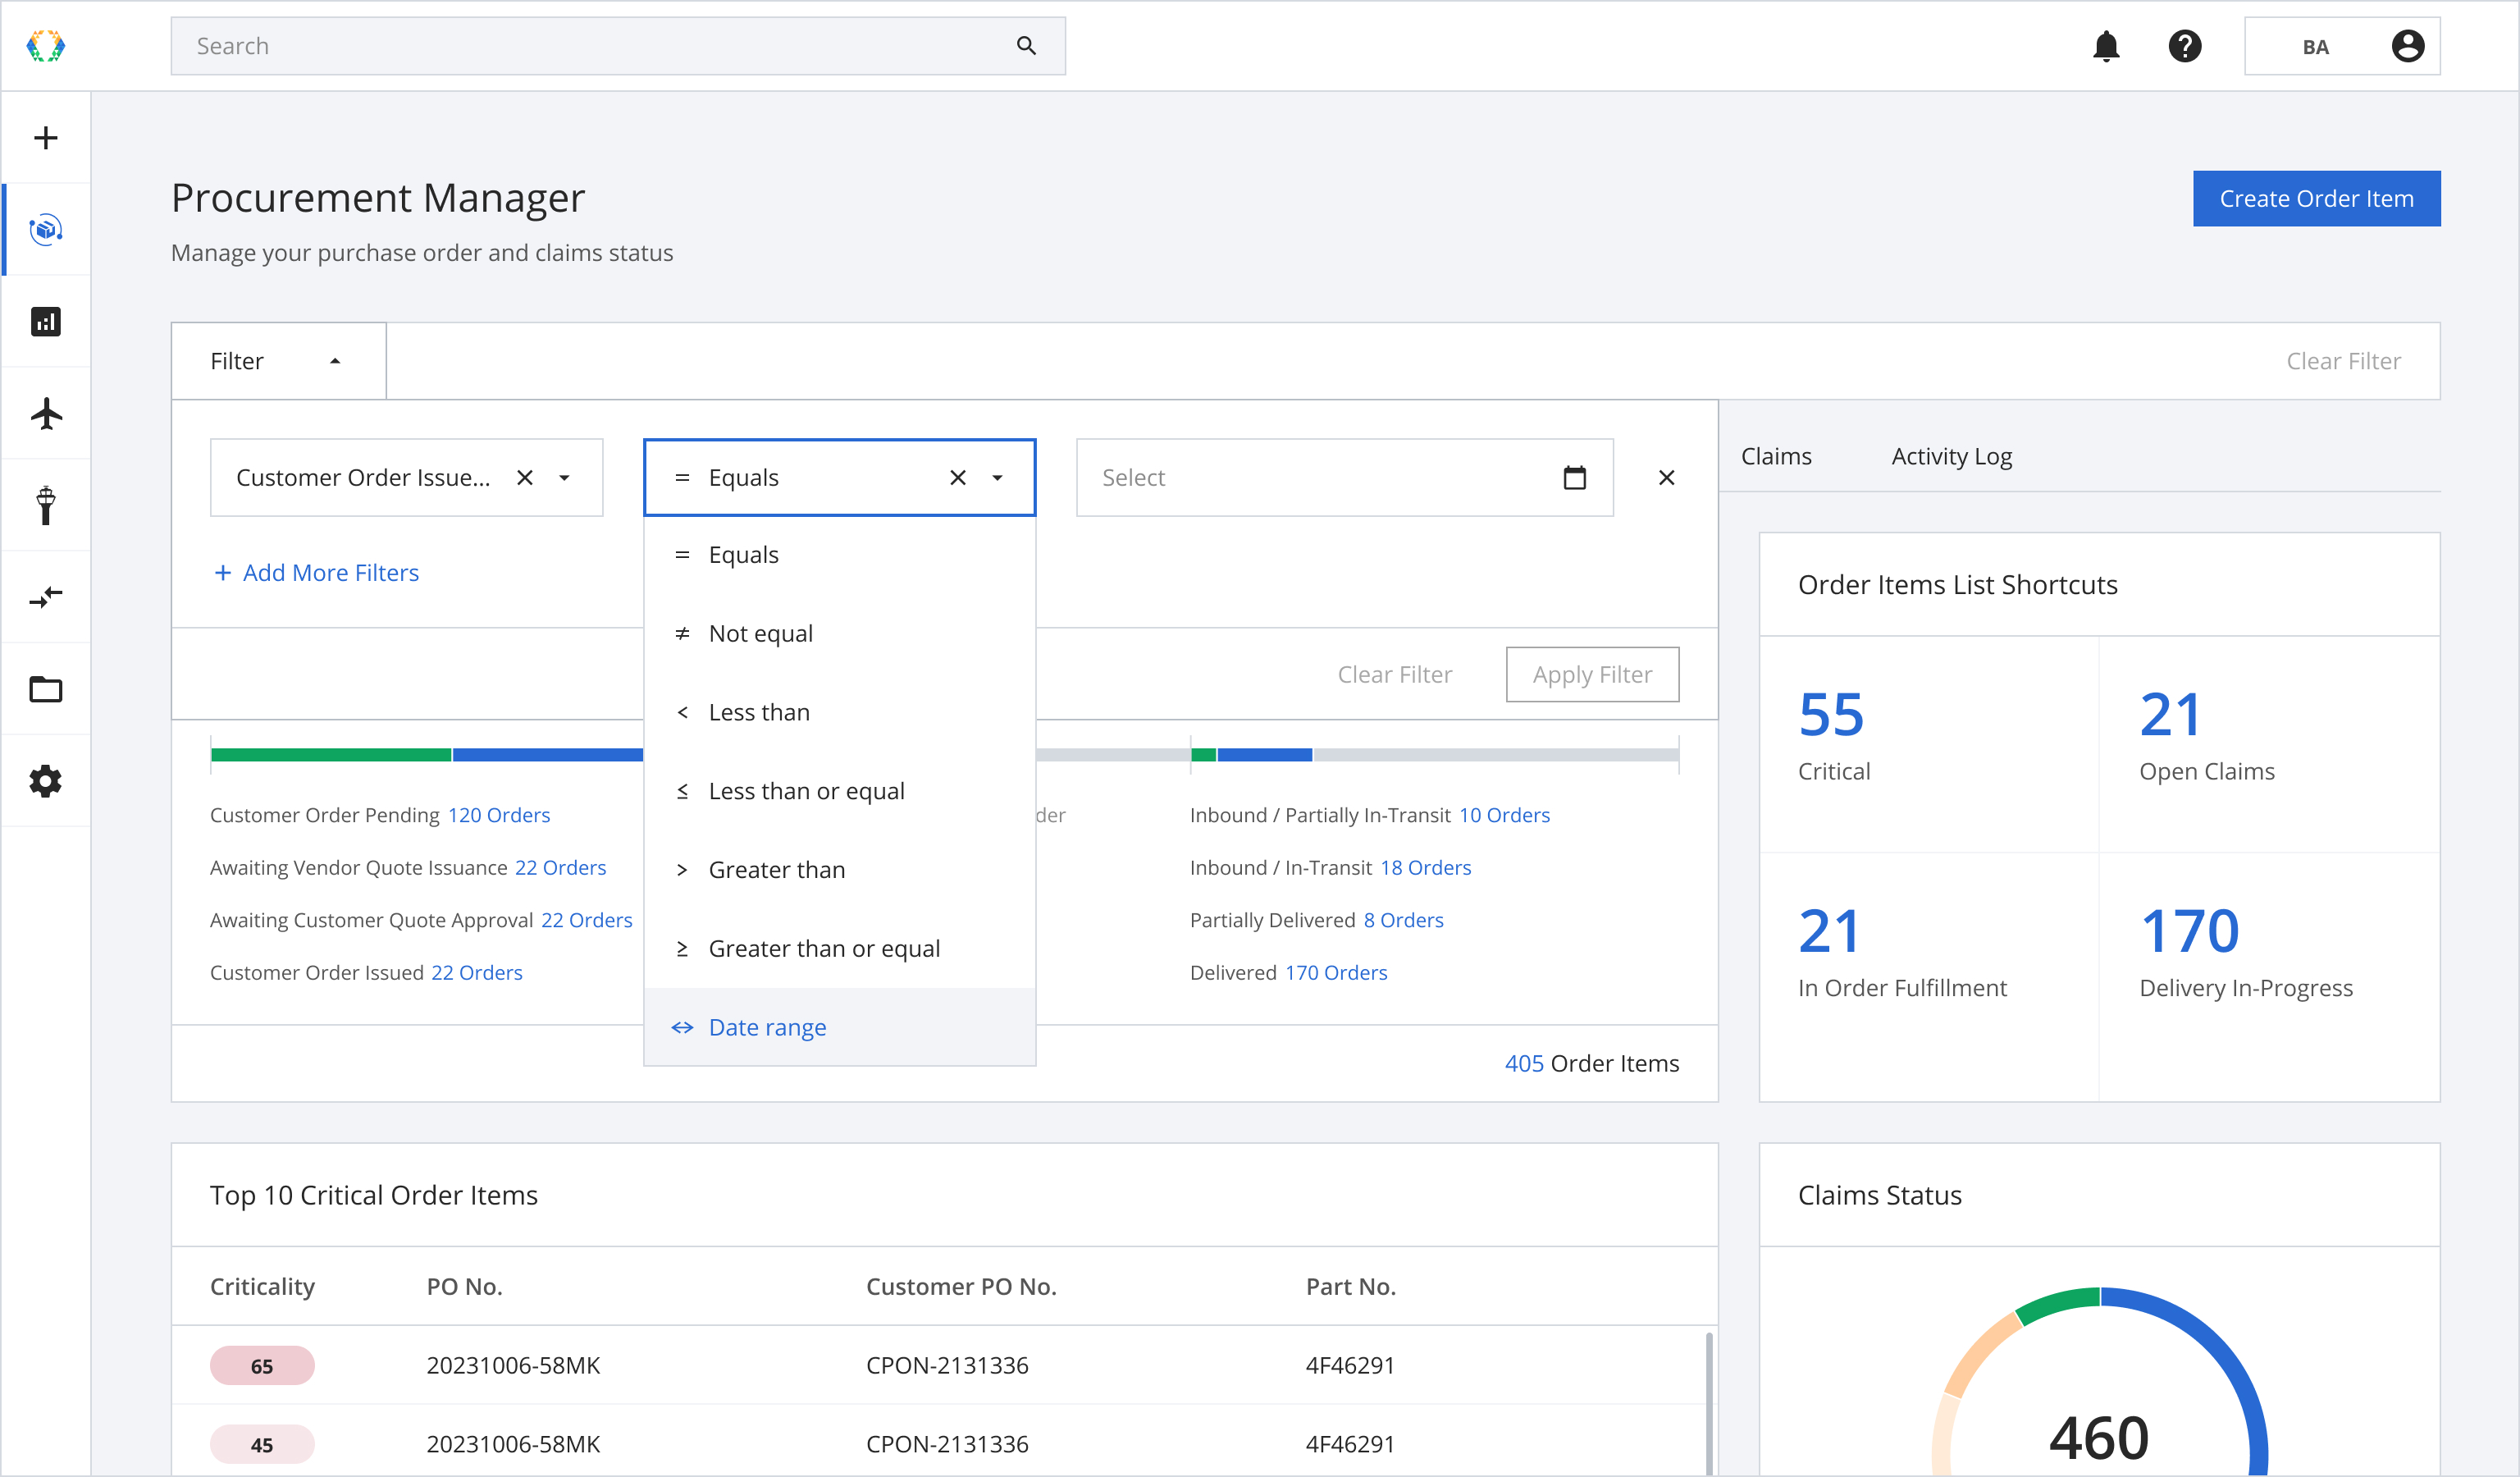
Step 4: Select the date range in the dropdown menu.
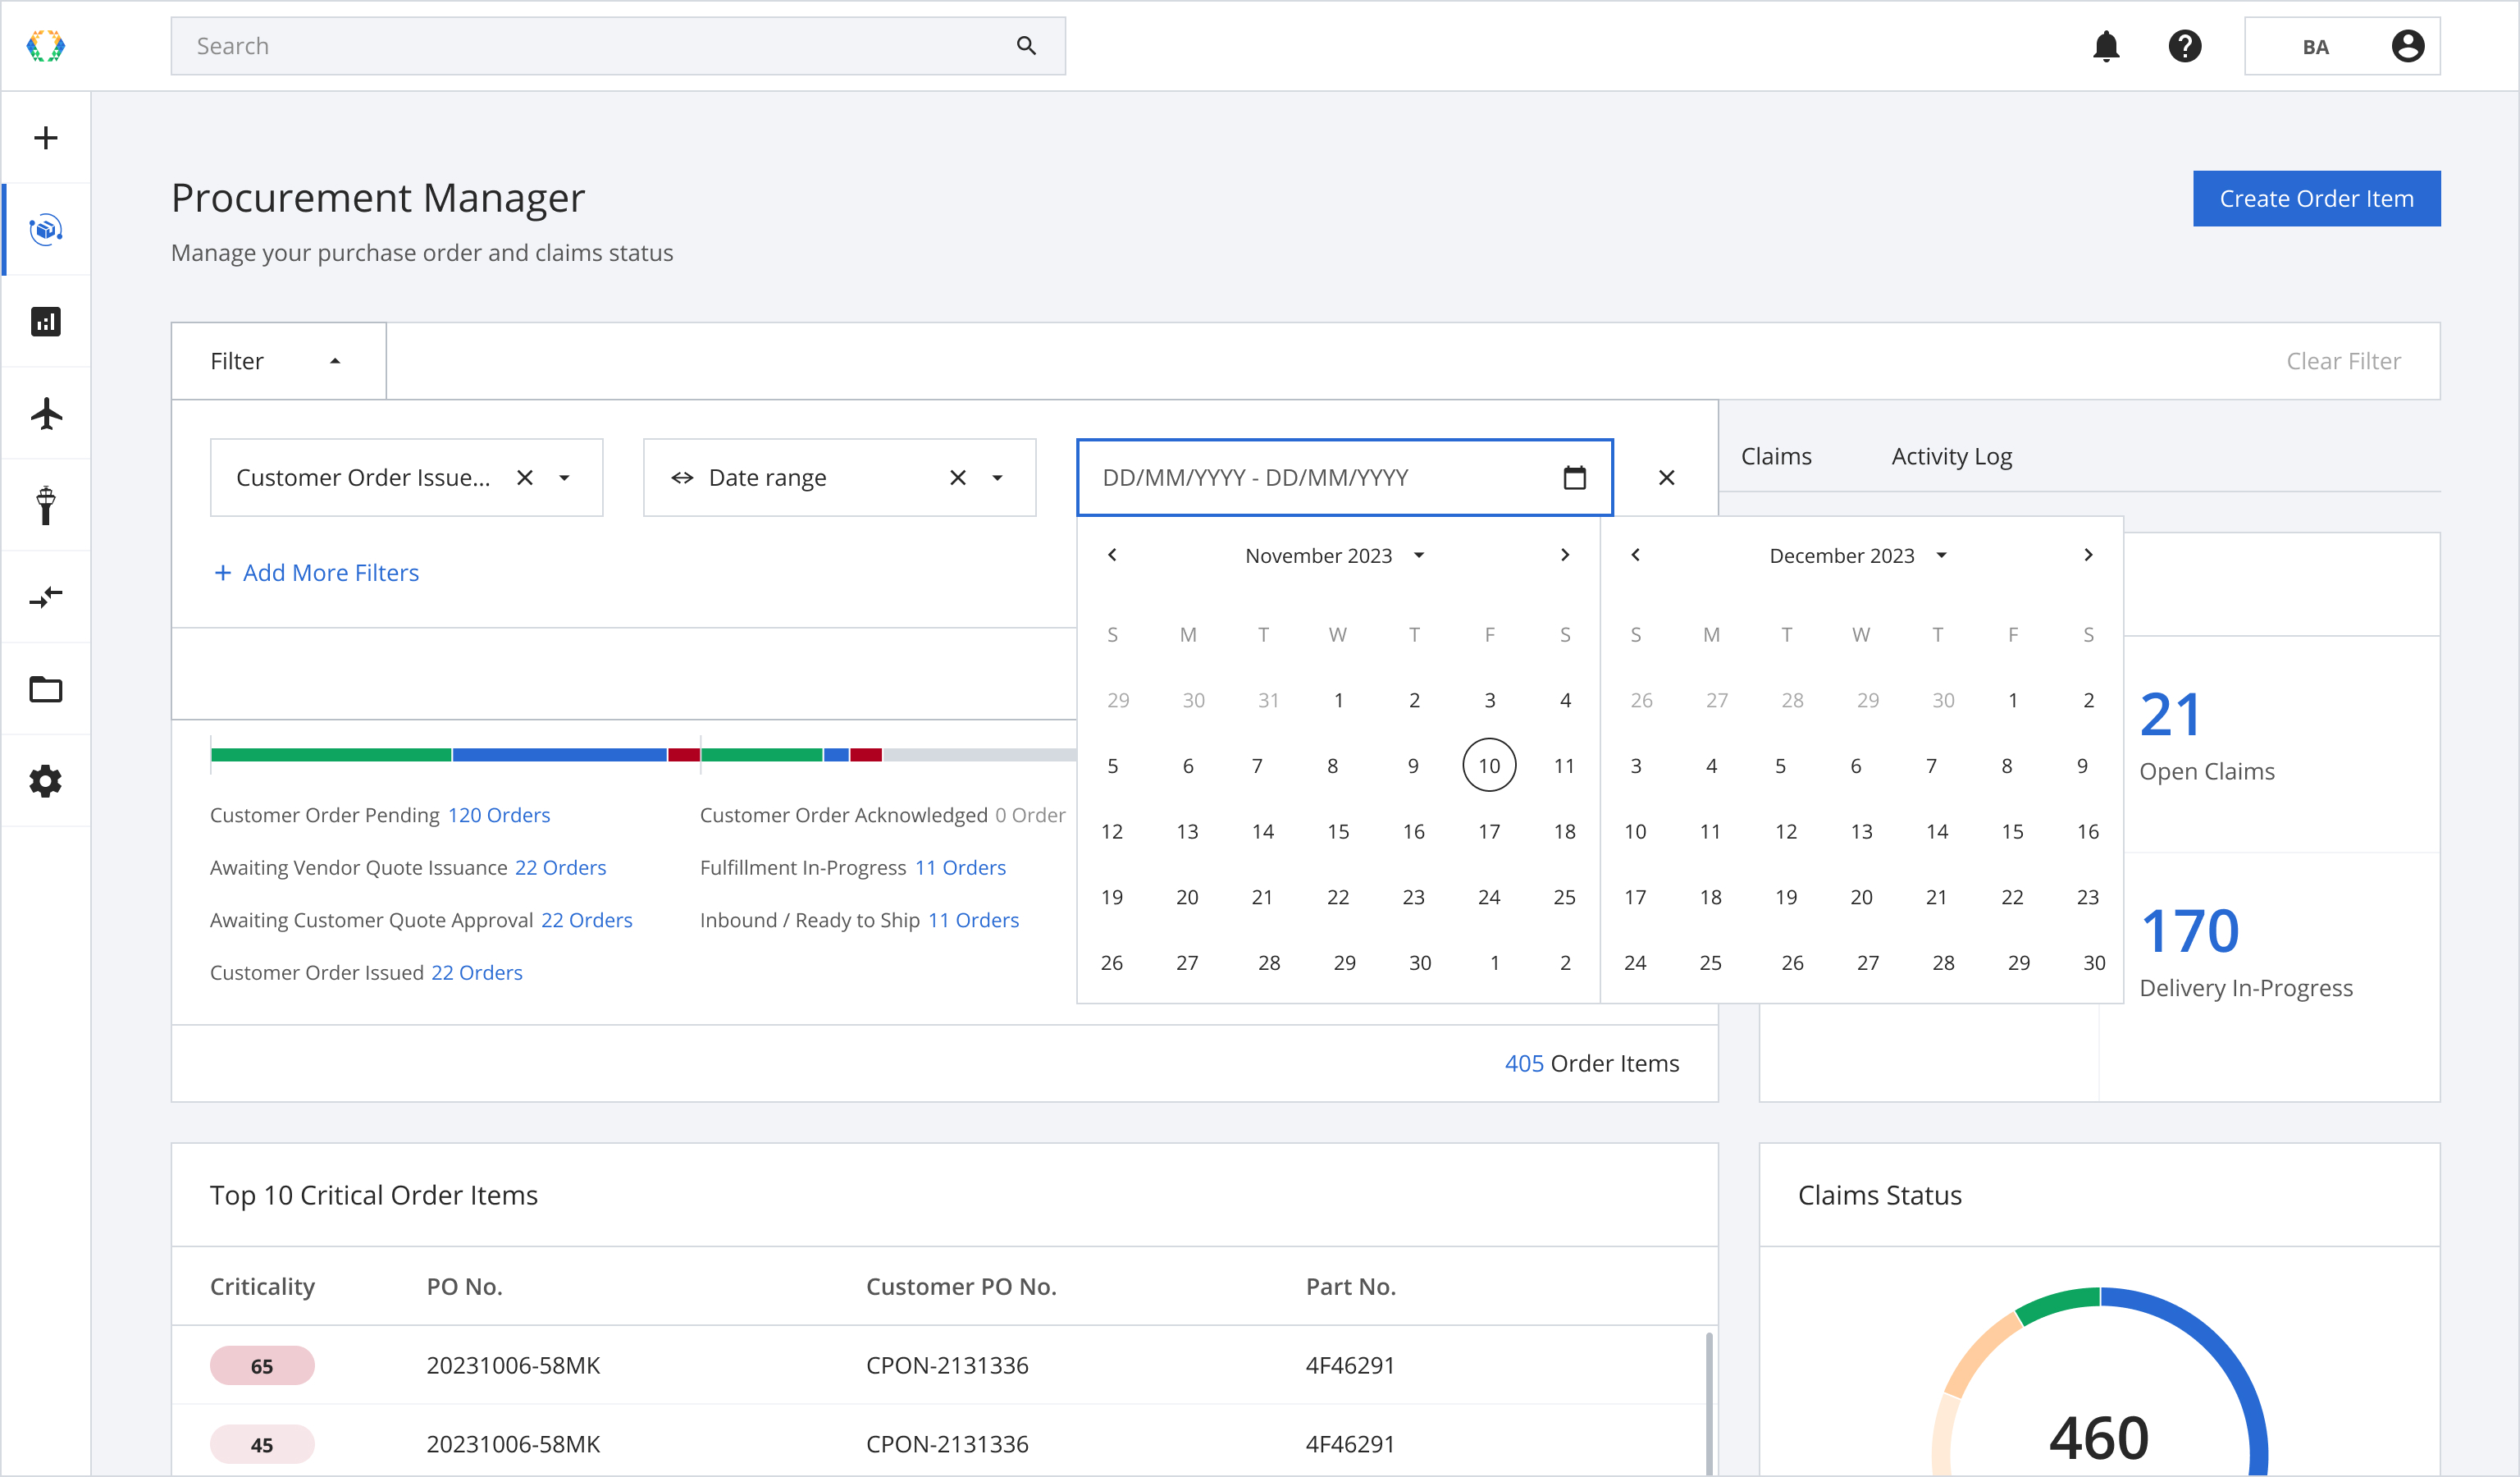
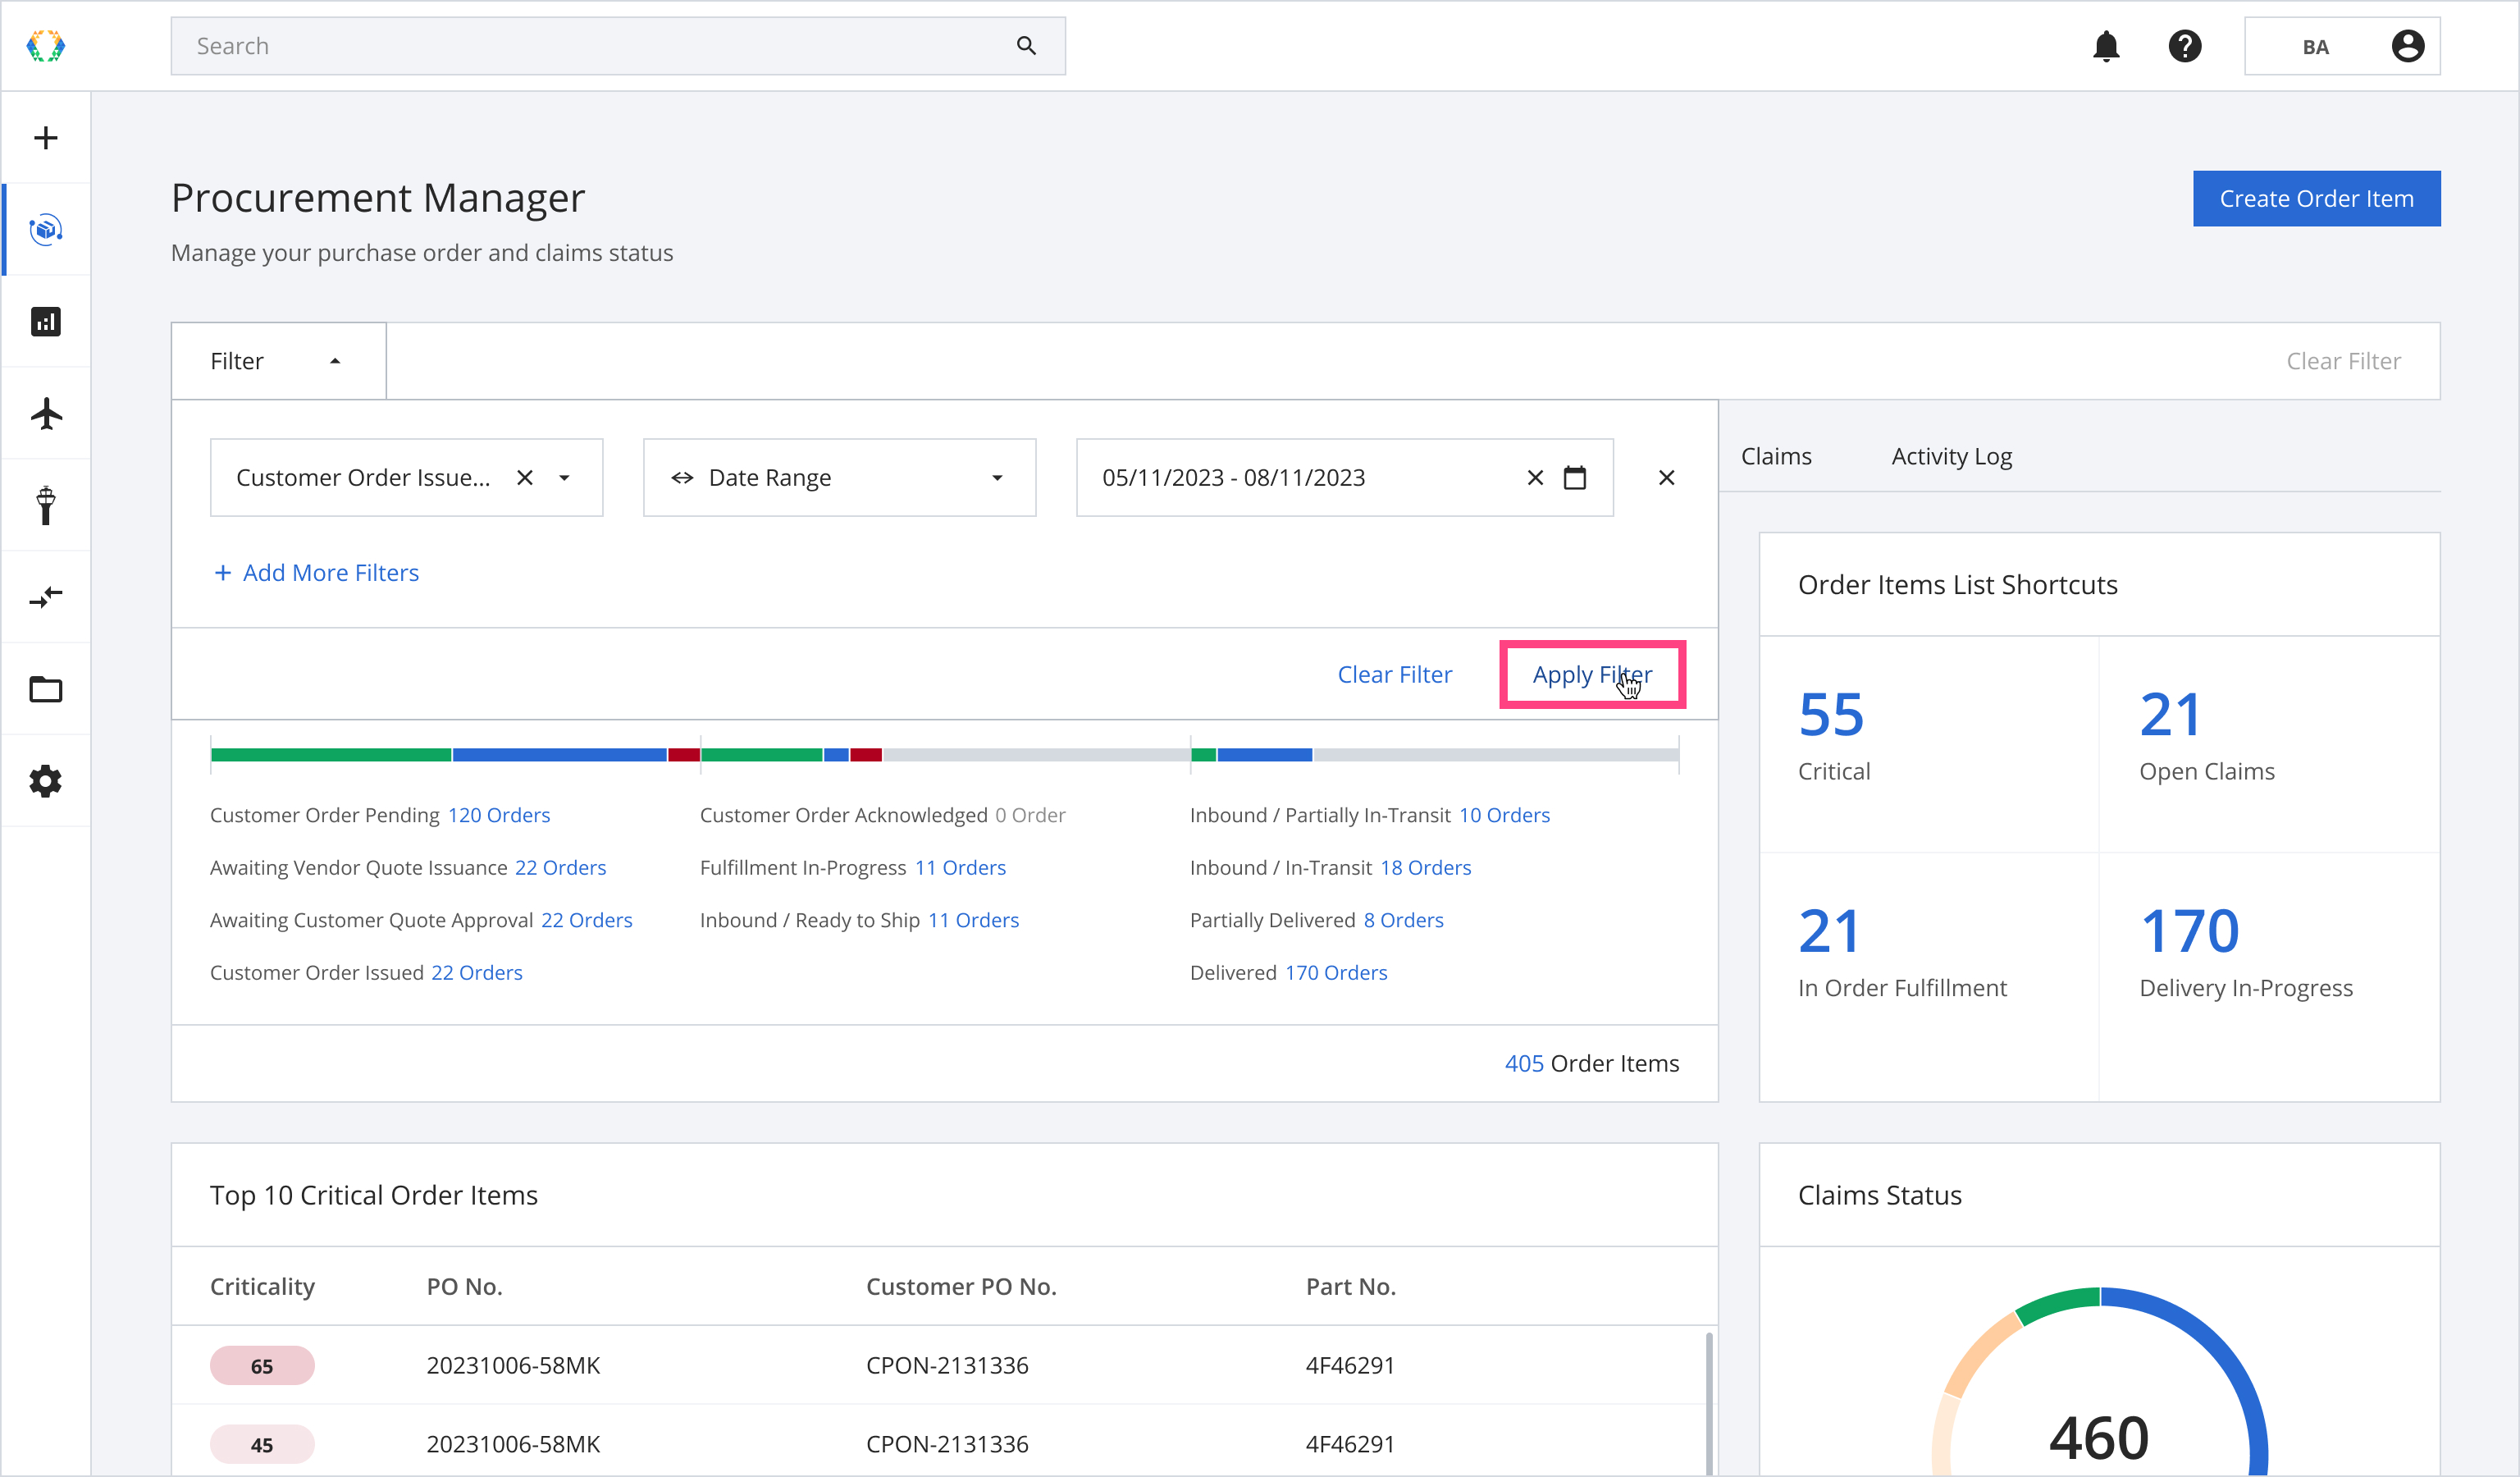
Step 5: Click 'Apply Filter'.
Step 6: Your applied filters will change the results shown across the entire Procurement Manager module, and the applied filters will be shown on the Global Filter Bar in a 'pill' shape.
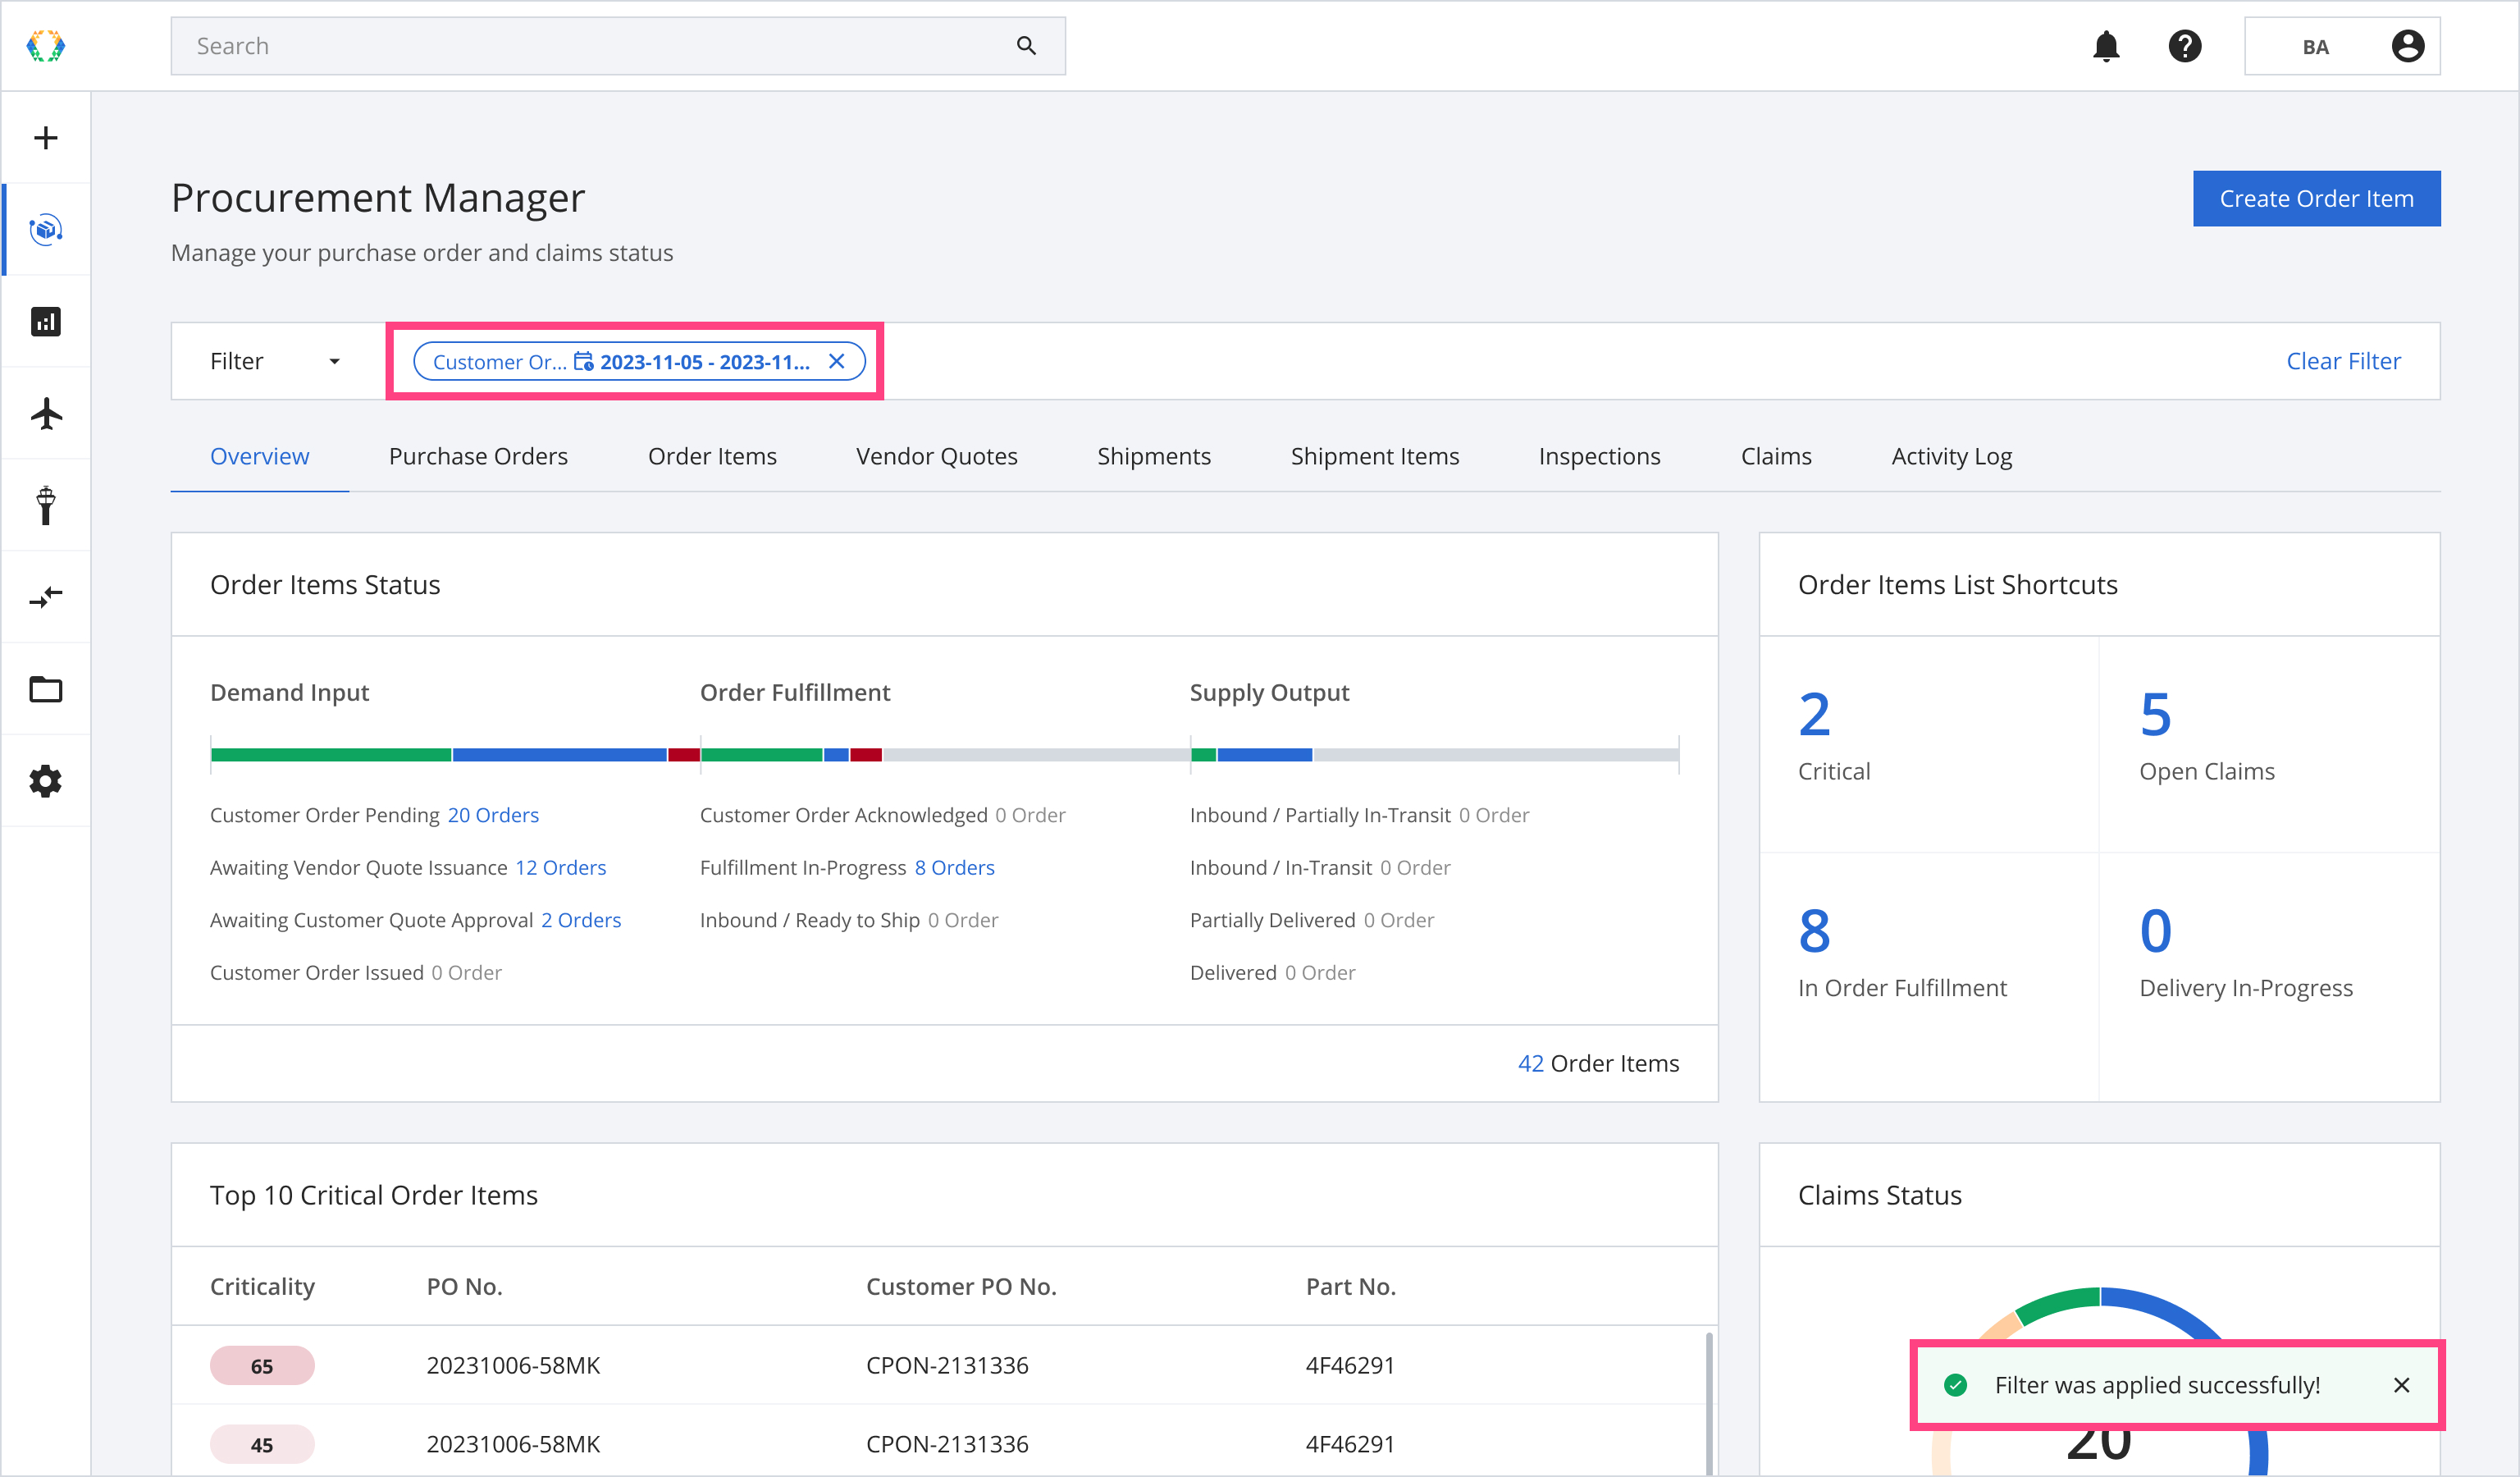
The Global Filter Bar works across all the tabs in the Procurement ManagerAll tabs in Procurement Manager will show results matching the applied filters.
Additional Features
Adding multiple filters
You can add multiple filters on the Global Filter Bar to narrow your results even further.
Step 1: Click 'Add More Filters'.
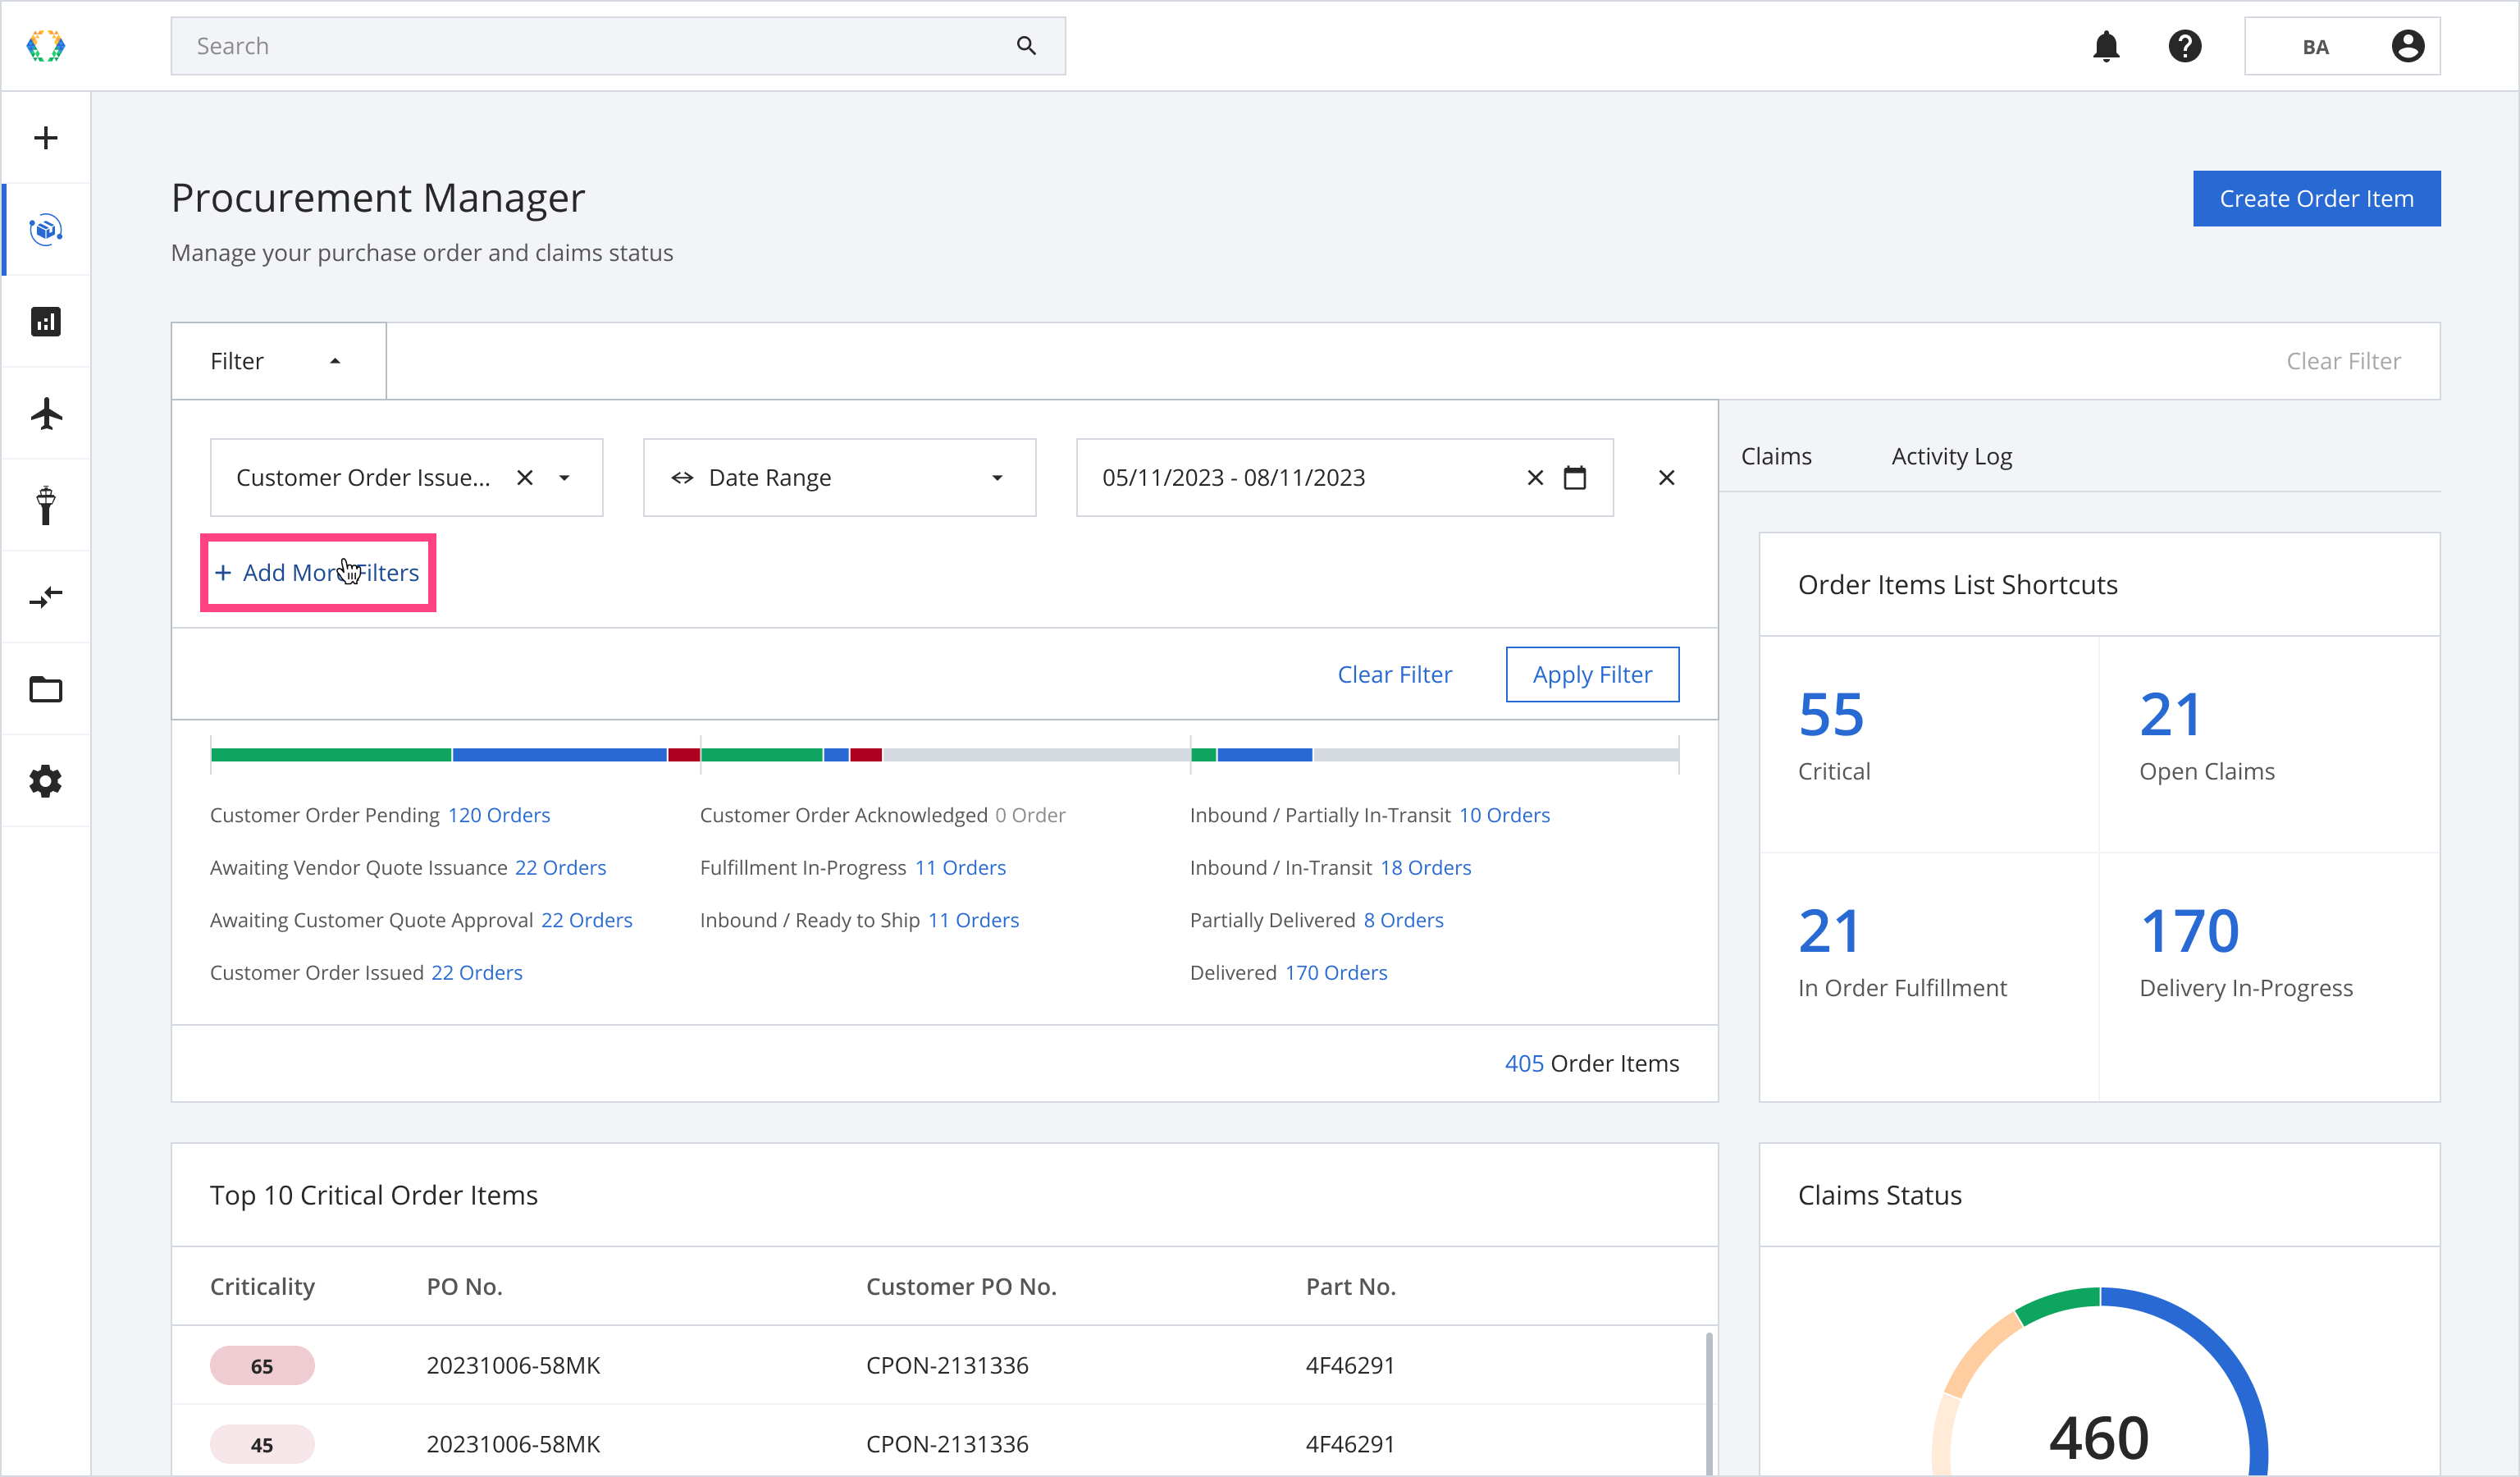
Step 2: Select parameters in the newly added fields and click 'Apply Filter'.
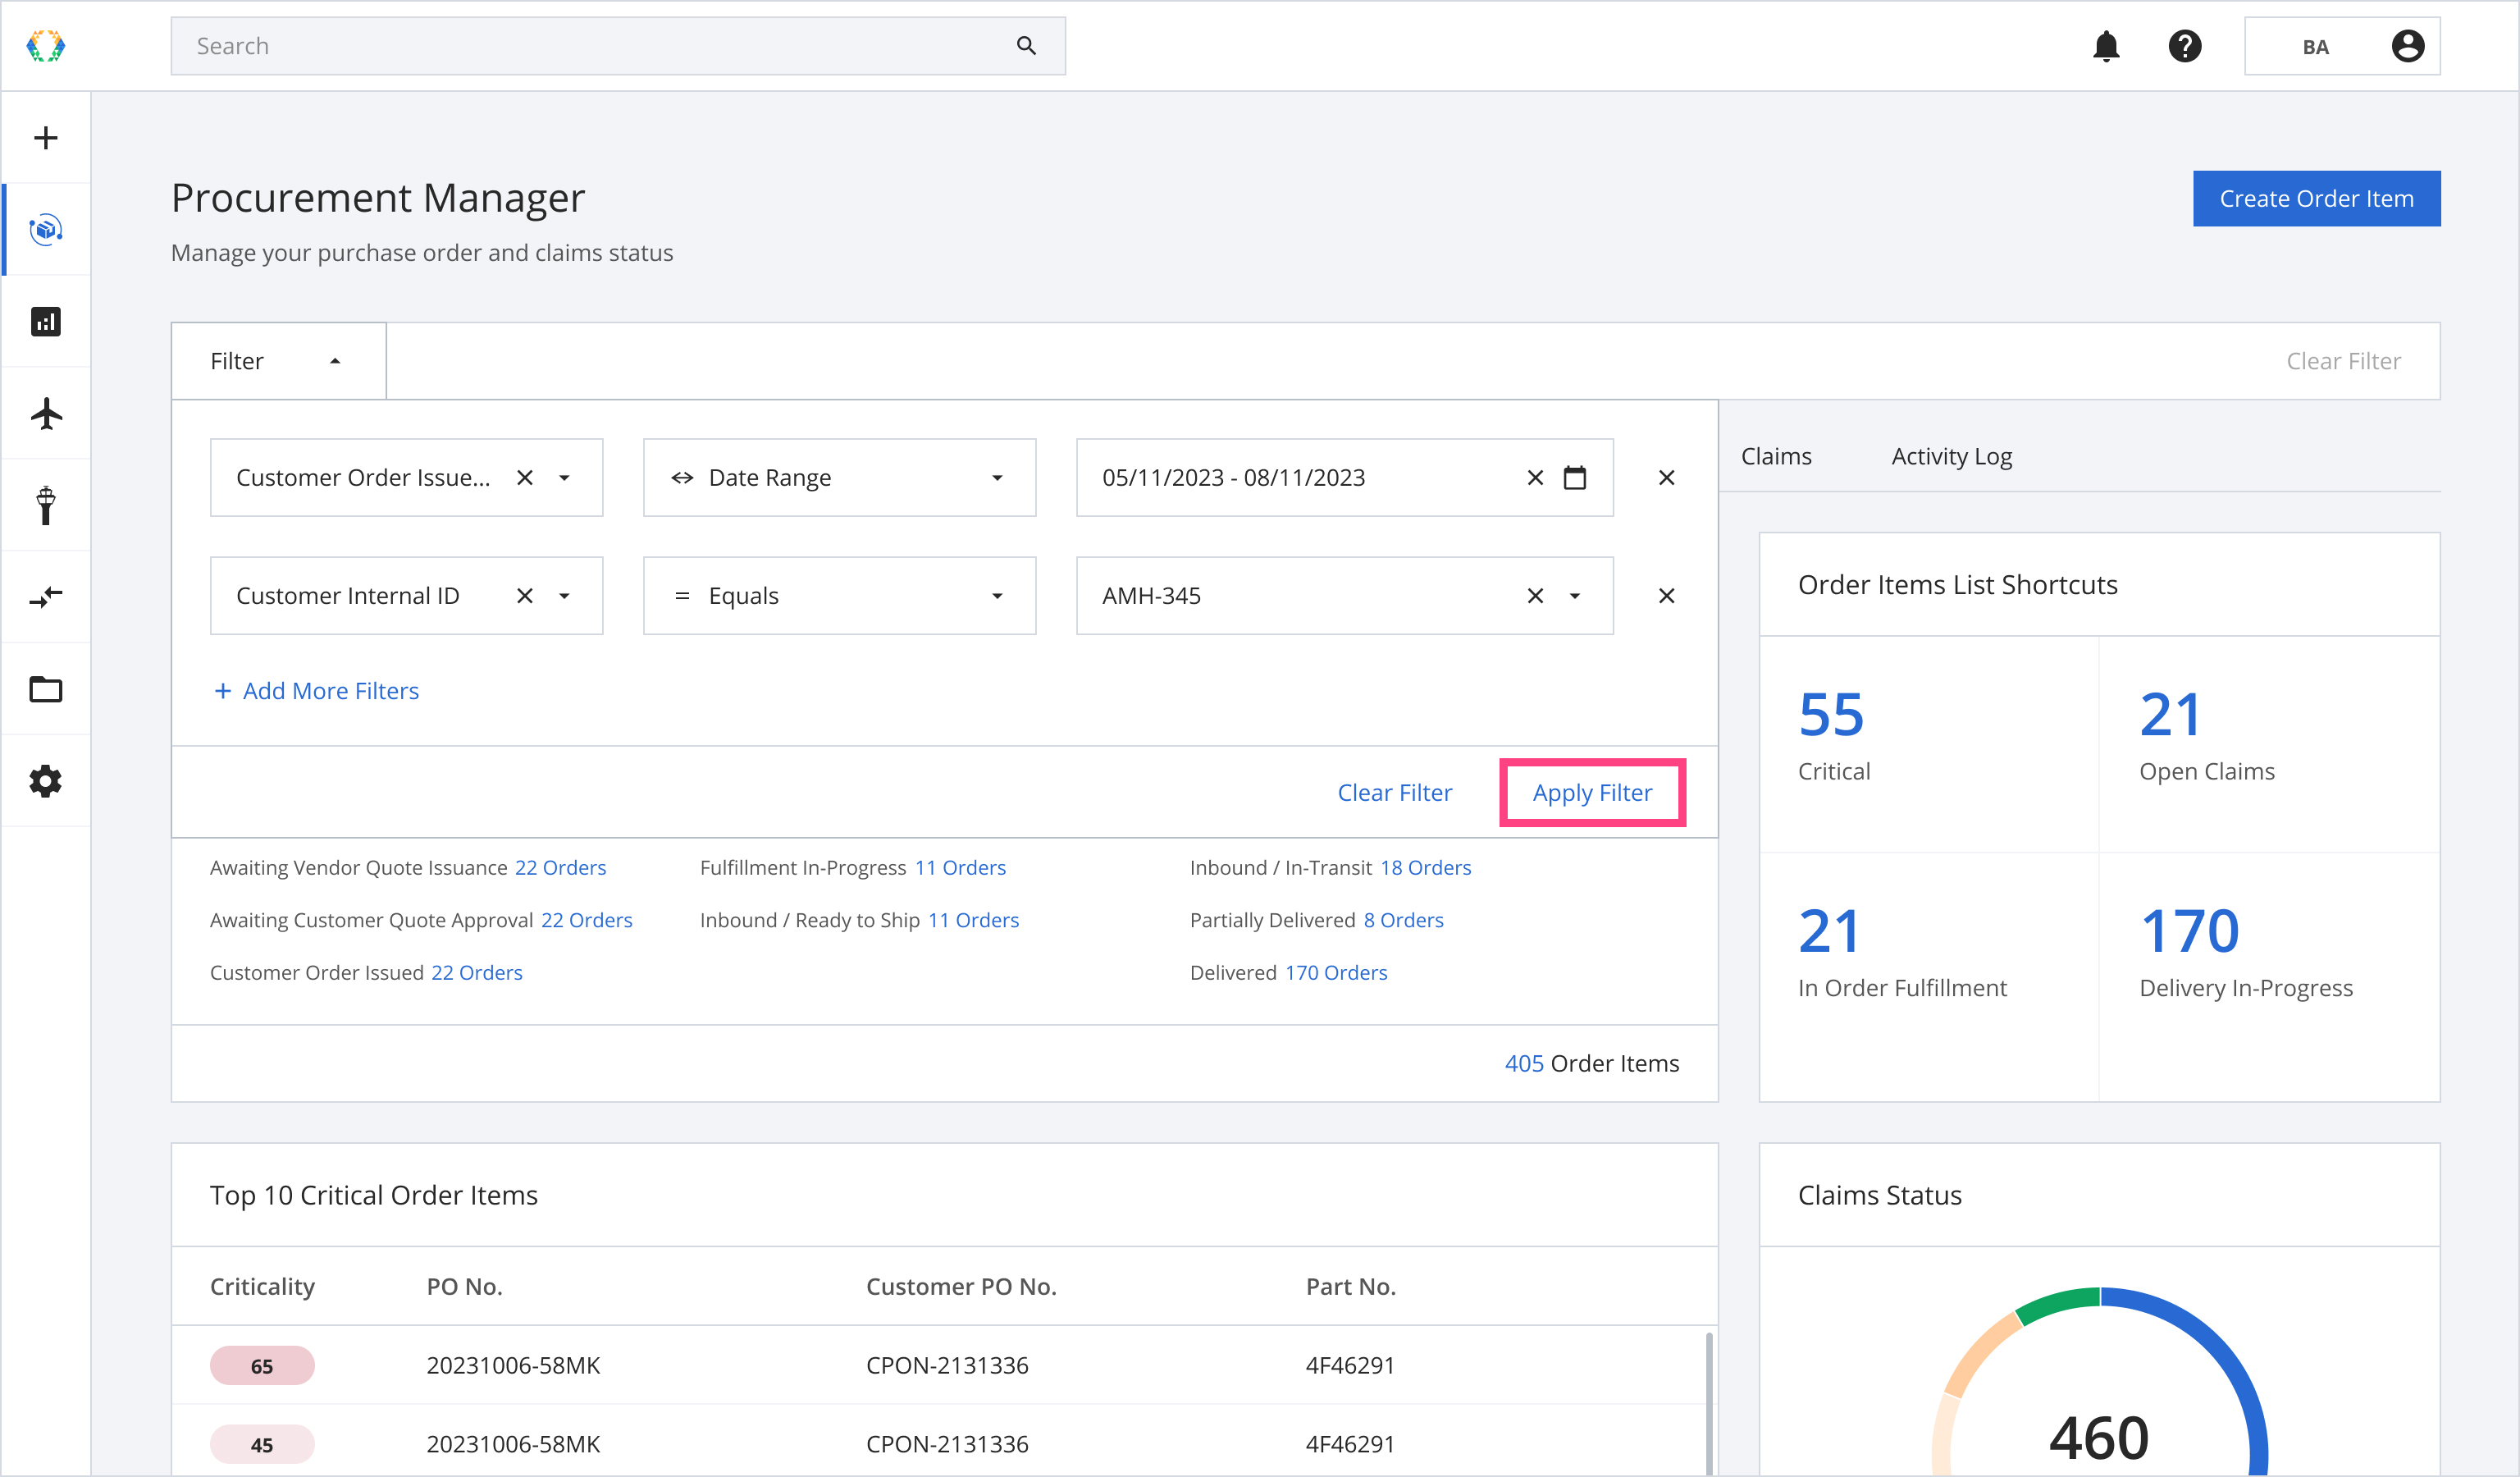
Step 3: Your applied filters will change the results shown across the entire Procurement Manager module, and the applied filters will be shown on the Global Filter Bar in a 'pill' shape.
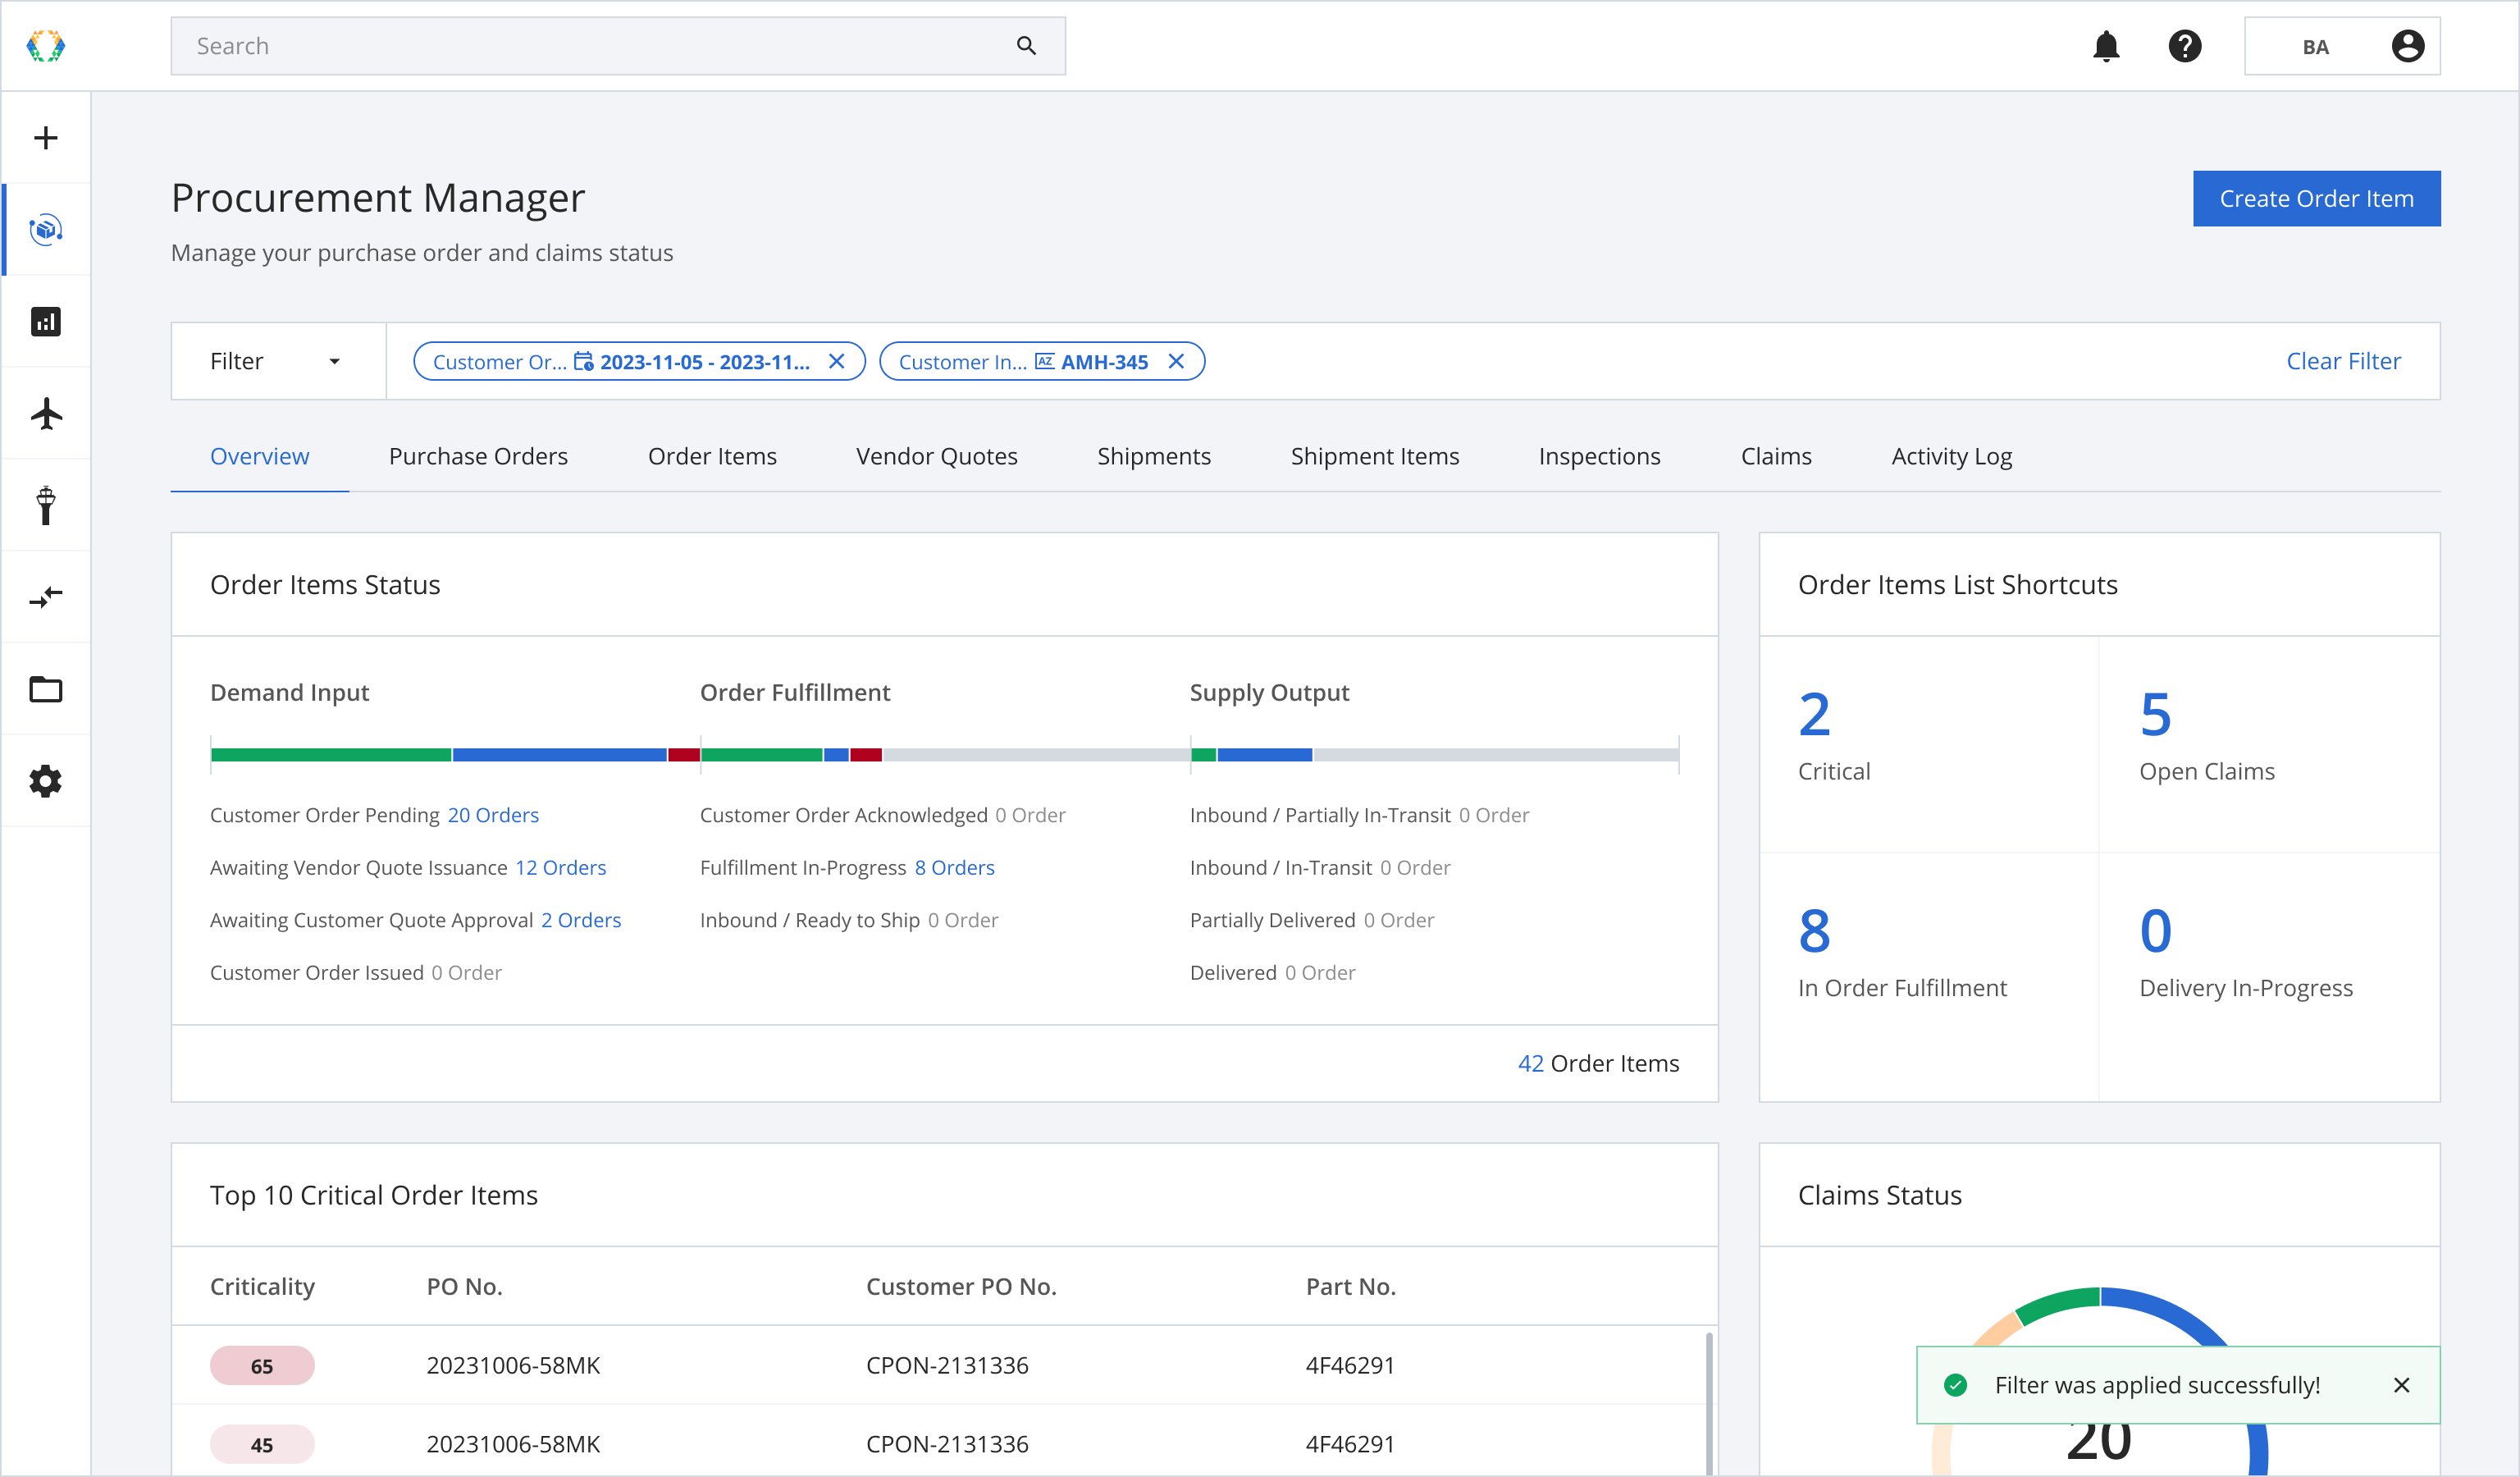
Removing filters
There are 4 ways to remove filters.
Option 1: Remove Filter in Filter Window
Option 2: Remove a Filter (Pill)
Option 3: Clear All Filters in the Filter Window
Option 4: Clear All Filters in the Filter Bar
Option 1: Remove Filter in filter options
Step 1: Click 'Filter' to expand the filters menu.
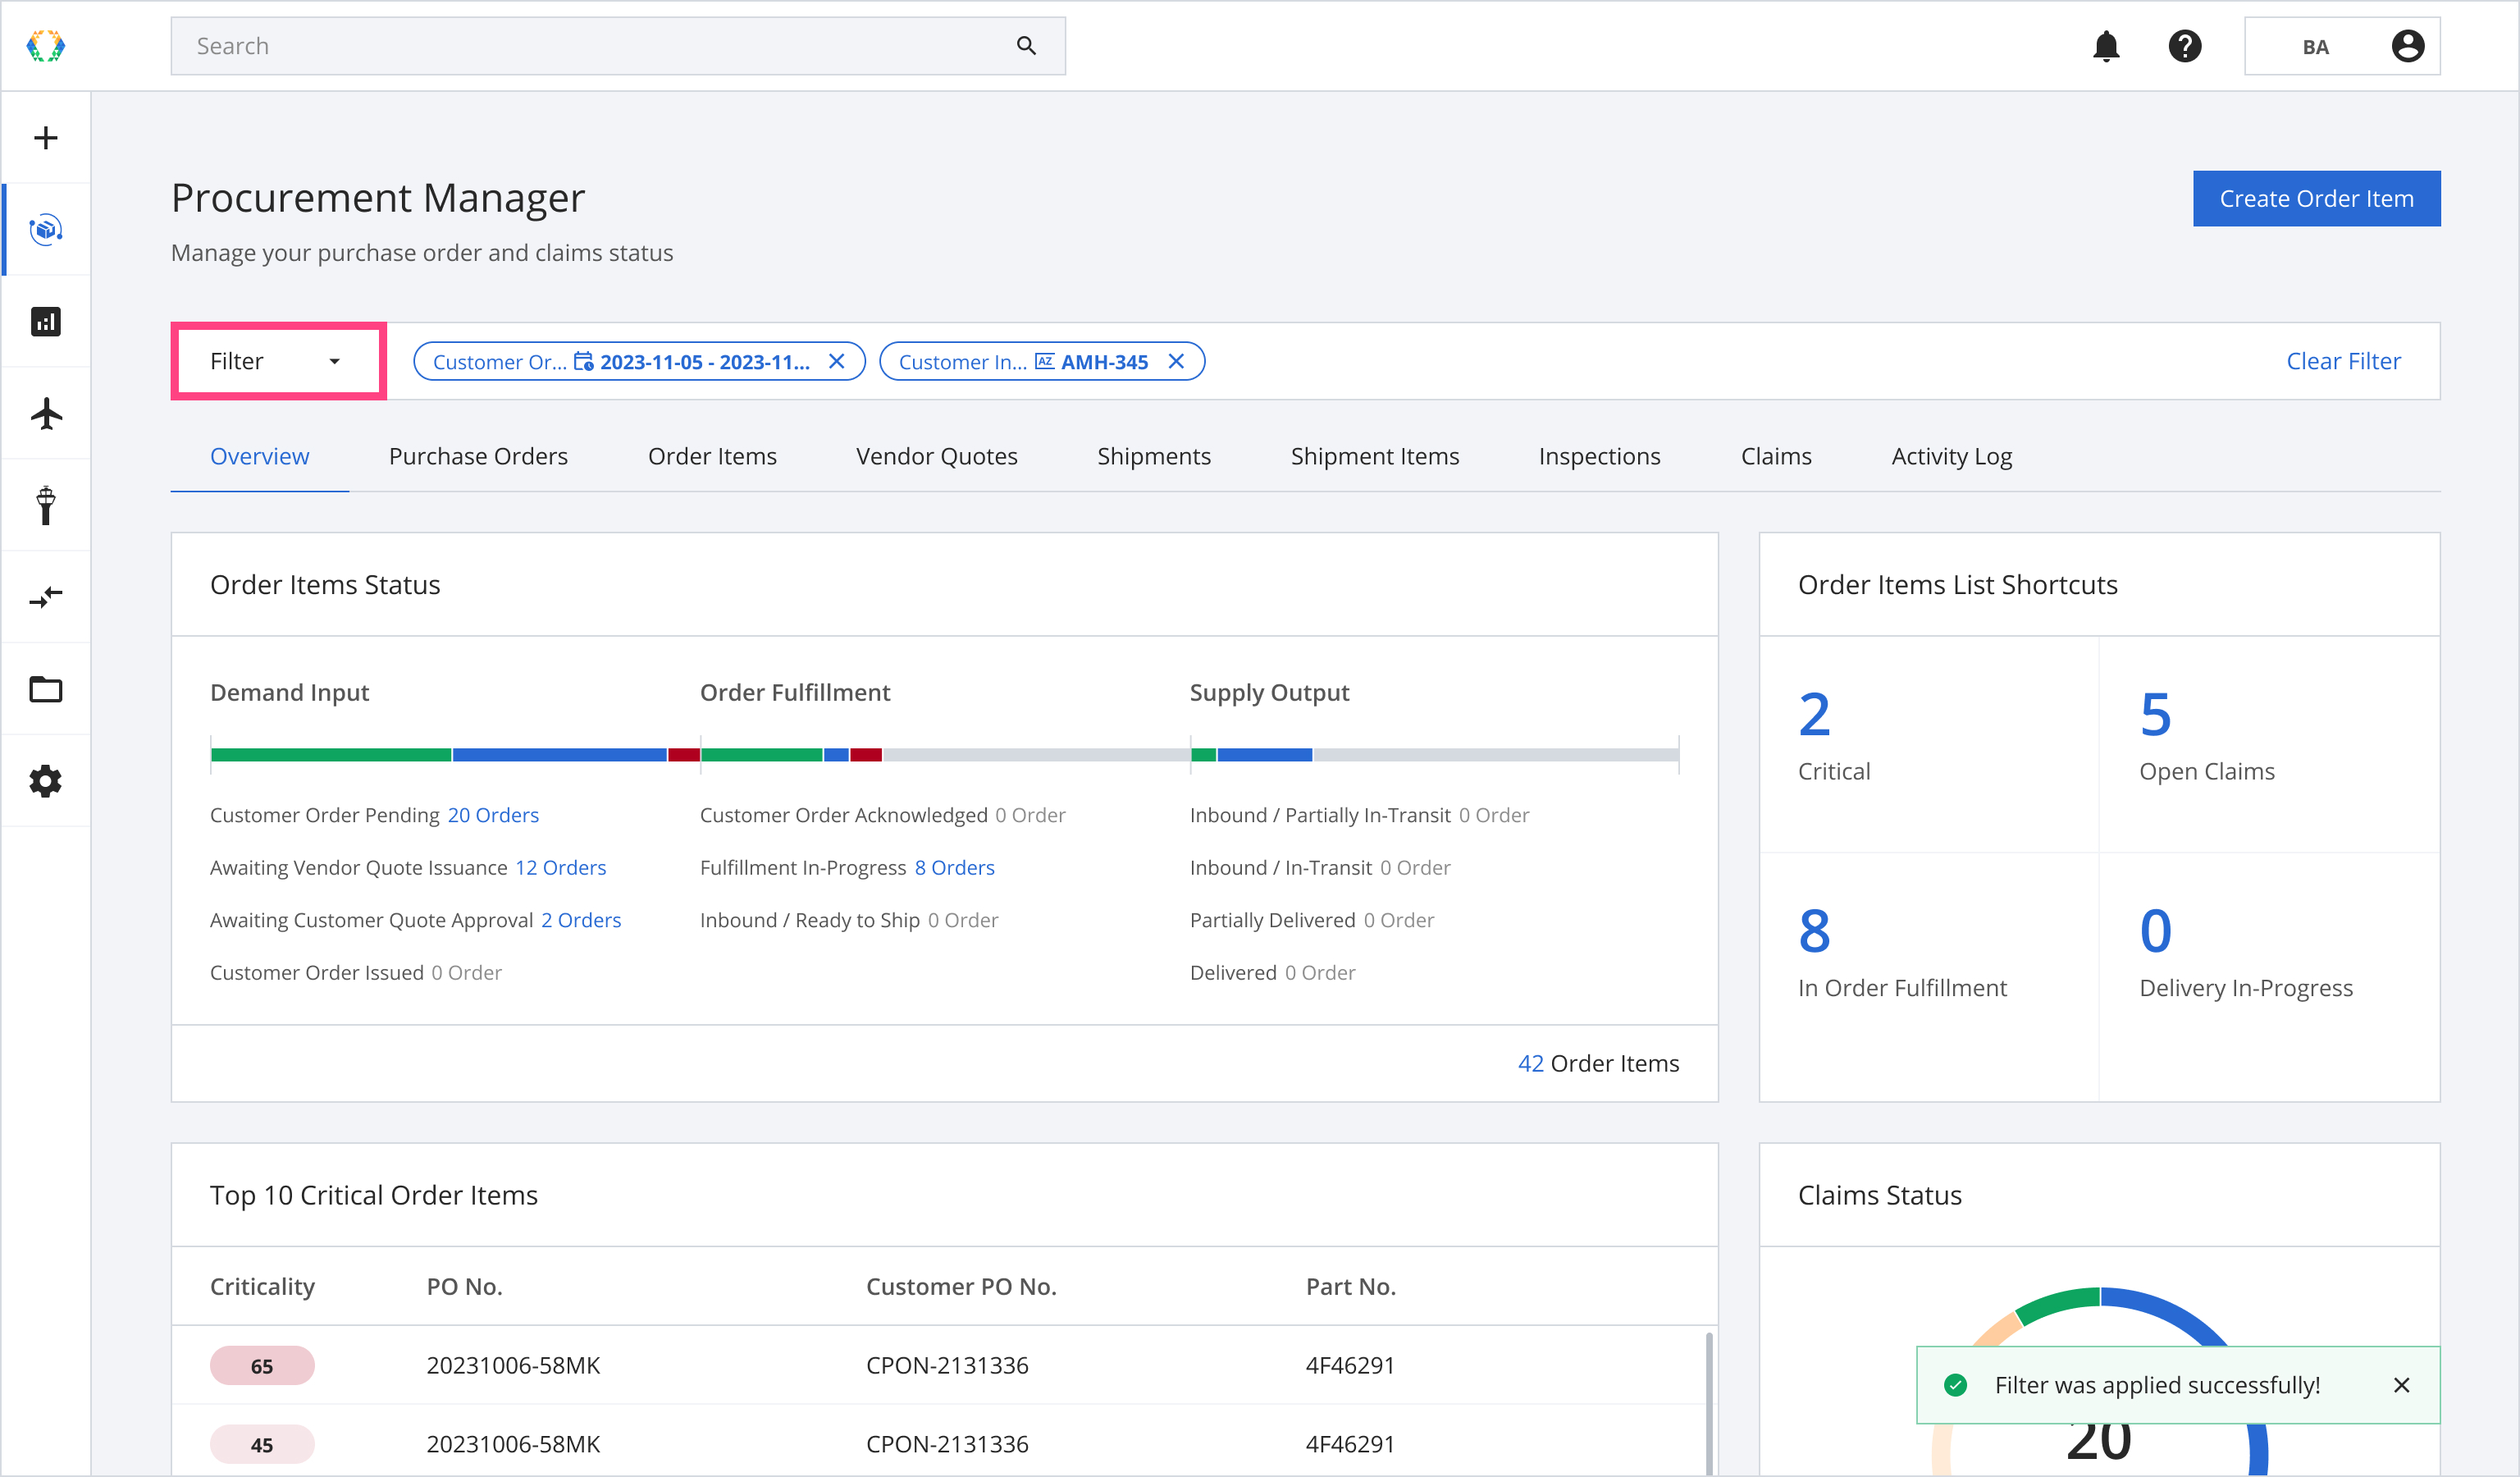
Step 2: Click “✕” to remove a filter.
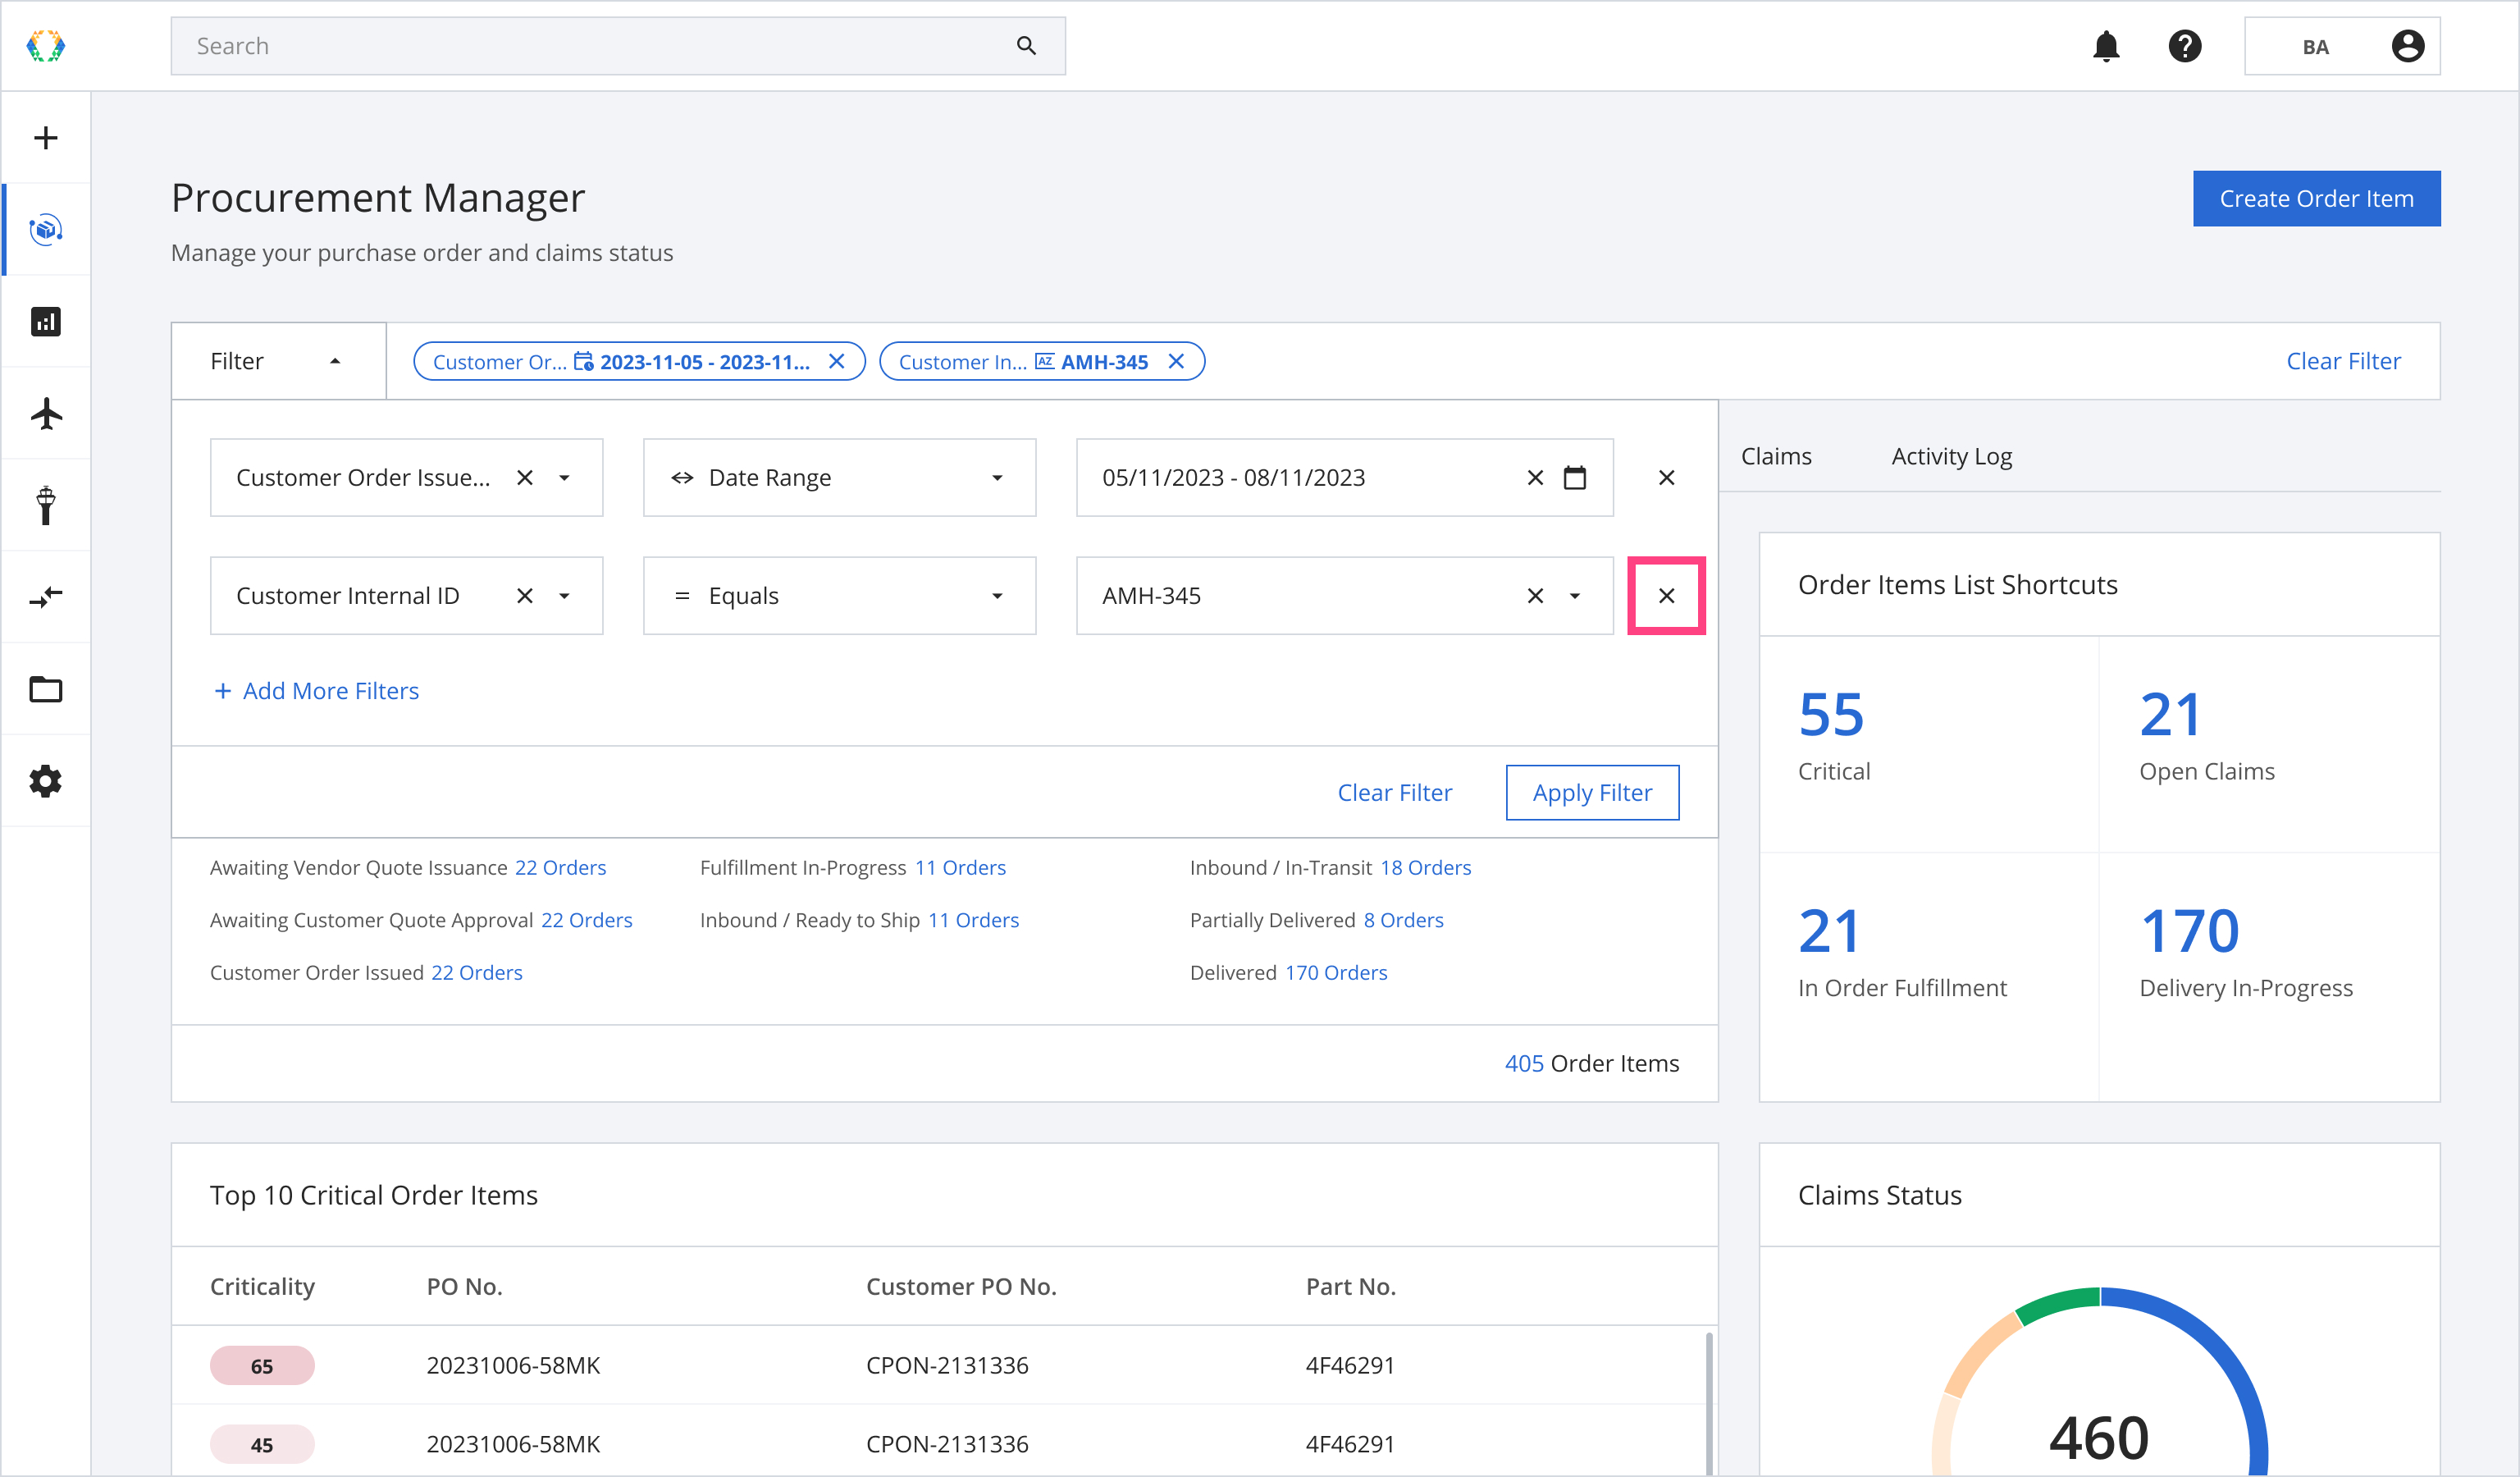
Step 3: Click 'Apply Filter' to apply the changes.
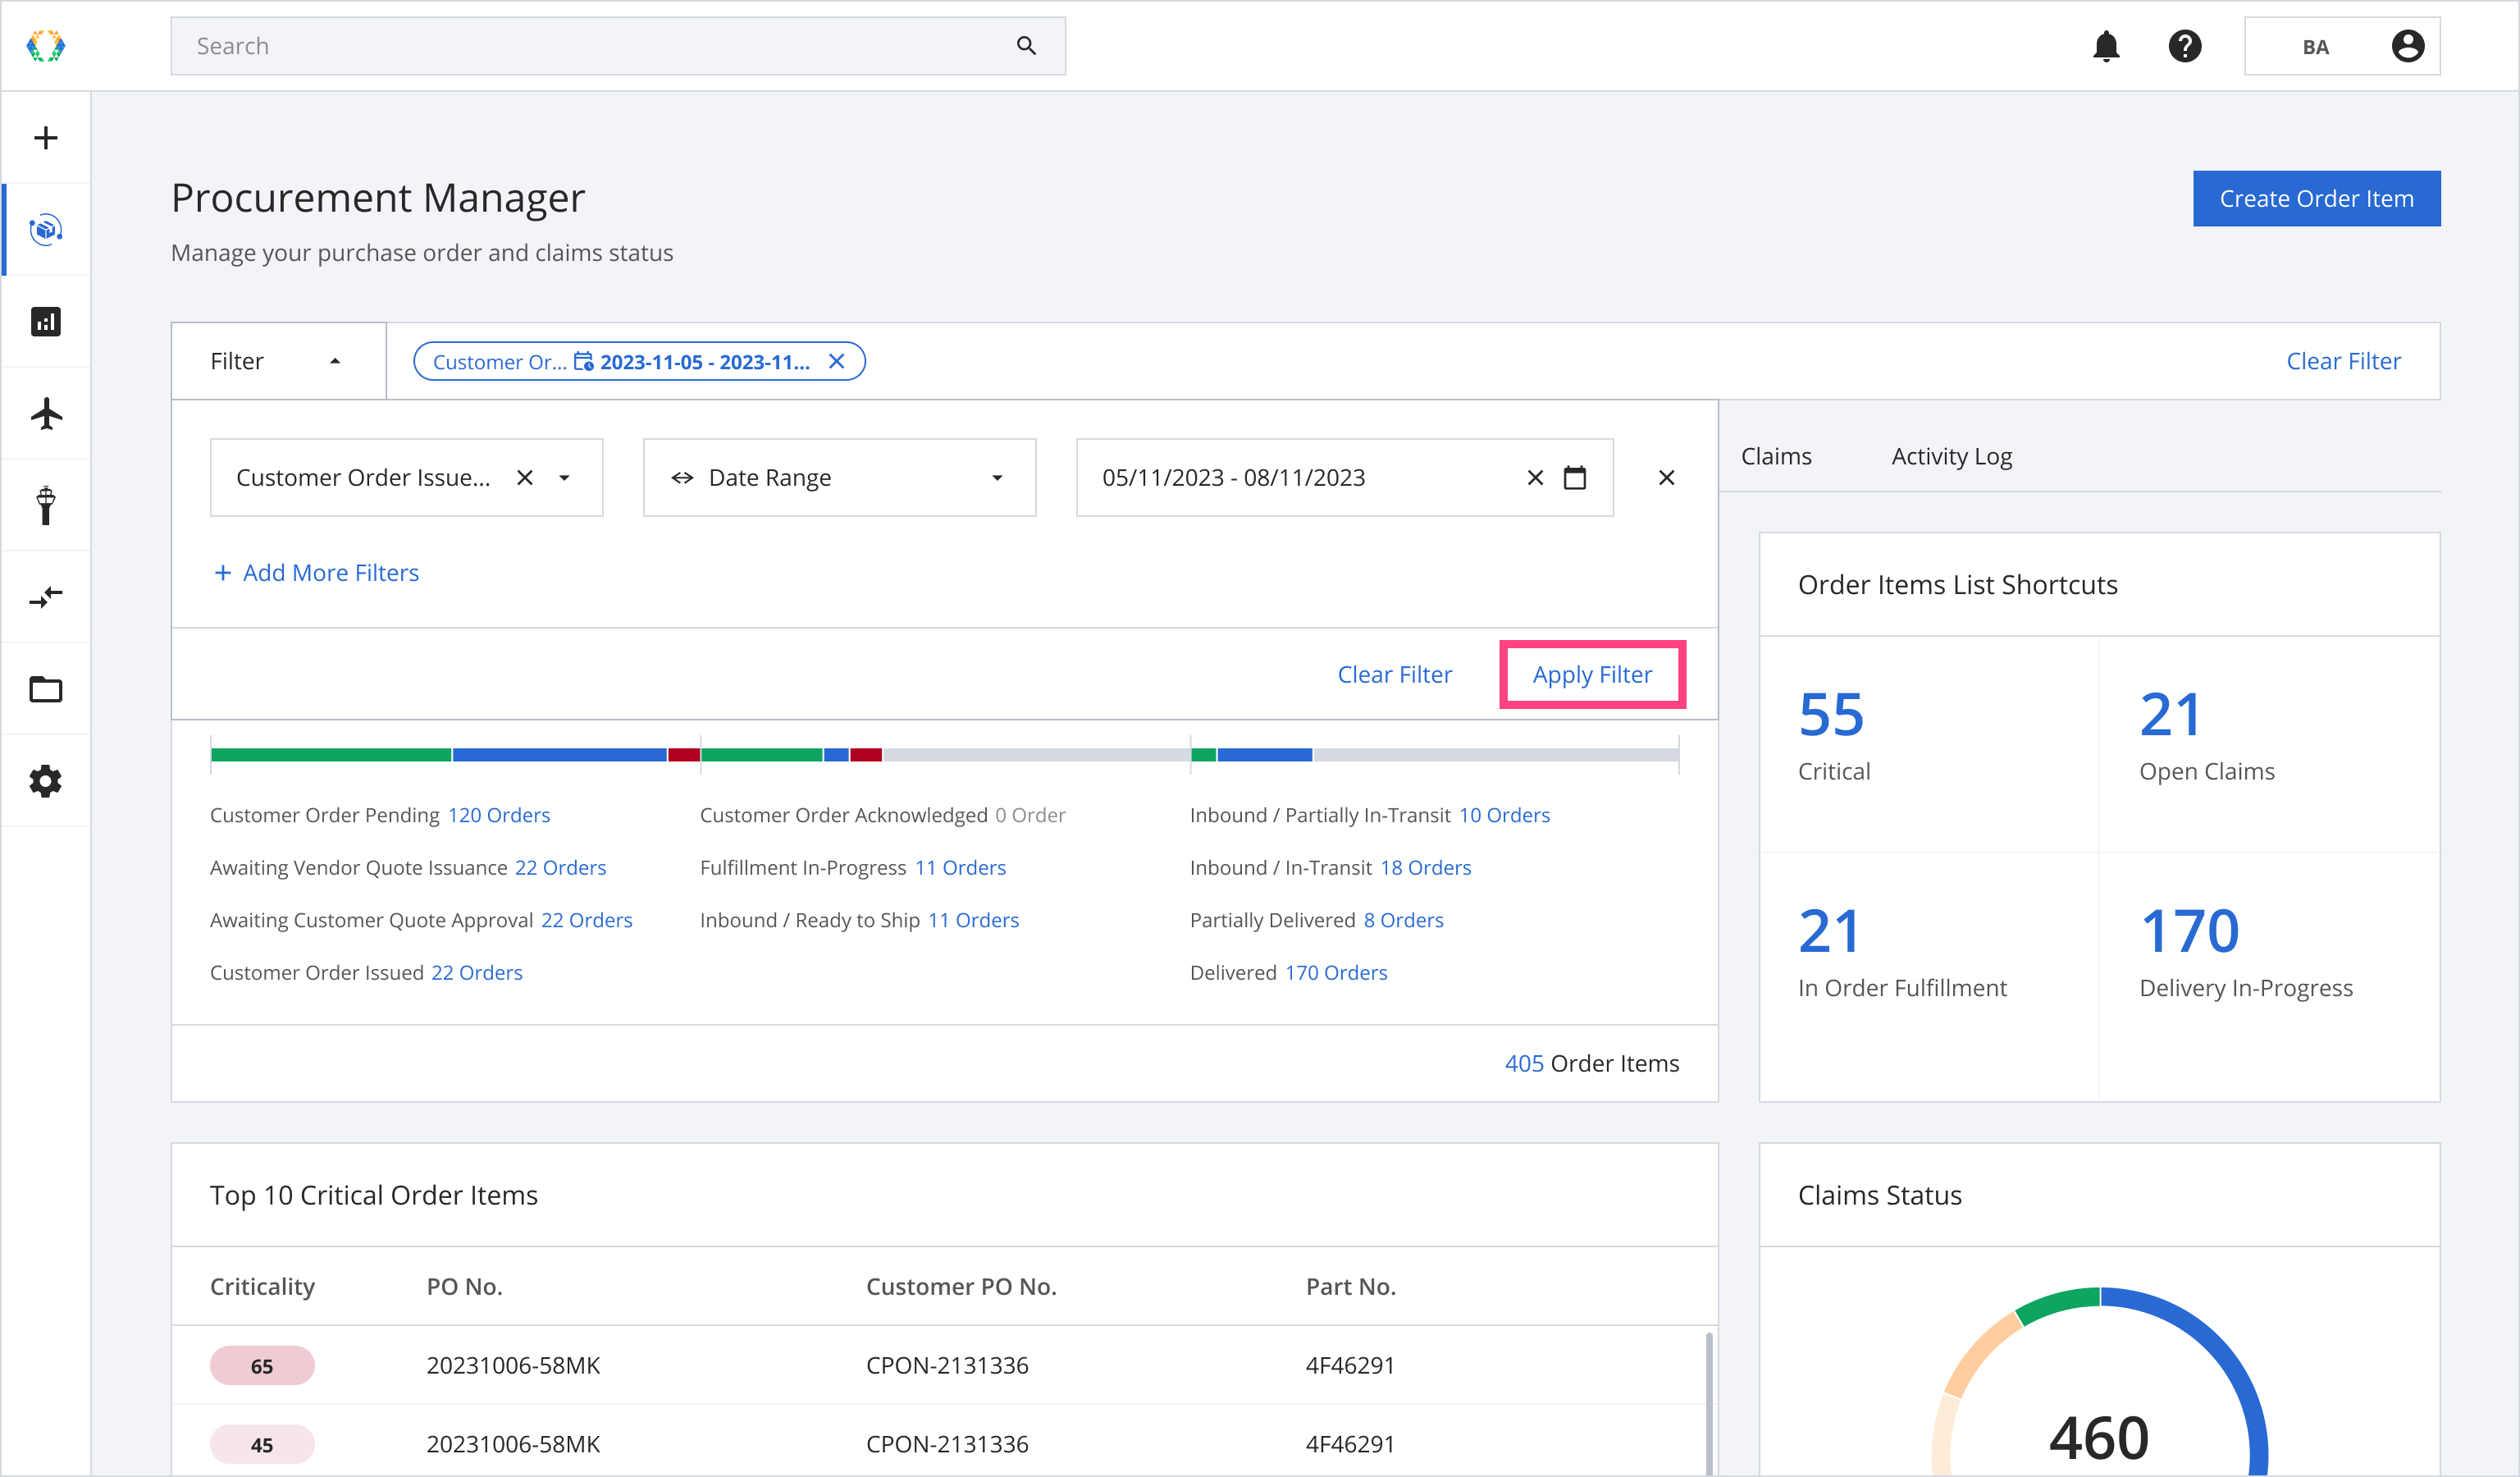
Step 4: Your applied filters will change the results shown across the entire Procurement Manager module, and the applied filters will be shown on the Filter Bar in a 'pill' shape.
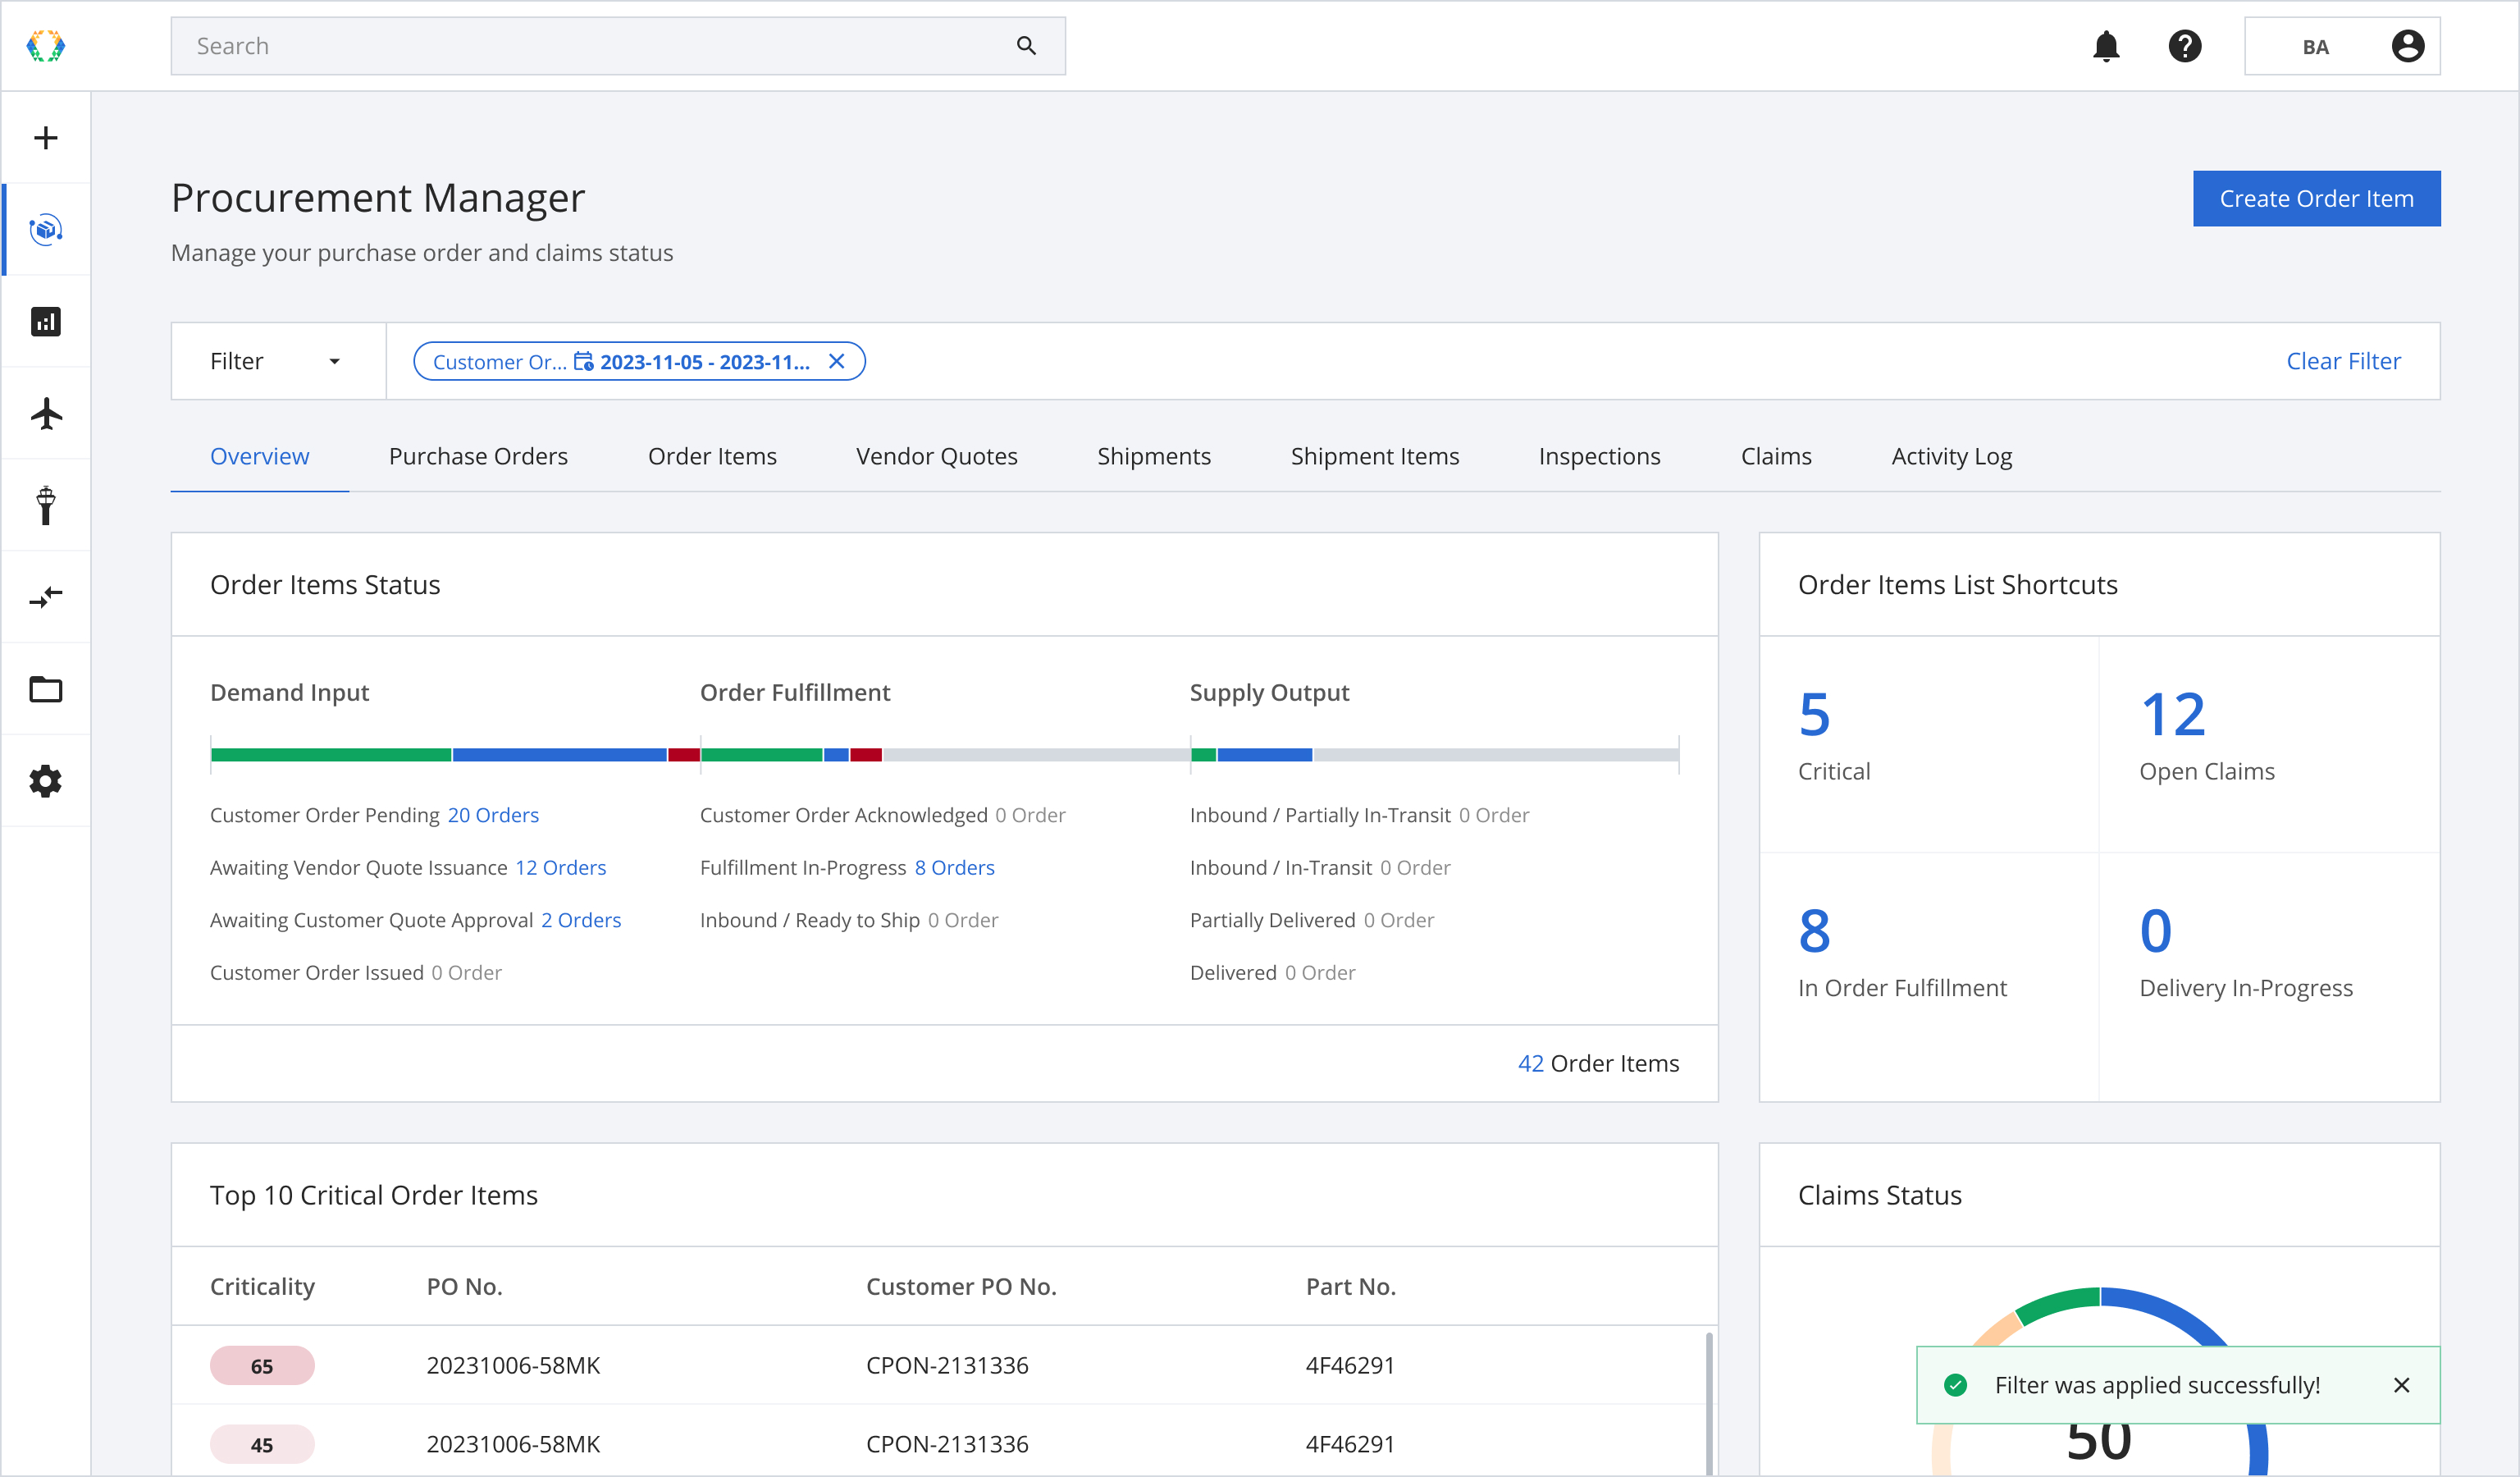
Option 2: Remove a Filter (Pill)
Step 1: Alternatively, you can remove a filter by removing a “pill” on the Filter Bar.
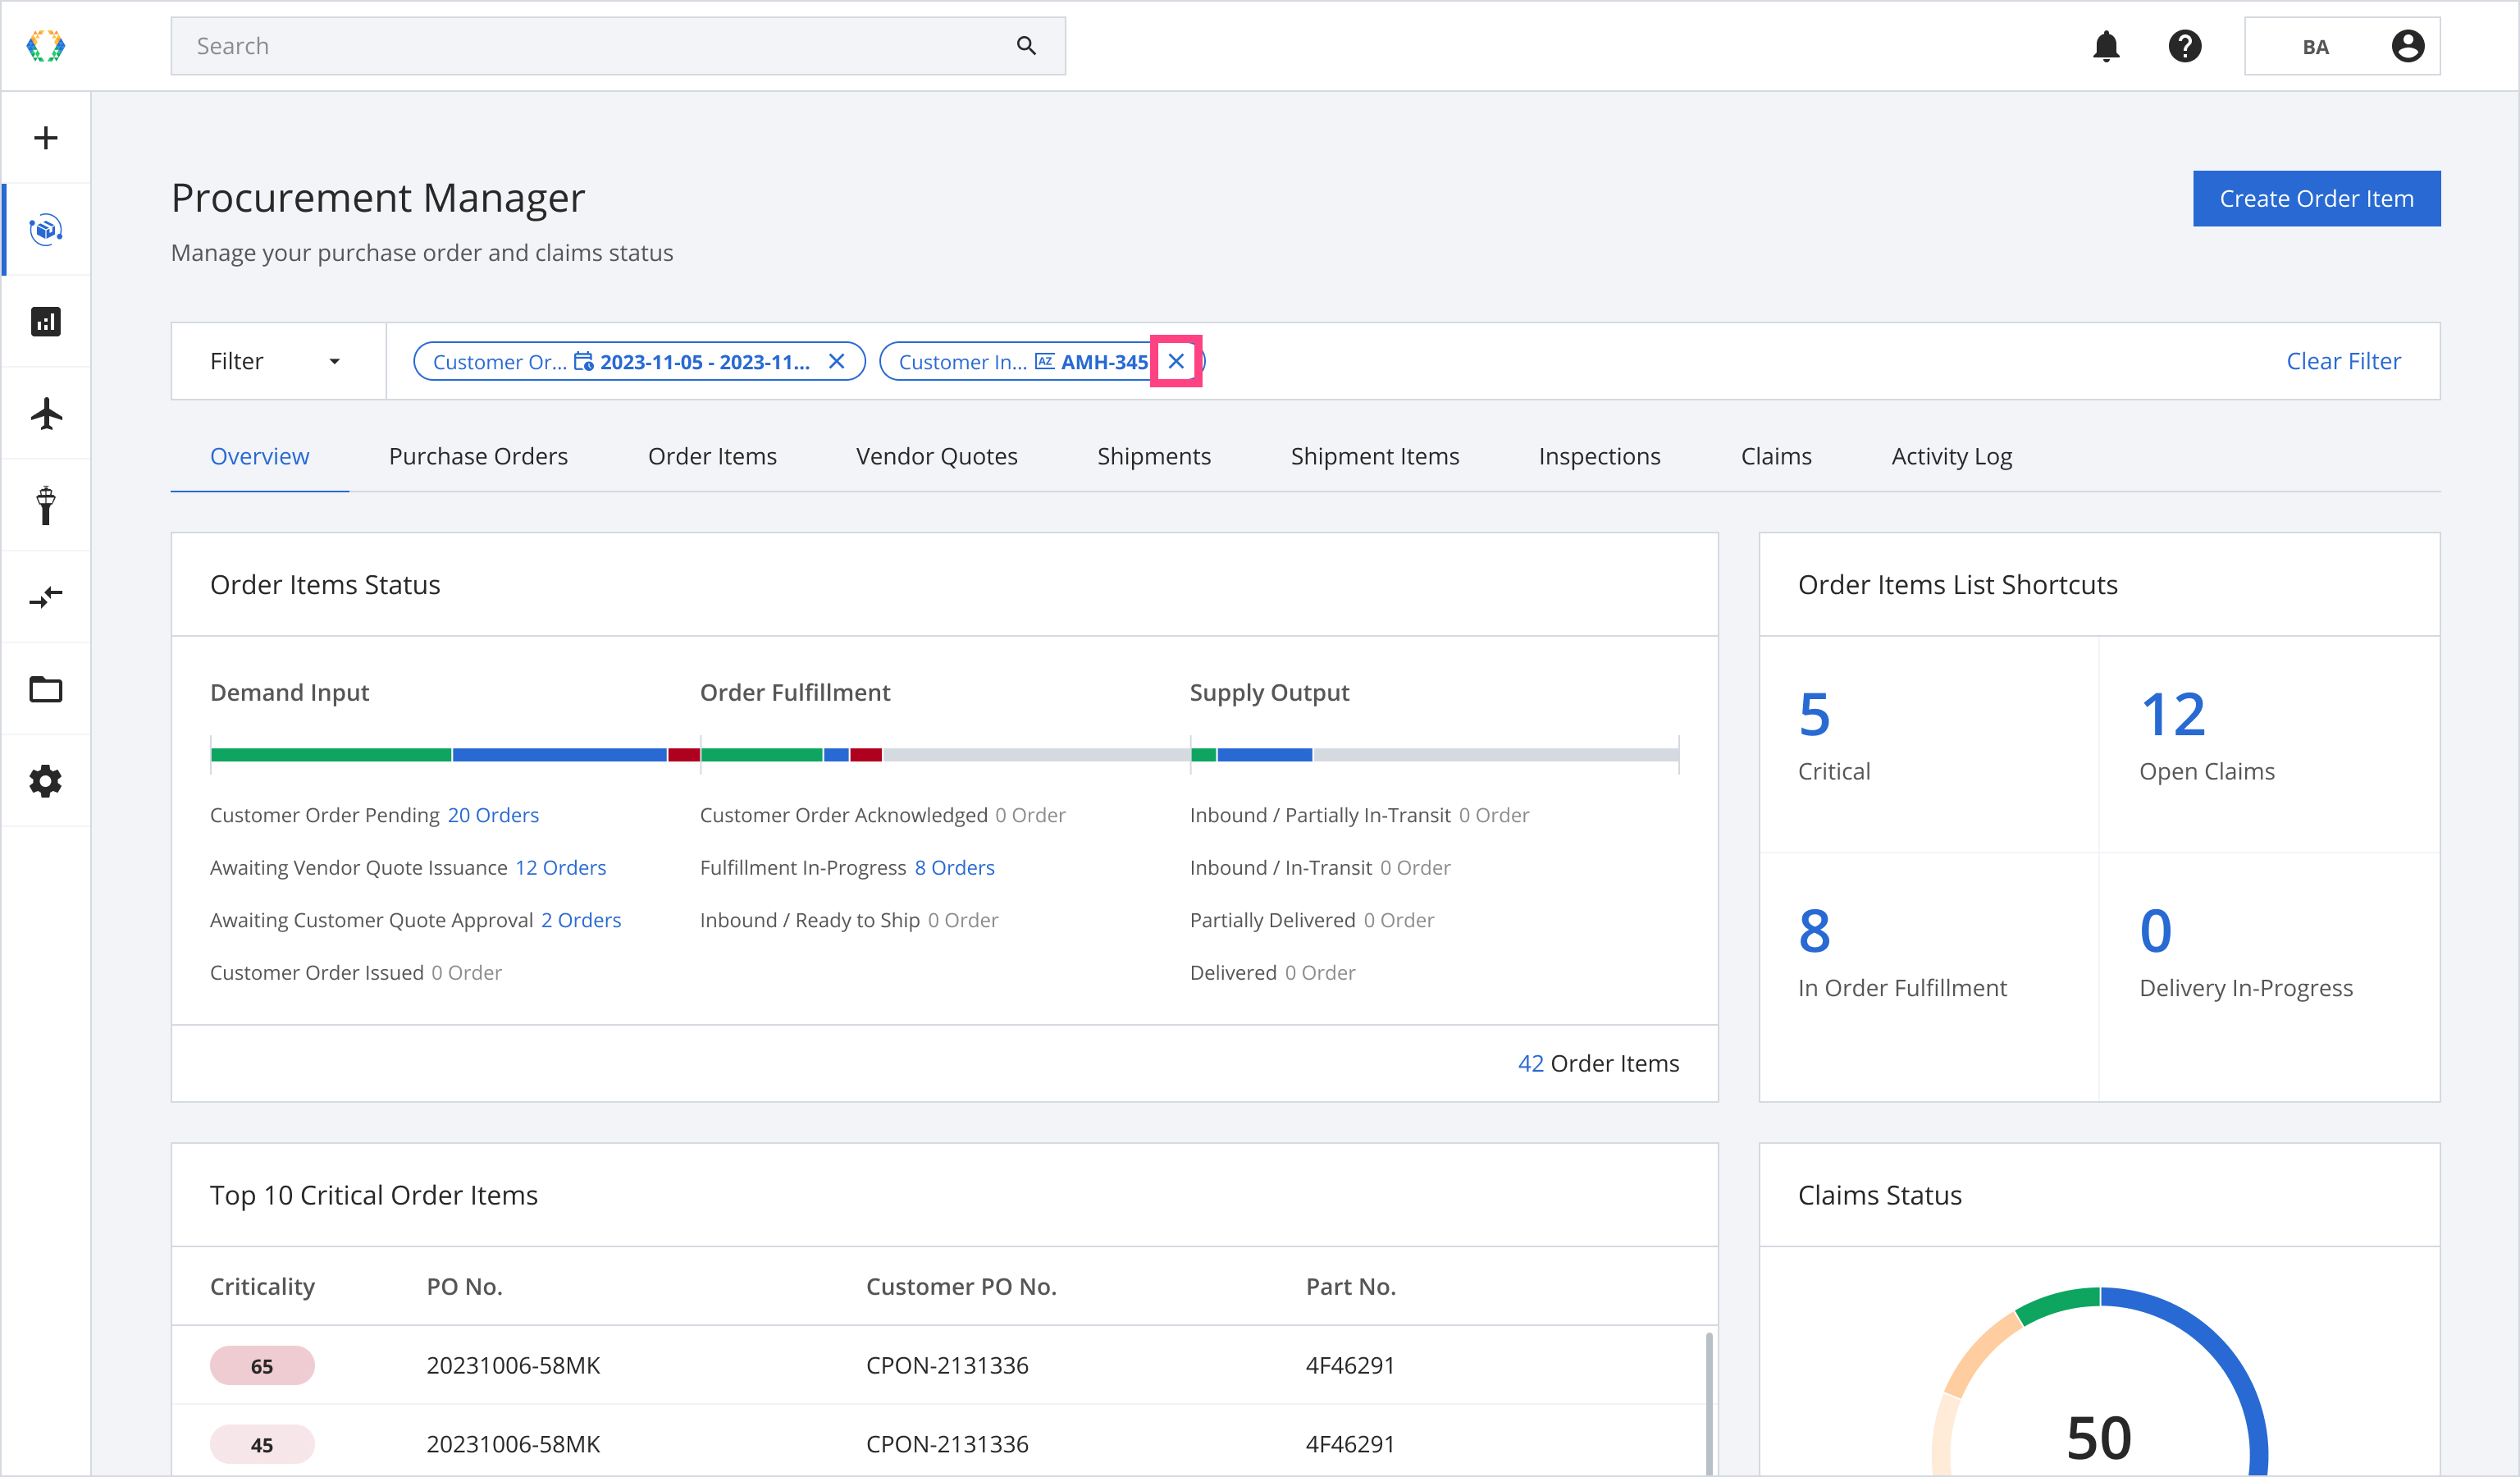
Step 2: Your applied filters will change the results shown across the entire Procurement Manager module, and the applied filters will be shown on the Filter Bar in a 'pill' shape.
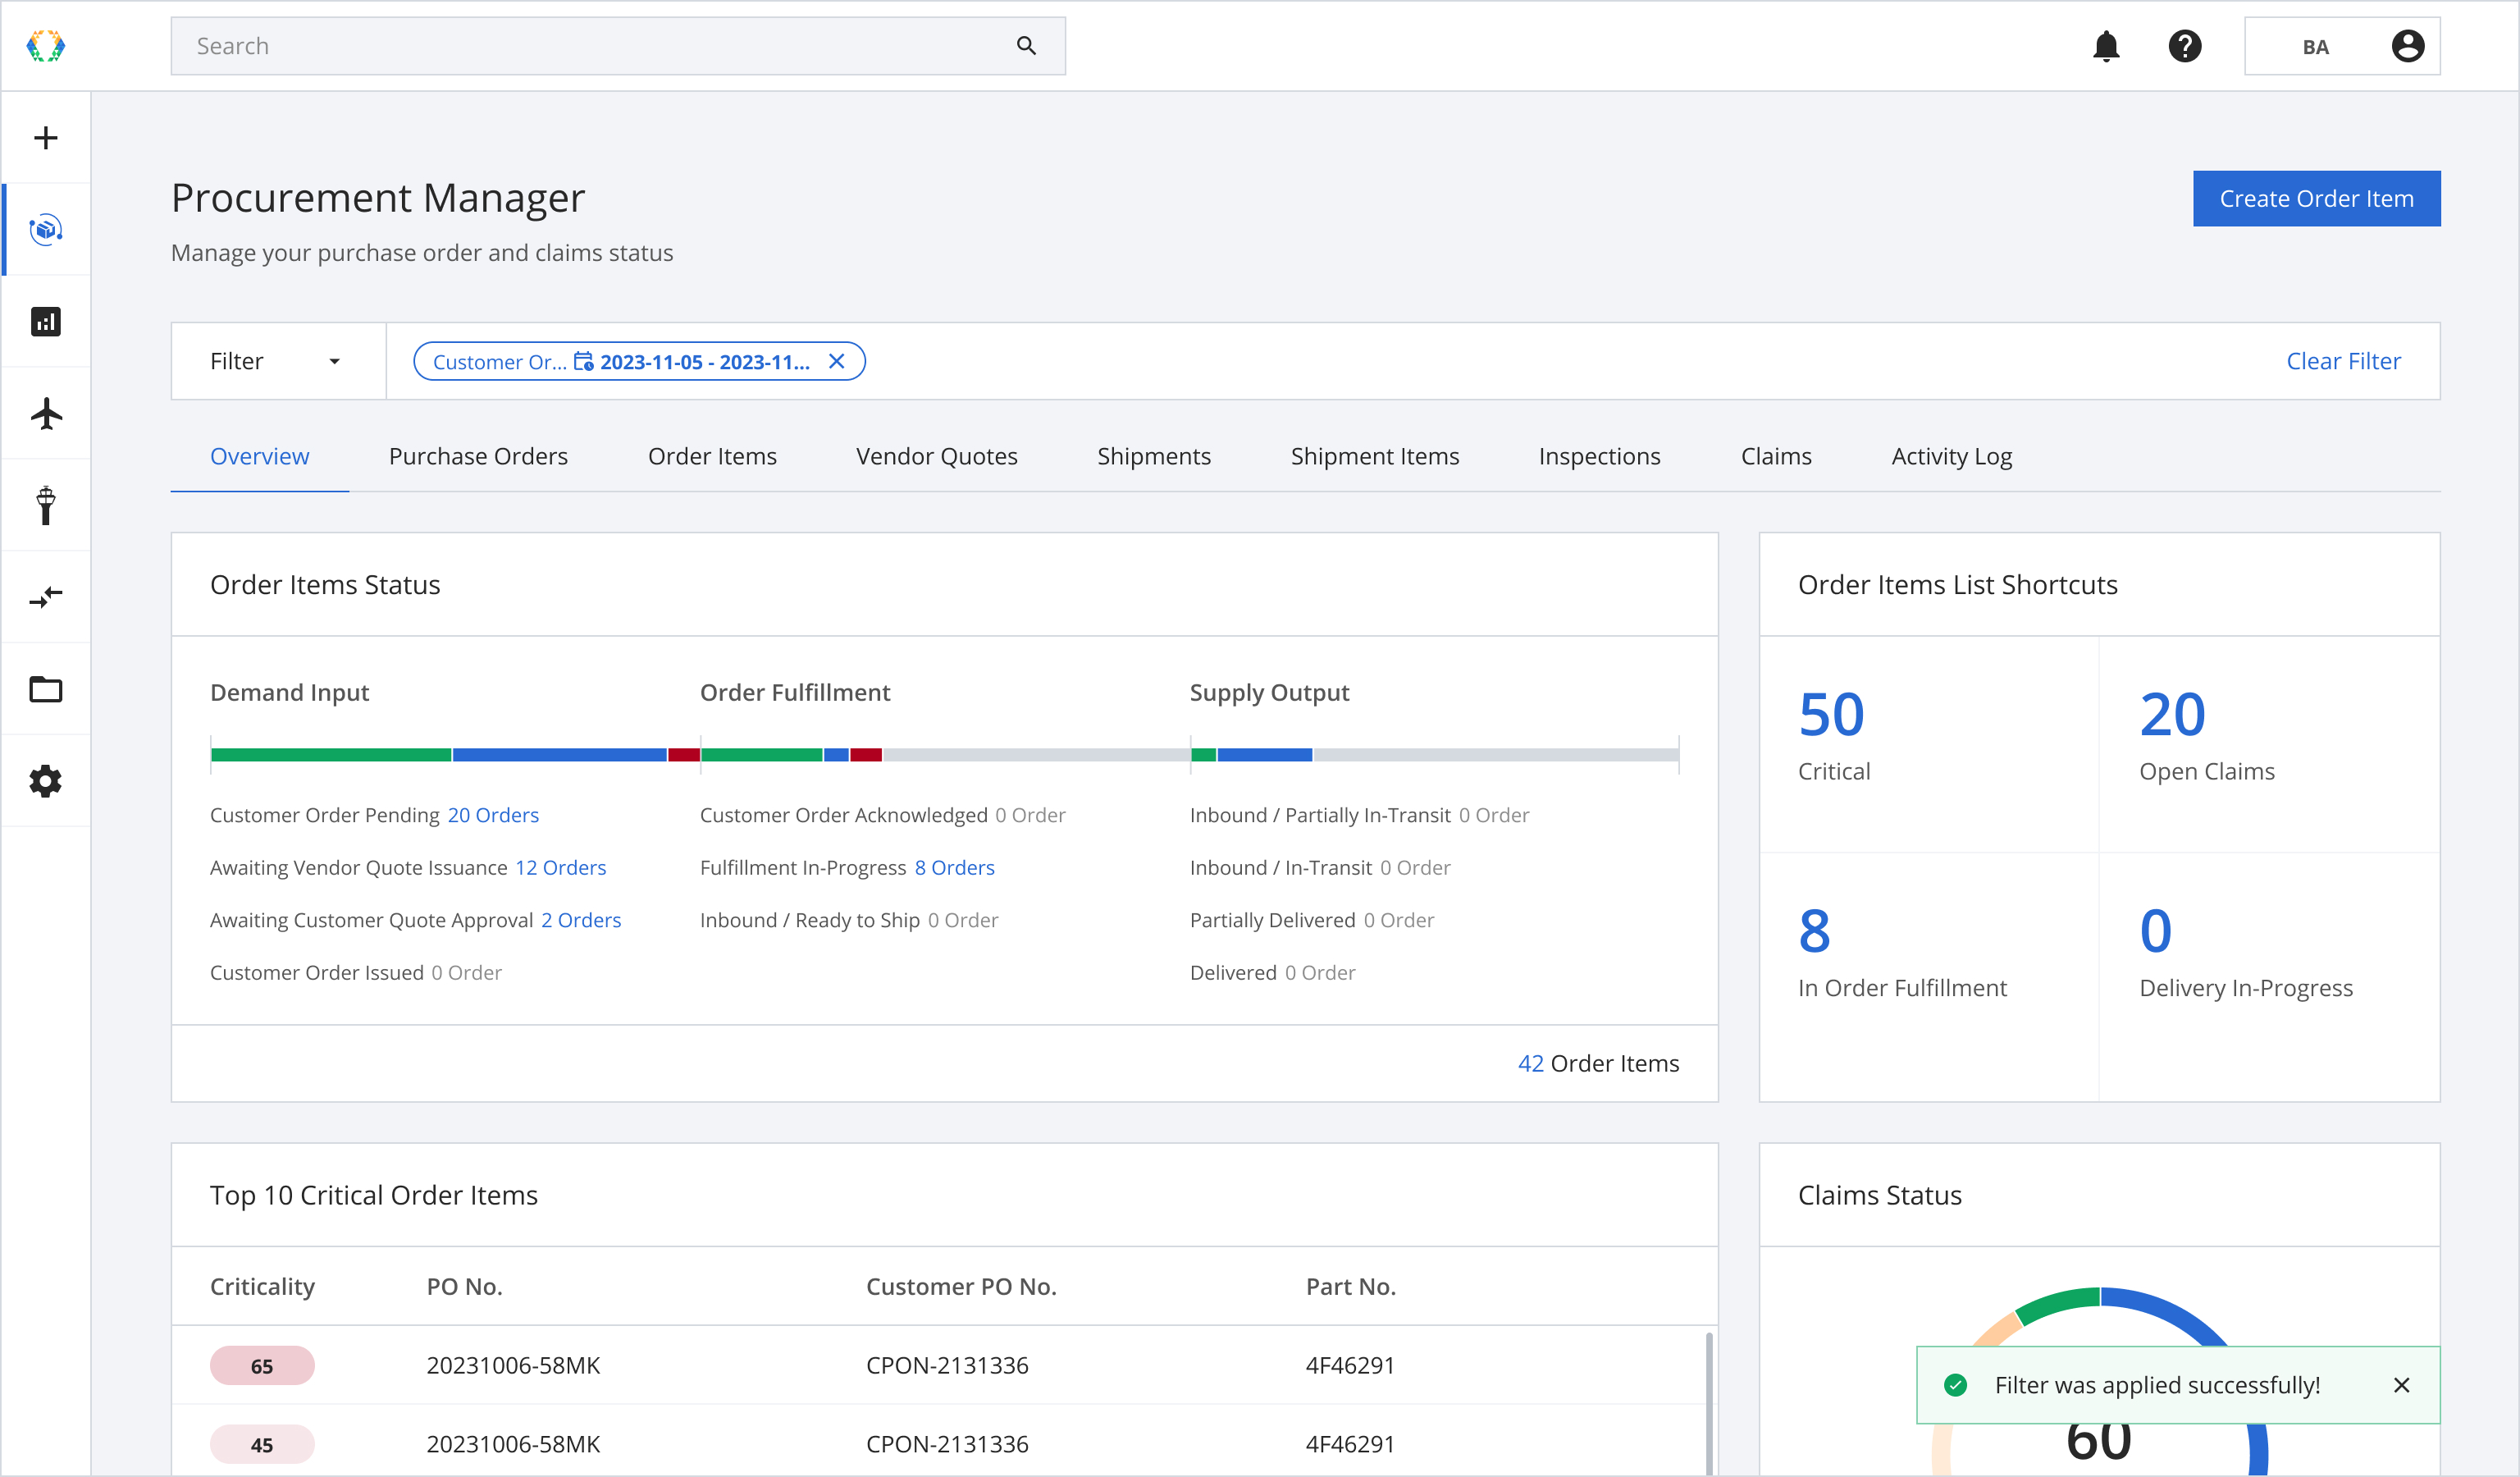
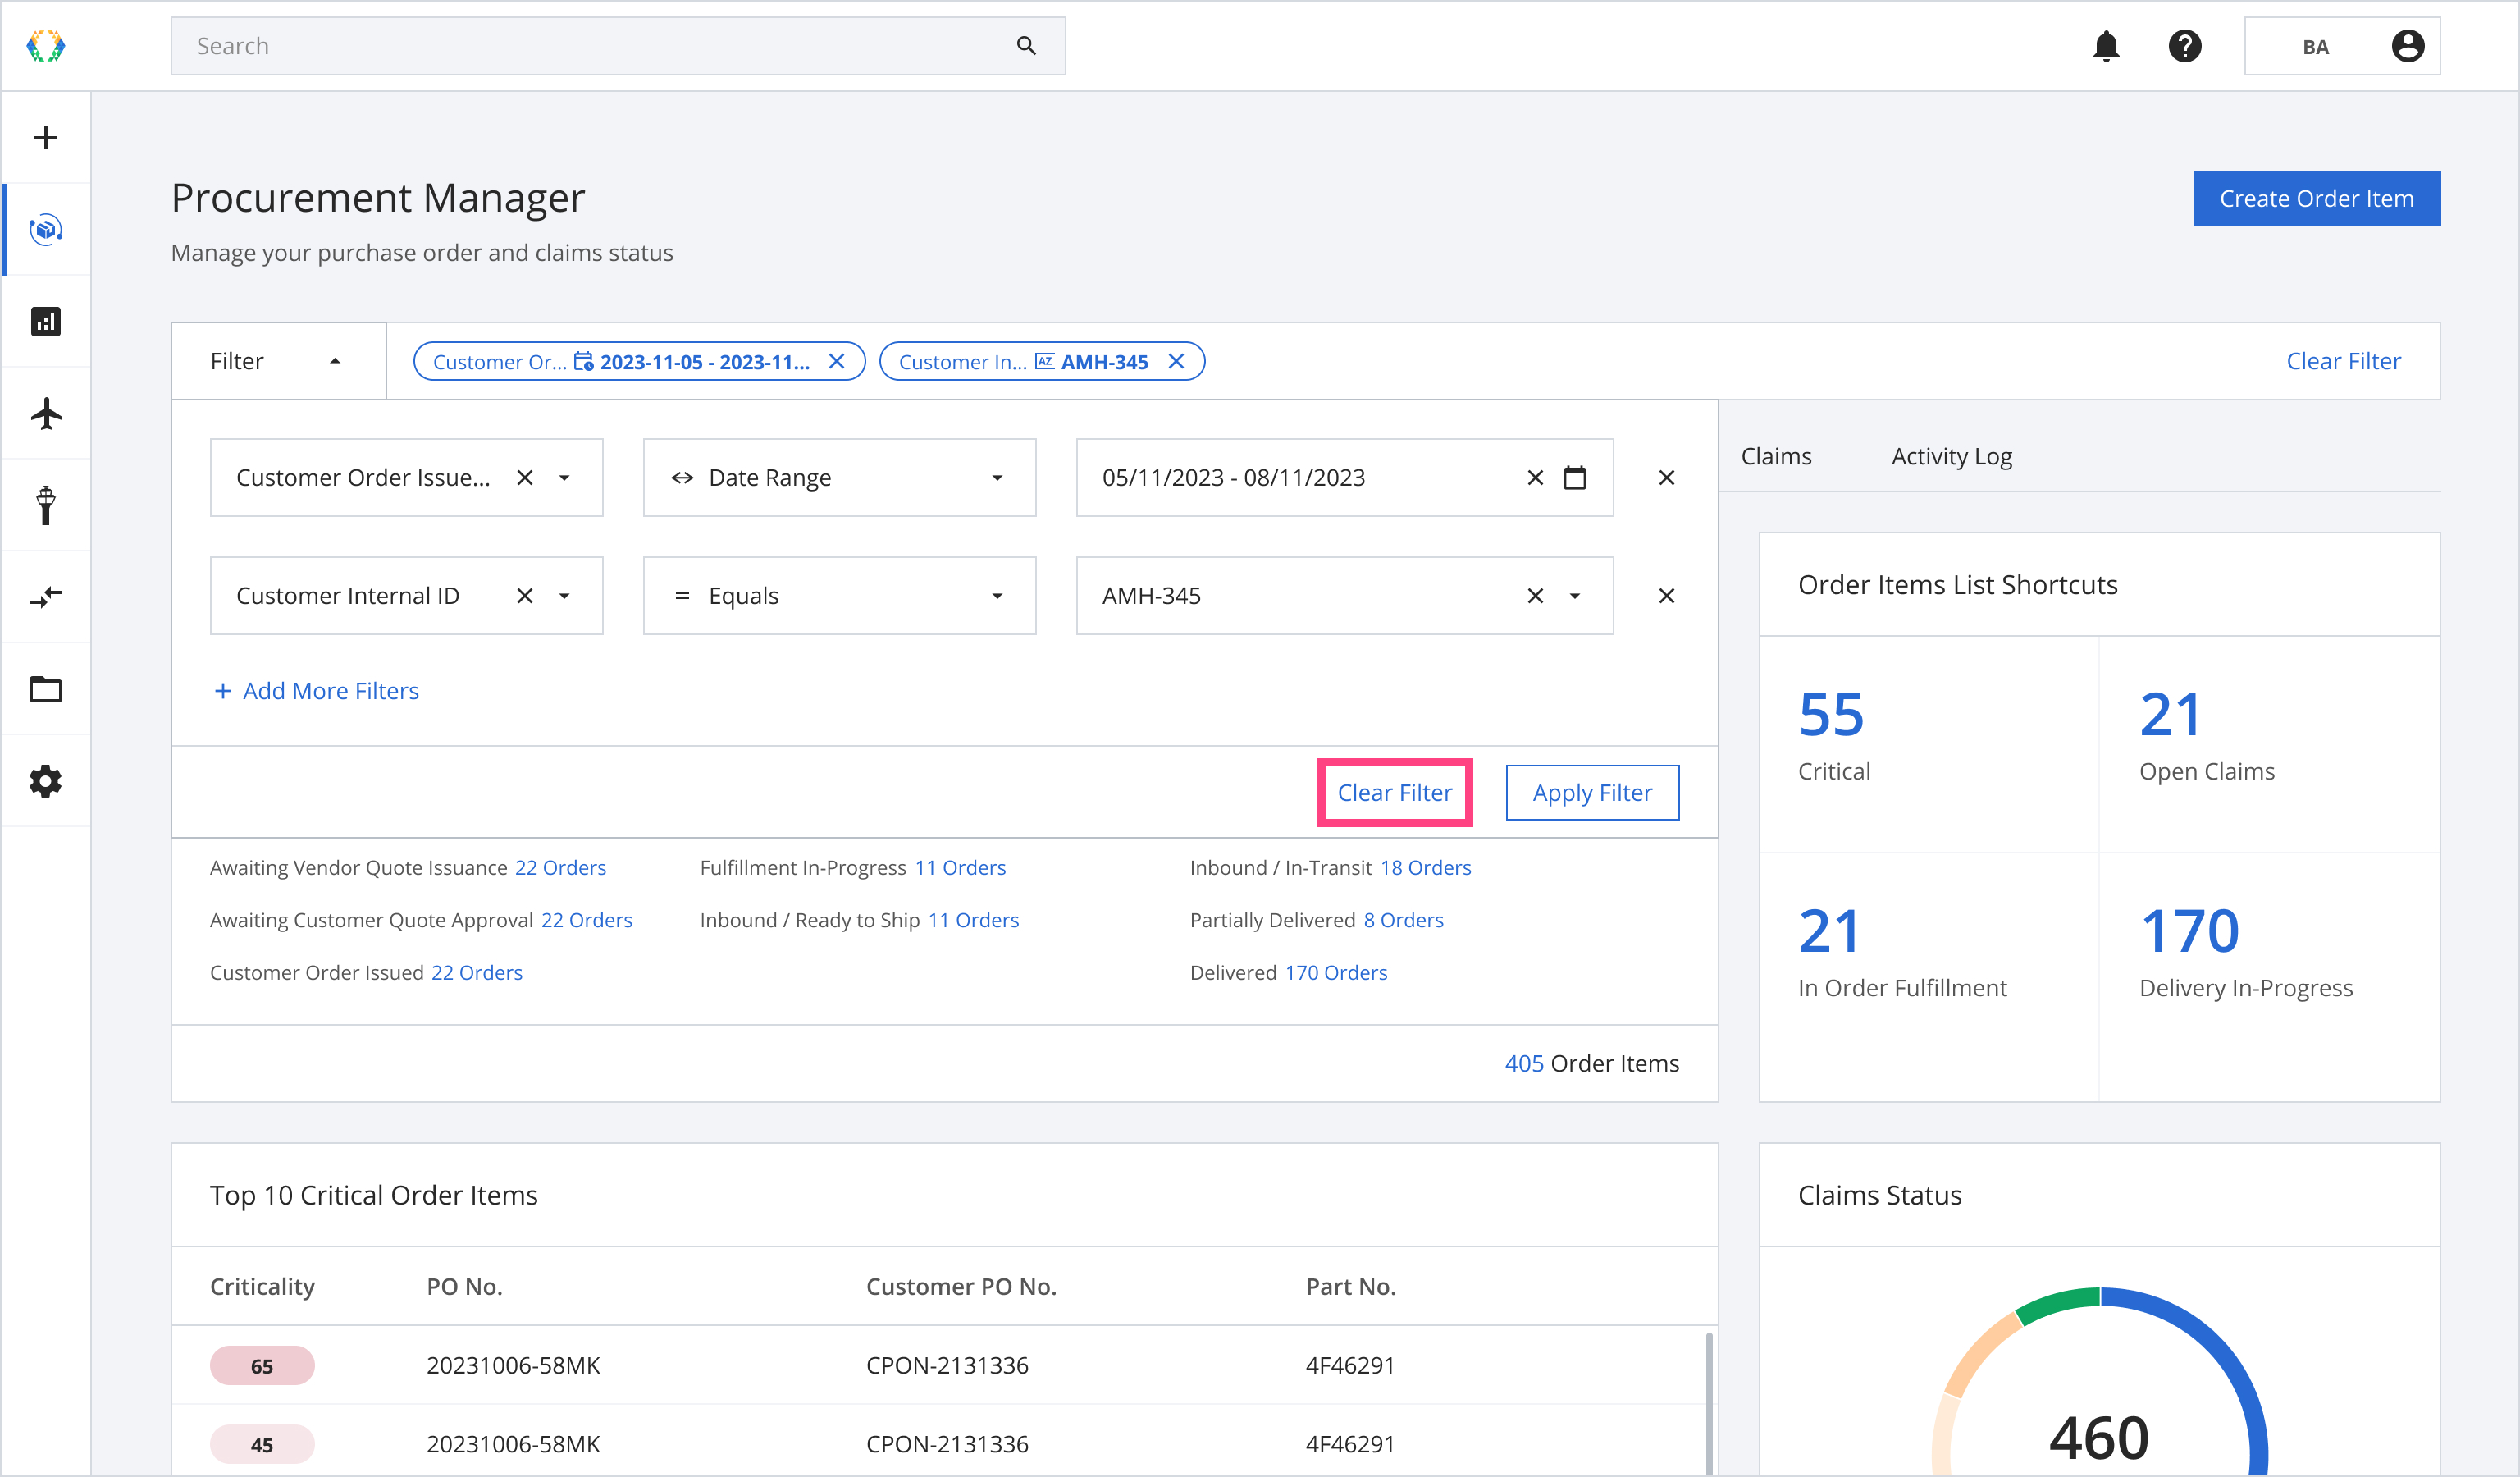
Option 3: Clear All Filters in the Filter Menu
Step 1: You can clear all applied the filters in the filter menu by clicking 'Clear Filter'.
This option instantly clears all of the filters.
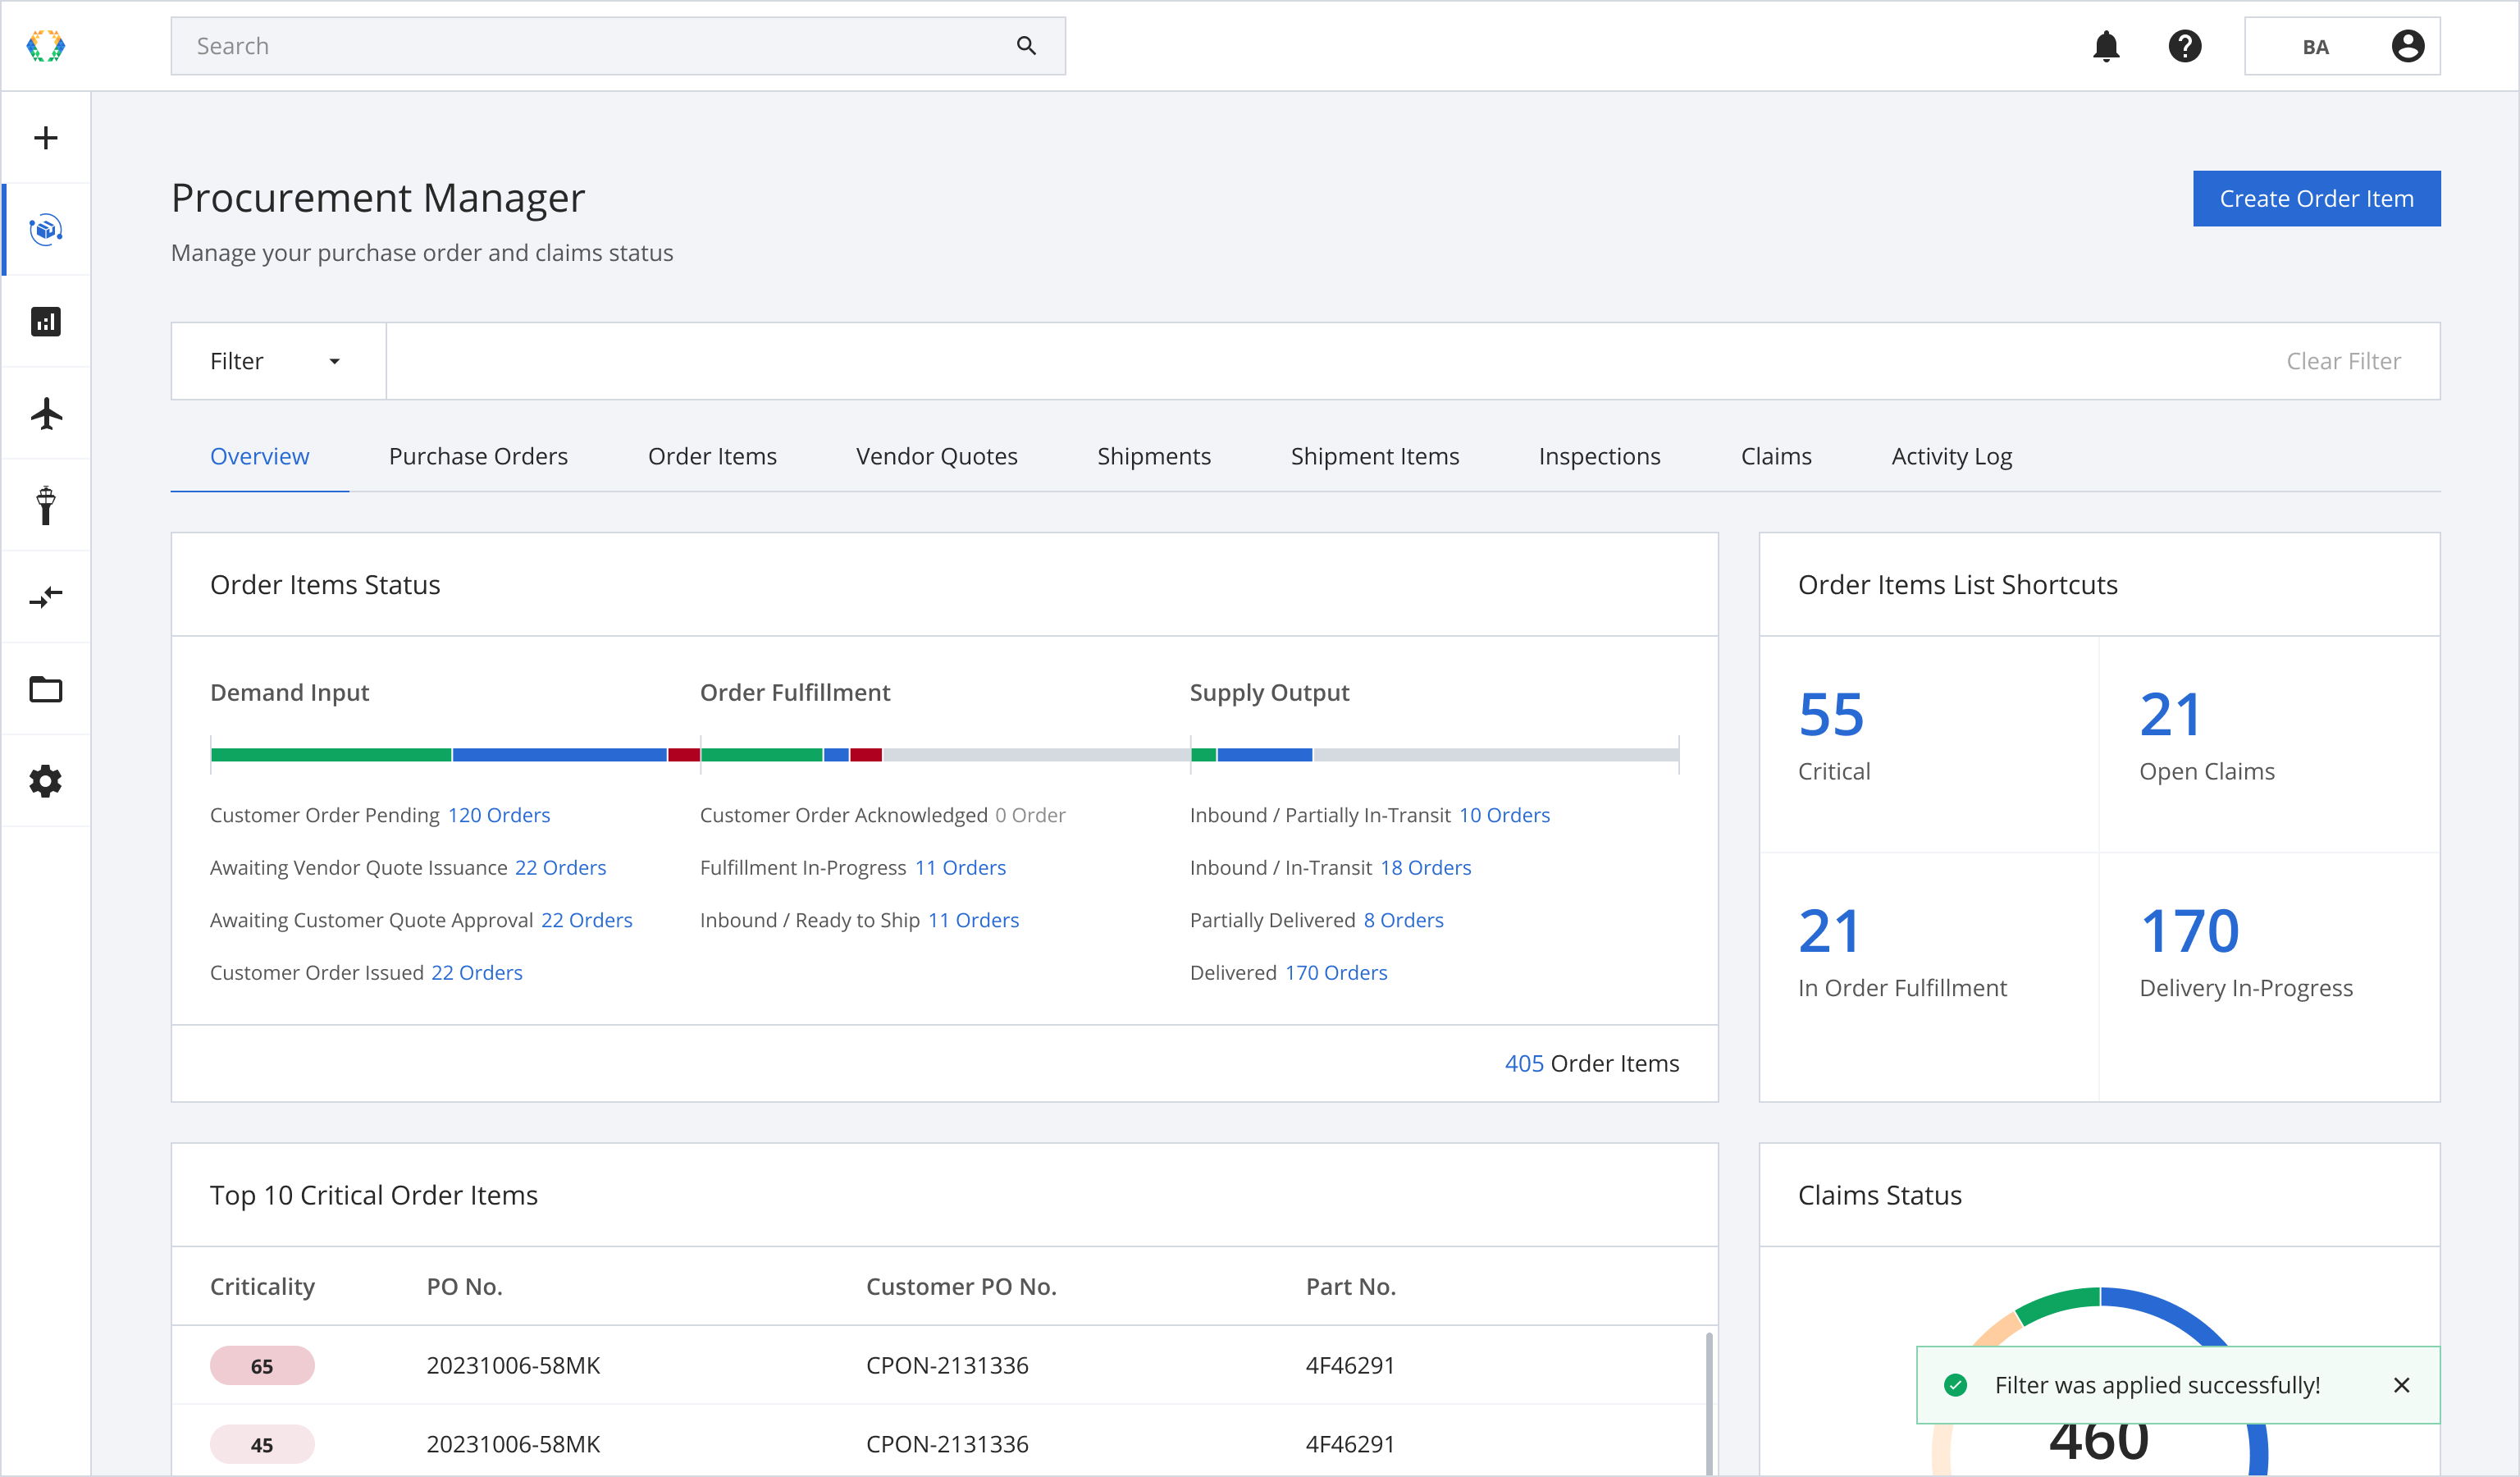
Step 2: Your applied filters will be cleared and no filters will be applied.
Option 4: Clear all filters in the Filter Bar
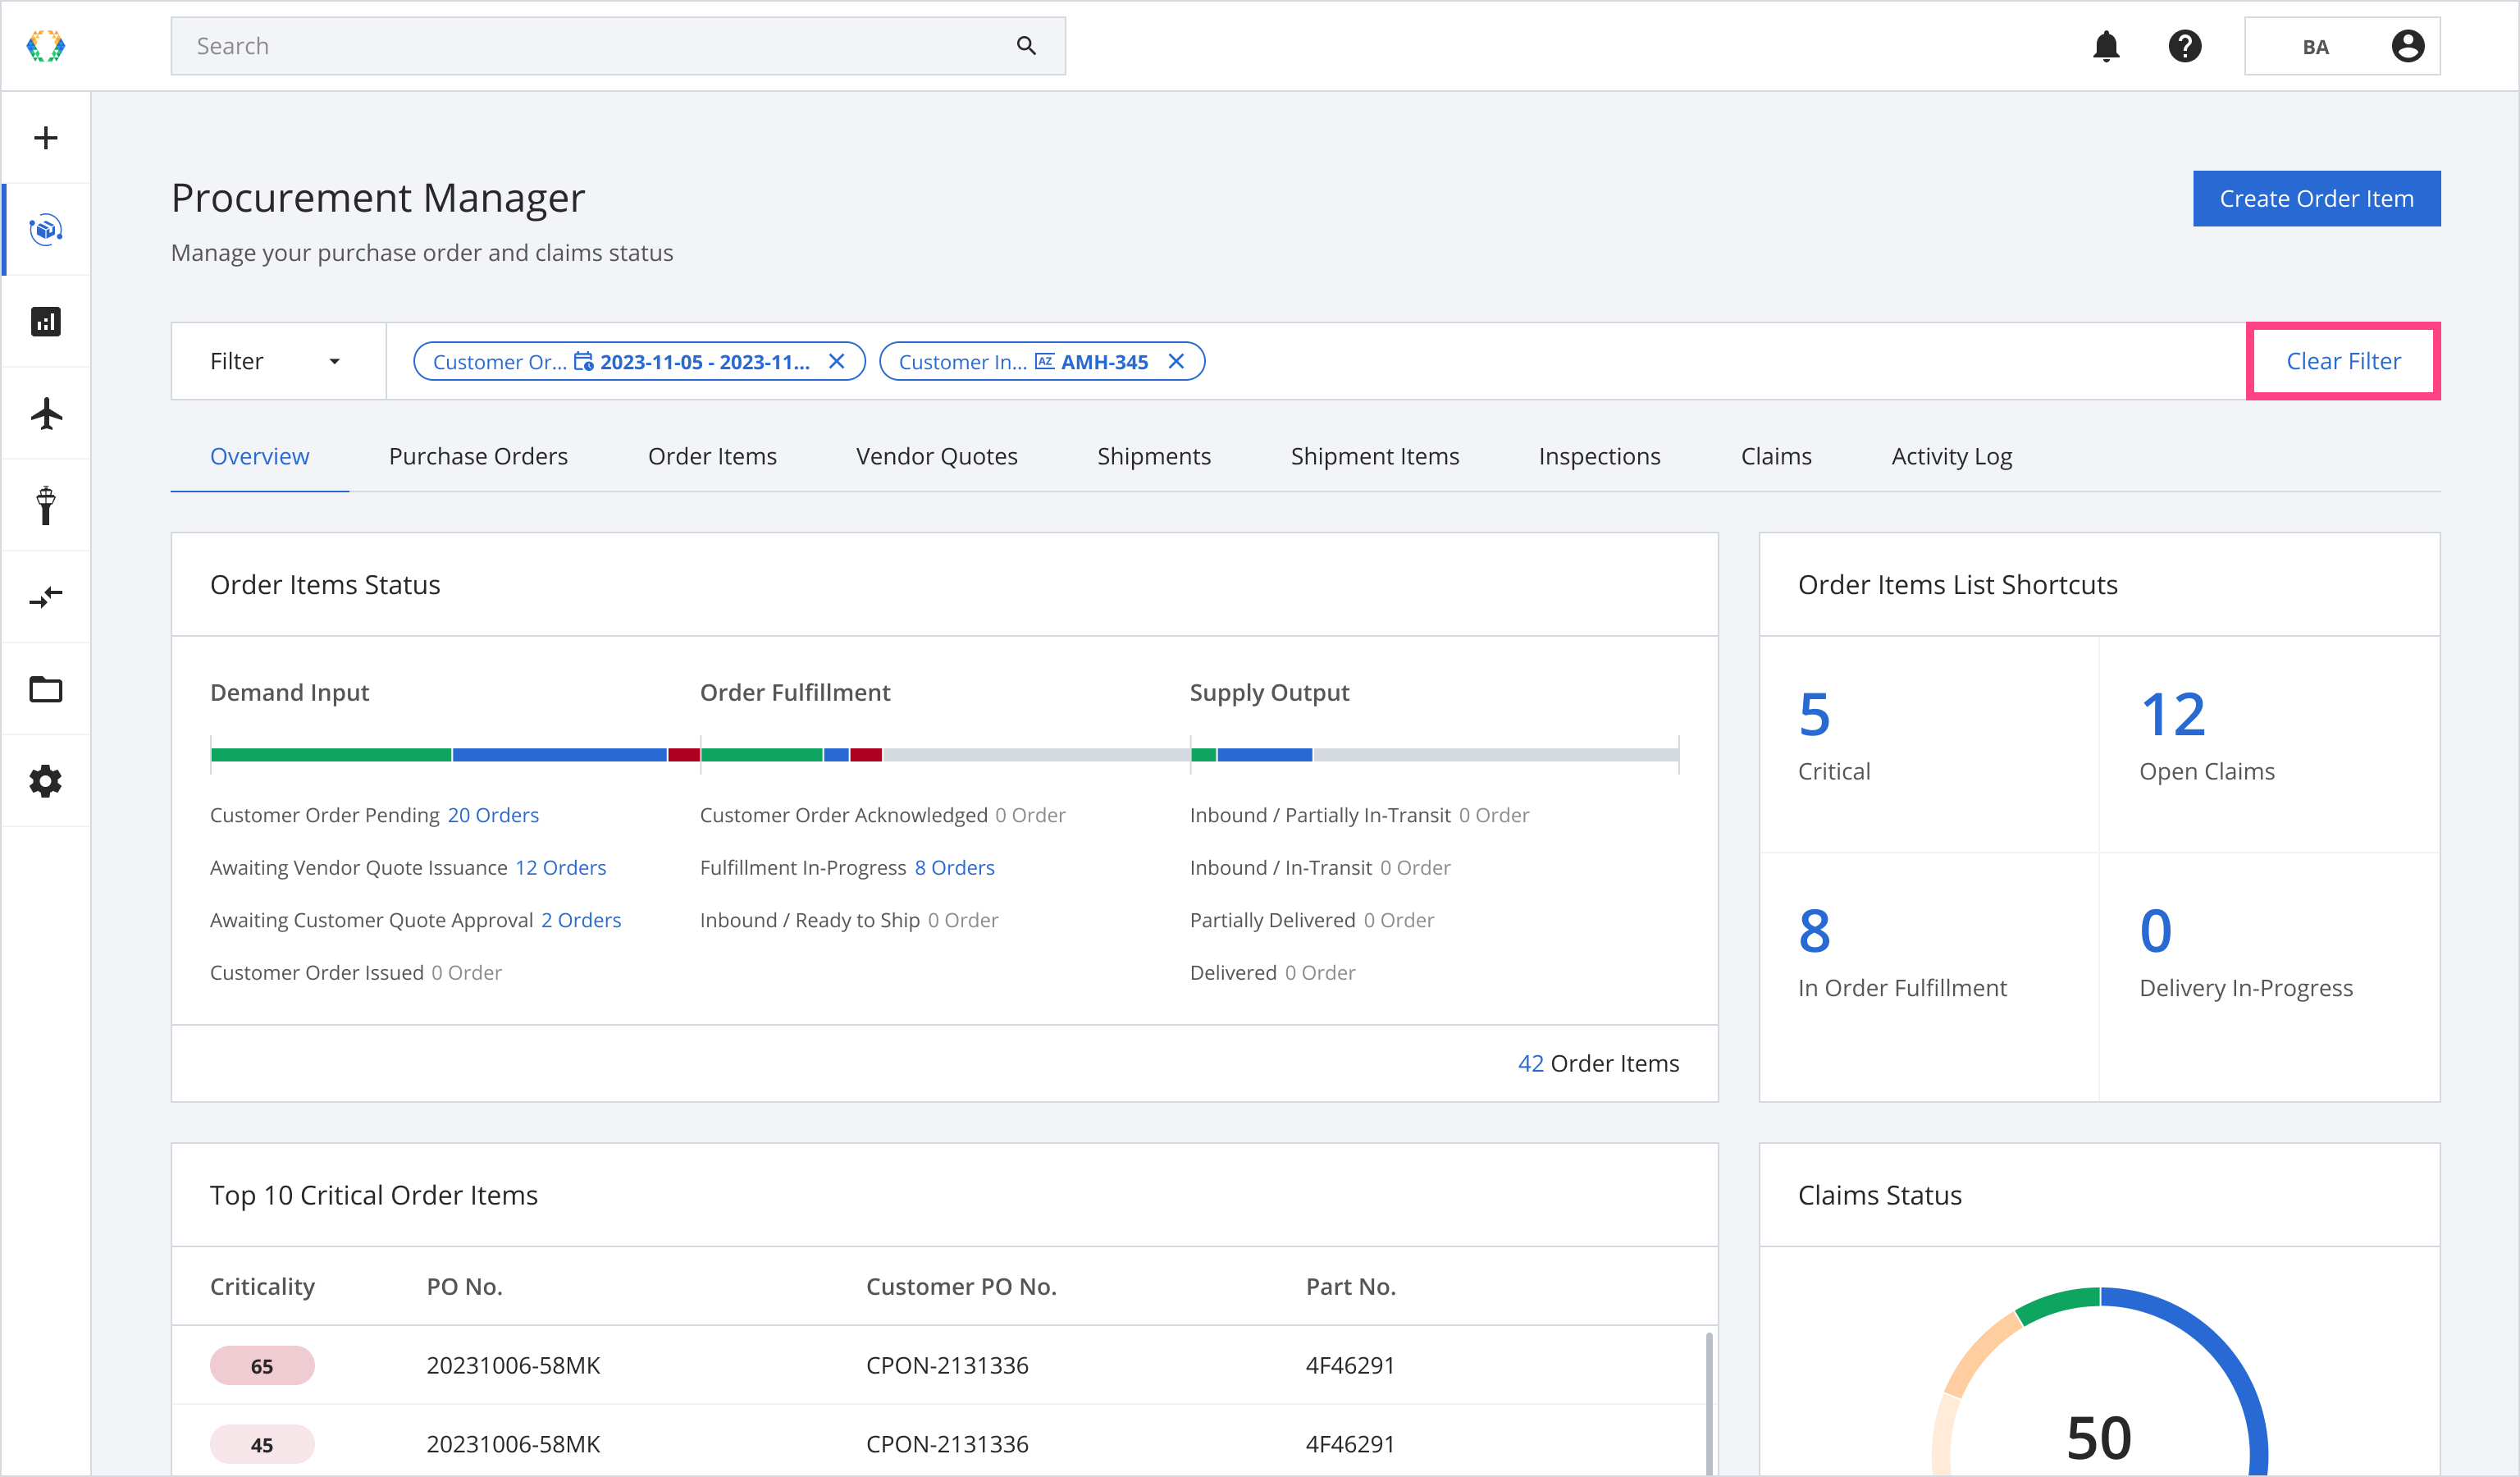
Step 1: You can clear all applied filters in the Filter Bar by clicking 'Clear Filter'.
This option instantly clears all of the filters.
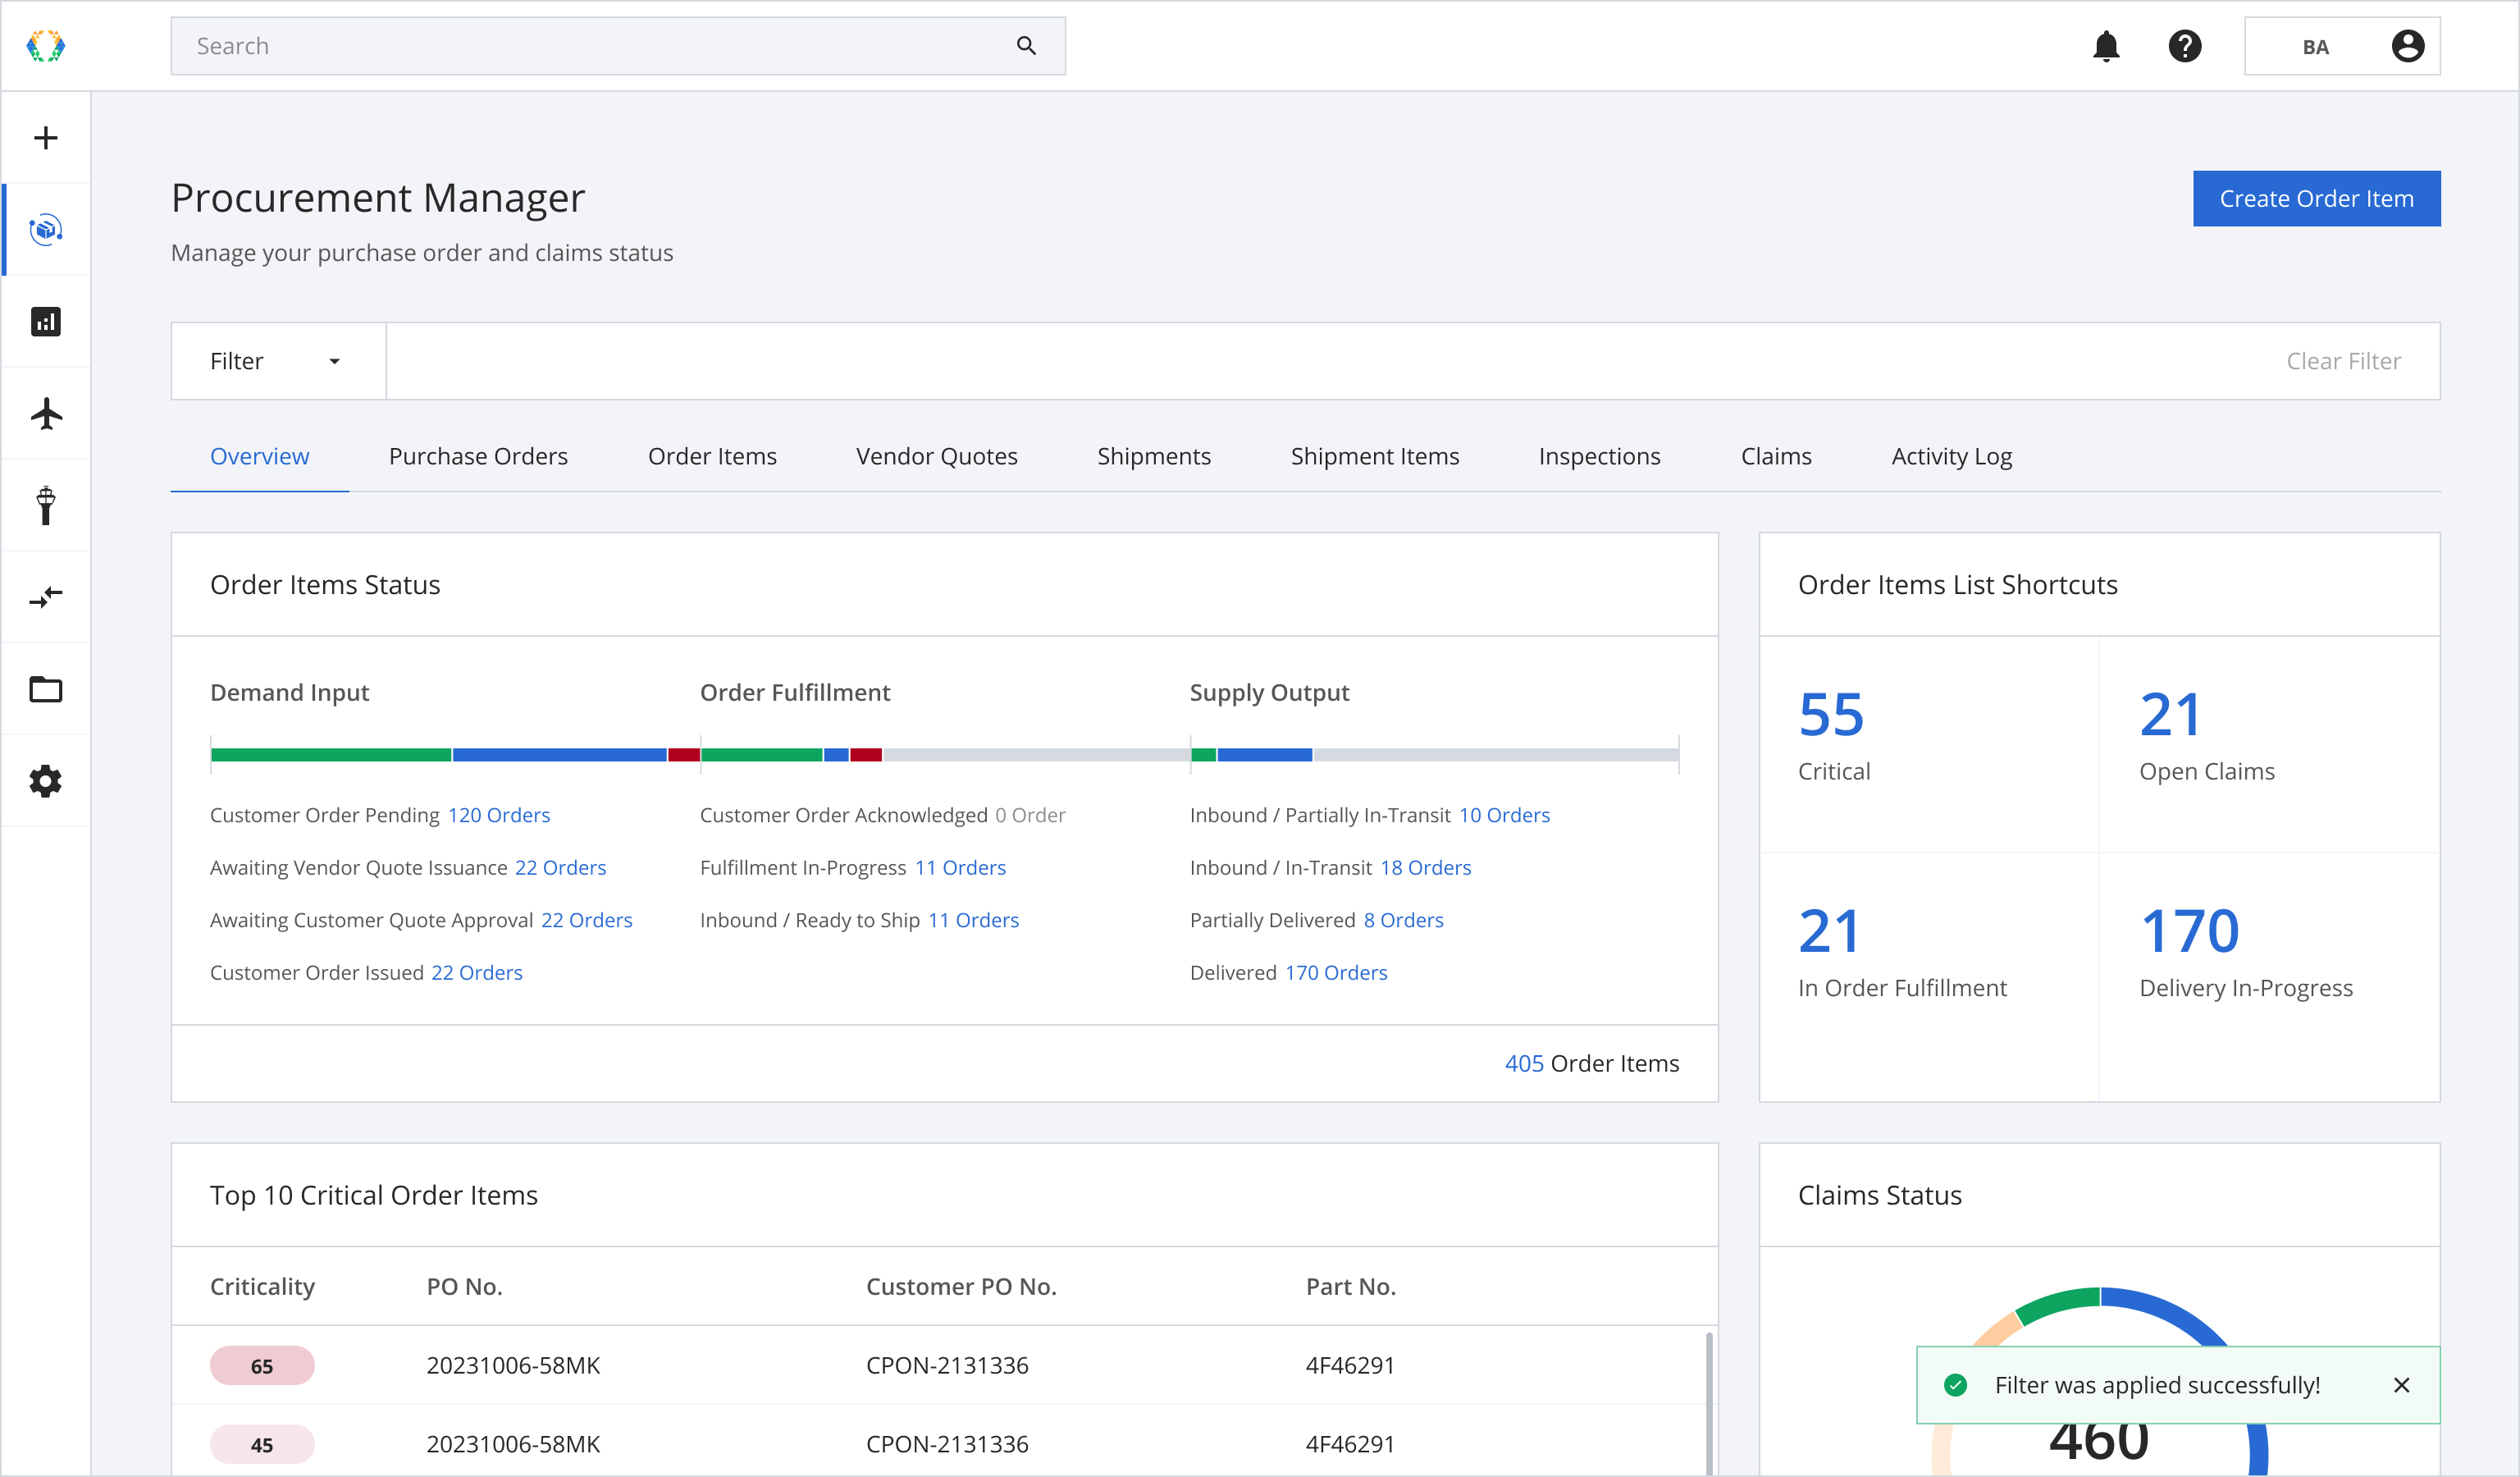
Step 2: Your applied filters will be cleared and no filters will be applied.
Updated 12 months ago