Update Order Details
Getting Started
To manage your repair order details, click 'Order Details' tab.
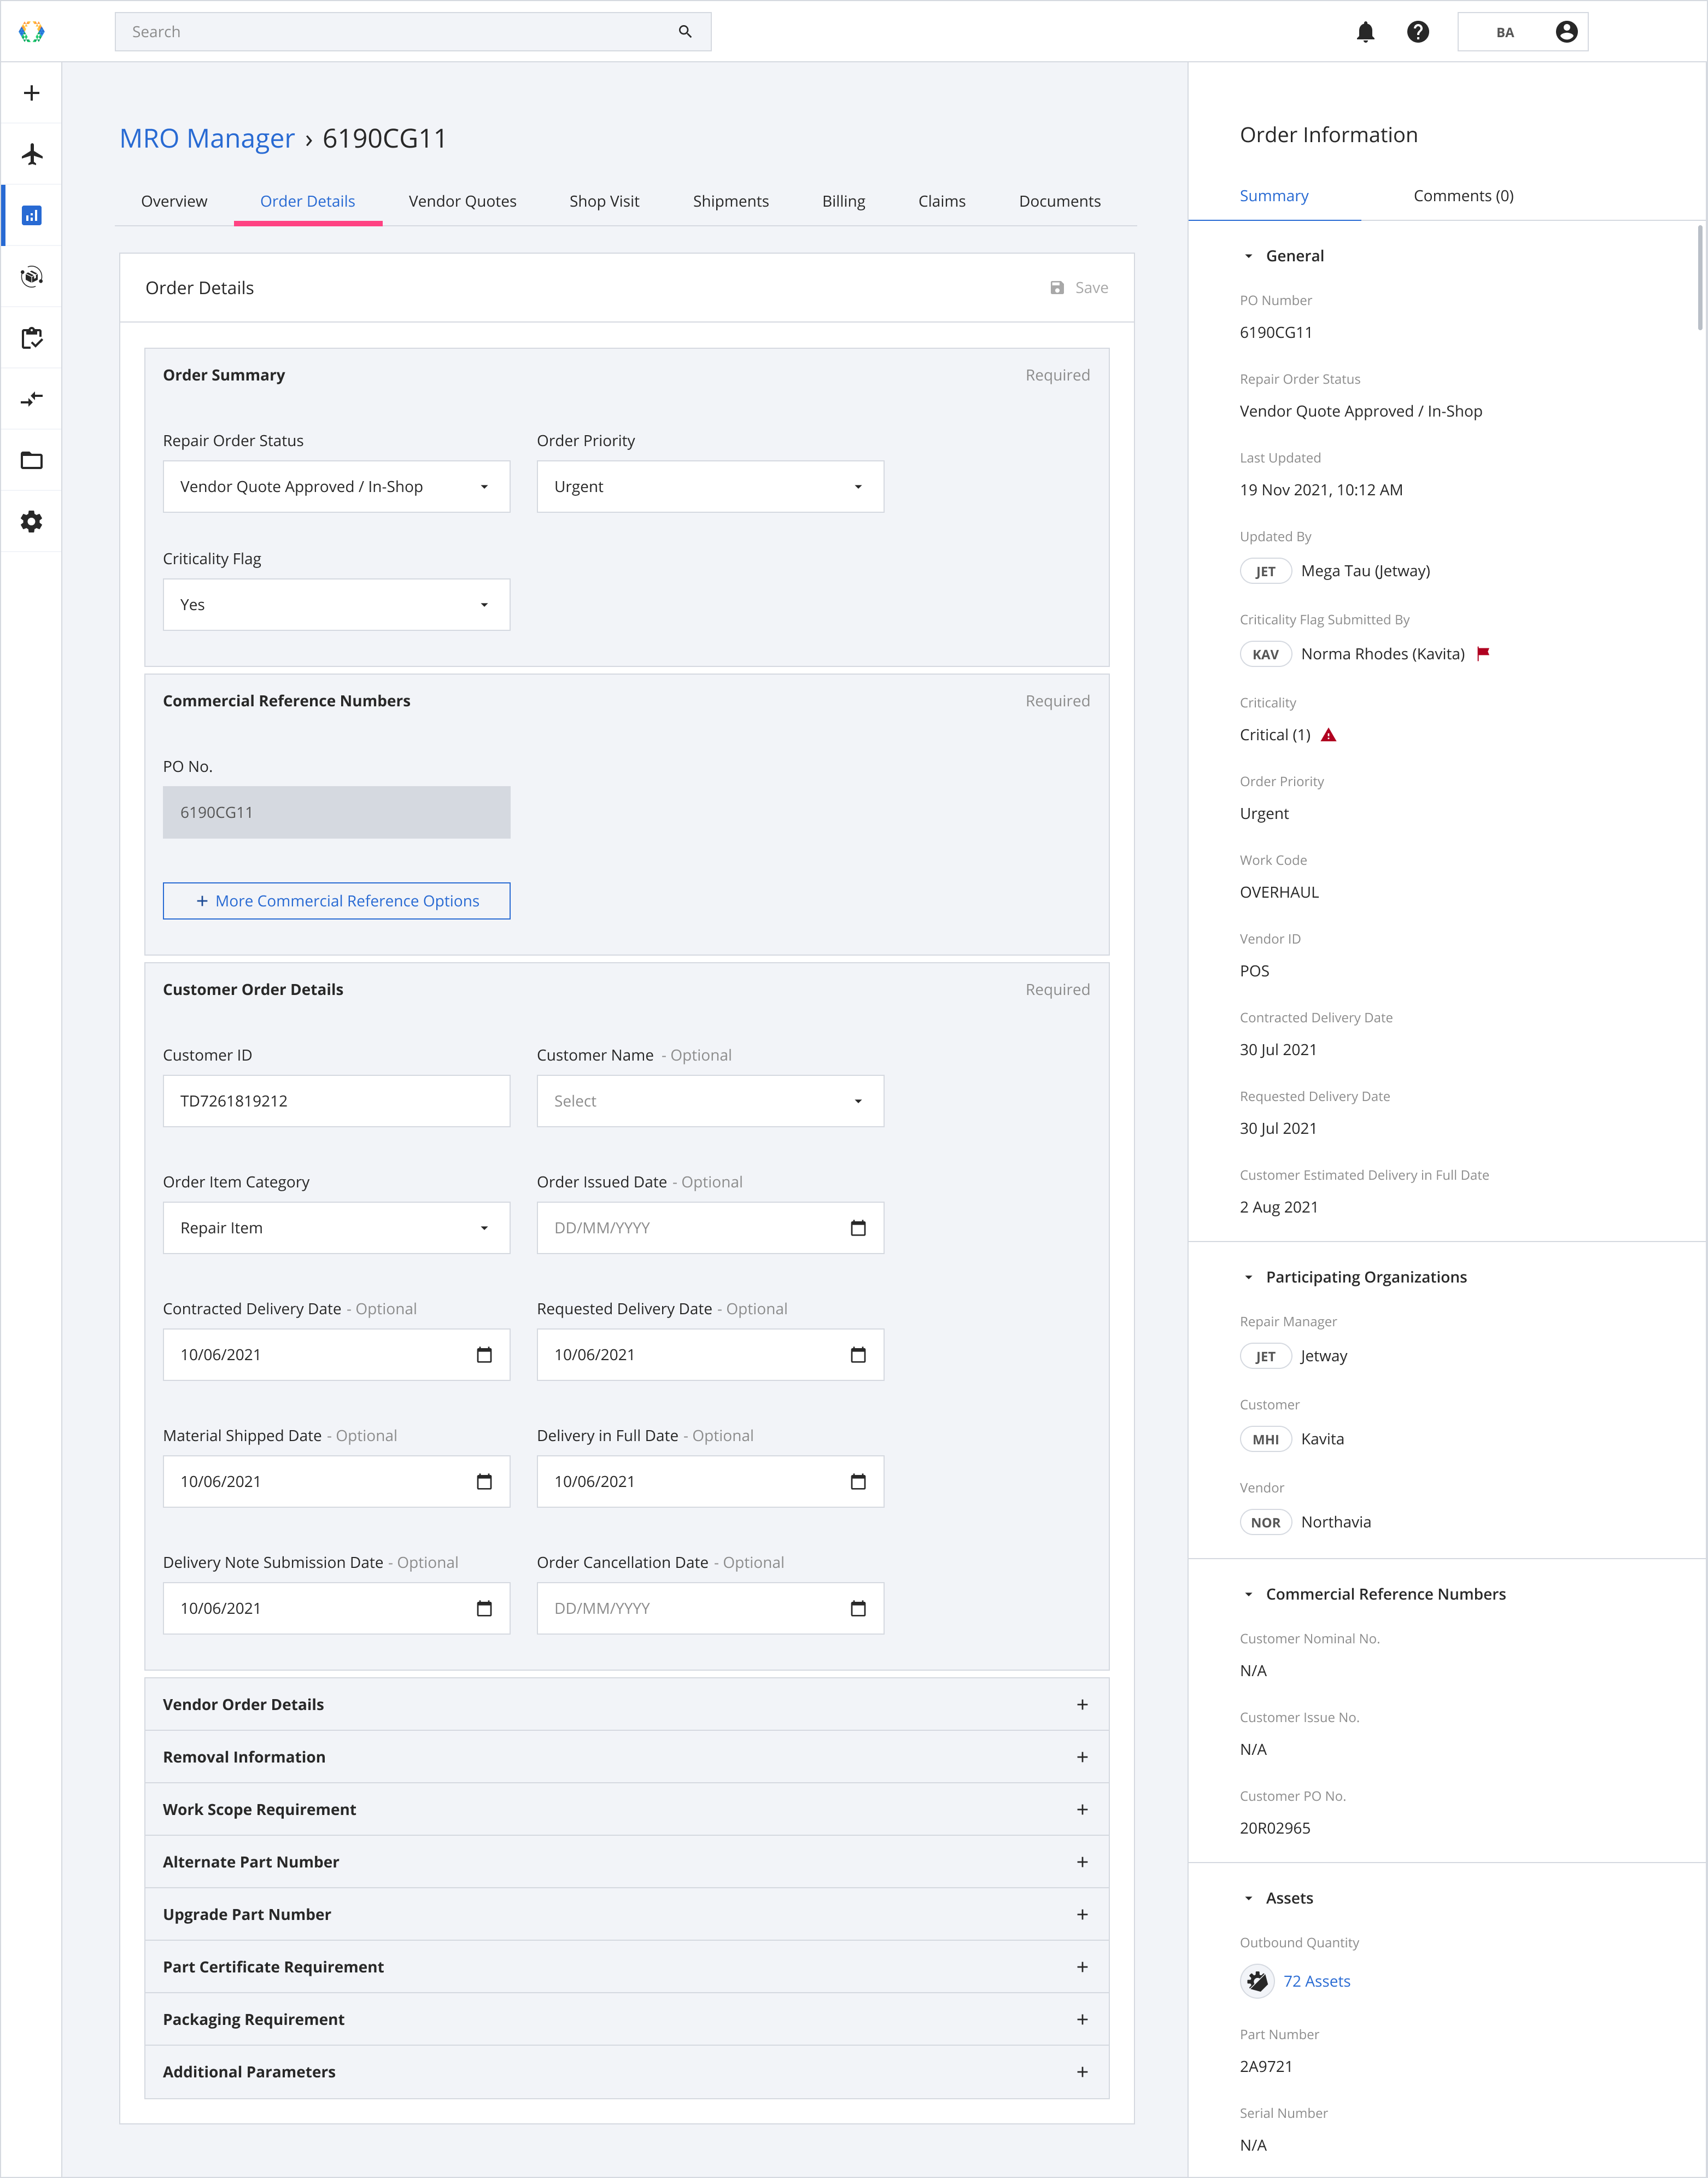
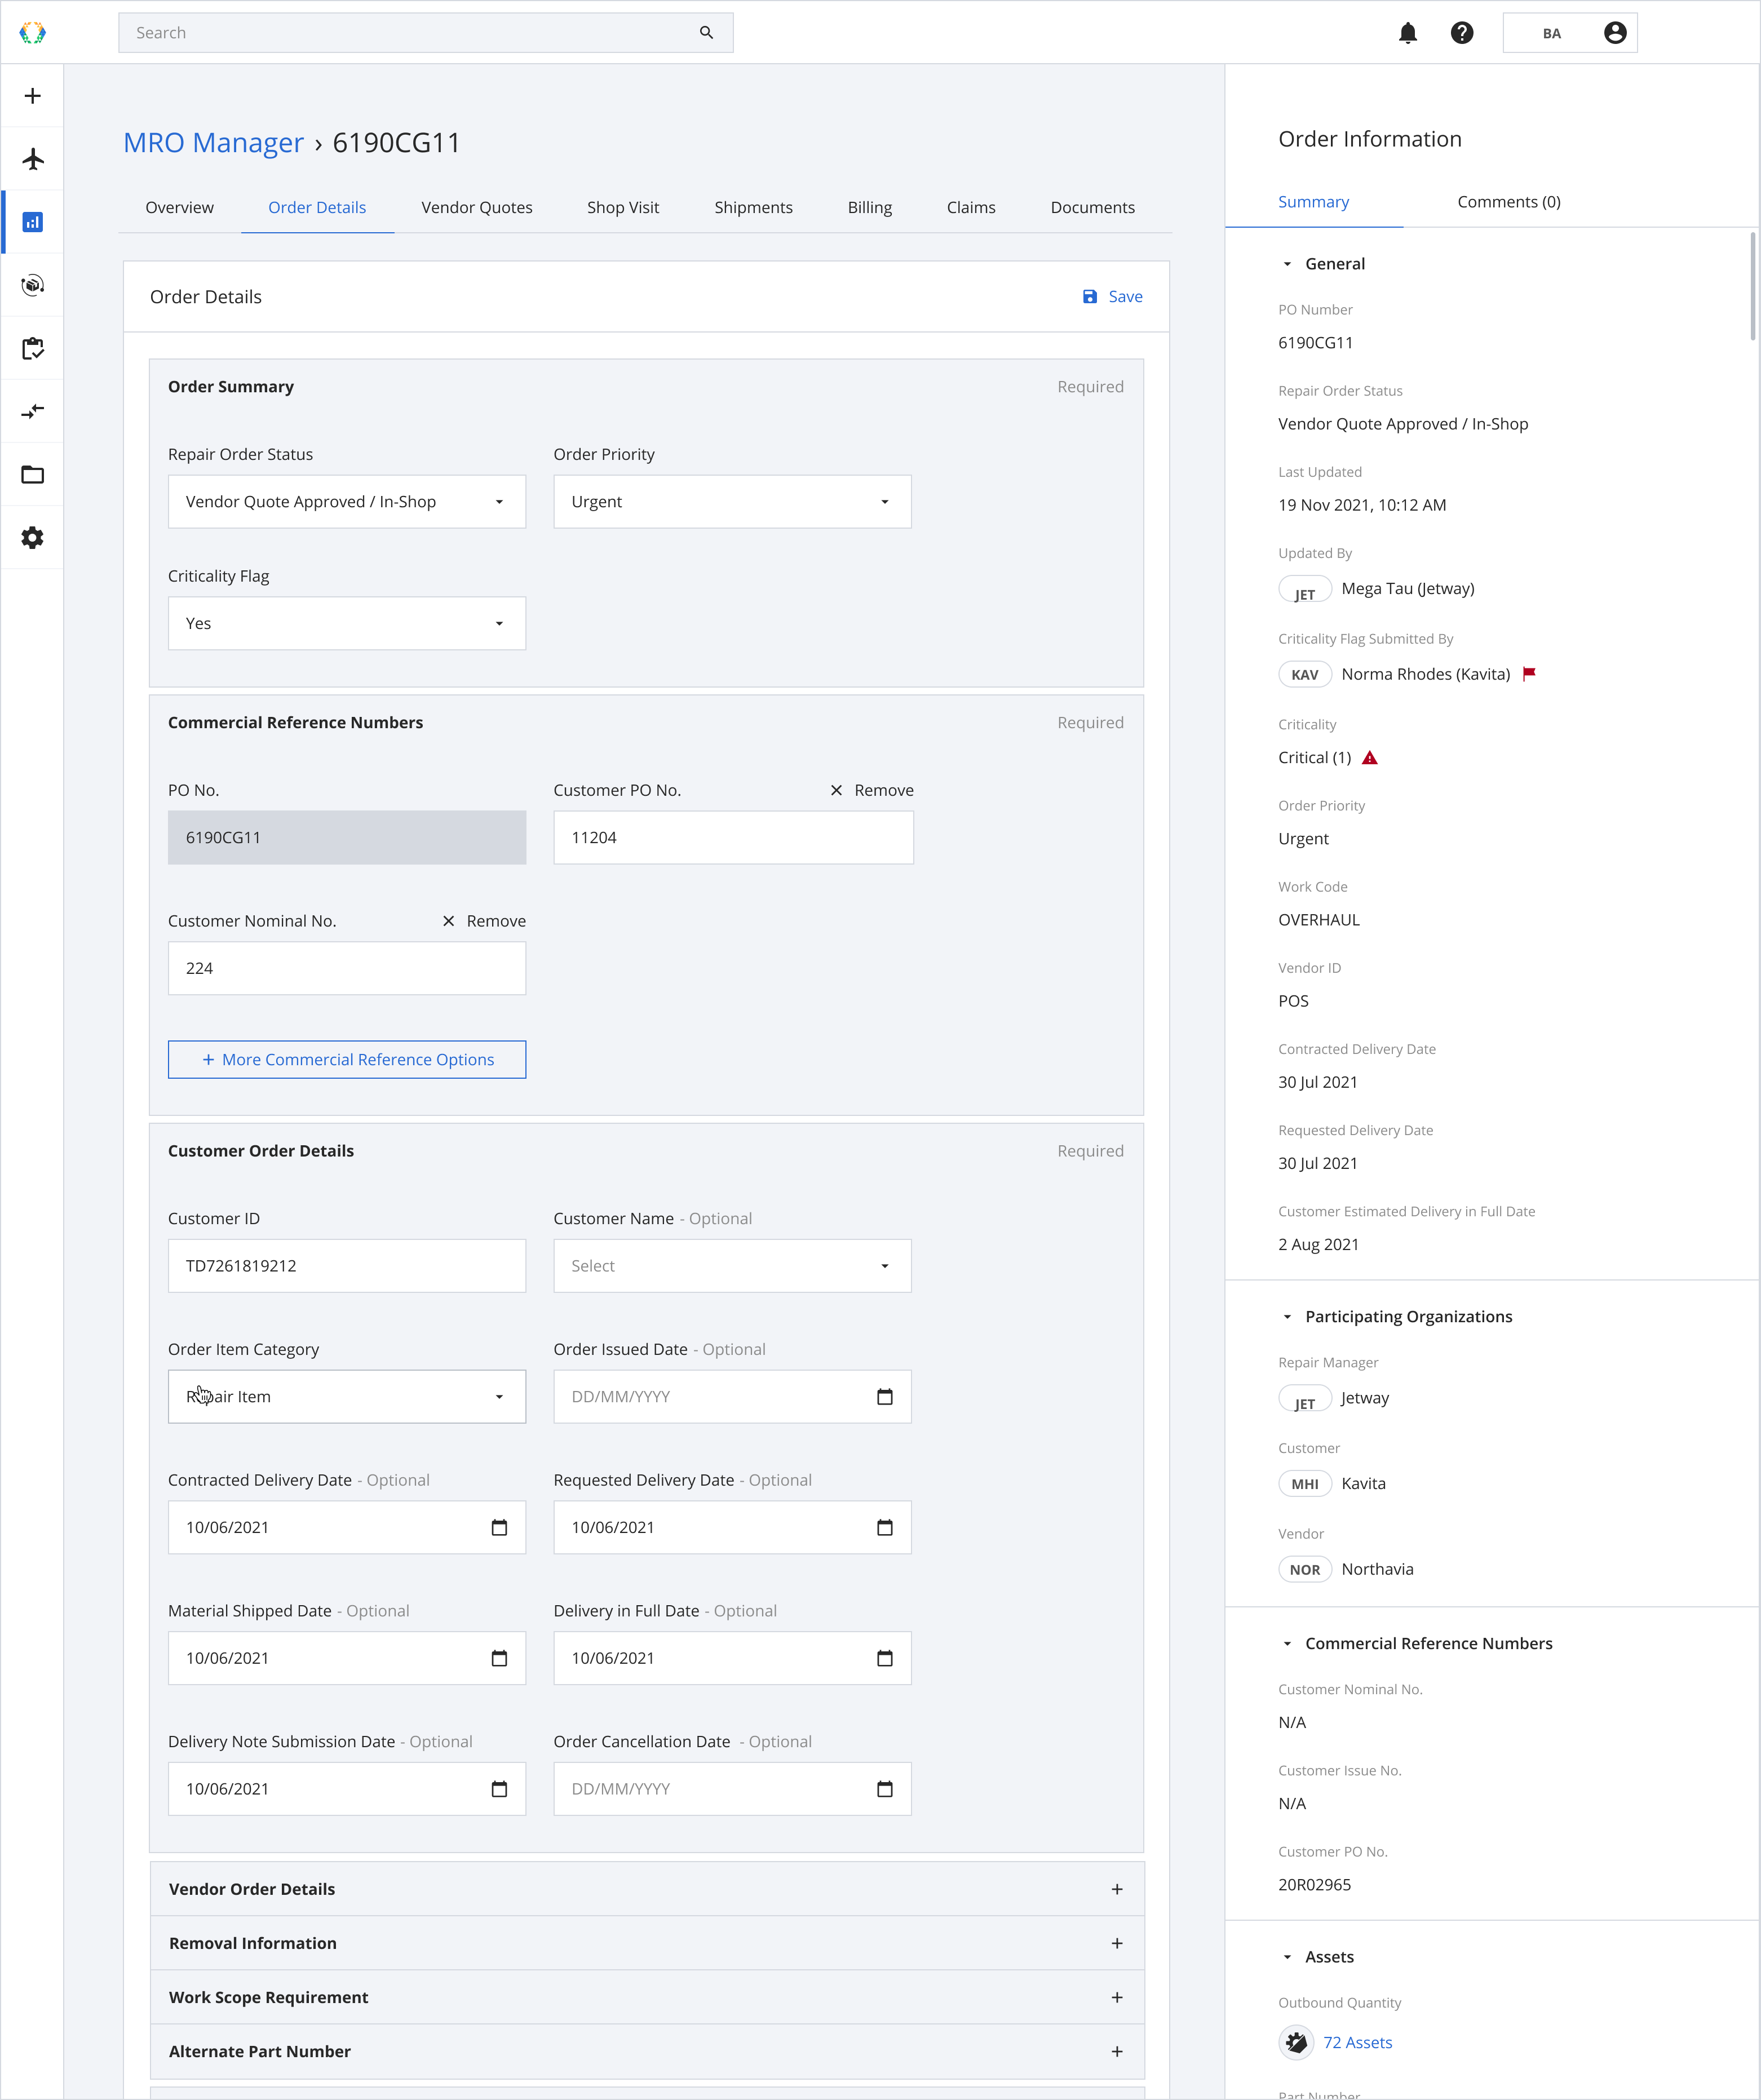
Sections in Order Details
There are 11 sections in Order Details:
- Order Summary
- Commercial Reference Numbers
- Customer Order Details
- Vendor Order Details
- Removal Information
- Work Scope Requirement
- Alternate Part Number
- Upgrade Part Number
- Part Certificate Requirement
- Packaging Requirement
- Additional Parameters
Required sections in Order DetailsOrder Summary
Commercial Reference Numbers
Customer Order Details
Order Summary (Required)

Repair Order Status
The Repair Order Status is used to update the stage of your Repair Order. There are 12 different options for you to choose from in the dropdown menu.
| Outbound | Shop Visit | Inbound |
|---|---|---|
| Customer Order Pending | Awaiting Vendor Quote Issuance | Inbound / Ready to Ship |
| Outbound / Ready to Ship | Awaiting Customer Quote Approval | Inbound / In-Transit |
| Outbound / In-Transit | Shop Visit In-Progress | Delivered |
| Partially Delivered | ||
| Customer Order Cancelled | ||
| Customer Delivery Accepted |
Order Priority
The Order Priority indicates the priority for your Repair Order.
| Available options for Order Priority |
|---|
| Routine |
| Urgent |
| Work Stoppage |
| AOG |
Set Criticality Flag
The Set Criticality Flag function helps you to flag the Repair Order as Critical, this will impact the criticality score of your Repair Order.
Commercial Reference Numbers (Required)
Commercial Reference Numbers provide easy tracking for your Repair Orders. There is a list of Commercial Reference Numbers for you to input. In case none of the available options fit your needs, you can also enter a custom commercial reference number.

| Available Commercial Reference Numbers Options |
|---|
| ASSY Code |
| ATA No. |
| Customer Issue No. |
| Customer Nominal No. |
| Customer PO No. |
| Customer Work Order No, |
| Module Code |
| ORT Code |
| OTC Code |
| SECT Code |
| WO No. |
| Custom Option |
Steps to add/edit your Commercial Reference Number
Step 1: Click '+ More Commercial Reference Numbers'.
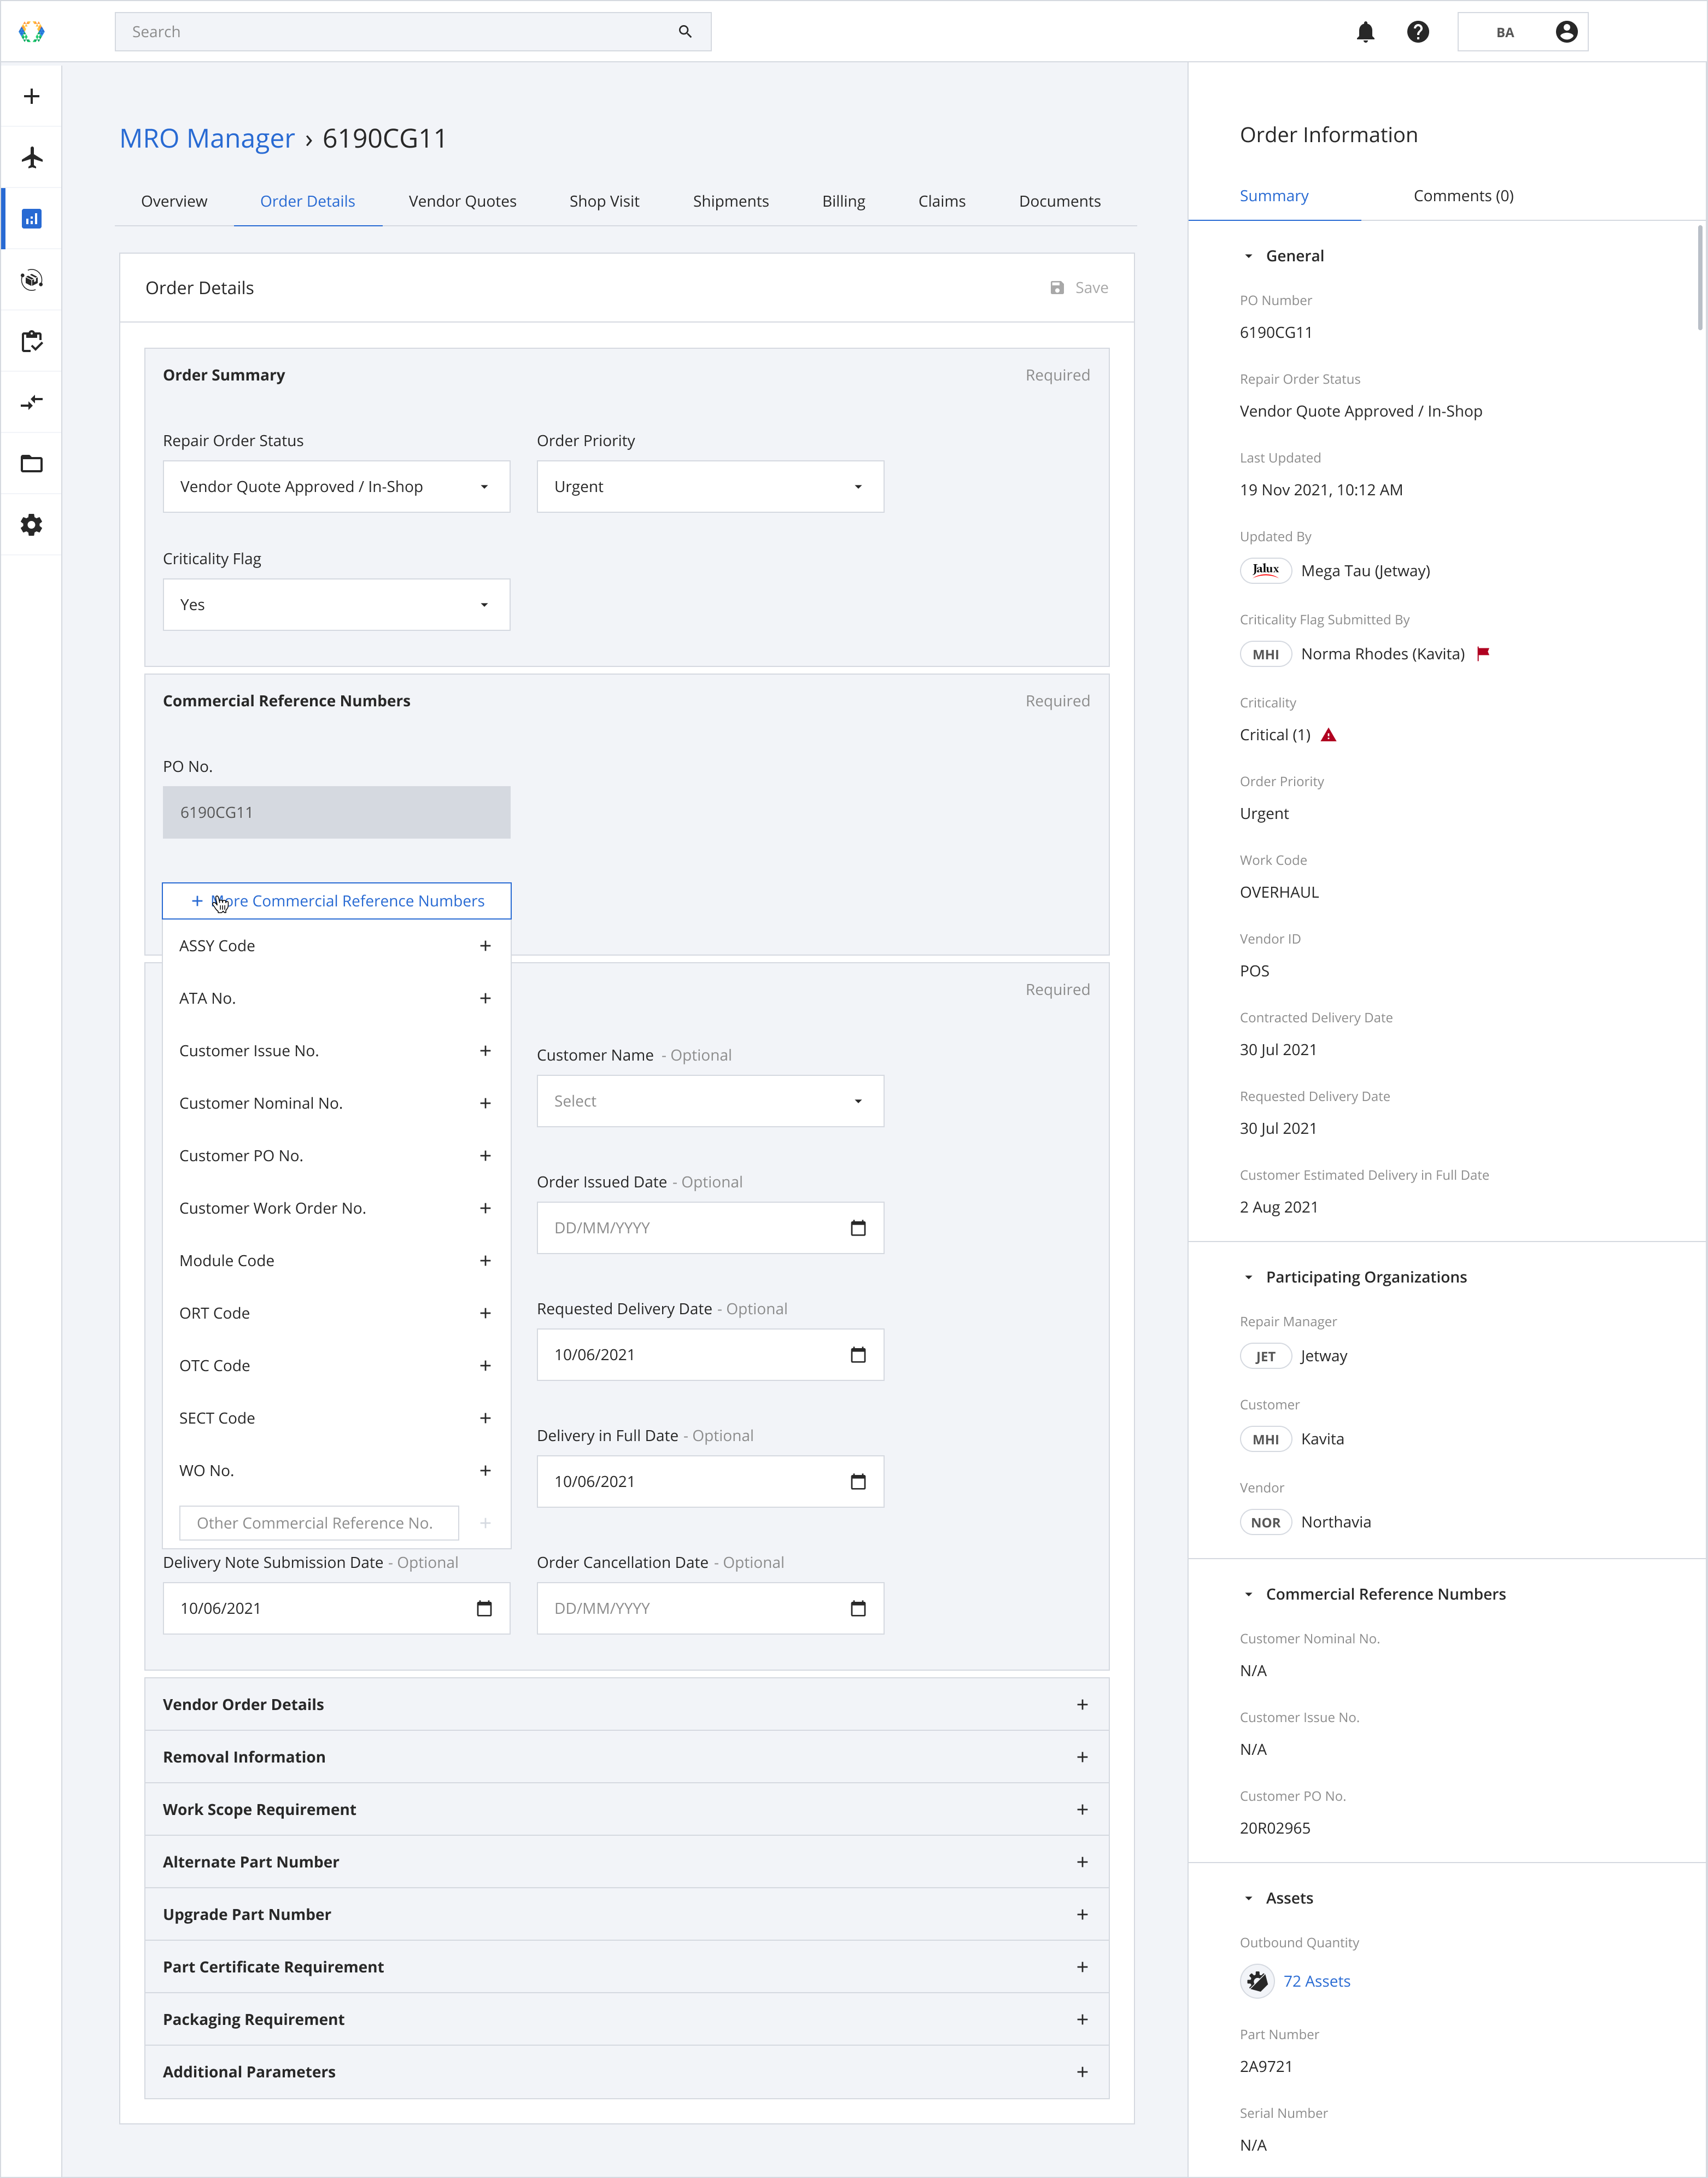
Step 2: Select the option, and the field will be generated for you to insert the data.
For a Custom Commercial Reference Number, you also need to input the field name of the Commercial Reference Number, then click "+"
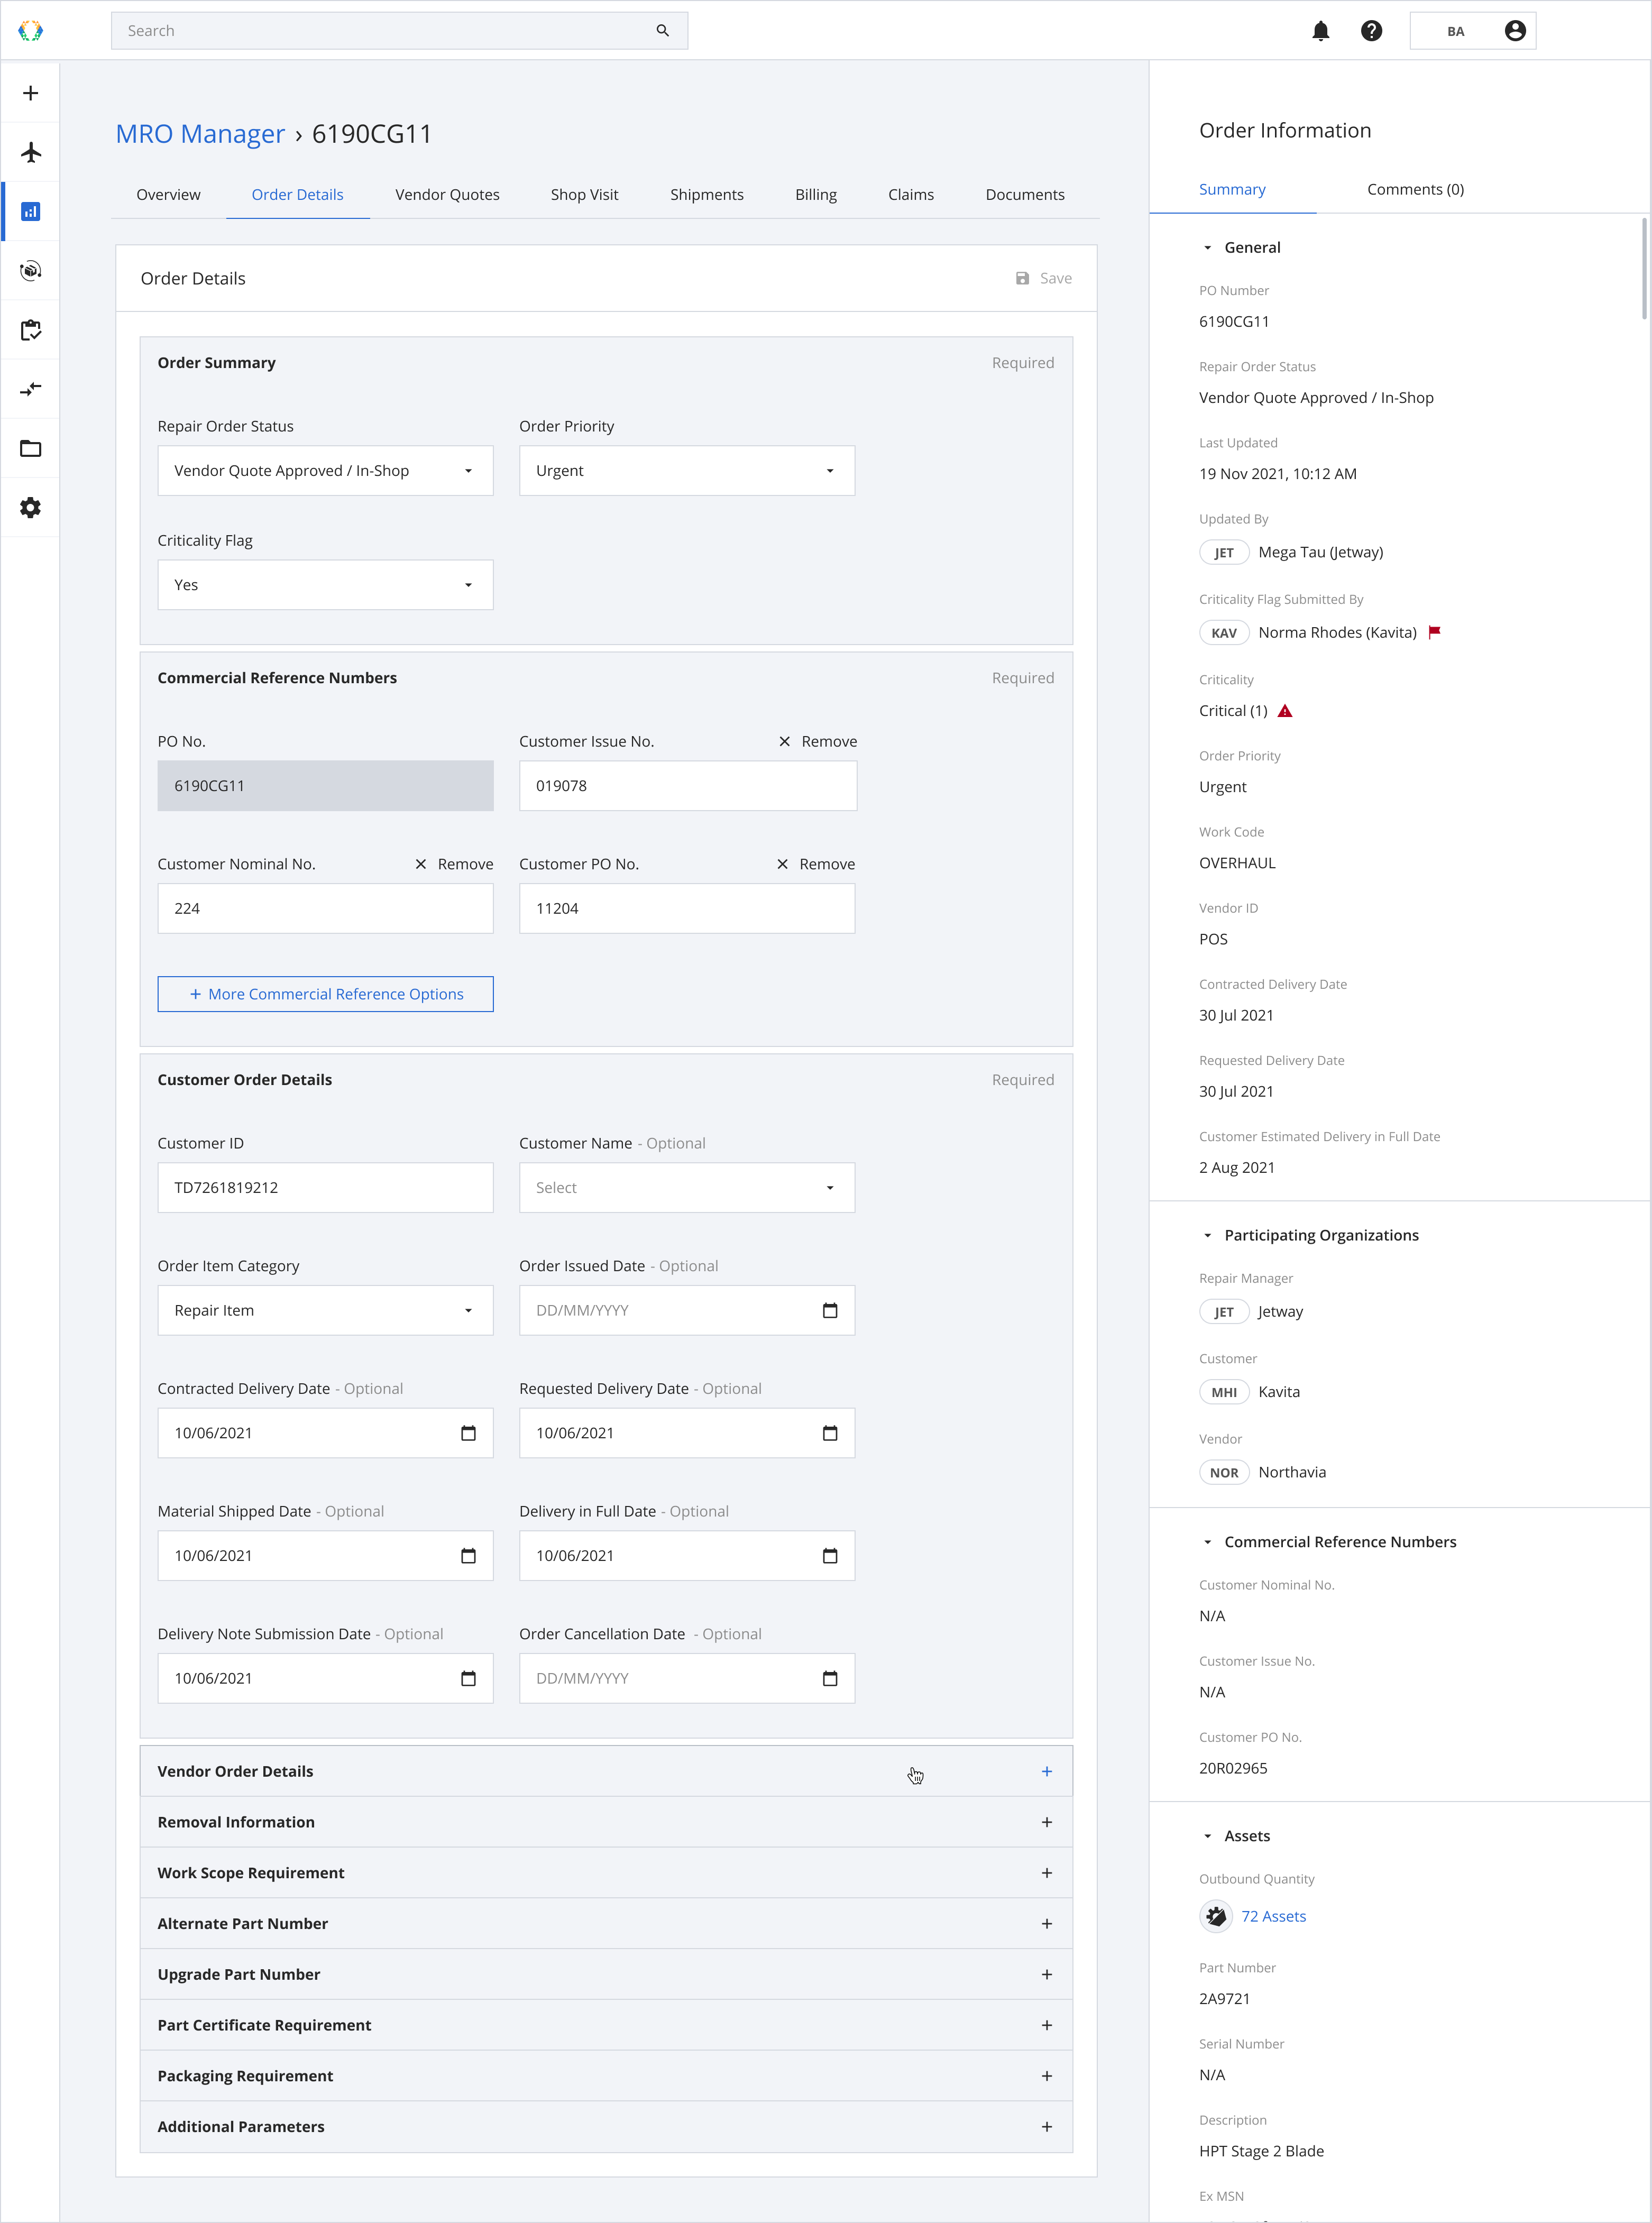
Removing Commercial Reference Number
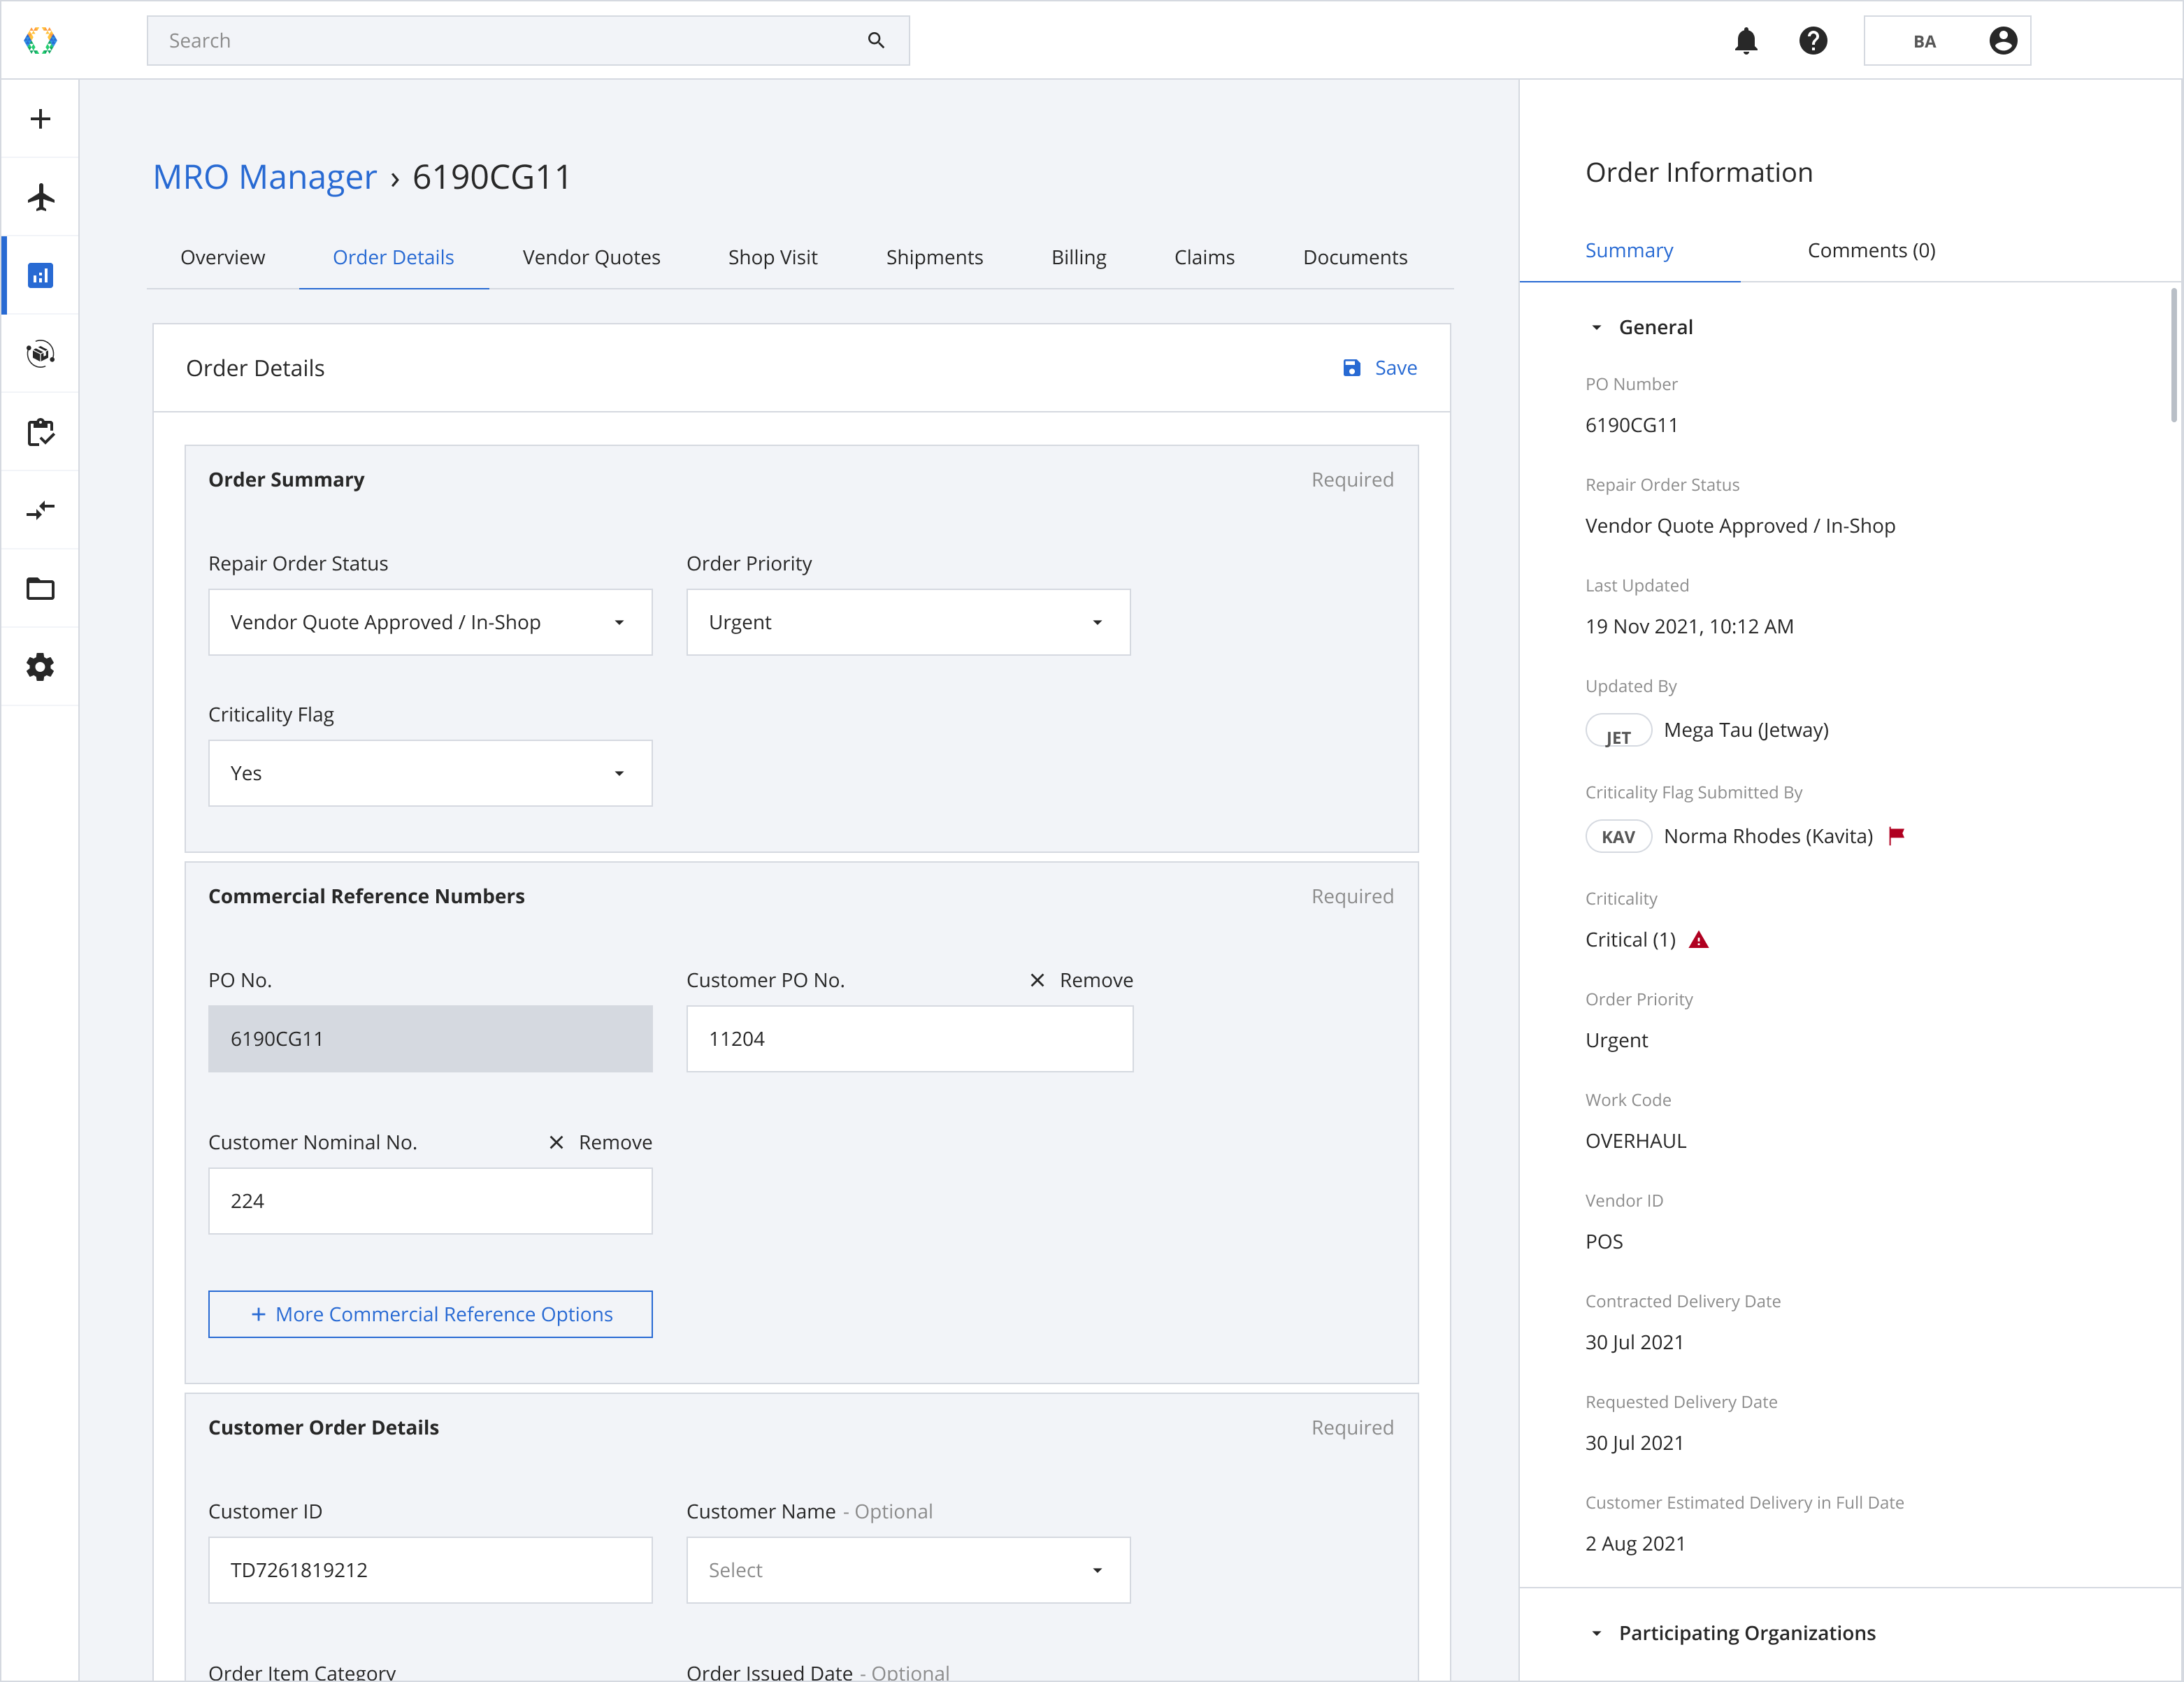
Step 1: Click ✕ Remove to delete the field from the Commercial Reference Number section.
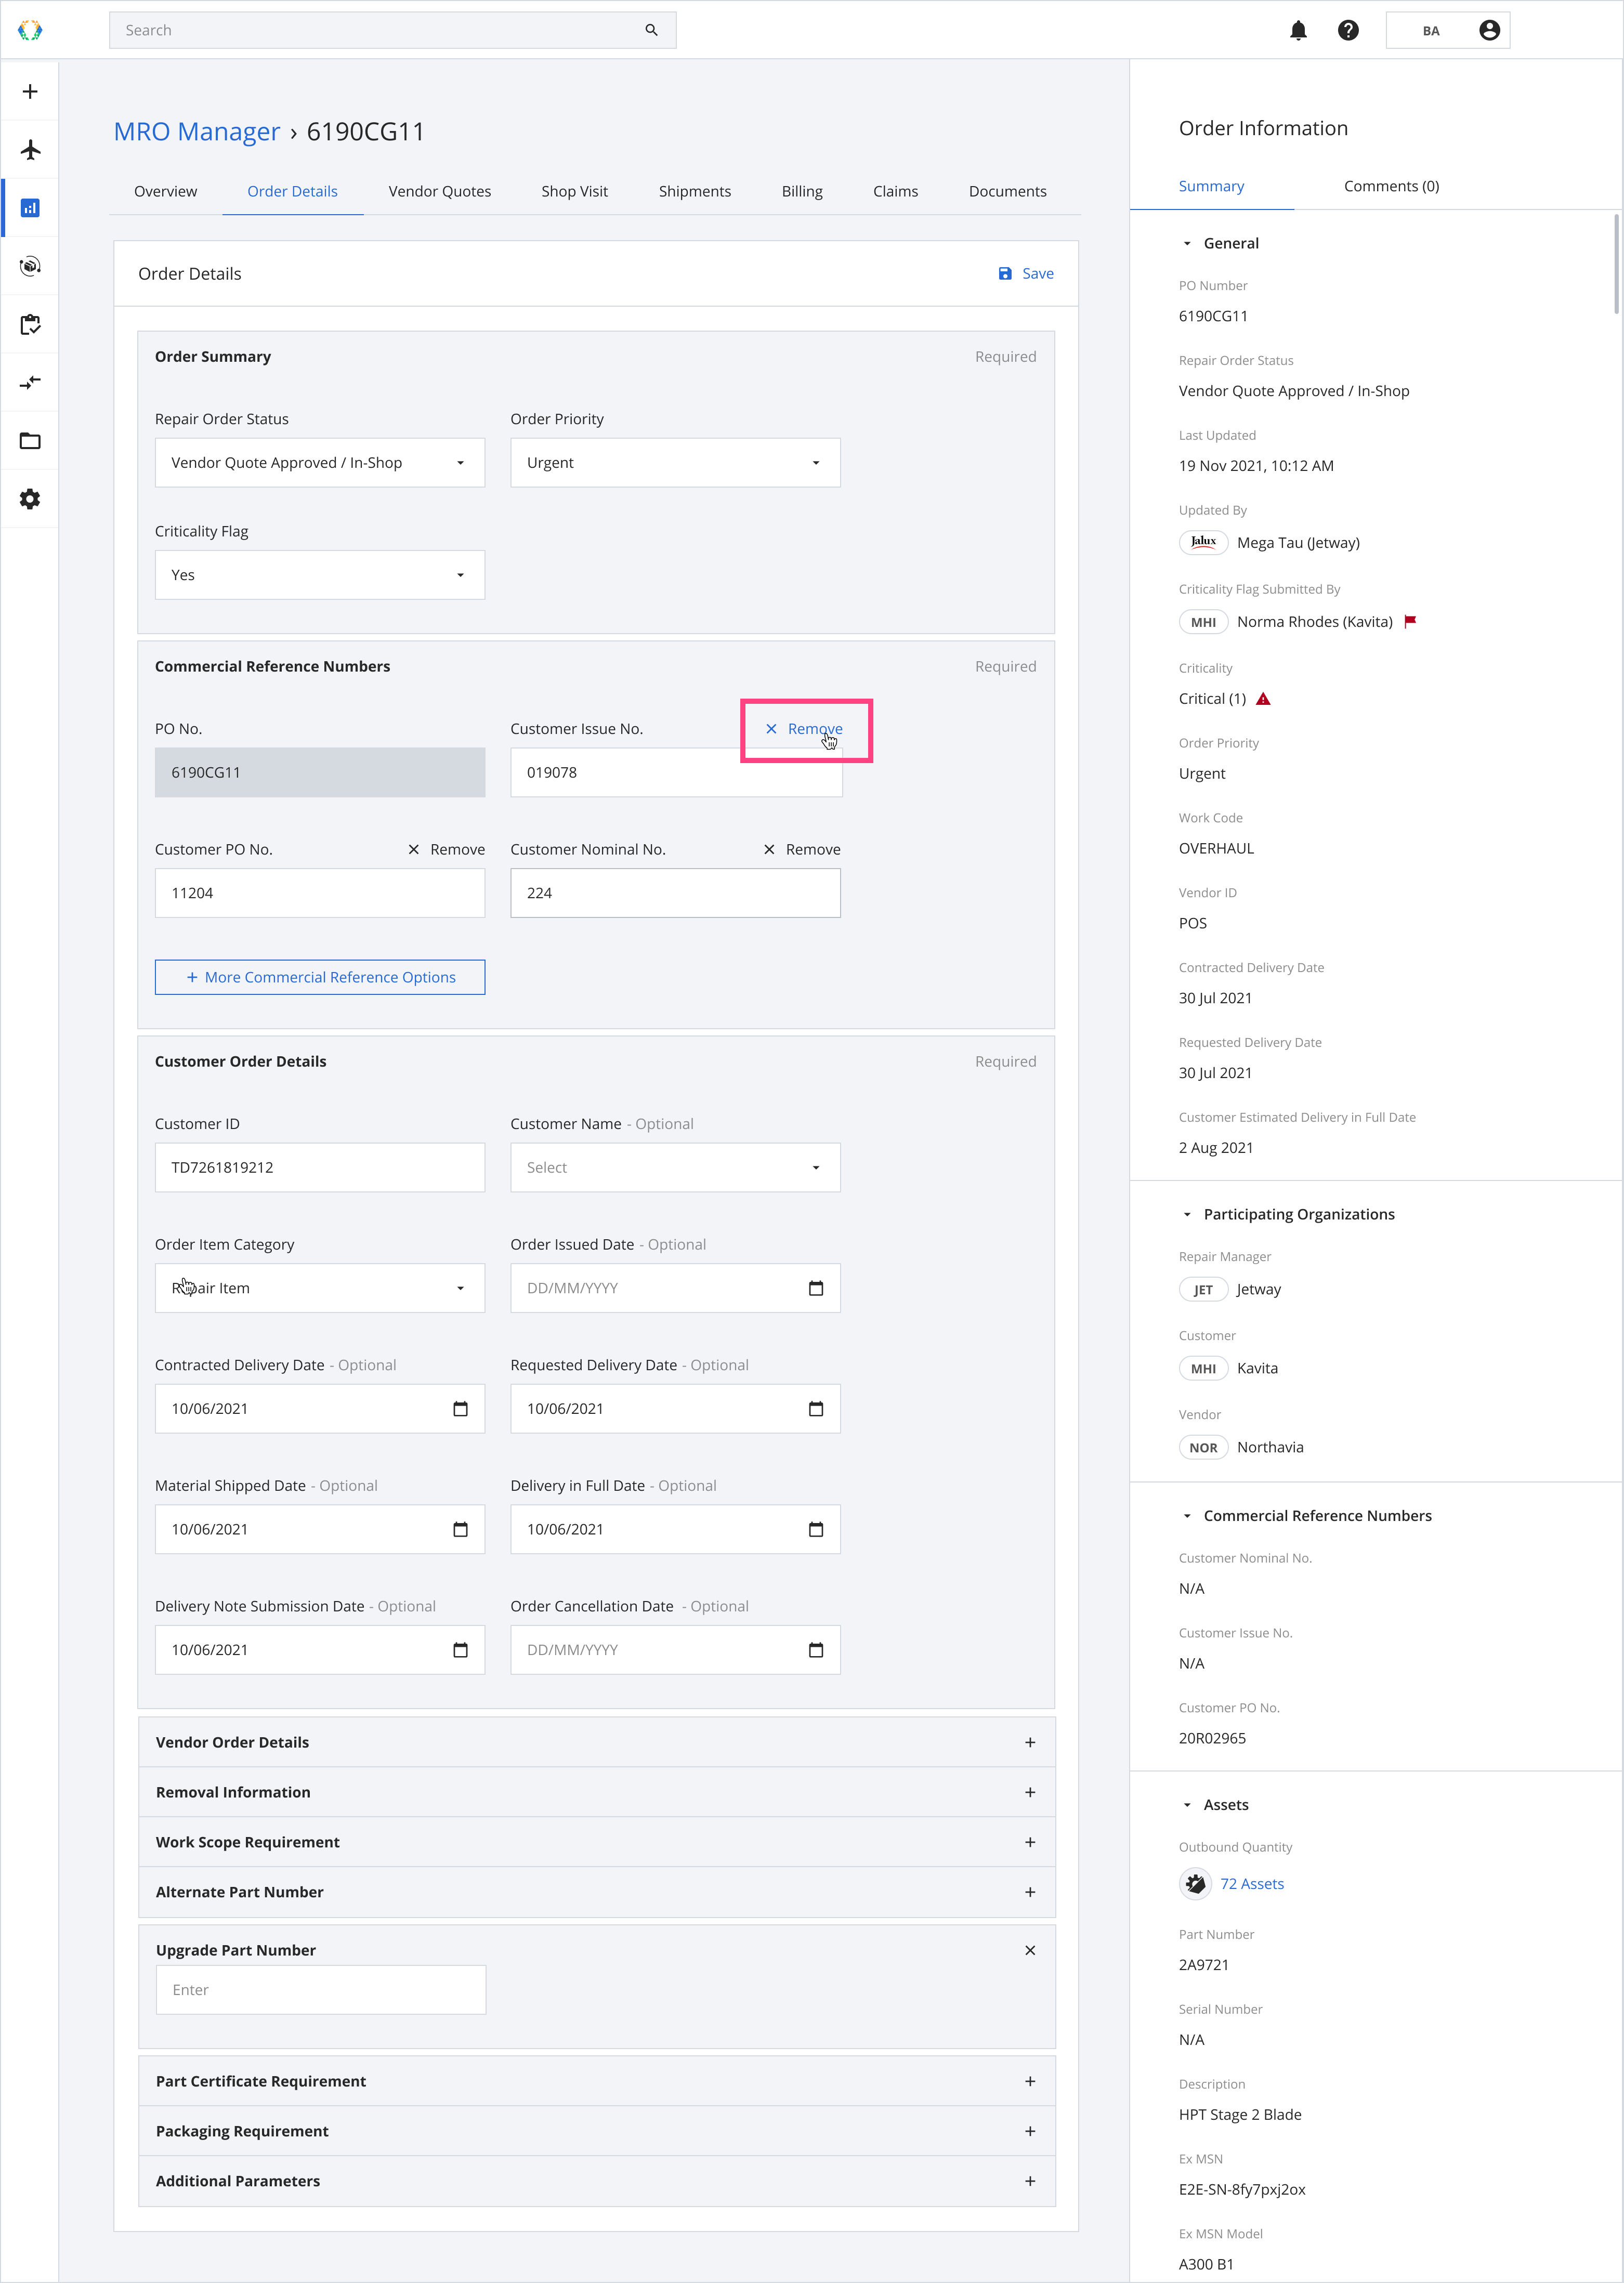
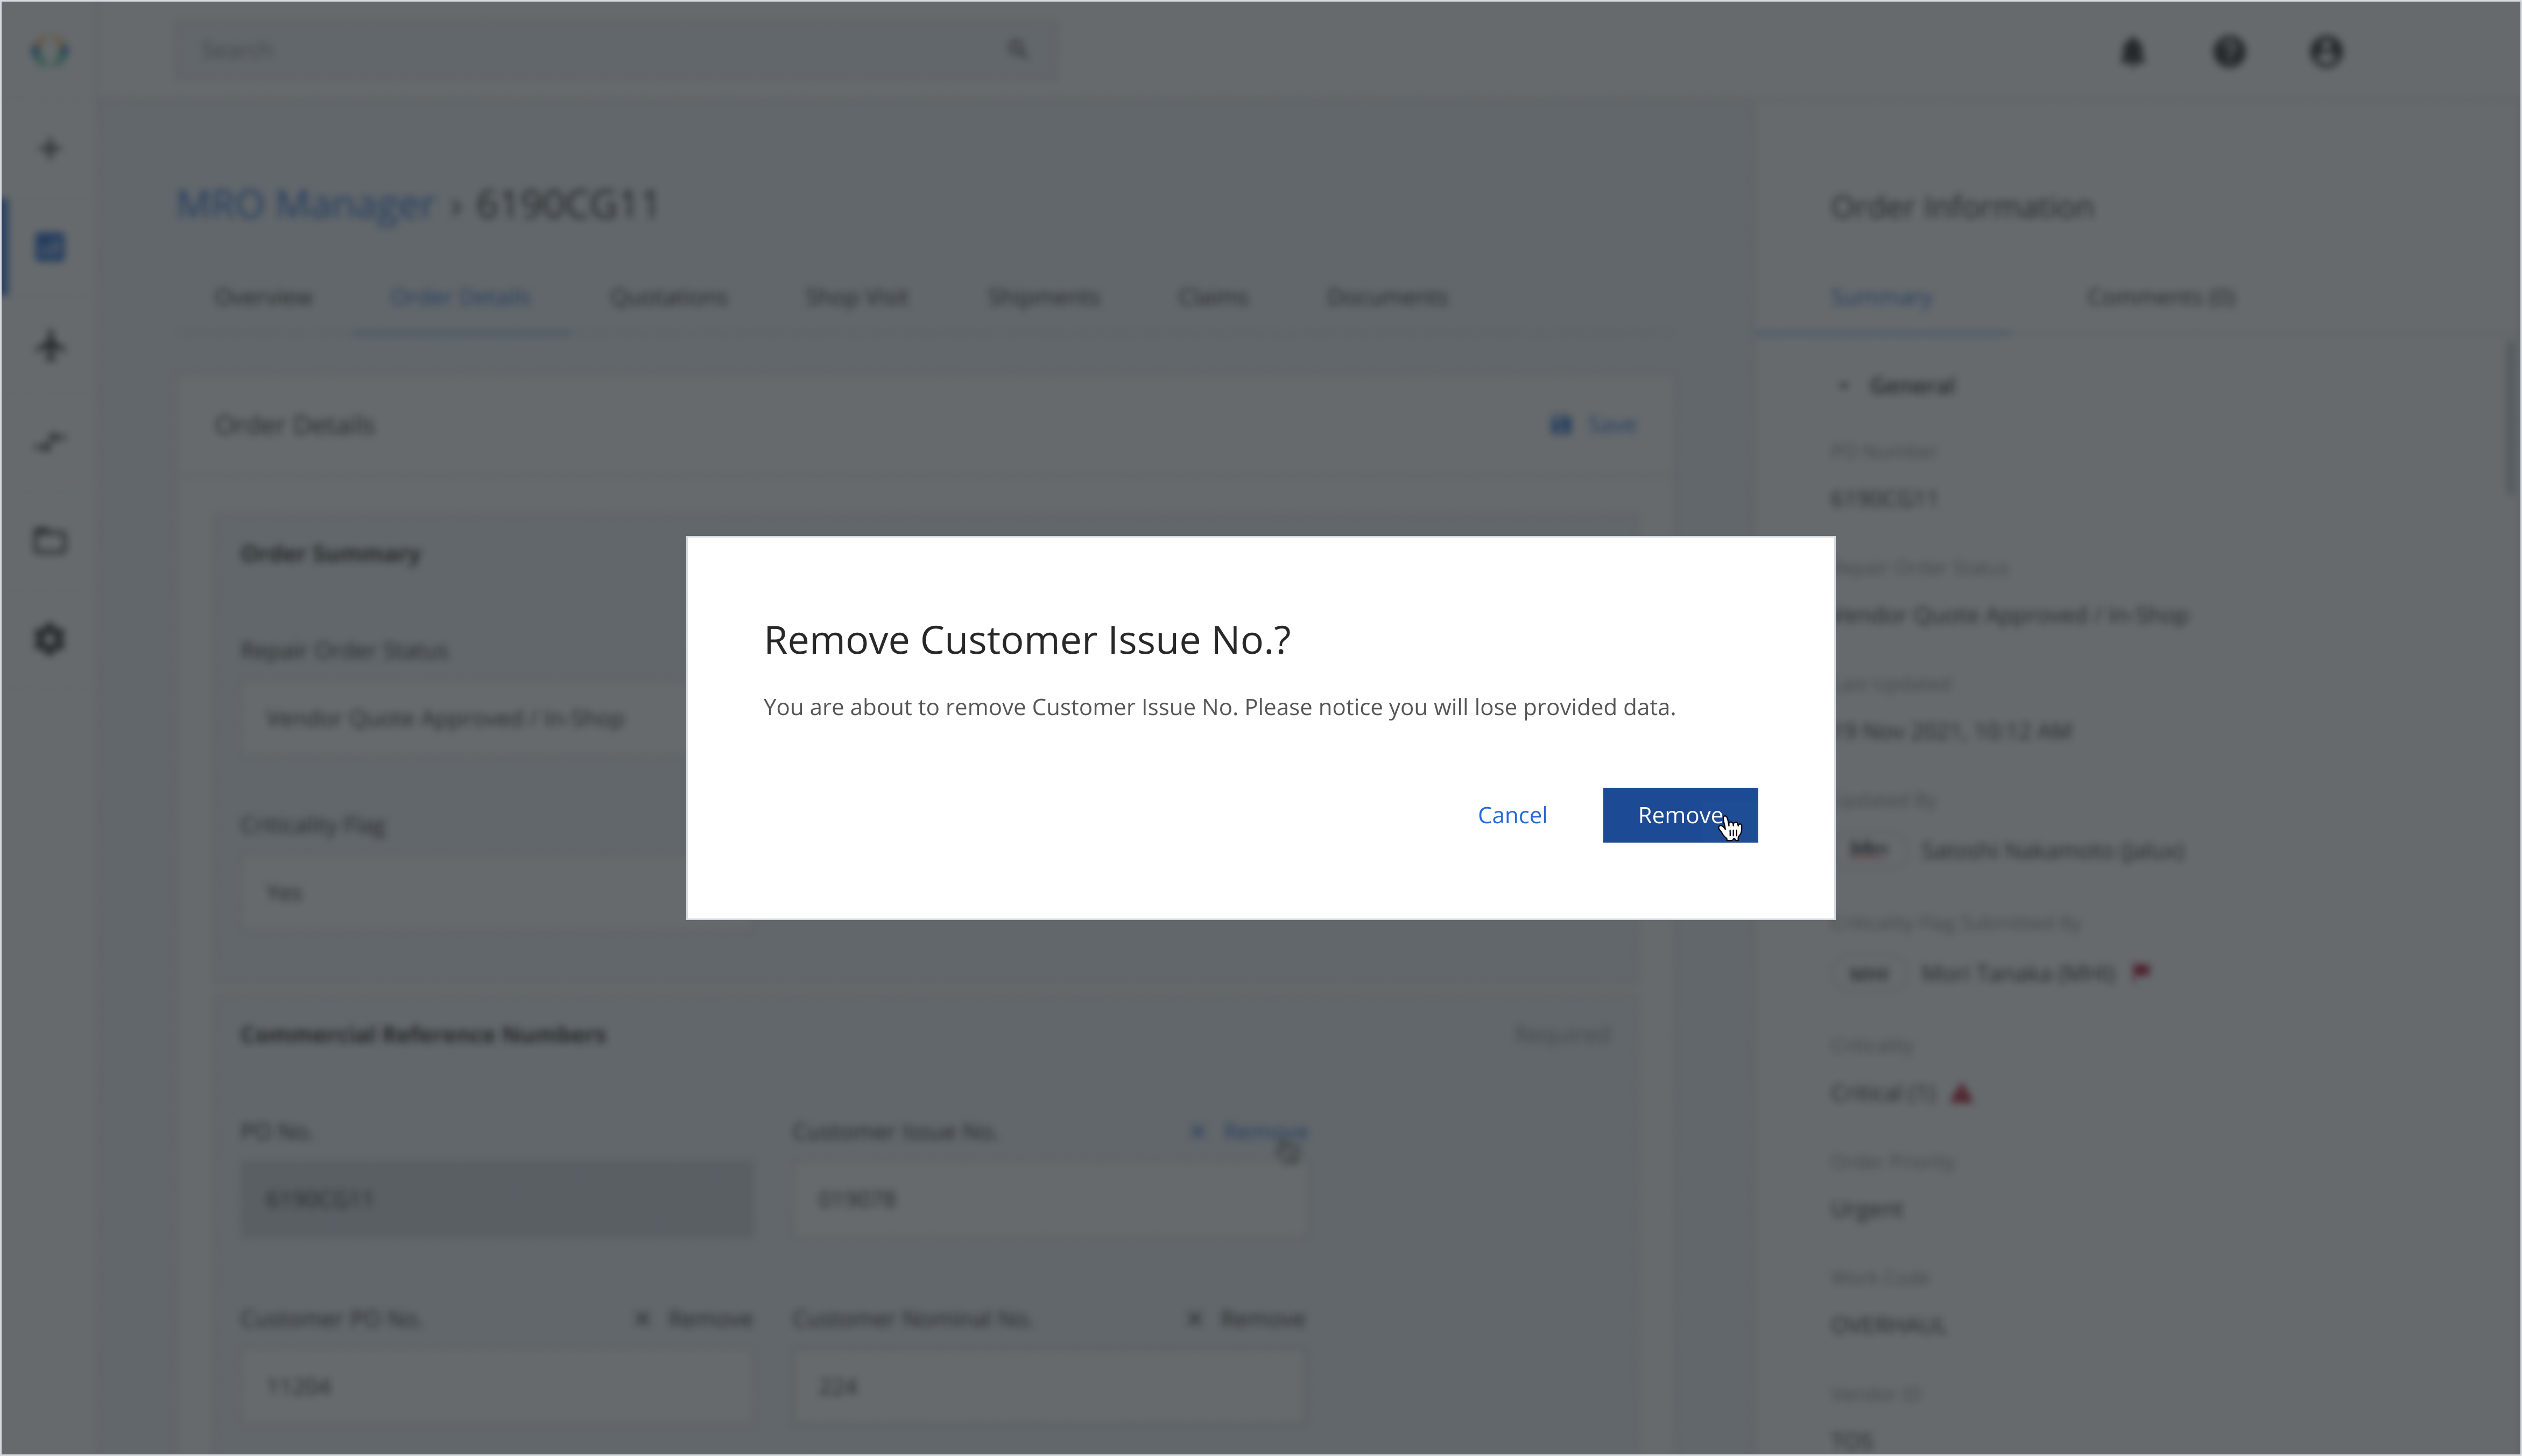
Step 2: A confirmation message will appear, click "Remove" to confirm the removal.
Step 3: The field is removed from the Commercial Reference Number section.
Customer Order Details (Required)
Customer ID
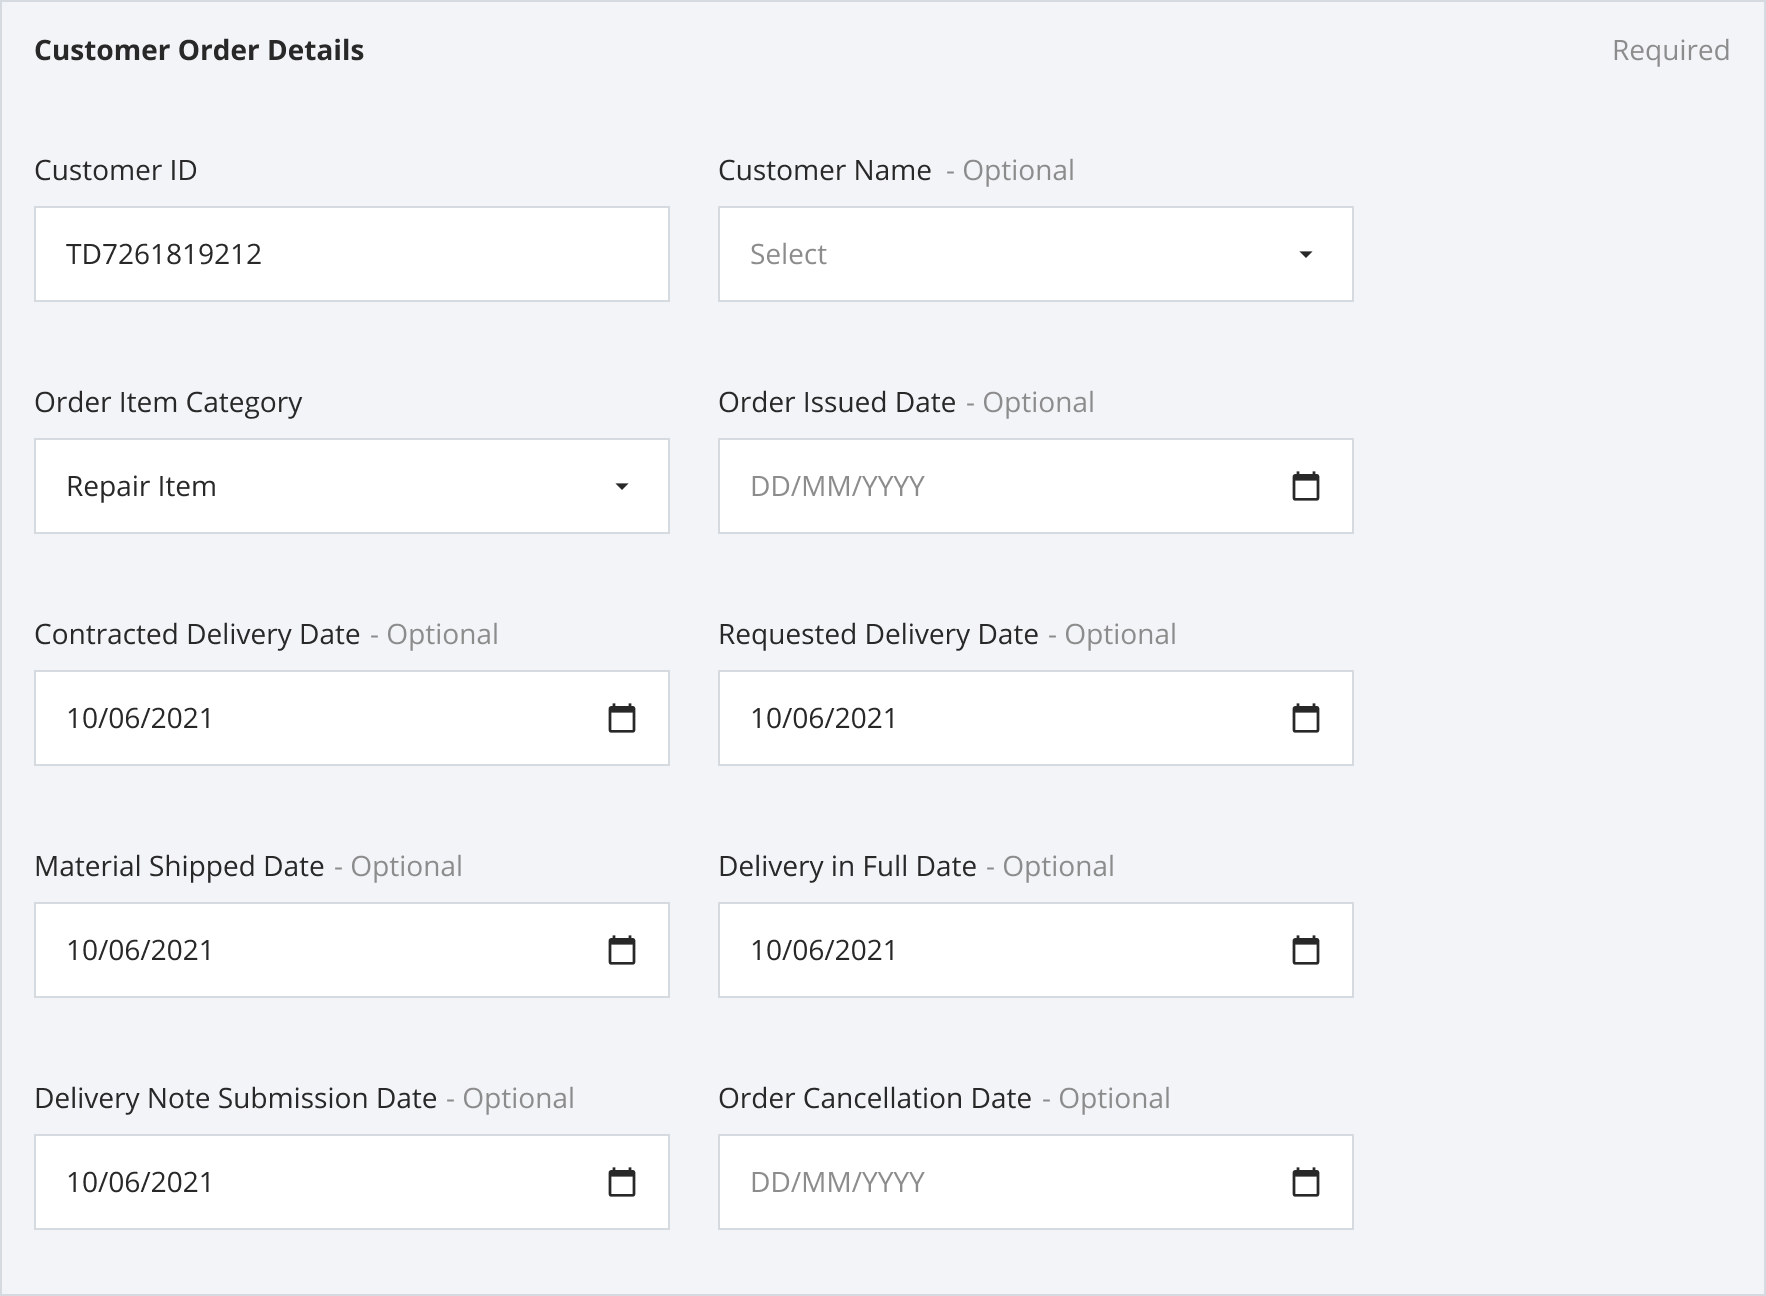
For the Customer Order Details section, the Customer ID is a required field to be filled.
Customer Name
You can select the Customer's name from the dropdown list or leave it blank.
Order Item Category
Order Item Category is set to Repair Item as default.
| Order Item Category Available Options |
|---|
| Repair Item |
| Initial Provision Item |
| Replenishment Stock Item |
| Allocation Item |
| Special Requirement Item |
| Warranty Item |
| Special Business Agreement |
The different date fields allow you to input each date for each checkpoint of the Repair process.
Vendor Order Details
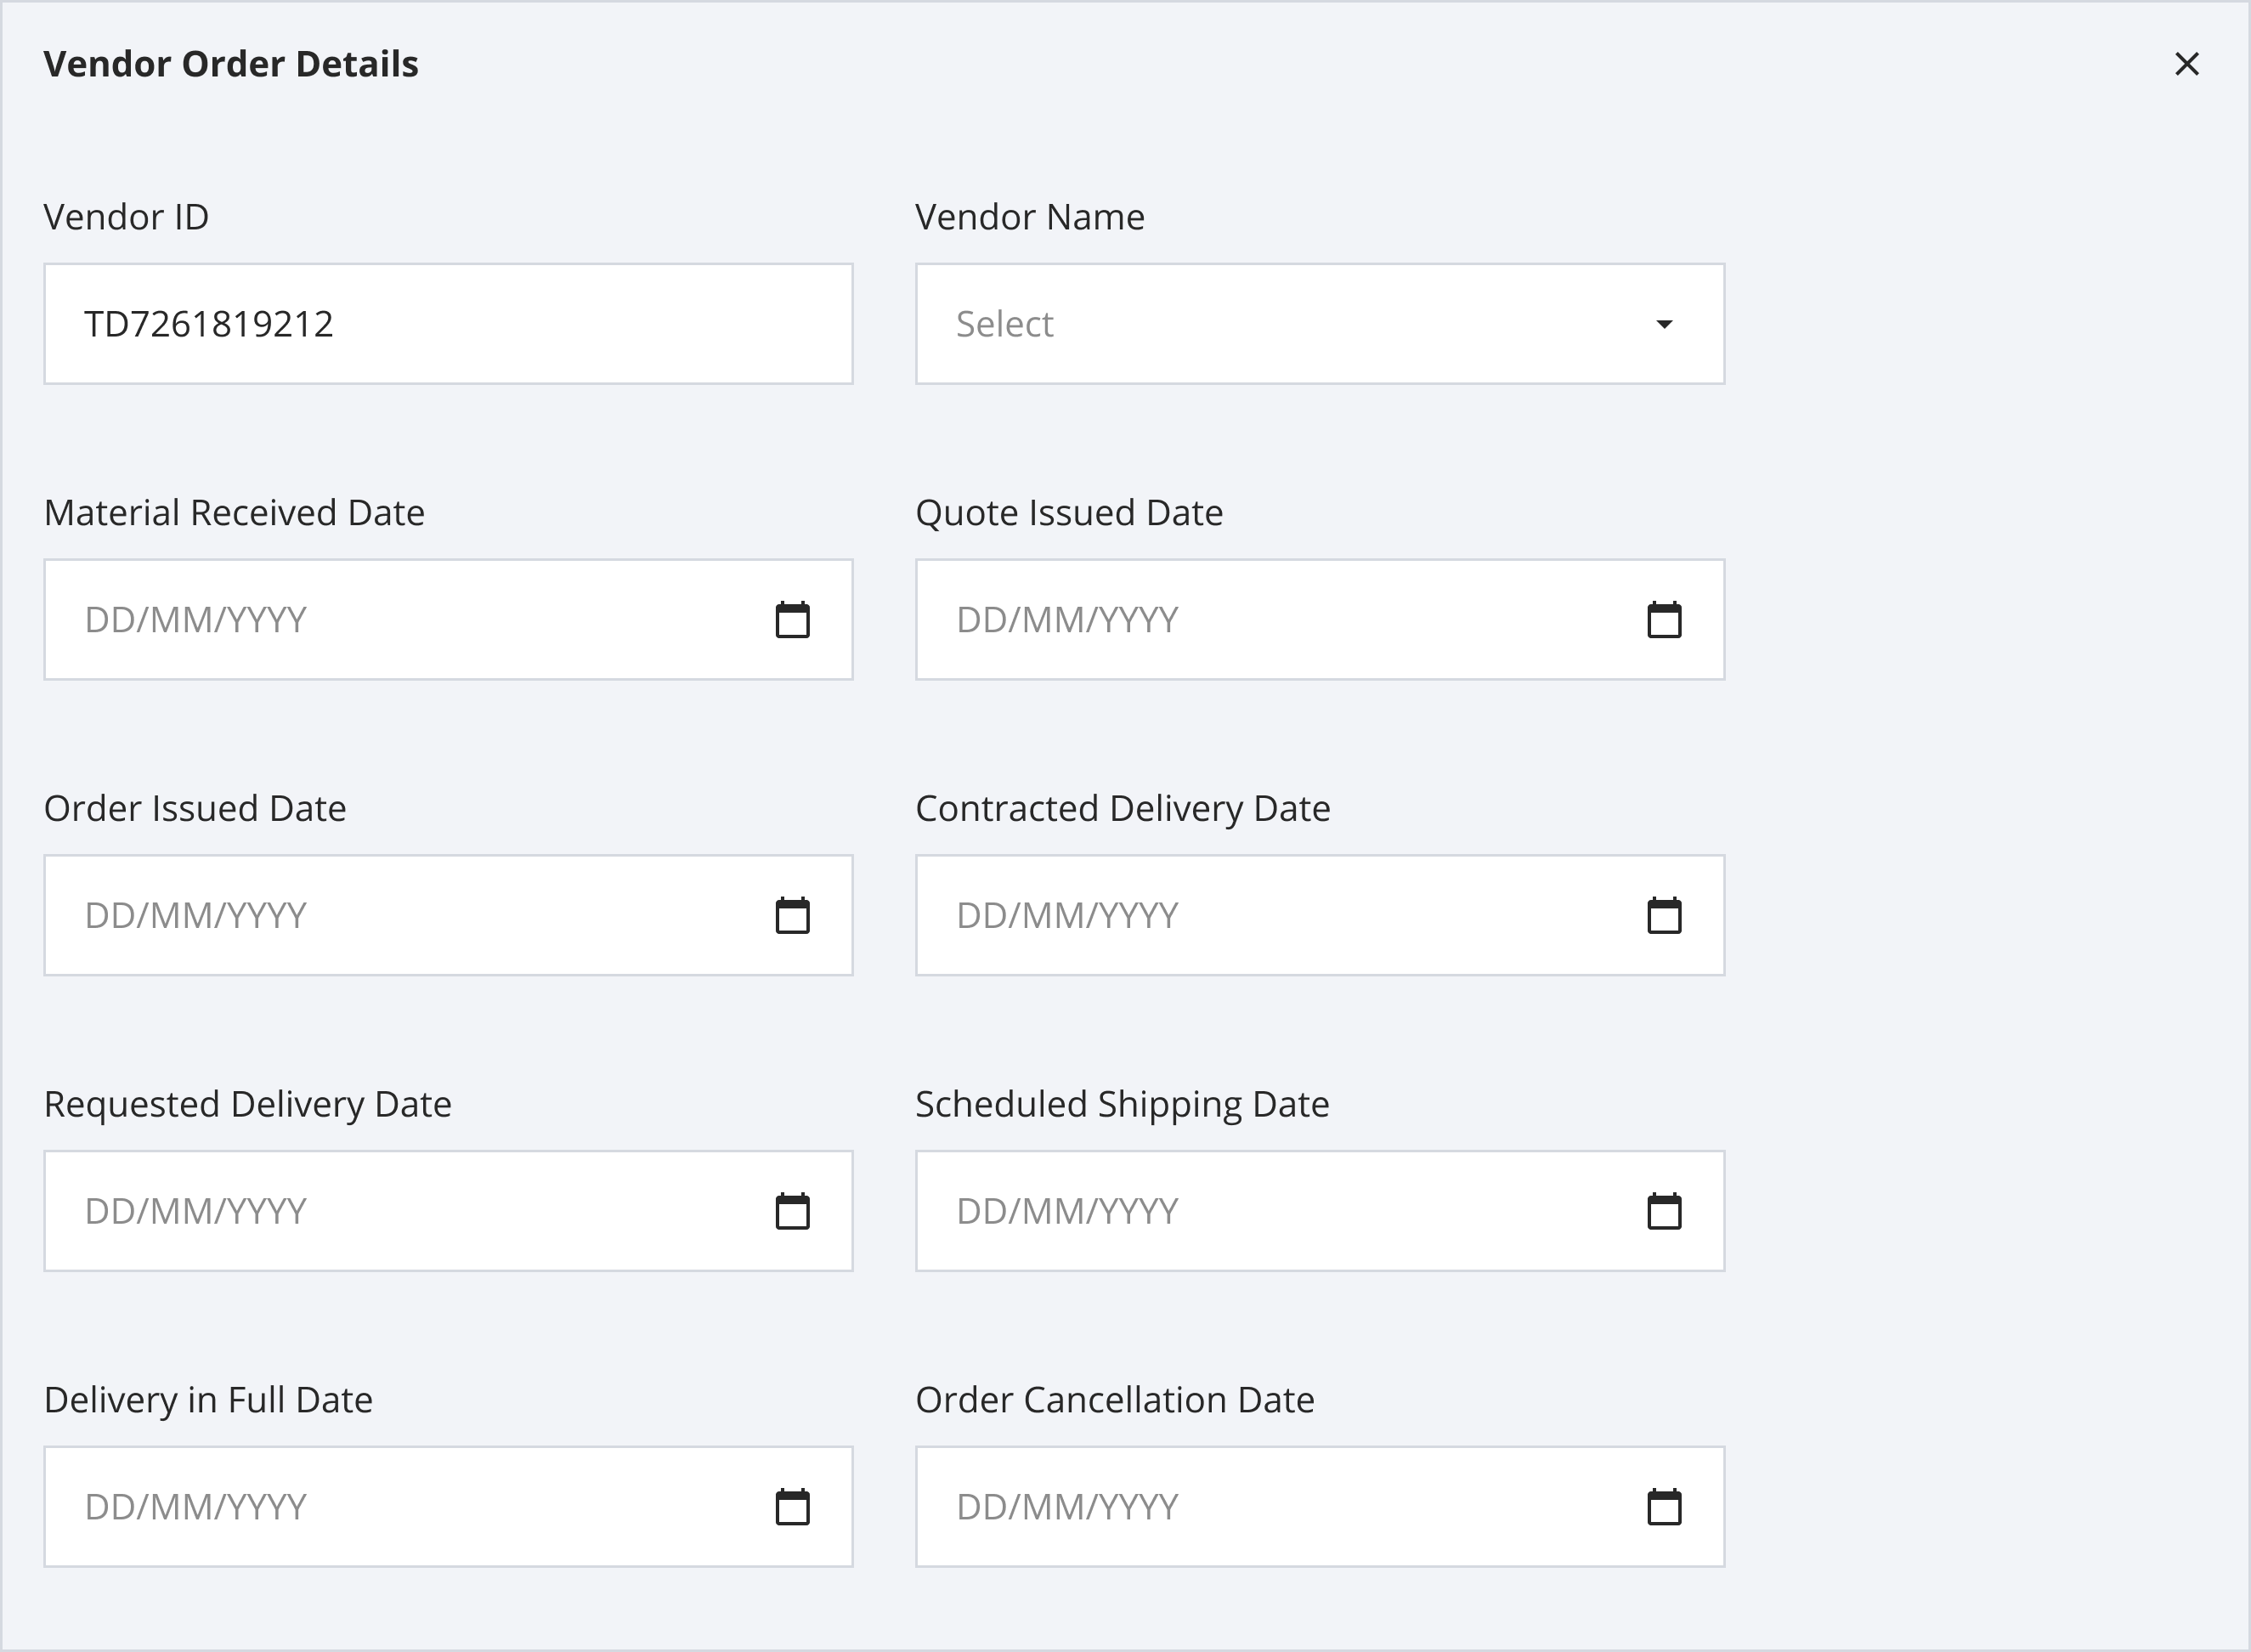
The Vendor Order Details section allows you to add the details of the Vendor for the Repair Order. This section is optional and can be added or collapsed.
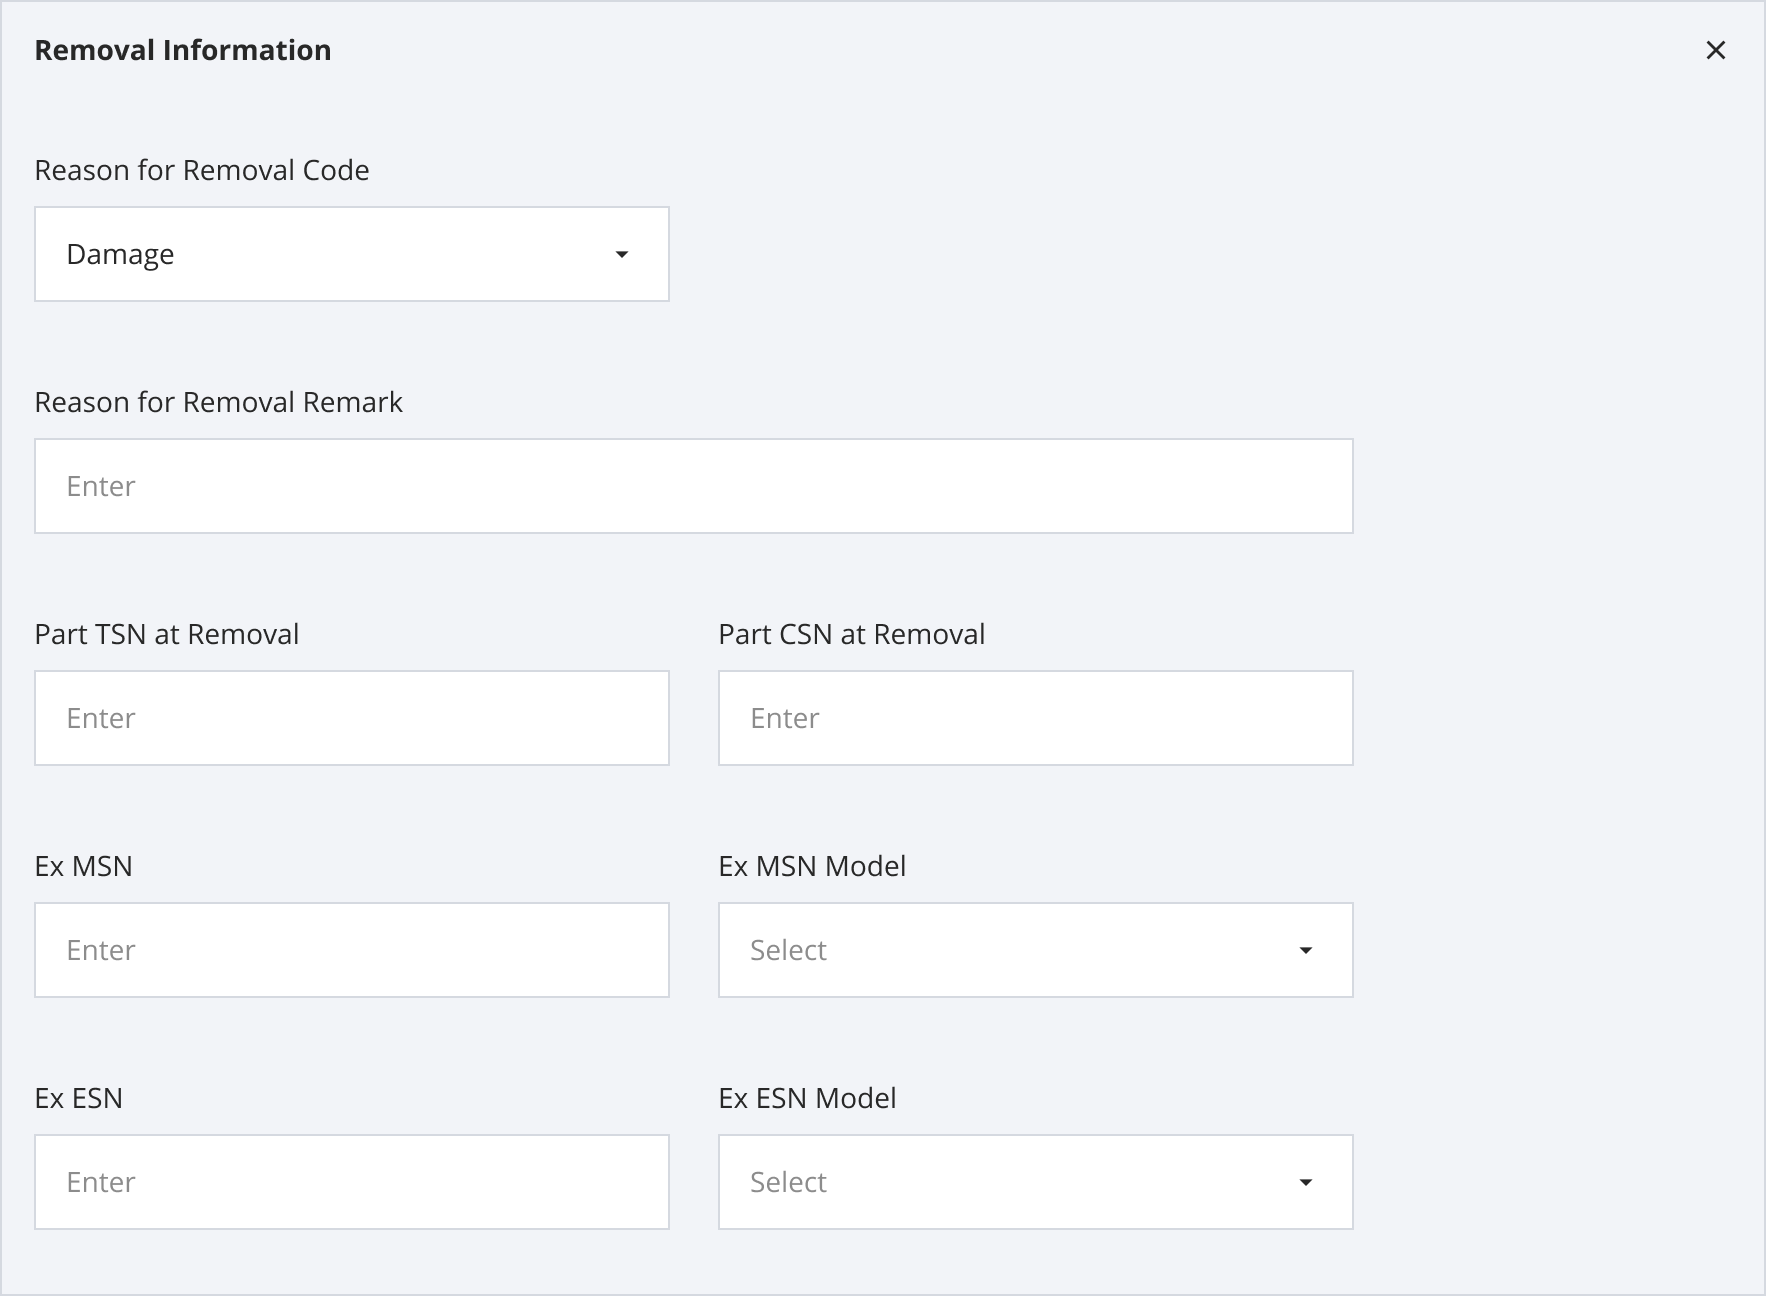
Removal Information
The Removal Information section allows you to fill in the relevant information related to the removal of the component from its parent asset. This section is optional and can be added or collapsed.
Work Scope Requirement
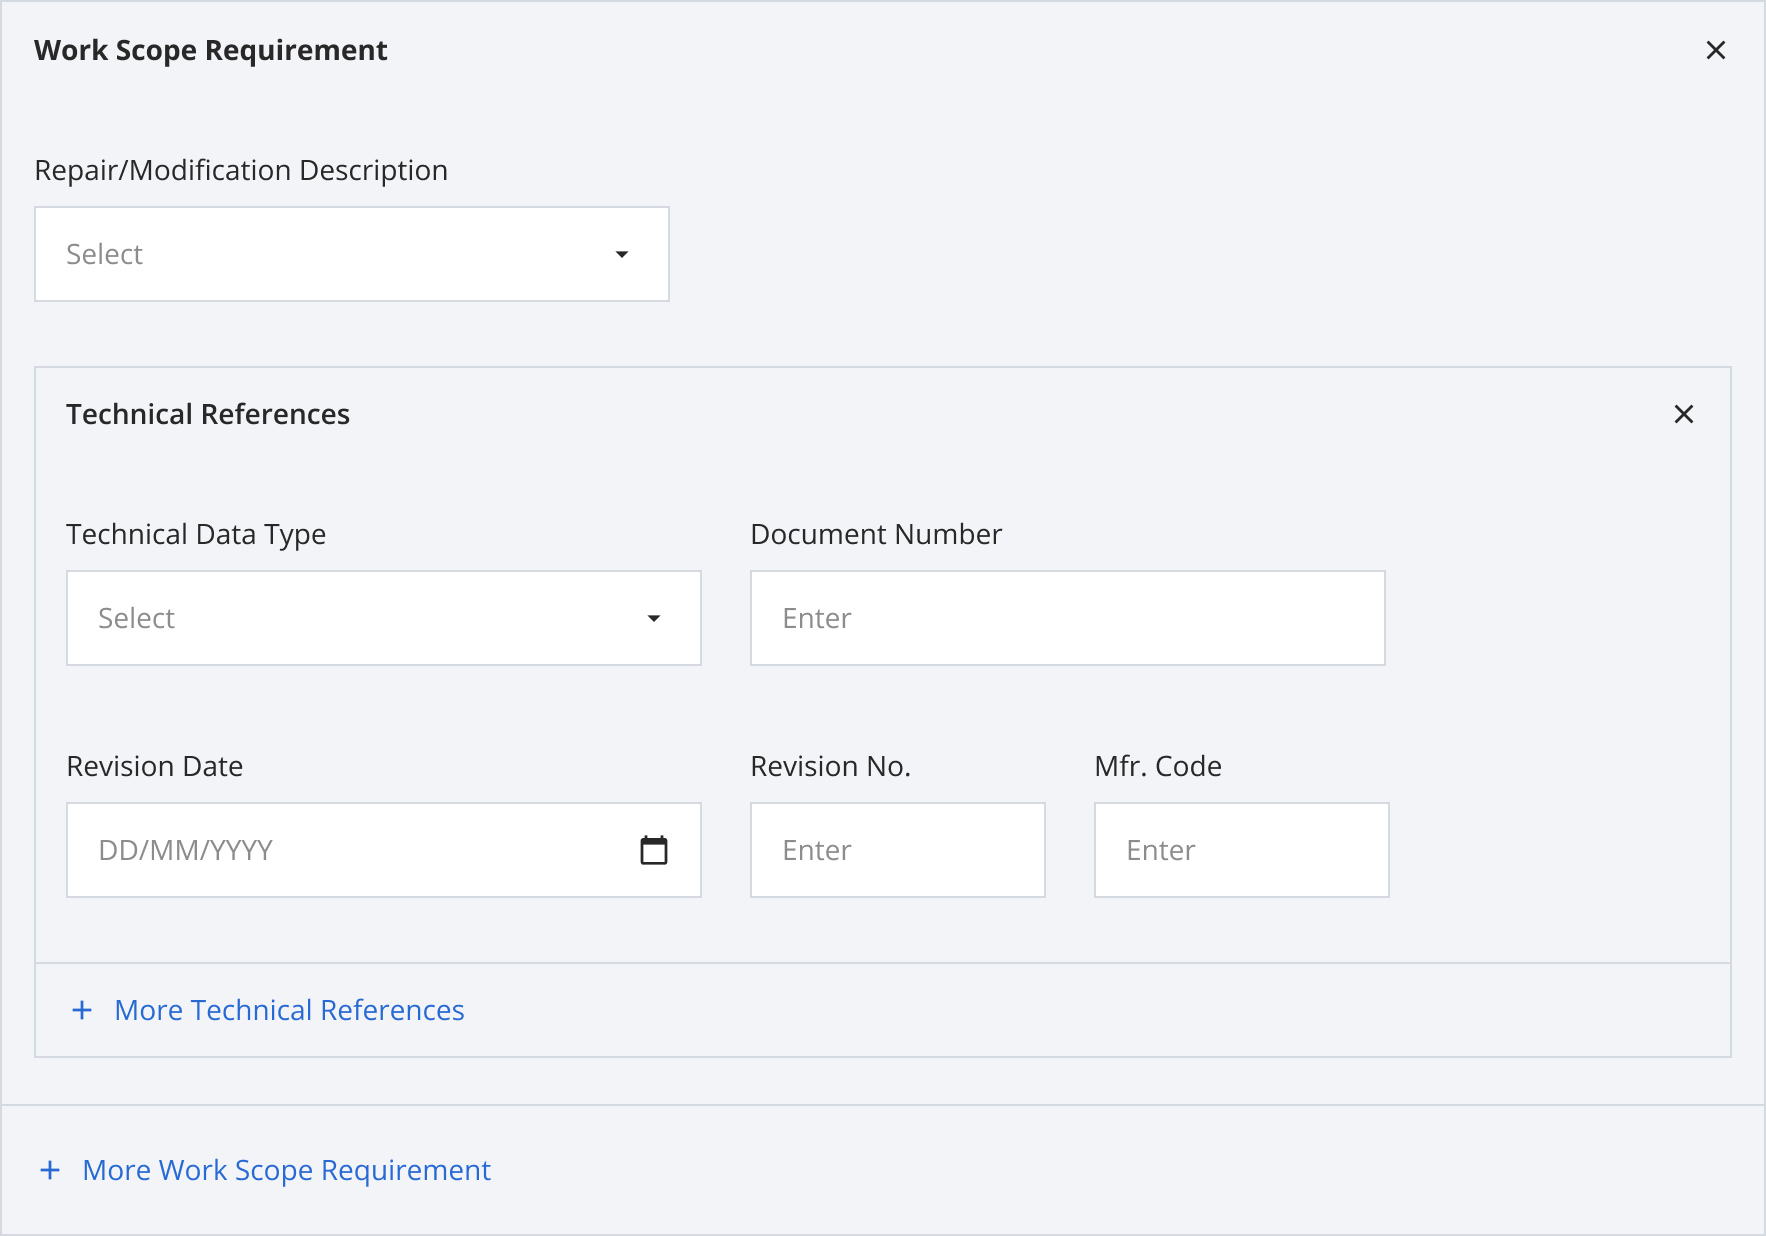
The Work Scope Requirement section allows you to provide the details about the repair that needs to be performed.
Repair Modification Description
The Repair Modification Description contains a list of possible values for you to choose.
| Repair Modification Description Available Options |
|---|
| Inspected |
| Inspected/Tested |
| Modified |
| Overhauled |
| Repaired |
| Tested |
You can add multiple Work Scope Requirement sections. Click on “+ More Work Scope Requirement” to generate a new section.
Technical References
Under the technical references is a list of technical data types to choose from. You can add additional Technical References by clicking “+ Technical References”.
Alternate Part Number
This section allows you to fill in the alternative number for your repair assets.

Upgrade Part Number
This section allows you to enter a new part number for your repair assets.

Packaging Requirement
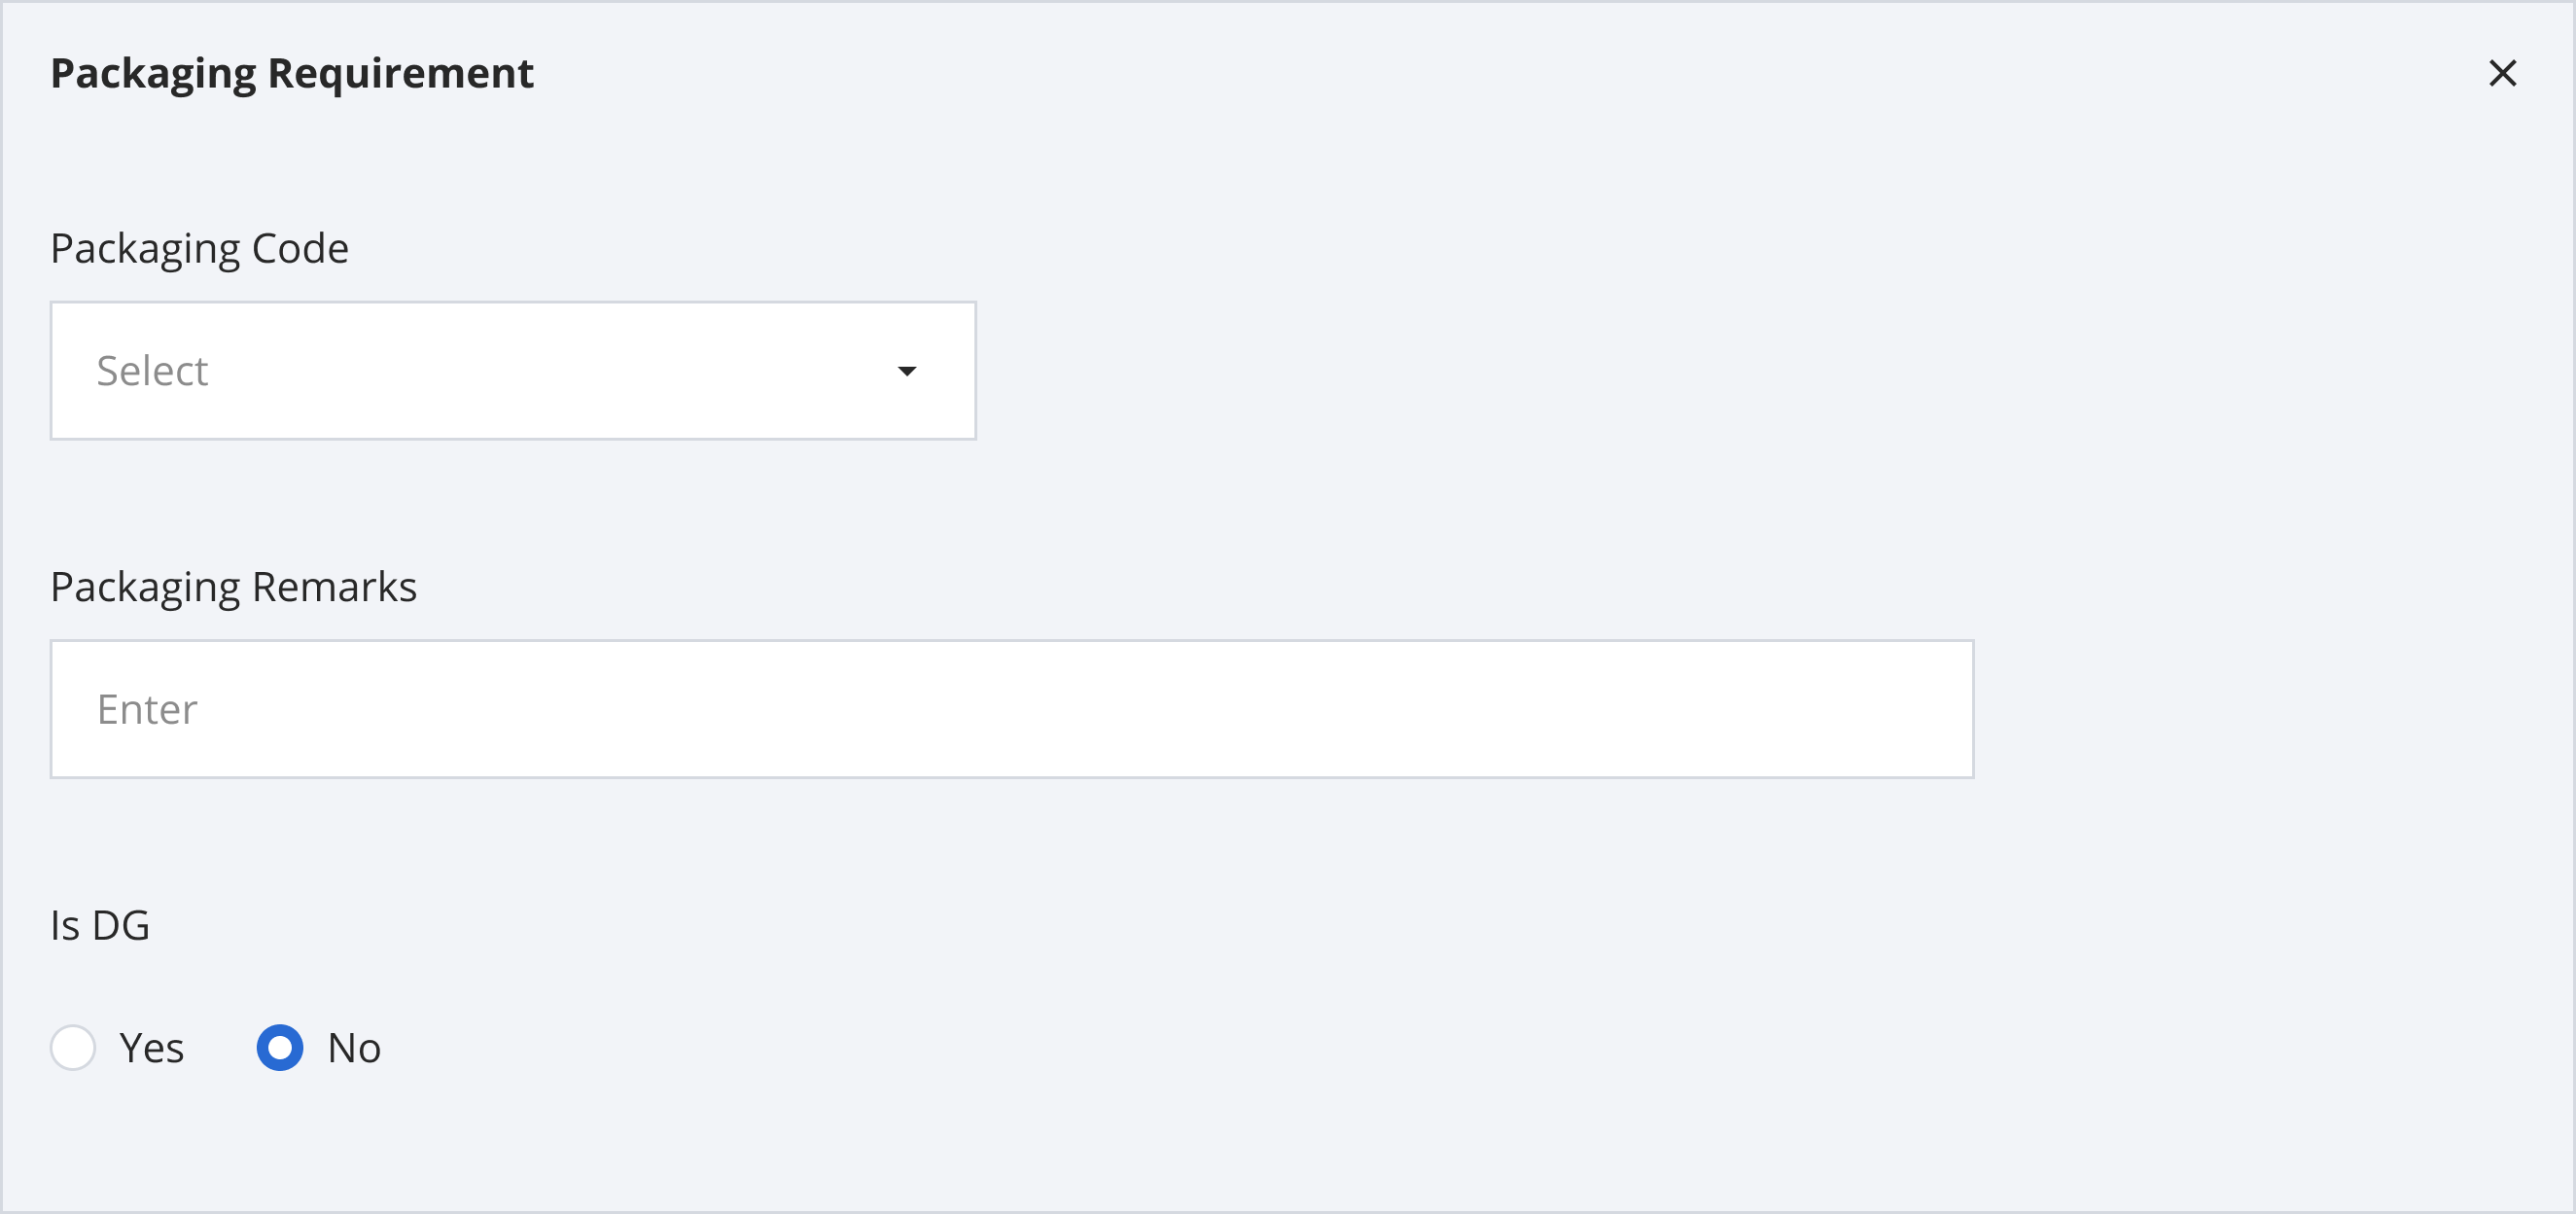
This section allows you to enter packing requirement information.
Packaging Code
There is a list of packaging codes for you to choose from.
| Packaging Code Available Options |
|---|
| No specific packaging requested |
| Use ATA Spec 300 Category 1 container |
| Use ATA Spec 300 Category 2 container |
| Packaged and marked as described in ATA Spec 300, Chapter 3 |
| Each Kit is to be packaged and identified as described in ATA Spec 300, Chapter 4 |
| Material handling devices required as described in ATA Spec 300, Chapter 5 |
| Hazardous Material requires specific packaging and approved markings as described in ATA Spec 300, Chapter 6 |
| Special Reference Packaging as described in ATA Spec 300, Para. 1-4. Includes electrostatic devices, photosynthetic processes and other Chapter 1 requirements where protection is required from abnormal deterioration or damage in storage or by handling |
| Part not shipped in ATA Spec 300 Category 1 container as indicated in the Purchase Order for repair/overhaul services |
| Part shipped by way of electronic messaging. (Packaging is to observe structure, security and content protection features as prescribed in section) |
Angle USI
This section allow you to indicate whether Angle USI has been performed and if it passed or not.

Additional Parameters
The Additional Parameters section lets you indicate whether the Repair Order Assets are an LLP and/or an Accessory.

Removing Sections
You can remove the sections in the Repair Order Details except for the required sections.
Steps to remove a section in Order Details
Step 1: Click '✕' on the expanded section you want to remove.
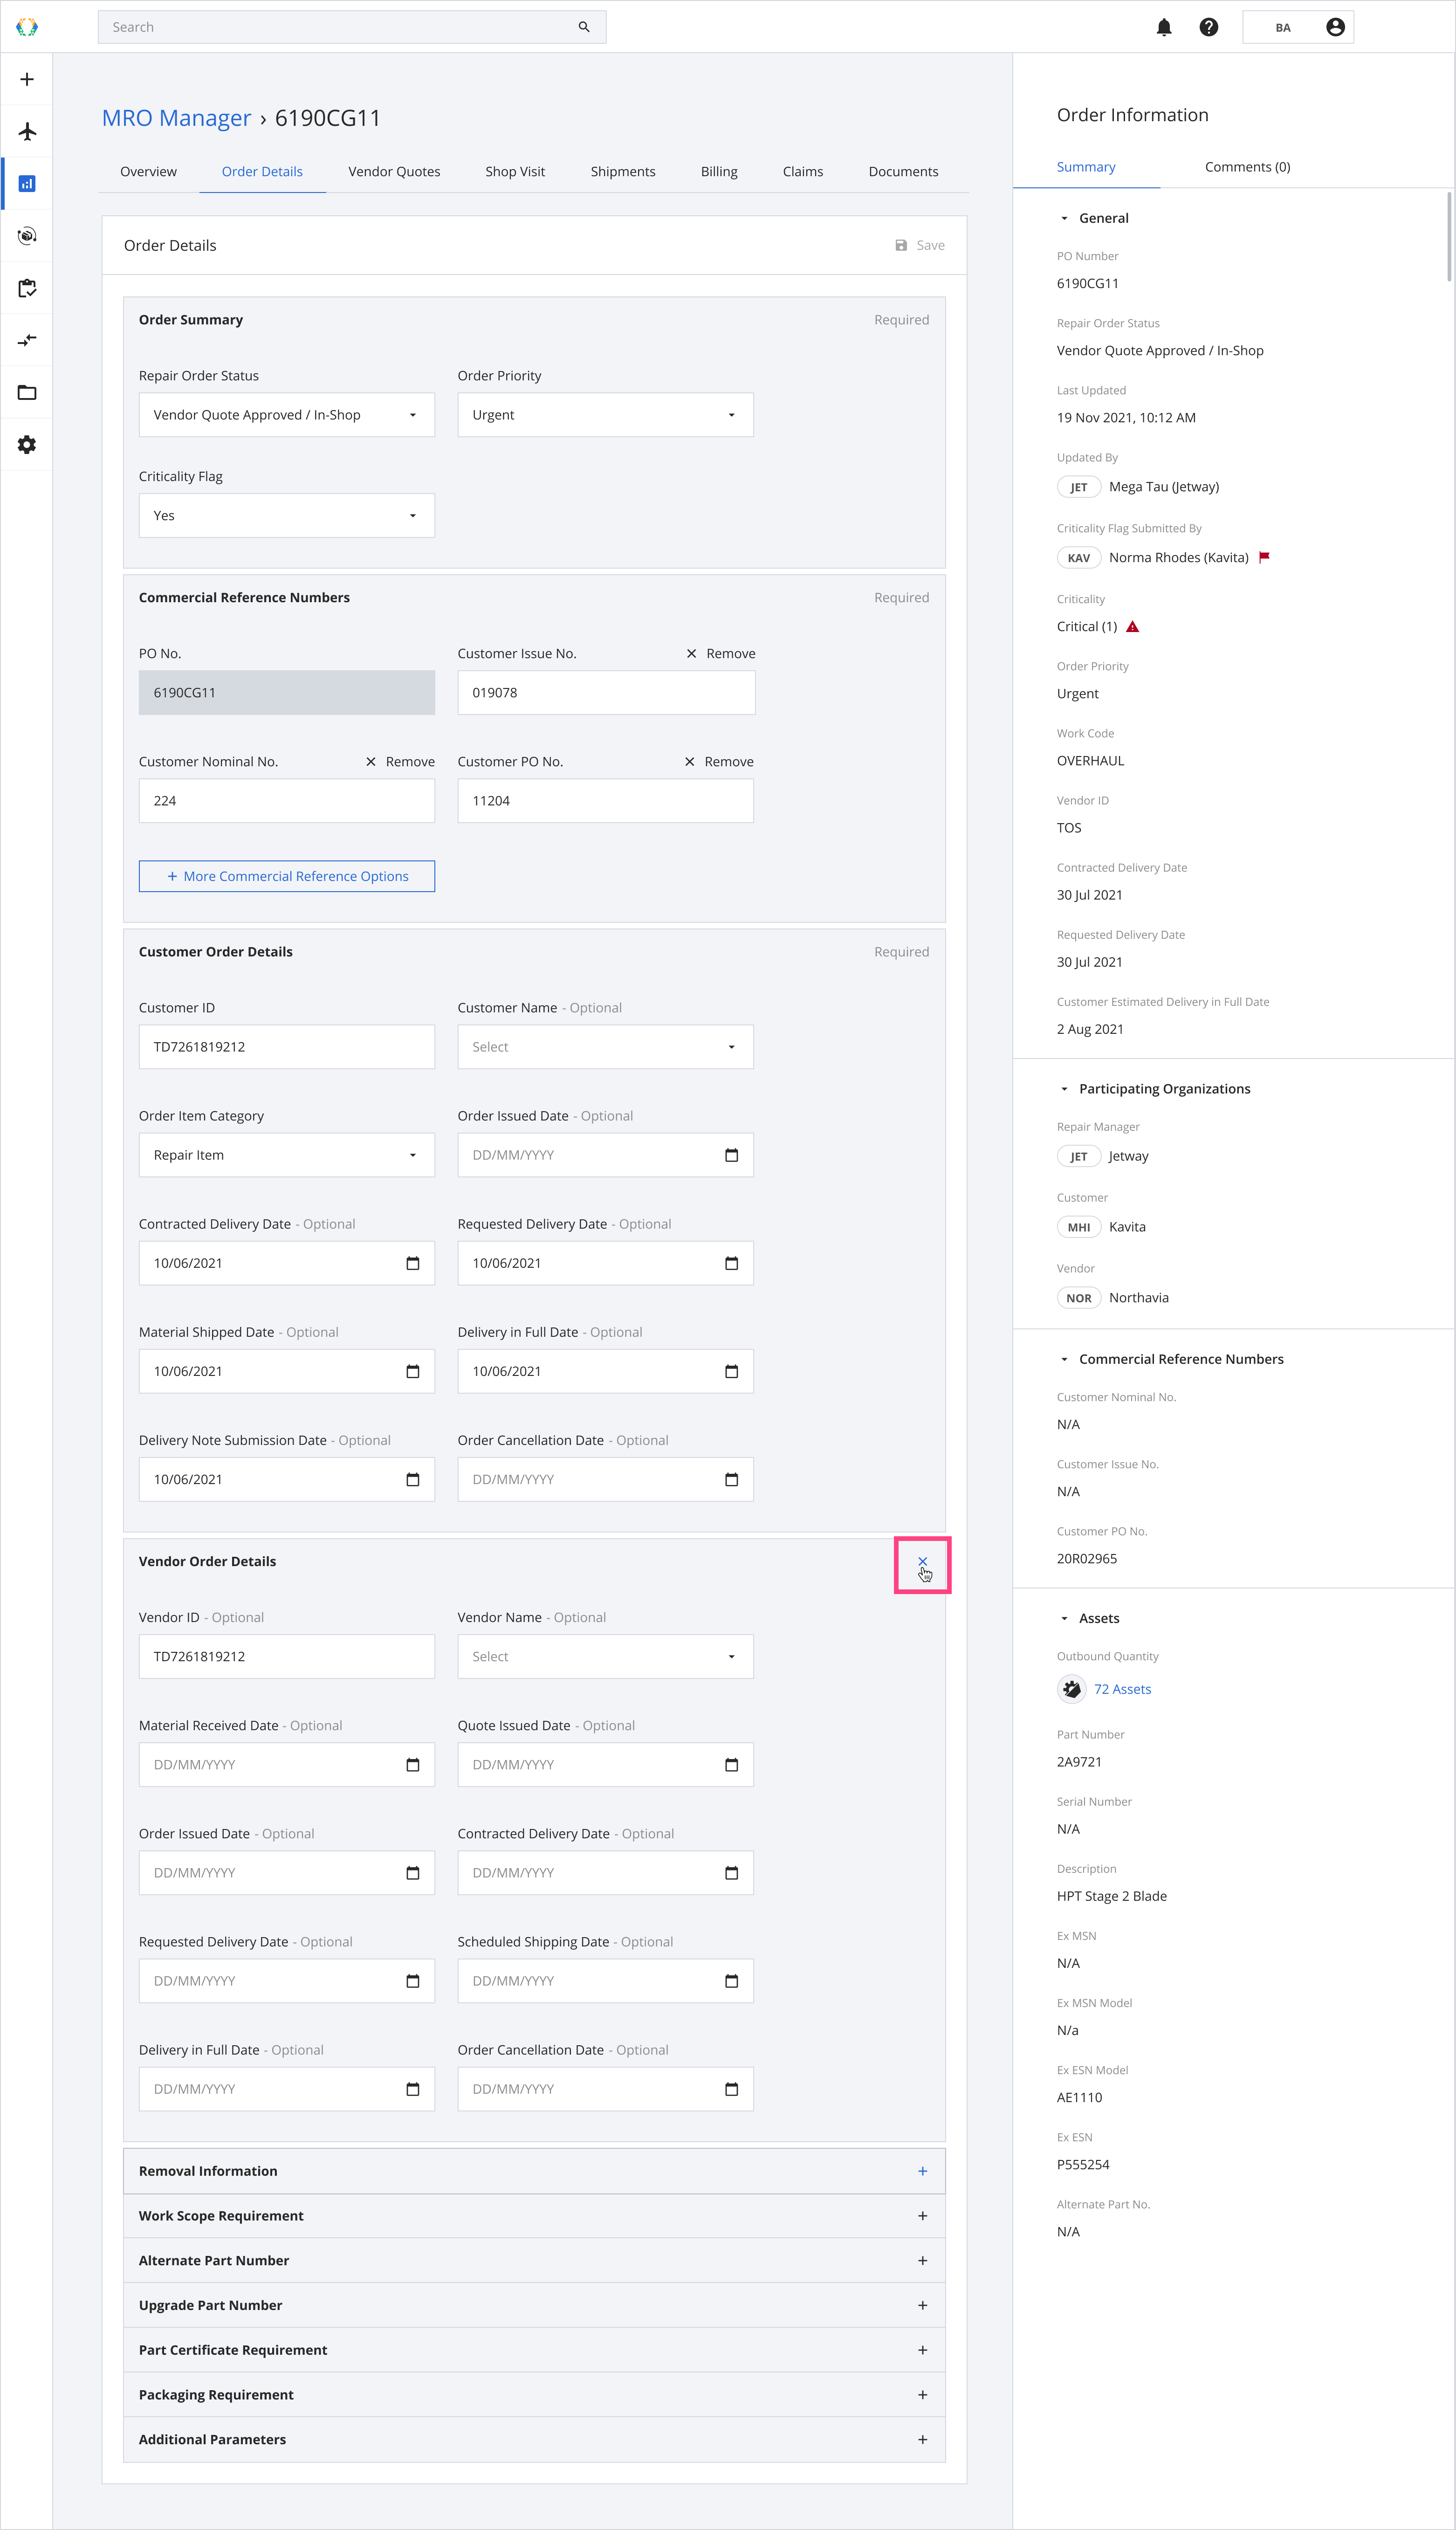
Step 2: A confirmation message will appear, click 'Remove' to confirm removal.
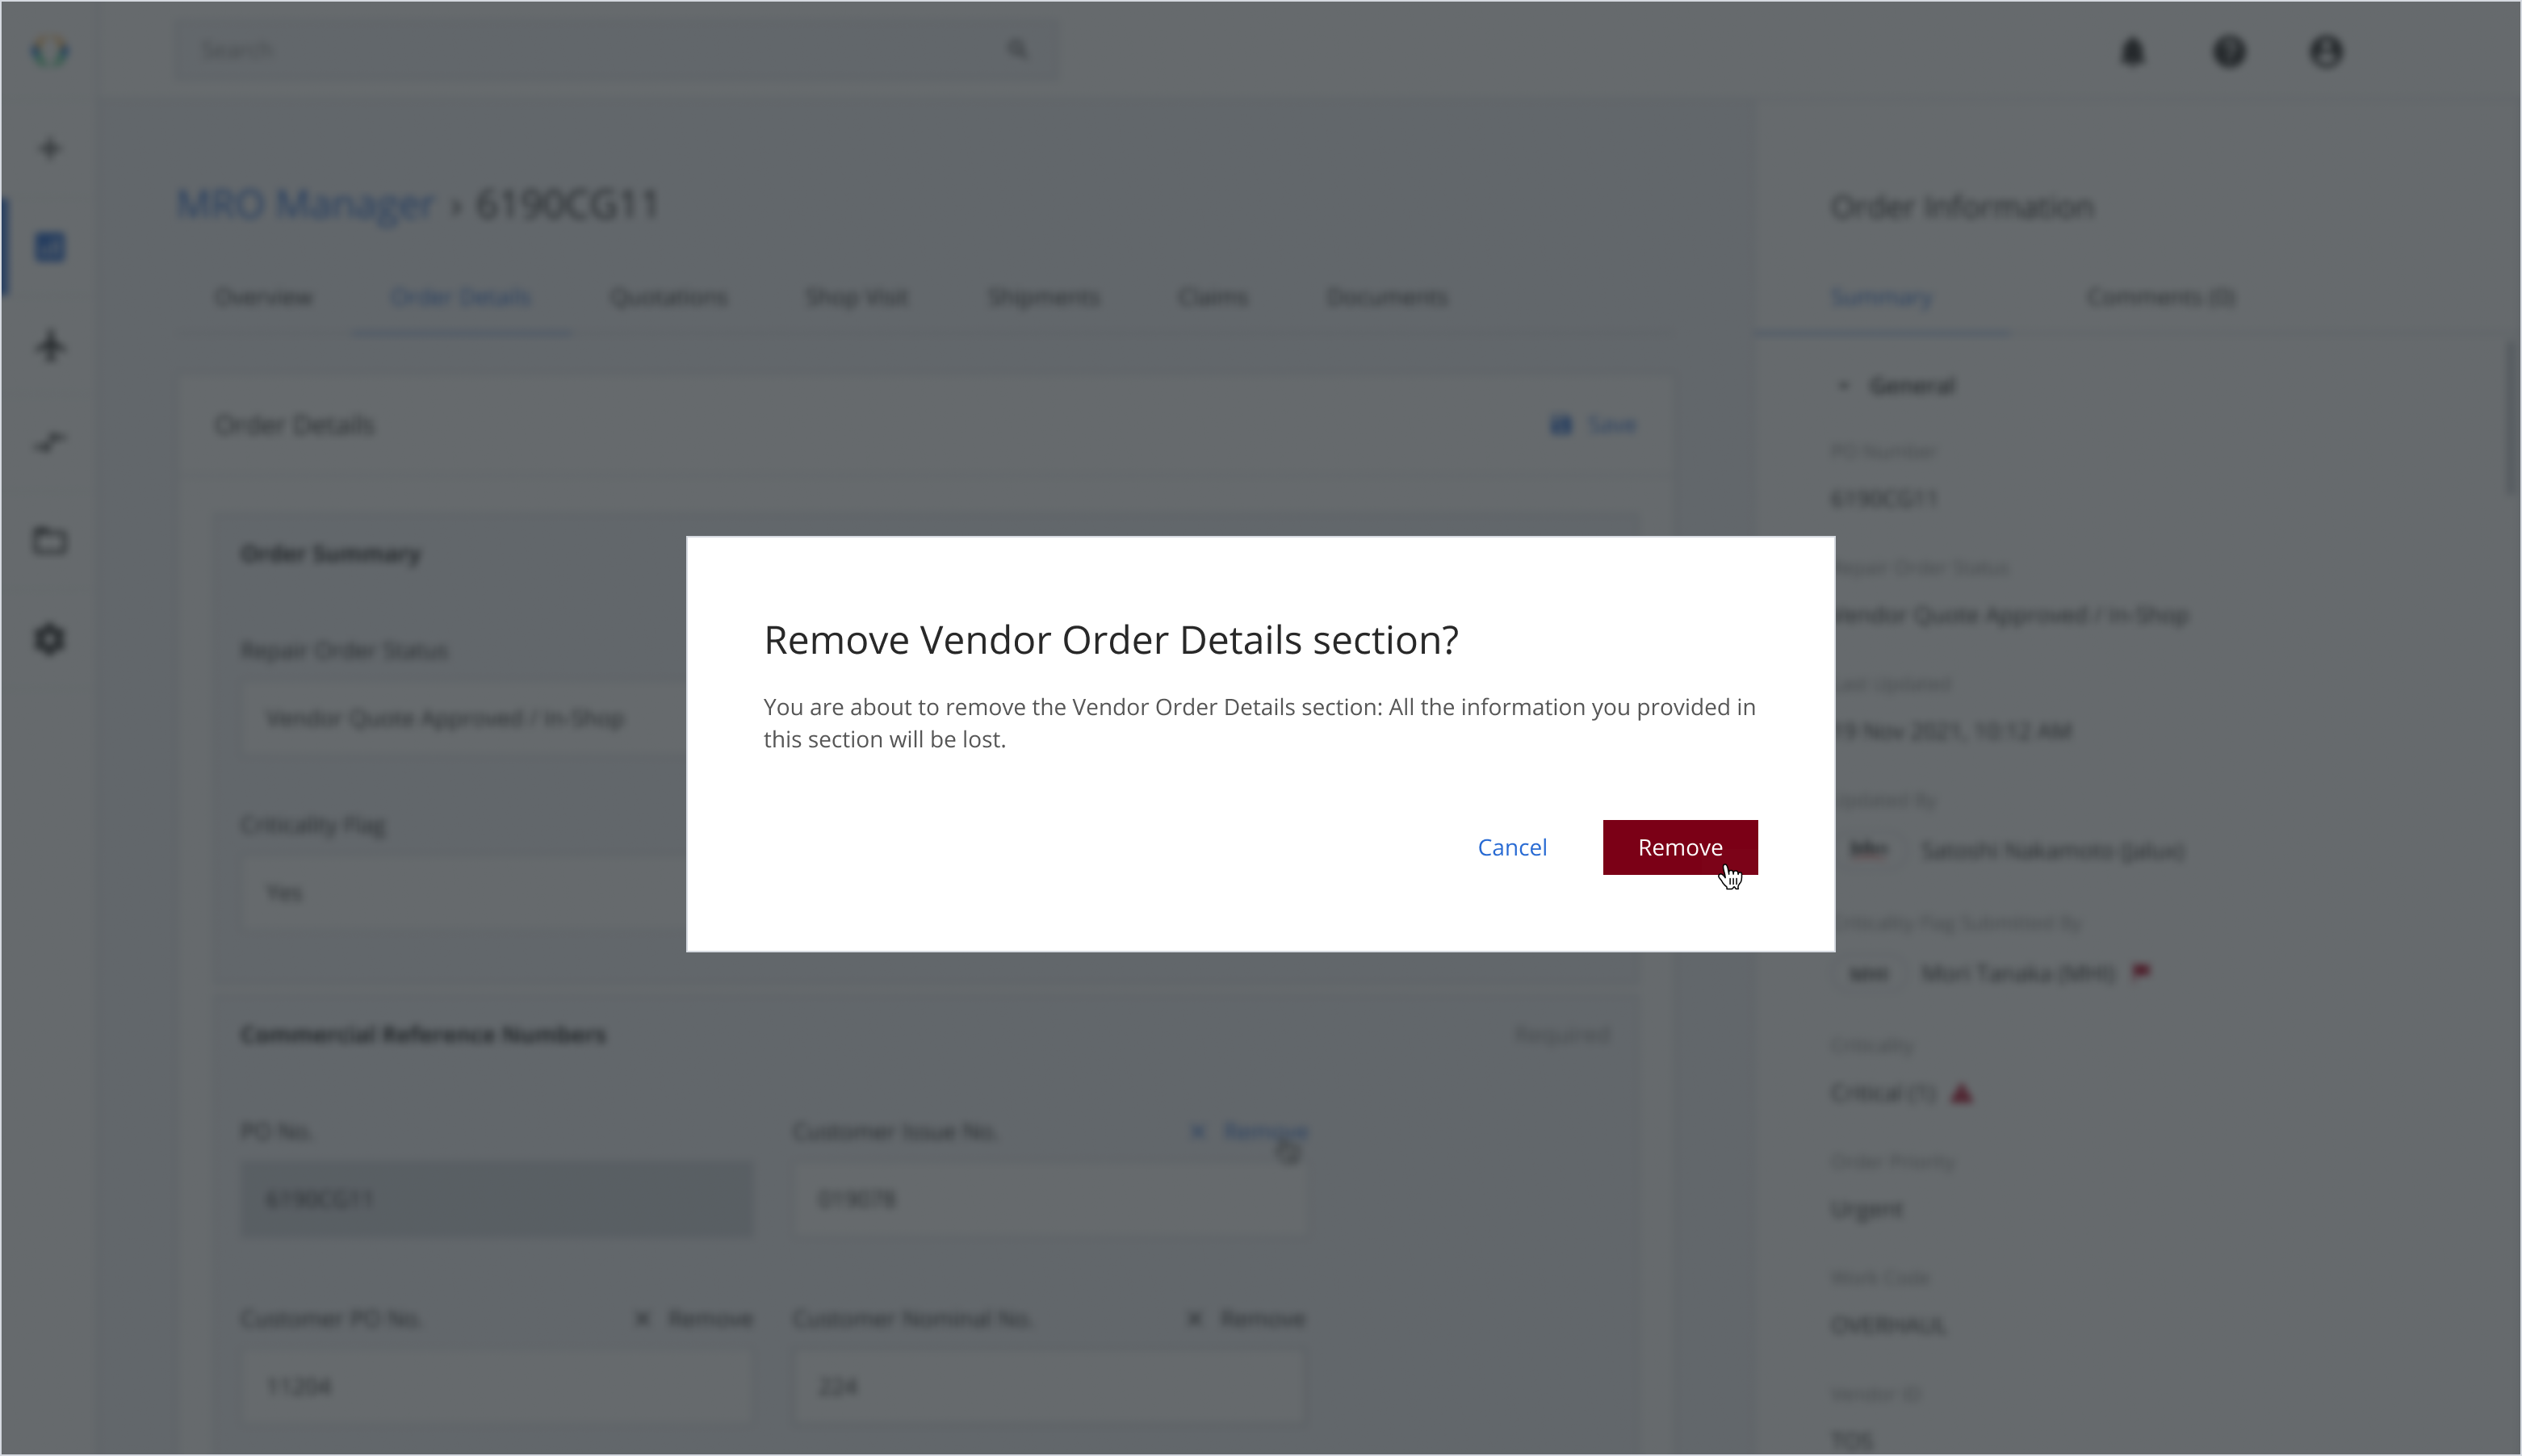
Step 3: After removal, the section will return to its collapsed state.
Saving Changes in Order Details
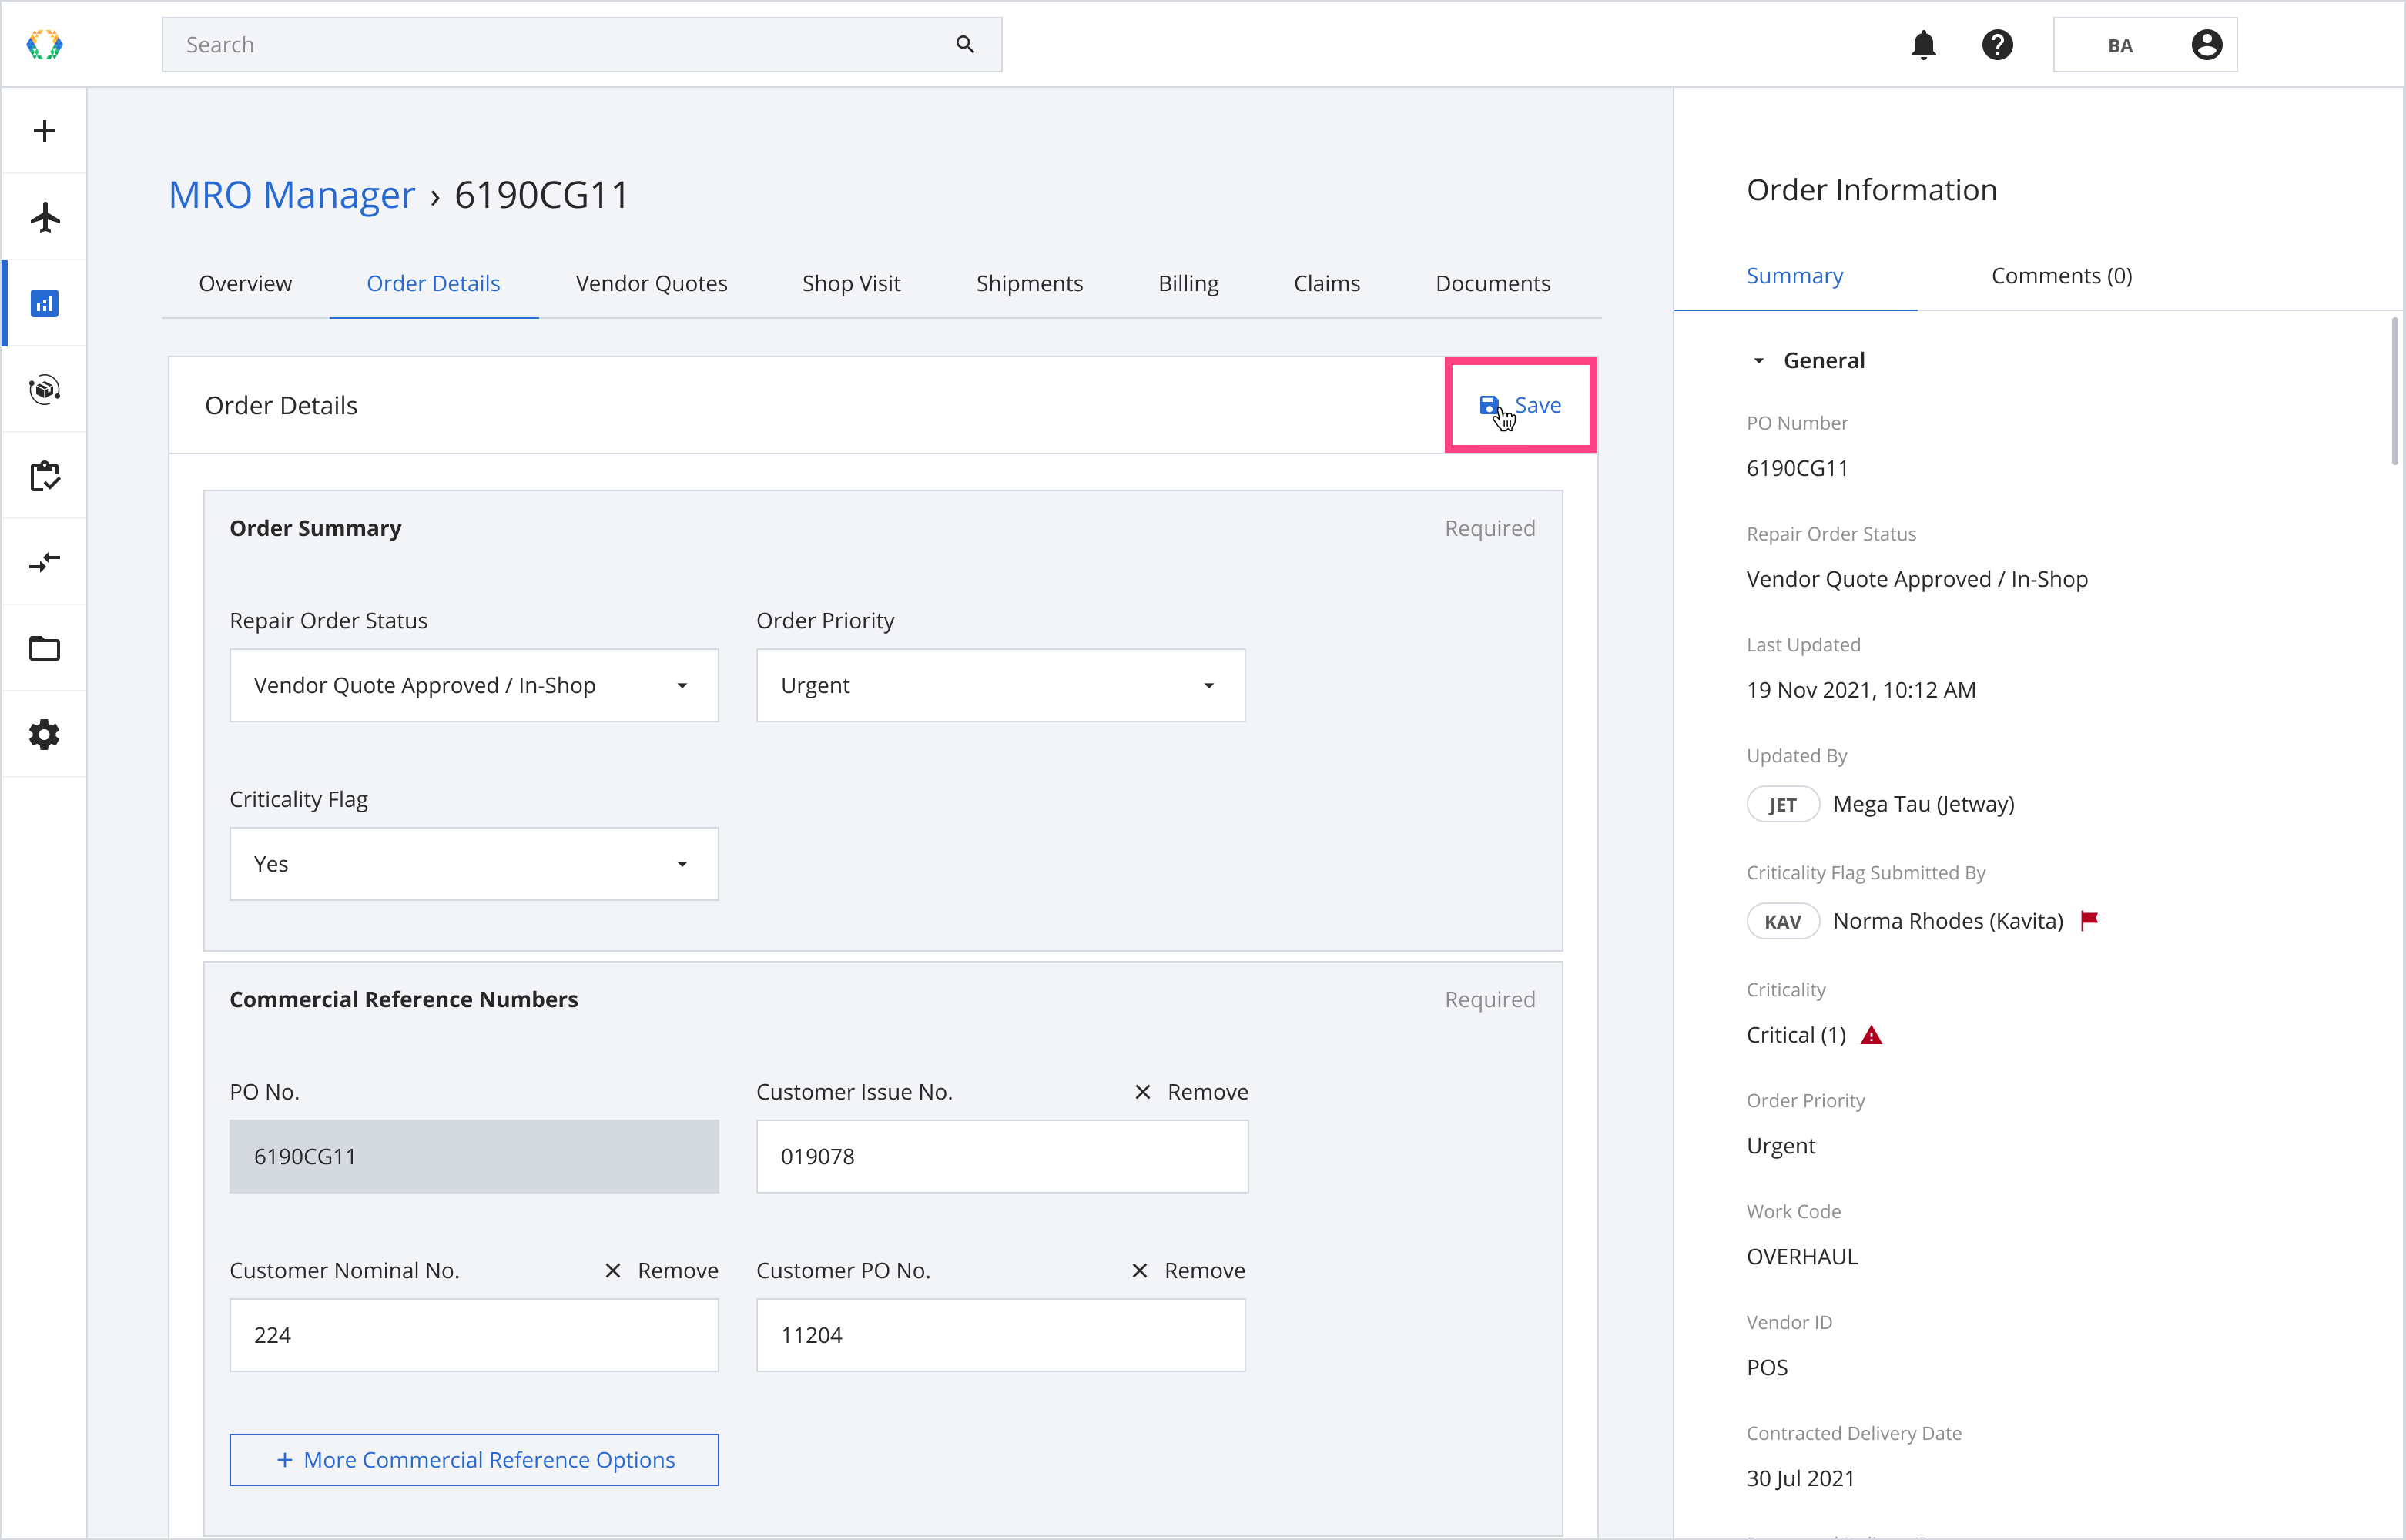
After filling in your Order Details, click 'Save' on the top right-hand corner of the Order Details tab.
Updated 12 months ago