Create Transaction
Entering Transaction Initiation
Your organization can initiate a transaction and request other participants who is in the organization's network to participate and complete a transaction.
There are multiple methods to trigger a transaction creation process.
Method 1: Create a transaction from the left panel - select “Create Transaction”
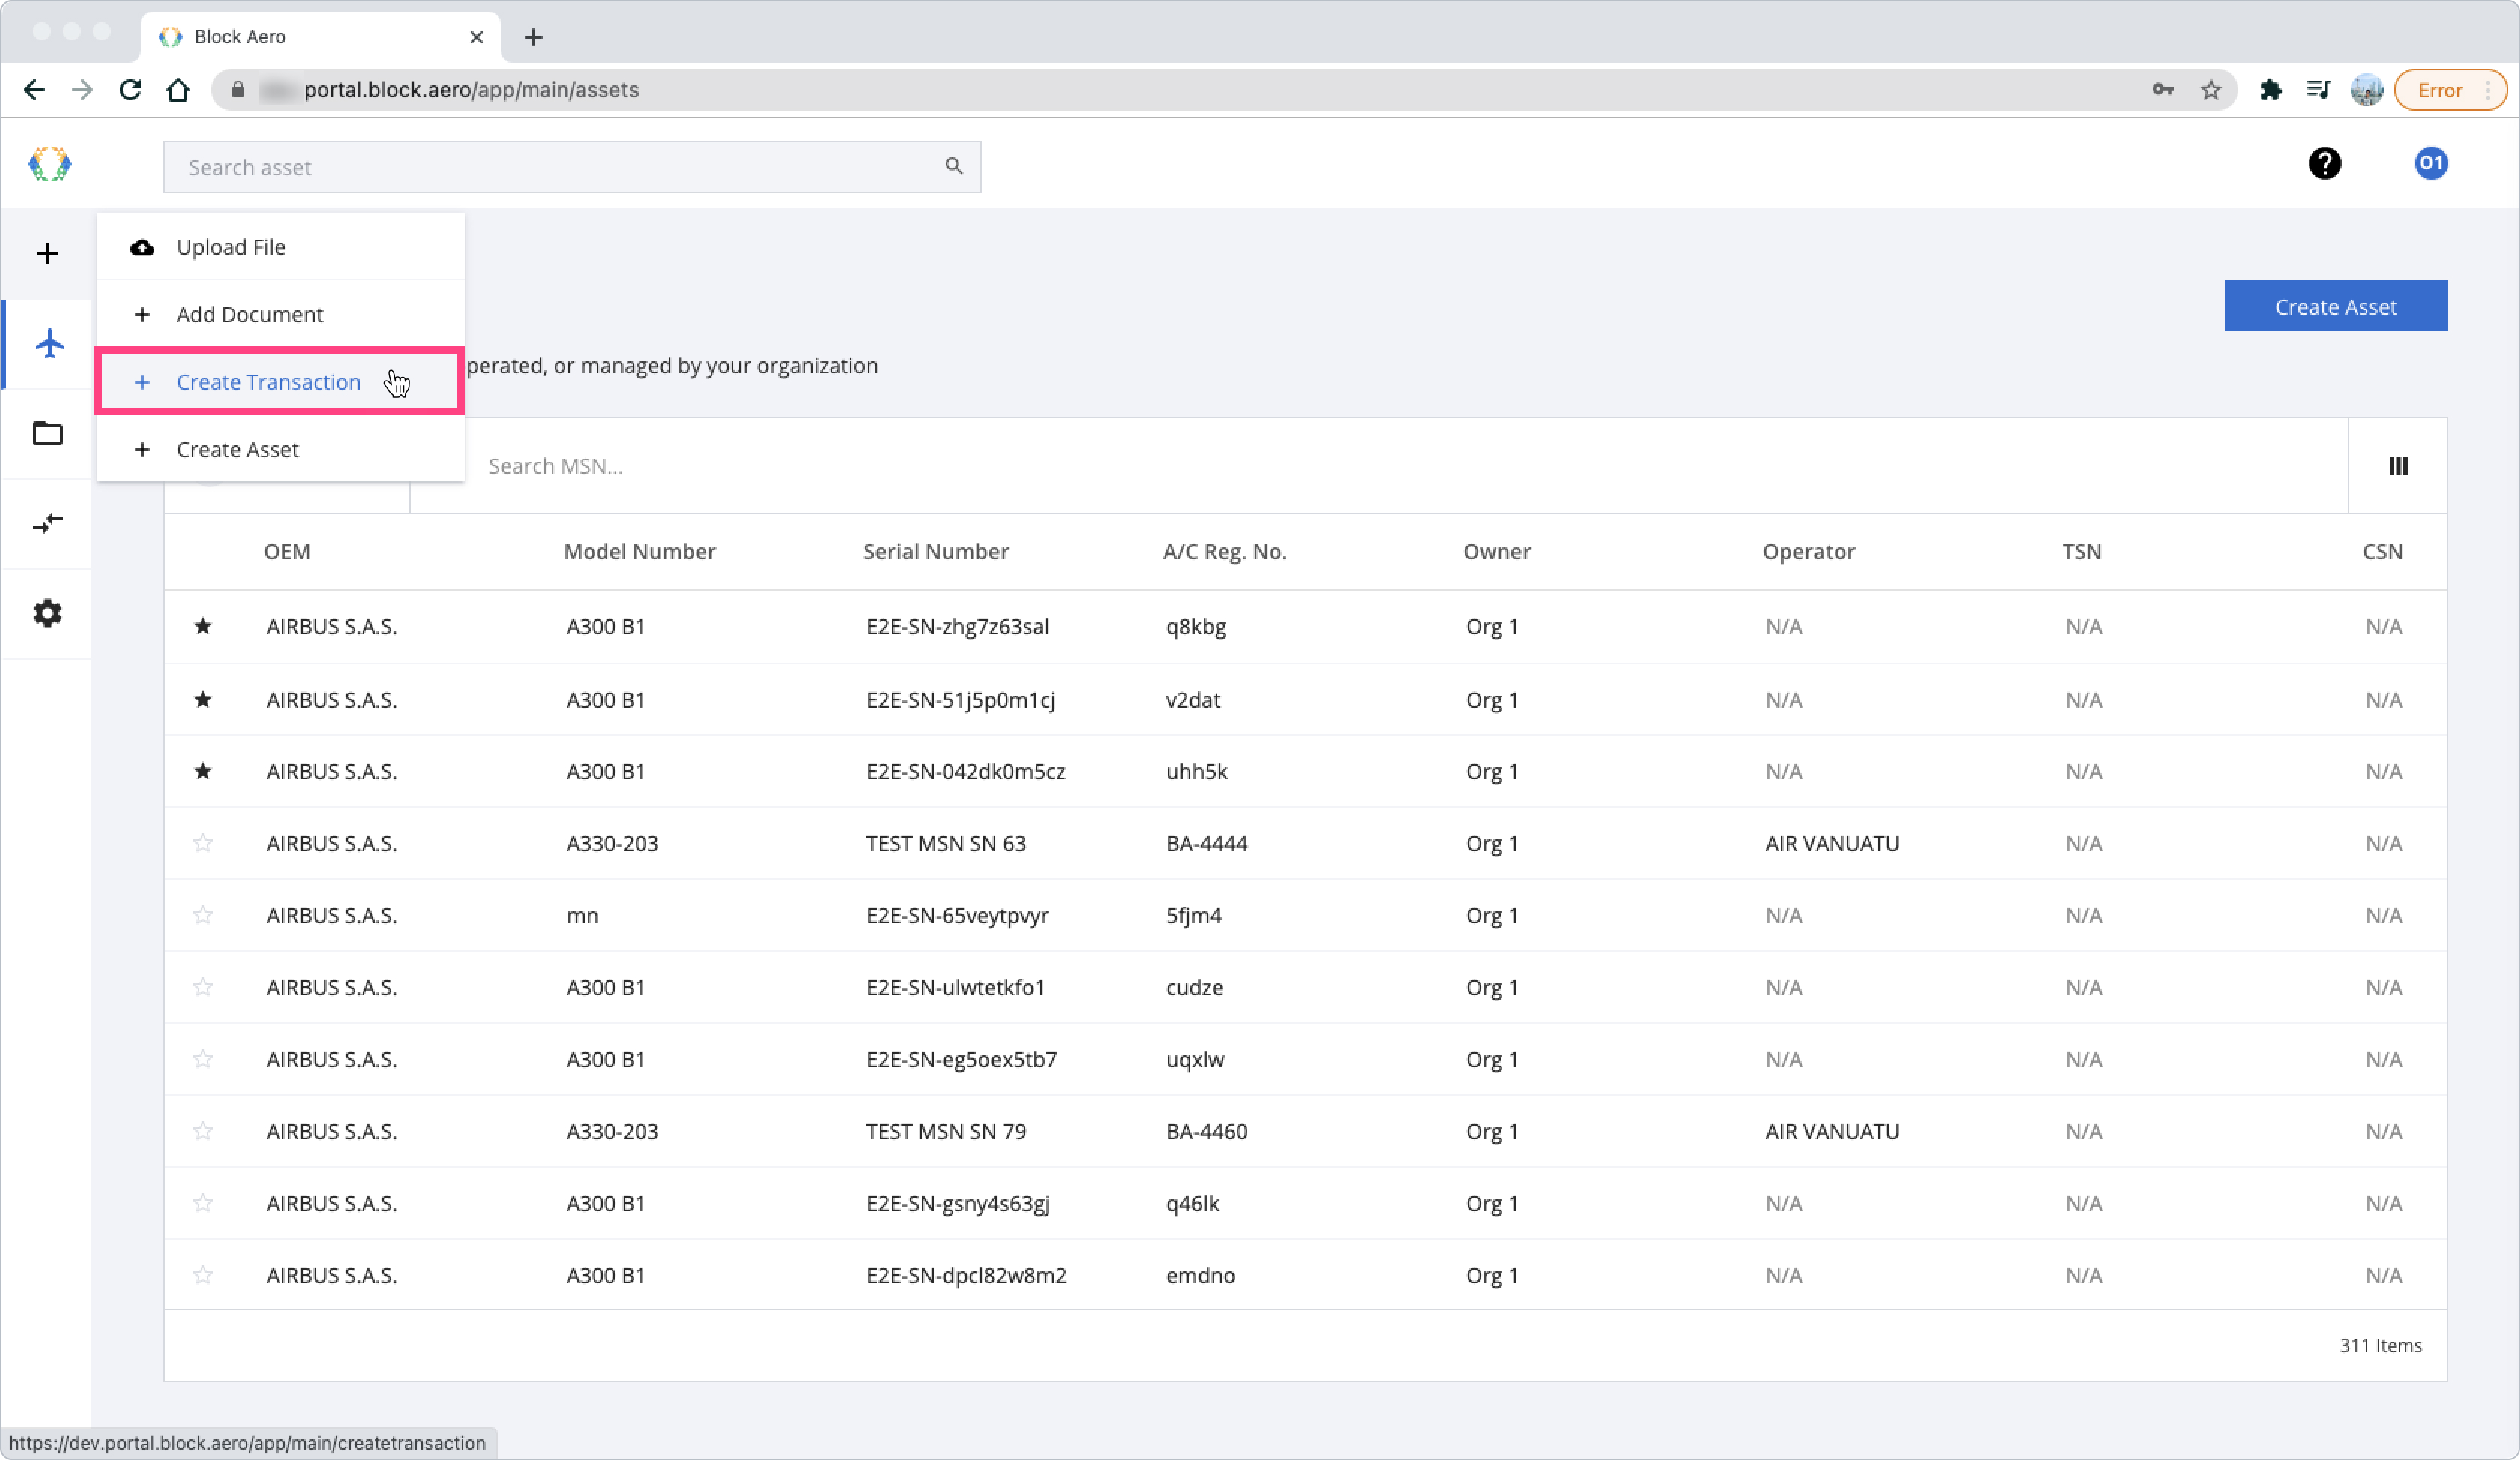
Left Panel - Create Transaction
Method 2: On the top-right of Transaction List screen, click “Create Transaction” button.
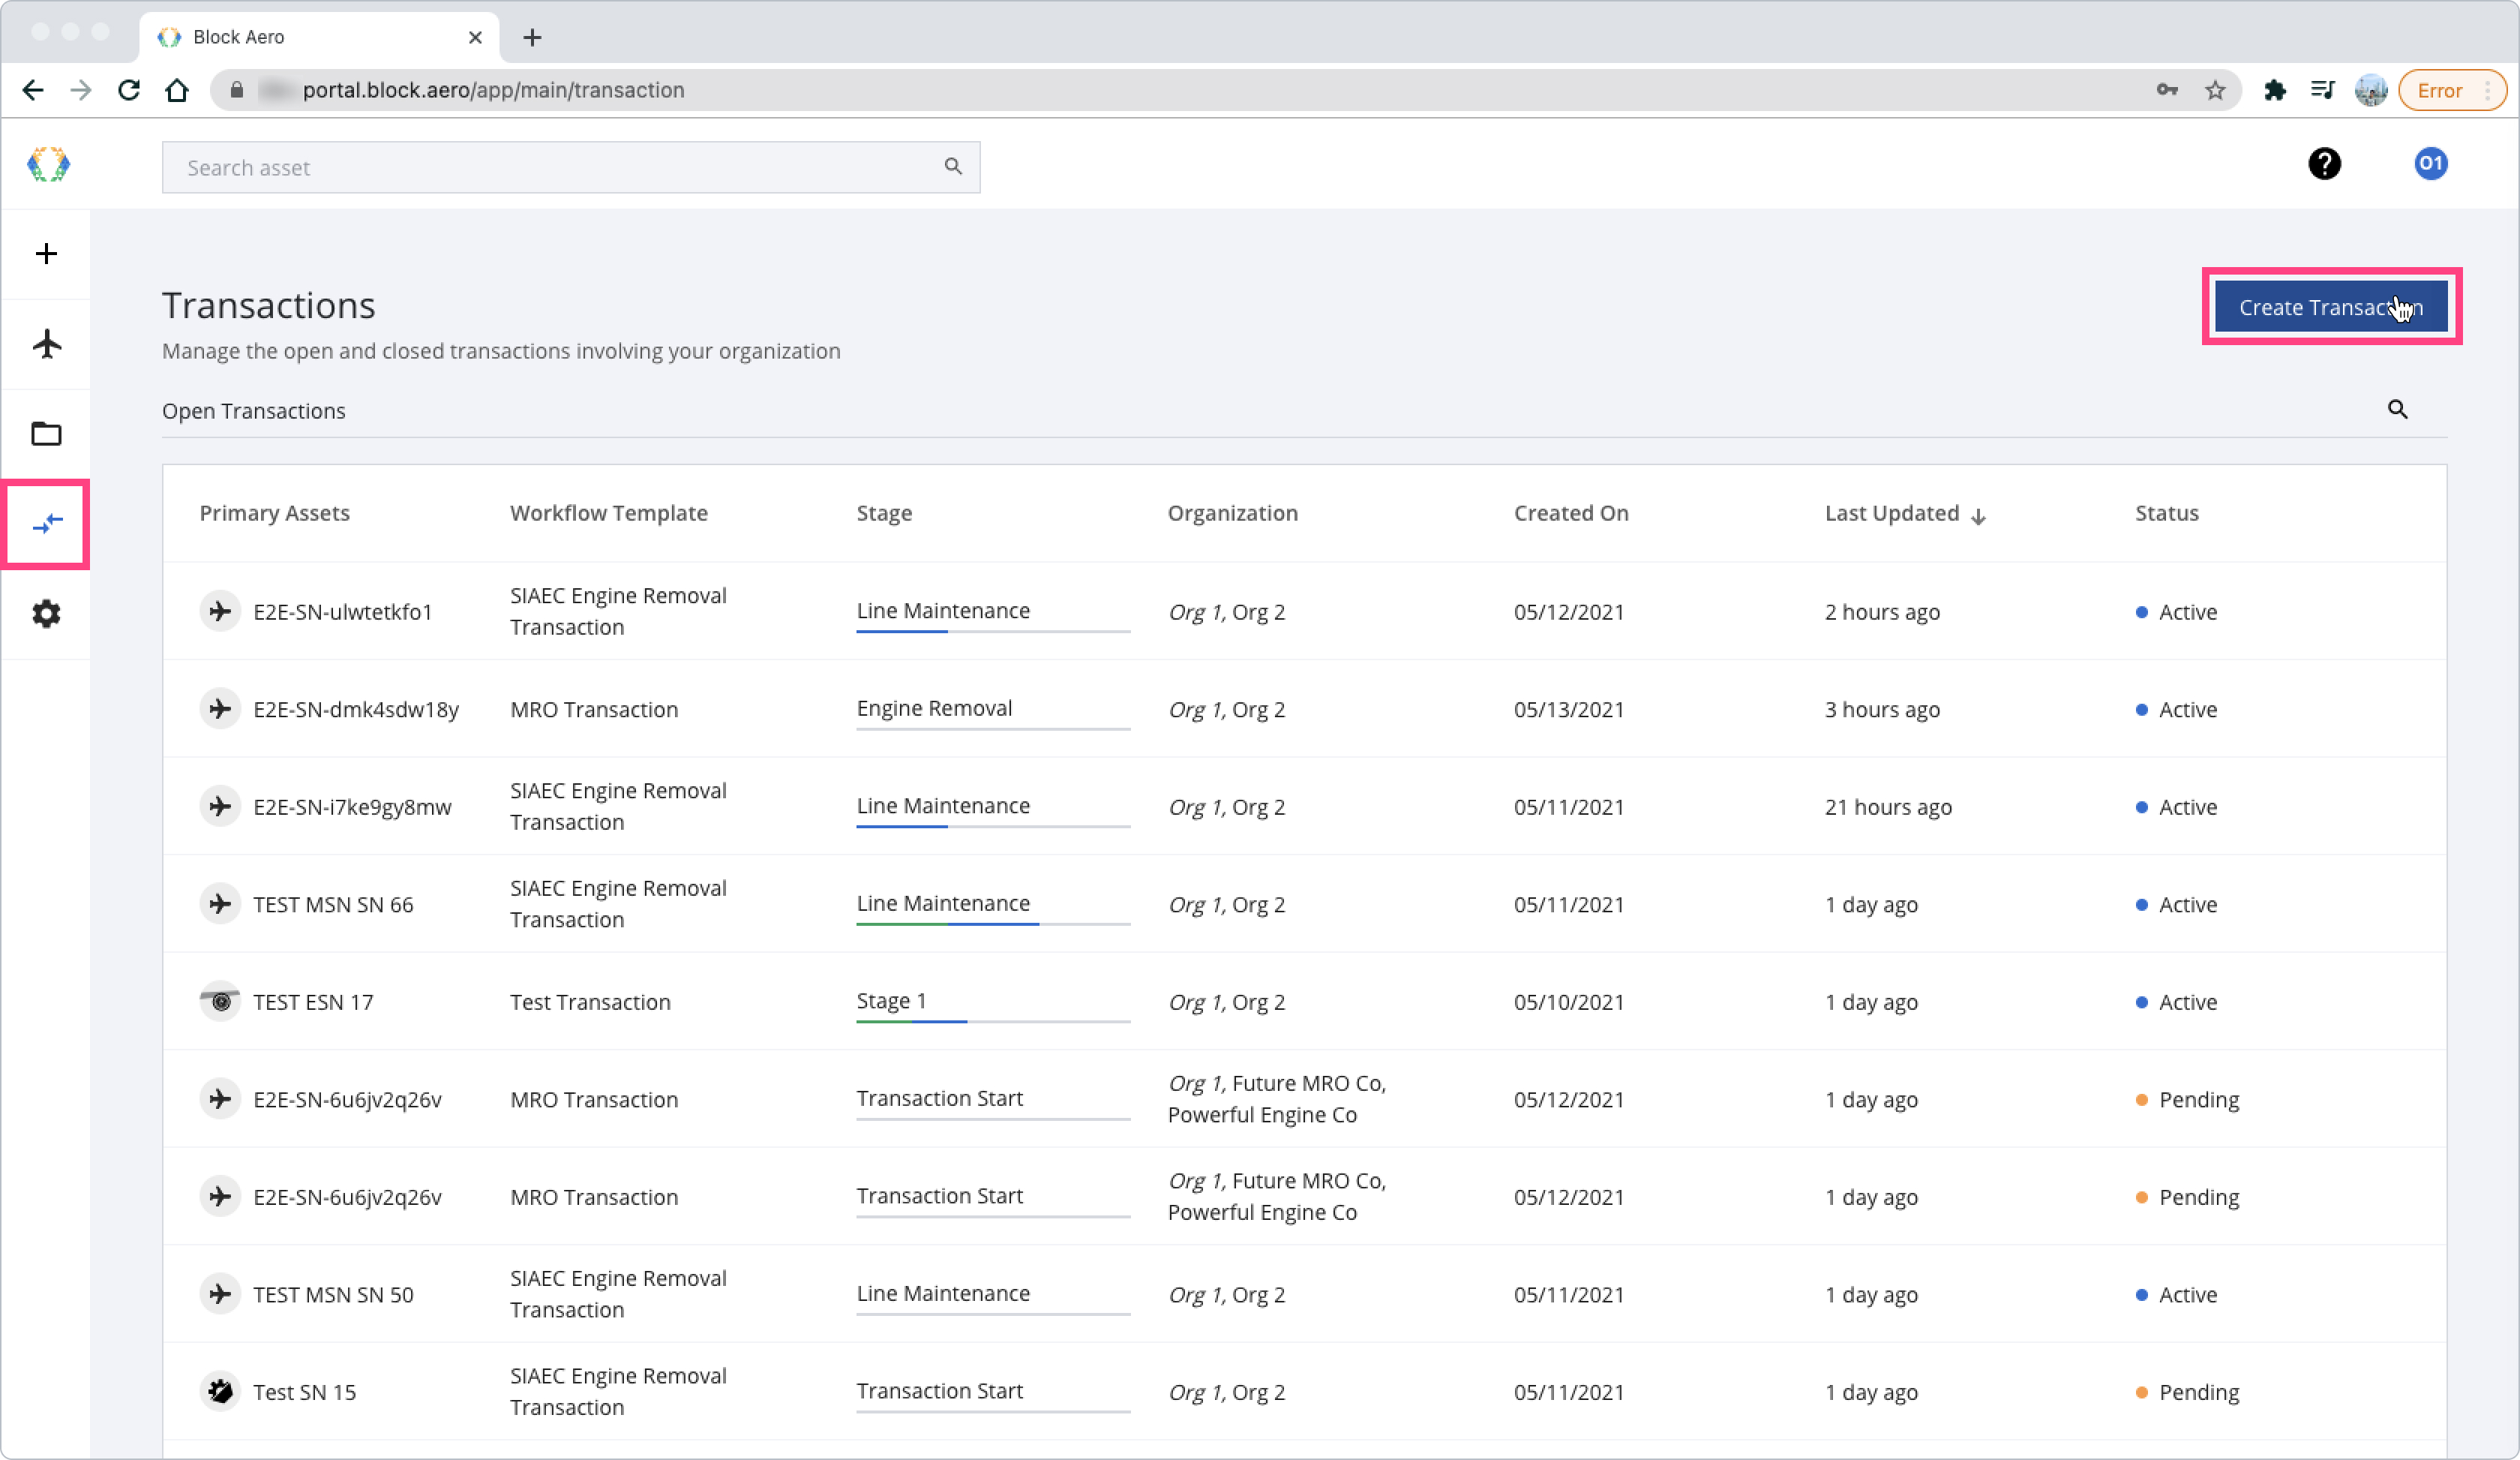
Step to Initiate a transaction
Step 1: Select Transaction Template Workflow
Step 2: Select an Asset to Transact
Step 3: Select Organization Participants
Step 4: Select Payor(s) Organization
Step 1 : Select Transaction Template Workflow
At this step, you will be able to select the workflow transaction that you want to create. The workflow transaction has a different transaction requirement and participant organization type.
Which you can simply study from each template workflow card.
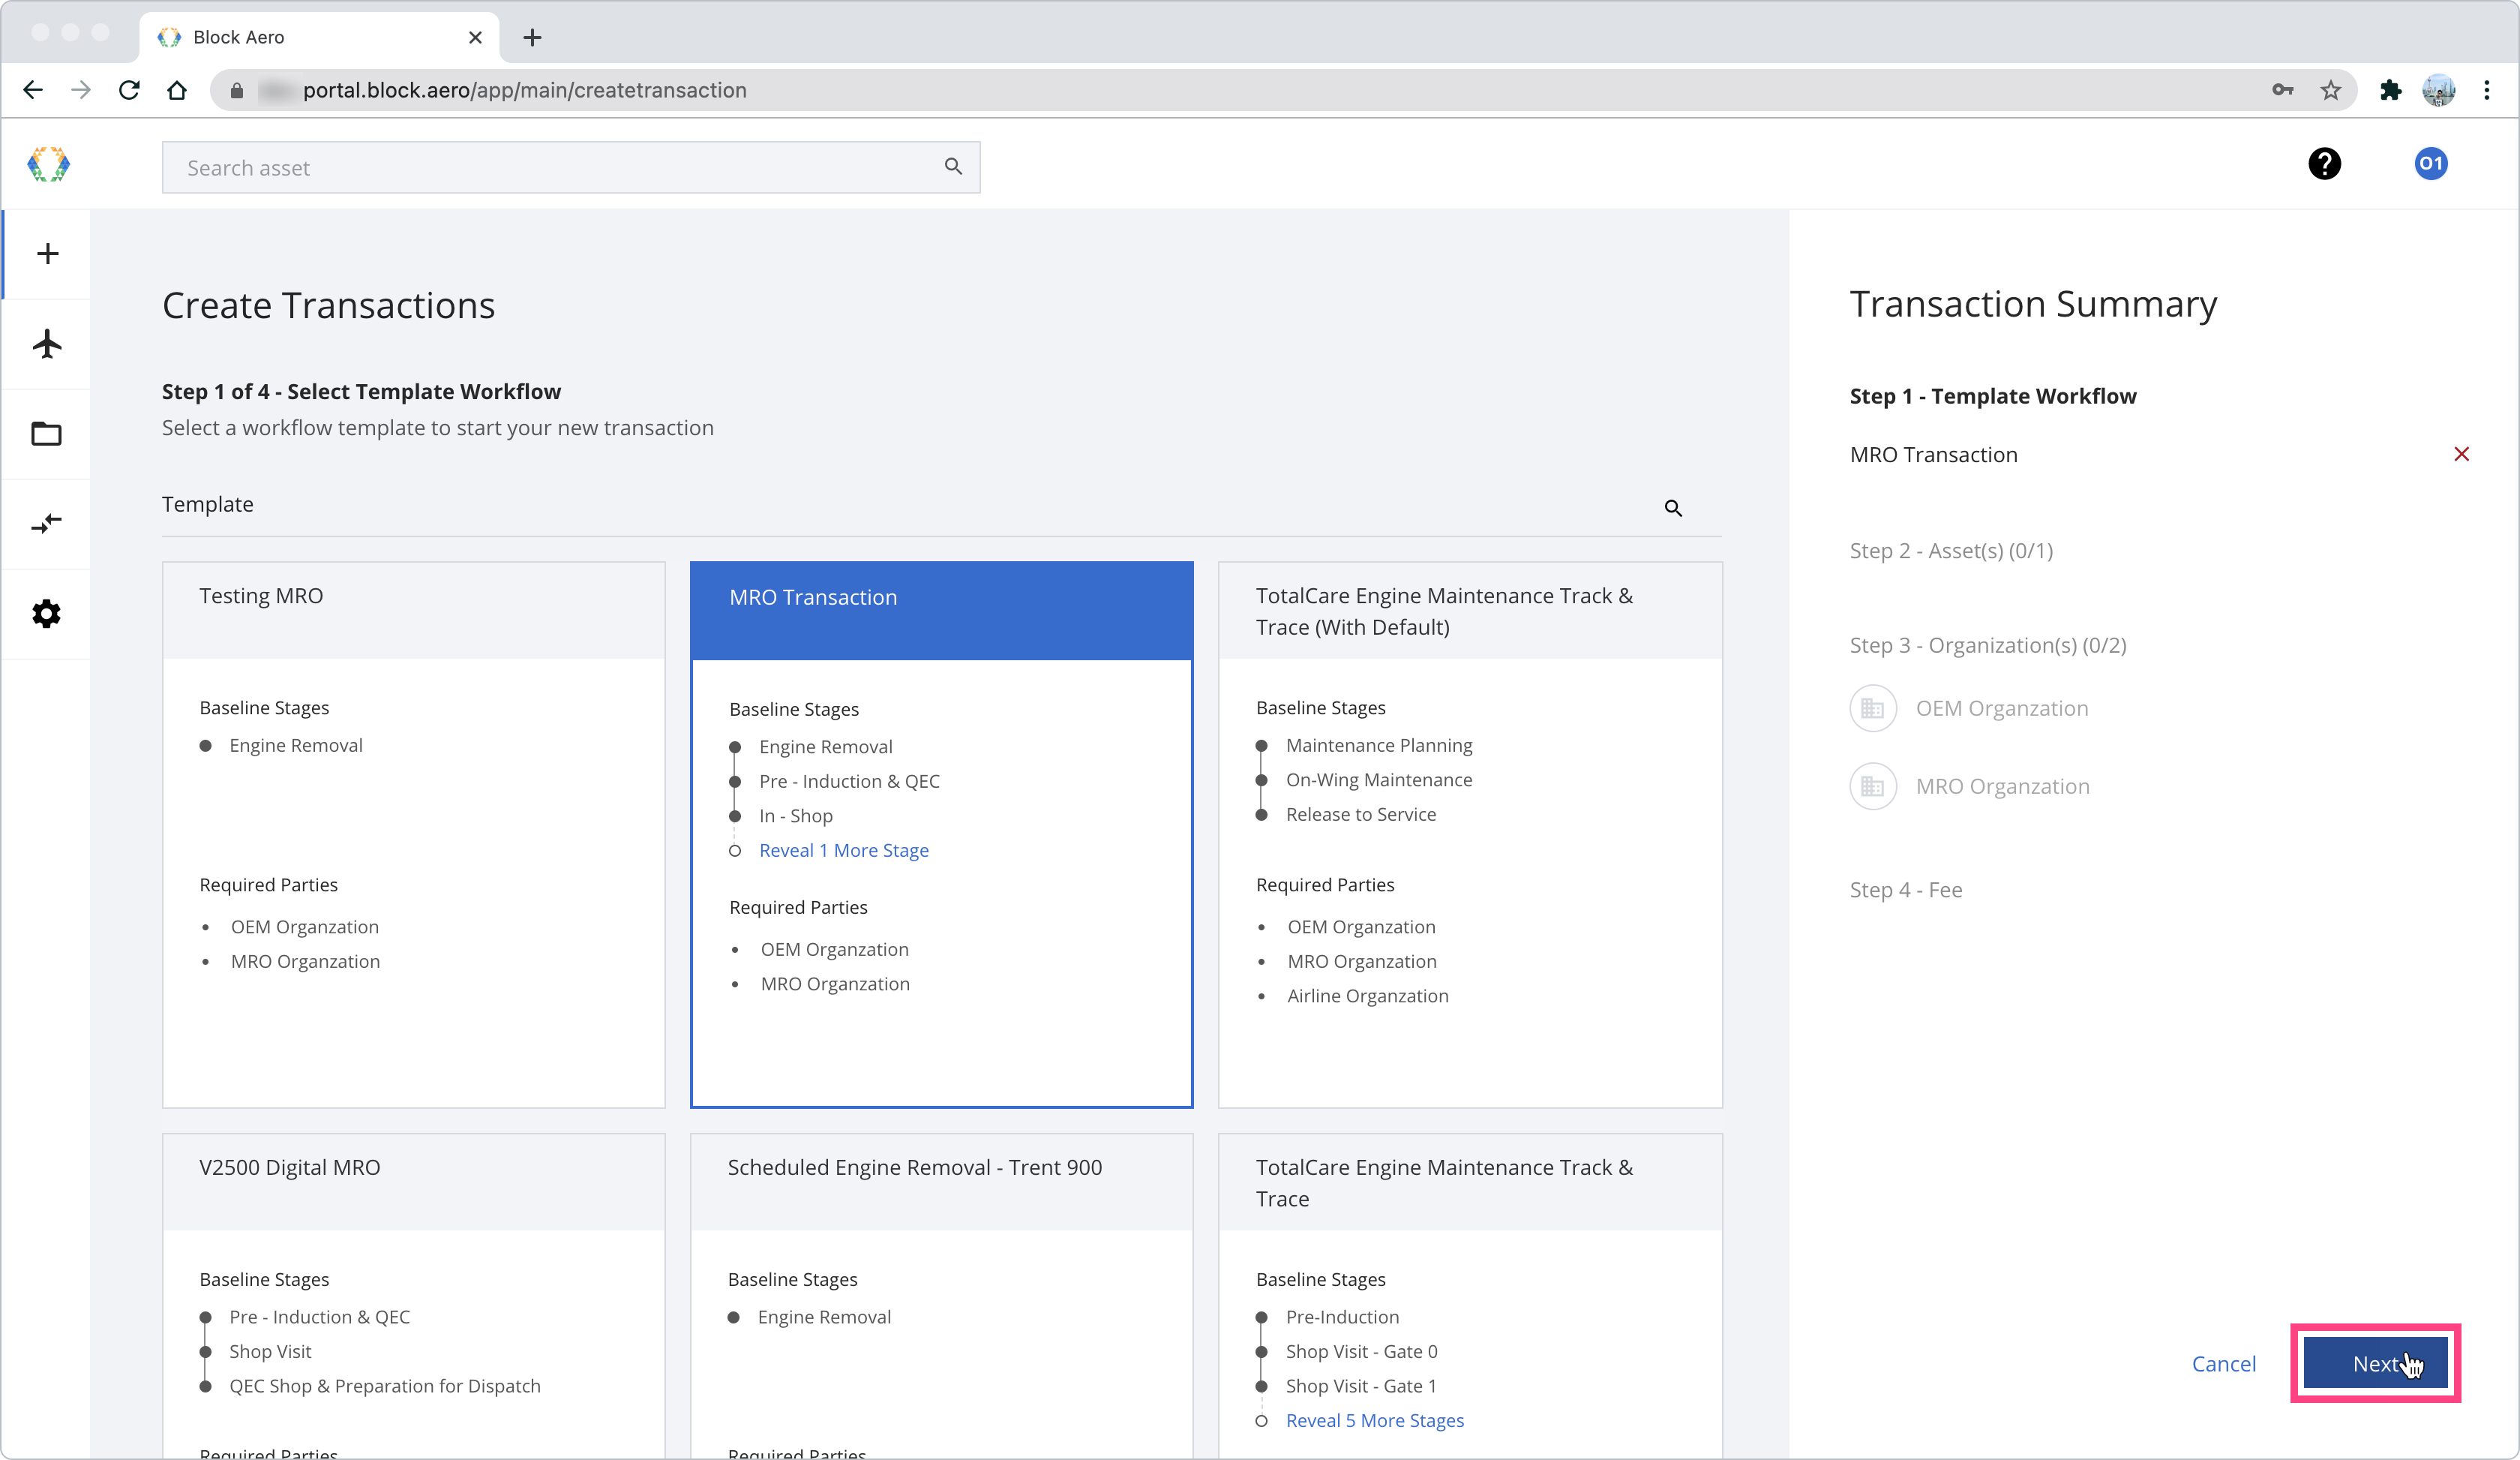
Select a workflow
Step 2: Select an Asset to Transact
During this step, the platform are filtering all the accessible asset that the transaction initiator can select in the selection table. Each transaction allow one single primary asset to be selected.
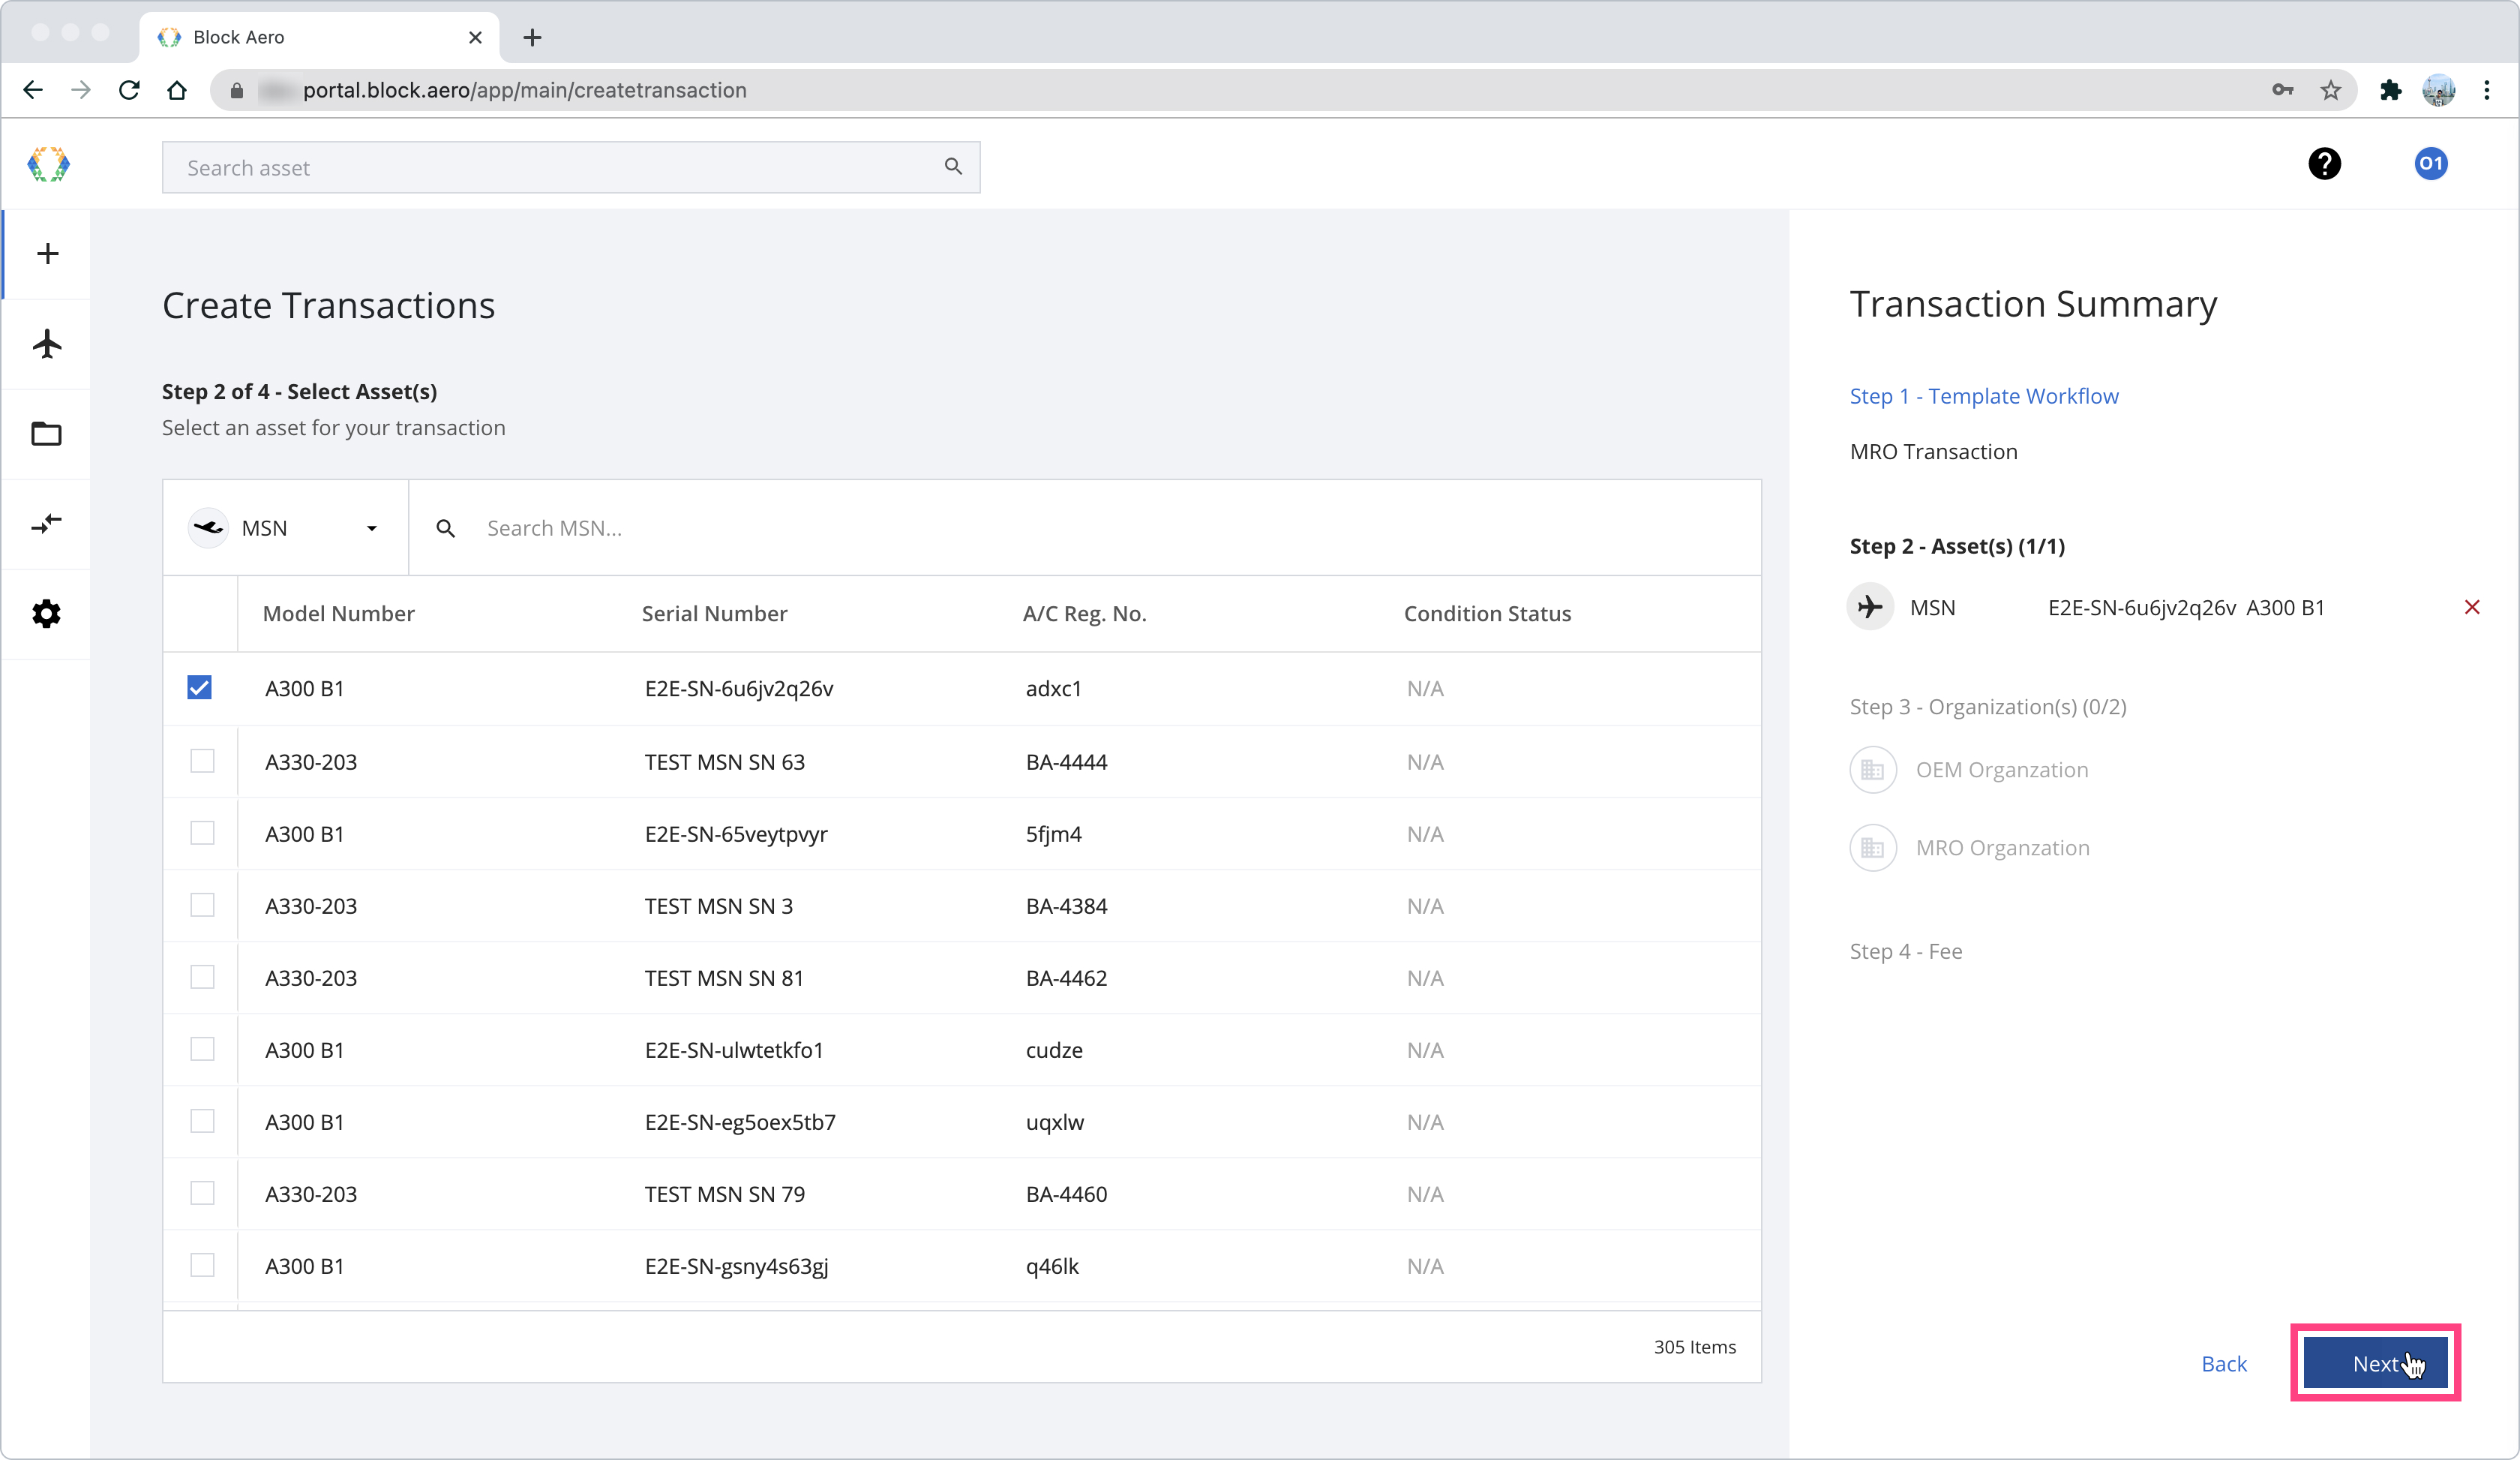
Select a Primary Asset for Transaction
Step 3: Select Organization Participants
In this step, transaction initiator are required to select network organizations that they want to participate with for each transaction role. The workflow template contain information about which roles are required during this part of the process.
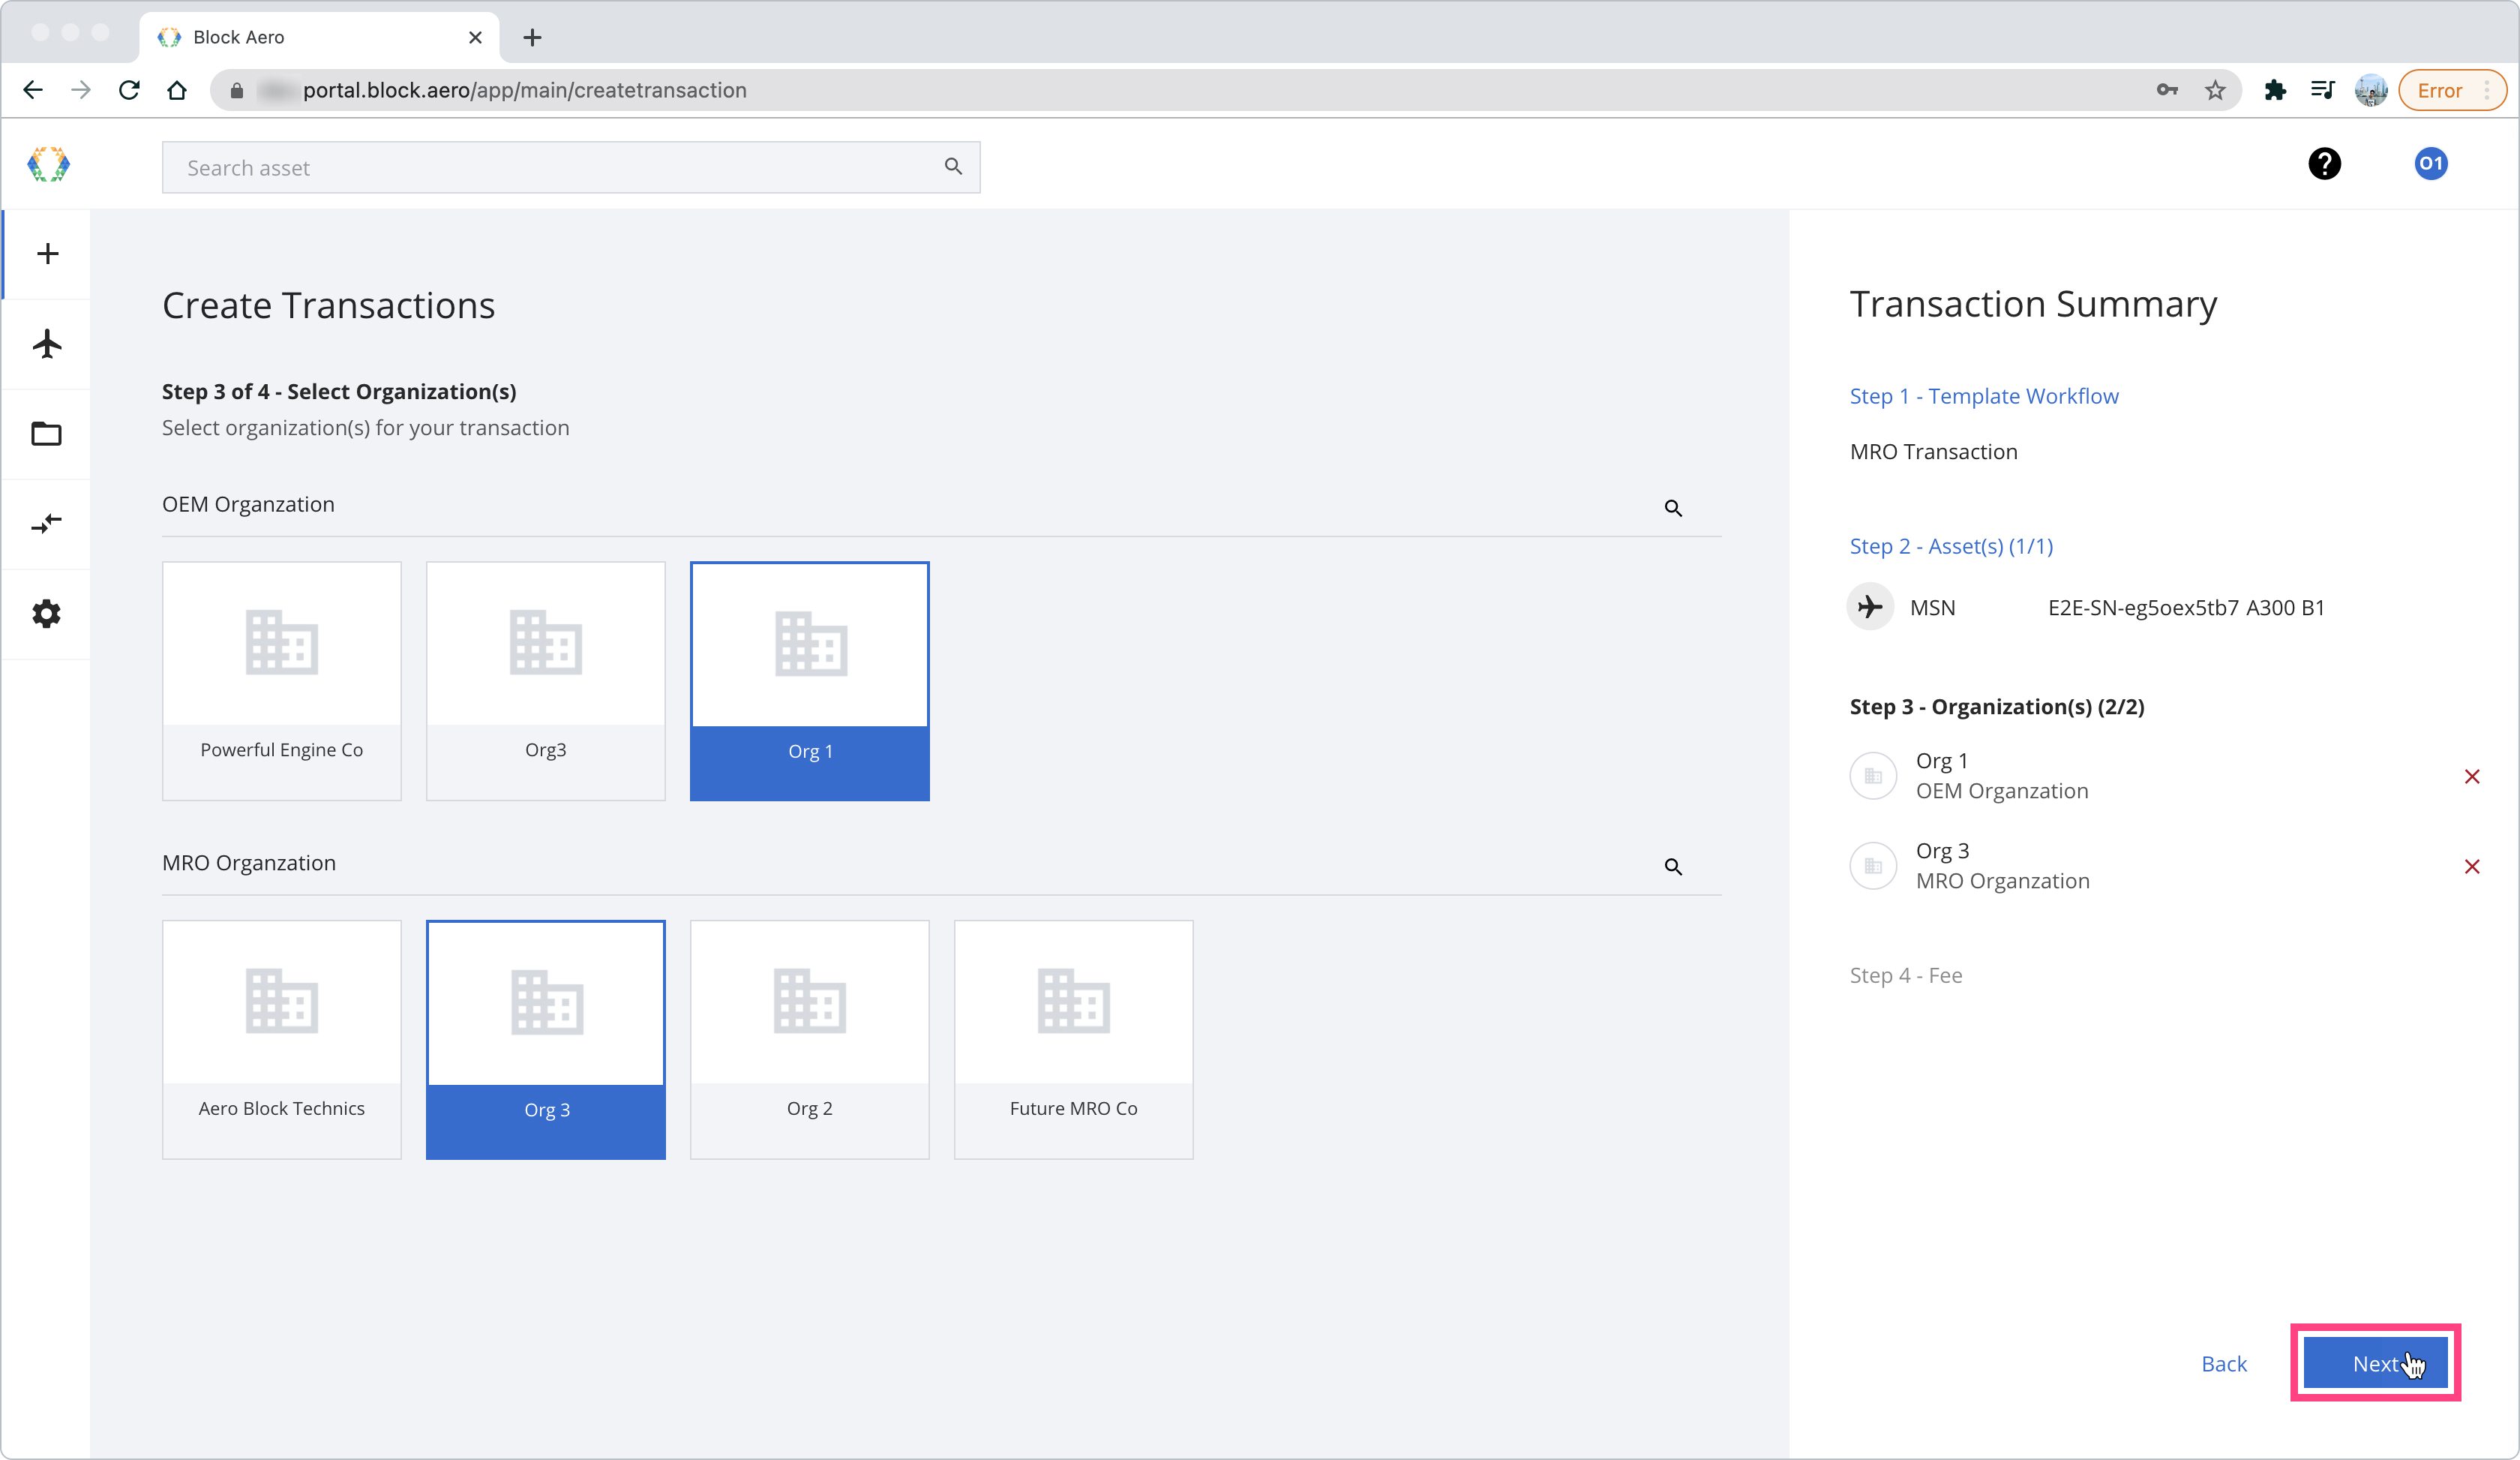
Select Organization Participants - Without an Observer
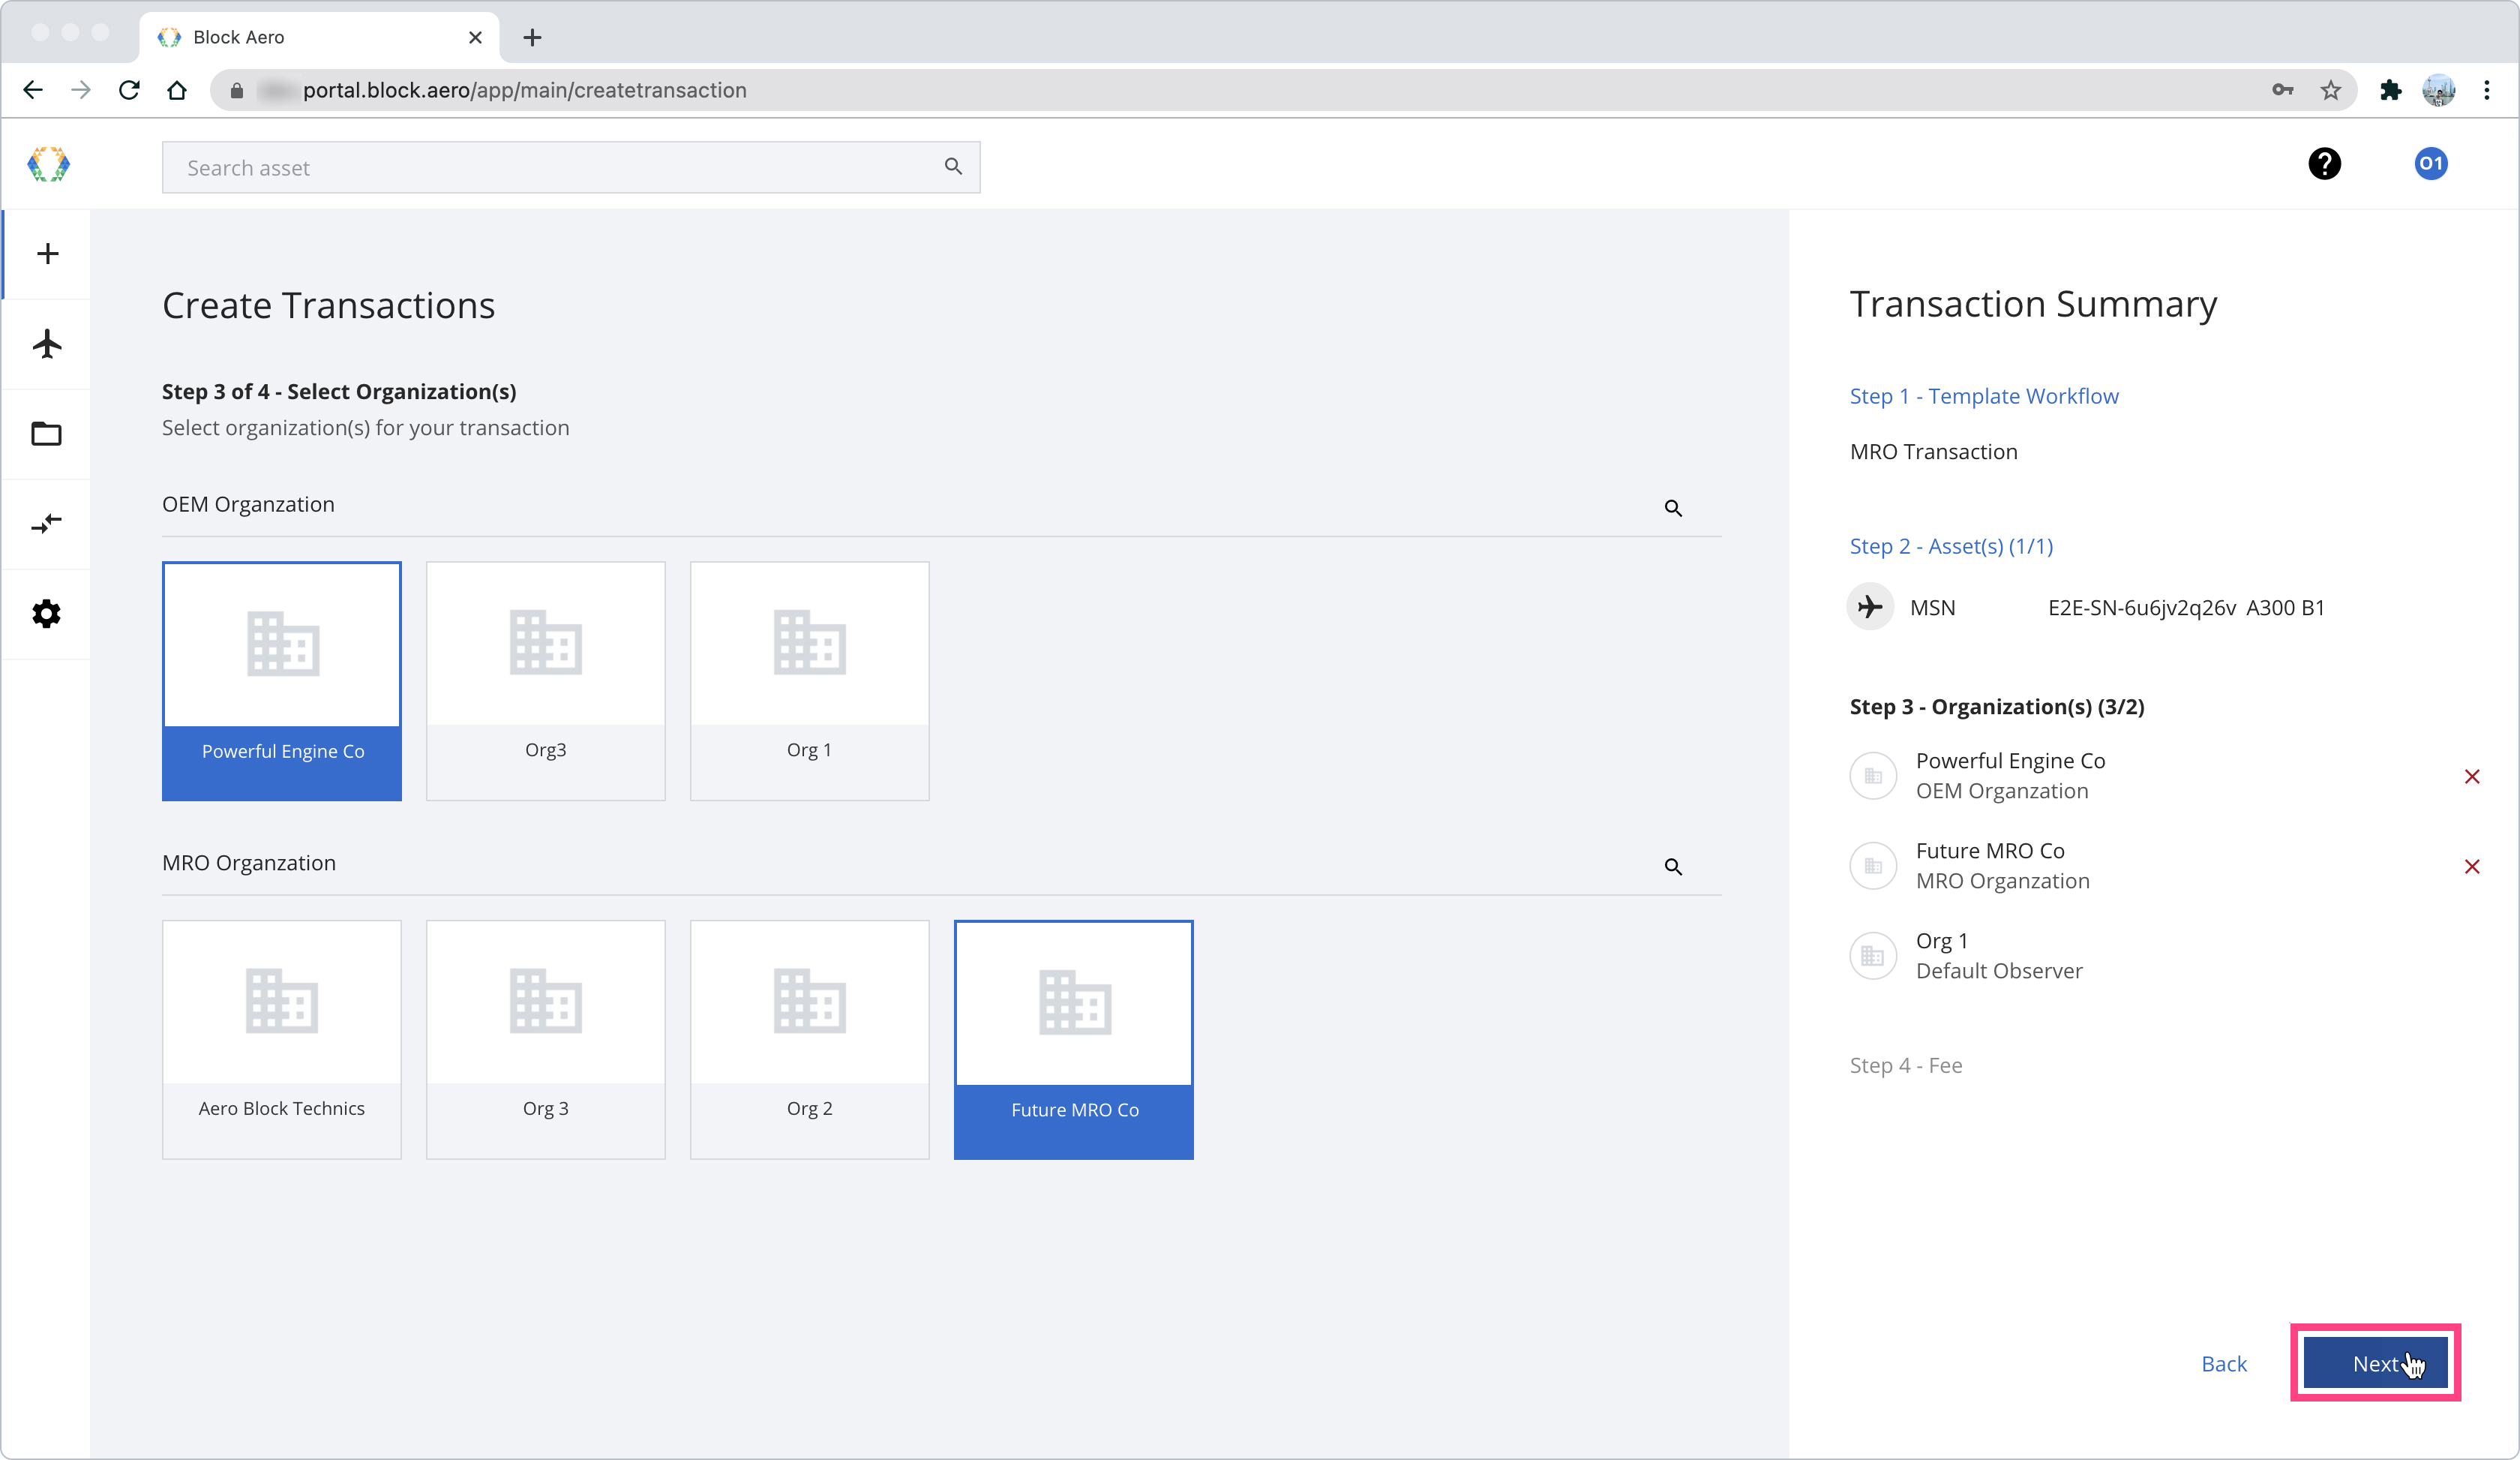
Select Organization Participant - With an Observer
Default ObserverDefault Observer role will be visible when a transaction initiator didn't choose any roles for themselves.
The default observer role allows the observer to view the transaction, without ability to interact with other participating organizations. In essence, they facilitate organization to work together through a transaction.
Step 4: Select Payor Organization
In this step, the transaction initiator can select payor organization for this transaction fee. The platform will automatically calculates the transaction fee for each organization.
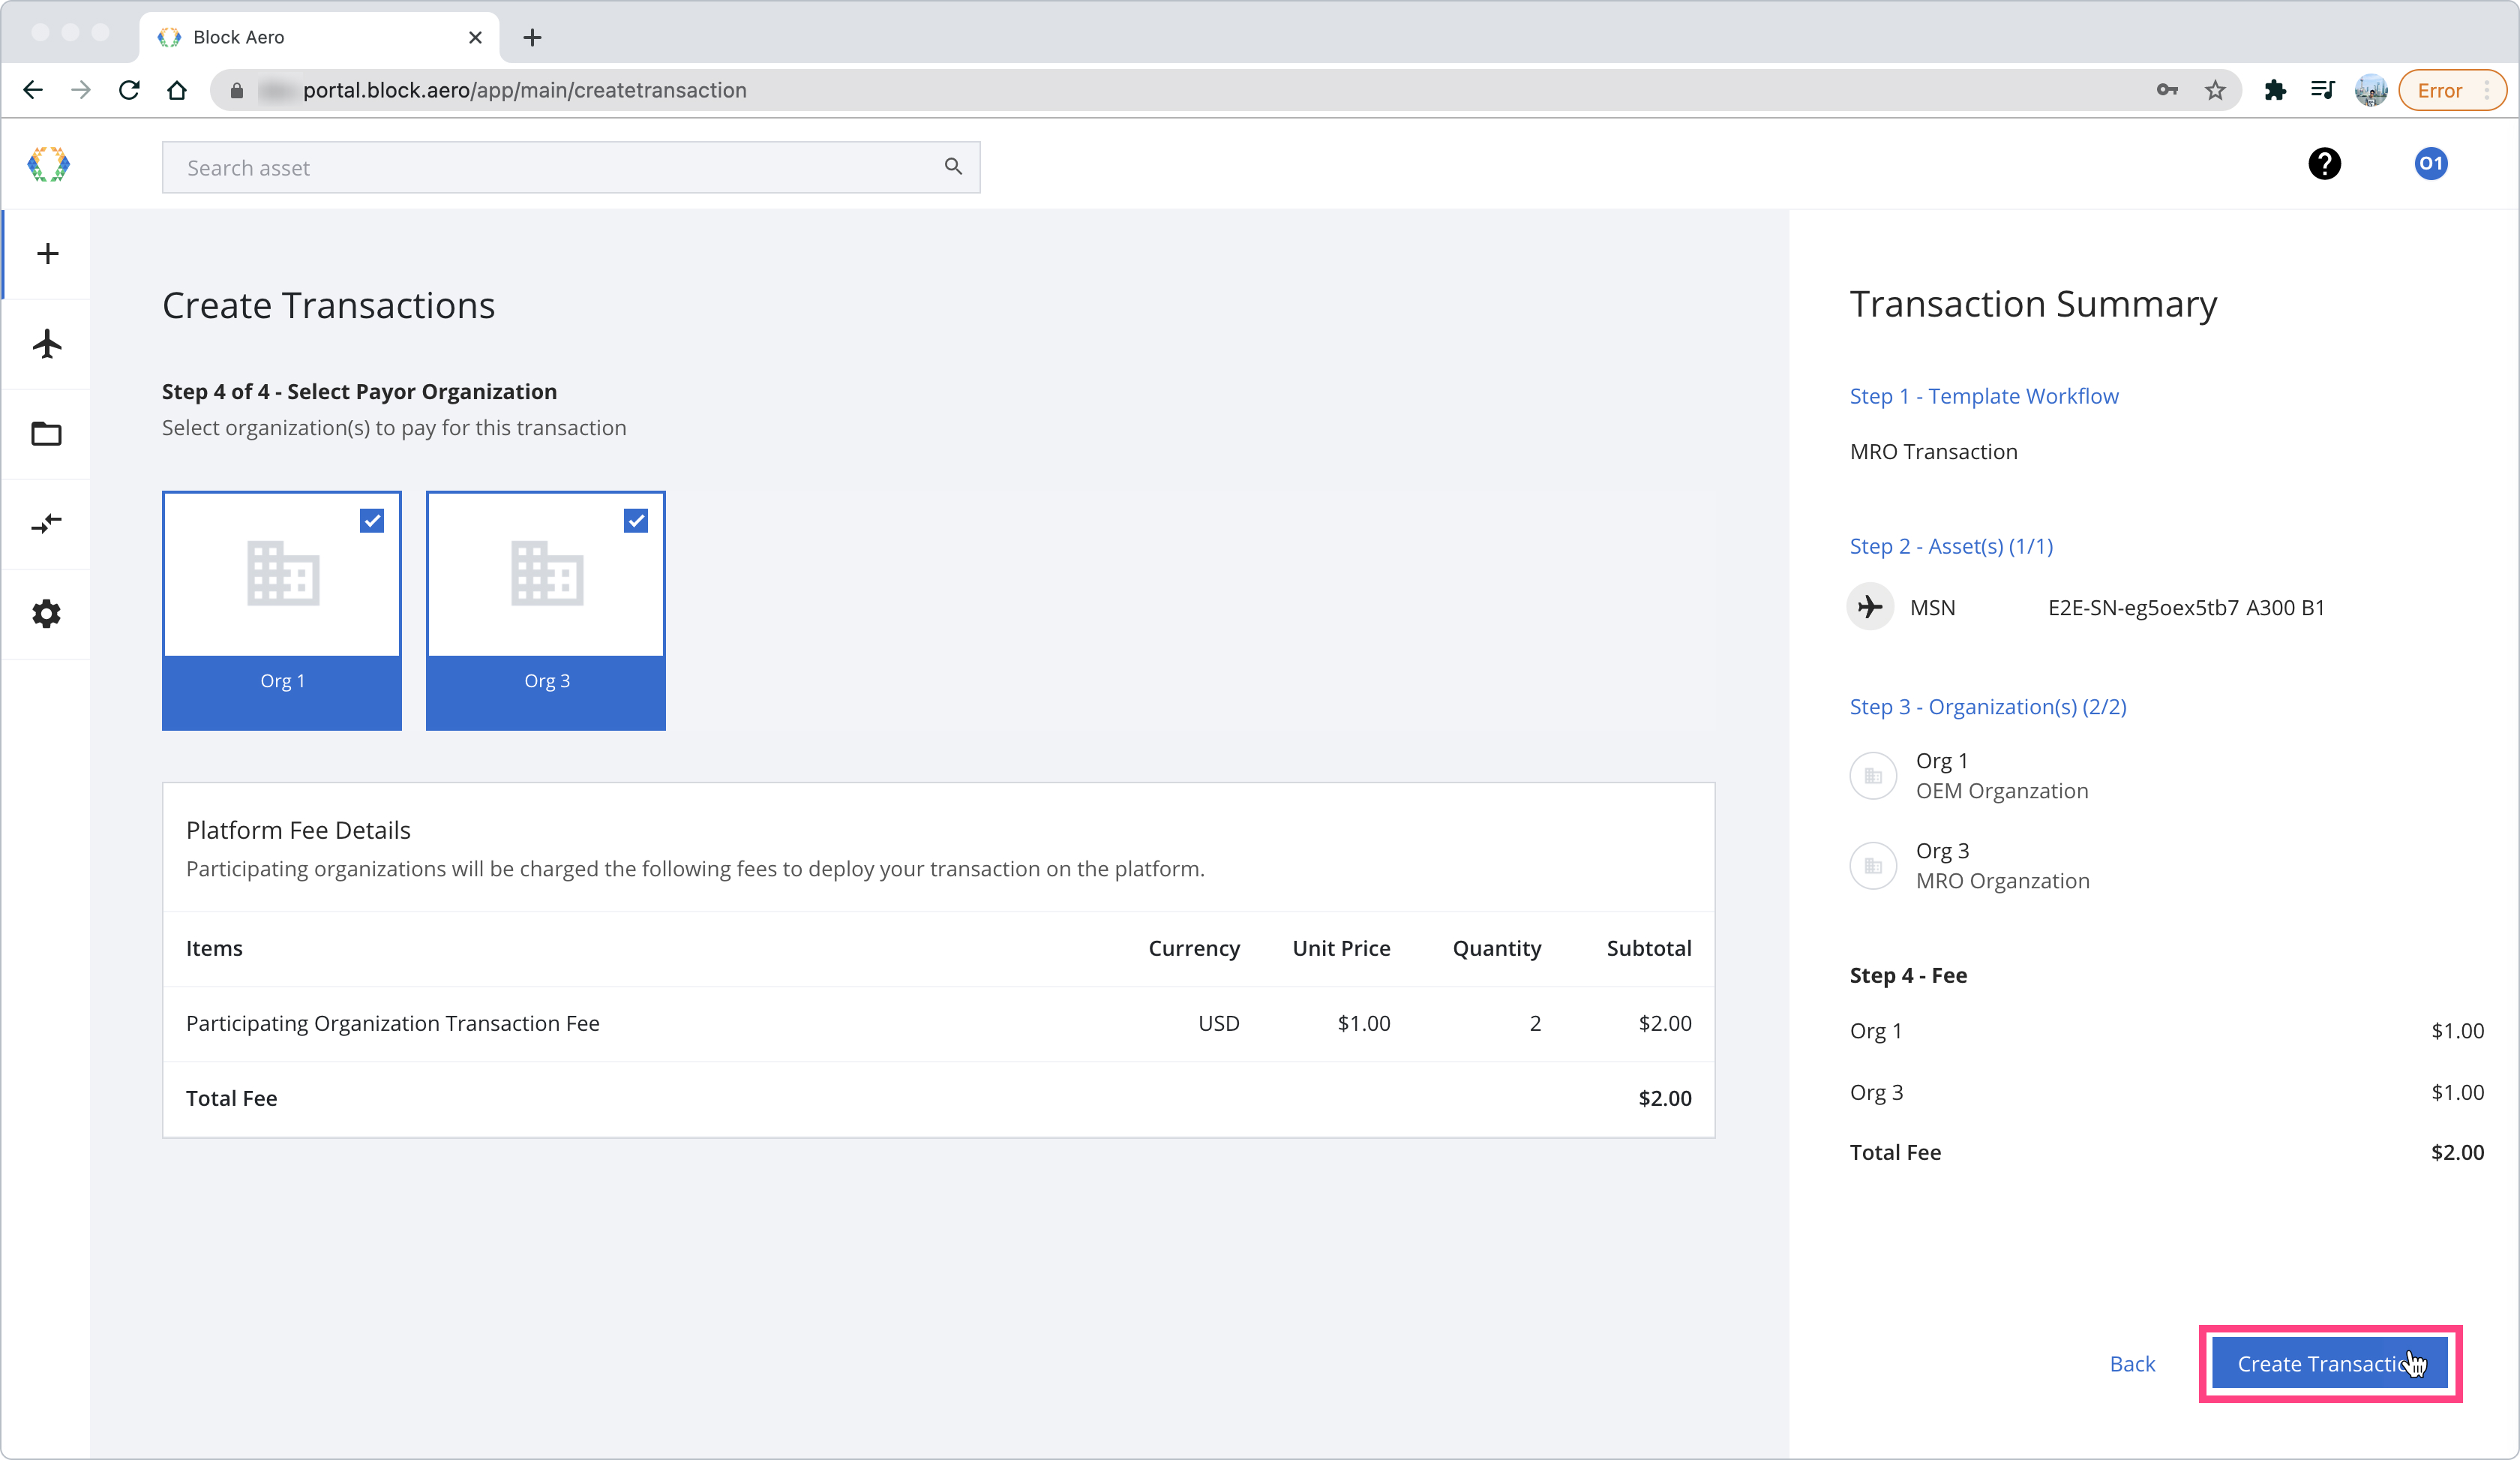
Select Payor Organization
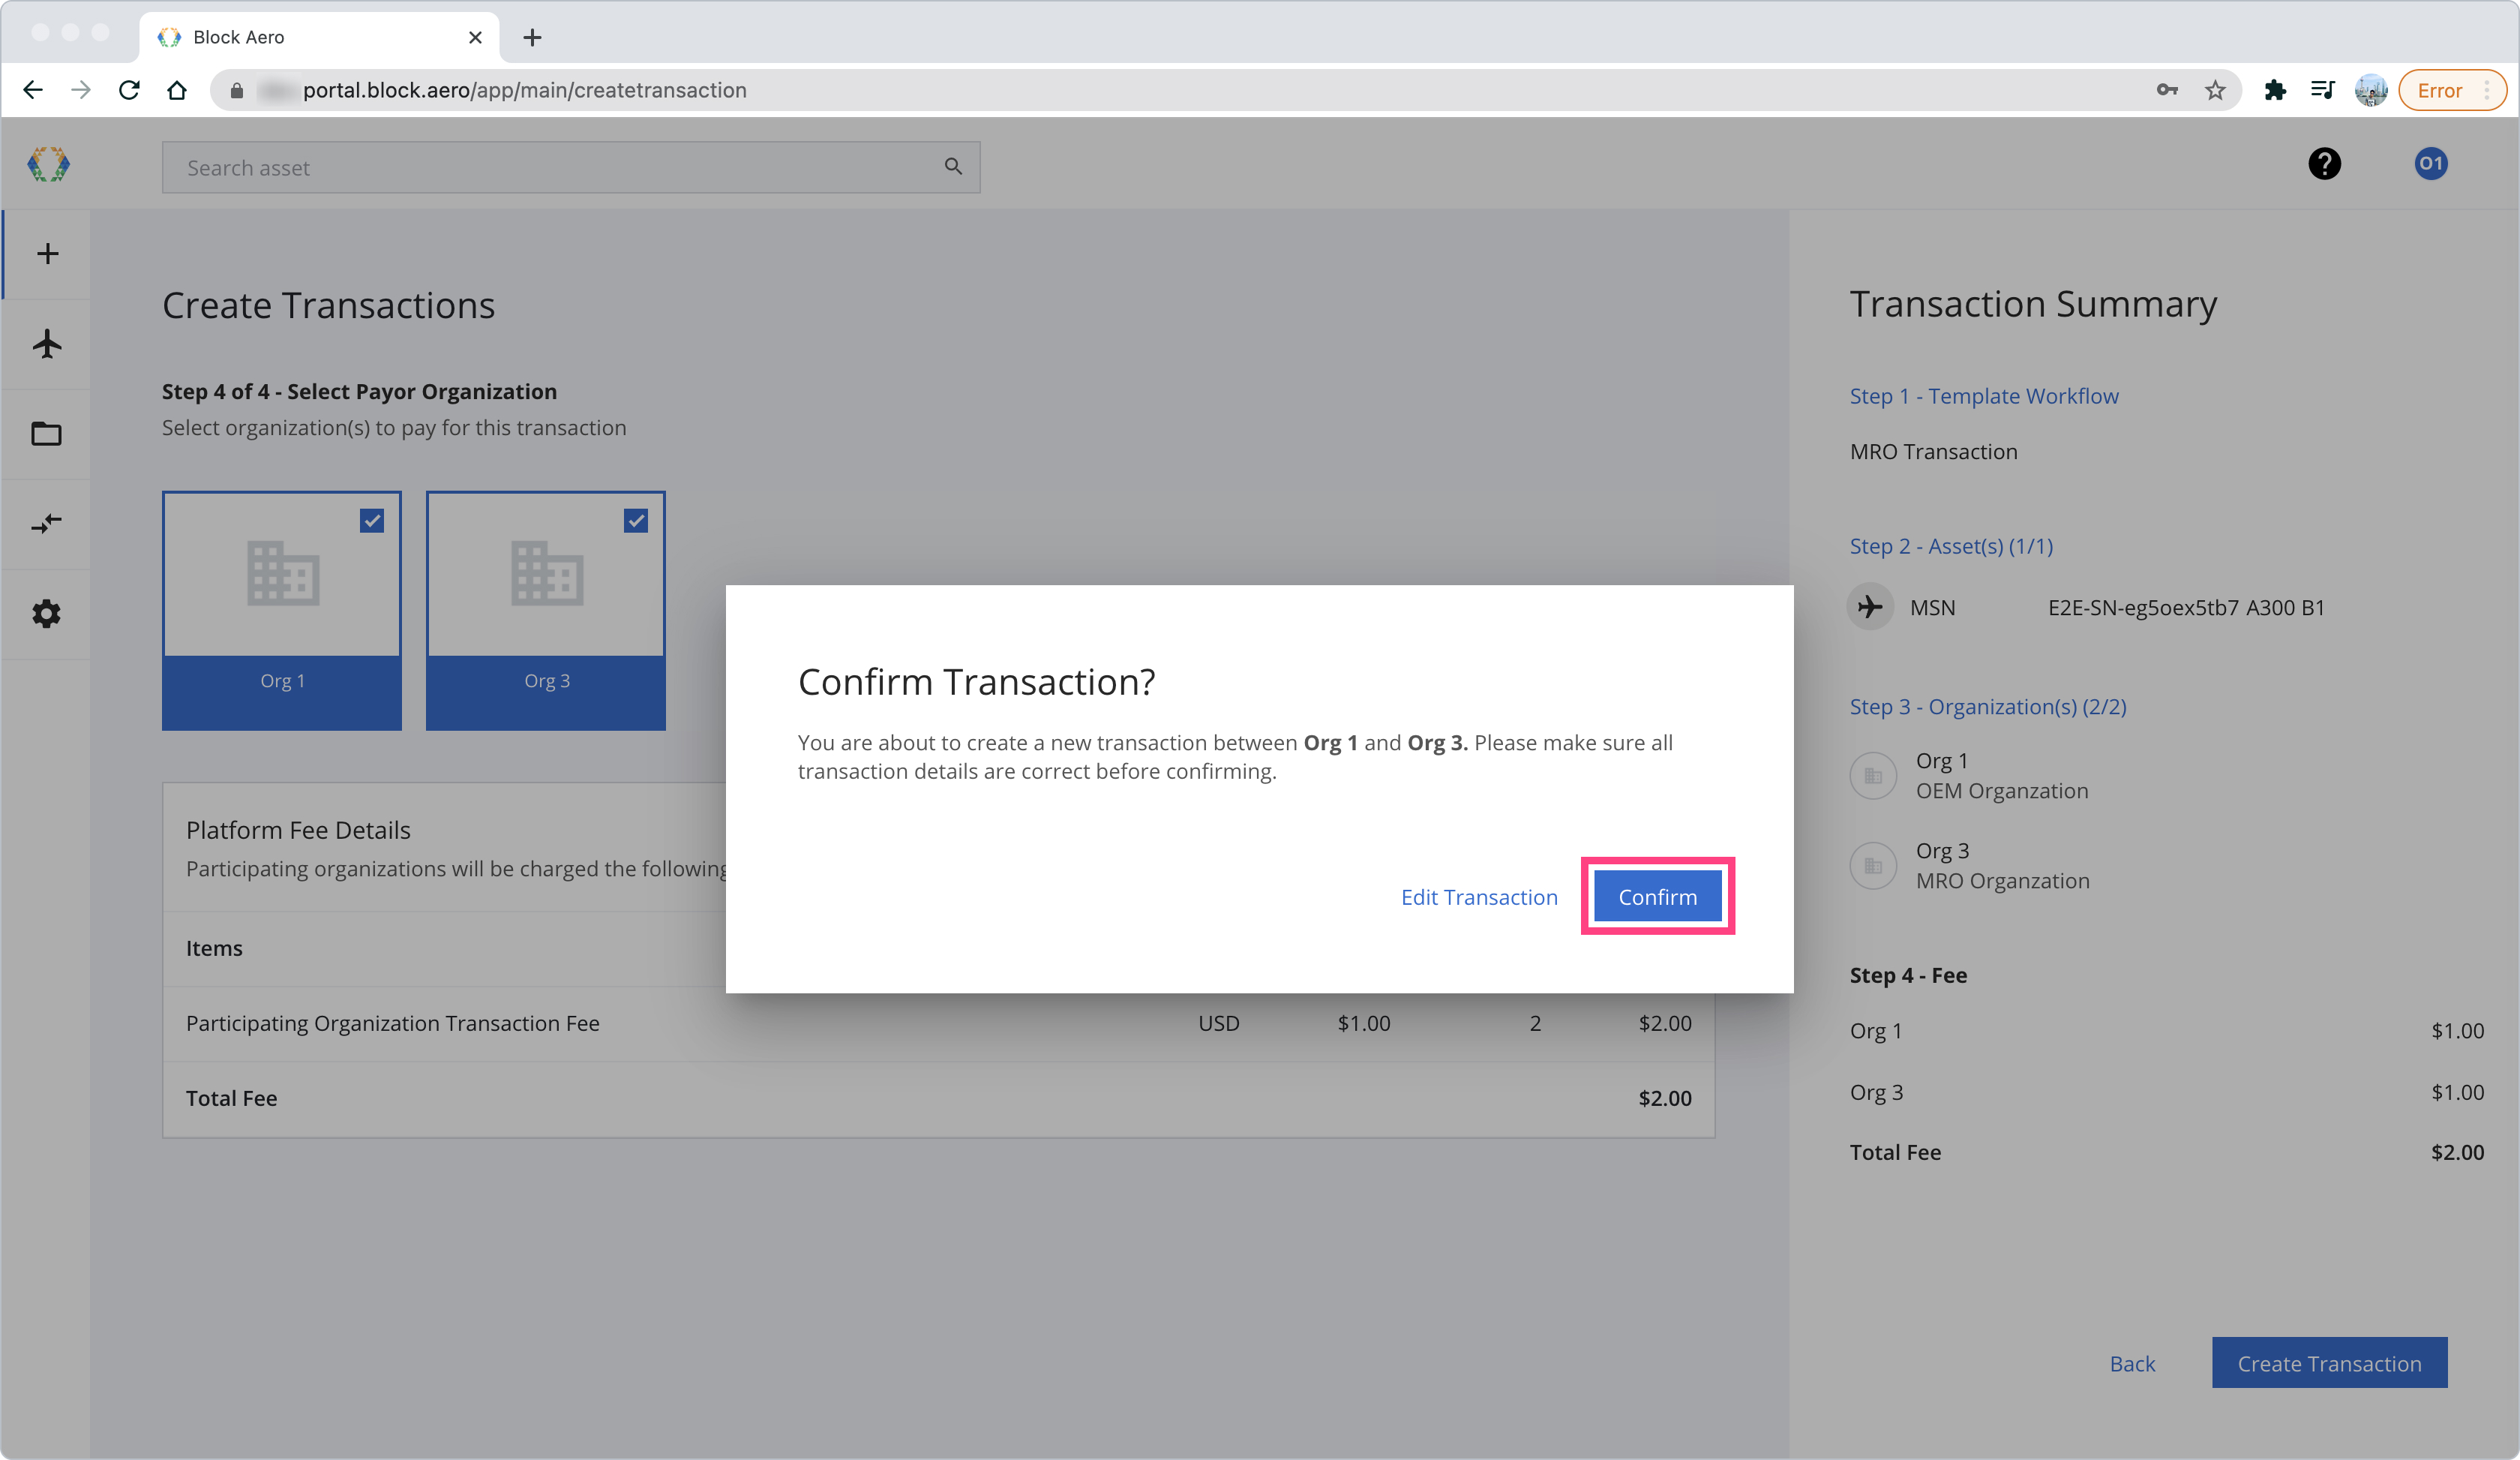
Confirm to create a transaction
After the transaction is created, you will find the transaction status as "Pending". To officially start, all organization must reach a consensus and approve the transaction.
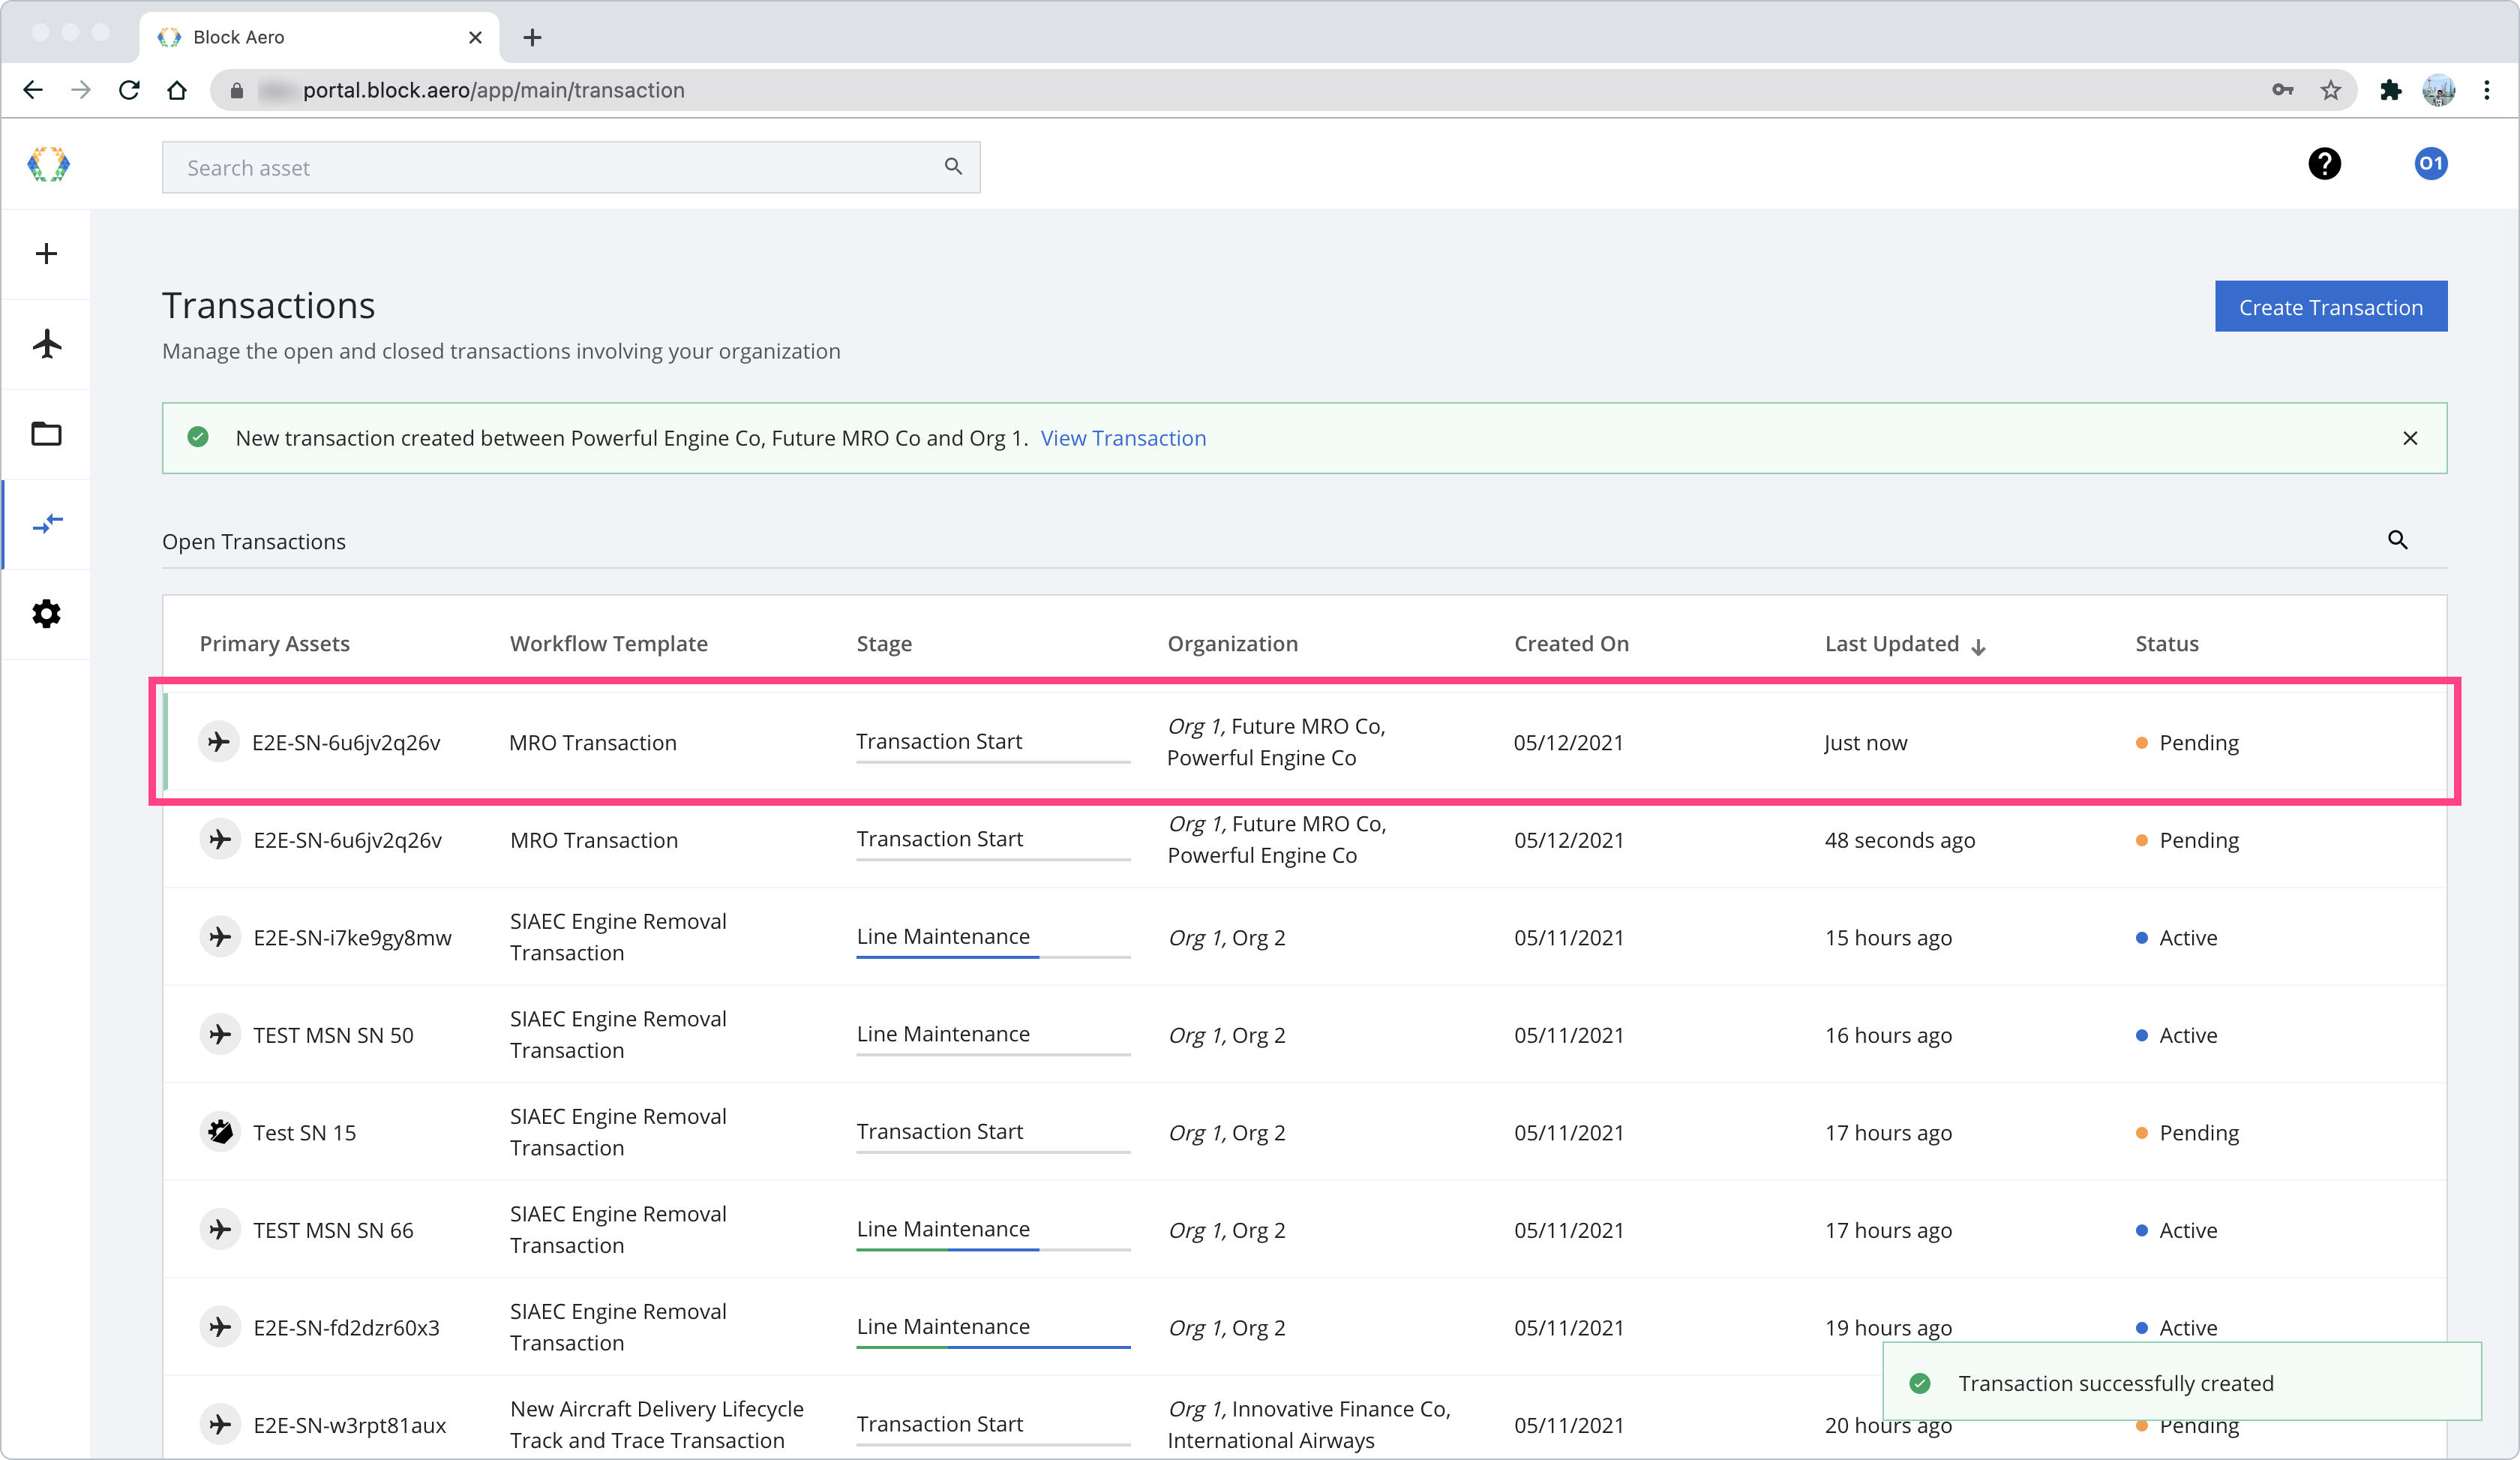
ImportantAll participating organization are required to approve transaction and the transaction status will change from "Pending" to "Active"
Updated about 1 year ago