Create Repair Status Item
Getting Started
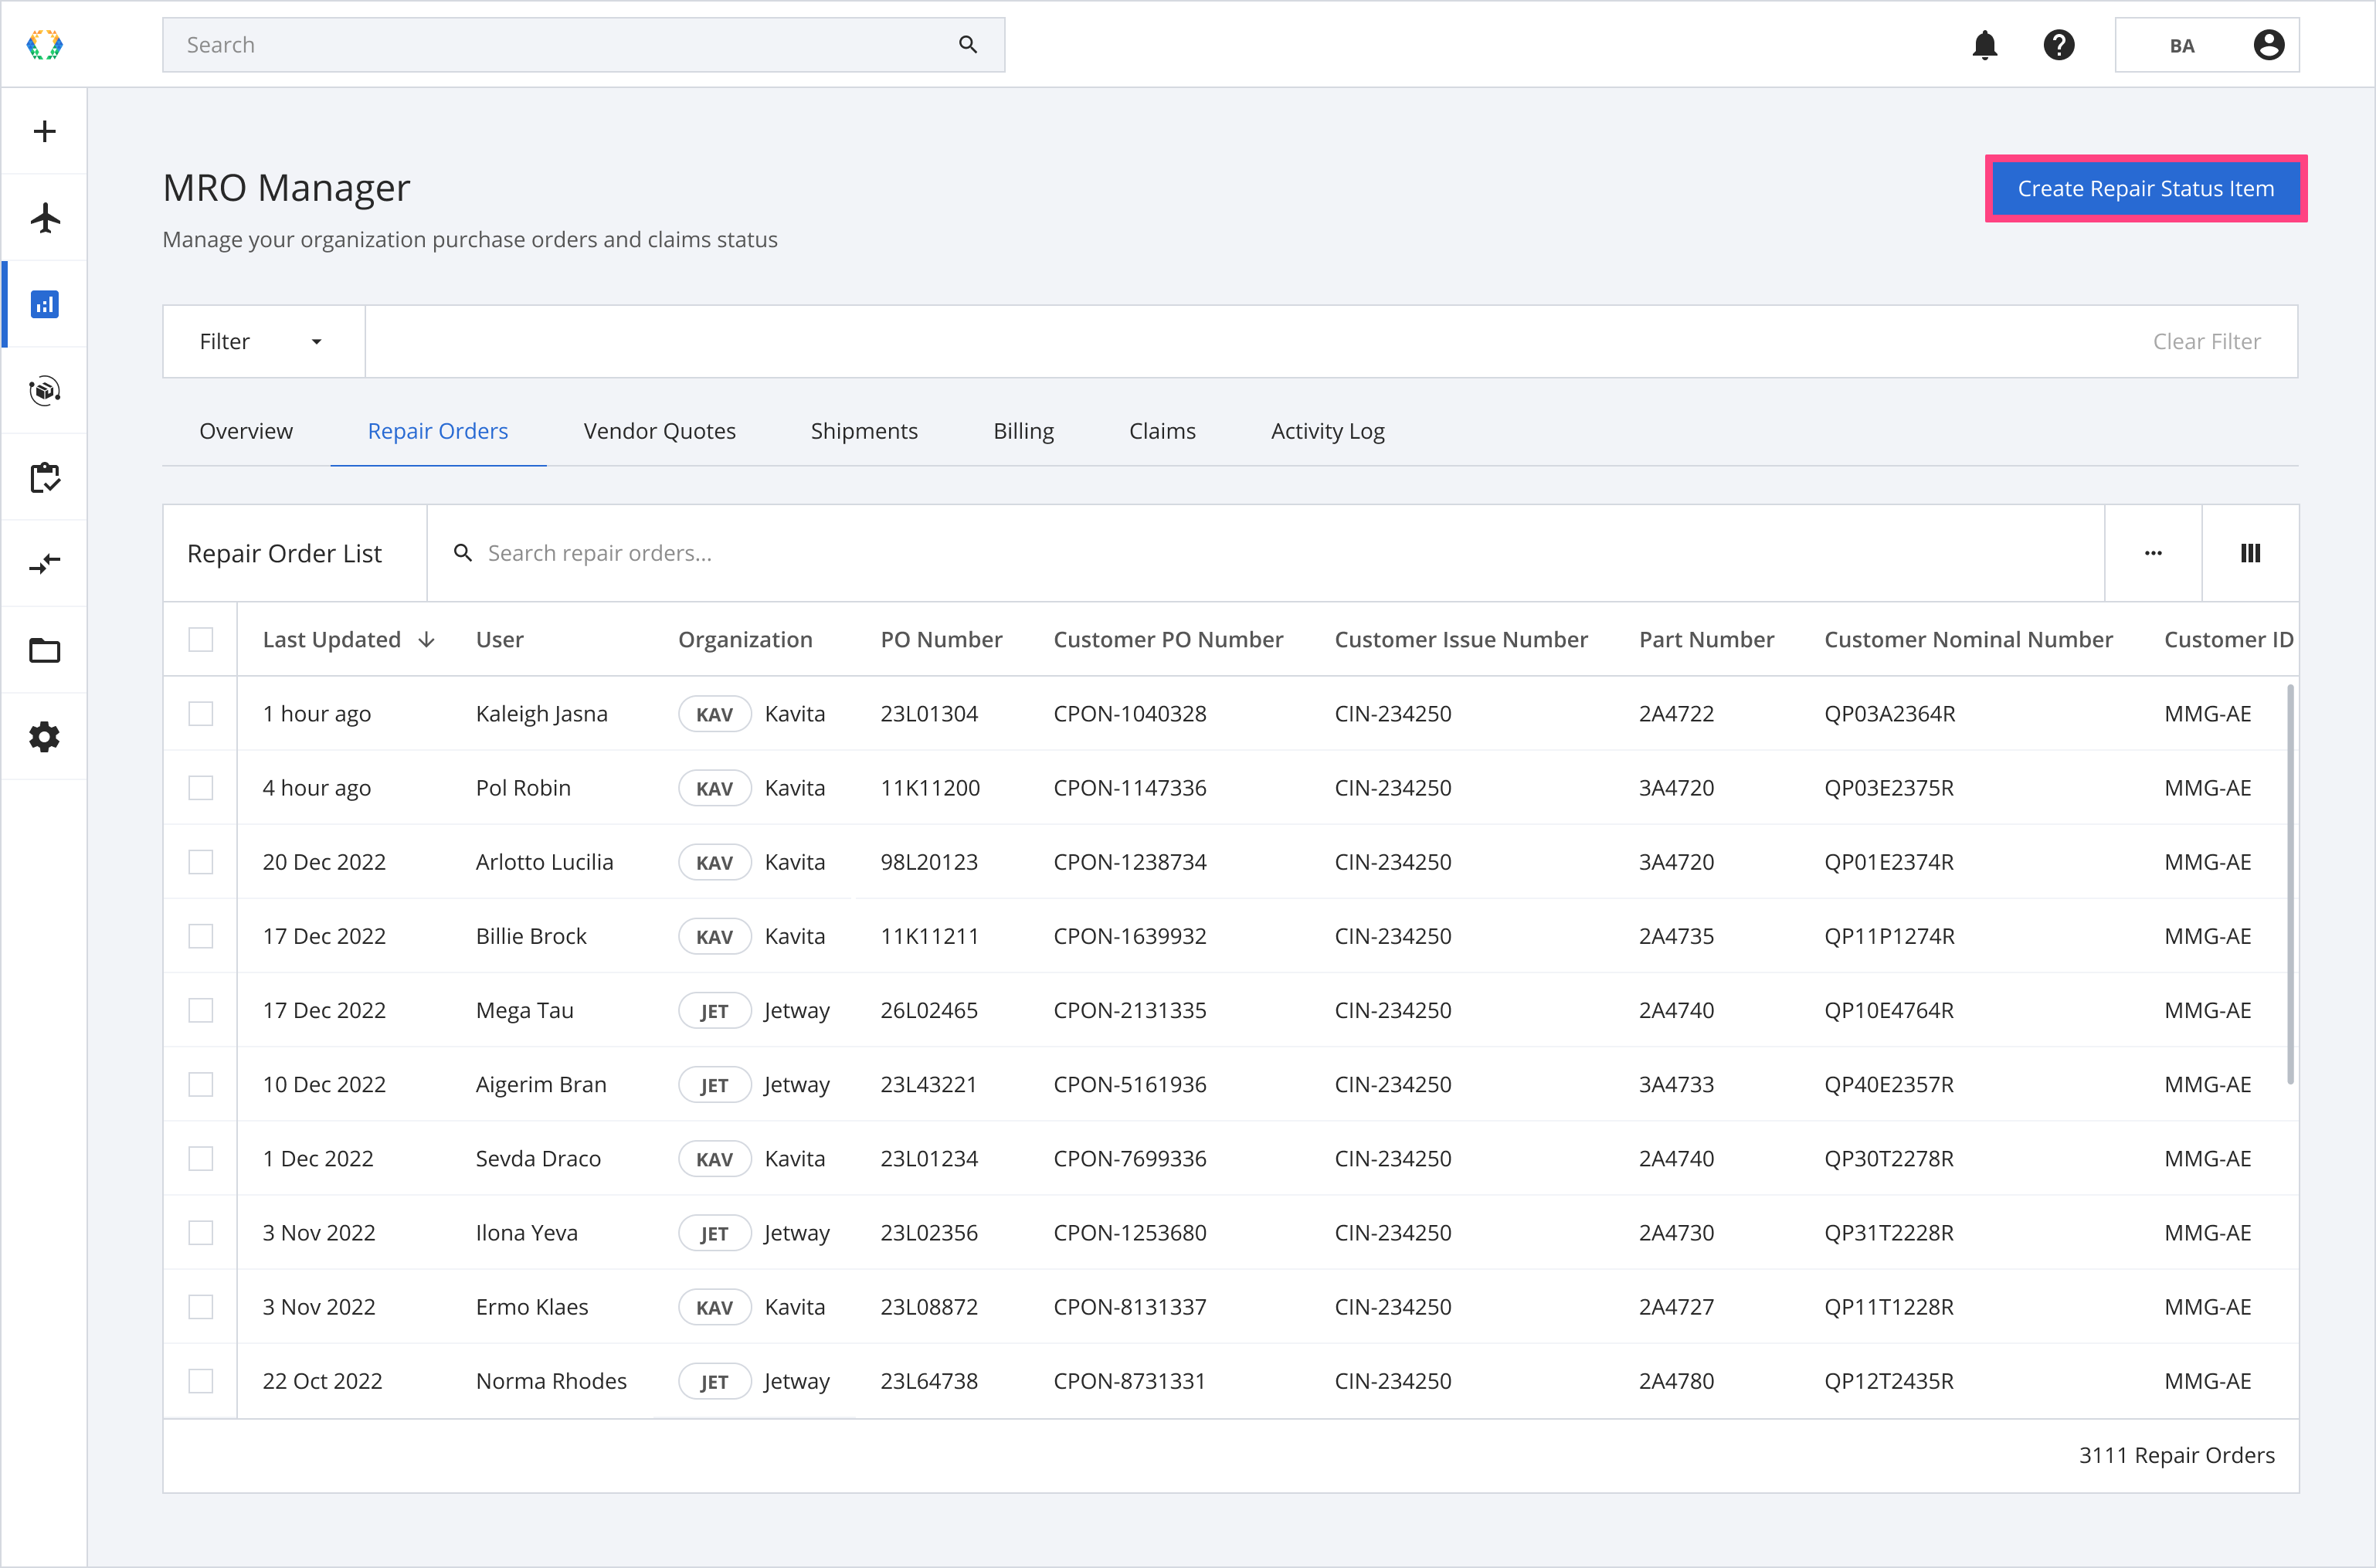
From MRO Manager overview, click 'Create Repair Status Item' at the top right-hand corner.
Steps to Create Repair Status Item
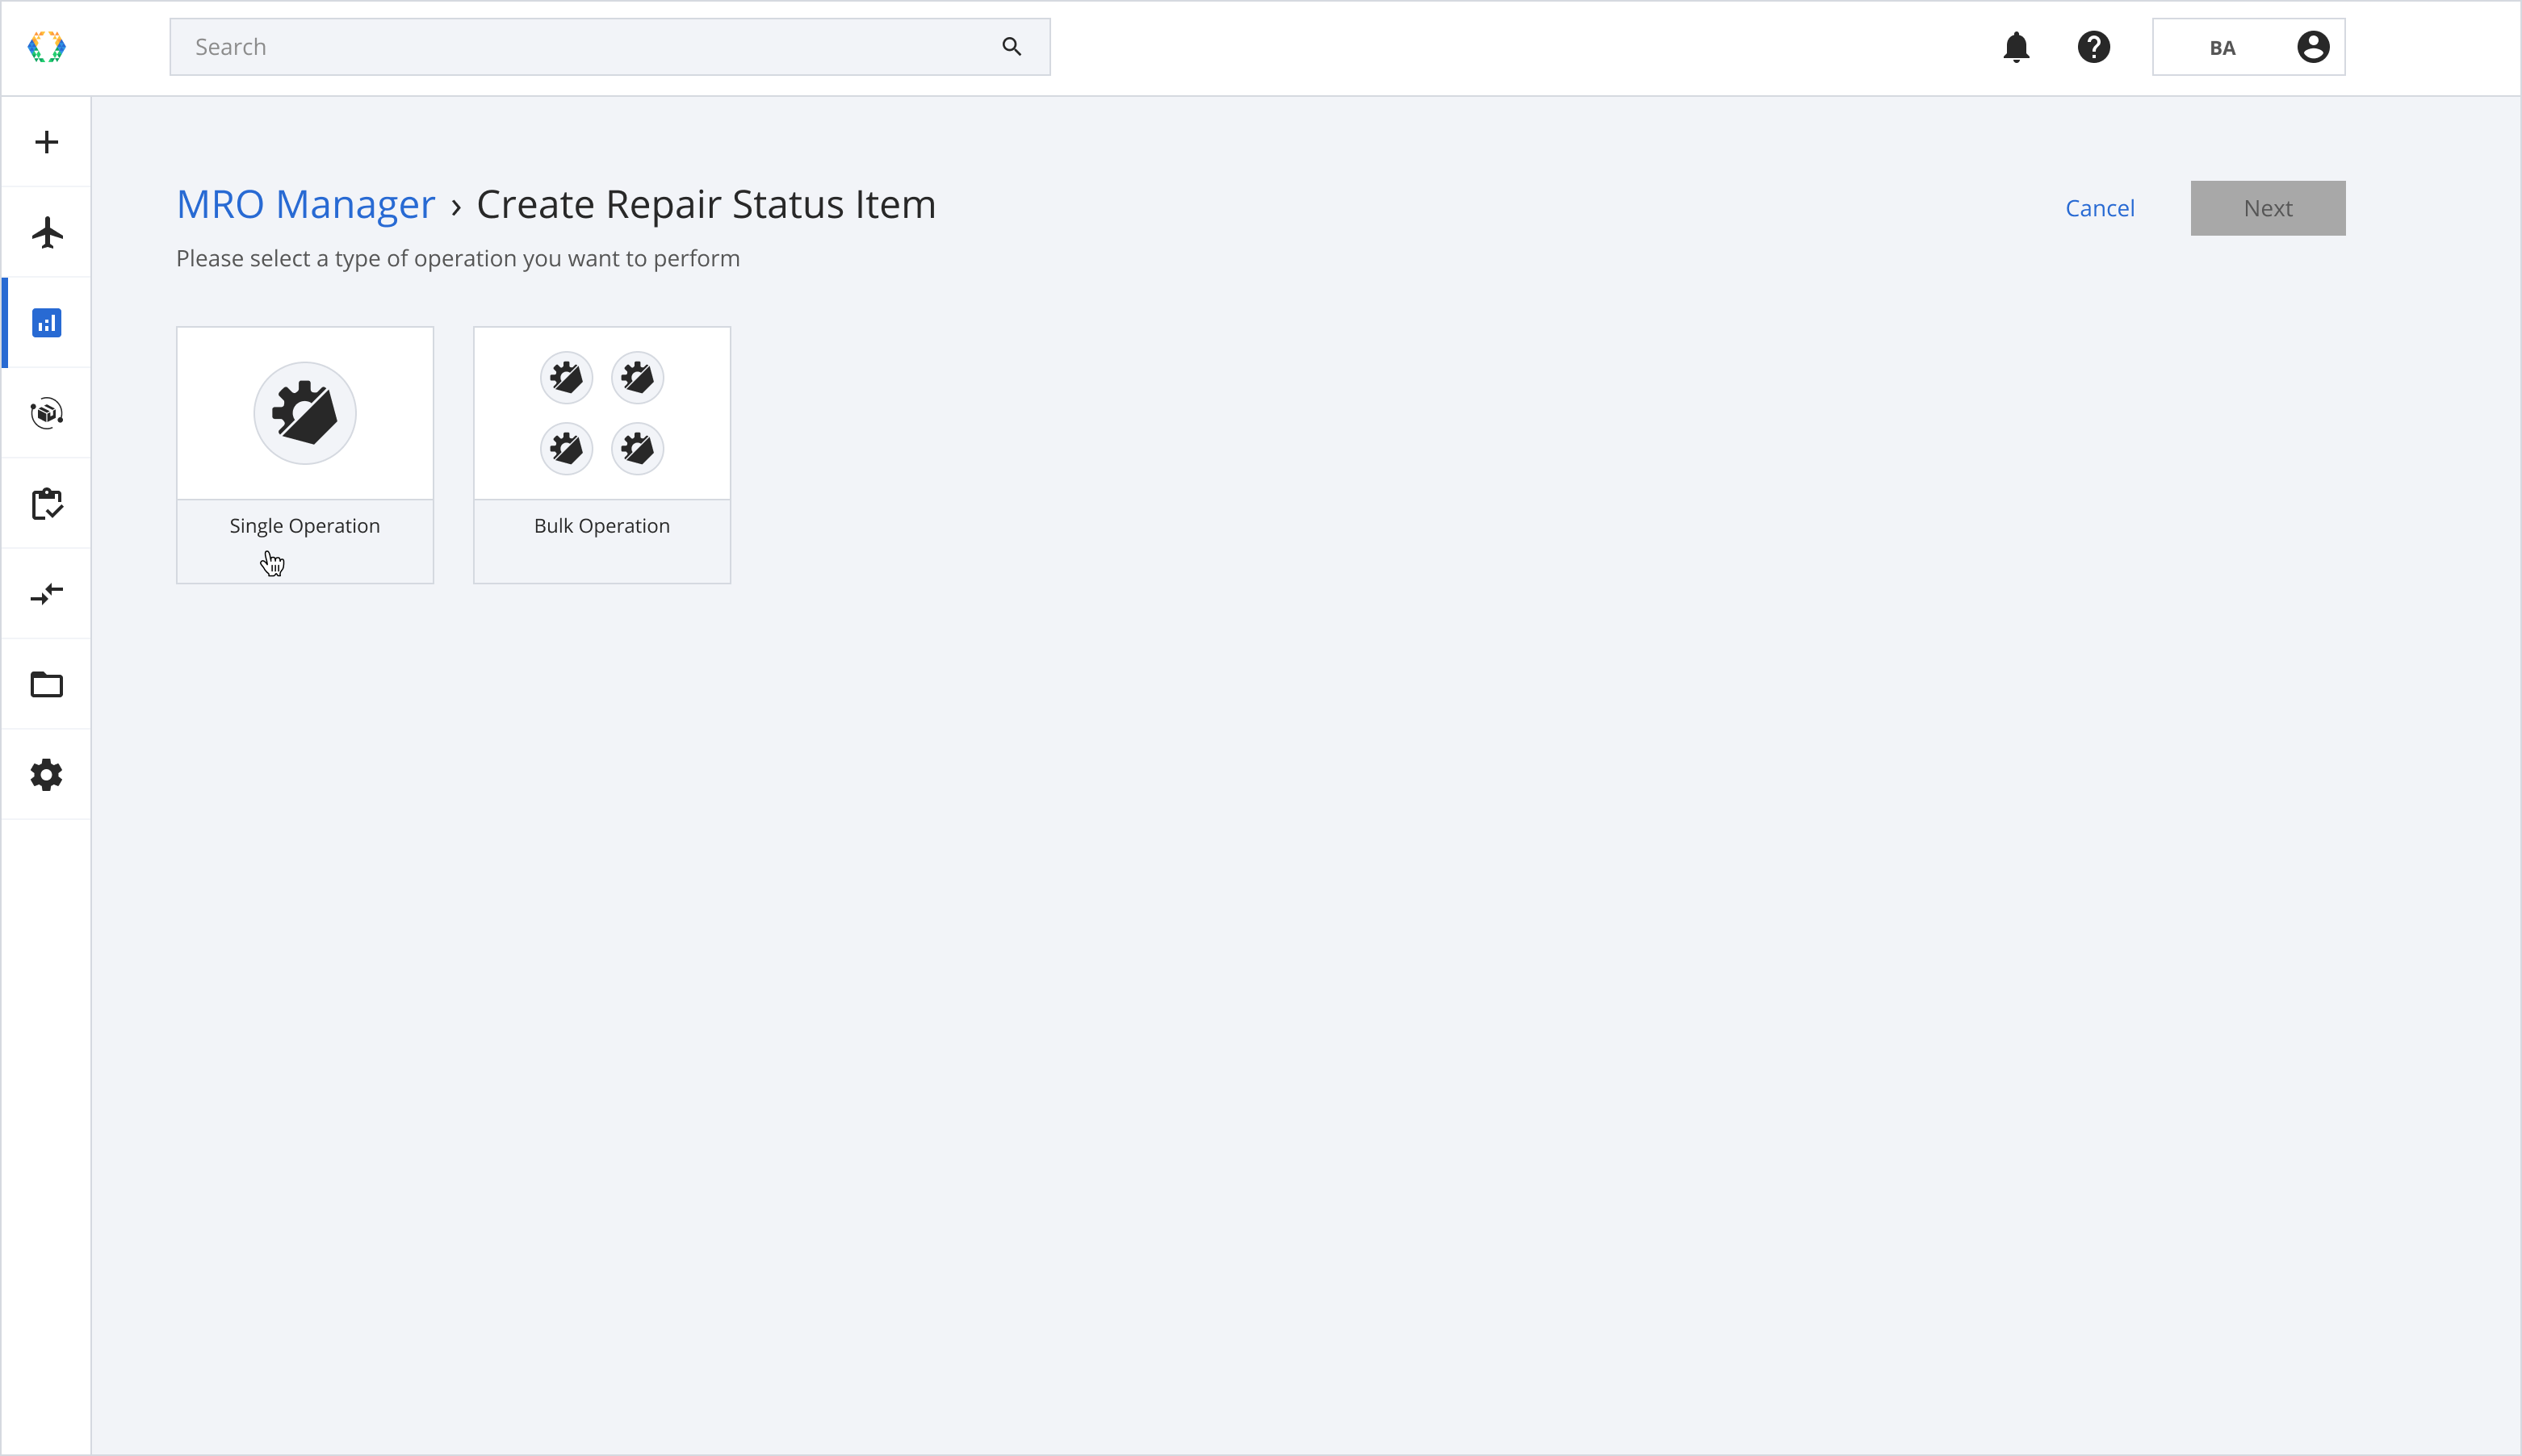
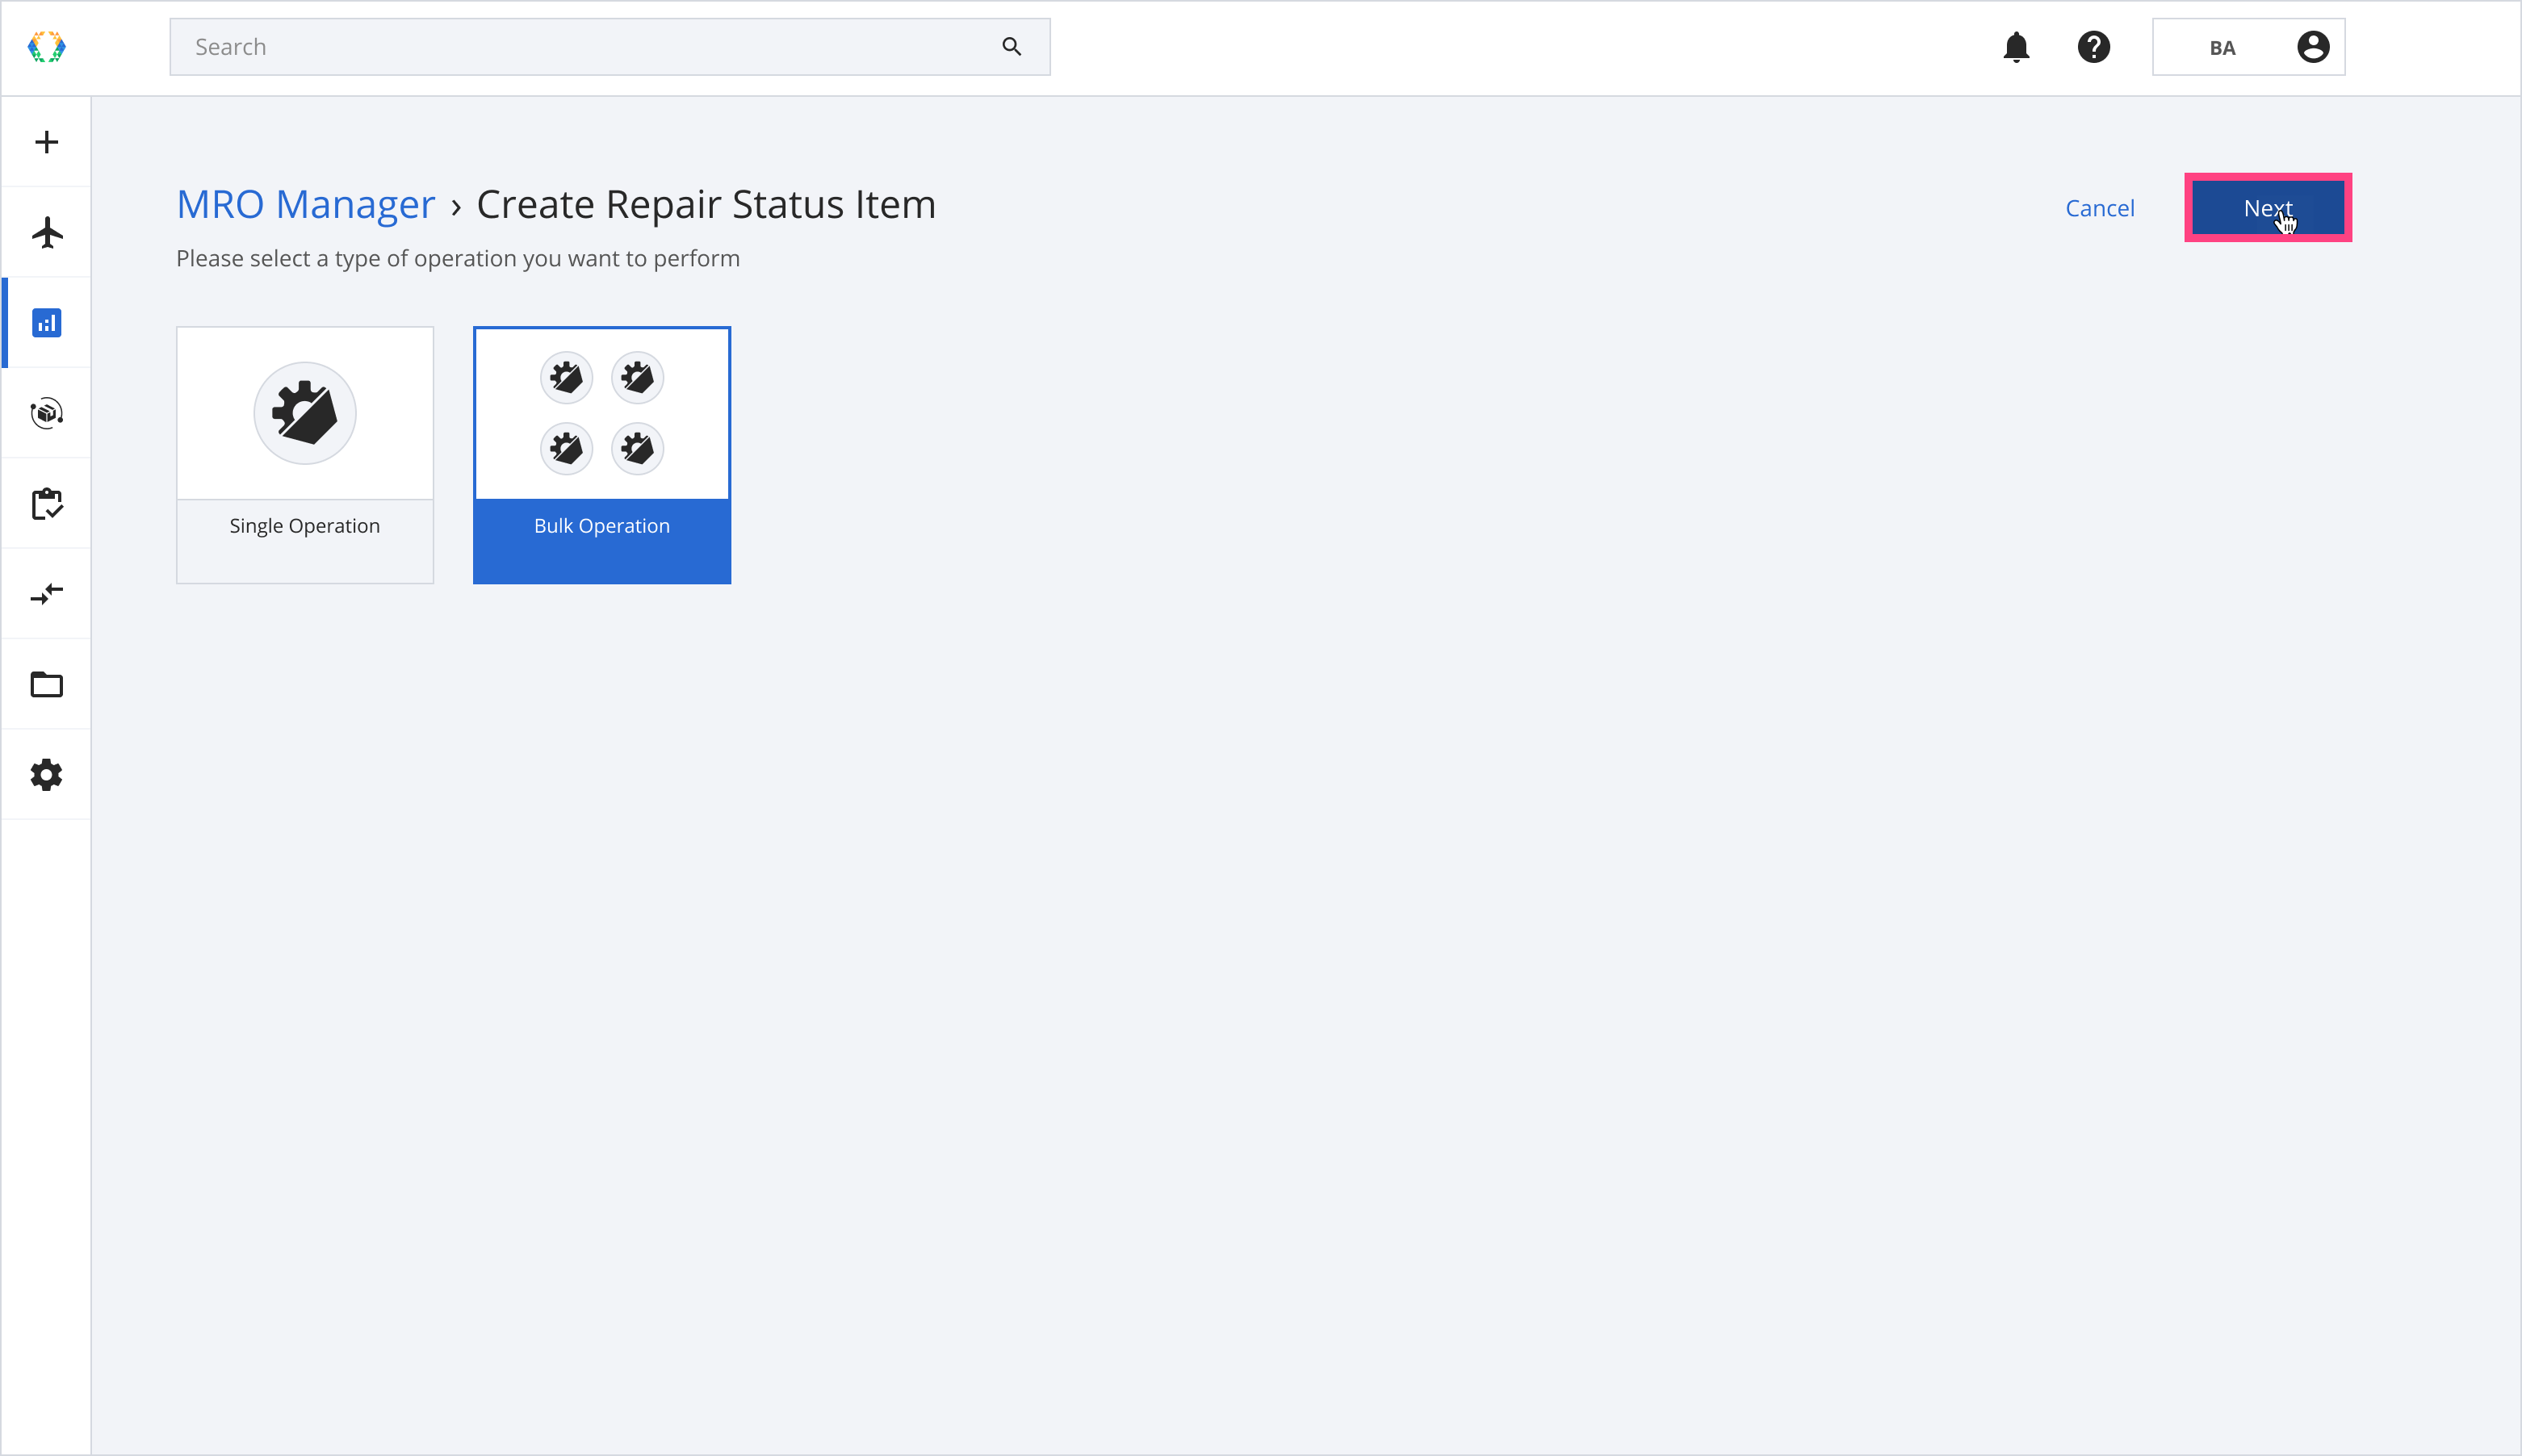
There are two types of operations available.
- Single Operation - create one repair status item
- Bulk Operation - create multiple repair status items simultaneously
Single Operation
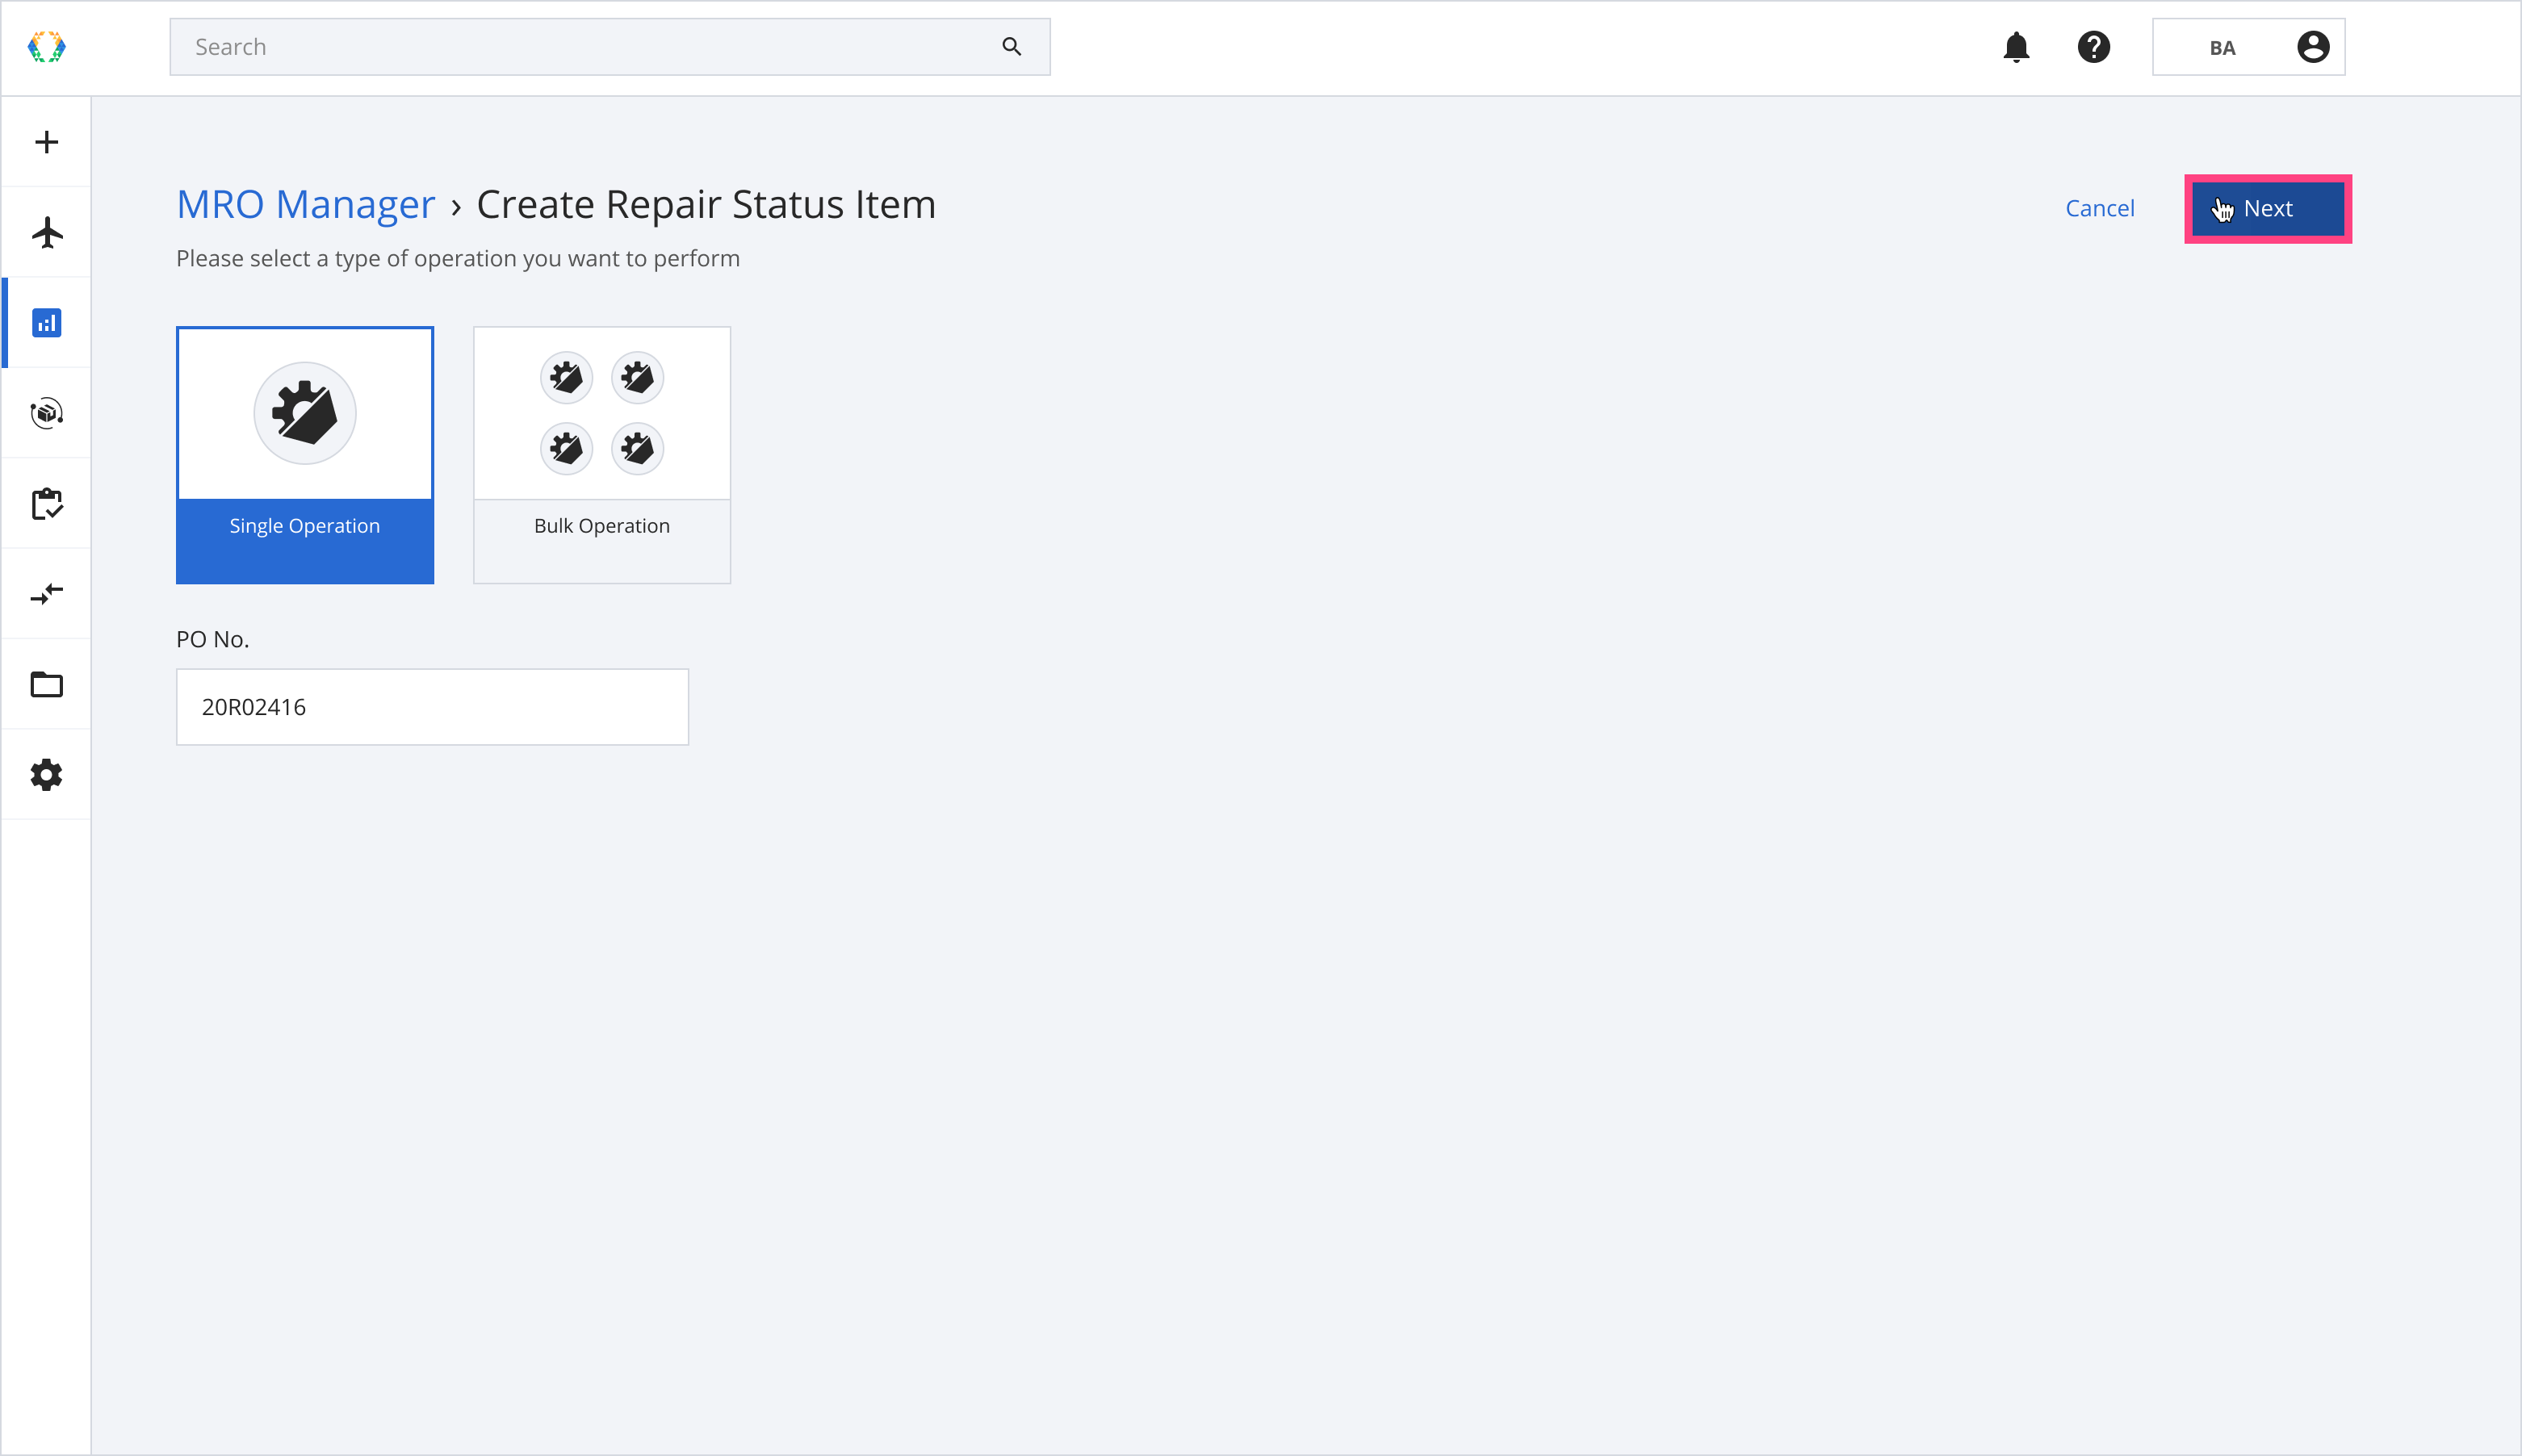
Step 1: Select ‘Single Operation’.
Step 2: Provide the Purchase Order Number (PO no.) and click ‘Next’.
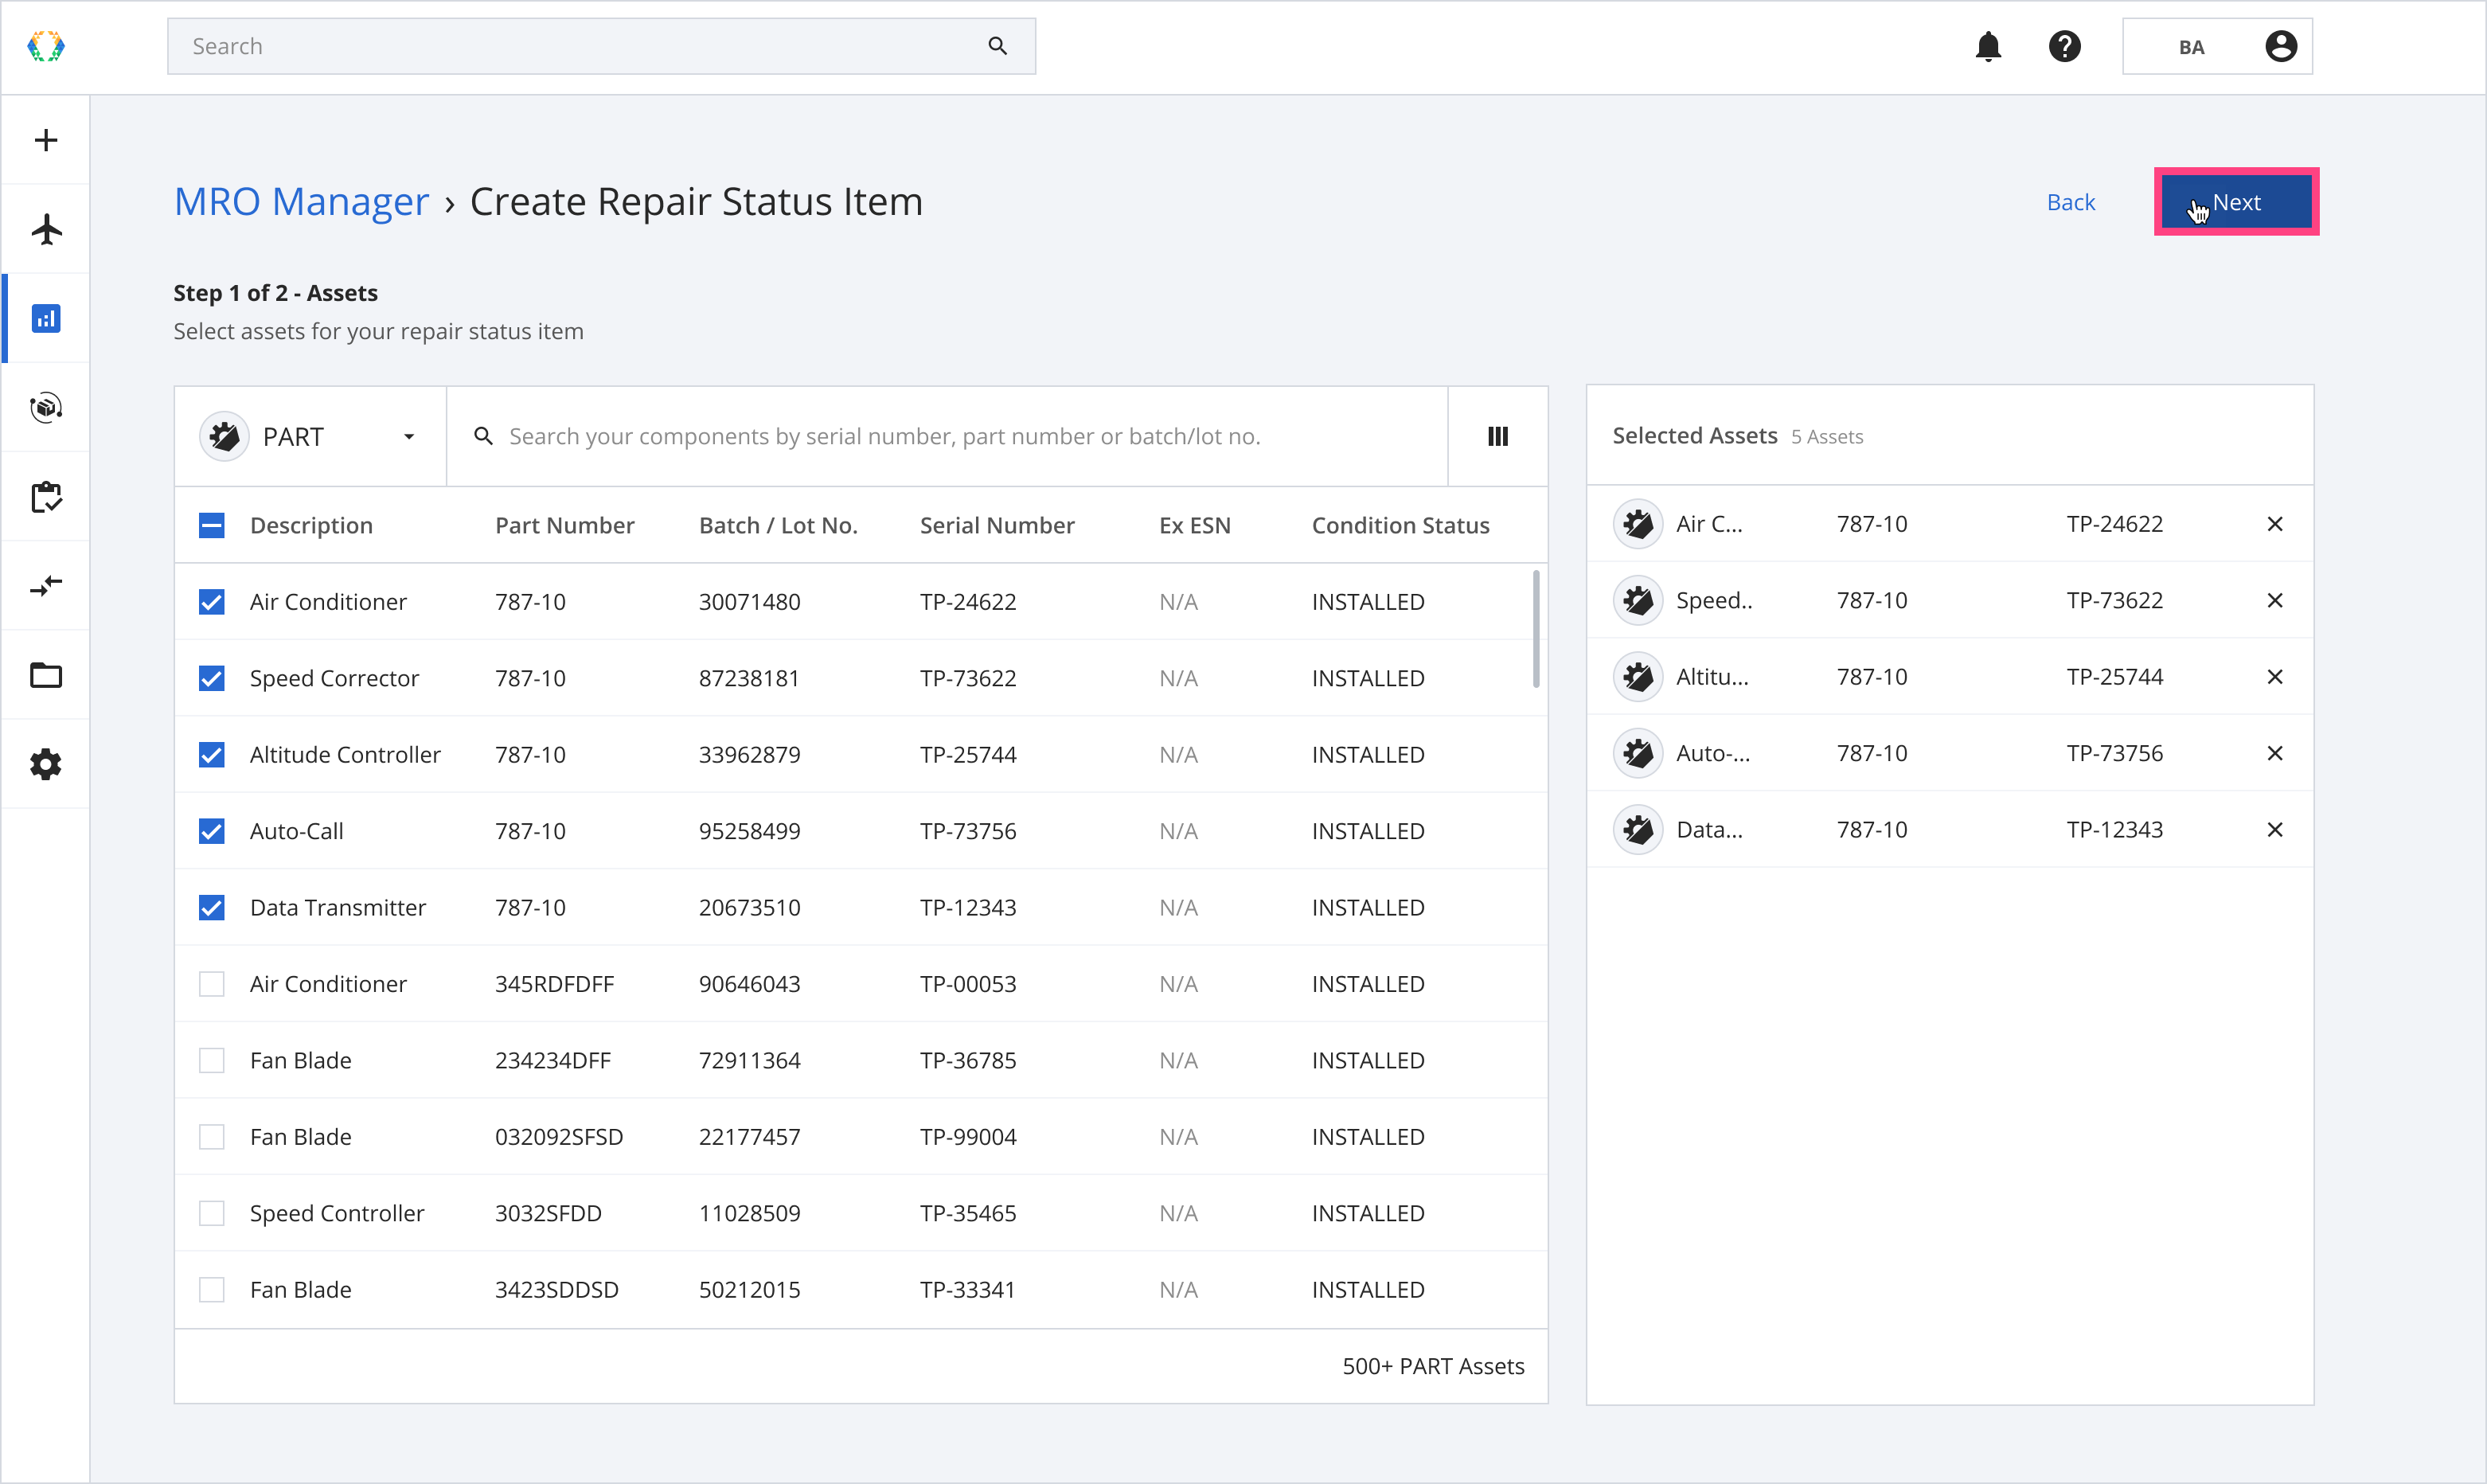
Step 3: Select Assets for your repair status item, and click ‘Next’.
You can use the search bar to find your assets easily.
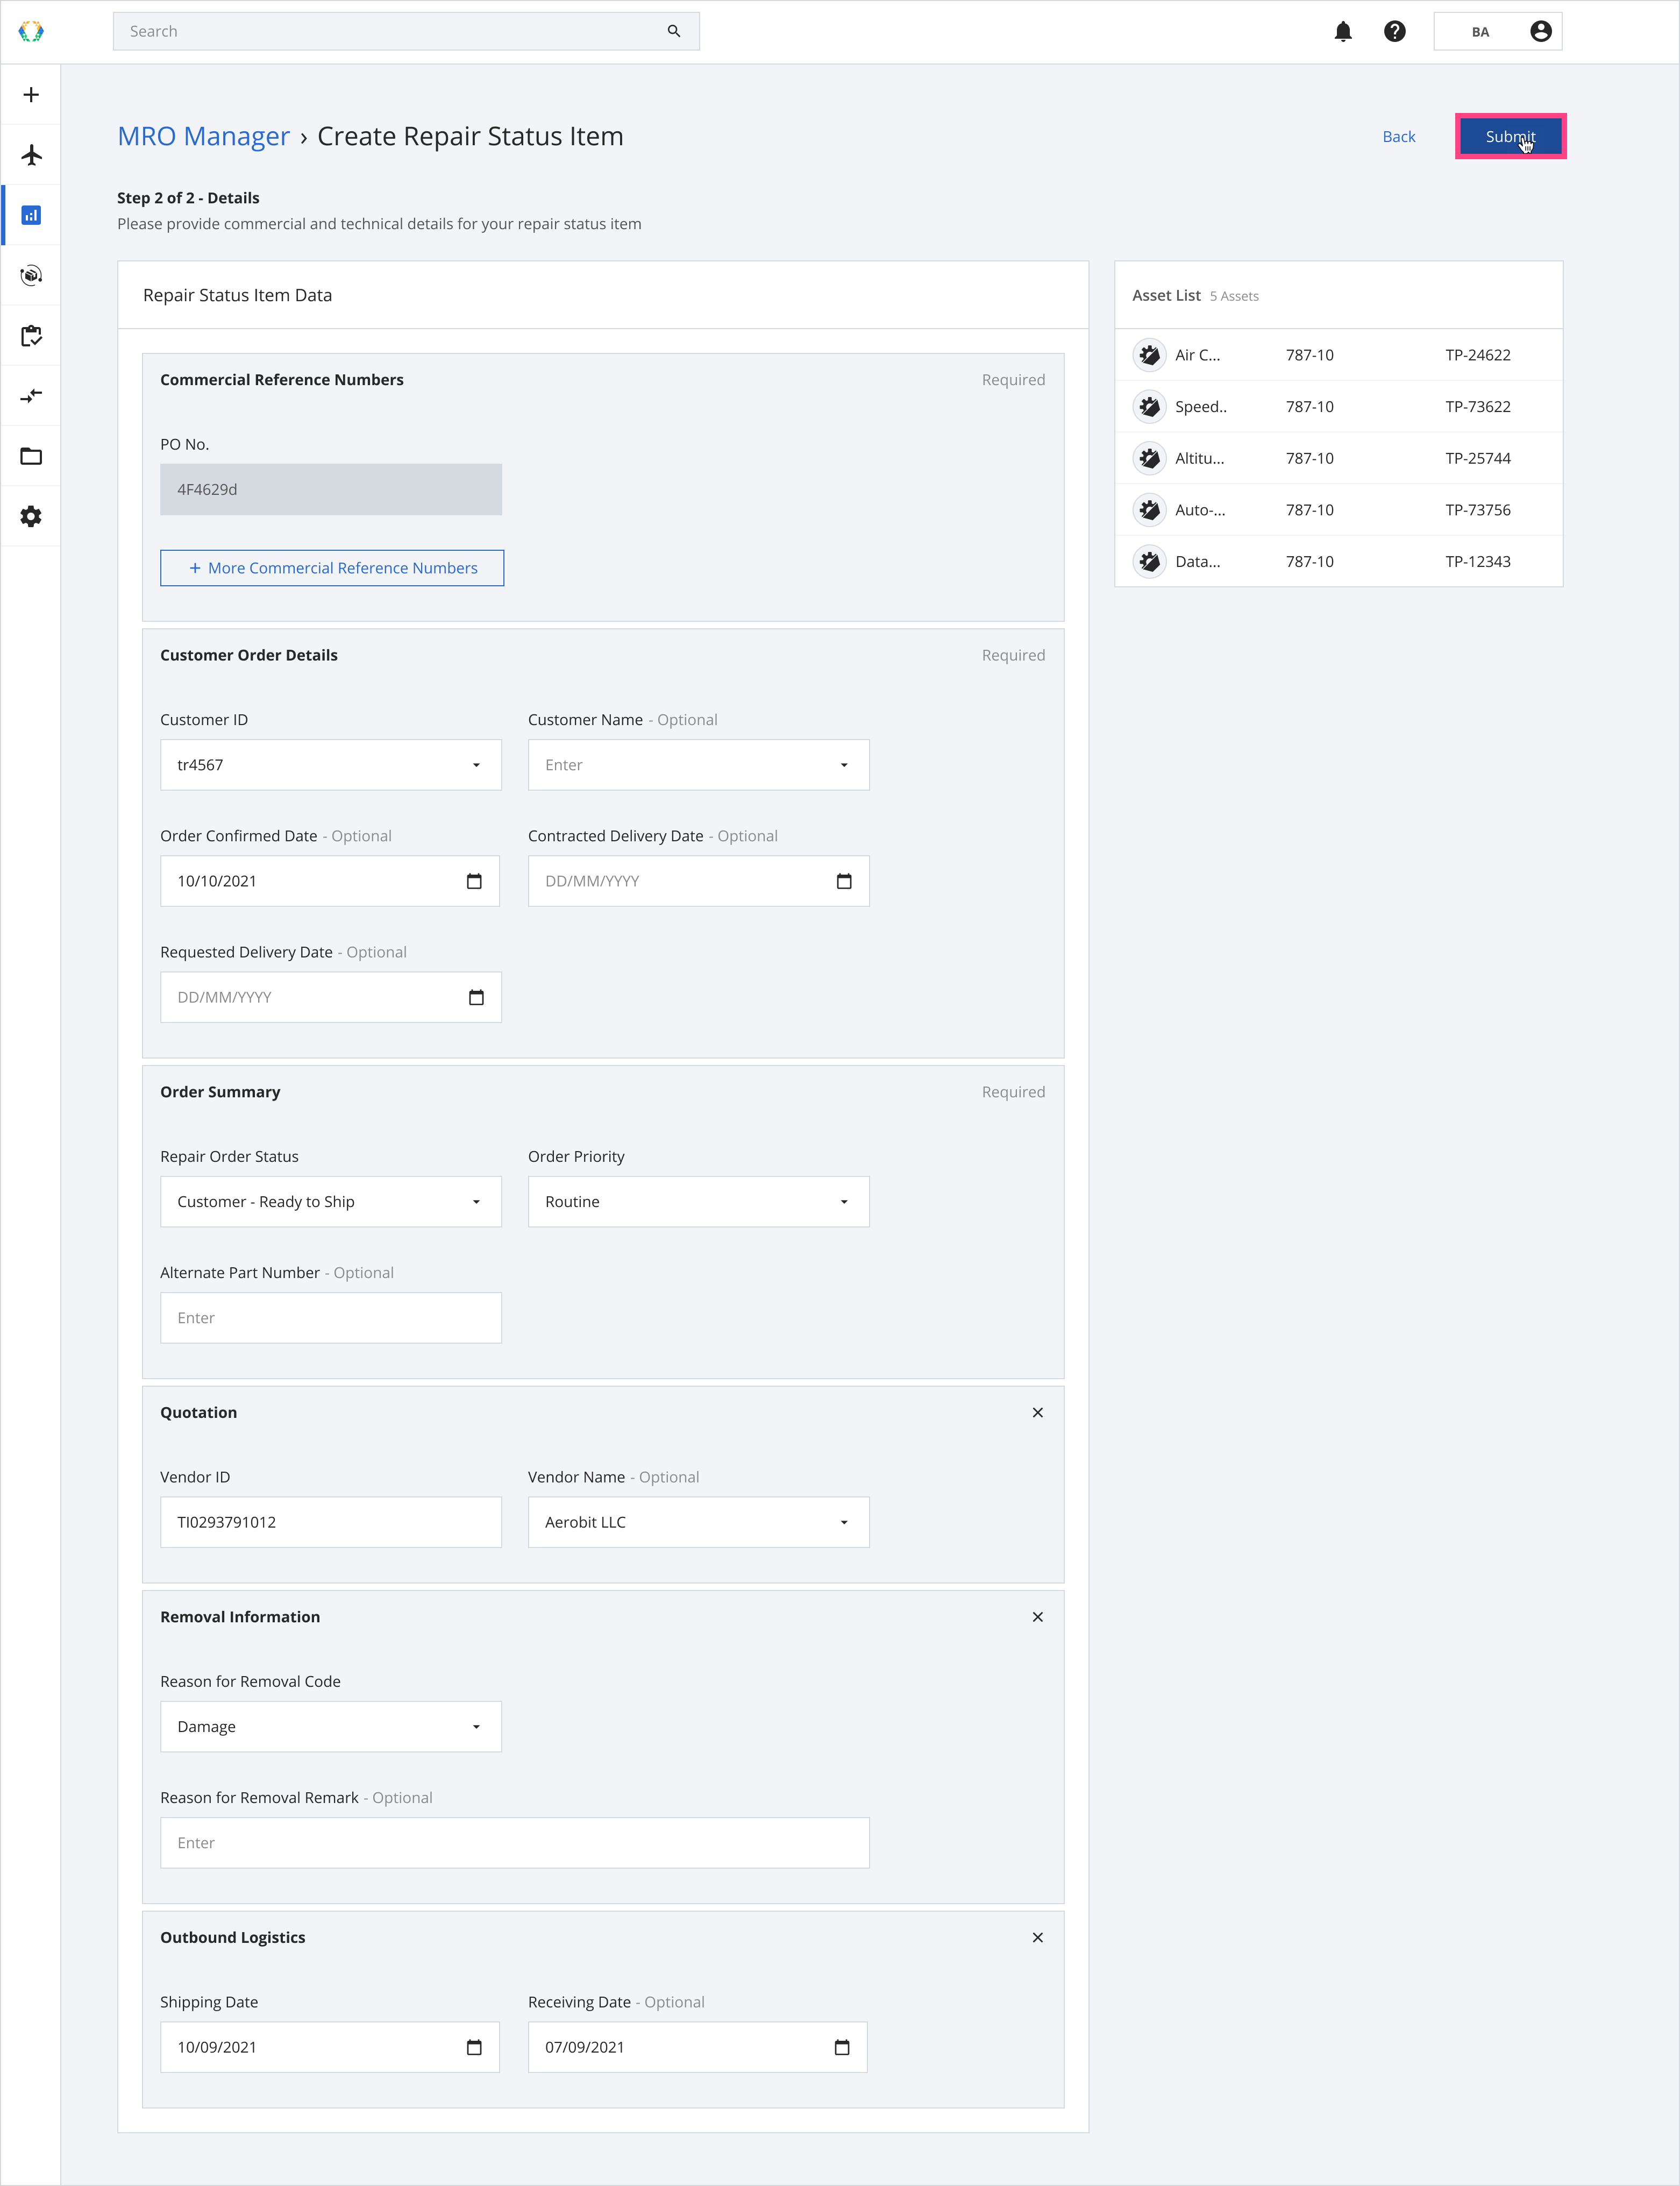
Step 4: Provide the details for your repair status item, and click ‘Submit’.
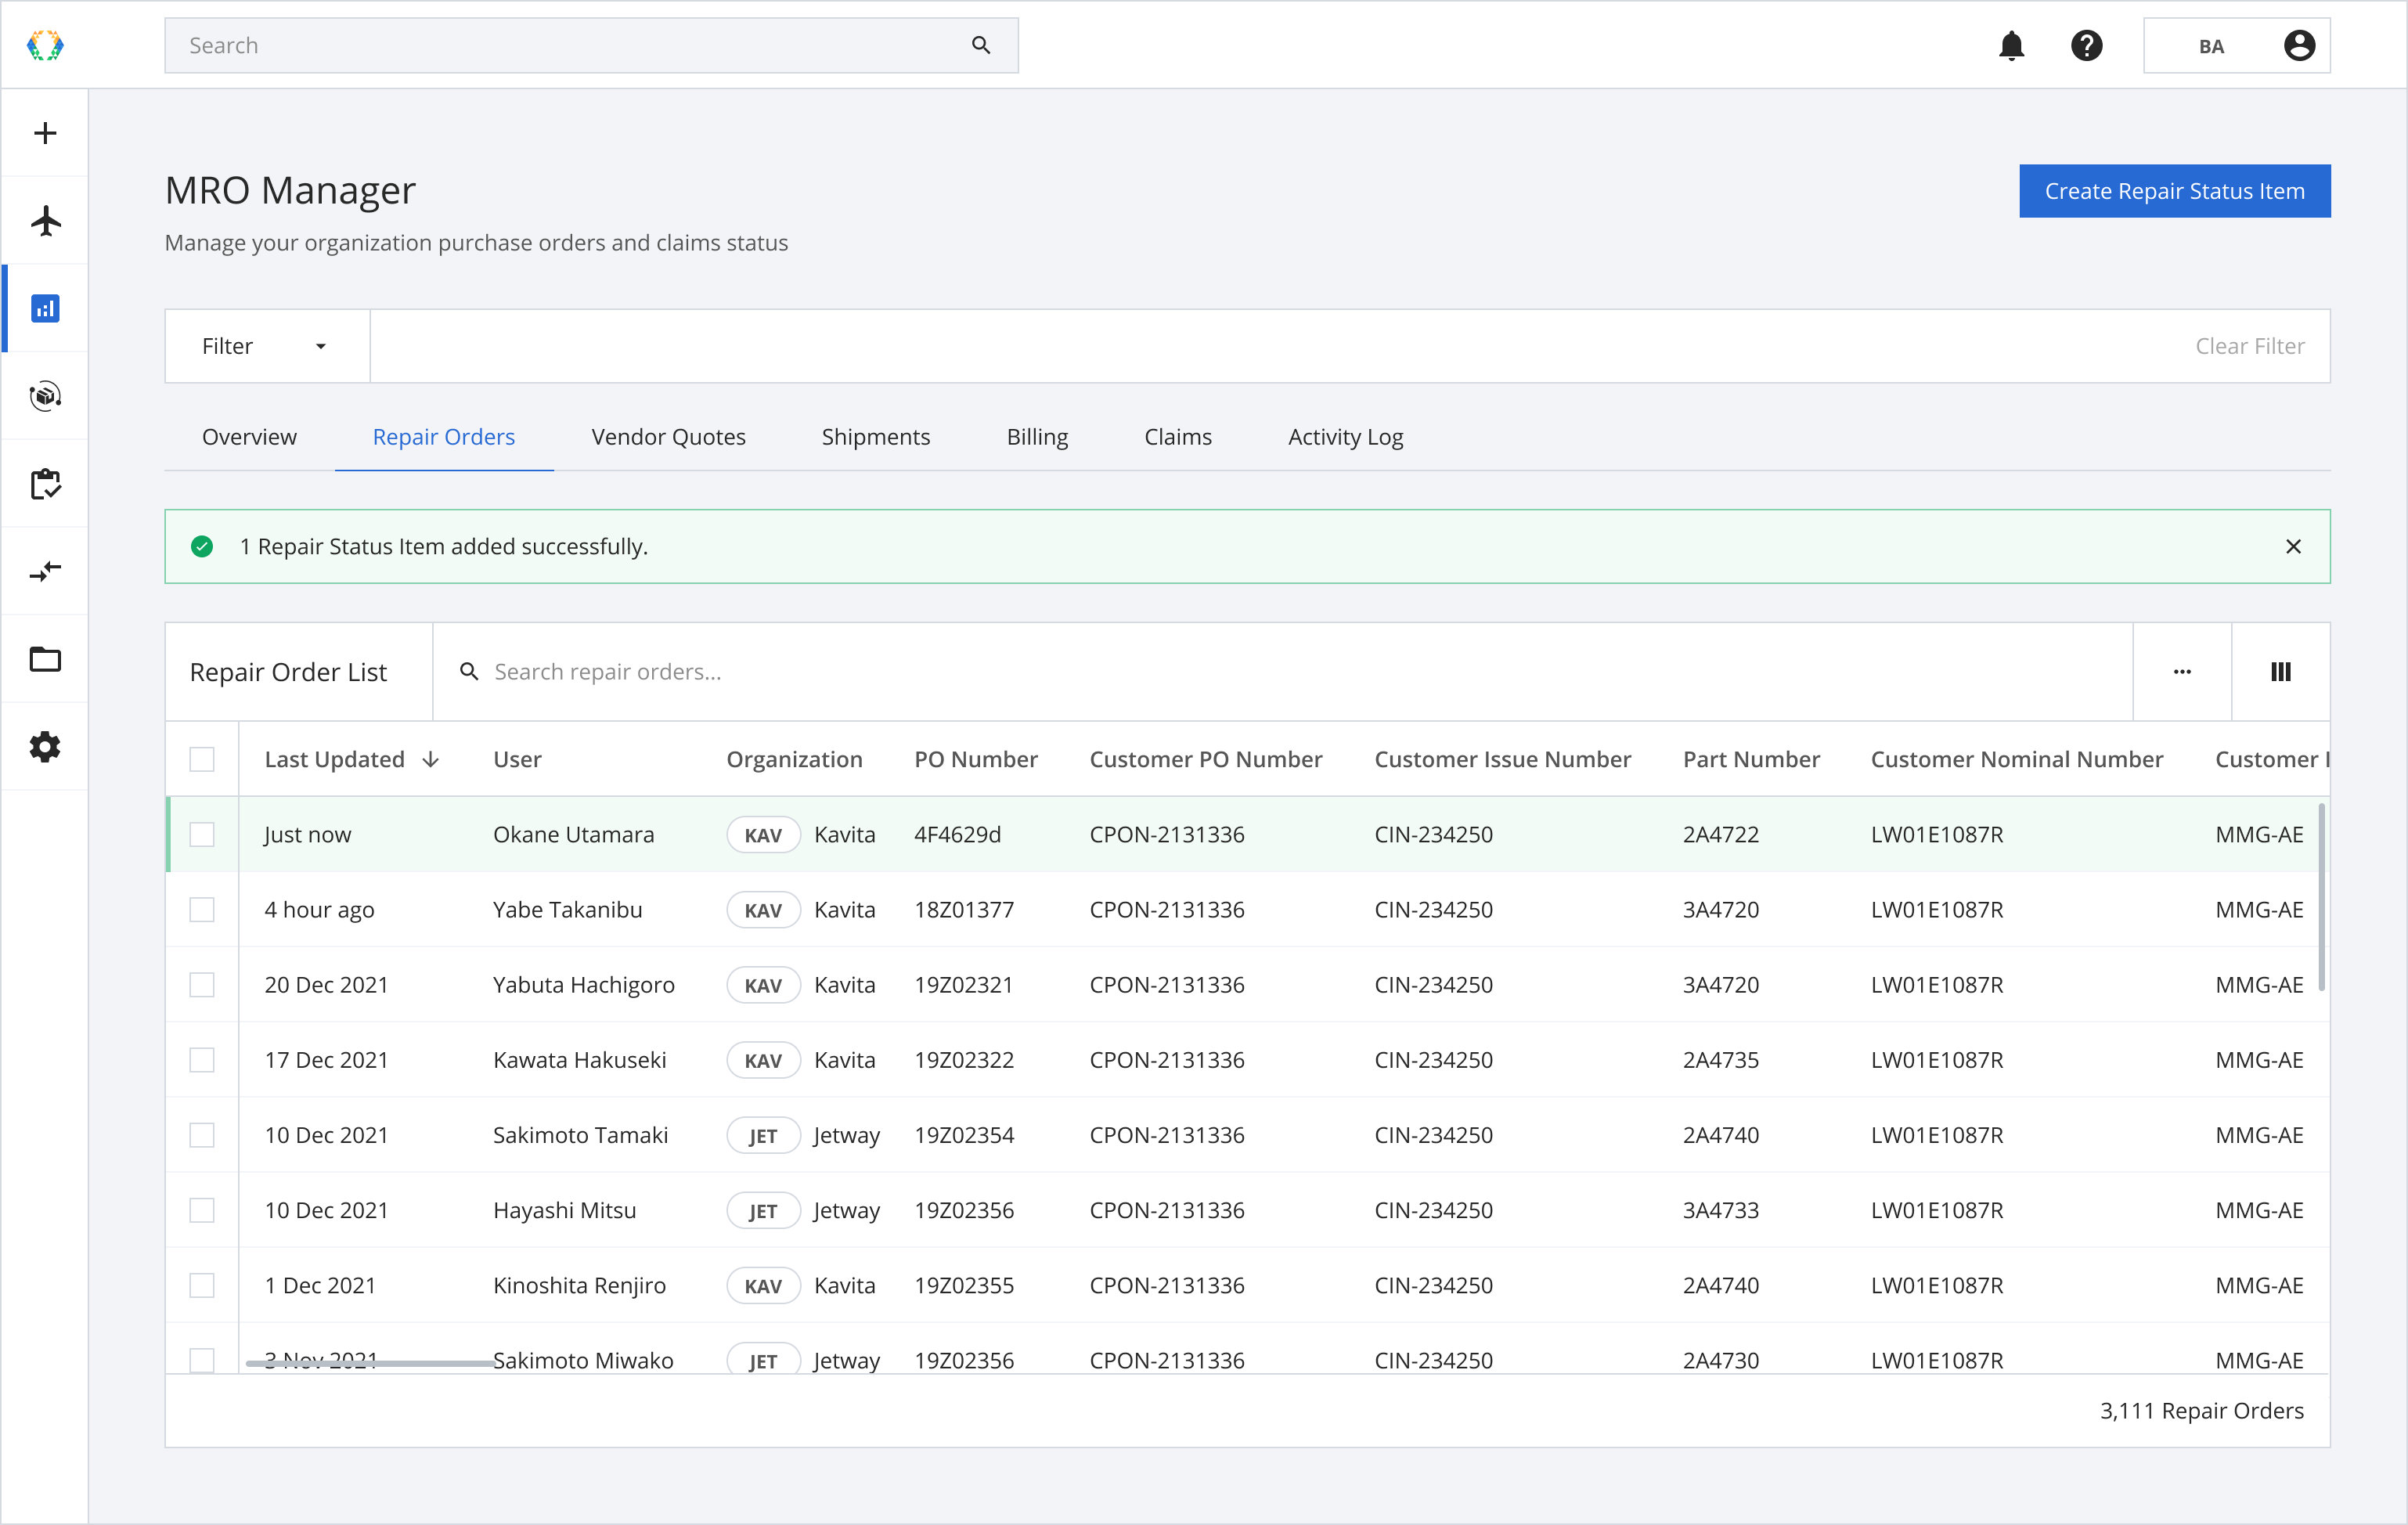
Once the repair status item has been created successfully, a green banner will appear on top of the repair orders list.
Bulk Operation
To create multiple Repair Status Items, select Bulk Operation, then click 'Next'.
There are 2 ways you can create Repair Status Items in Bulk Operation.
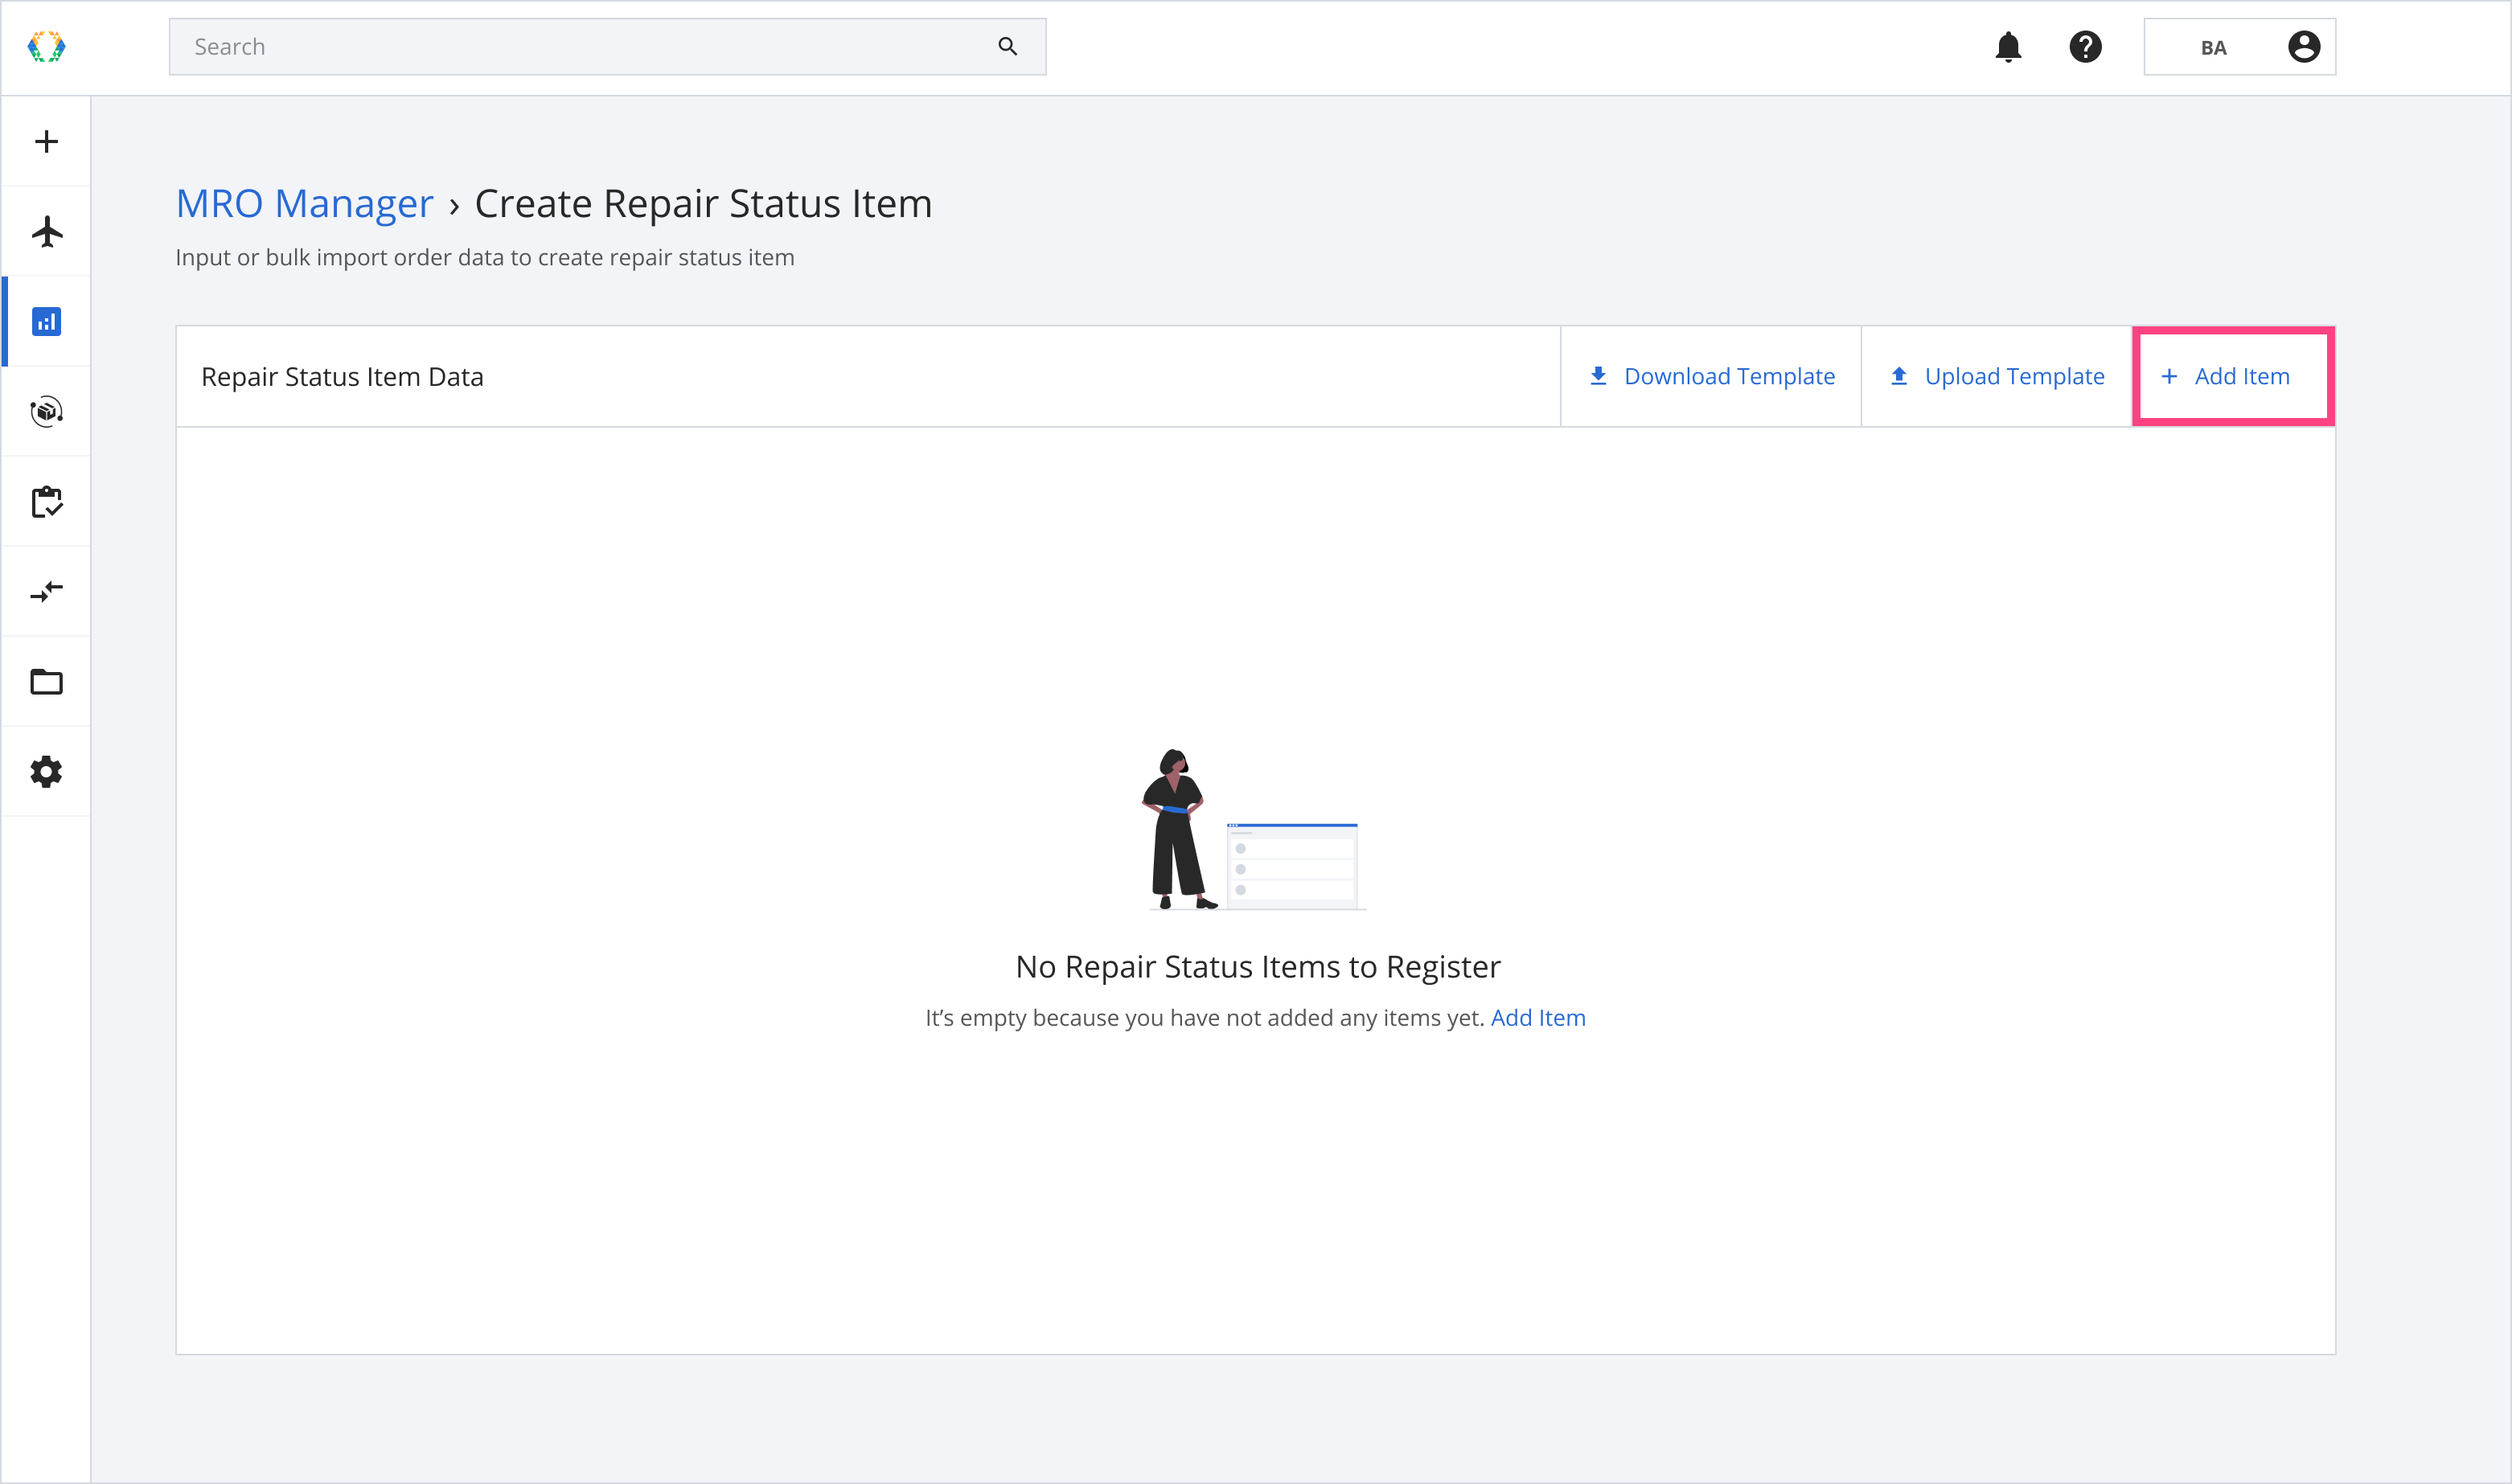
Option 1: Create Repair Status Item by inputting data directly
Option 2: Create Repair Status Item using excel template
Option 1: Create Repair Status Item by inputting data directly
Step 1: Click 'Add Item'.
You can click “Add Item” multiple times to add multiple Repair Status Items.
Step 2: Provide repair status items details and click ‘Submit’.
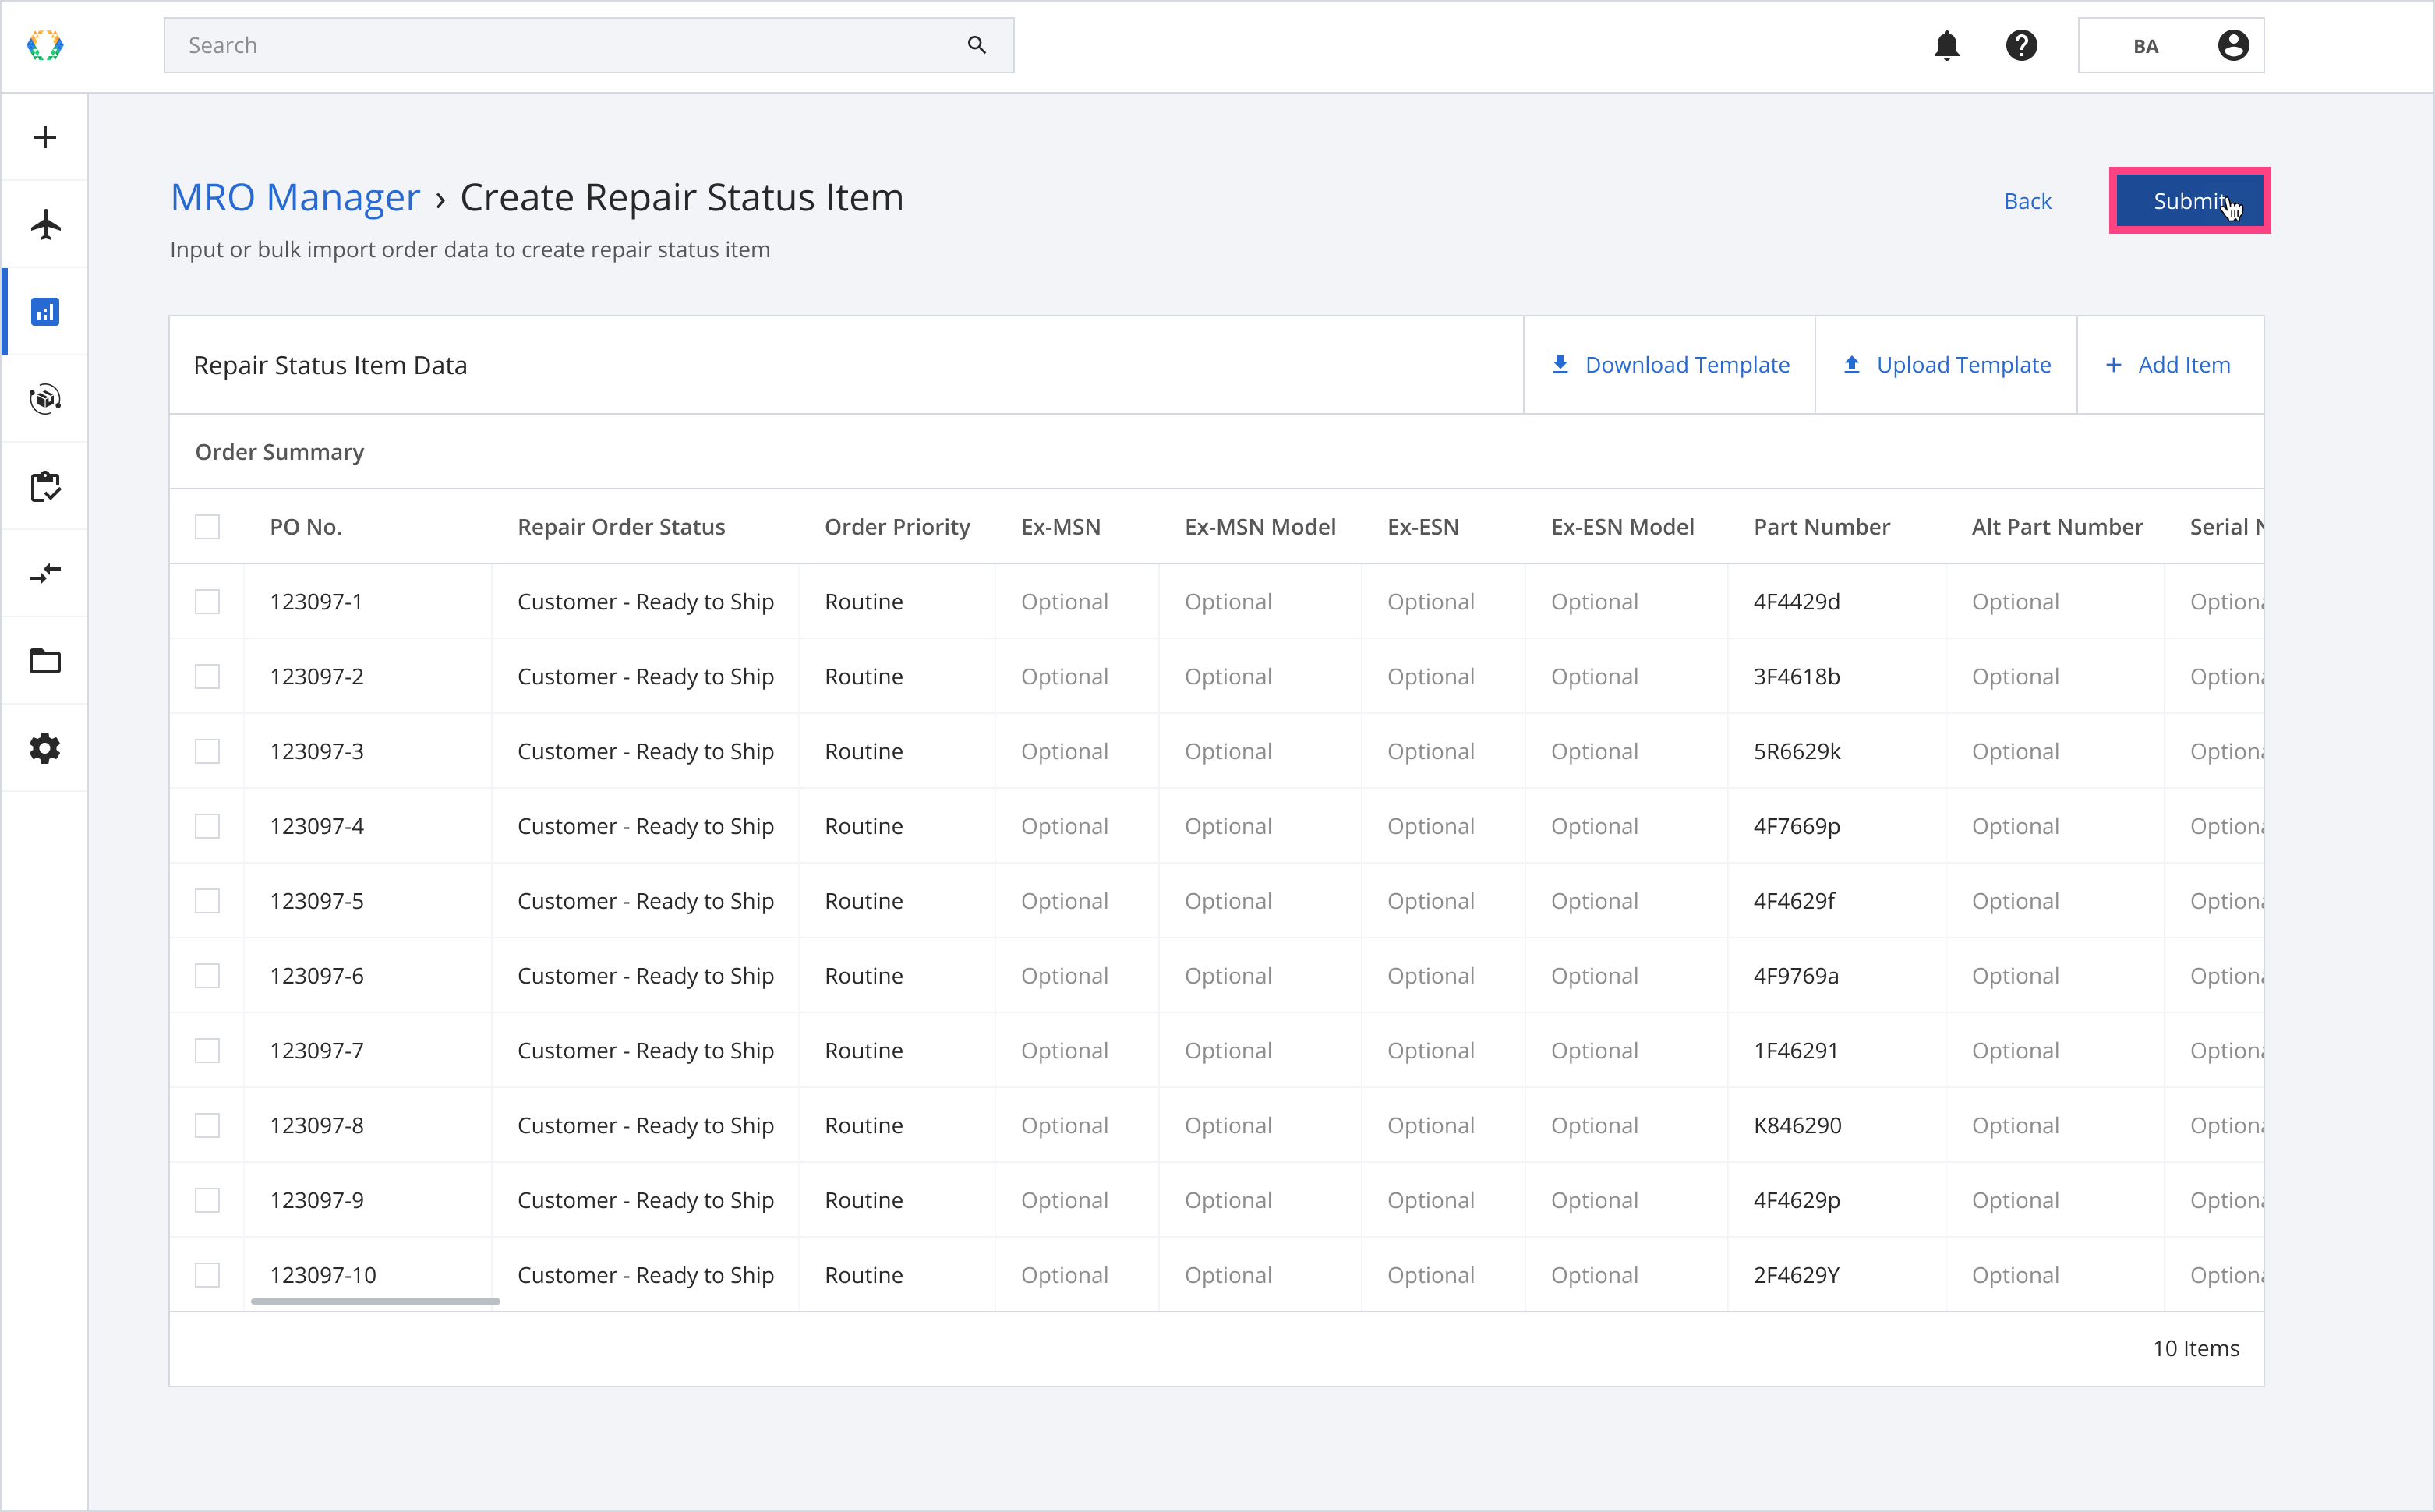
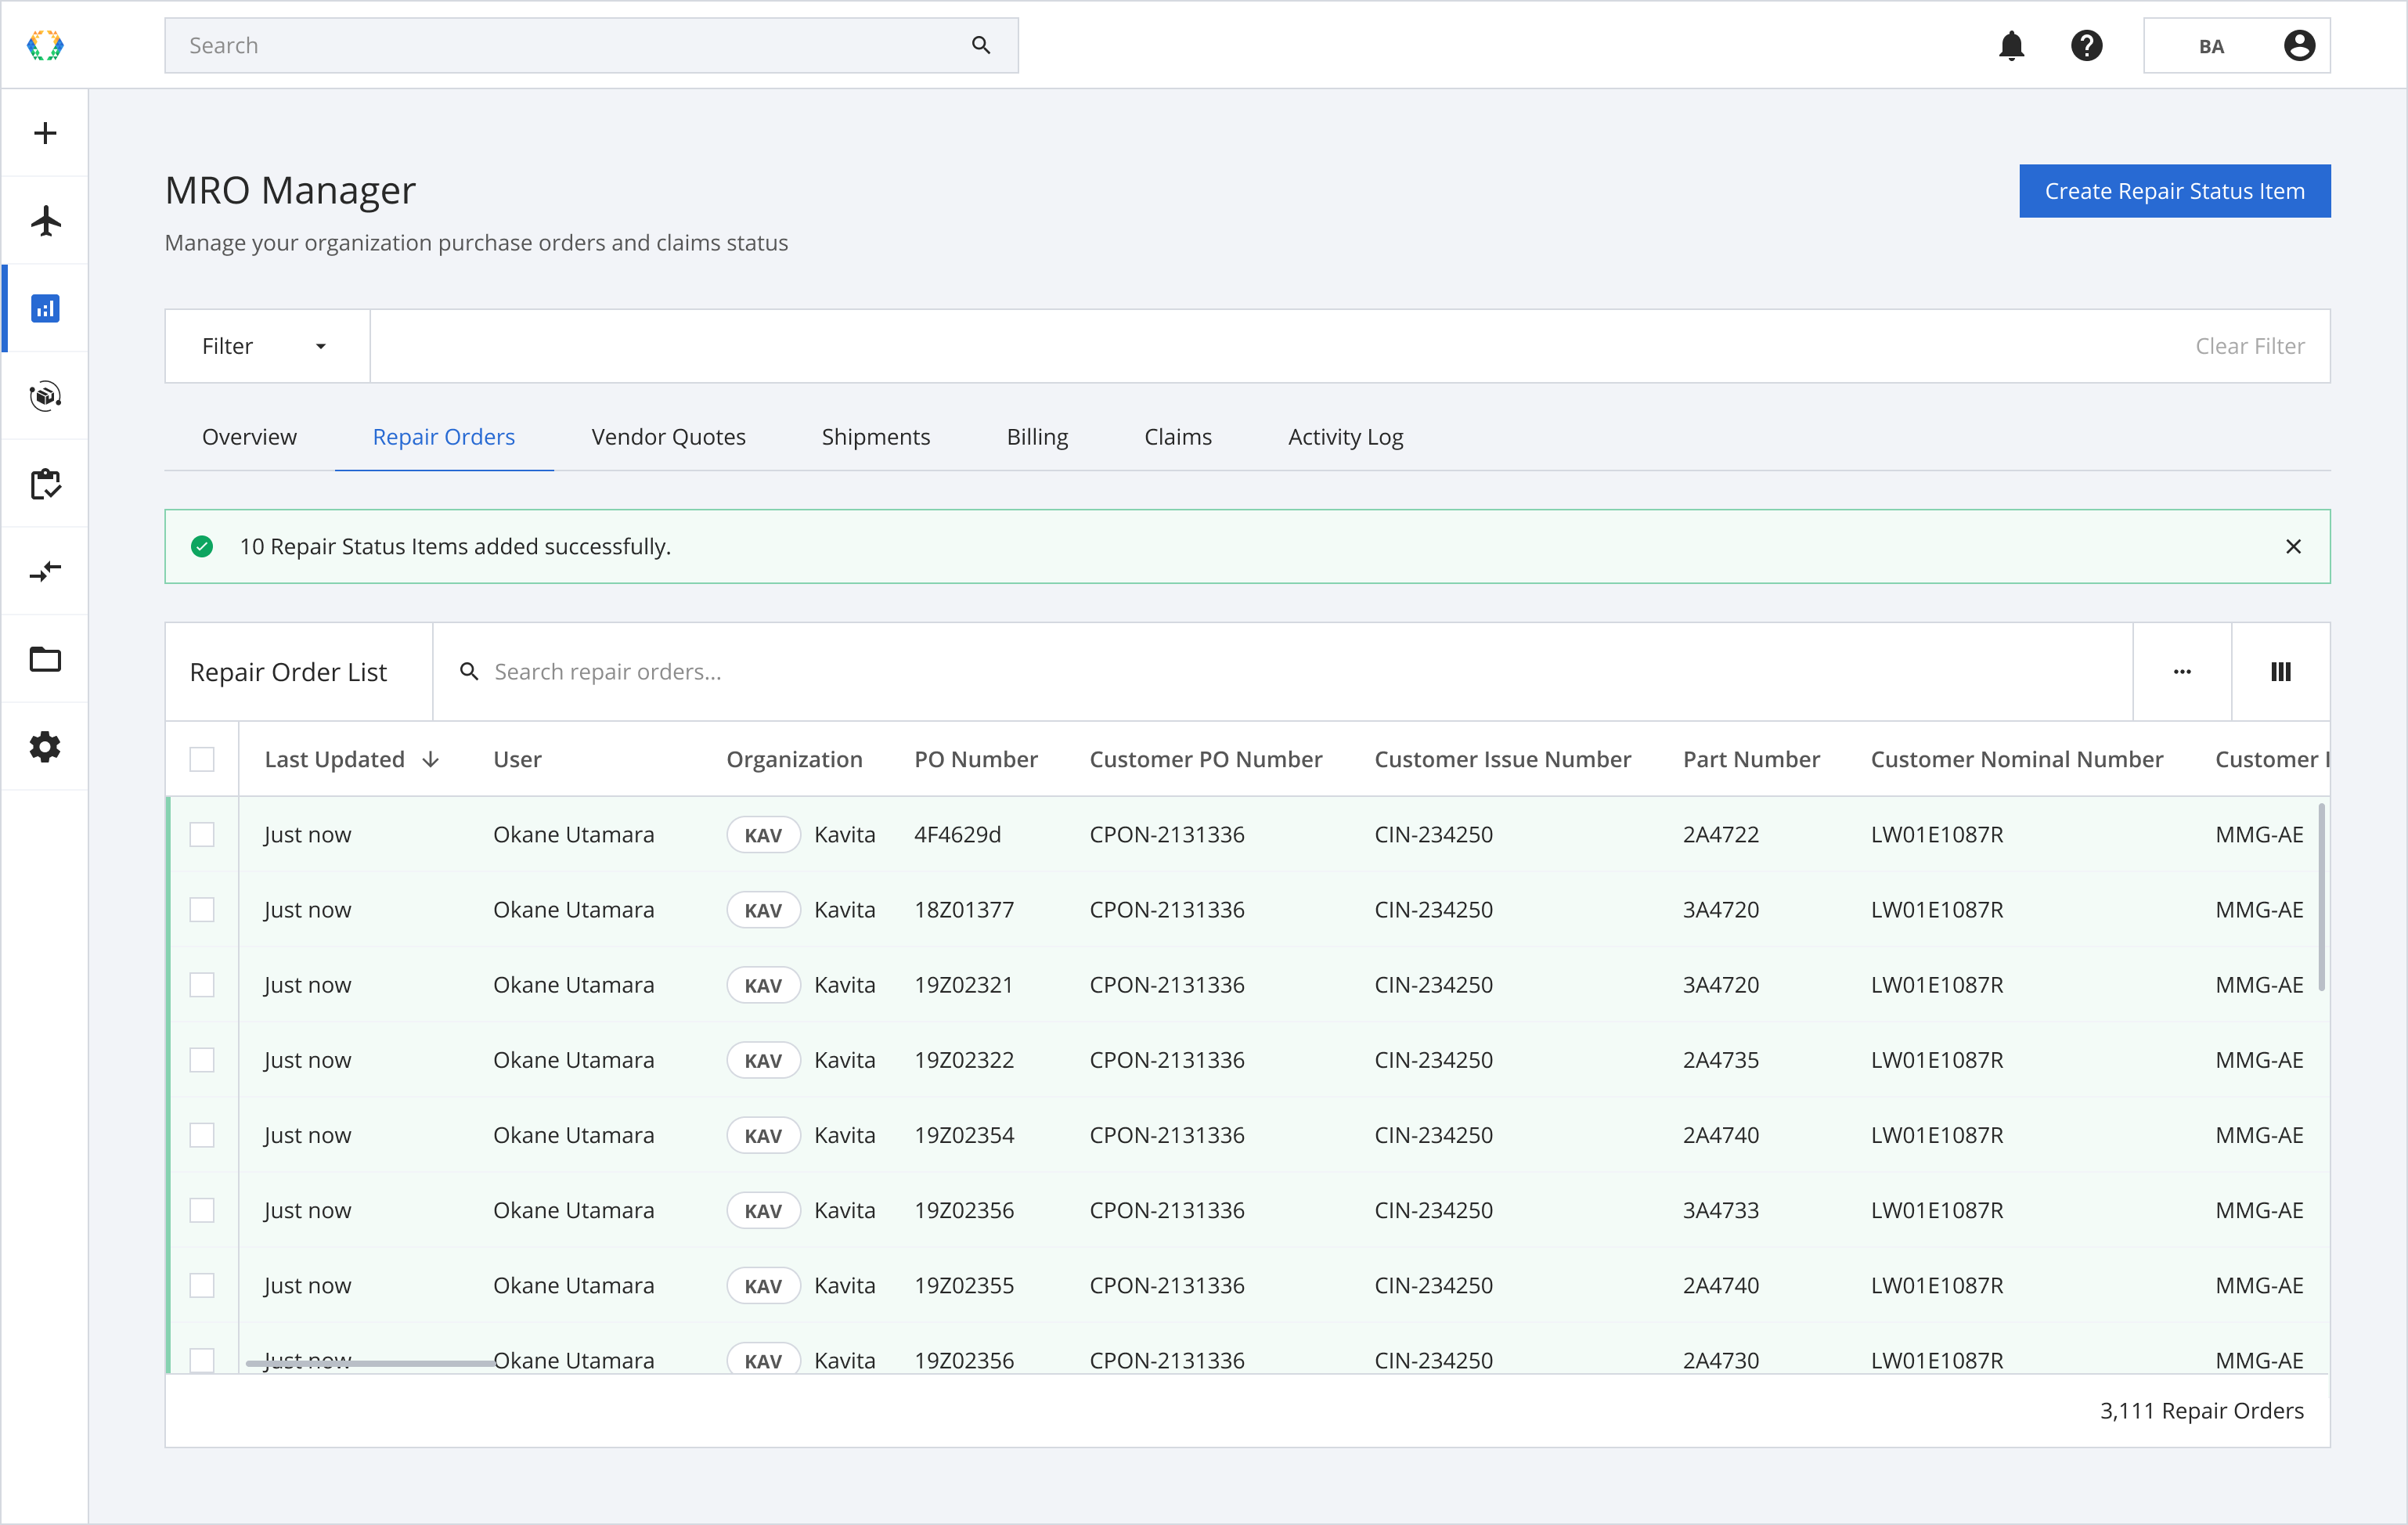
Once the repair status items are created successfully, a green banner will appear on top of the repair orders list.
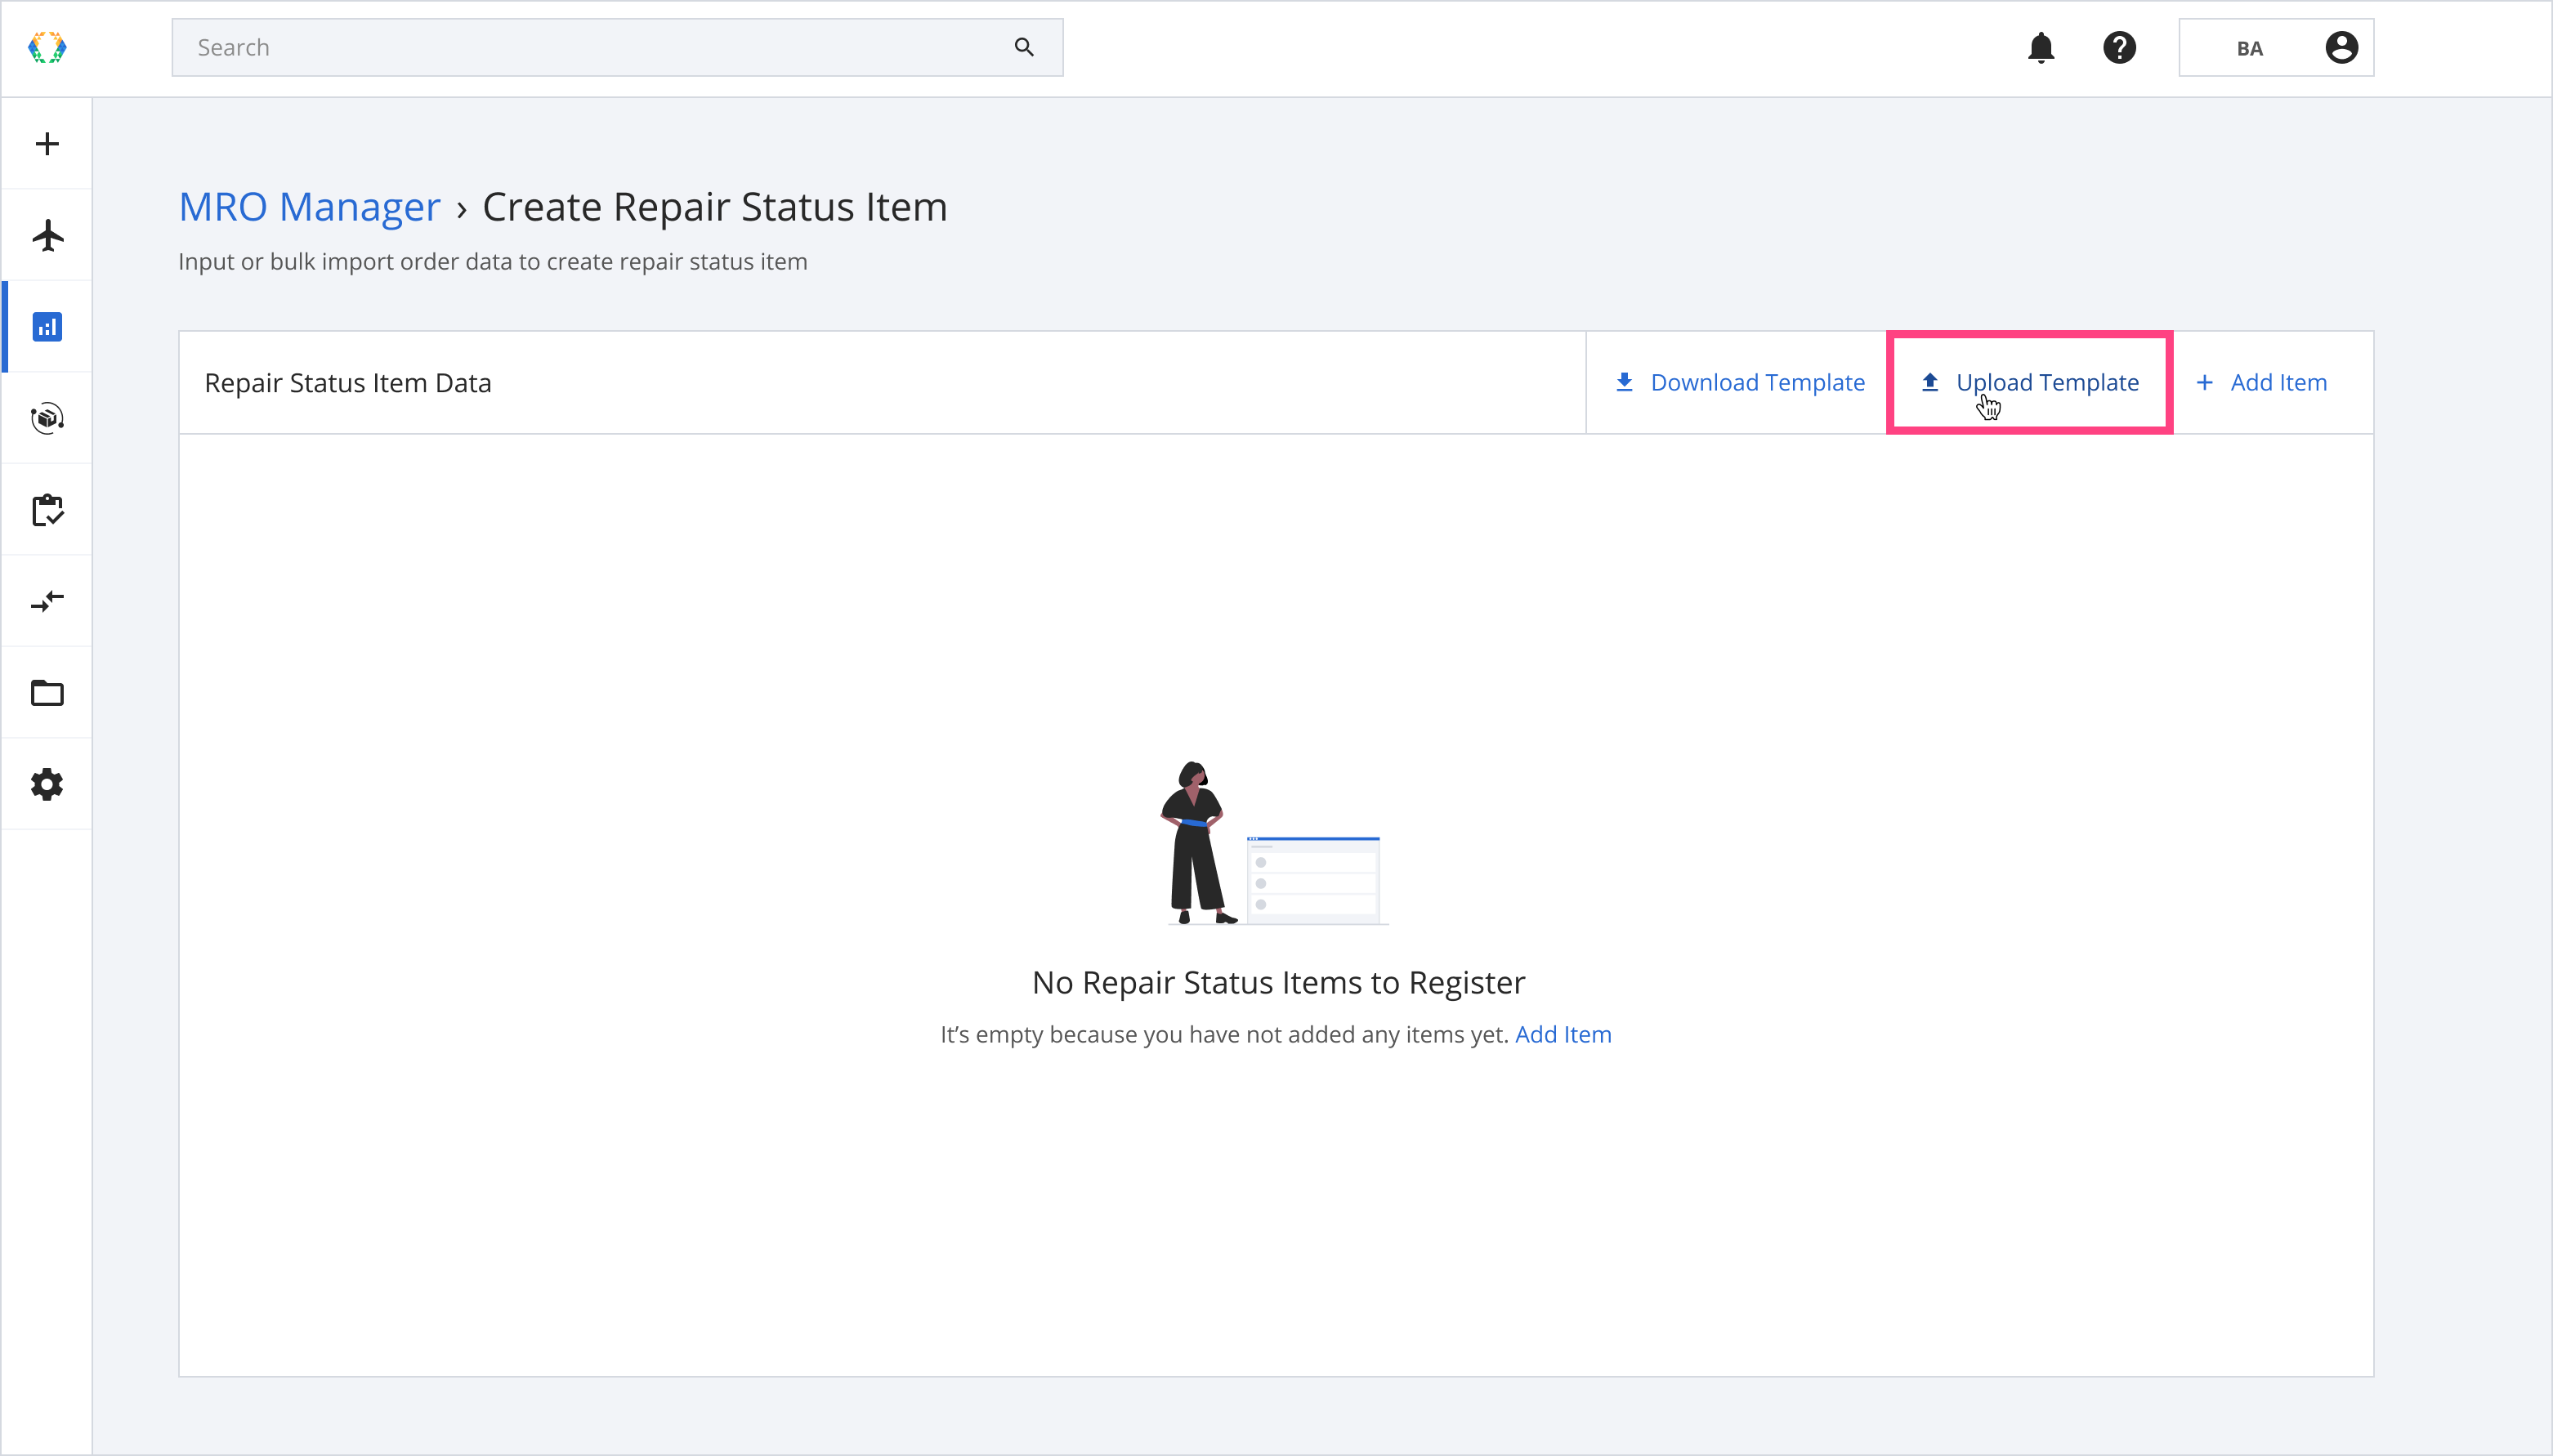
Option 2: Create Repair Status Item using excel template
Alternatively, download excel template and fill in the Repair Status Item details on your local computer. Ensure the data is accurate and the required sections are filled.
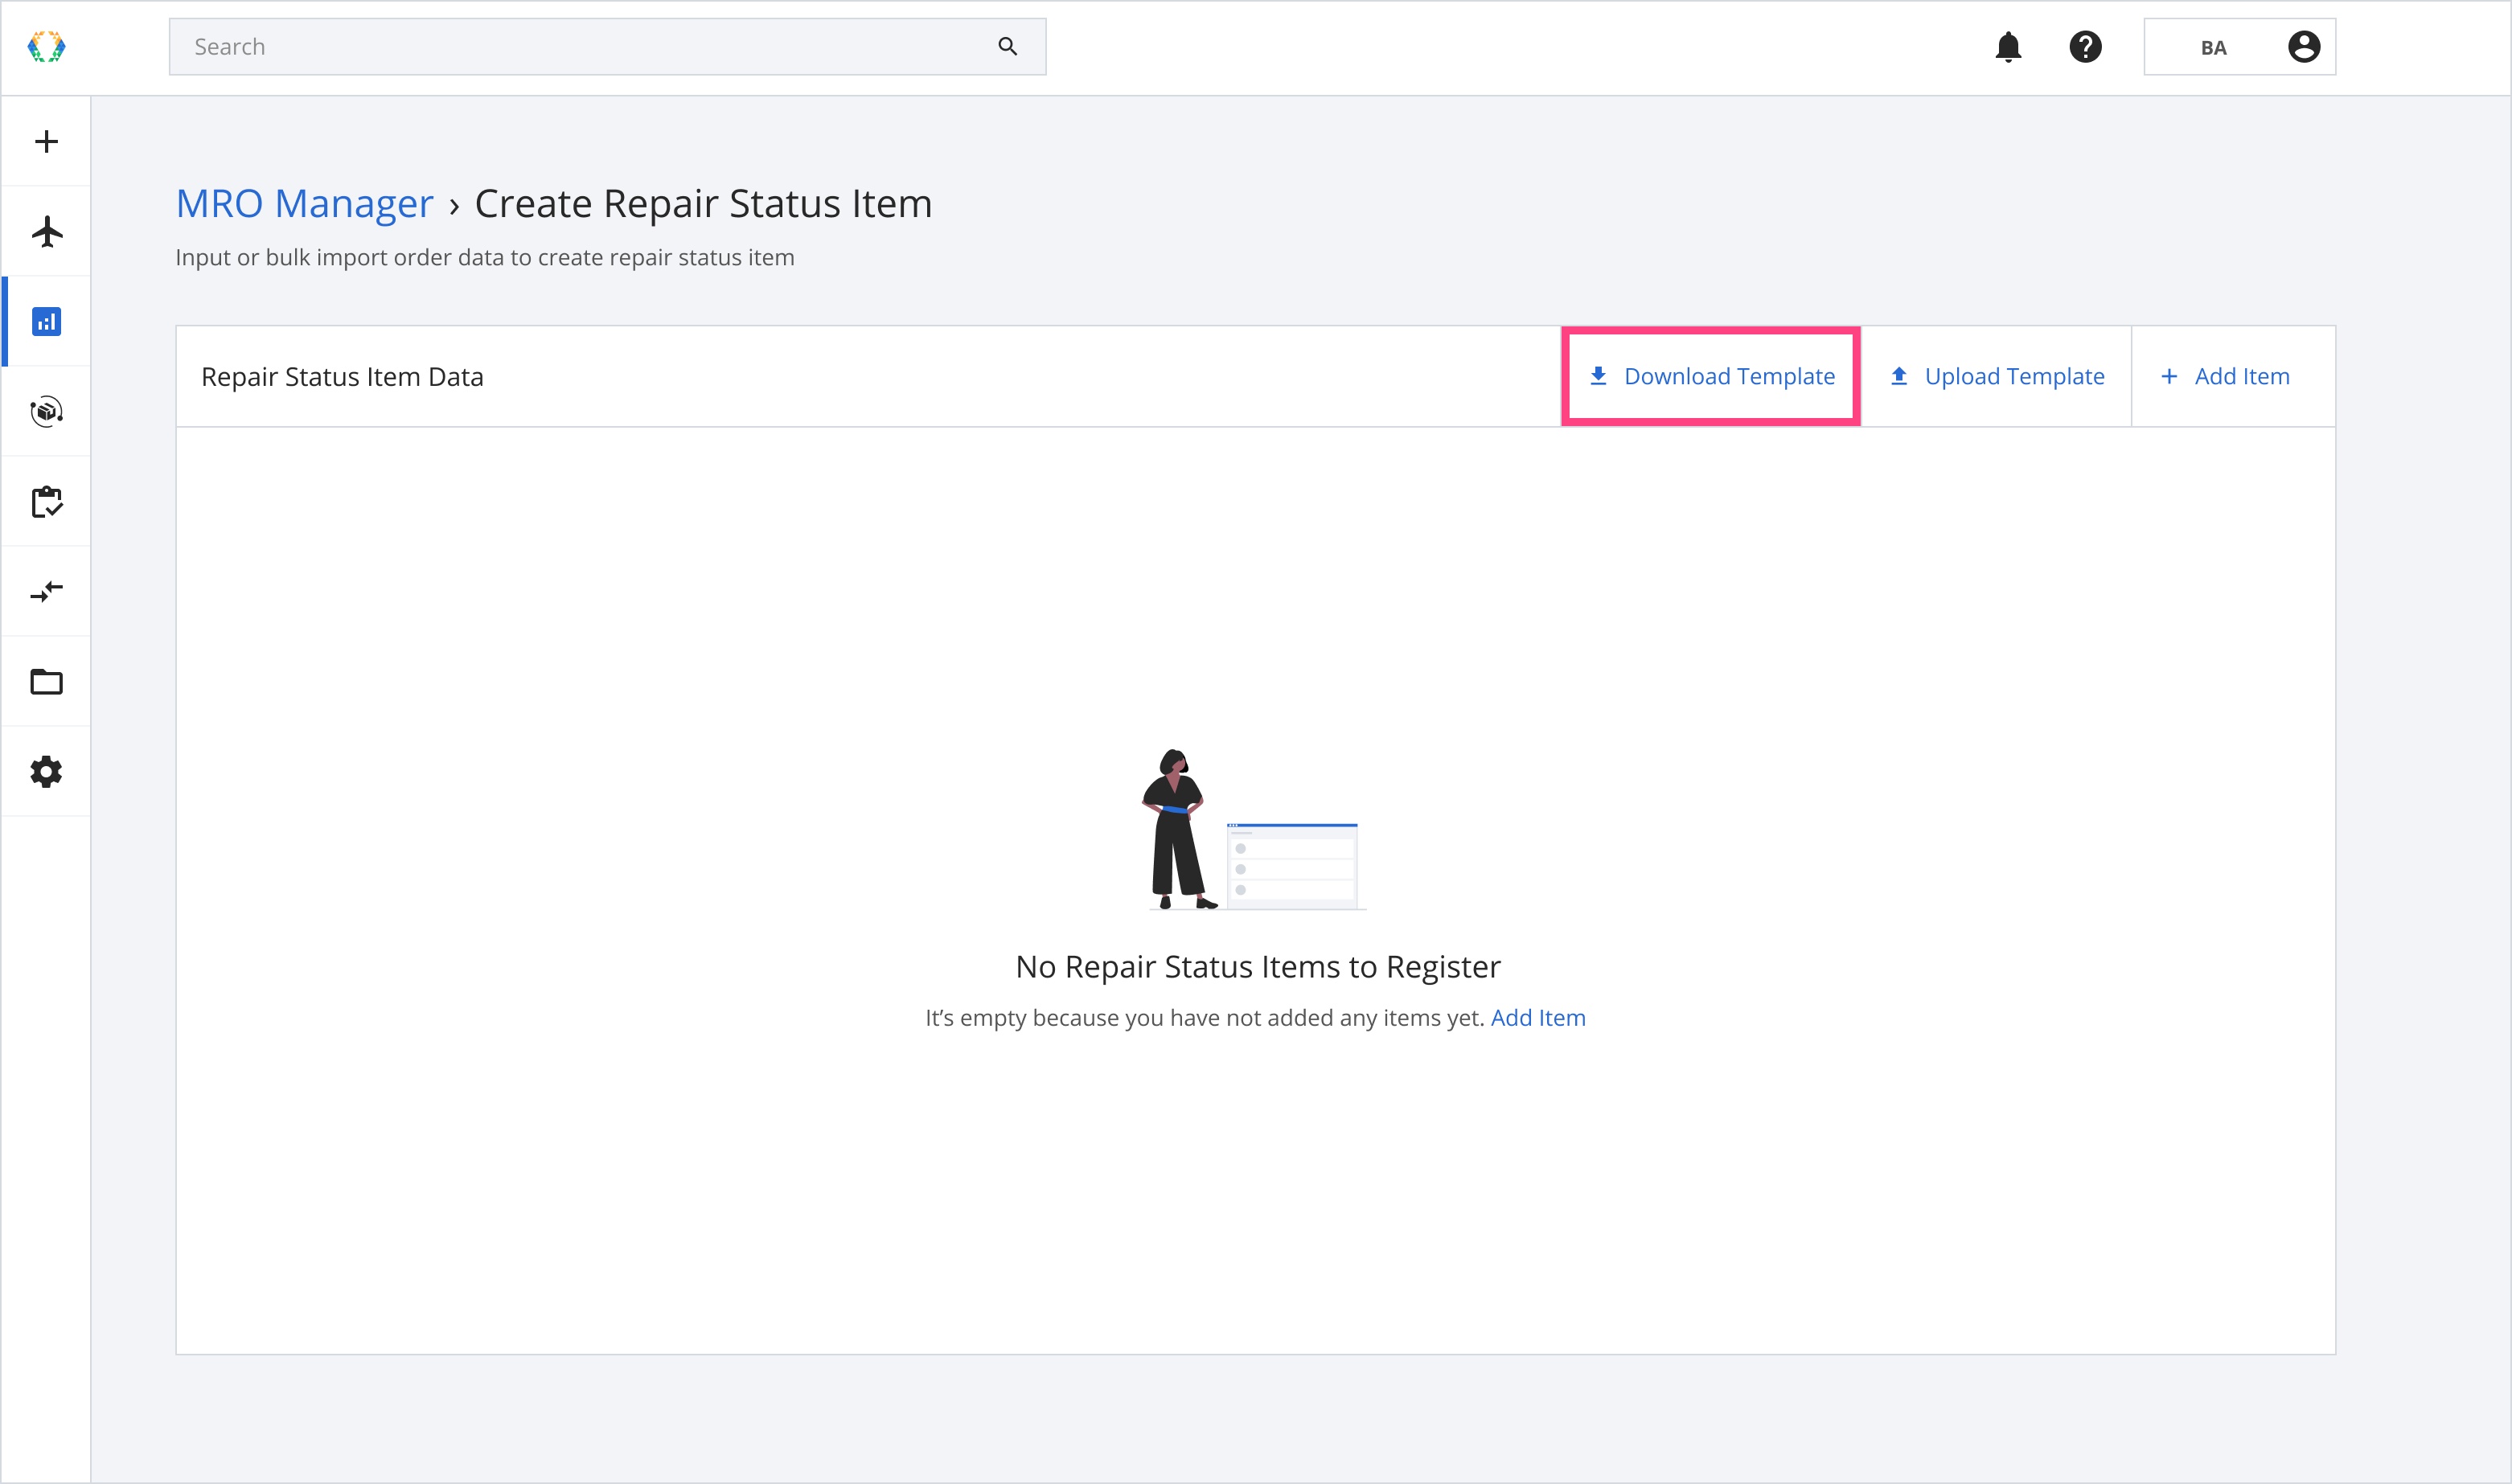
Step 1: Download excel template.
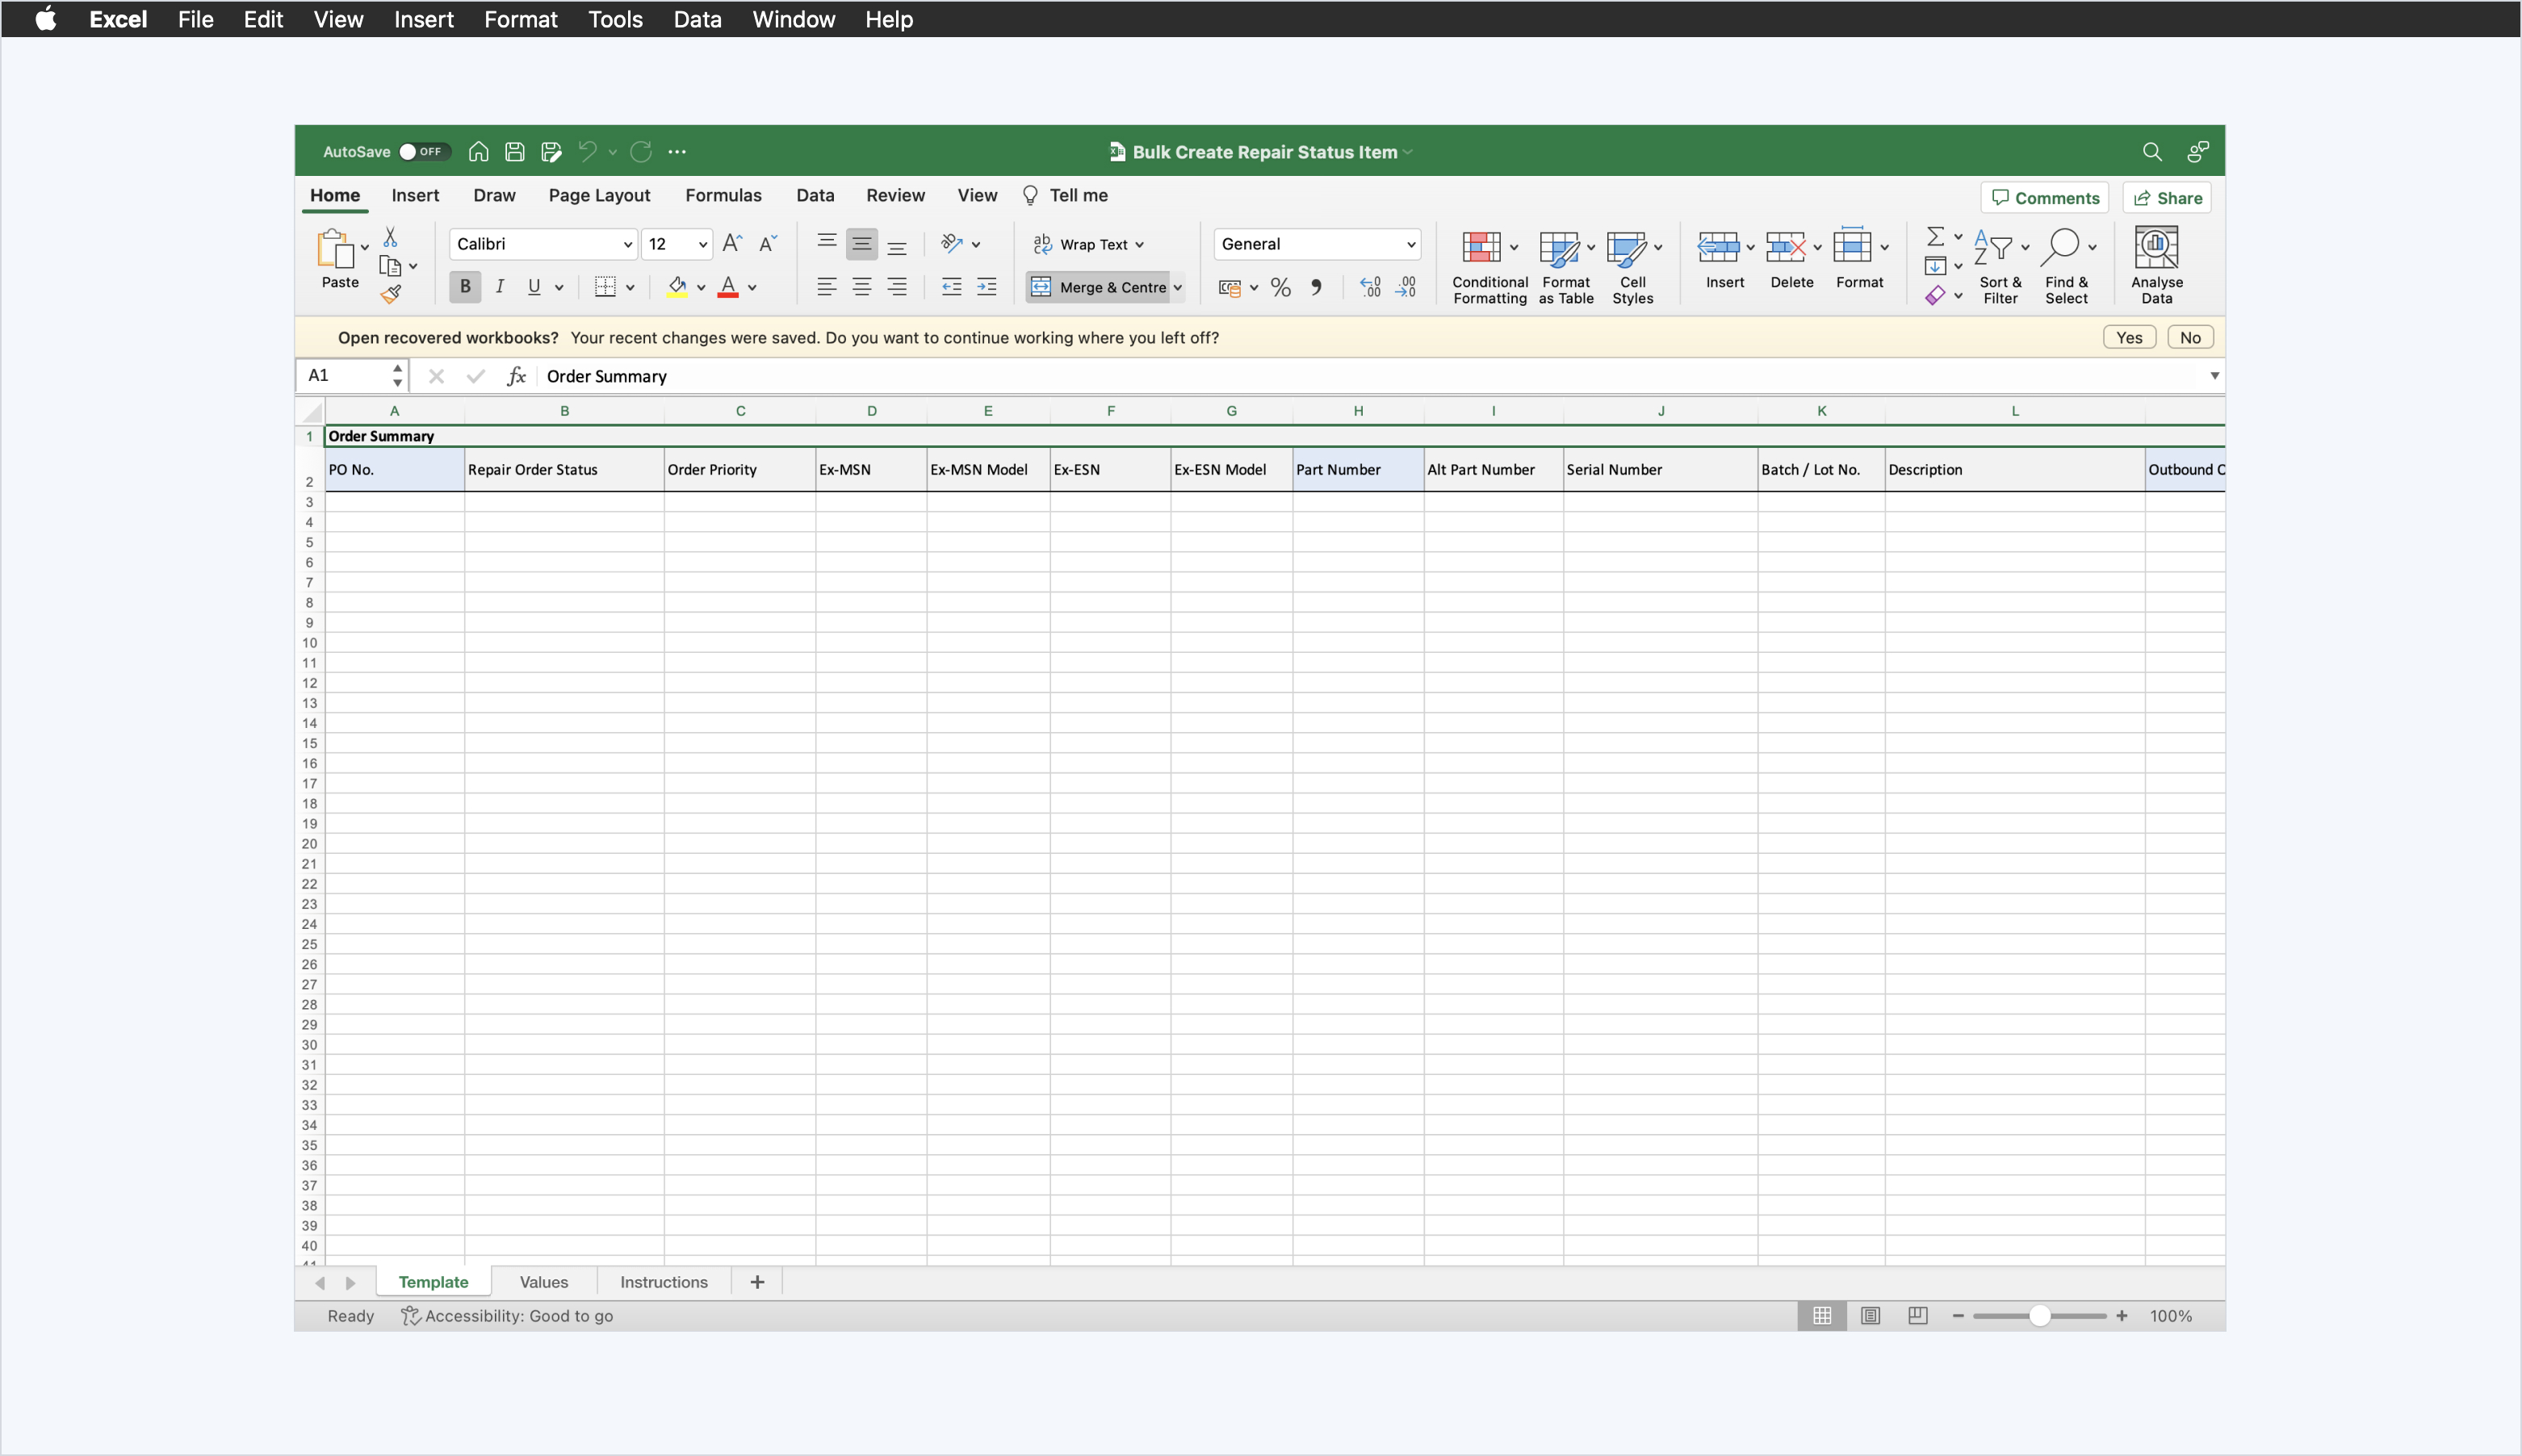
Step 2: Provide the details in the excel template.
Require parametersPO No.
Part Number
Outbound Quantity
Step 3: Once you have filled in the relevant data about your repair status items, upload the template by clicking 'Upload Template'.
Step 4: Select the excel file from your local computer.

Step 5: Once the repair orders data are imported successfully, a green banner will appear on top of the repair status item data.
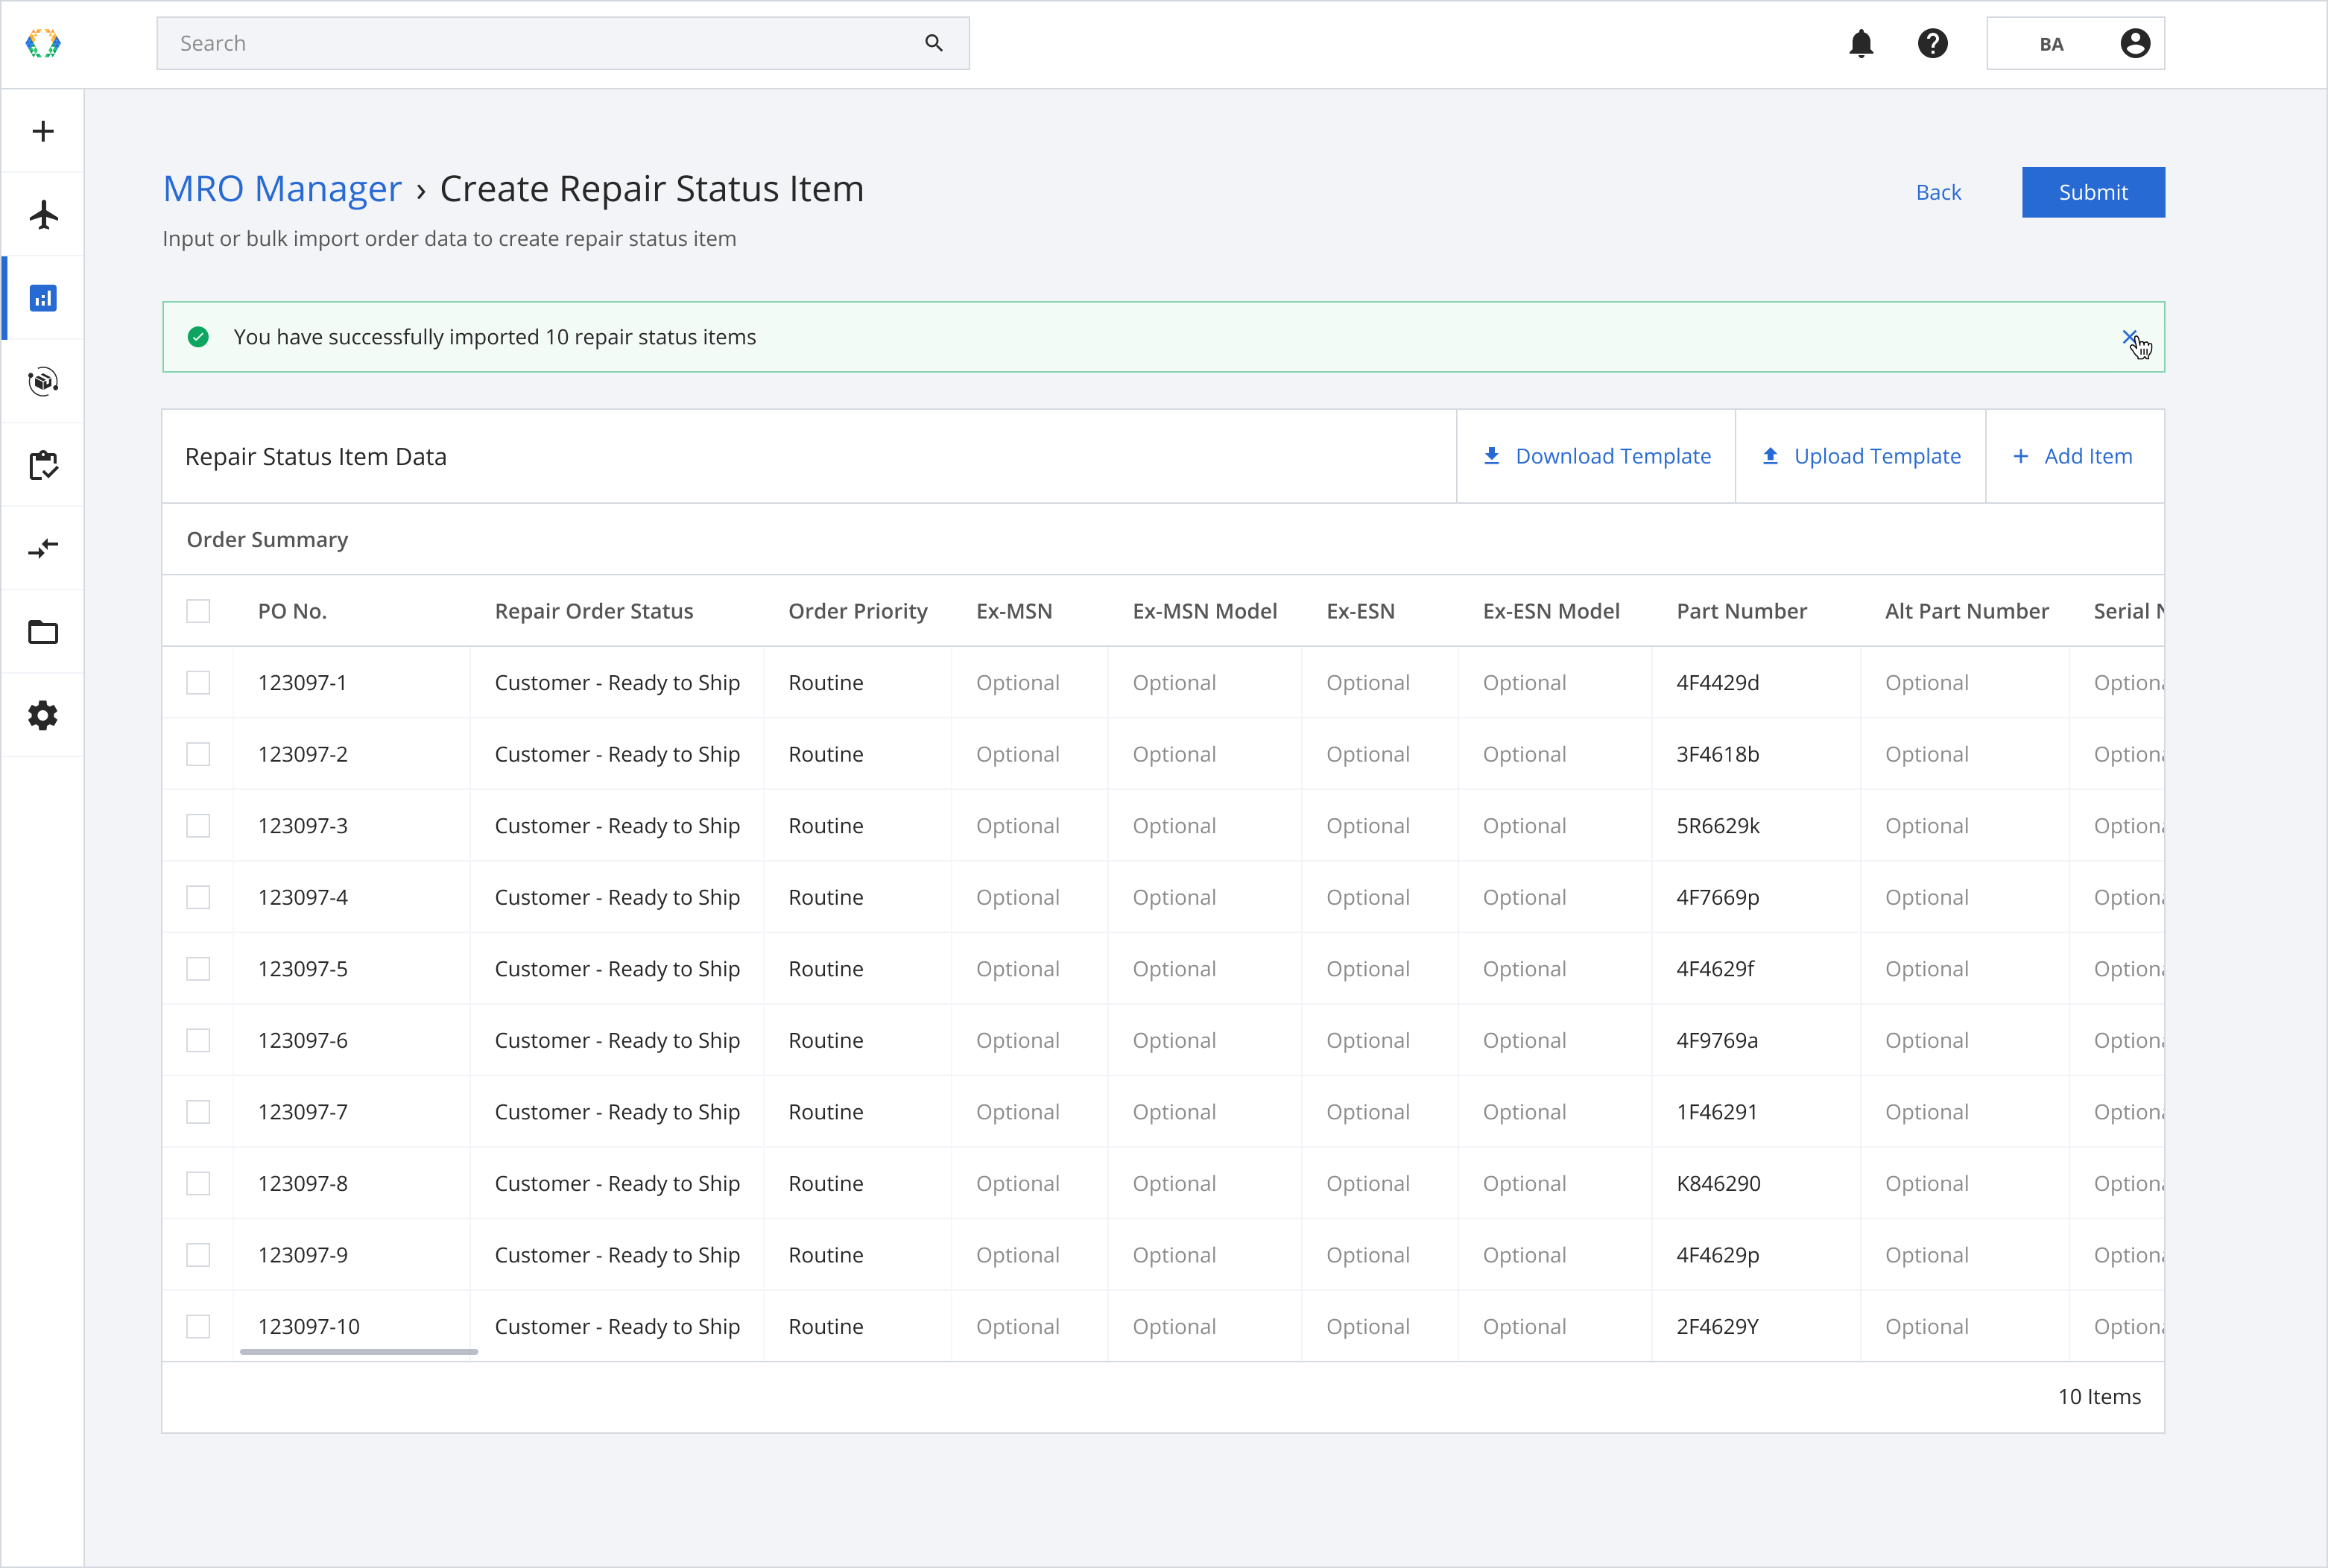
Step 6: Click 'Submit'.

Once the repair status items are created successfully, a green banner will appear on top of the repair orders list.
Updated over 1 year ago