Issue Documents in Bulk
Getting Started
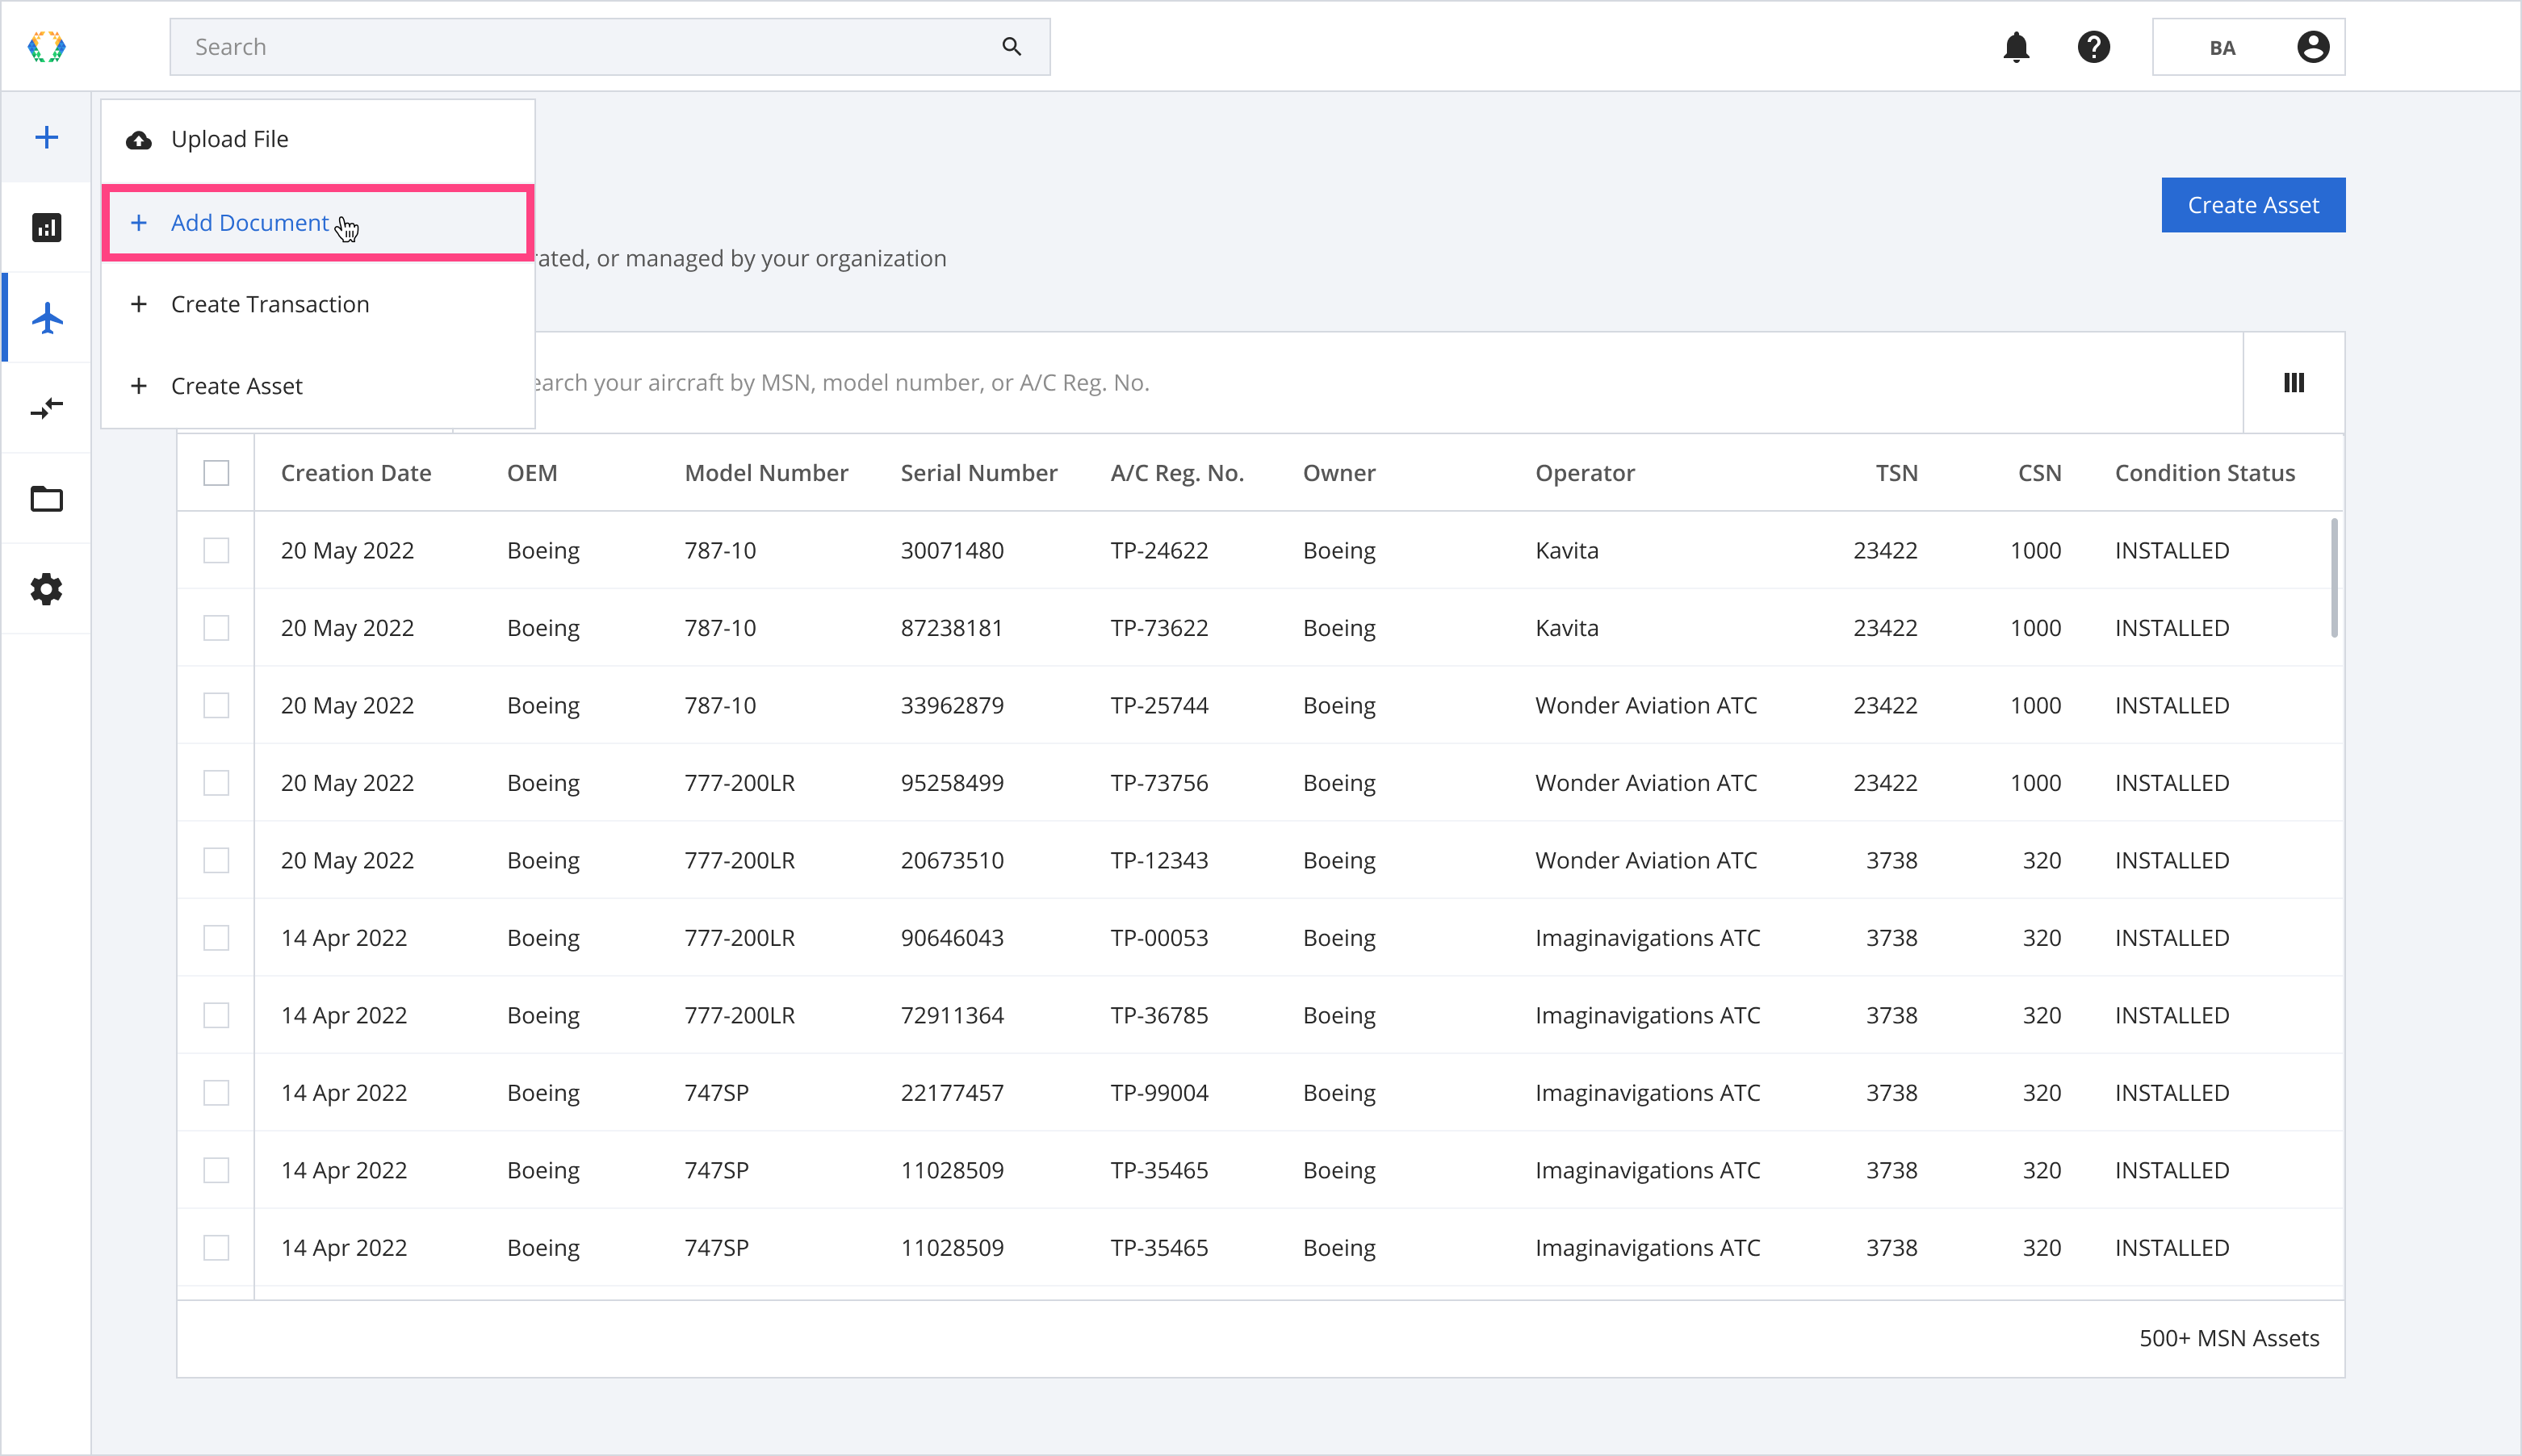
You can issue documents on Block Aero in bulk. Bulk operations for issuing documents have similar behavior for all document types.
To begin, hover over the ➕ button and click "Add Document".
Issue ARCs in bulk
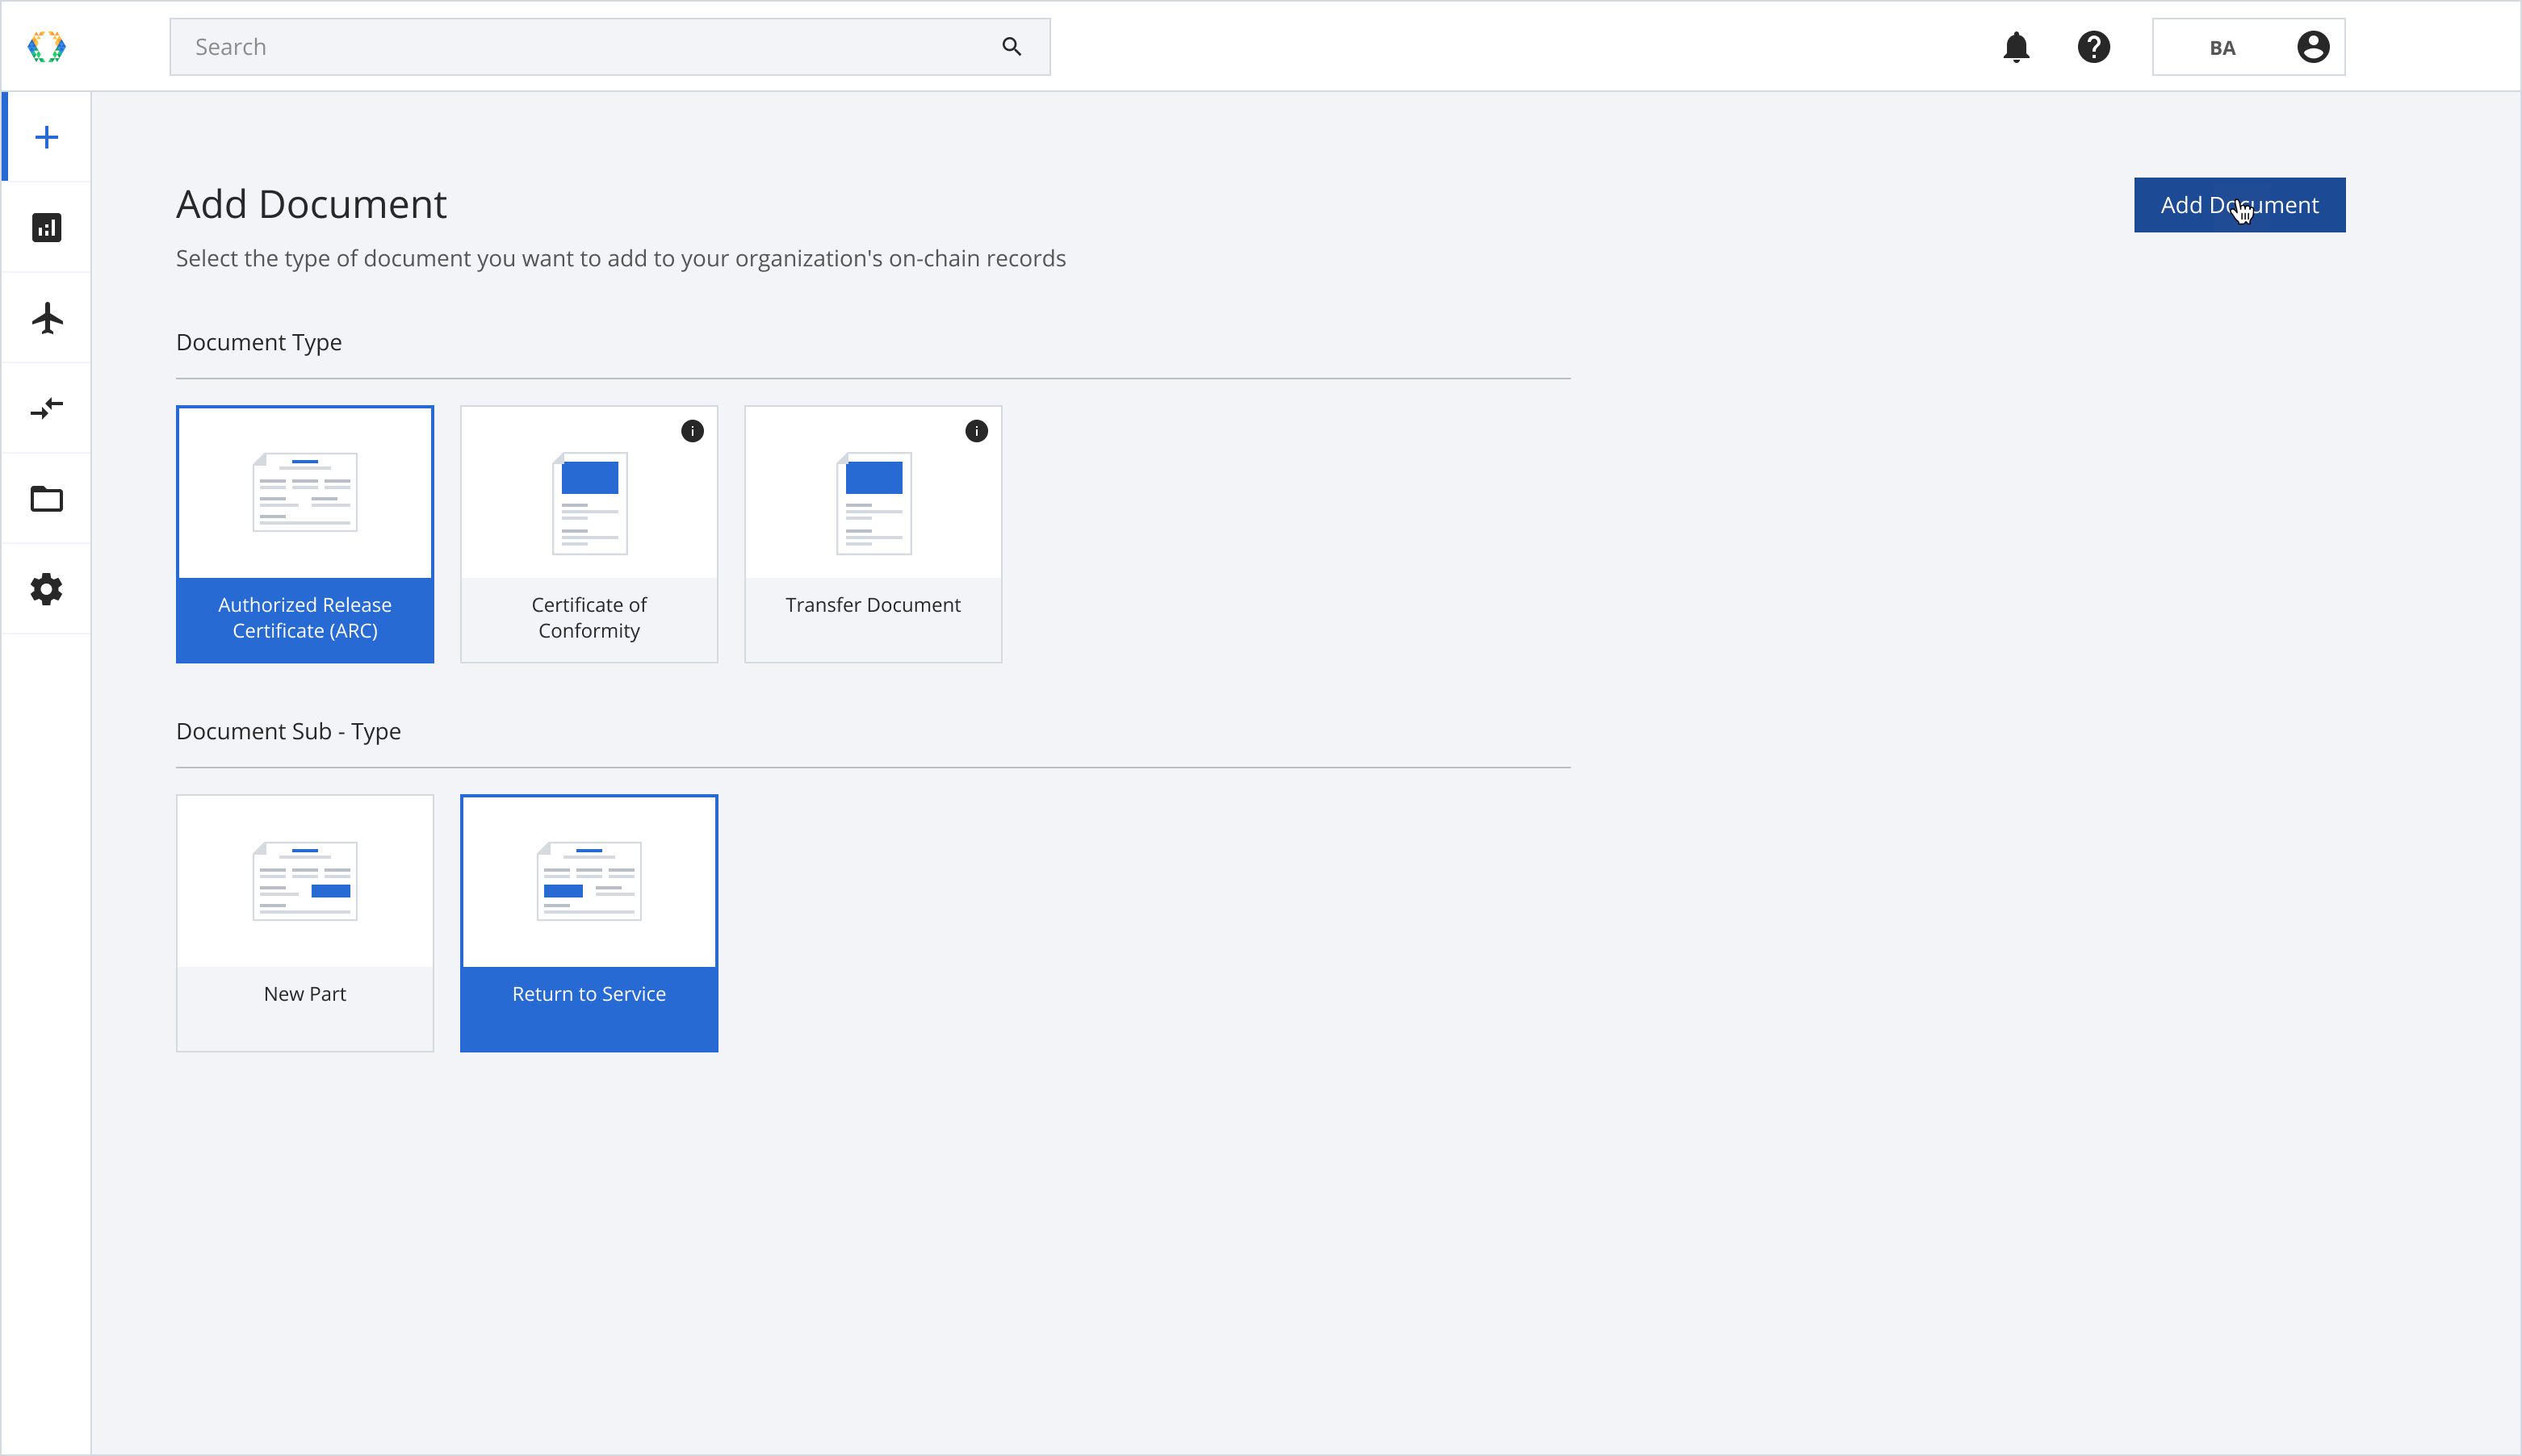
Step 1: On the add document page, click on the Authorized Release Certificate.
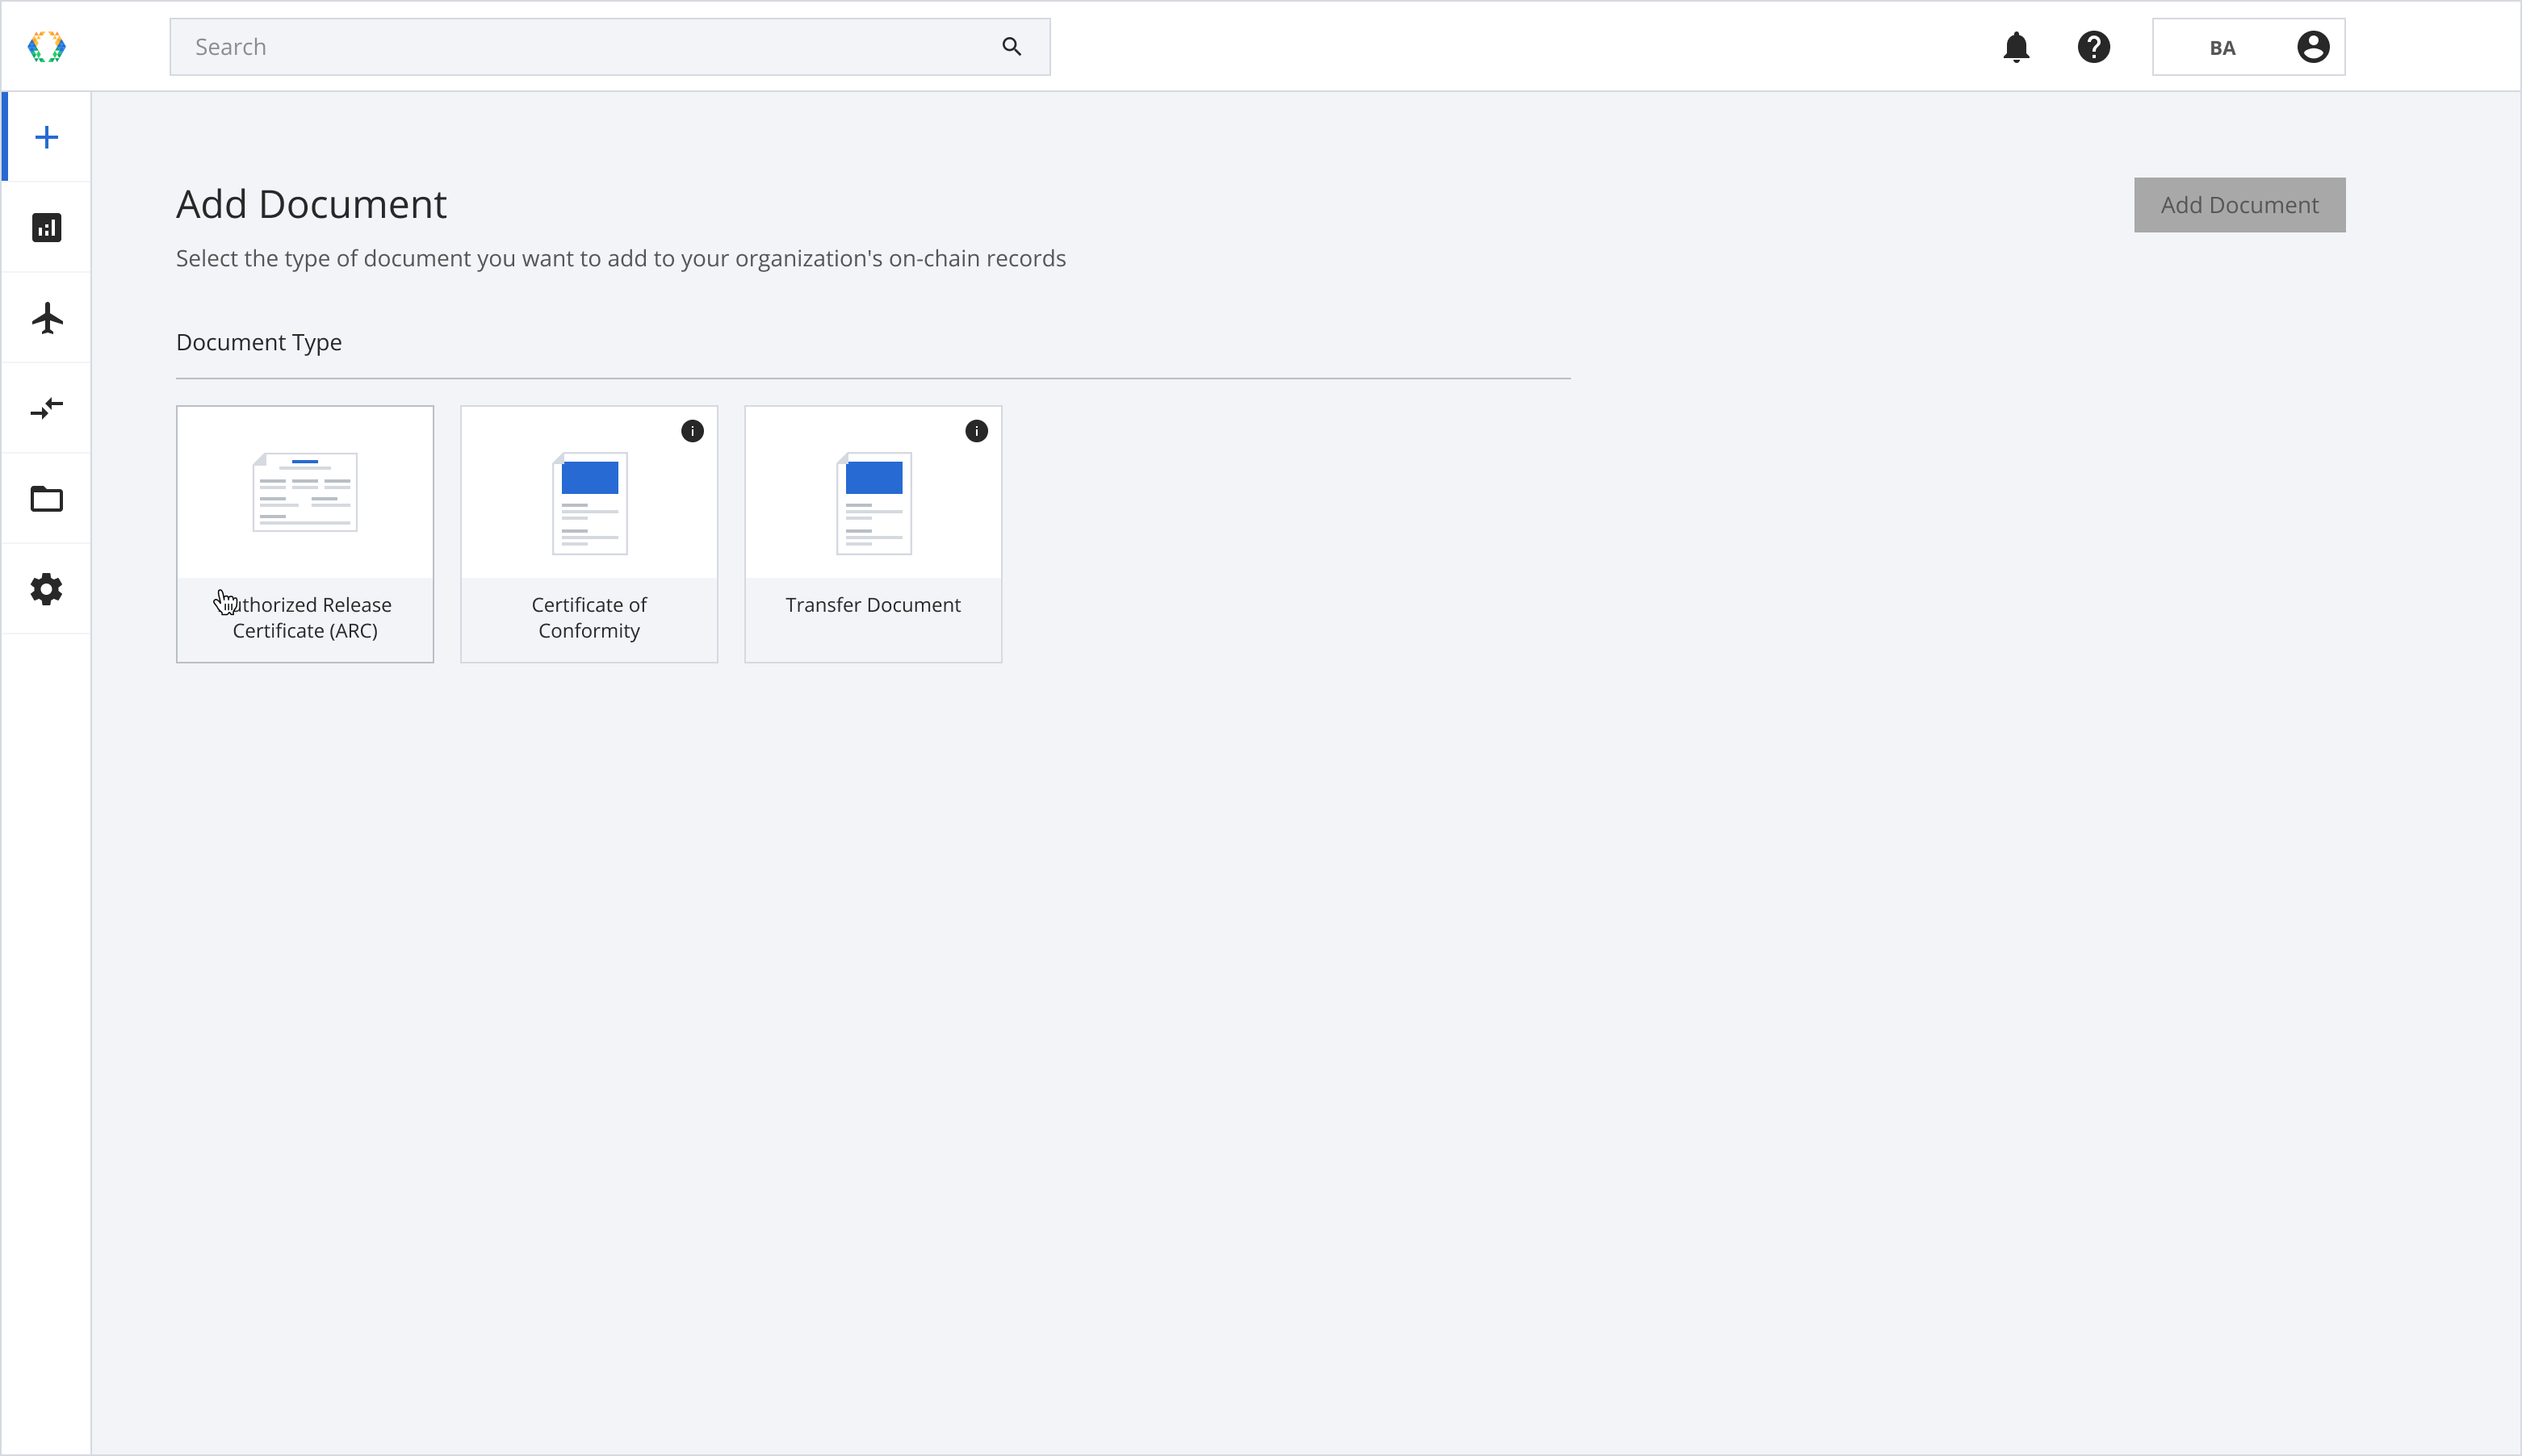
Step 2: Select your document subtype as “Return to Service”.
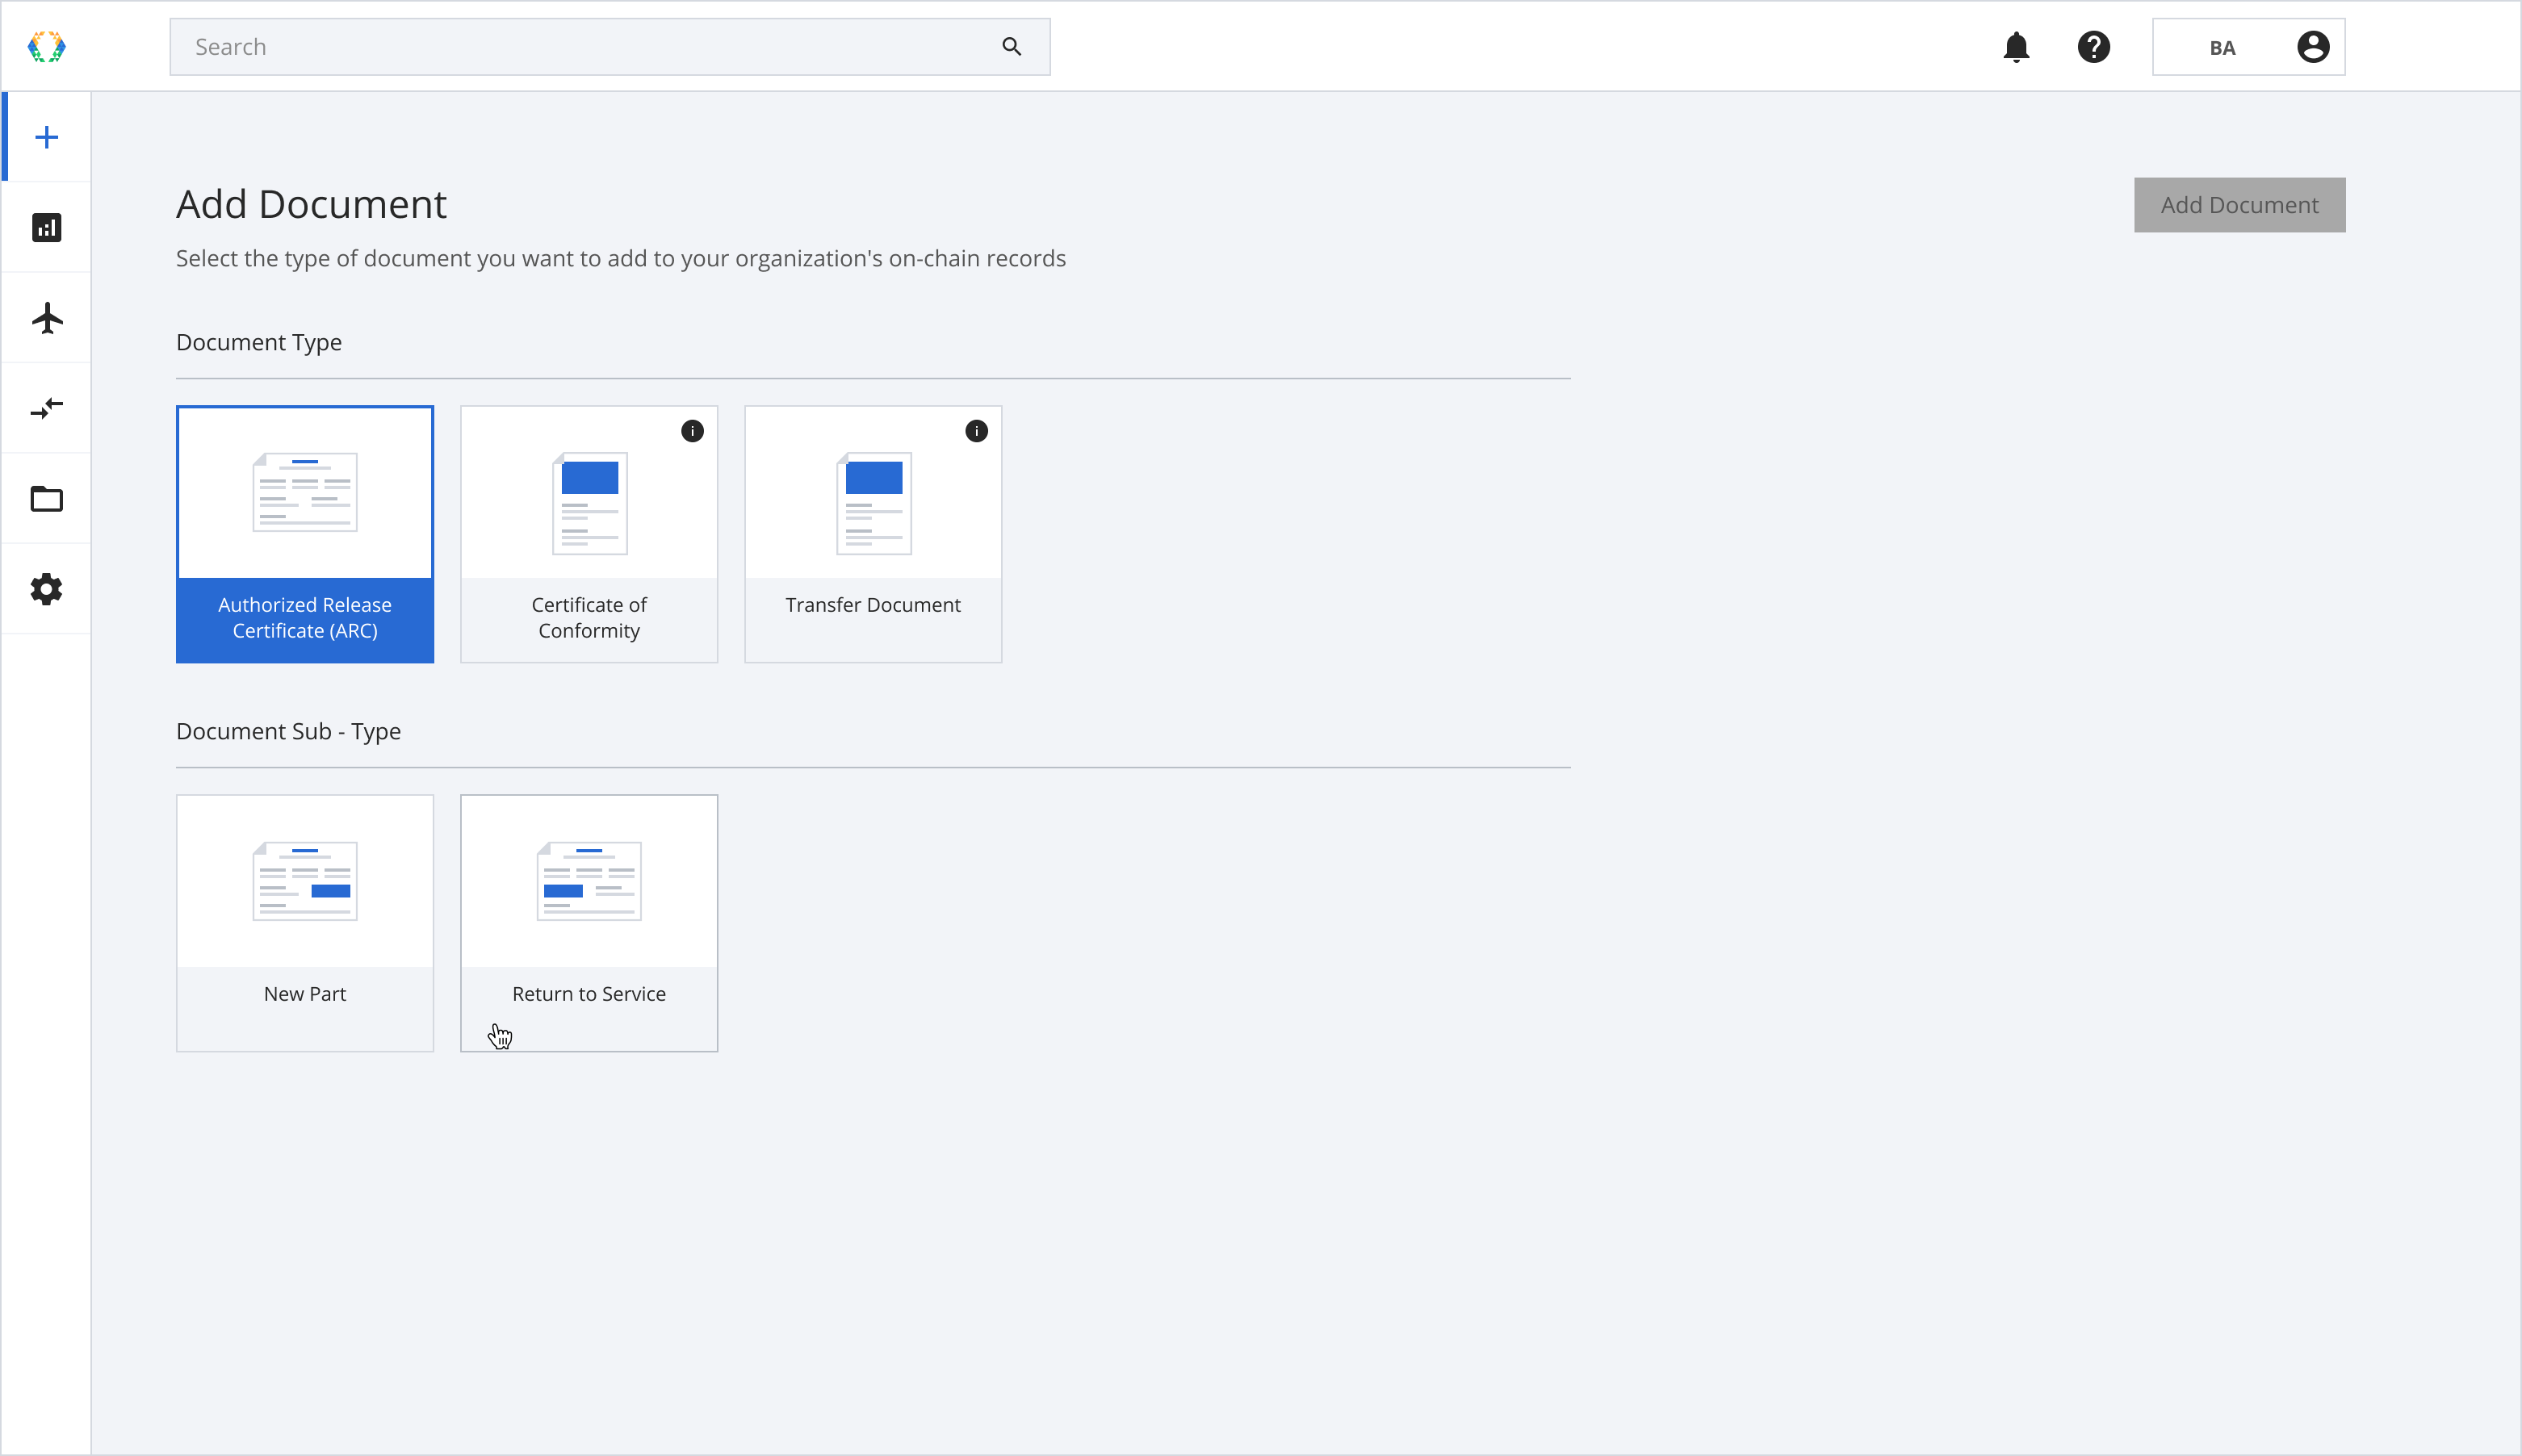
Step 3: Click “Add Document” to proceed to the next step.
Step 4: Select the assets for the Authorized Release Certificate.
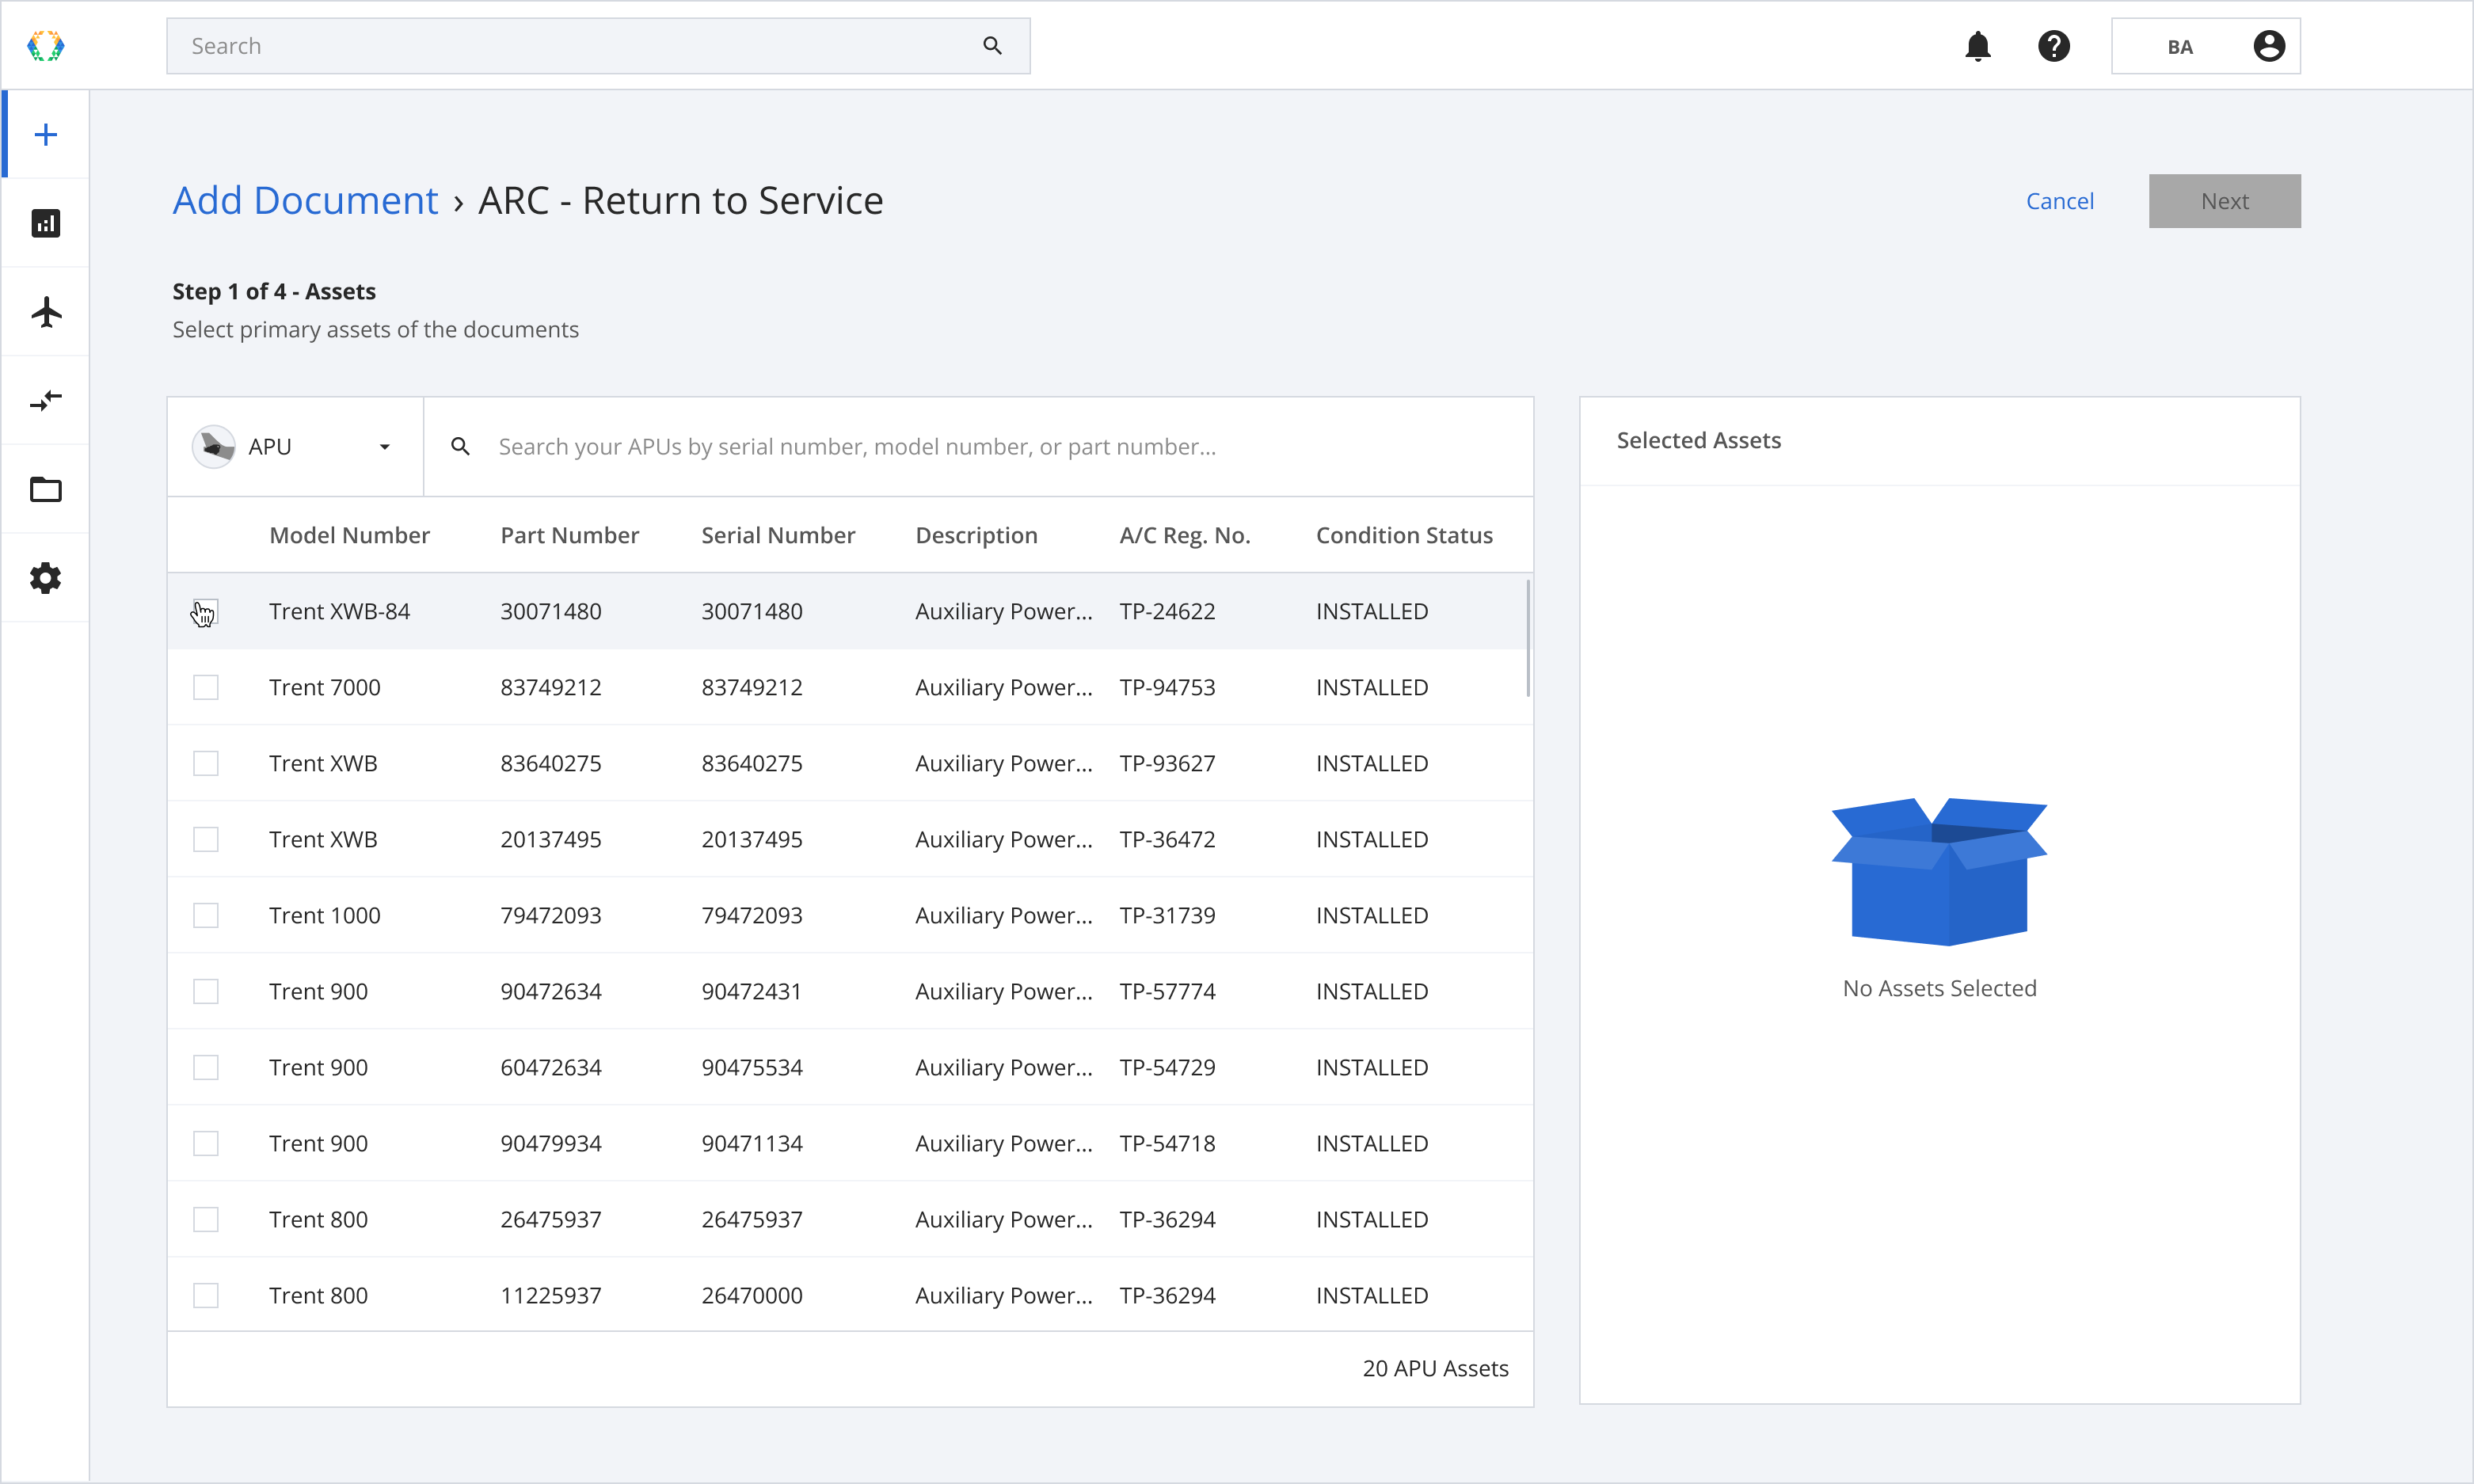
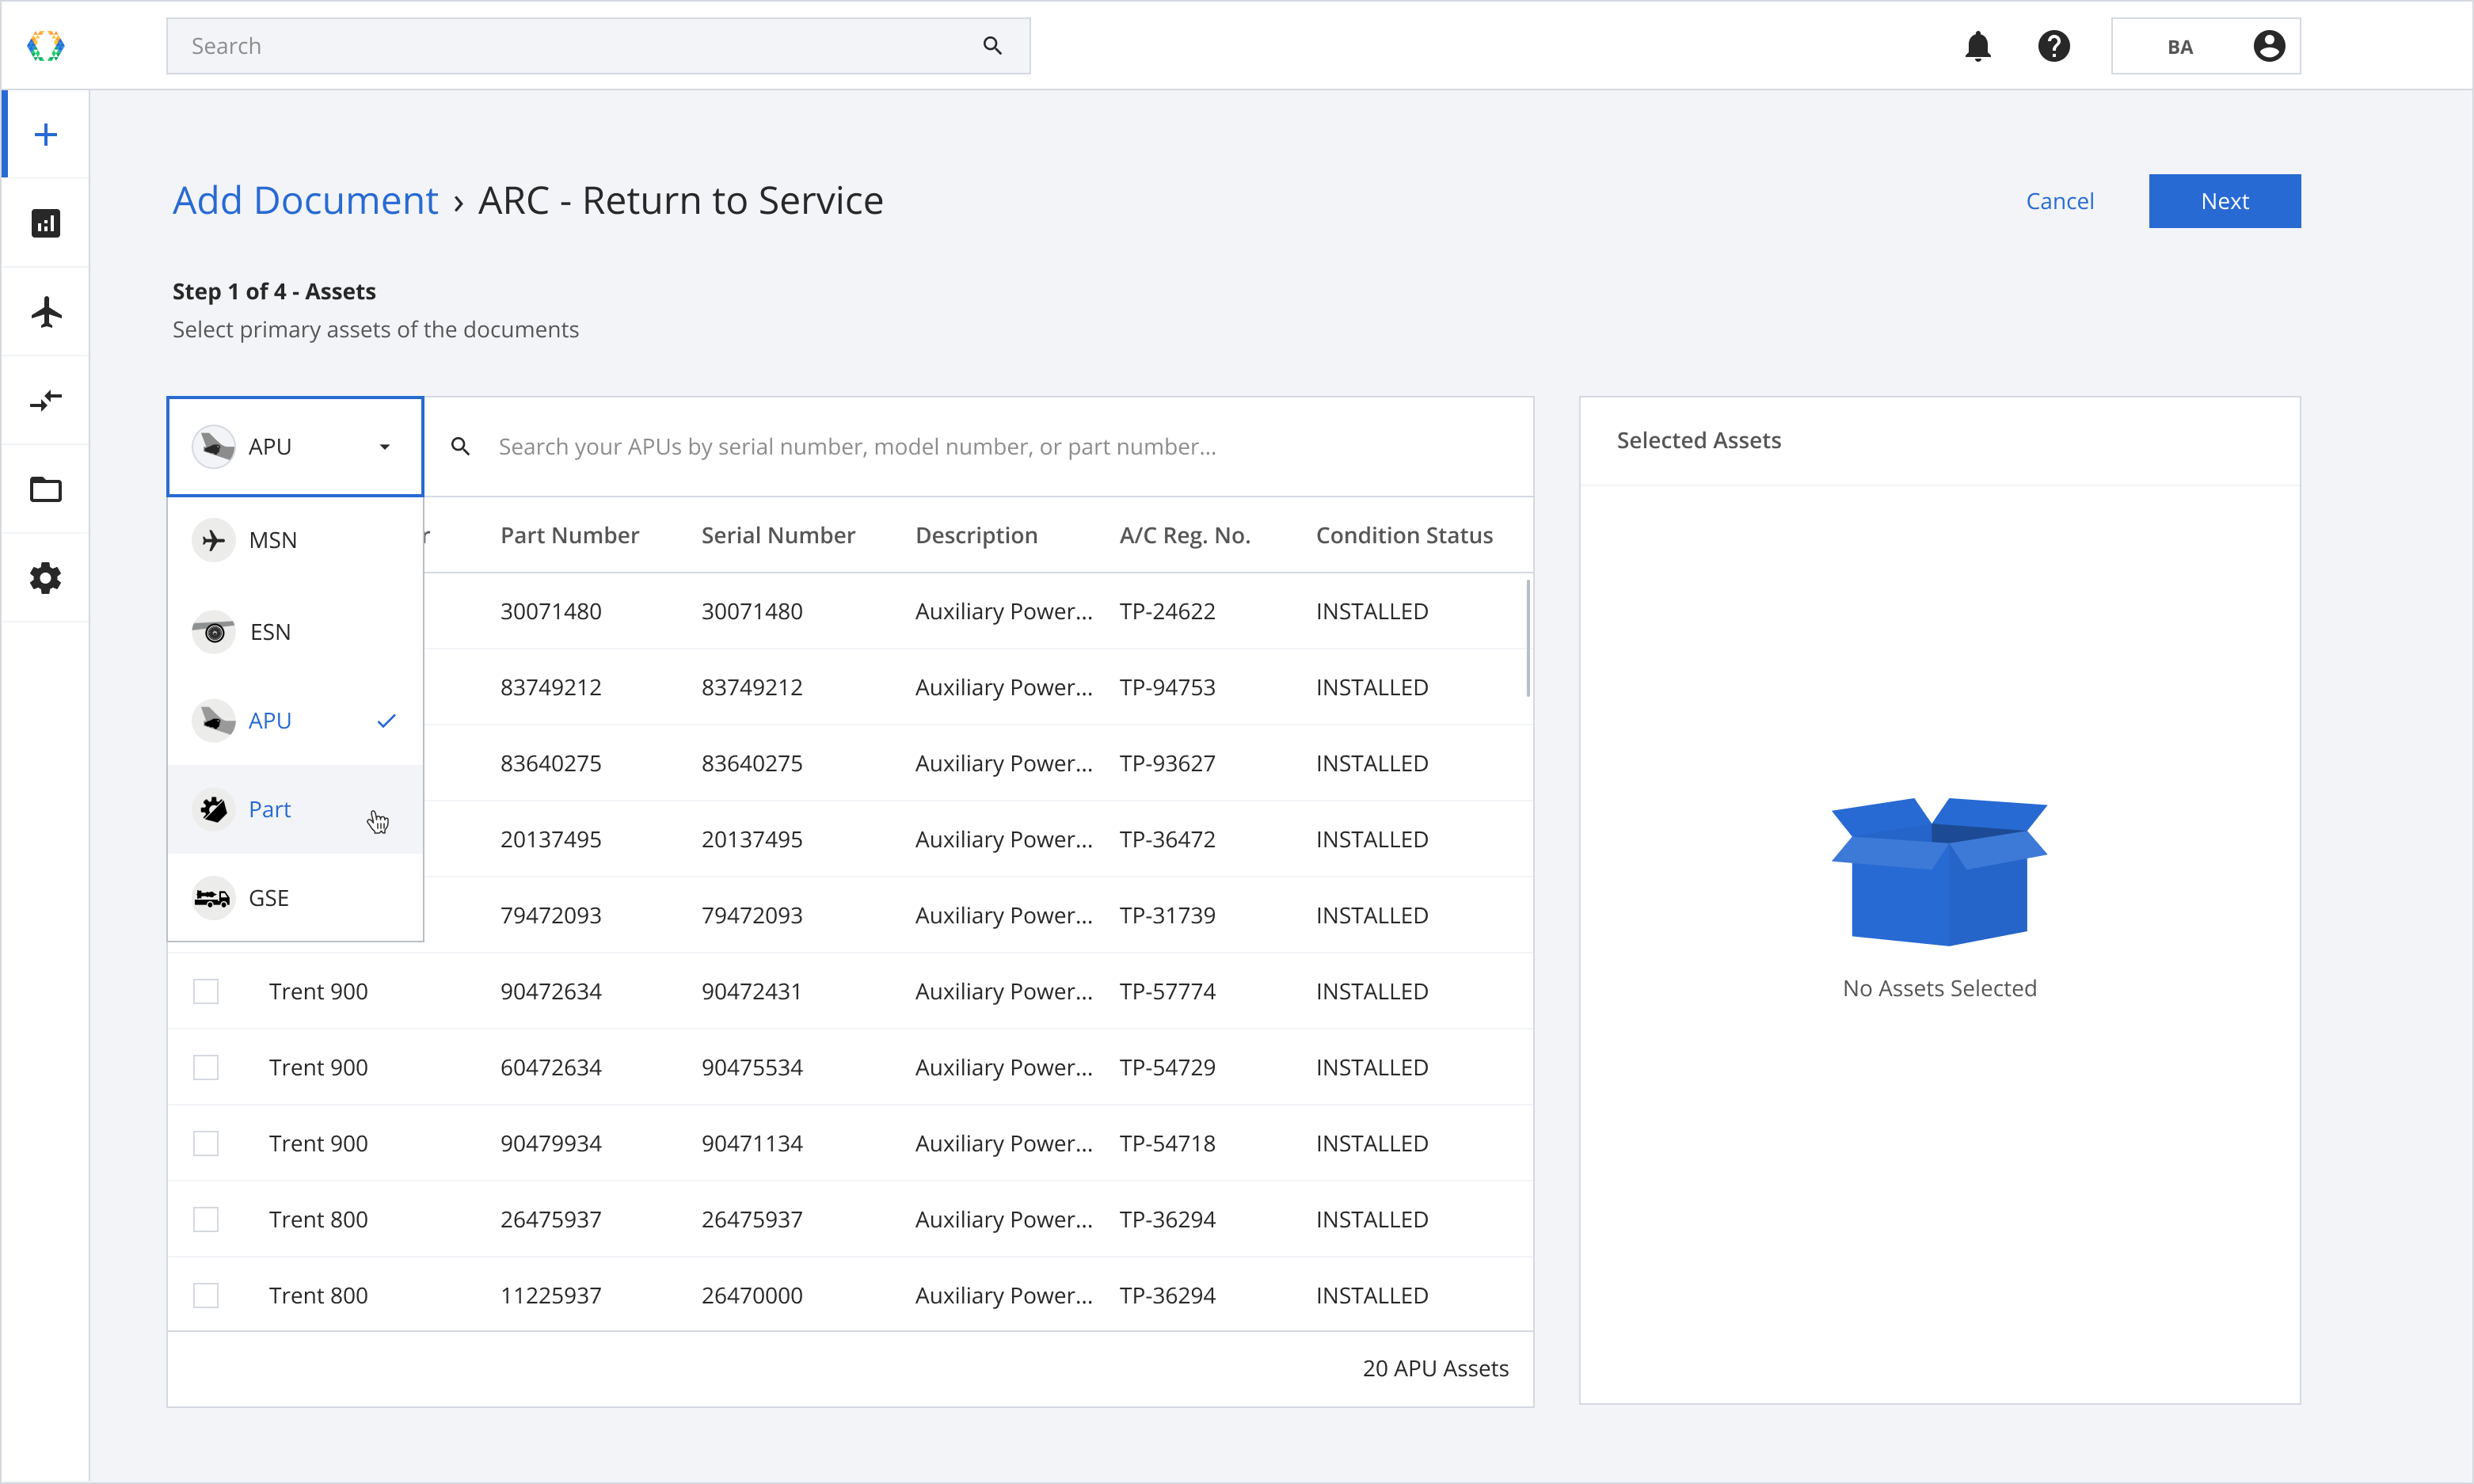
Step 5: You can change the asset type you are selecting on the dropdown menu.
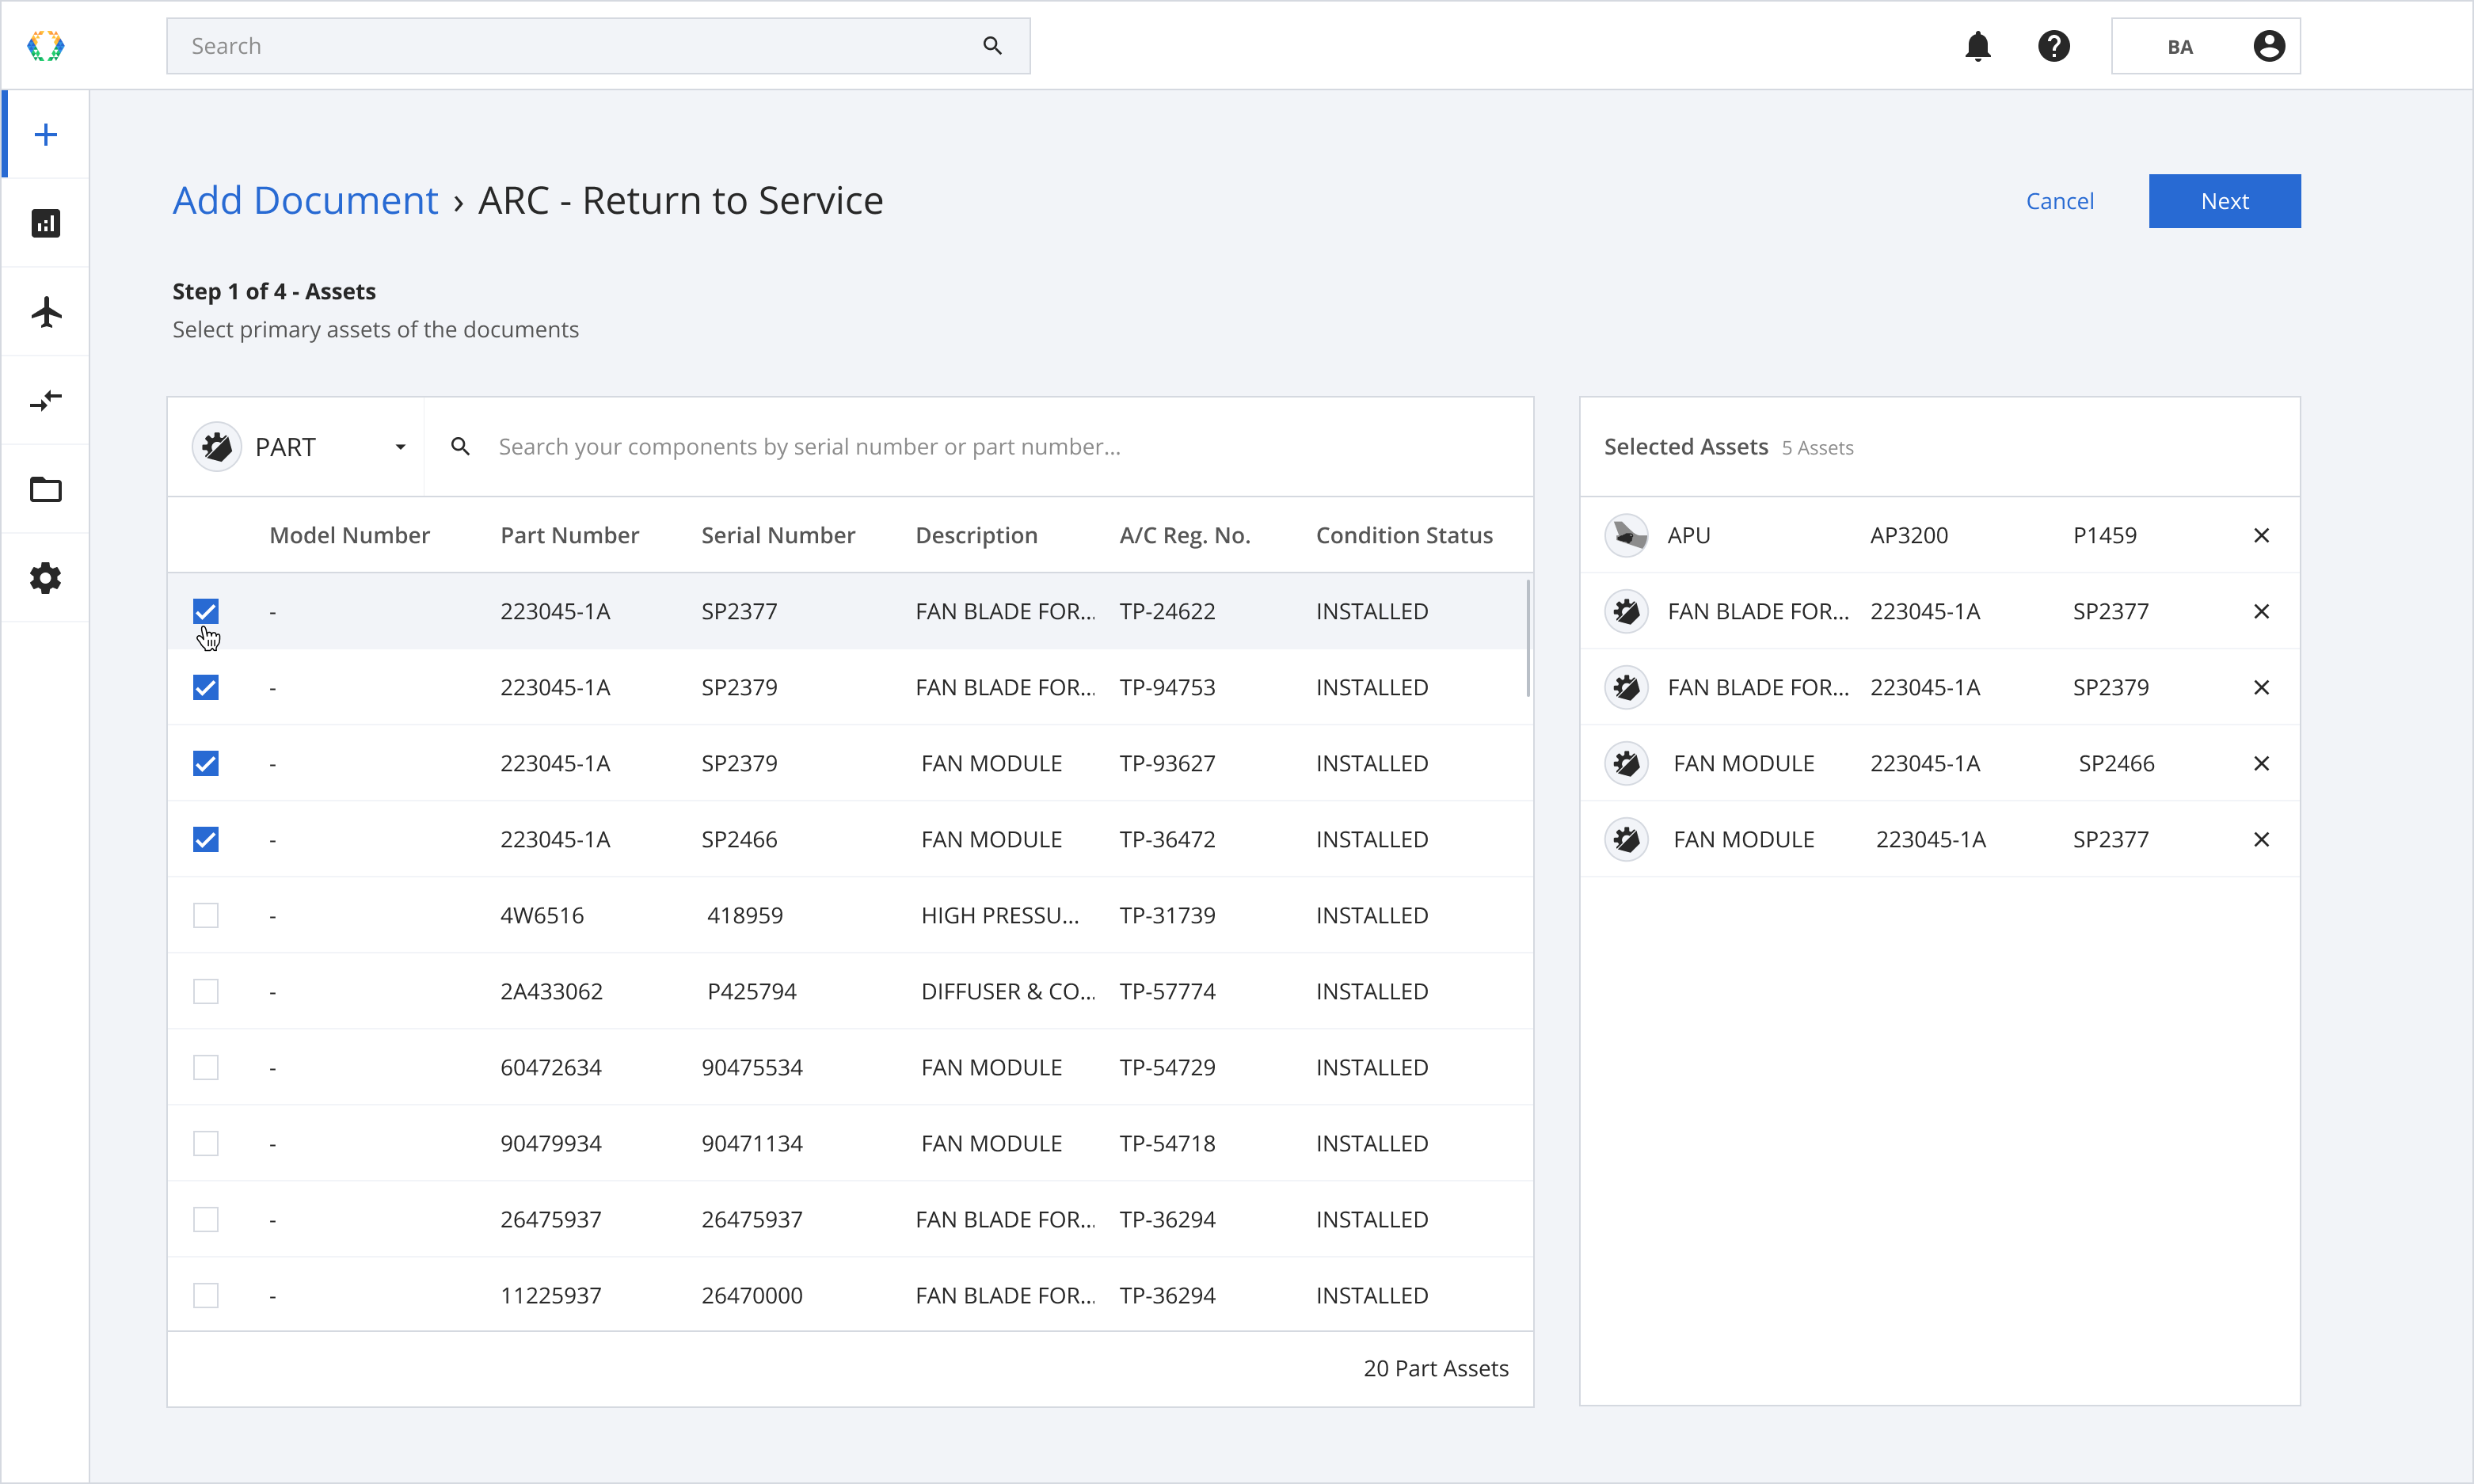
Step 6: Your selected assets will appear on the “Selected Assets” List.
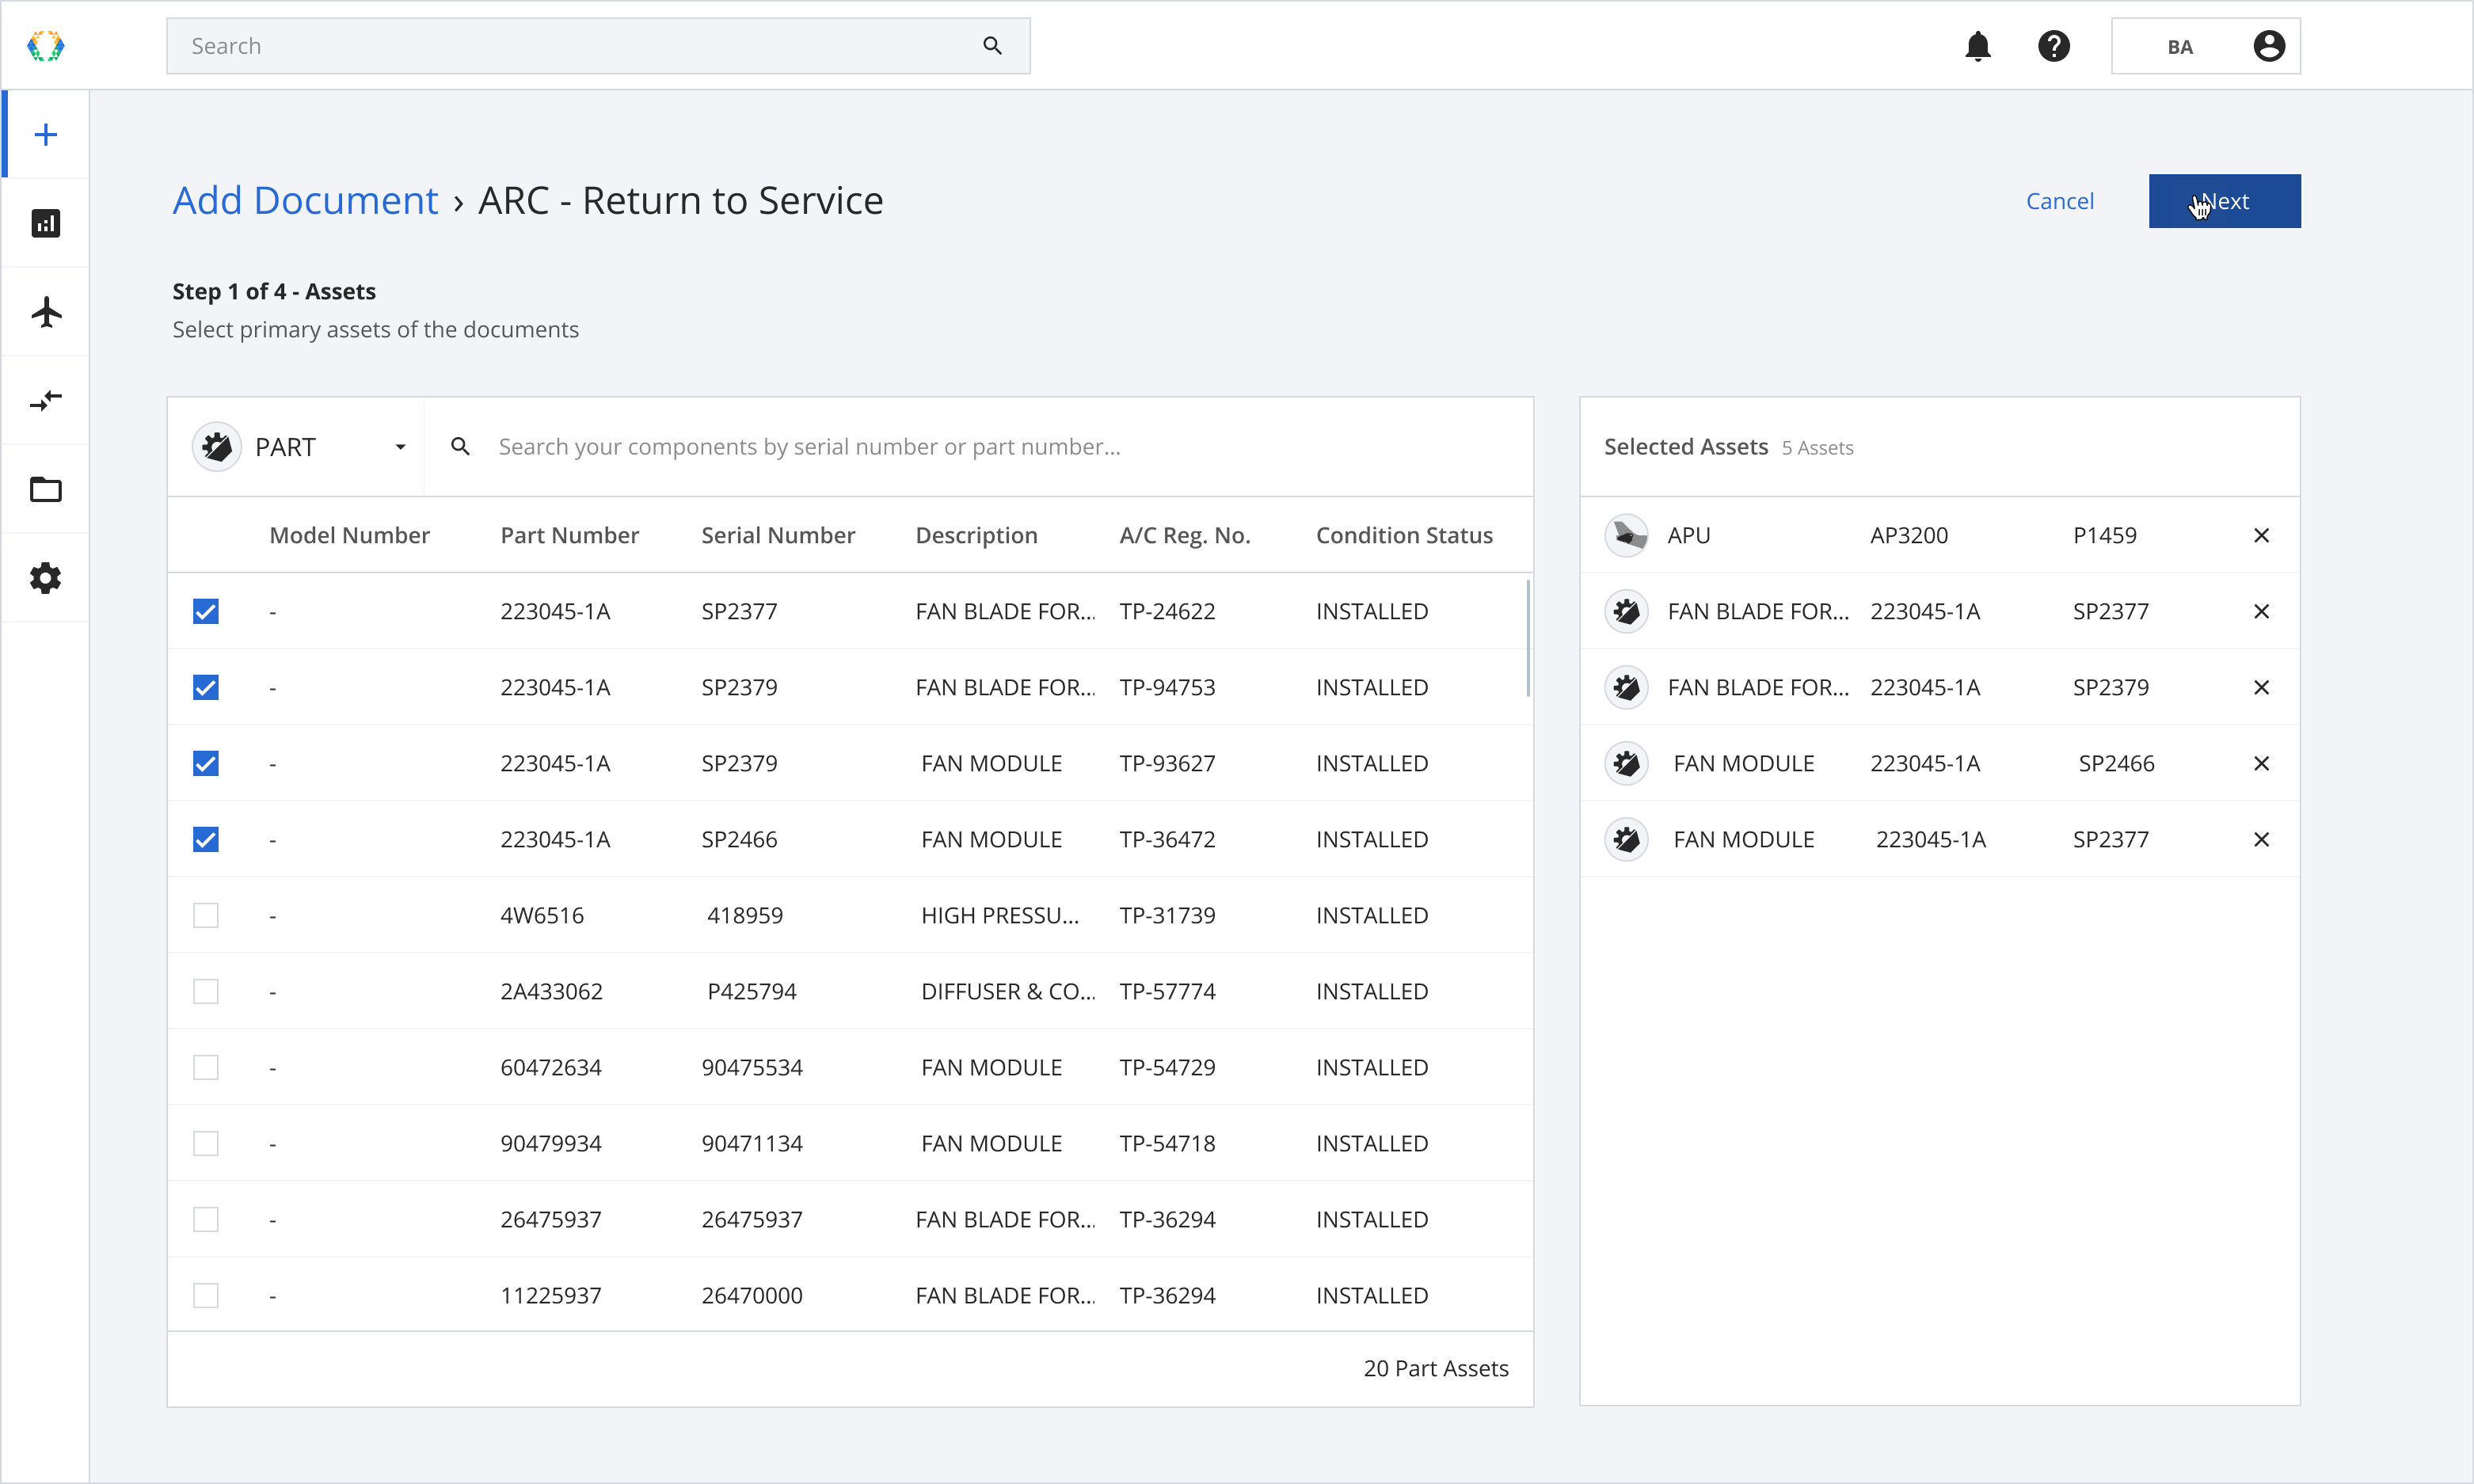
Step 7: Click “Next” when the asset is selected.
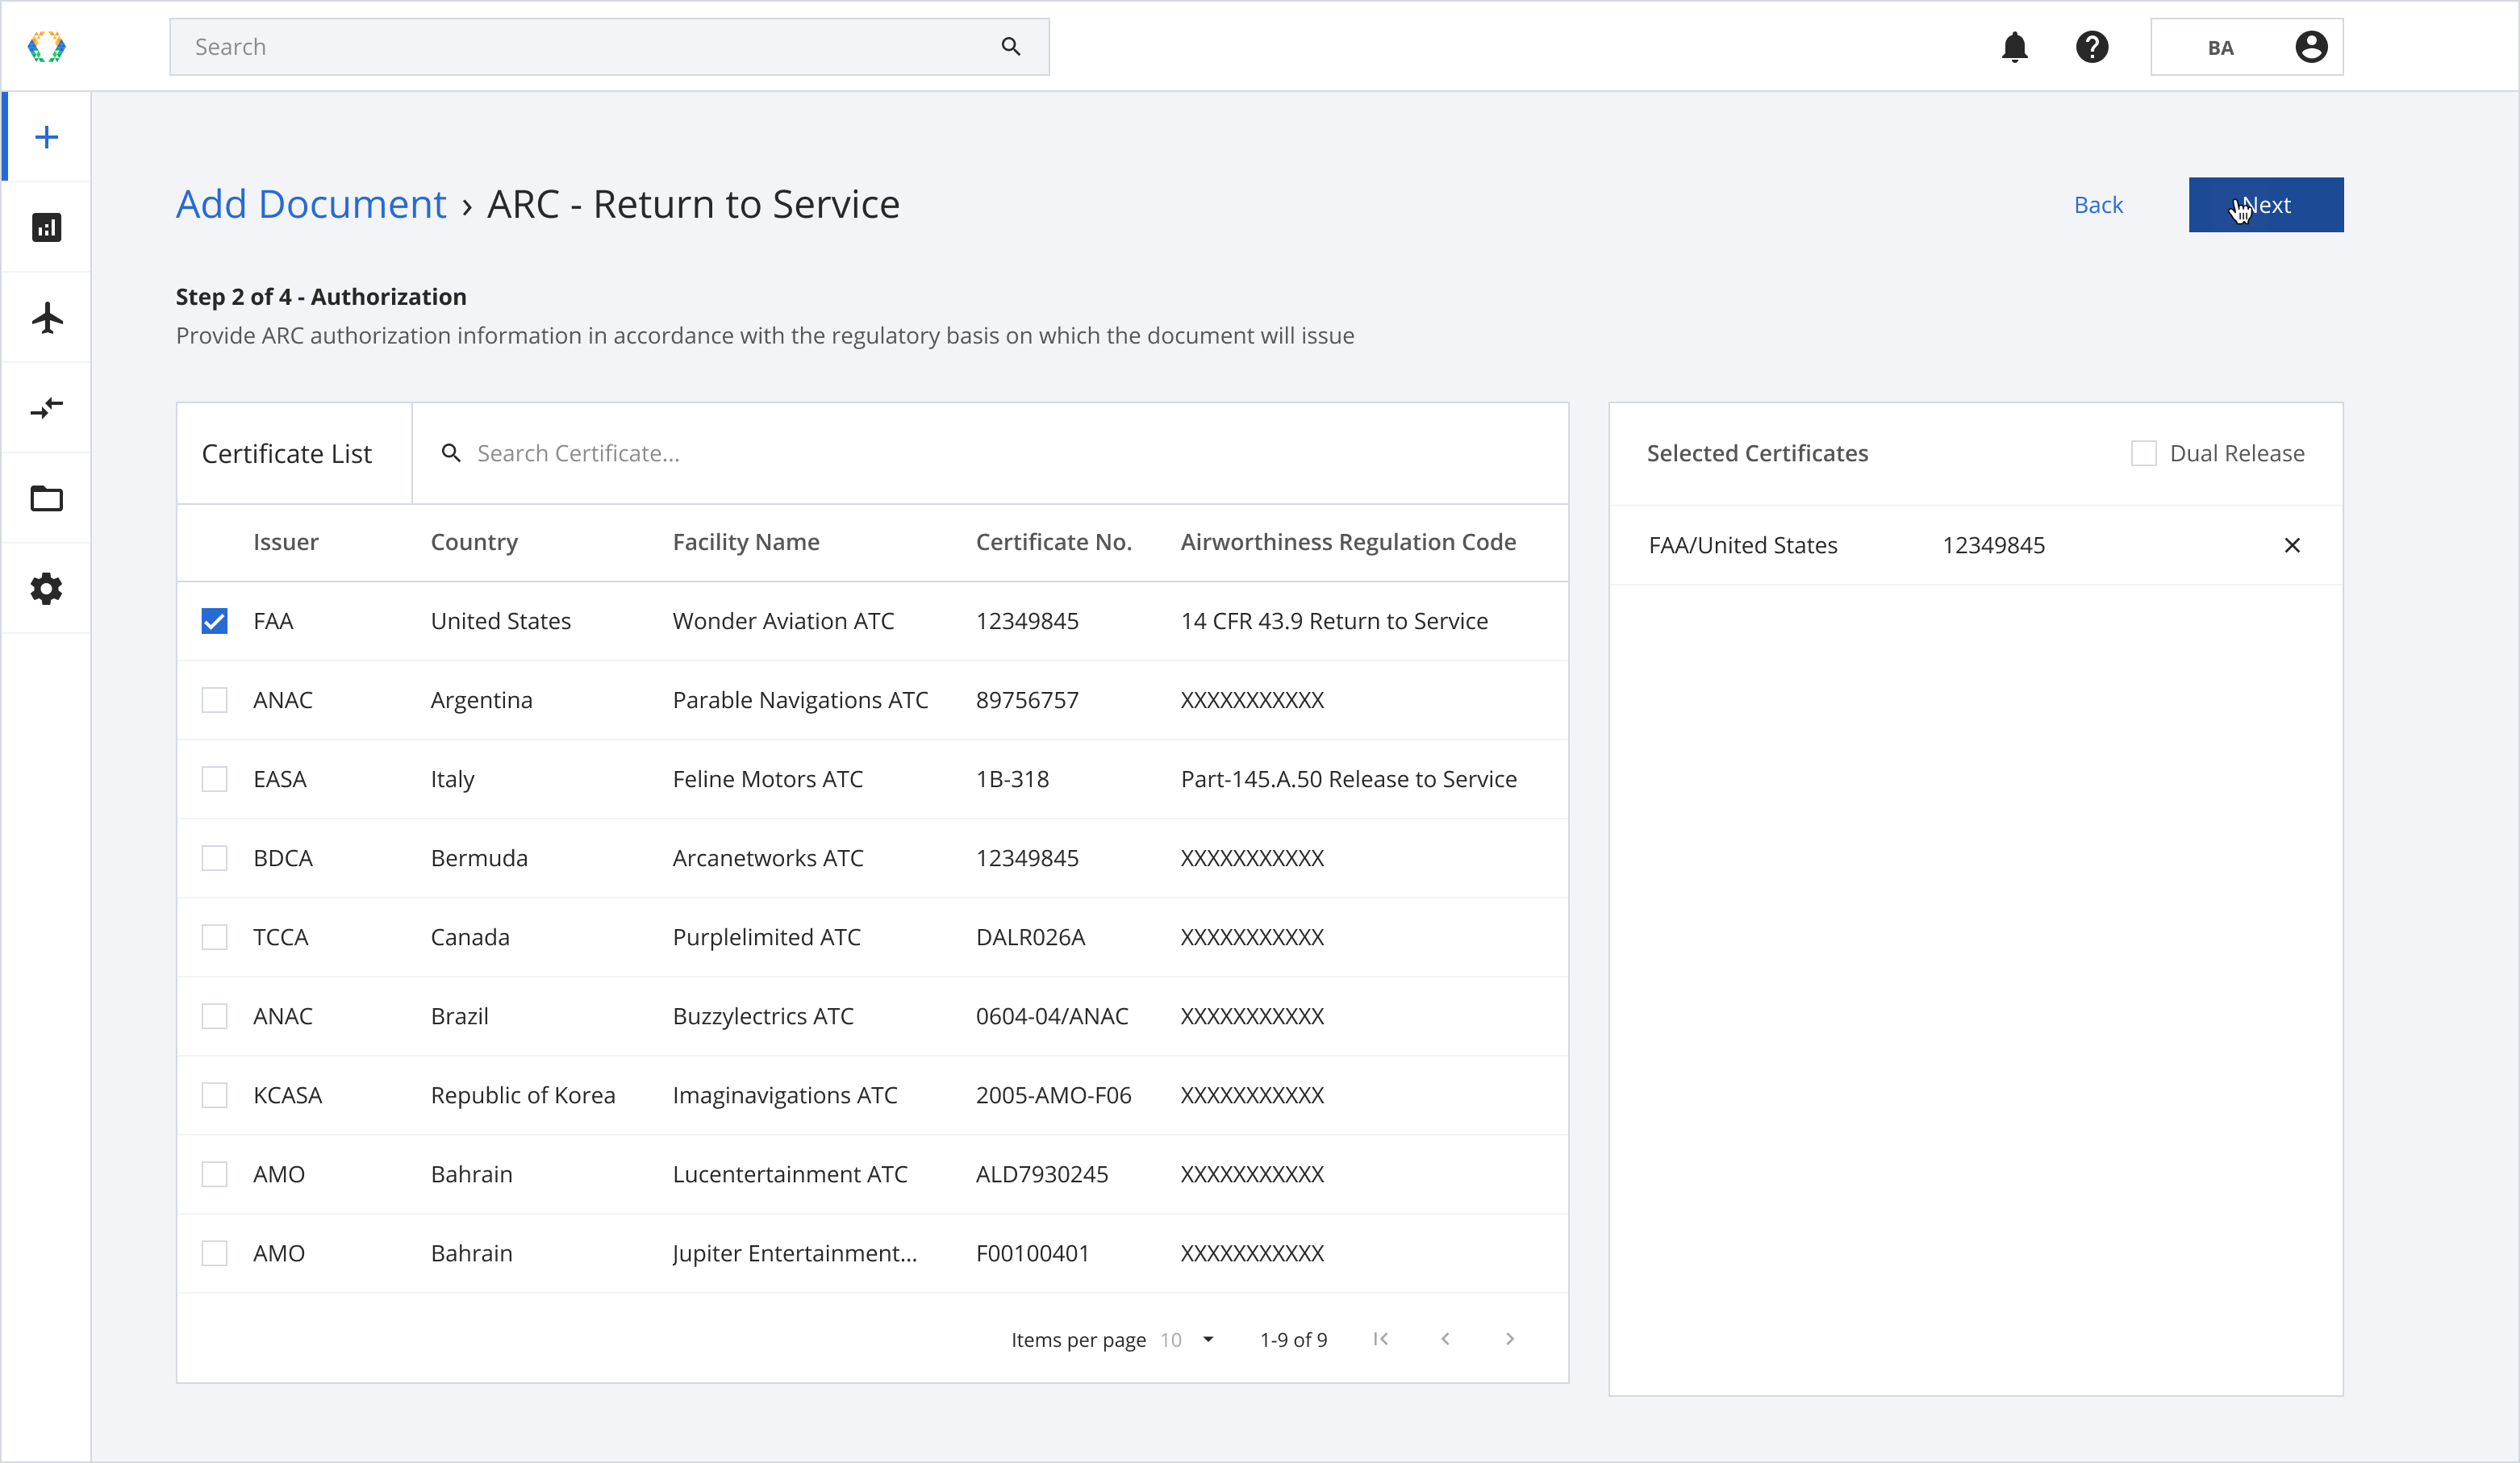
Step 8: Select the certificate that provides the authorization information required by the regulatory basis for the document you are issuing.
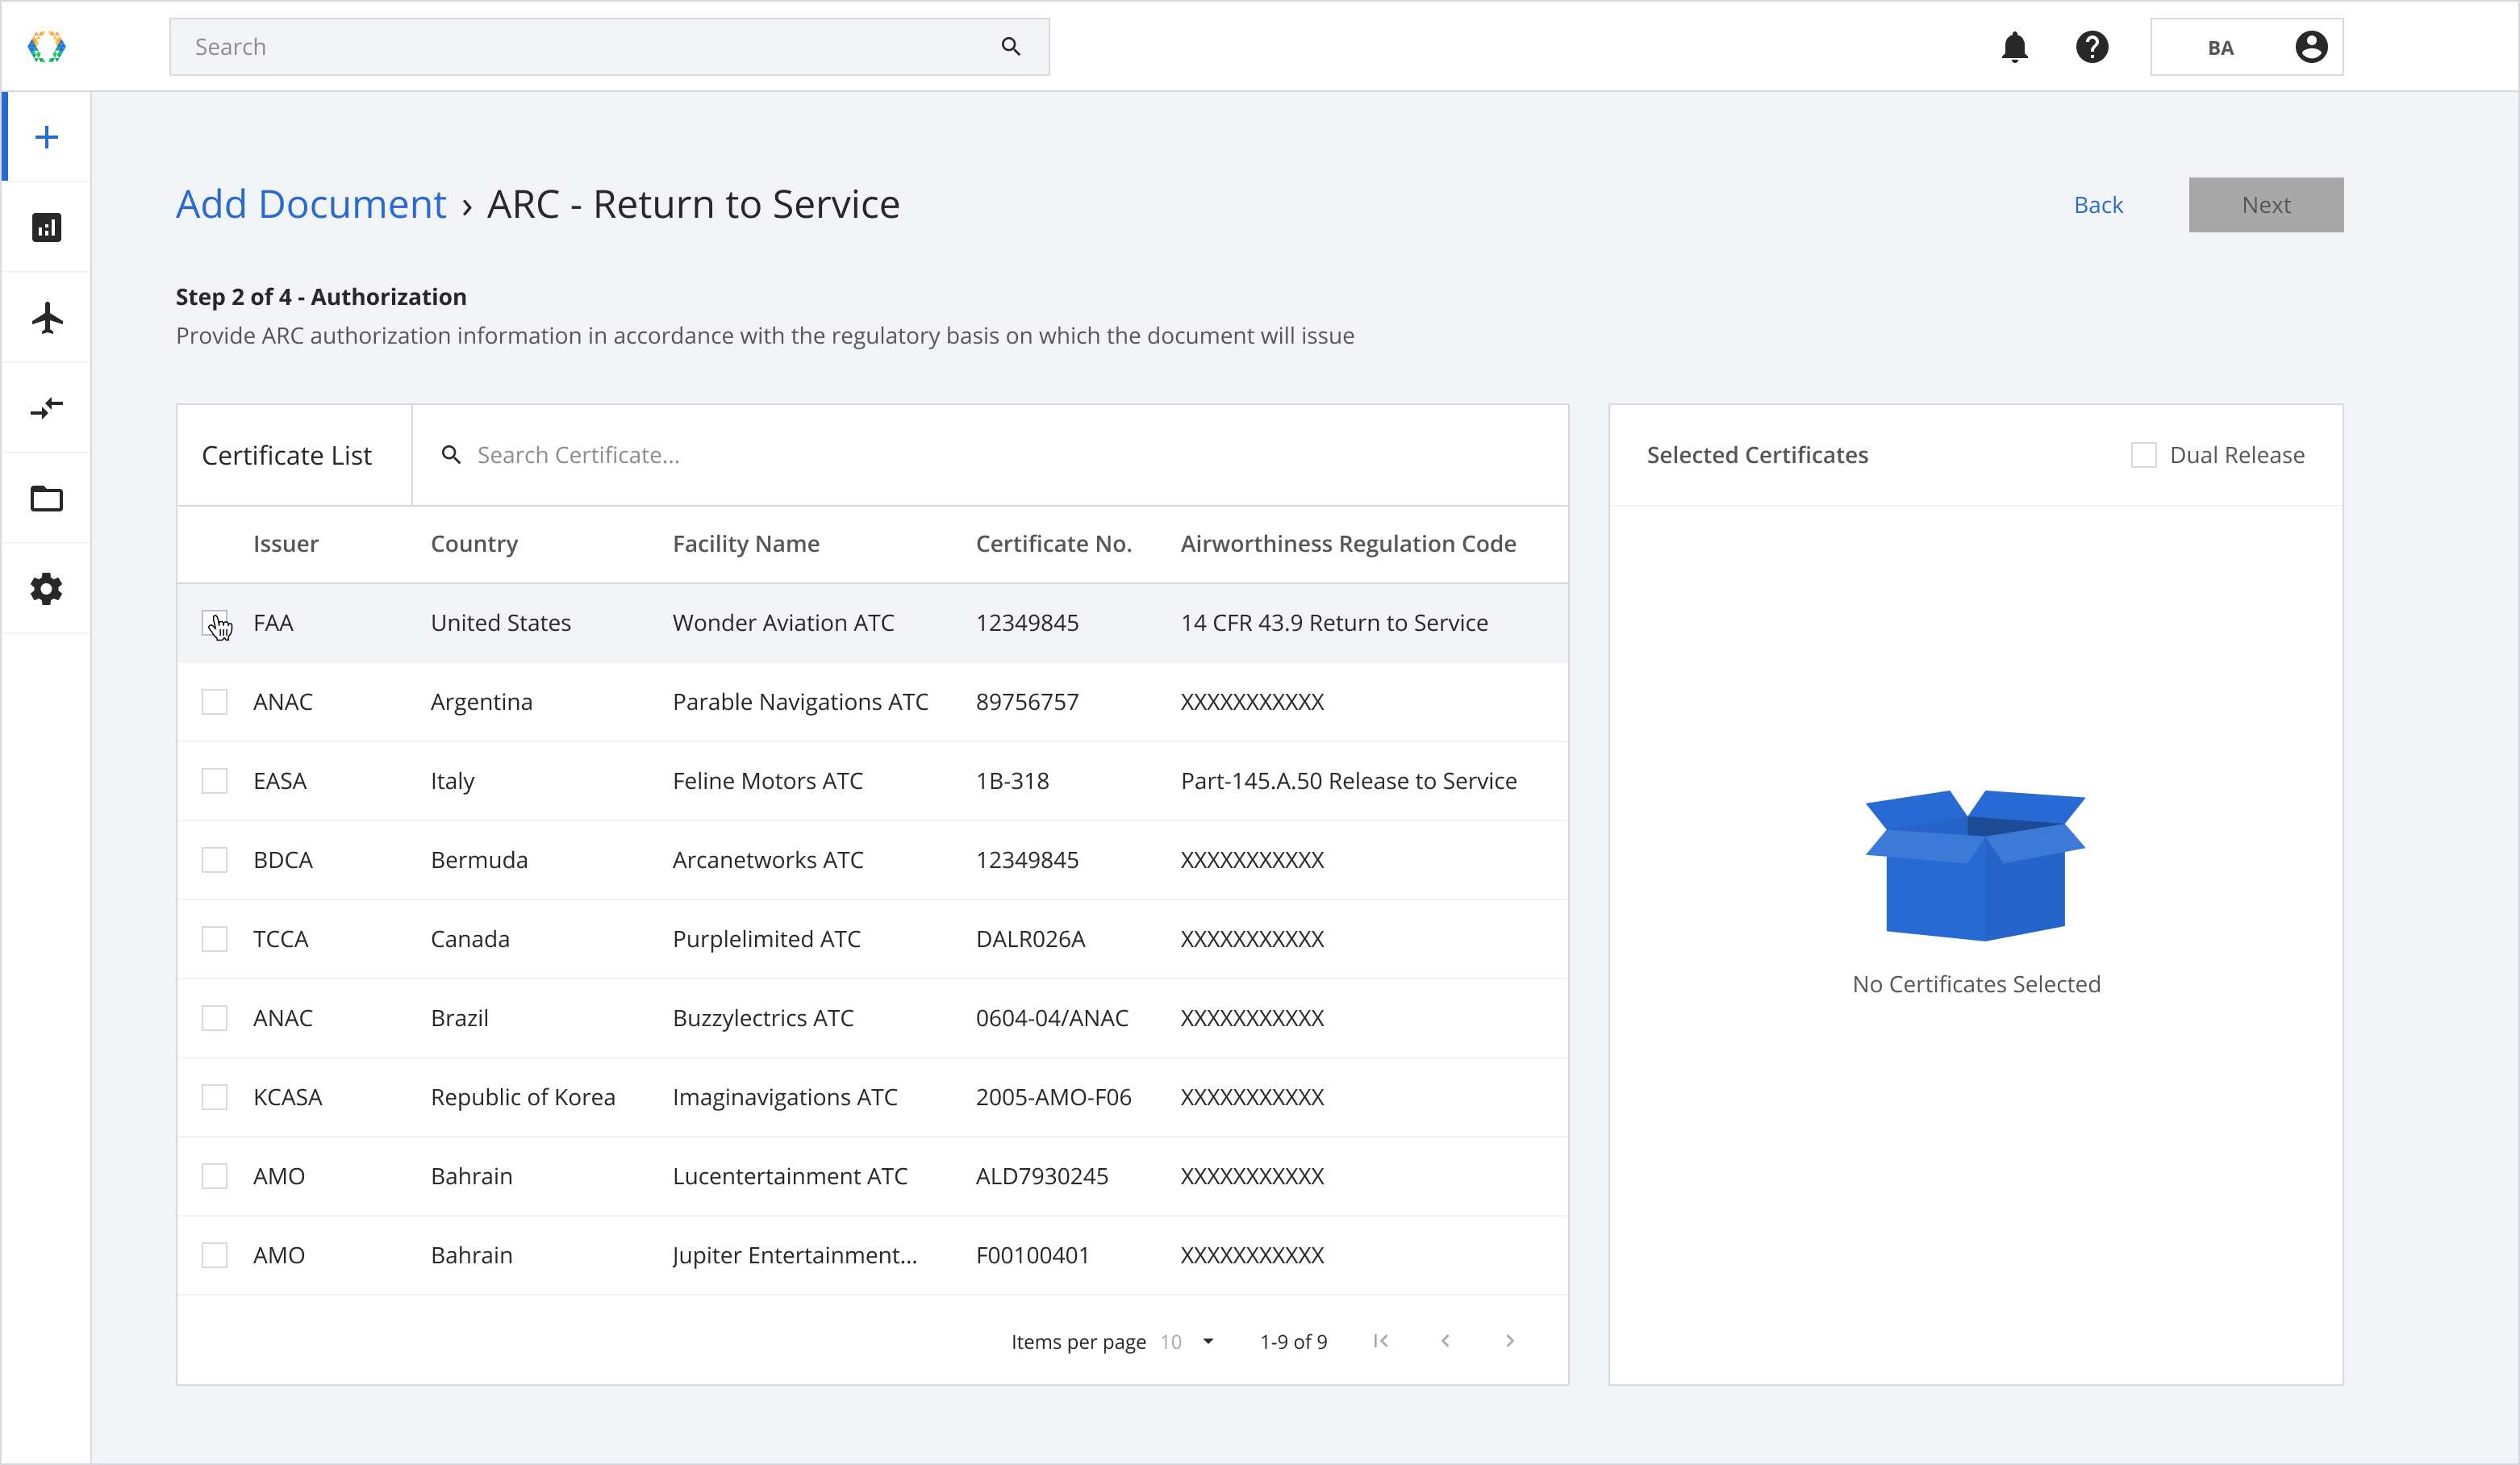
Step 9: Click “Next” once the selection is made.
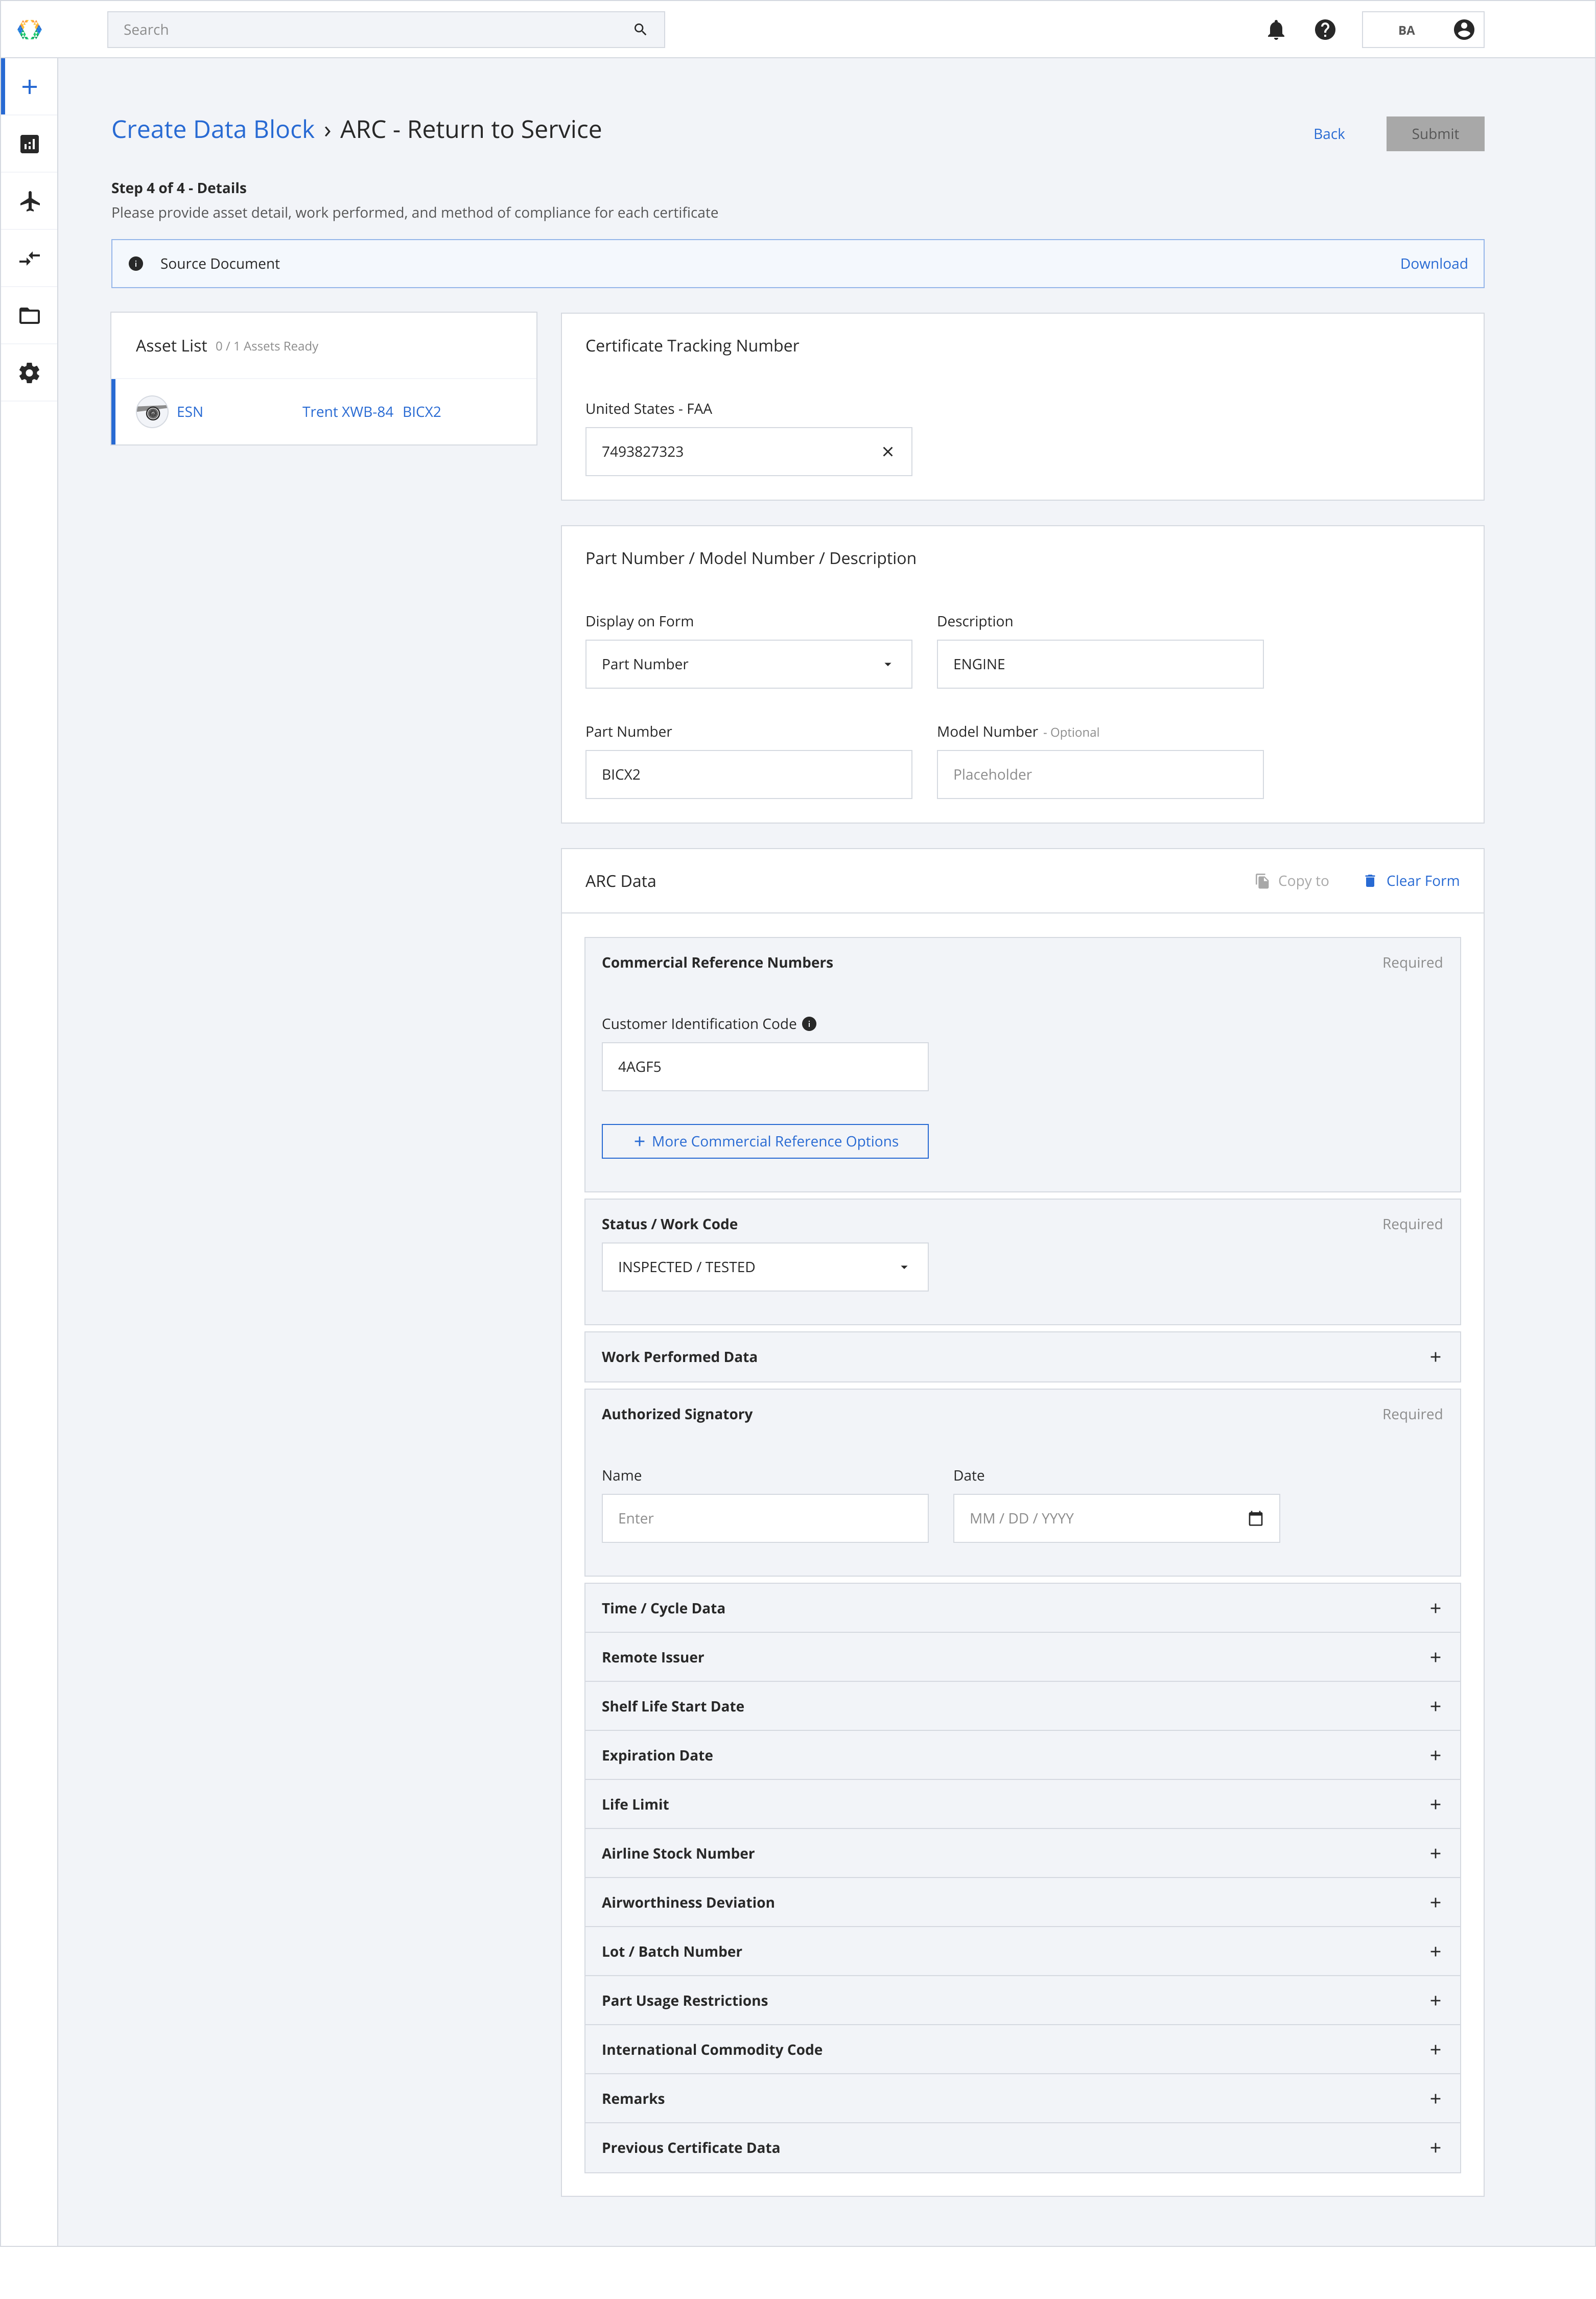
Step 10: Enter the asset details, work performed and method of compliance for each certificate.
Step 11: When you have filled in the relevant details of your first asset, you can click “Copy to” to duplicate the same information for your other selected assets.
Step 12: A pop-up will allow you to select the assets you want to copy data to.
Step 13: Once you have selected the assets, click “Copy to X Assets”.
Step 14: Continue to provide details for the remaining assets. Ensure all data is correct before proceeding.
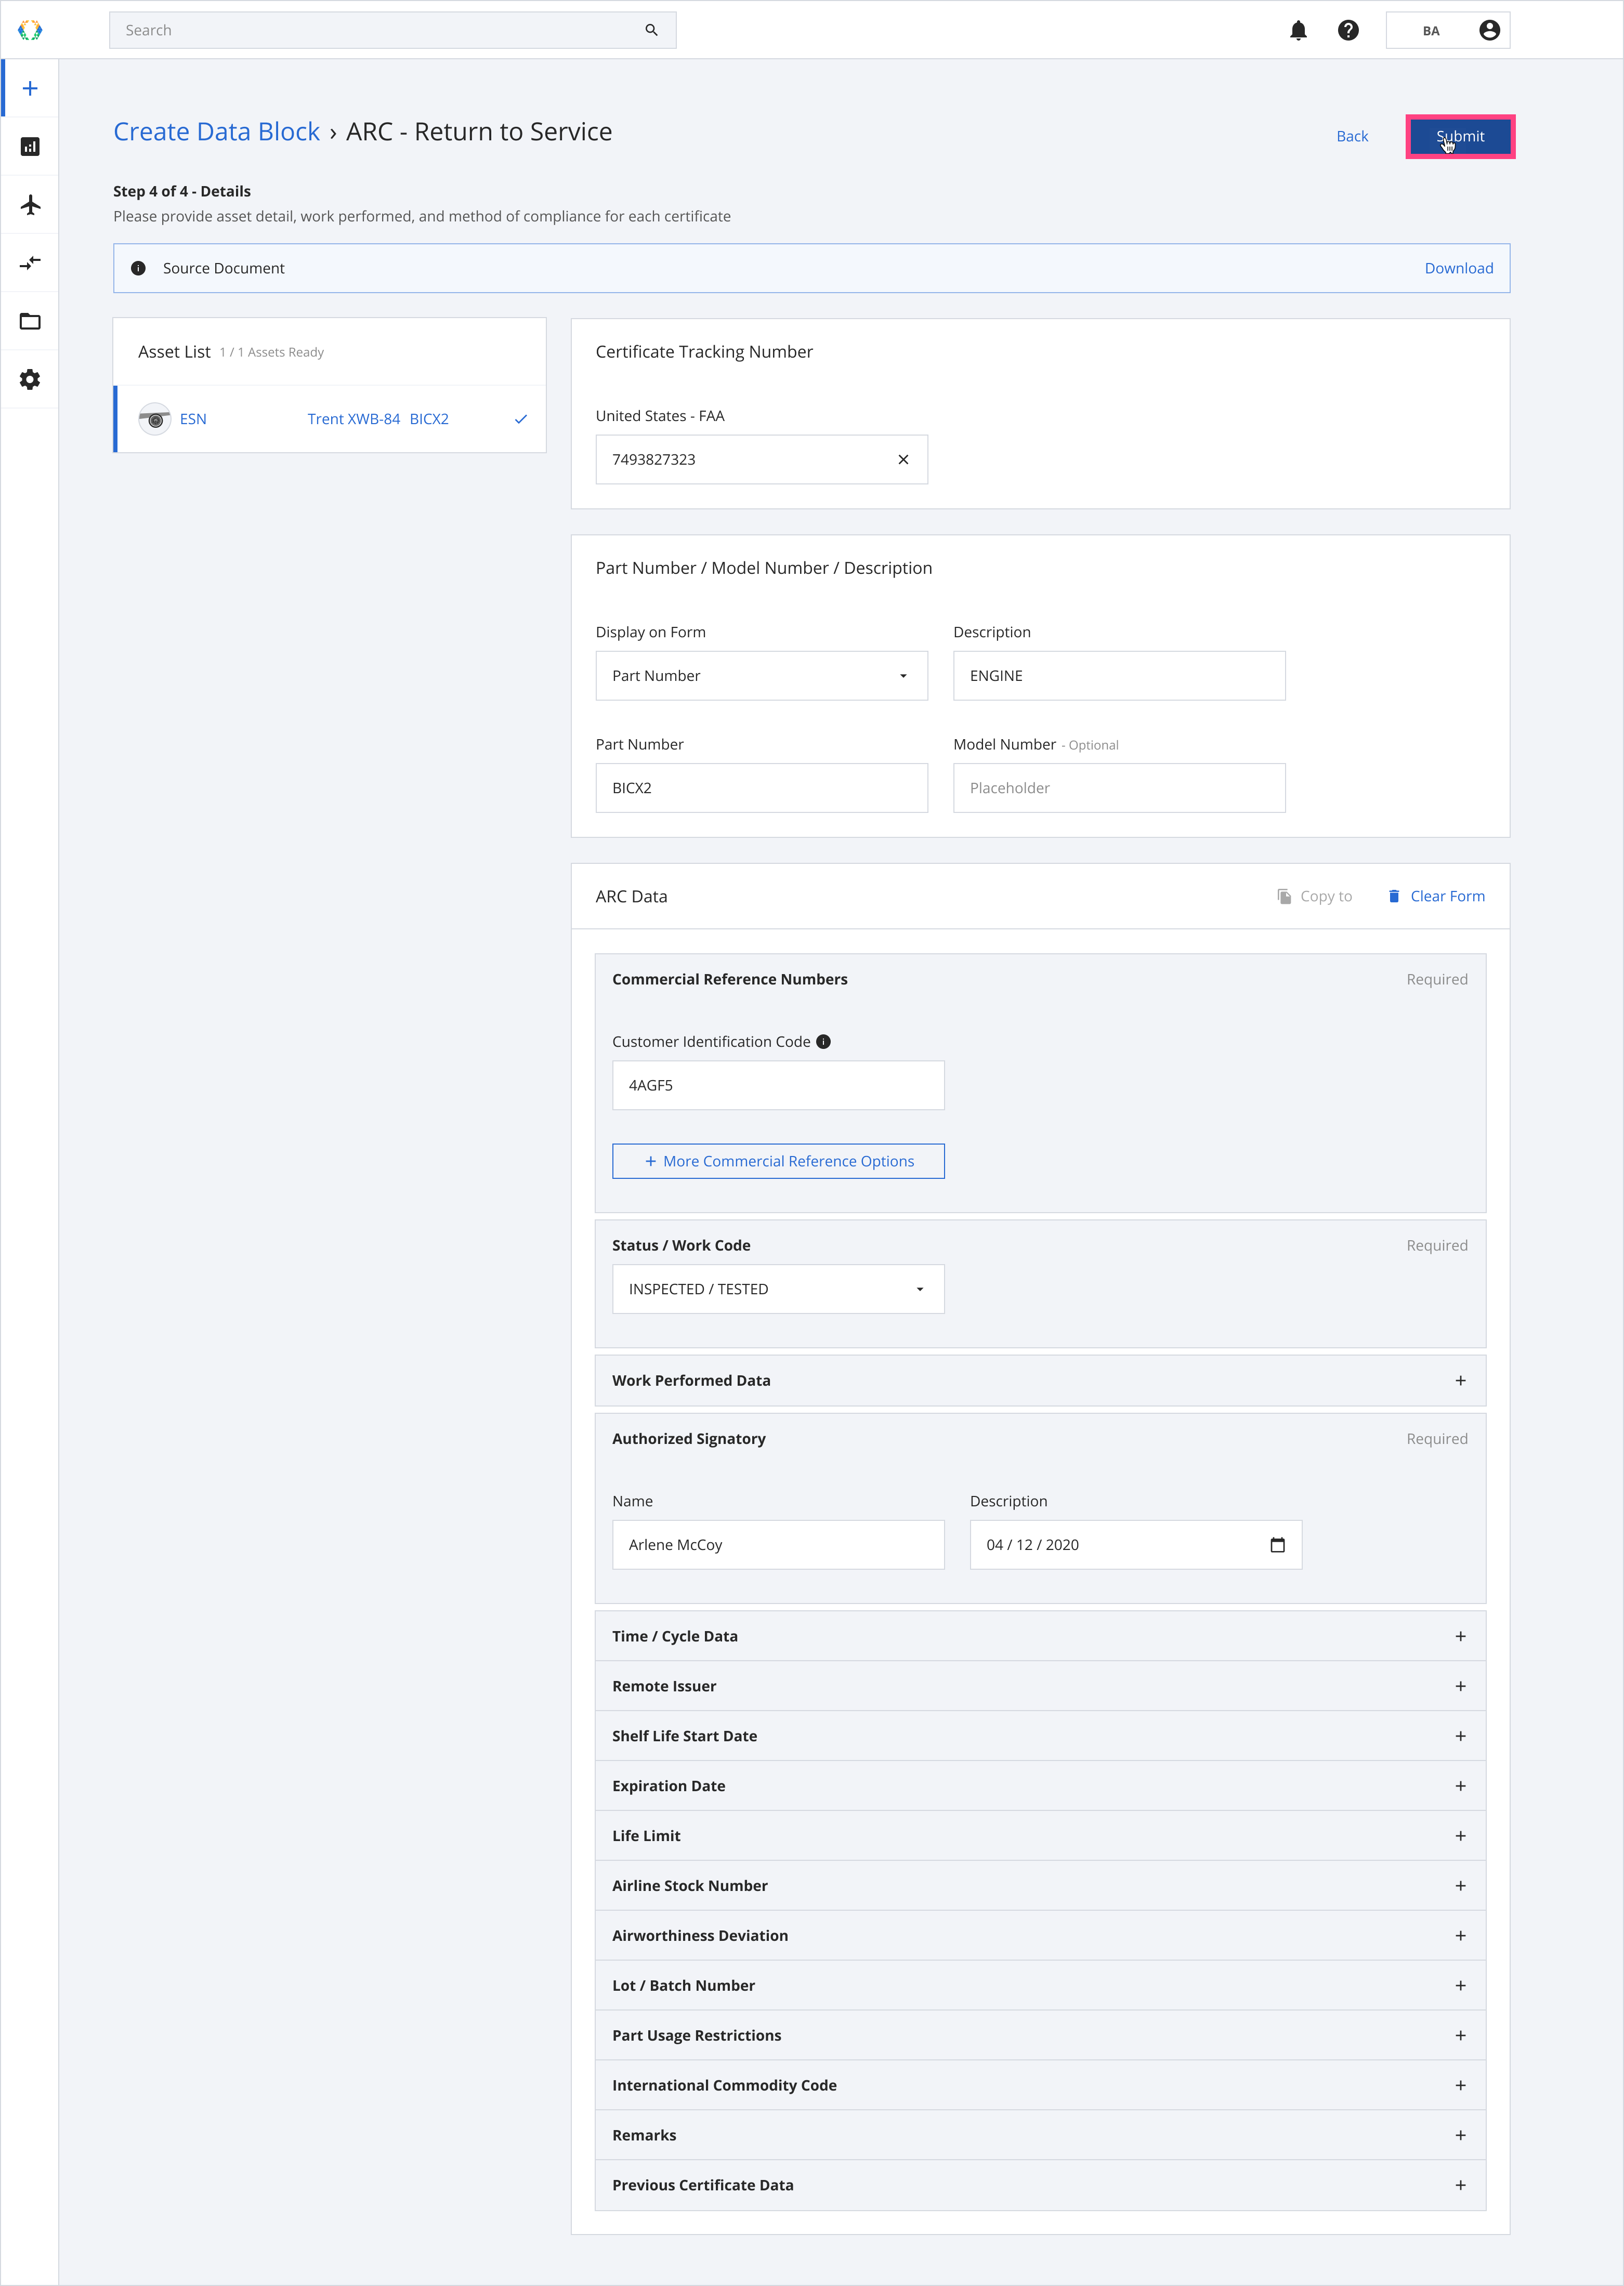
Step 15: Once all the details are entered and ready to proceed, a checkmark will appear on the right side of the asset list. Click “Next” to proceed to the next step.
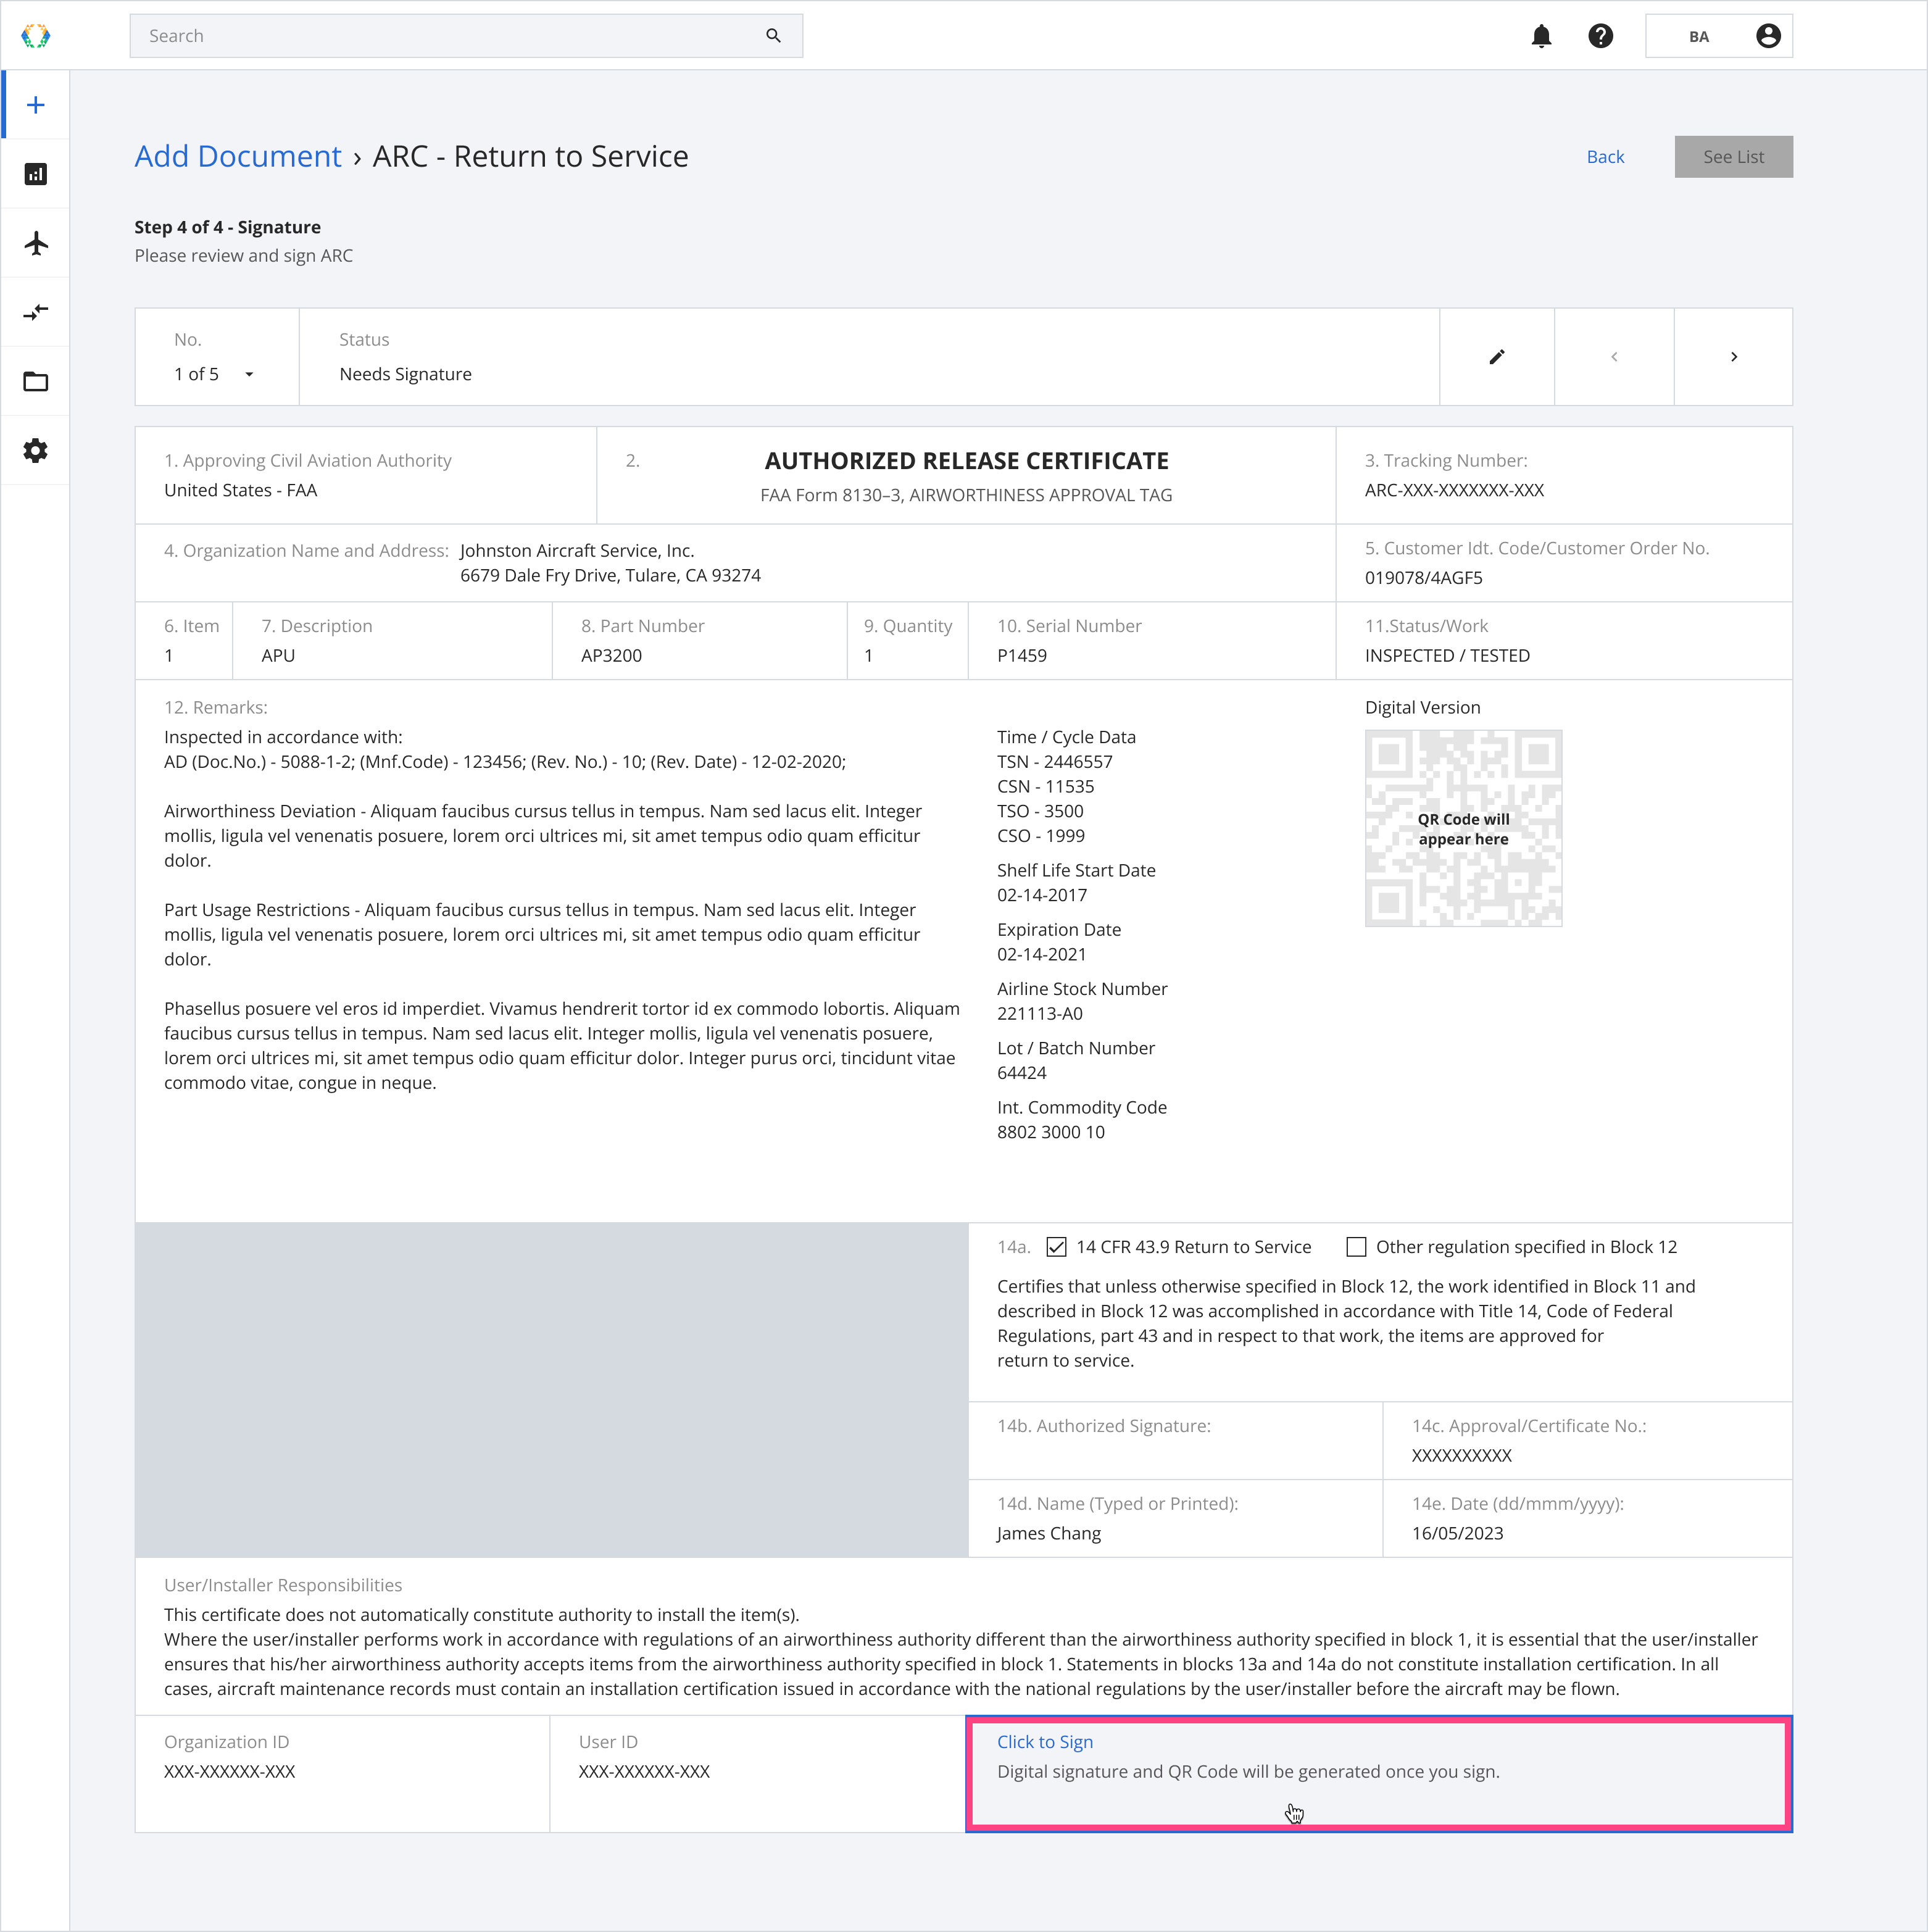
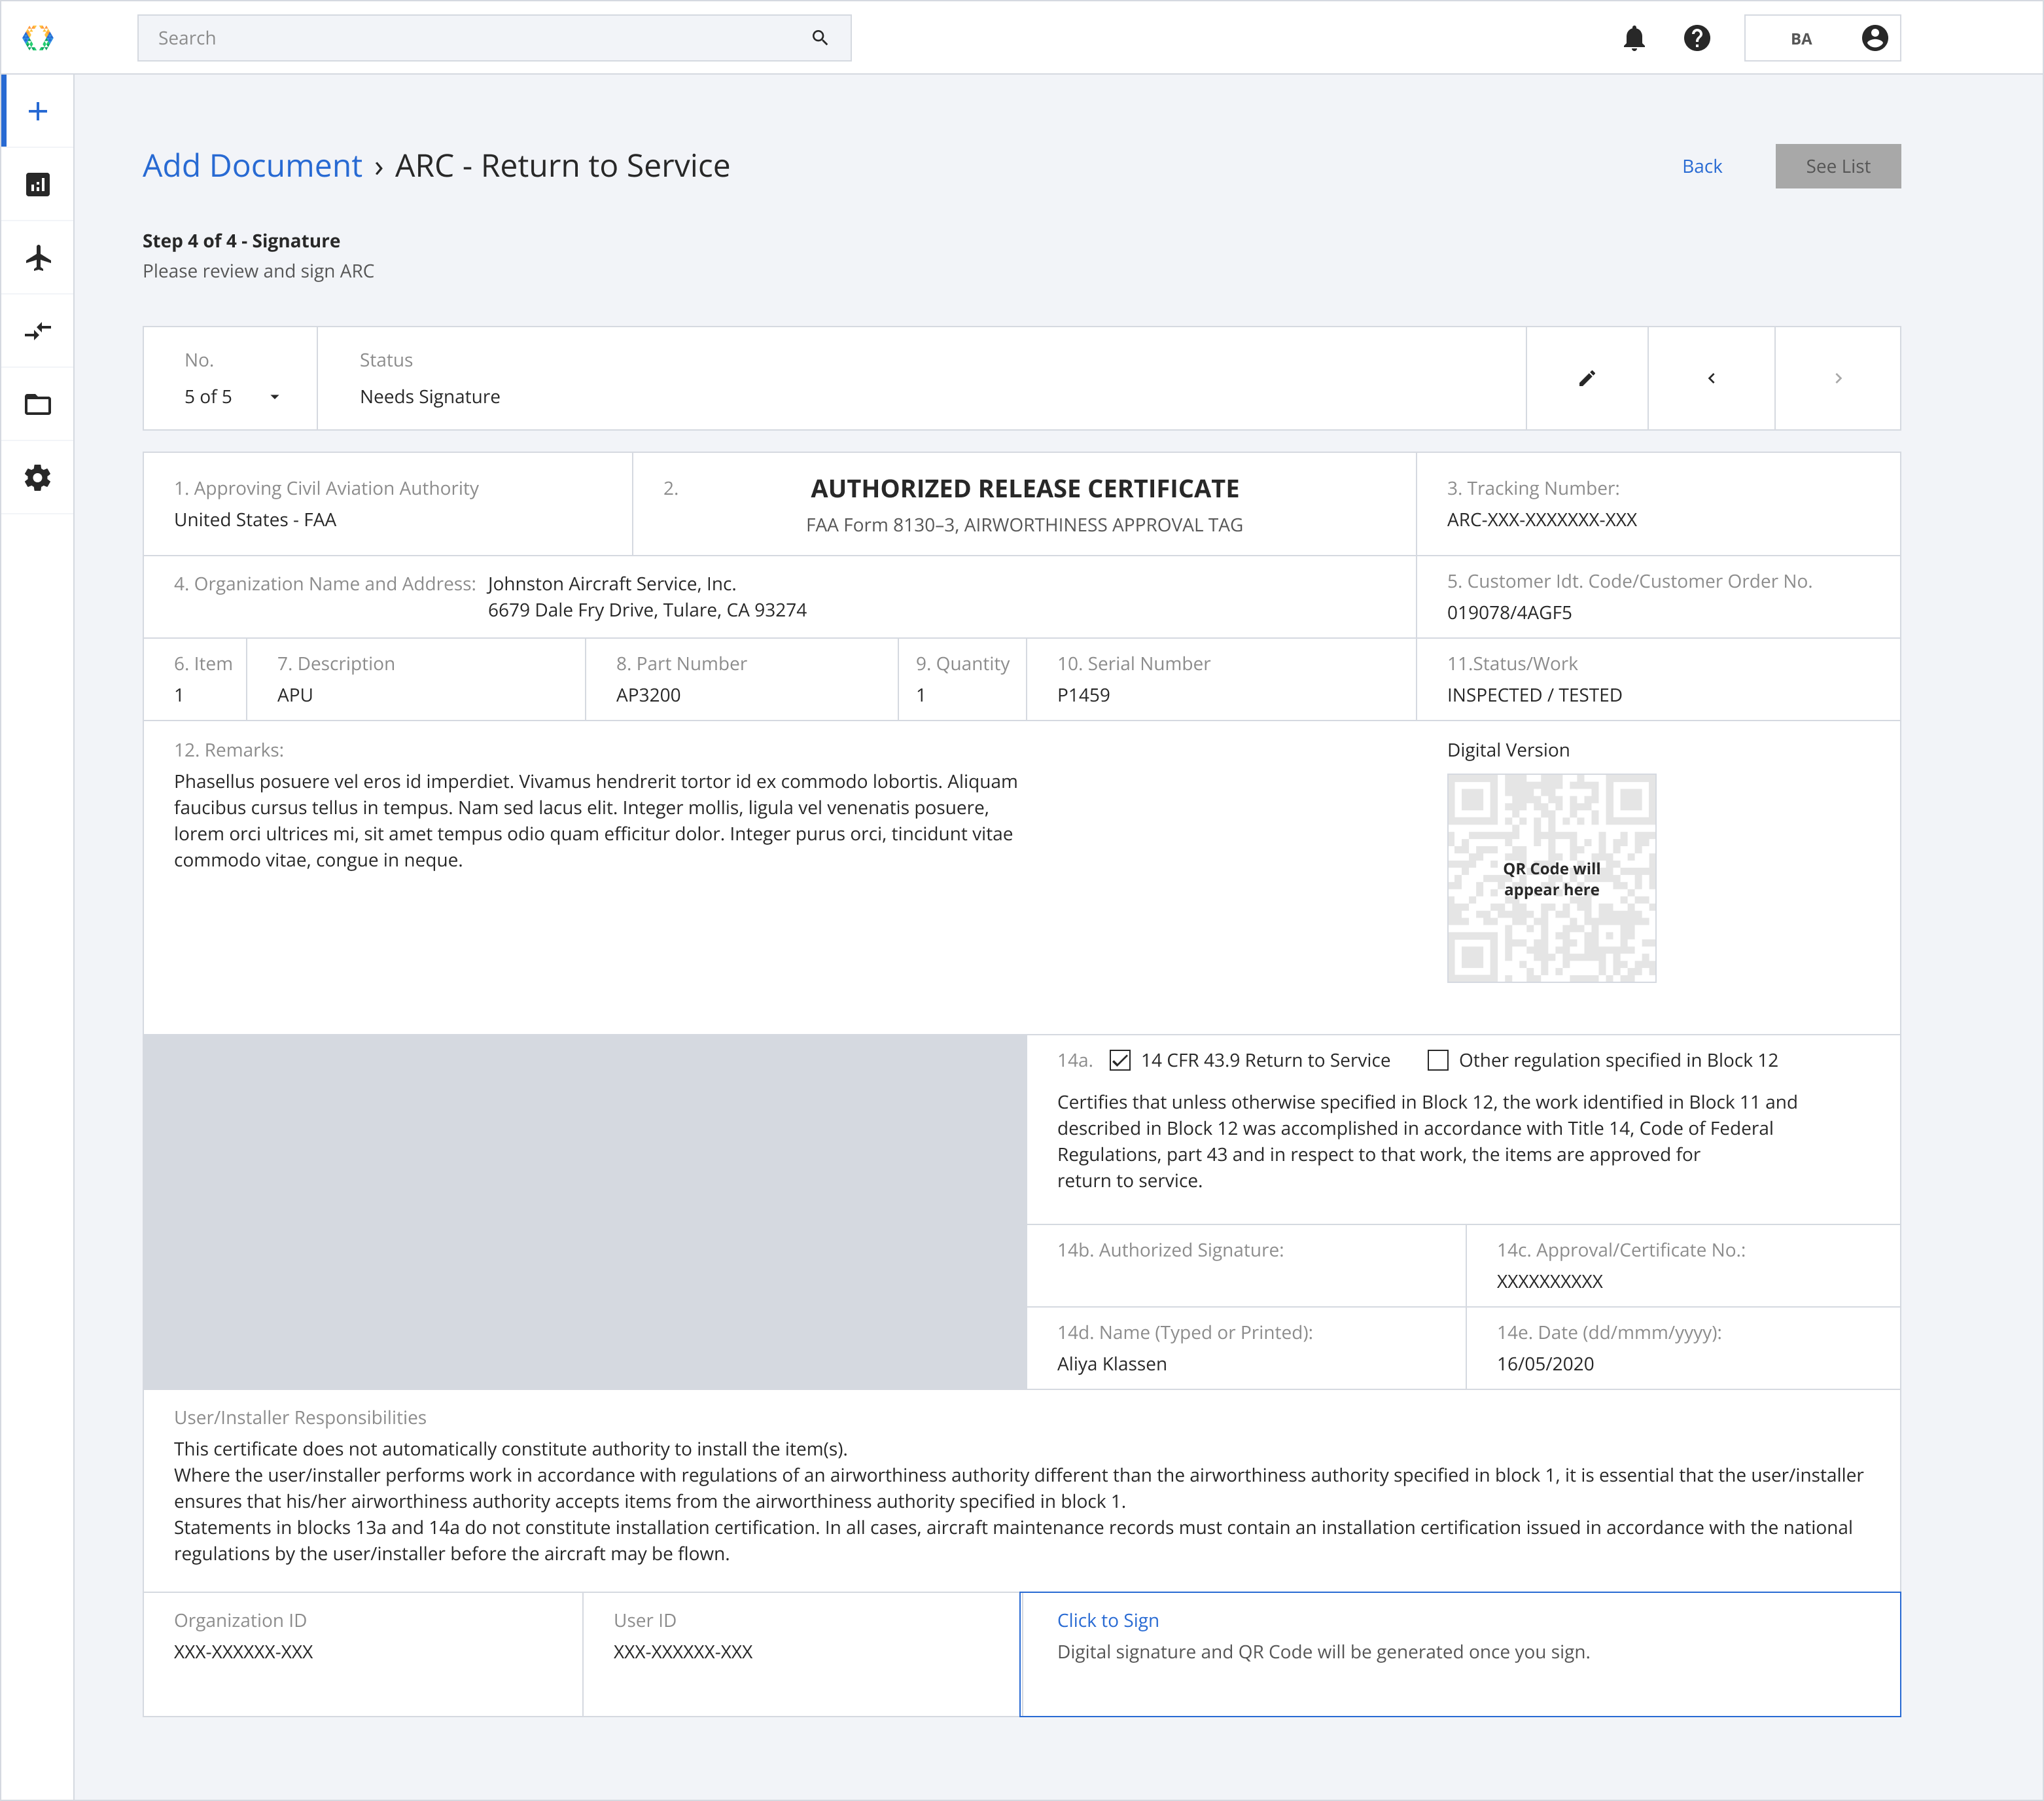
Step 16: Check the generated ARC details and click “Click to Sign” to generate the QR code and create your certificate on Block Aero’s blockchain.
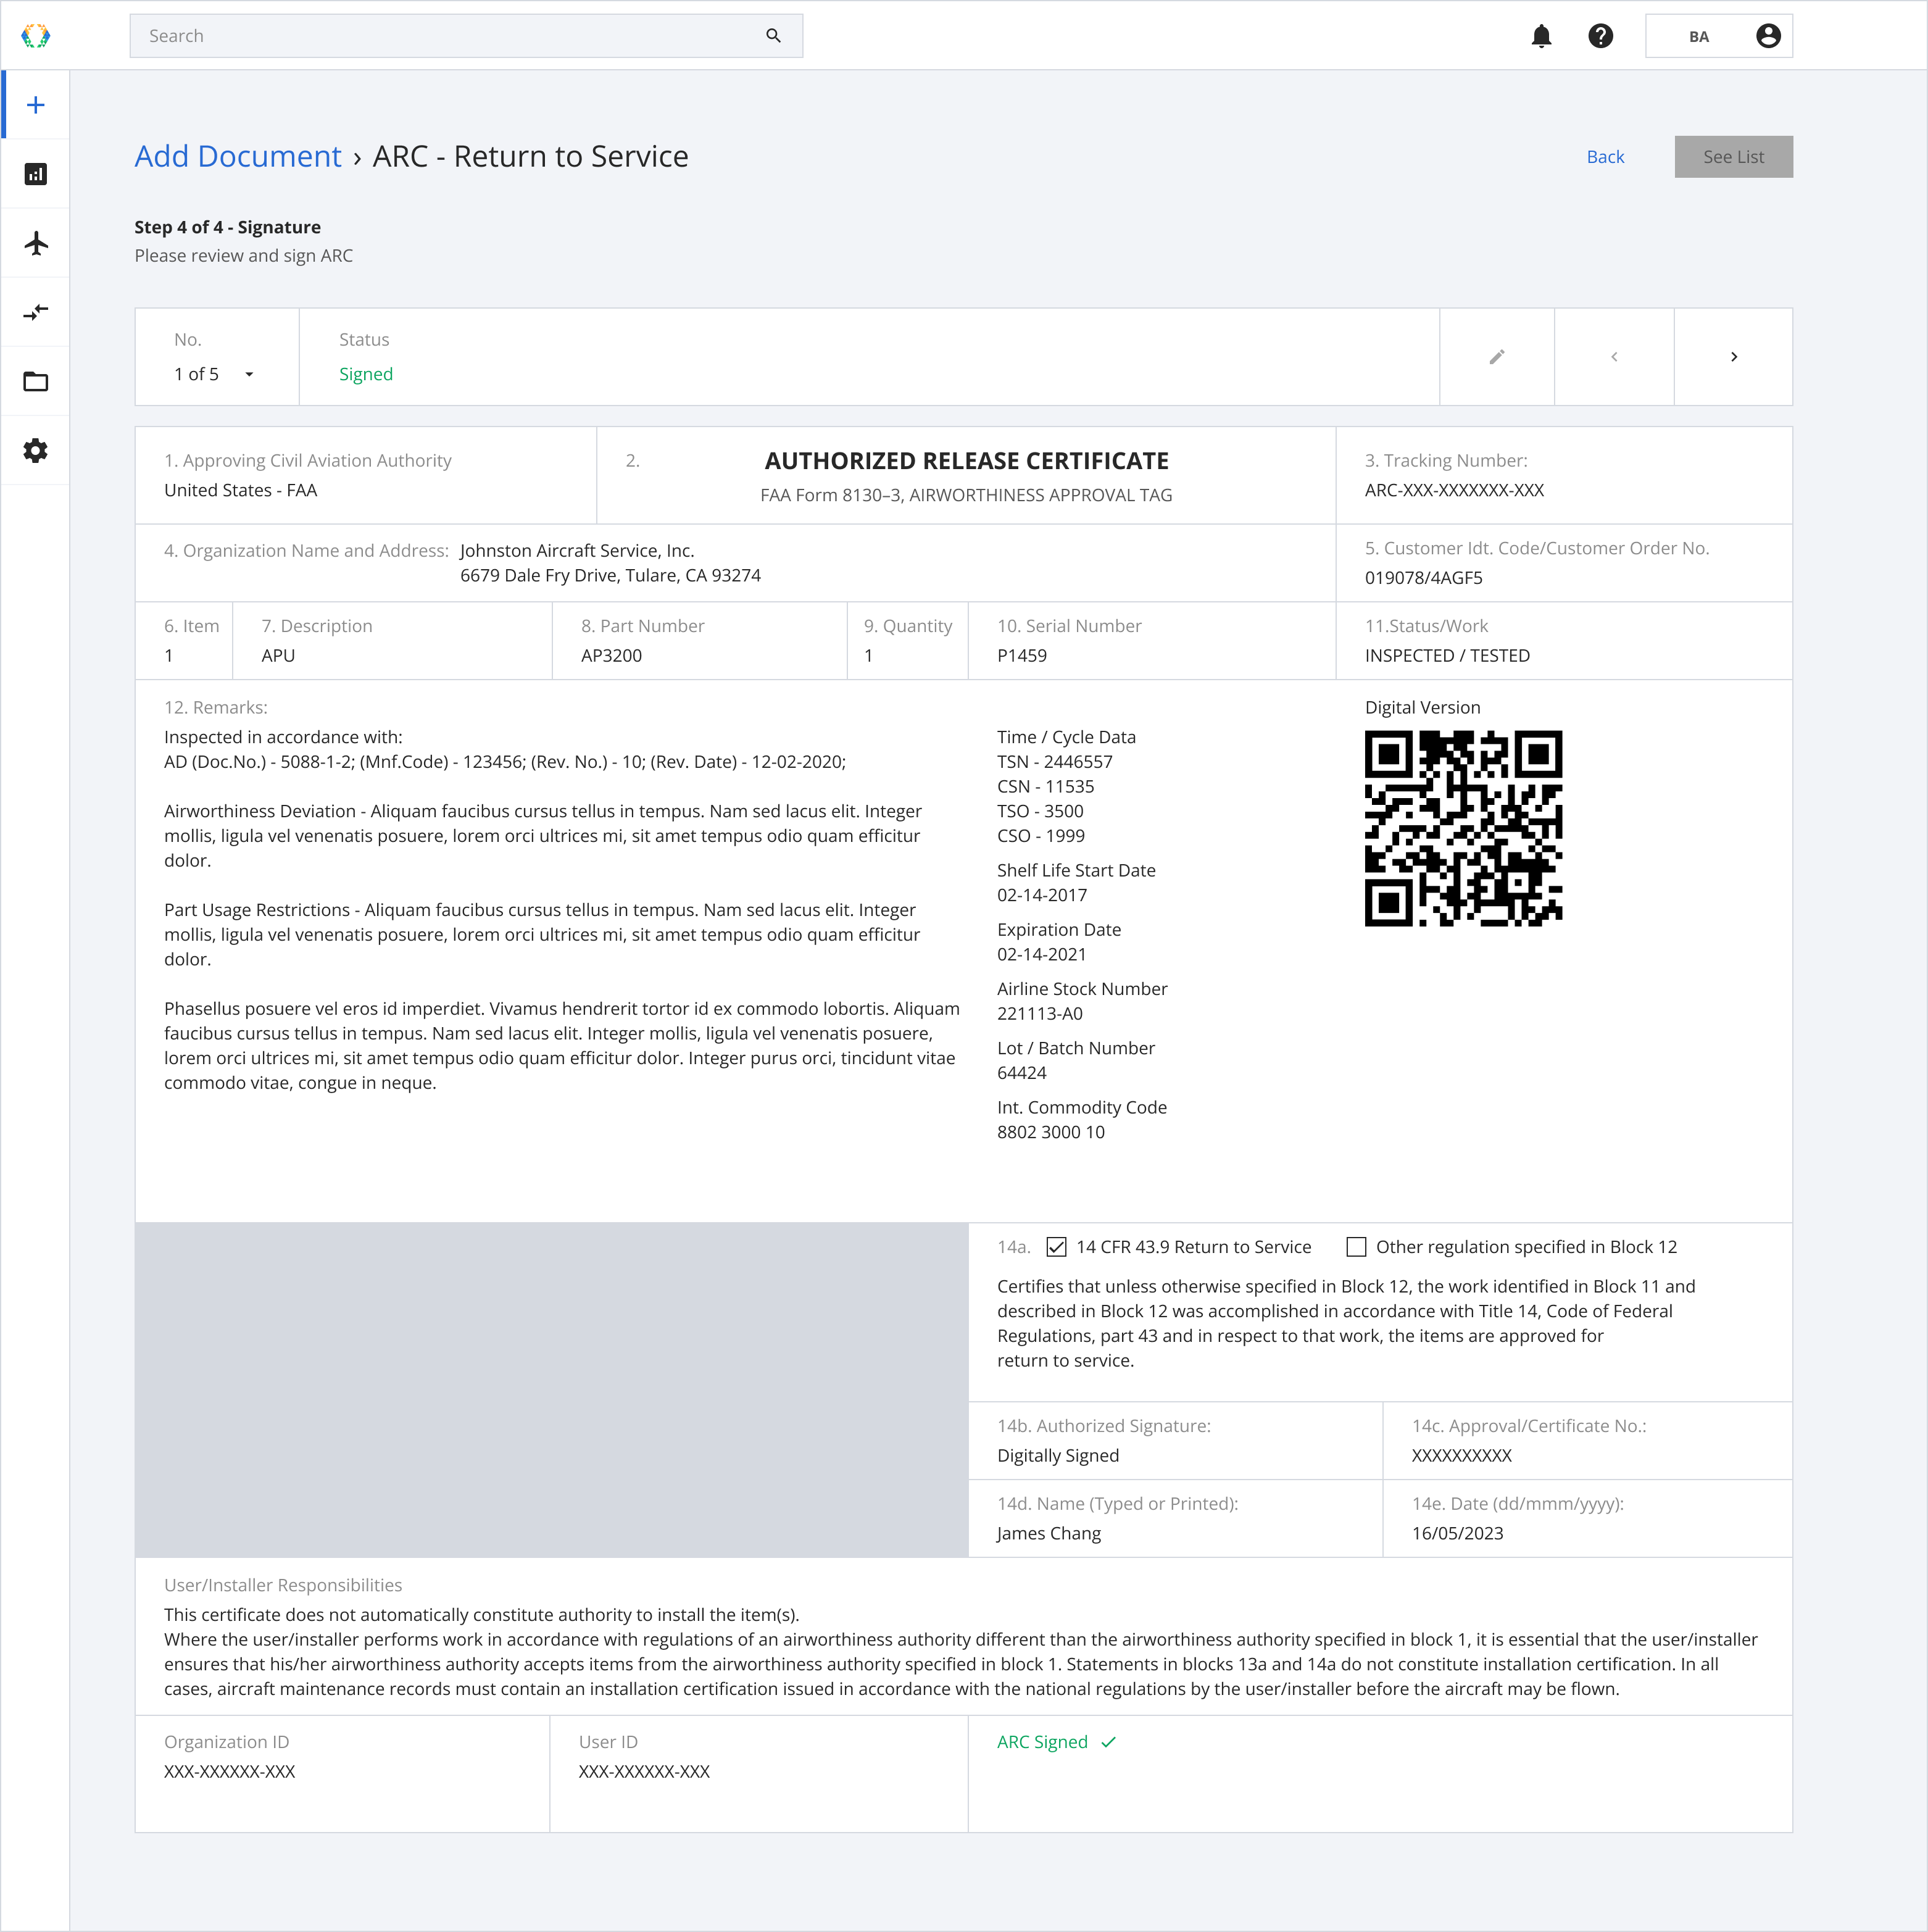
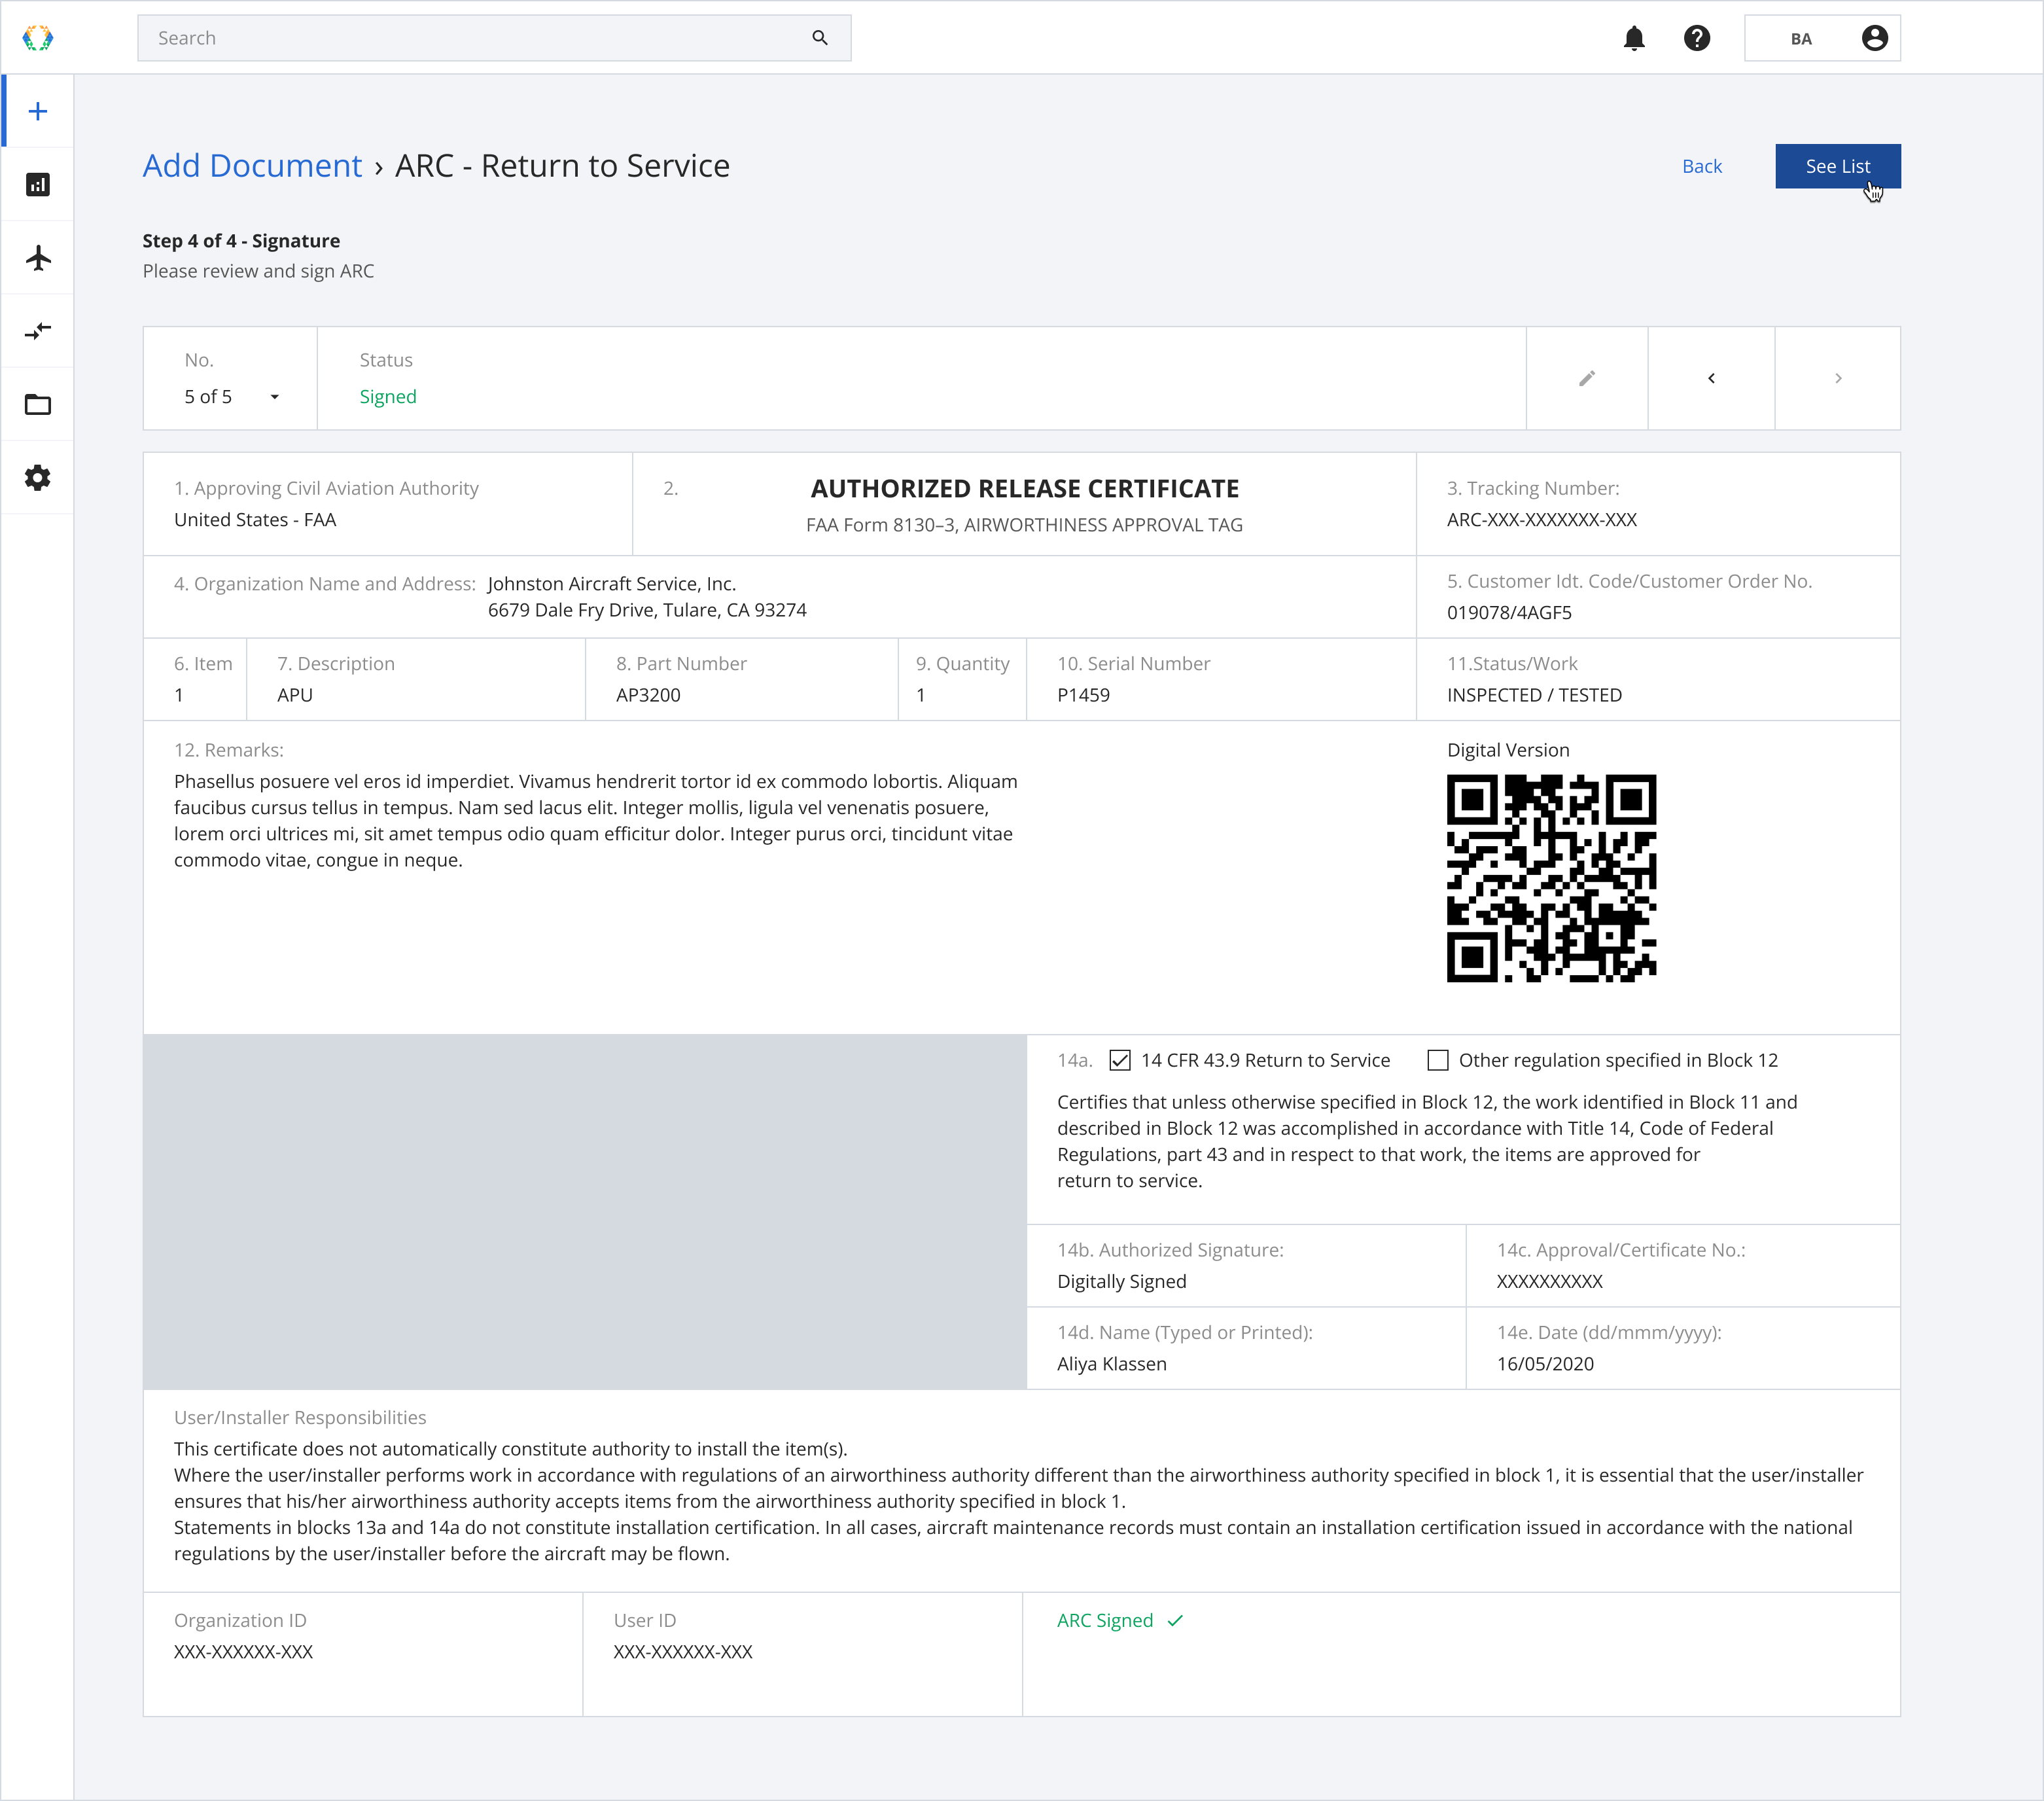
Step 17: Once the signature is complete, the status at the top of the page will be changed to “Signed”, and the QR code is generated for you.
Step 18: For the signing process, you must sign the certificate individually and ensure that all certificates are signed.
You can go back to change the details of any unsigned certificates and click sign once it has been confirmed.
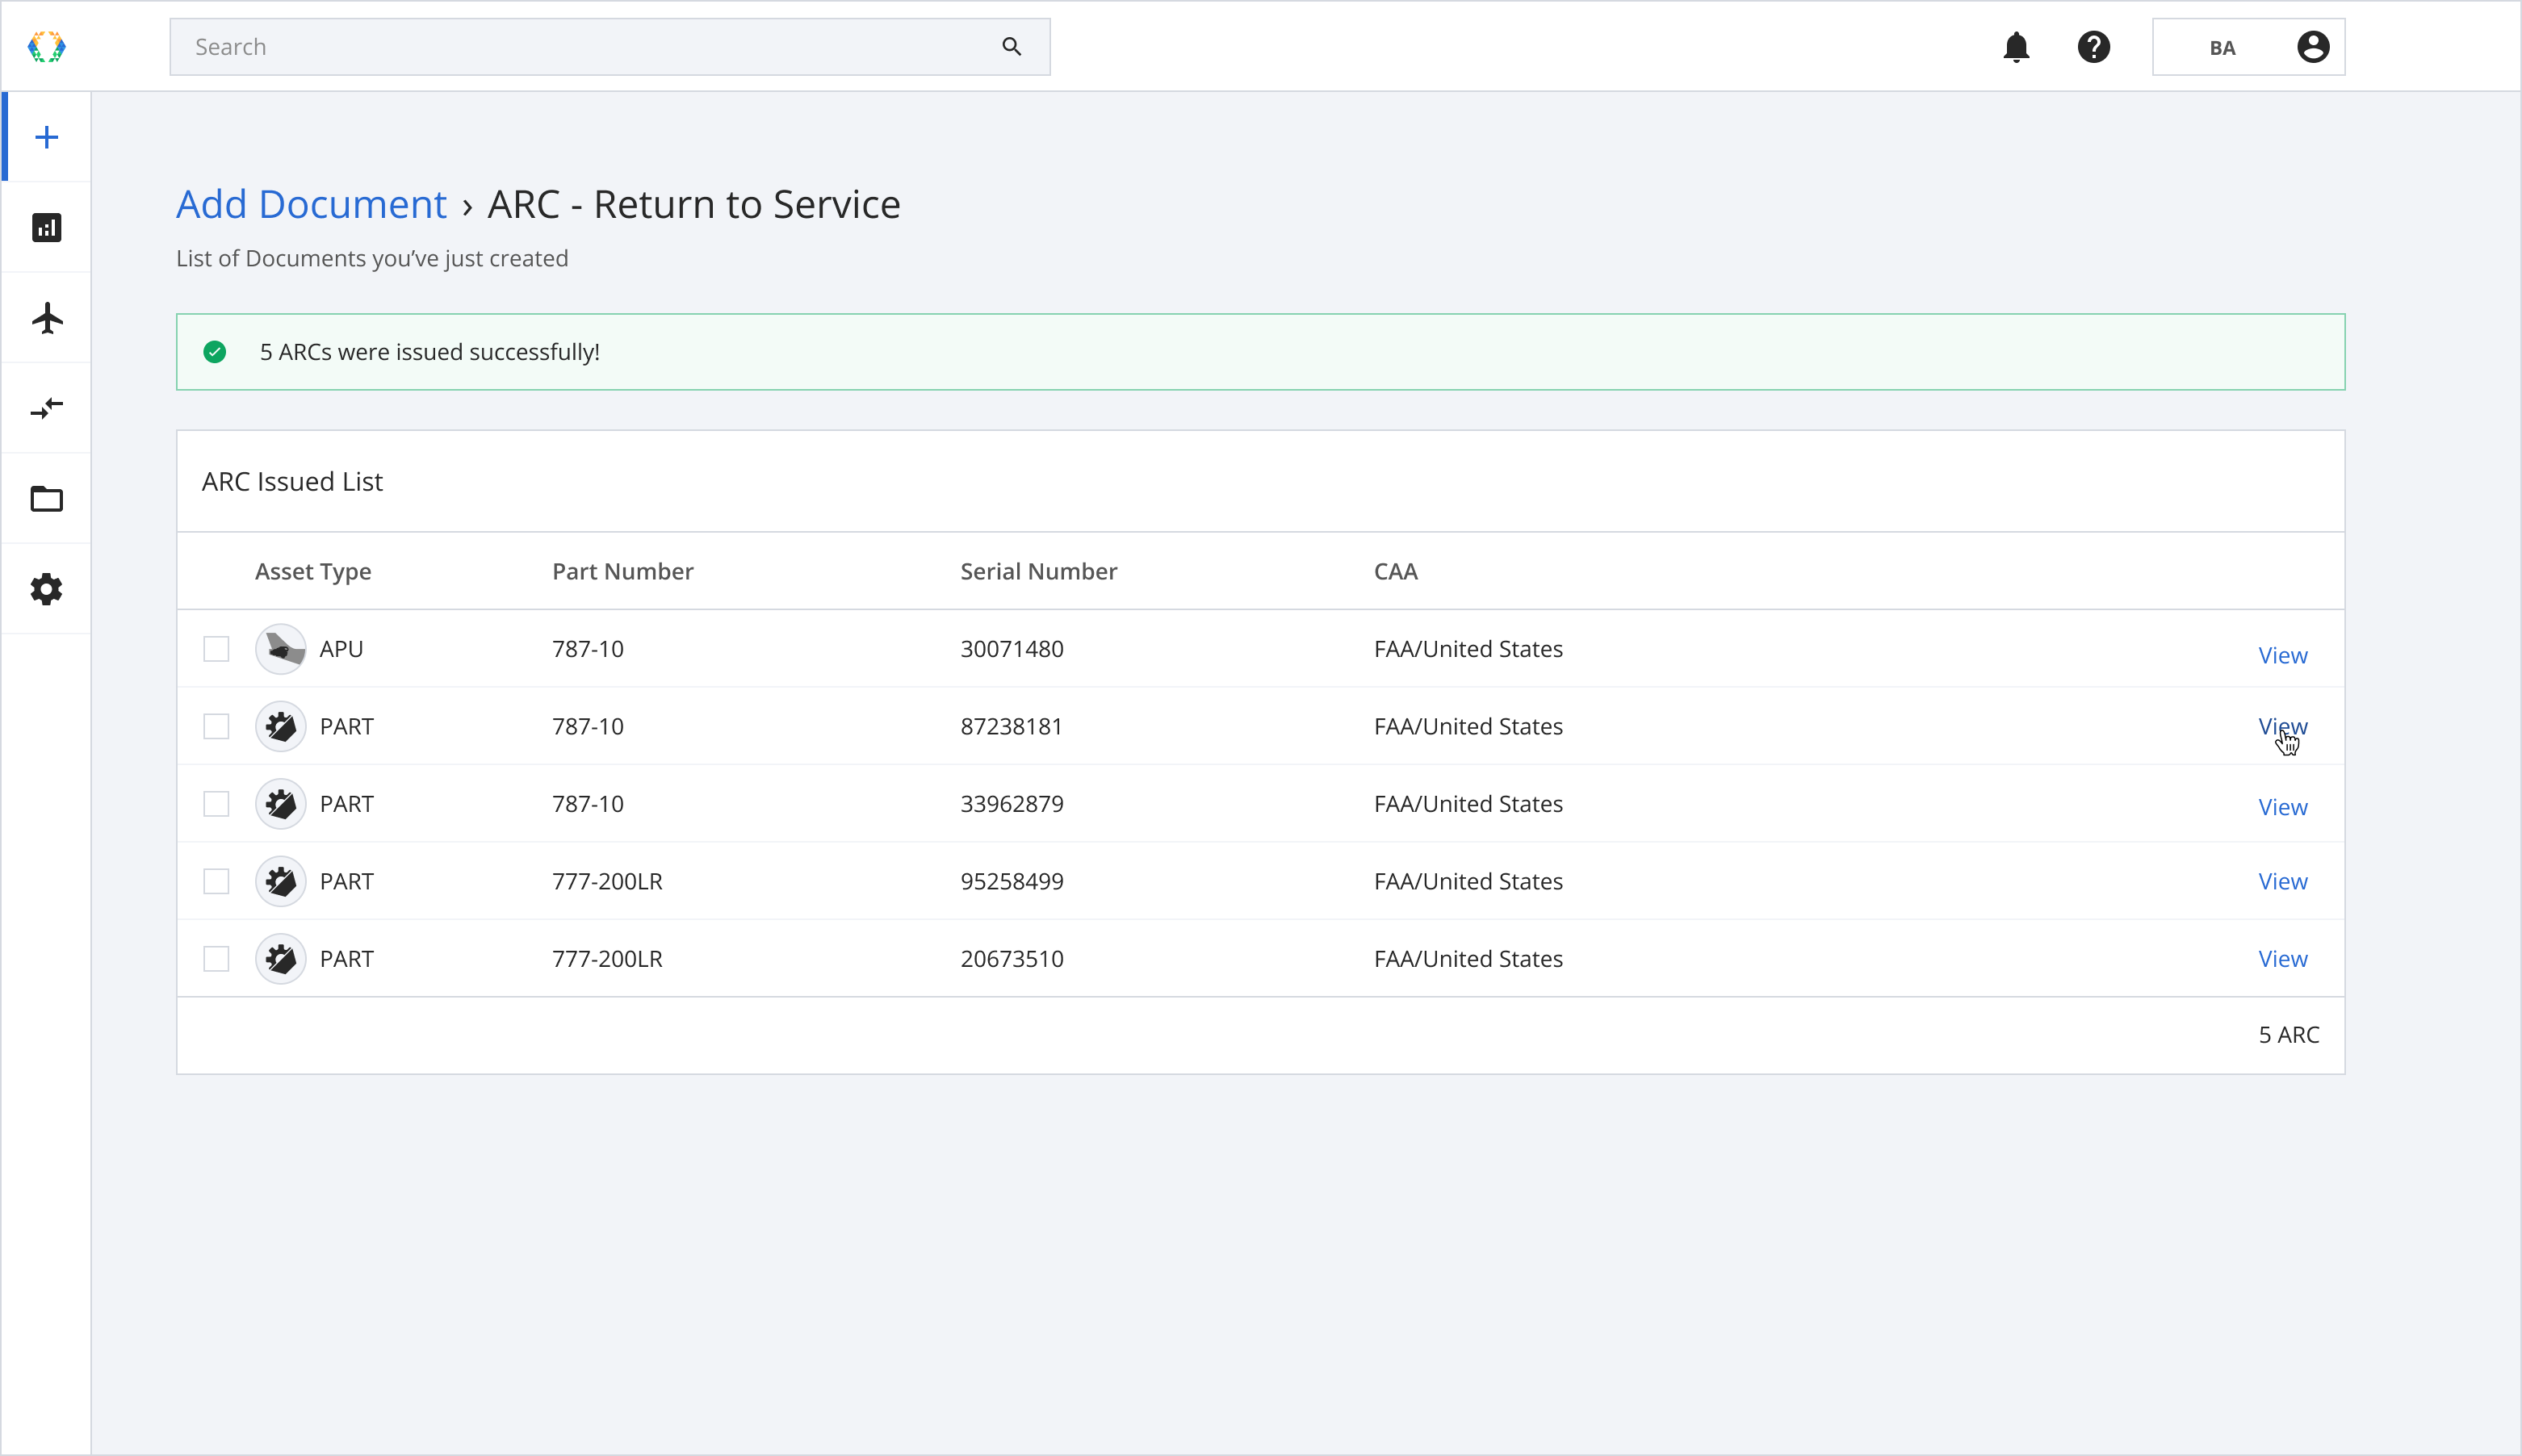
Step 19: Once the signing process is completed, you can click on “See List” to view the list of generated ARCs.
Step 20: A green banner will appear at the top of the ARC Issued List to indicate your ARCs were issued successfully. Click on “View” to see your generated ARC through Block Aero!
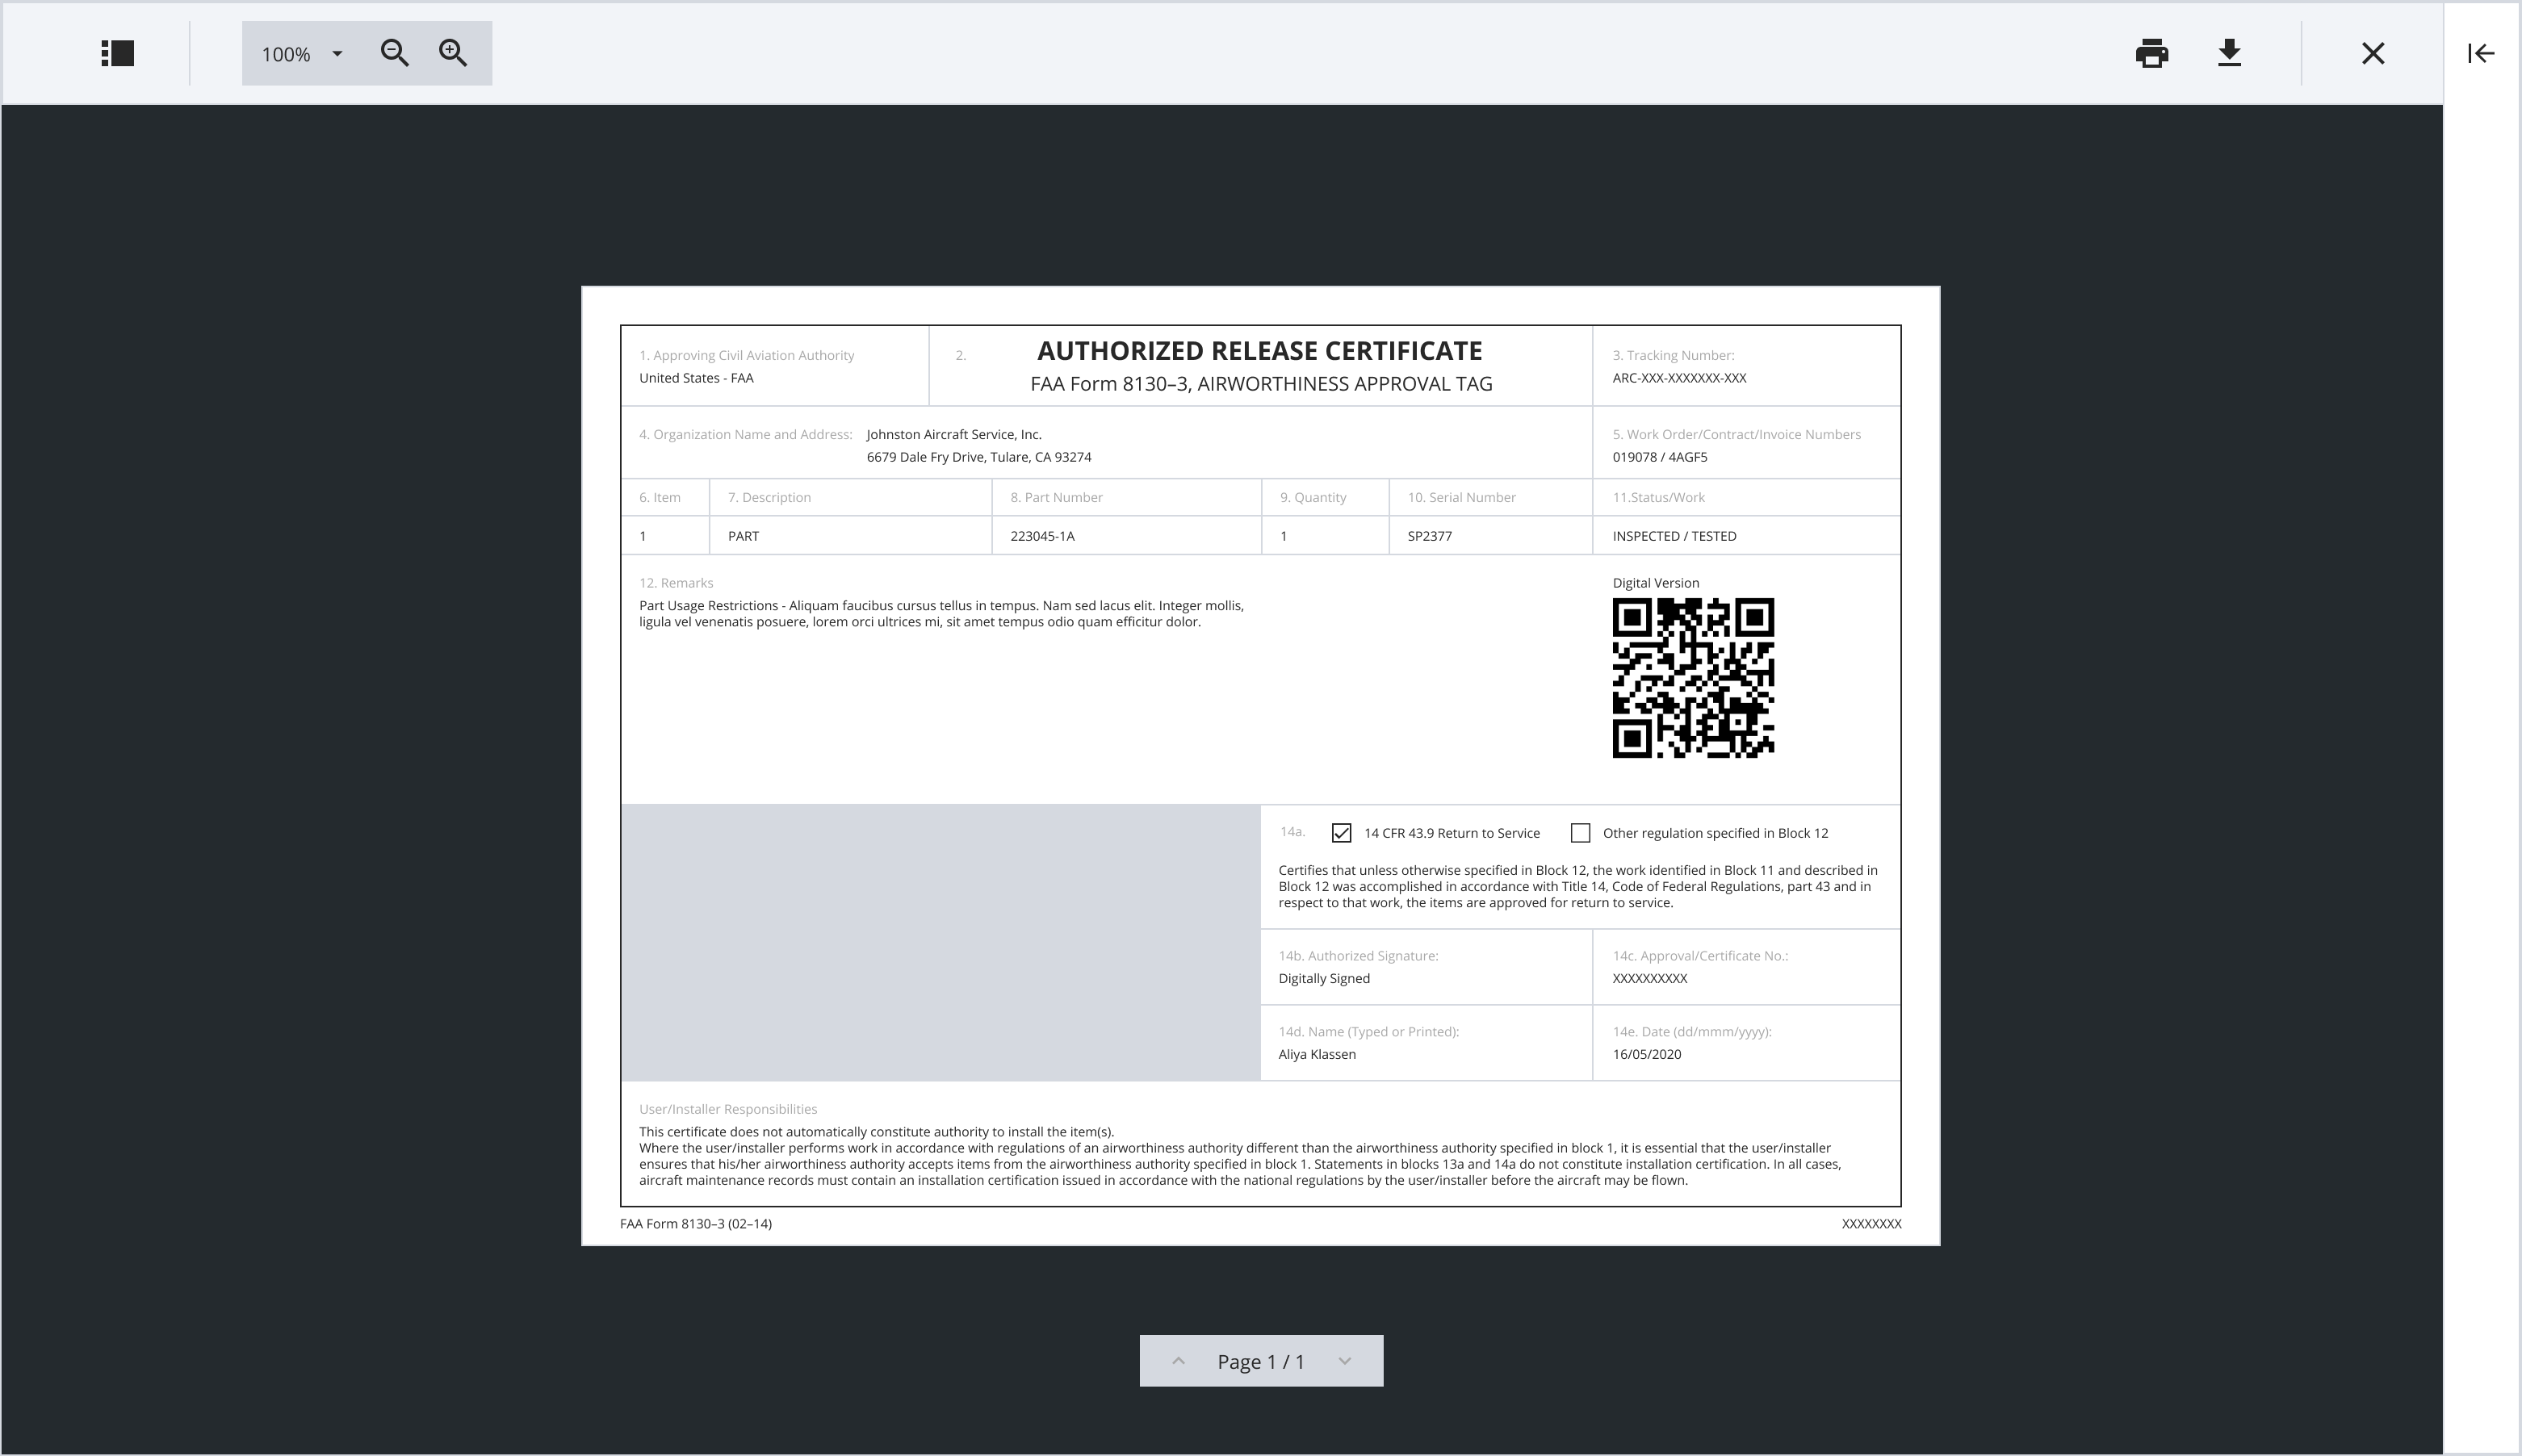
Step 21: You can now view, print or download your ARCs.
Updated 11 days ago