Repair Order Bulk Operations
Getting Started
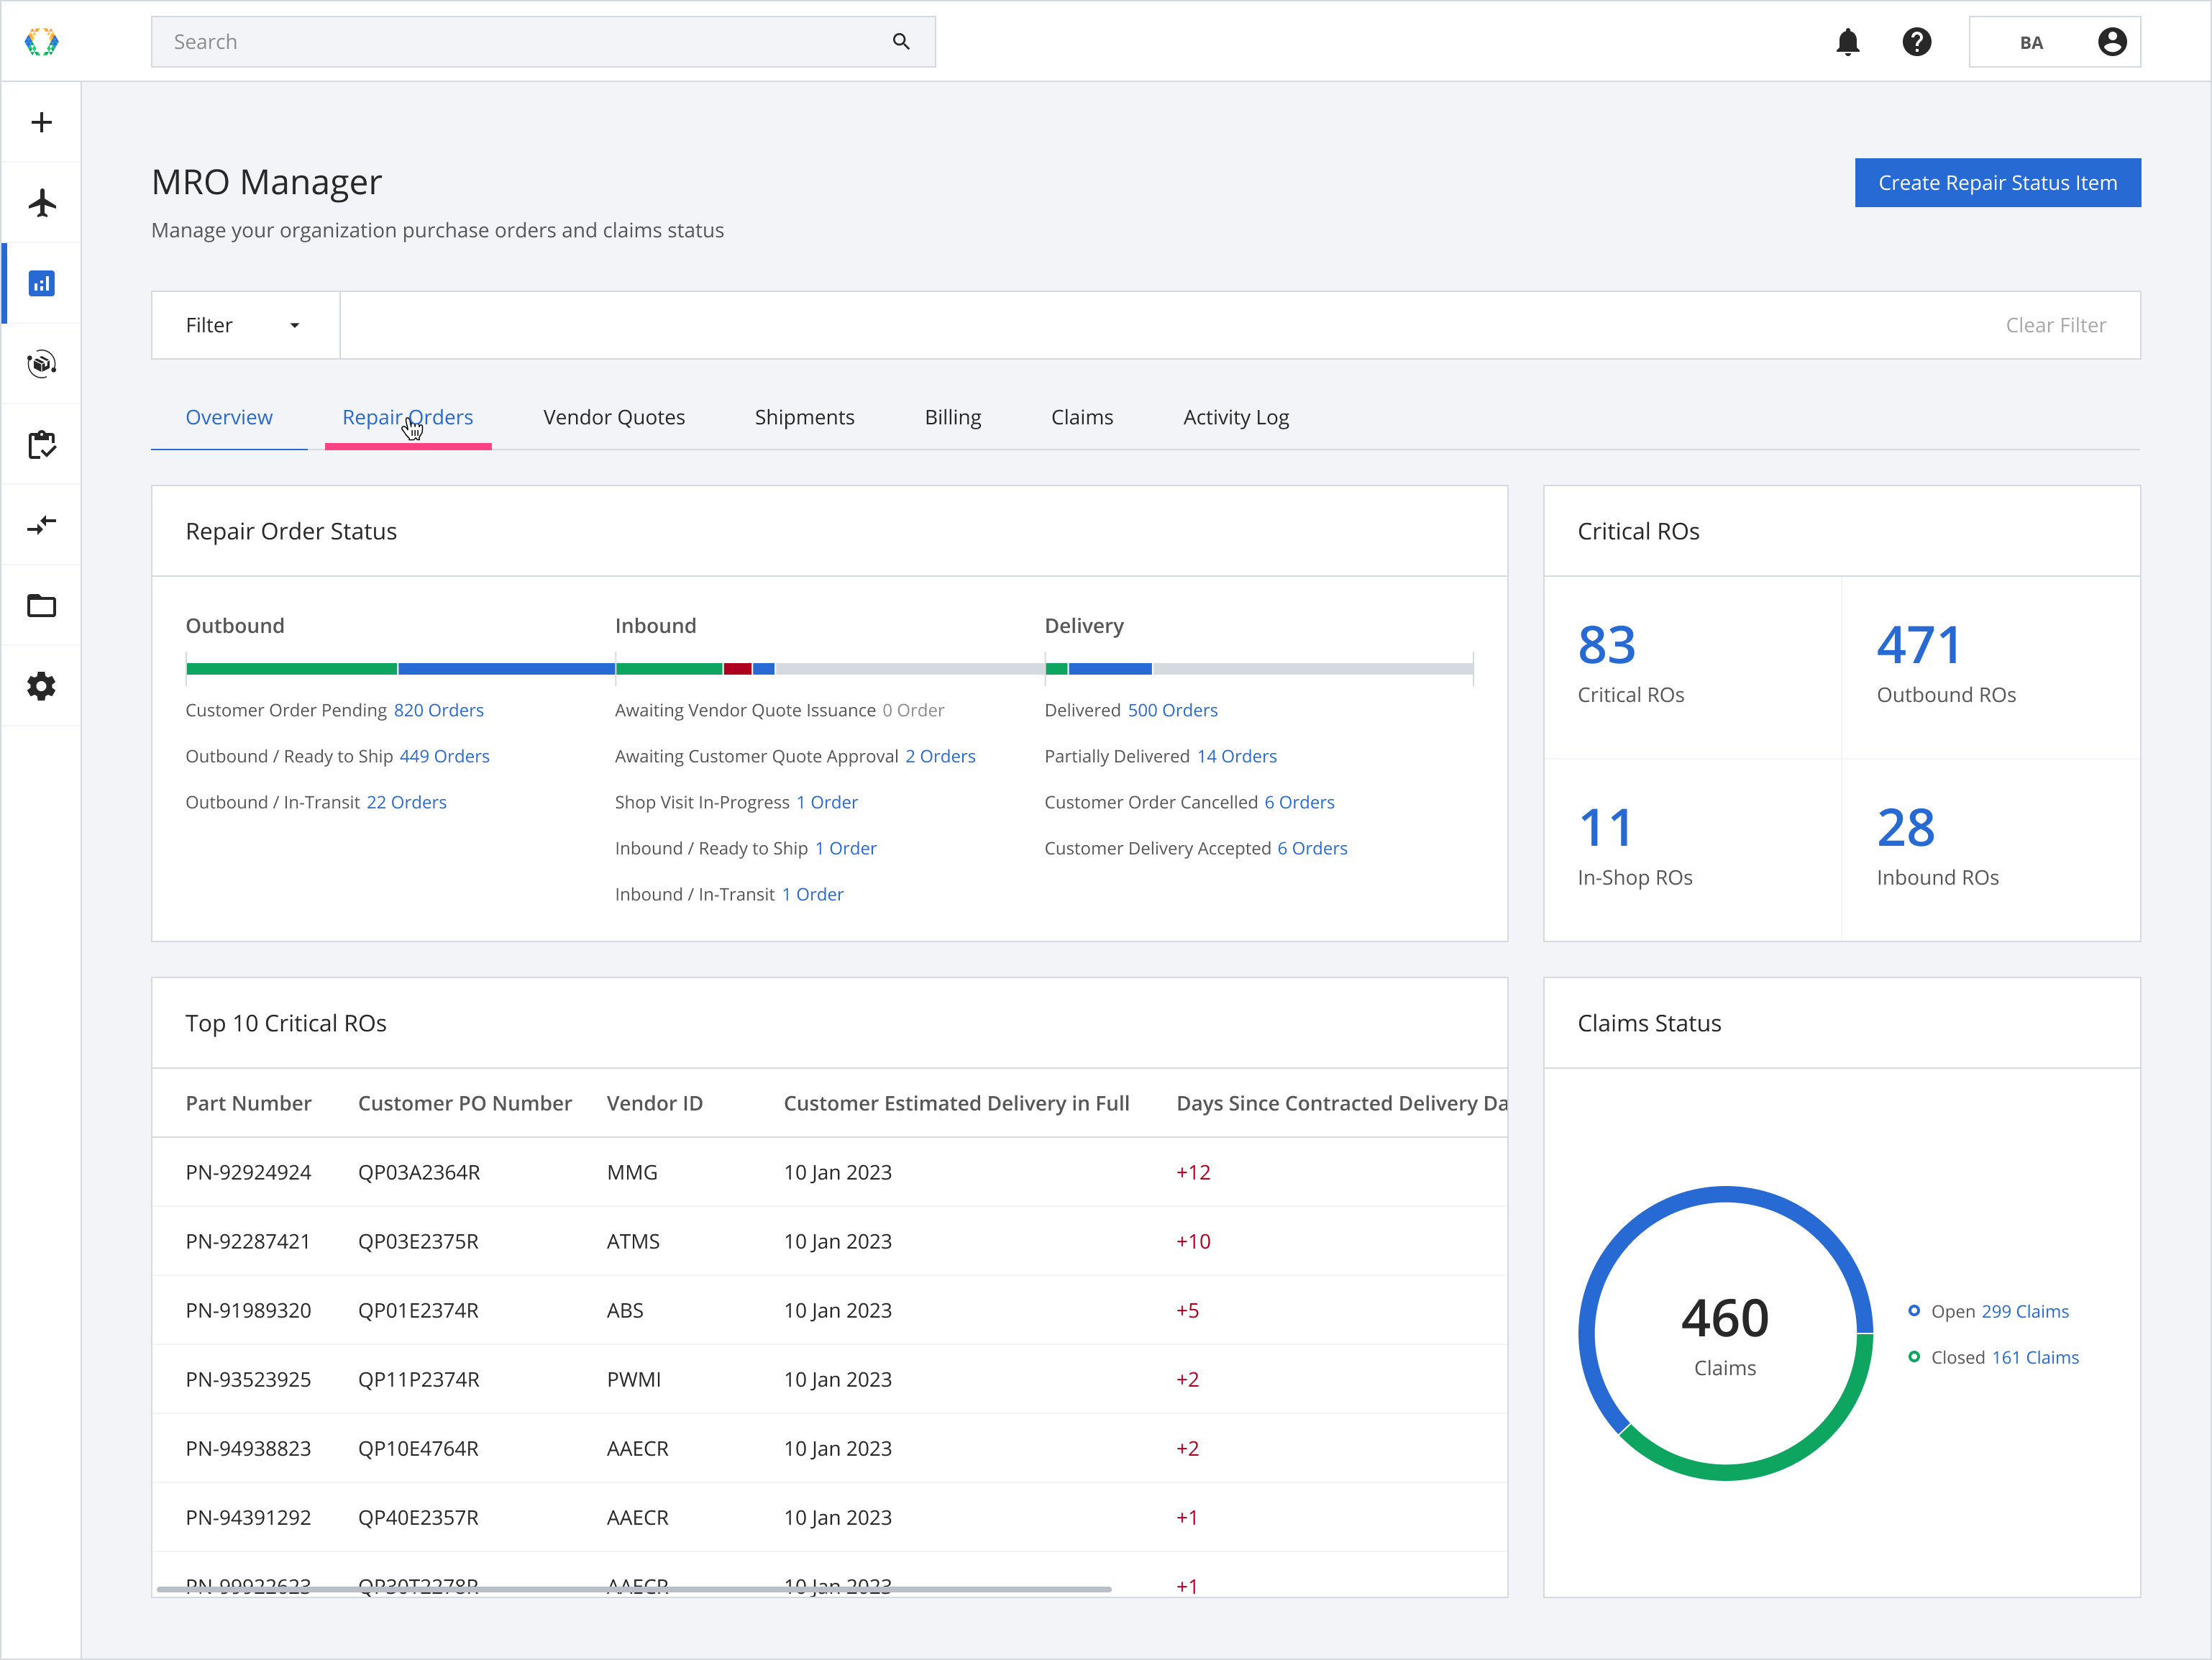
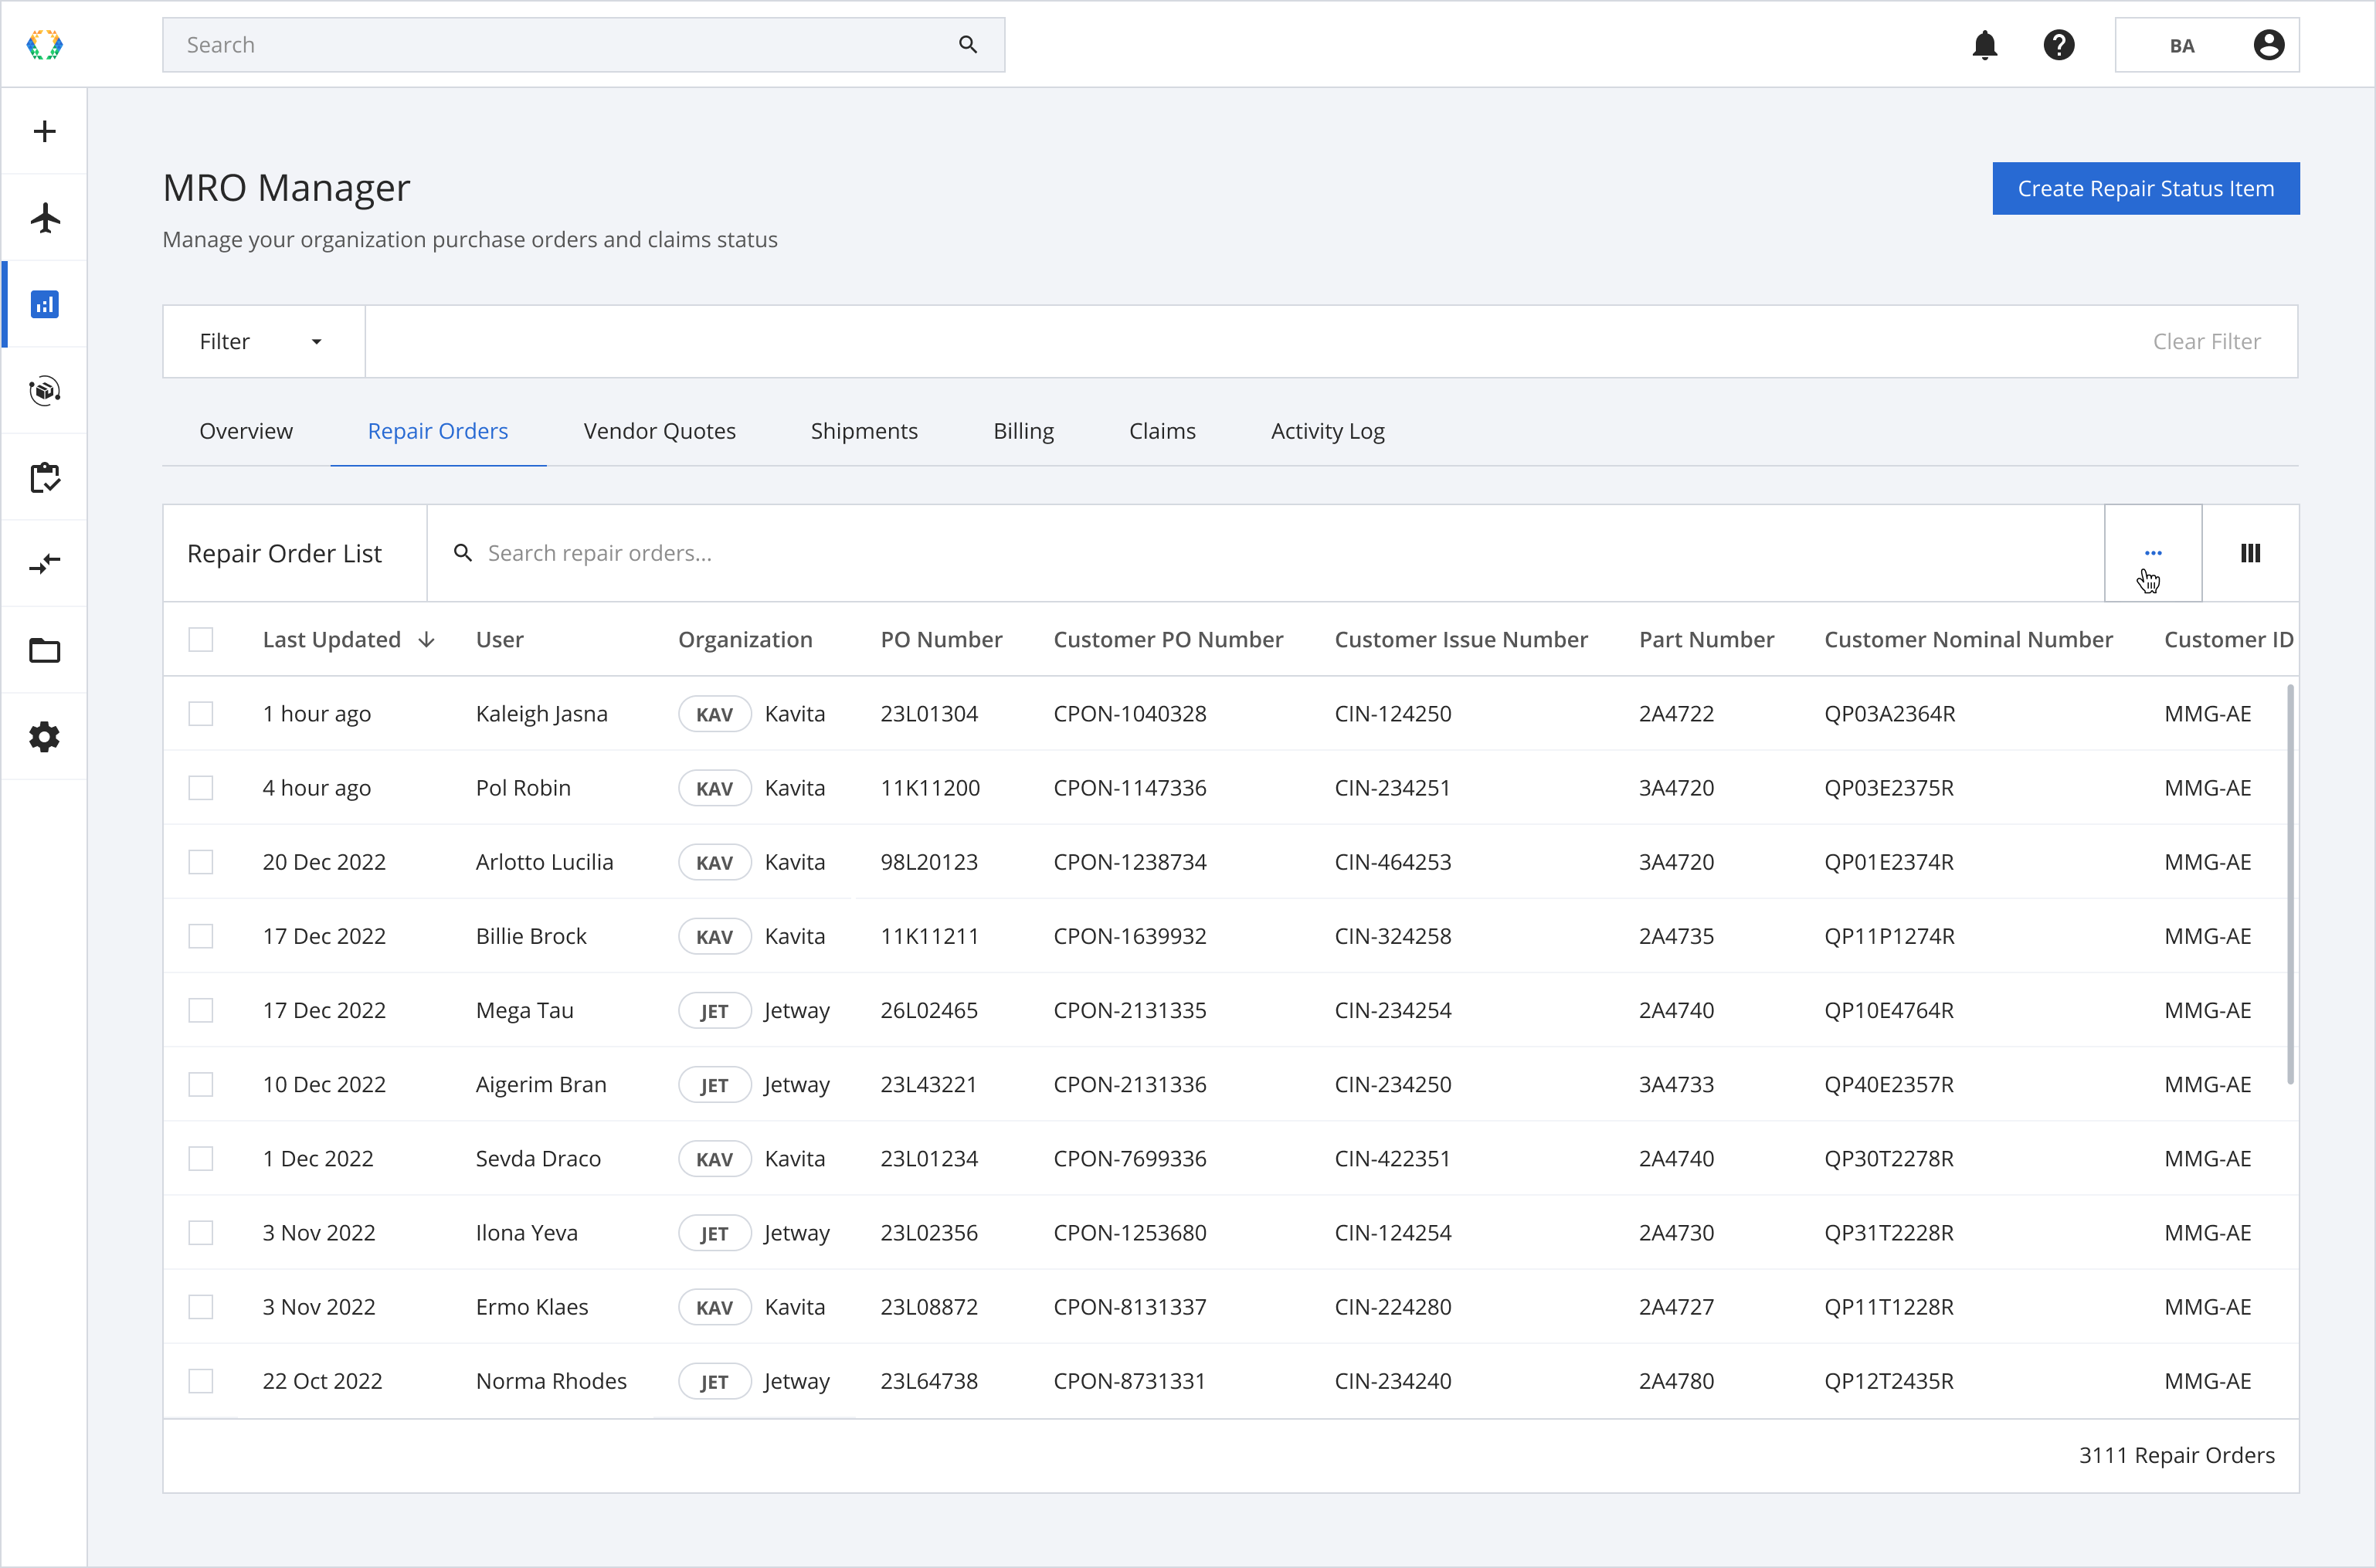
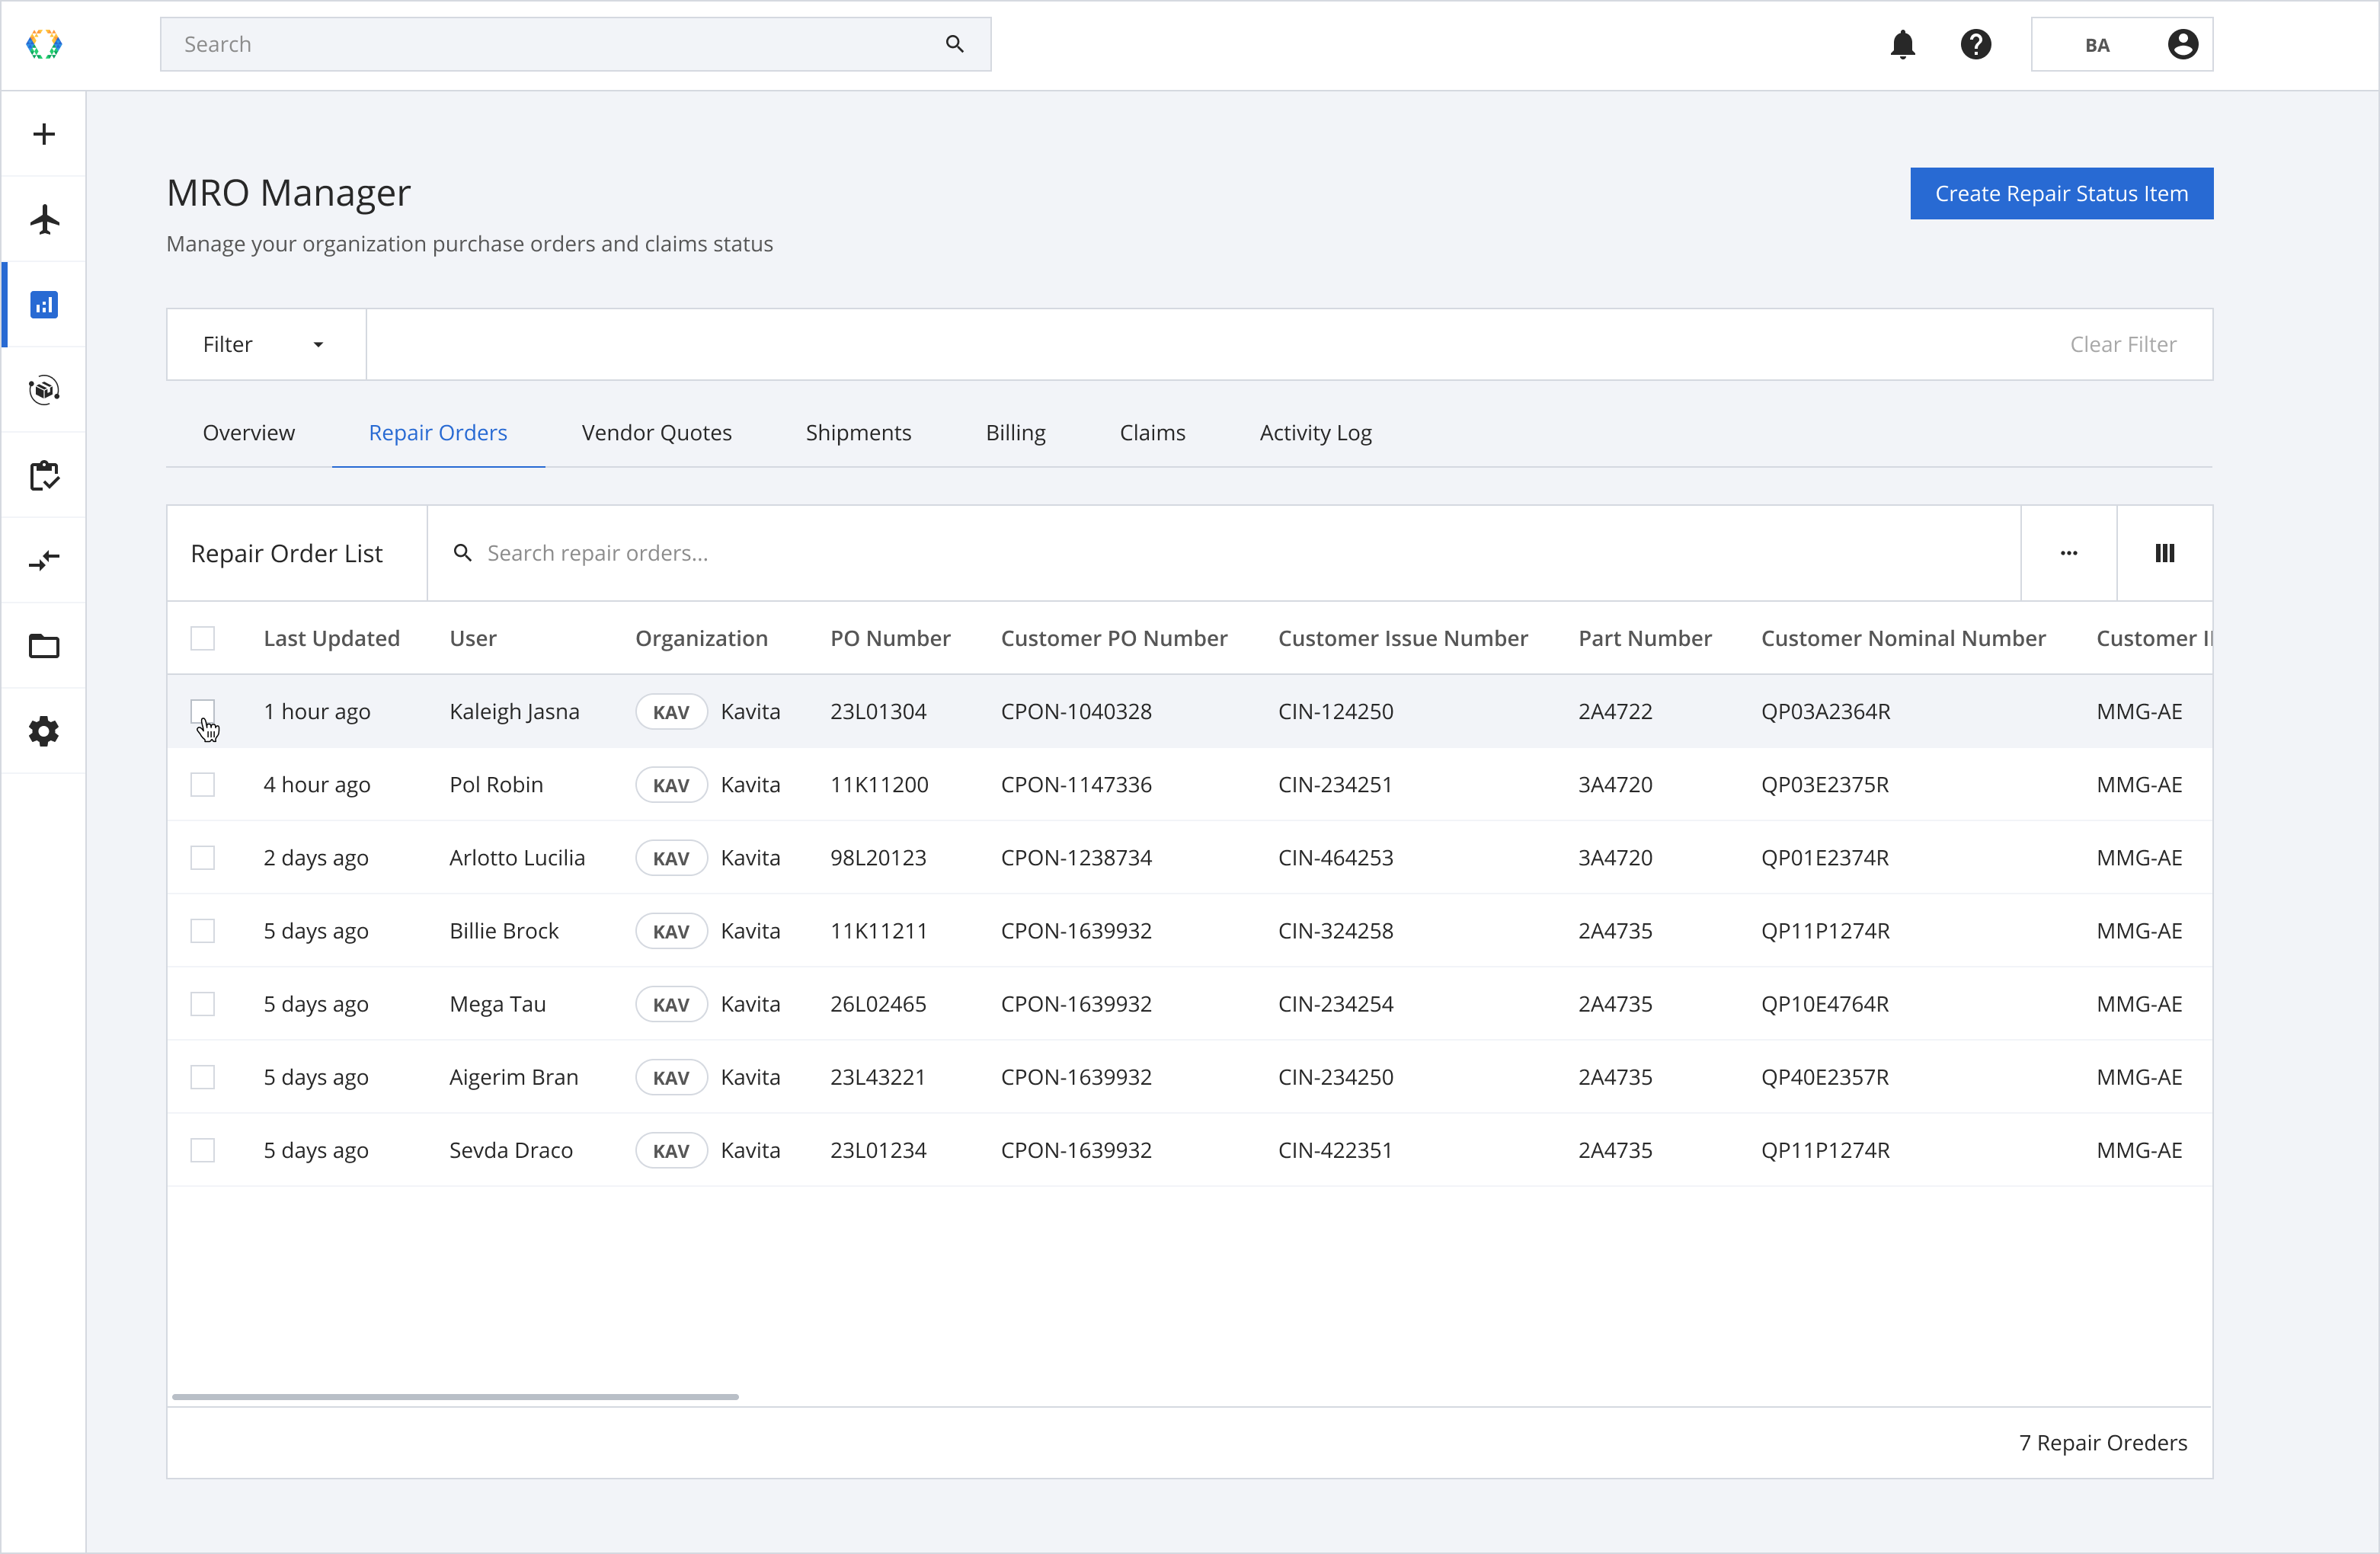
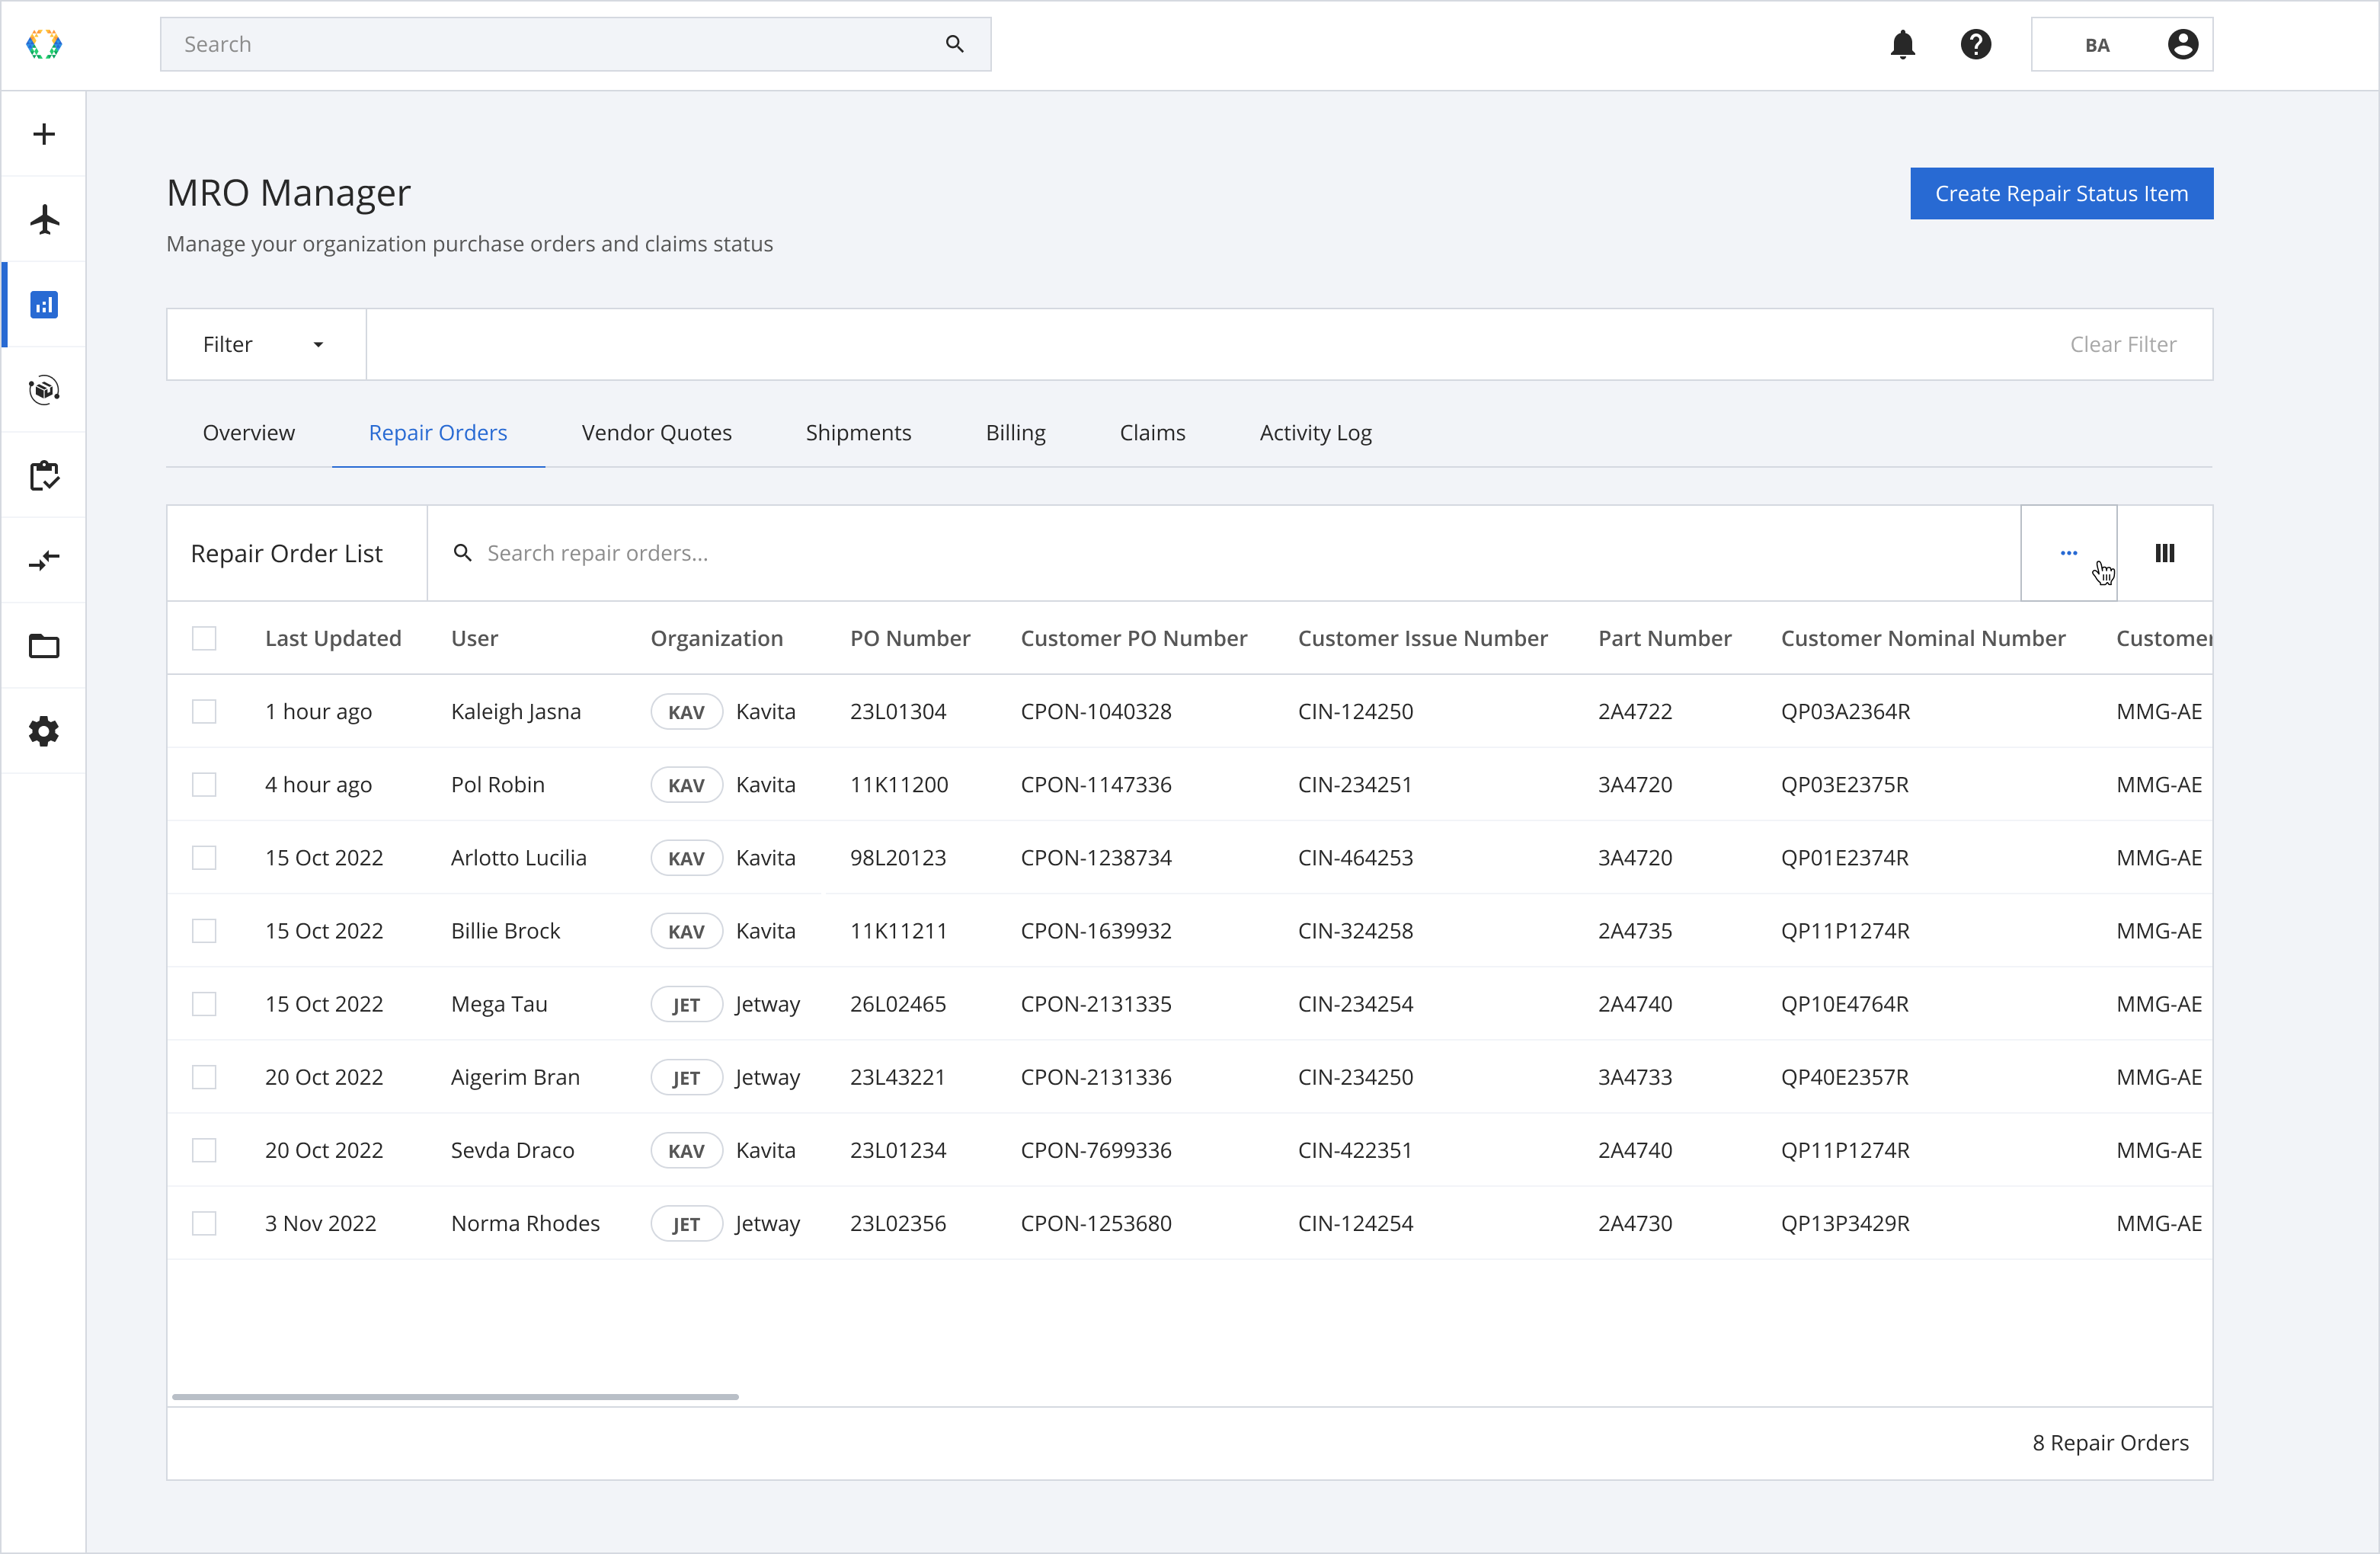
To view your organization's repair orders list, click on the 'Repair Orders' option on the MRO manager navigation tab.
Repair Orders List Layout
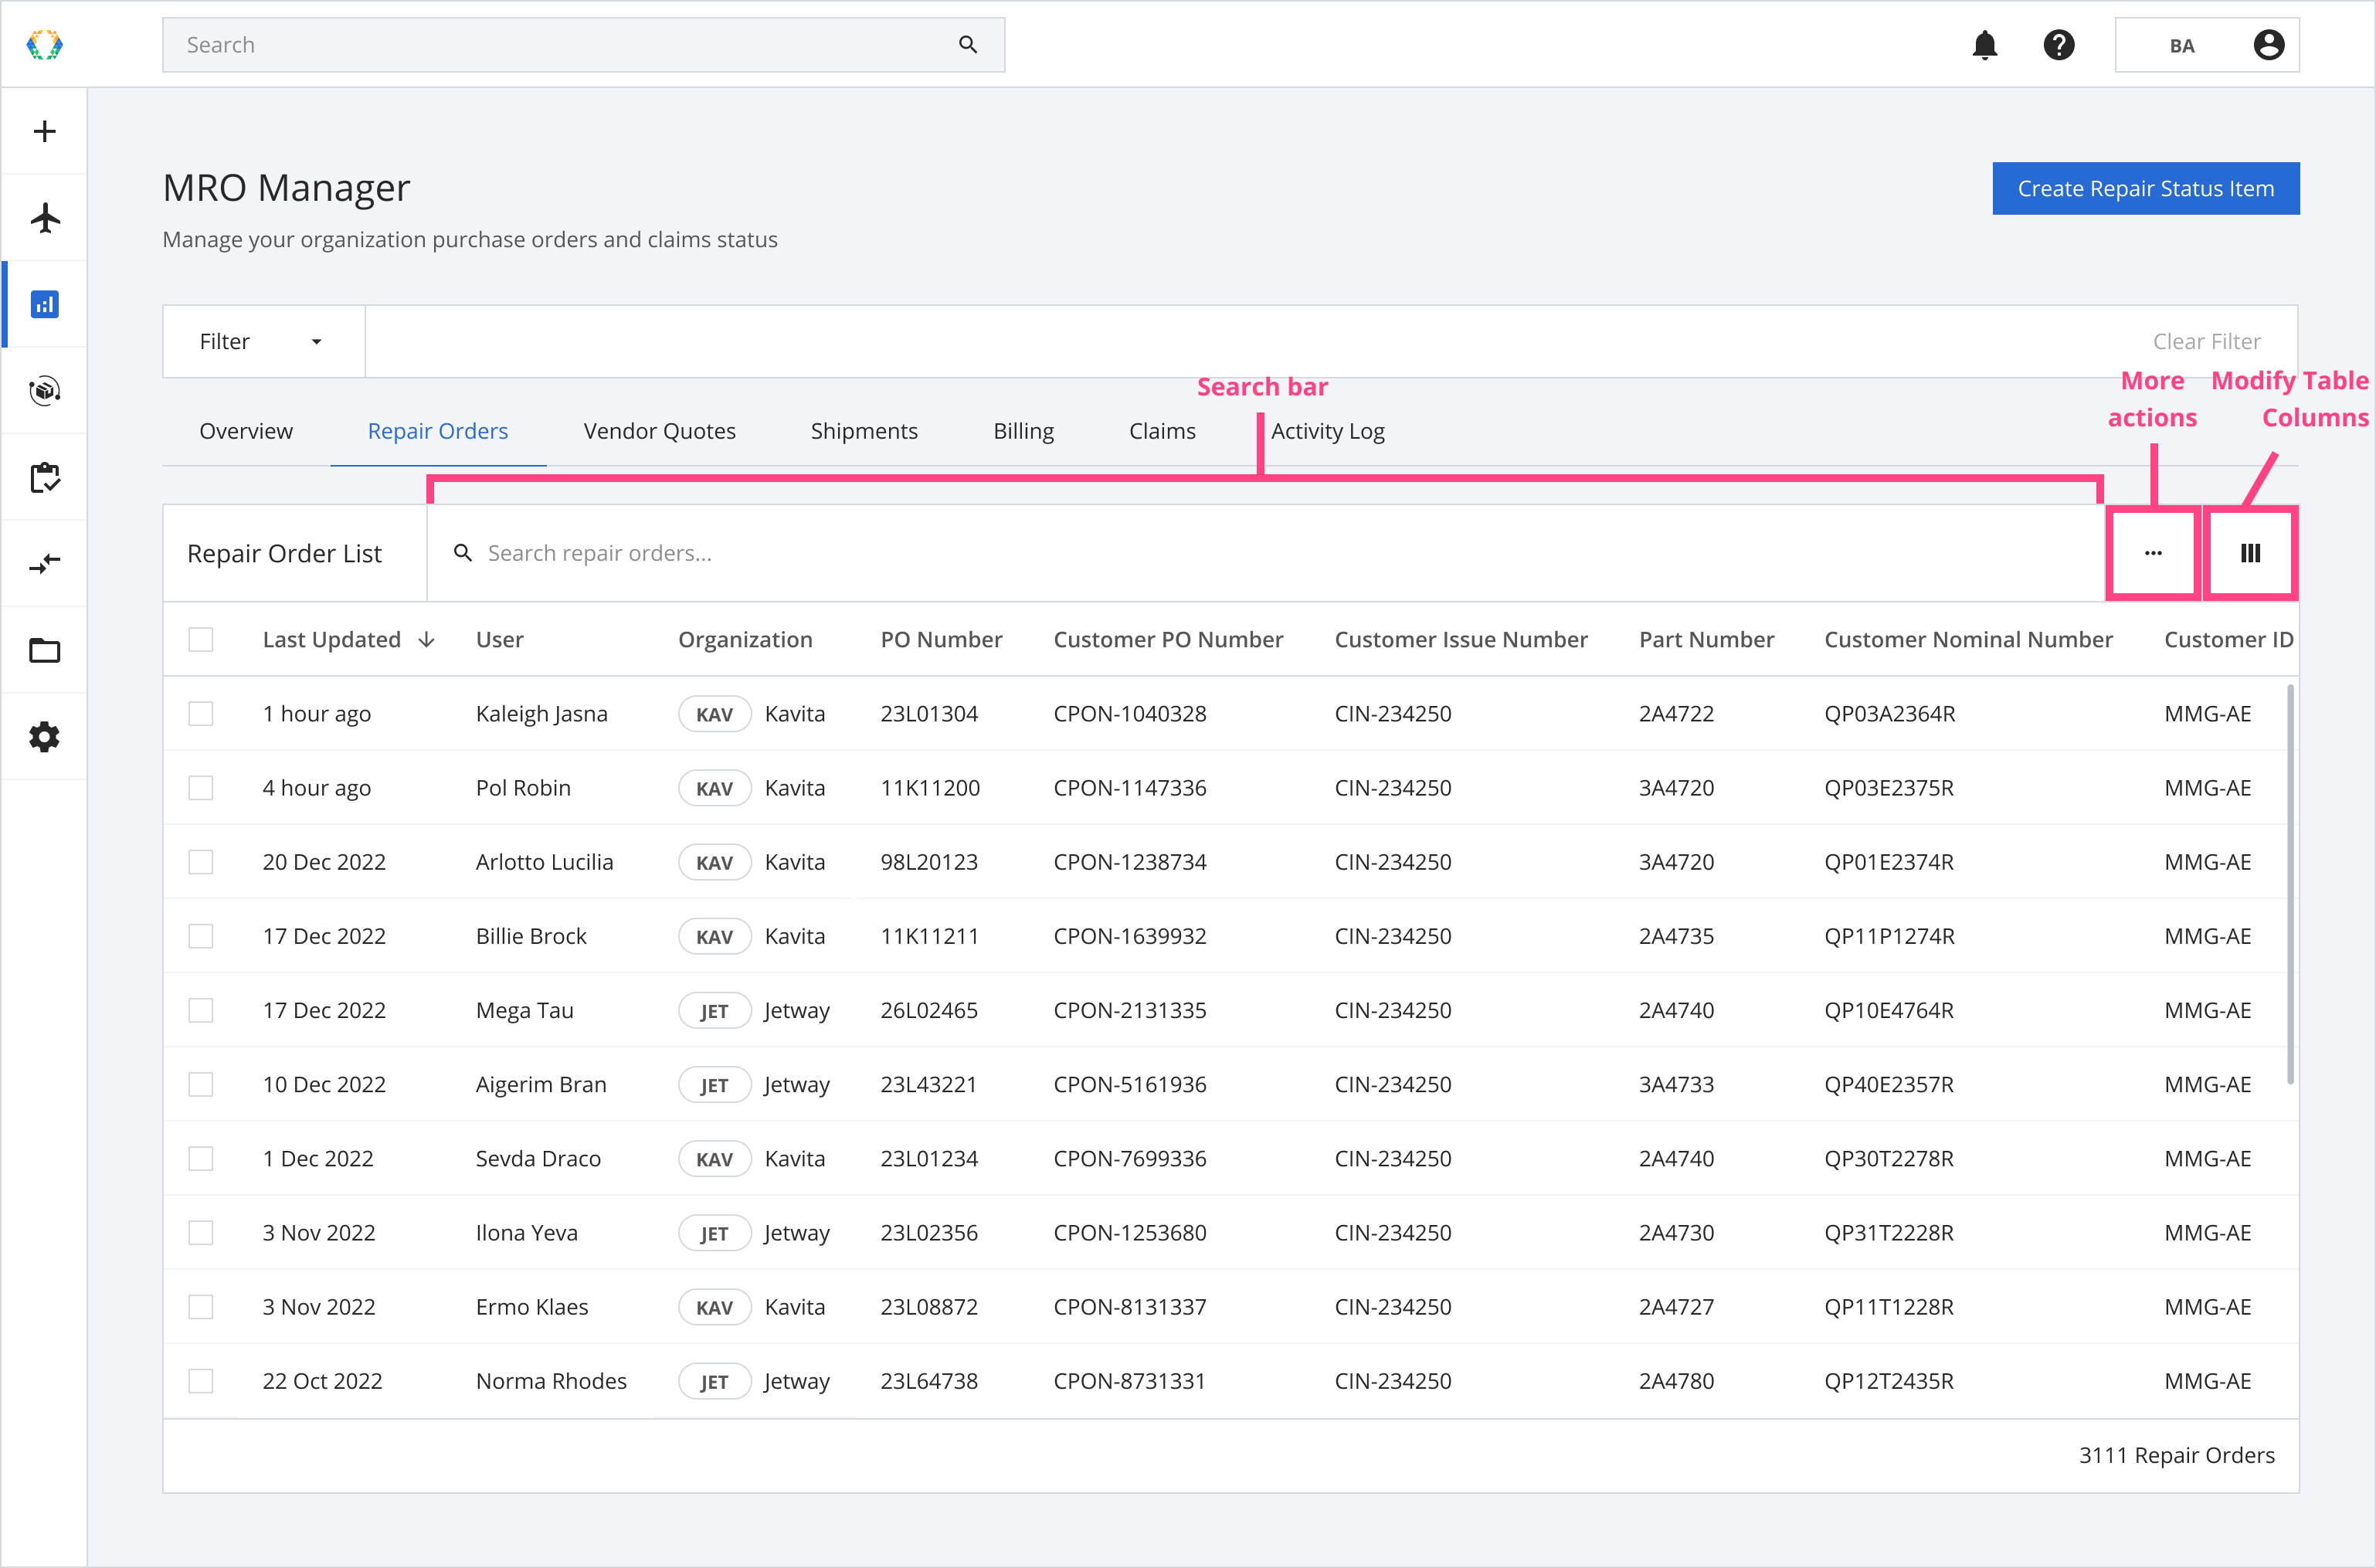
Searching on Repair Order List
The search bar on the Repair Order List allows you to search for specific repair orders within your organization. You can use a variety of parameters to search for your repair order.
| Searchable Parameters |
|---|
| Repair Order Status |
| Vendor ID |
| Customer ID |
| Vendor Name |
| Customer Name |
| Part Number |
| Ex ESN |
| Ex MSN |
| Ex ESN Model |
| Ex MSN Model |
| PO Number |
| Work Order number |
| Customer PO Number |
| Customer Work Order Number |
| Customer Issue Number |
| Customer Nominal Number |
| SECT Code |
| ASSY Code |
| ATA No. |
| Module Code |
| OTC Code |
| ORT Code |
Exporting Repair Order List
Export method will differ based on the number of Repair Orders
- Exporting less than 500 repair orders, the excel template will be downloaded onto your local computer immediately.
- Exporting excel templates with more than 500 repair orders will be sent to you via email.
Option 1: Exporting specific repair orders
Option 2: Exporting all repair orders on the Repair Order List
| Available Export Data Type Templates |
|---|
| Table Data |
| Repair Order Details Template |
| Outbound Delivery Schedule Template |
| Repair Order Details |
| Vendor Delivery Schedule Report |
| Vendor Delivery Schedule Template |
| Inbound Delivery Schedule Template |
| Quotation Details Template |
| Repair Order Quotations |
| Repair Order Claims |
Option 1: Export specific repair orders
Step 1: From the repair order list, select the repair orders you want to export data.

Step 2: Click 'Export' and choose the data type template you want to export.
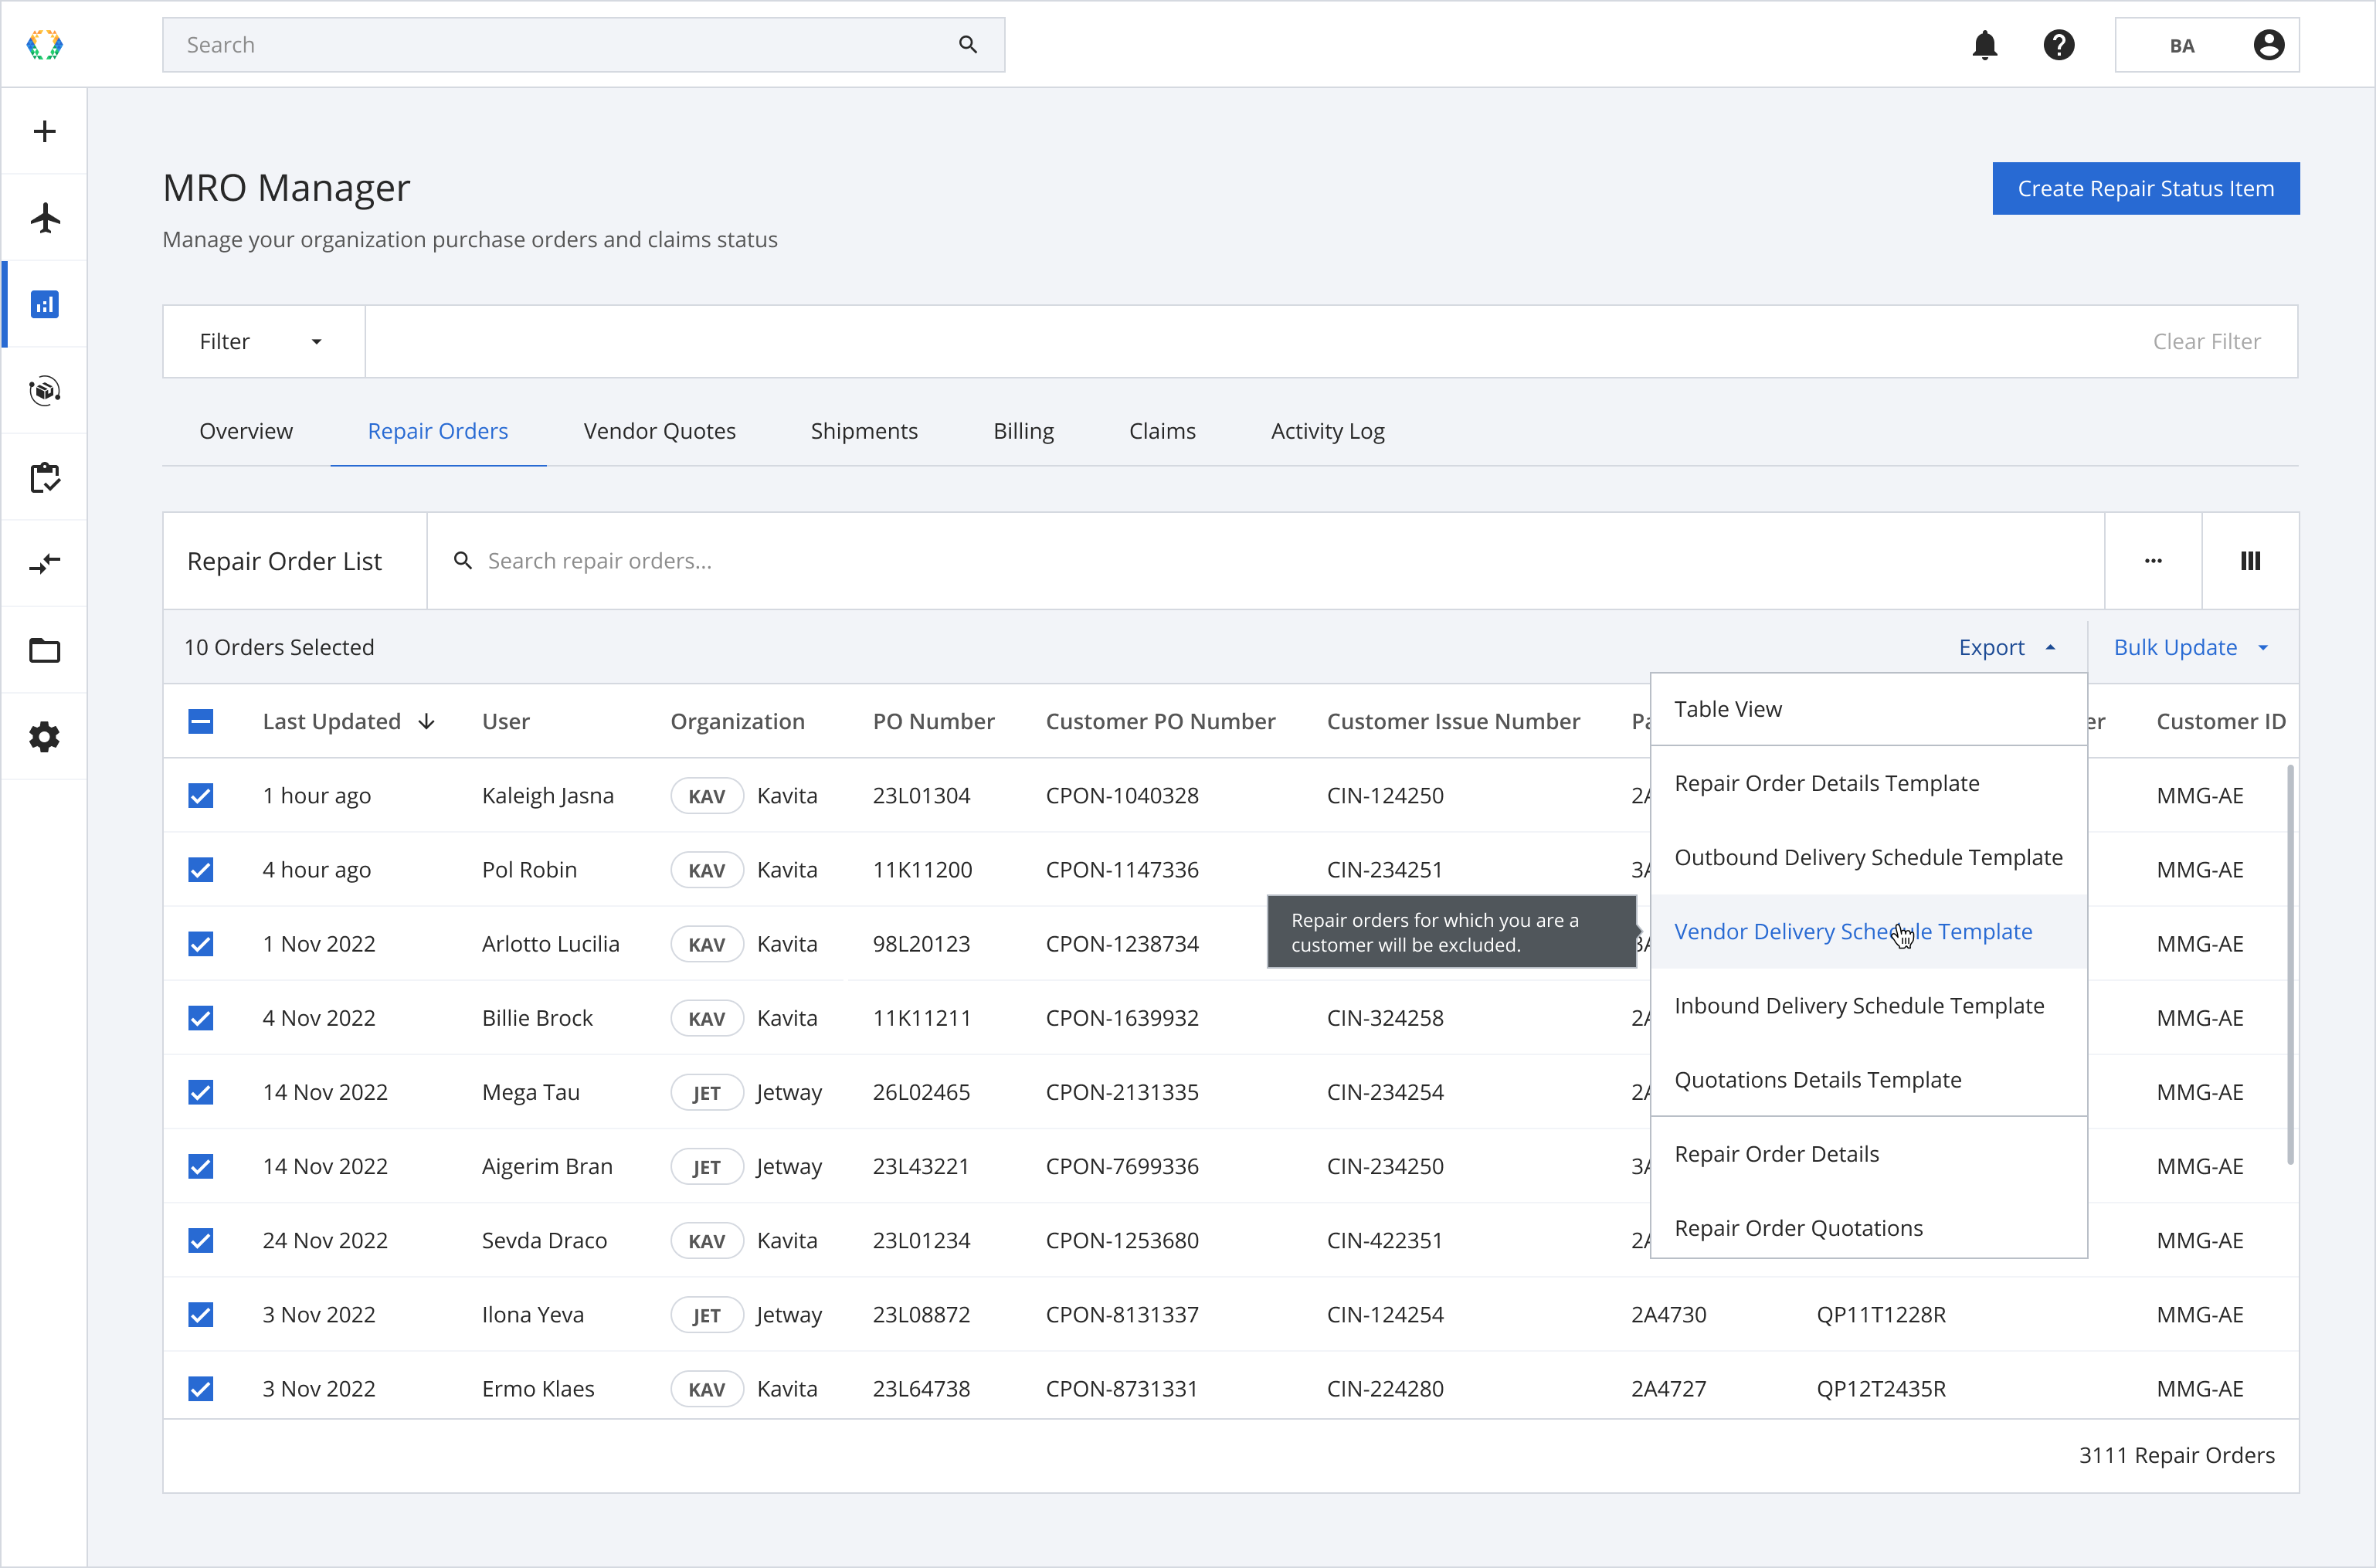
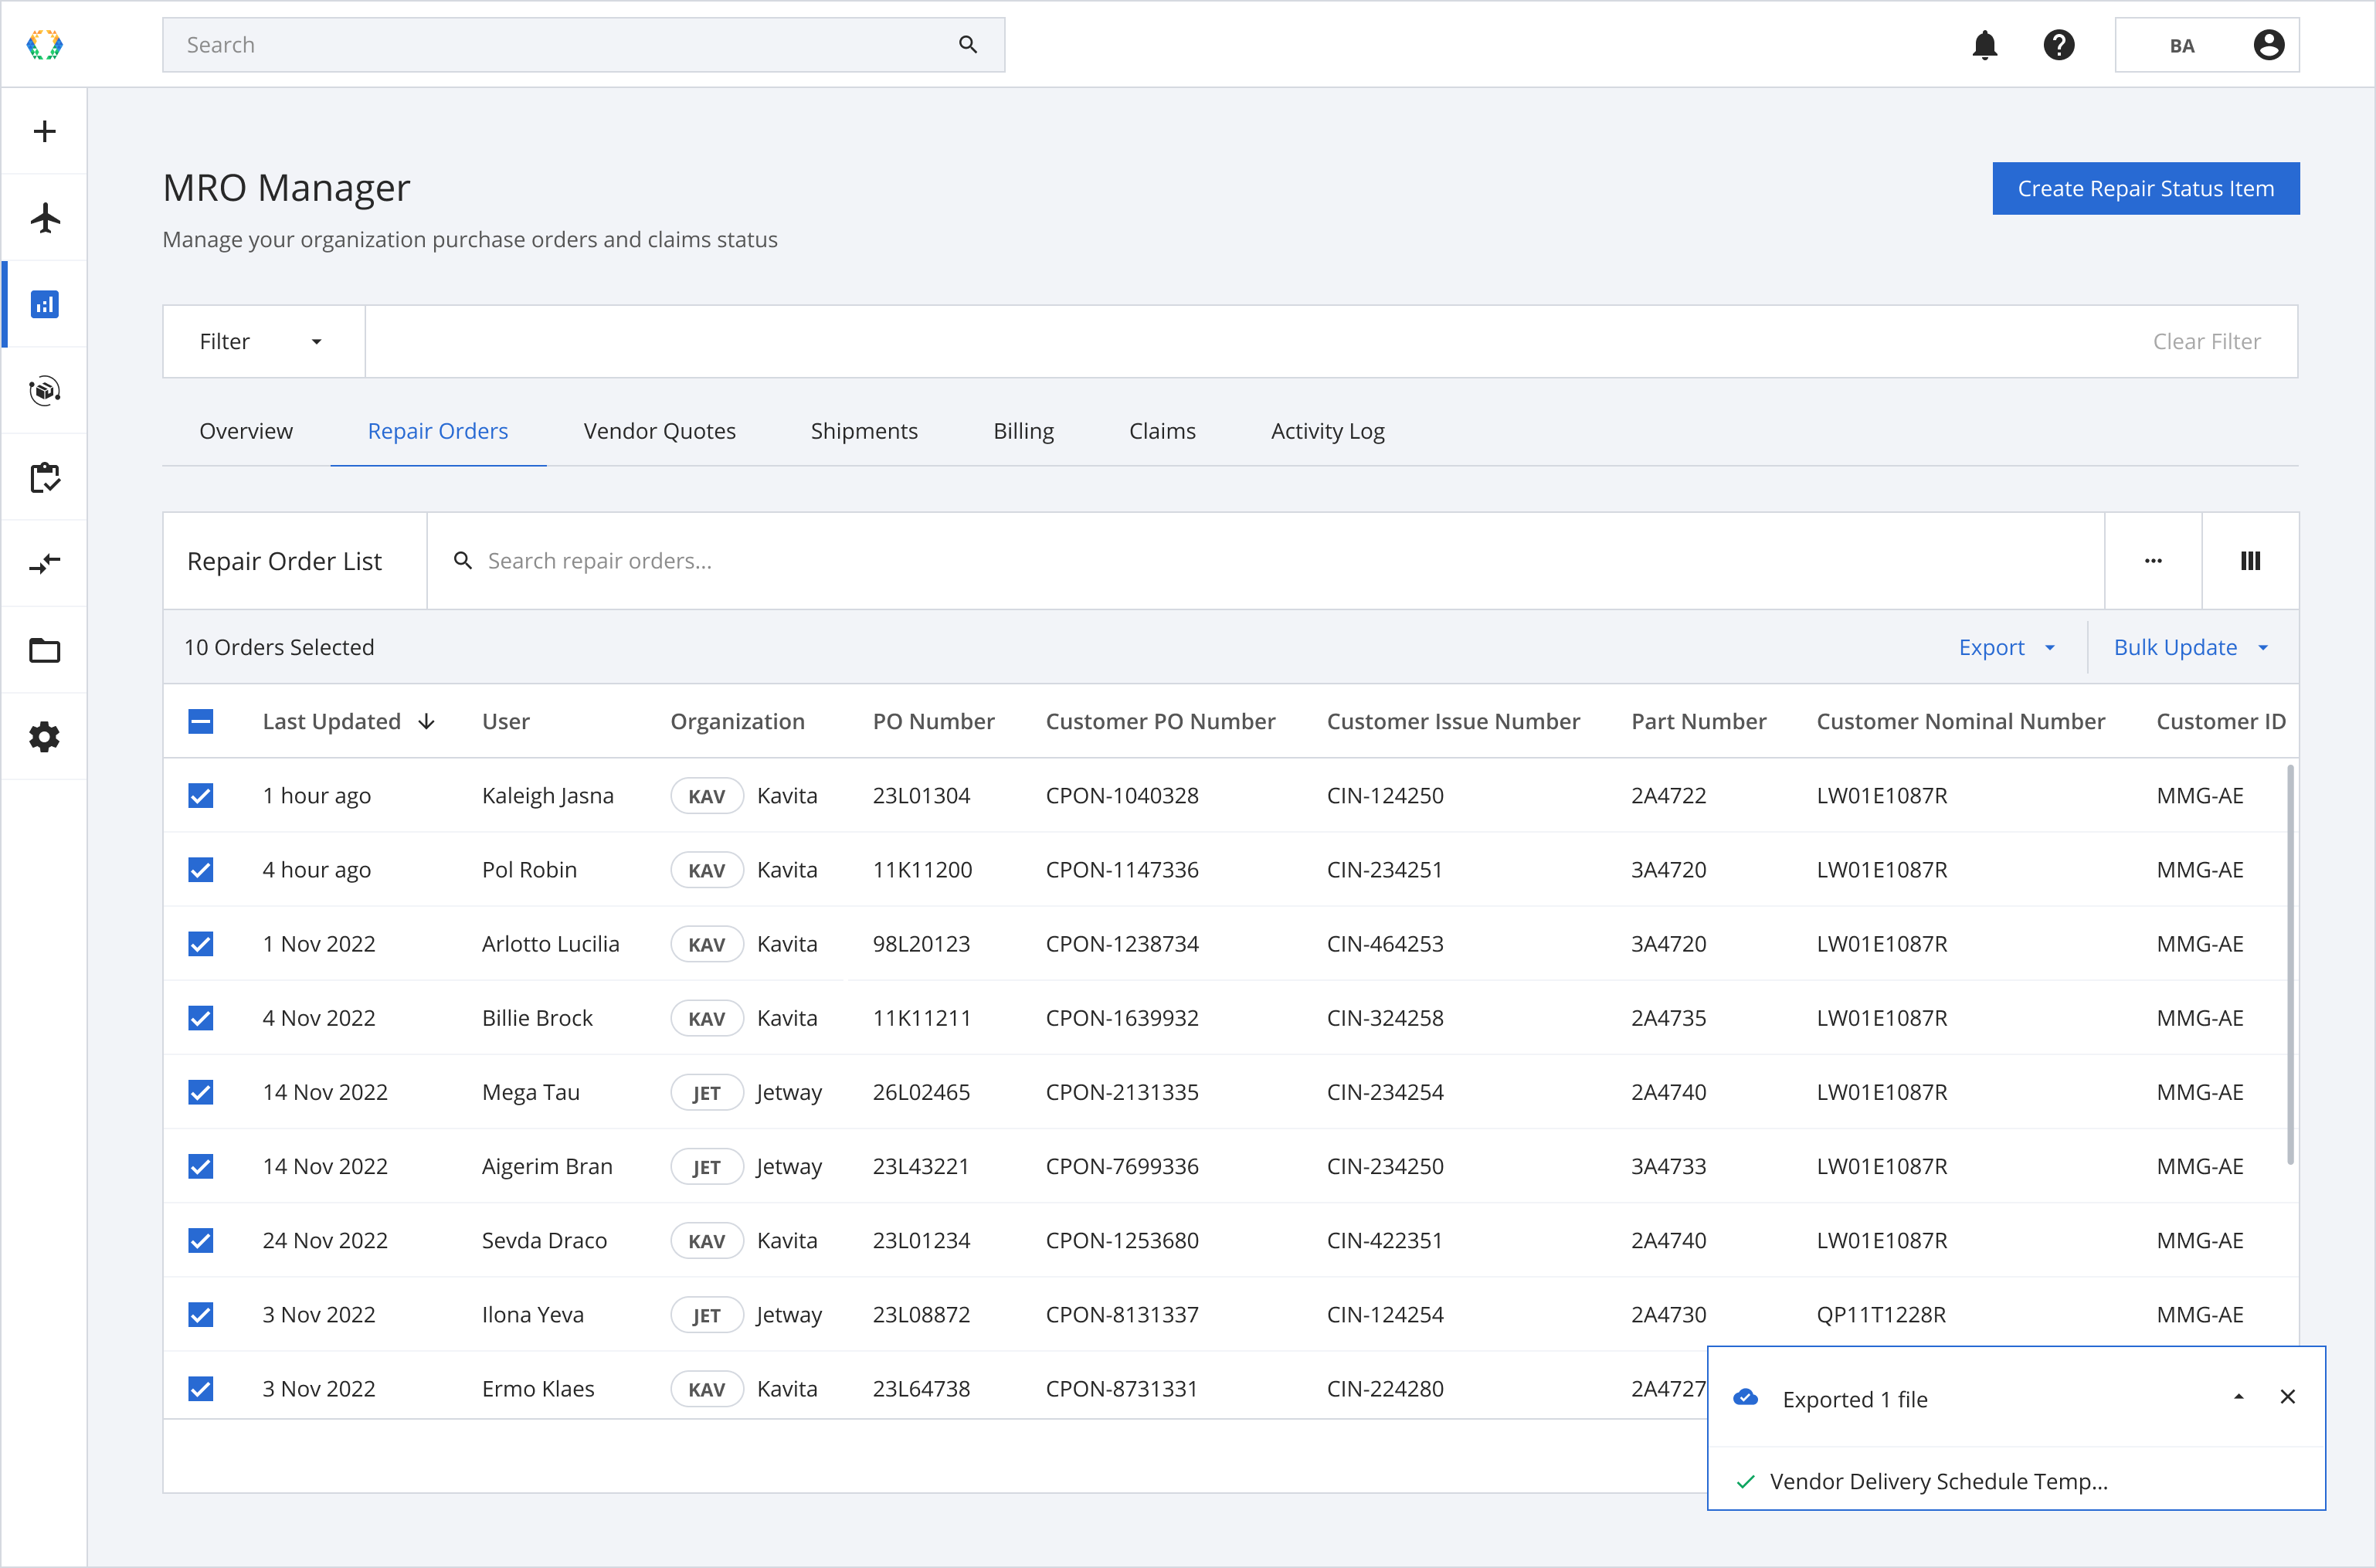
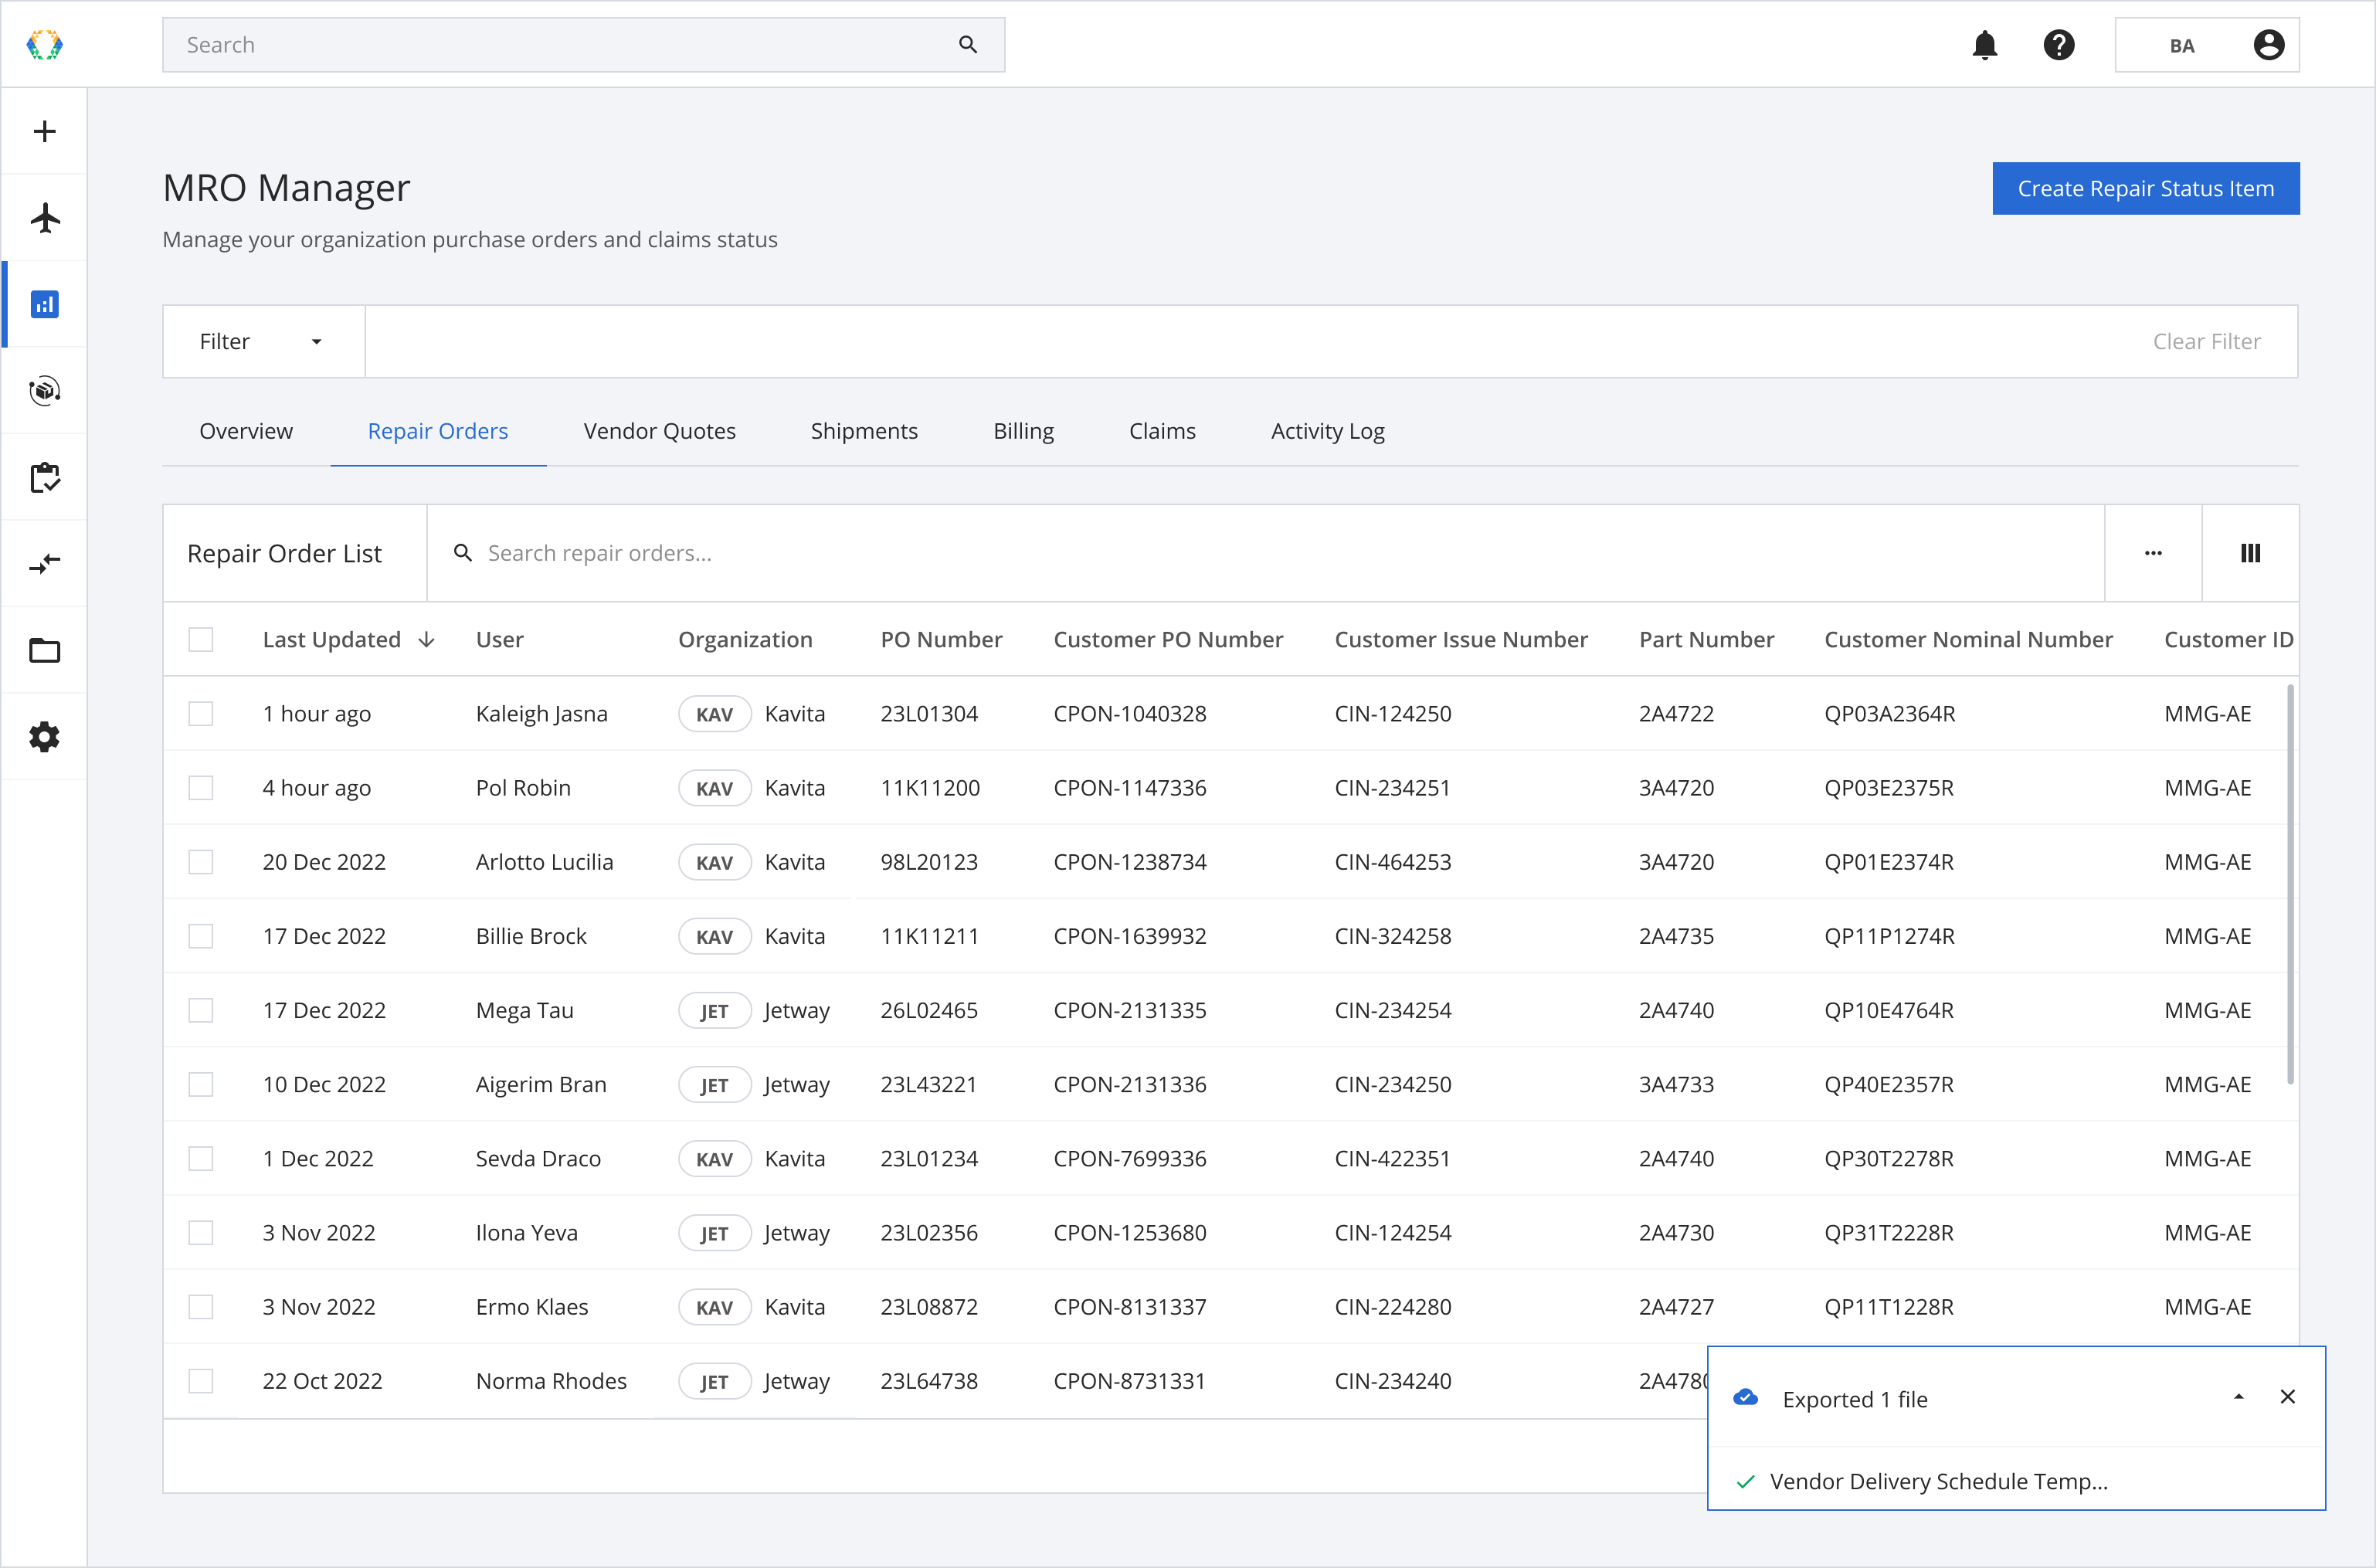
Step 3: The data will be exported in excel format.
Option 2: Export all repair orders on the Repair Order List
You can export all the data in the Repair Order List in any data type template option.
Step 1: Click on the 'More Options' button to expand the dropdown list.
Step 2: Click 'Export All' and choose the data type template you want to export.
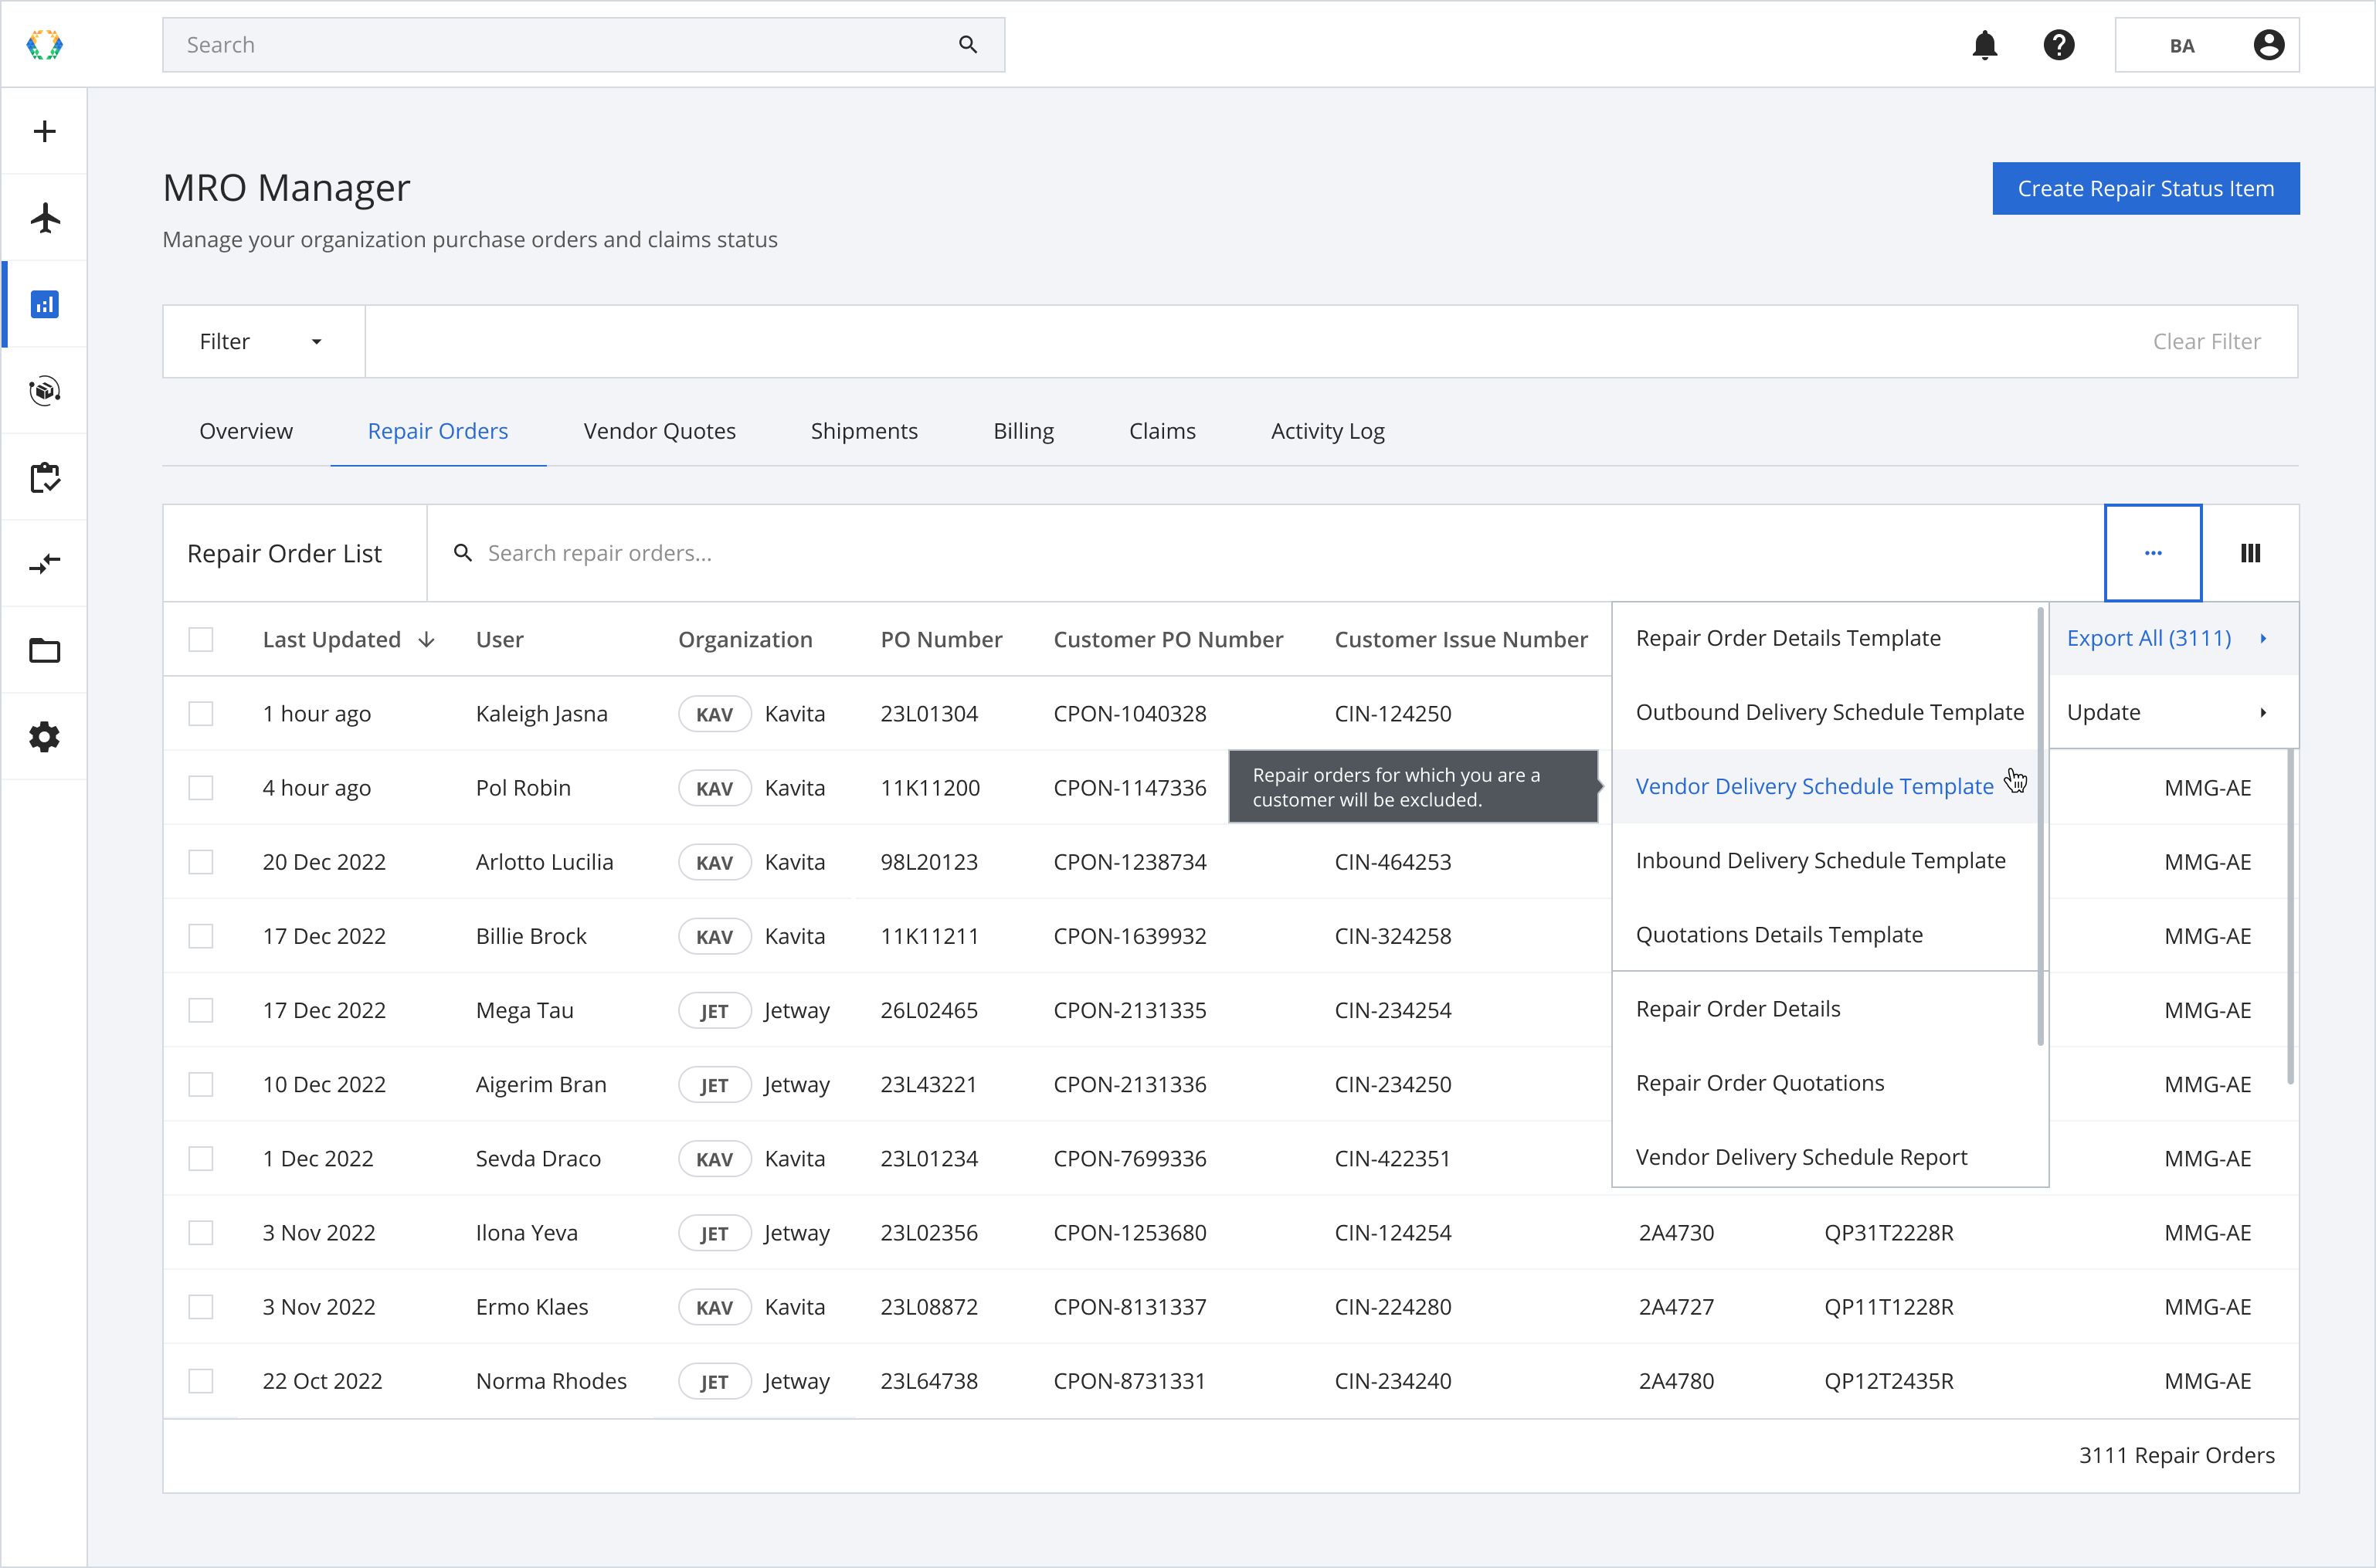
Step 3: The data will be exported in excel format.
Updating Repair Orders
There are two ways to update your repair orders.
Option 1: Updating repair orders directly
Option 2: Updating specific repair orders using excel template
Option 3: Updating with existing excel template
There are 6 update types for you to perform.
| Update Type | Description |
|---|---|
| Repair Order Details | Update the information on your repair orders. |
| Outbound Delivery Schedule | Edit/Change the delivery schedule of your repair order to the vendor. |
| Vendor Delivery Schedule | Edit/Change the schedule of the vendor delivery date of your repair order. |
| Inbound Delivery Schedule | Edit/Change the delivery schedule of your repair order that will be returned to you. |
| Vendor Quote Details | Update the quote details you received from the vendor. |
| Create Customer Quote | Create a quotation for your customer. |
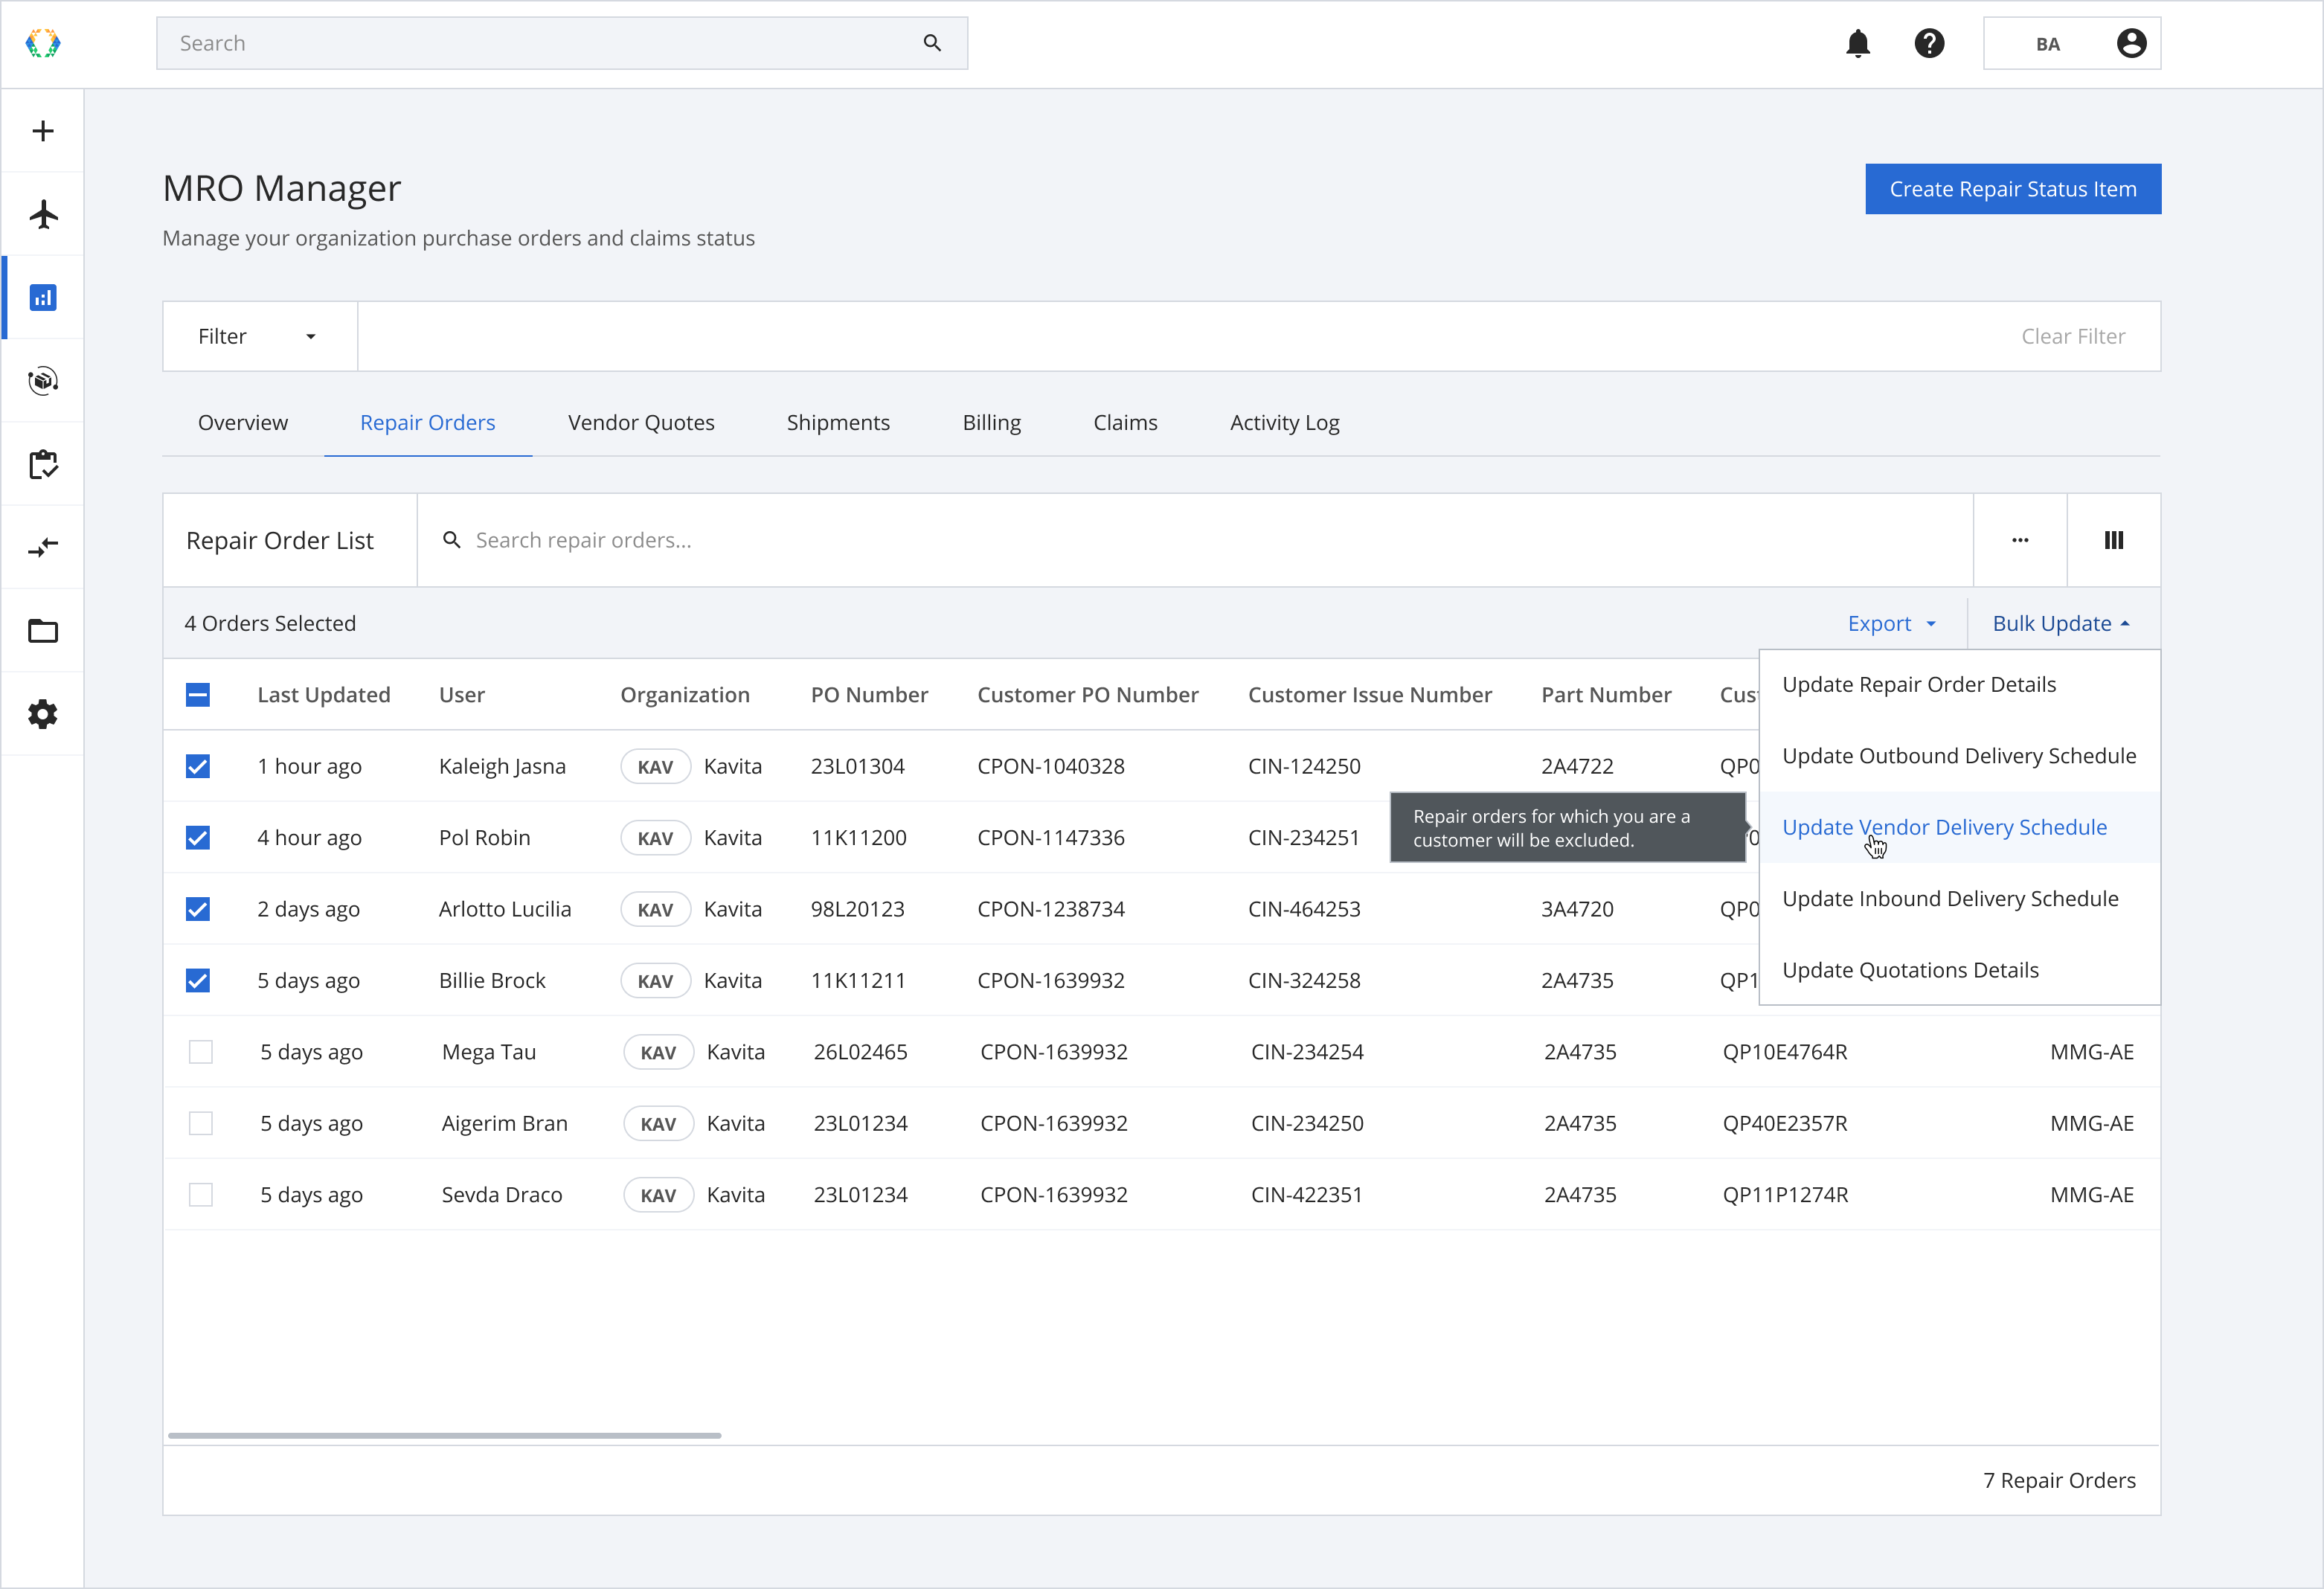
Option 1: Updating repair orders directly
Step 1: Select the repair orders you want to update.

Step 2: Click 'Bulk Update' and choose the desired update option from the dropdown list.

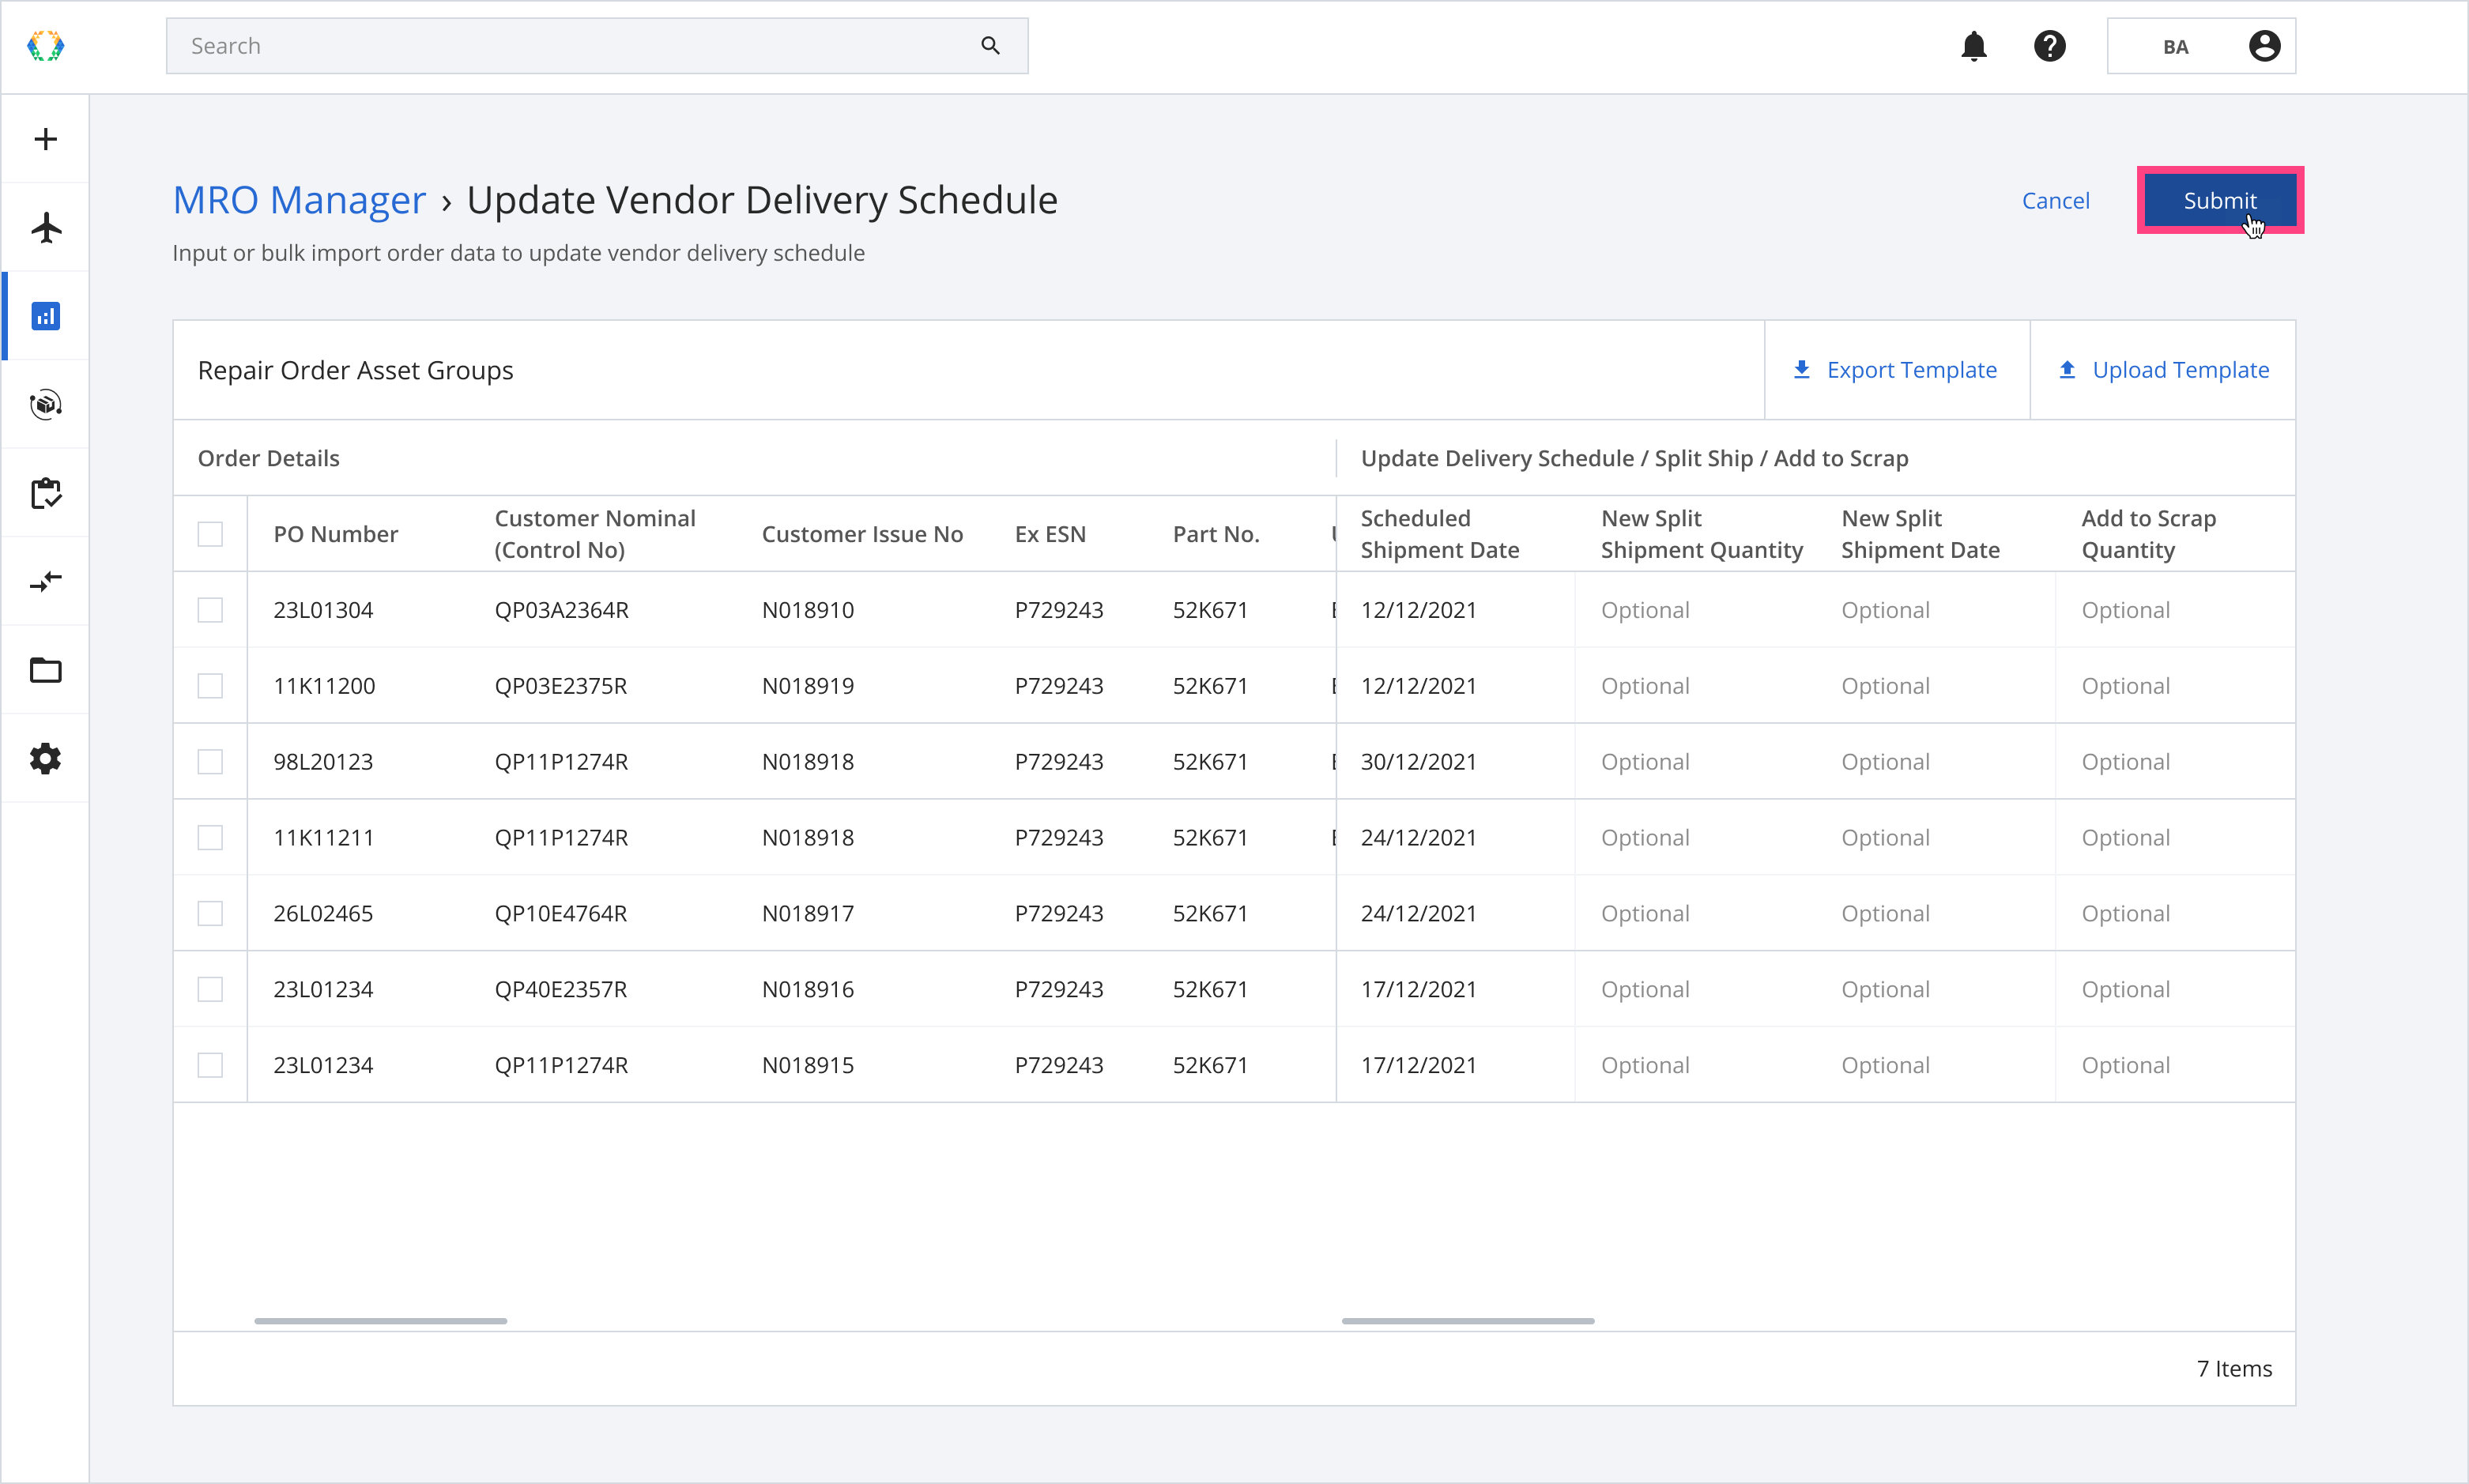
Step 3: You will be redirected to a page on which the selected repair orders will be shown for you to update them.
Step 4: Once you confirm all details, click 'Submit' to complete the update.

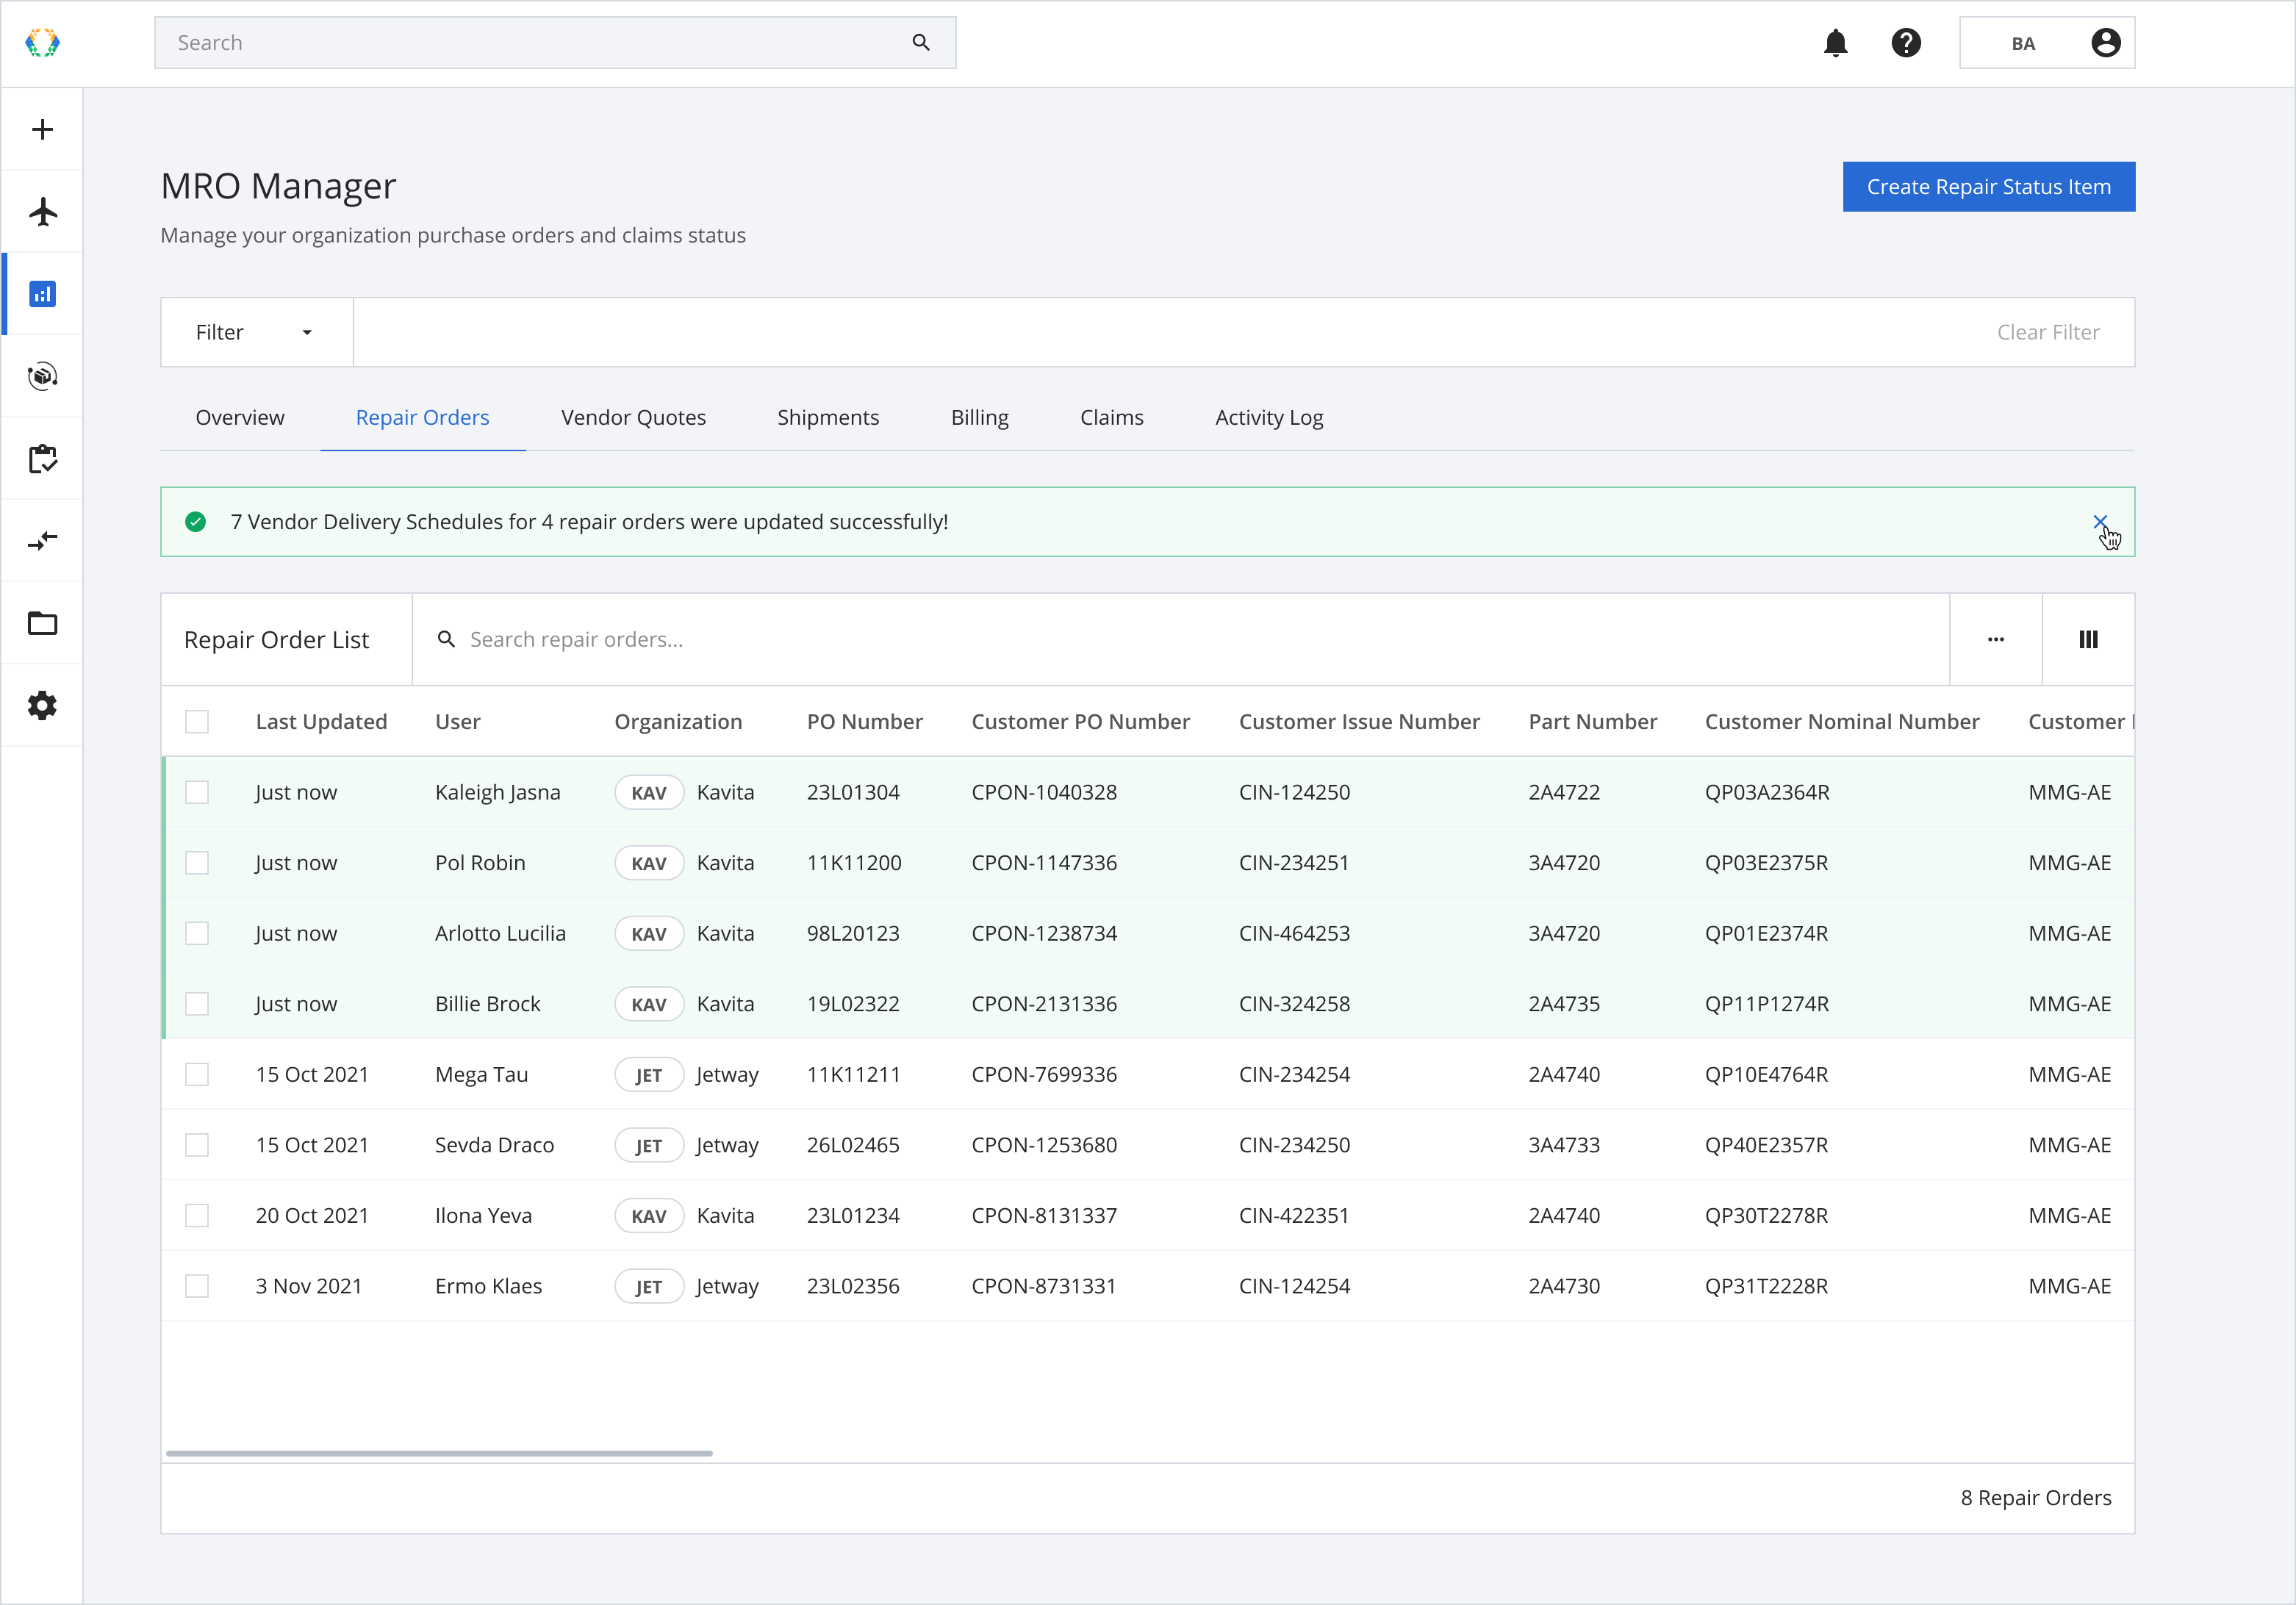
Once your repair orders are successfully updated, a green banner will appear at the top of the repair order list.
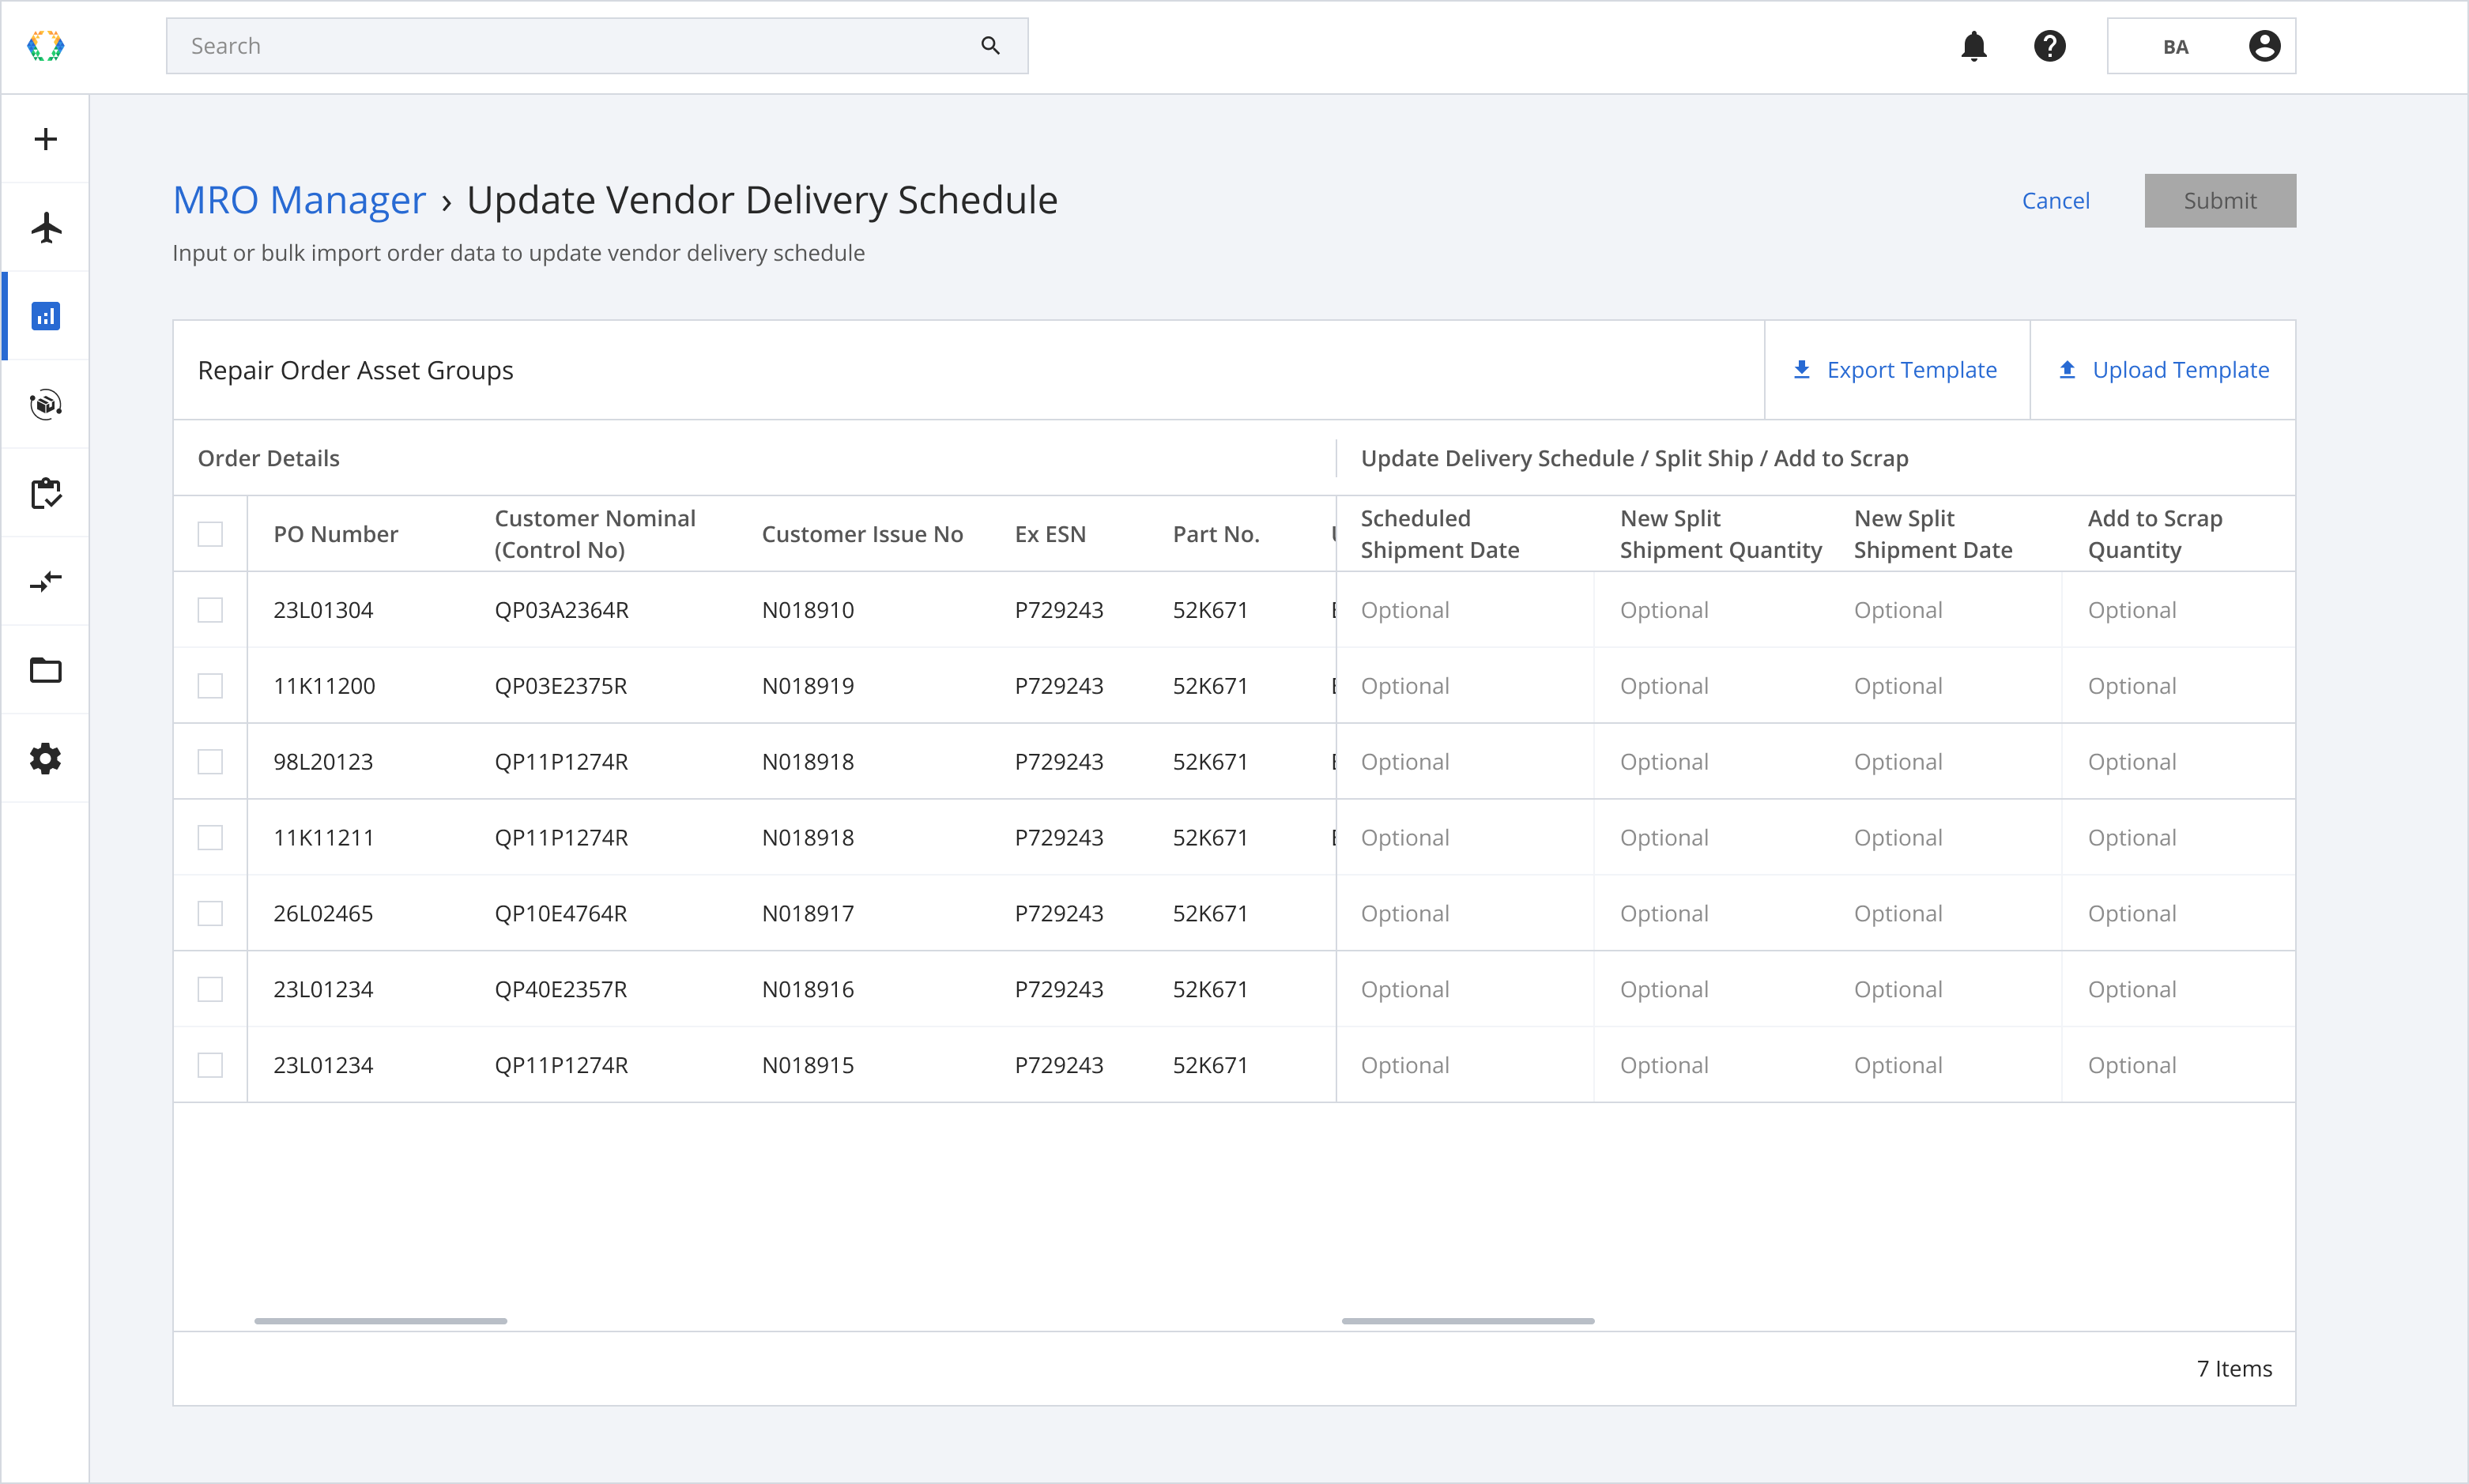
Option 2: Updating specific repair orders using excel template
Step 1: Select the repair order you want to update.
Step 2: Click 'Bulk Update' and choose the desired update option on the dropdown list.
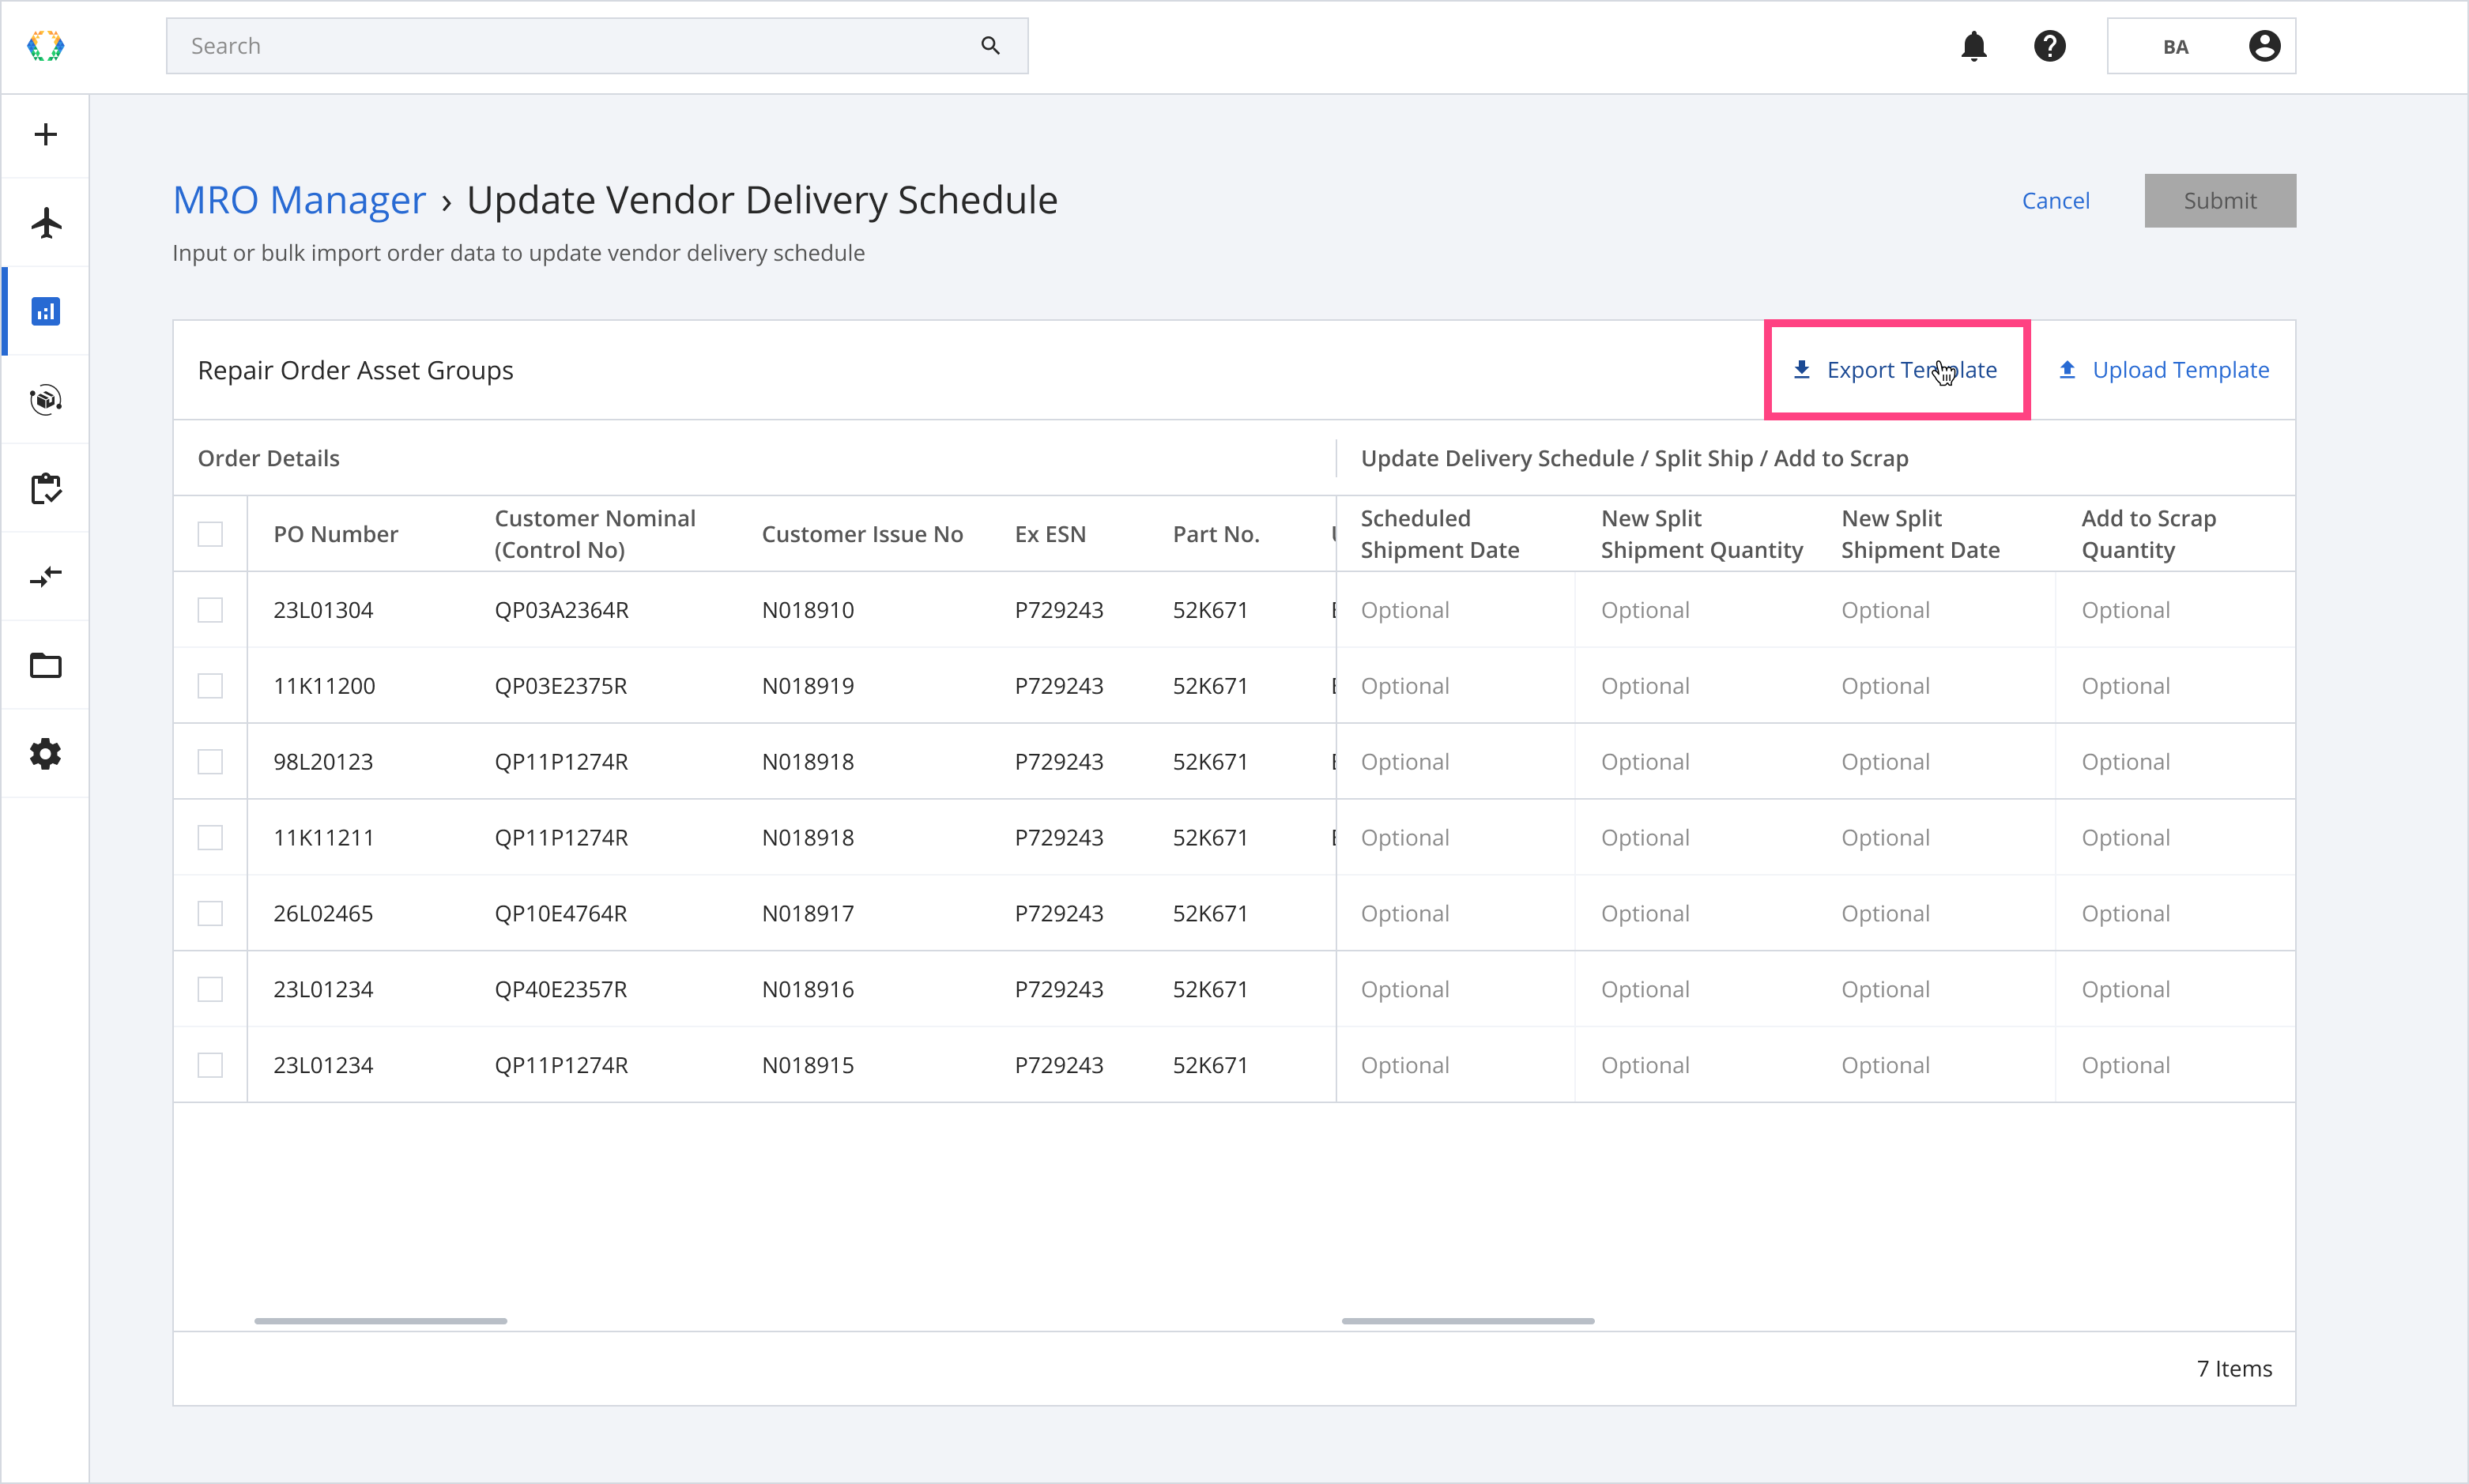
Step 3: You will be redirected to a page on which the selected repair orders will be shown for you to update them.

Step 4: Click 'Export Template' to download the repair orders you selected.
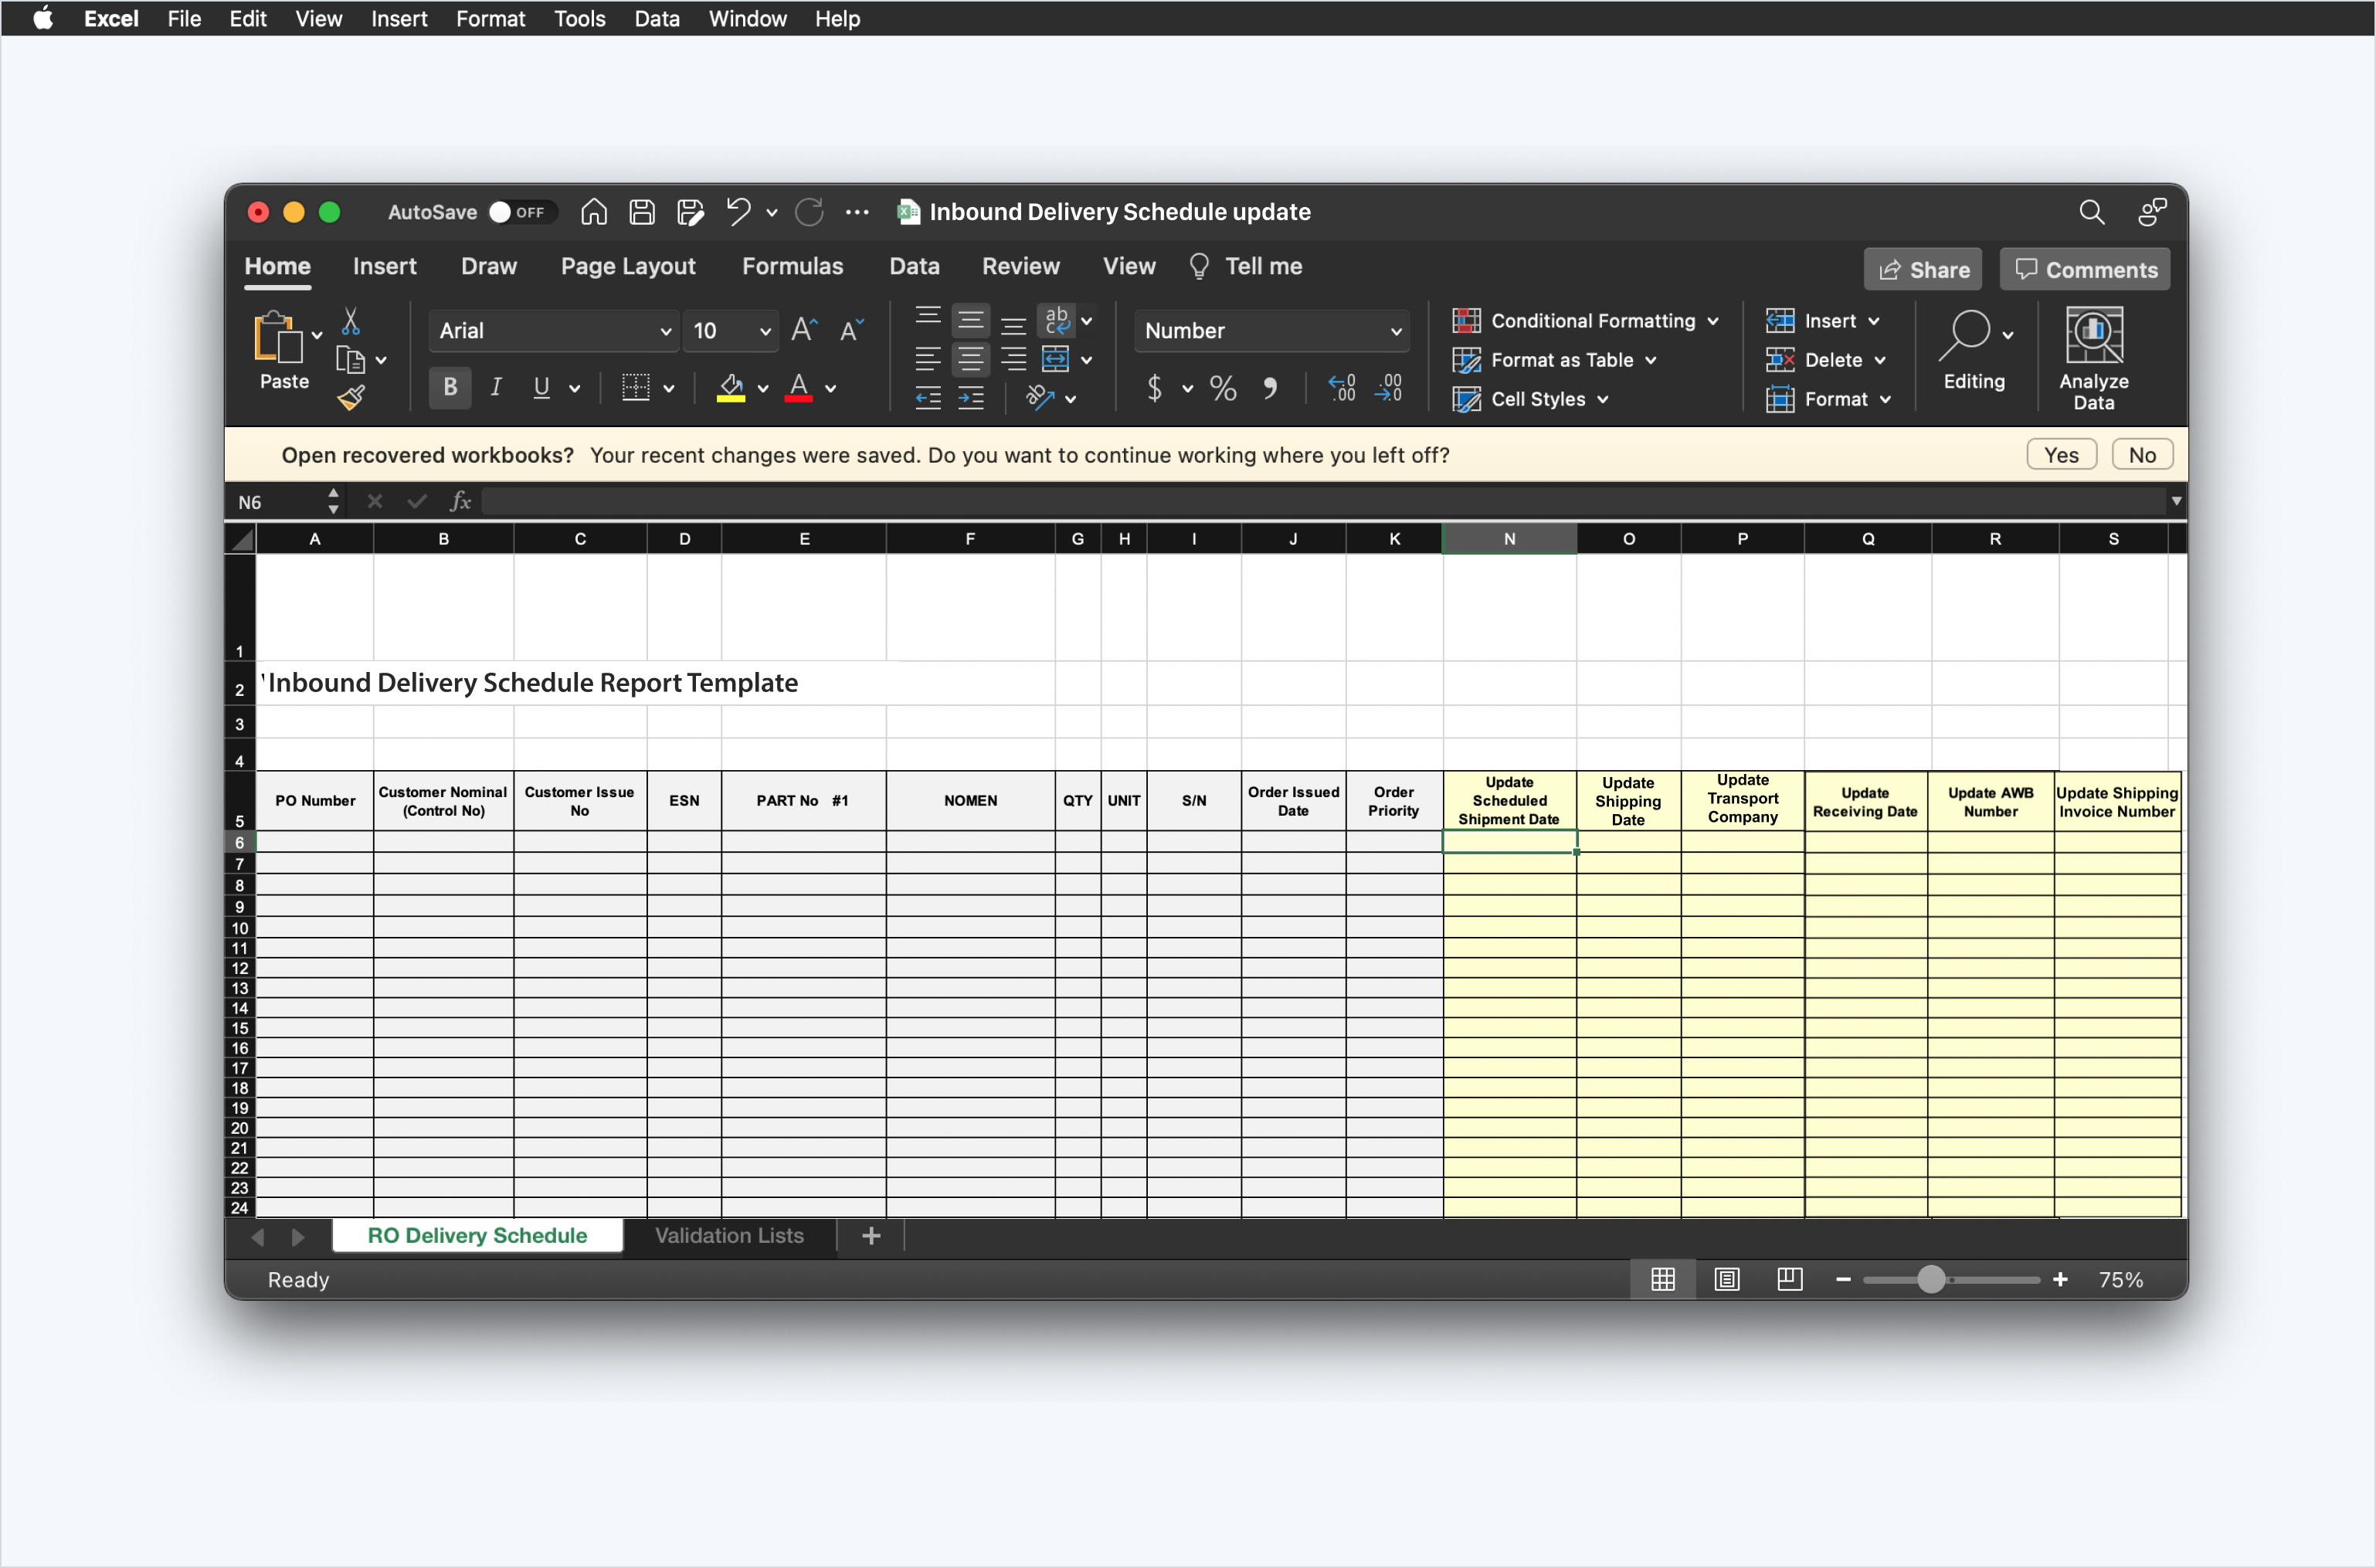
Step 5: Updating repair order details in excel template.
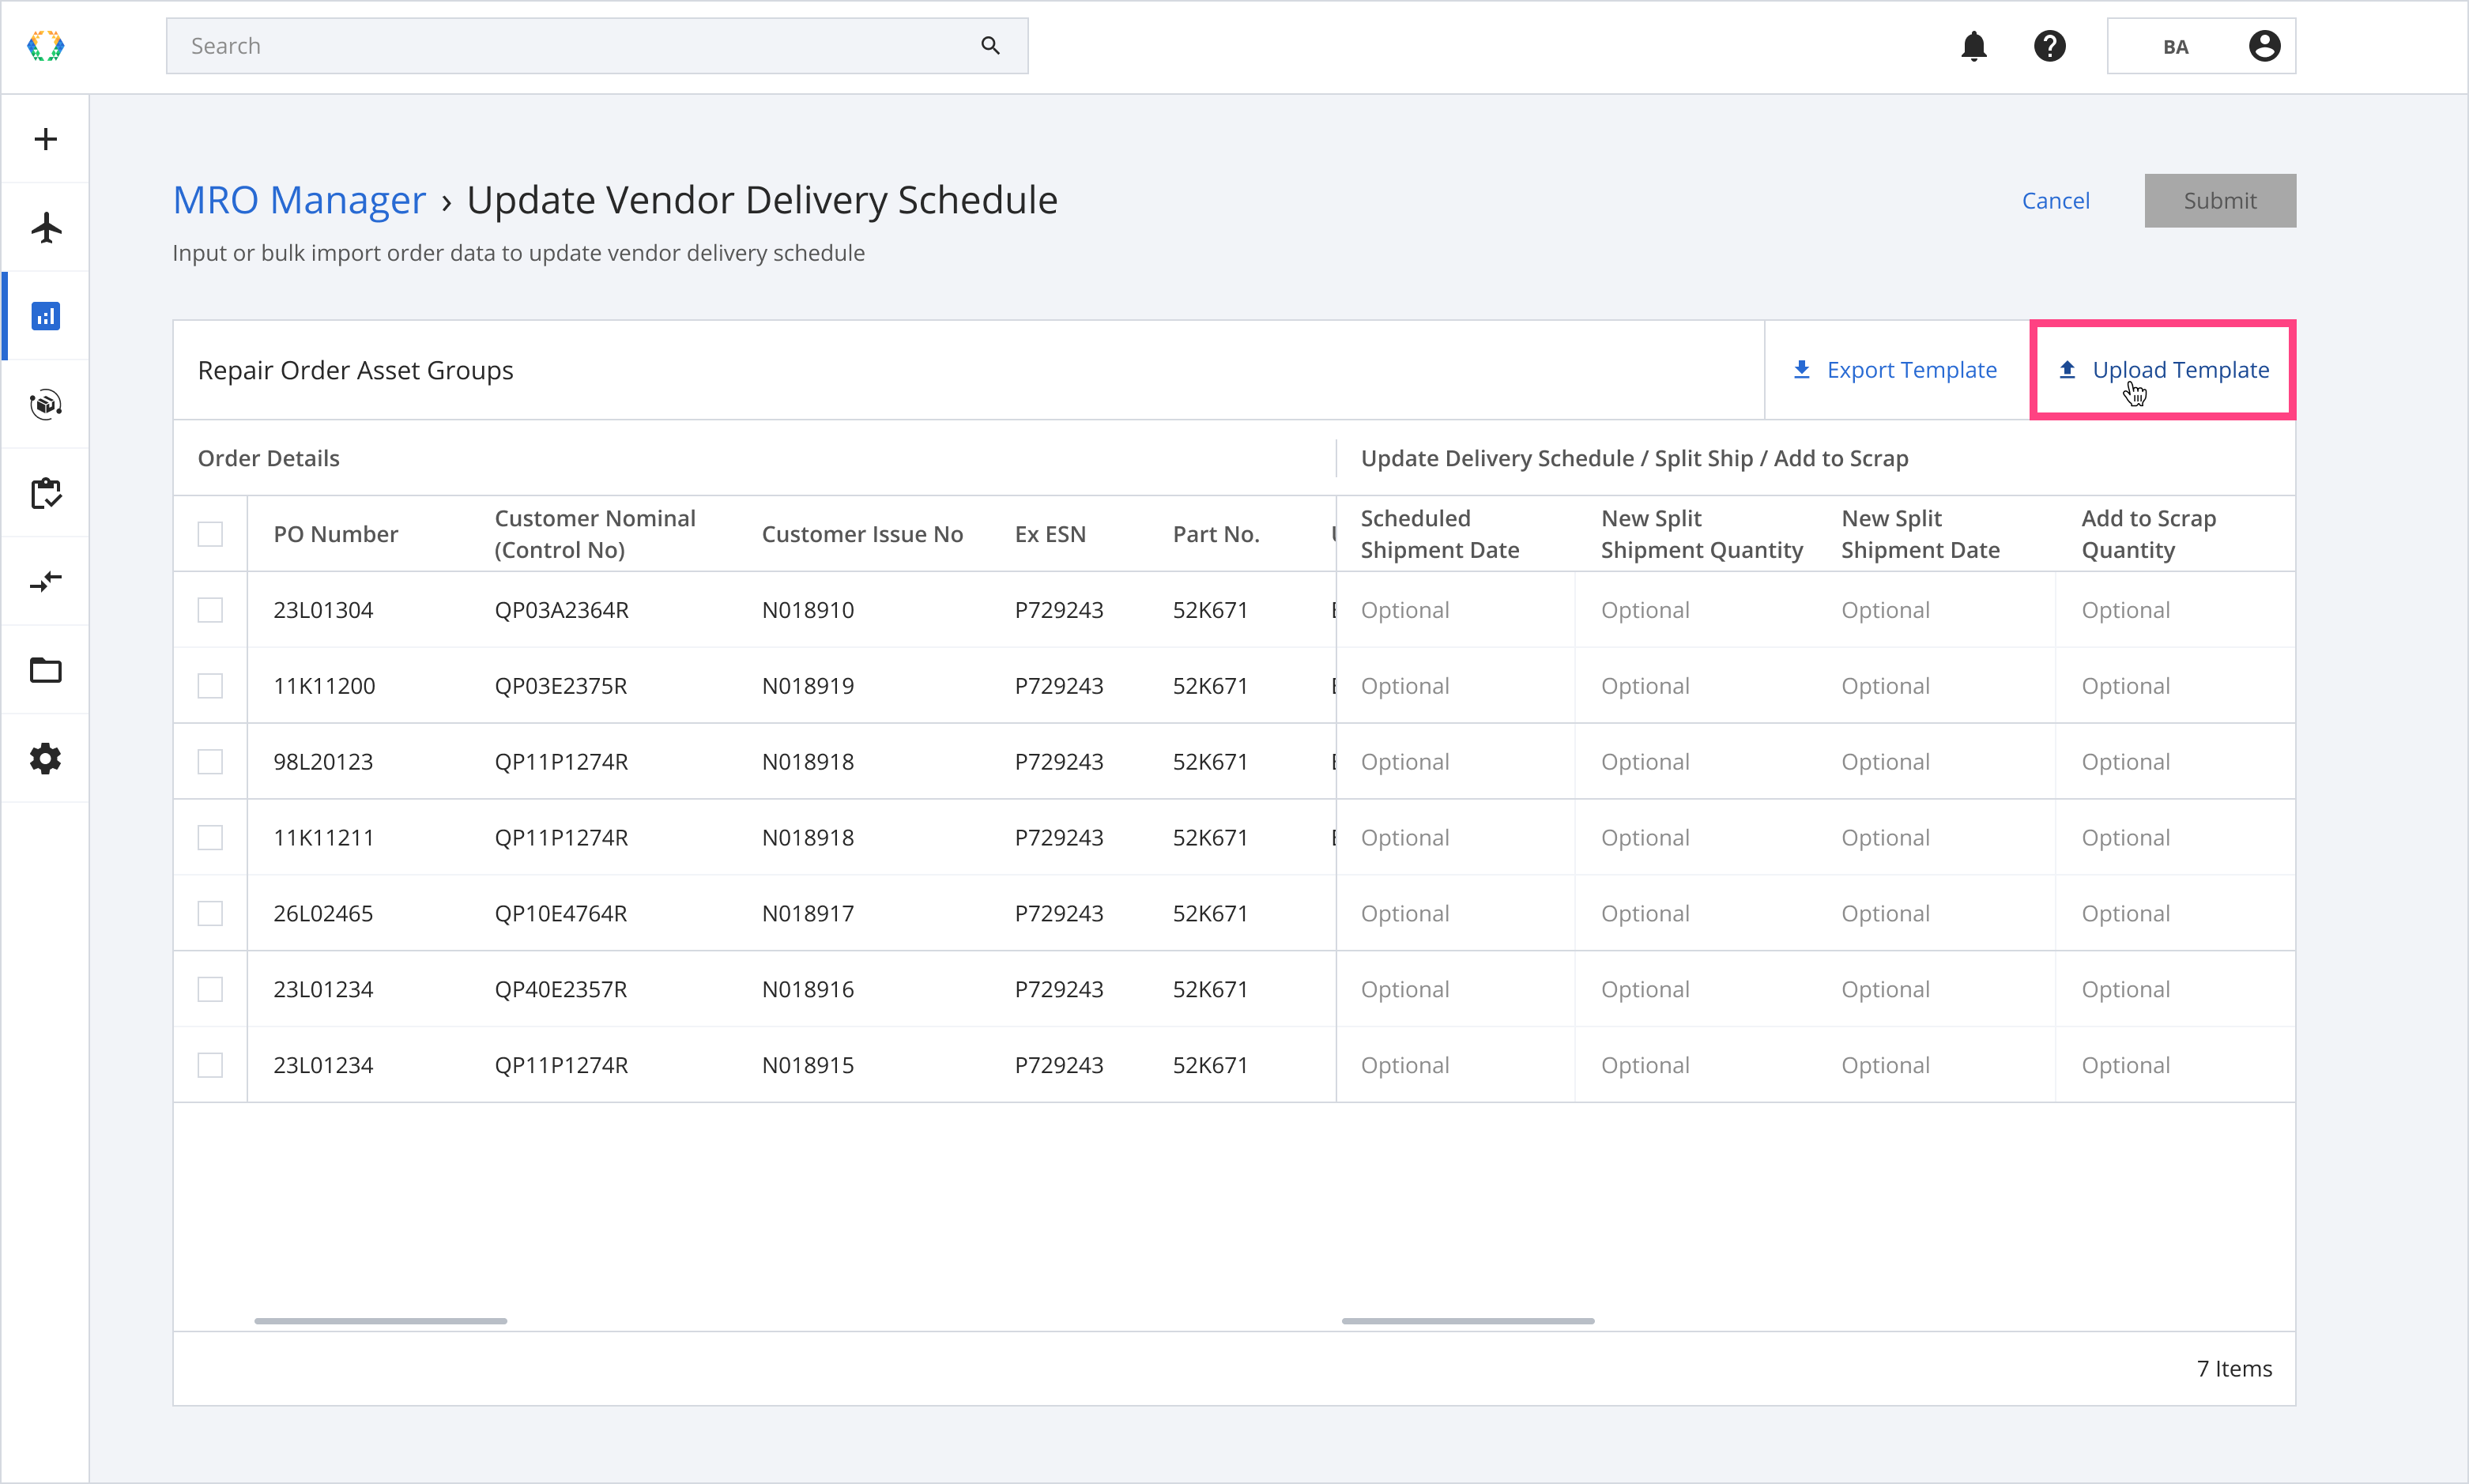
Step 6: Once the new details are entered, you can upload the template.
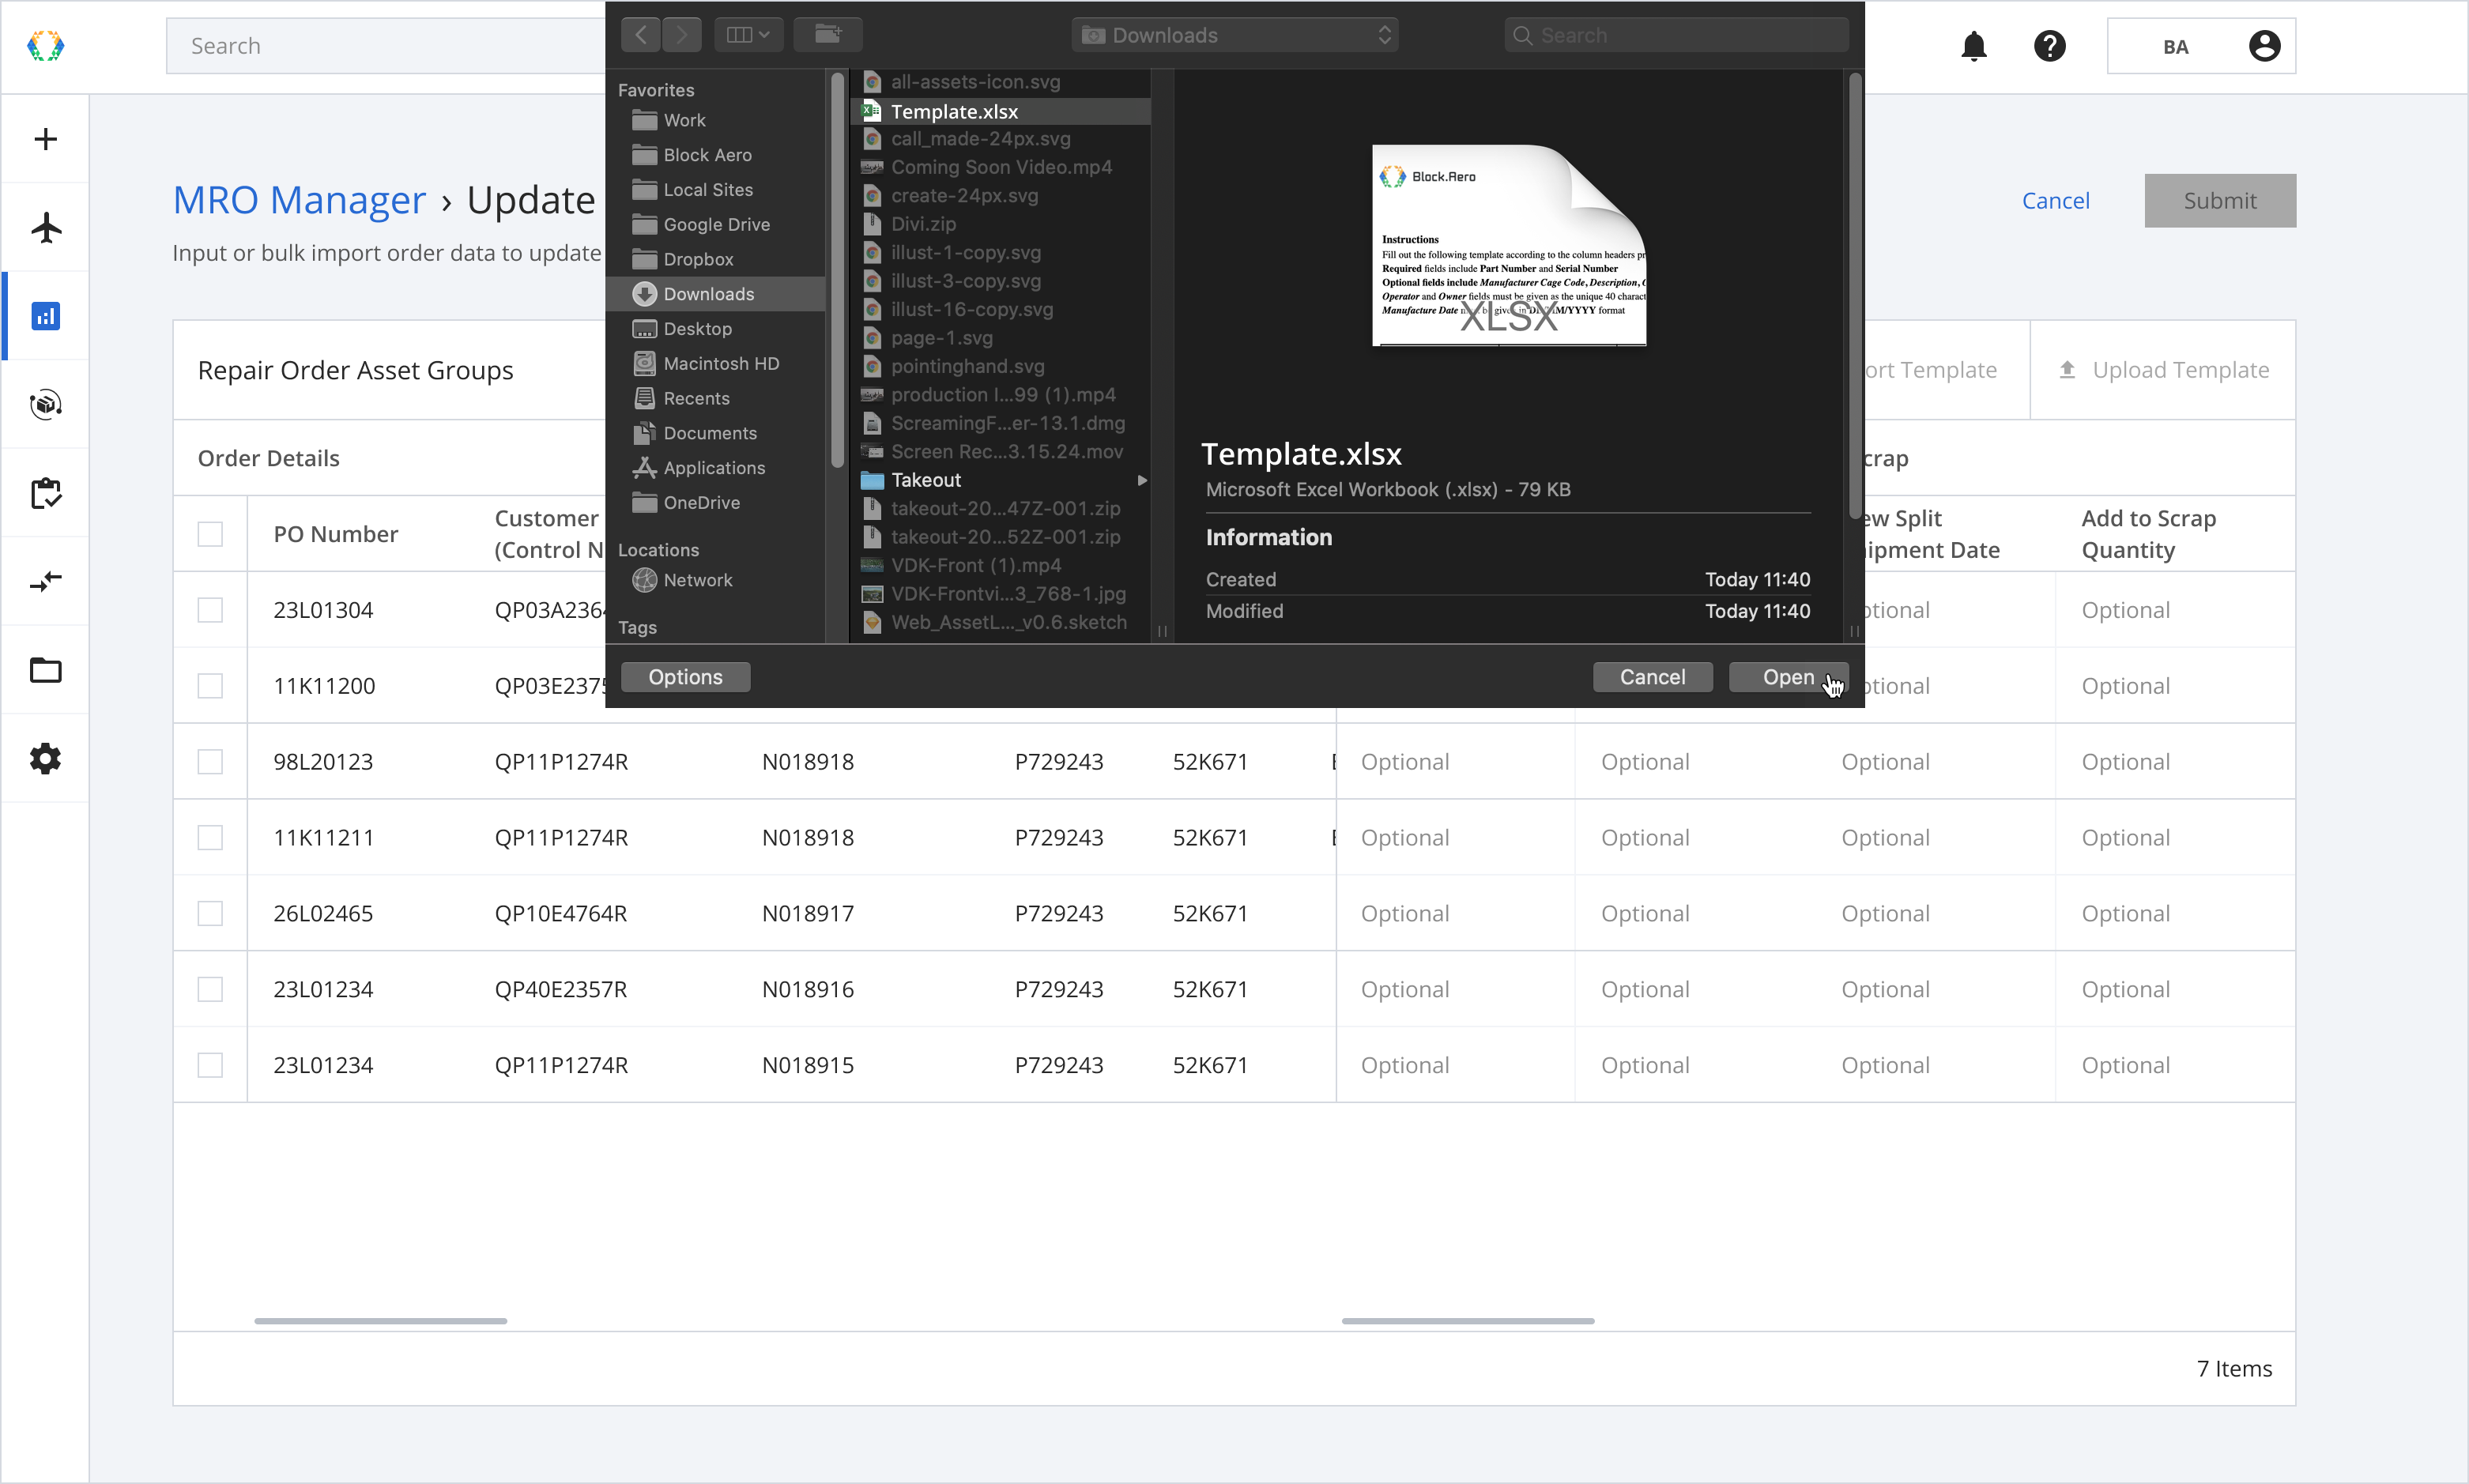
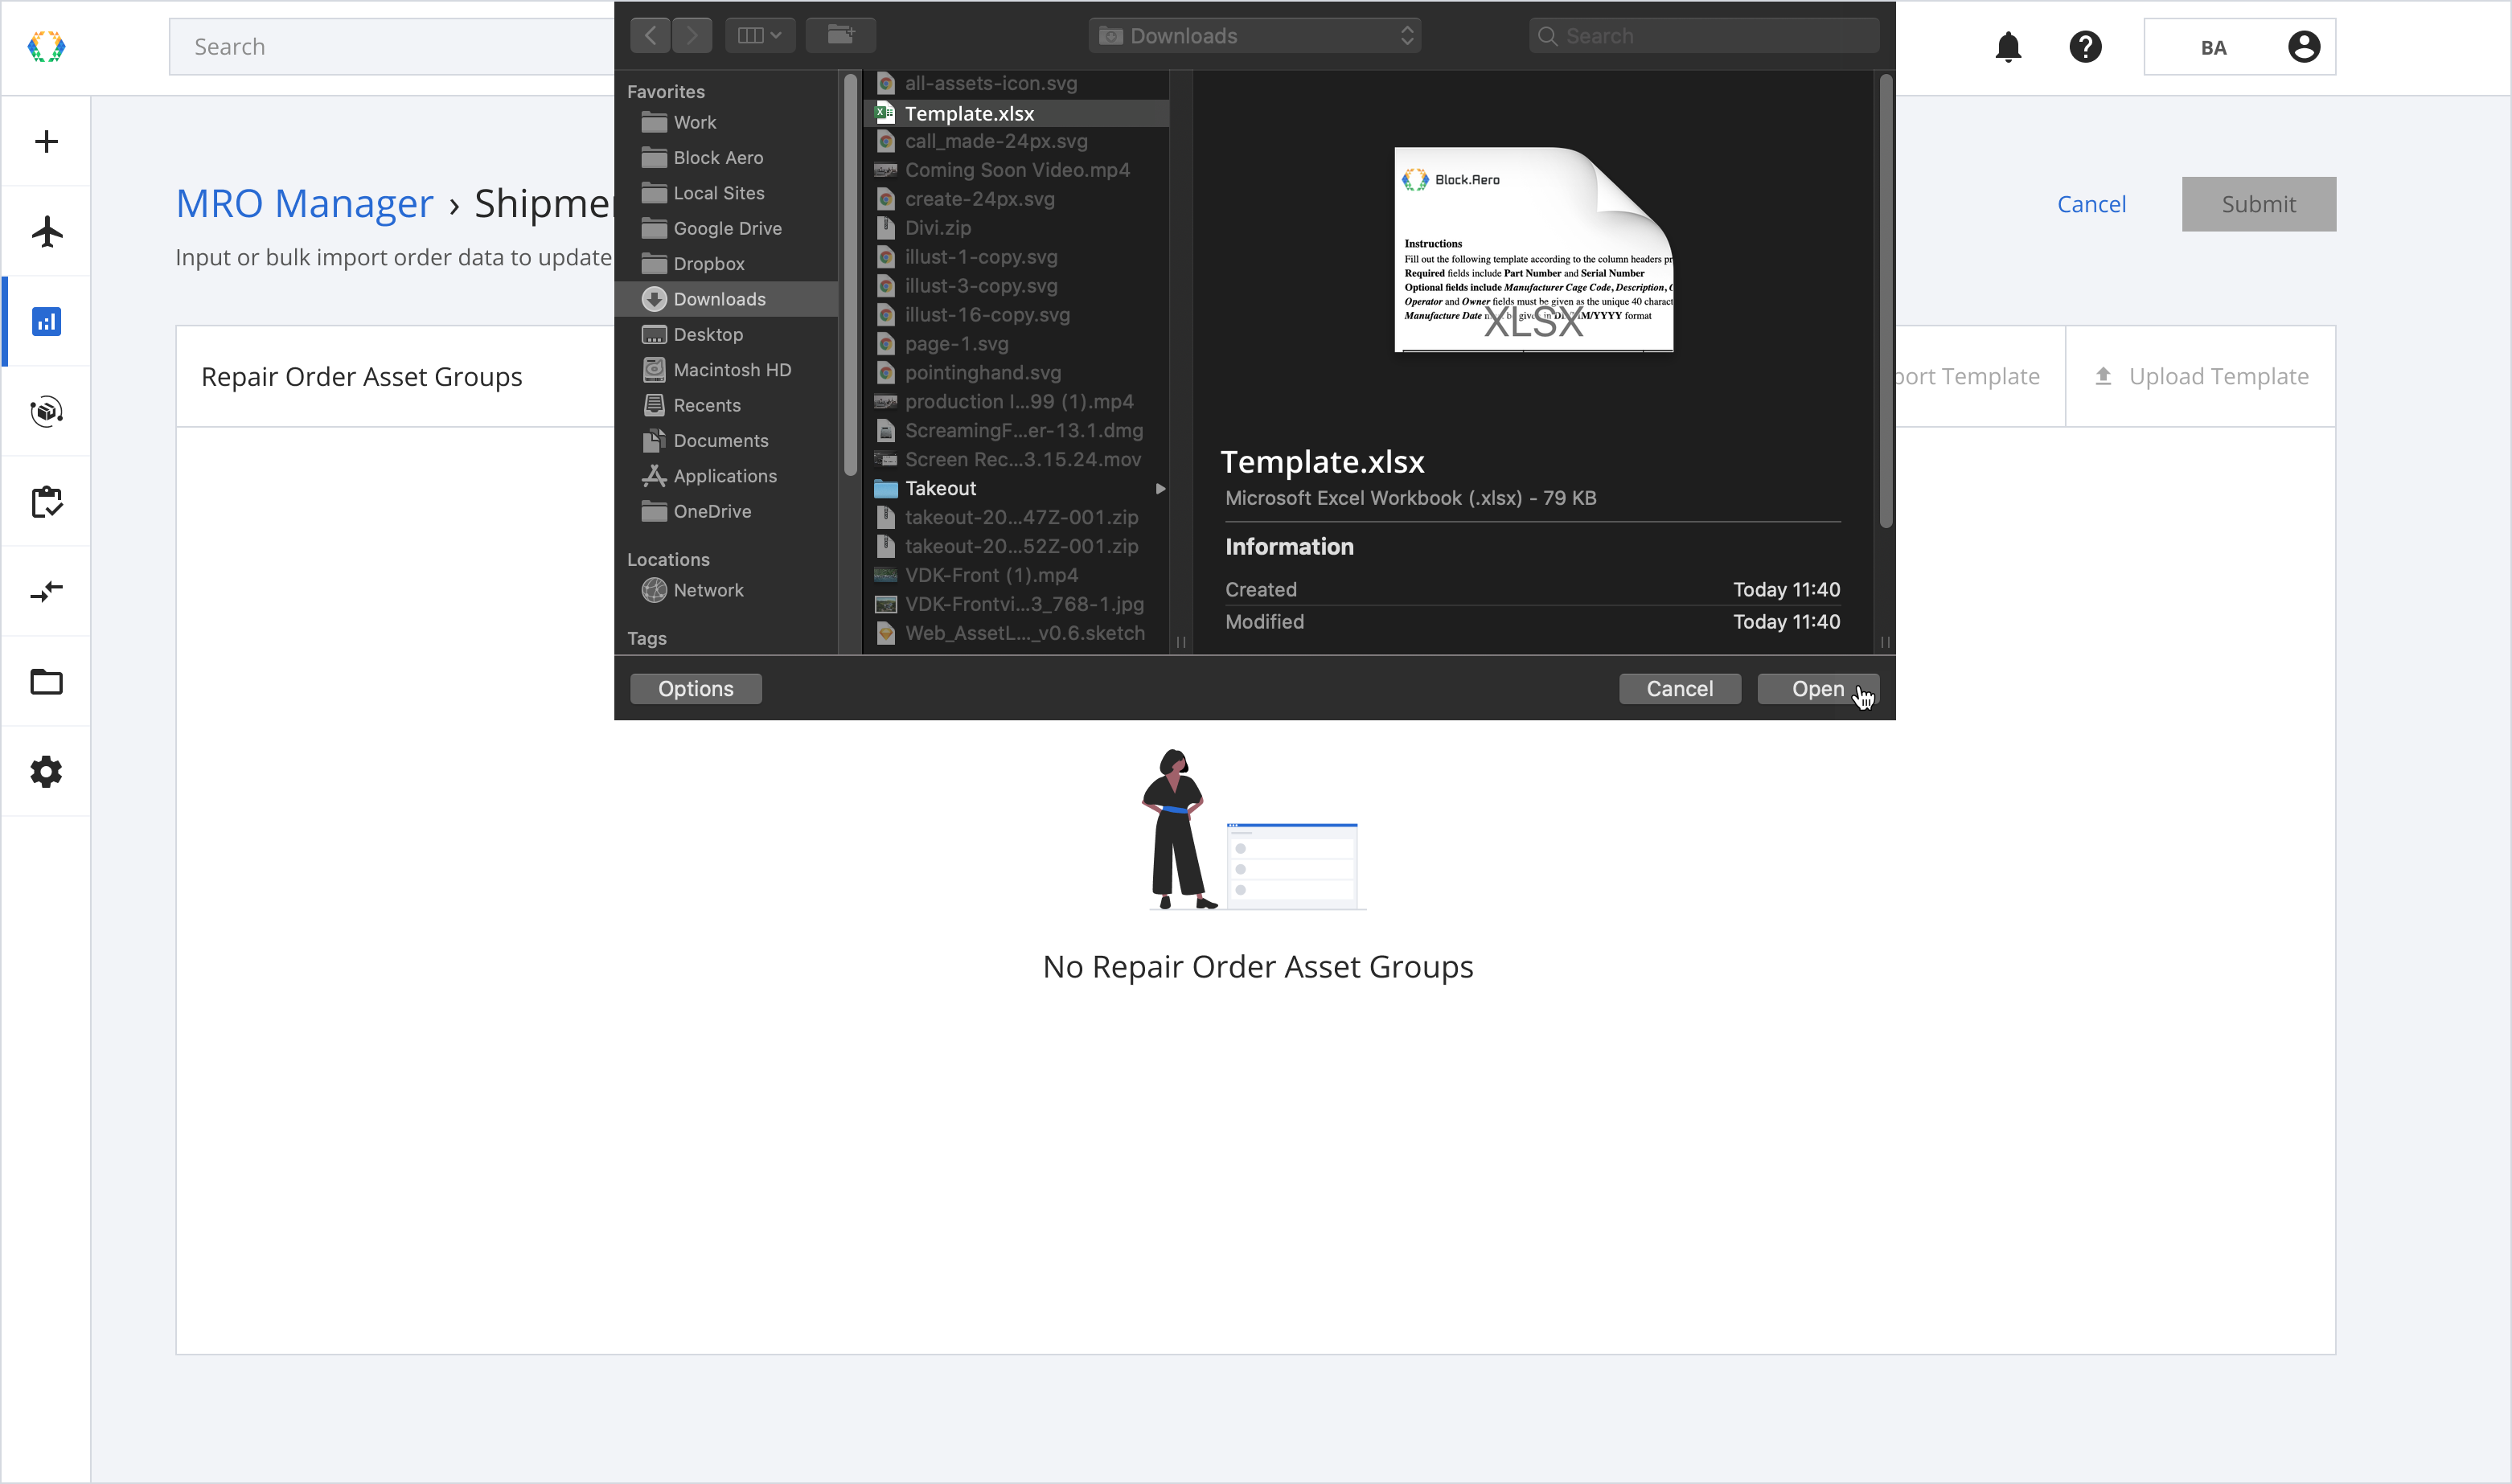
Step 7: Please choose the correct template to upload from your local computer.
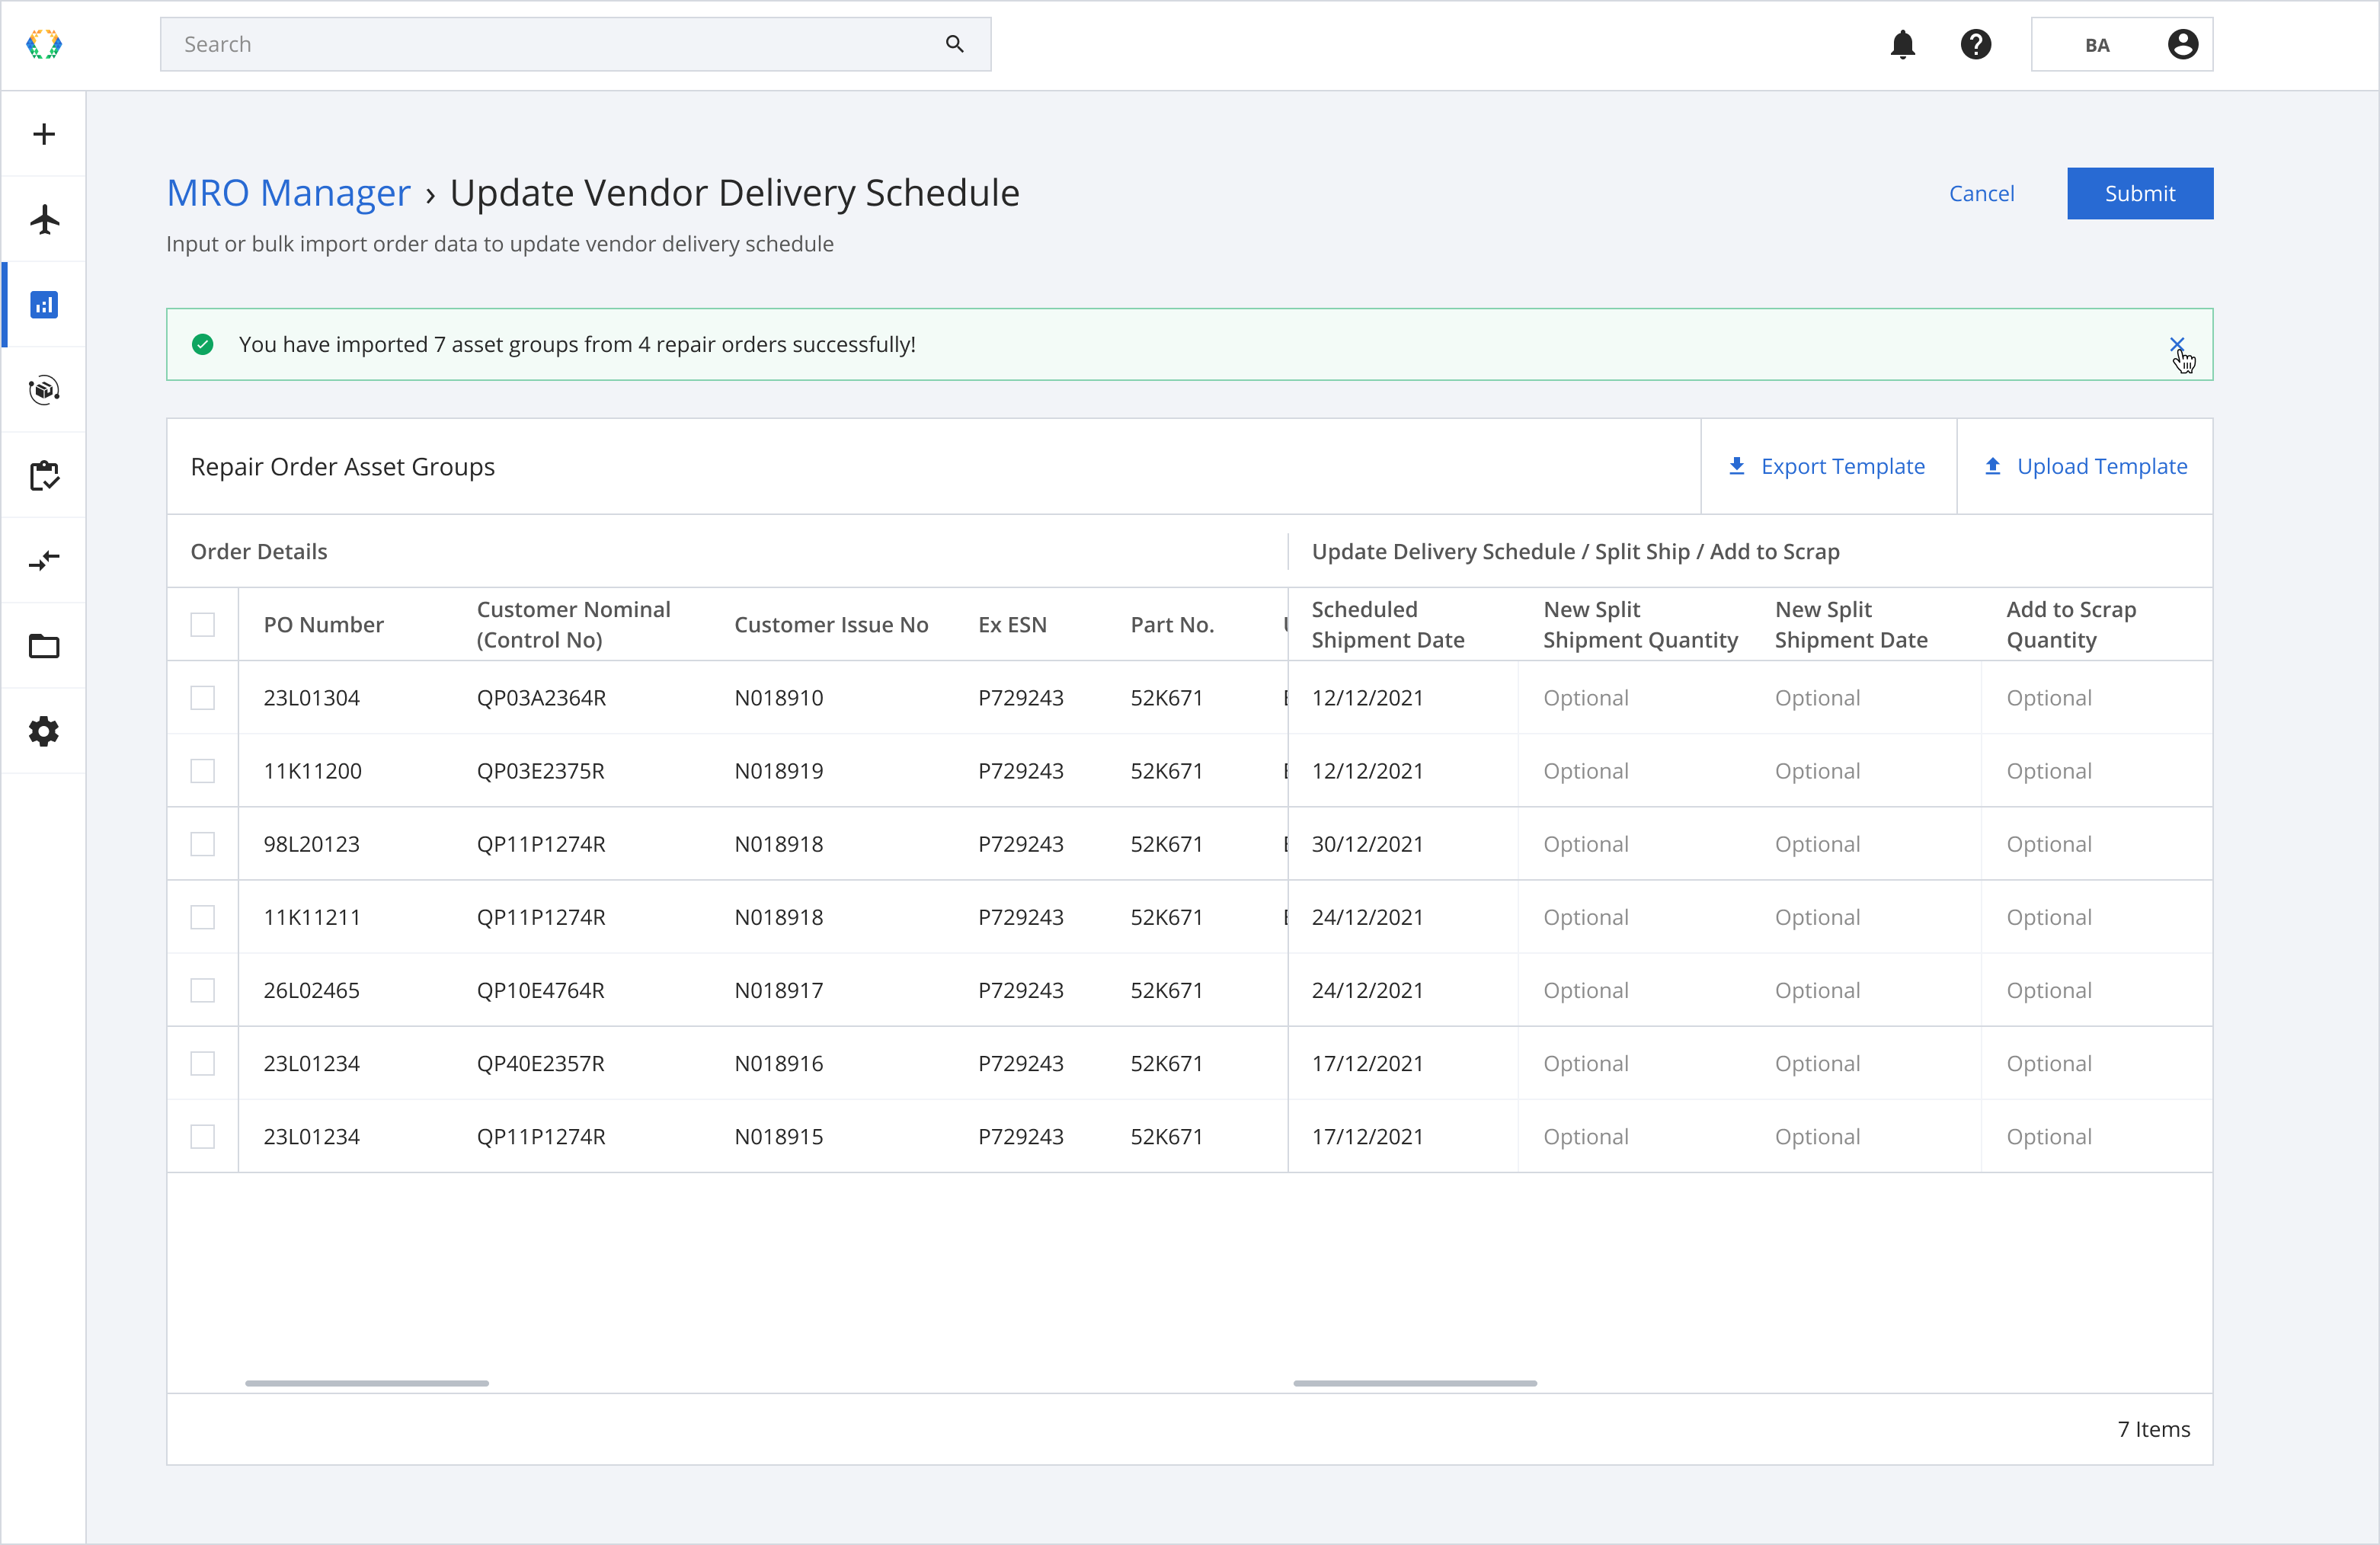
Step 8: Once your data is uploaded successfully, a green banner will appear at the top of the page table, and your data will be imported.
Step 9: Once you confirm all details, you can click 'Submit' to complete the update.
Once your repair orders are successfully updated, a green banner will appear at the top of the repair order list.

Option 3: Update repair orders with existing excel template
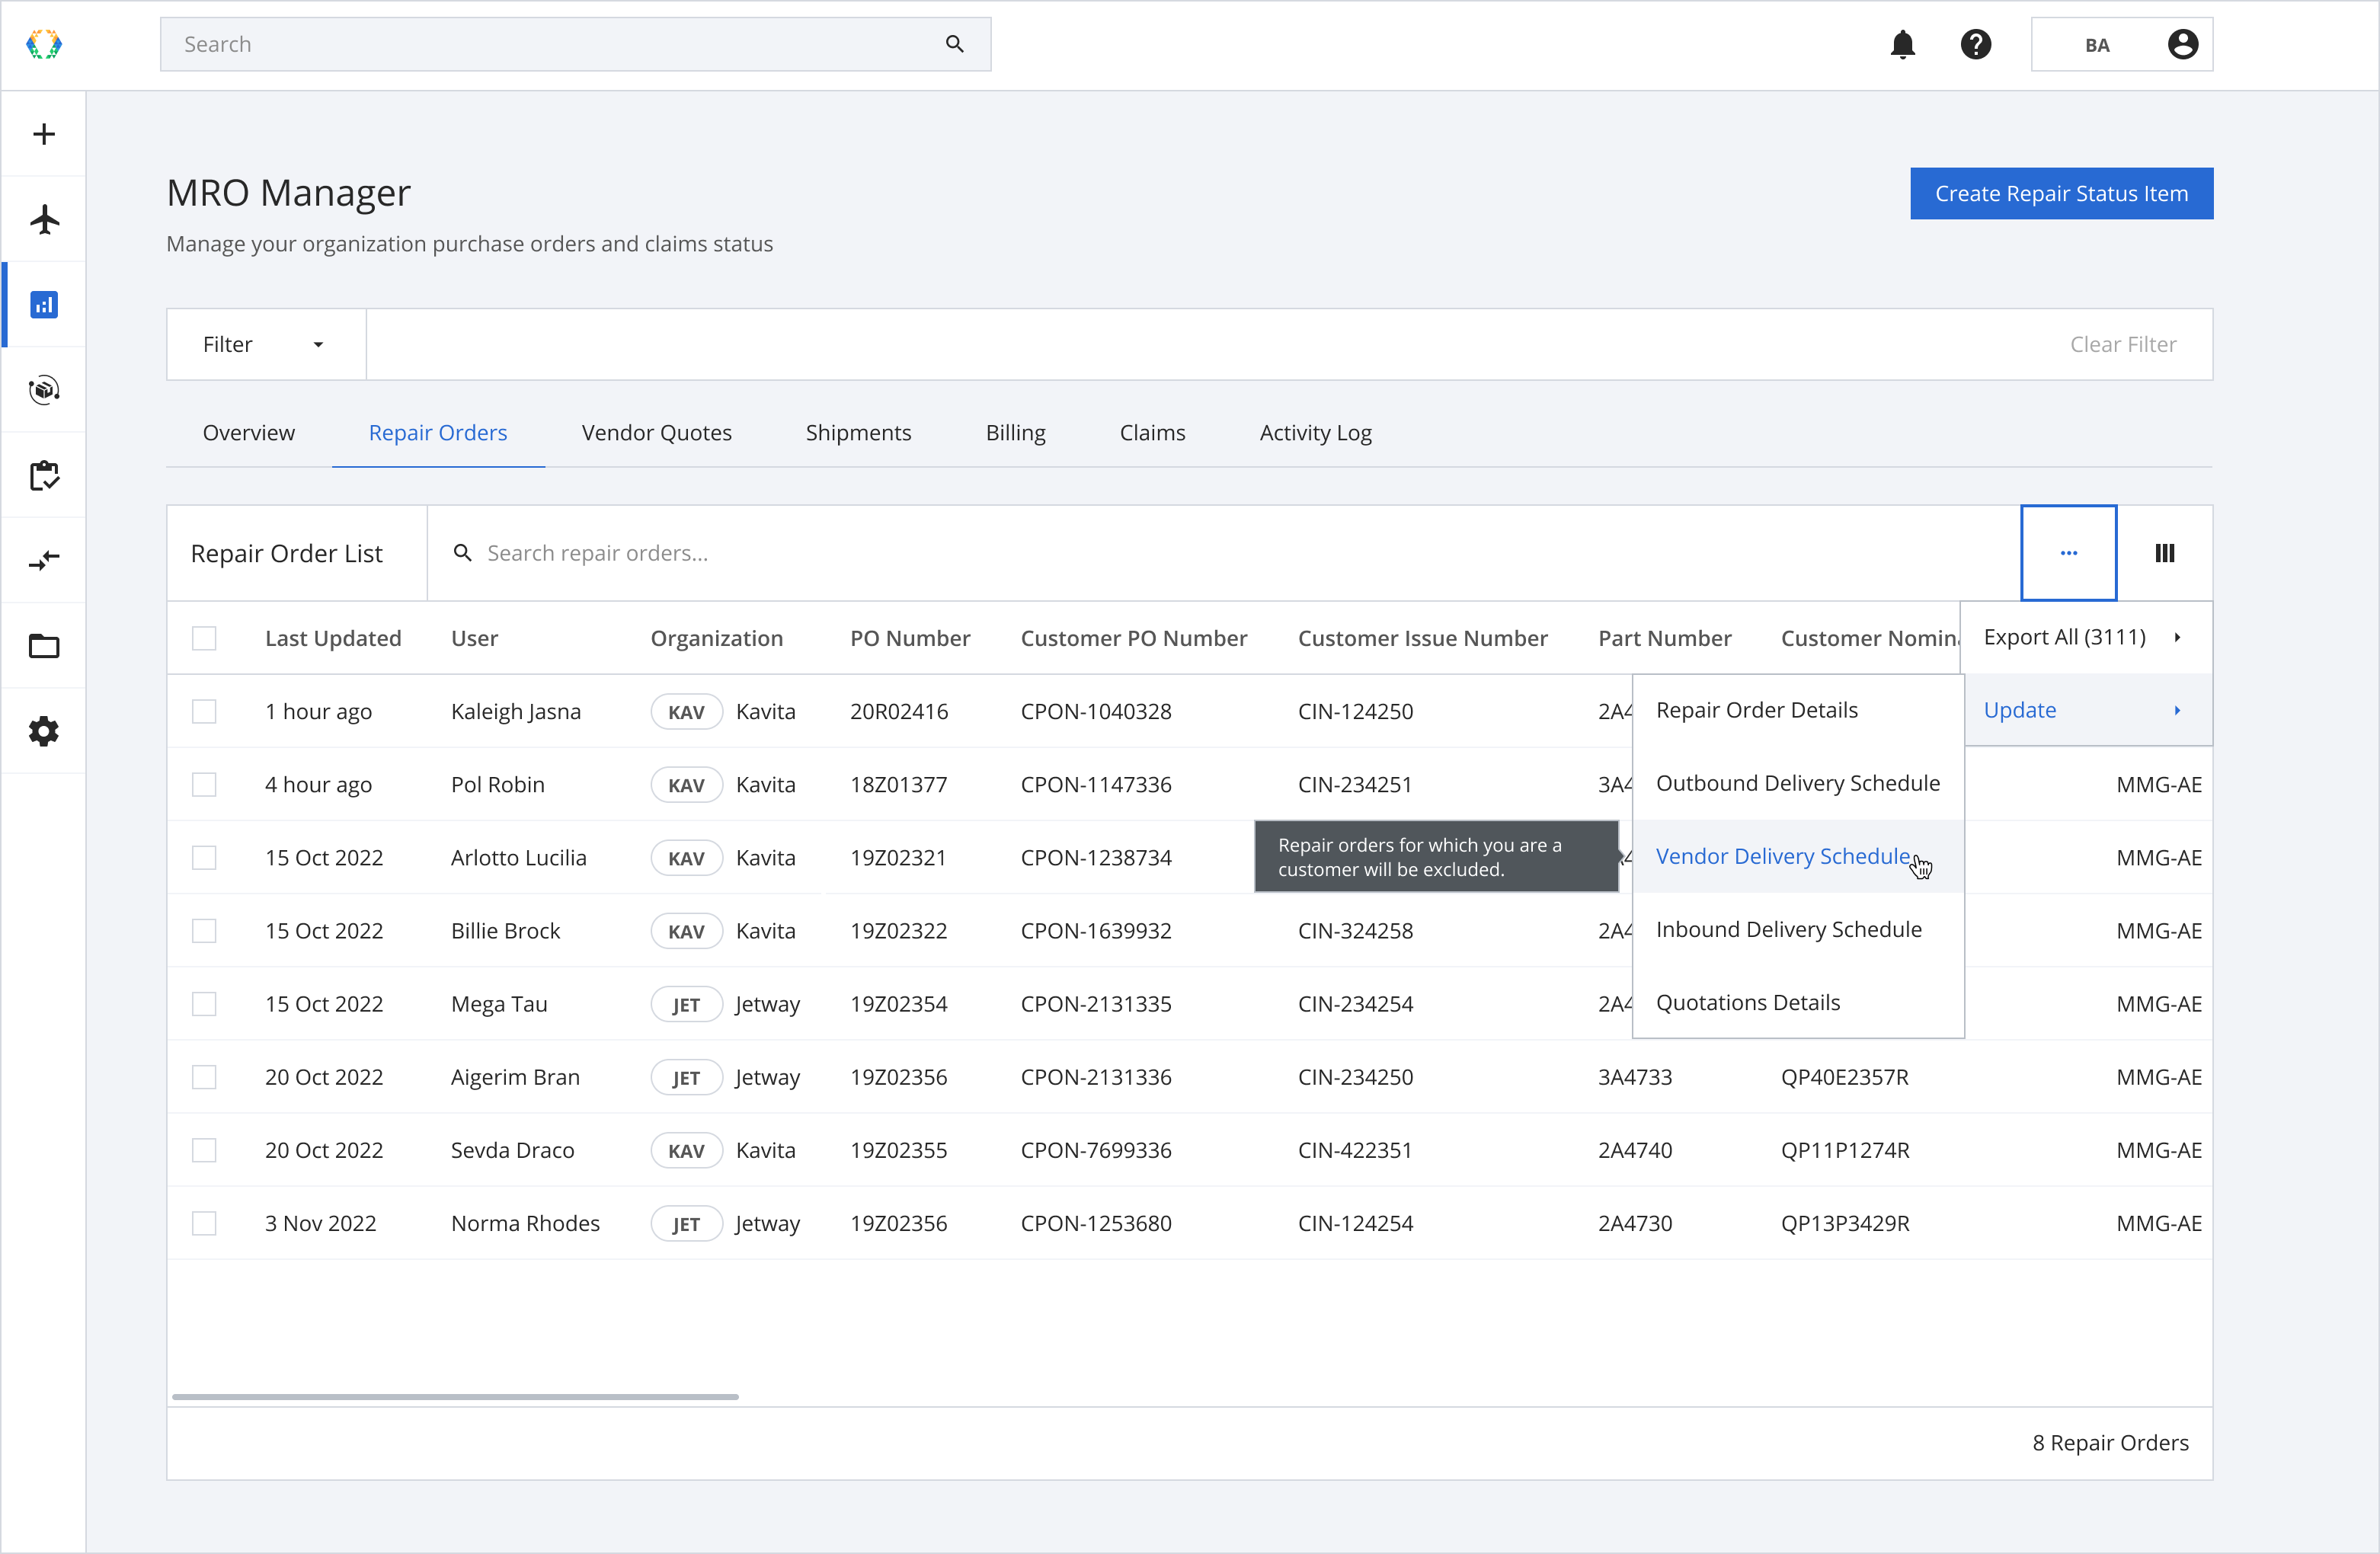
Step 1: Click 'More Options' button to expand the dropdown list.
Step 2: Click 'Update' and choose the details you want to update.
Step 3: You will be directed to a page to upload your template. Click 'Upload Template' to upload your excel template to import them.
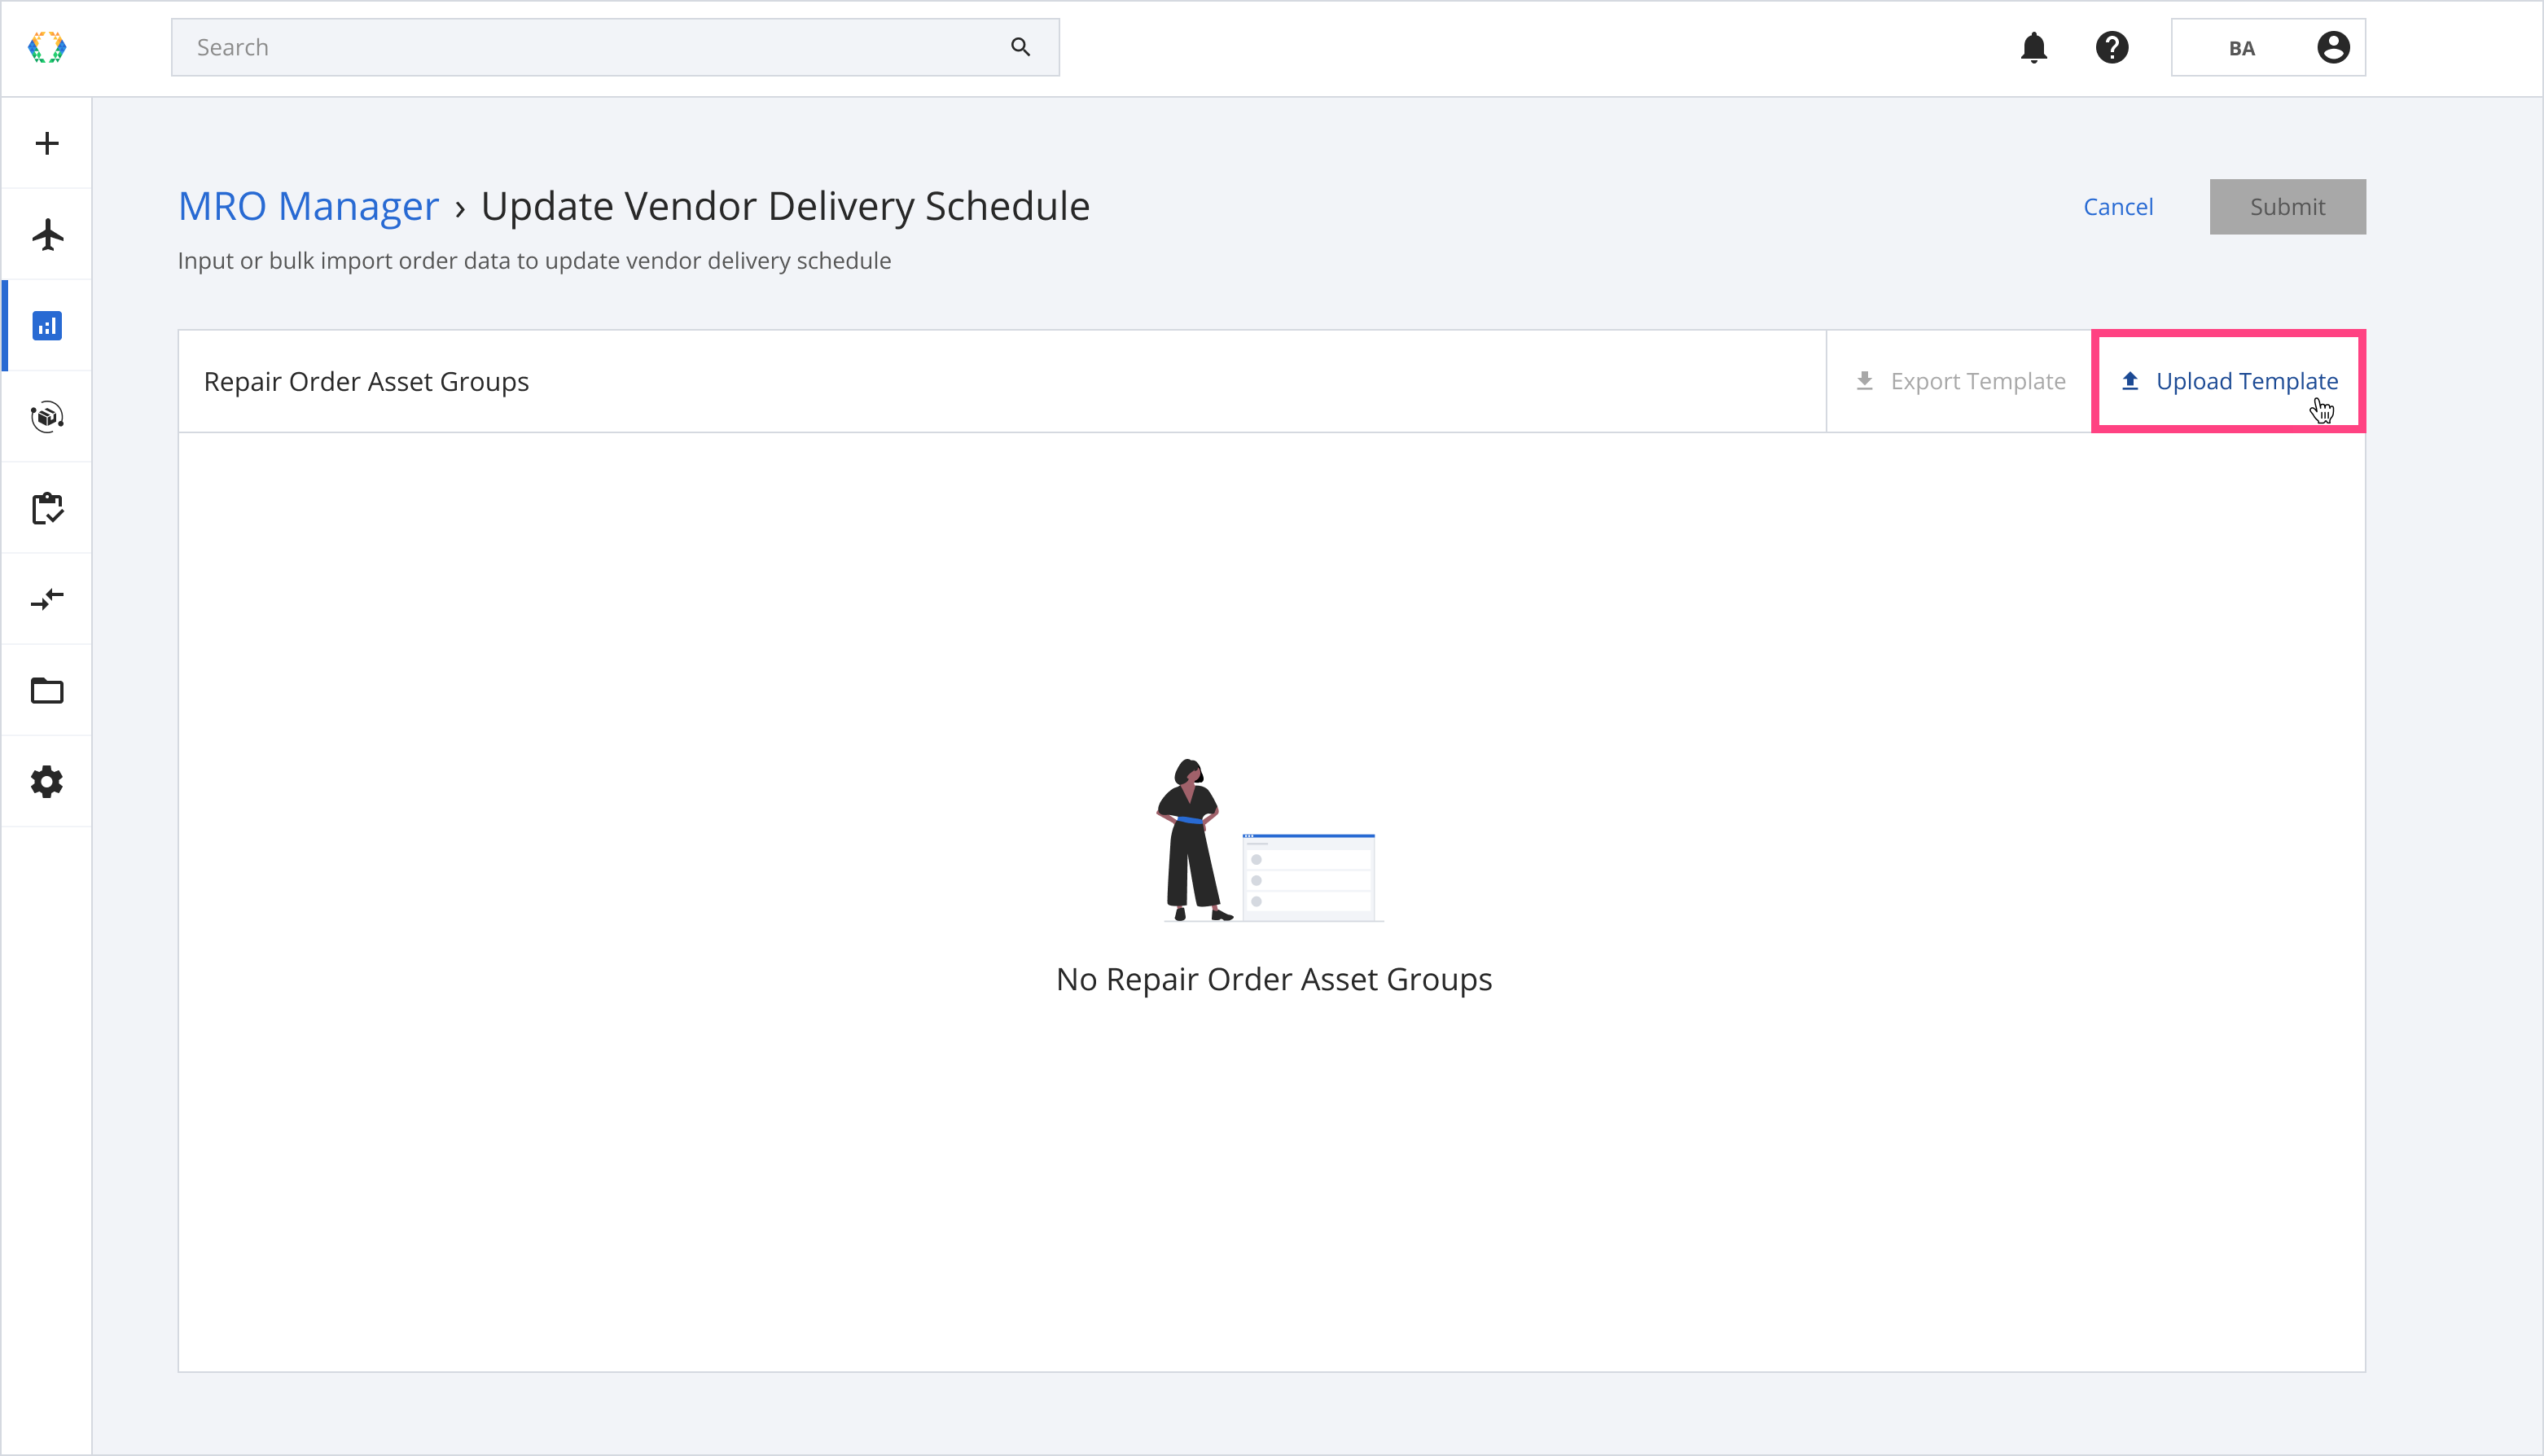
Step 4: Please choose the correct template from your local computer to upload.
Step 5: Once your data is uploaded successfully, a green banner will appear at the top of the page table, and your data will be imported.

Step 6: Once all your data has been updated, click 'Submit' to complete the update.

Once your repair orders are successfully updated, a green banner will appear at the top of the repair order list.

Updated over 1 year ago