Create Claims (Bulk Operation)
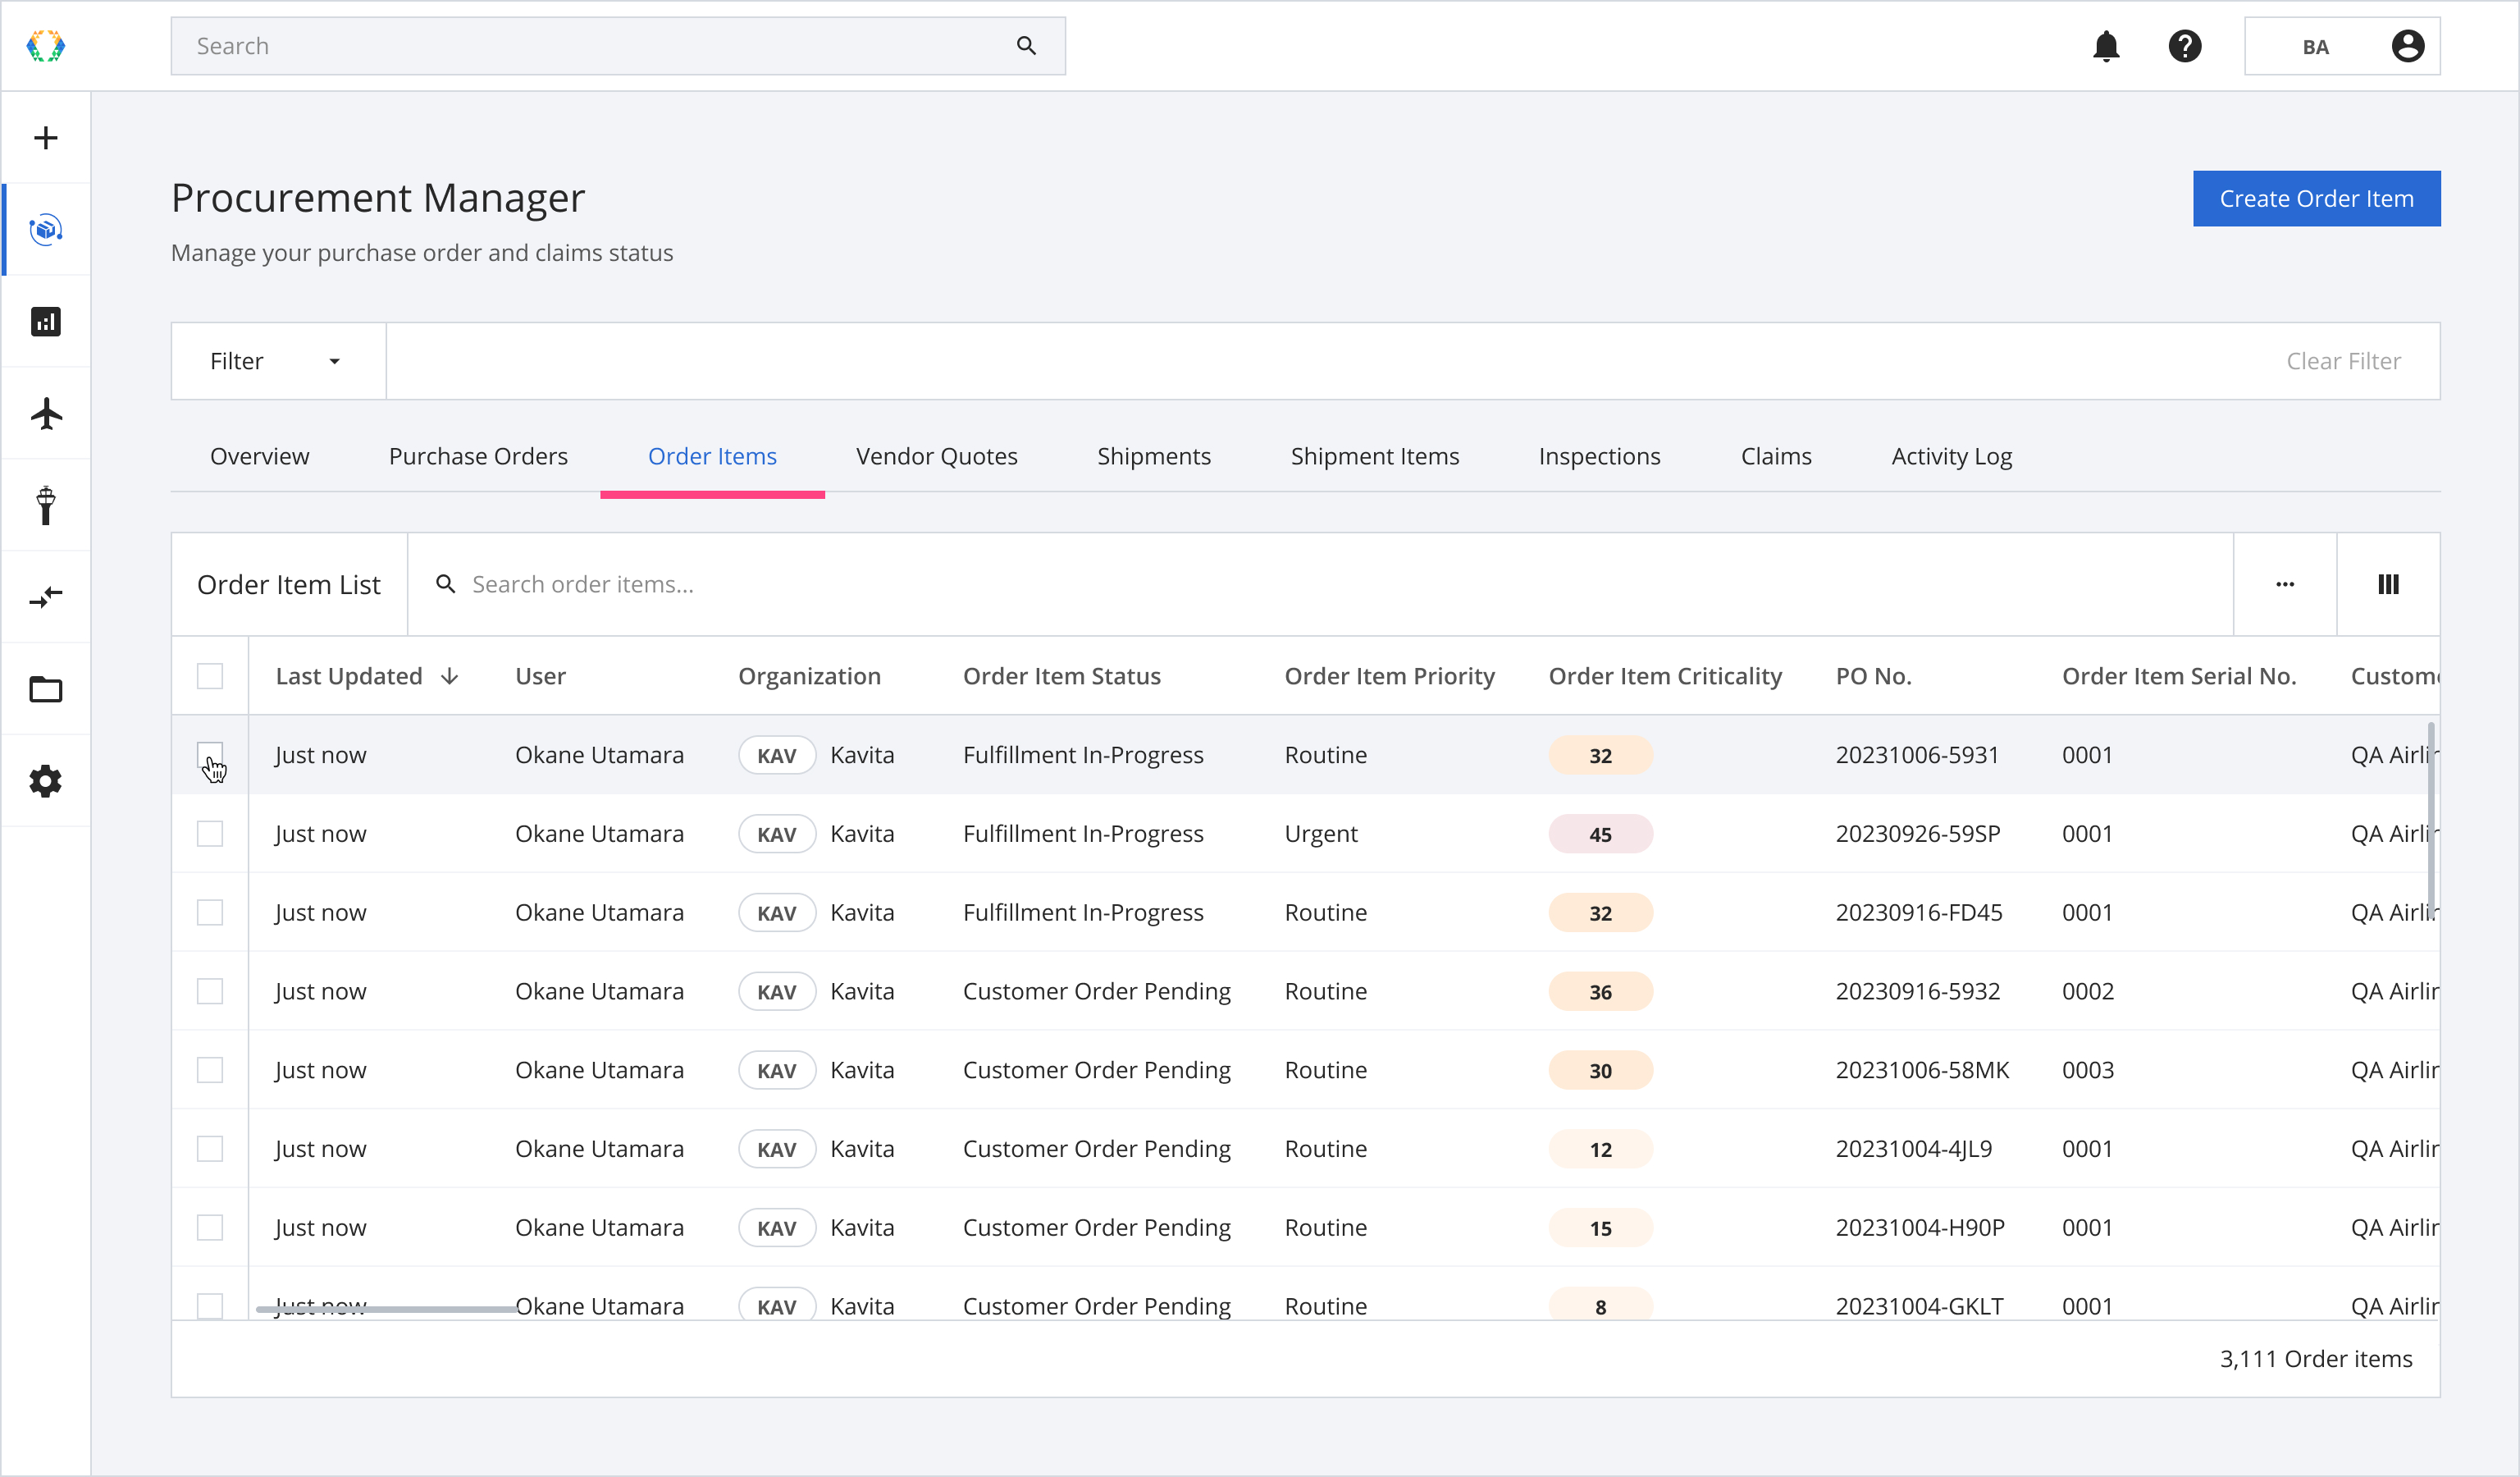
Step 1: From the order items list, select order items which you want to create claims.
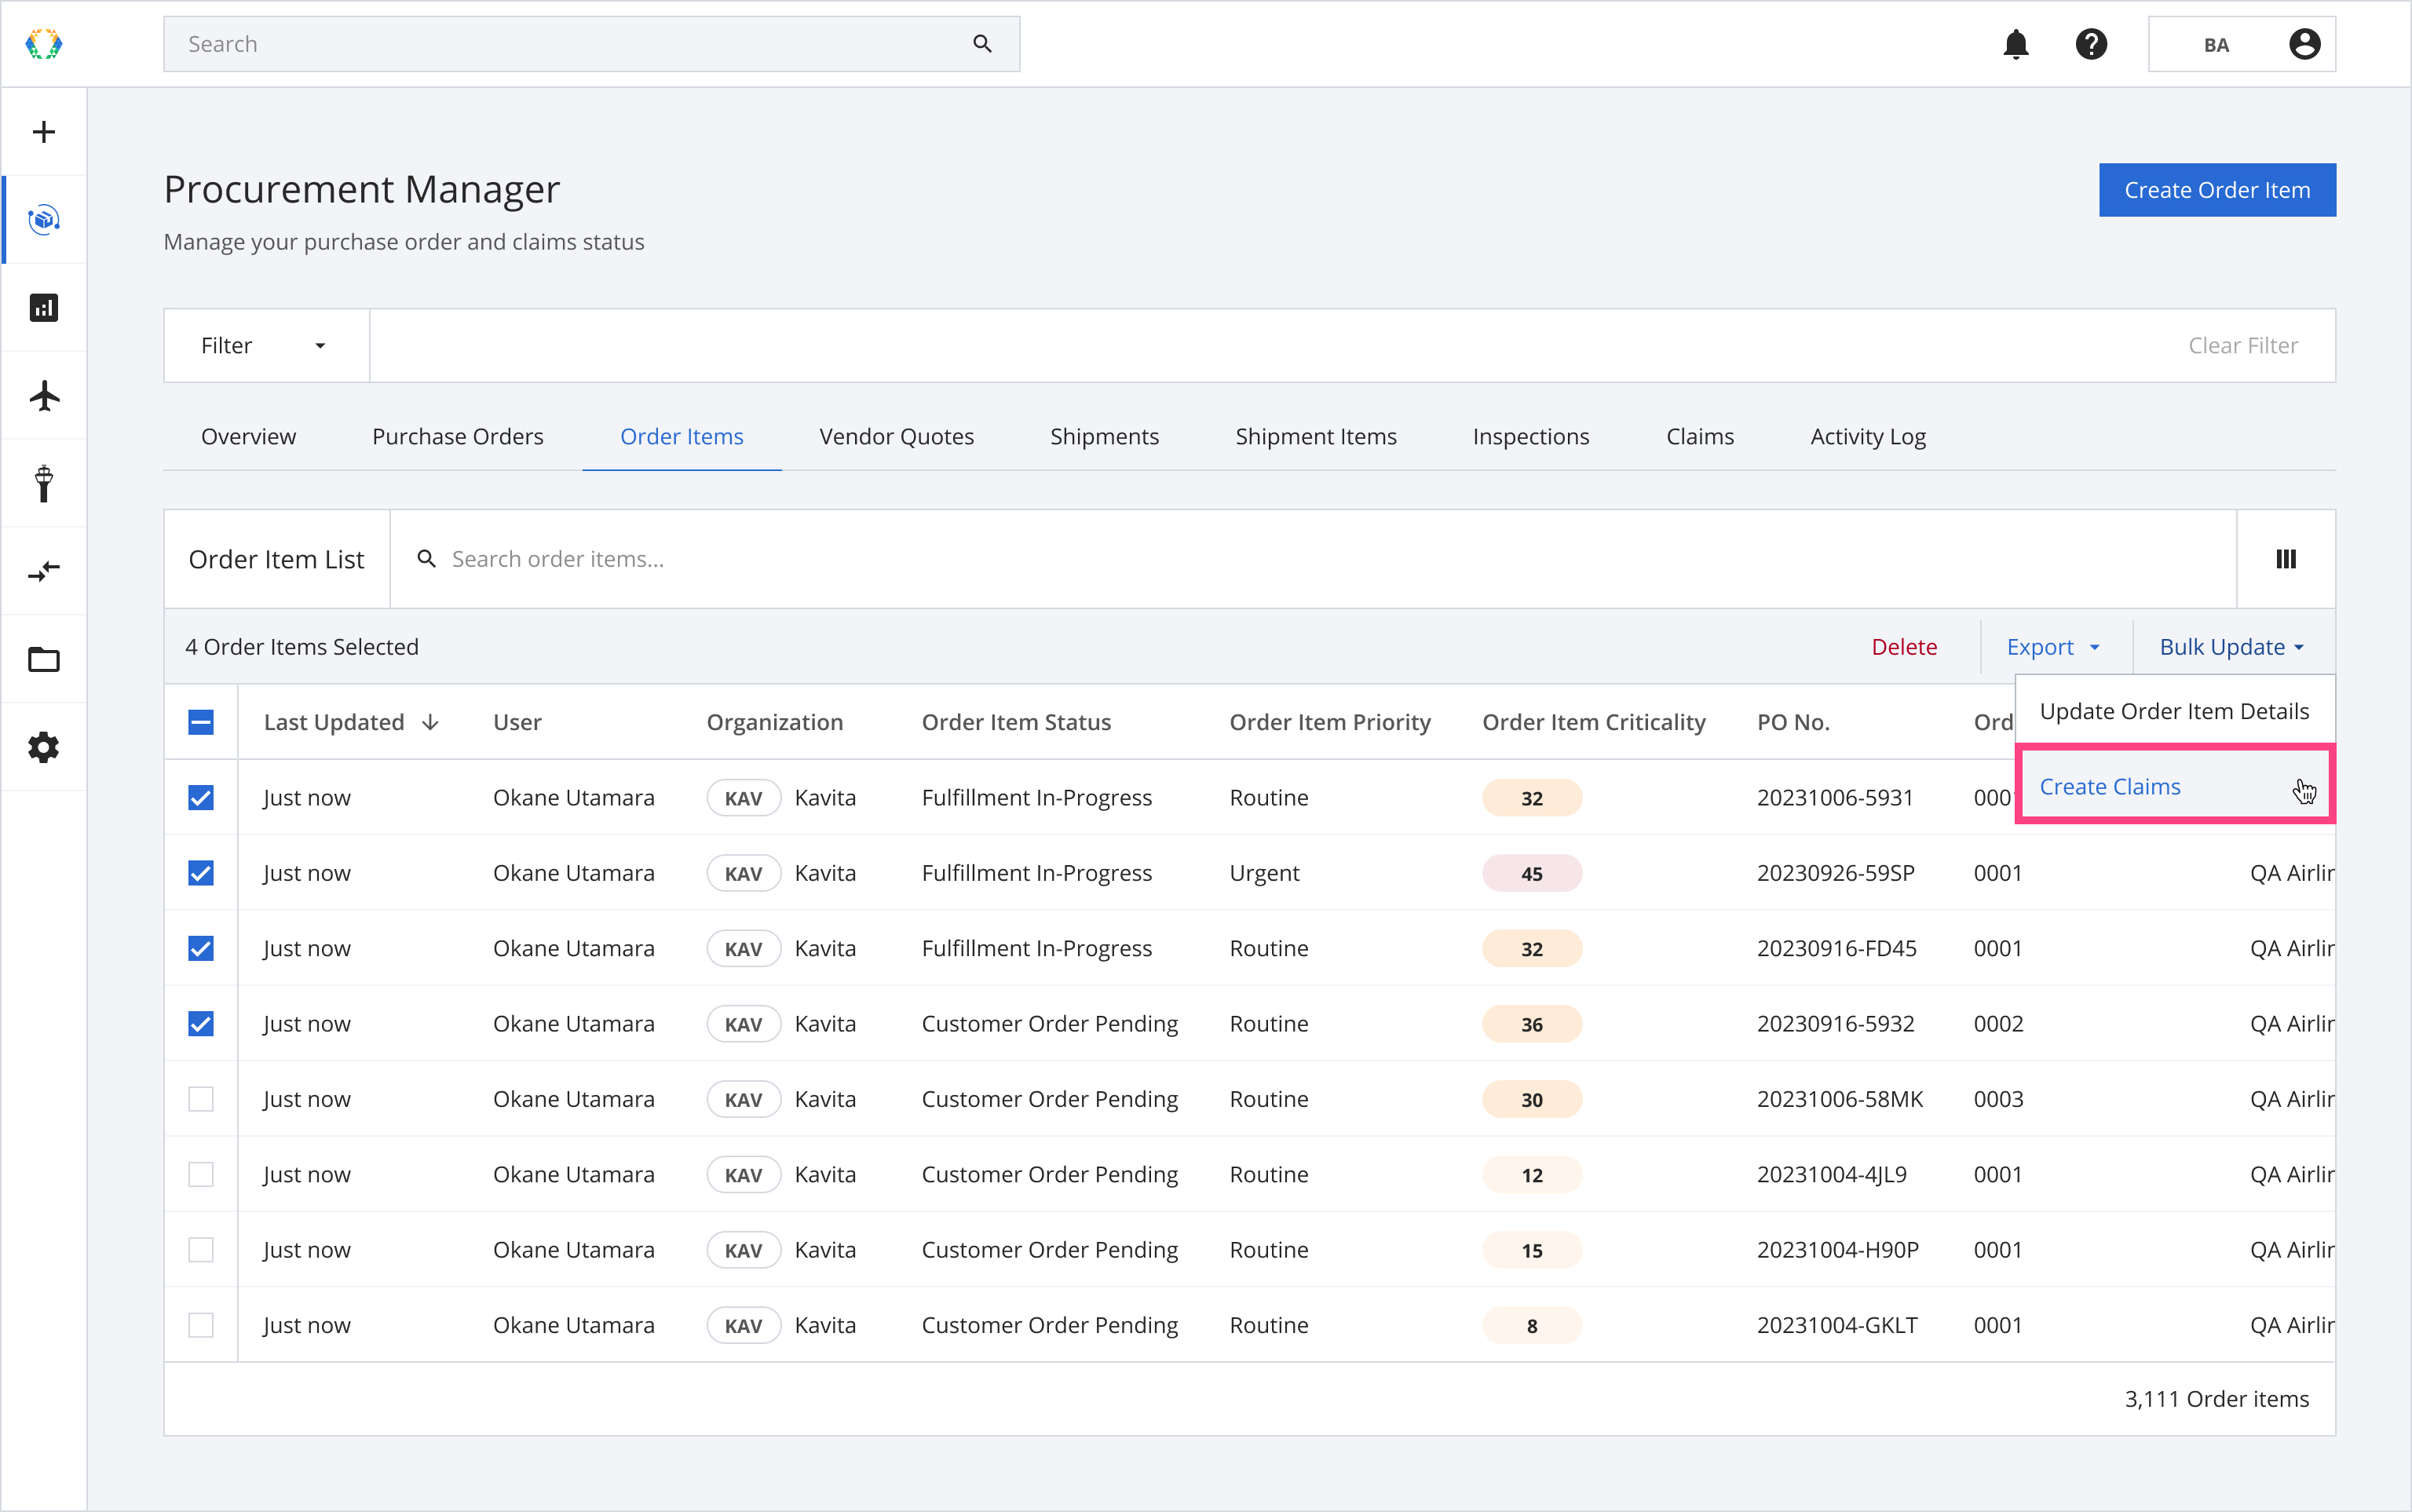
Step 2: Click ‘Bulk Update’ and then select 'Create Claims'.
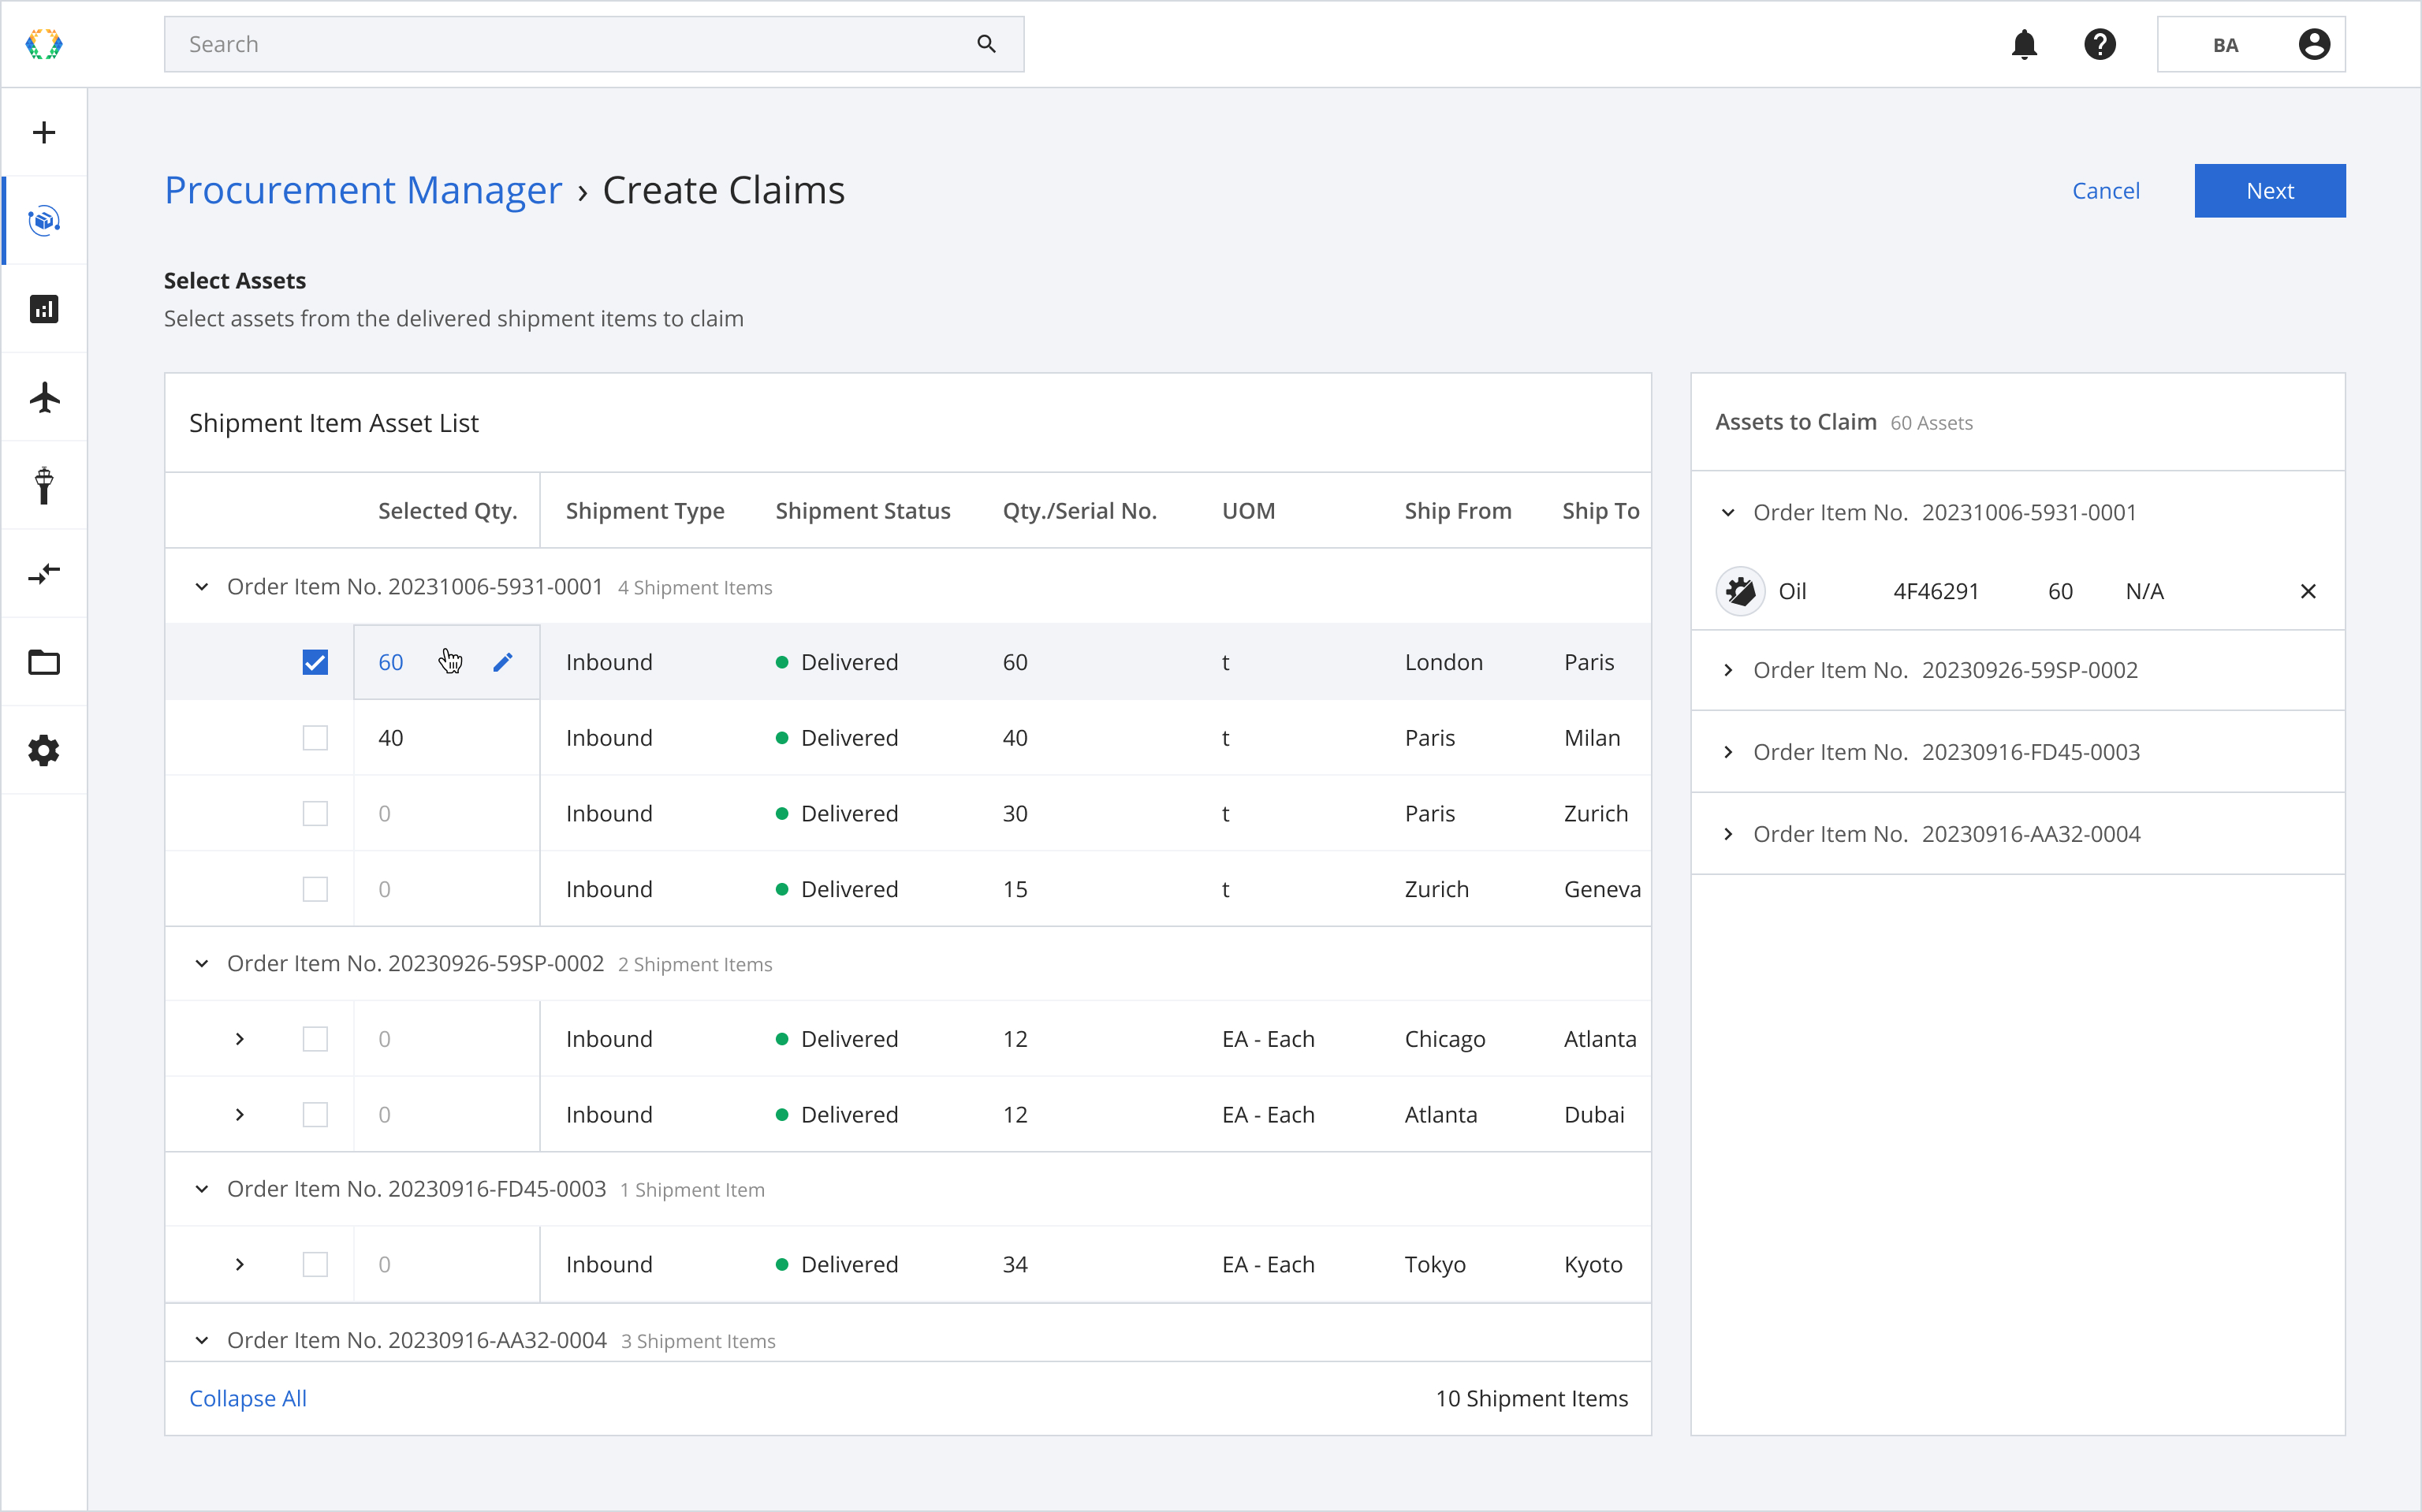
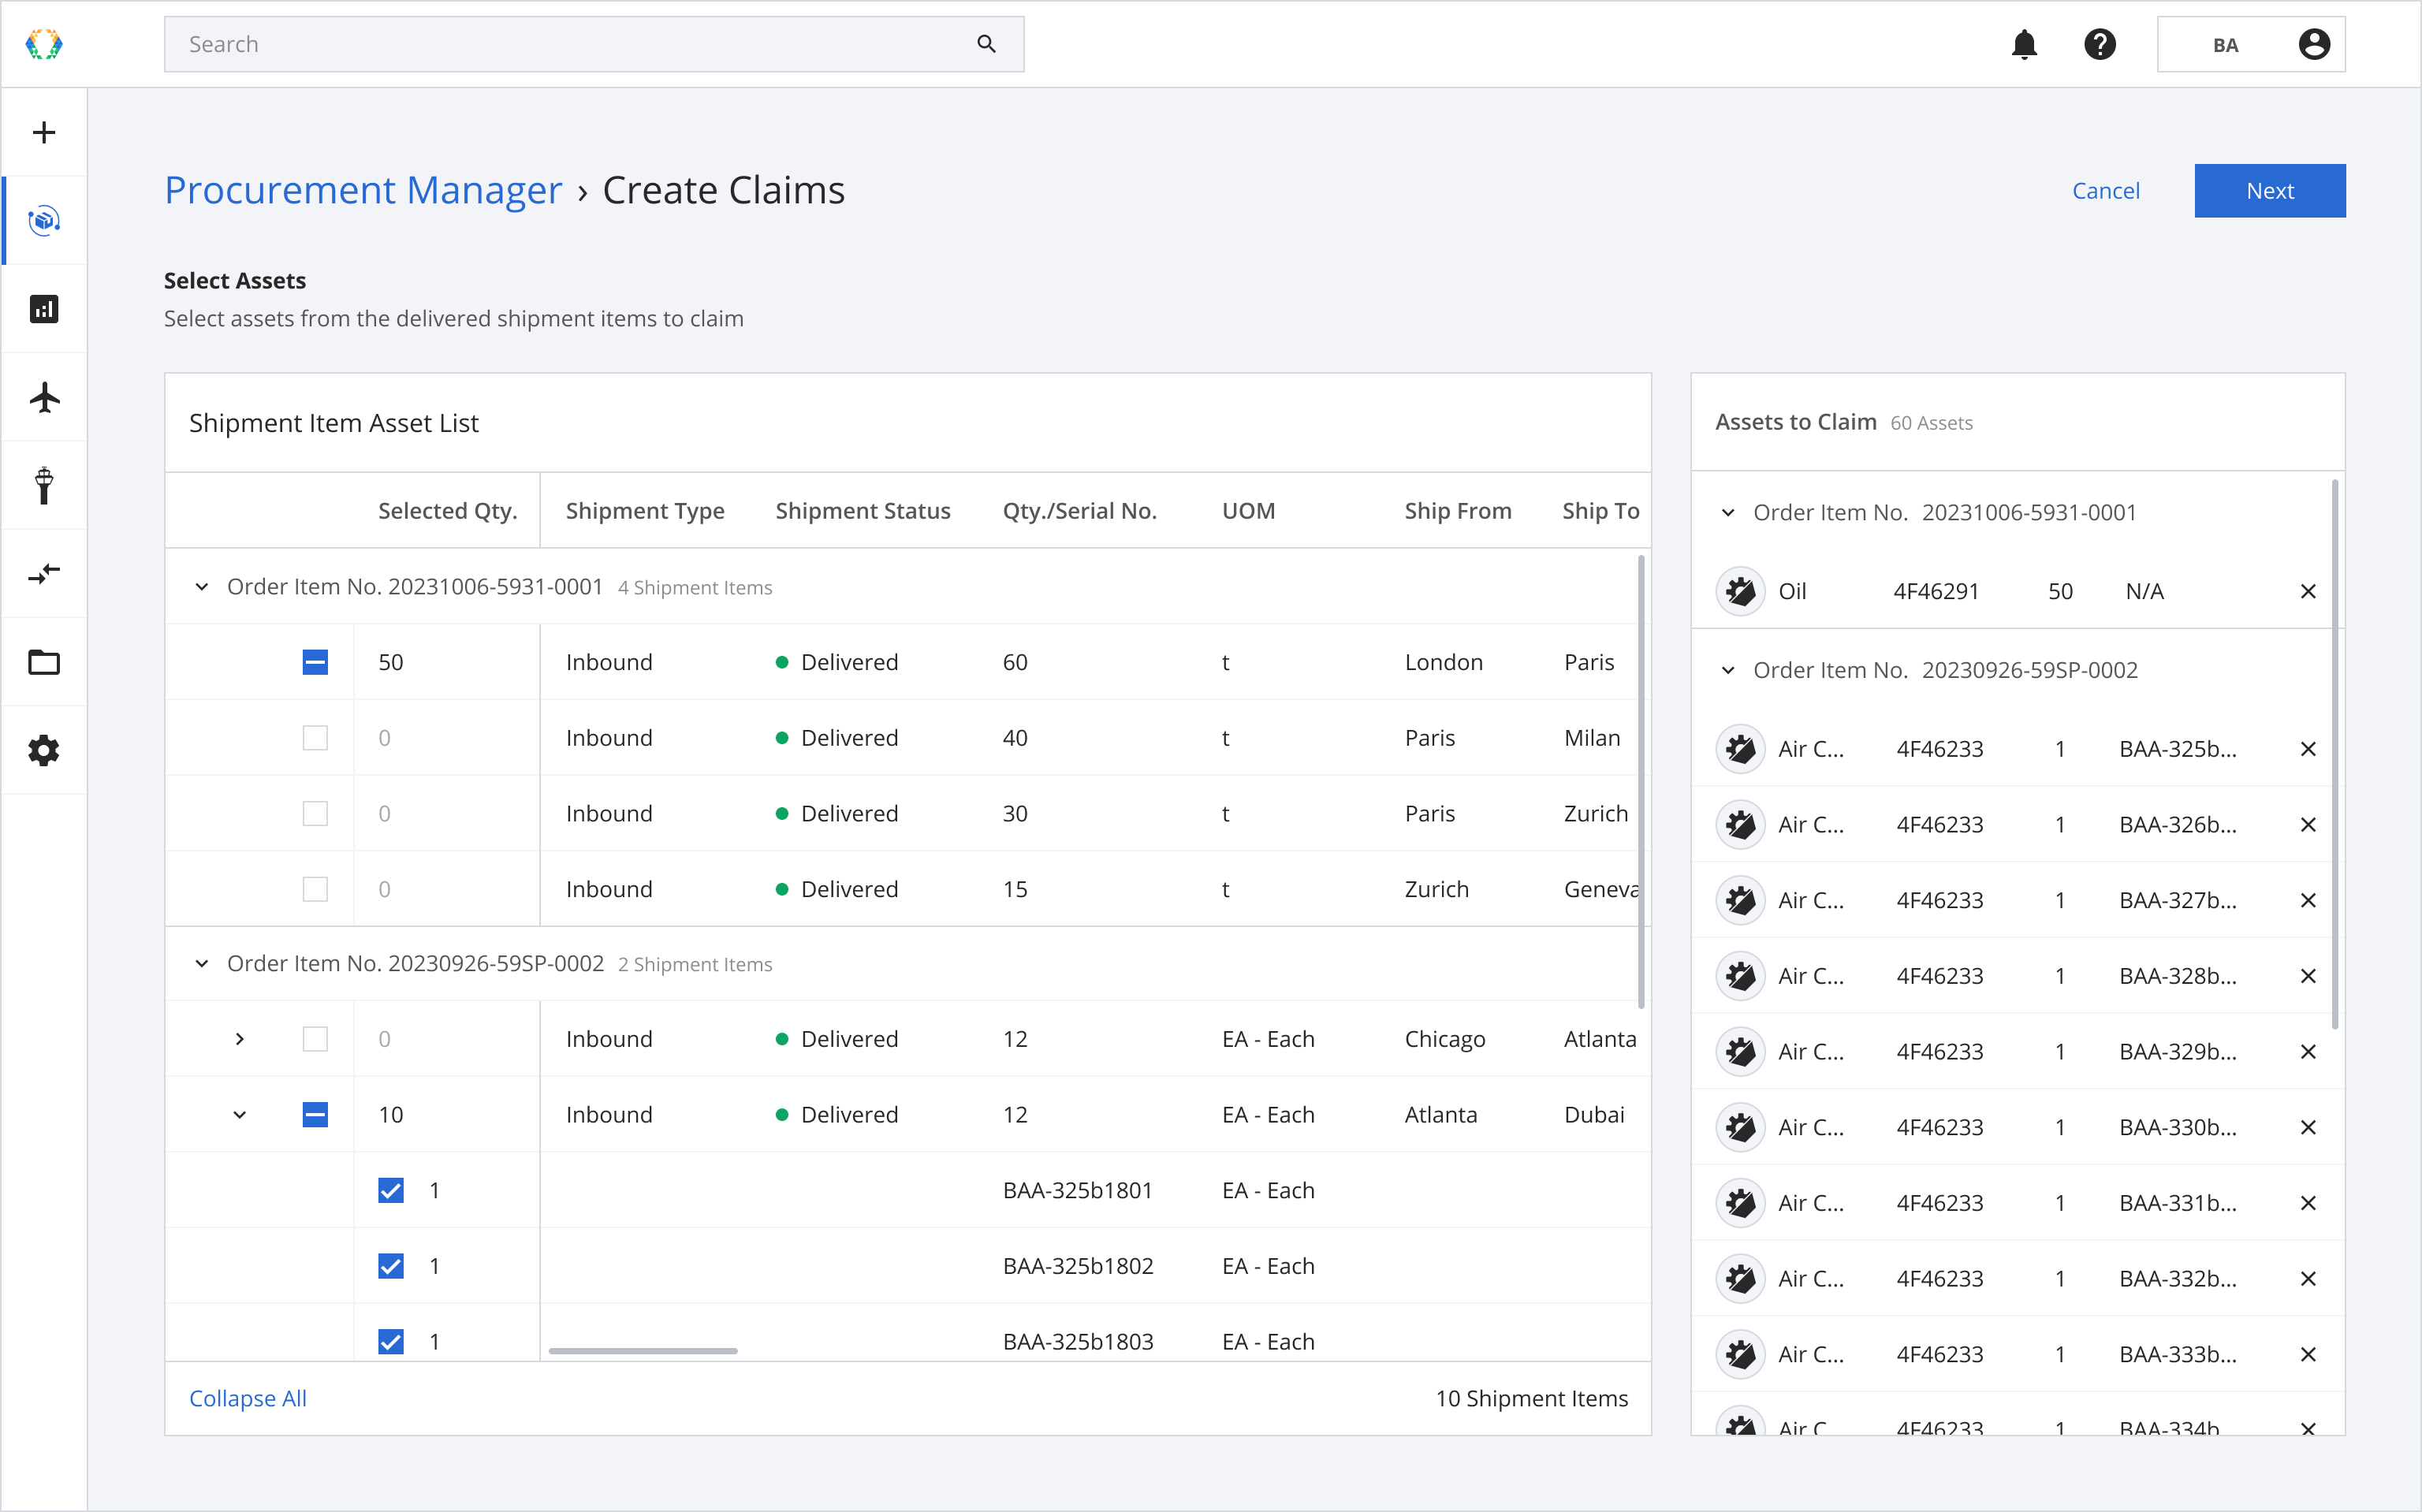
Step 3: Select assets for your claims from the Shipment Item Asset List.
This table includes all the delivered shipment items related to the order items for which you're creating claims. In this table, you can find references to both assets and the shipment items they belong to.
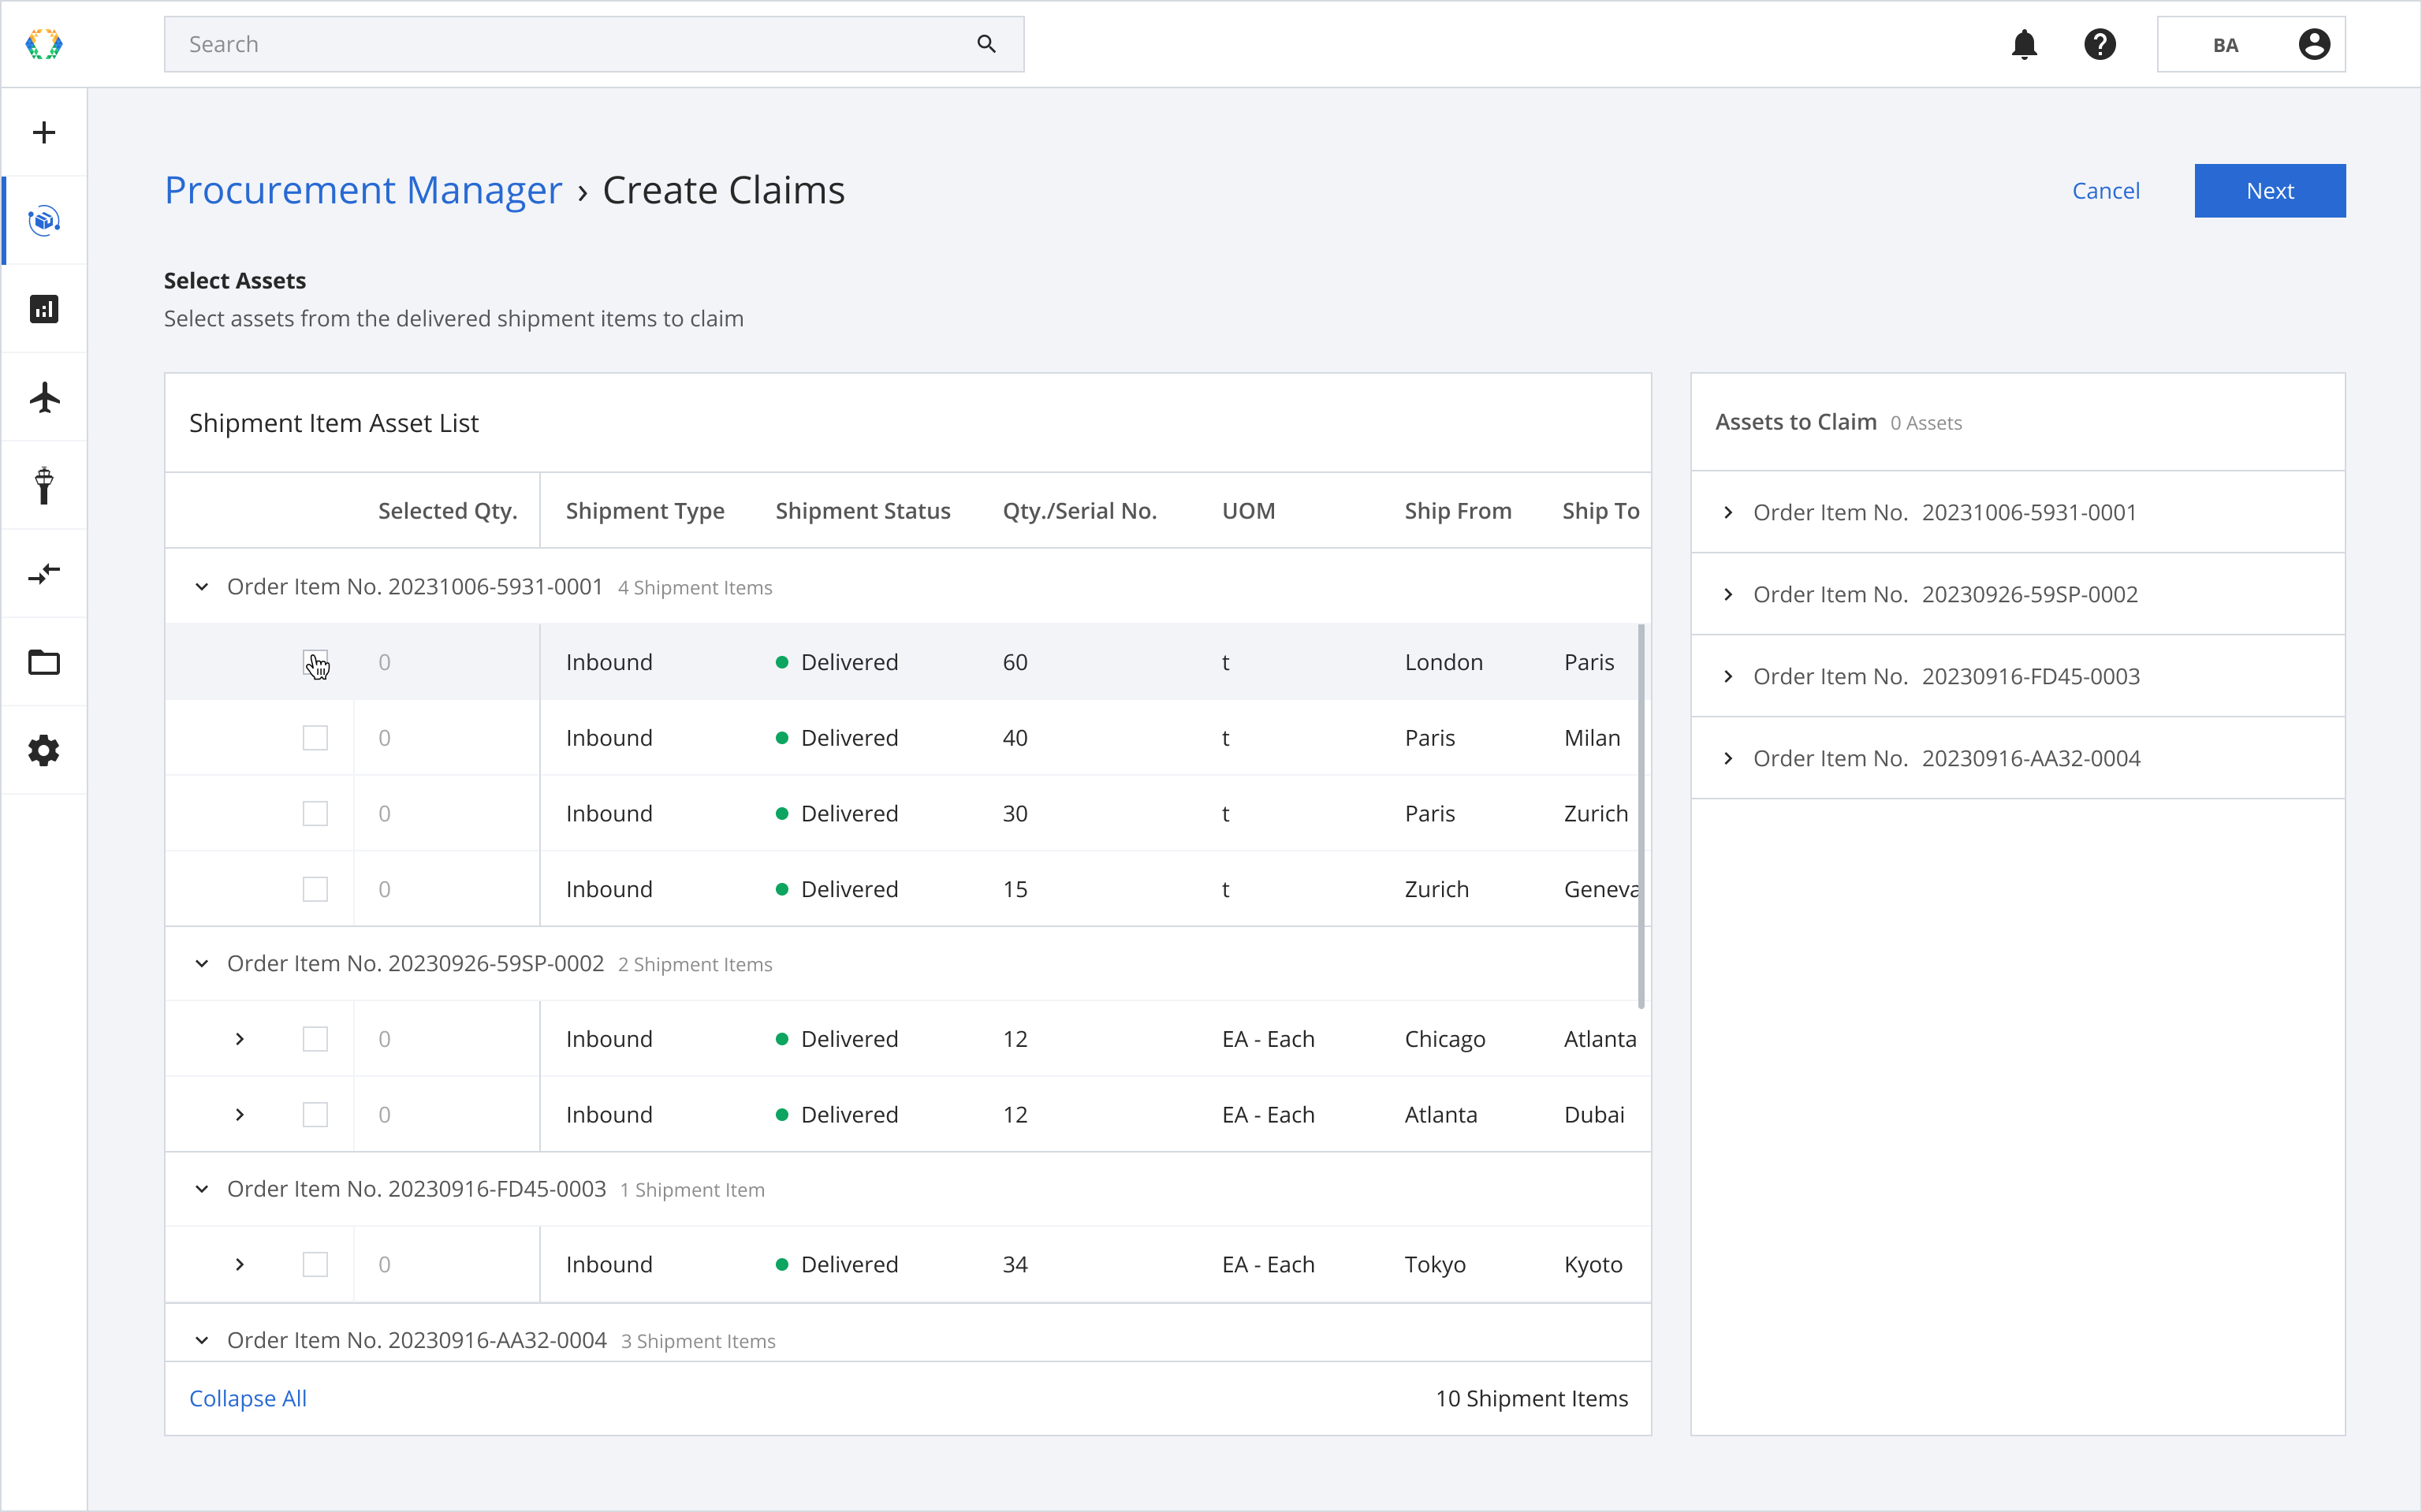
Table Layout:
A. Order Item No.
B. All the delivered shipment items related to the order item above, including the assets in those shipment items.
C. On the right side panel, you'll see all the assets you selected to claim.
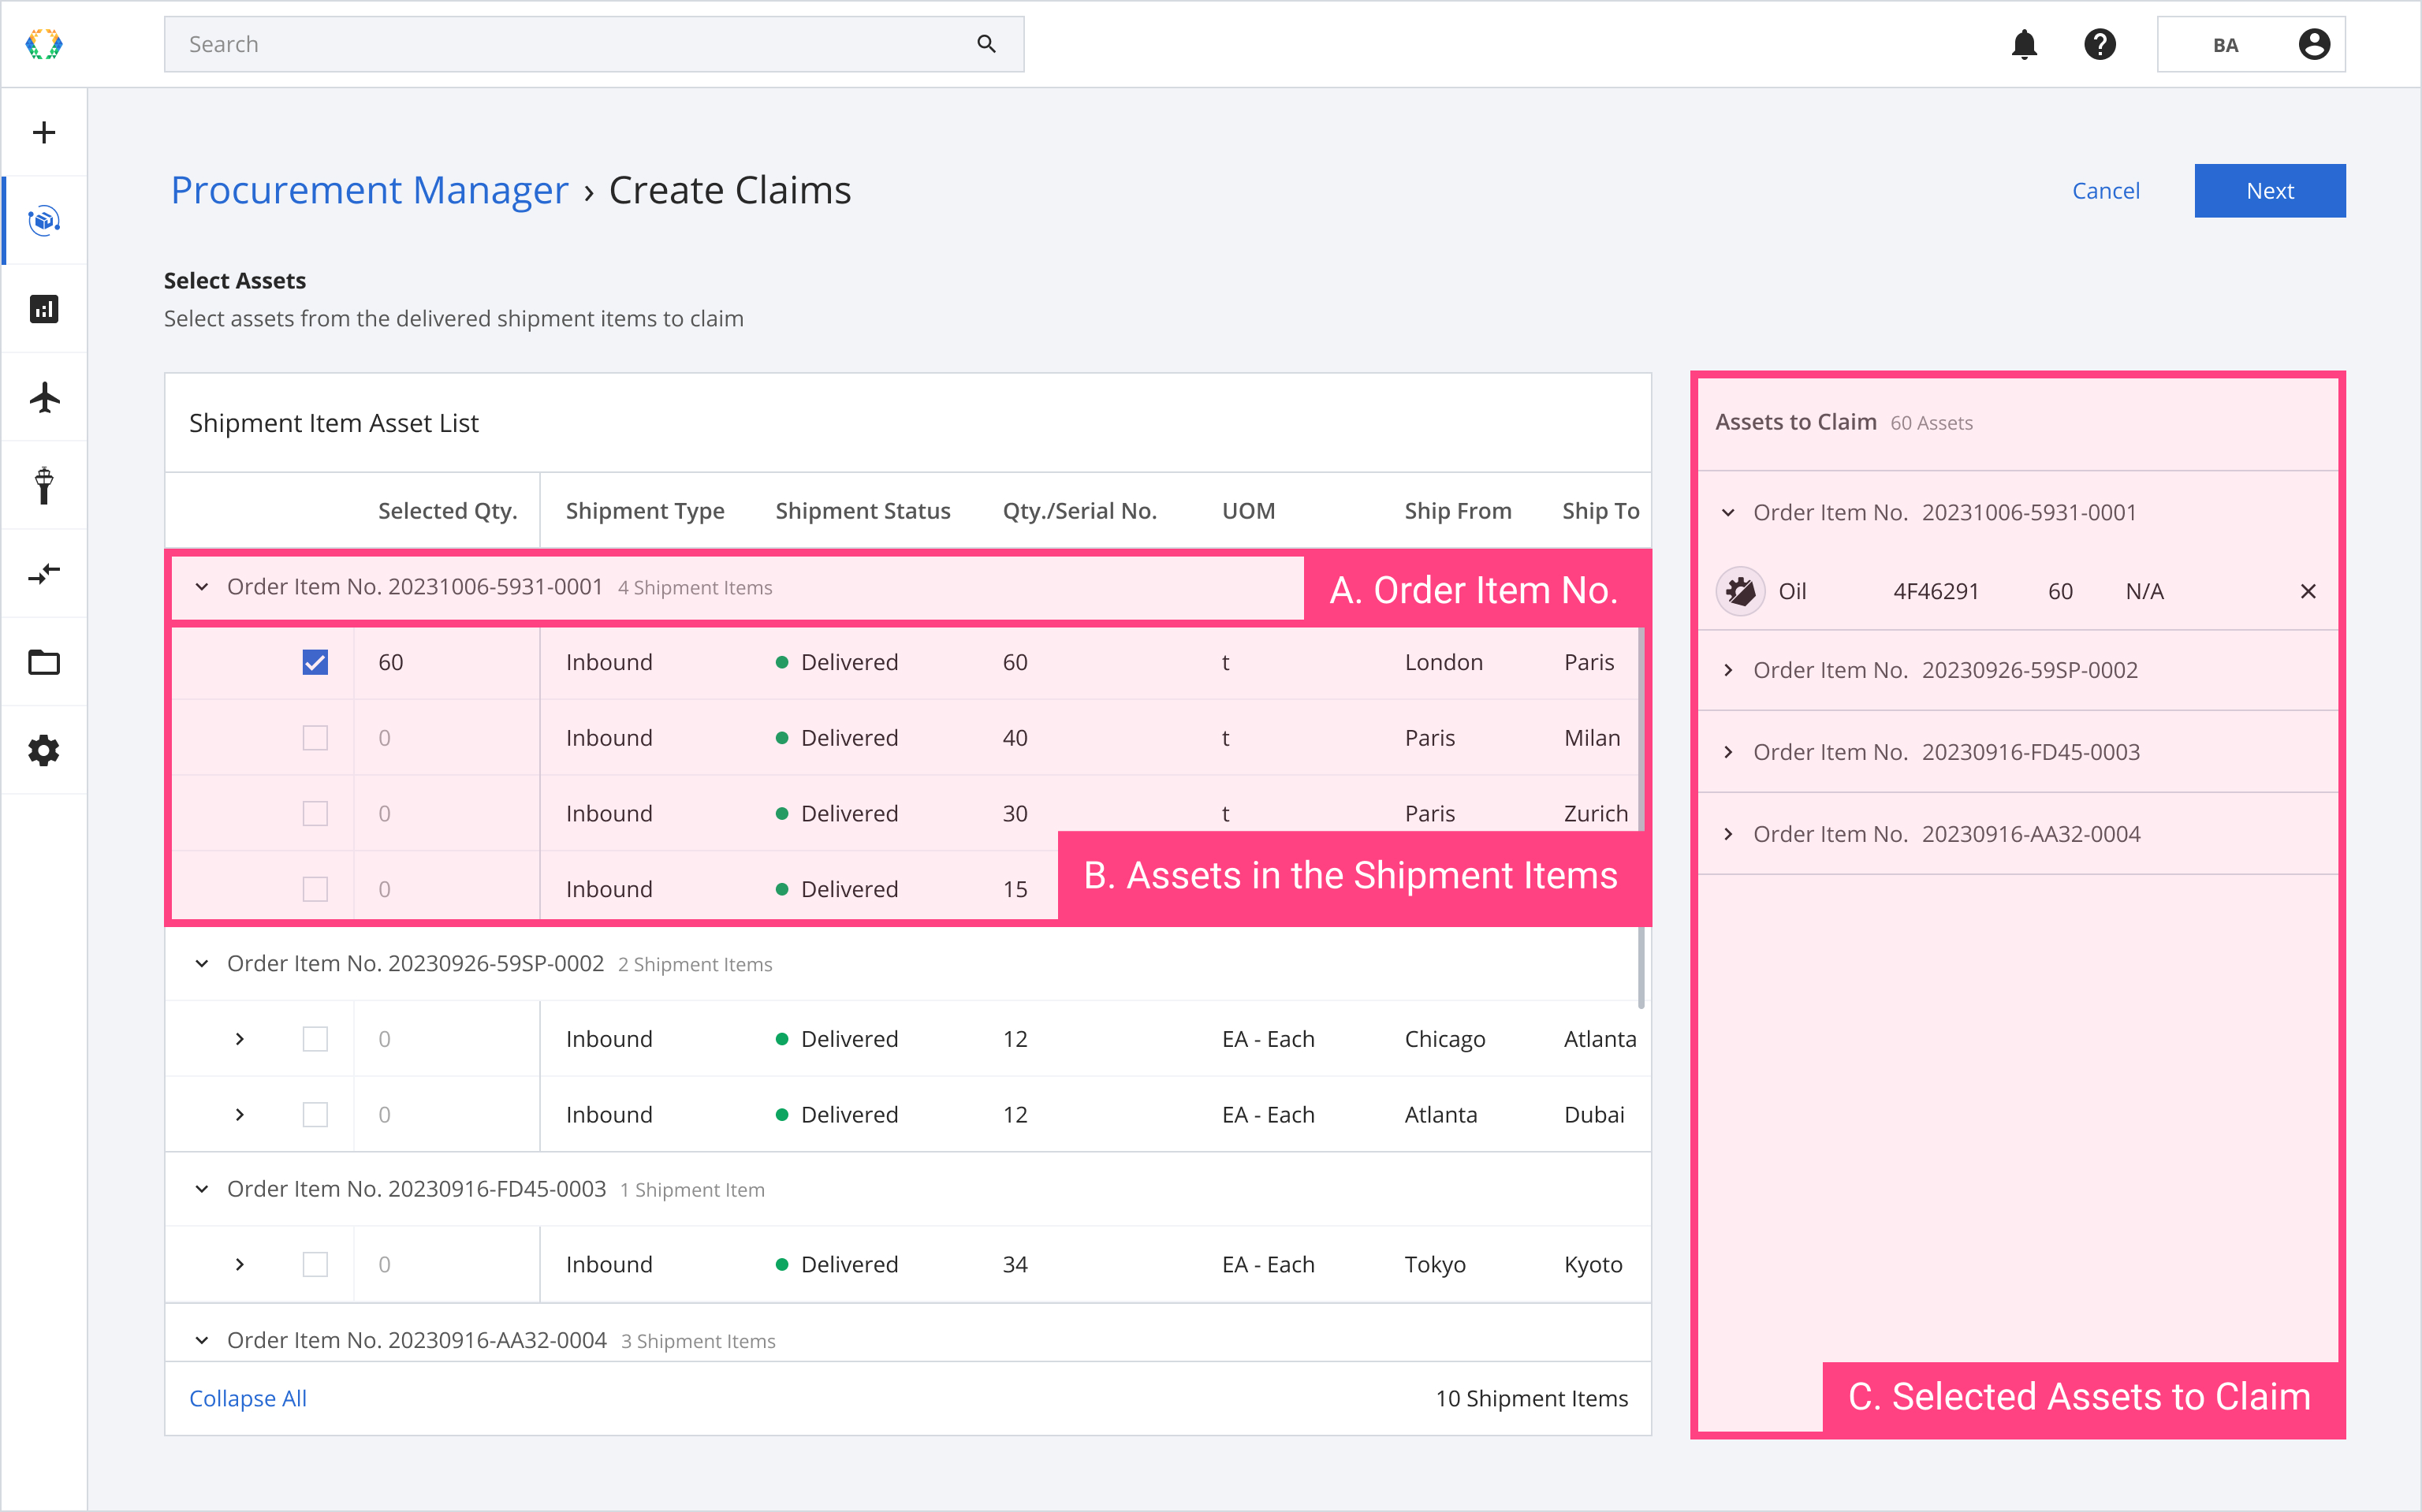
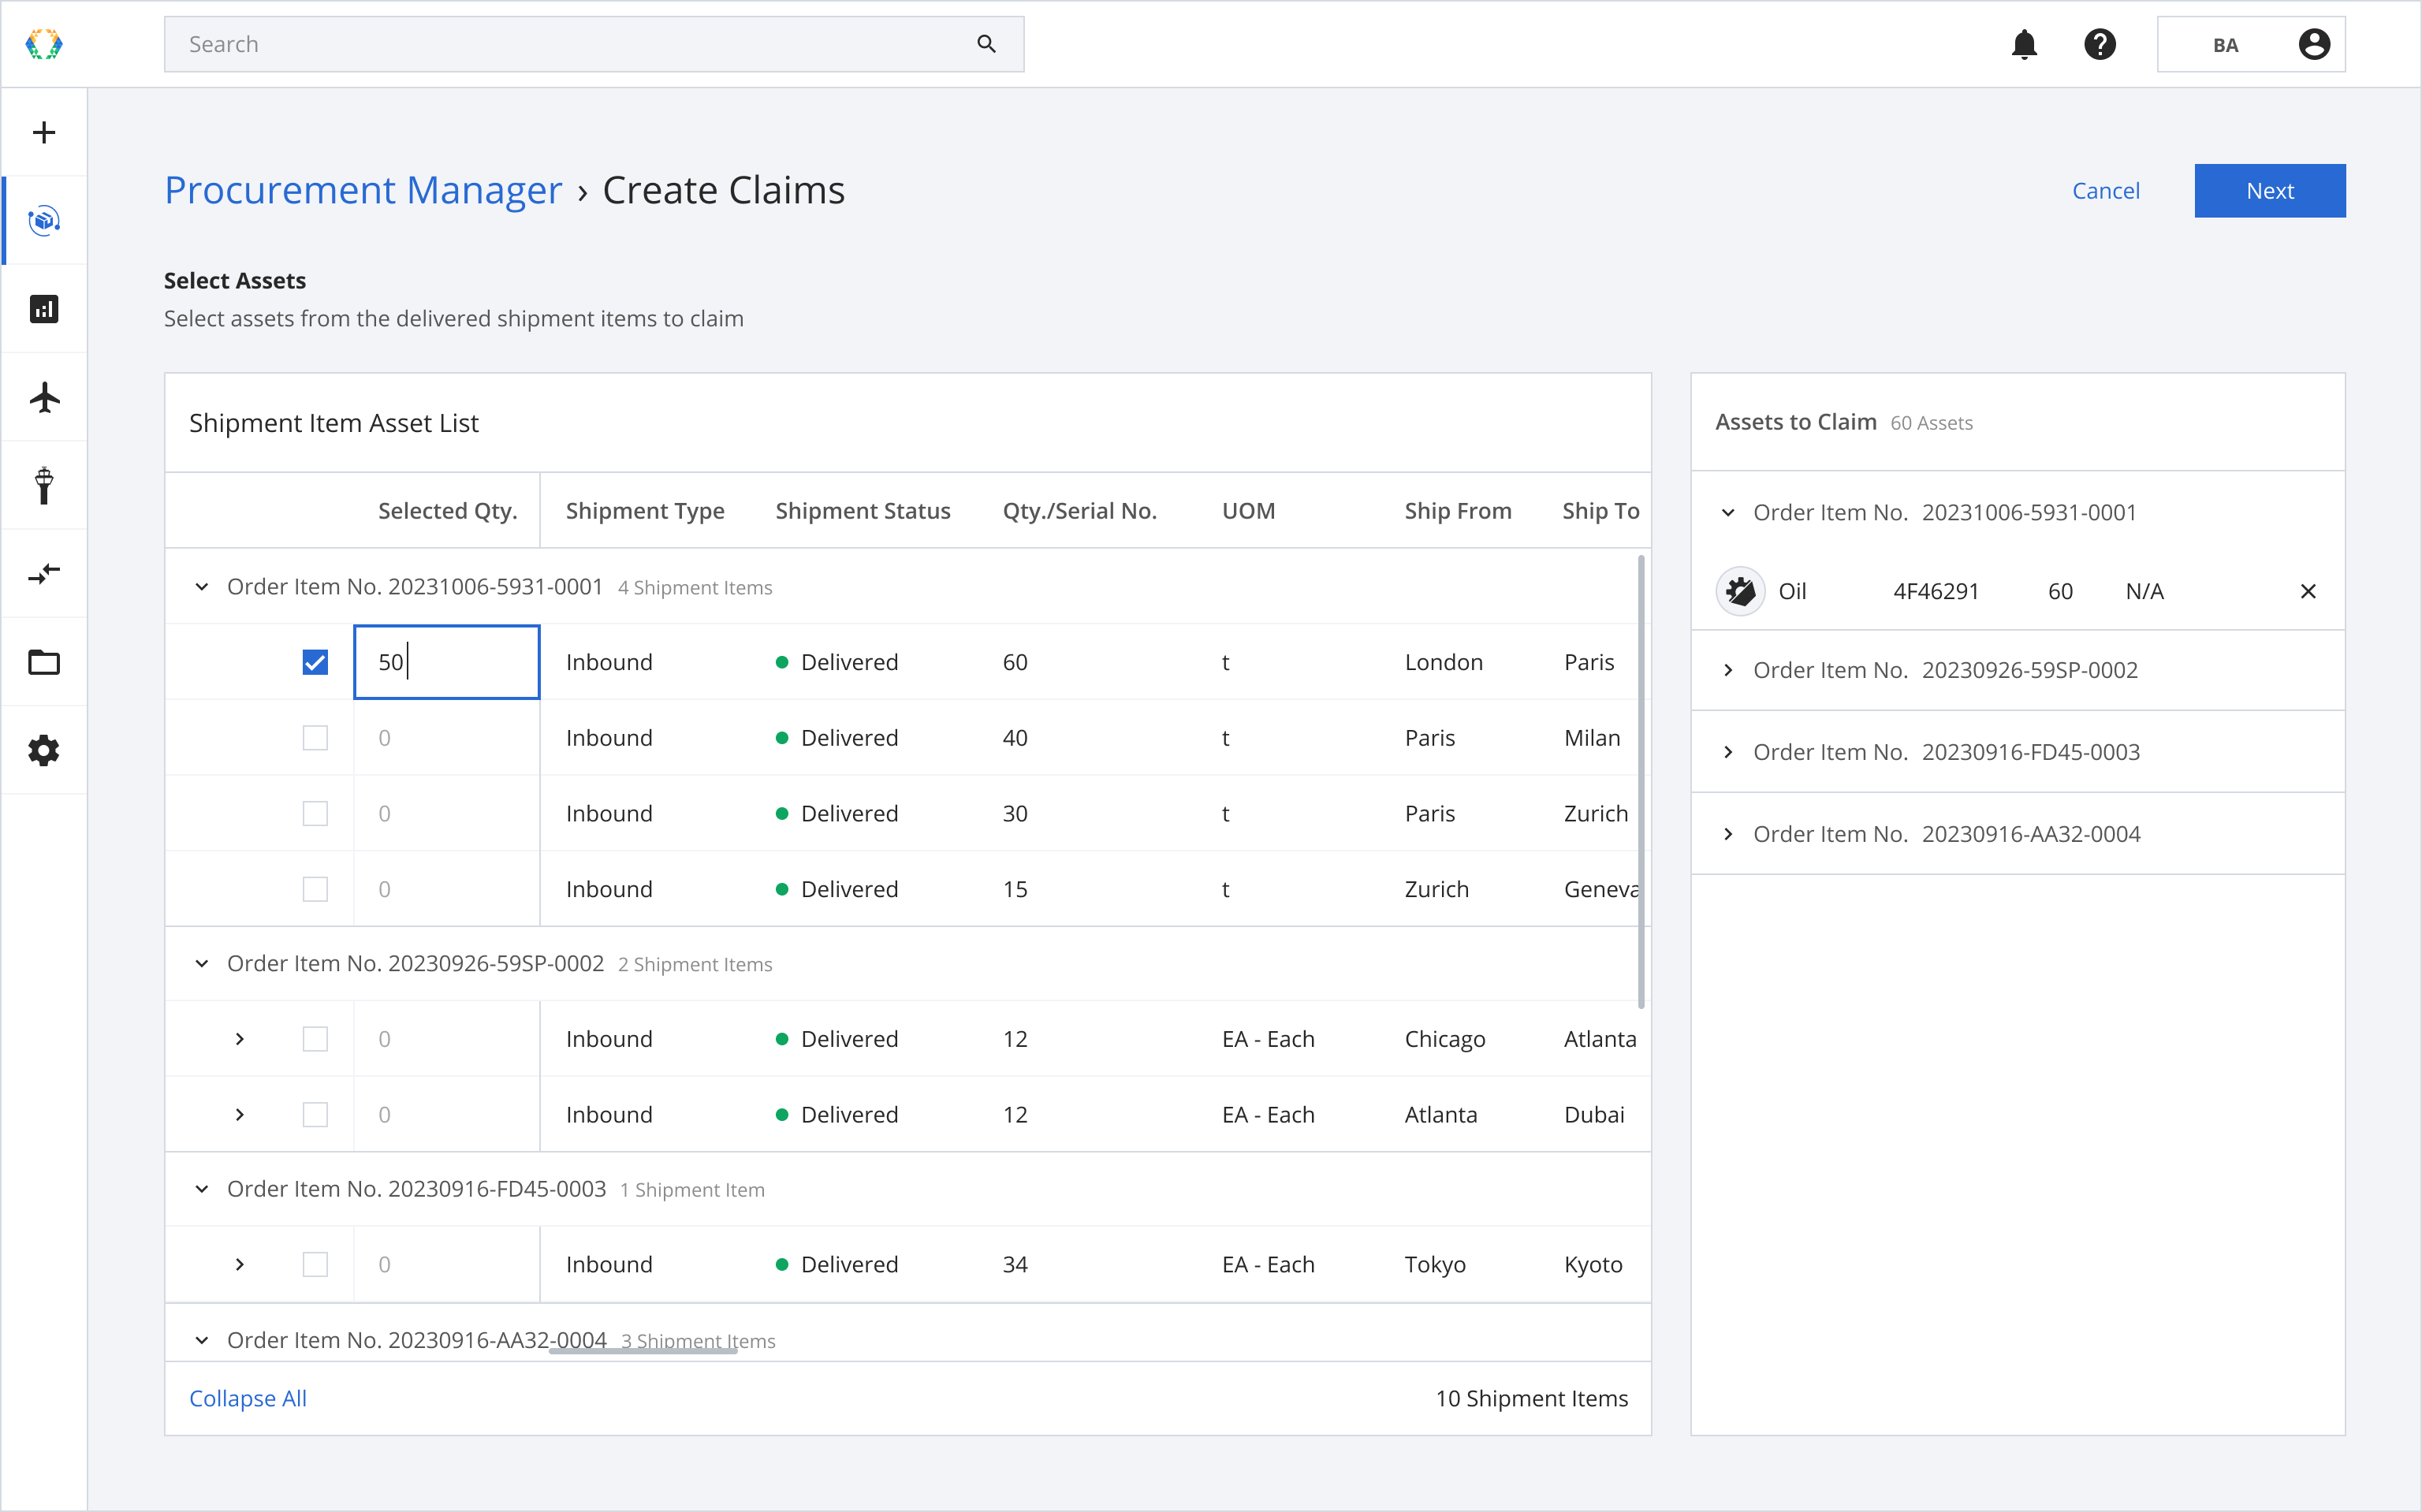
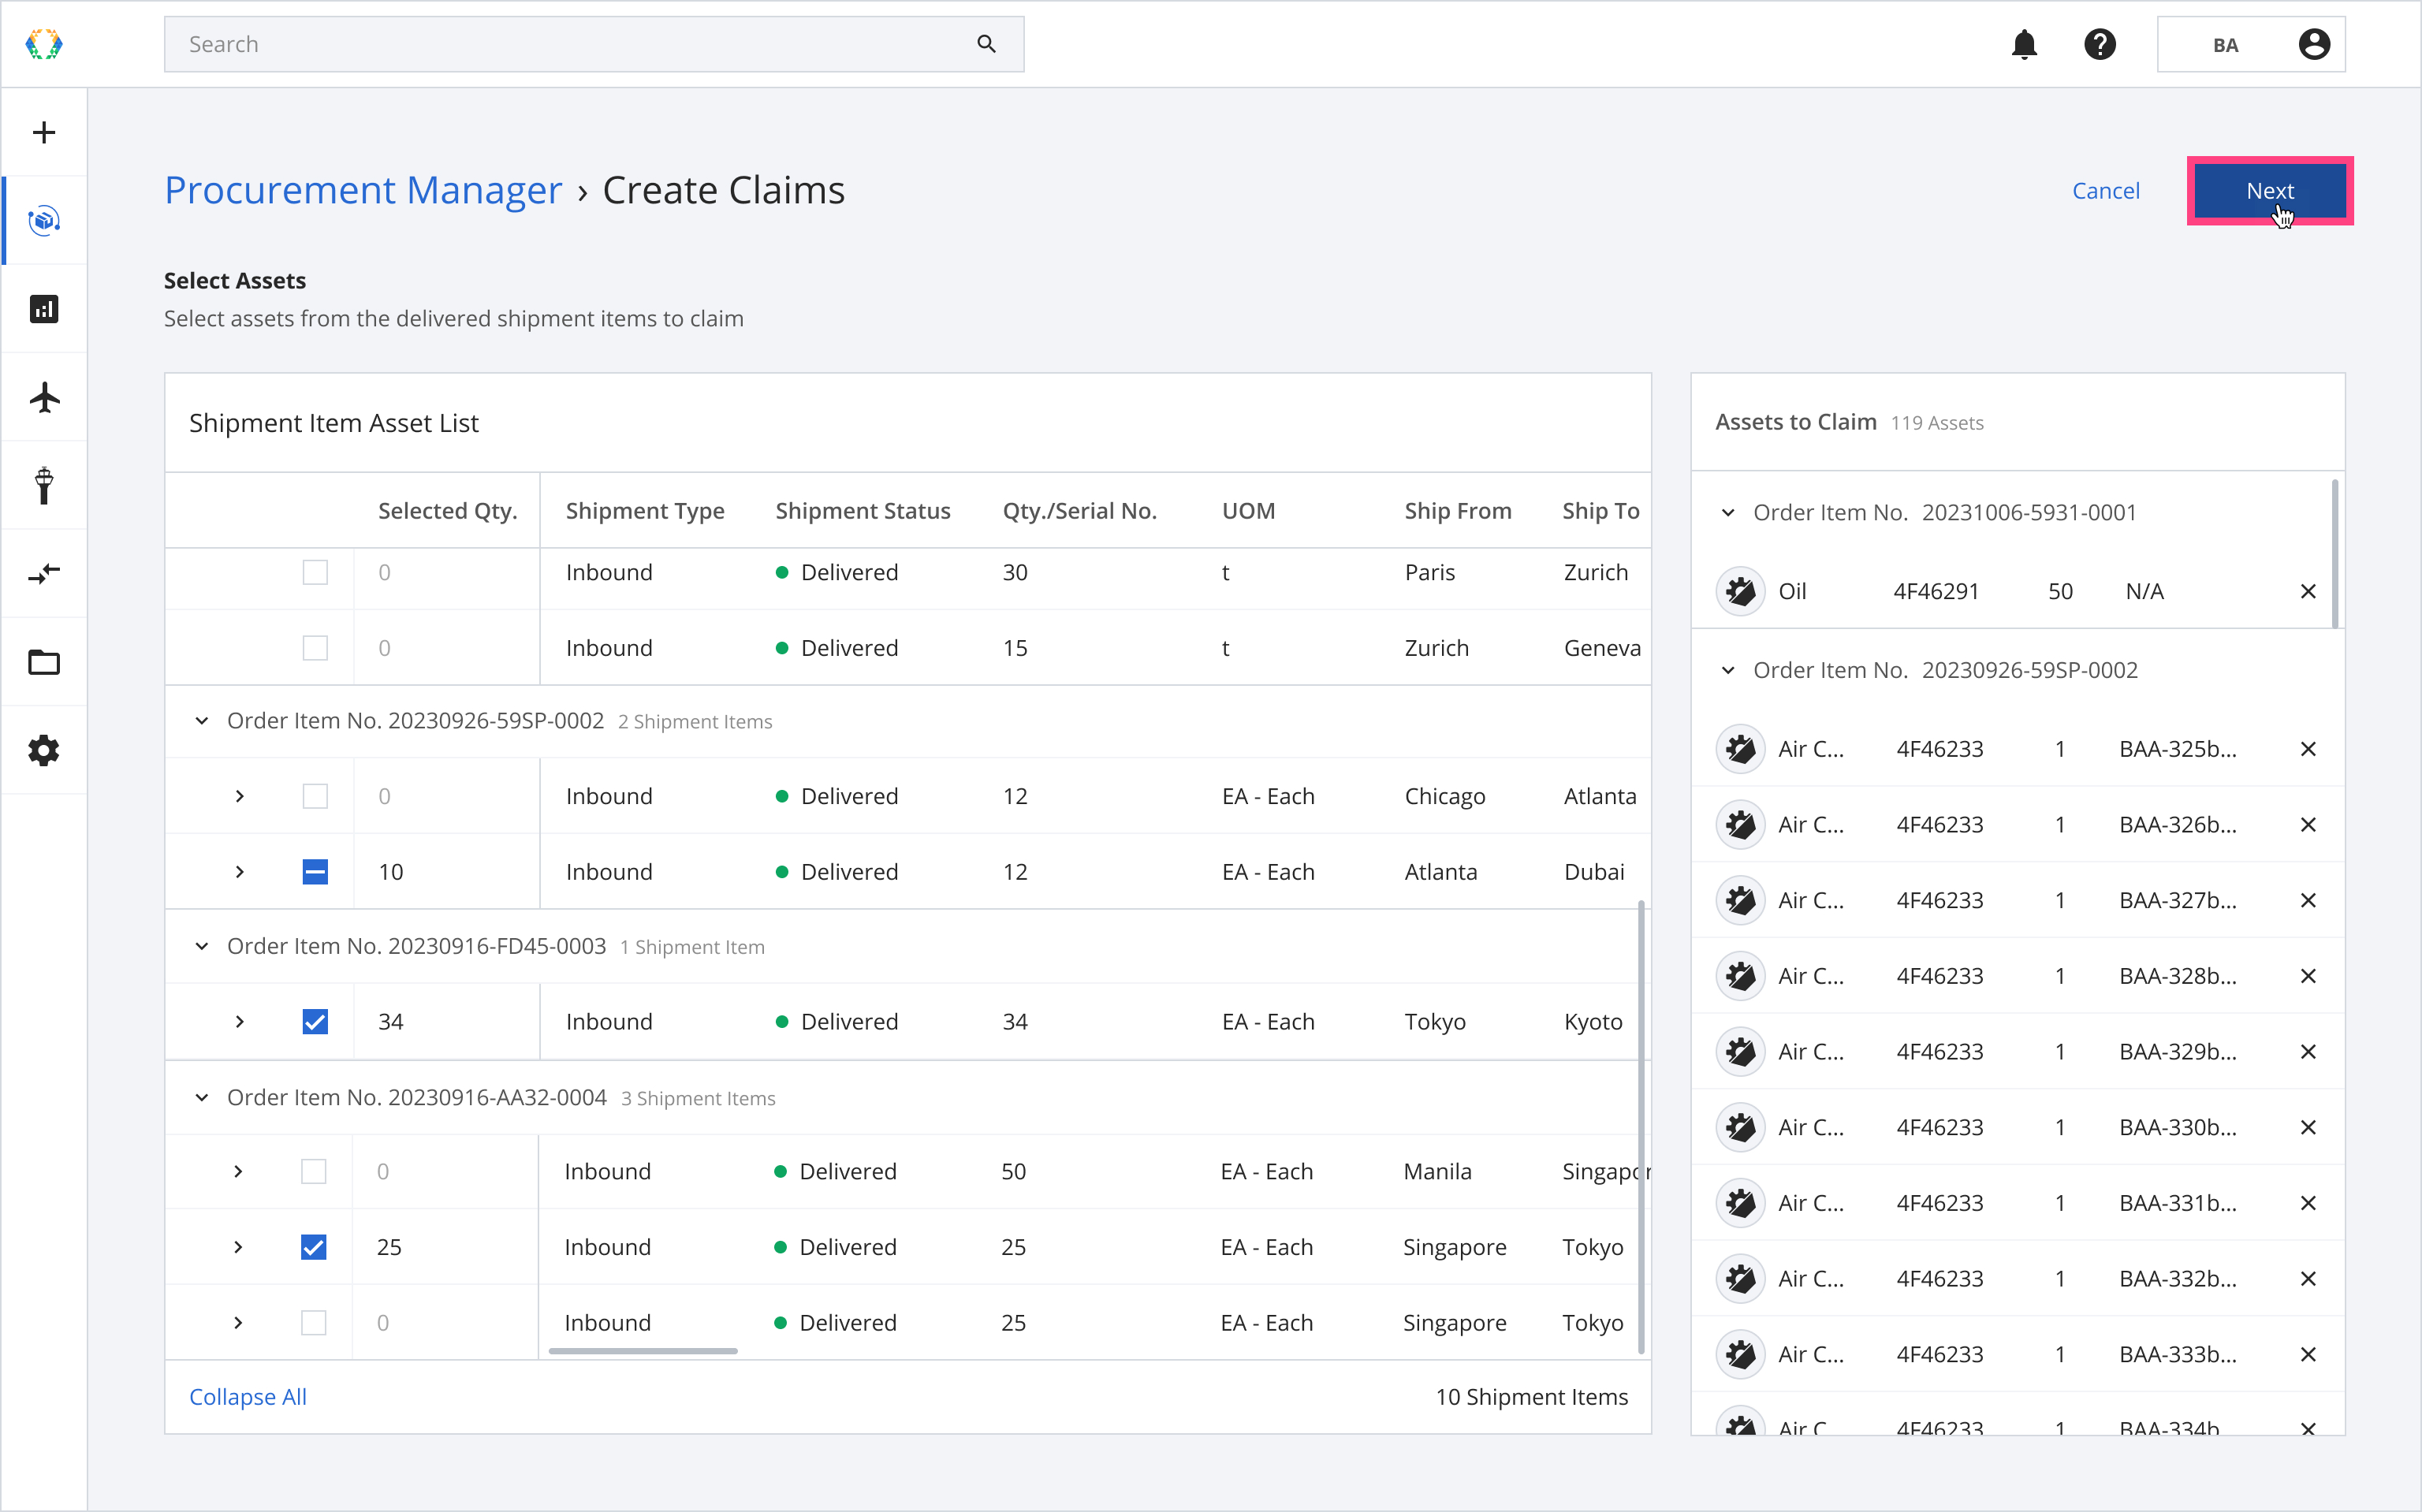
You can select assets from only one shipment item per order item group. Additionally, you can modify your selected assets' quantity by changing the number in the 'Selected Qty.' column.
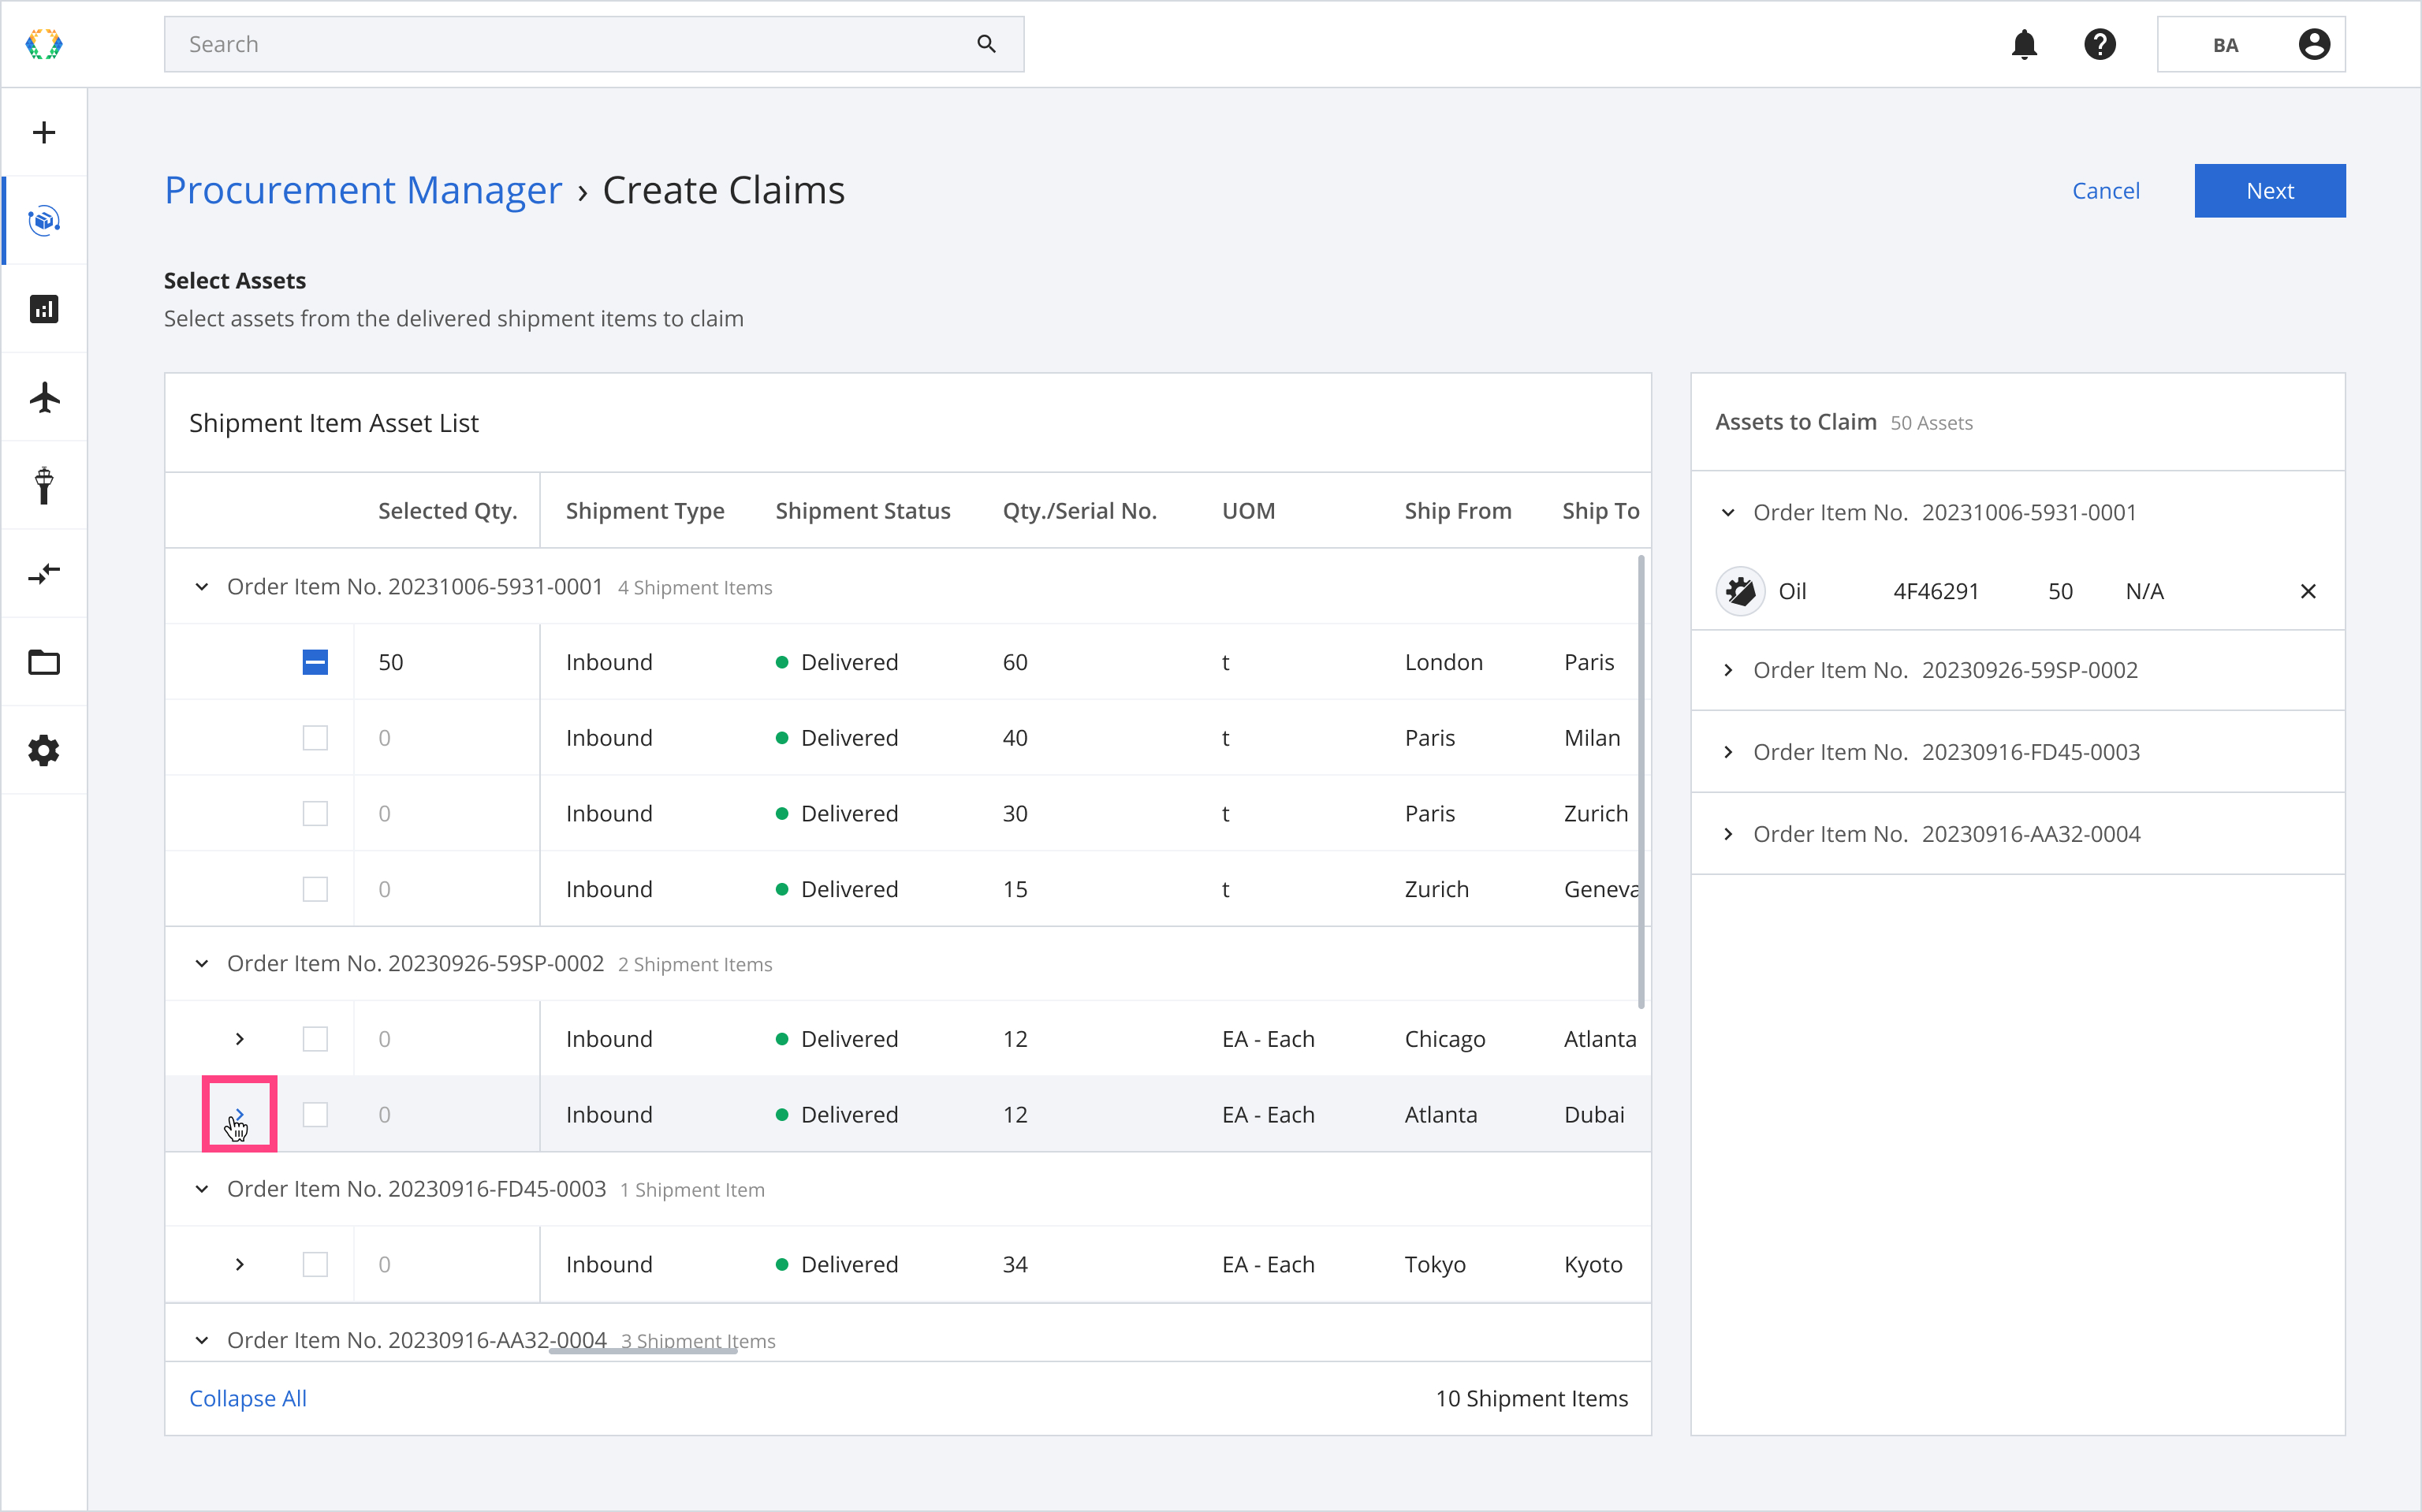
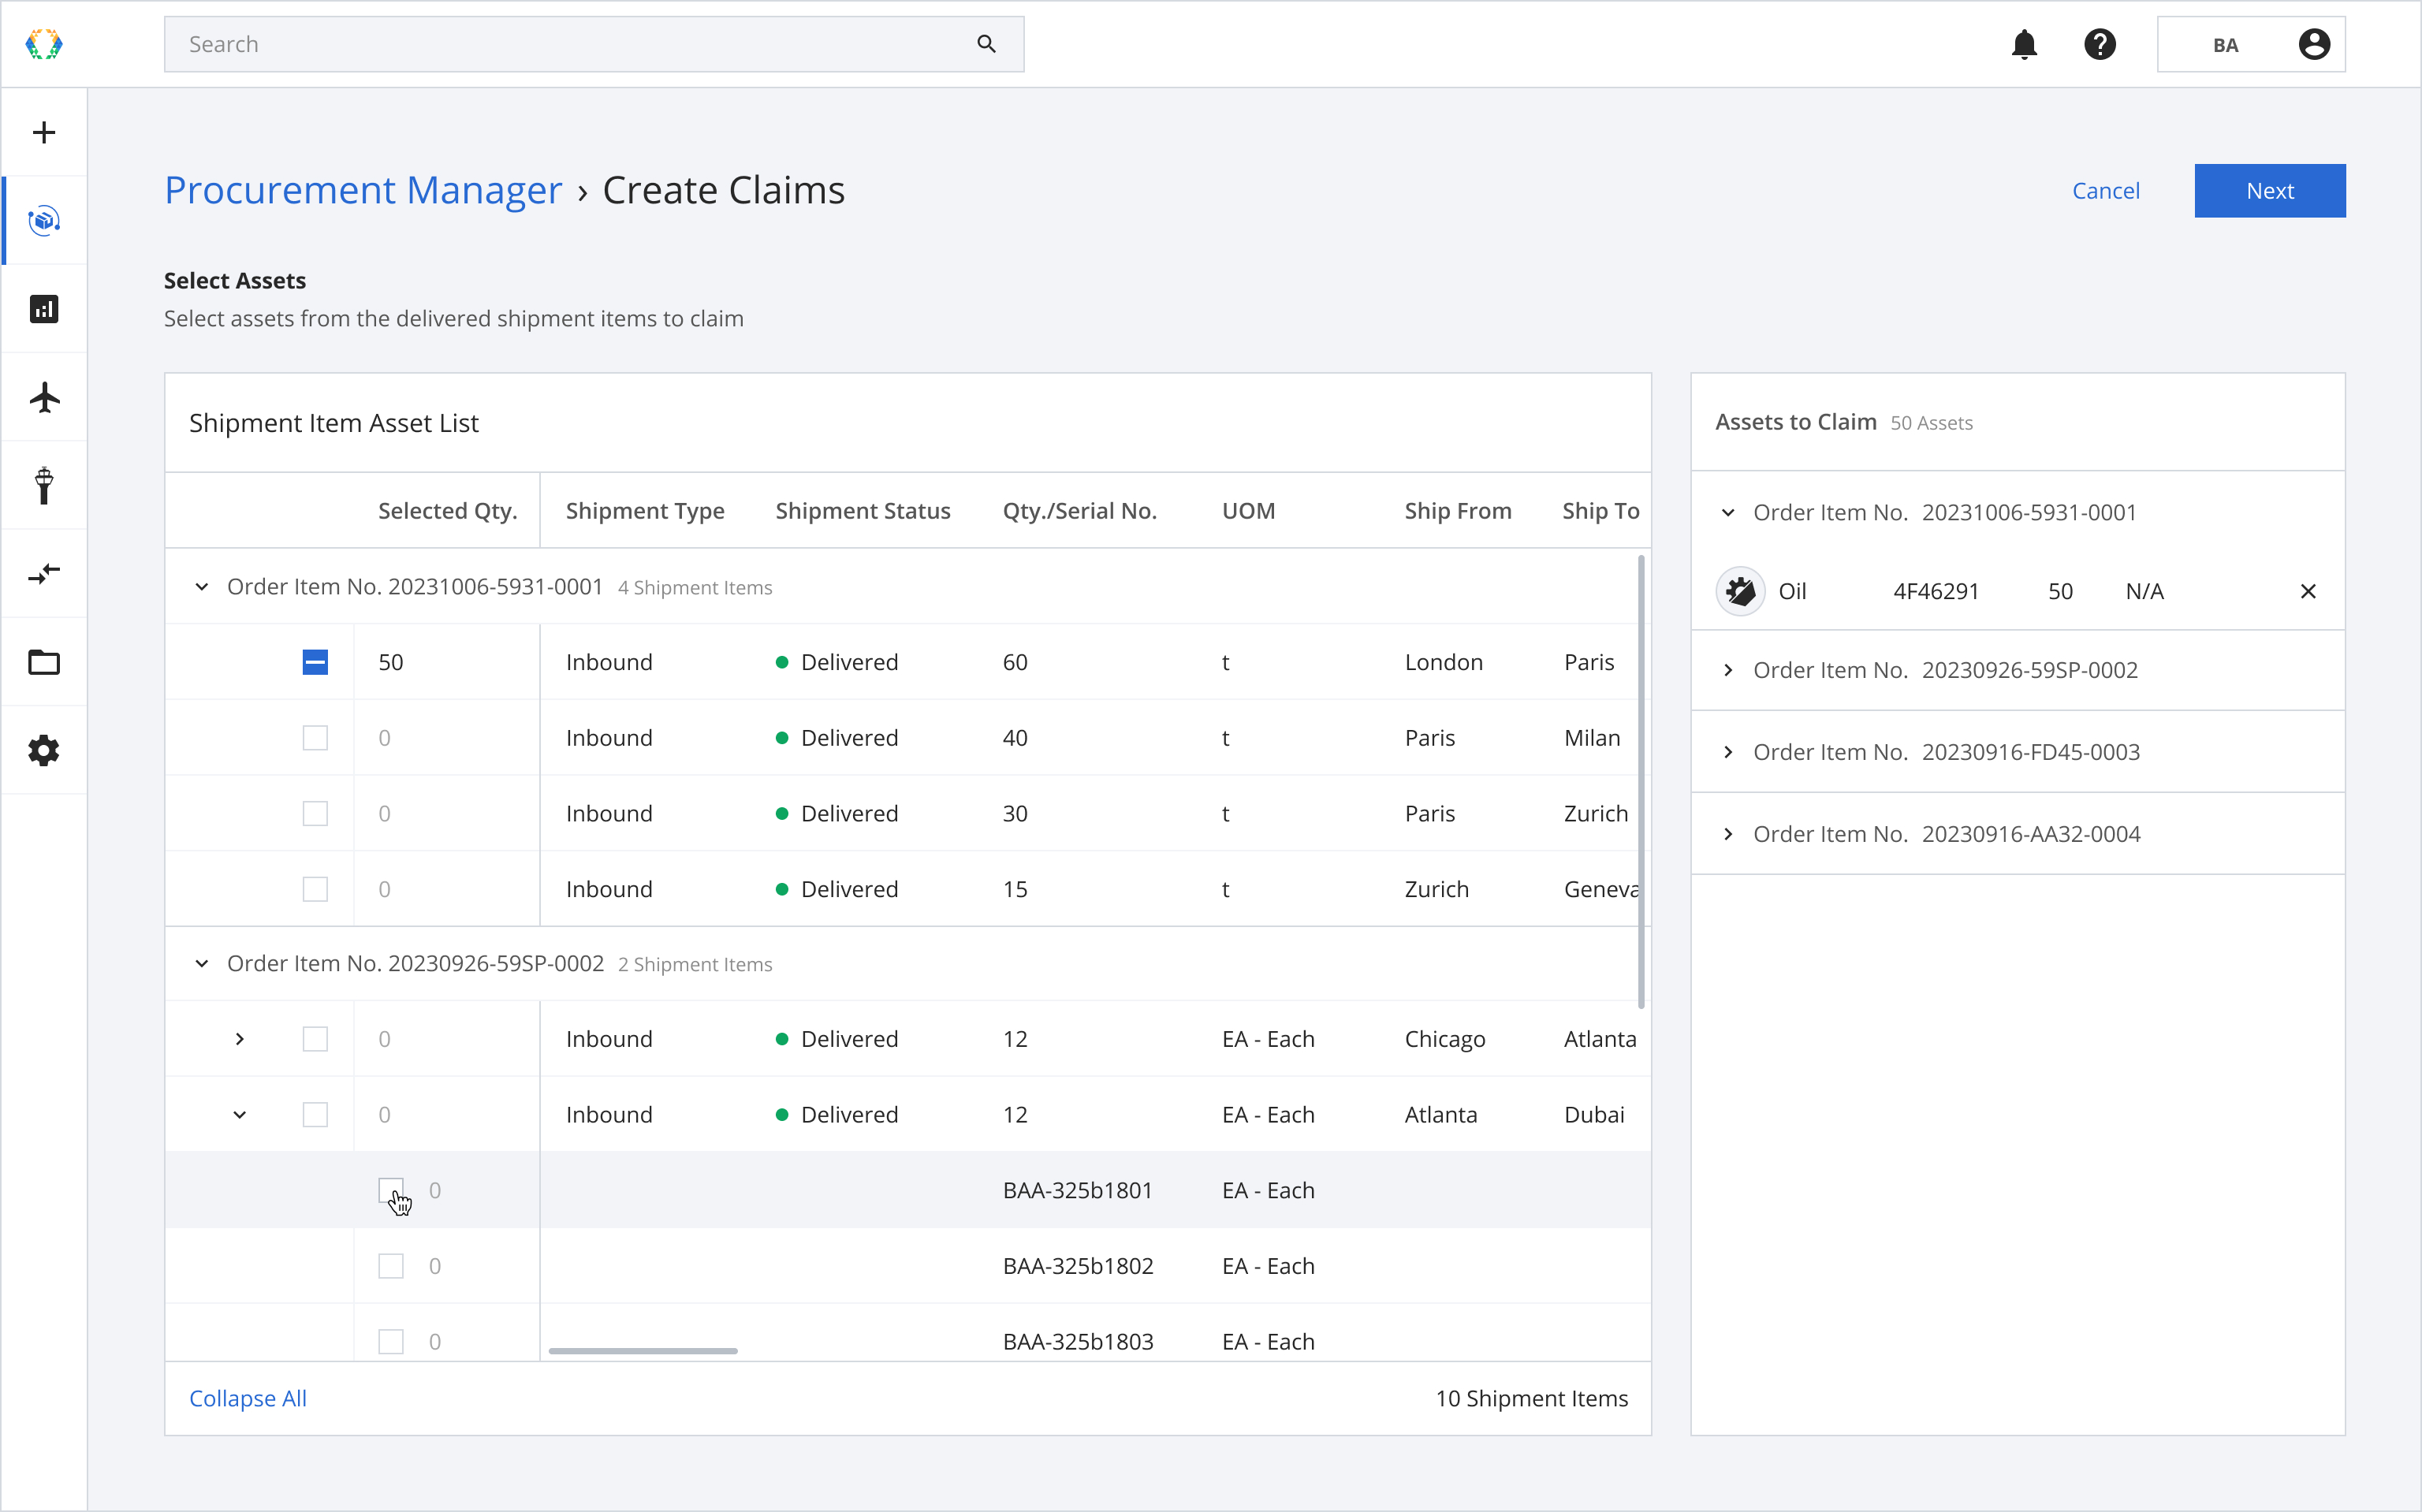
For serialized assets: there is a dropdown where you can select and view the assets by their serial numbers.
Step 4: Click 'Next'.
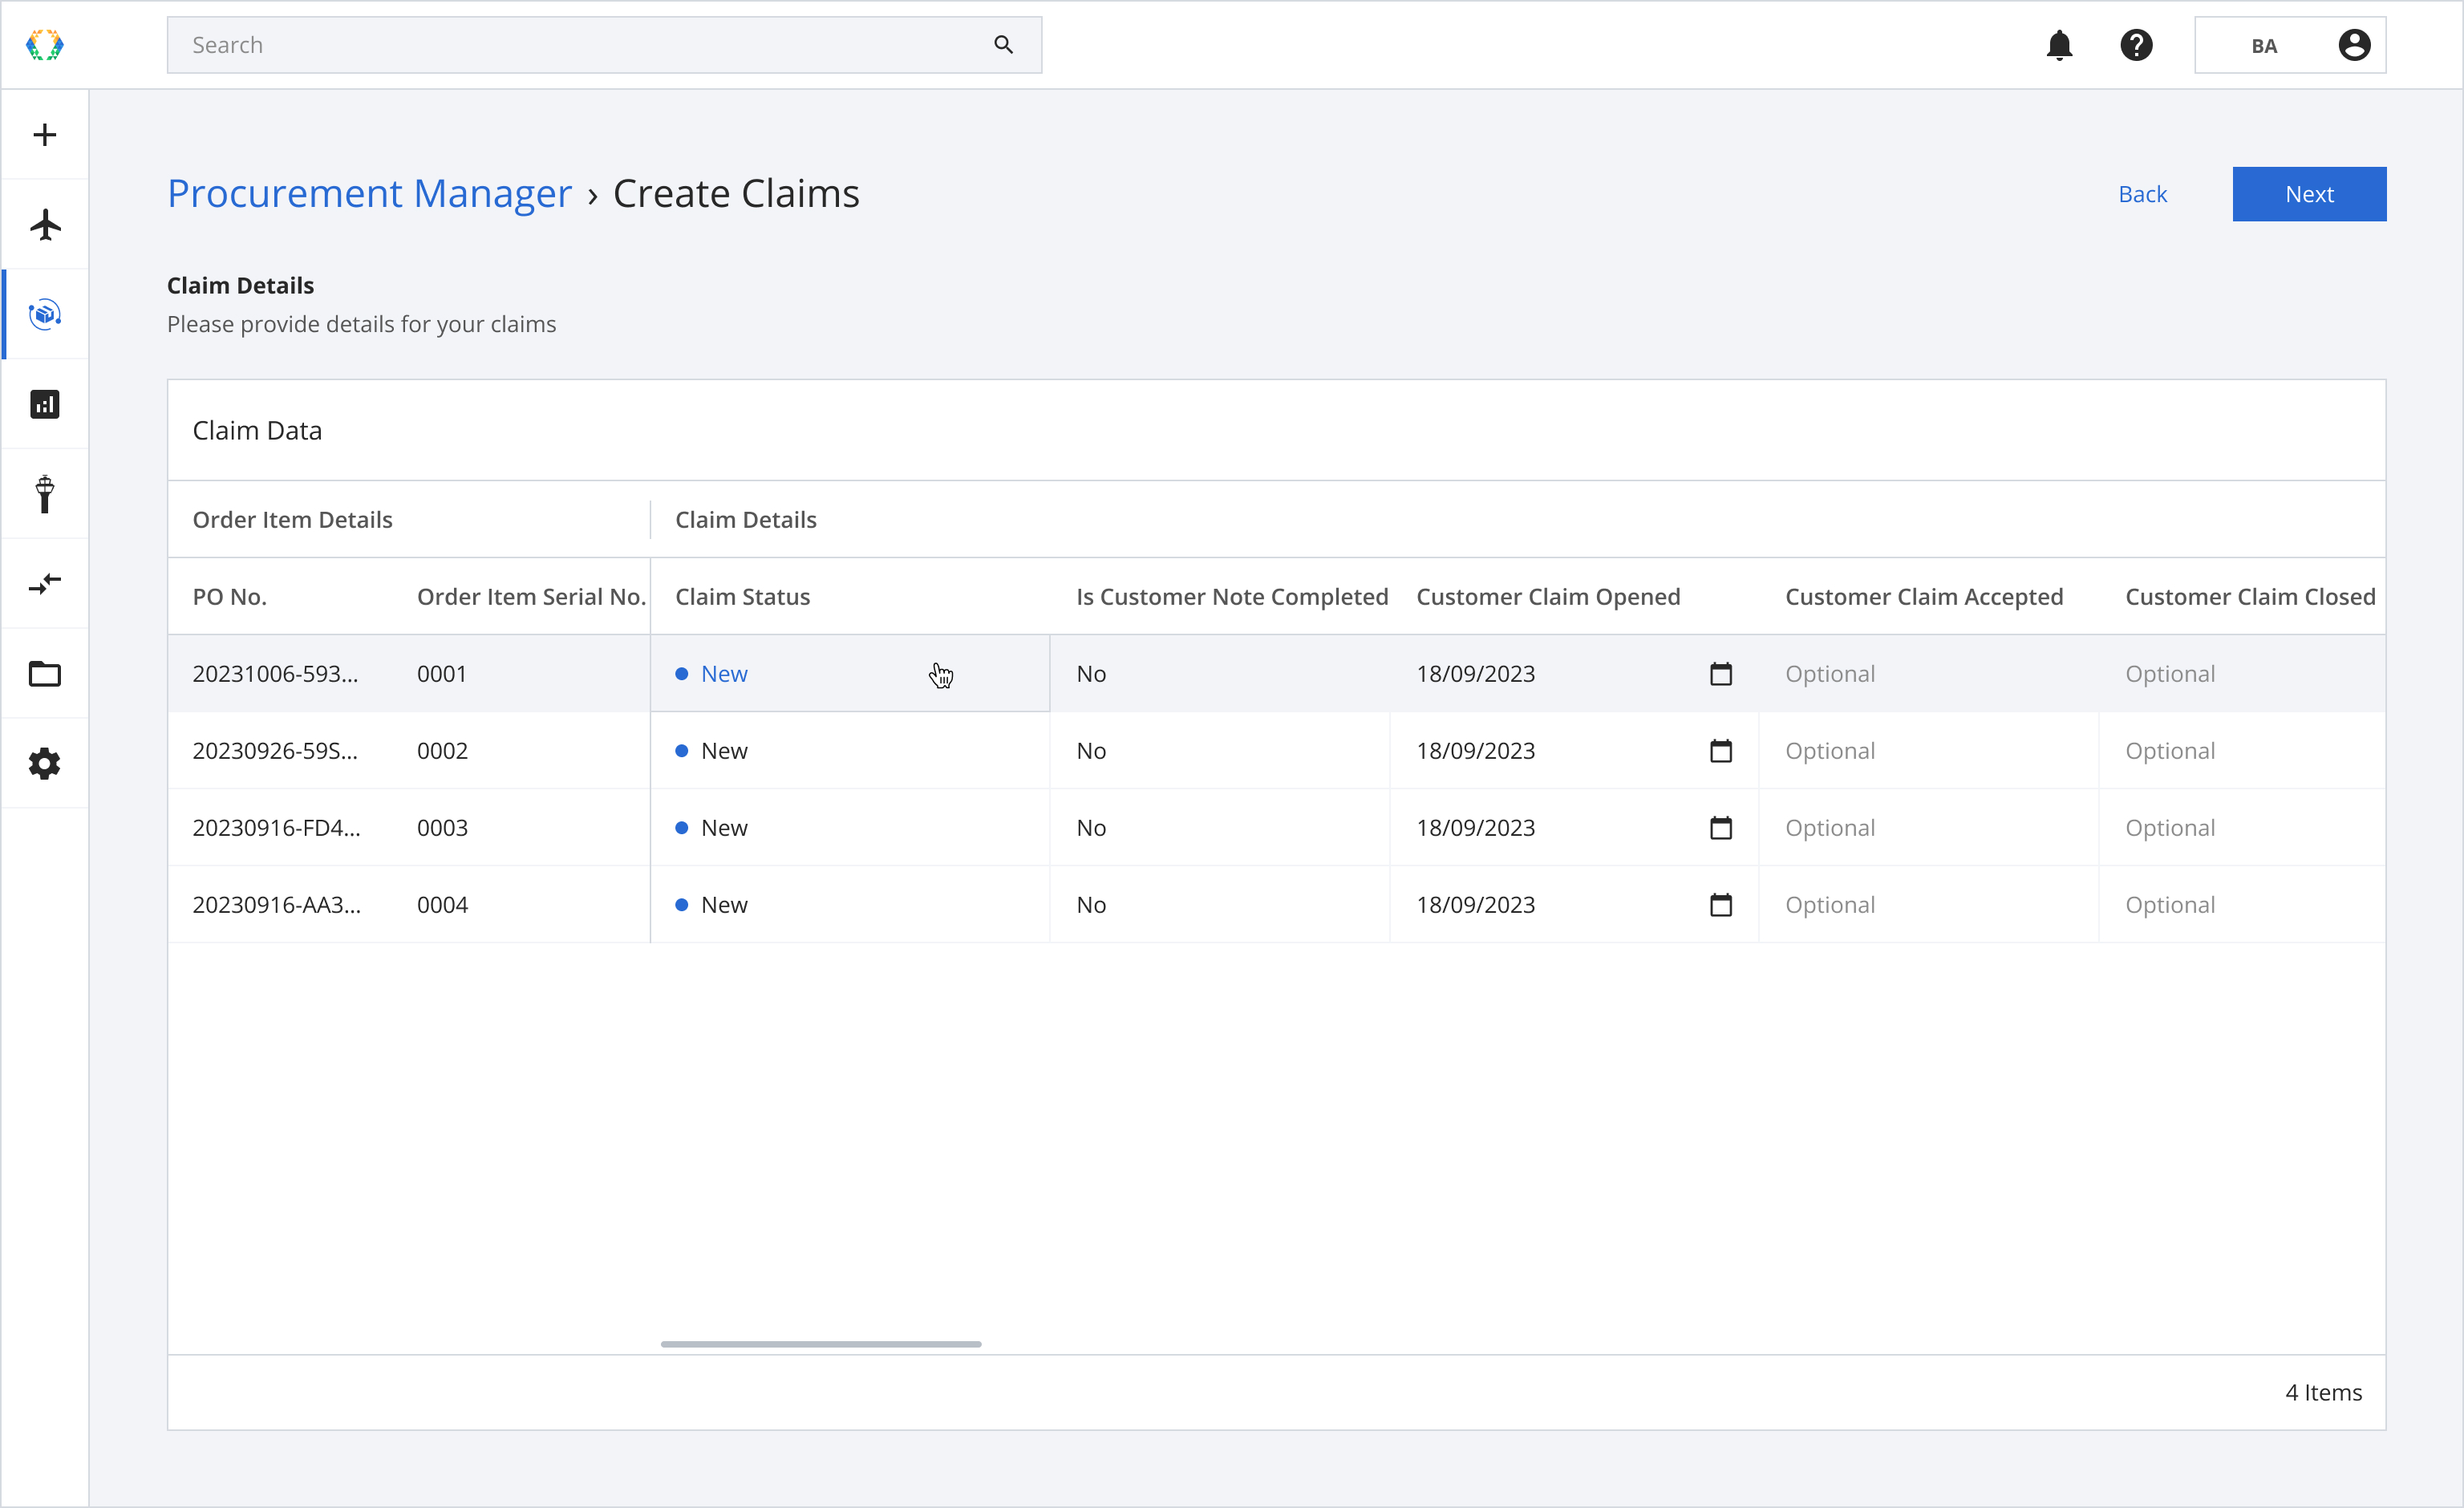
Step 6: Update claims details.
Required parameters:Claim Status
Claim Note Completed
Customer Claim Opened
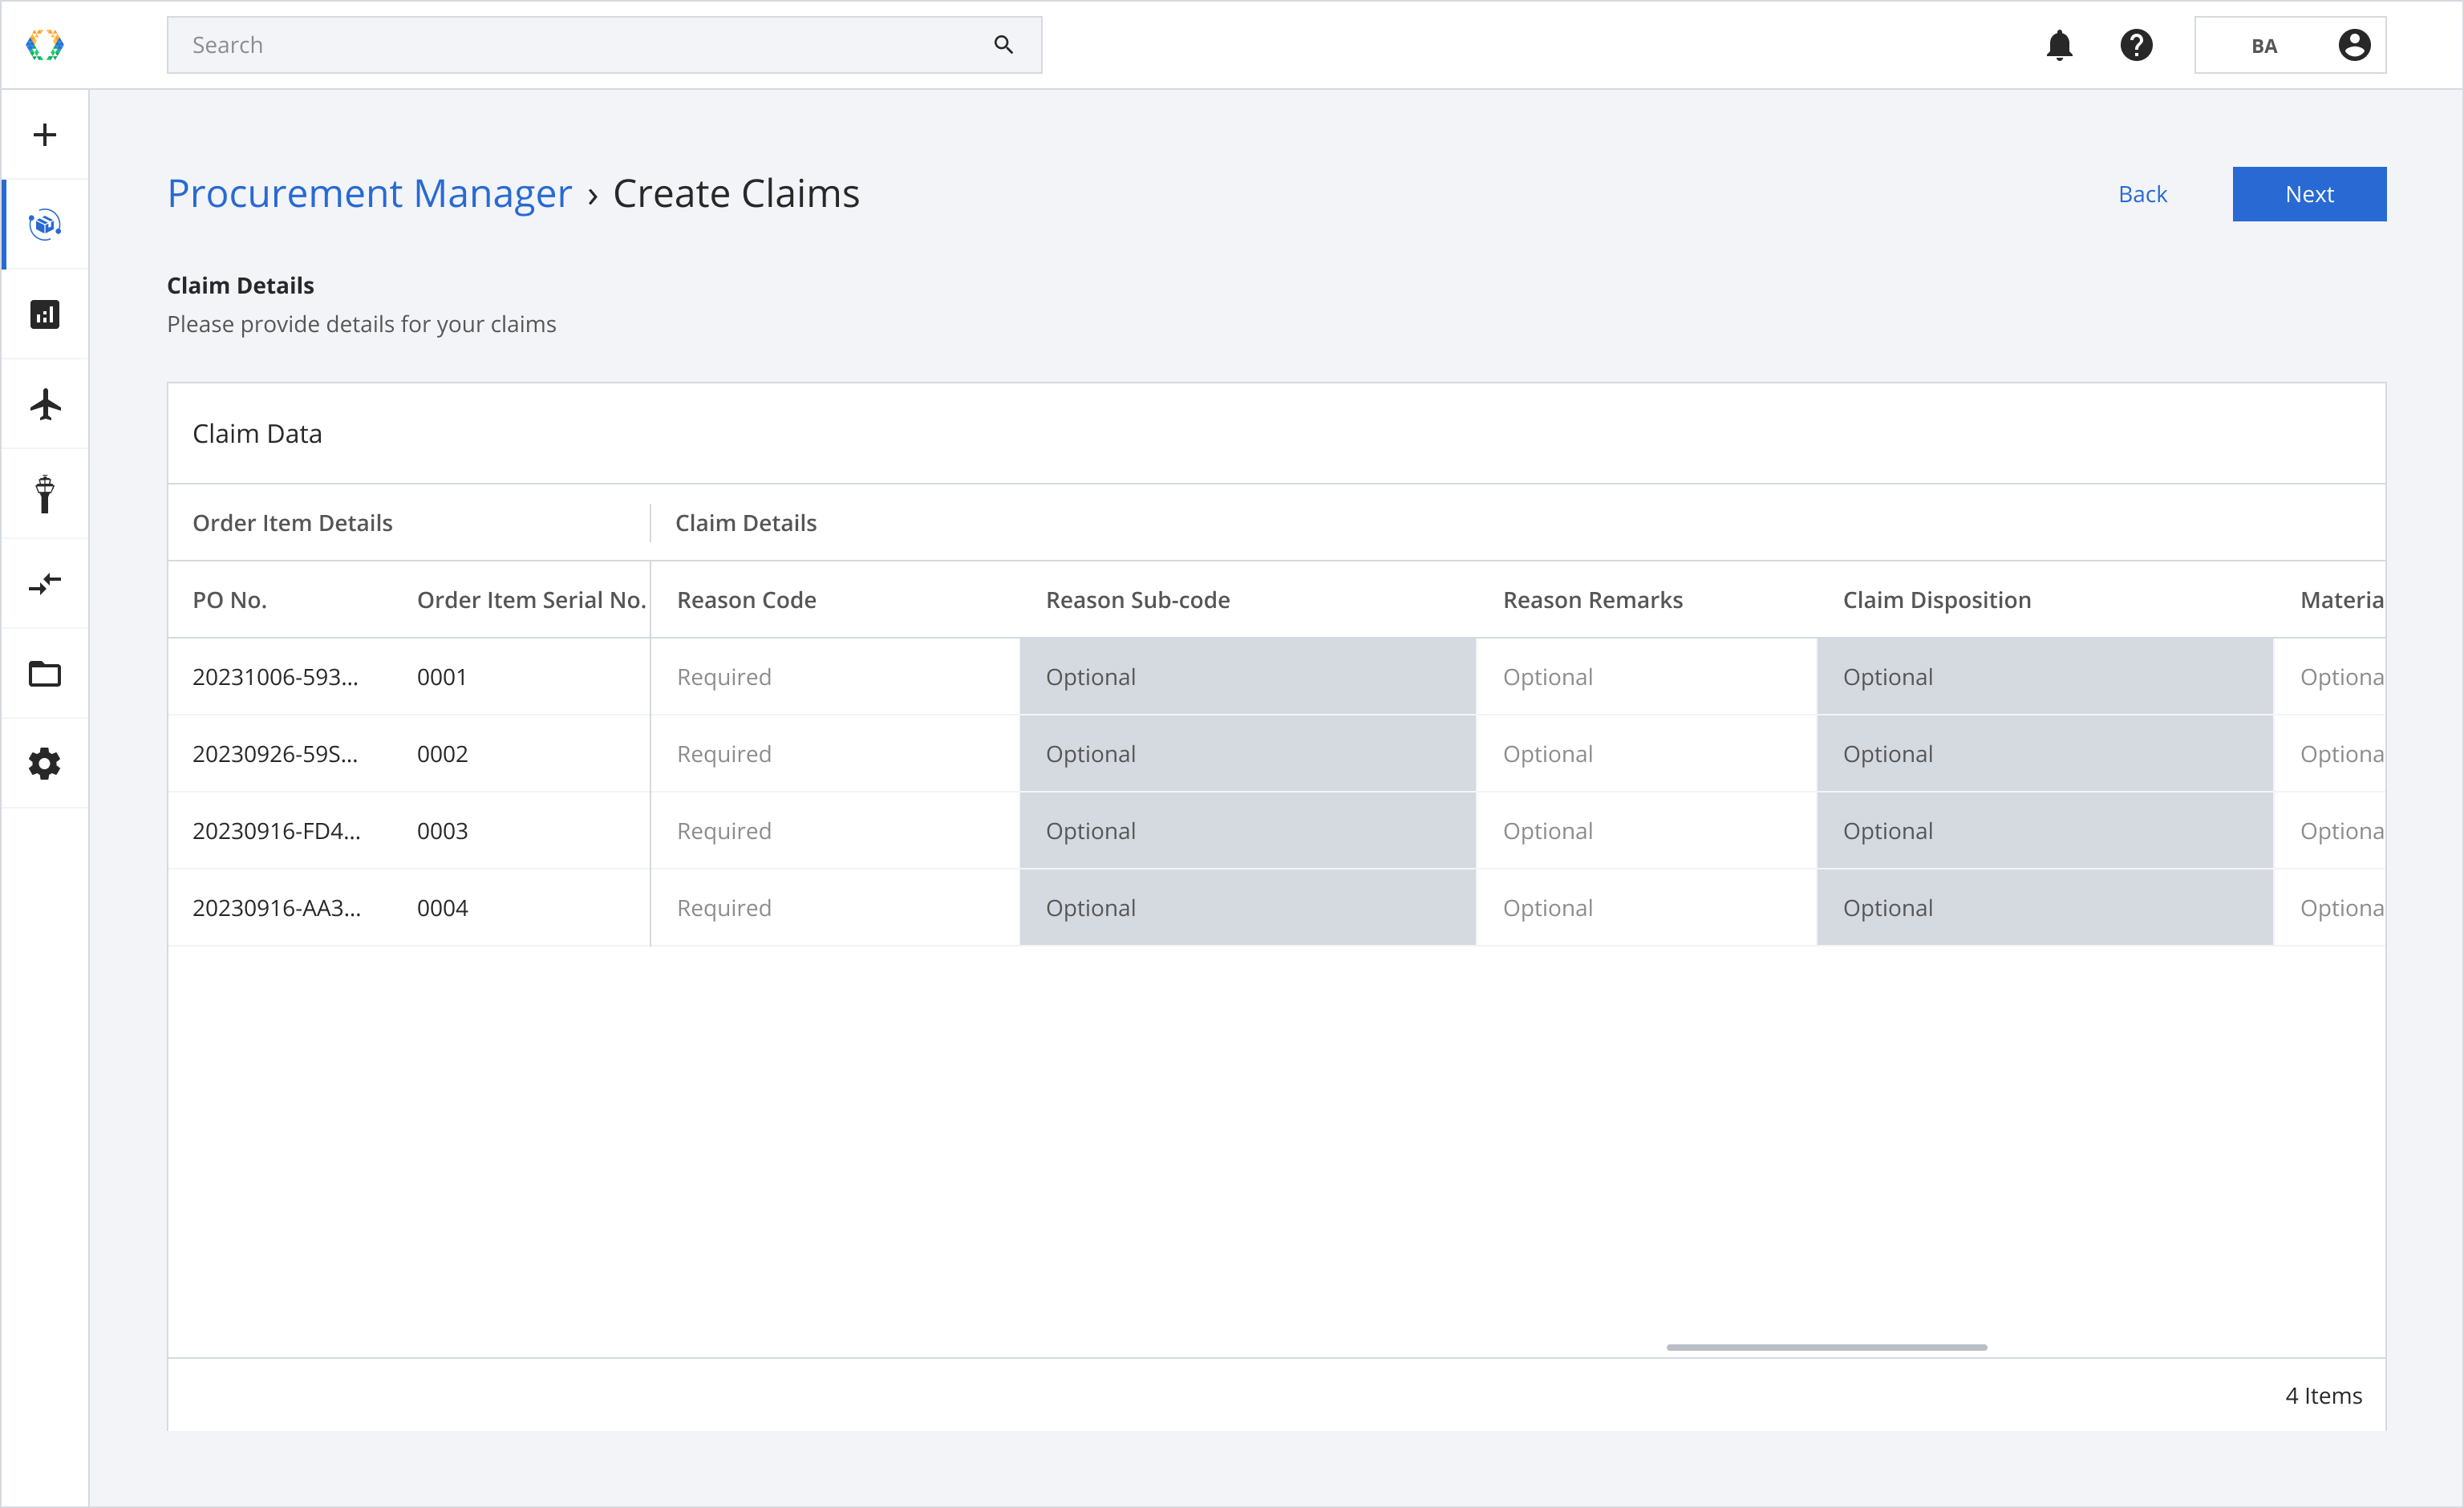
Reason Code
Claim Disposition
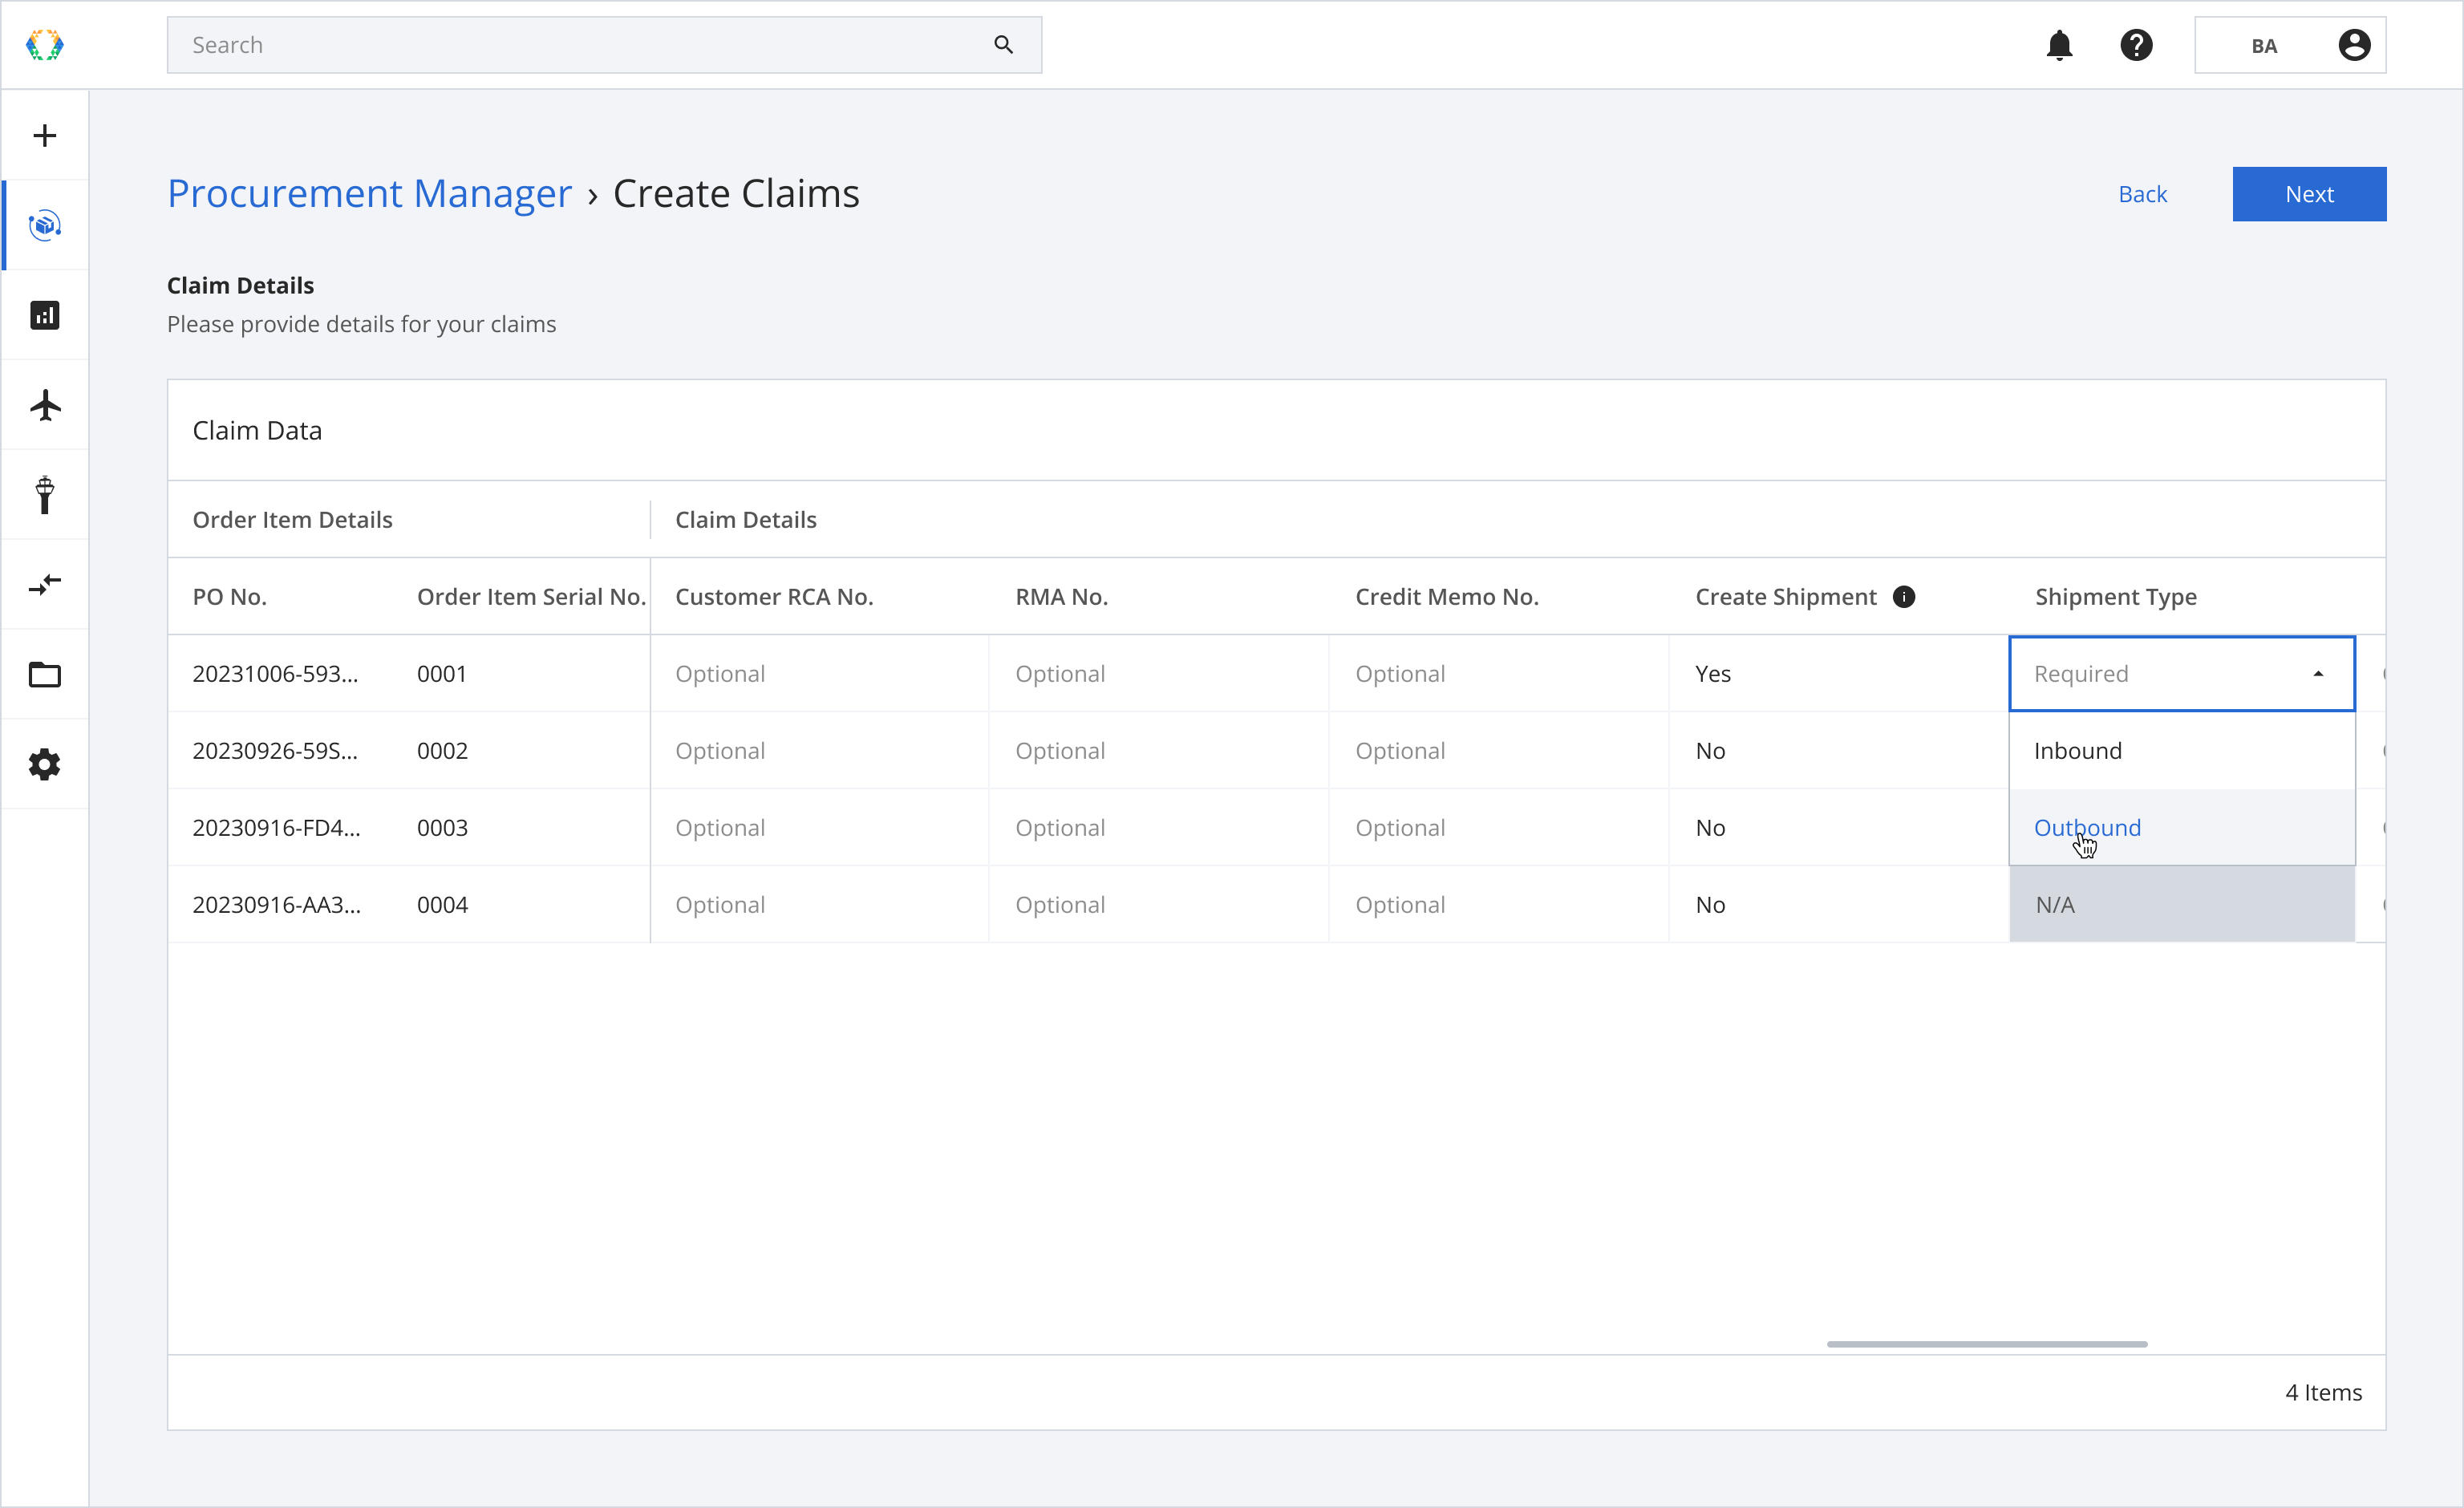
Shipment Type (If Create Shipment - Yes)
Claim Reference Numbers
Select the Claim Status (by default - New)
Select the Claim Note Completed (by default - No)
Customer Claim Opened (by default - this is the date of claim creation)
Reason Code (Required)
The Reason Sub-code and Material Disposition fields become enabled after selecting a Reason Code.
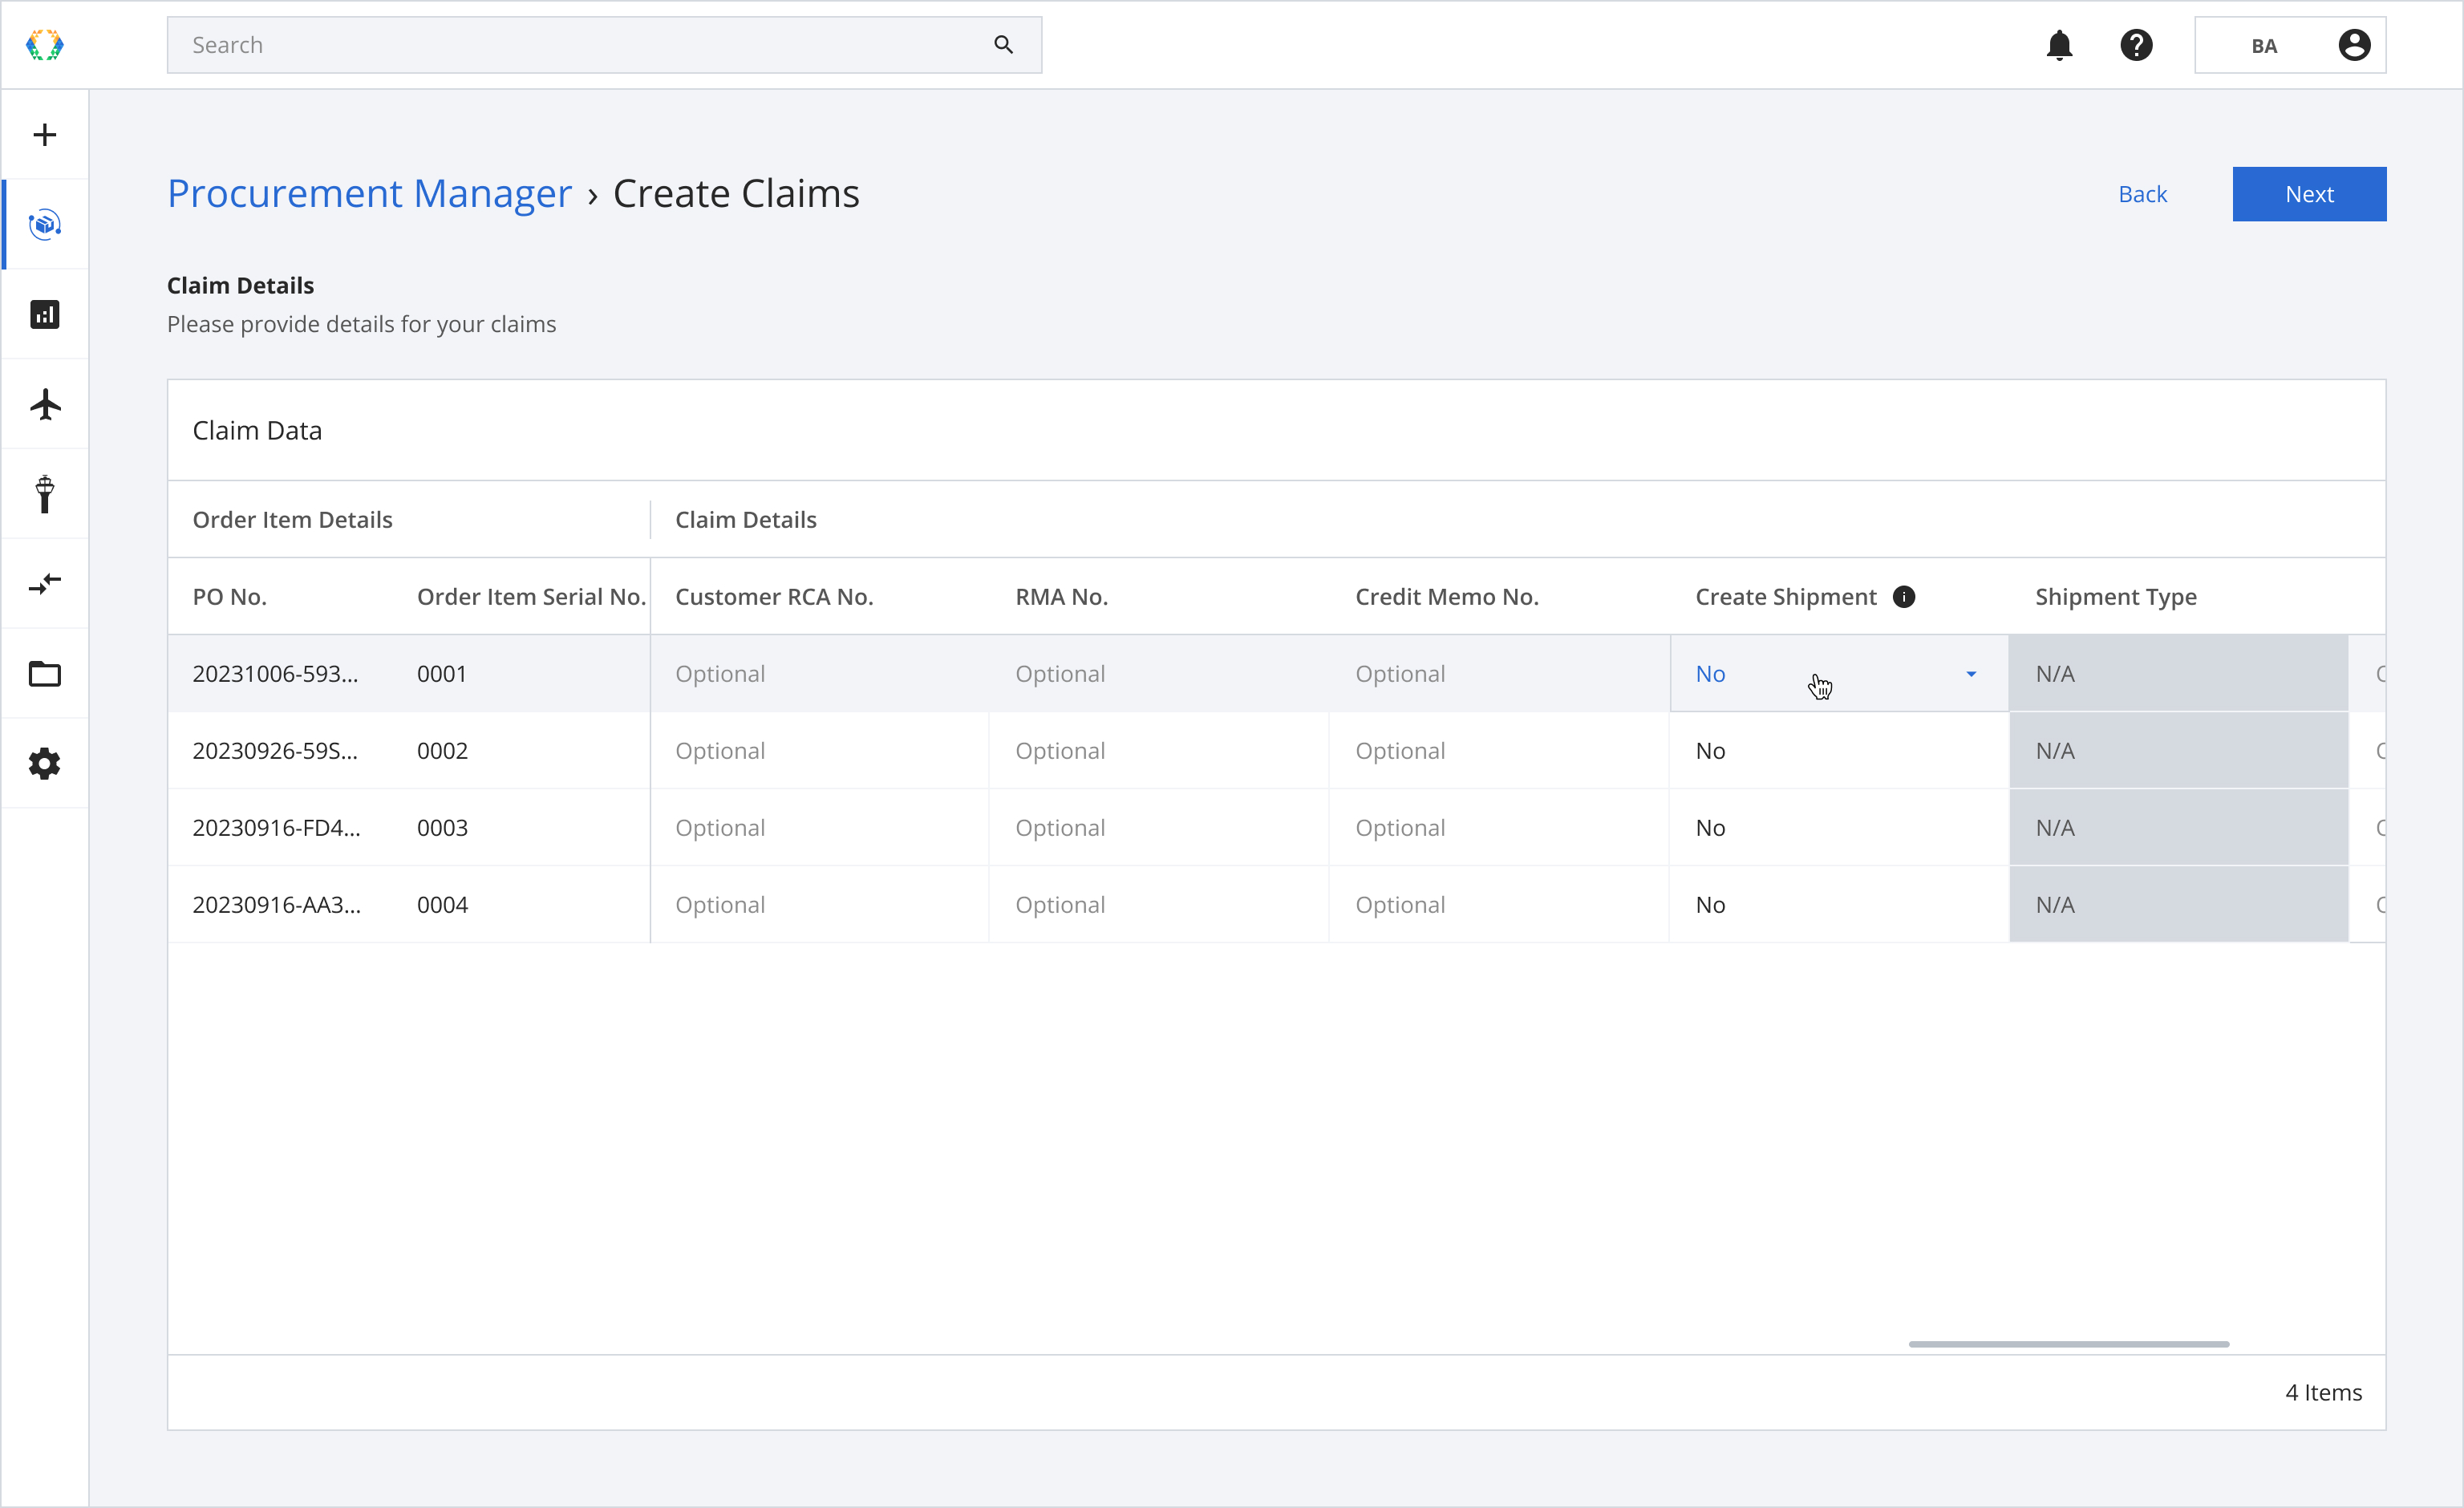
Create Shipment
Create Shipment (by default - No)
By selecting 'Create Shipment,' you can create a shipment with the claimed assets (if necessary). Choose the Shipment Type - inbound/outbound.
This action is only available during the claim creation process and won't be available during claim update process.
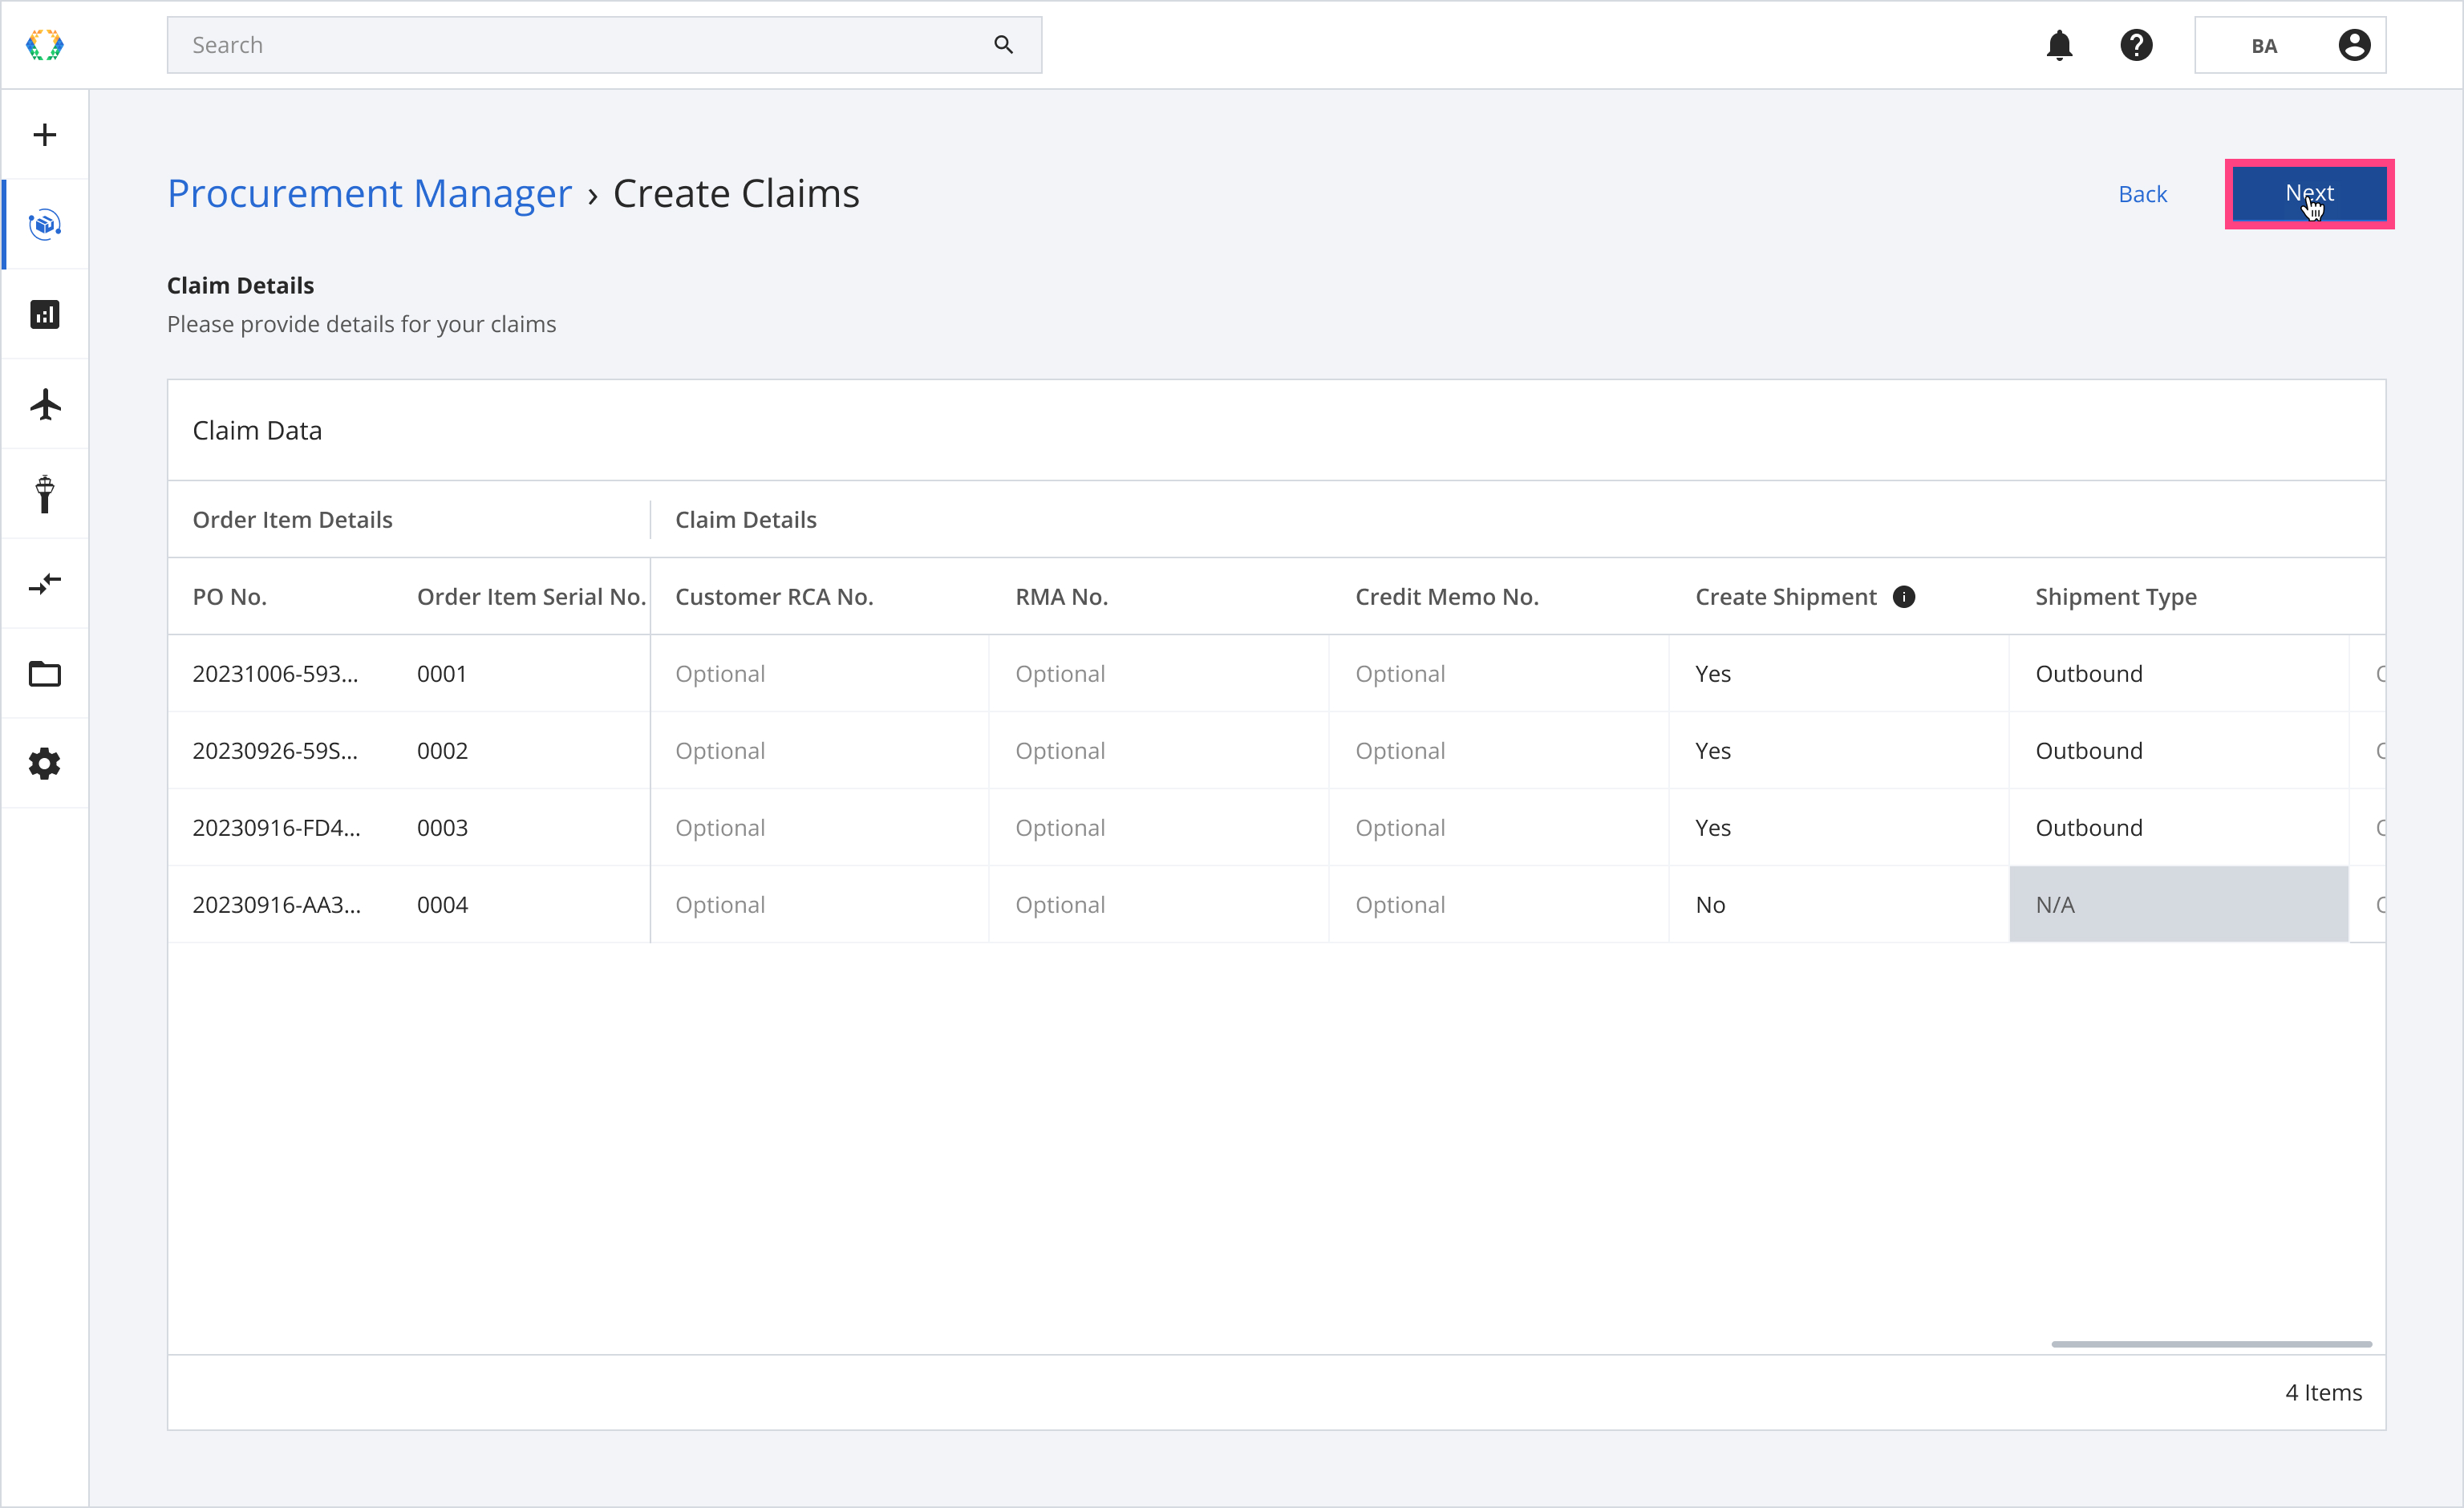
Step 7: Click 'Next'.
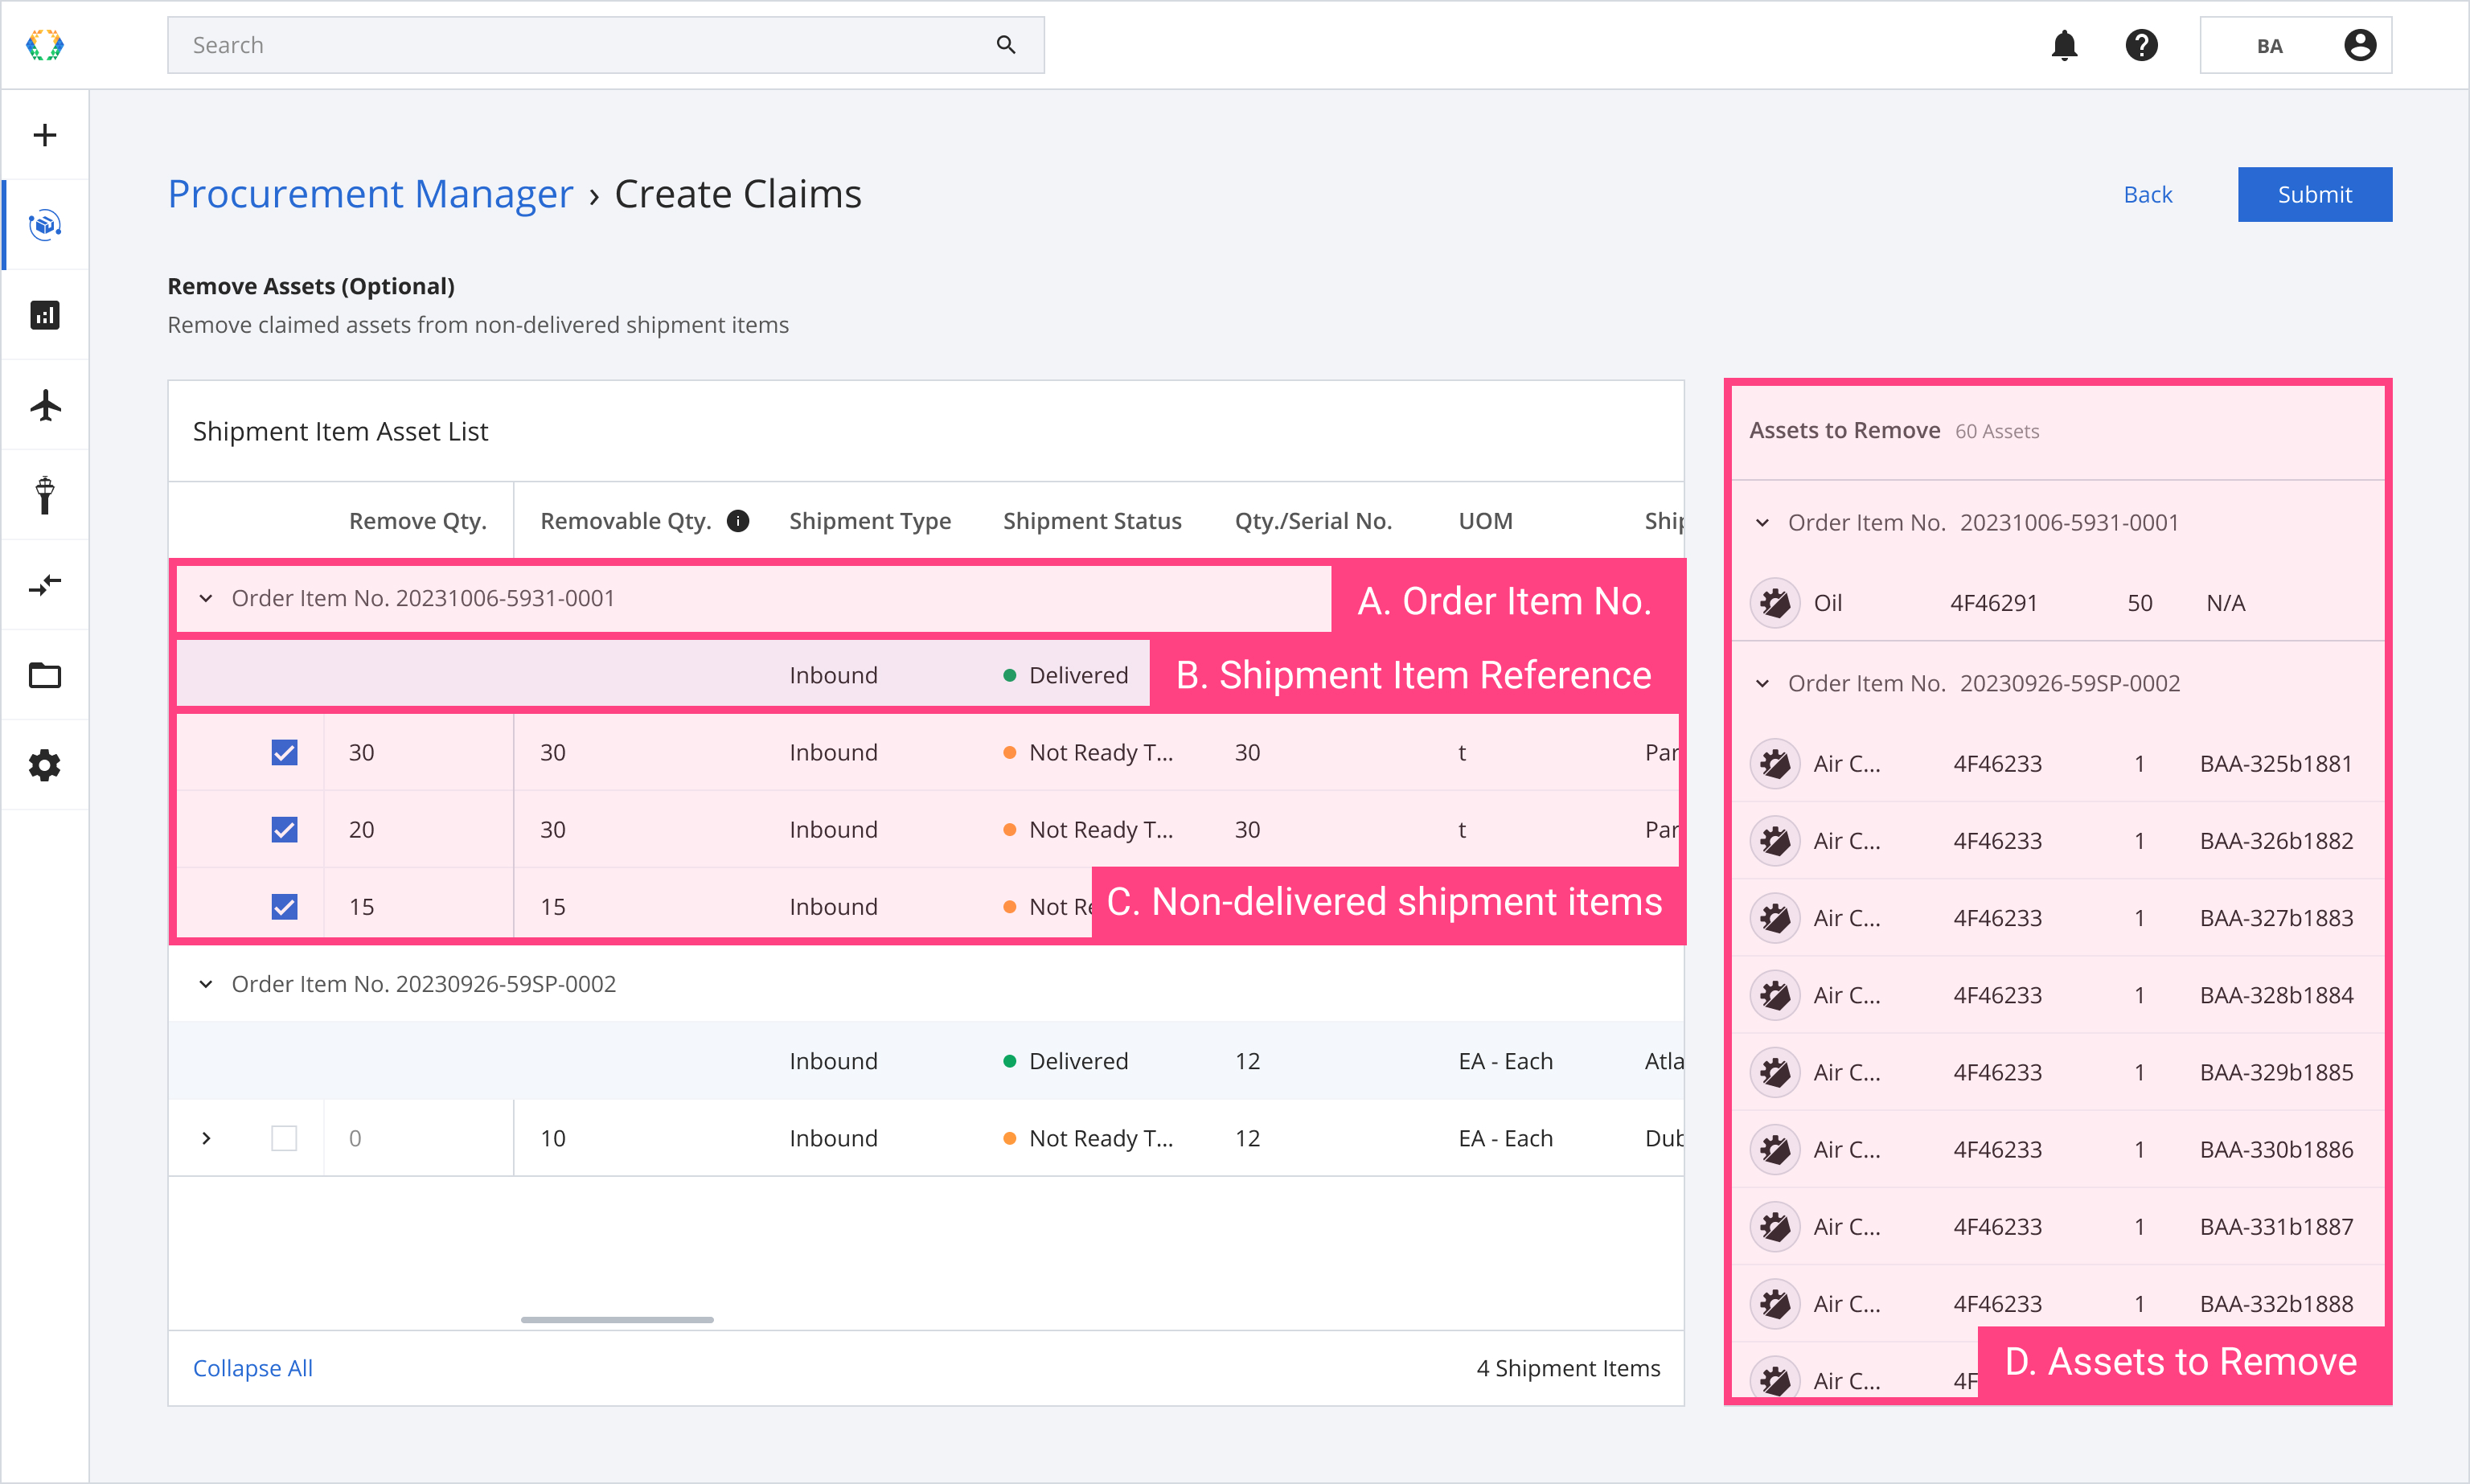
Step 8: Remove assets from non-delivered shipment items if necessary. (Optional)
This step will appear if you have non-delivered shipment items.
We recommend removing assets if you created a shipment in the previous step to avoid duplicated assets in different shipment items.
Select the assets you would like to remove from non-delivered shipment items in the 'Remove Qty.' field. The 'Removable Qty.' field indicates the available quantity of assets.
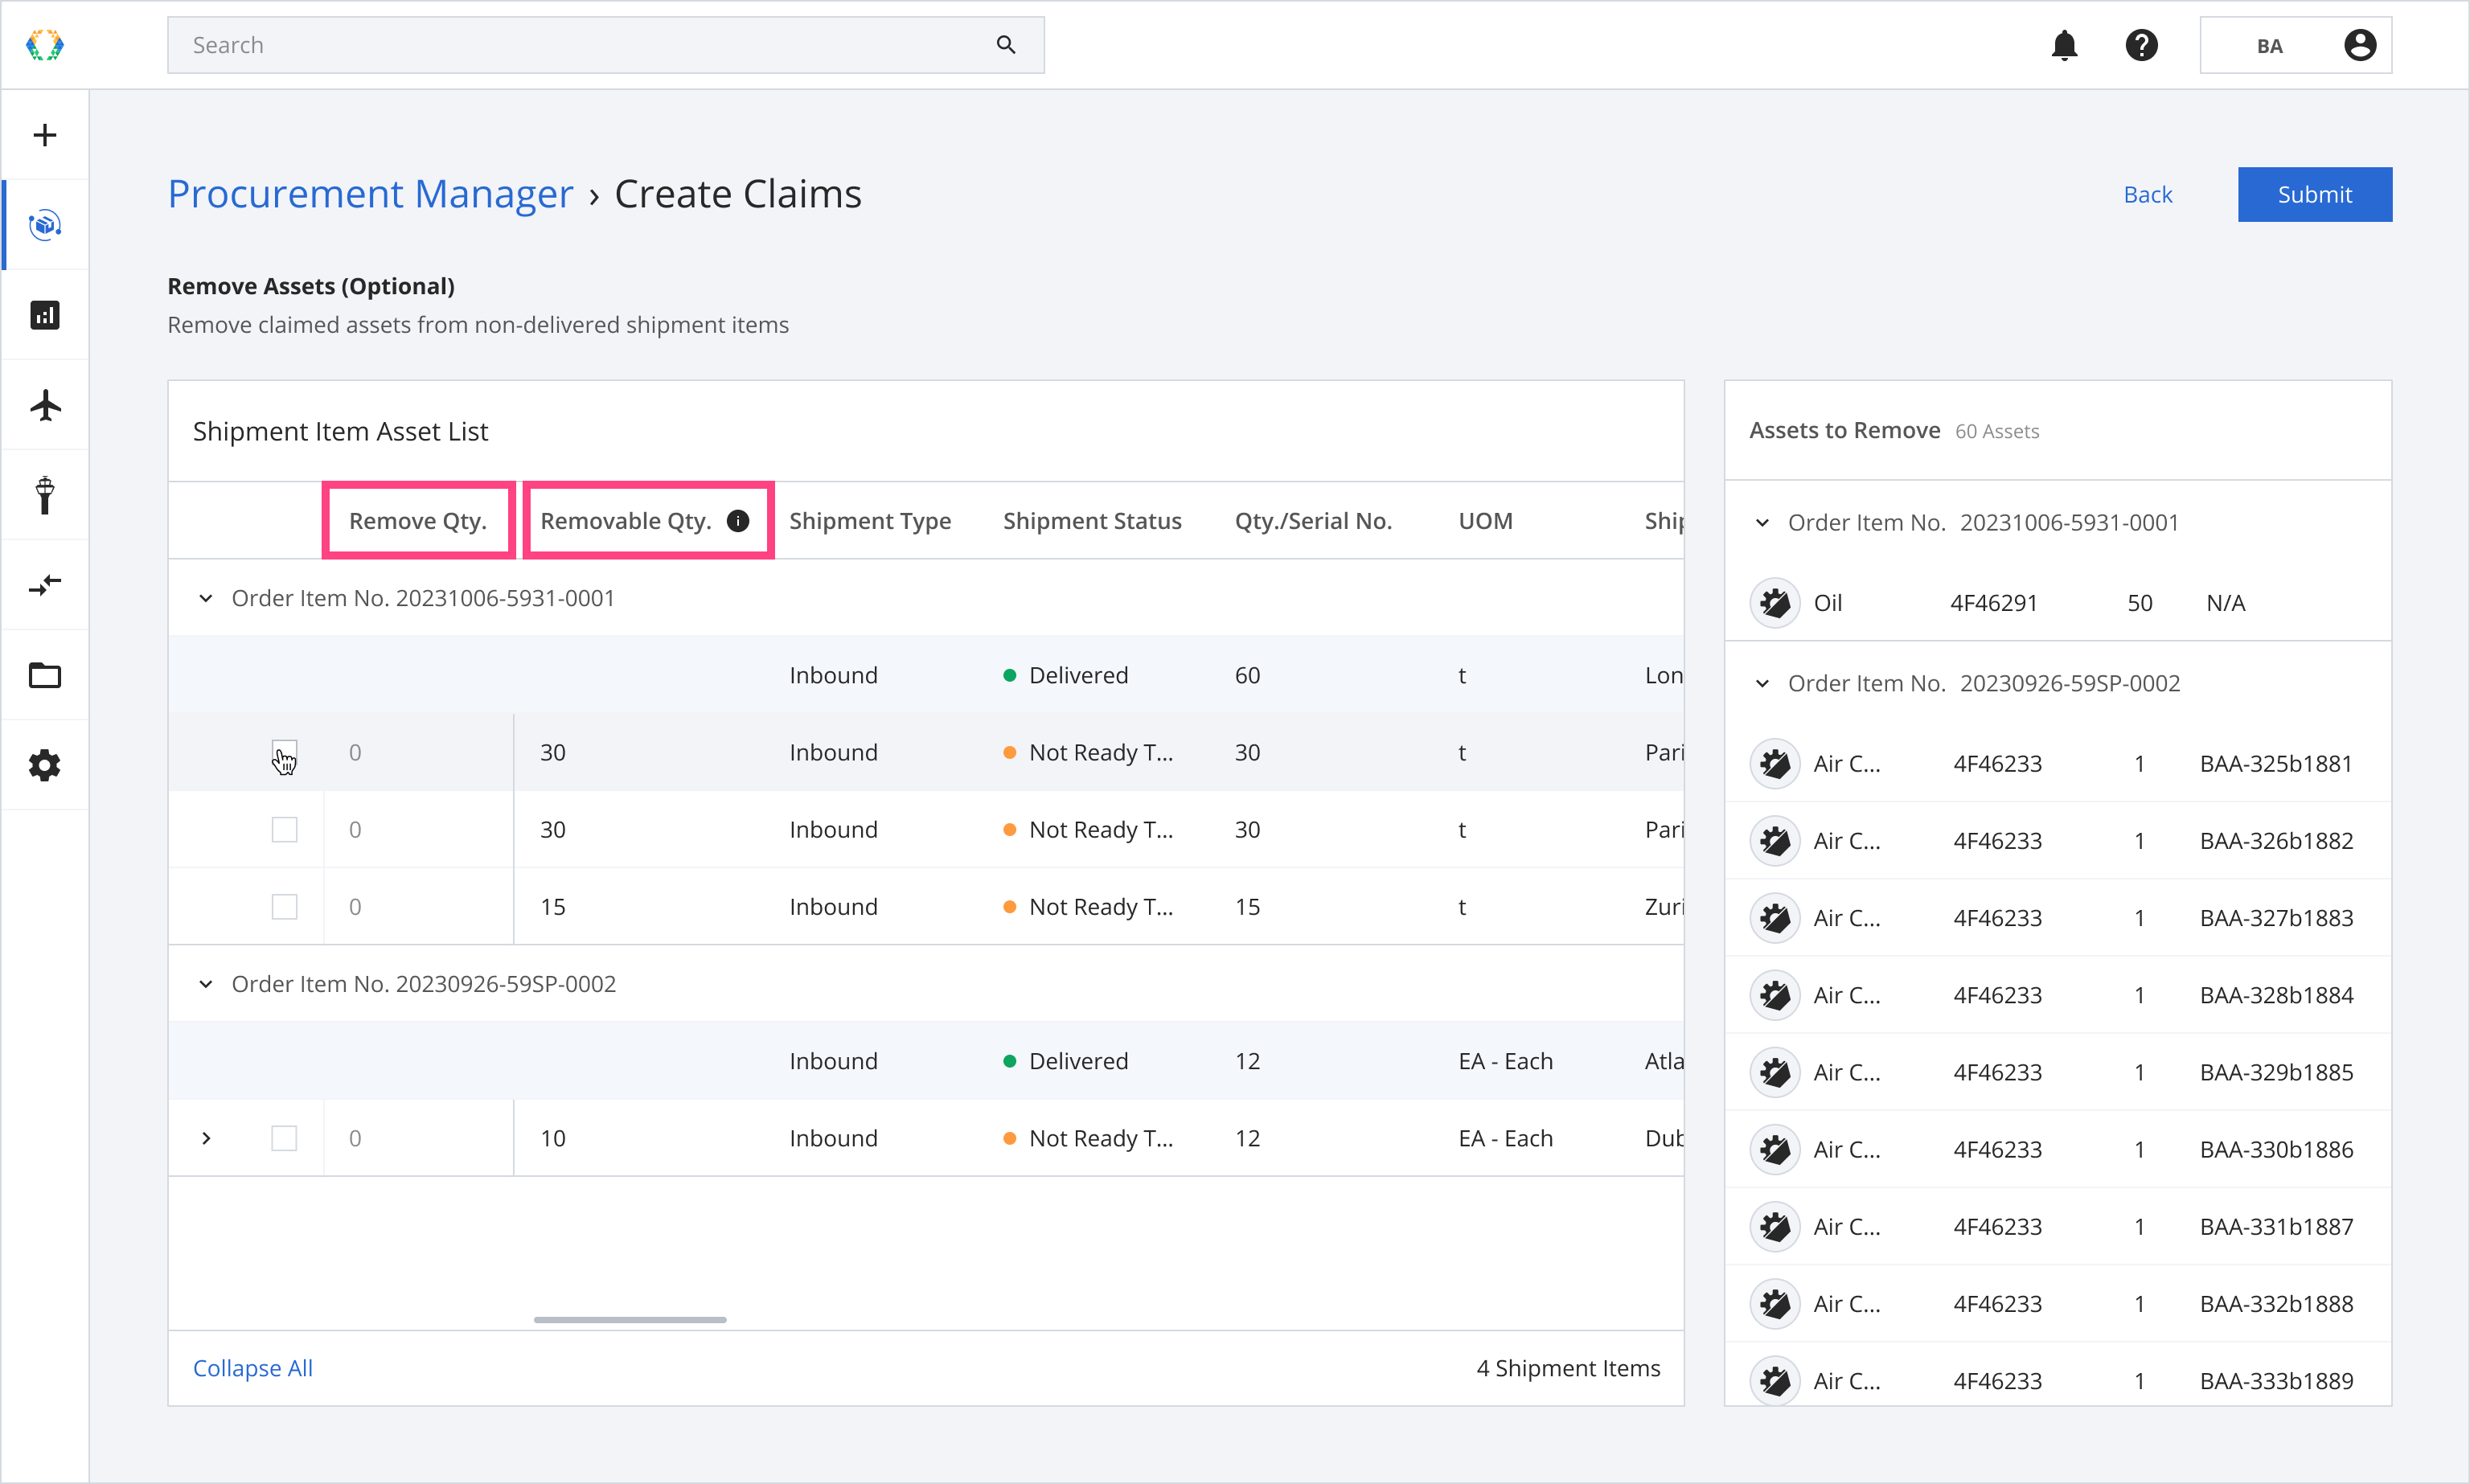
Table Layout:
A. The order item row divider allows you to indicate what order item you're working on
B. The blue row indicates the shipment item that was used to claim assets from. Parameters in this row are non-editable and serve as a reference.
C. The rows below indicate non-delivered shipment items
D. The right-side panel demonstrates the assets you selected to claim and potentially can be removed from non-delivered shipment items.
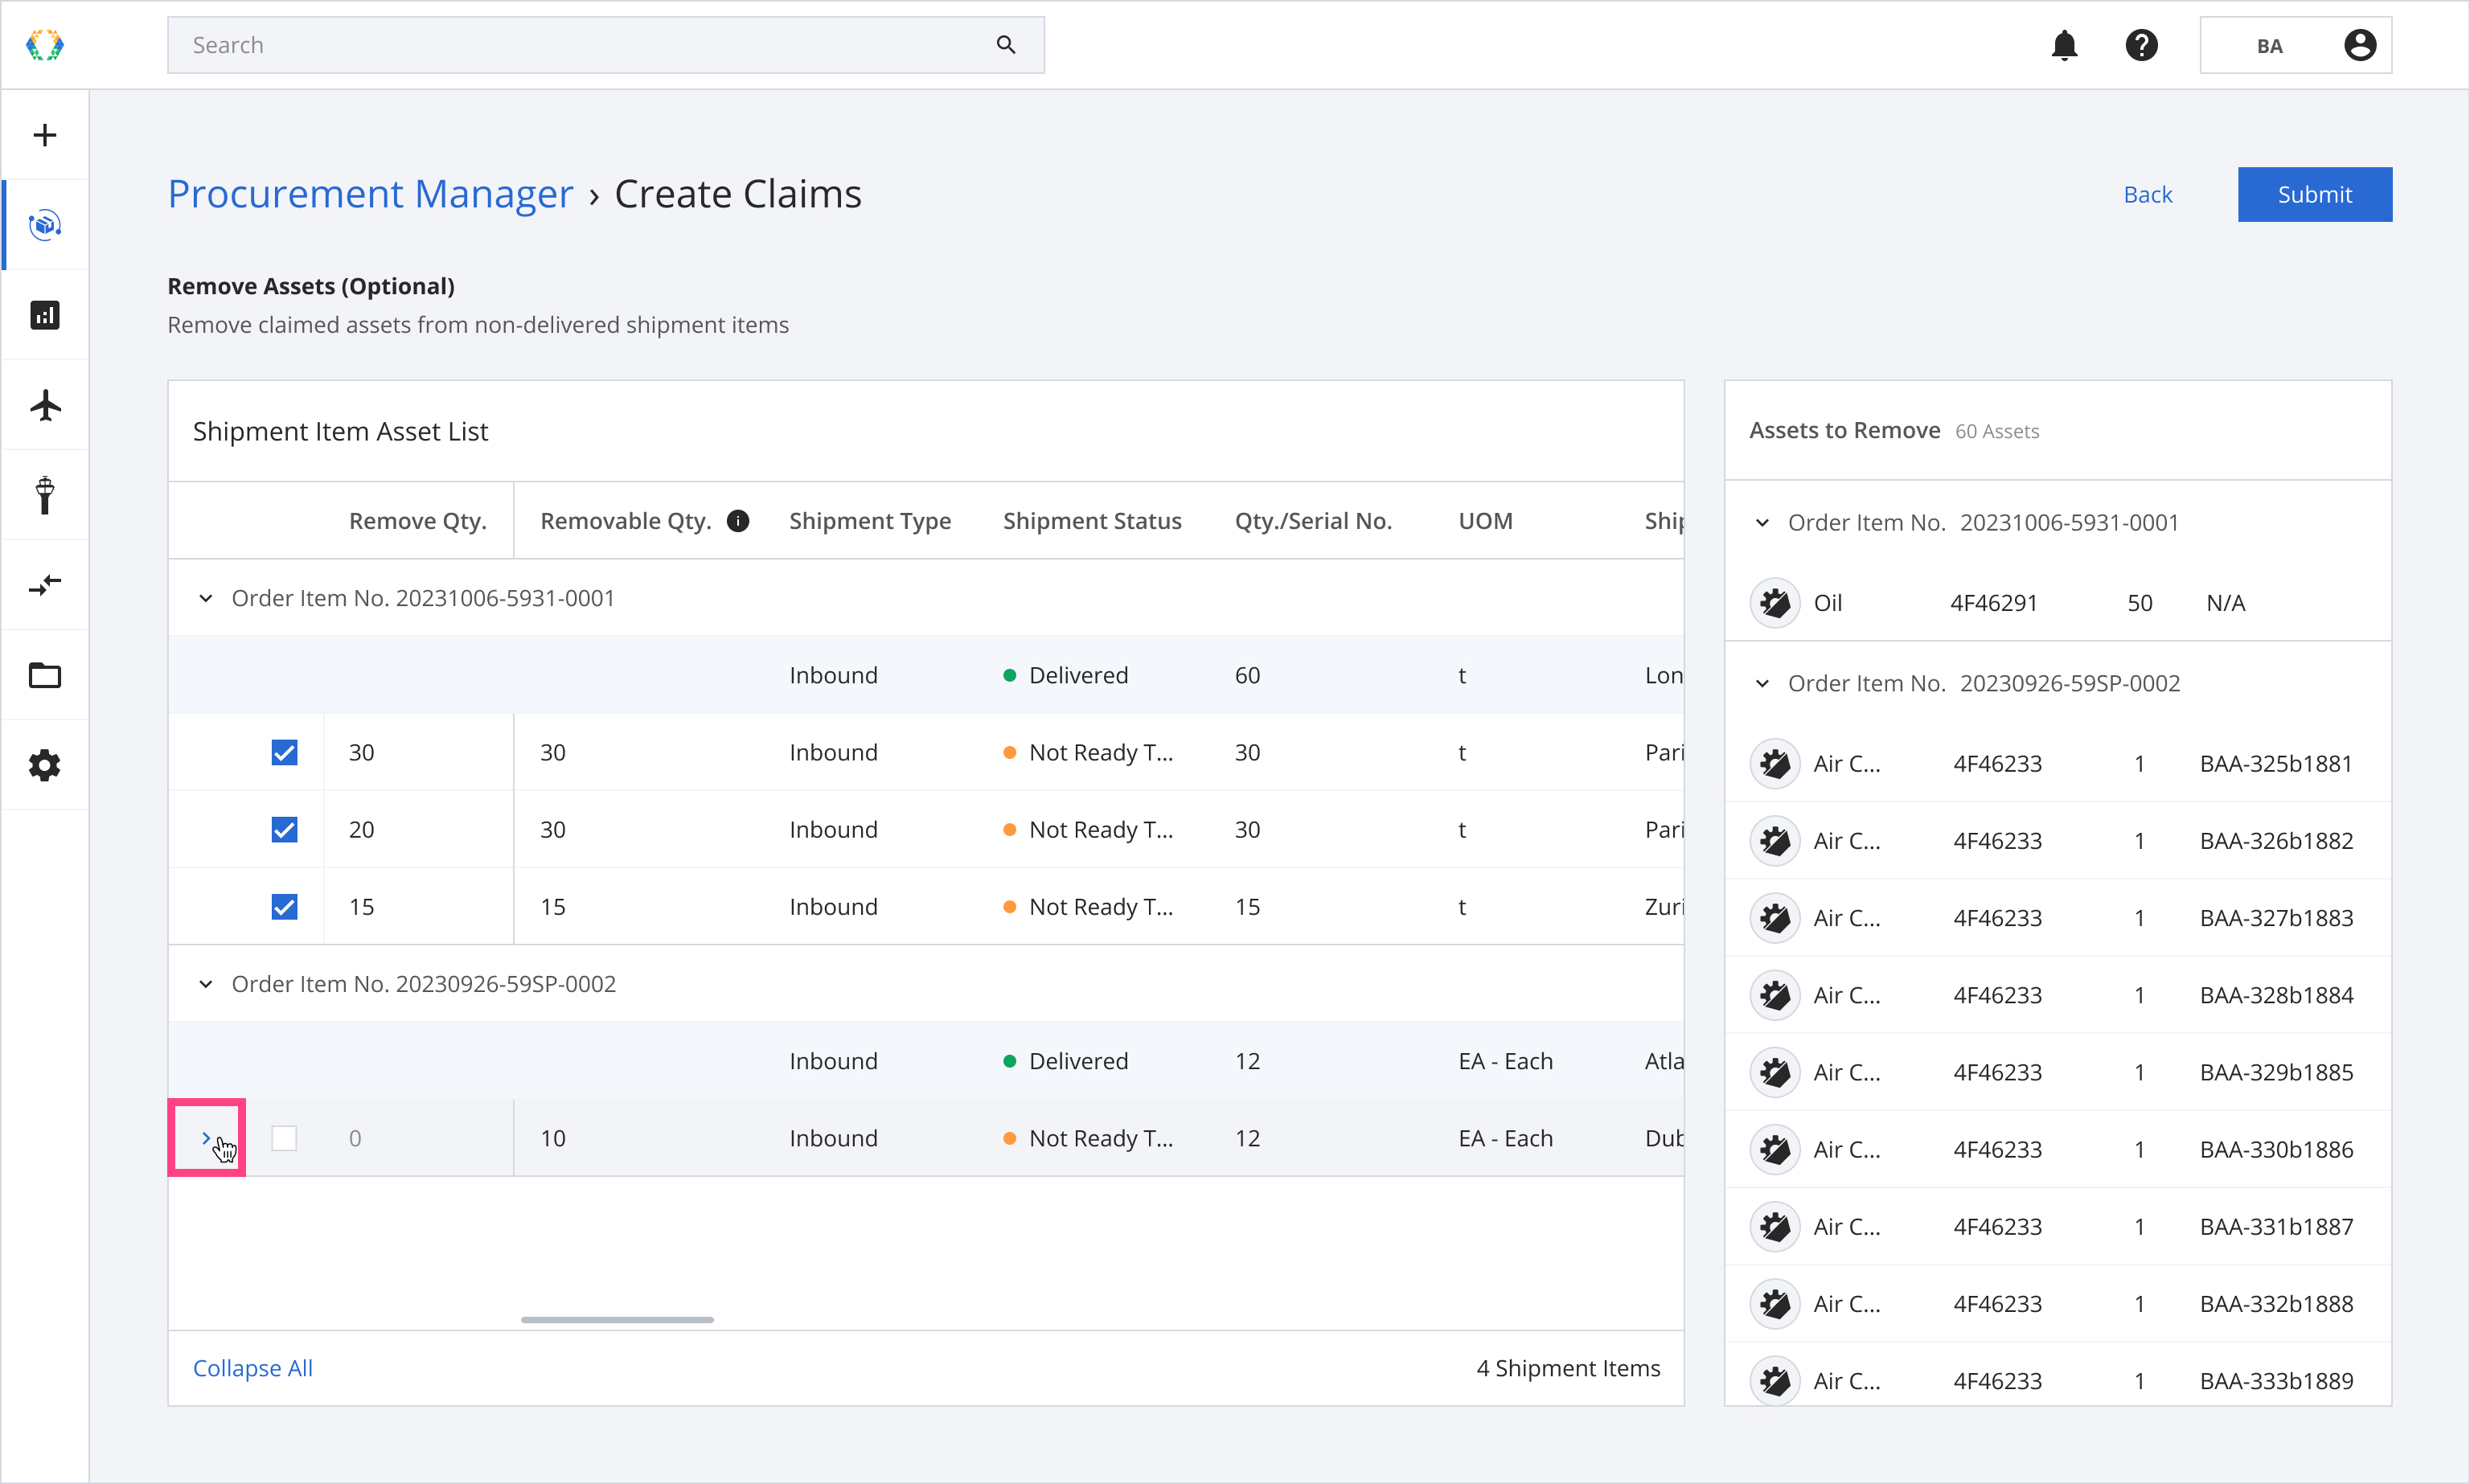
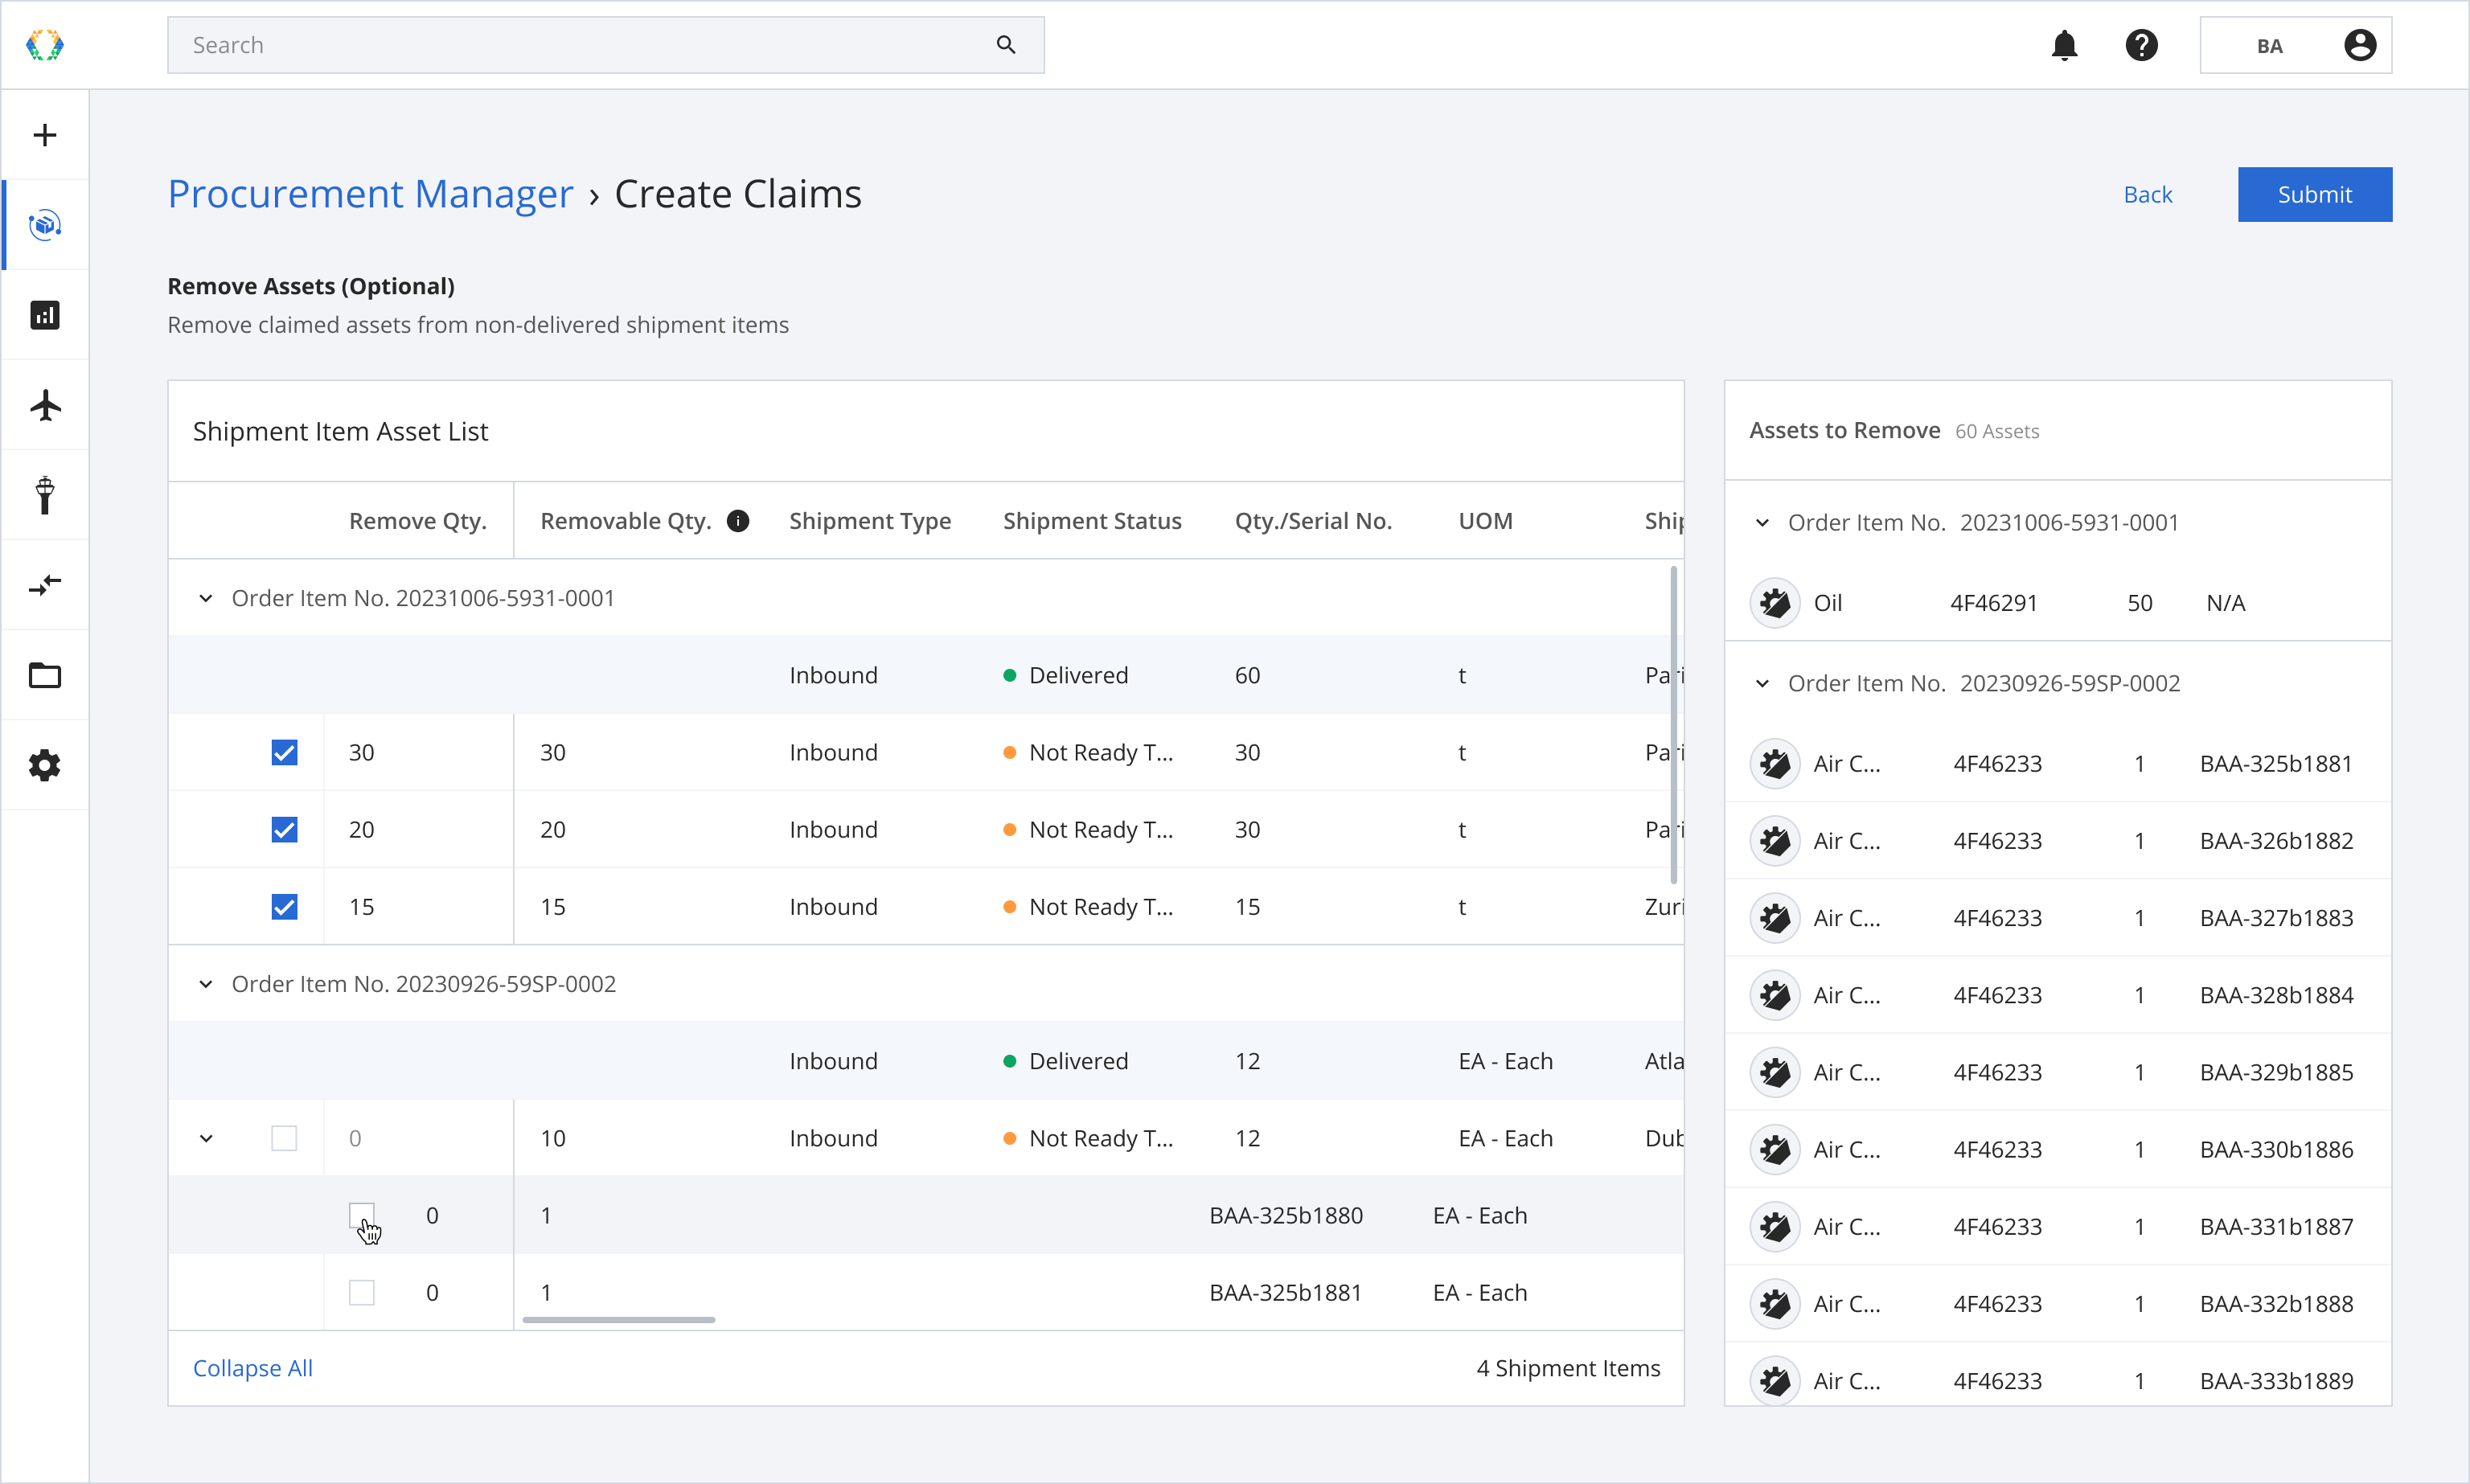
For serialized assets: there is a dropdown you can expand and see the assets by their serial numbers. Additionally, you can view all the assets in the non-delivered shipment item.
You can compare assets with the right side panel using serial numbers.
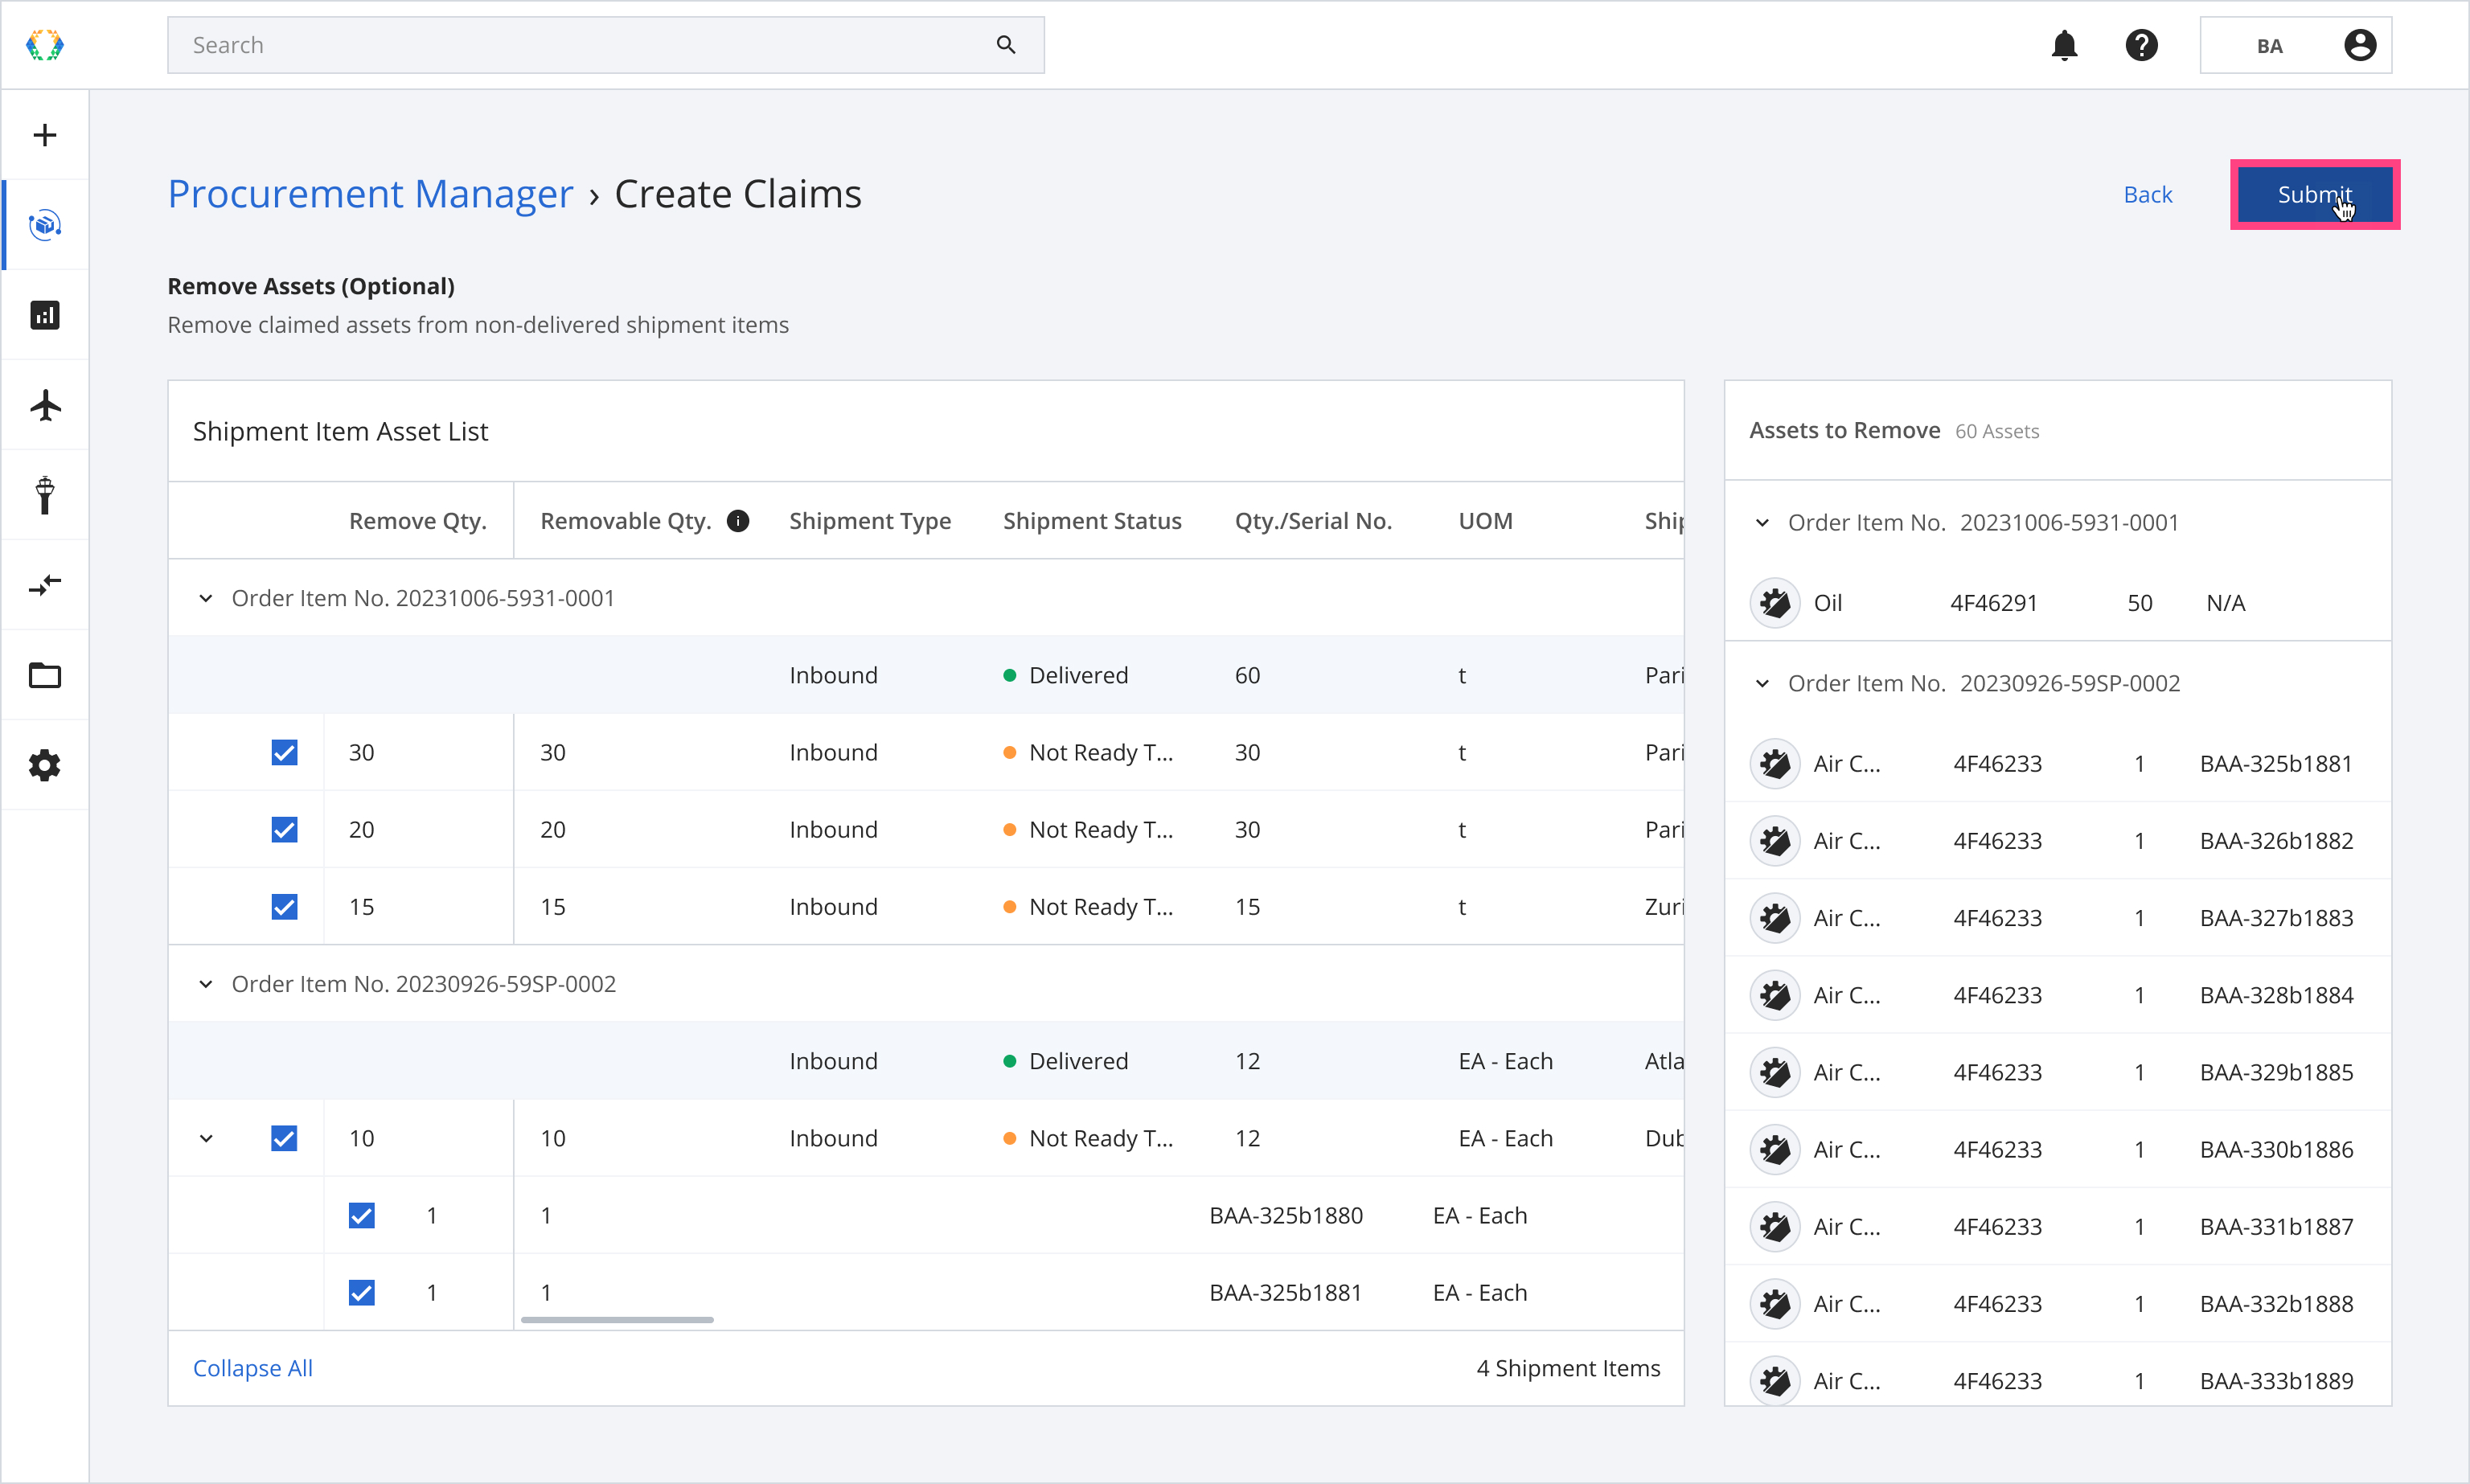
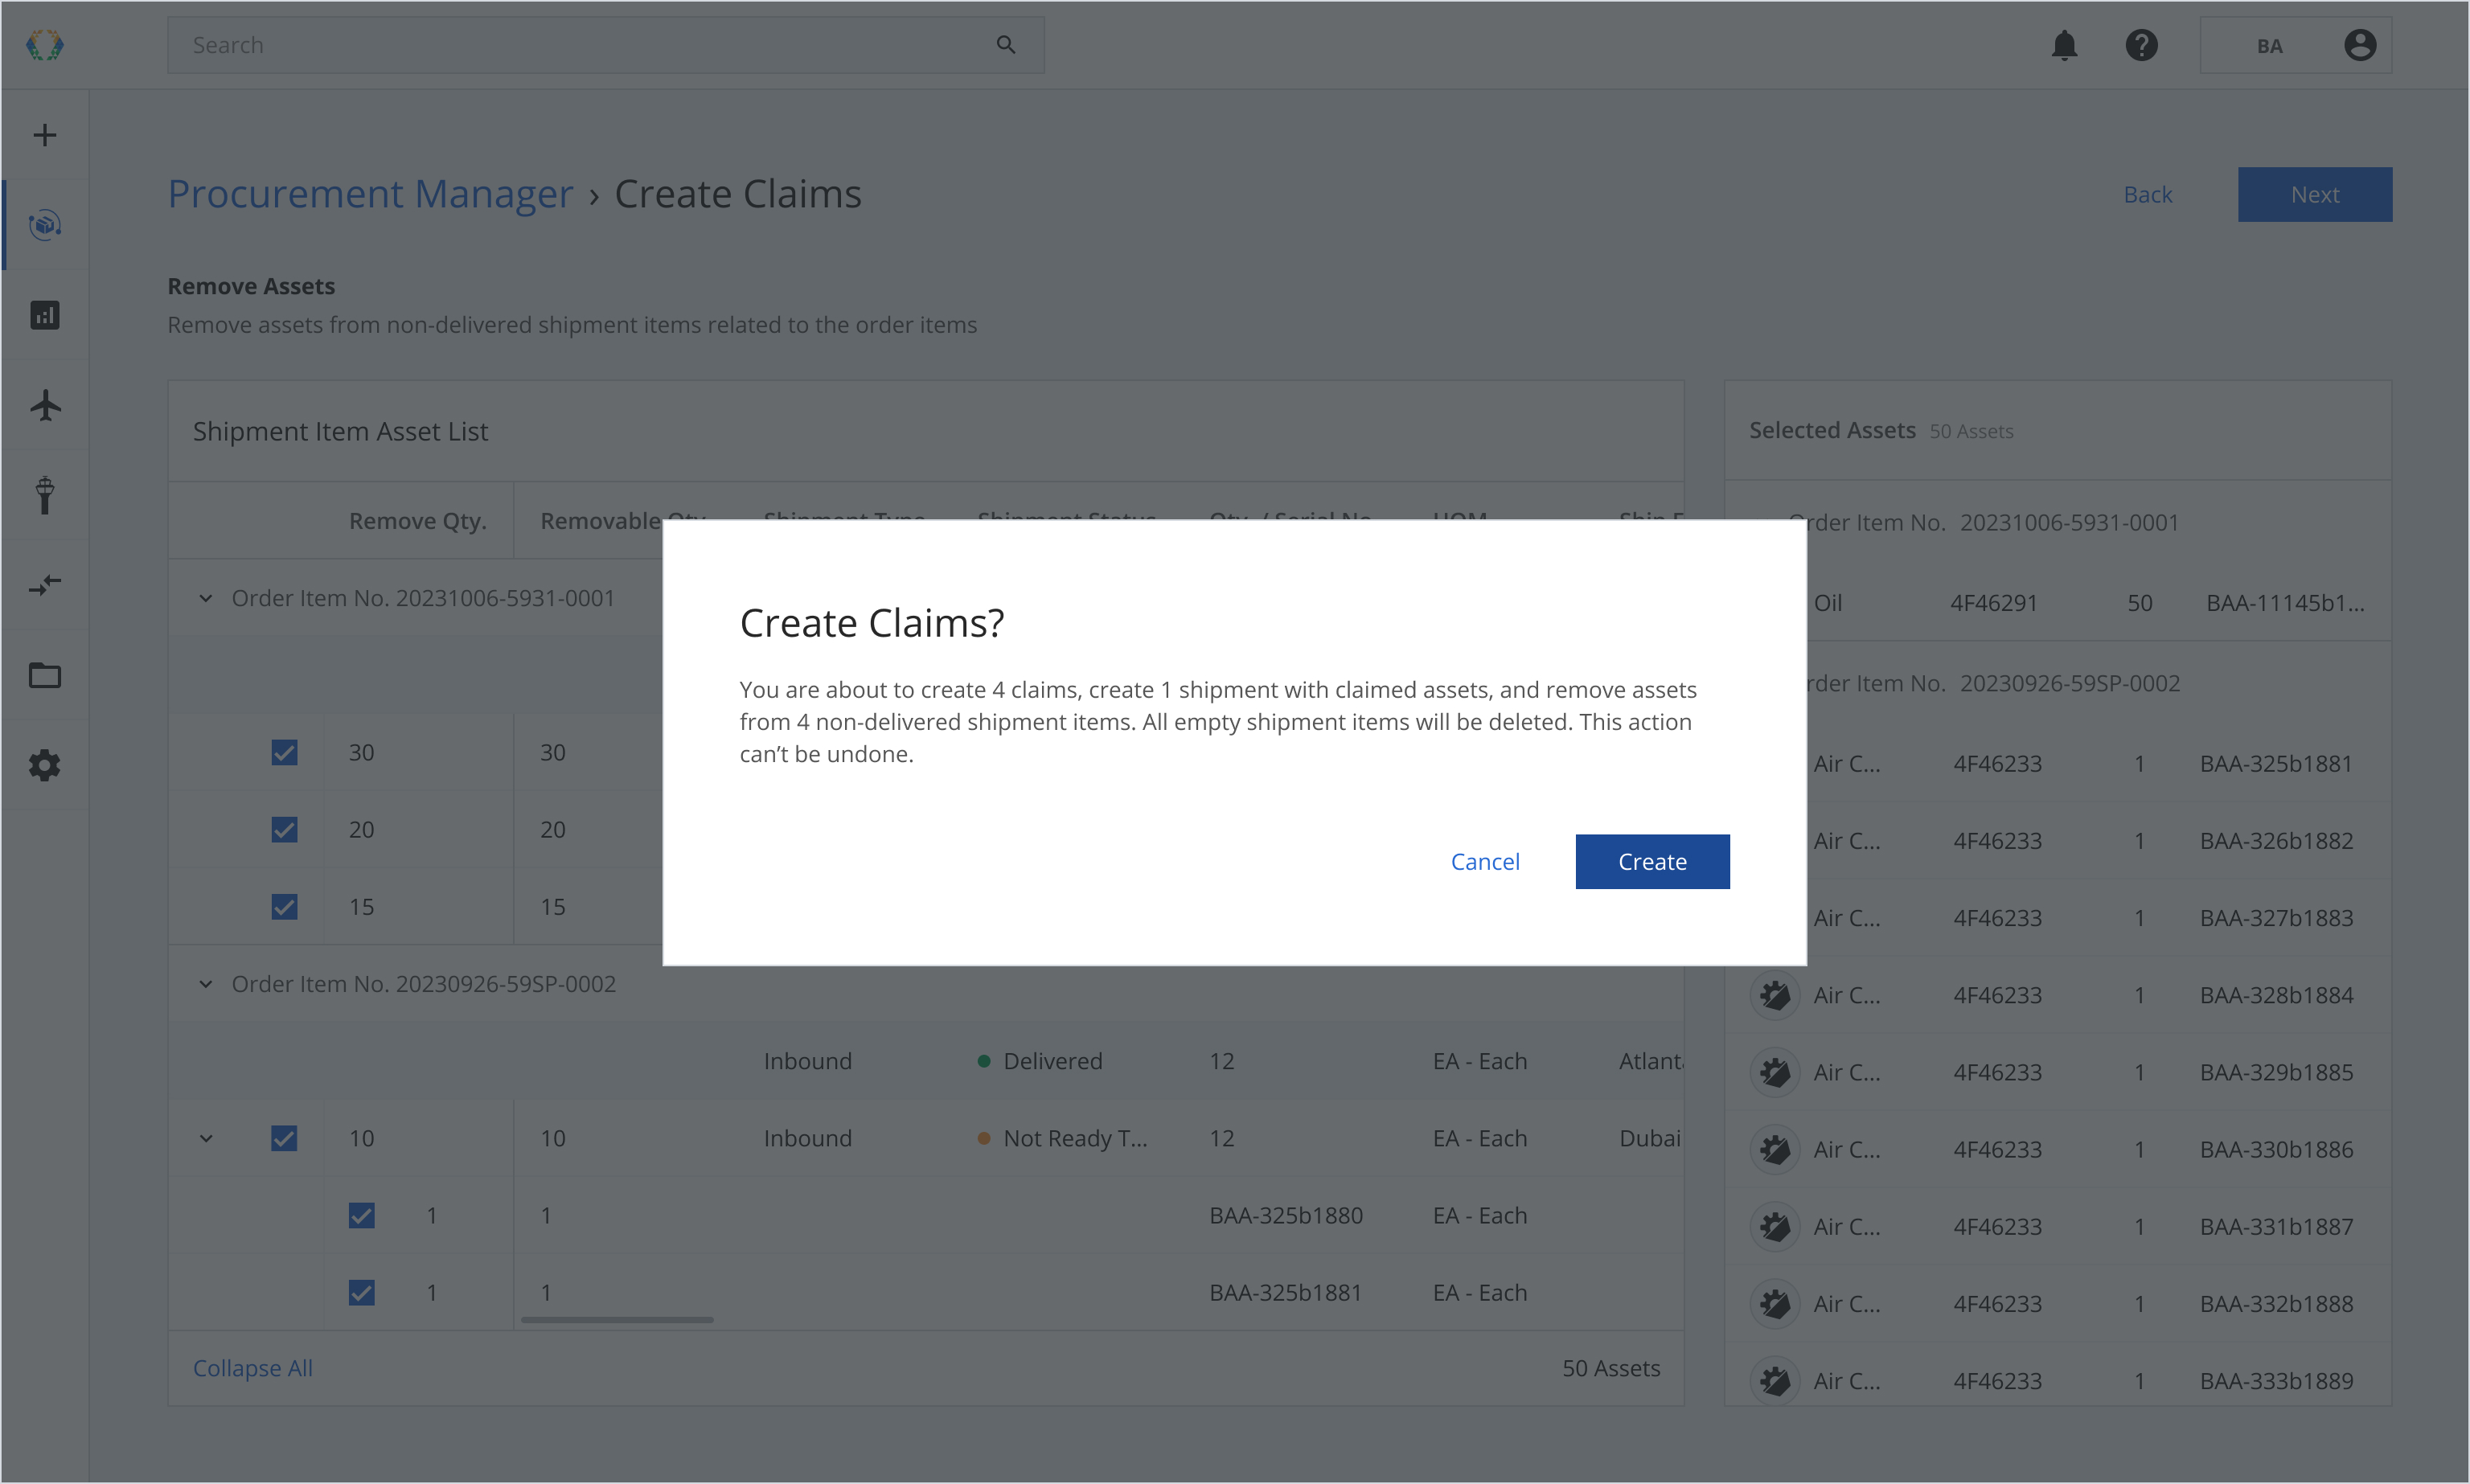
Step 9: Click 'Submit'.
Step 10: A confirmation banner will appear, click 'Create'.
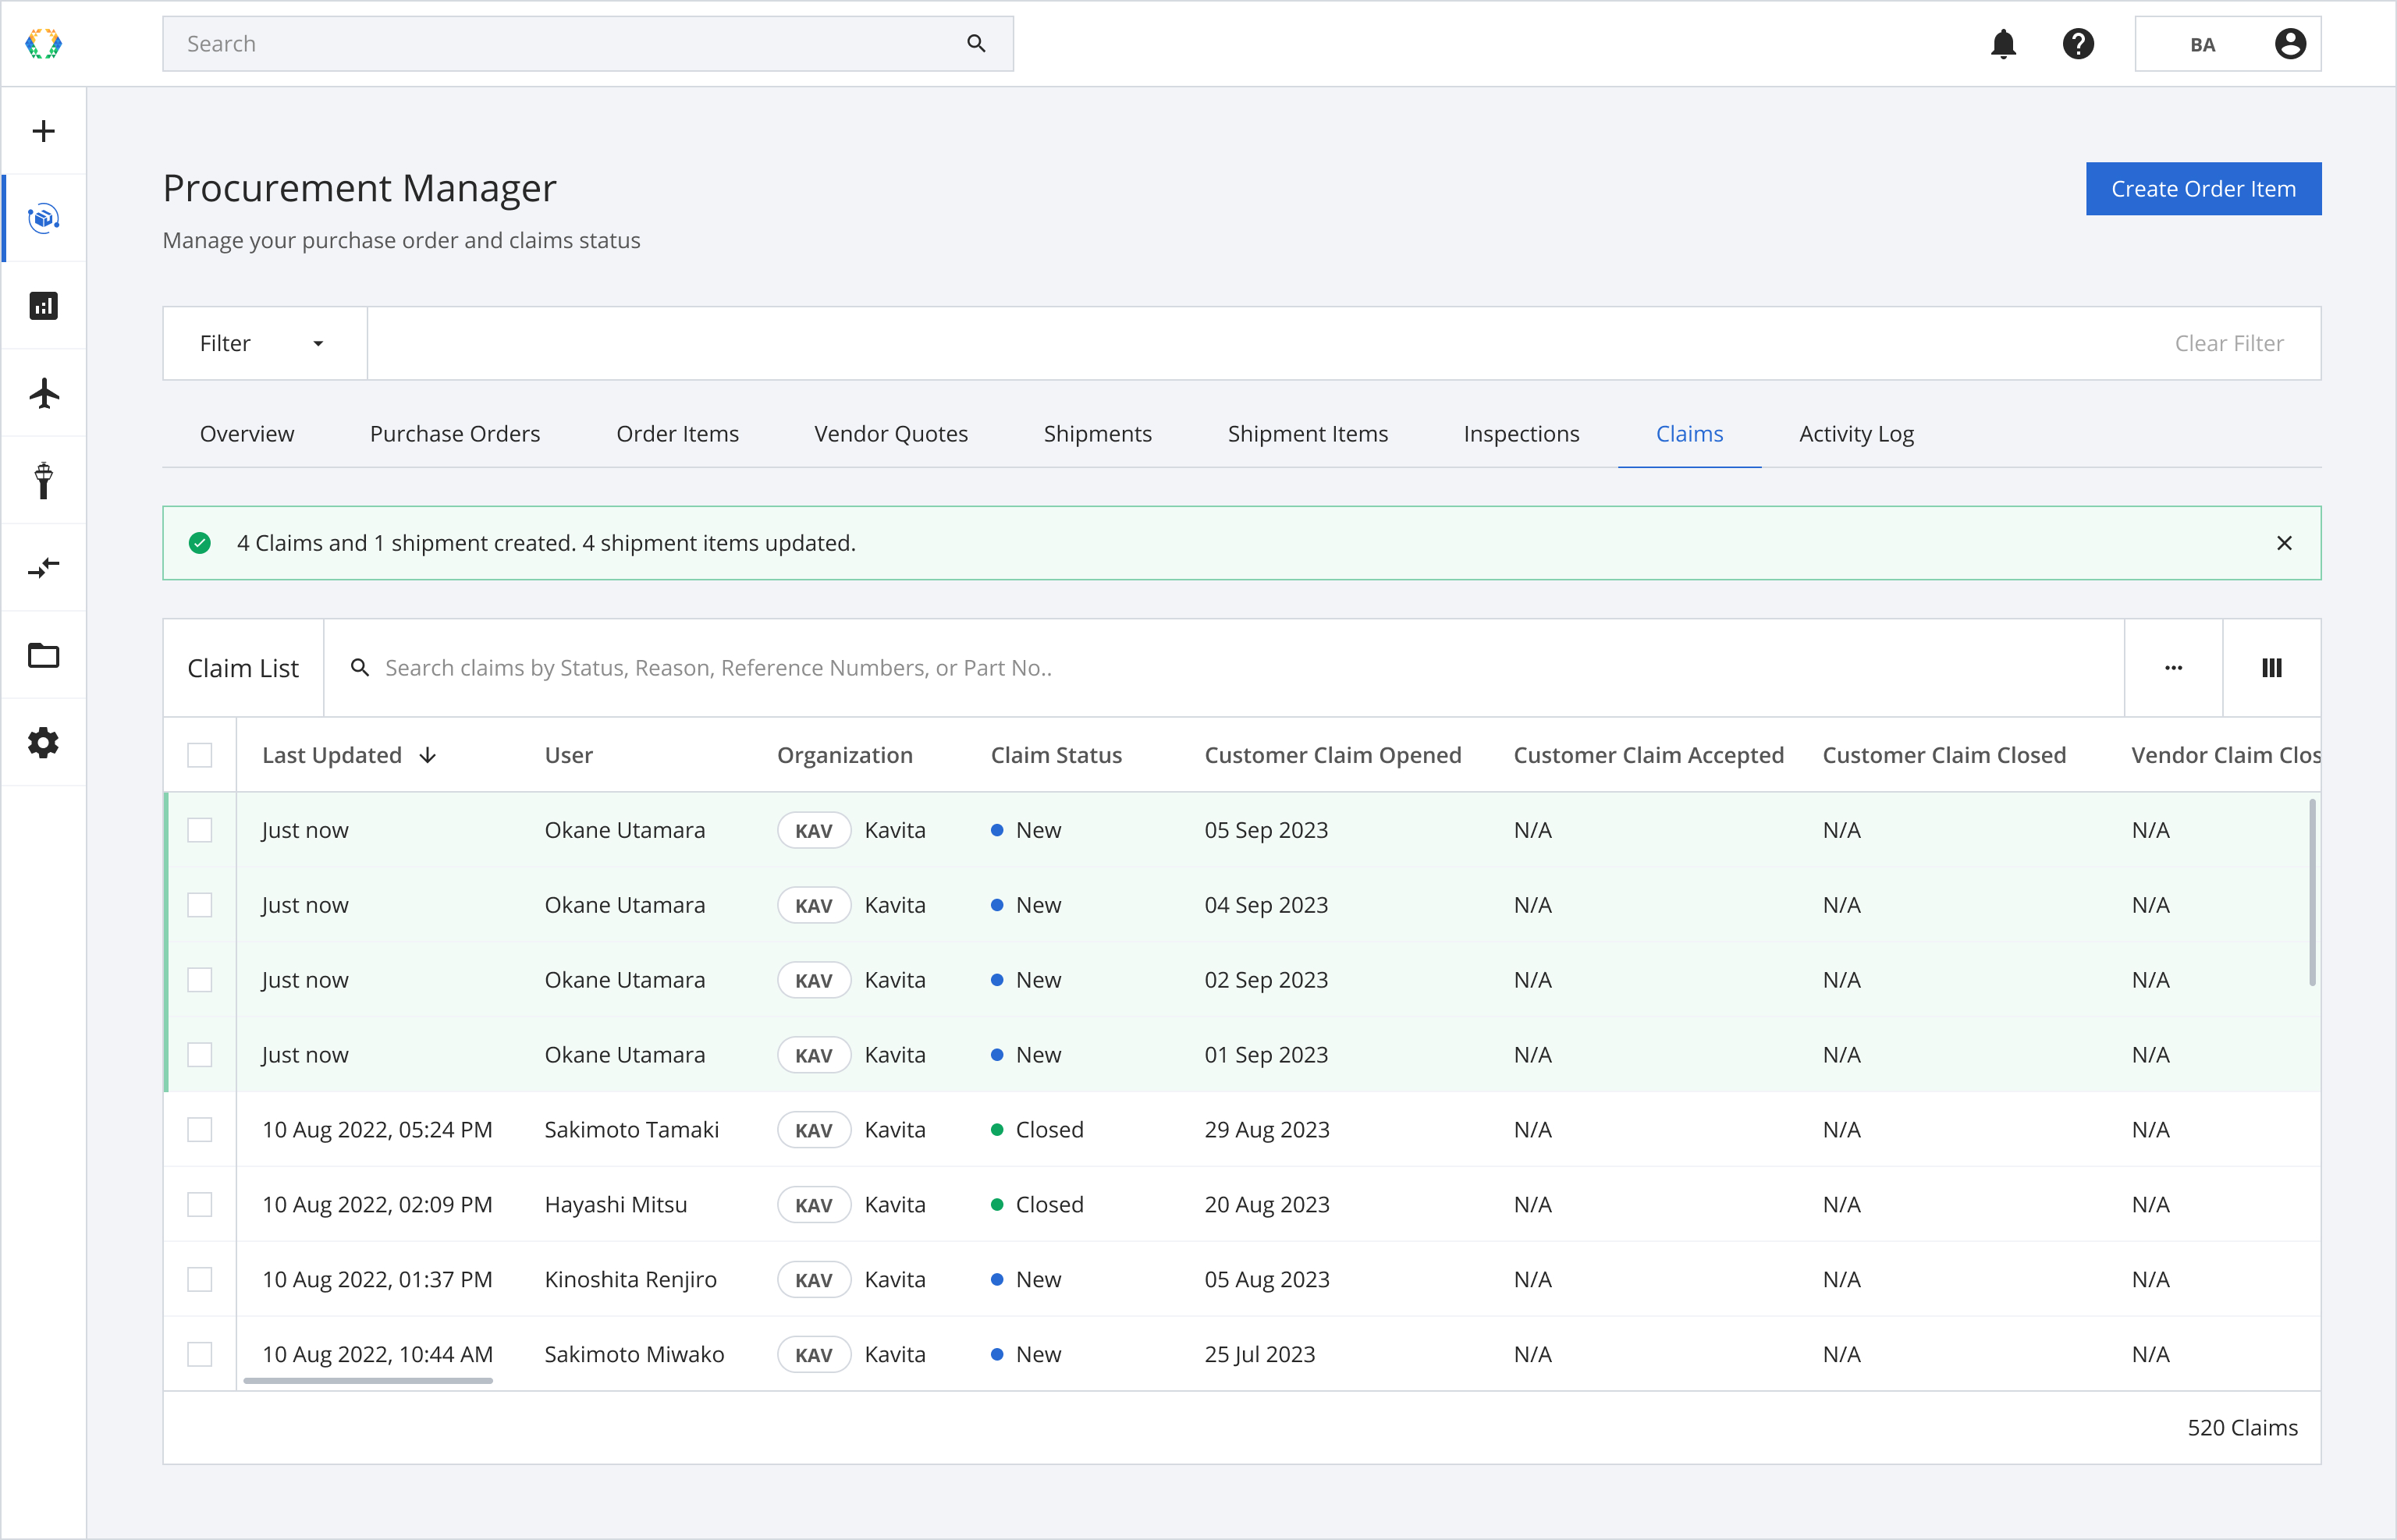
Step 11: Once the claims are successfully created, a green banner will appear at the top of the claims list.
Updated 5 months ago