Billing Records Bulk Operations
Getting Started
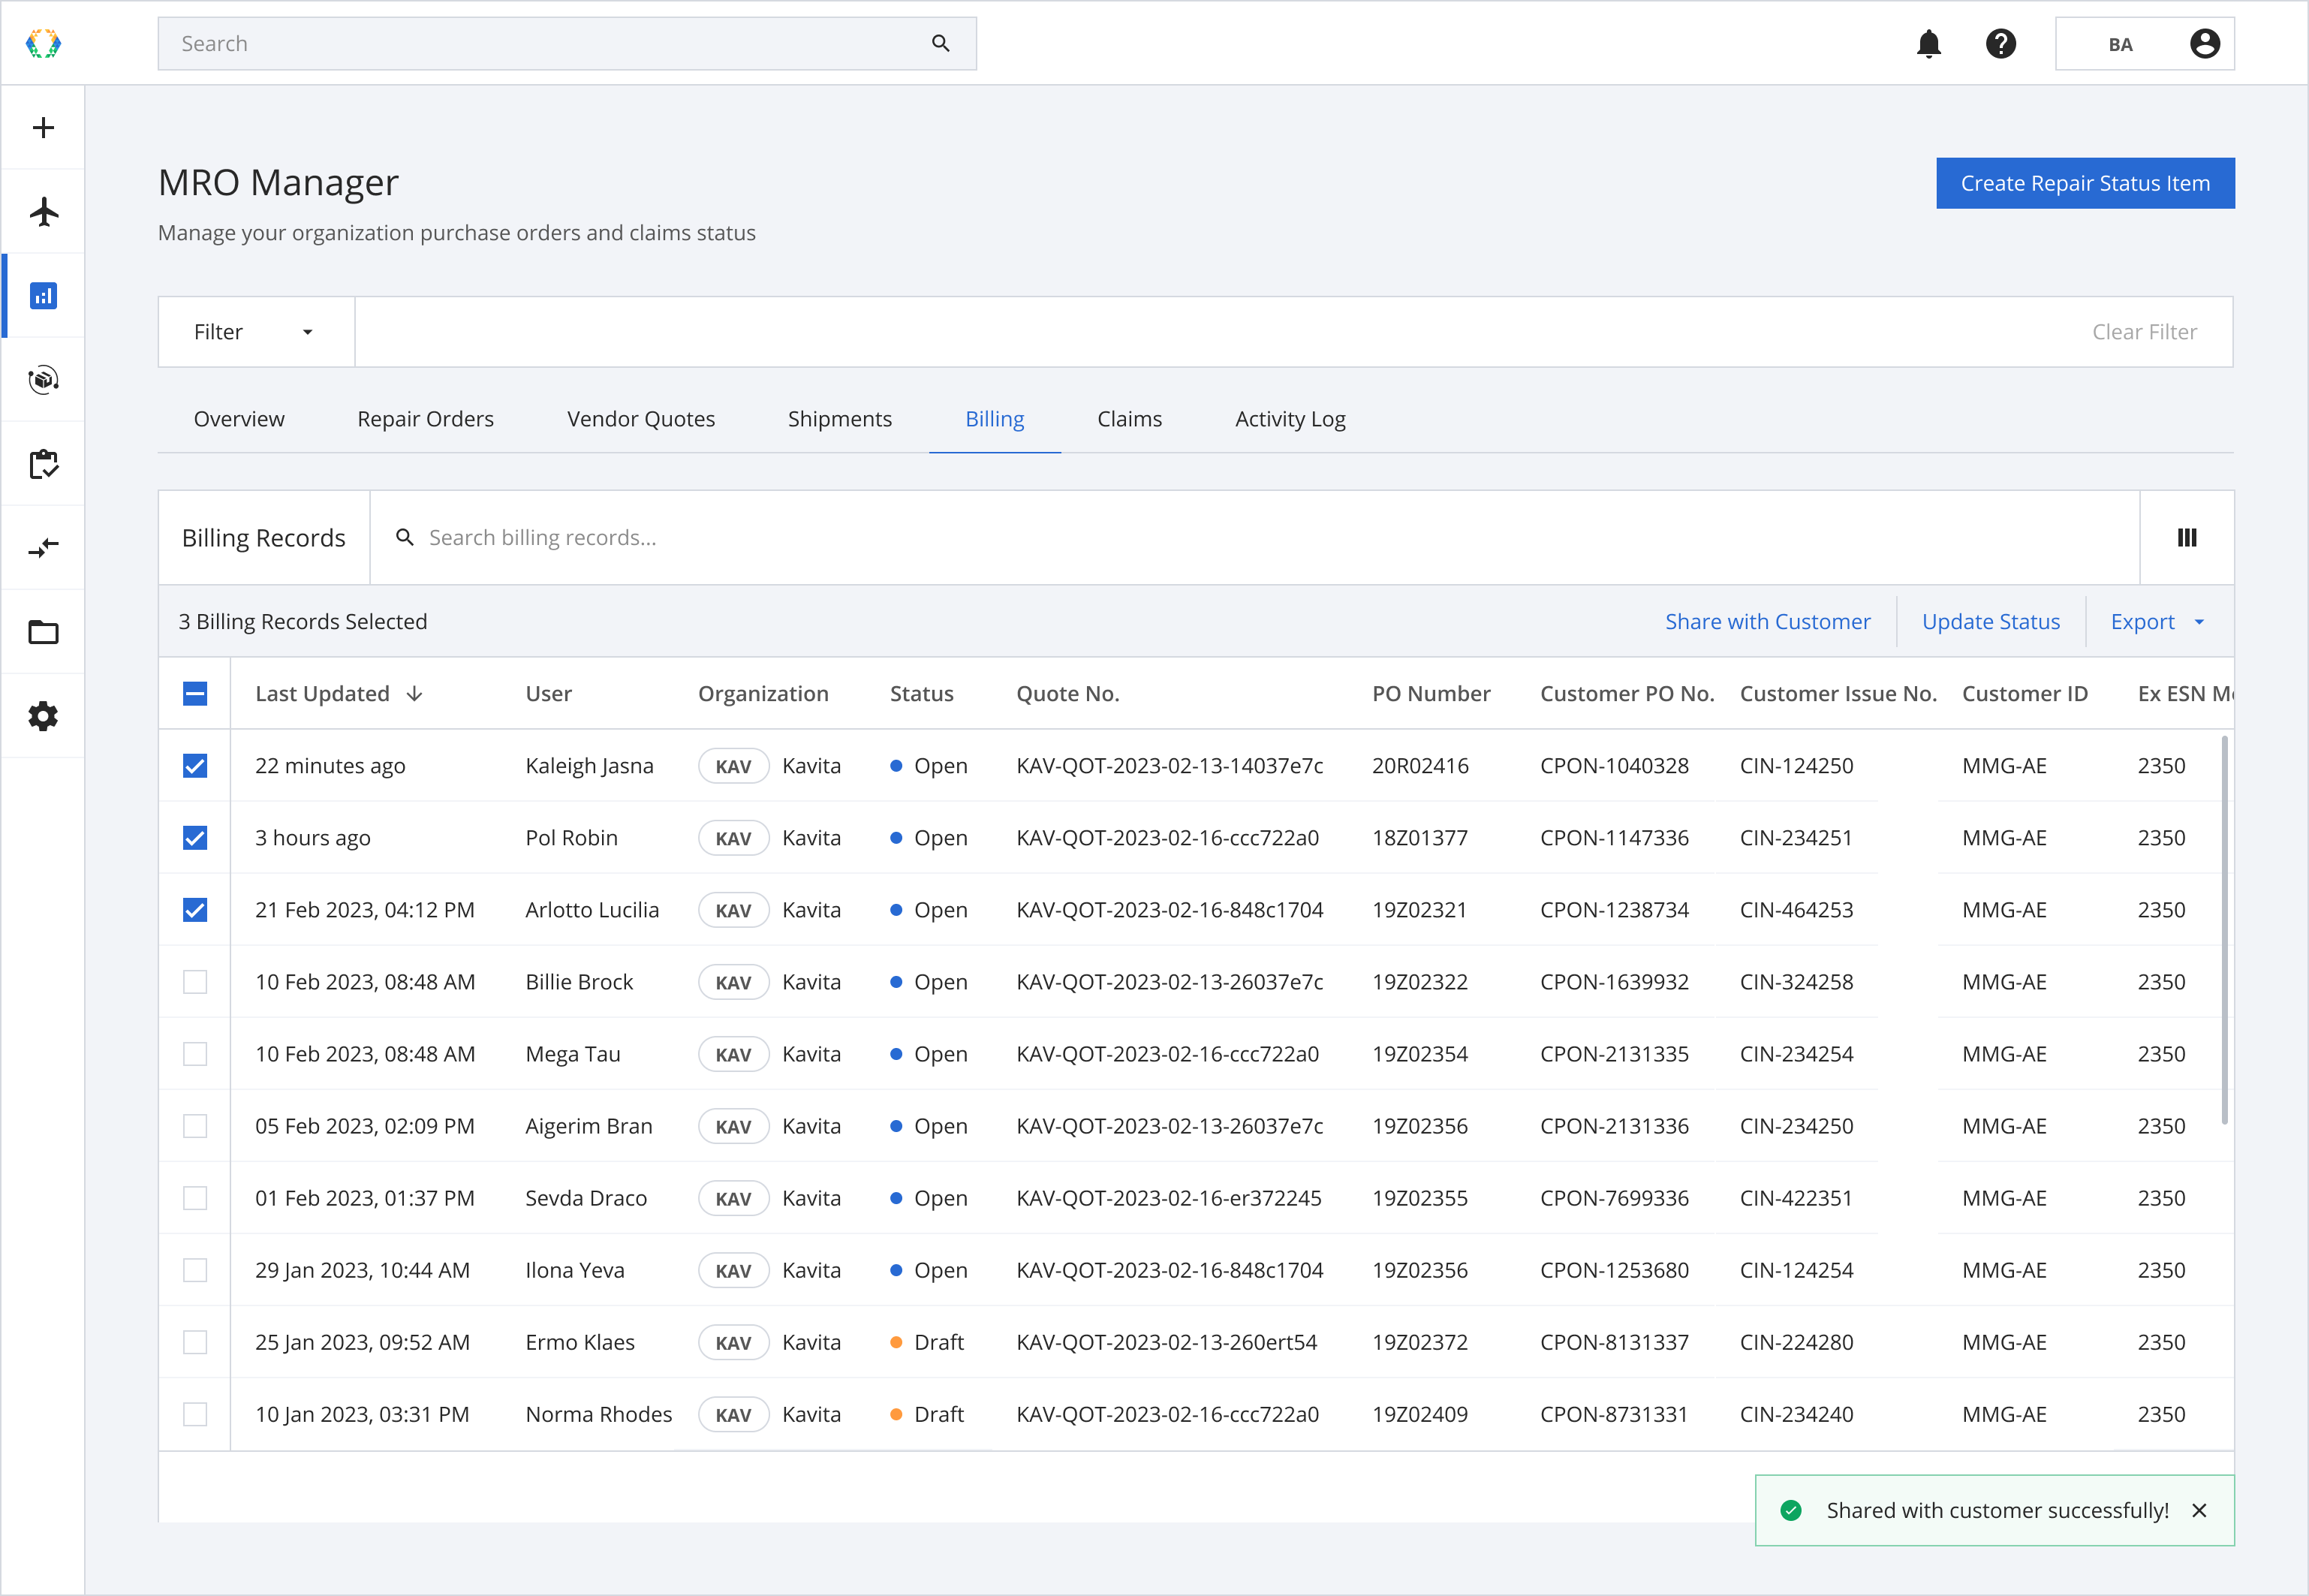
To view your organization's list of Billing Records, click the 'Billing' button on the MRO manager navigation tab.
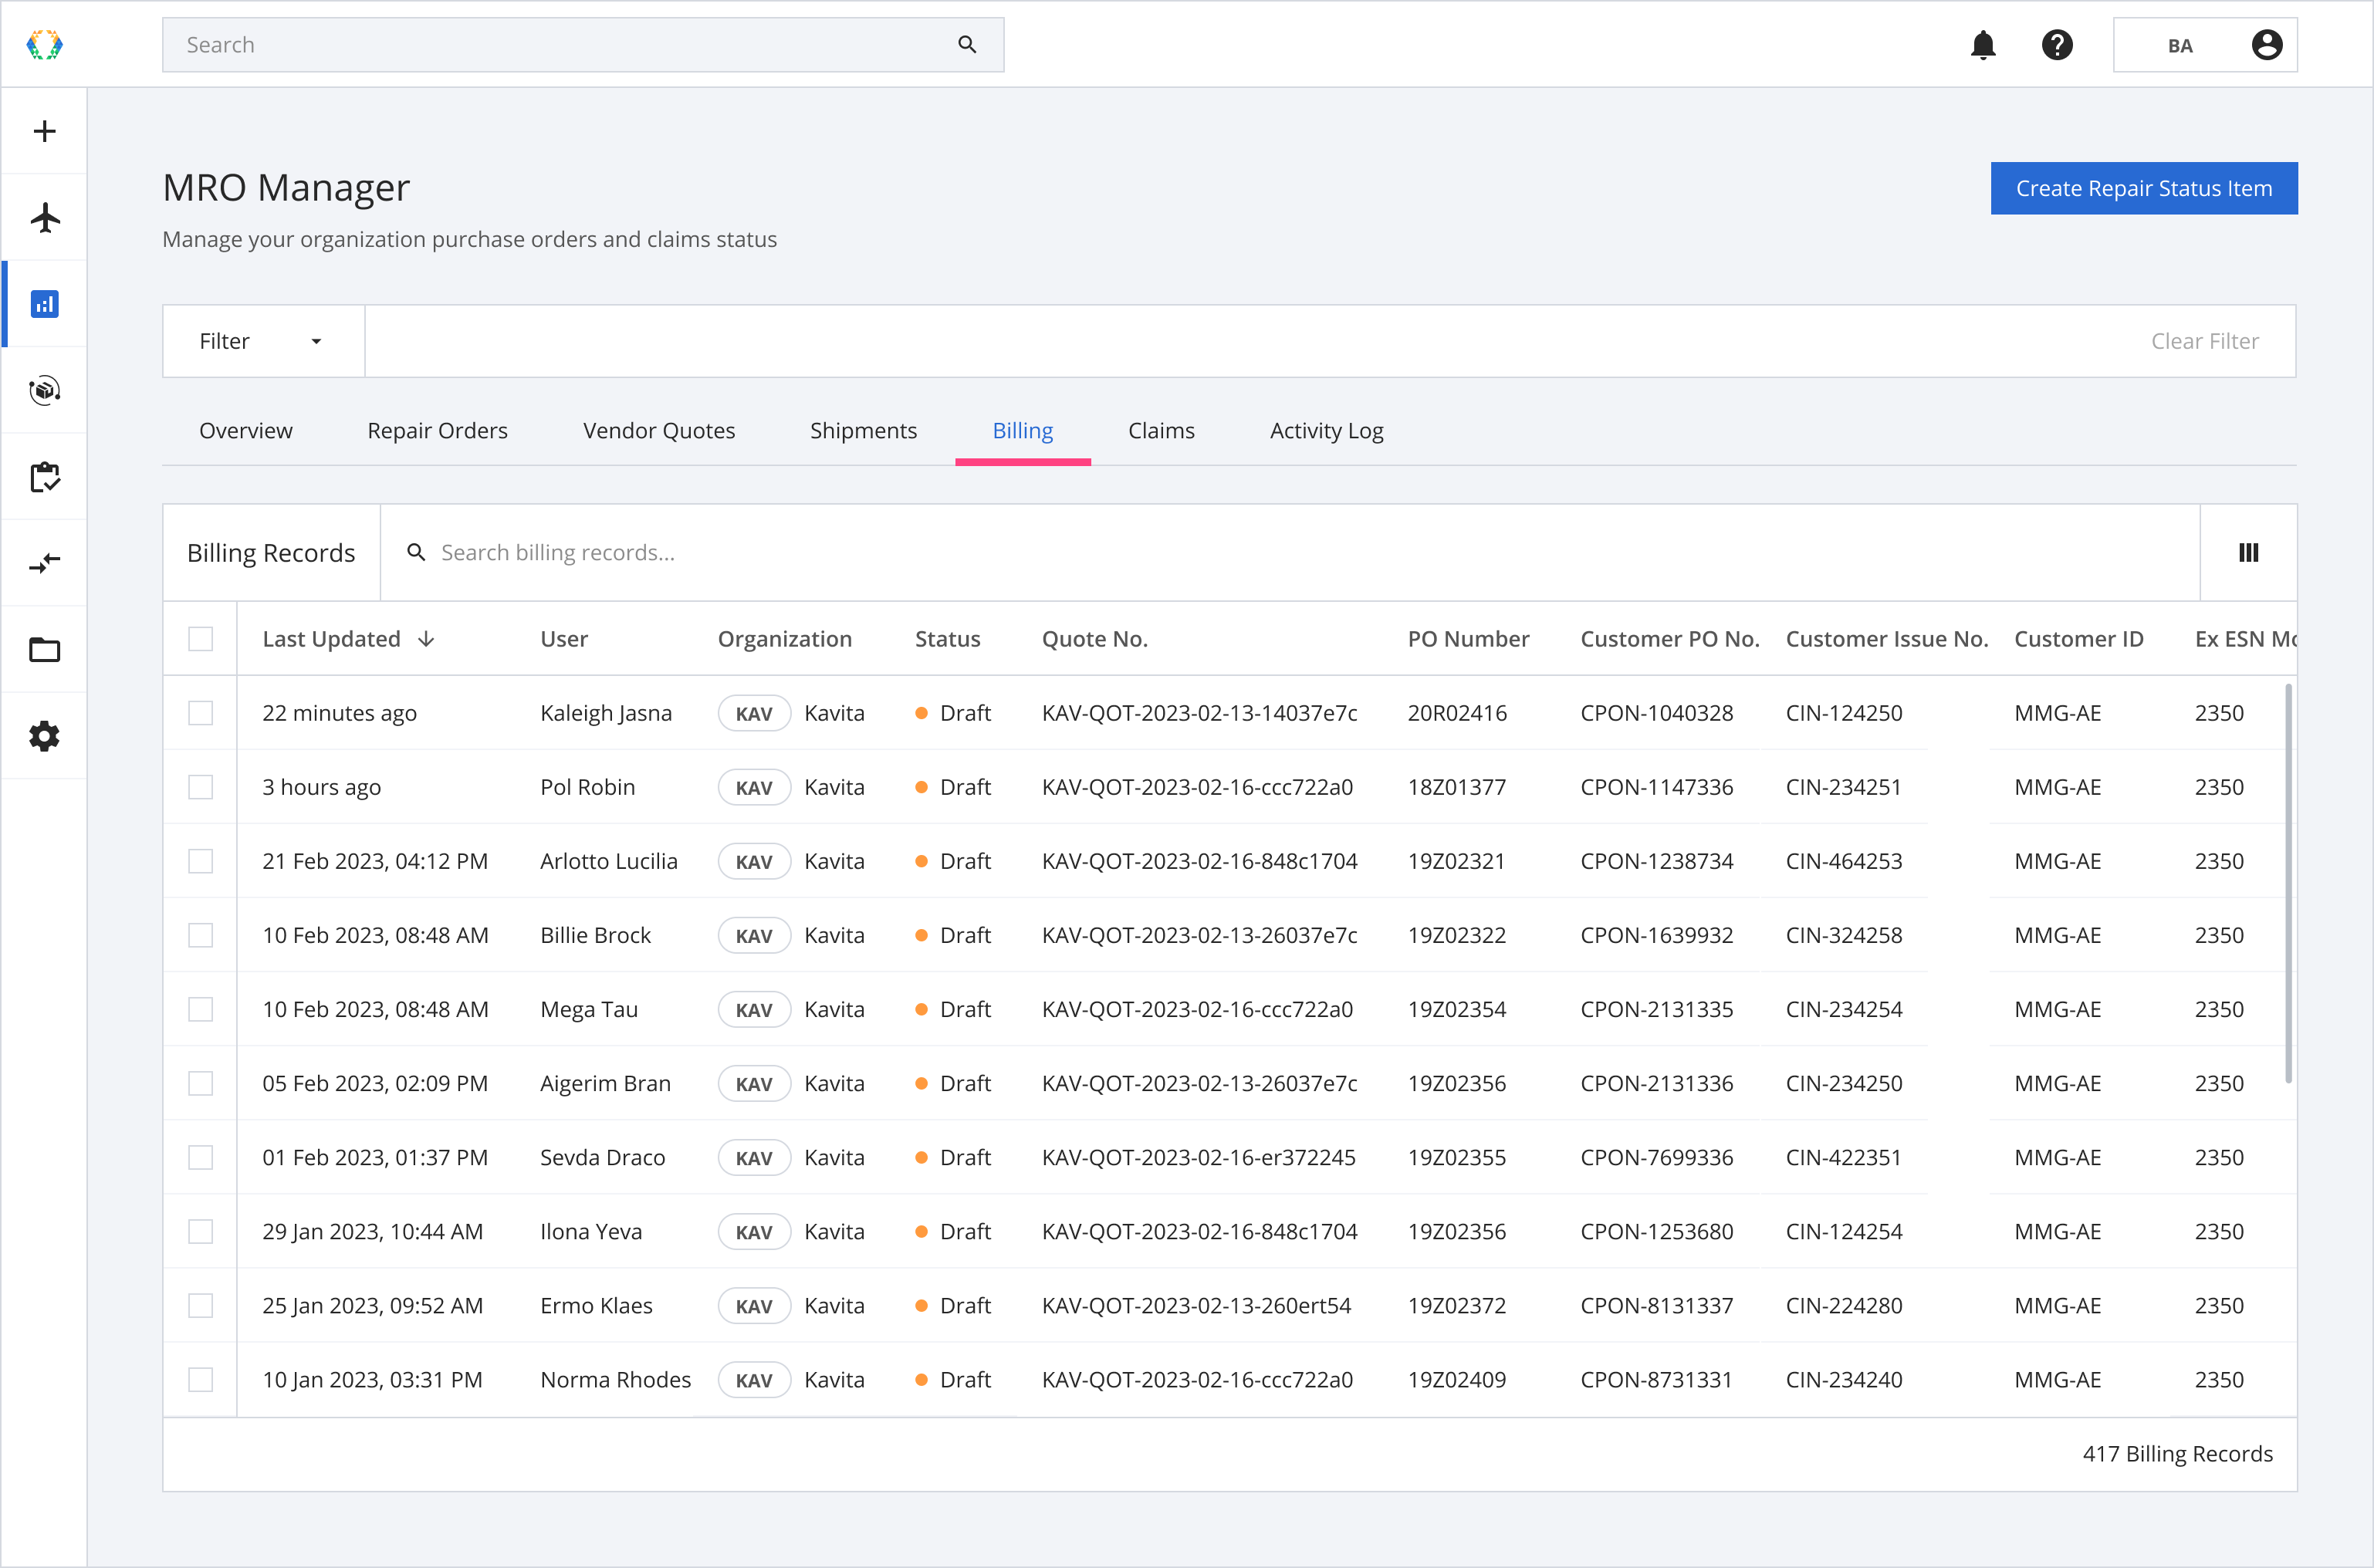
Billing Records Layout.
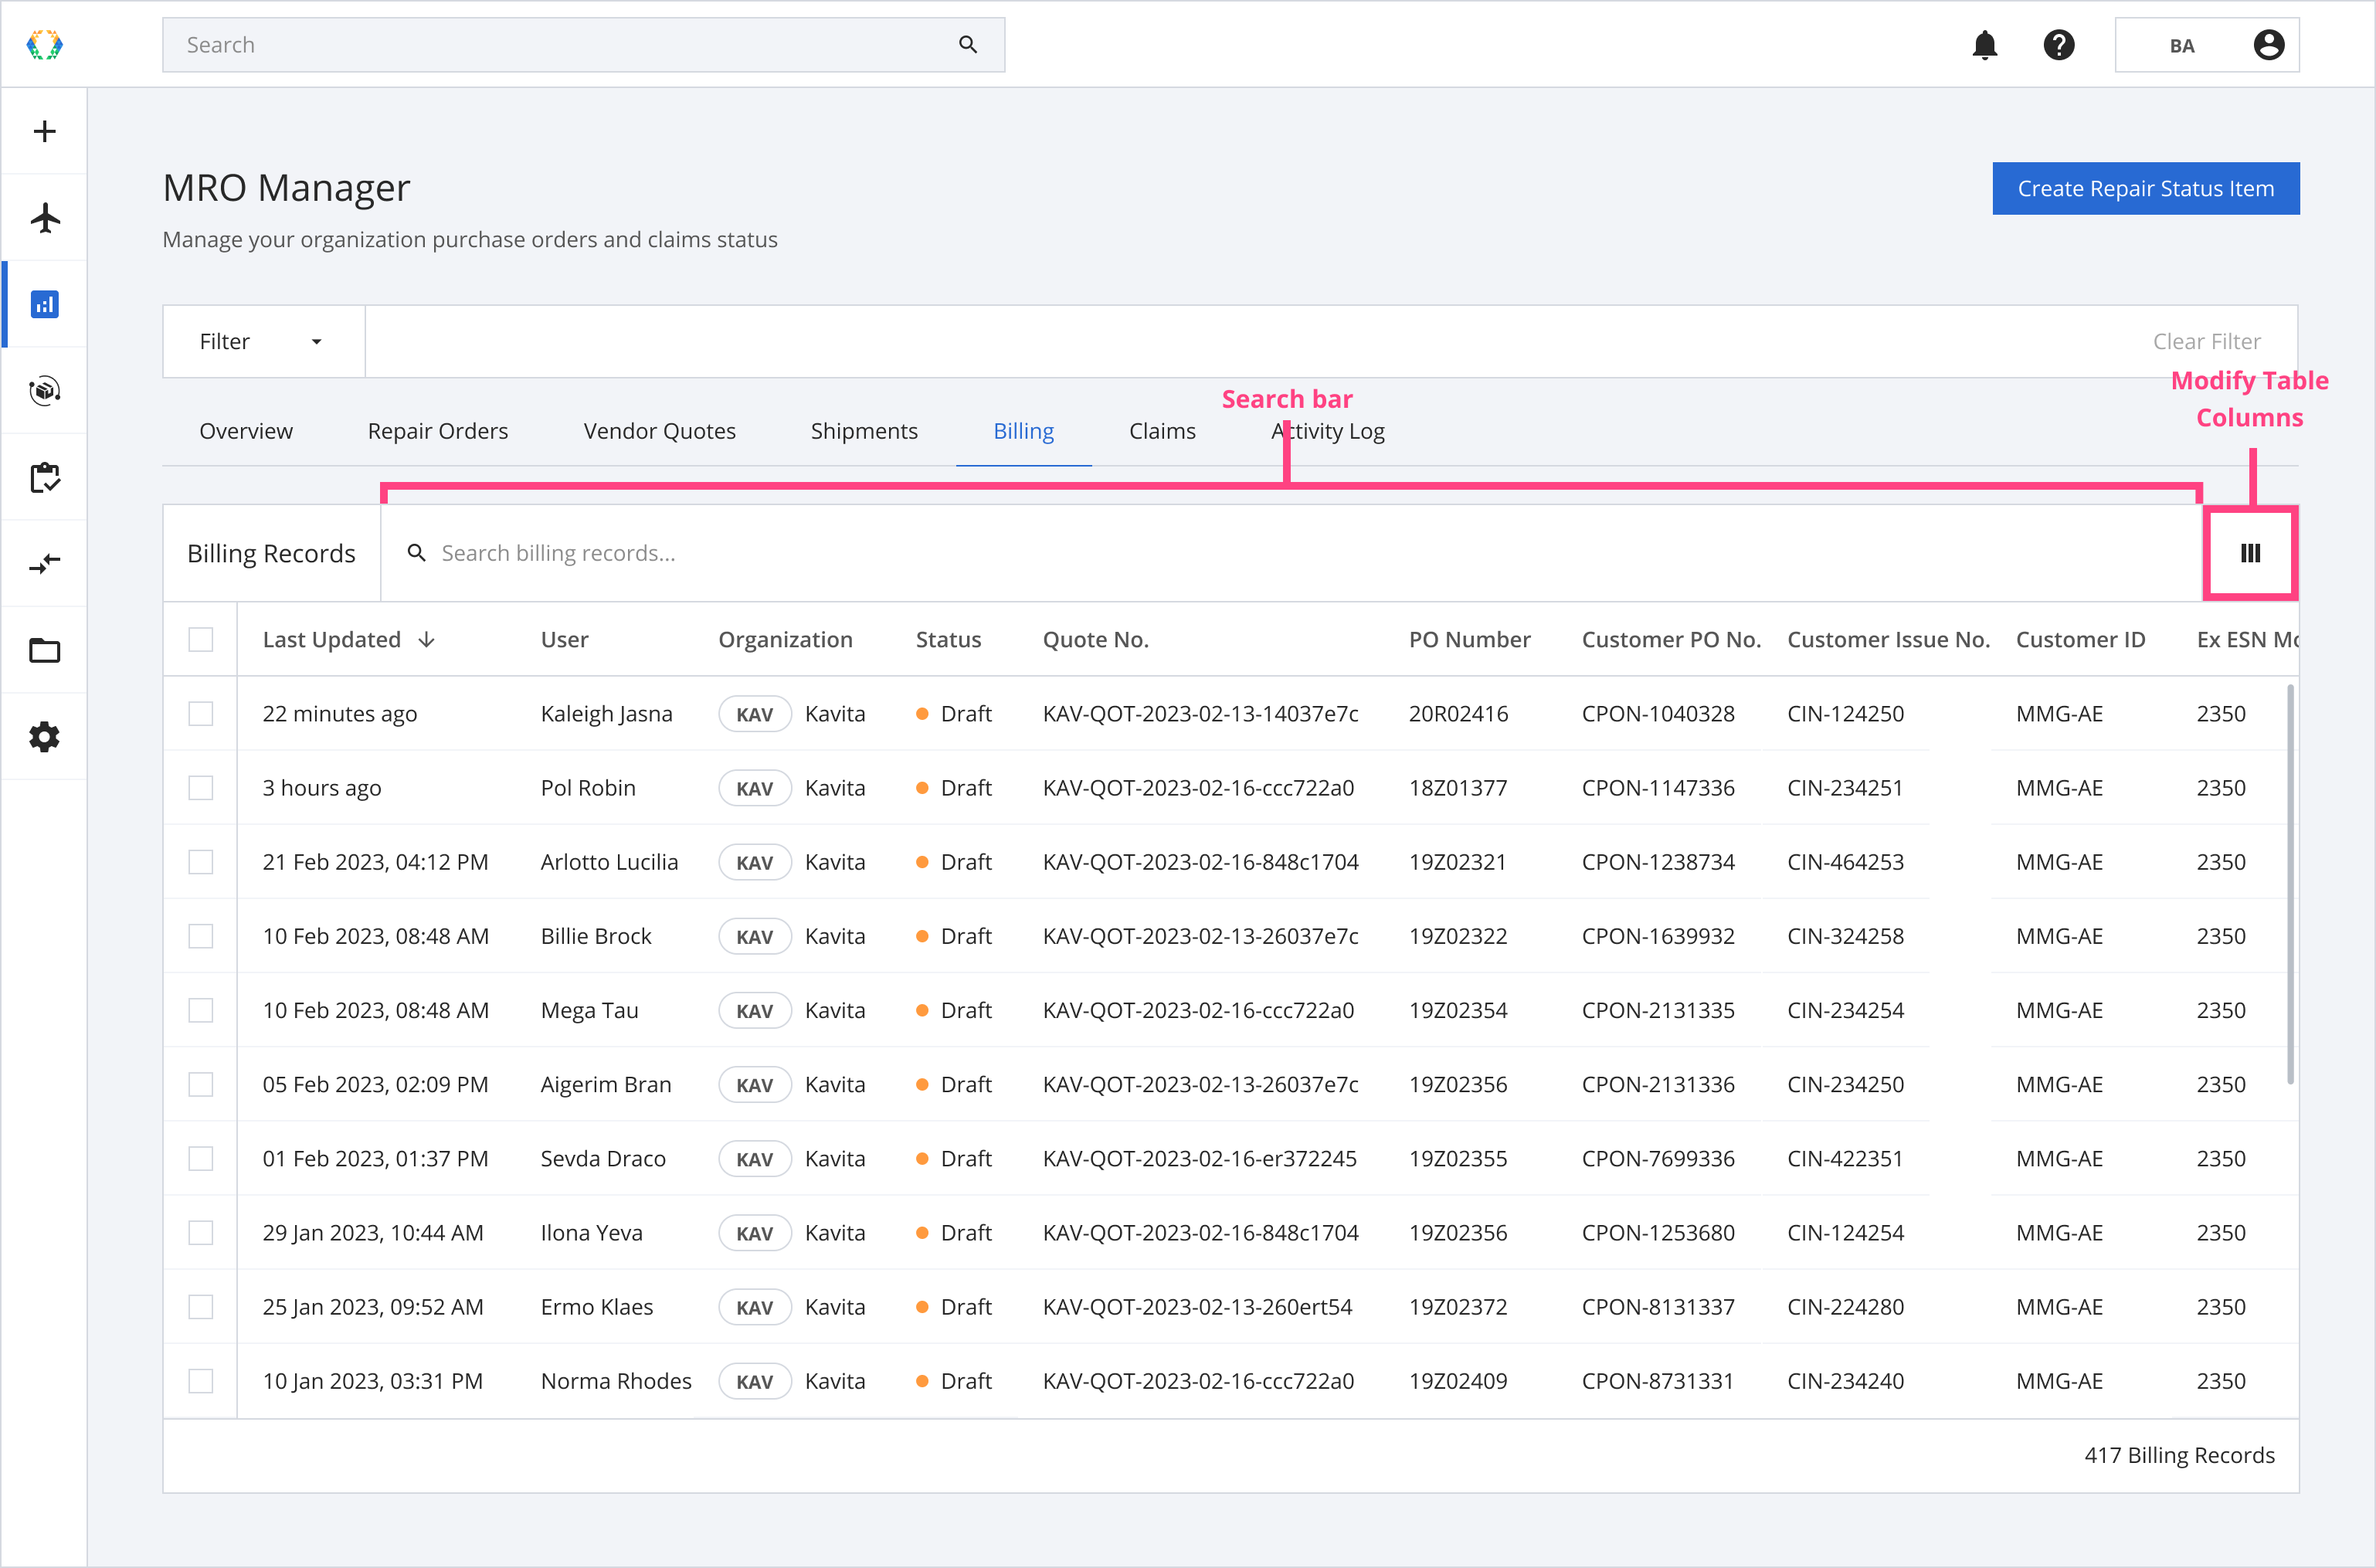
Searching on Billing Records
The Search Bar on the Billing Records List allows you to search for specific Quotes within your organization. You can use a variety of parameters to search for your Billing Records.
| Searchable Parameters |
|---|
| Status |
| Quote No. |
| PO No. |
| Customer PO No. |
| Customer Issue No. |
| Customer ID |
| Ex ESN Model |
| Ex ESN |
Create Billing Quotes for Repair Orders in Bulk
Generate your Billing Quotes in bulk in the Repair Order List.
Step 1: From the Repair Order List, select the repair orders you want to create quotes.
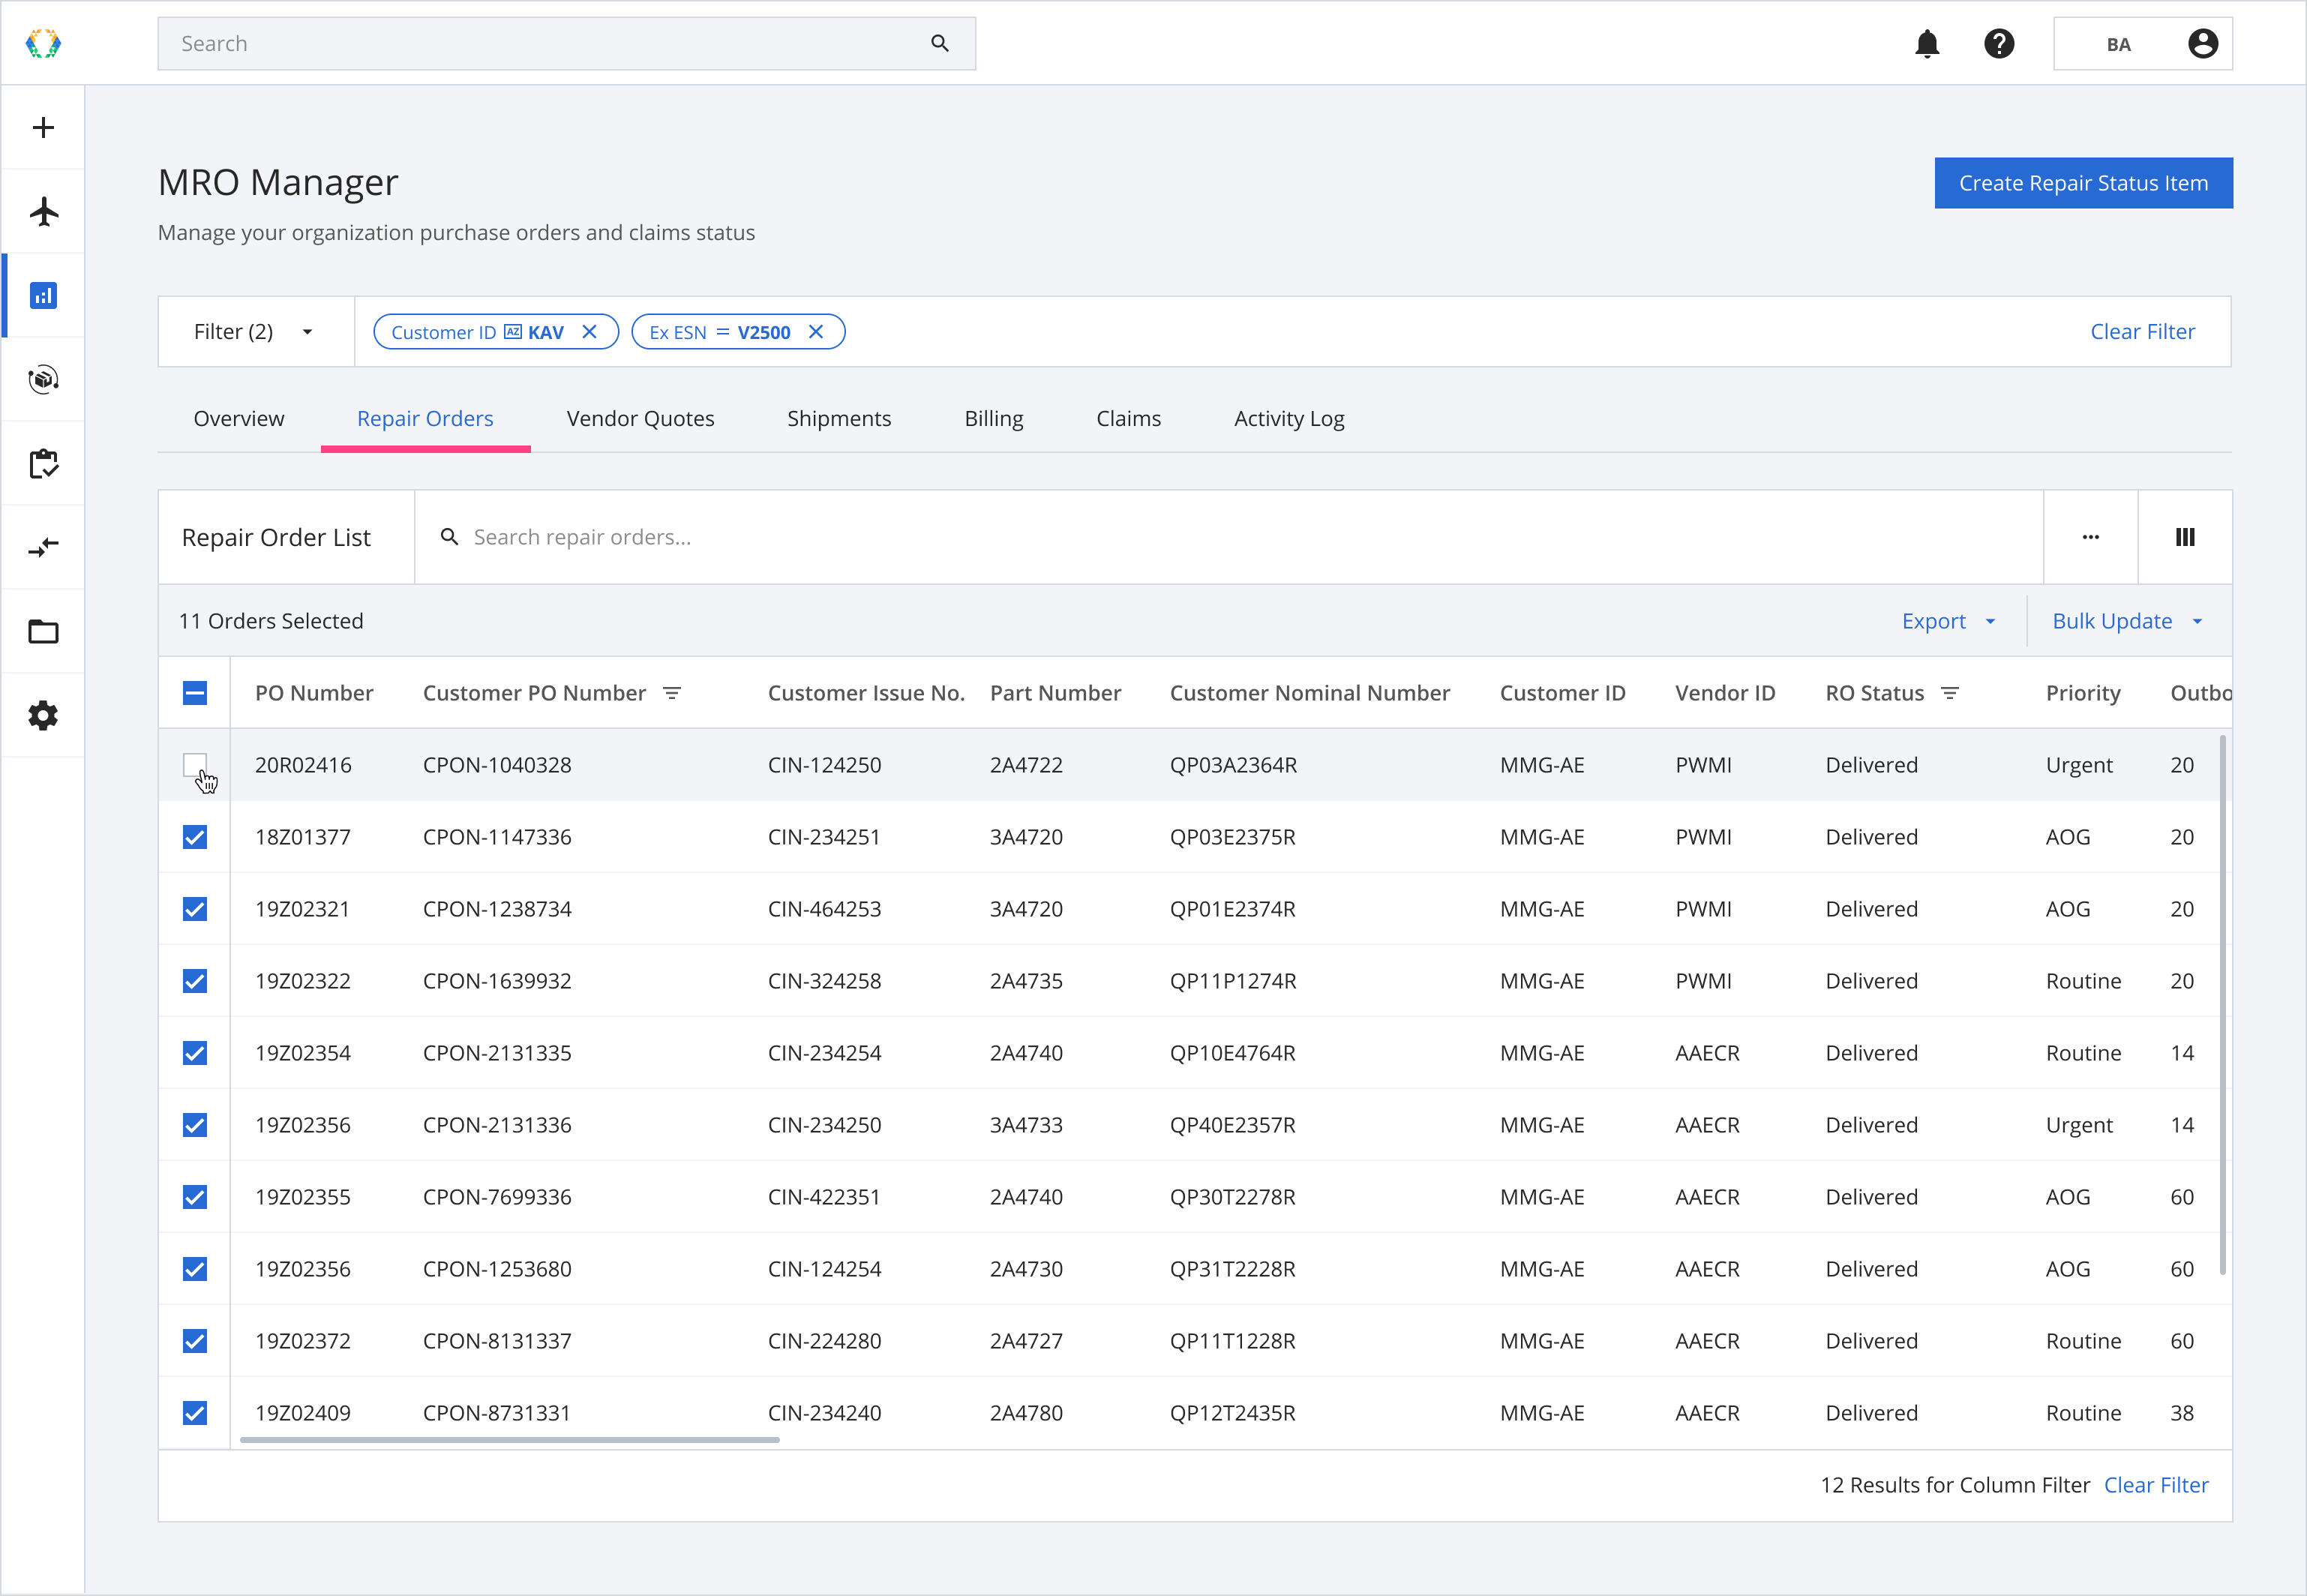
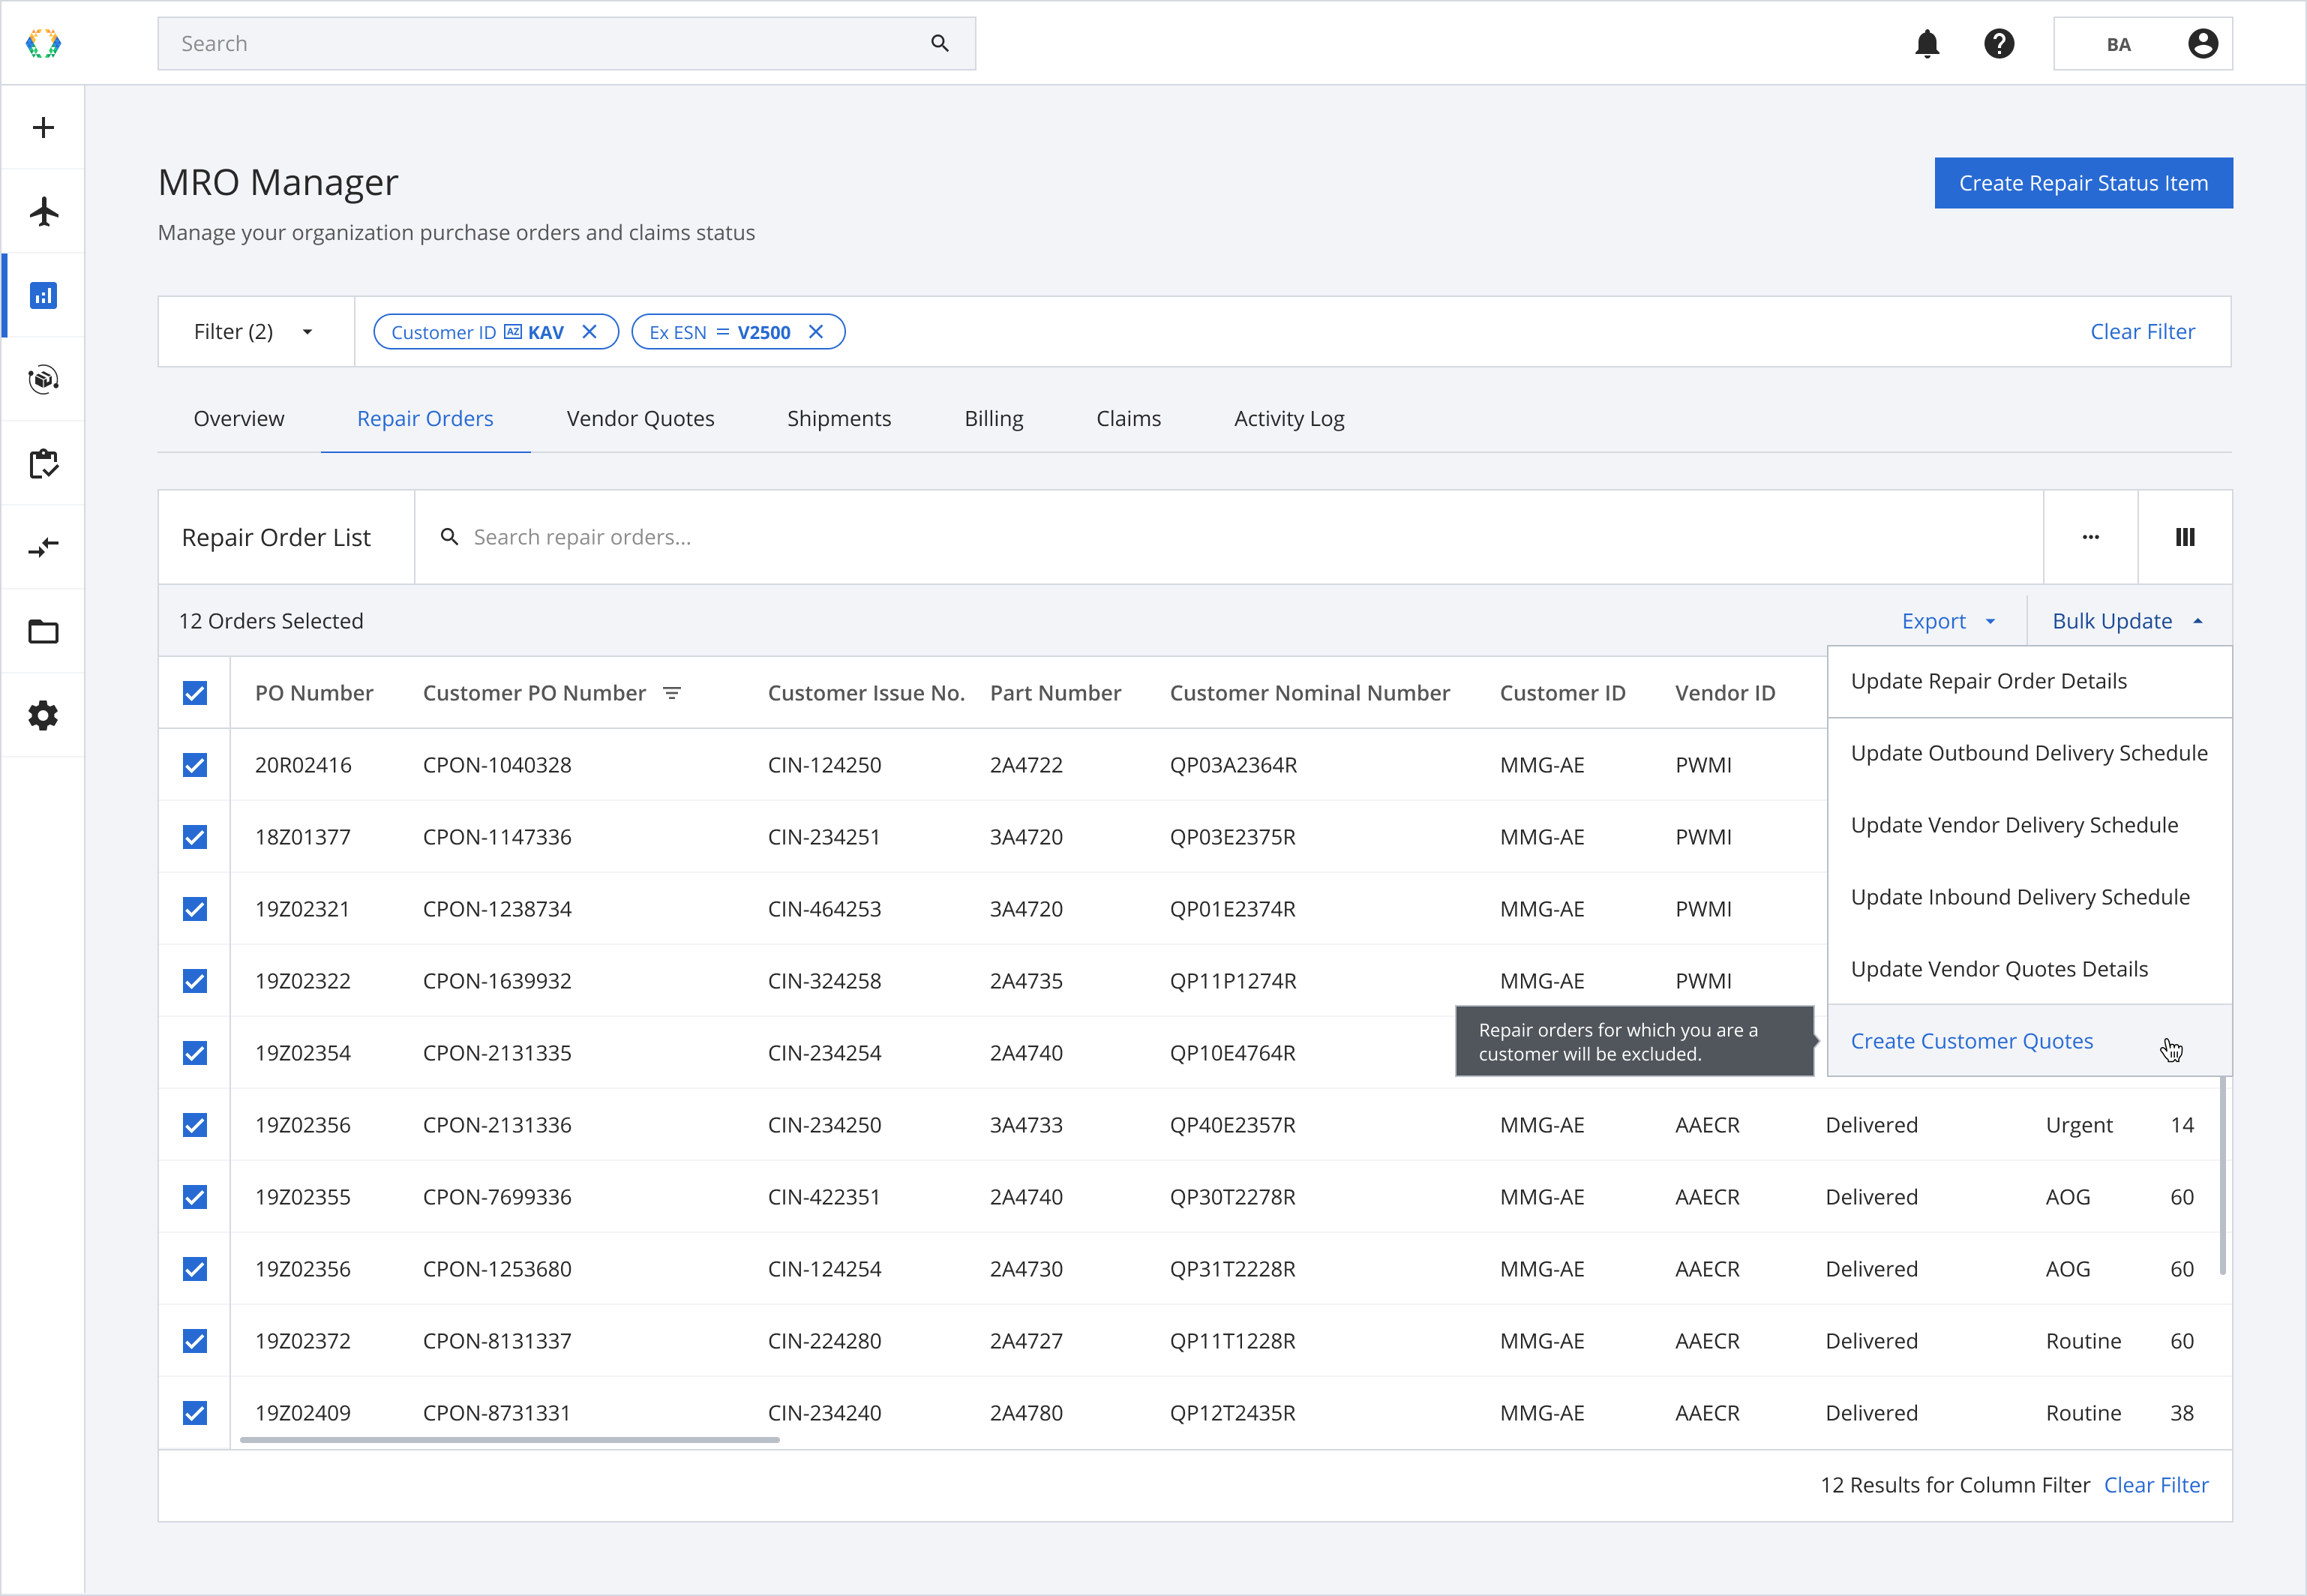
Step 2: Click 'Bulk Update' and select 'Create Customer Quotes' in the dropdown list.
Step 3: Select Billing Profile from the dropdown list.
Billing Profile informationThe Billing Profiles saved on the platform help you to automate the creation of your billing quotes. When a Billing Profile is selected, information such as default payment terms, quote currency, billing and shipping information will be populated automatically.
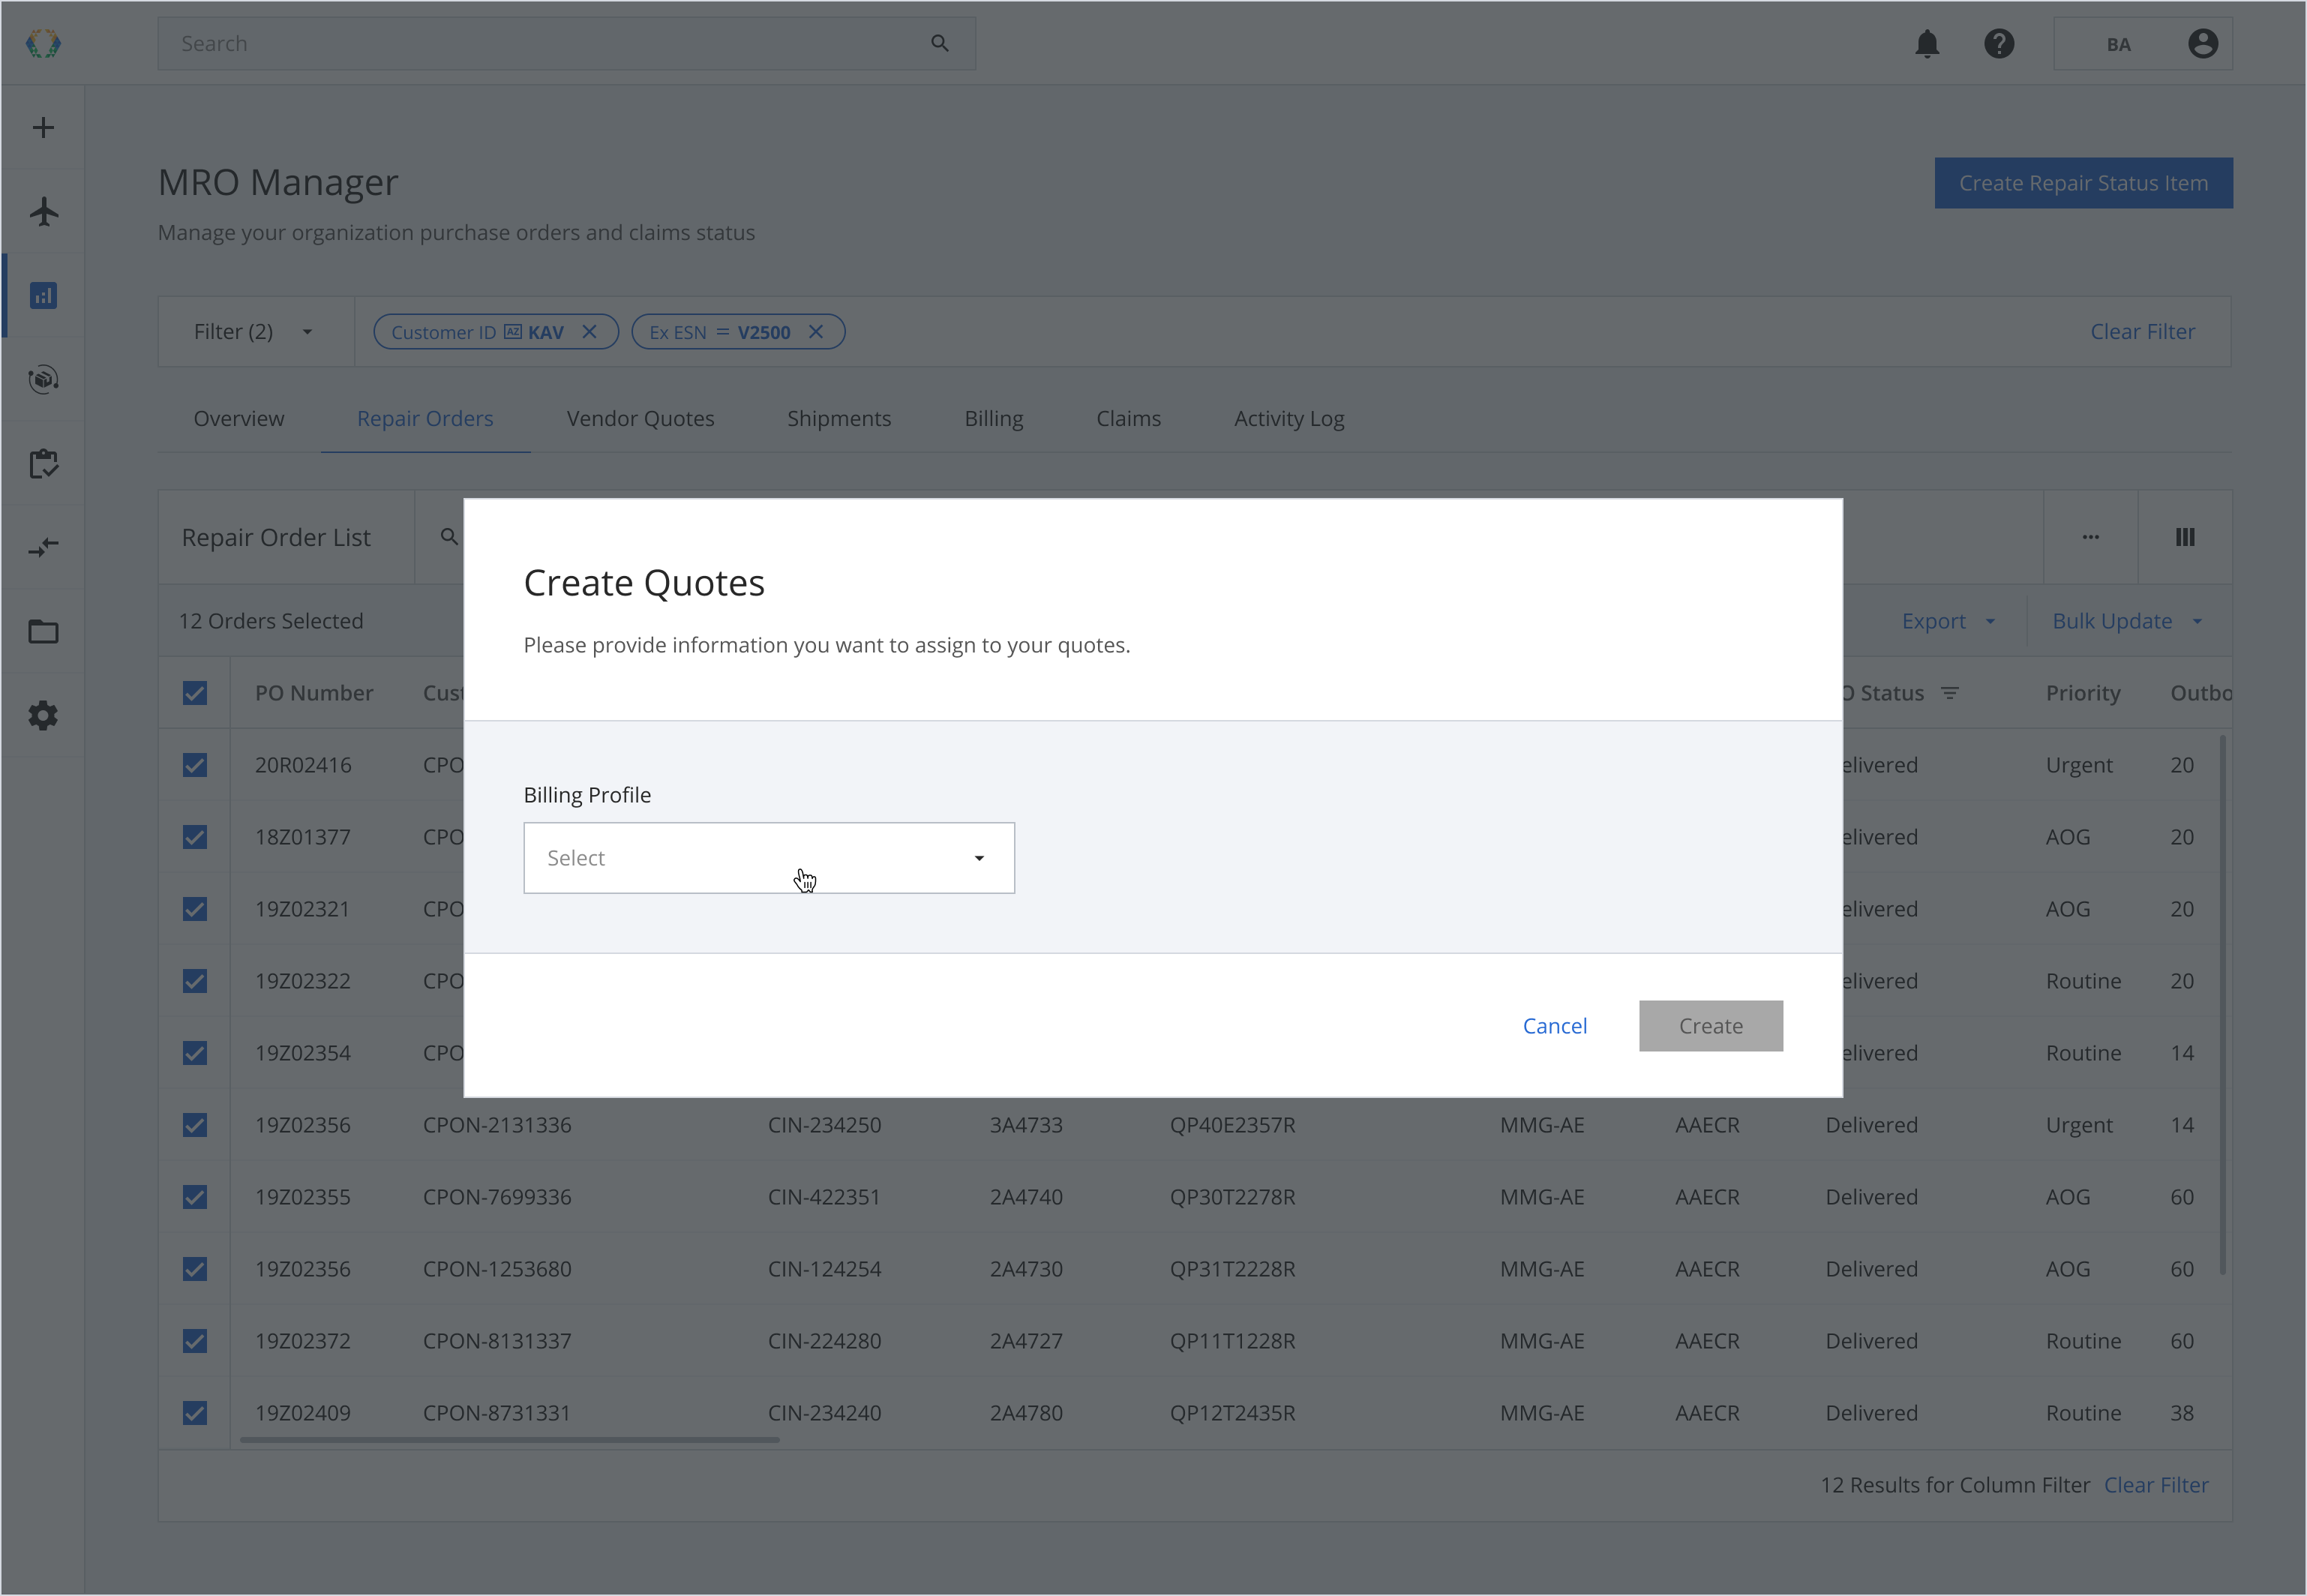
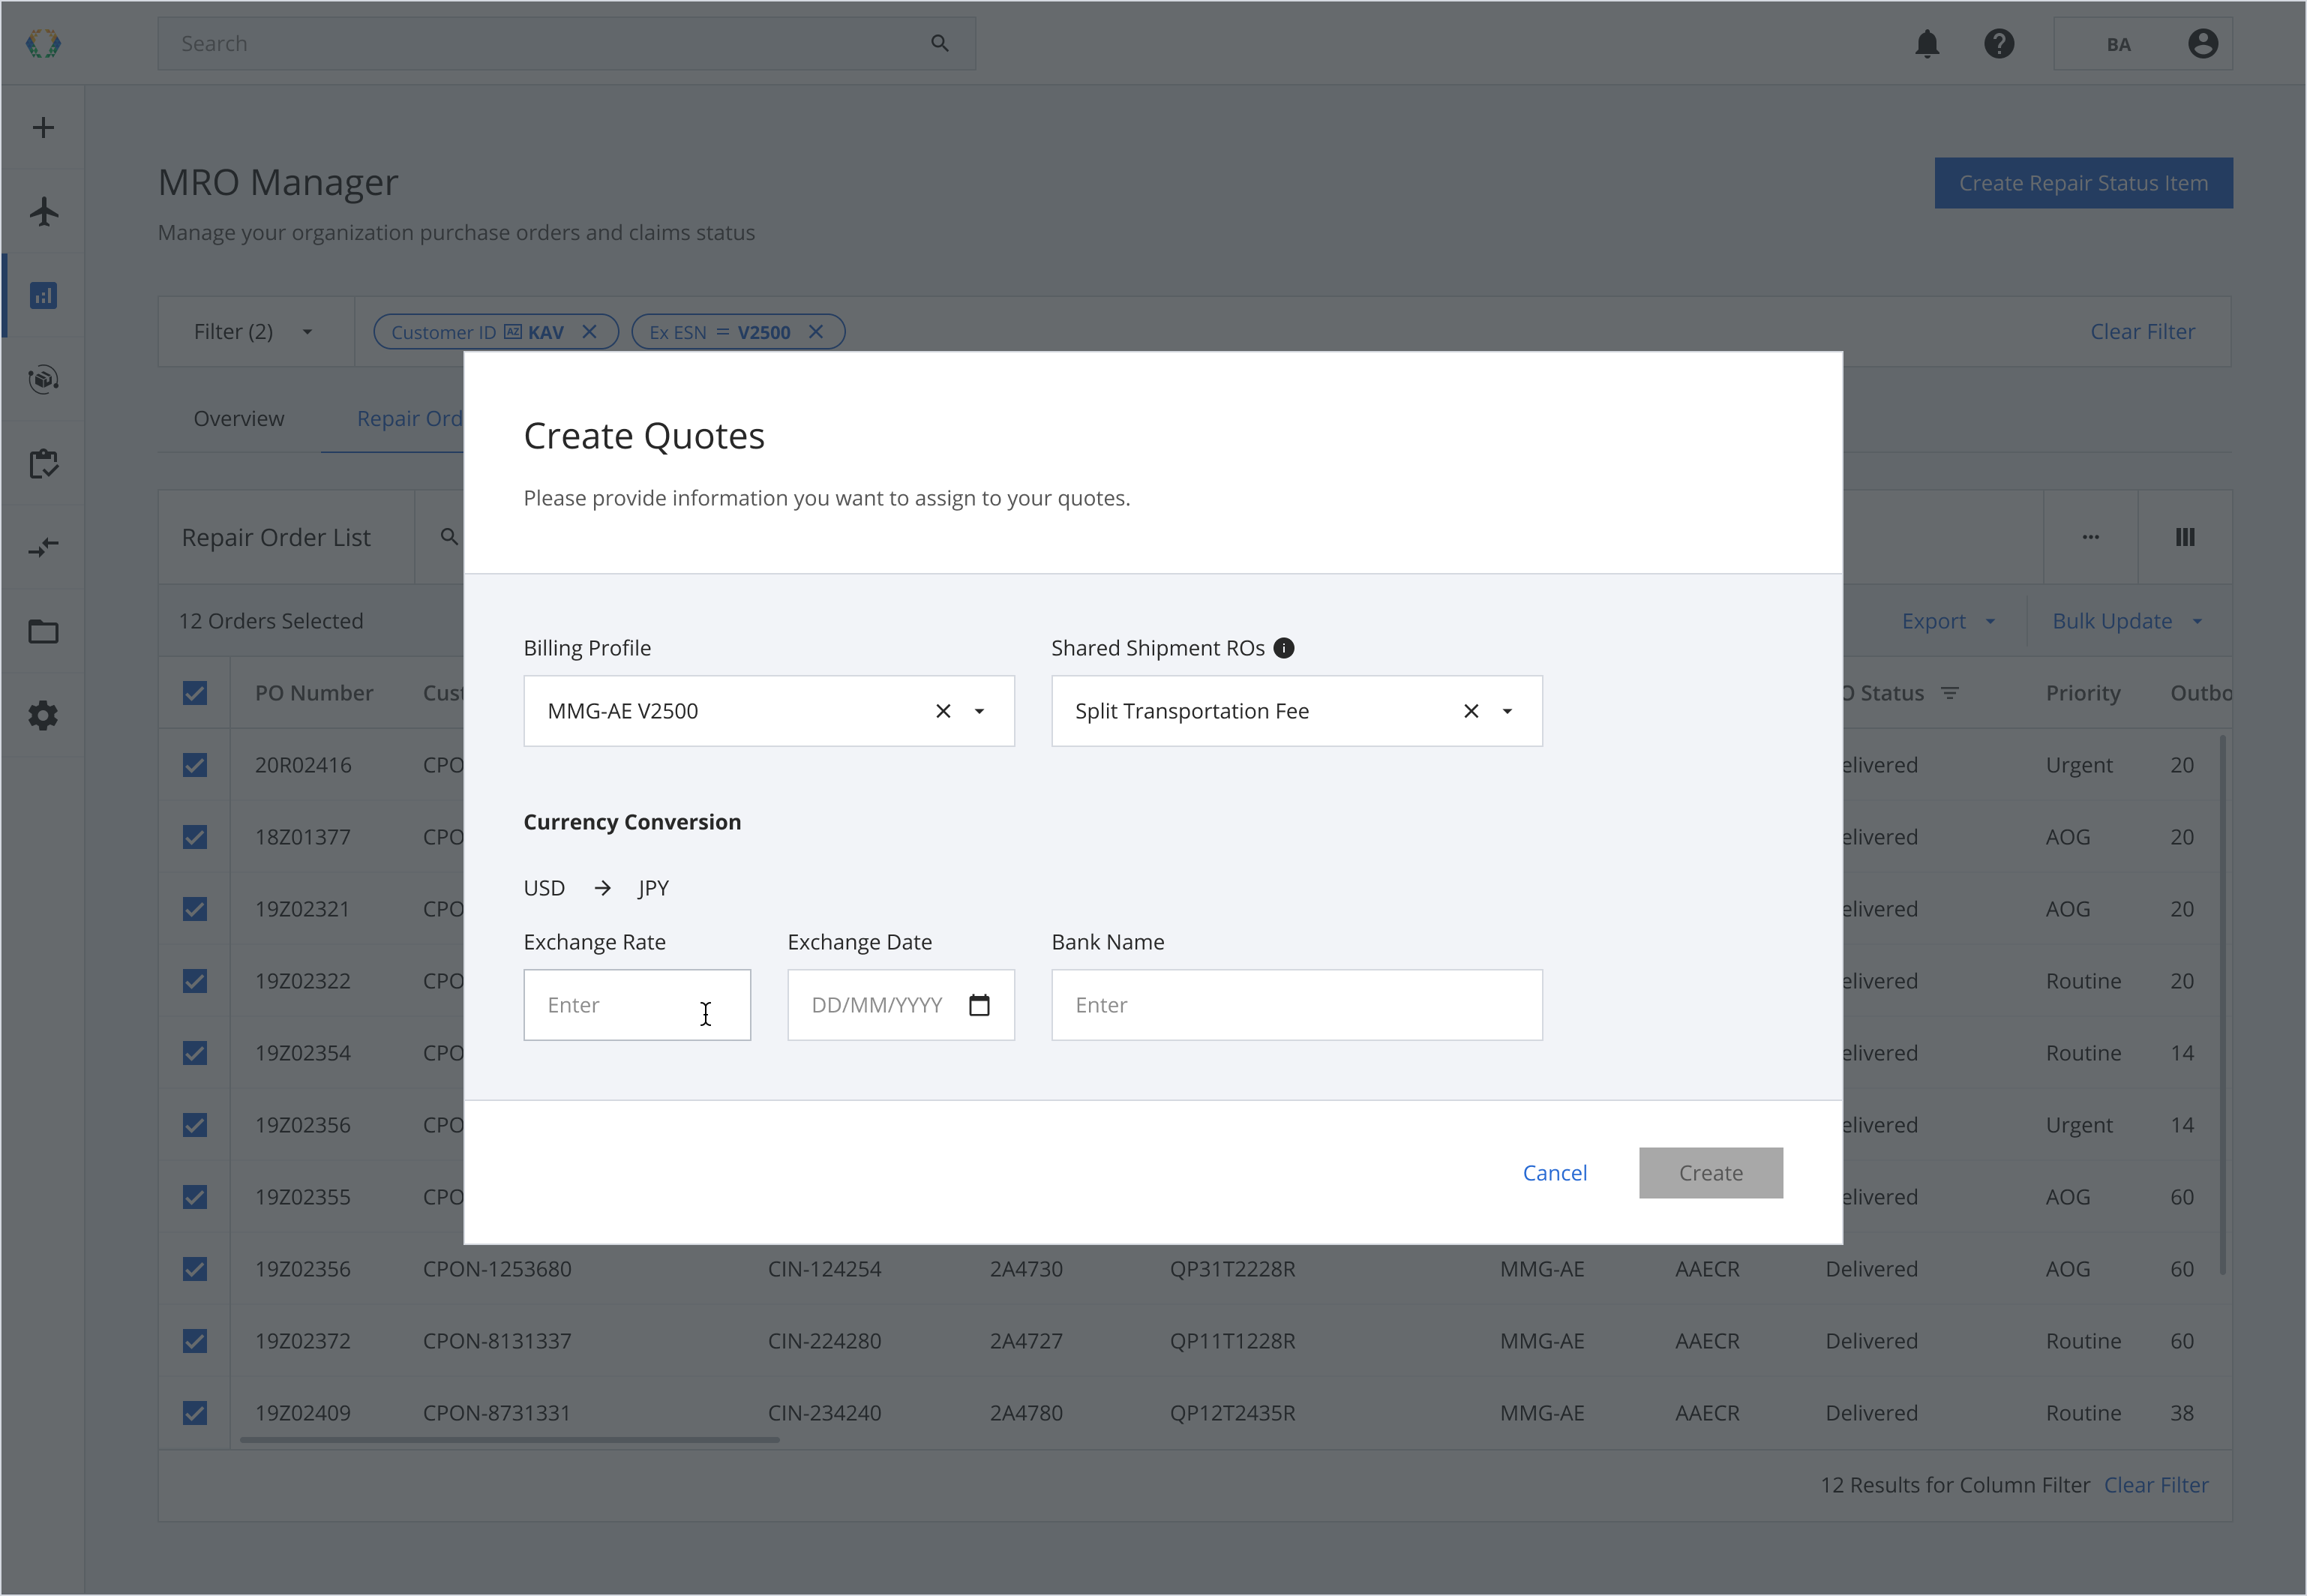
Step 4: If Billing Profile is in a different currency, a currency conversion information field will appear.
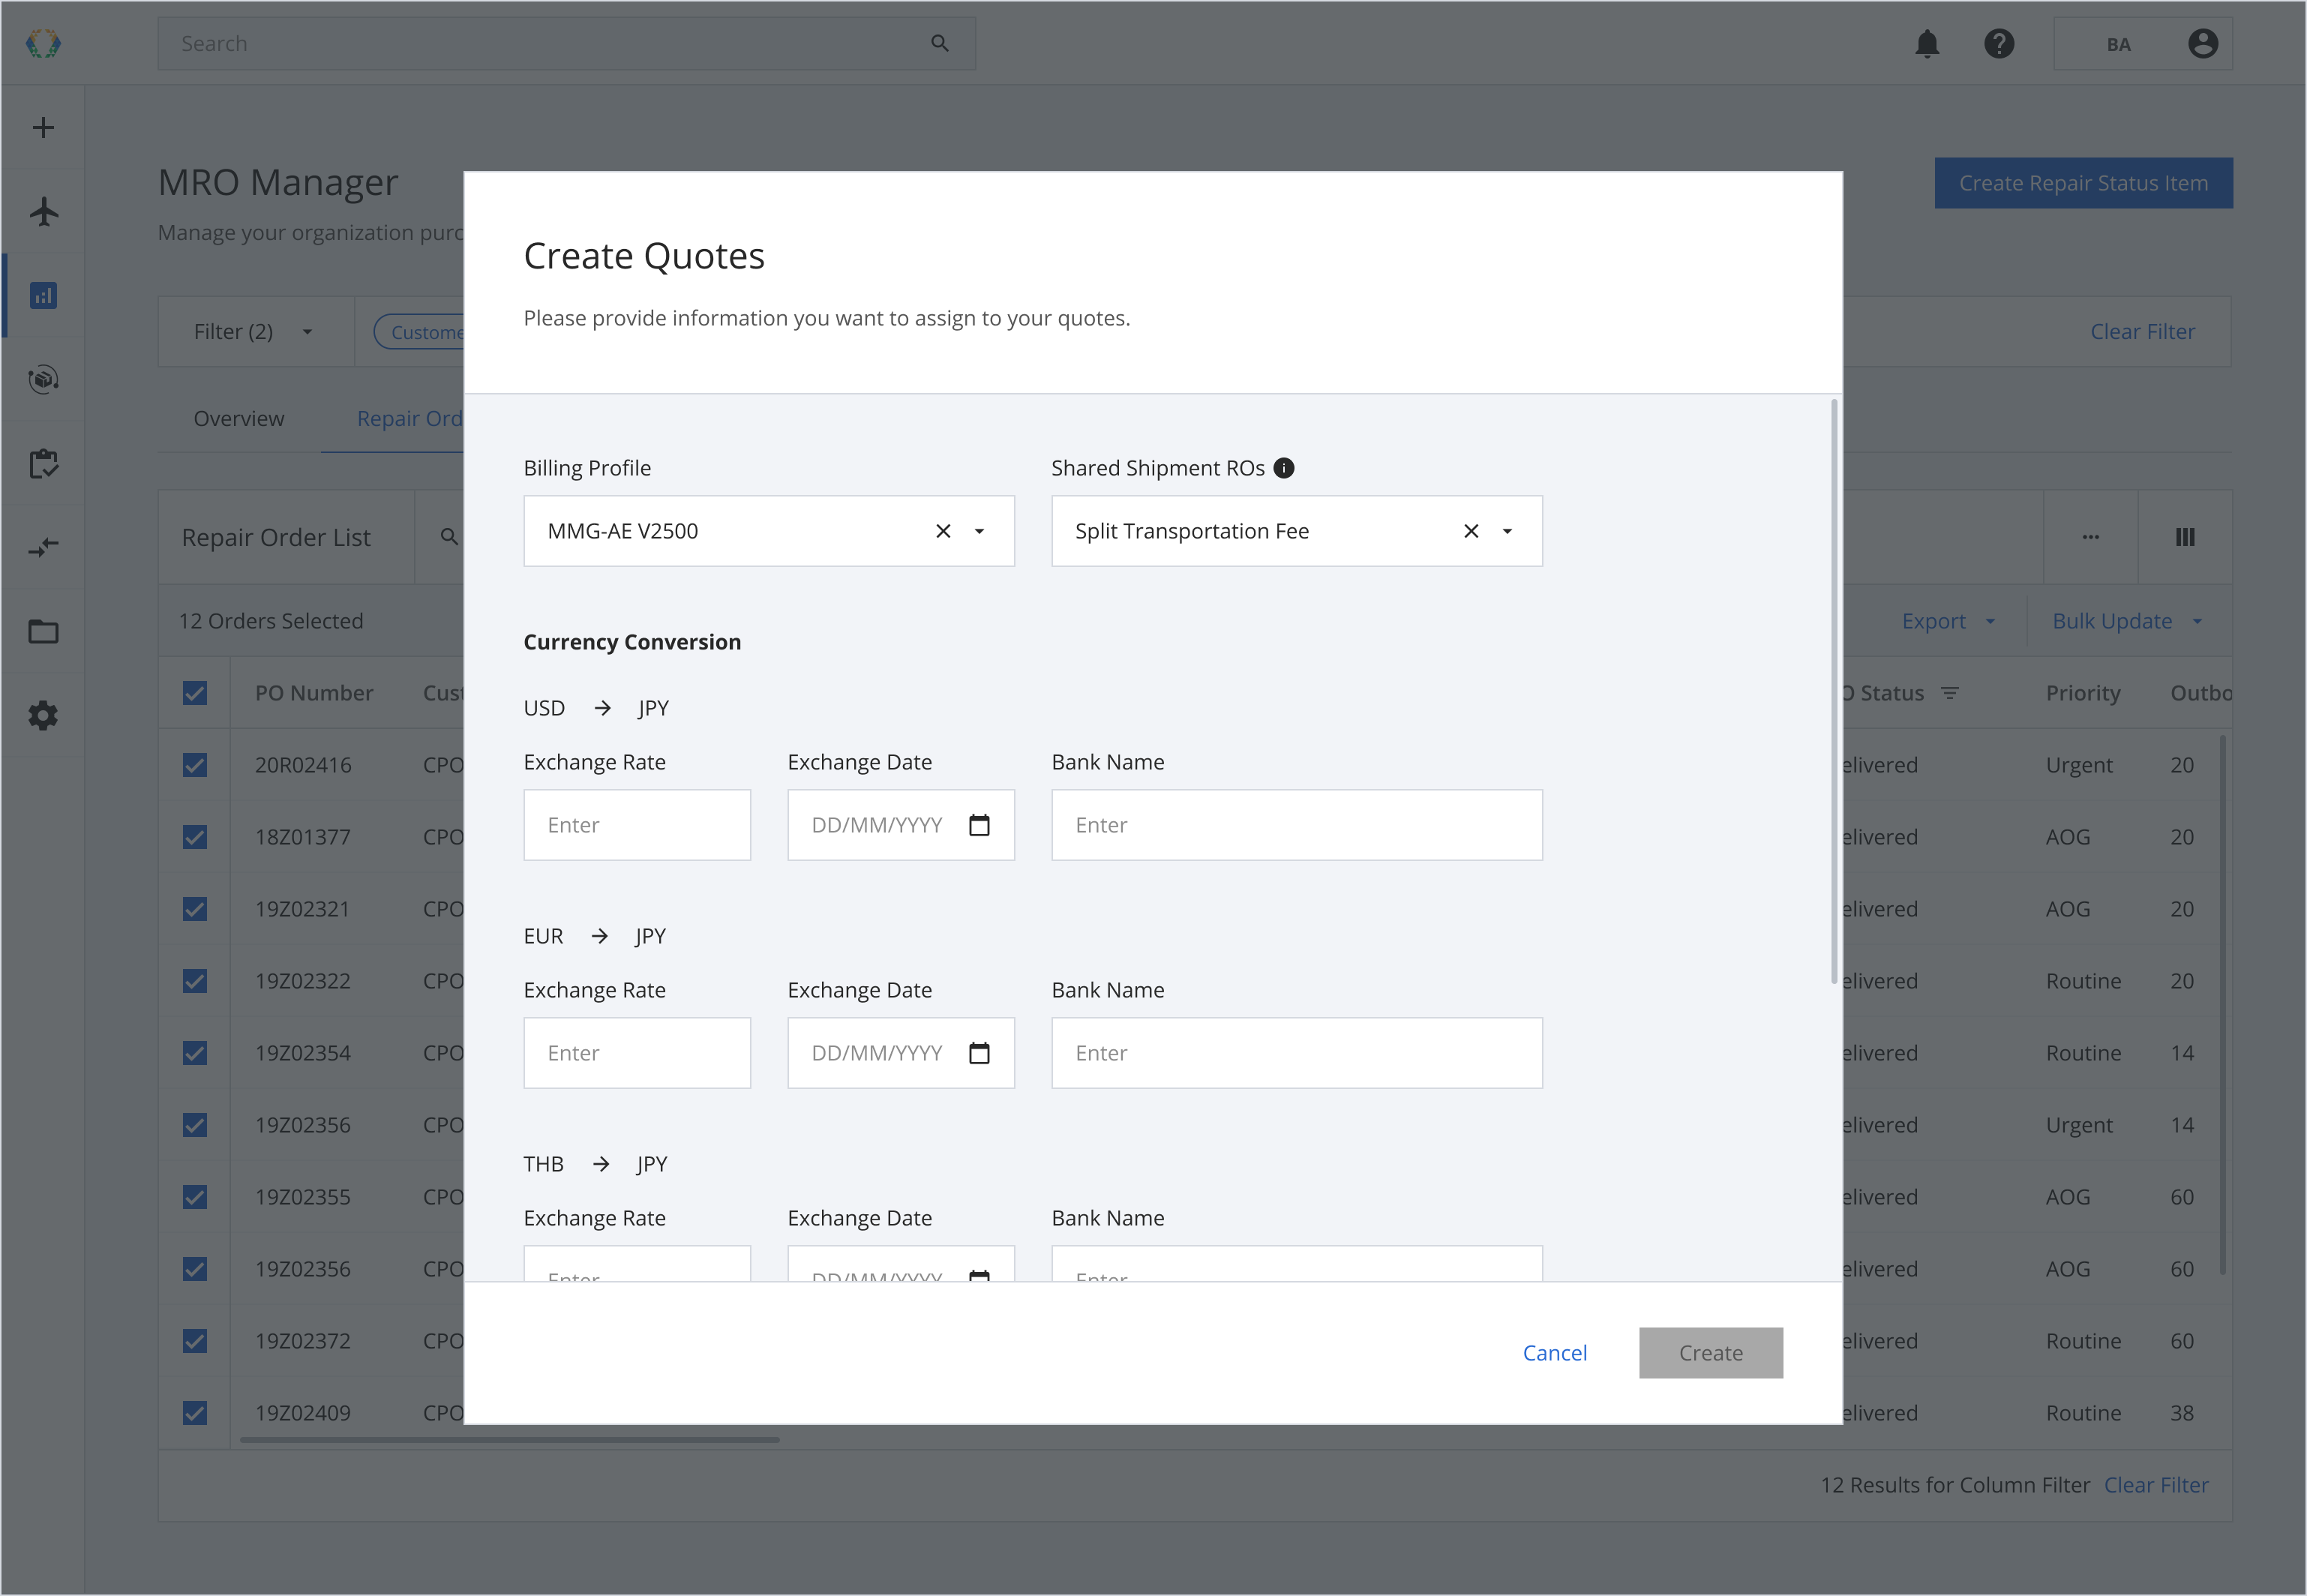
If the Billing Profile involves multiple currencies, multiple currency conversion information fields will be generated.
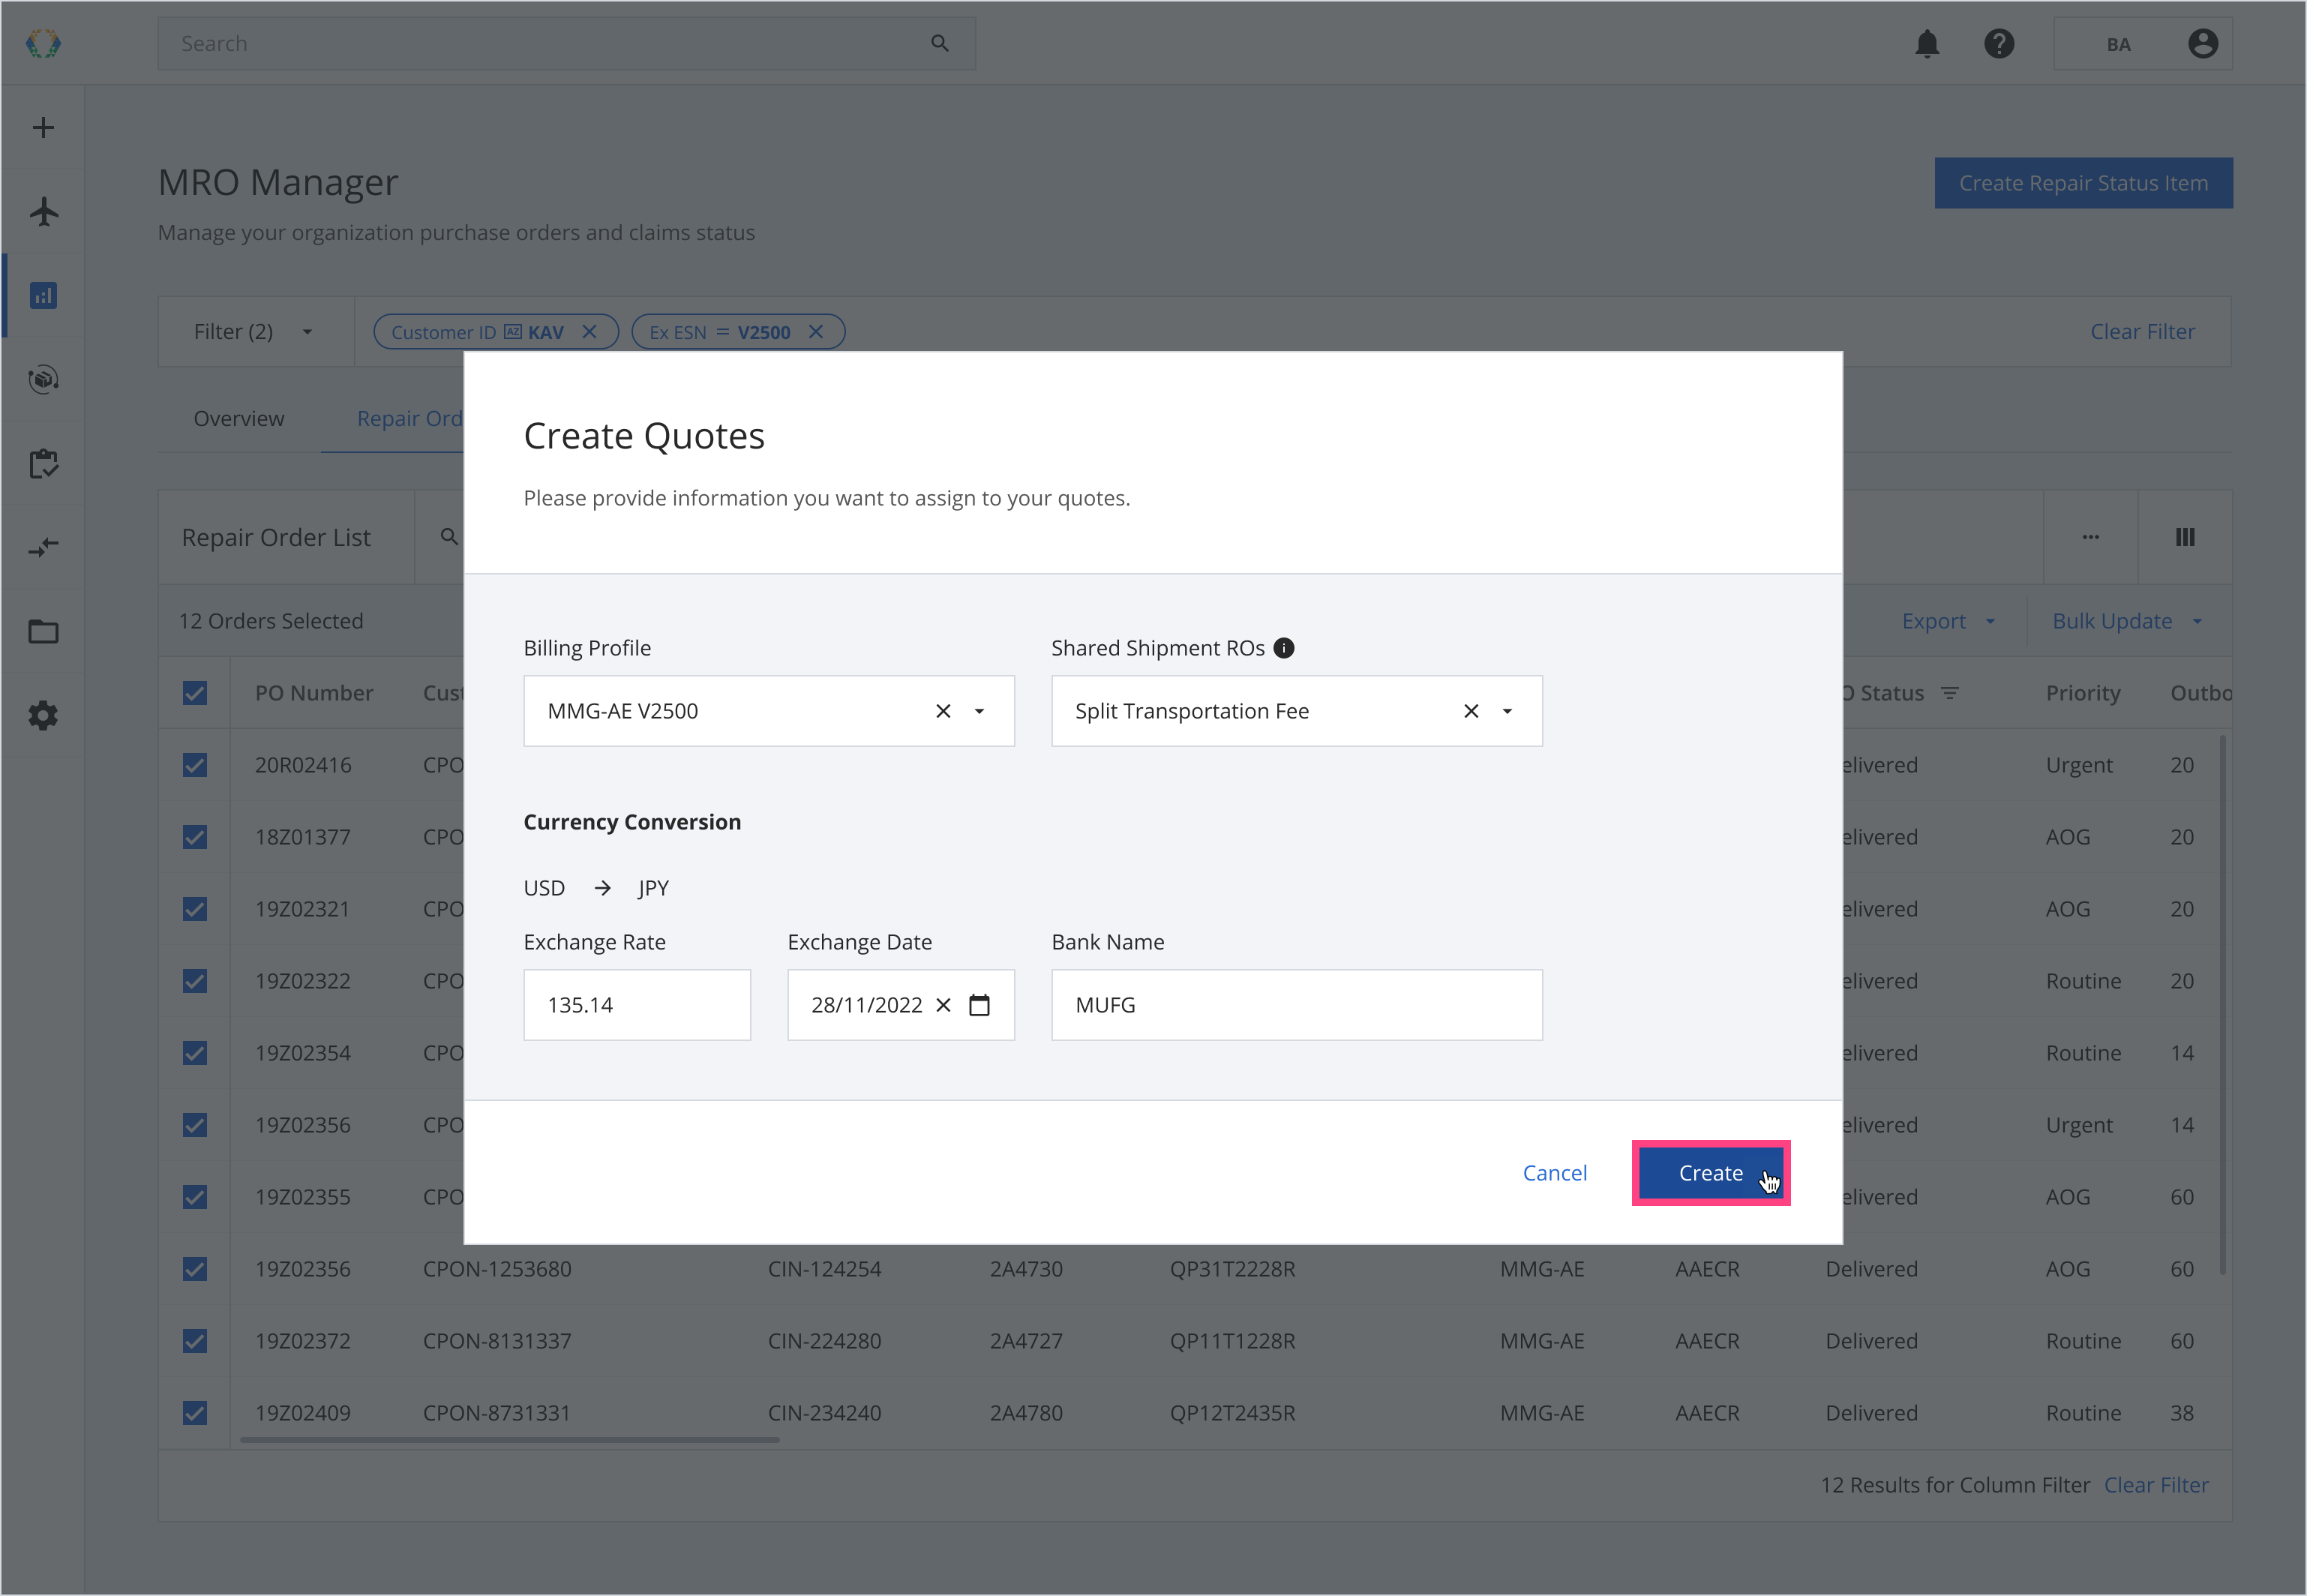
Step 5: Click 'Create' to create quotes.
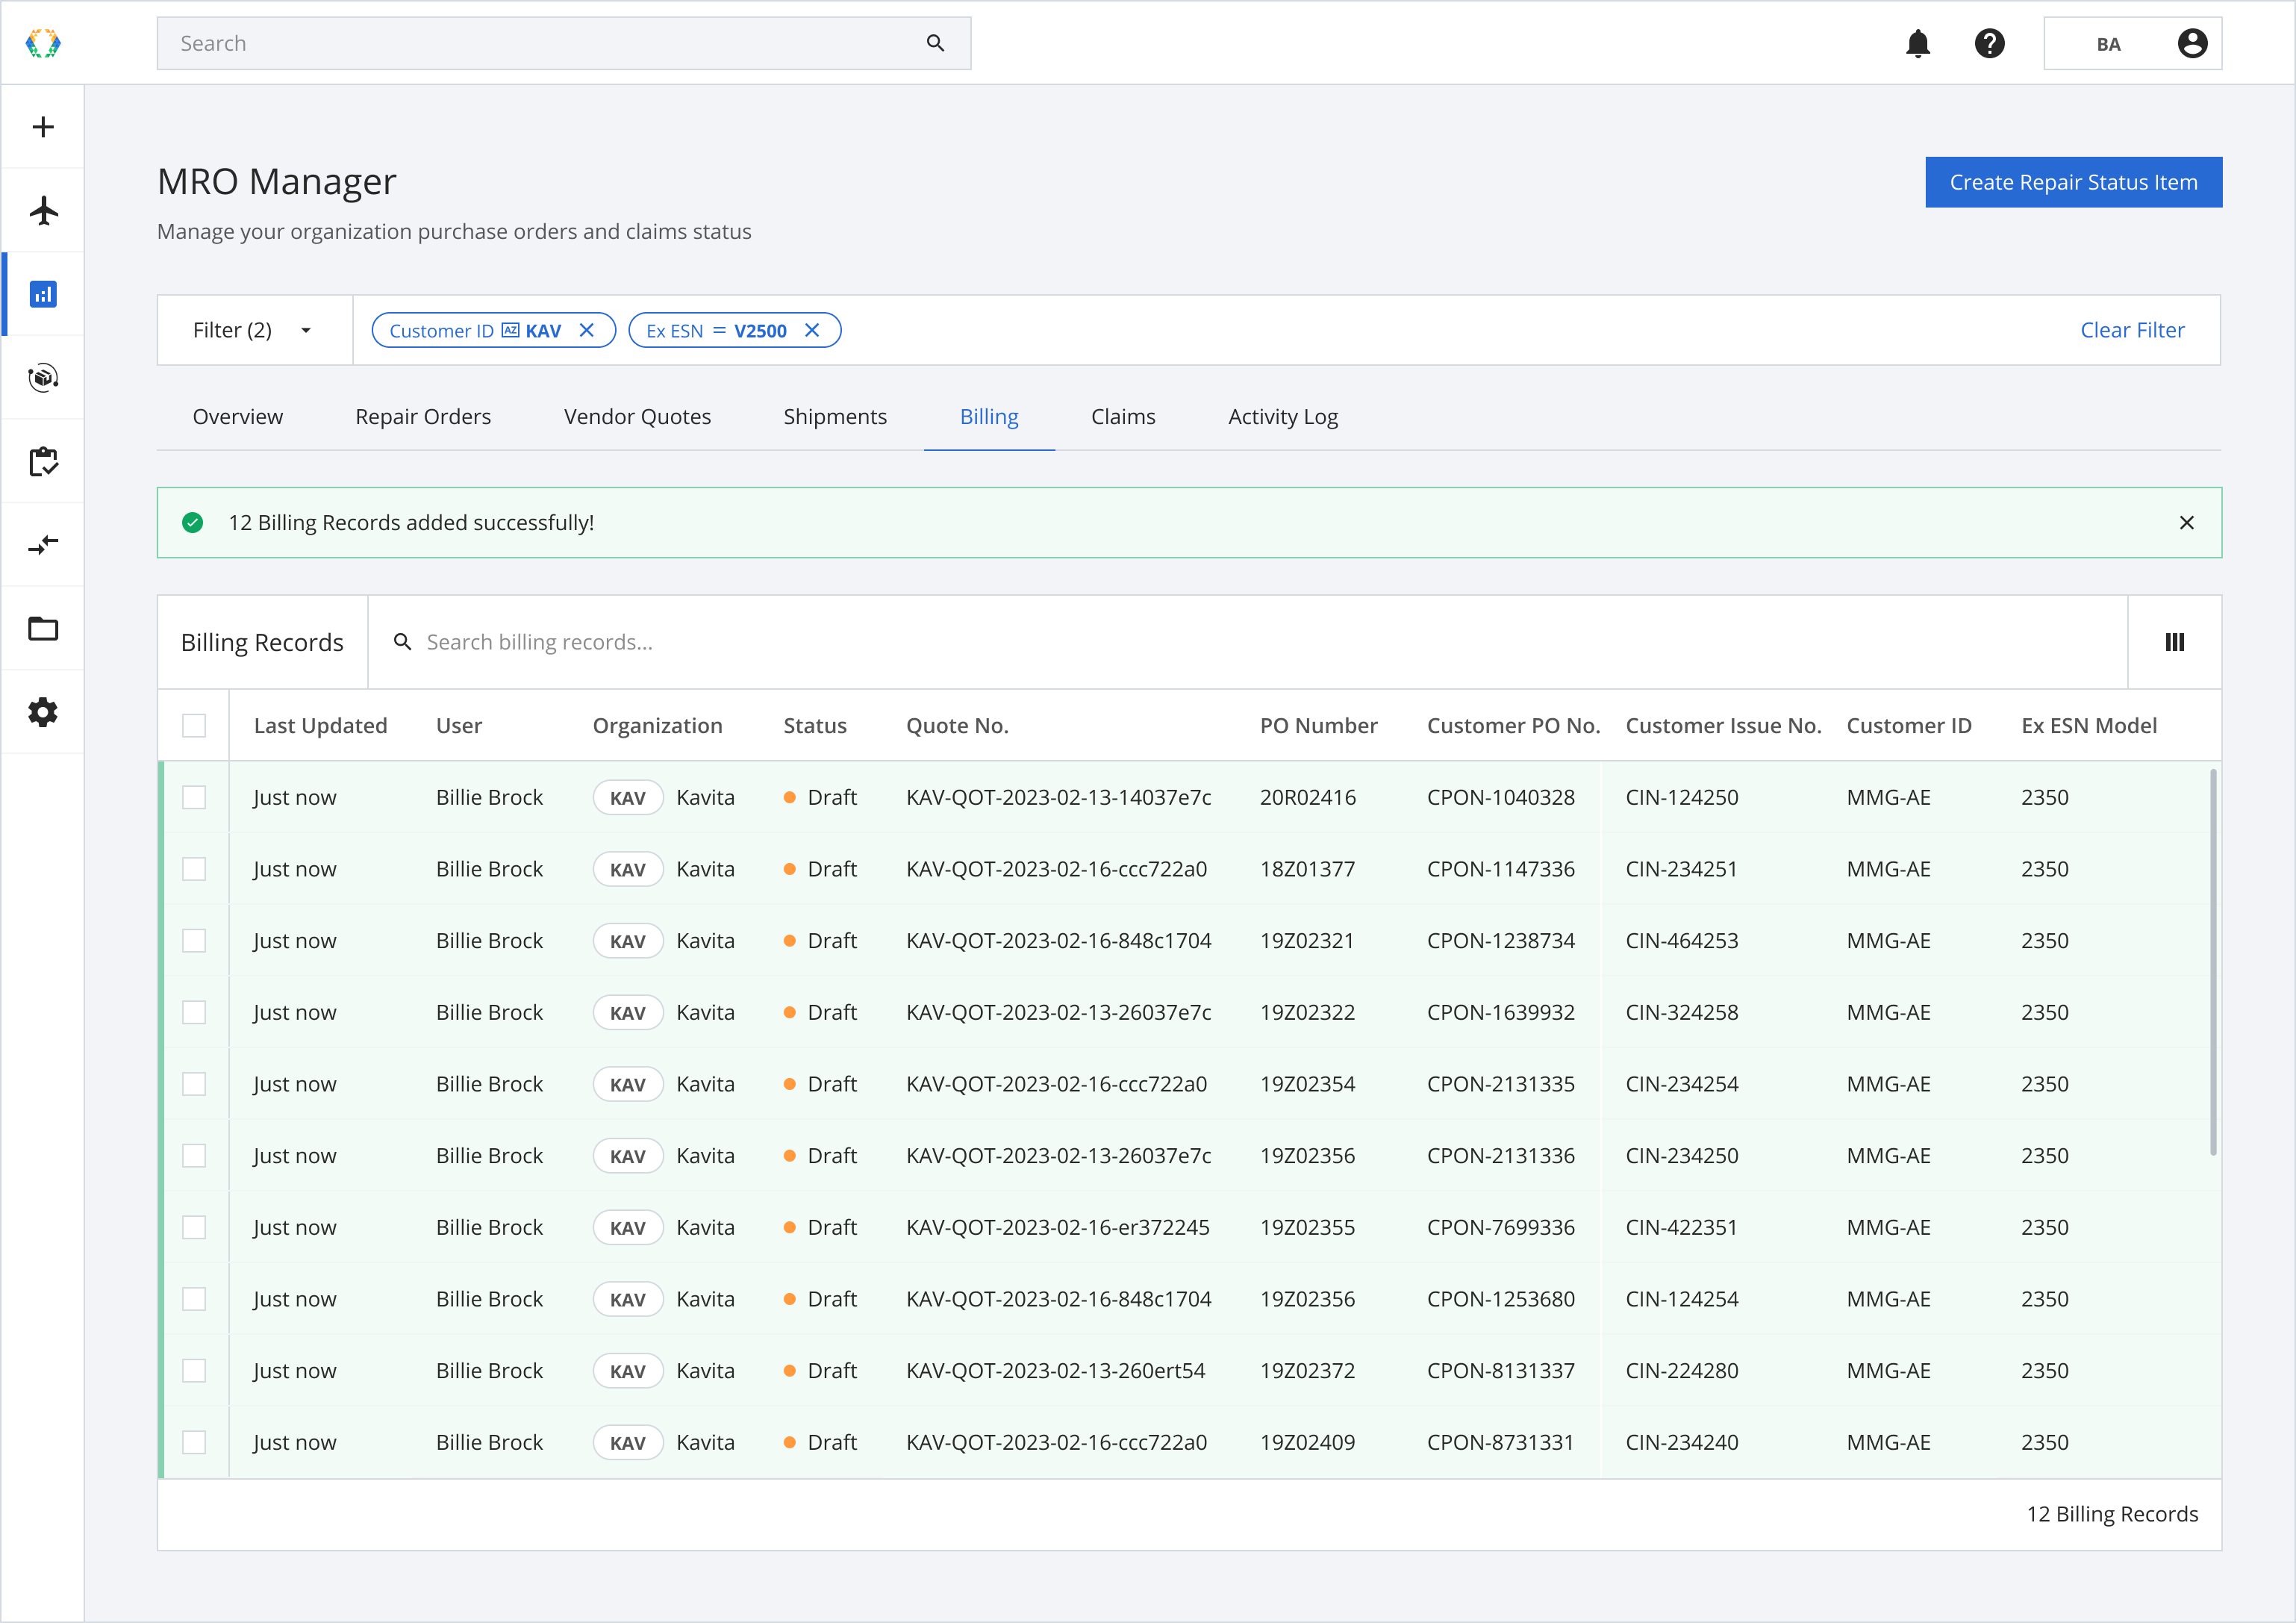
Once the billing quotes are created successfully, a green banner will appear at the top of the billing records list.
Exporting Billing Records List
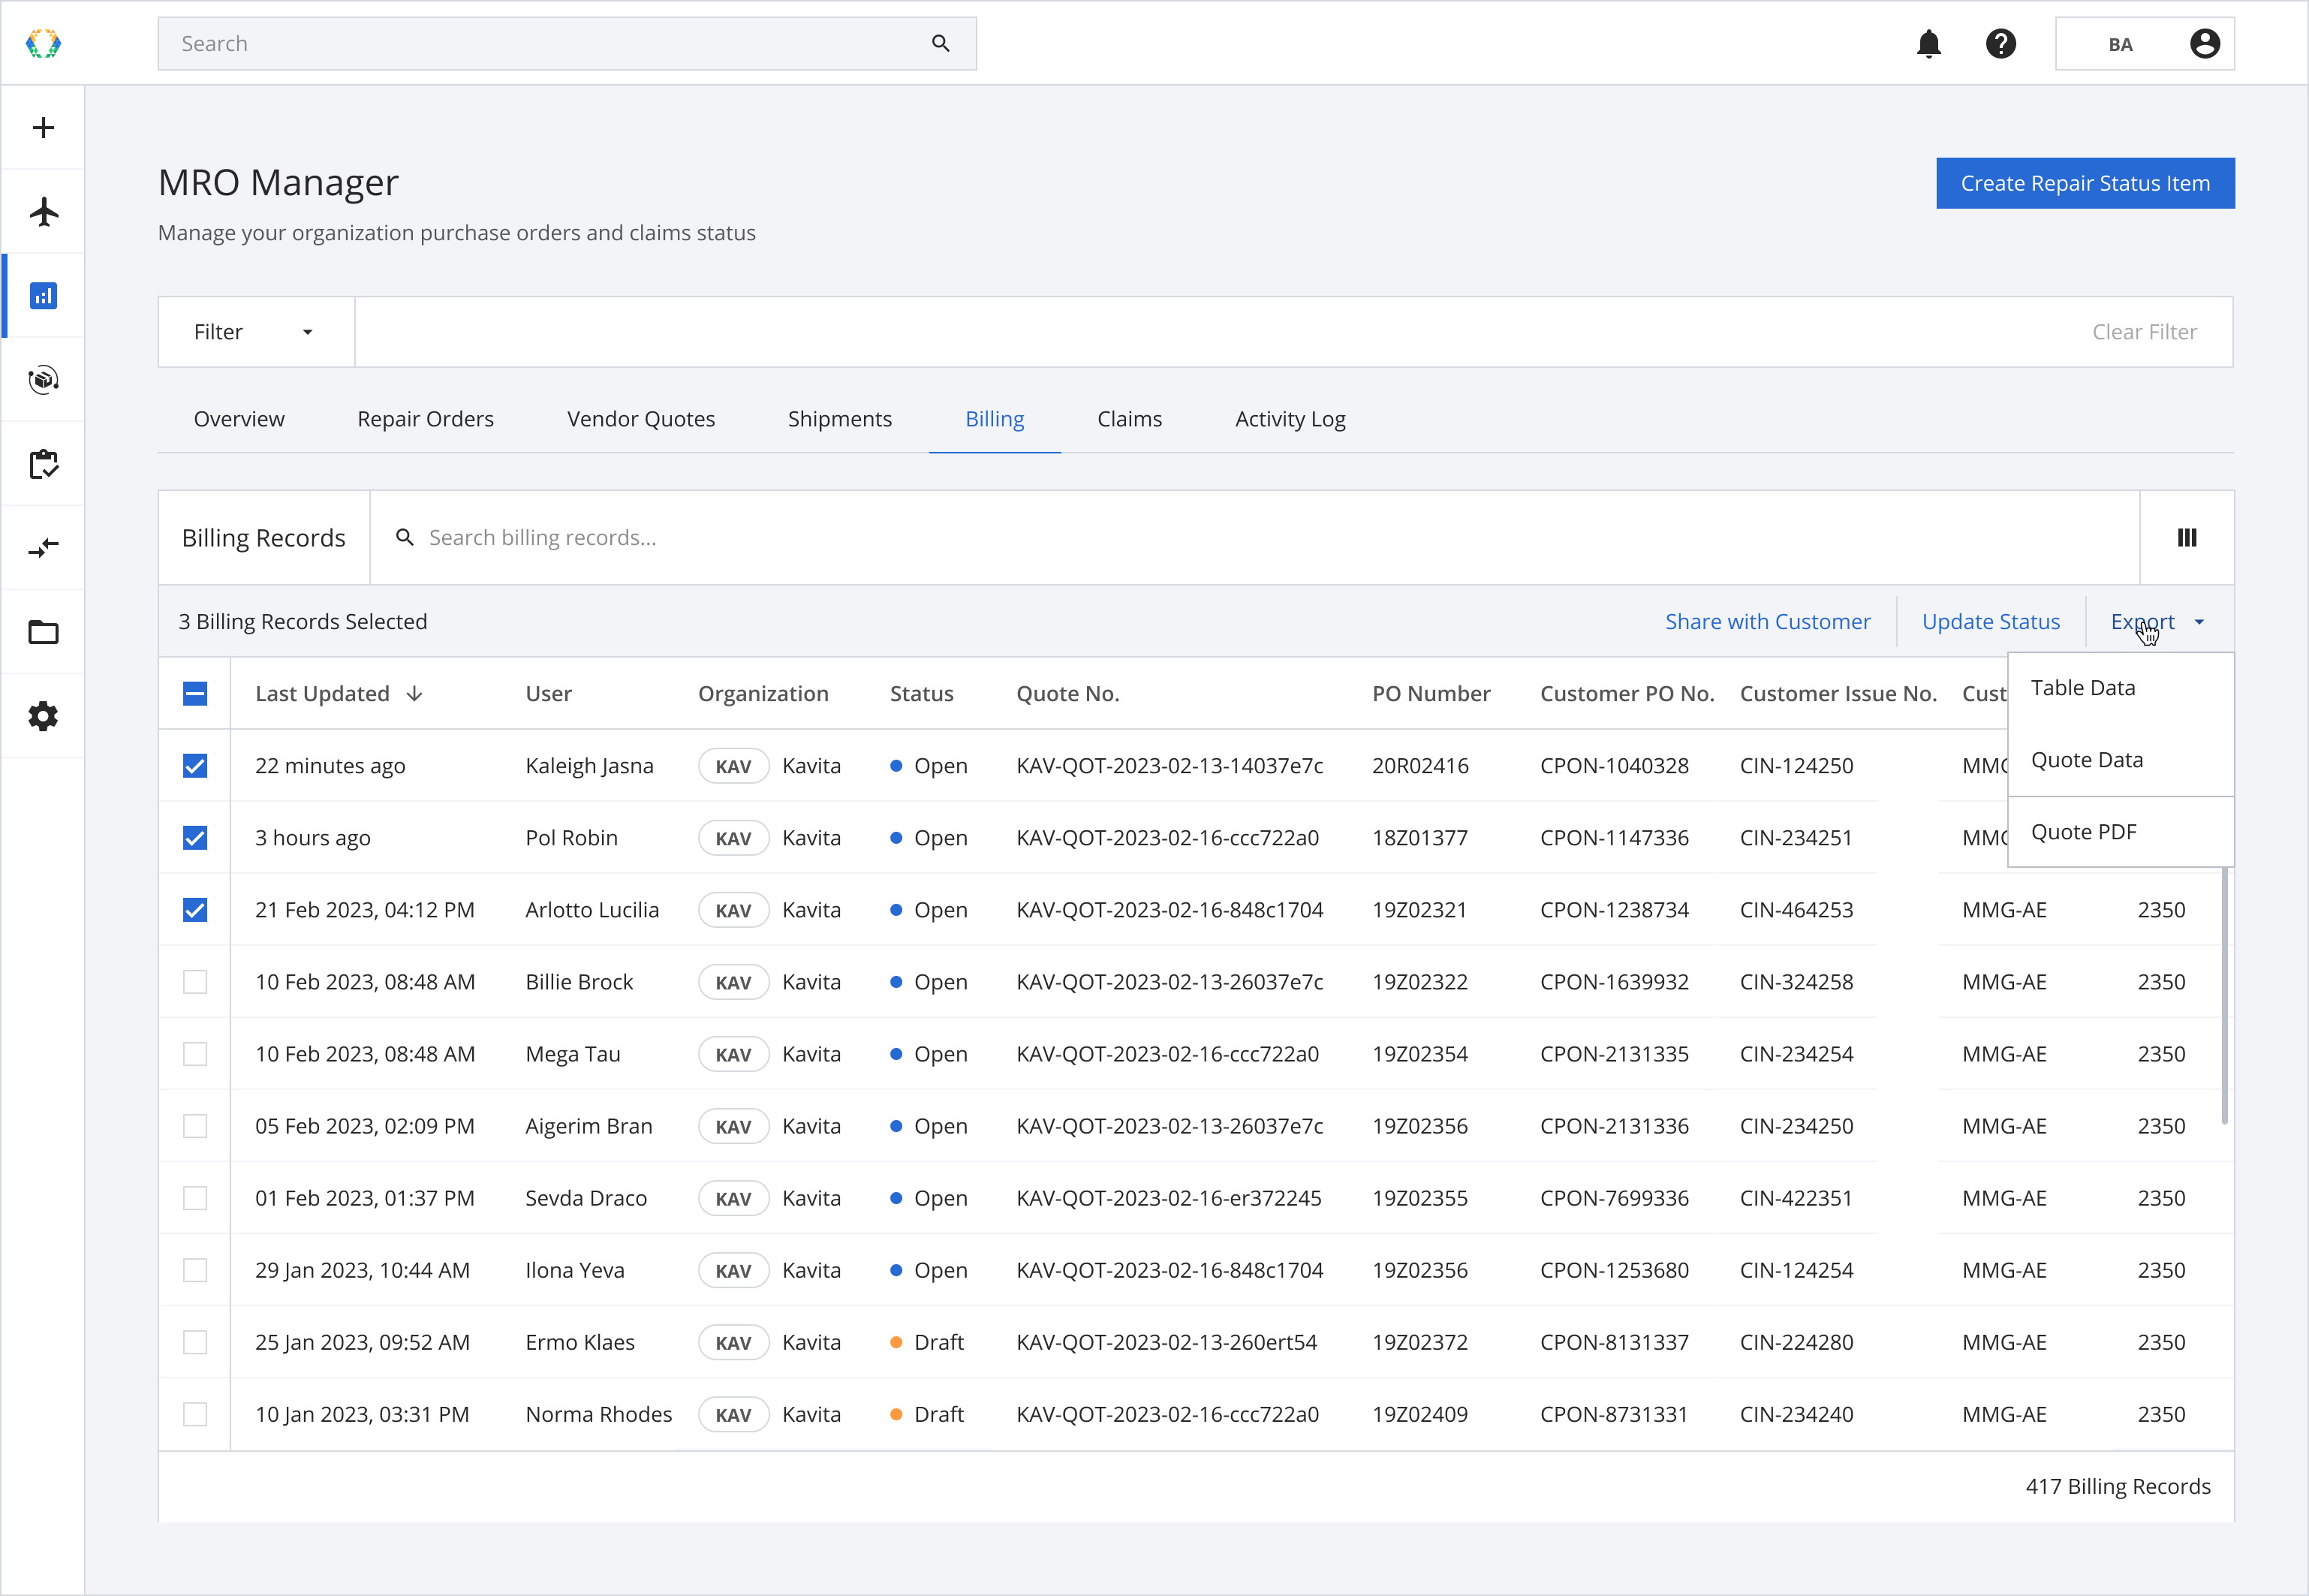
You can export your Billing Records to view or update them from the platform.
| Available Export Data Types |
|---|
| Table Data |
| Quote Data |
| Quote PDF |
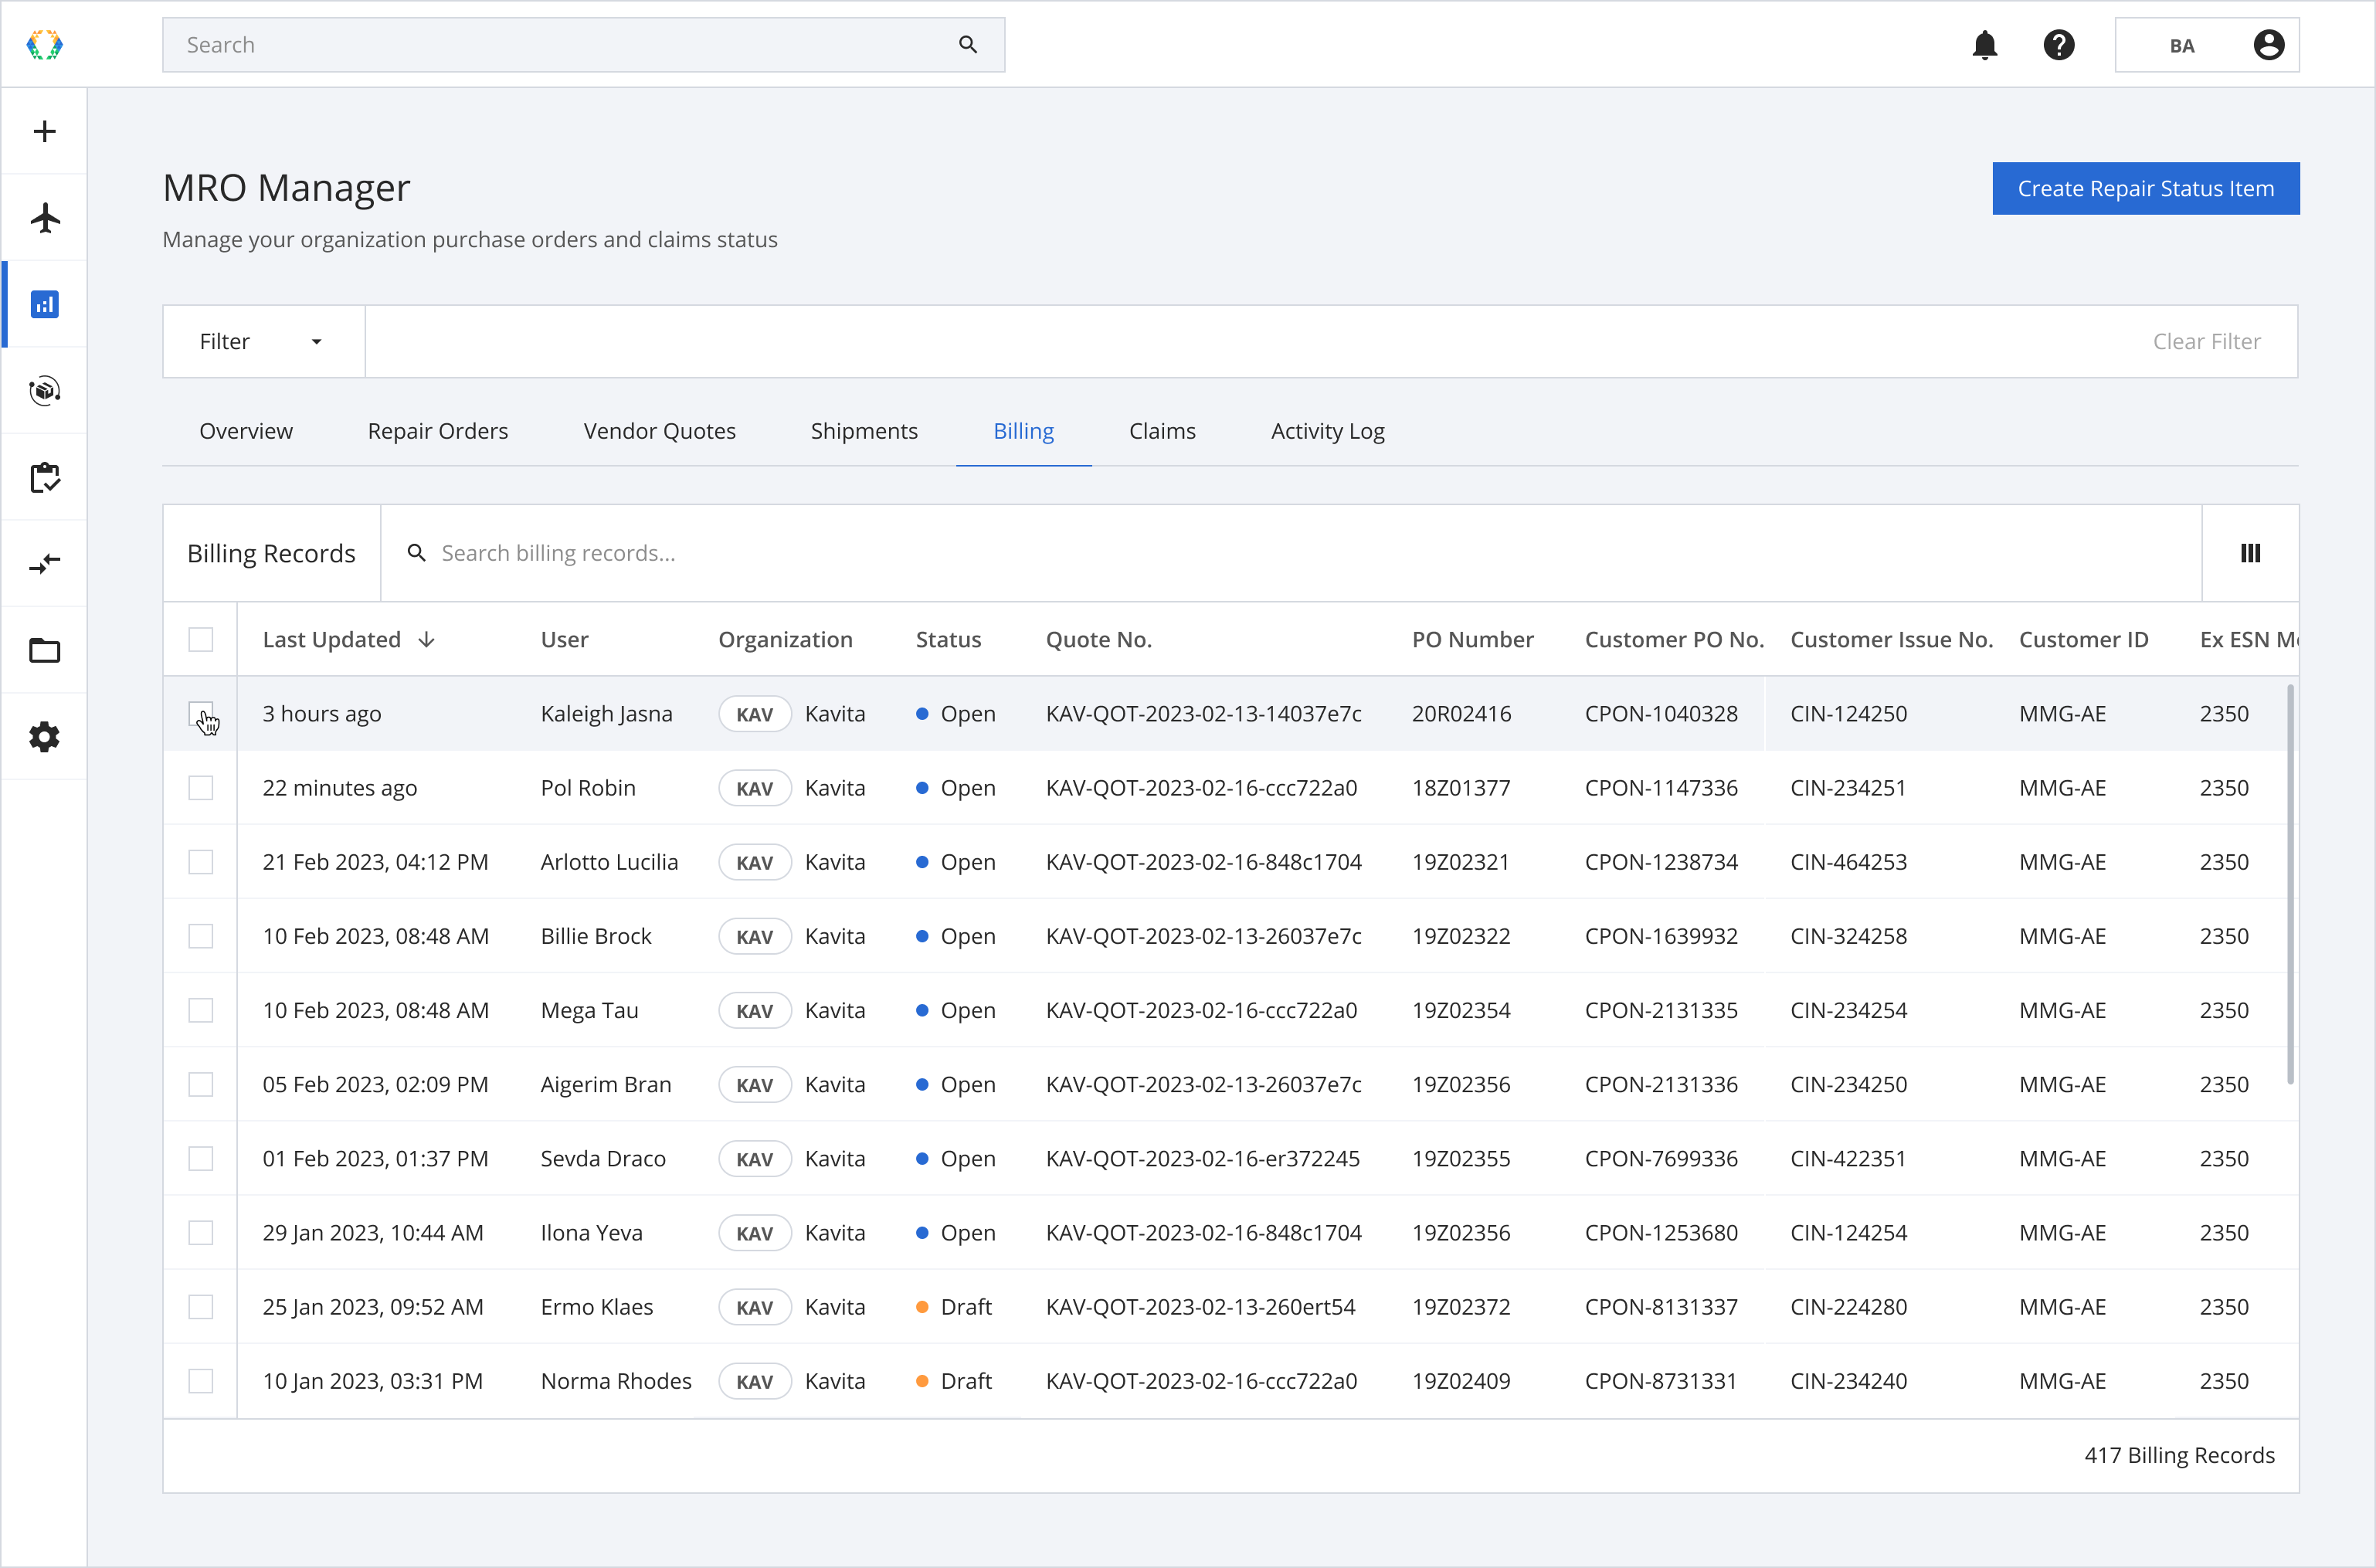
Step 1: From Billing Records, select quotes you want to export.
Step 2: Click 'Export' and select the template you want to export.
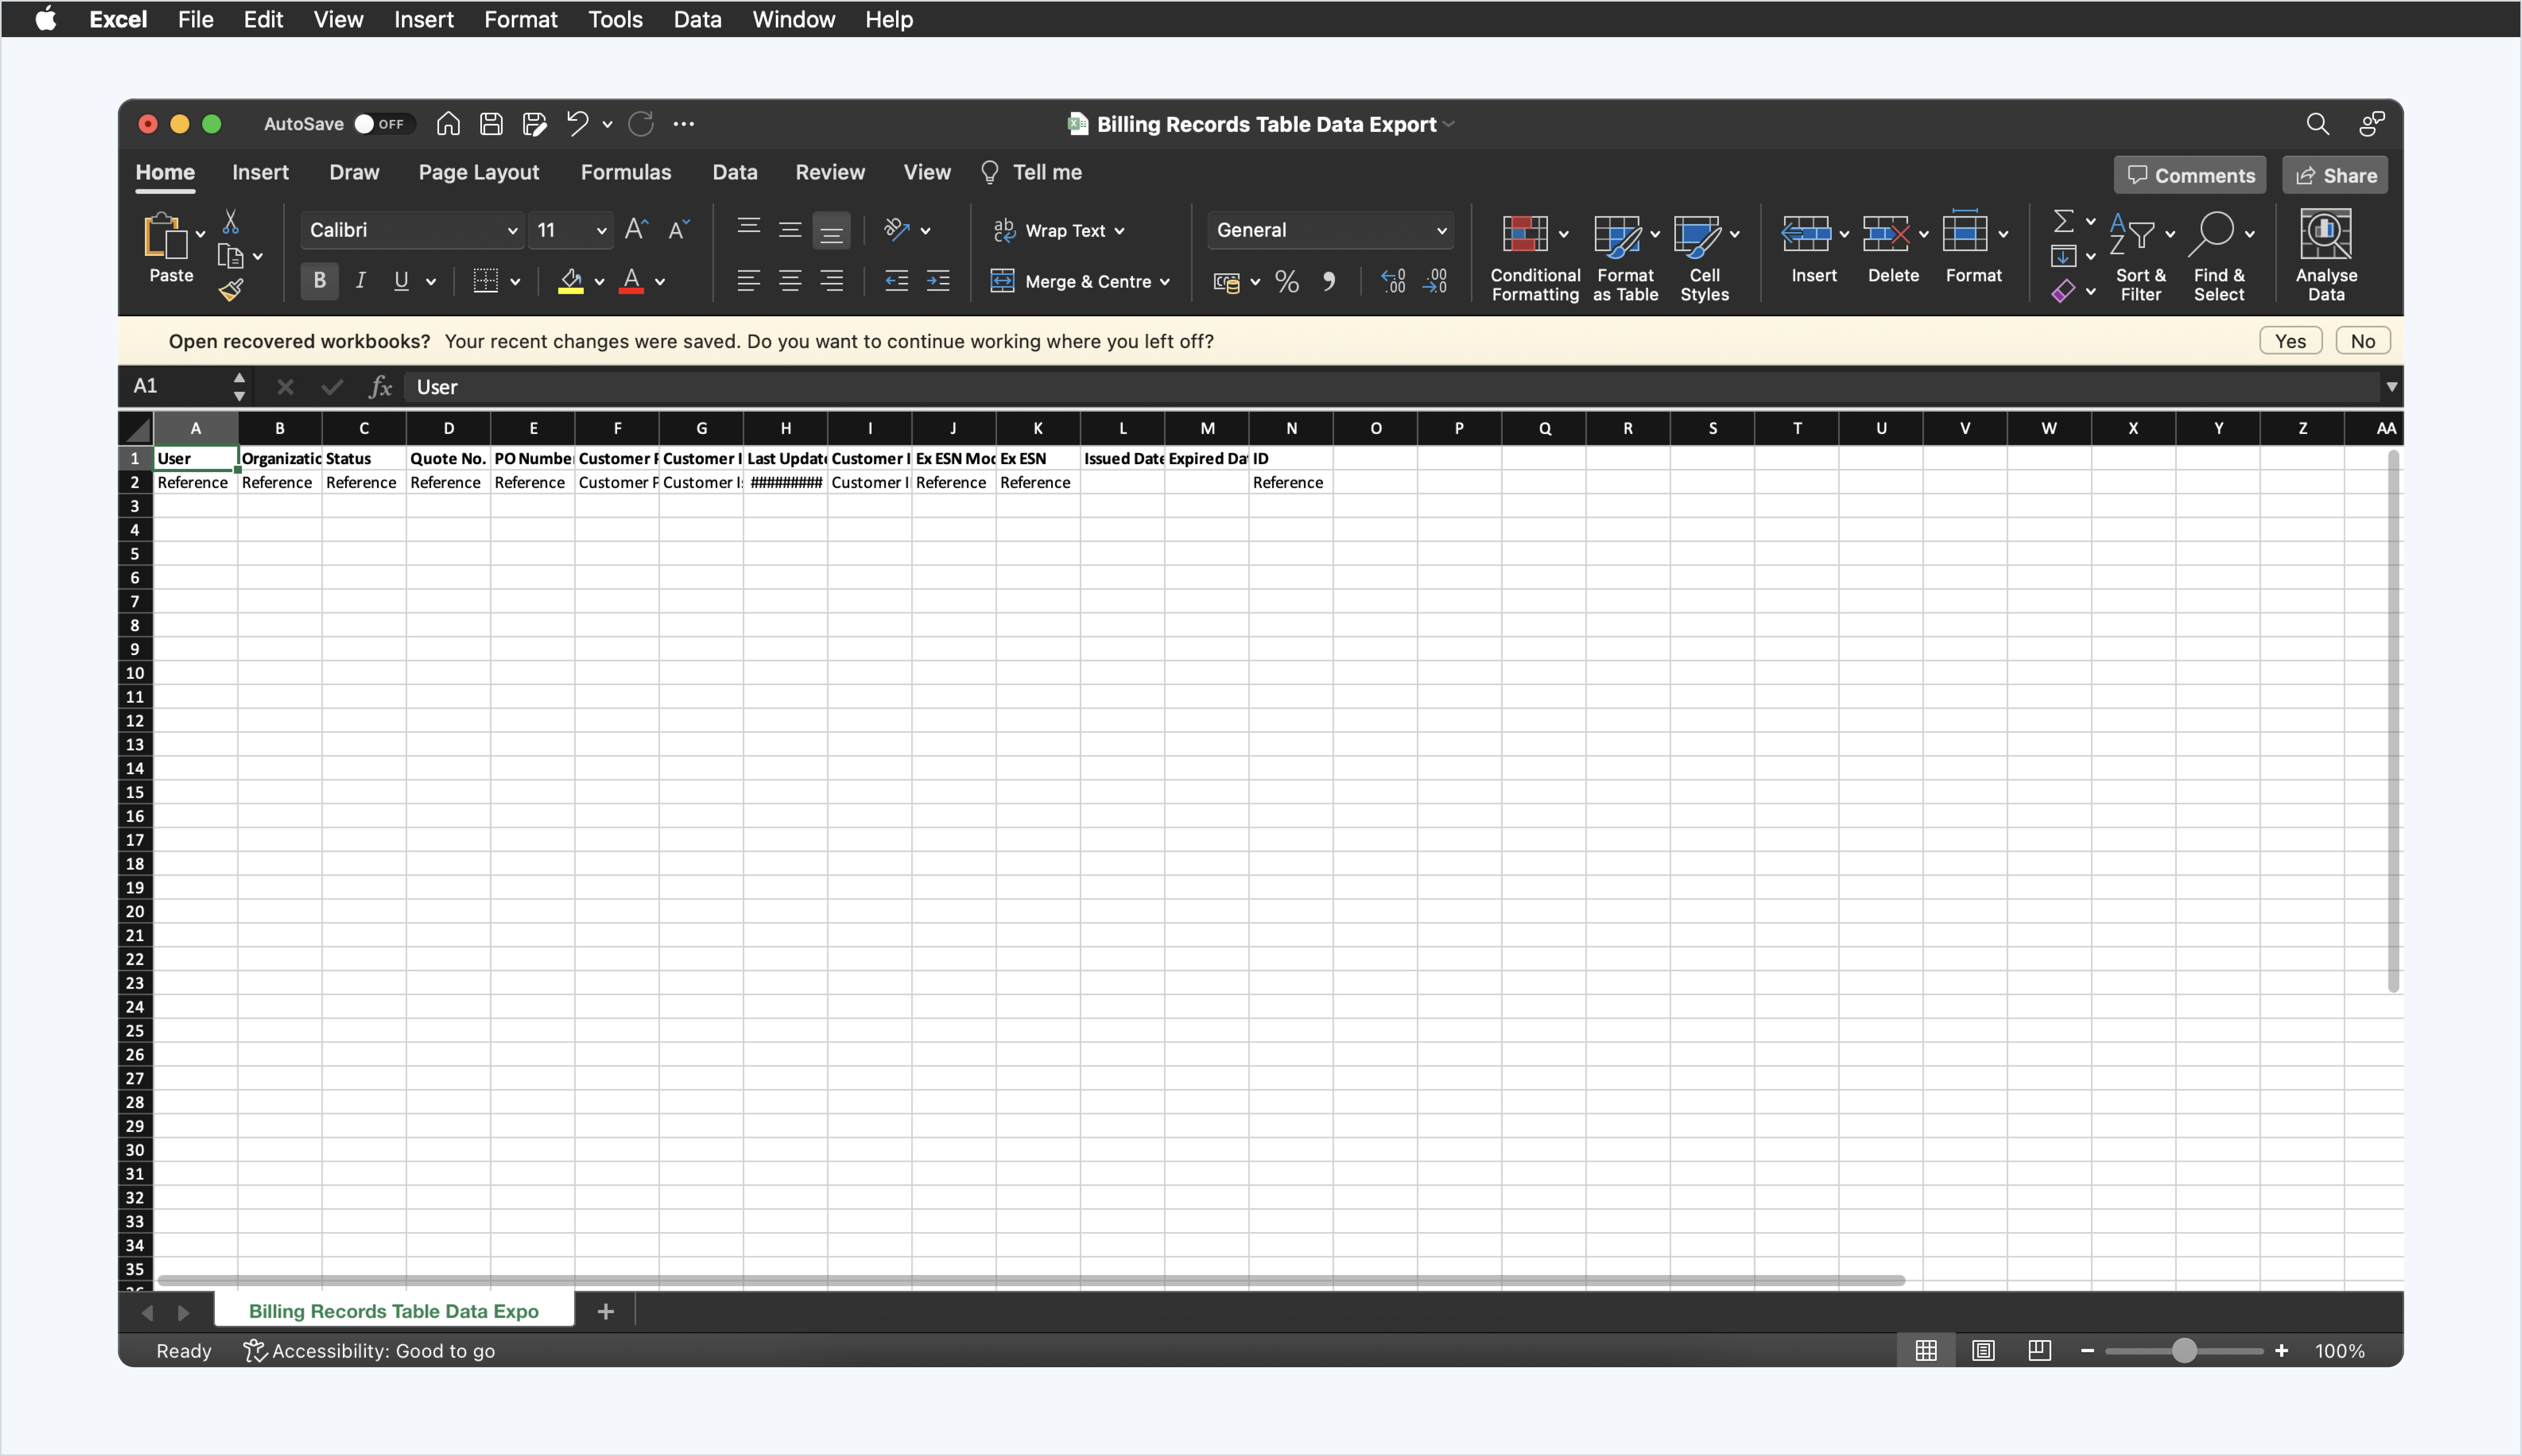
Step 3: Open the template in Excel format and view the data on your computer.
Updating Billing Records Status
There are two different status updates for your Billing Records.
Option 1: Update Billing Records Status to Open
Option 2: Update Billing Records Status to "Accepted"," Rejected", "Cancelled", or "Expired"
Option 1: Update Billing Records Status to Open
Step 1: From Billing Records, select the quotes you want to update the status.
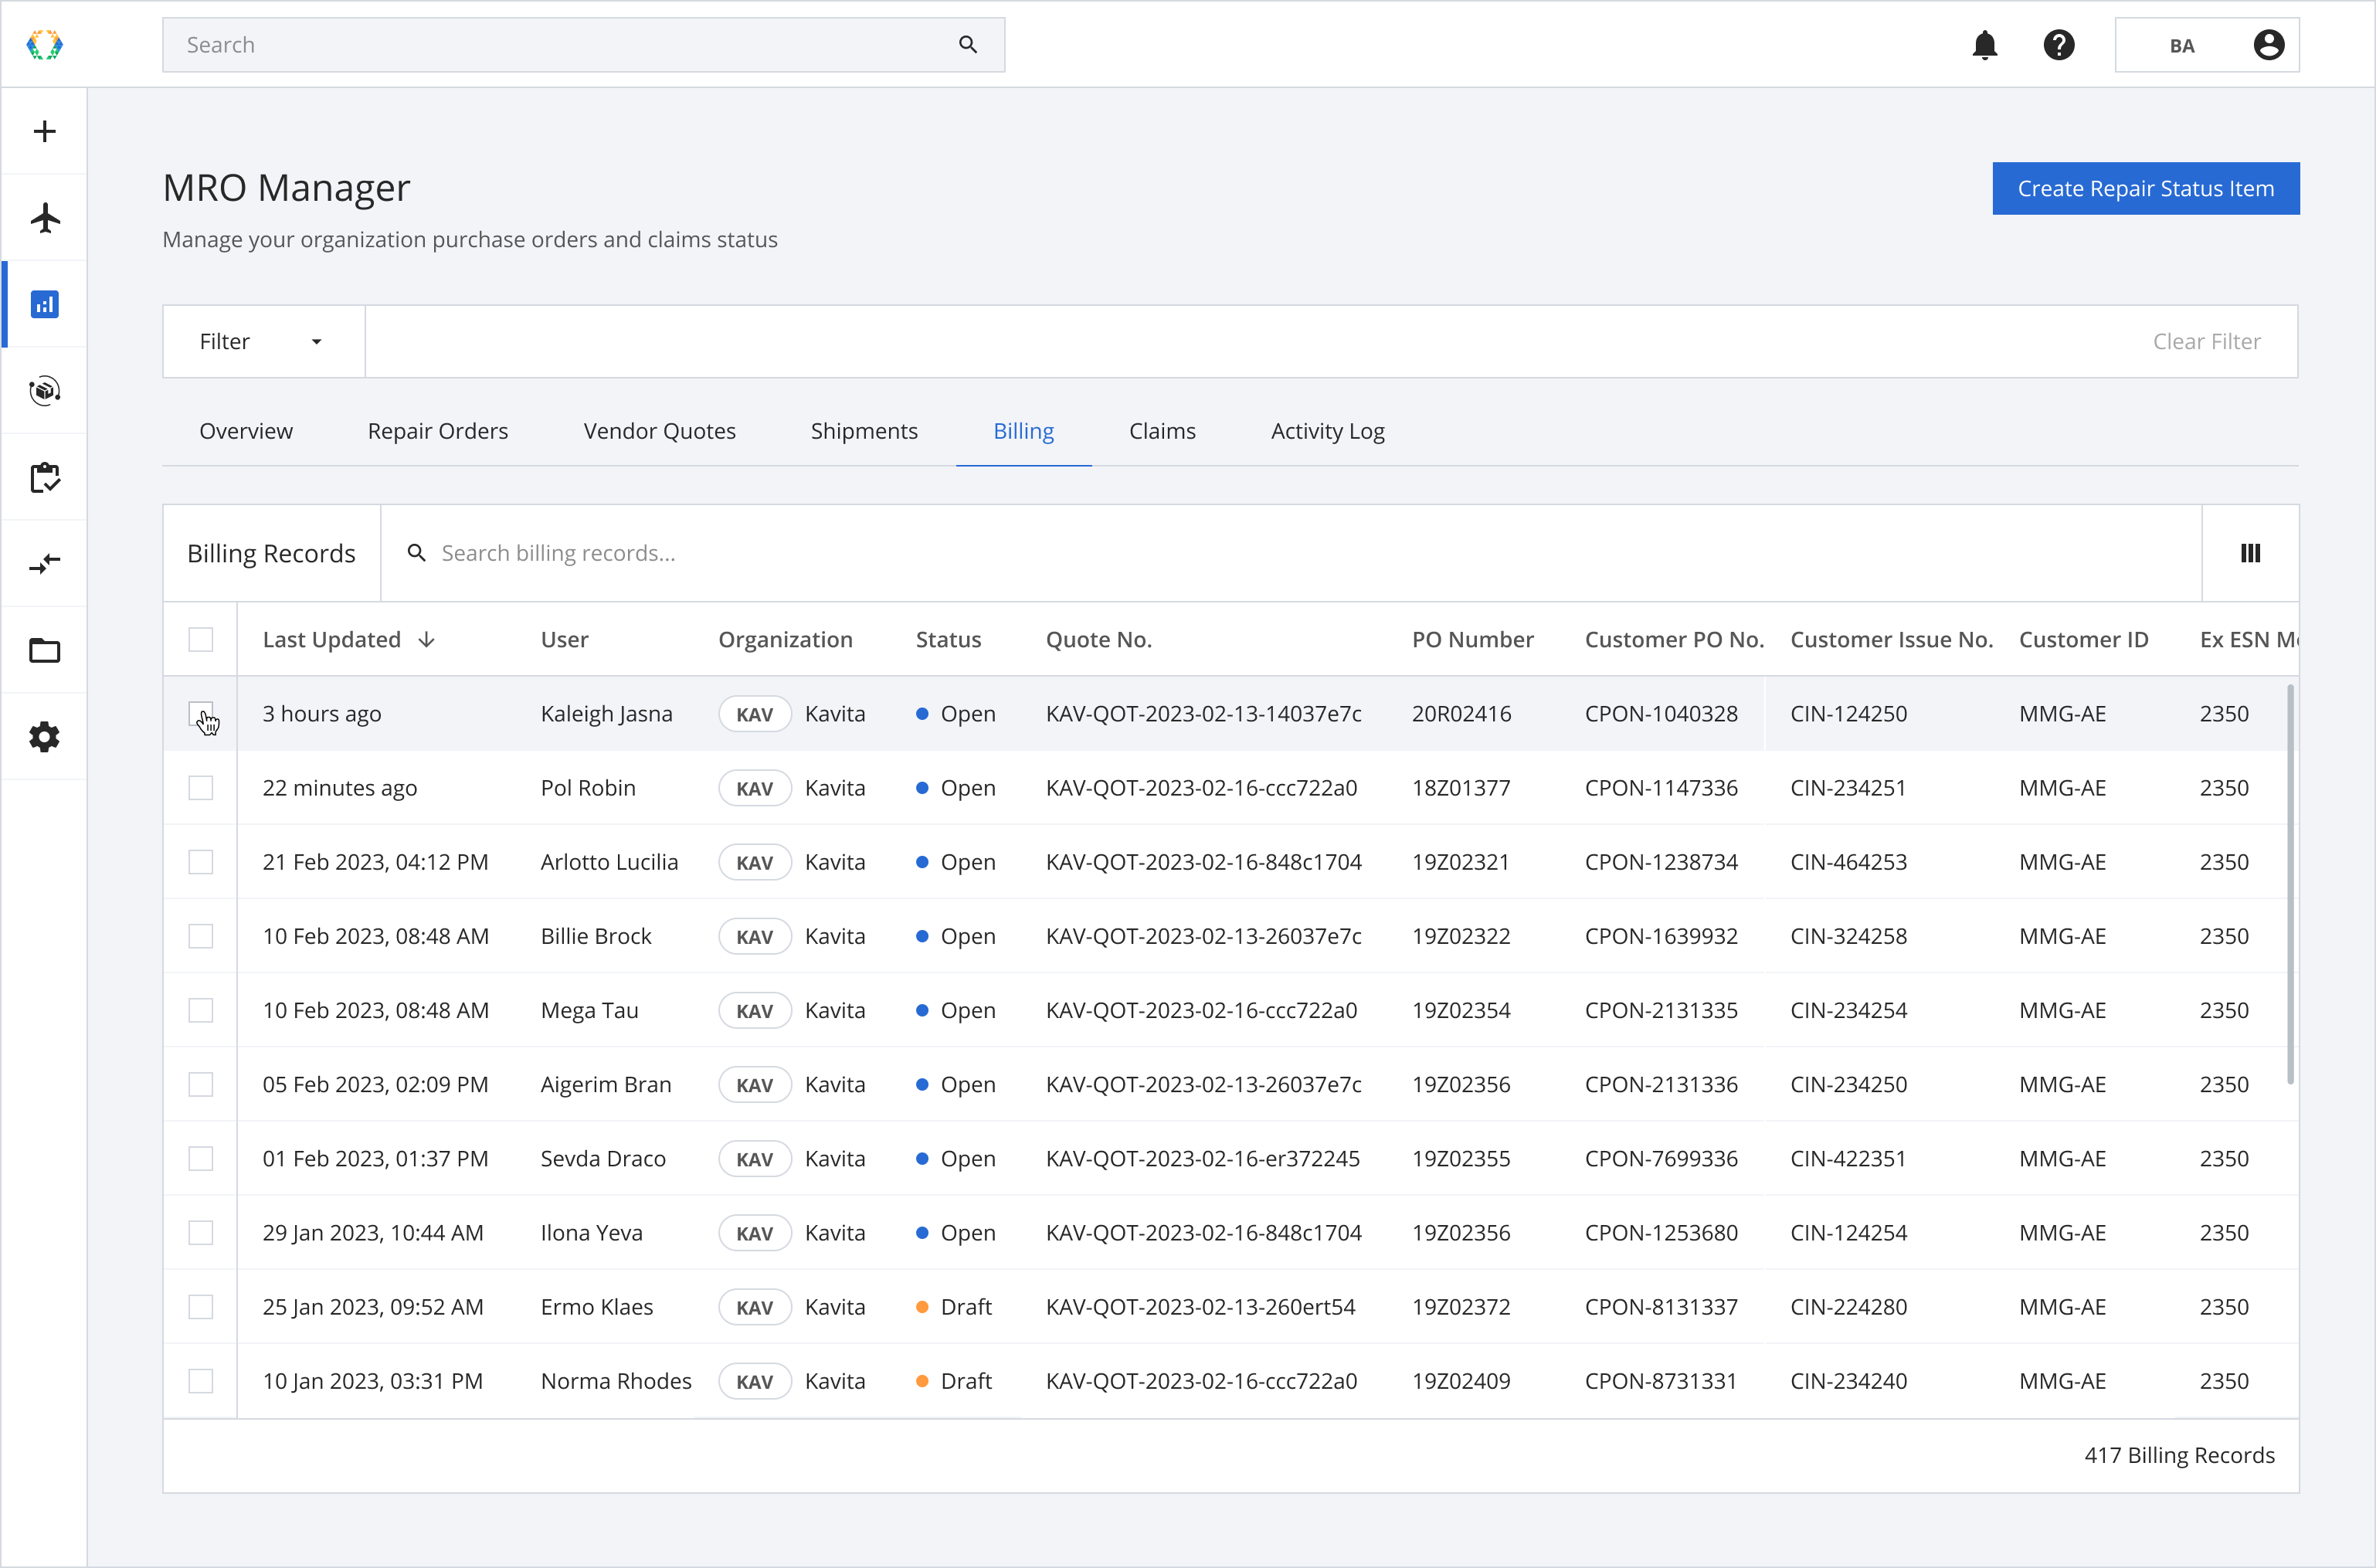
Step 2: Click ‘Update Status’
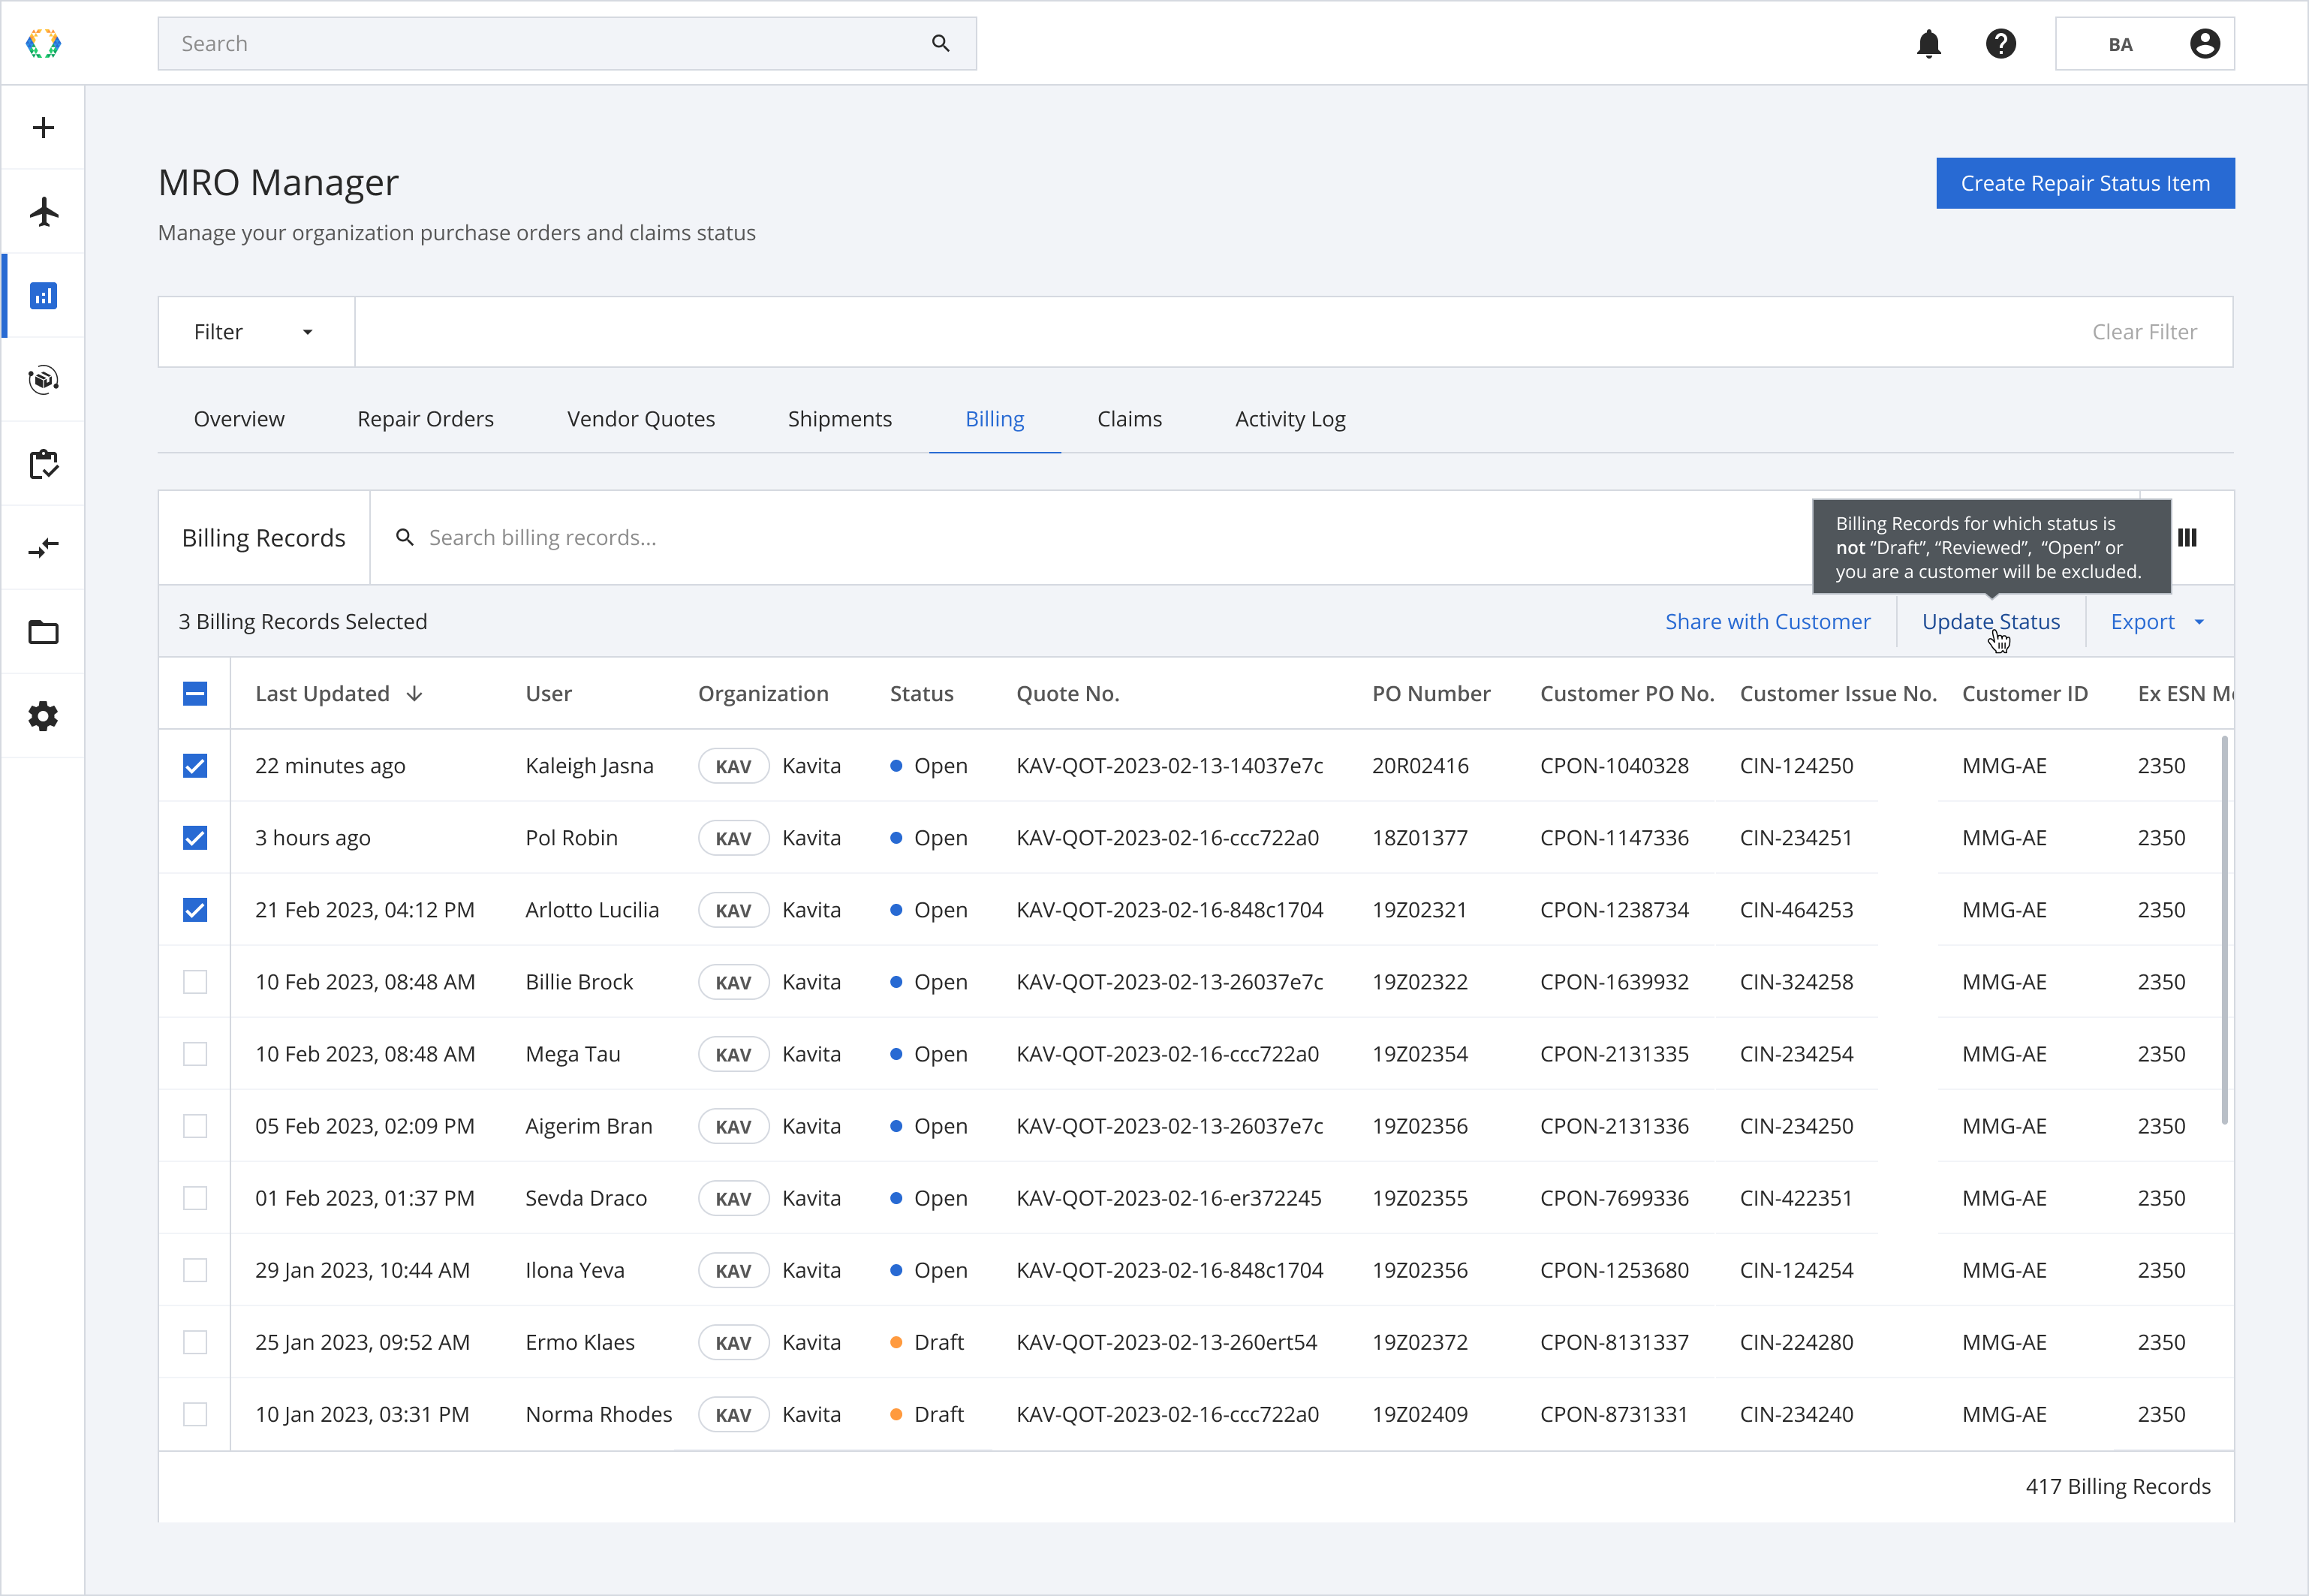
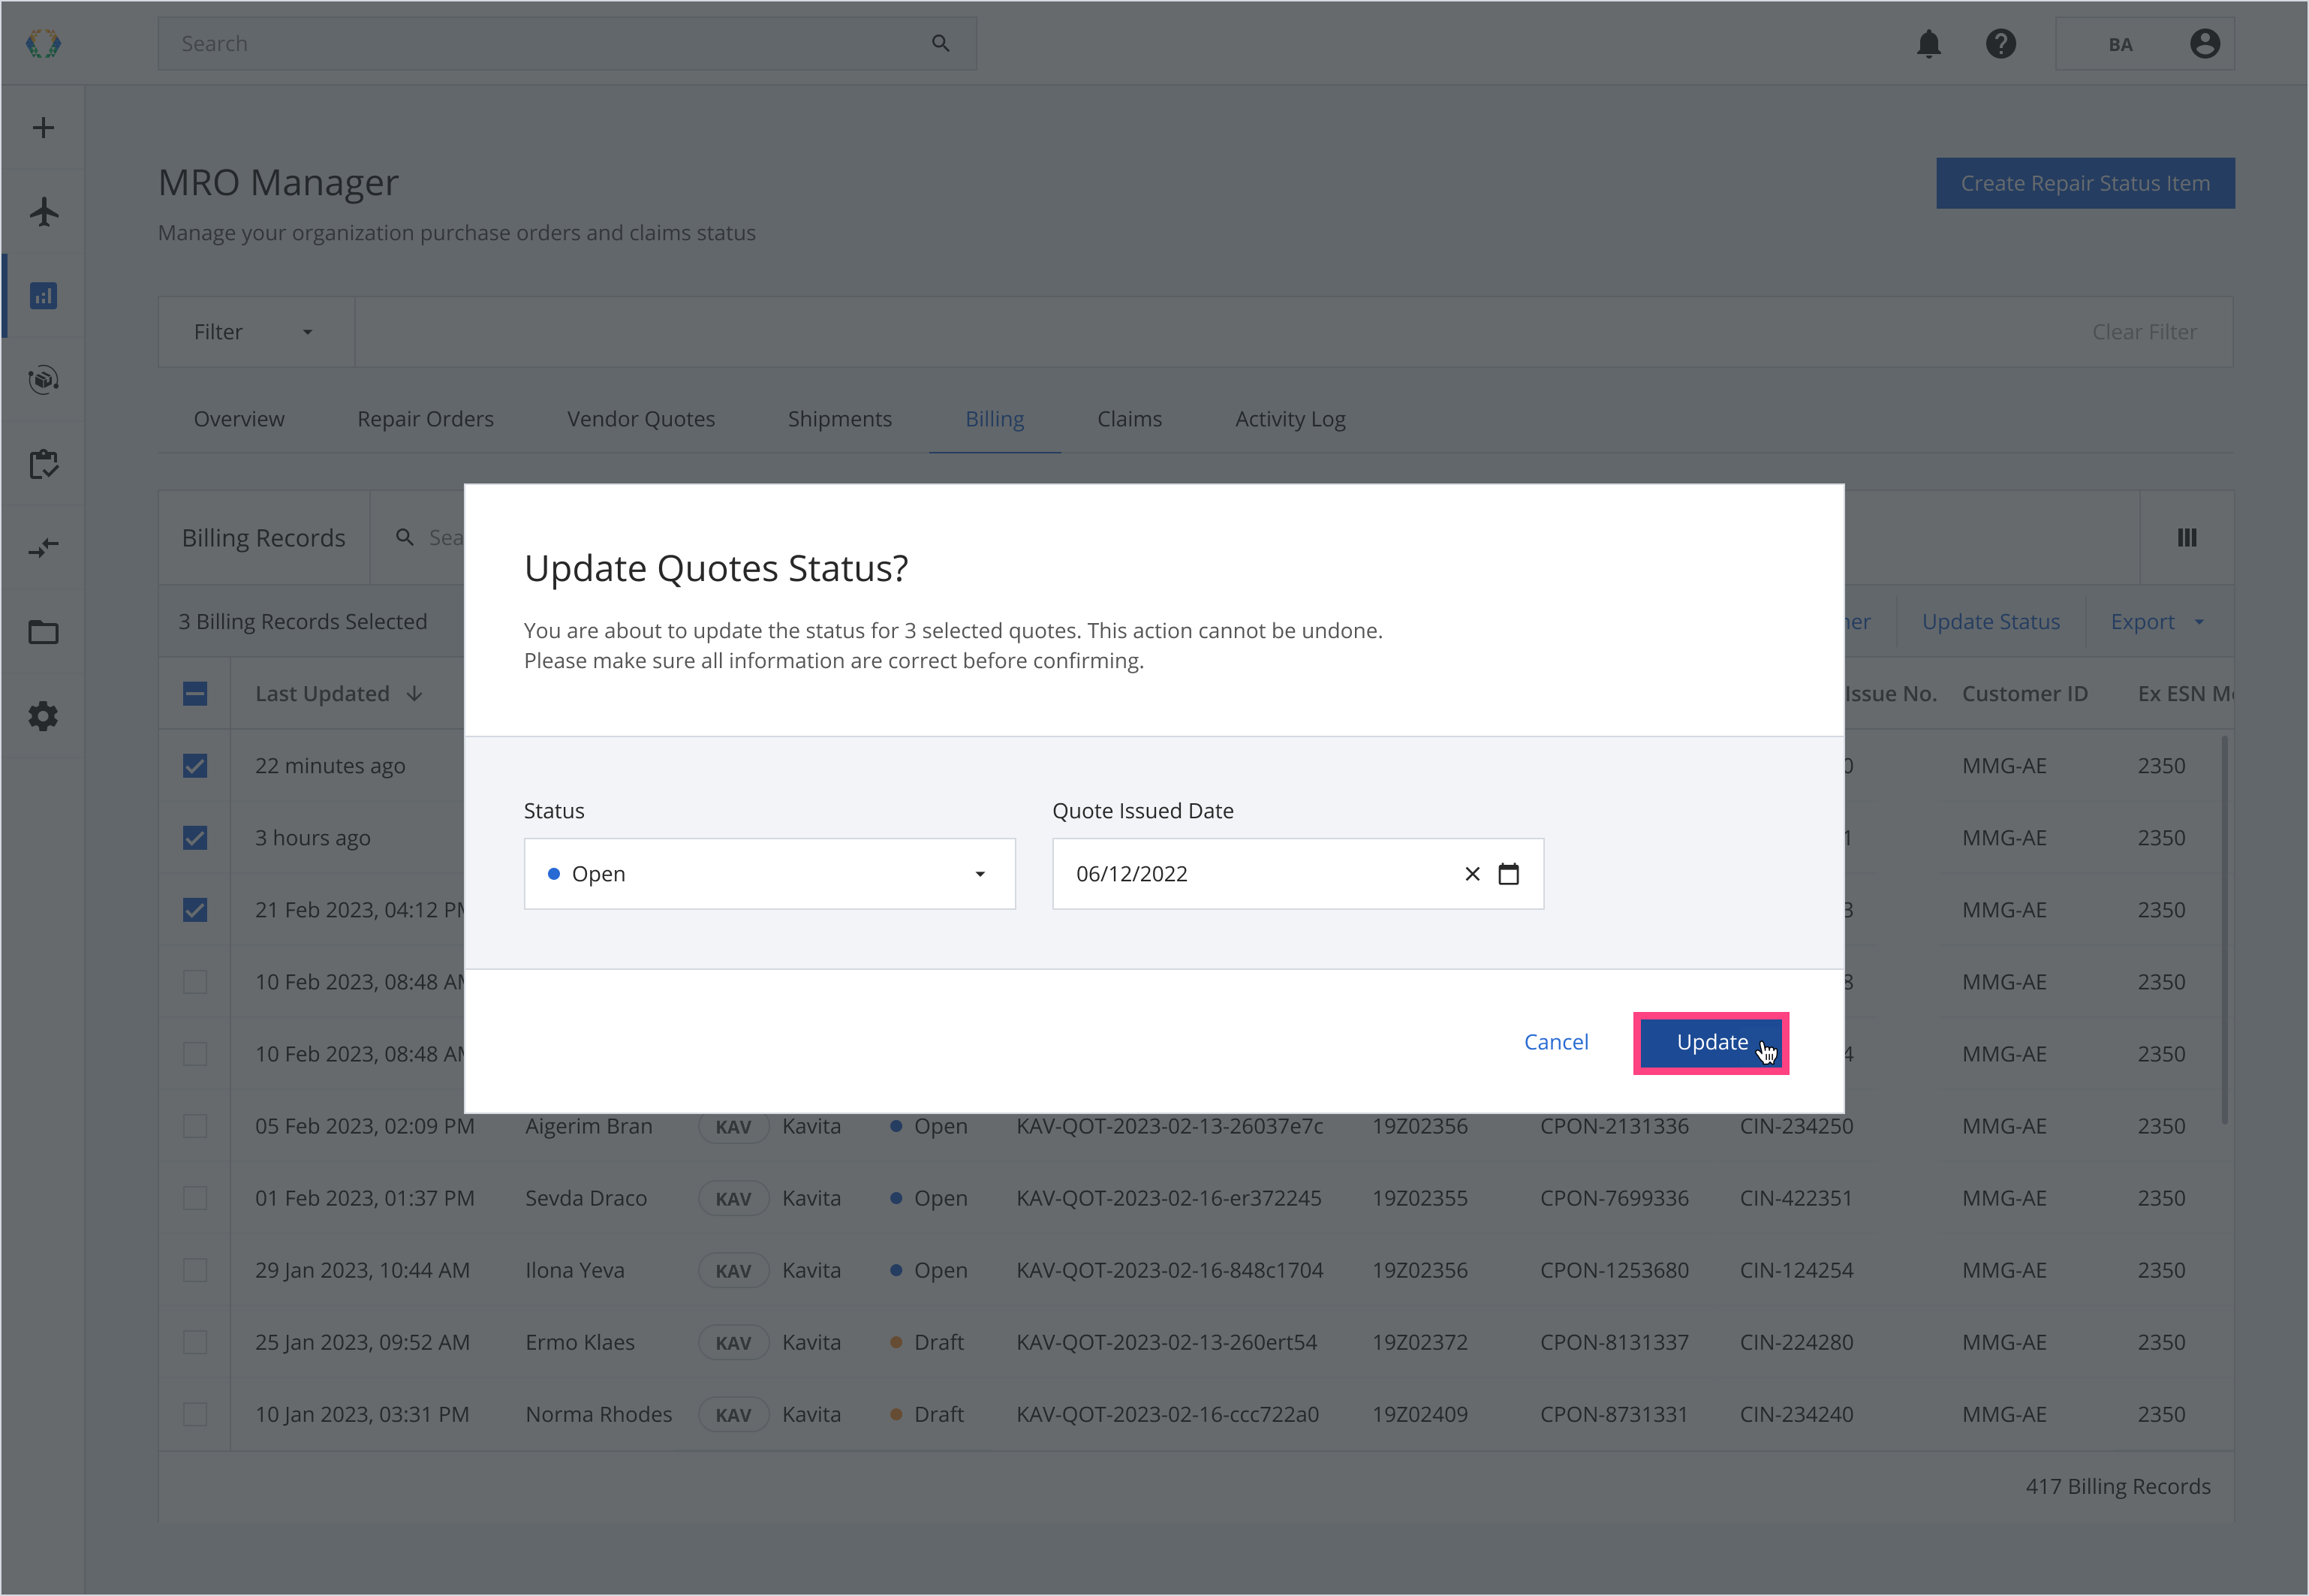
Step 3: Update quotes status.
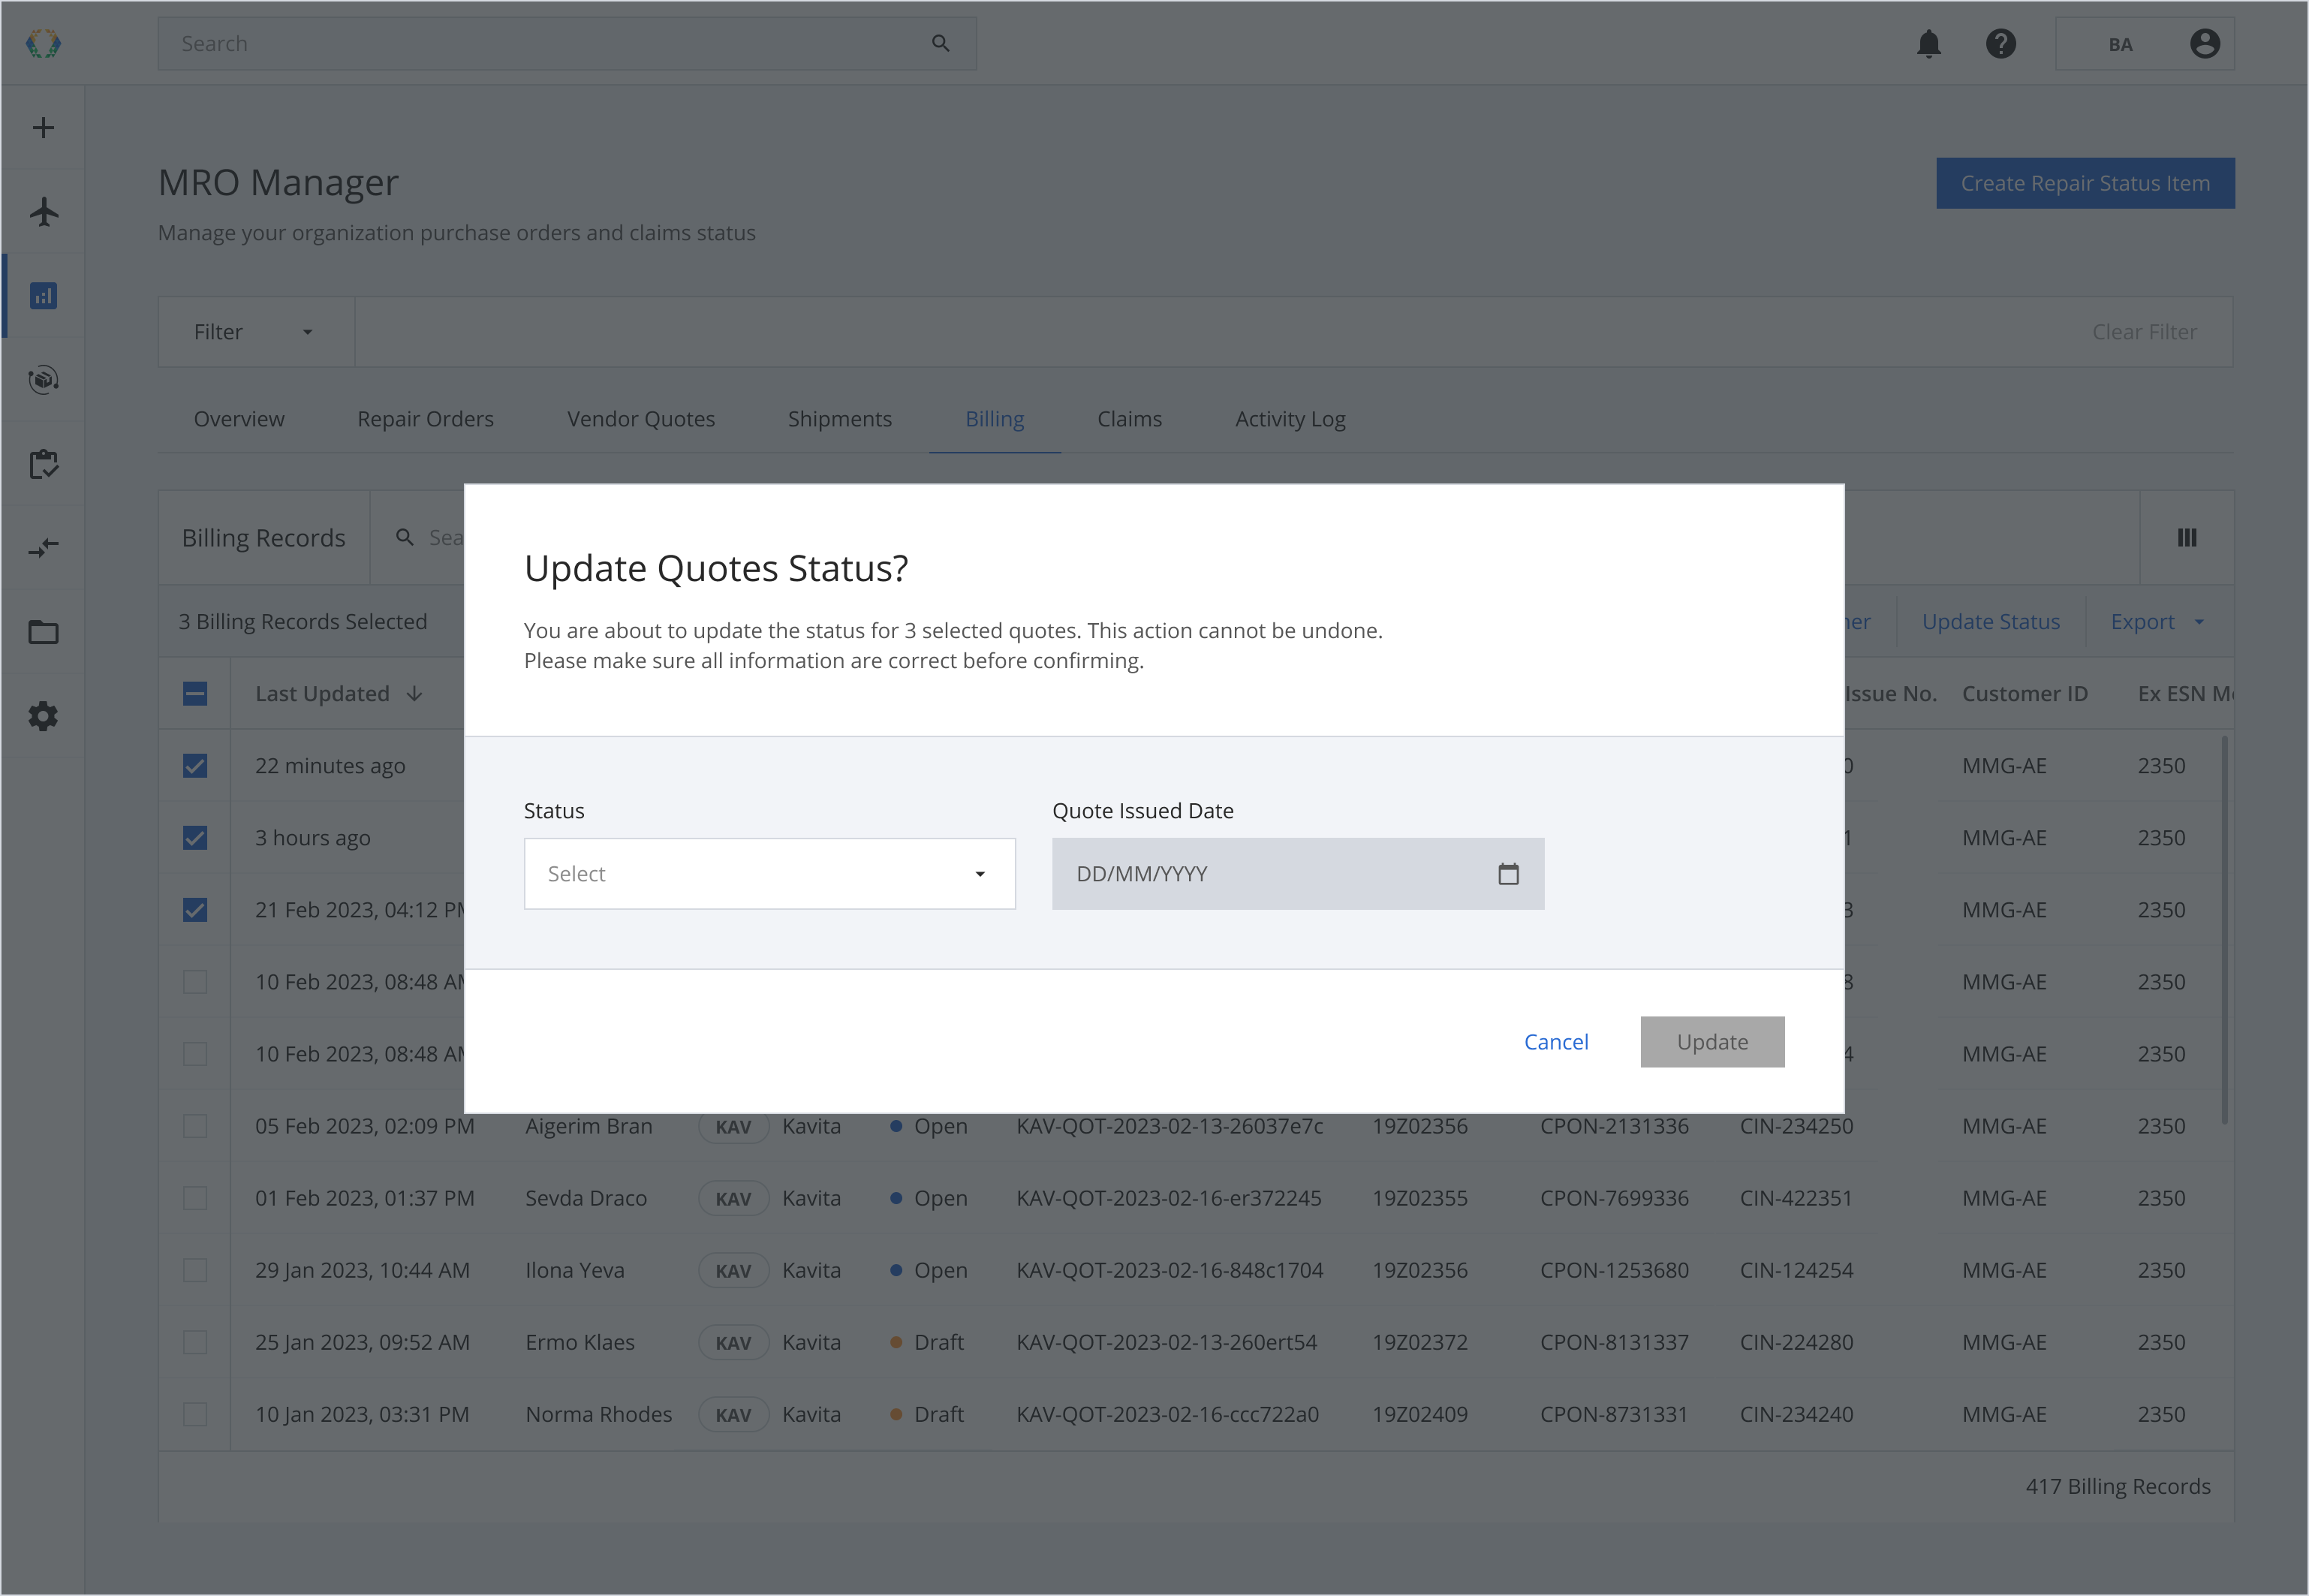
Step 4: Under the Status dropdown list, select 'Open'.
The "Quote Issued Date" field will only be enabled when the Quote Status is changed to "Open."
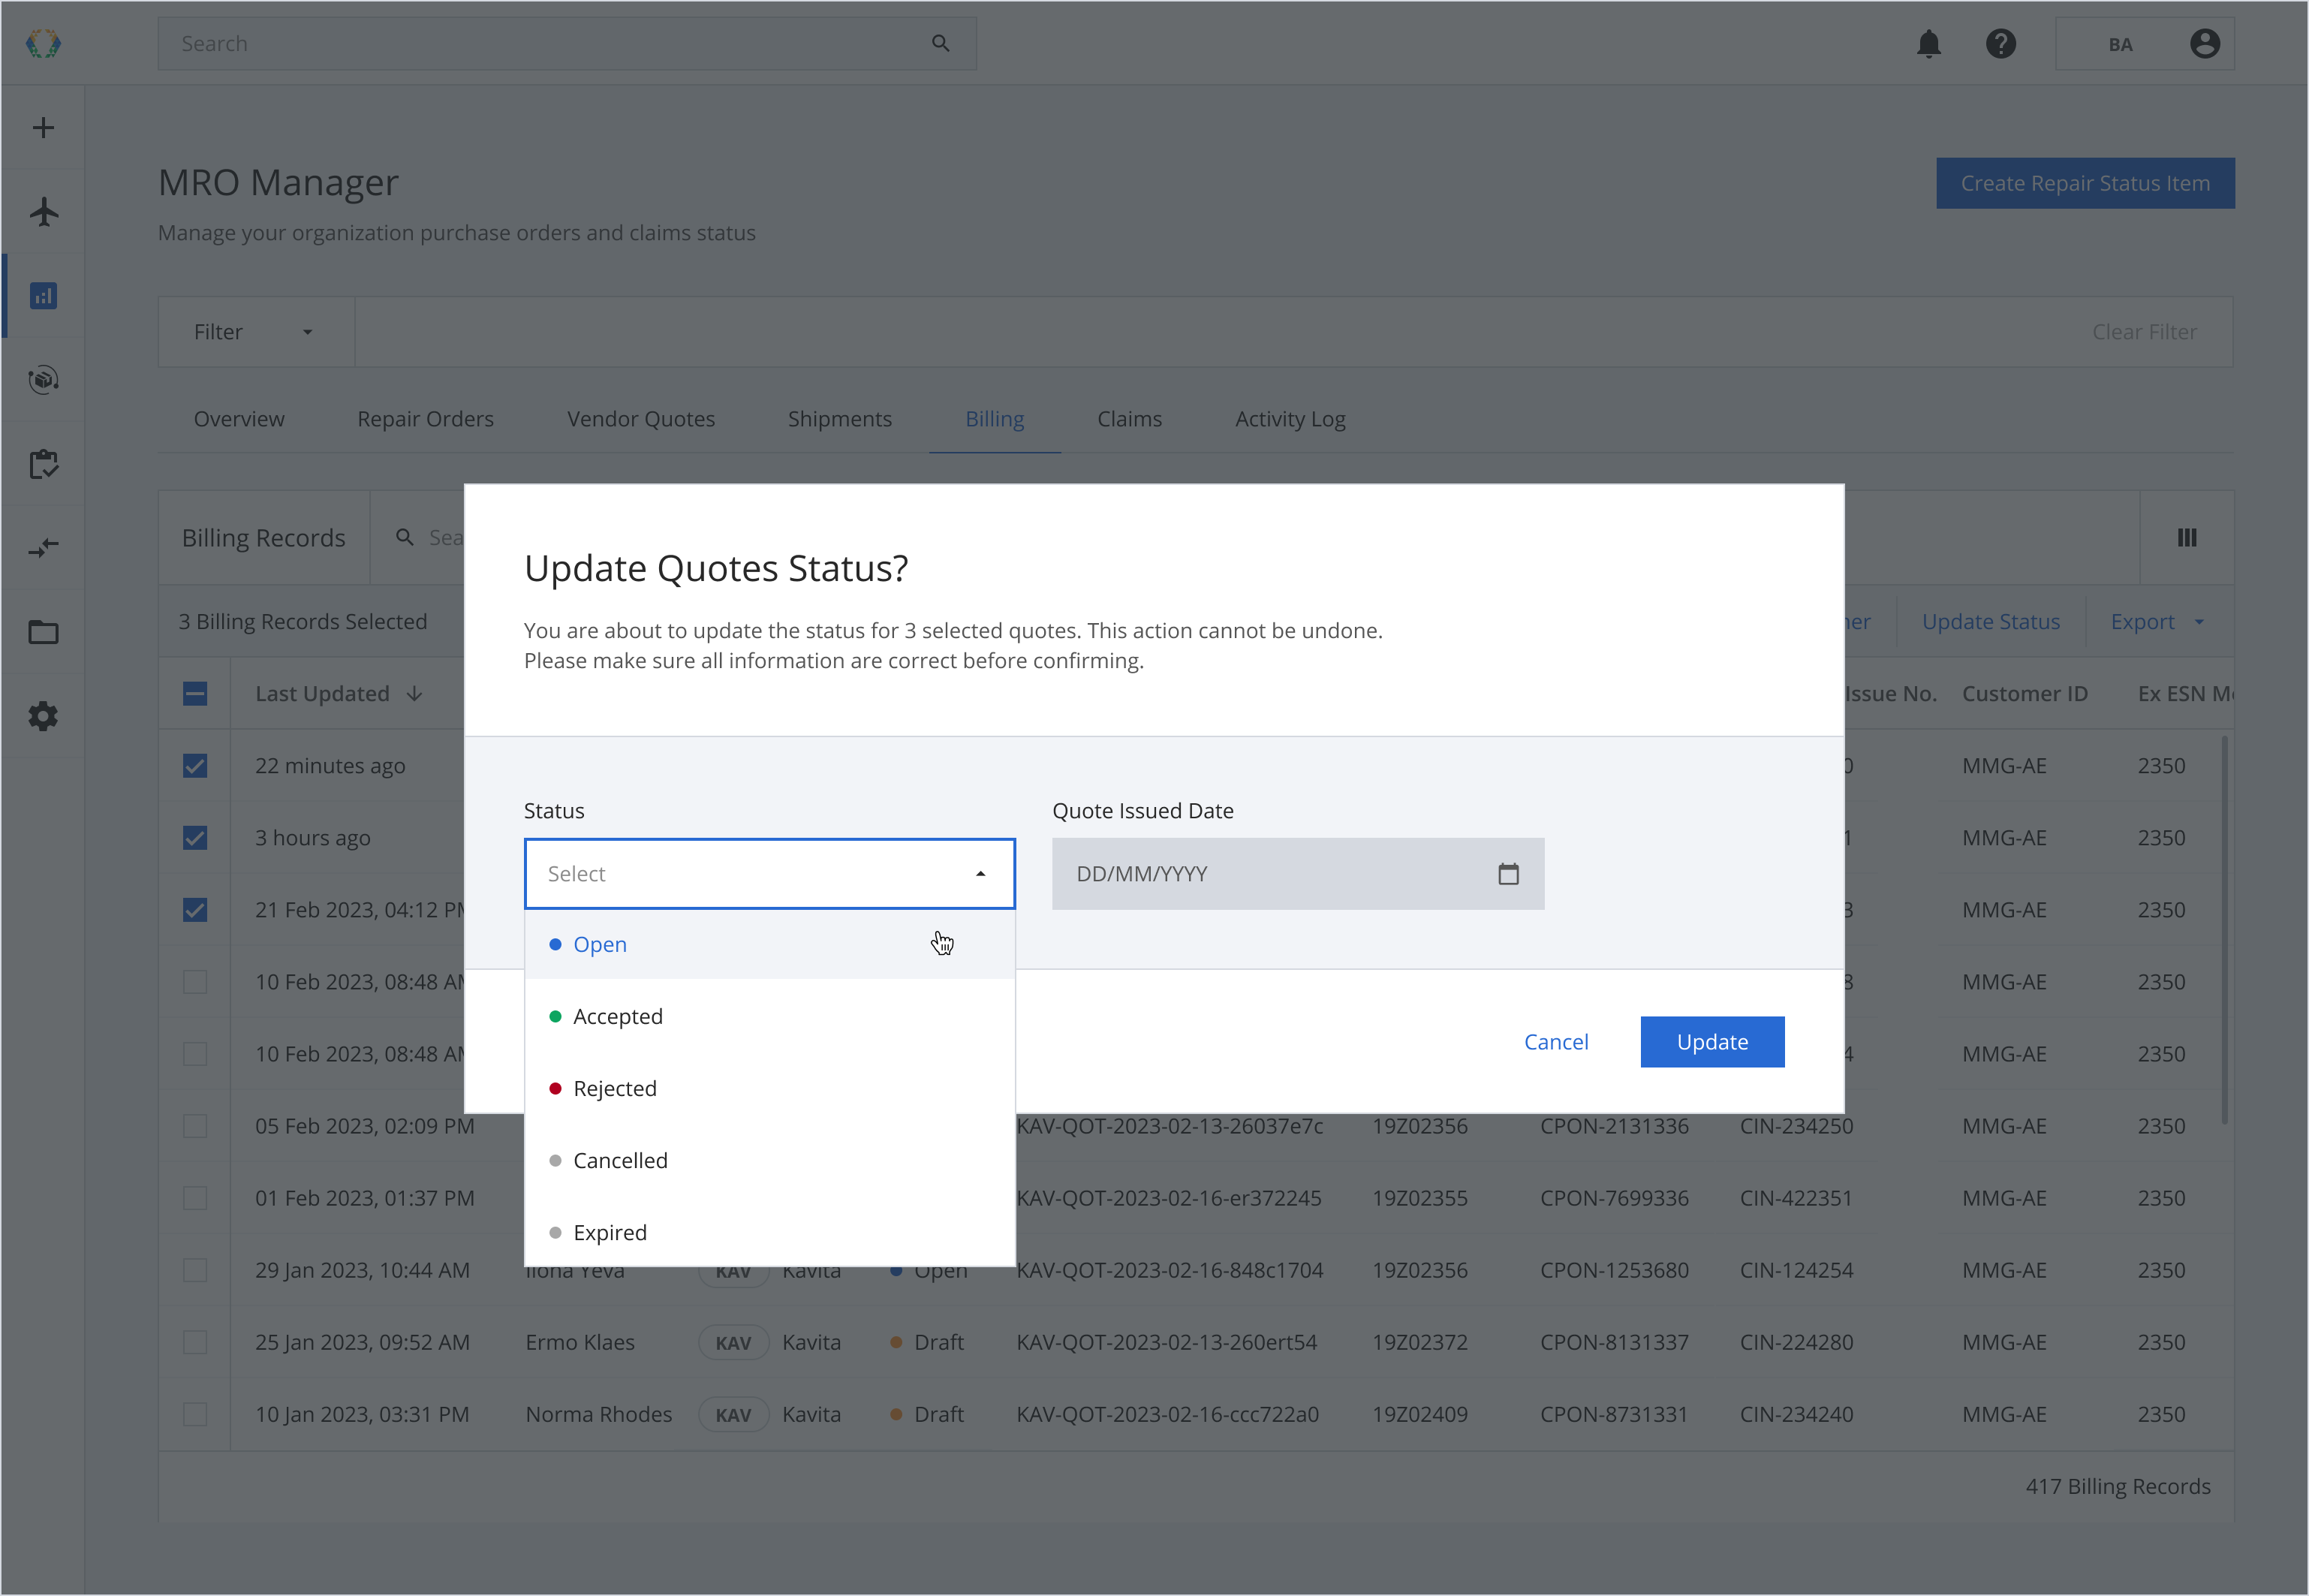
Step 5: Click 'Update' to confirm your selection.
Confirm your Quote Status is correct before clicking 'Update'. This action cannot be undone.
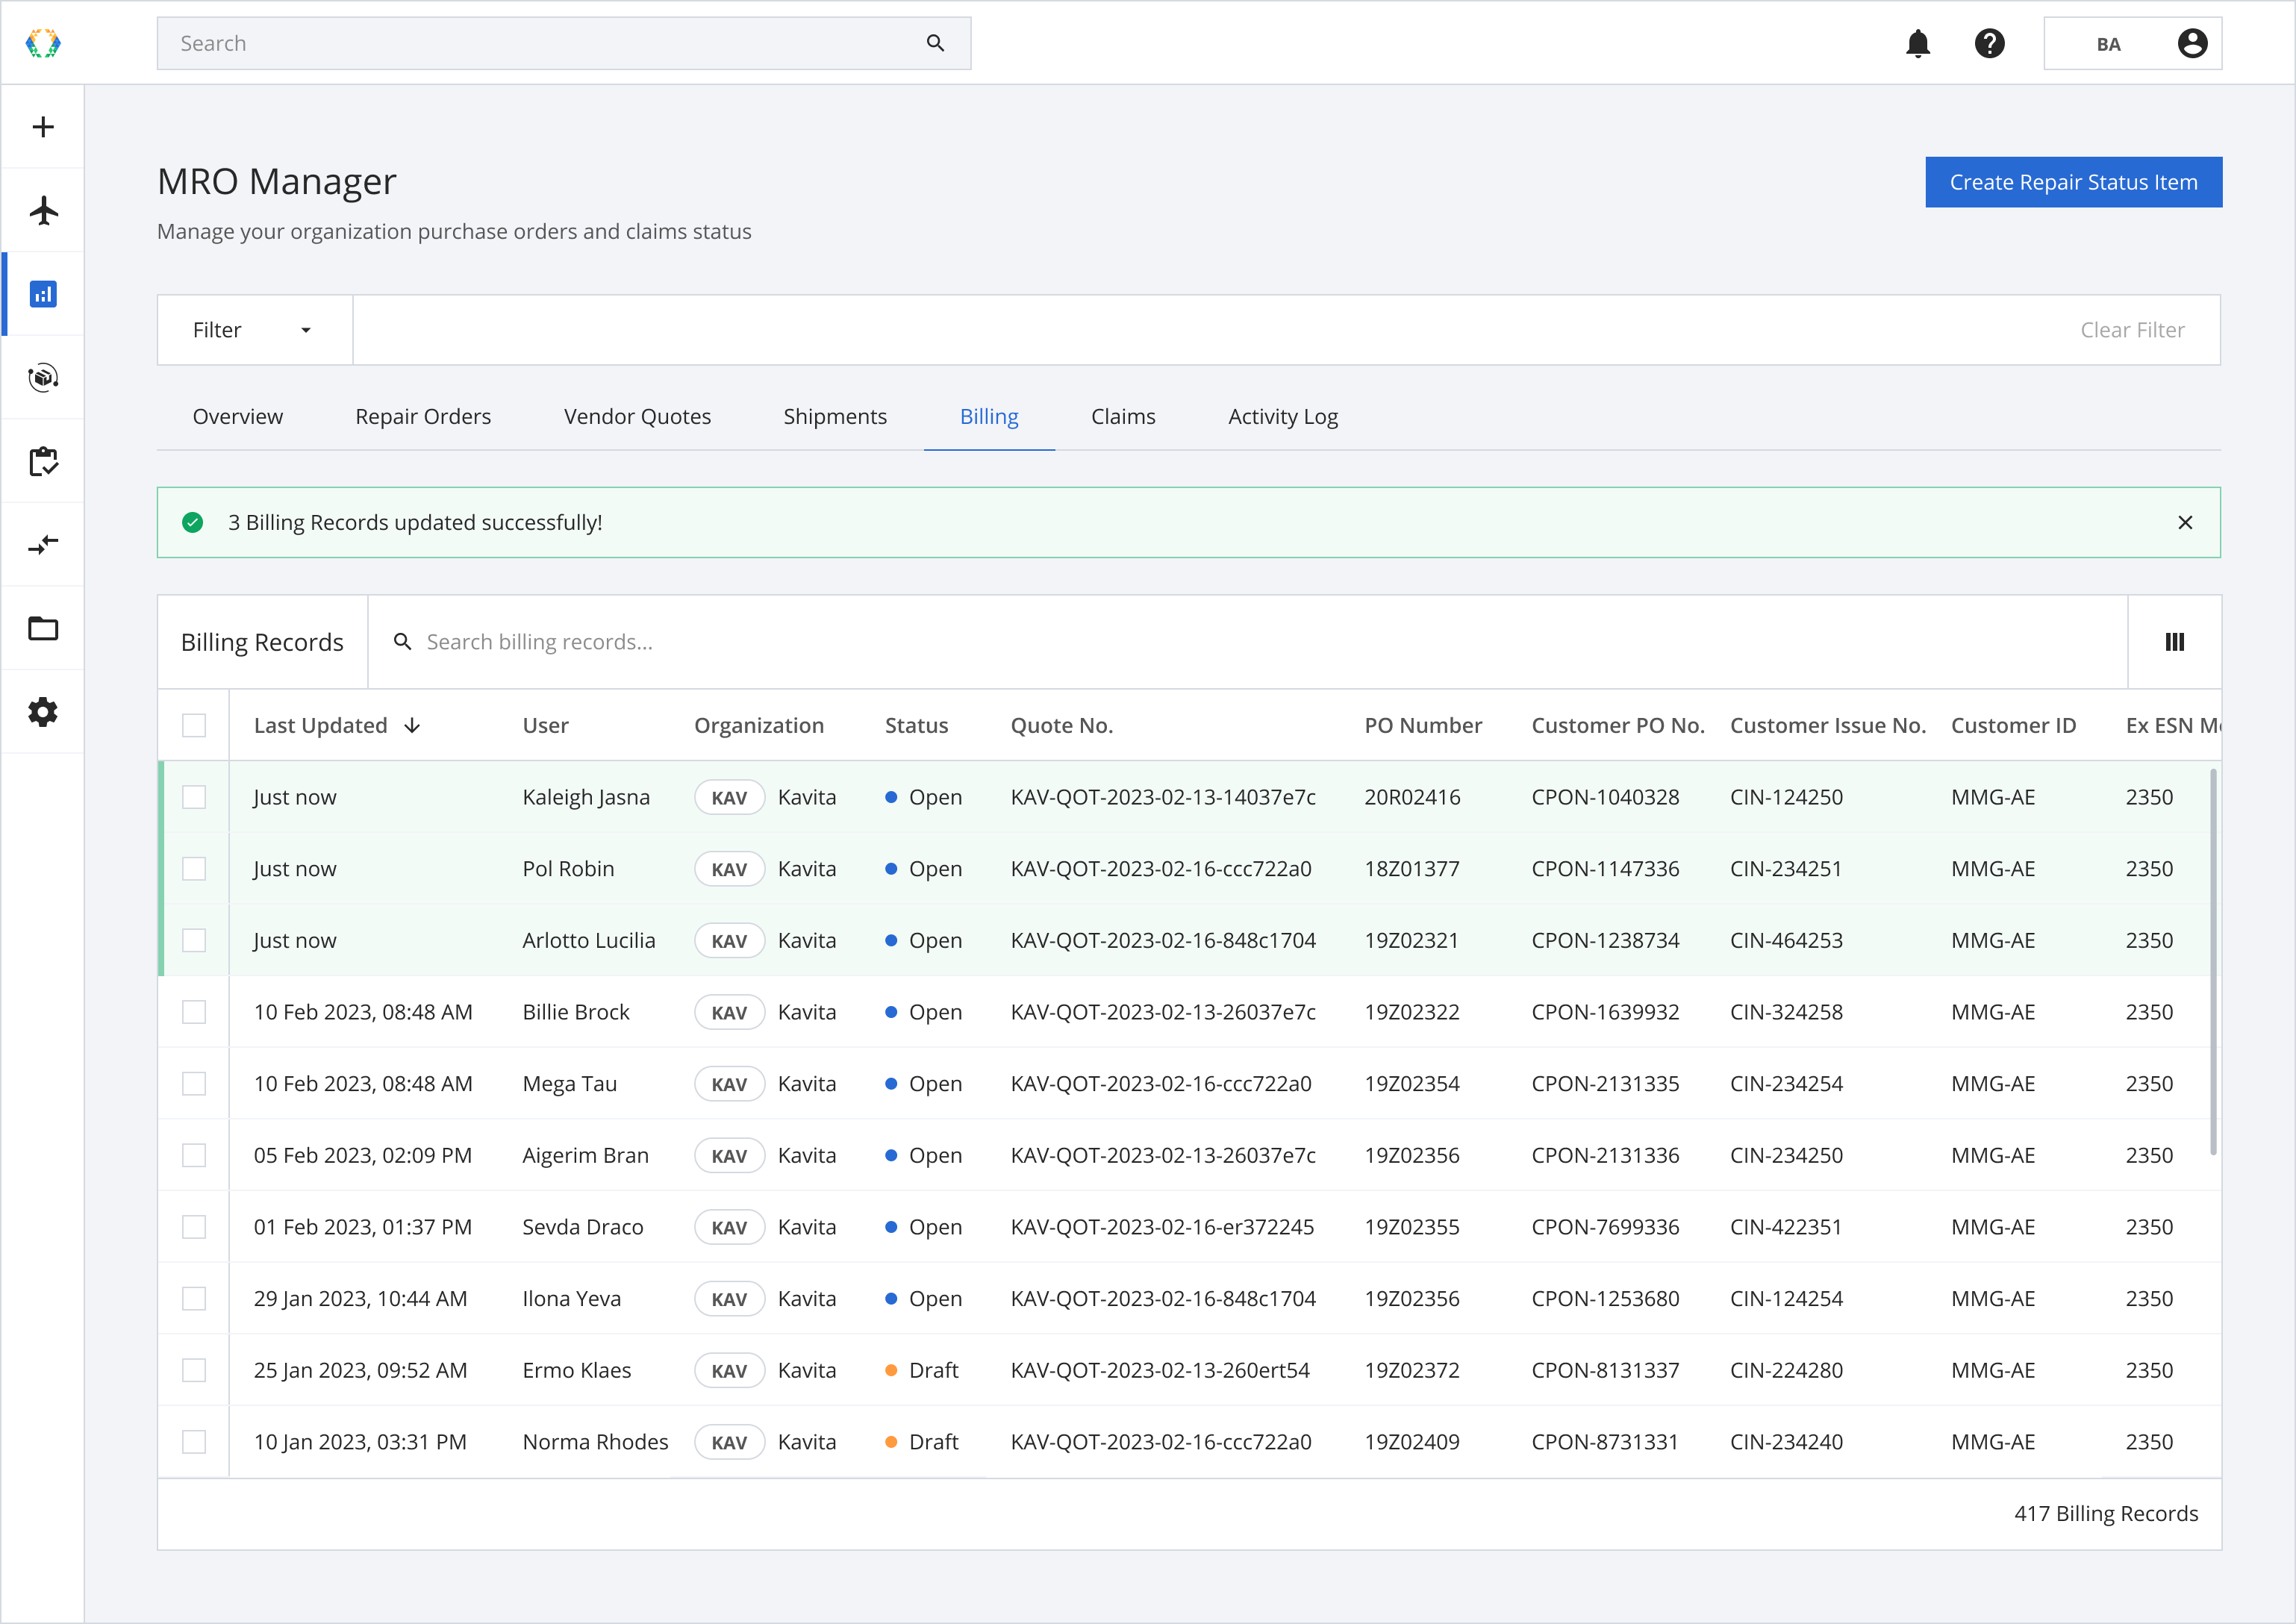
Once your Quote statuses are successfully updated, a green banner will appear at the top of the billing records list.
Option 2: Update Billing Records Status to "Accepted"," Rejected", "Cancelled", or "Expired"
Once your Billing Records are updated to "Accepted"," Rejected", "Cancelled", or "Expired", they cannot be reverted to "Open", and the status cannot be changed/edited.
Step 1: From Billing Records, select the billing records you want to update the status.

Step 2: Click ‘Update Status’
Billing Records for which status is not “Draft” or “Open” or you are a customer will be excluded.

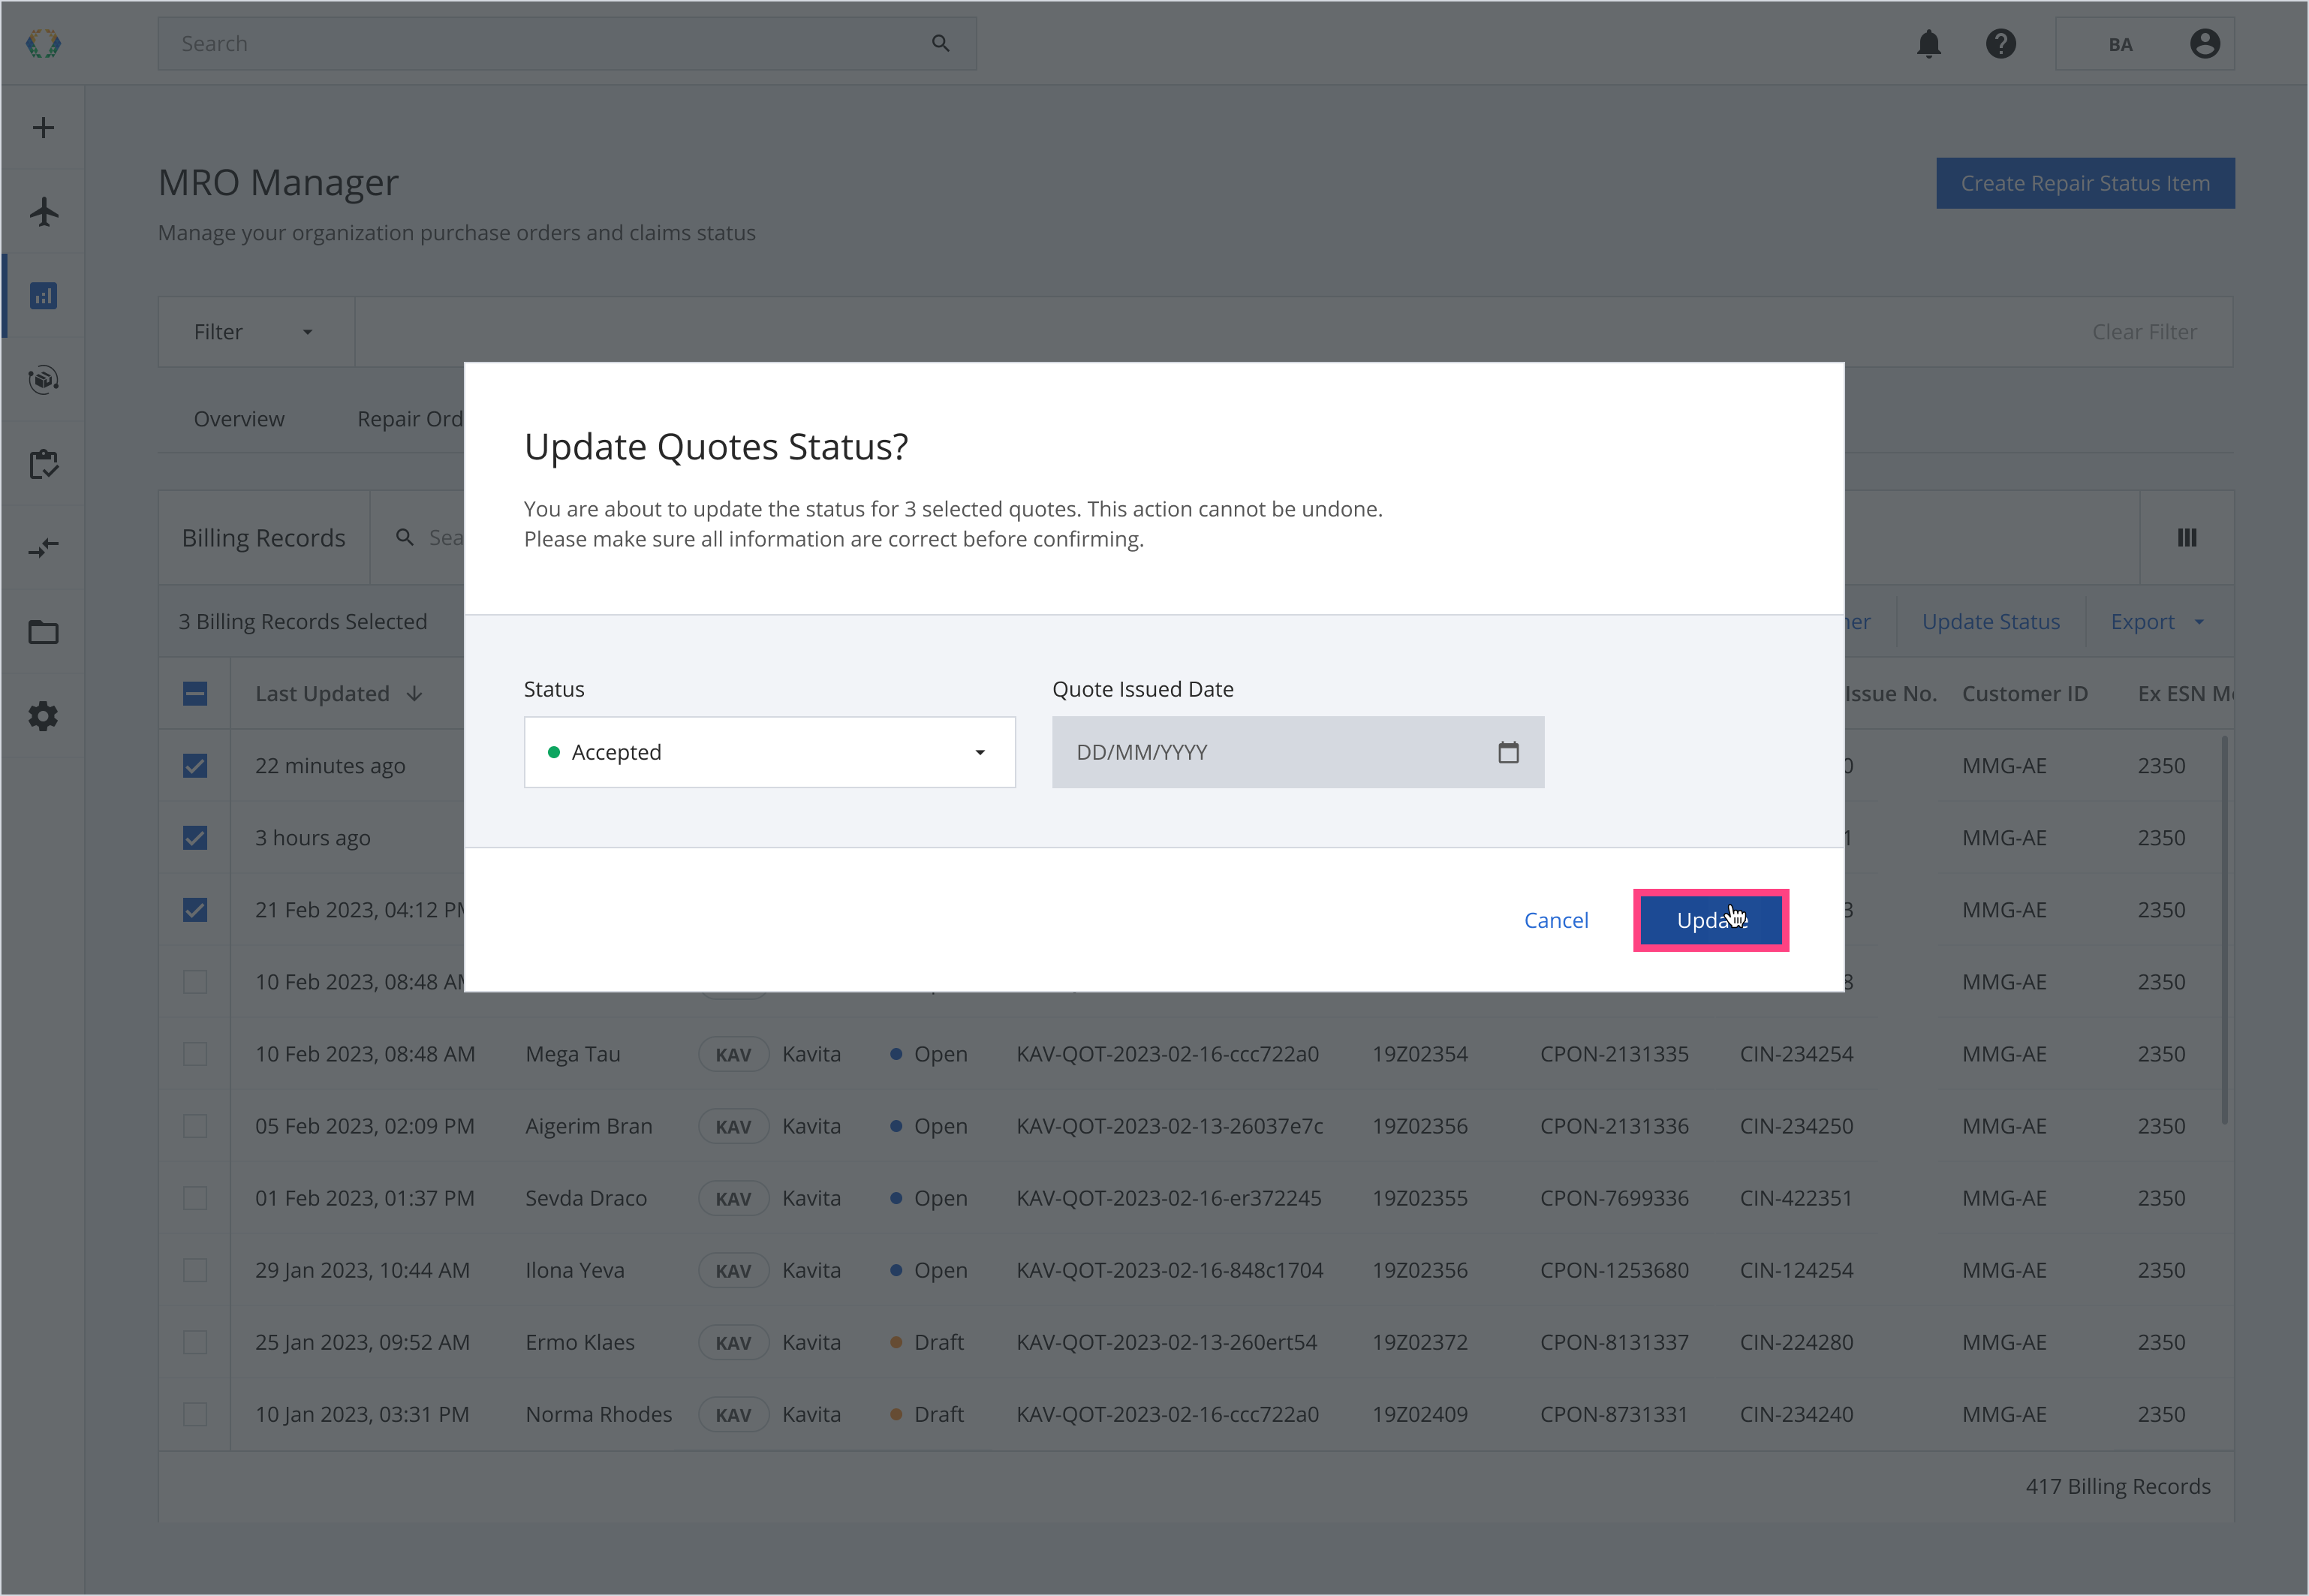
Step 3: Update quotes status.
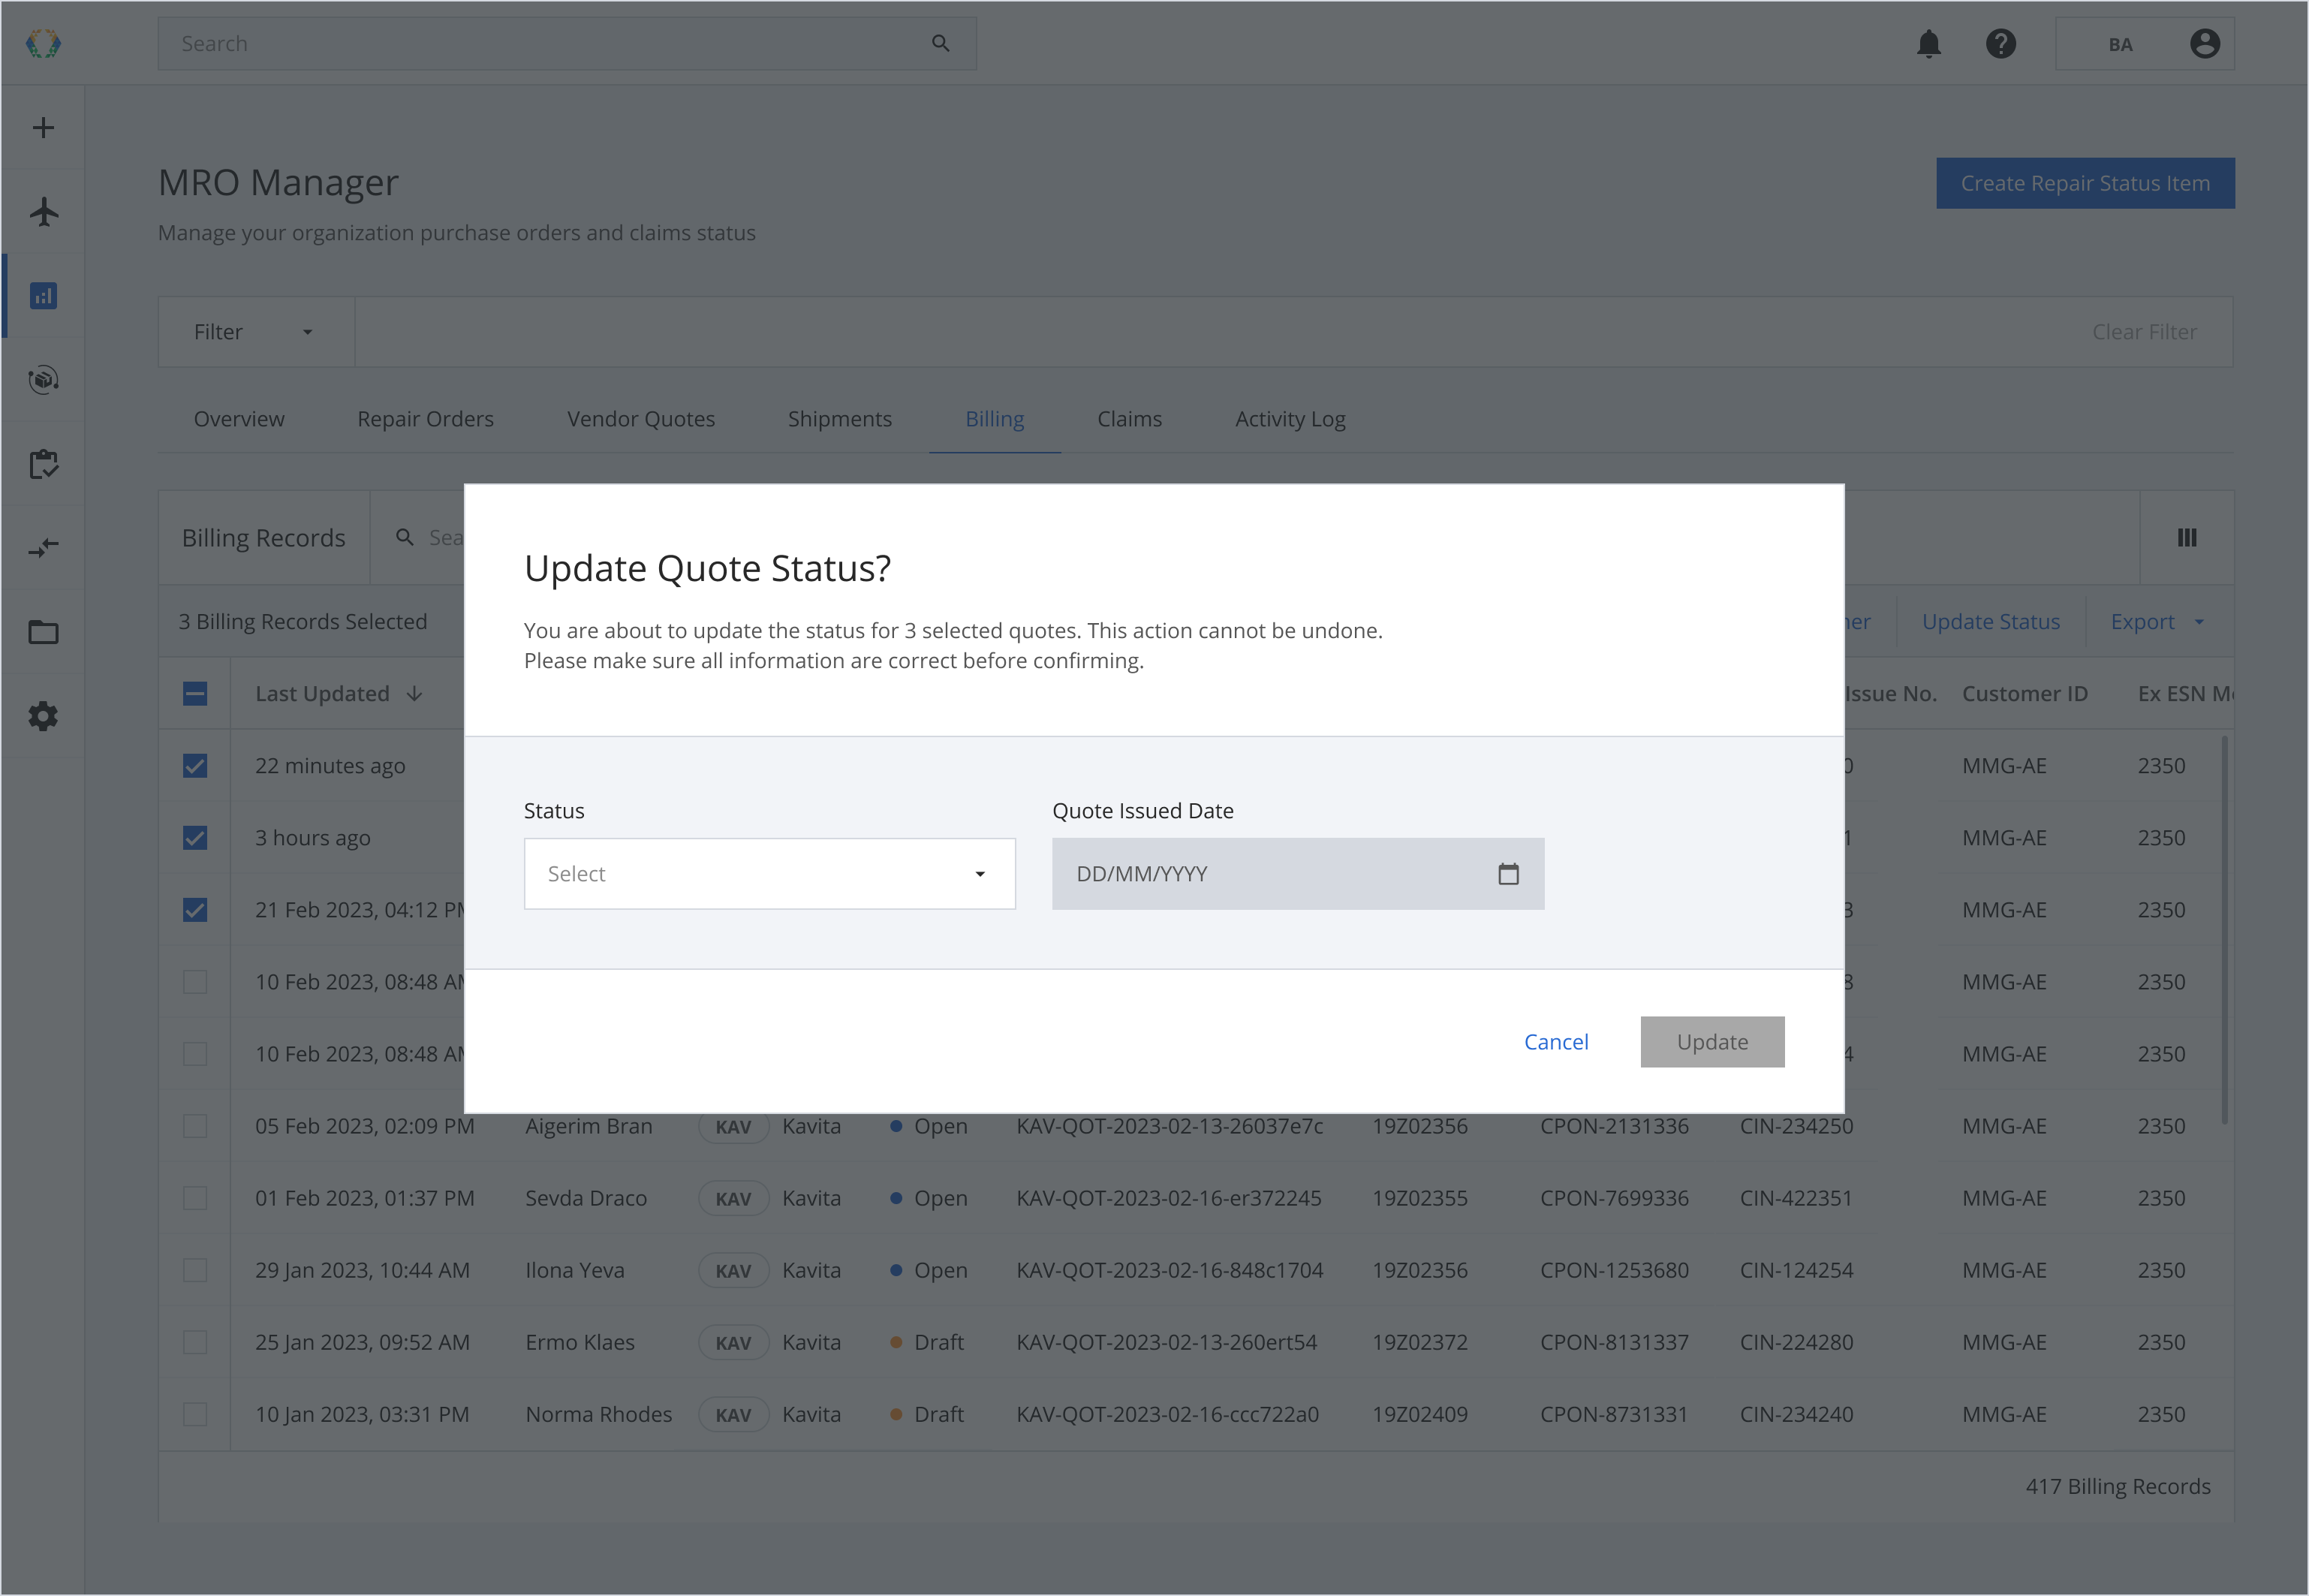
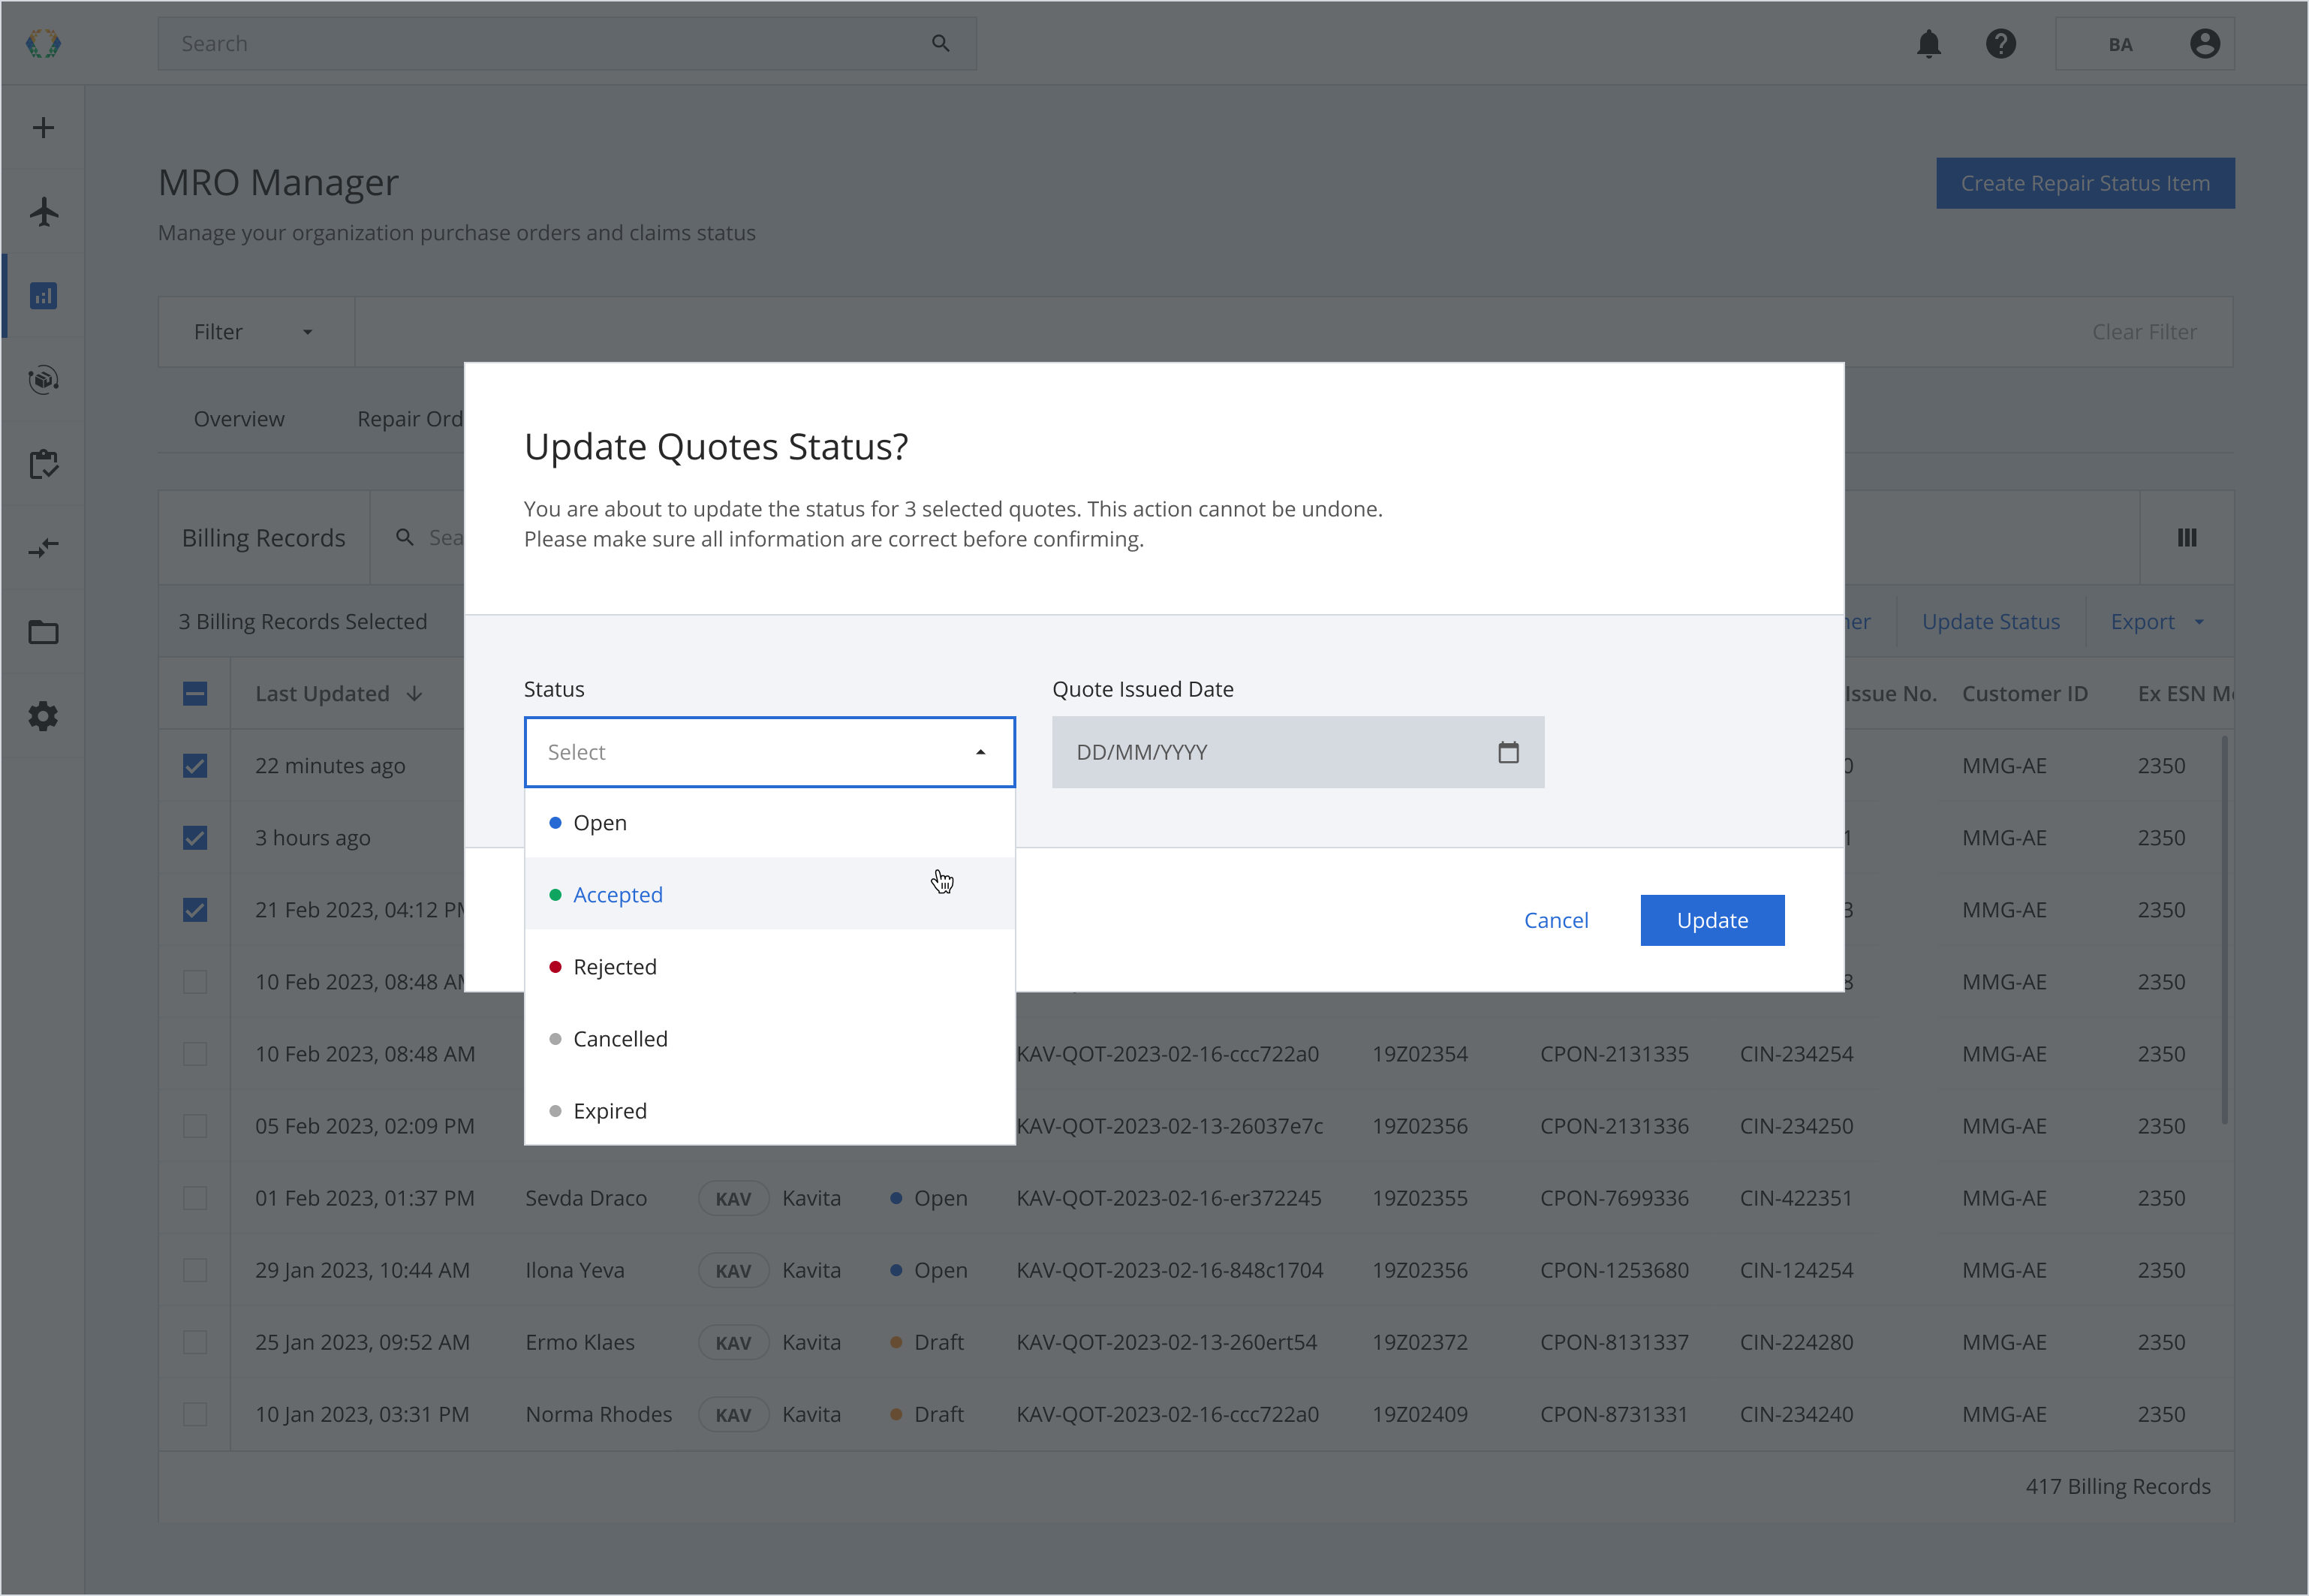
Step 4: Under the Status dropdown list, select 'Accepted', 'Rejected', 'Cancelled', or 'Expired'.
Step 5: Click 'Update' to confirm your selection.
Confirm your Quote Status is correct before clicking 'Update'. This action cannot be undone.
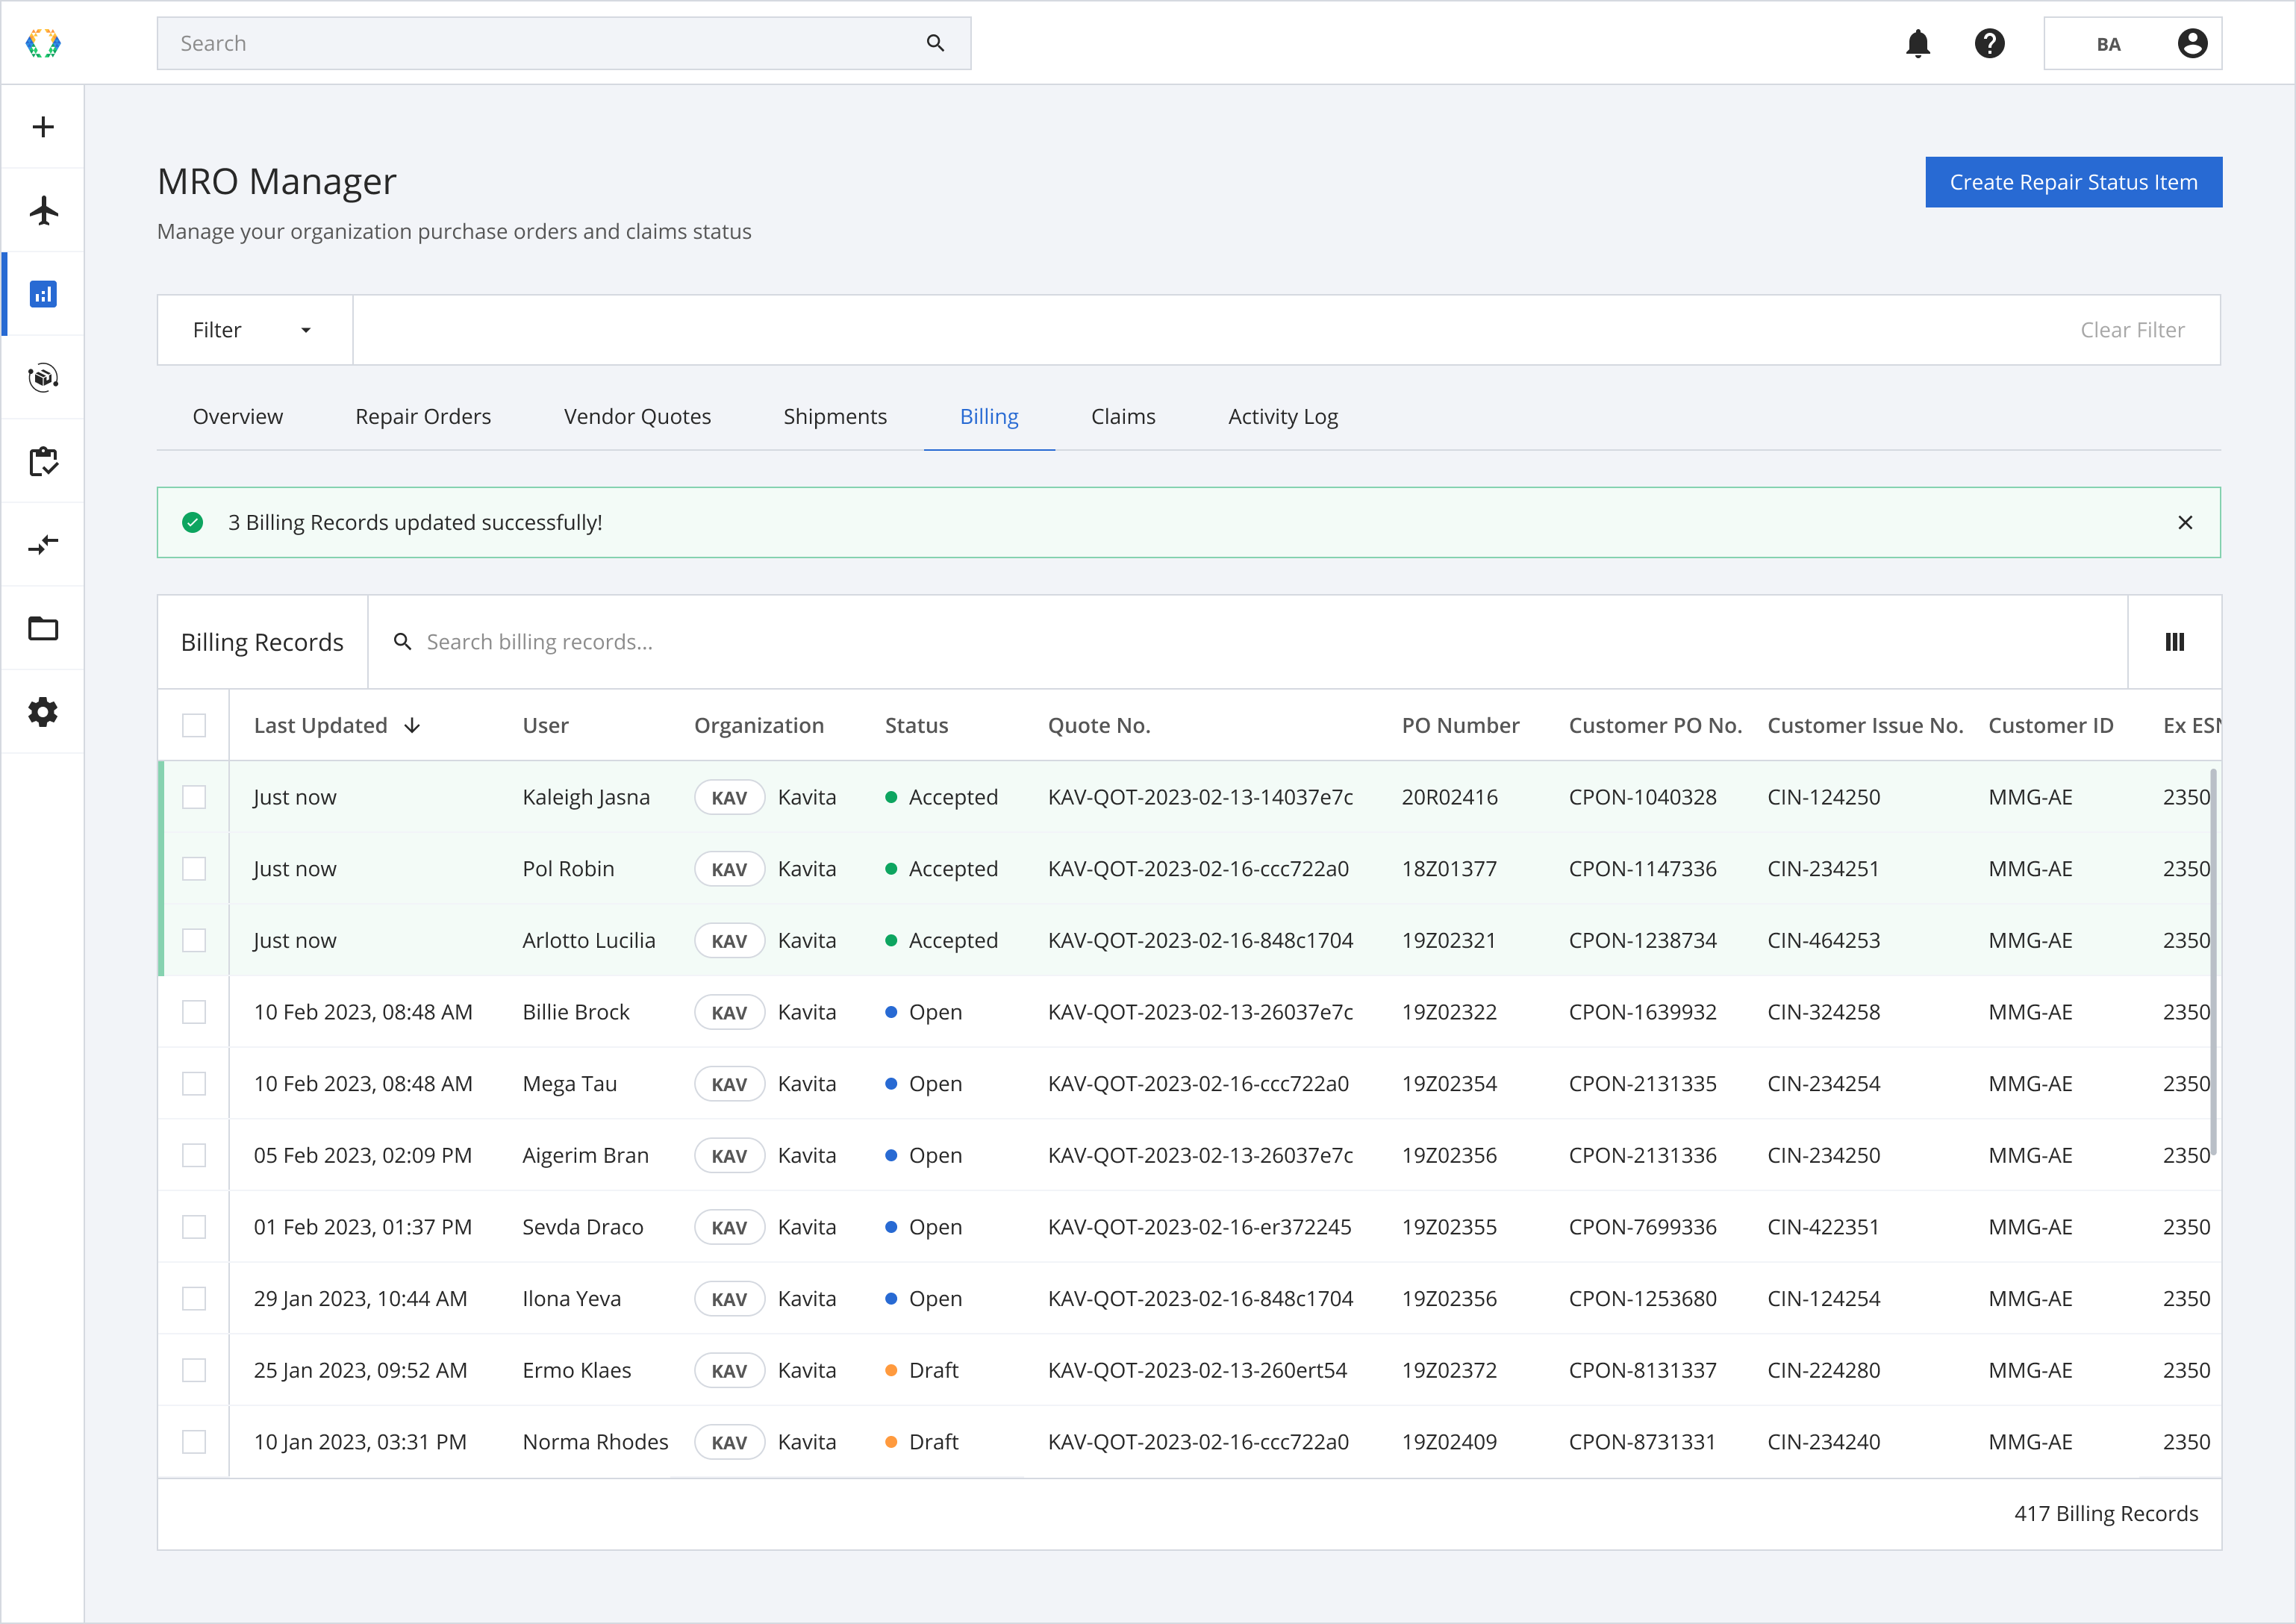
Once your quotes status are successfully updated, a green banner will appear at the top of the billing records list.
Sharing “Open” Quote with customers via Email
Step 1: From Billing Records, select quotes you want to share.
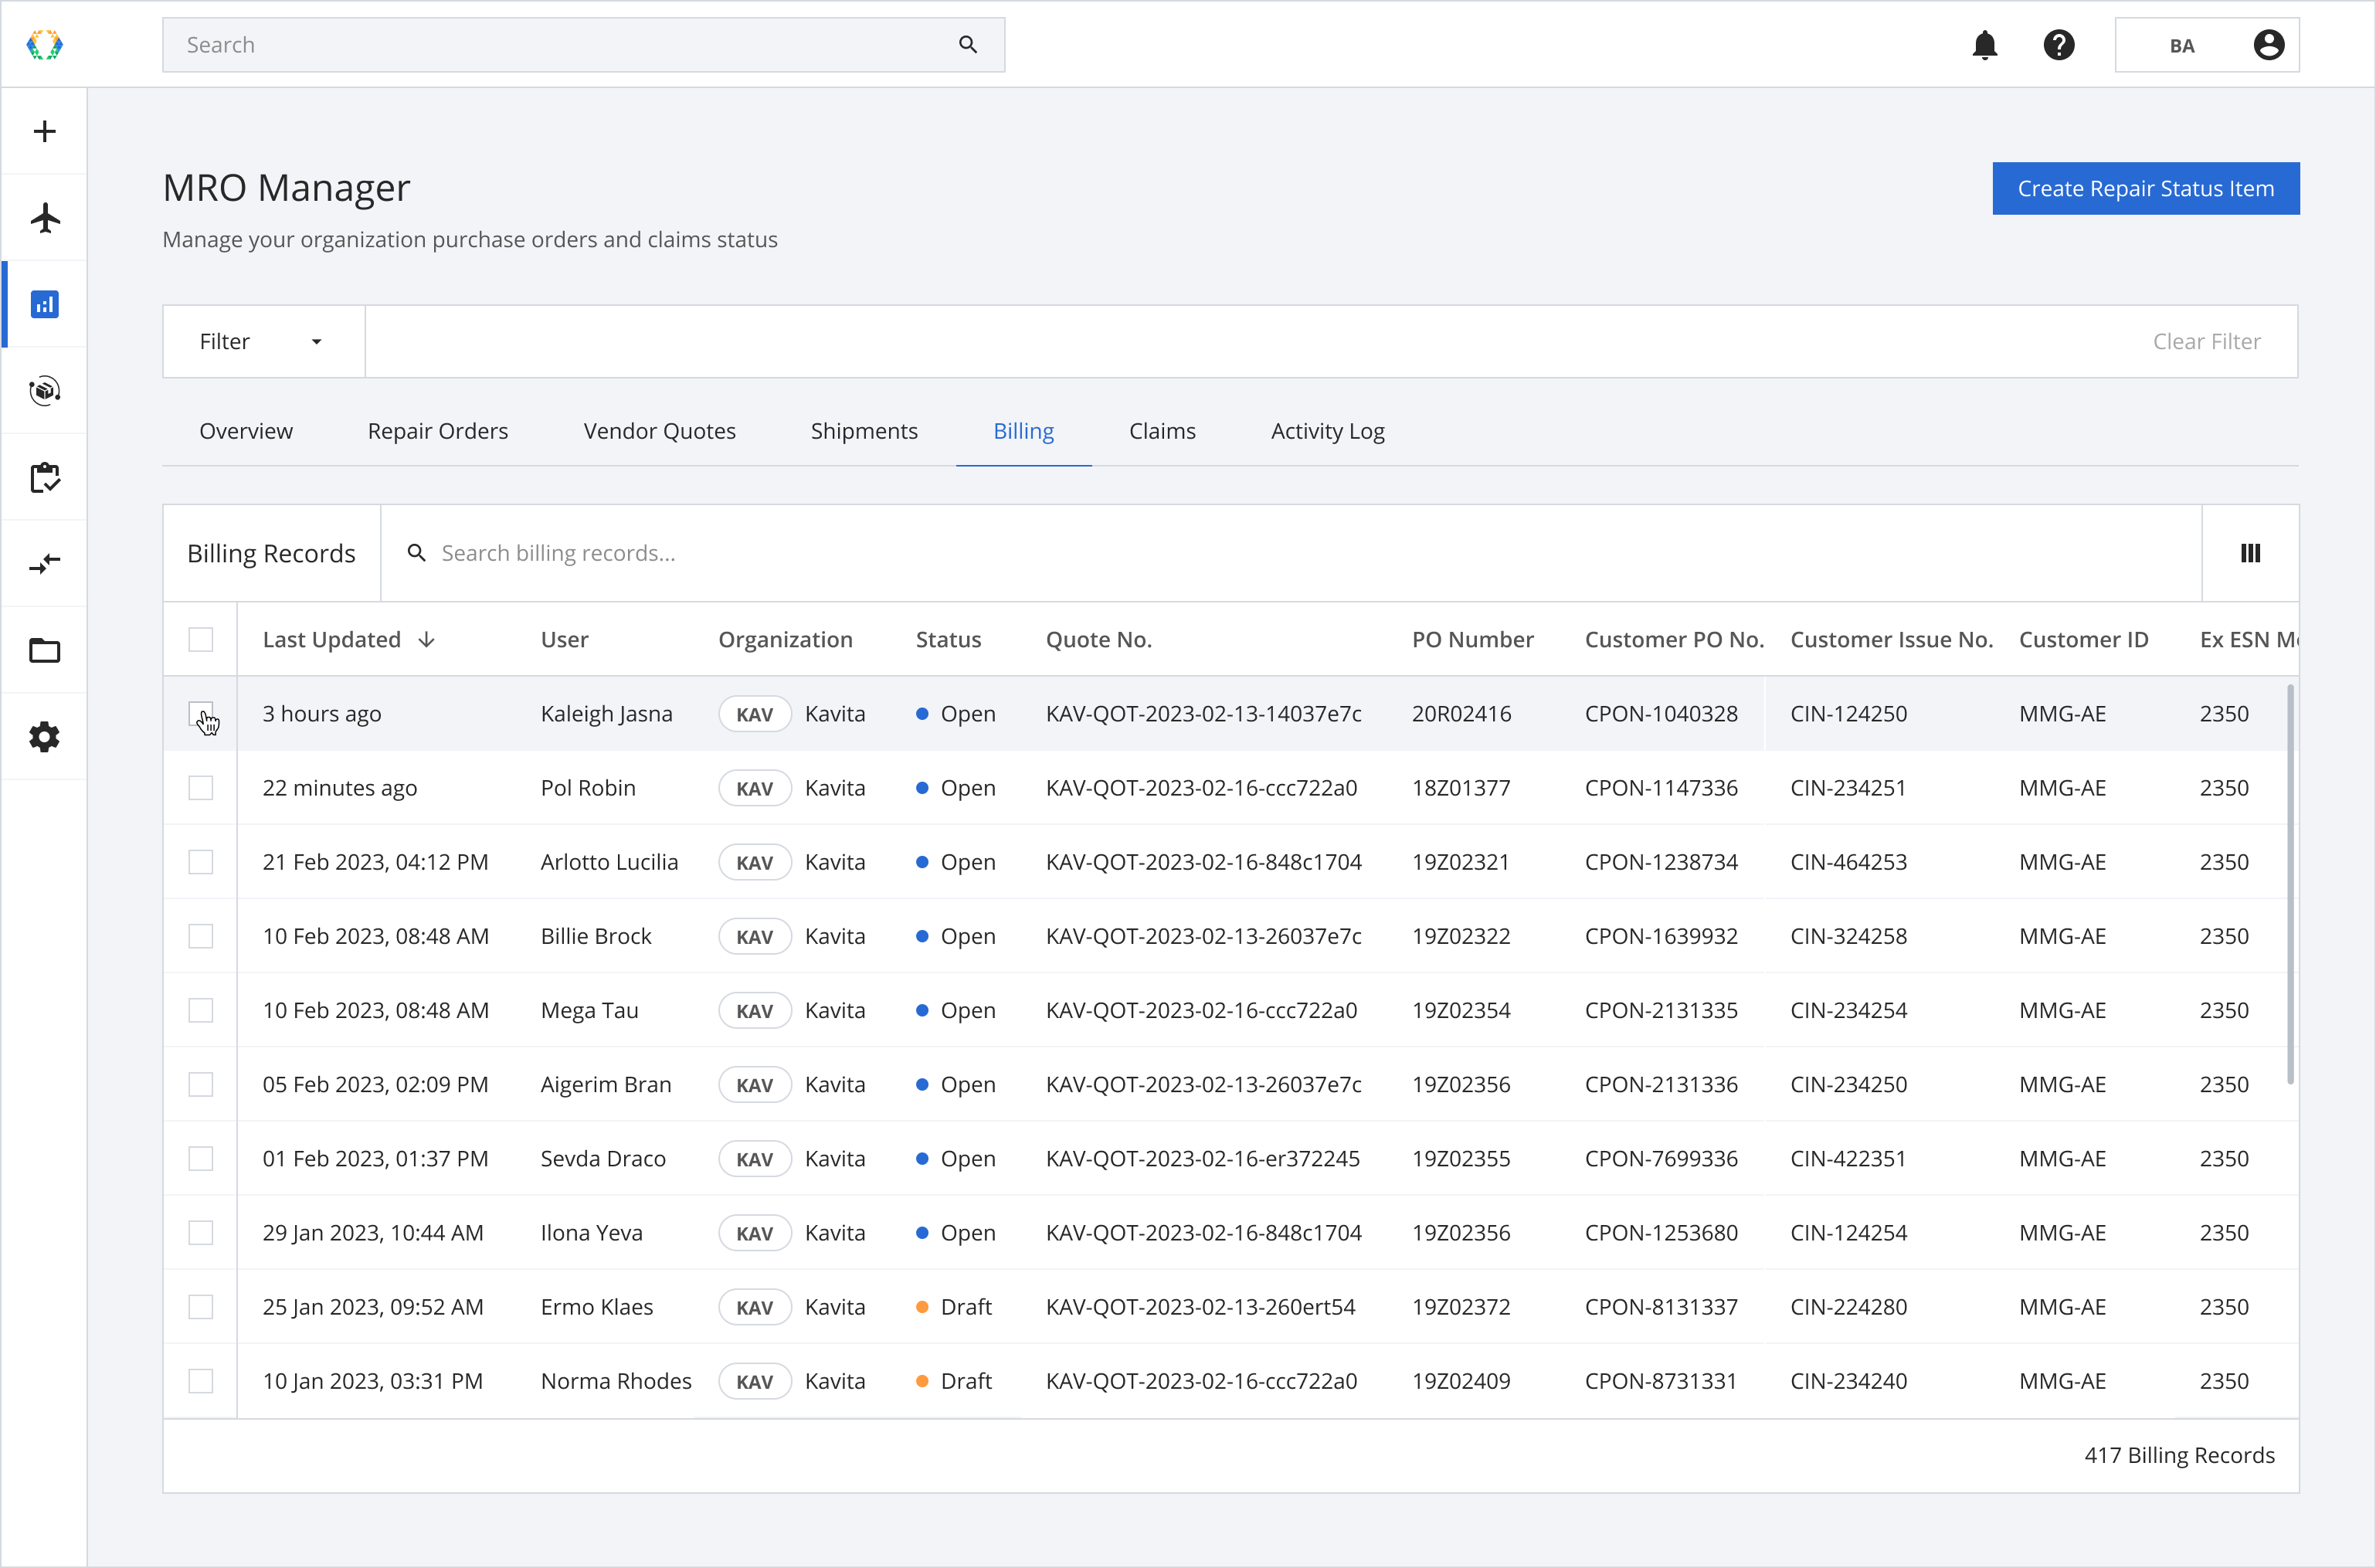
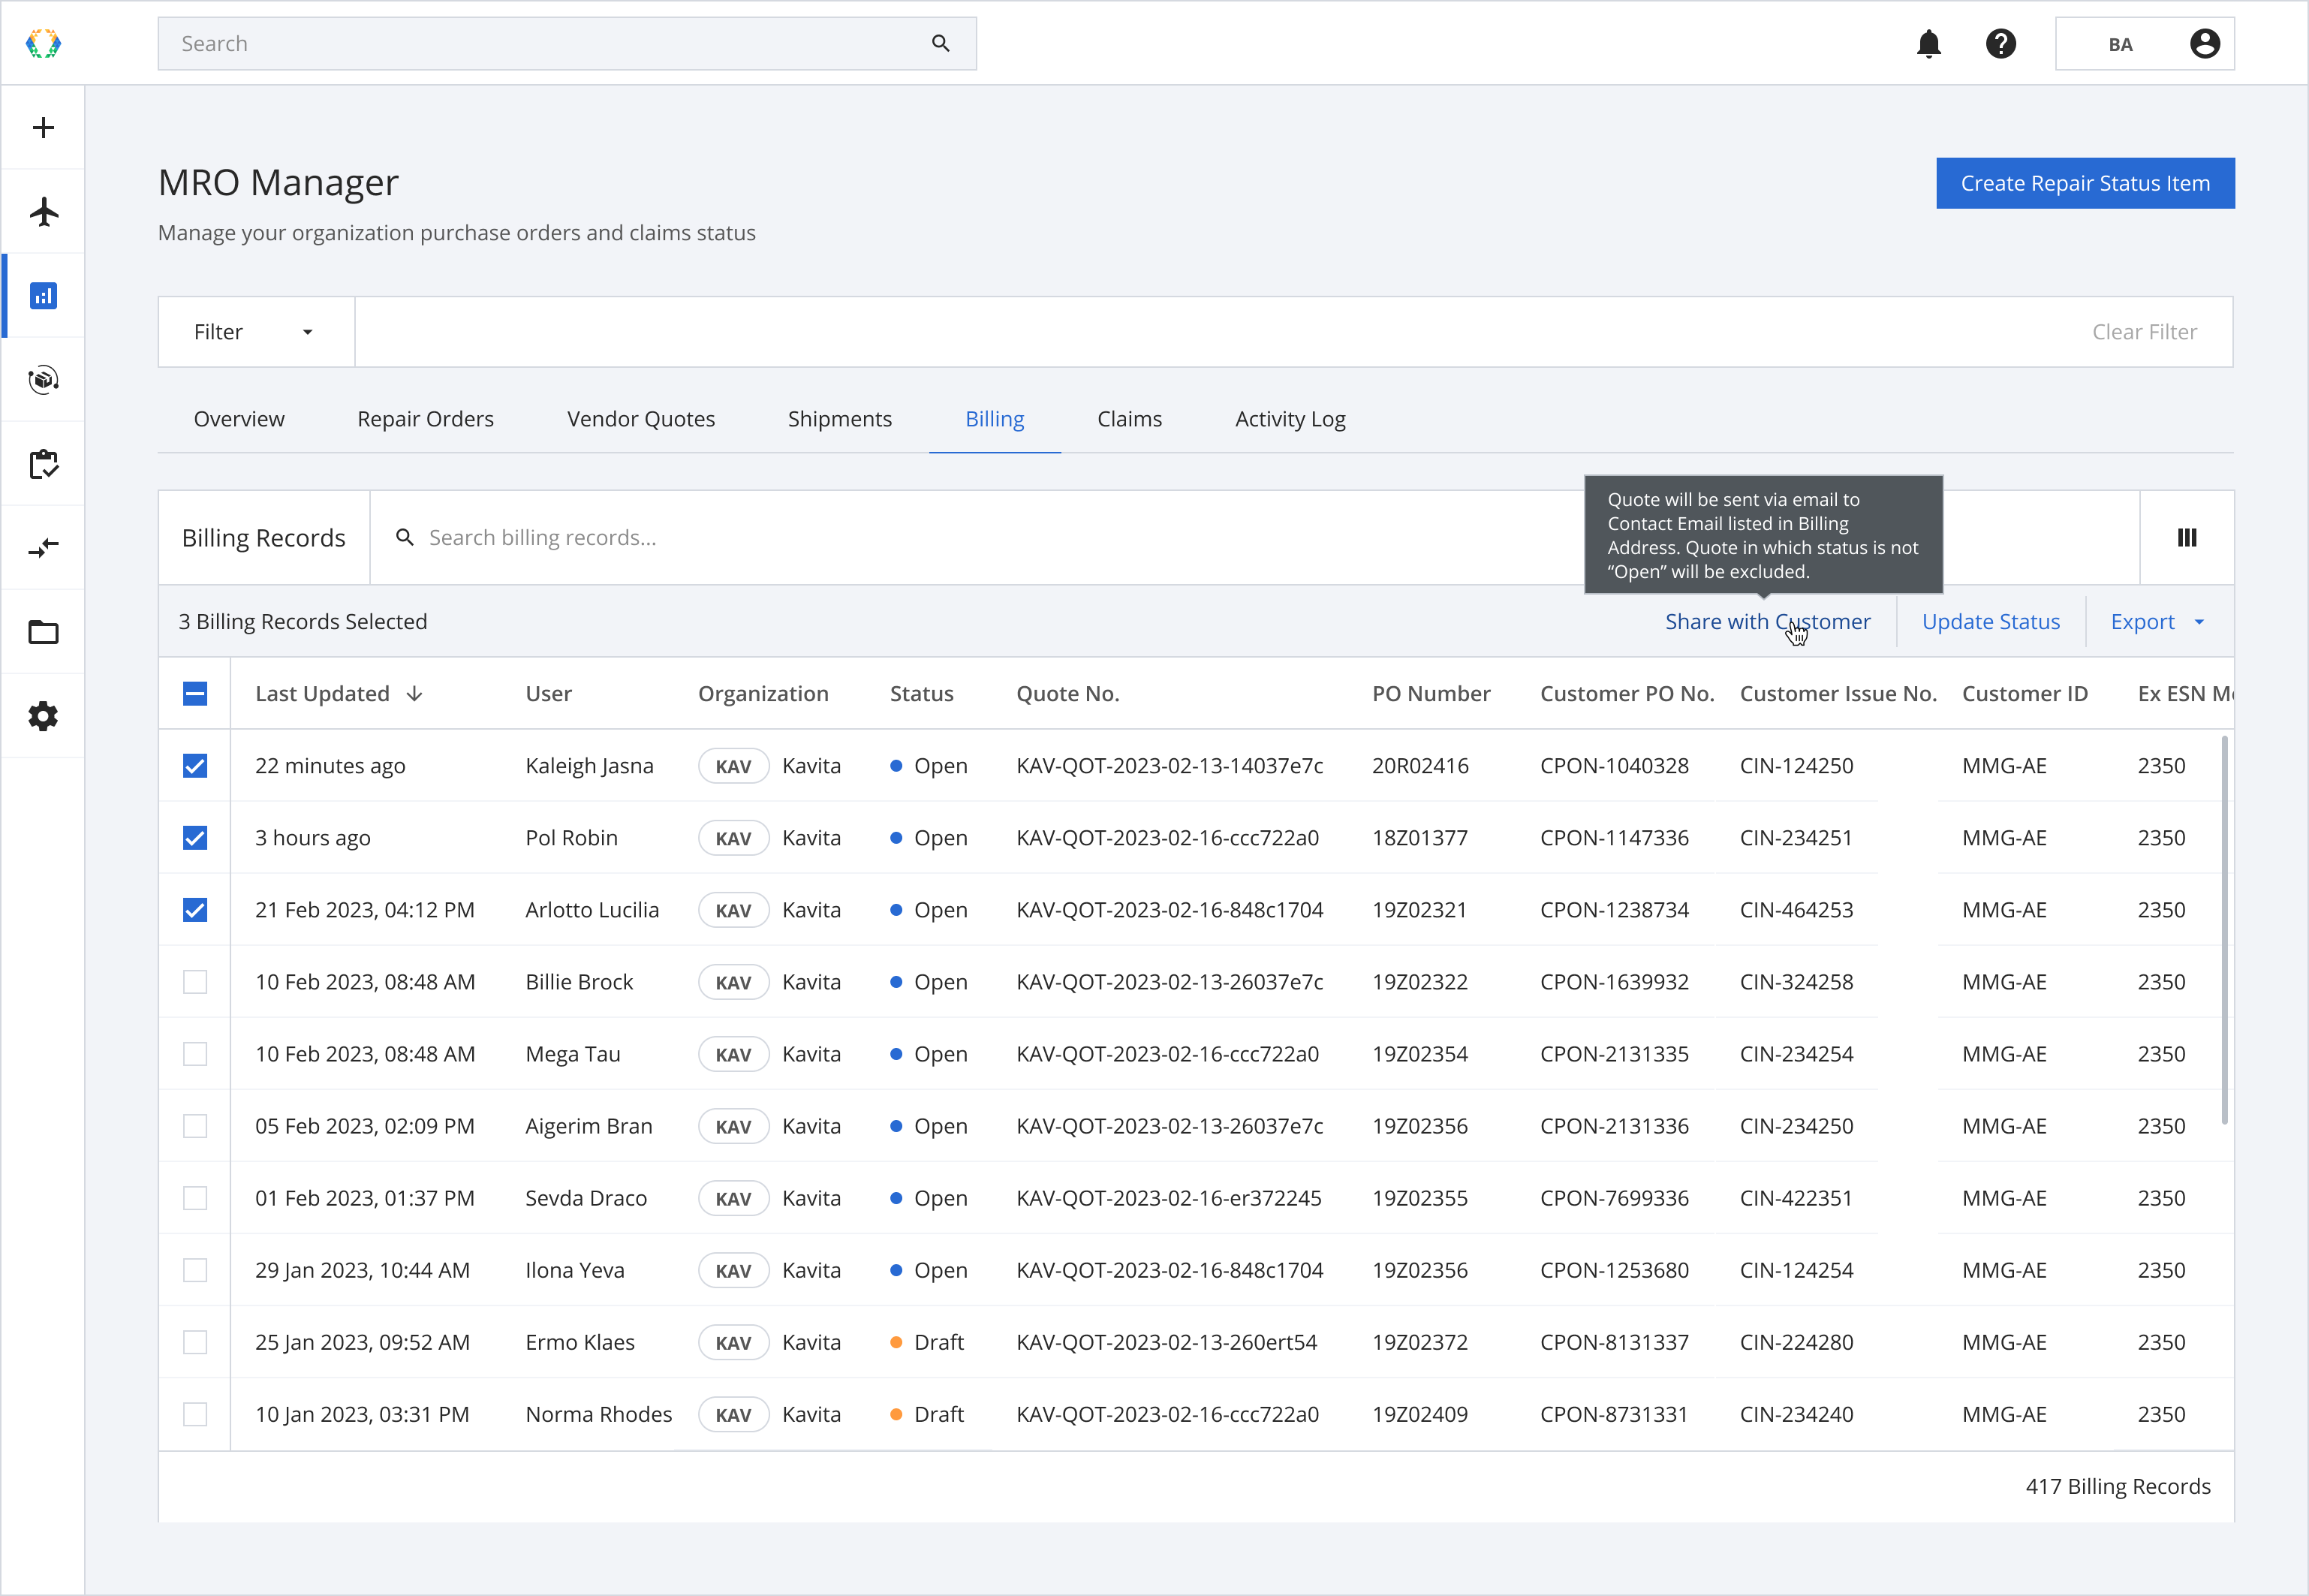
Step 2: Click 'Share with Customer'.
Quote will be sent via email to Contact Email listed in Billing Address. Quote in which status is not “Open” will be excluded.
Step 3: A green message will appear at the bottom right corner of the Billing Records List when Quote is shared with the customer successfully.
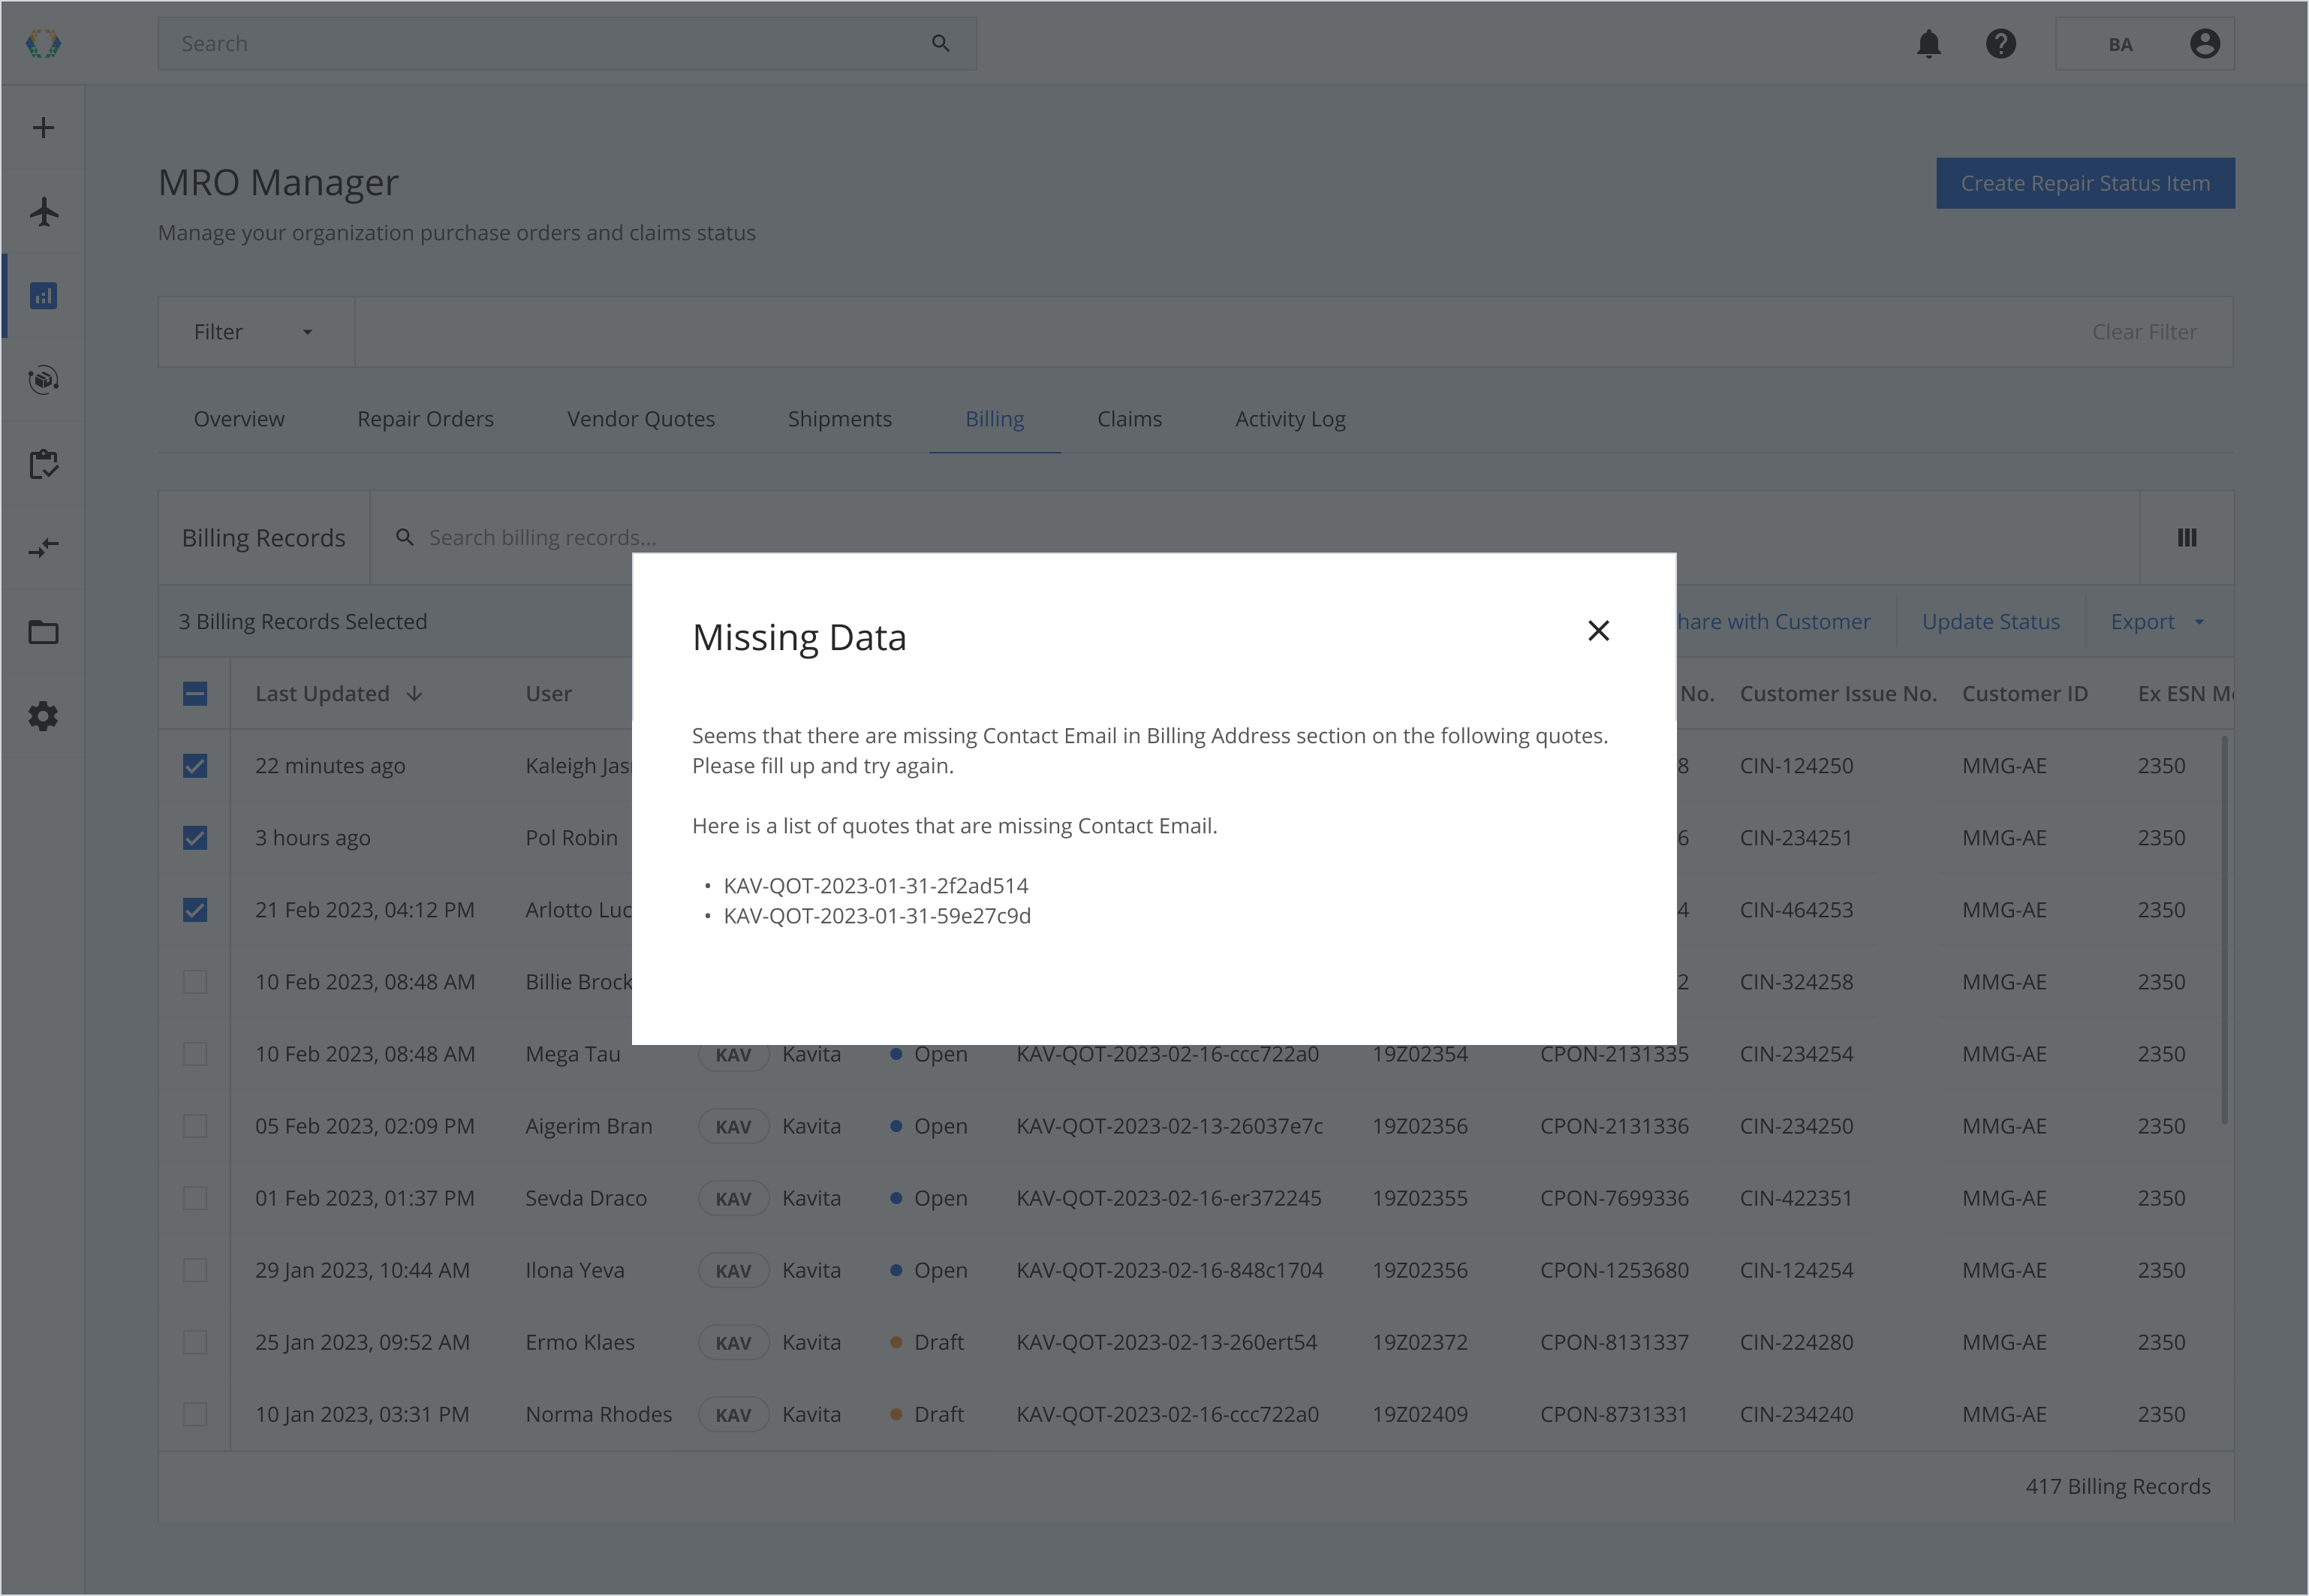
If there are missing details in your Quote, a pop-up will indicate which Quotes are missing contact details.
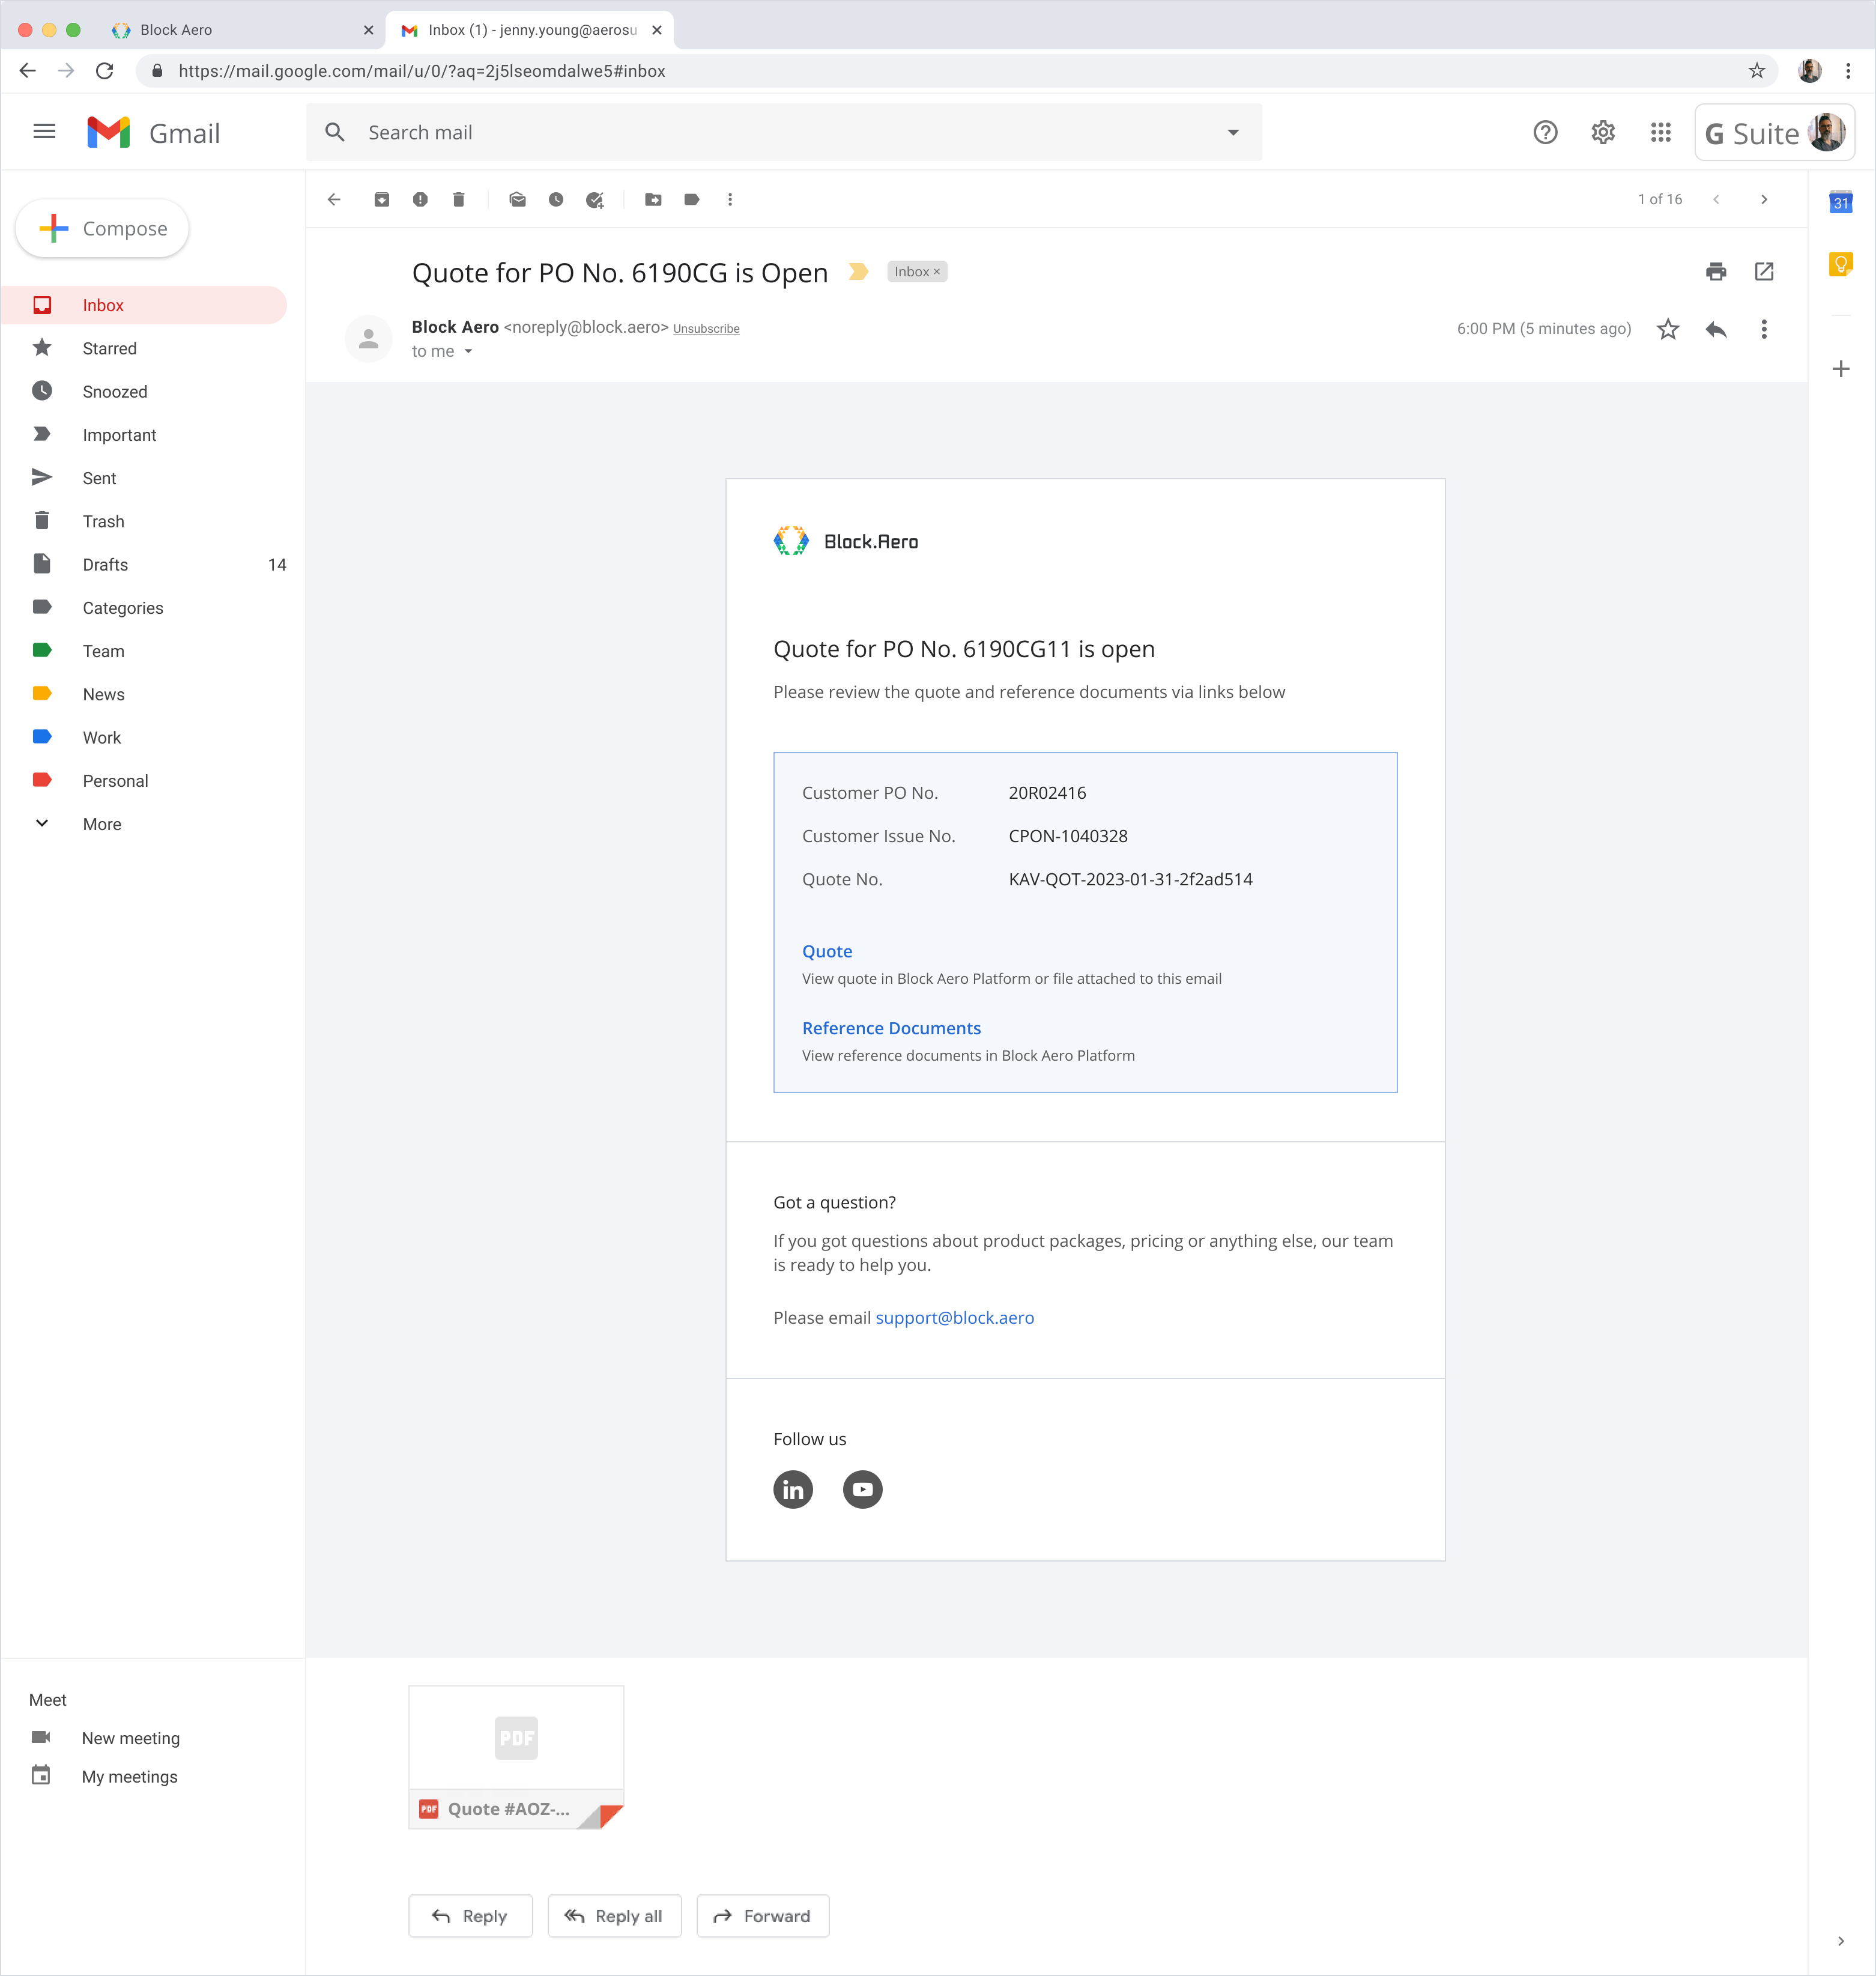
Step 4: You and your customer will receive the Quote document in your email that is generated through the platform.
Updated 12 months ago