Certificates Management
Getting Started
To manage your organization’s certificates, click on the Settings module and the 'Certificates' section.
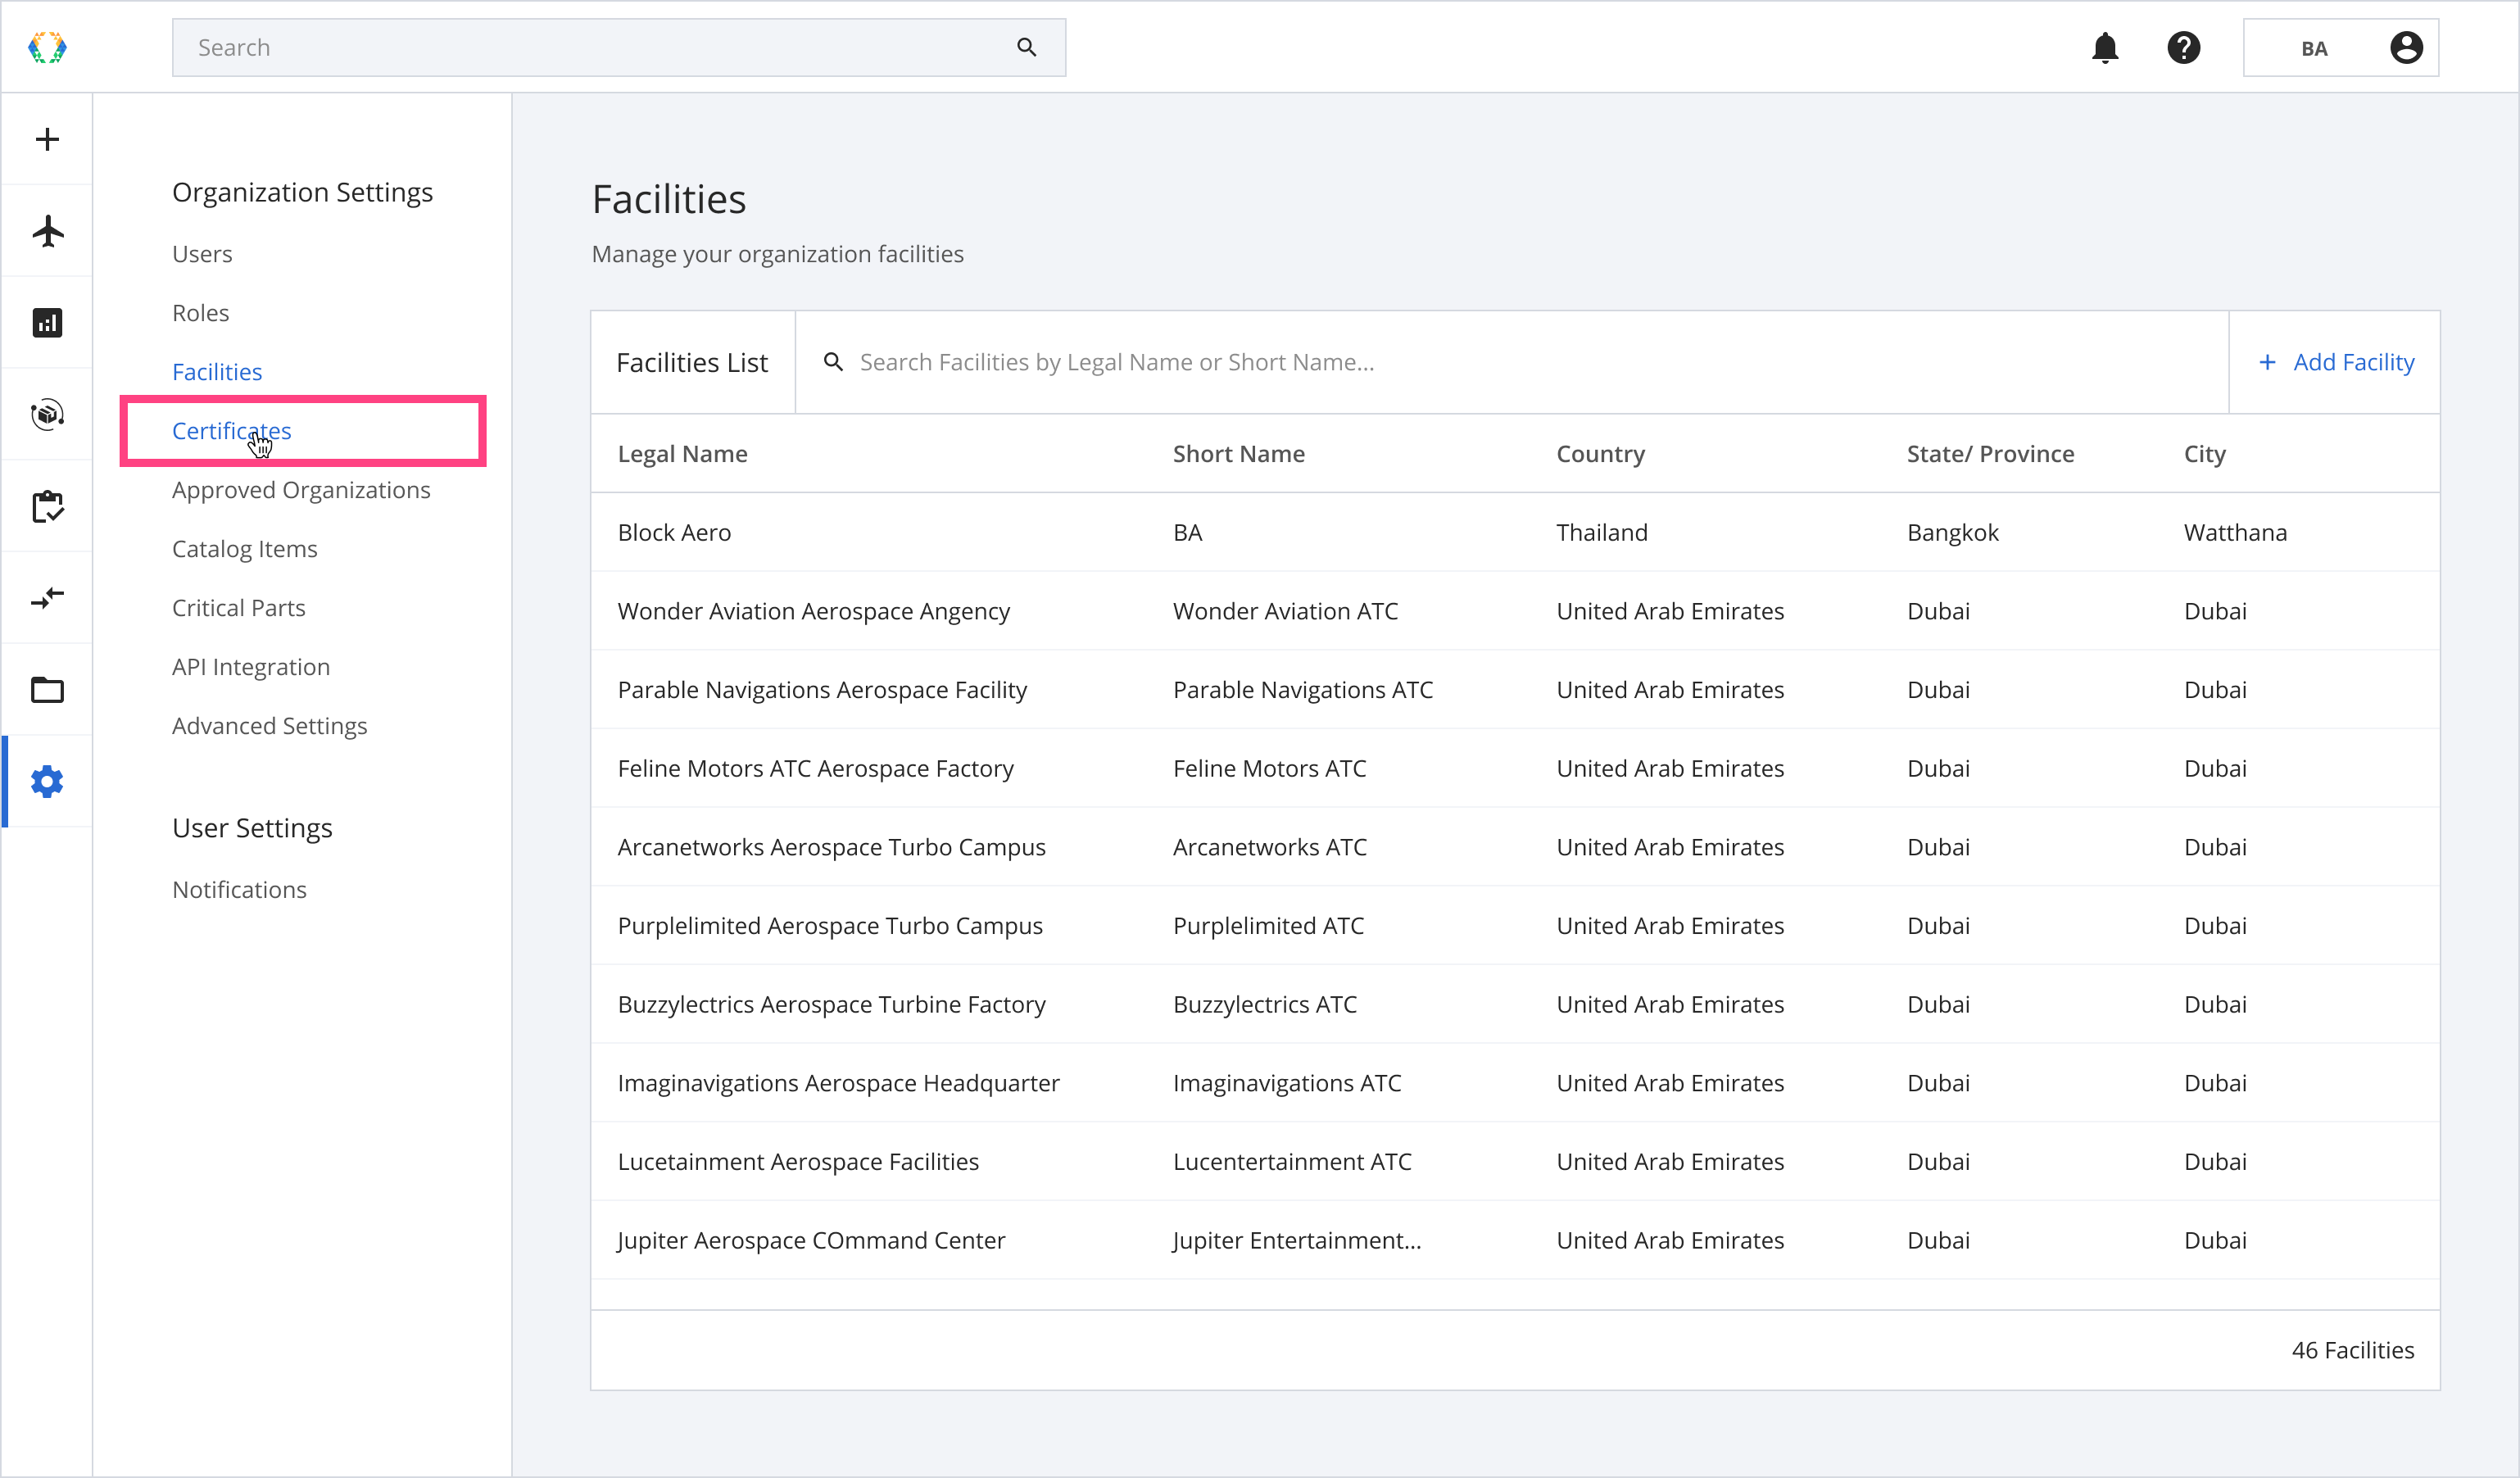
Certificates Layout
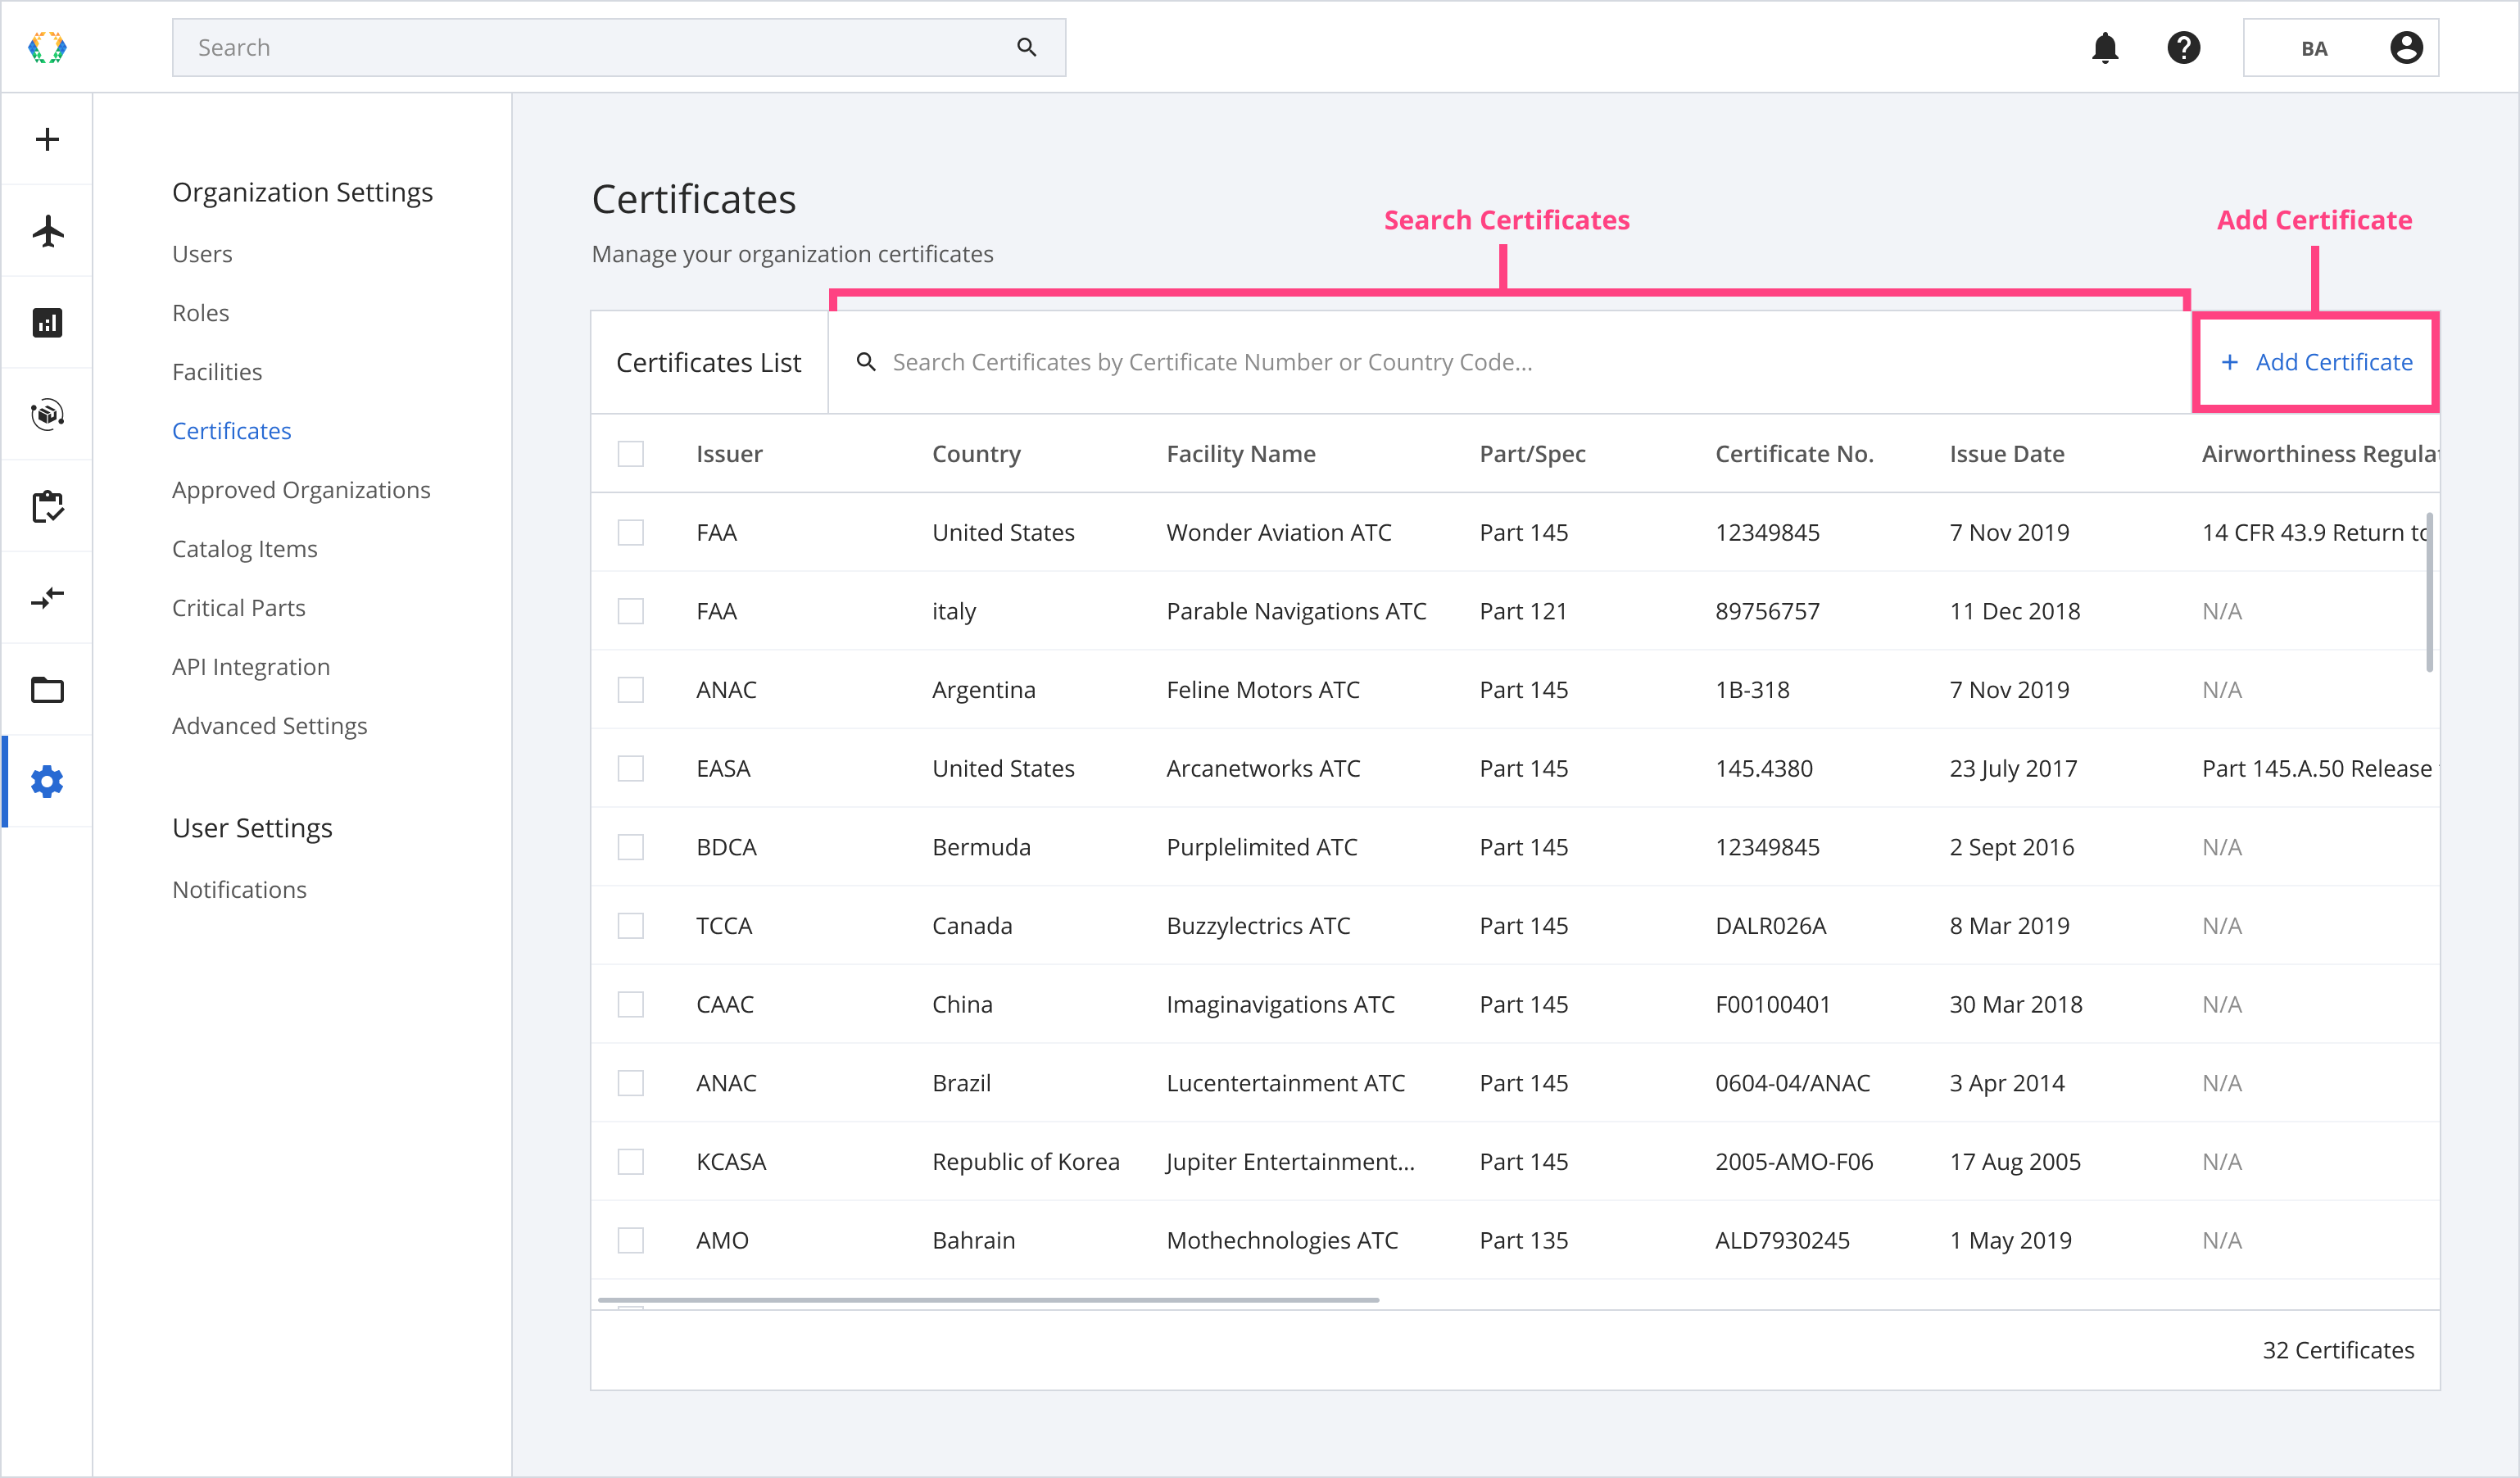
Searching on the Certificates List
The search bar on the Certificates List allows you to search for your organization’s certificates.
| Searchable Parameters |
|---|
| Certificate No. |
| Country Code |
Add Certificates
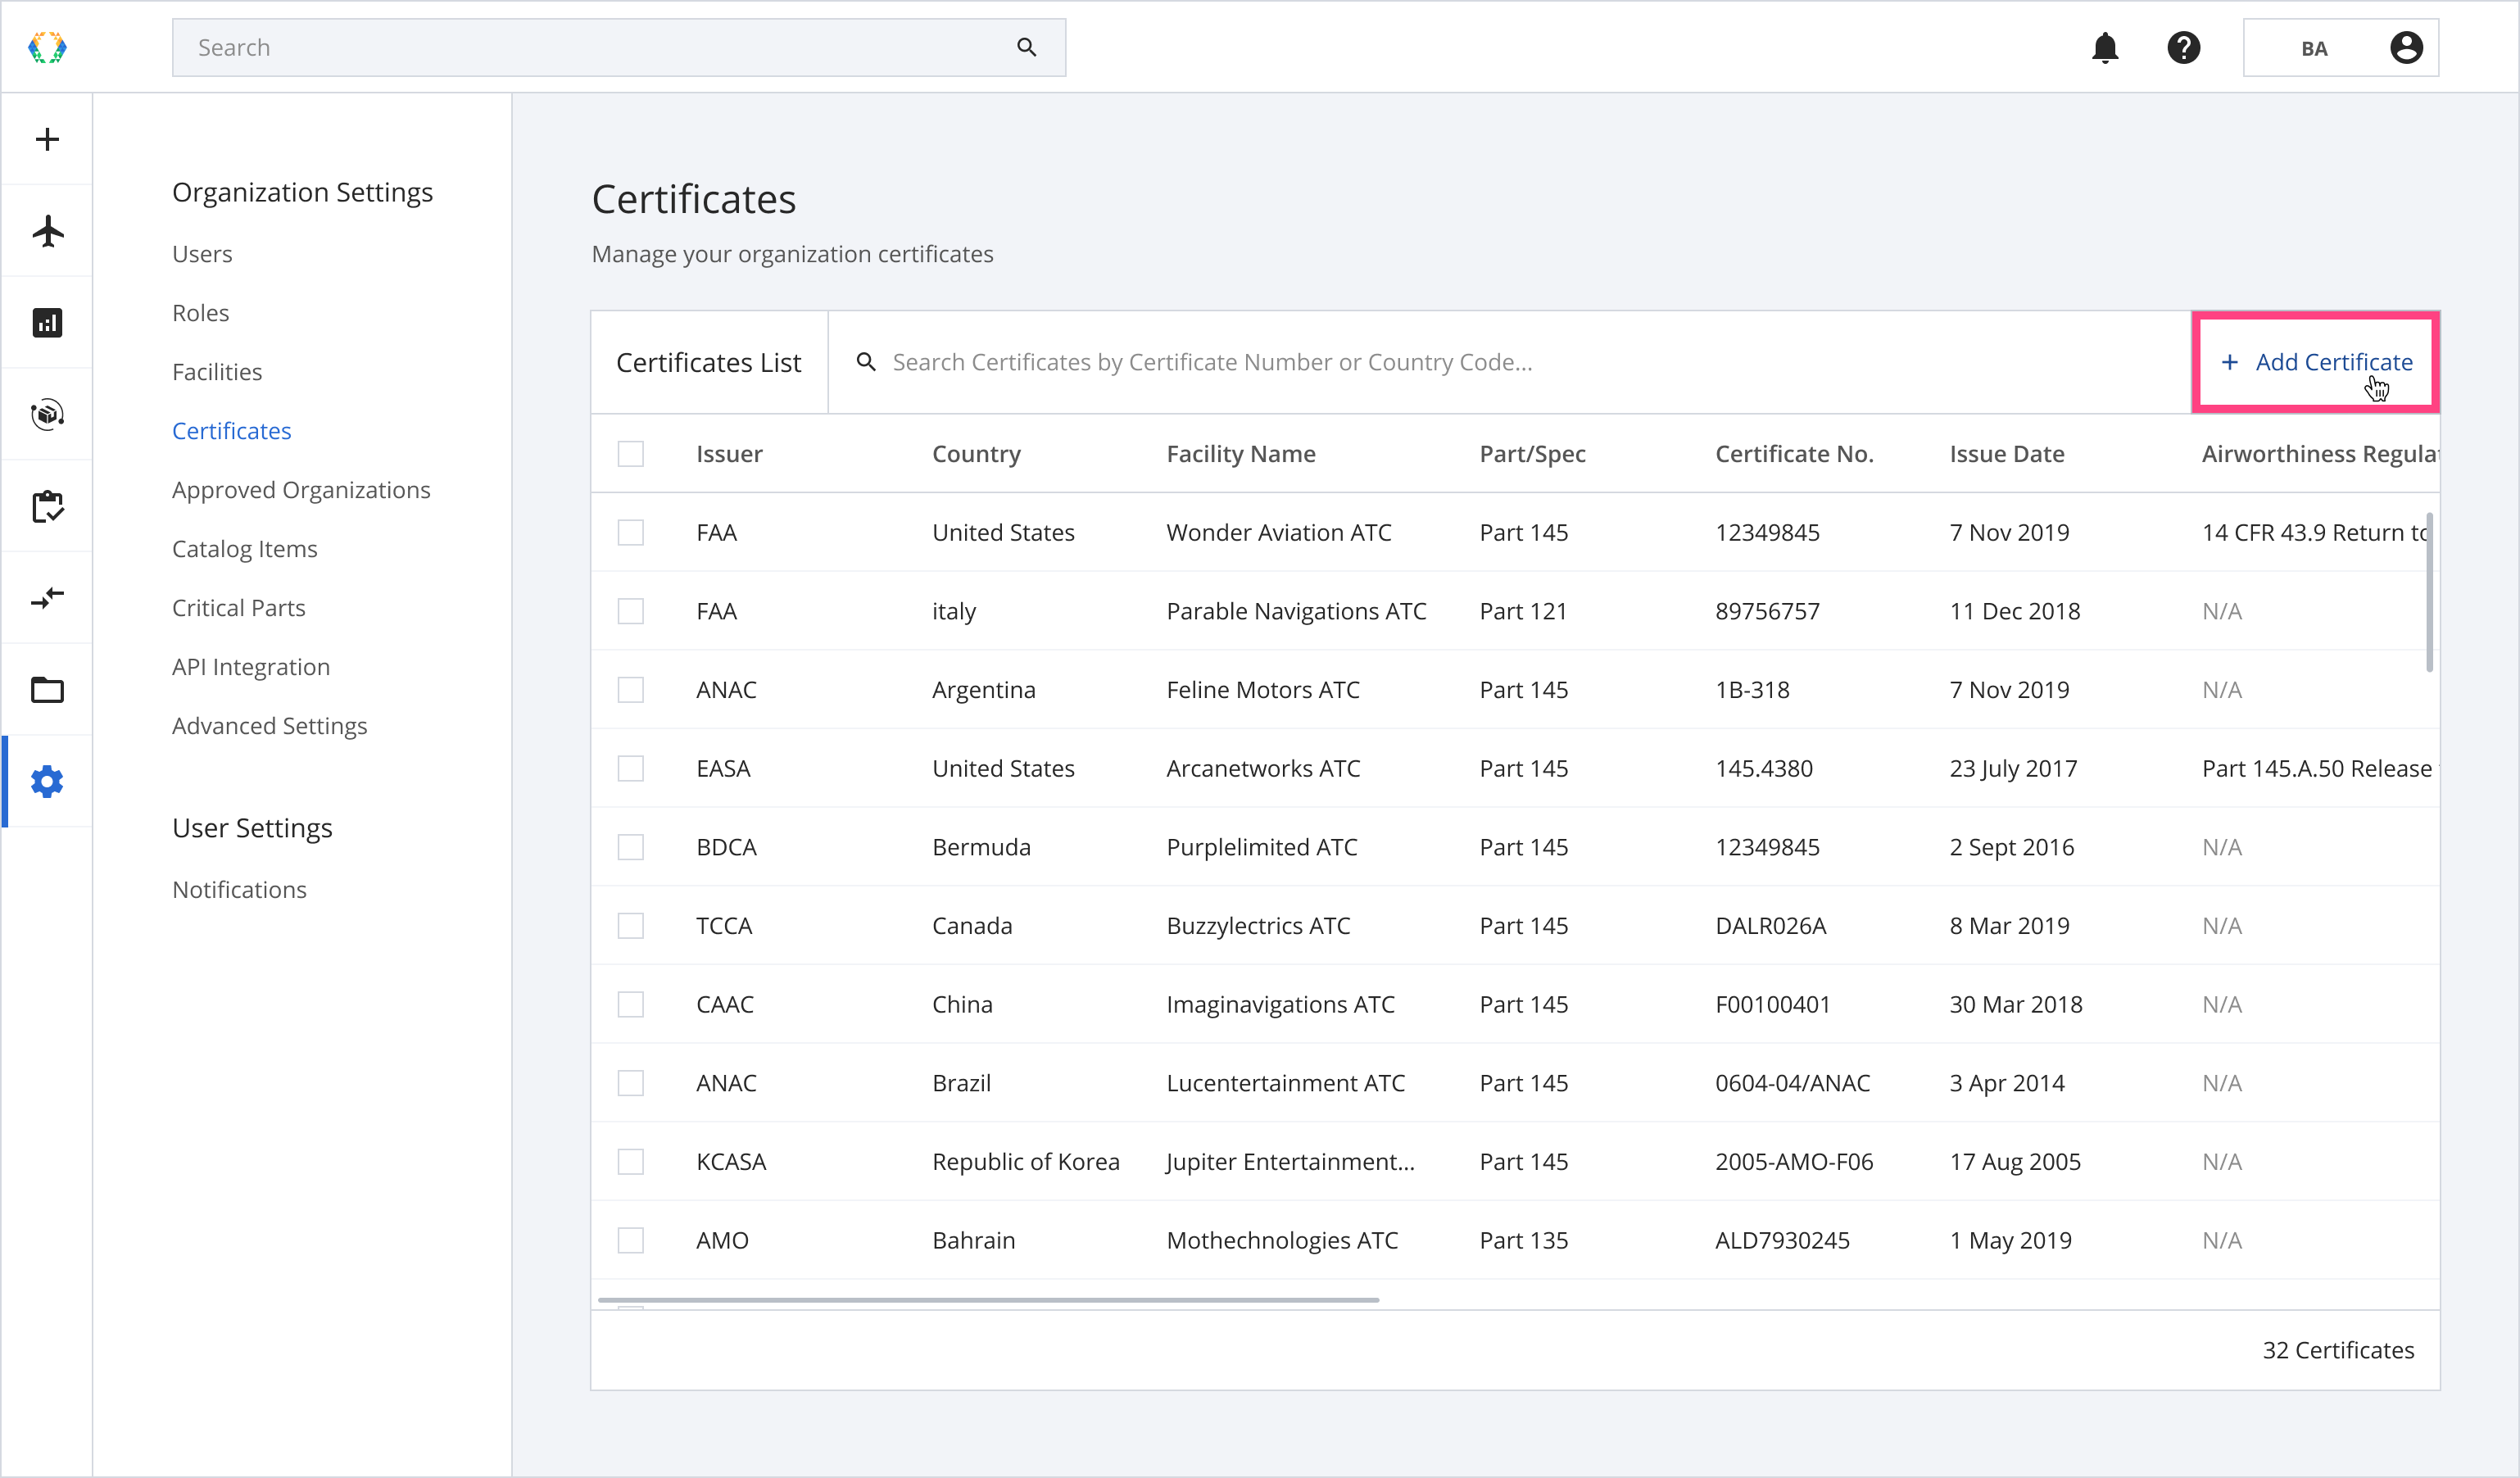
Step 1: From the certificates list, click 'Add Certificate'.
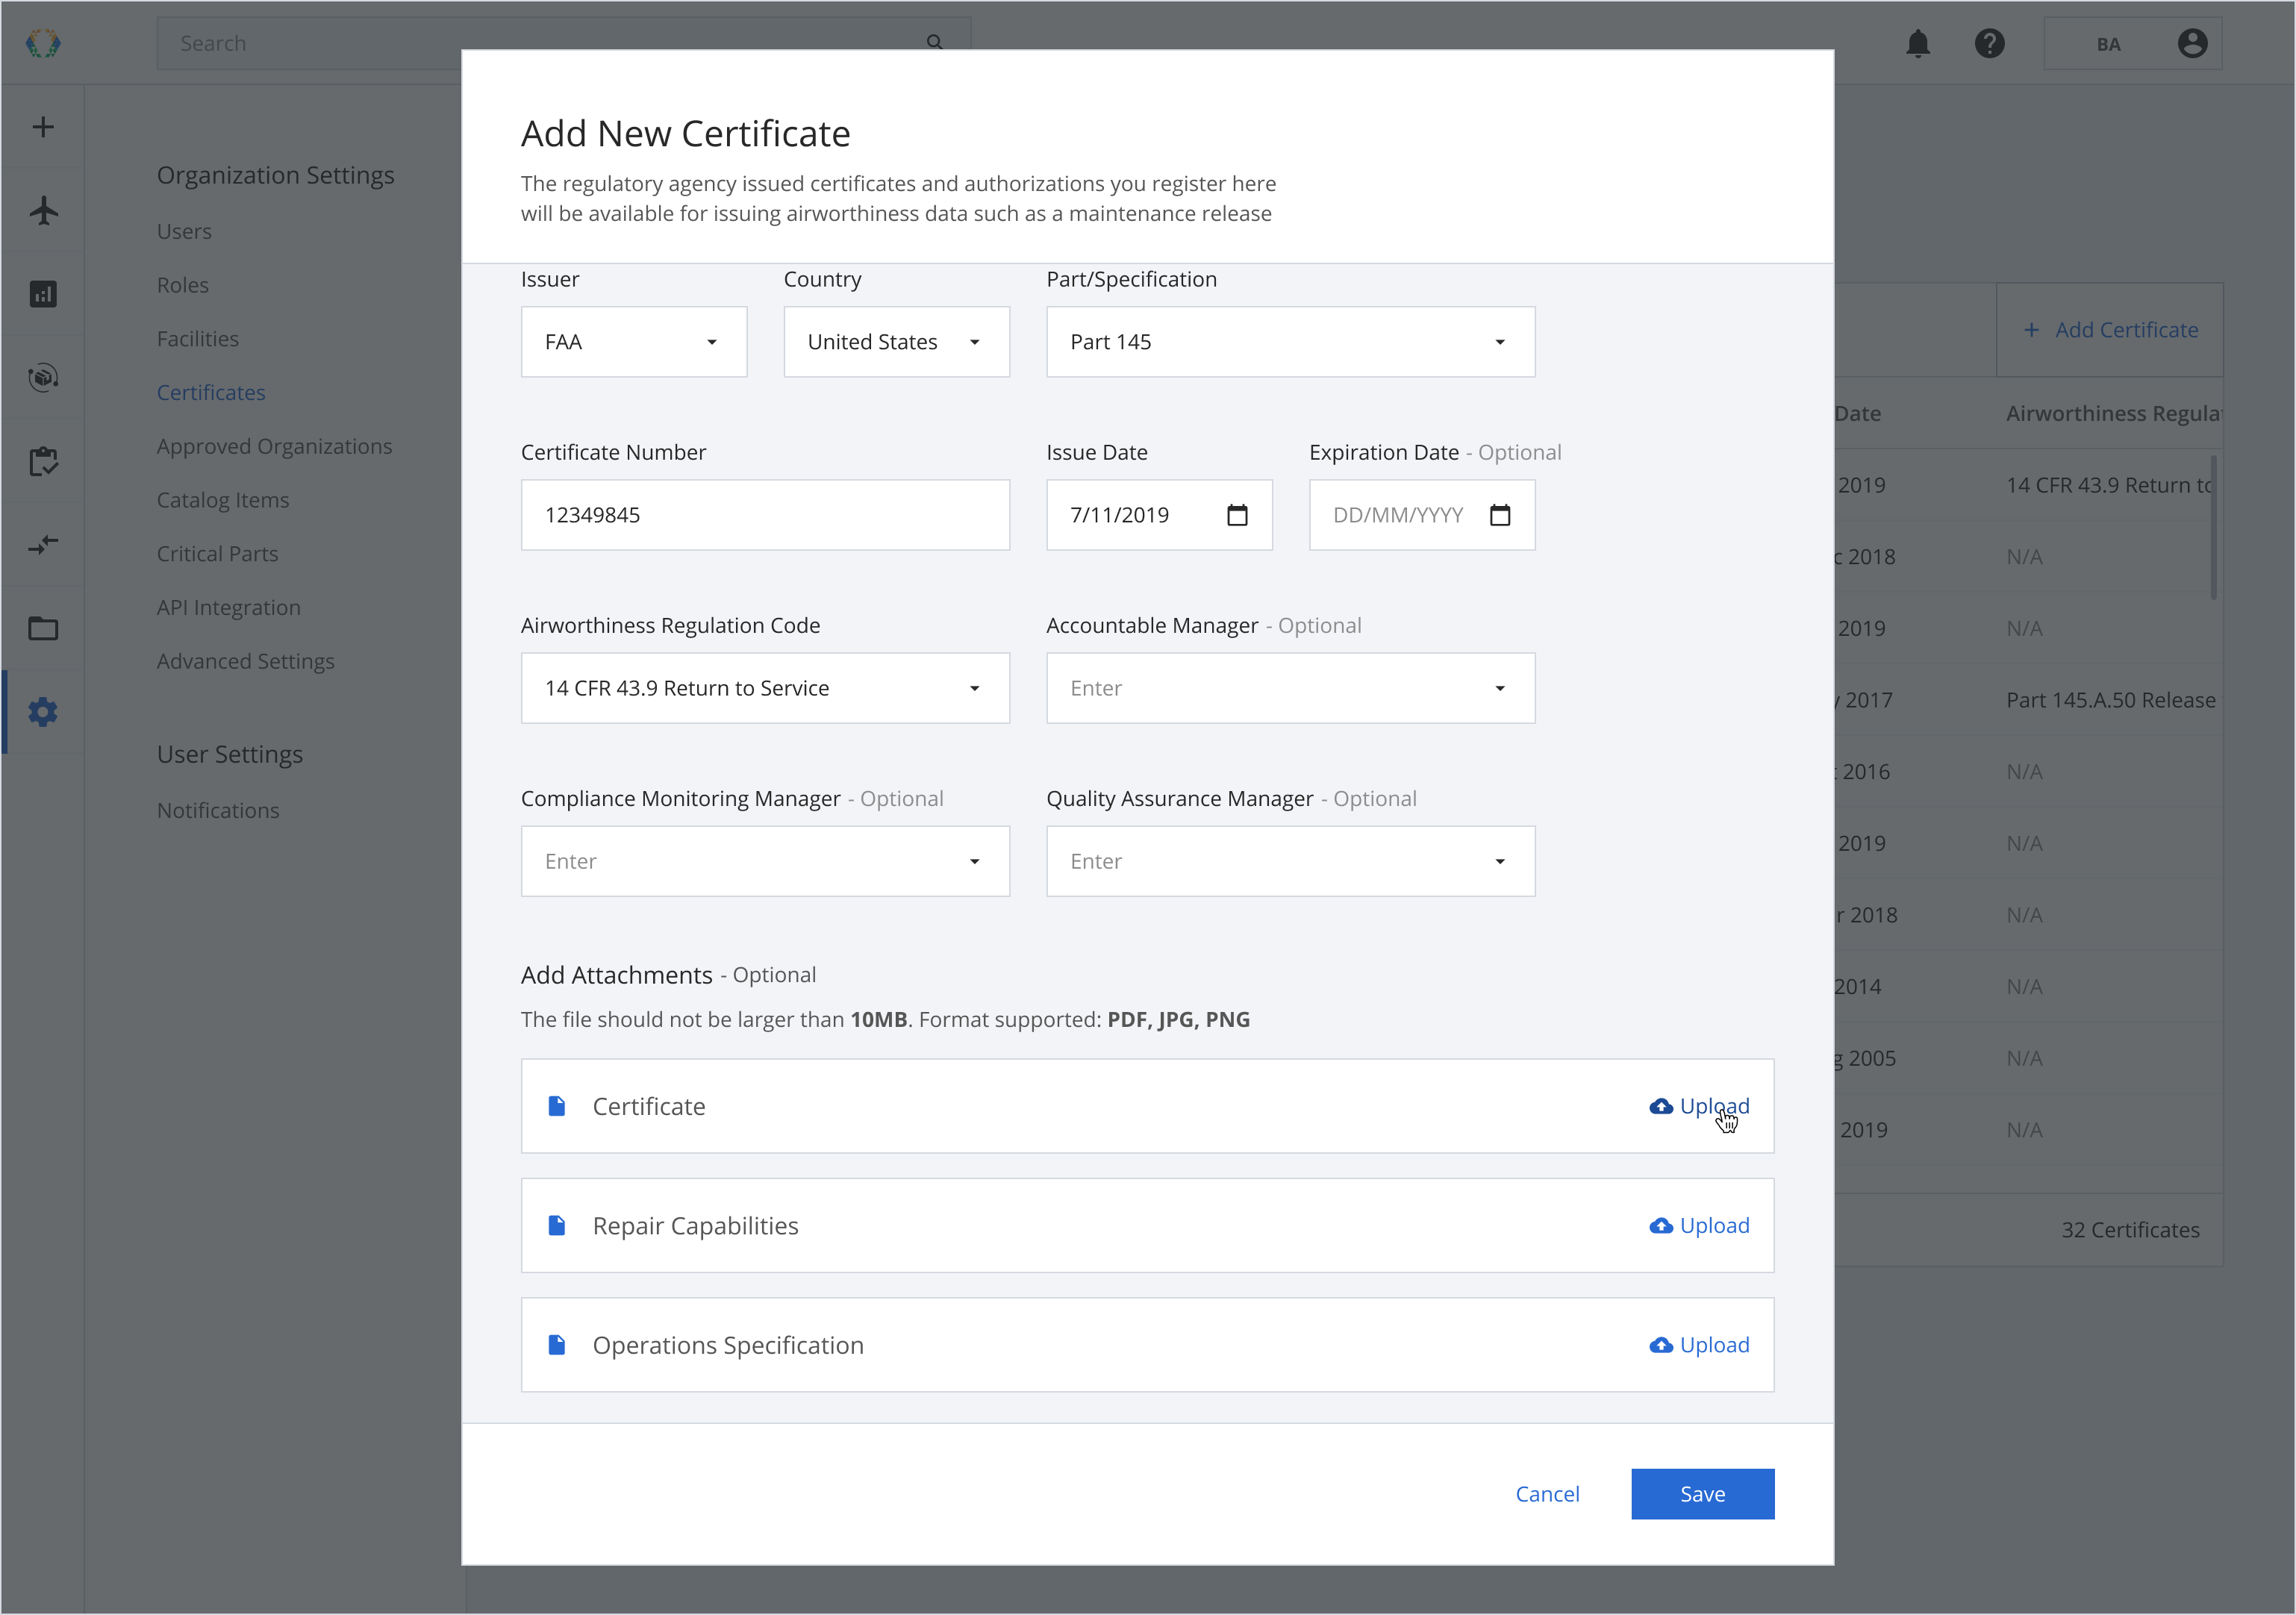
Step 2: Provide the details for the new certificate.
To add a new certificate, your organization will need at least 1 existing facility on the platform to create the certificate.
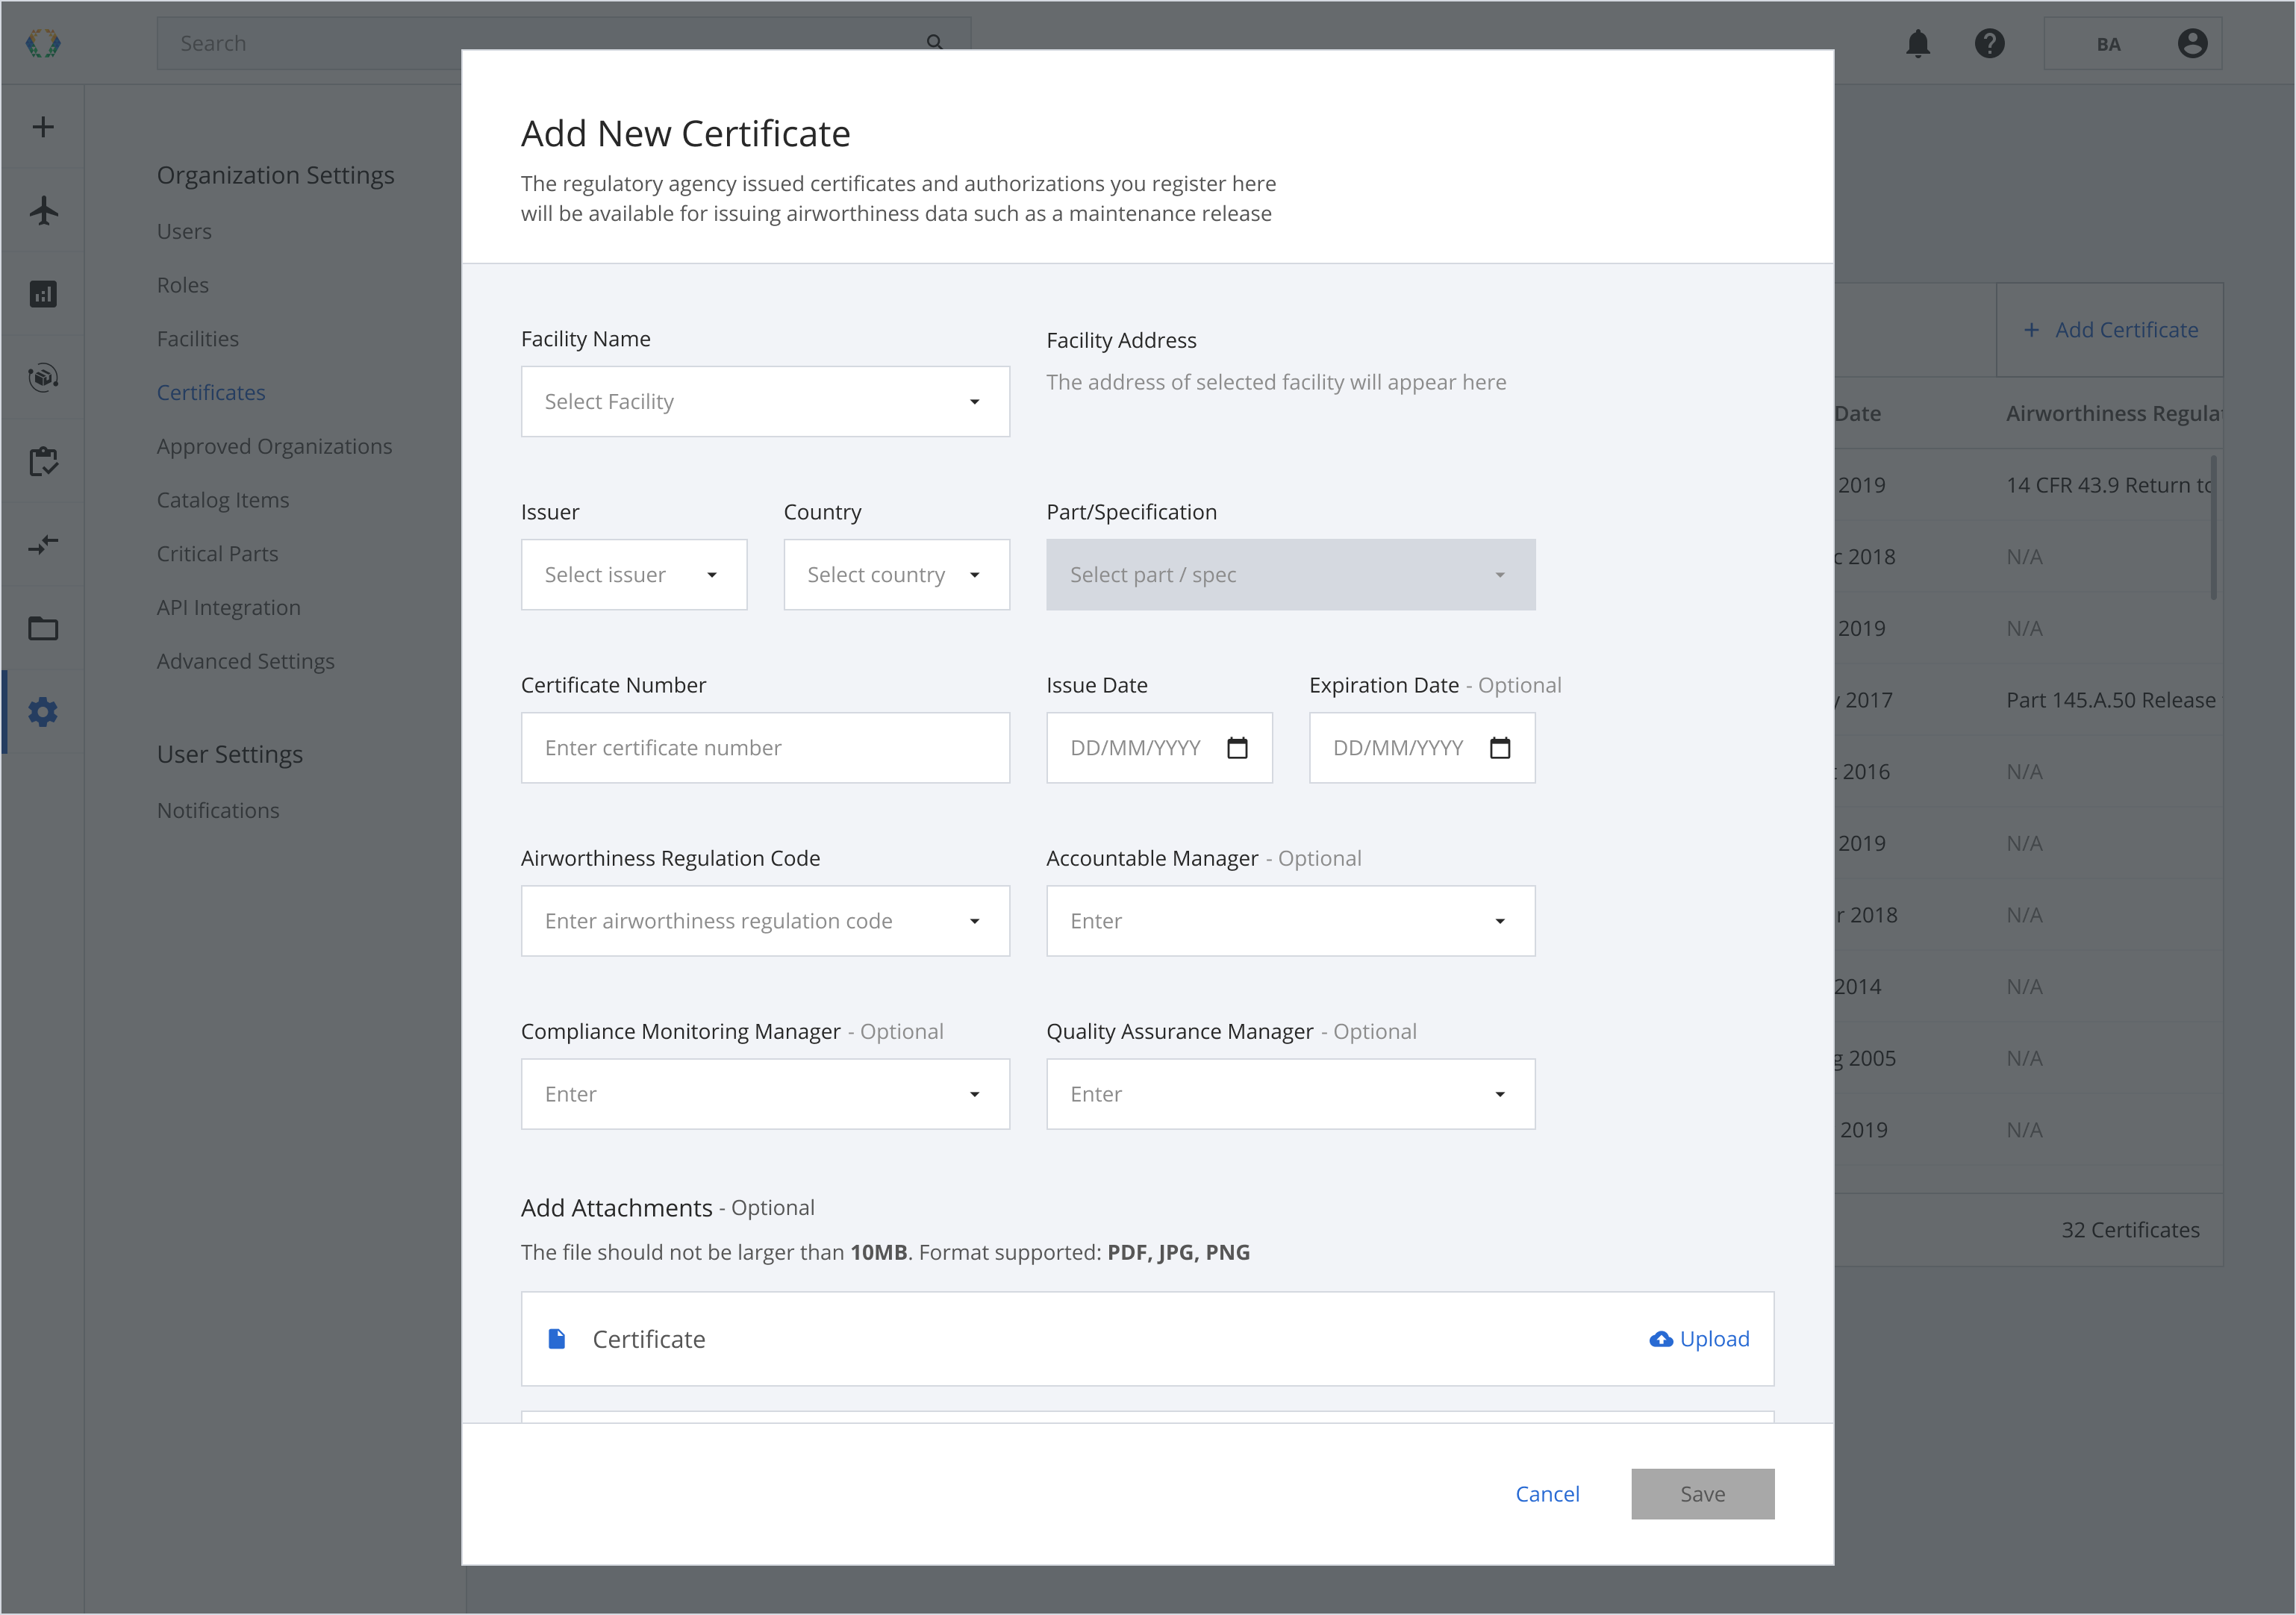
| Required fields |
|---|
| Facility Name |
| Issuer |
| Country |
| Part/Specification |
| Certificate Number |
| Issue Date |
| Airworthiness Regulation Code |
Step 4: Click 'Upload' to add an attachment.
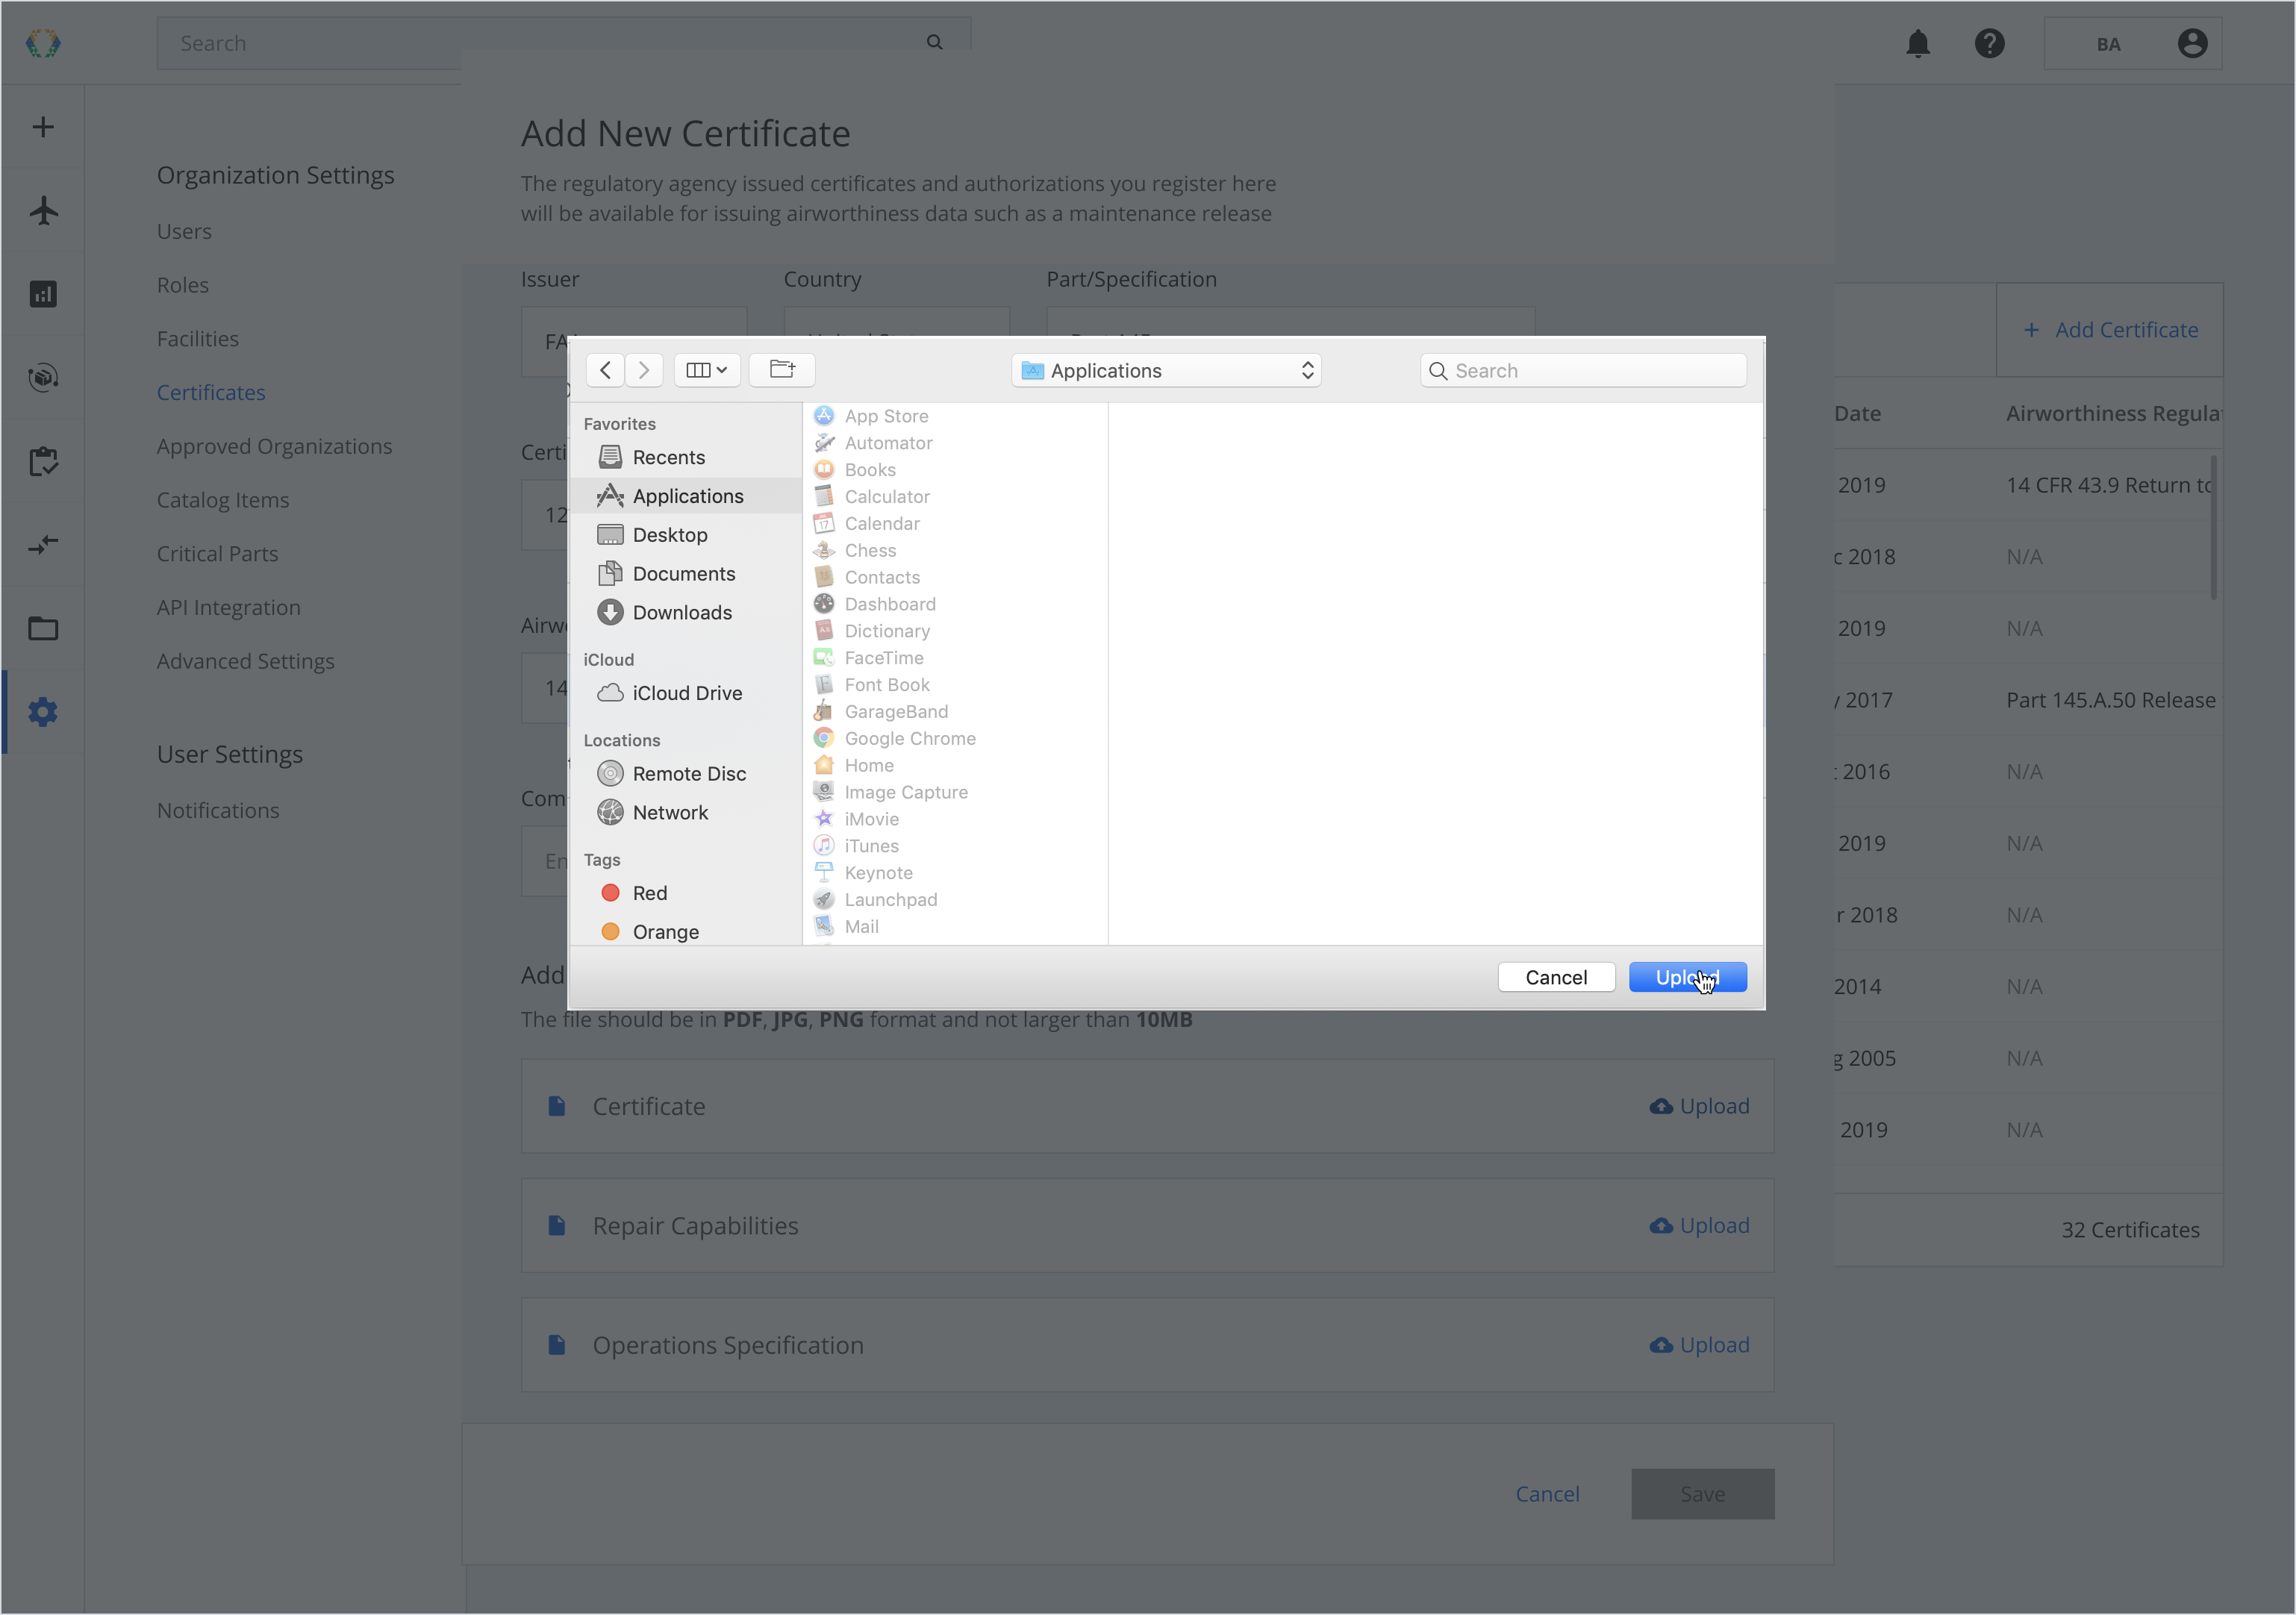
Step 5: Select the attachment from your local computer.
File Format and Size limitOnly PDF, PNG and JPG files format that are no larger than 10 MB is allowed to be uploaded.
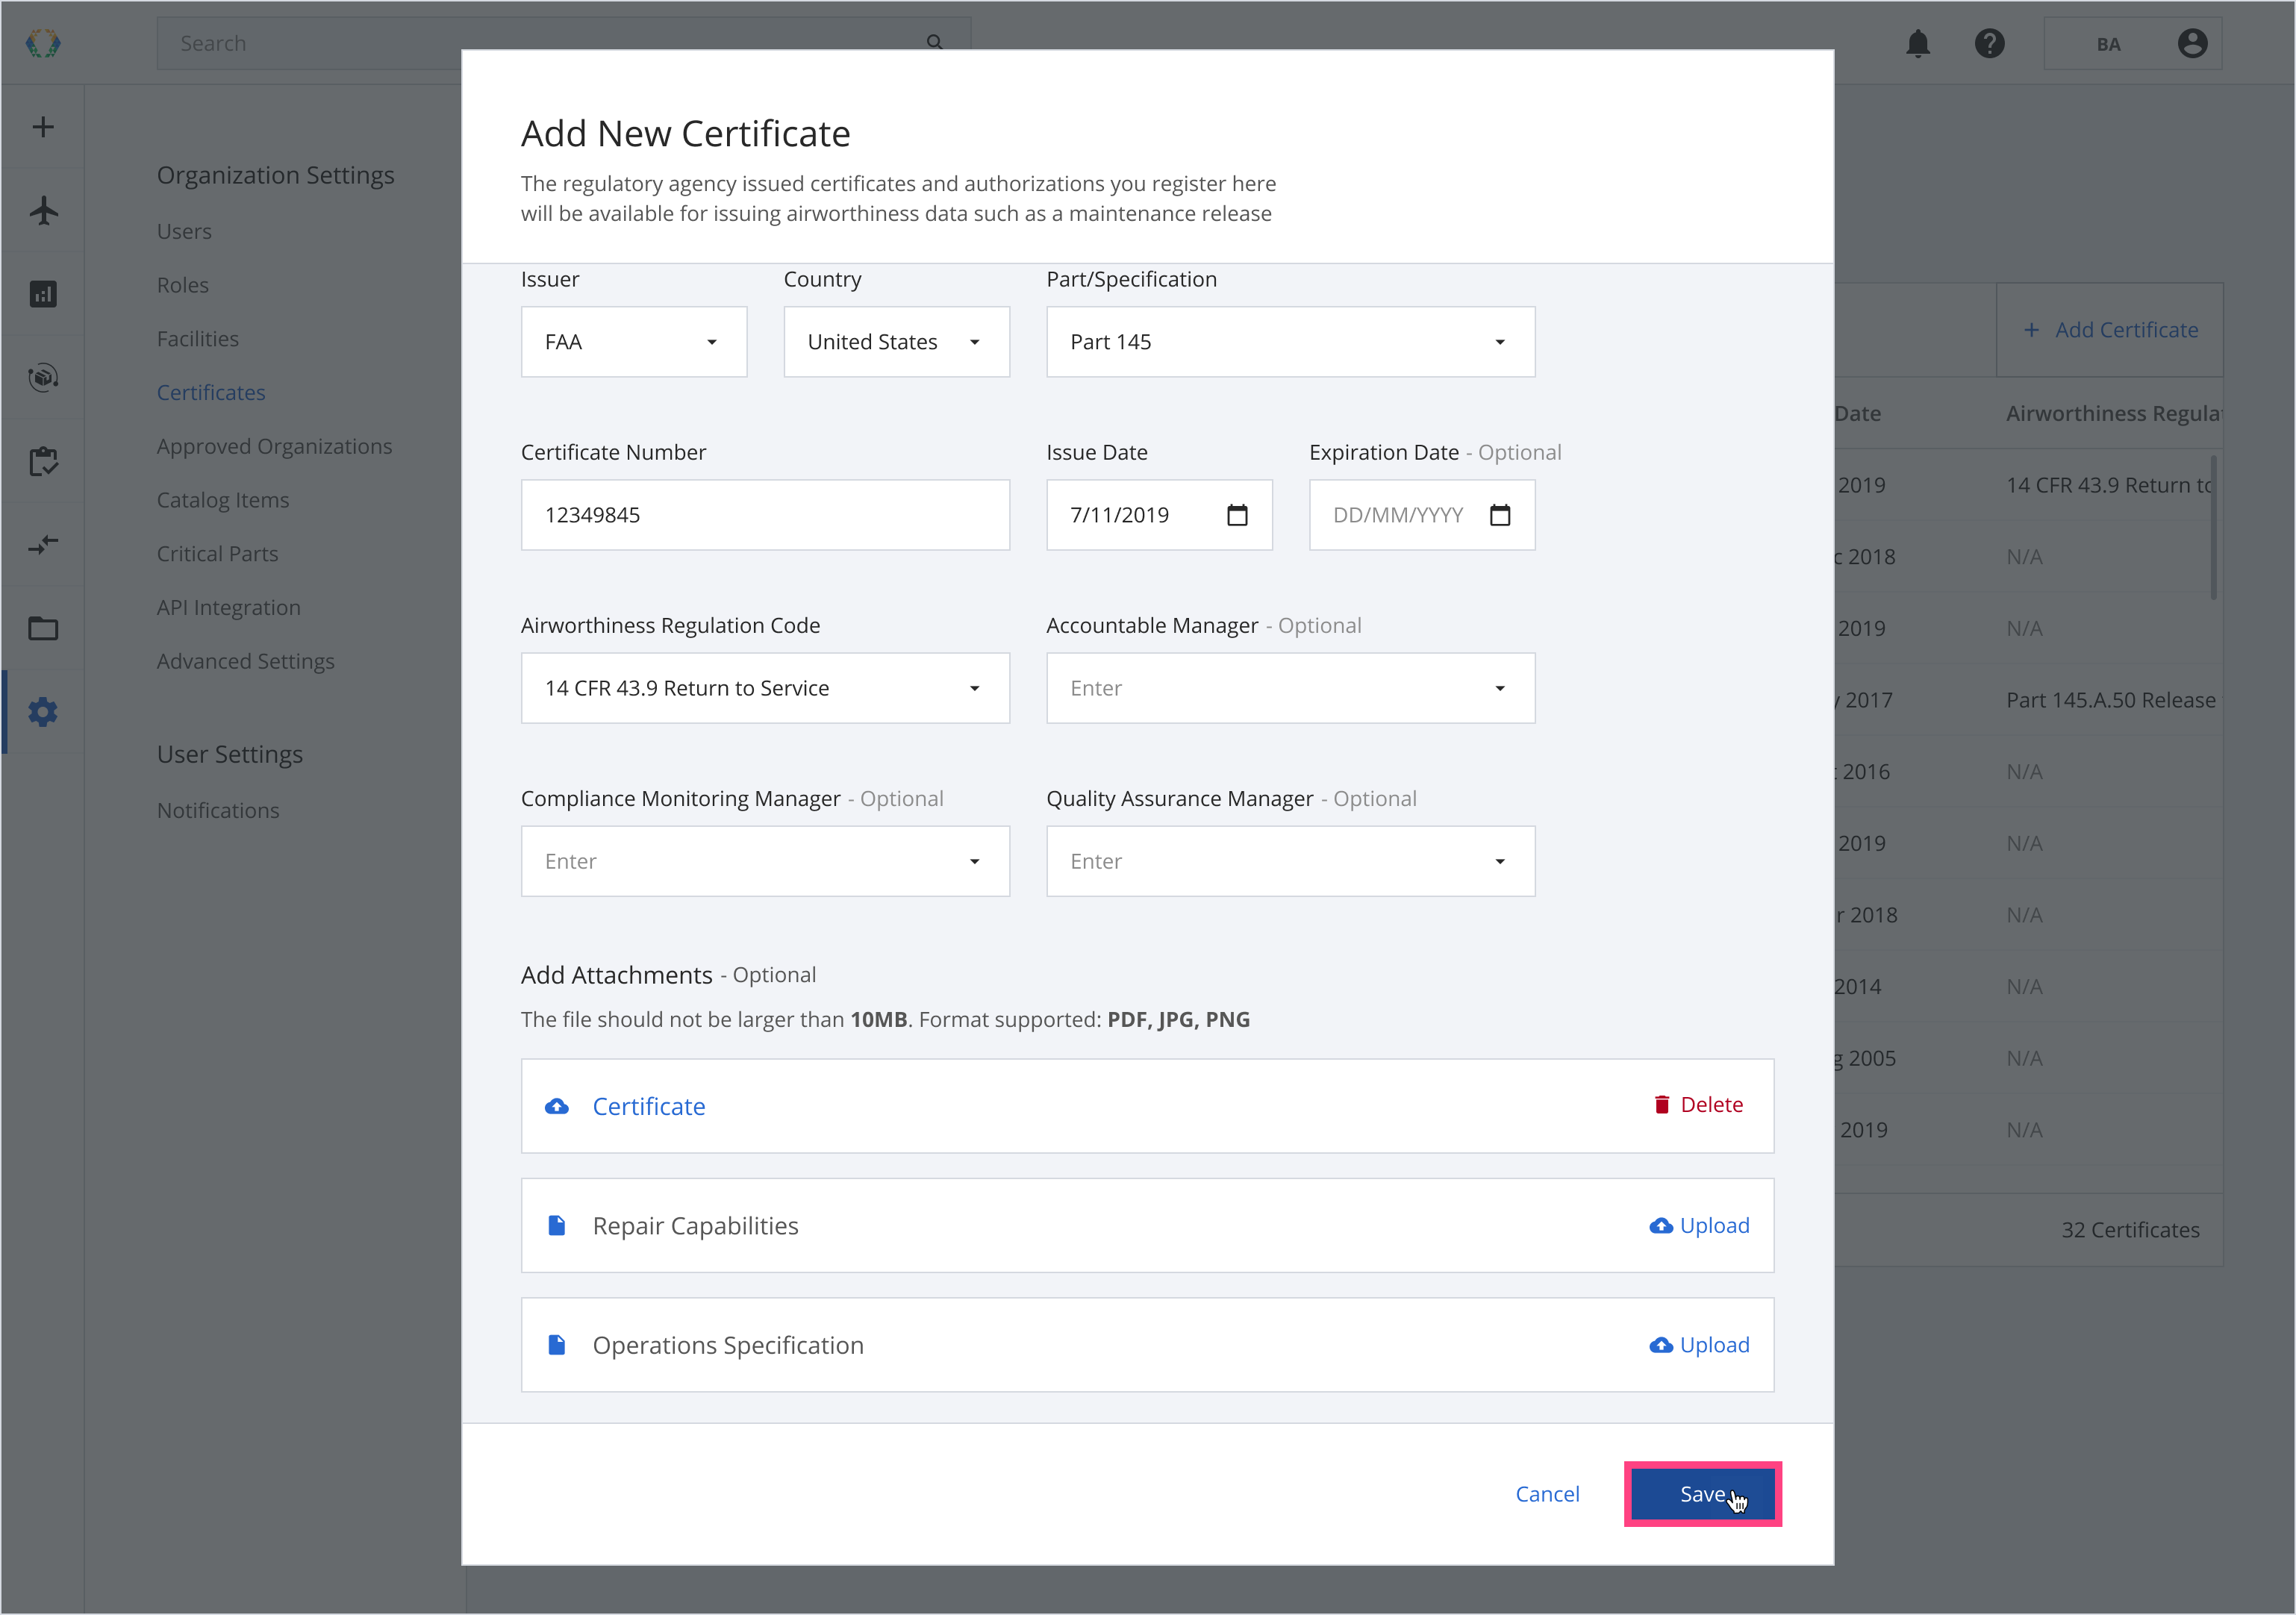
Step 6: Click 'Save'.
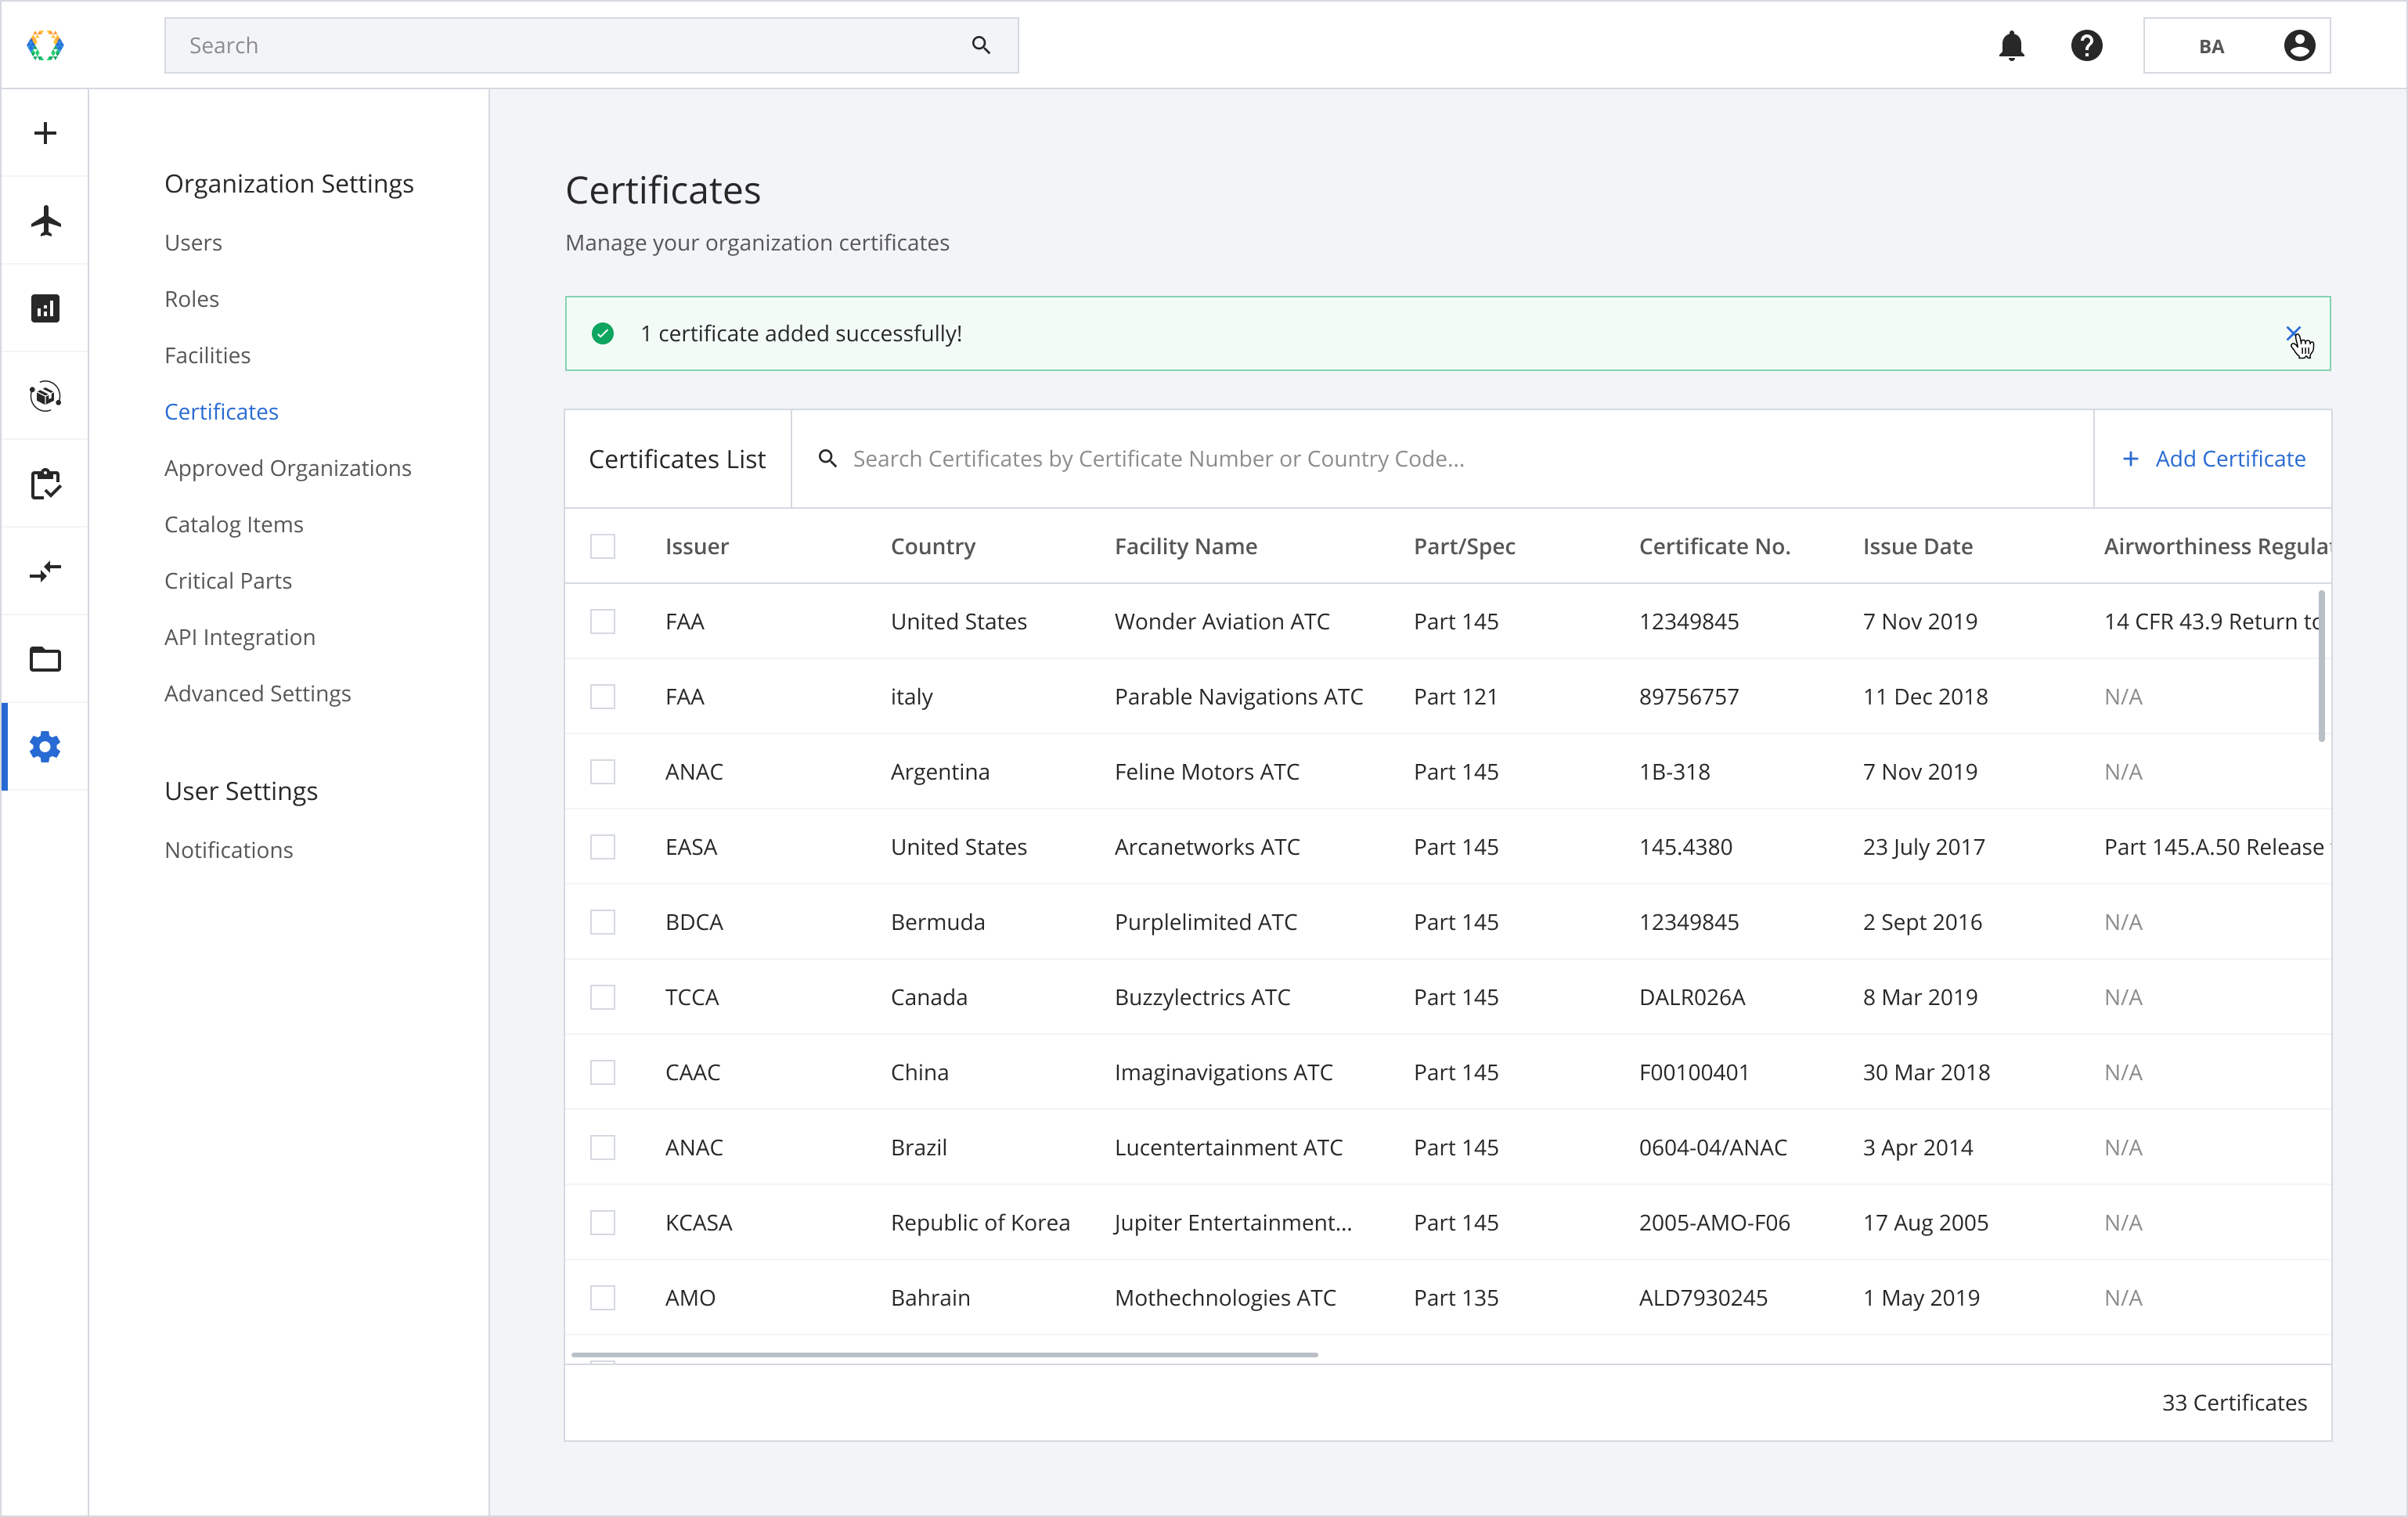
Once the certificate has been added, a green banner will appear at the top of the certificates list.
View Attachments
Step 1: From the Certificates List, open the certificate you want to view.
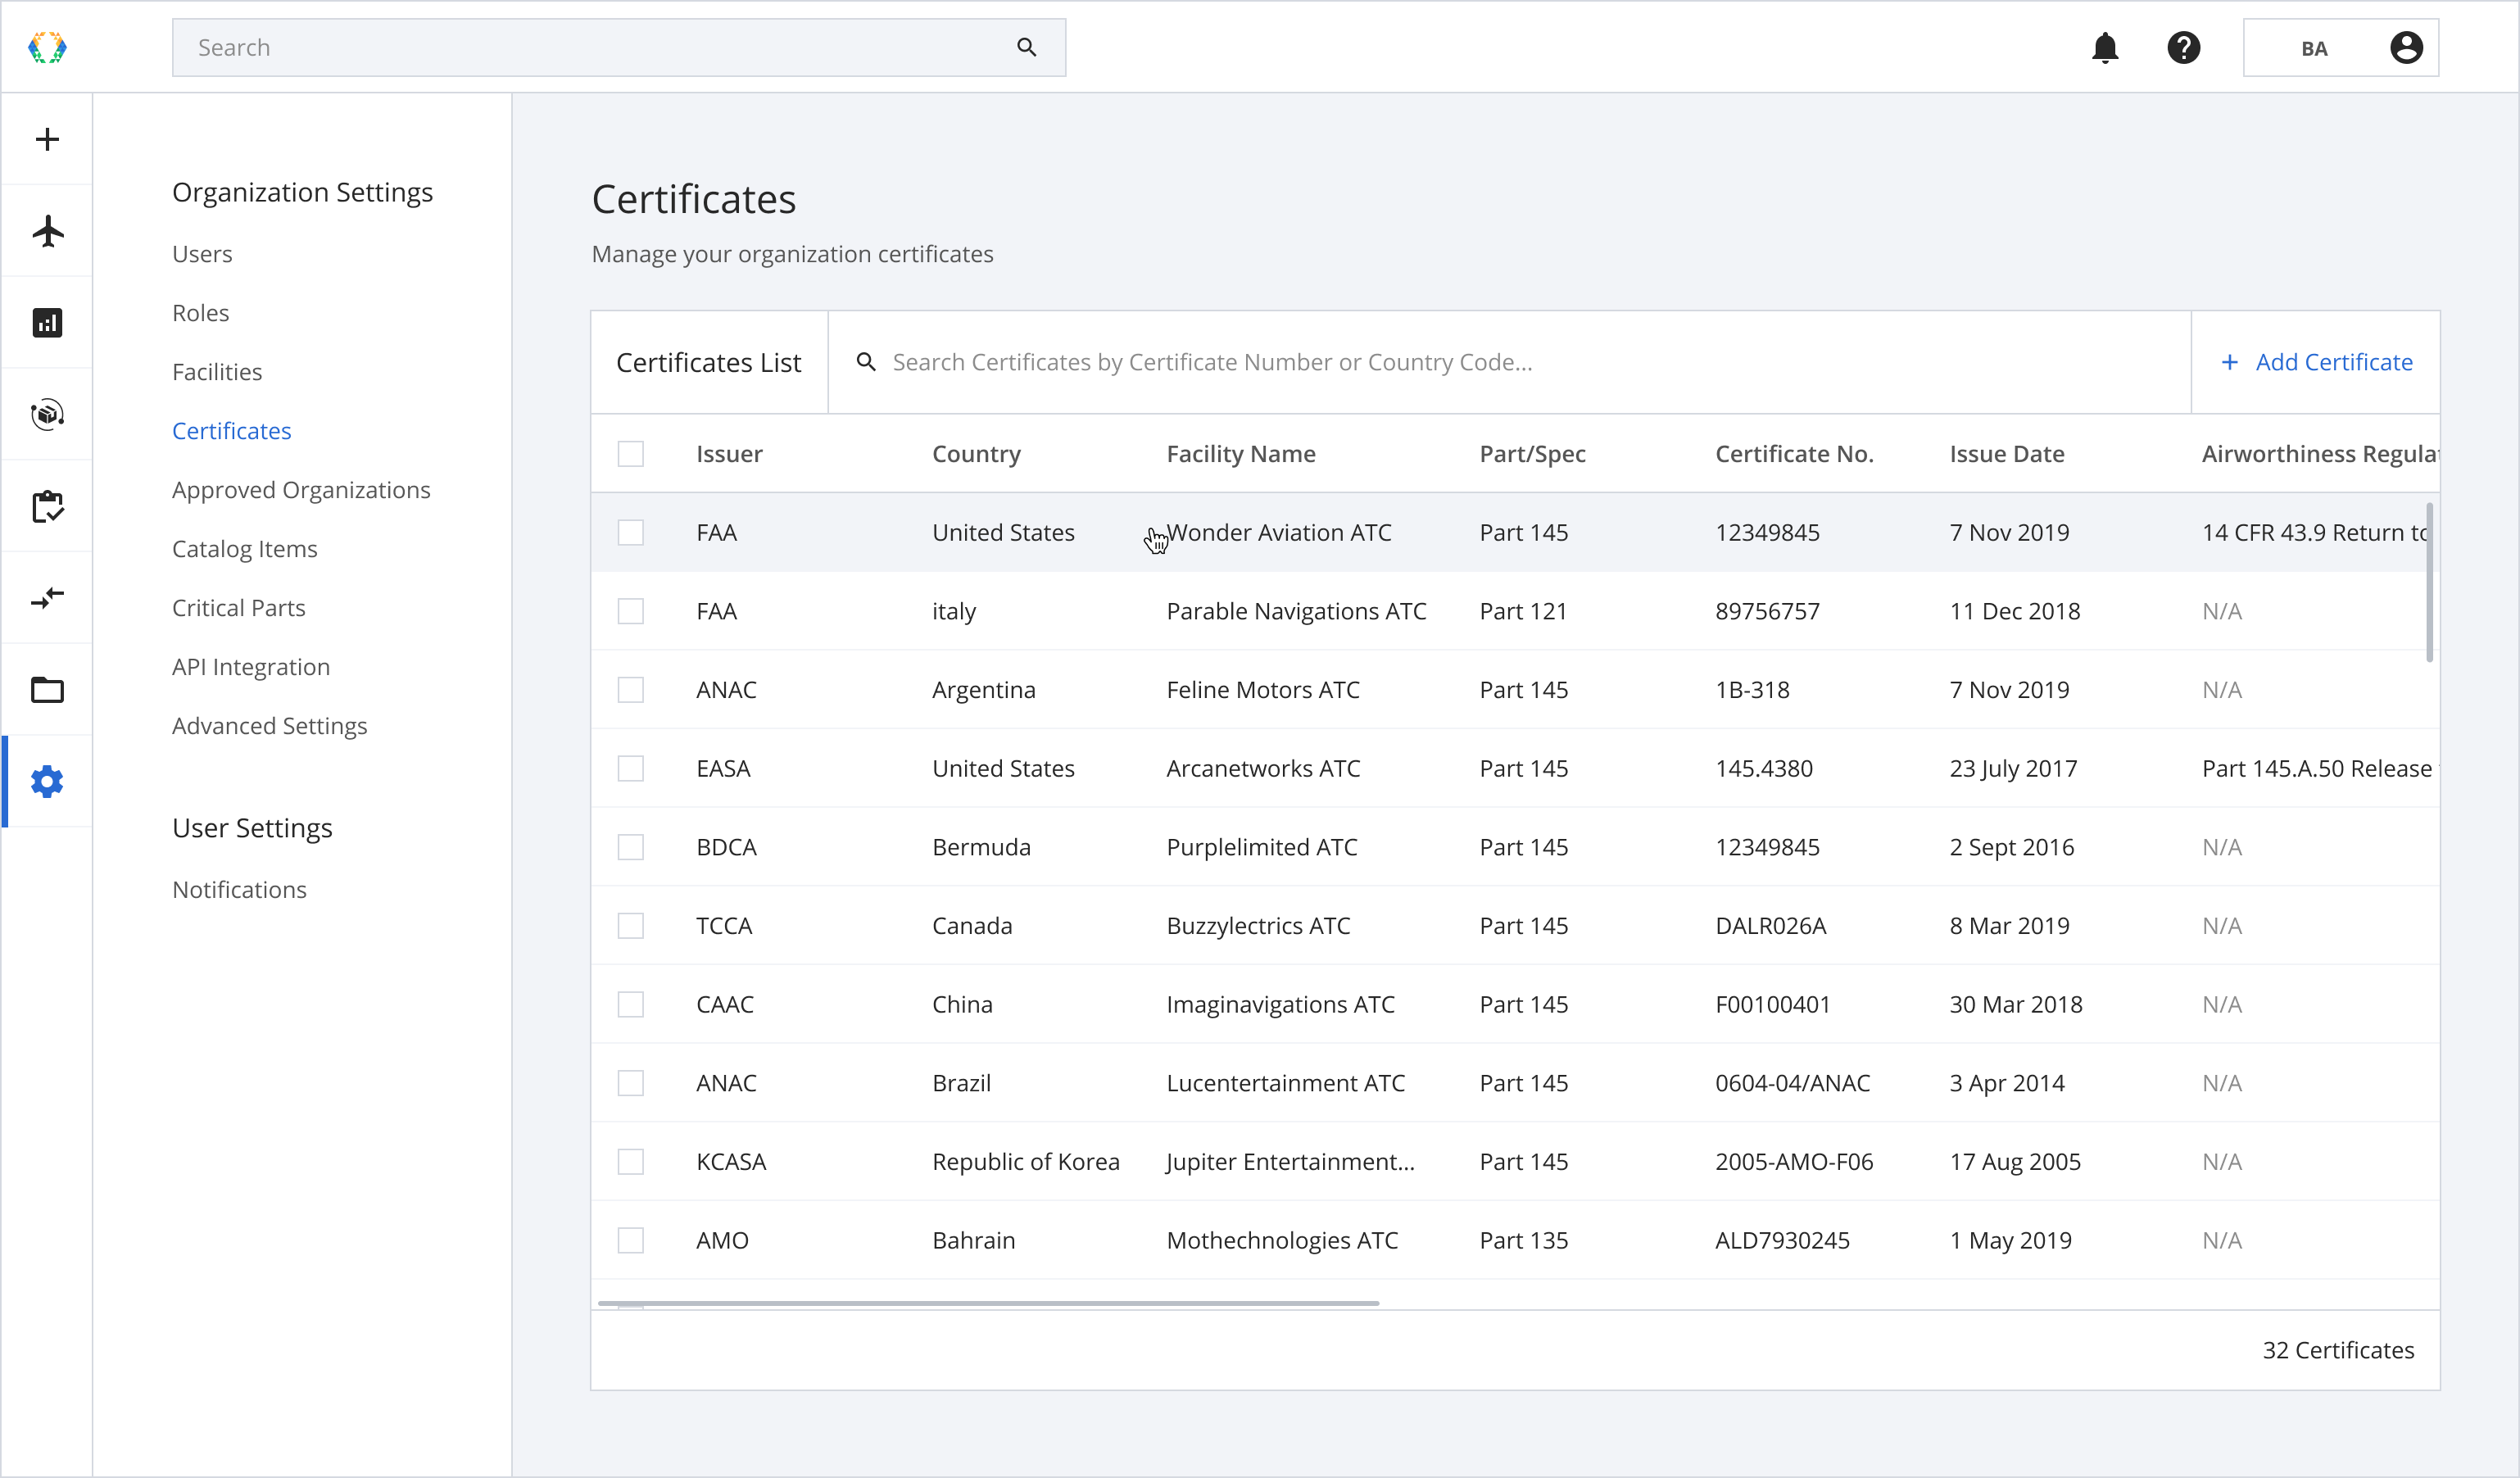
Step 2: View/edit the certificates details.
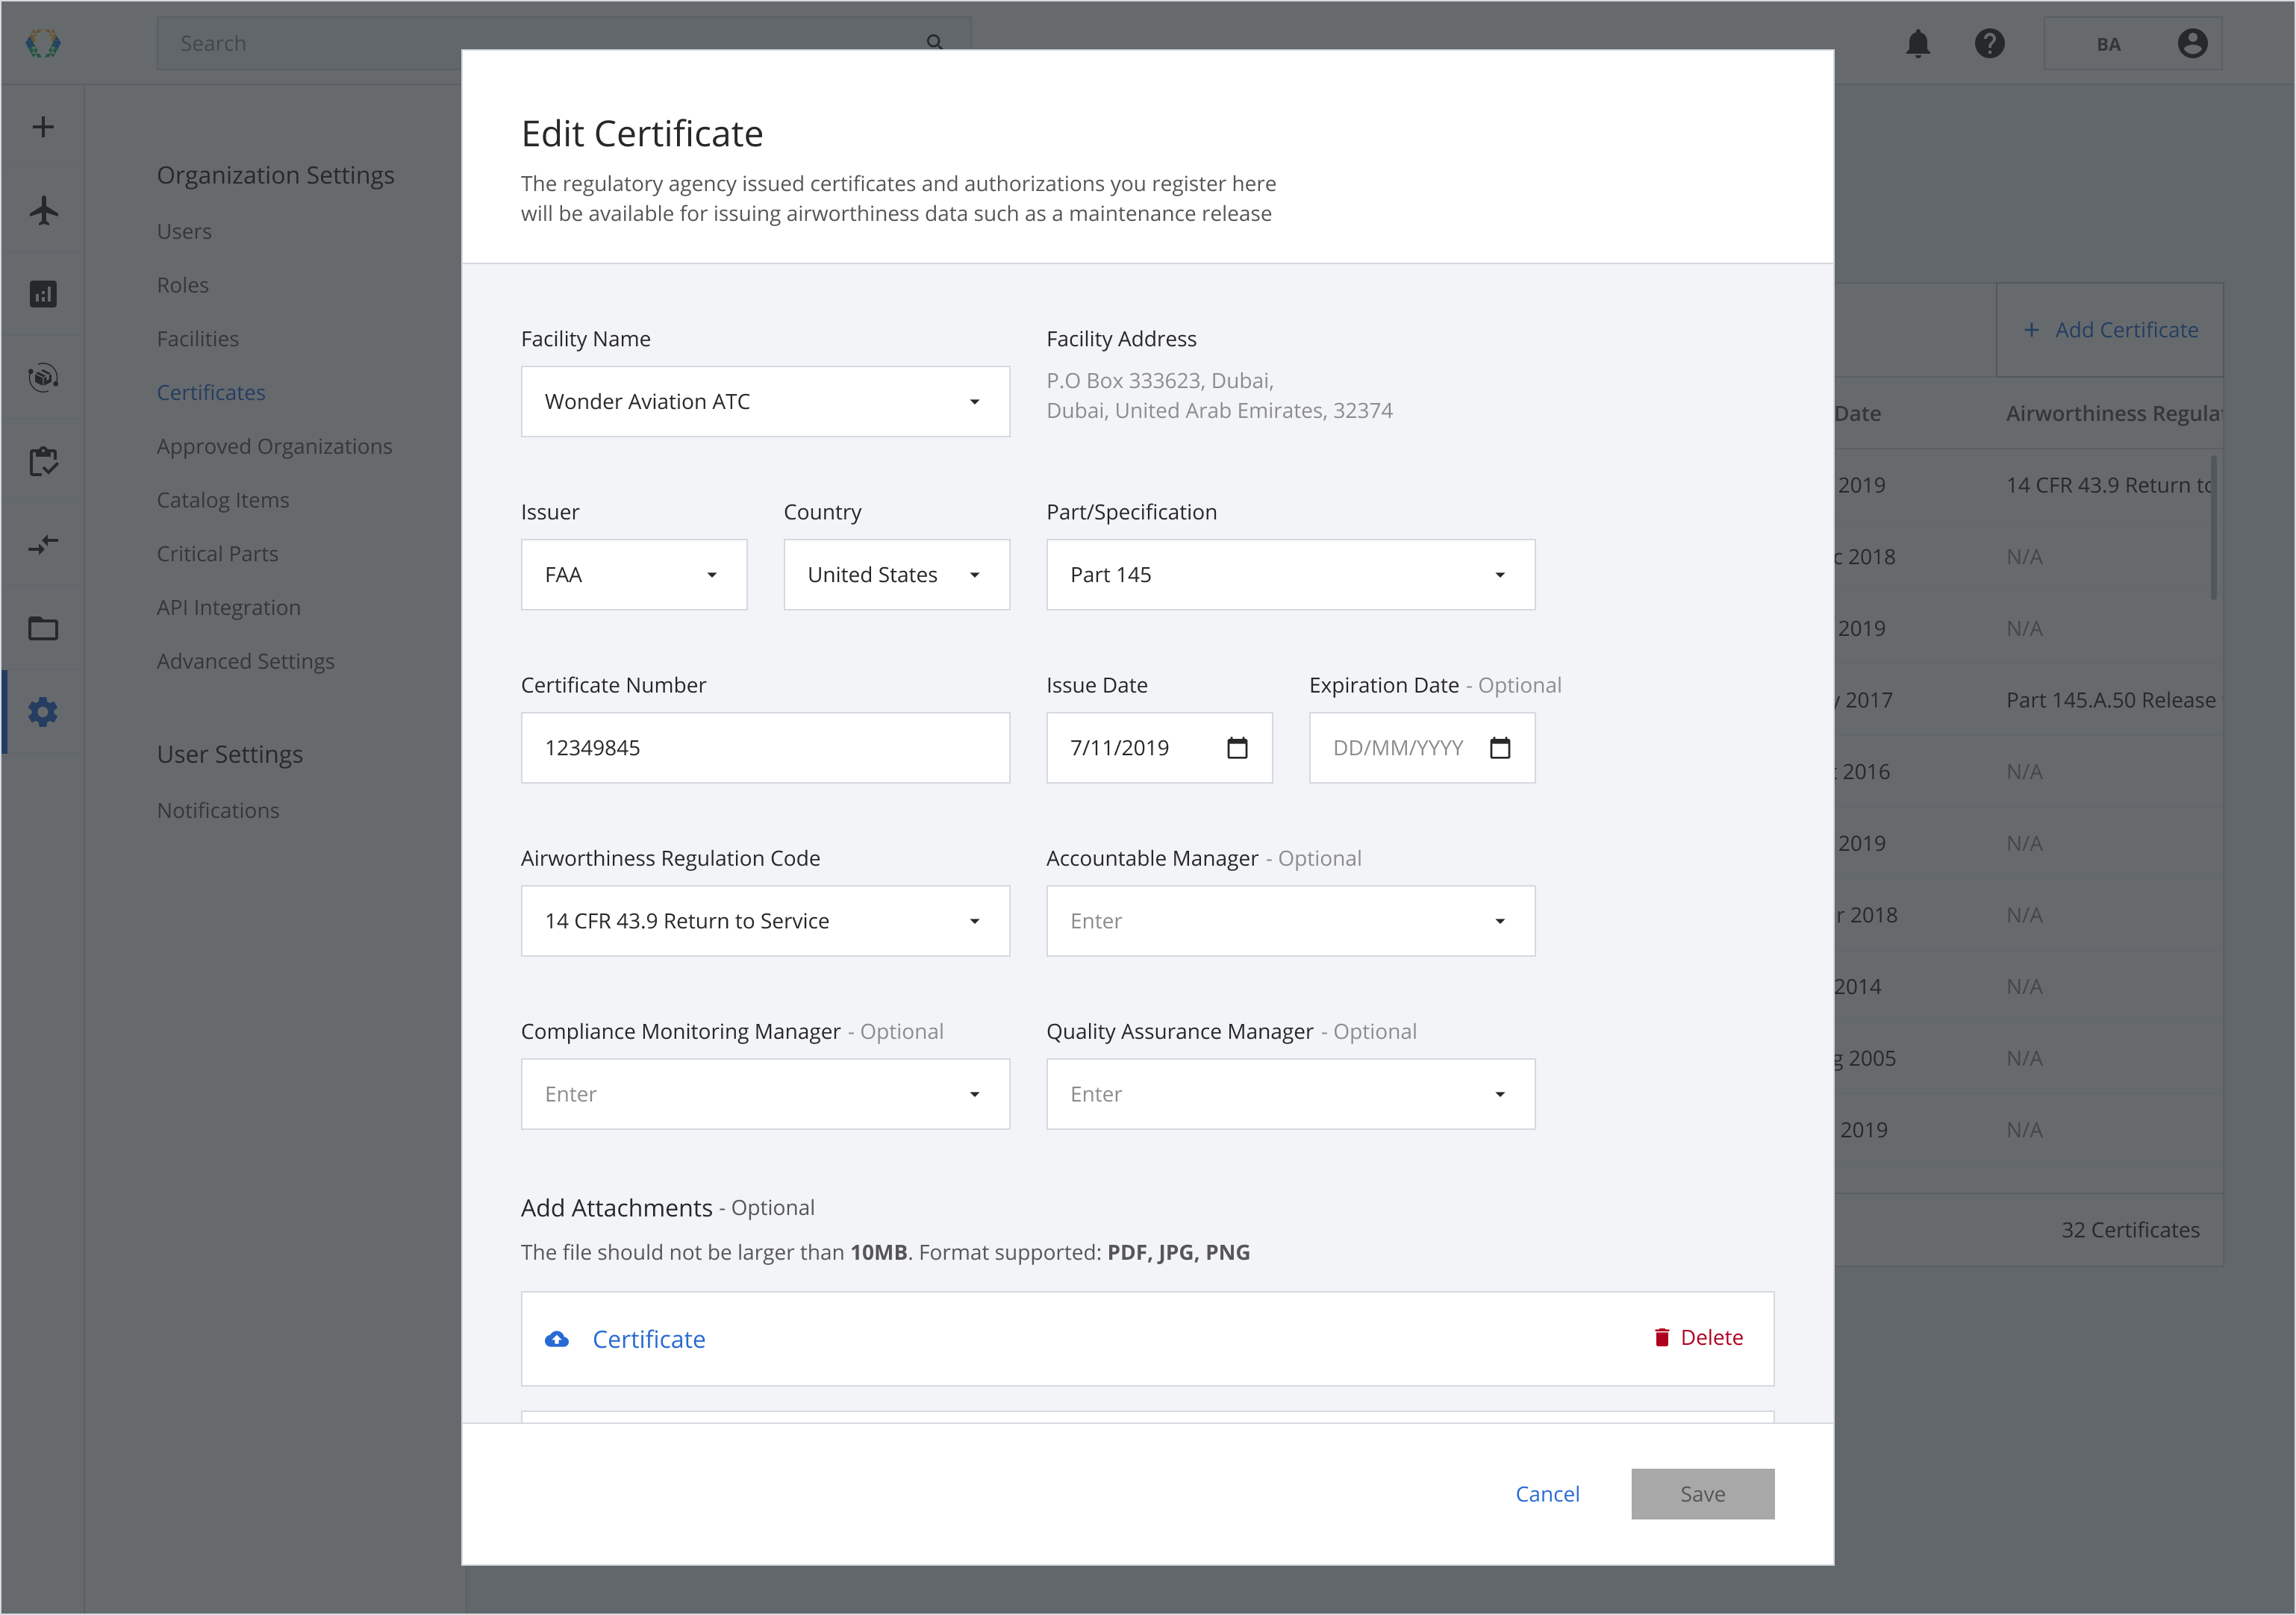
Step 3: Click the blue text to view the attachment.
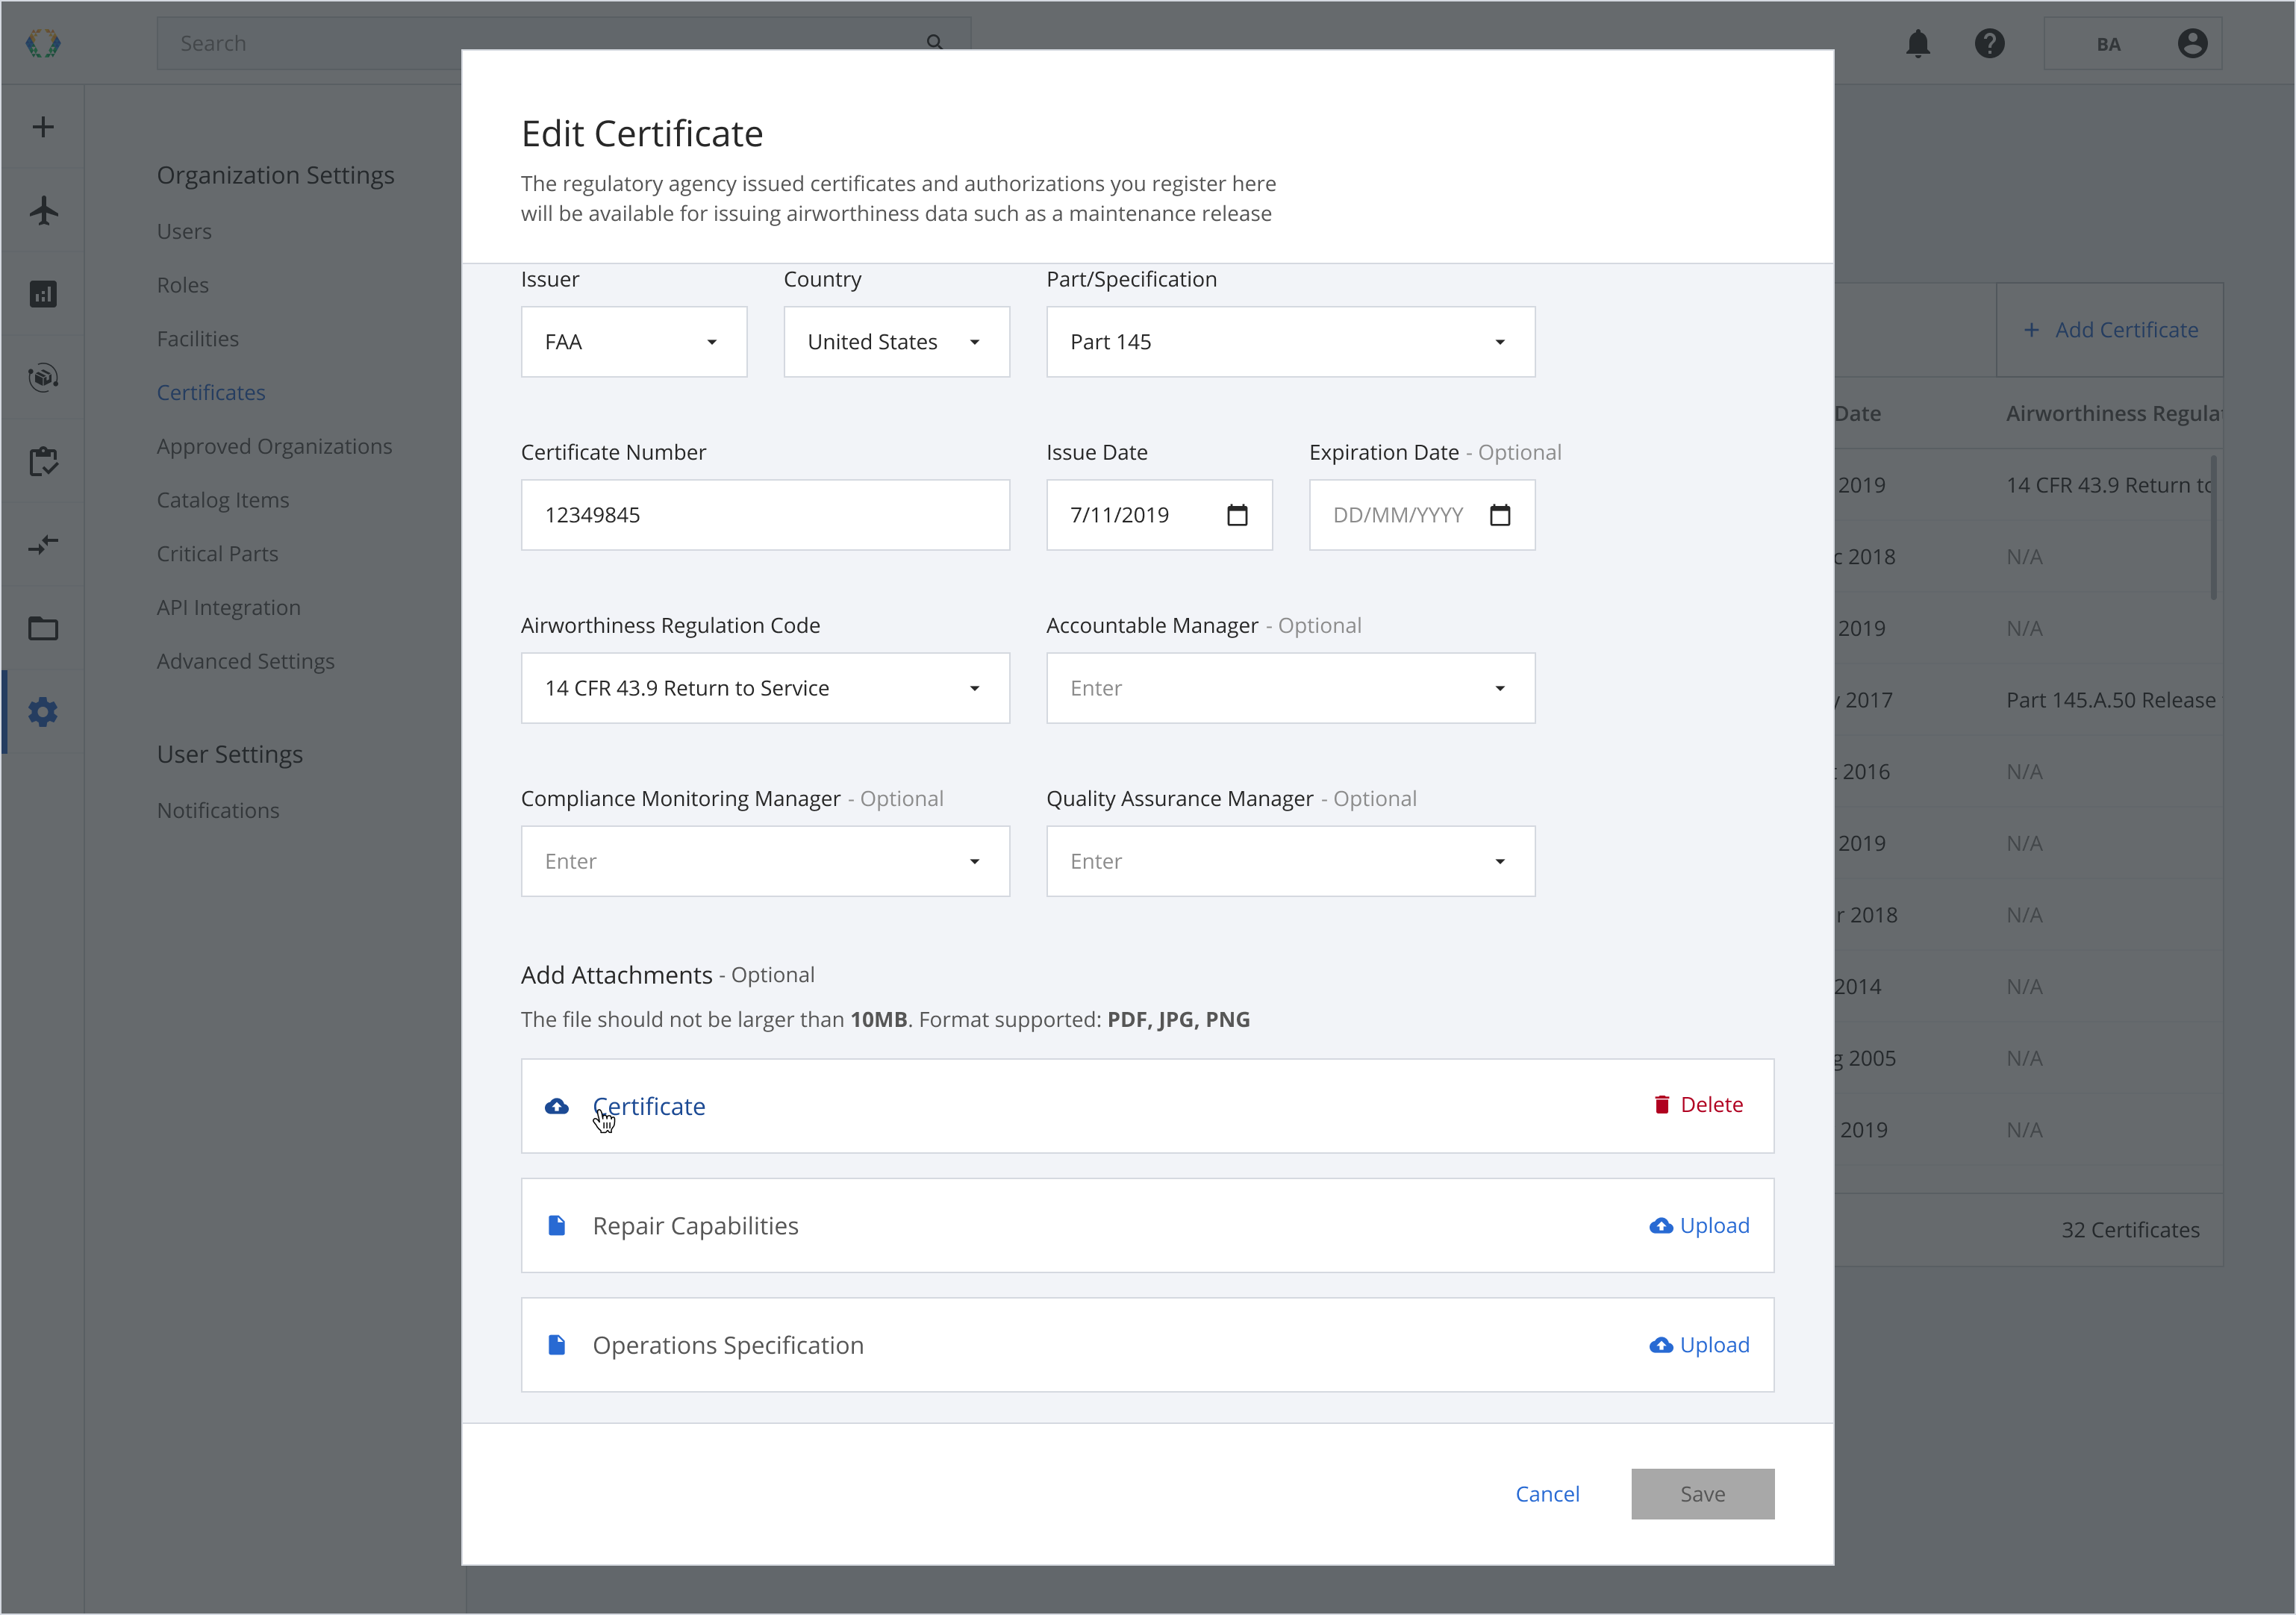
Step 4: View uploaded attachment in the expanded window.
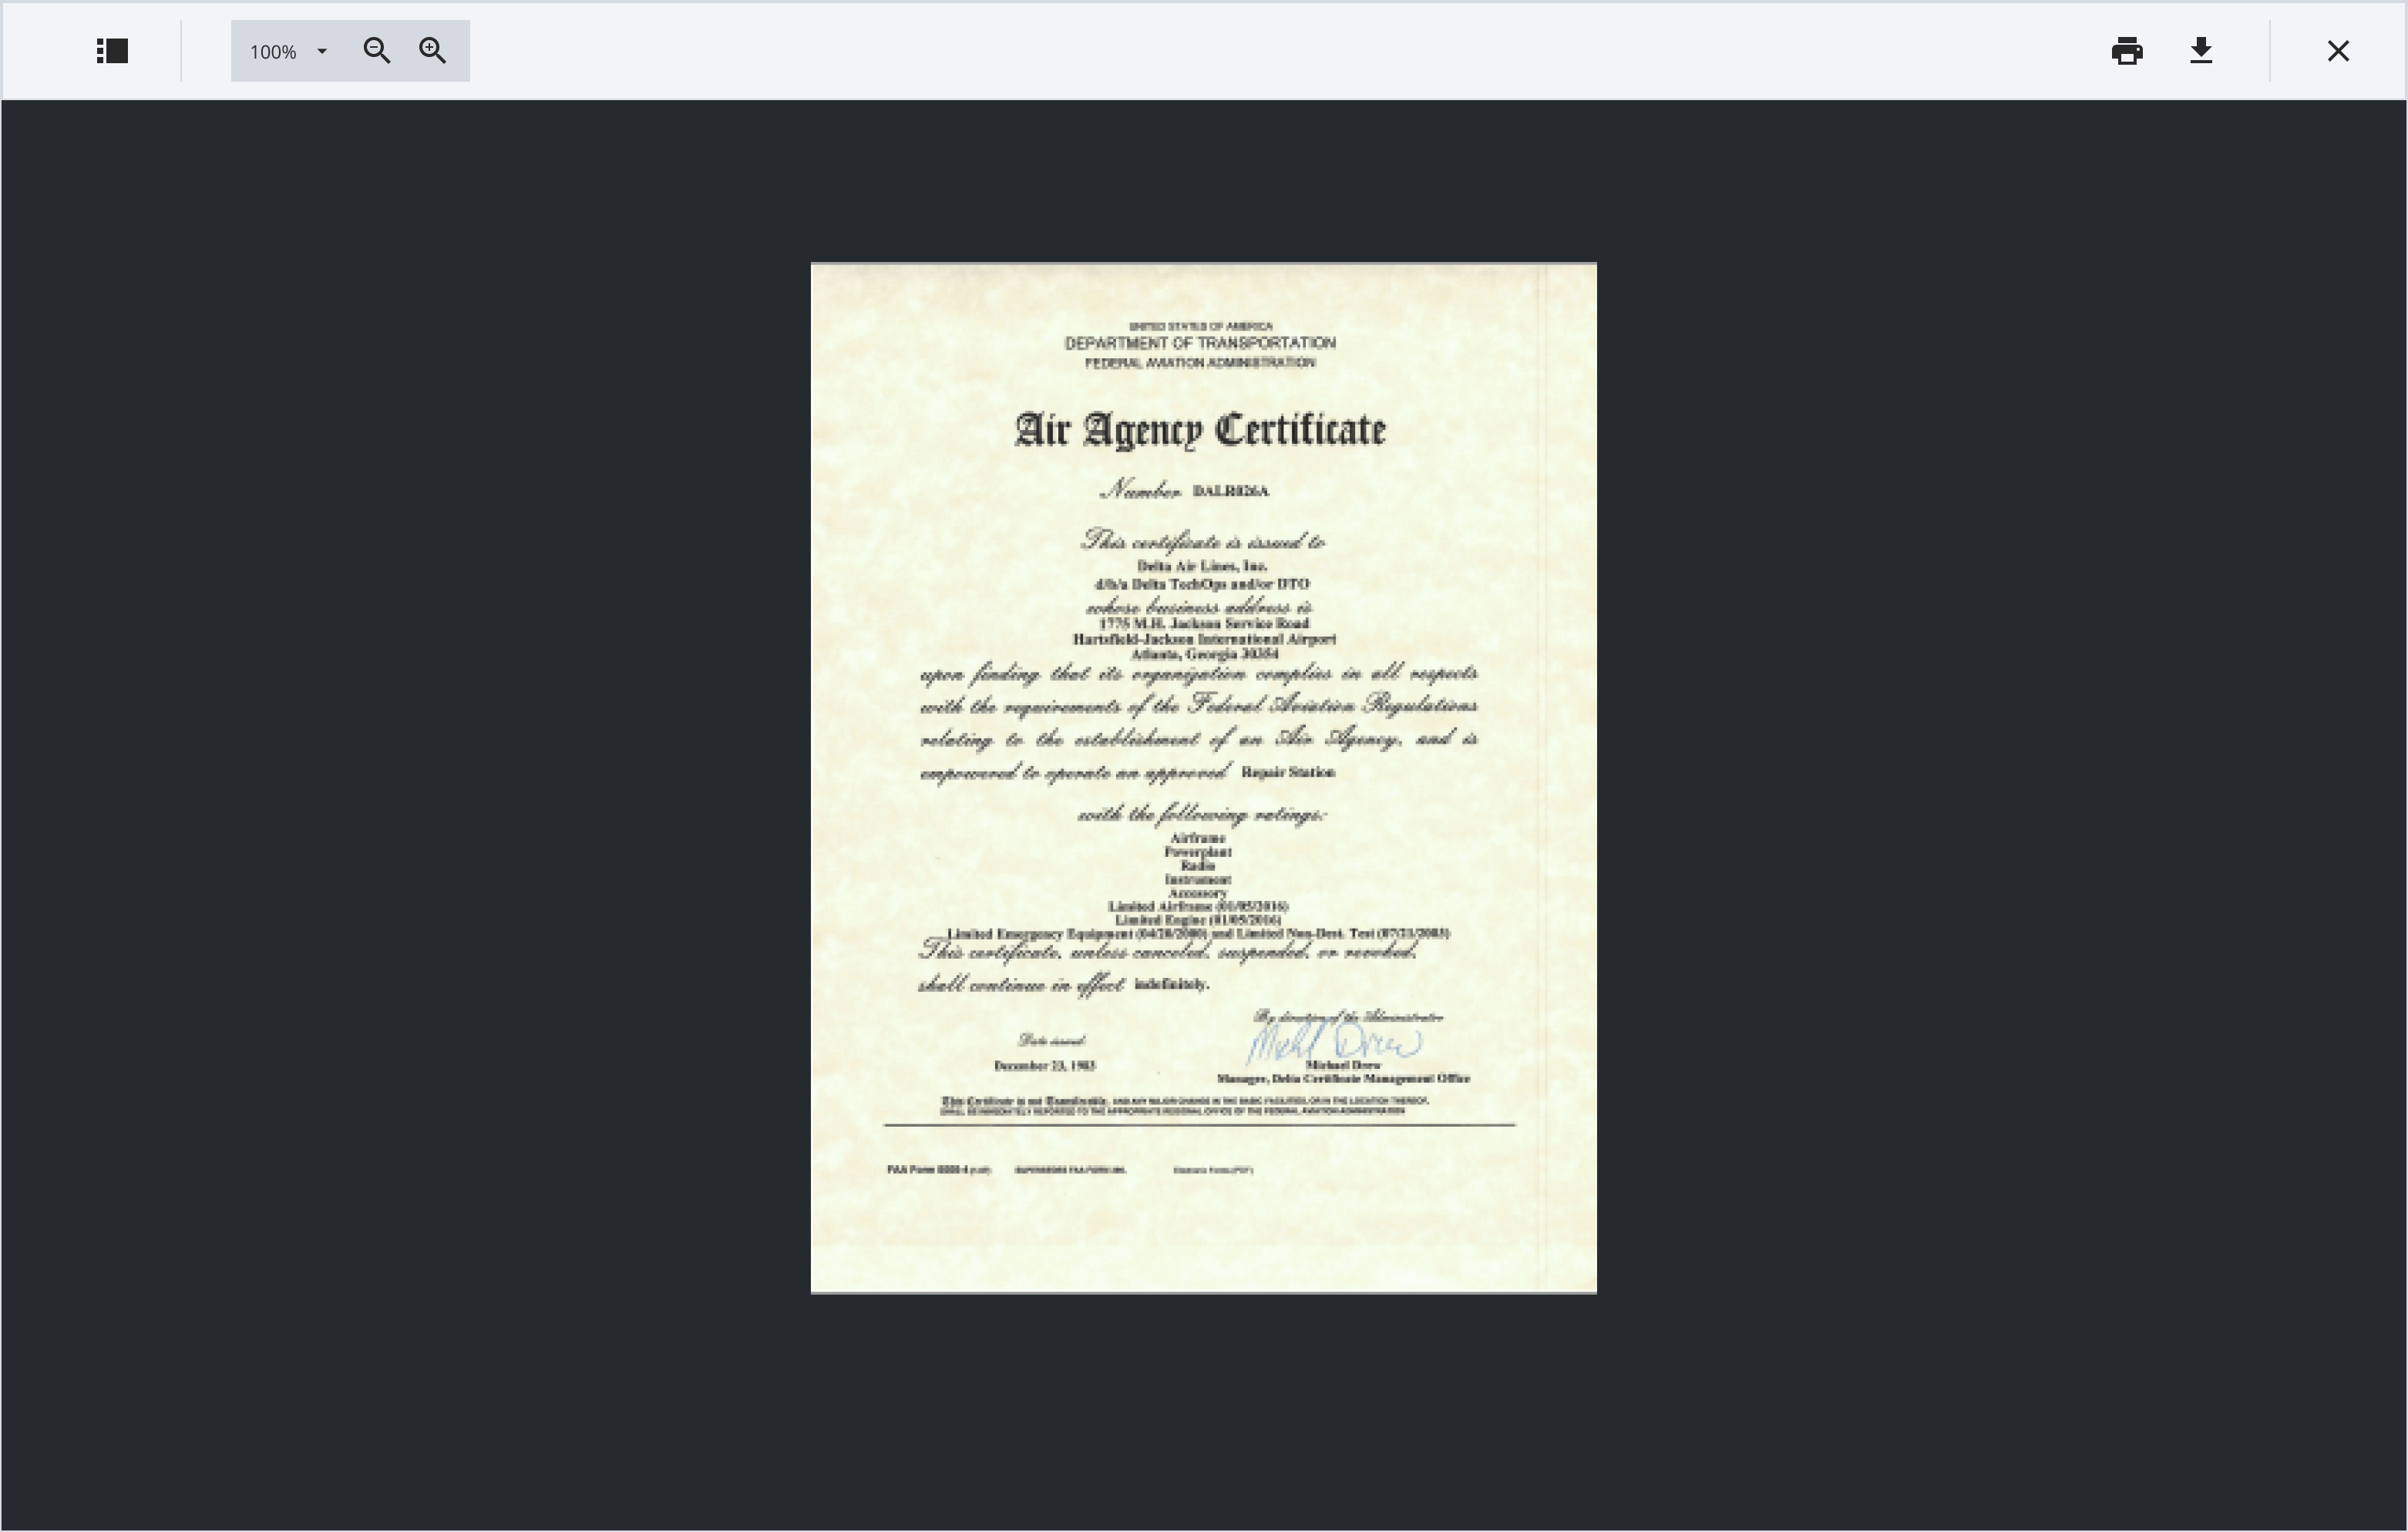
Edit Certificates
Step 1: From the Certificates List, open the certificate you want to edit.
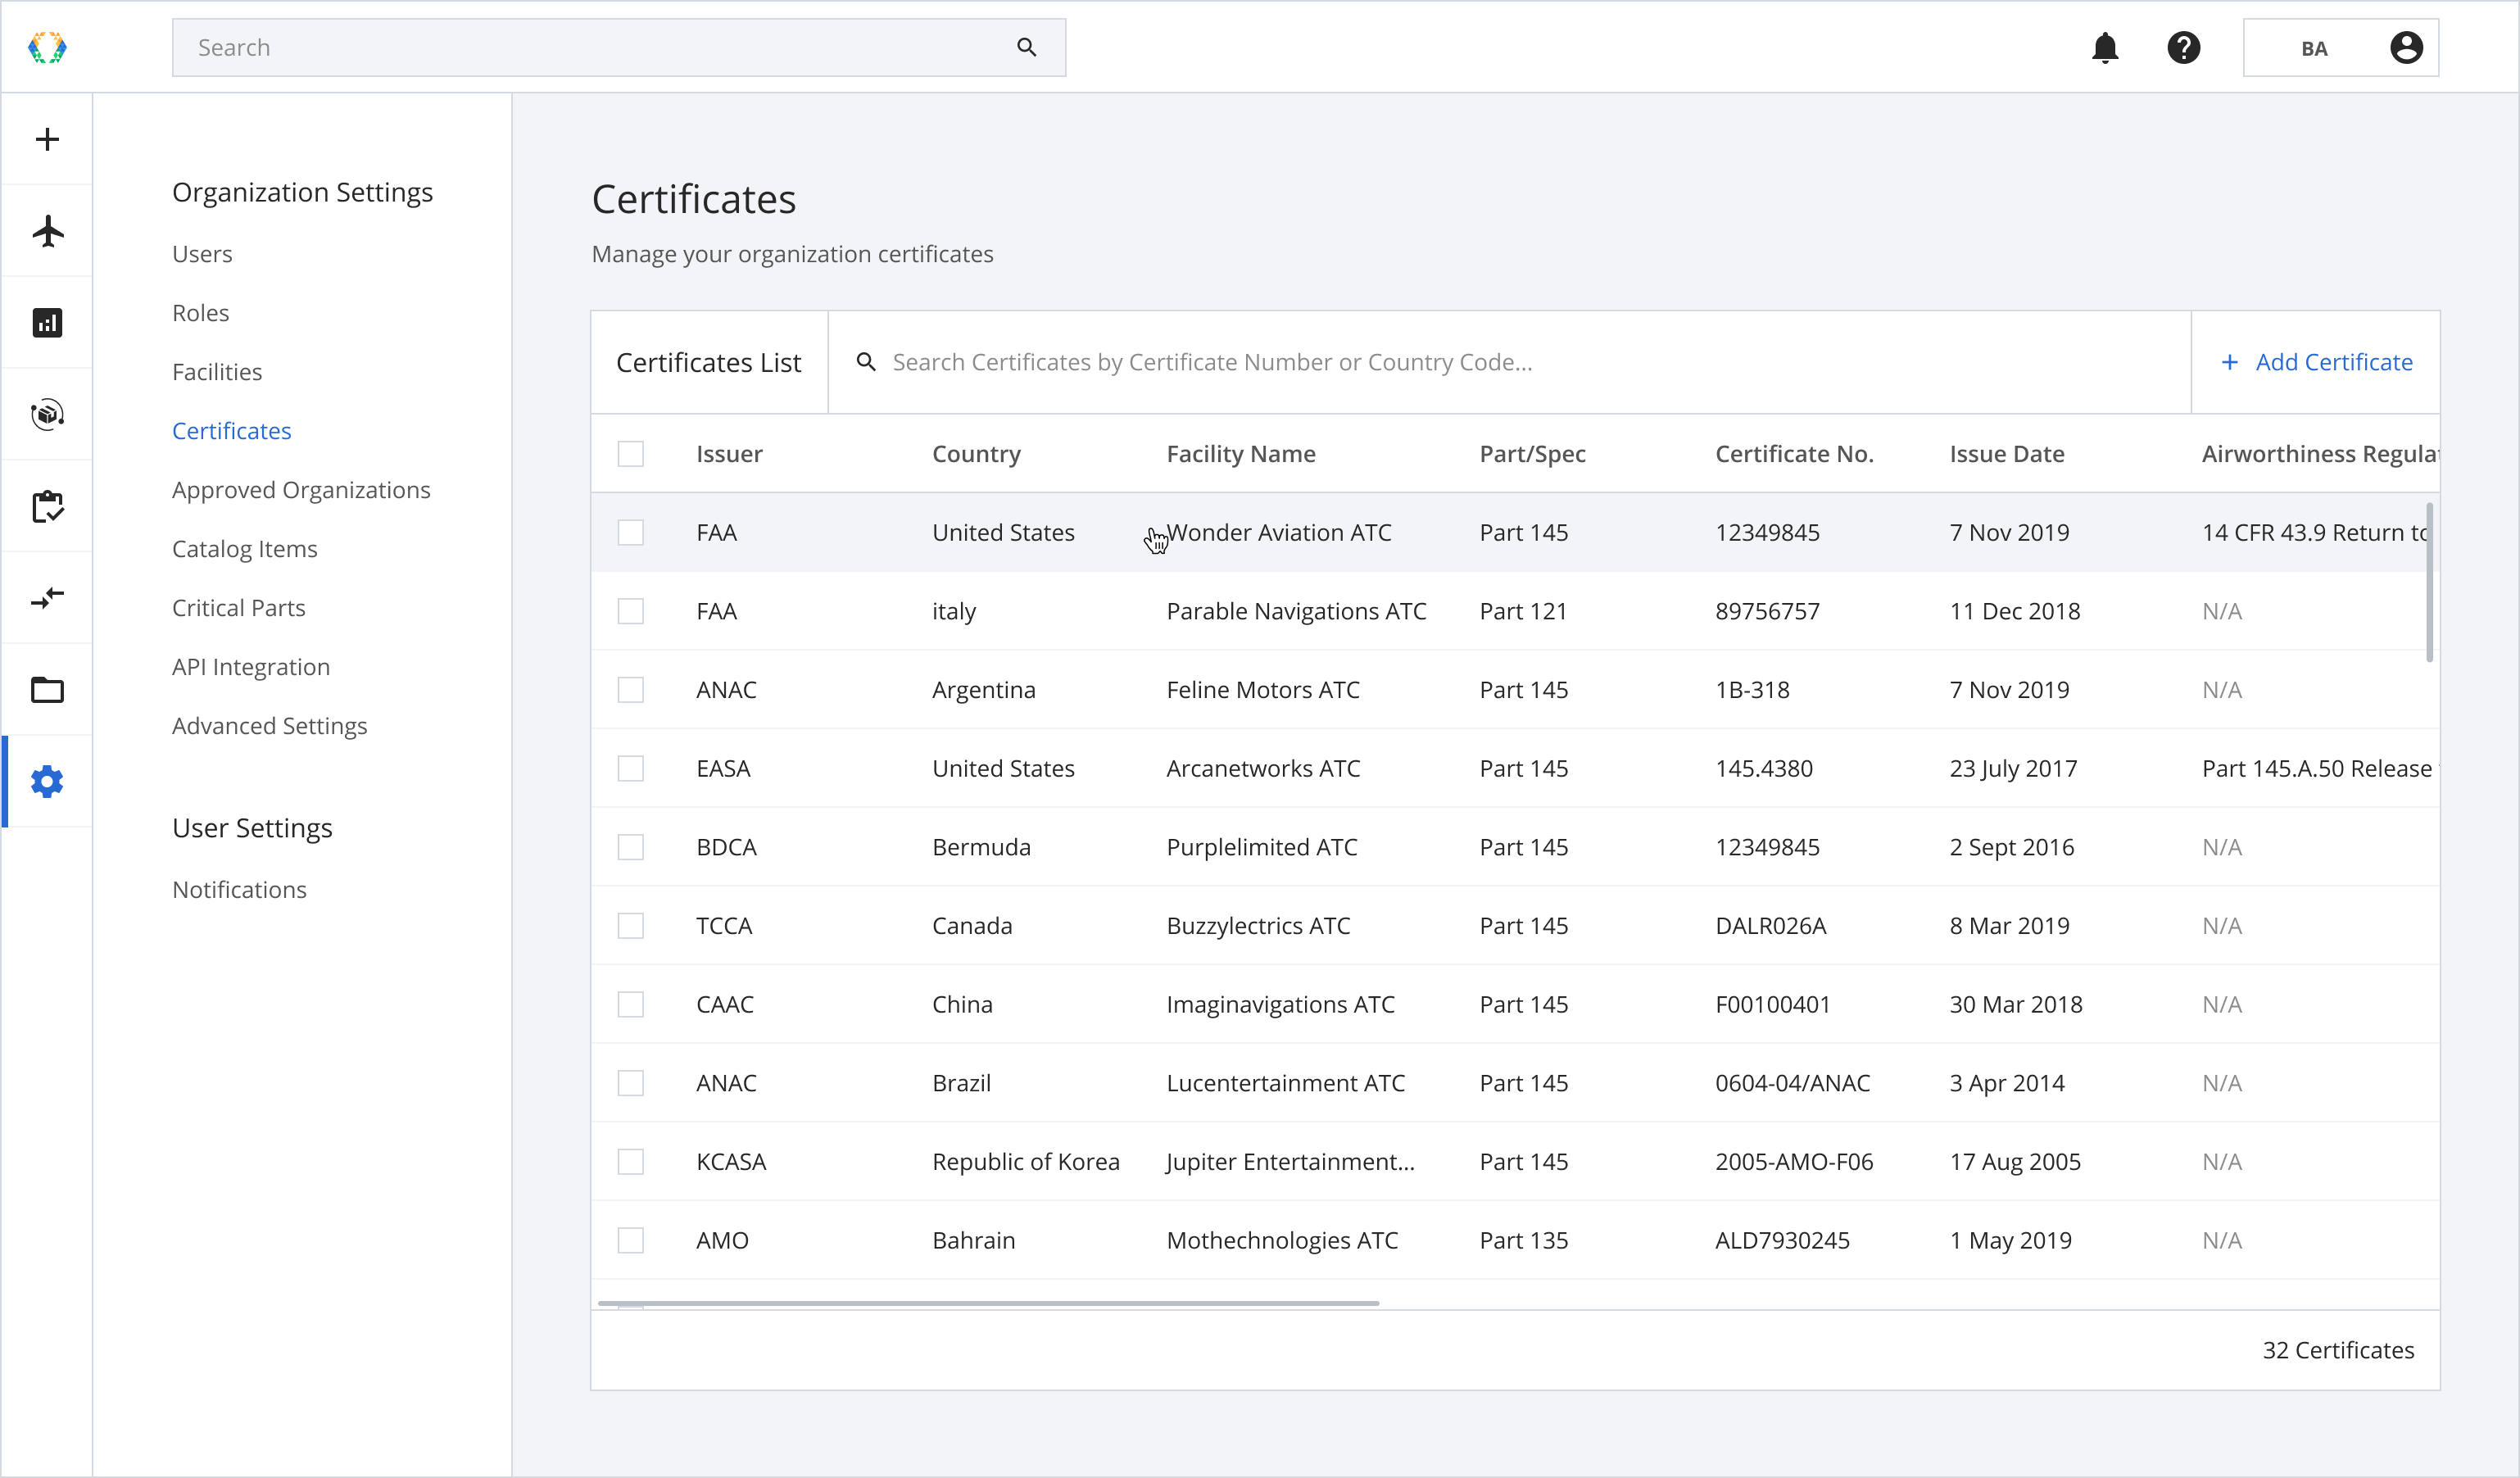
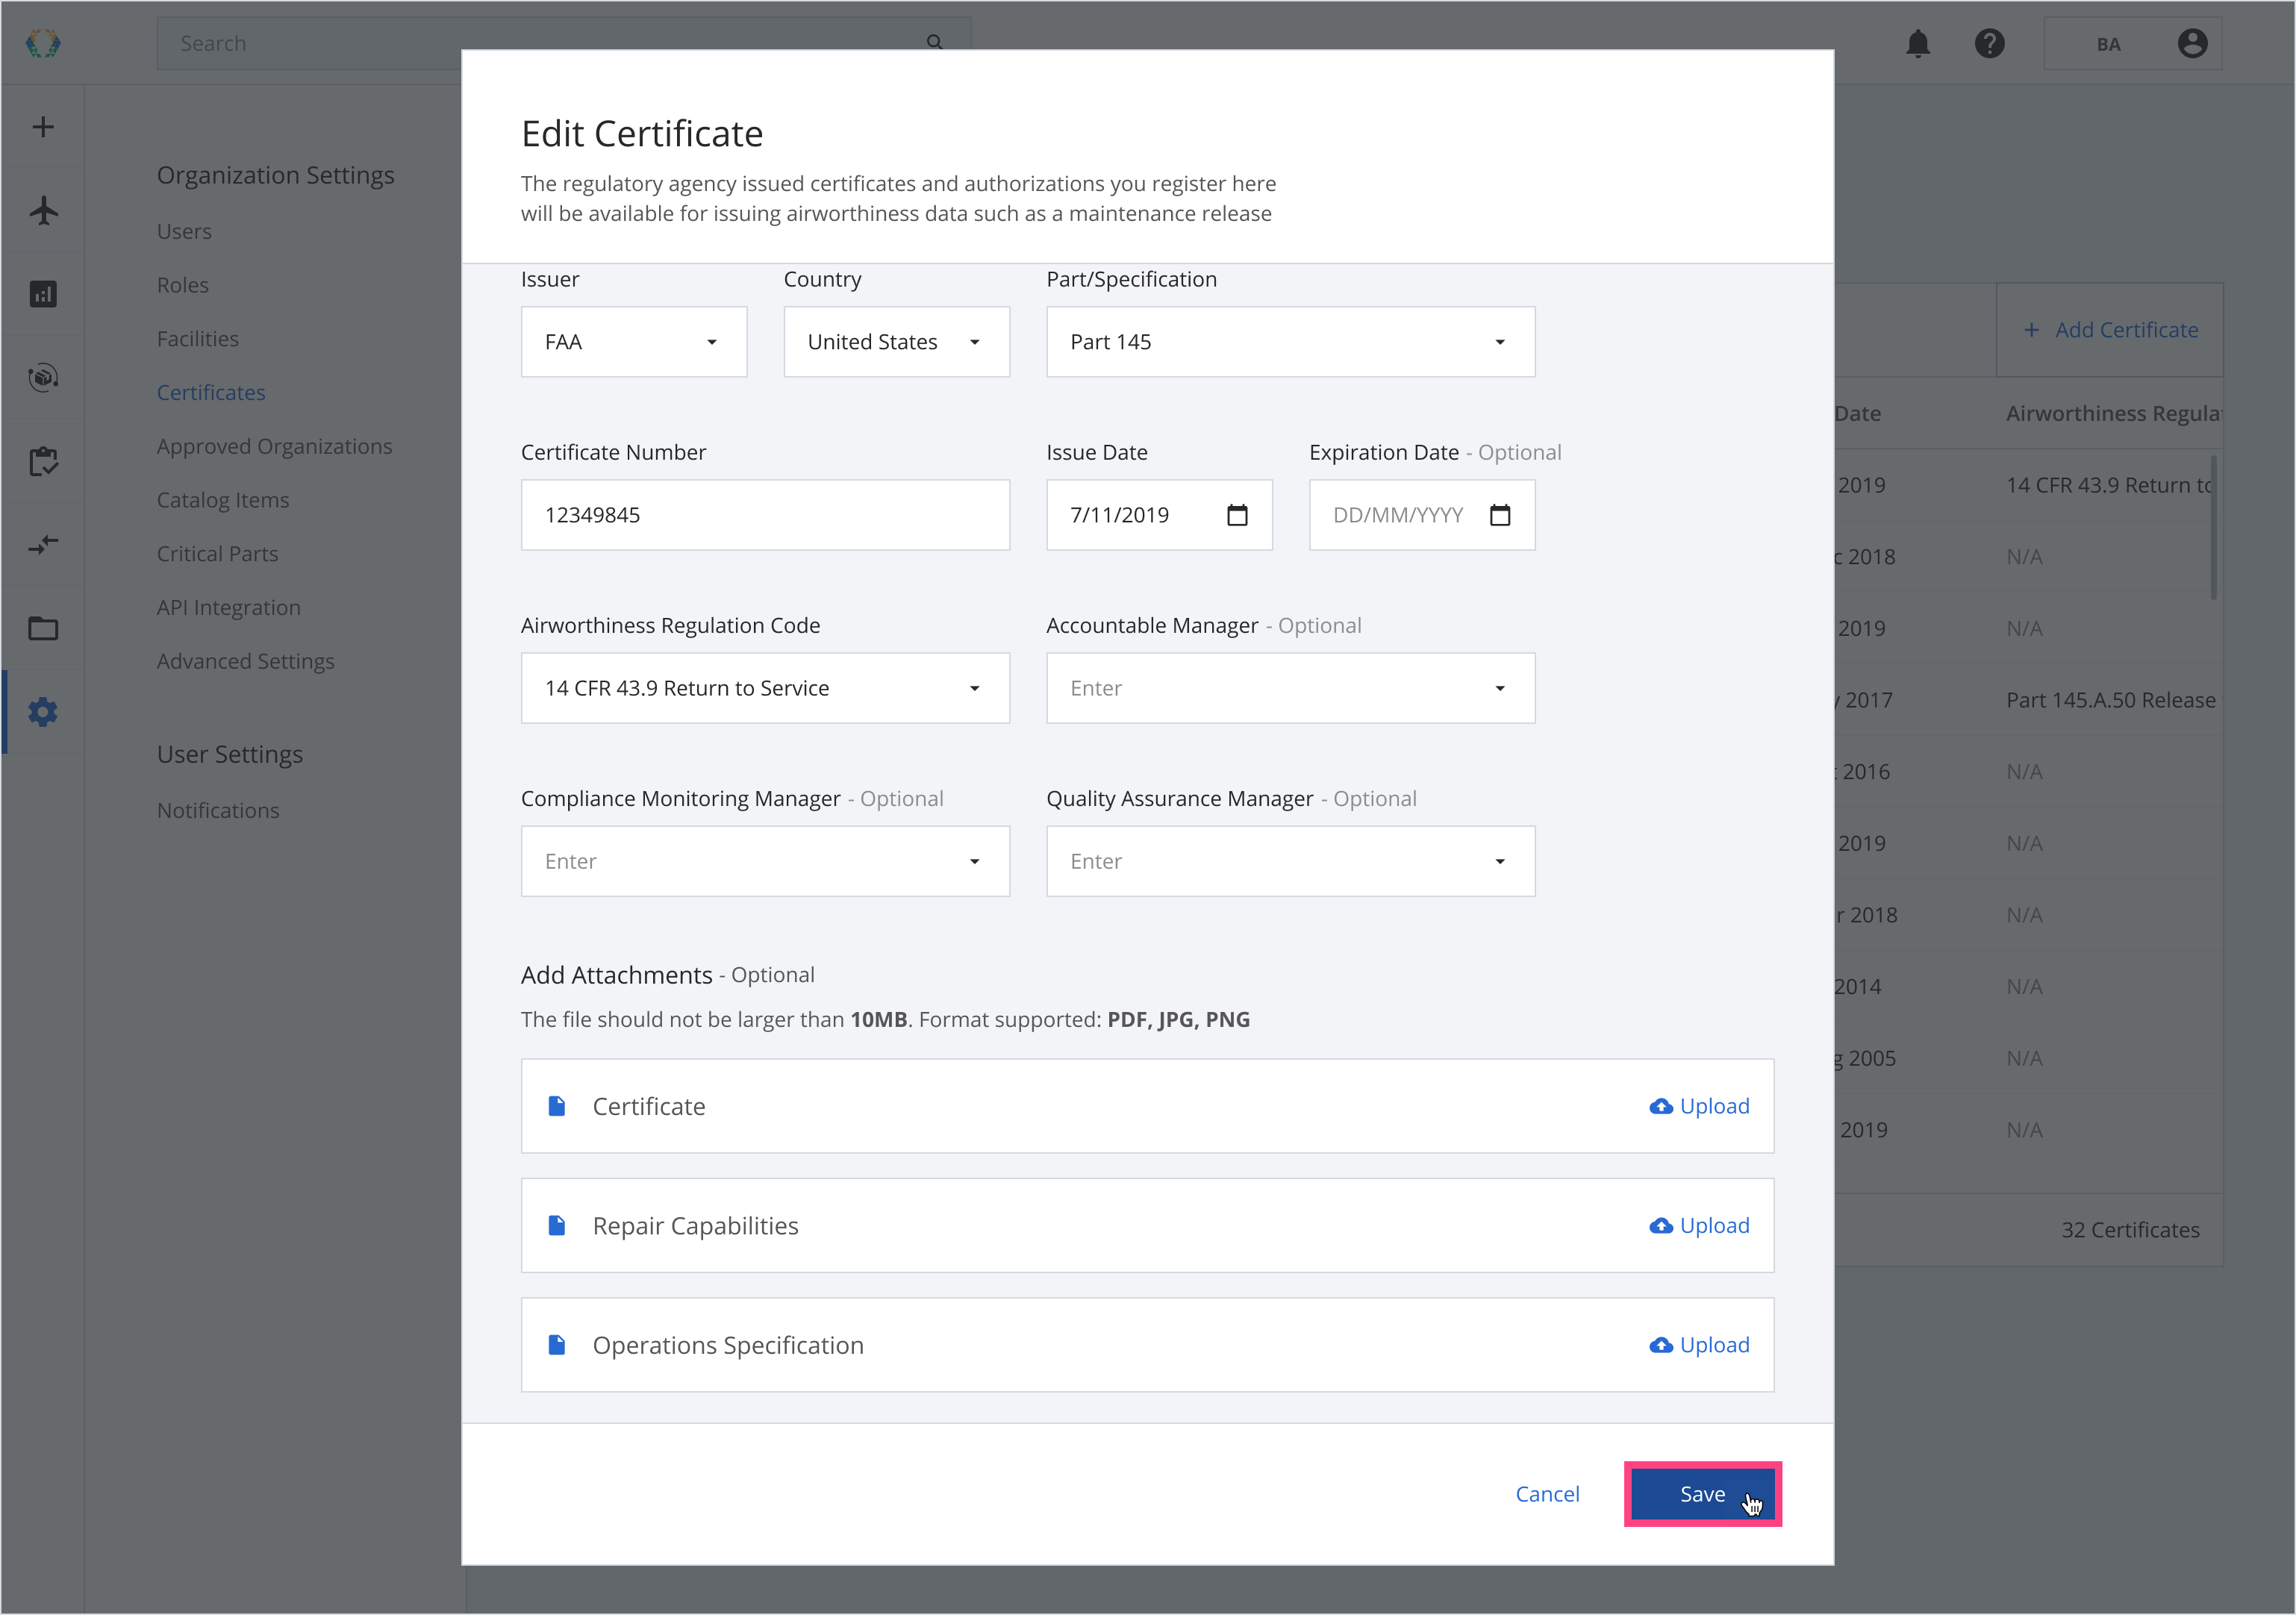
Step 2: Edit the certificate details.
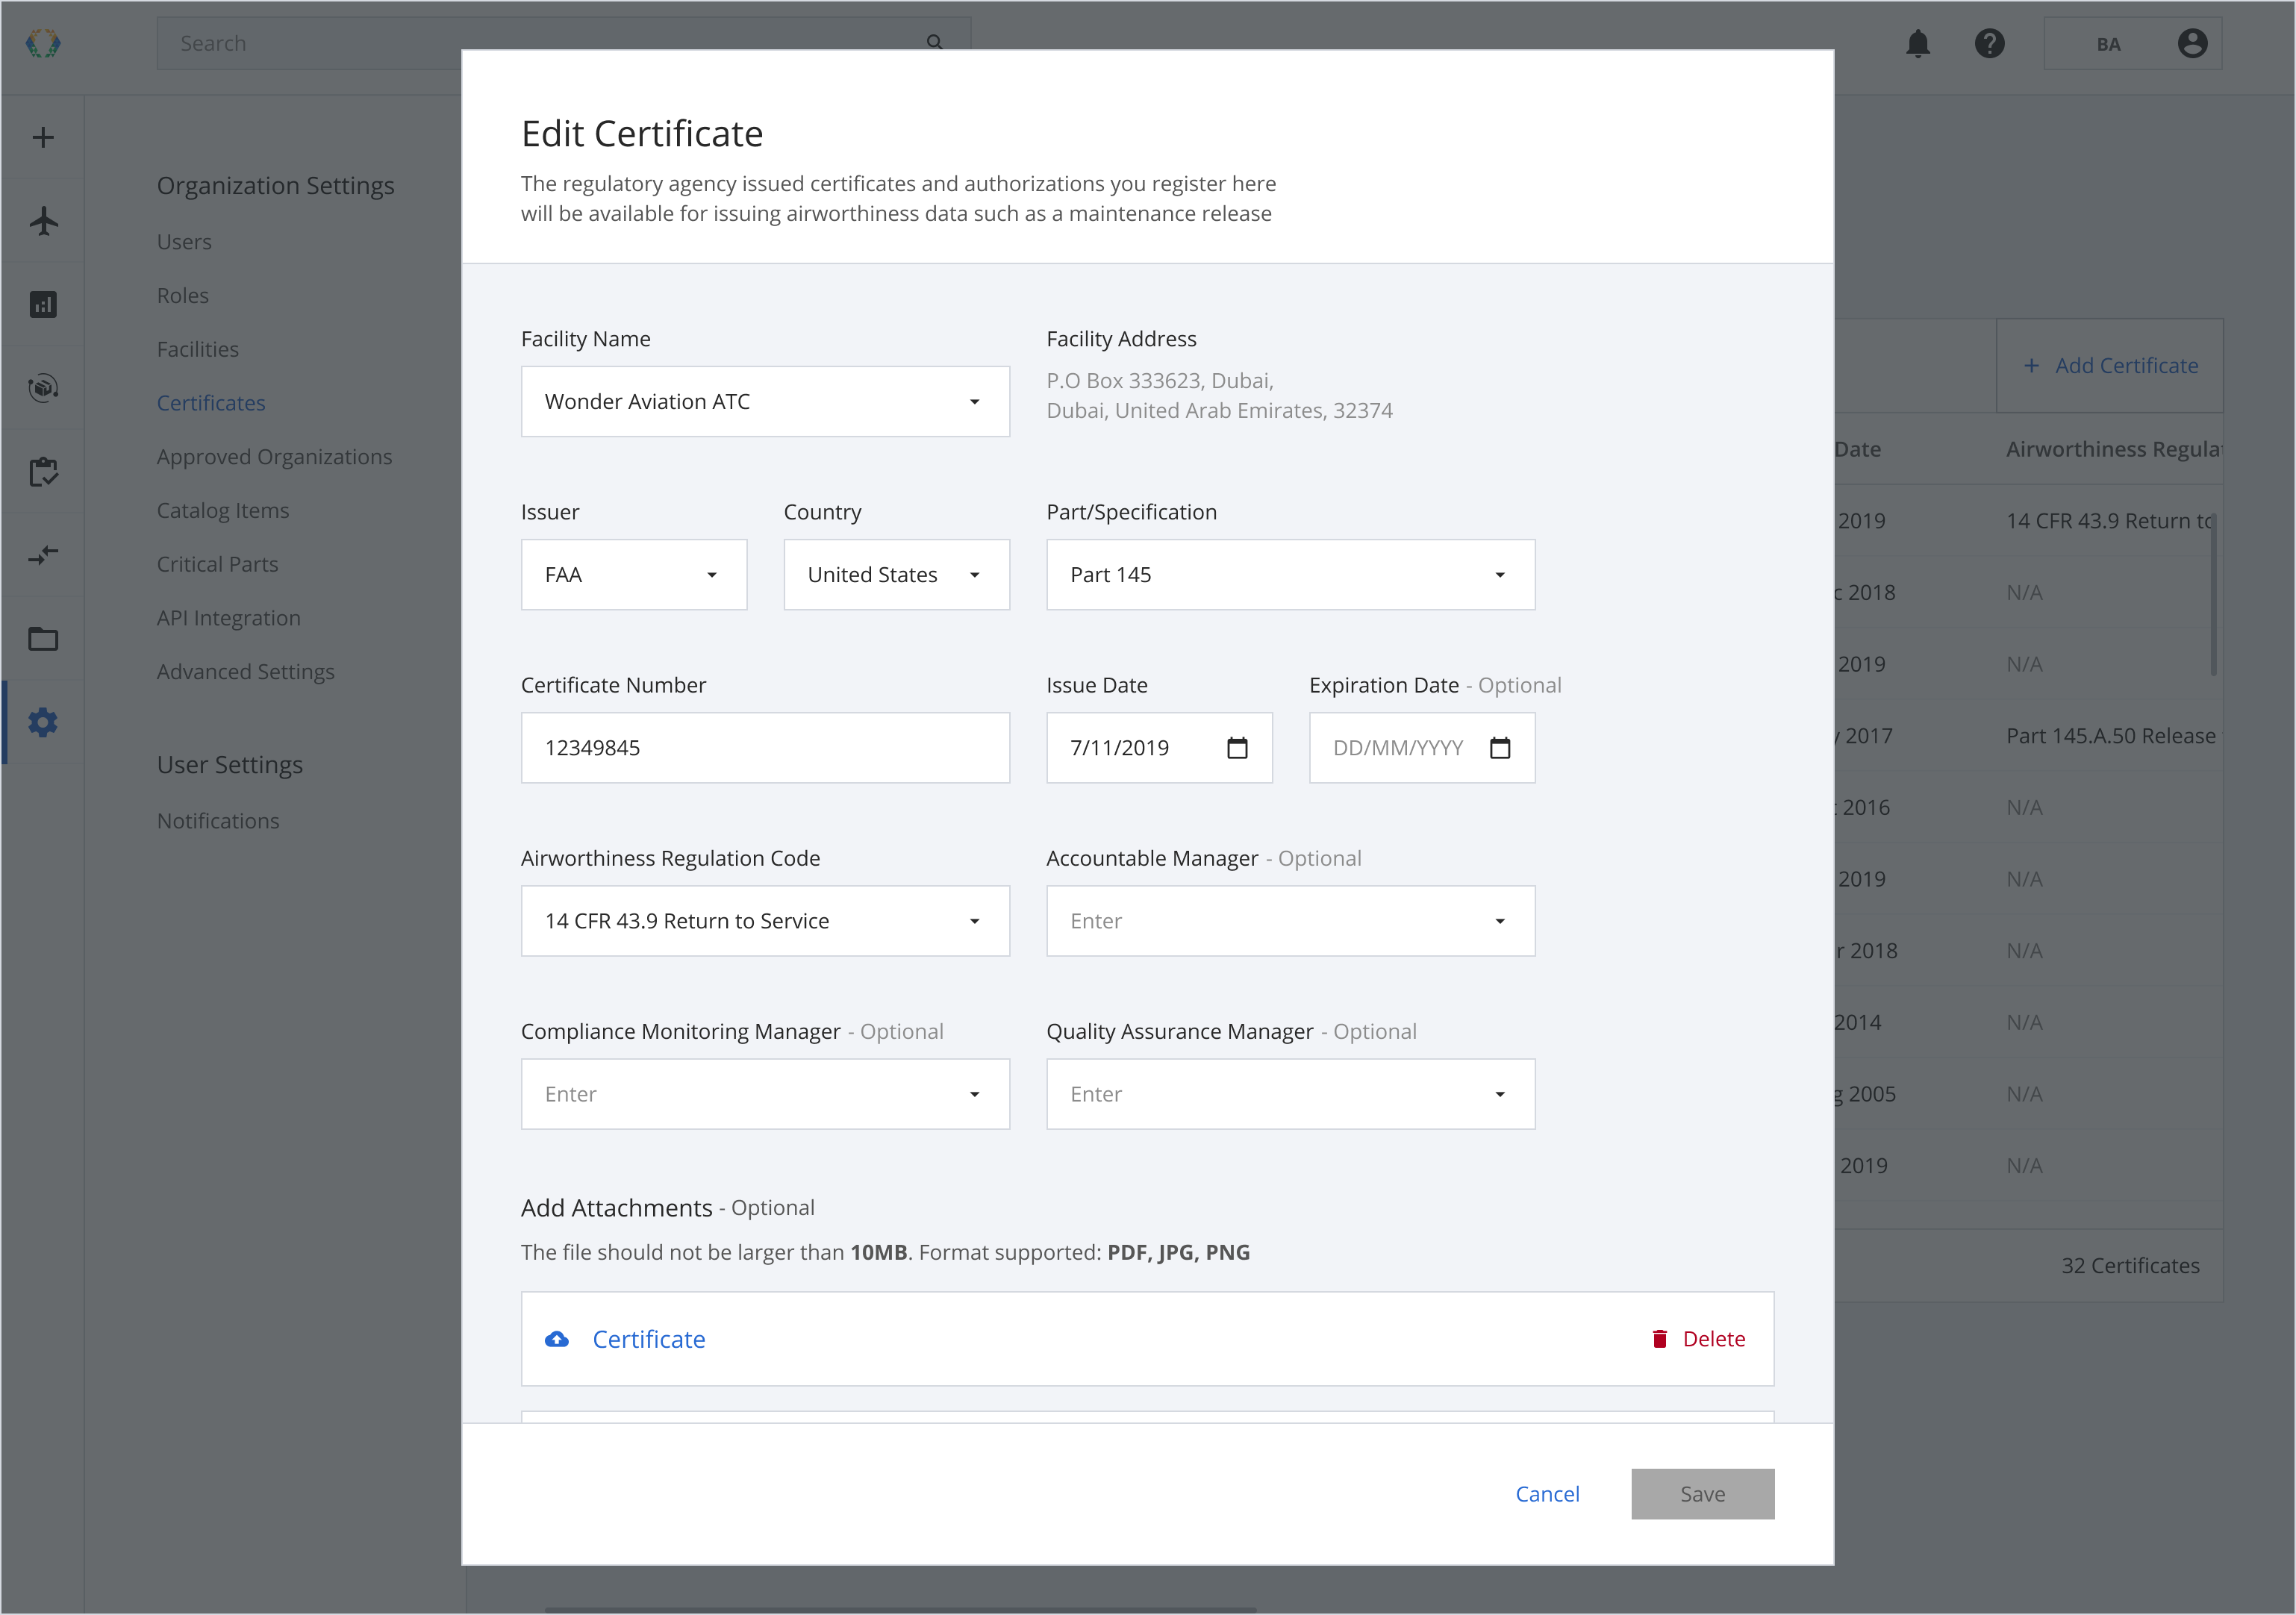
Step 3: You can edit the existing fields, add new information or upload a new attachment in the pop-up.
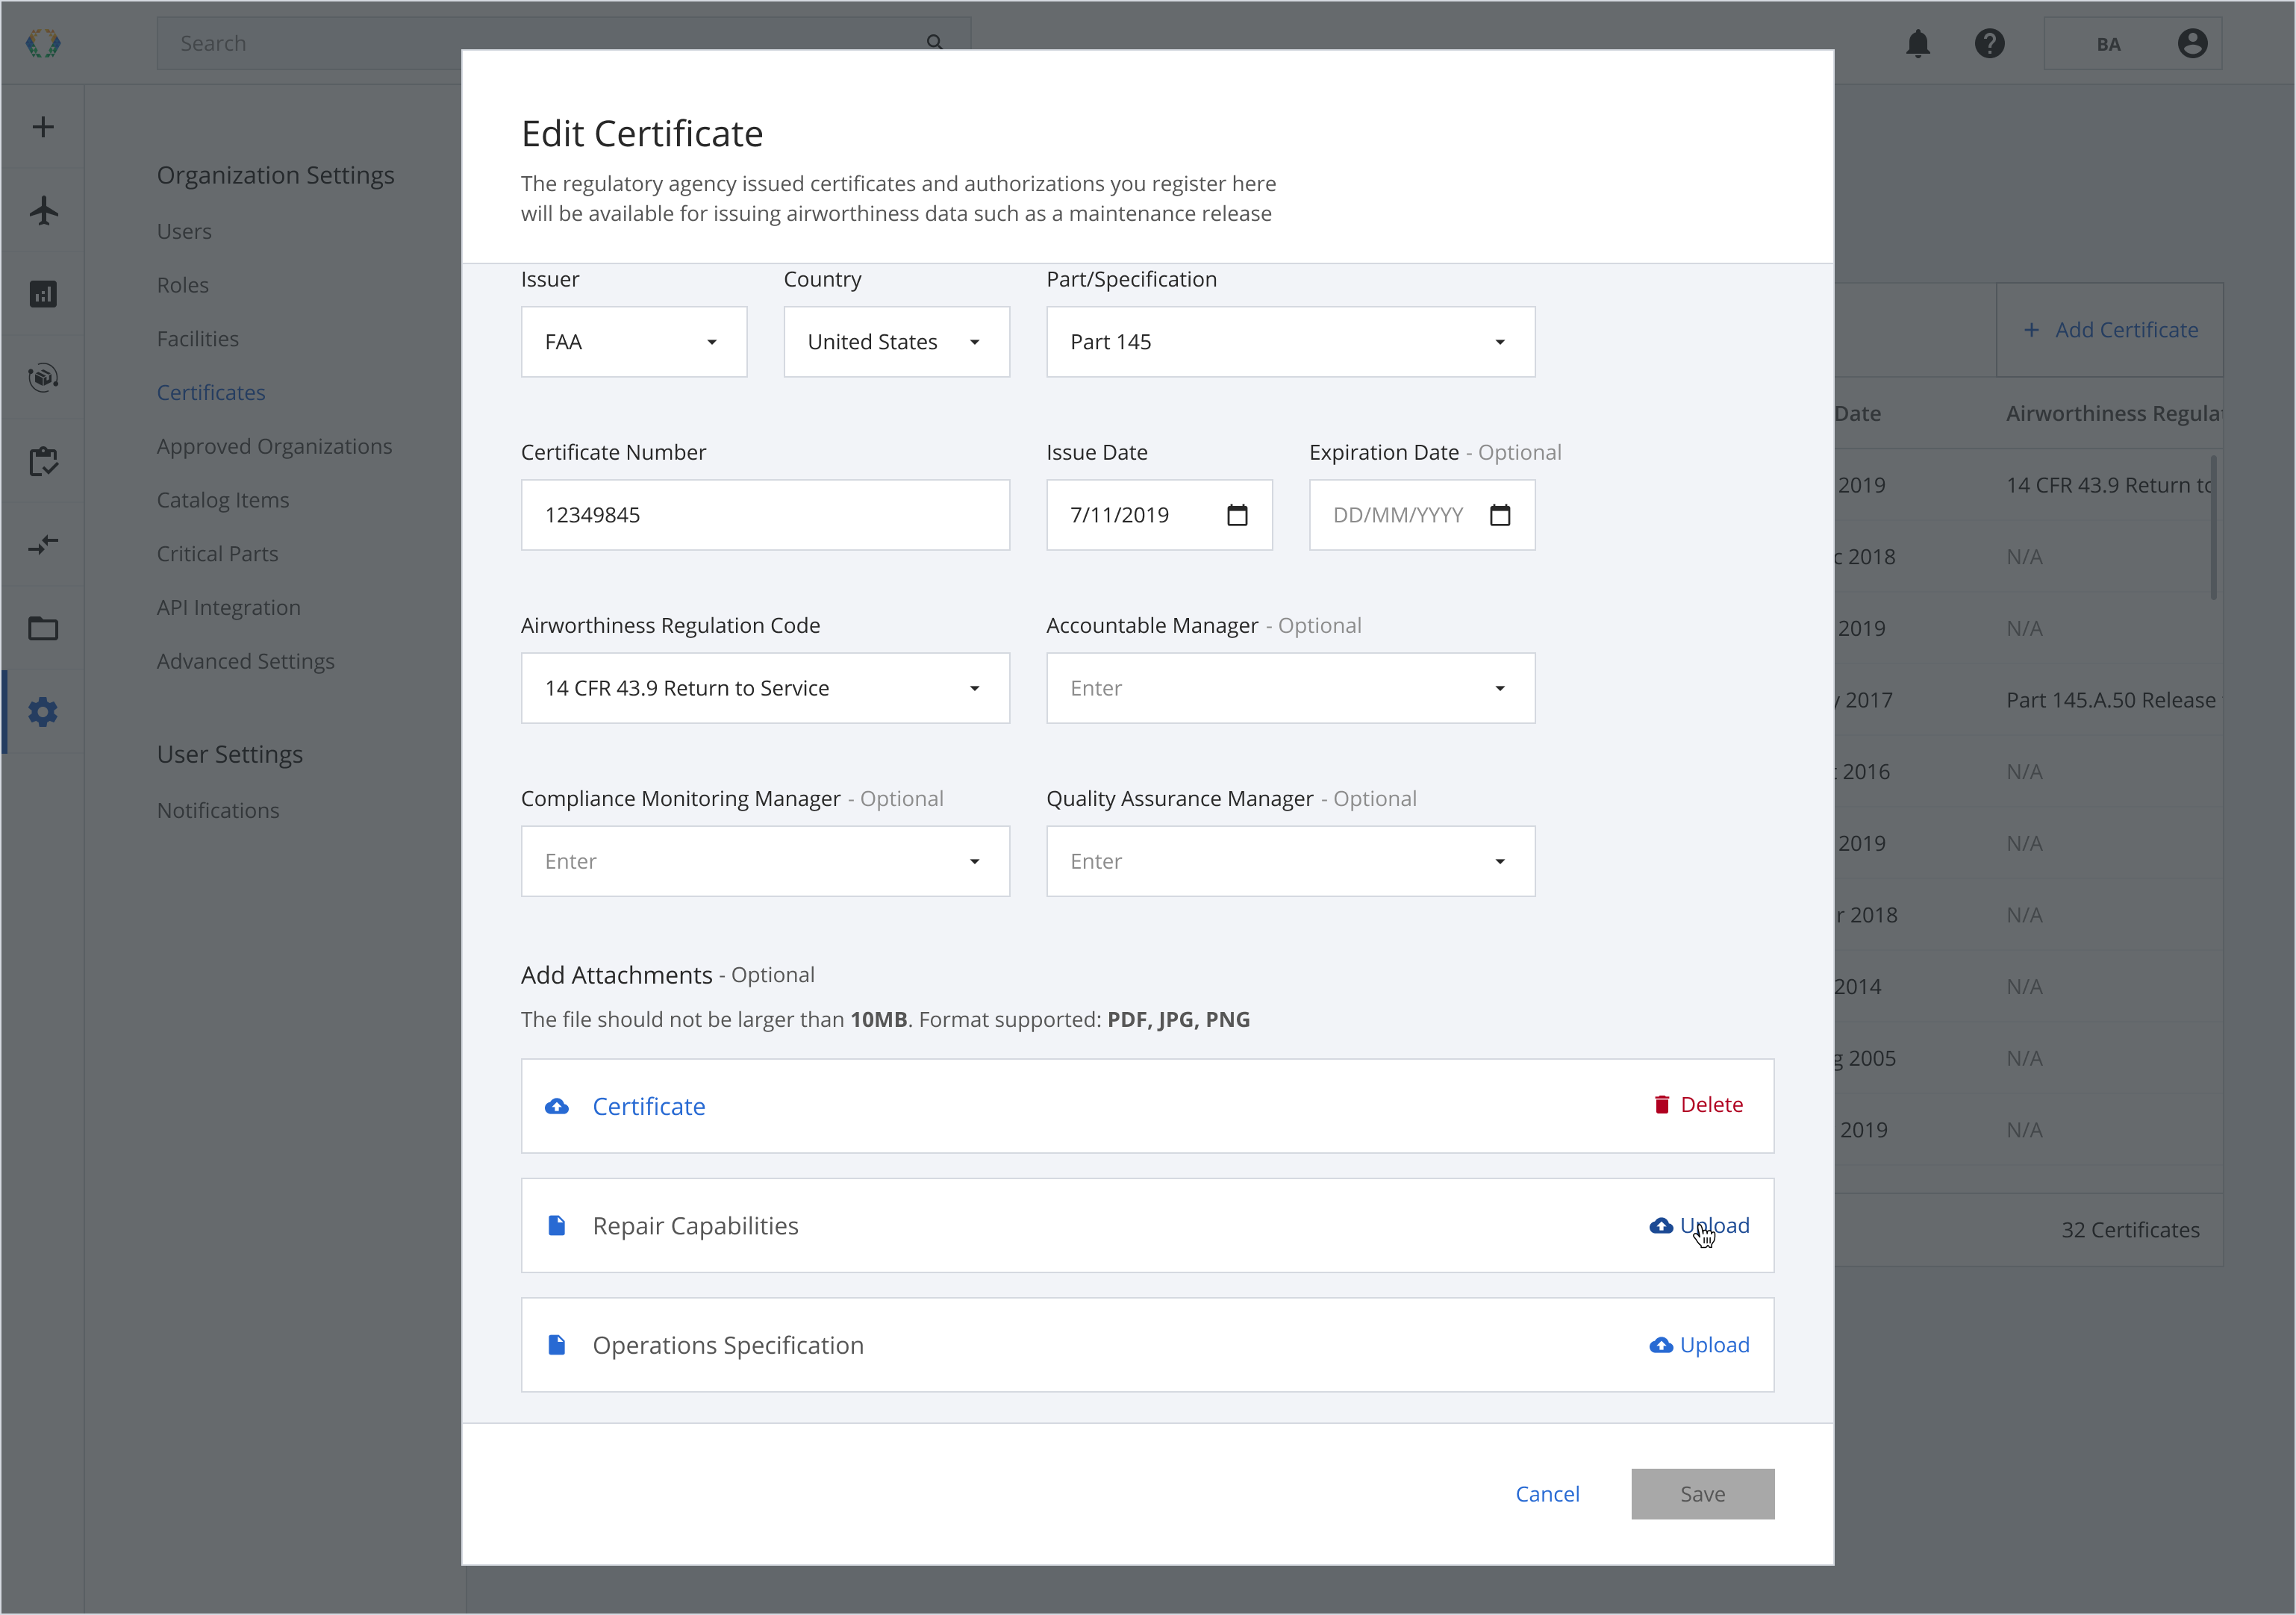
Step 4: Click 'Save'.
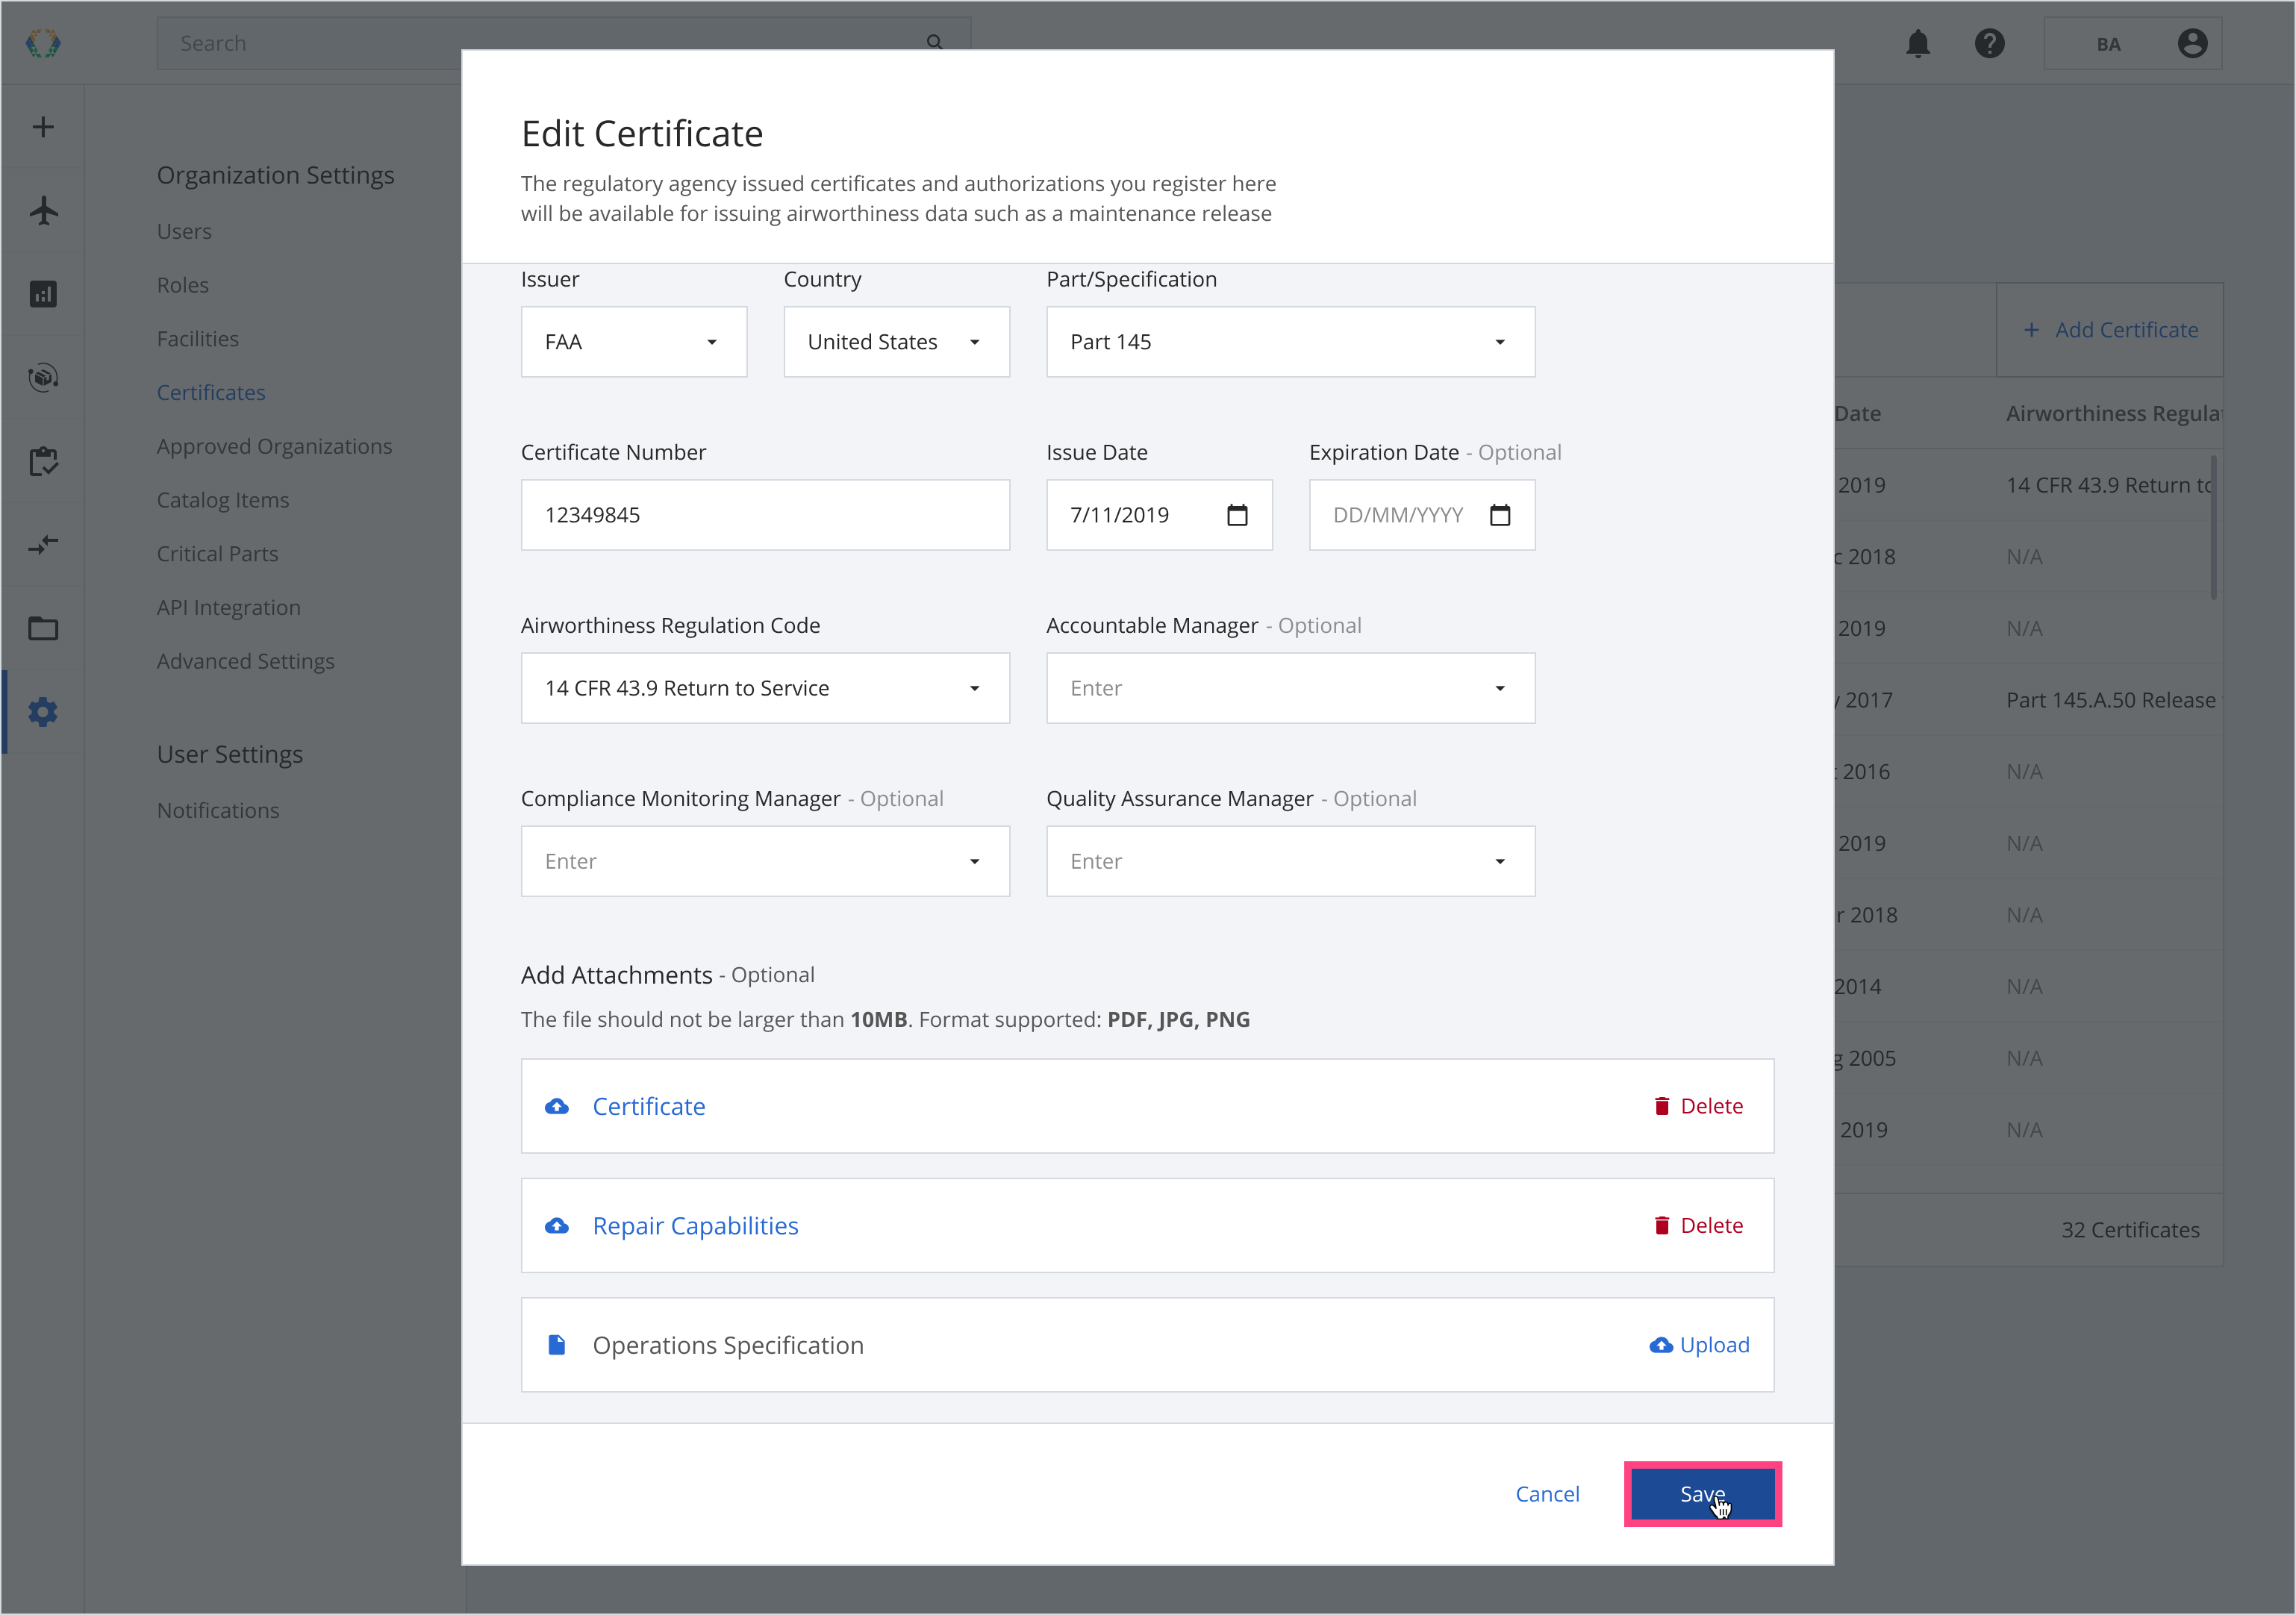
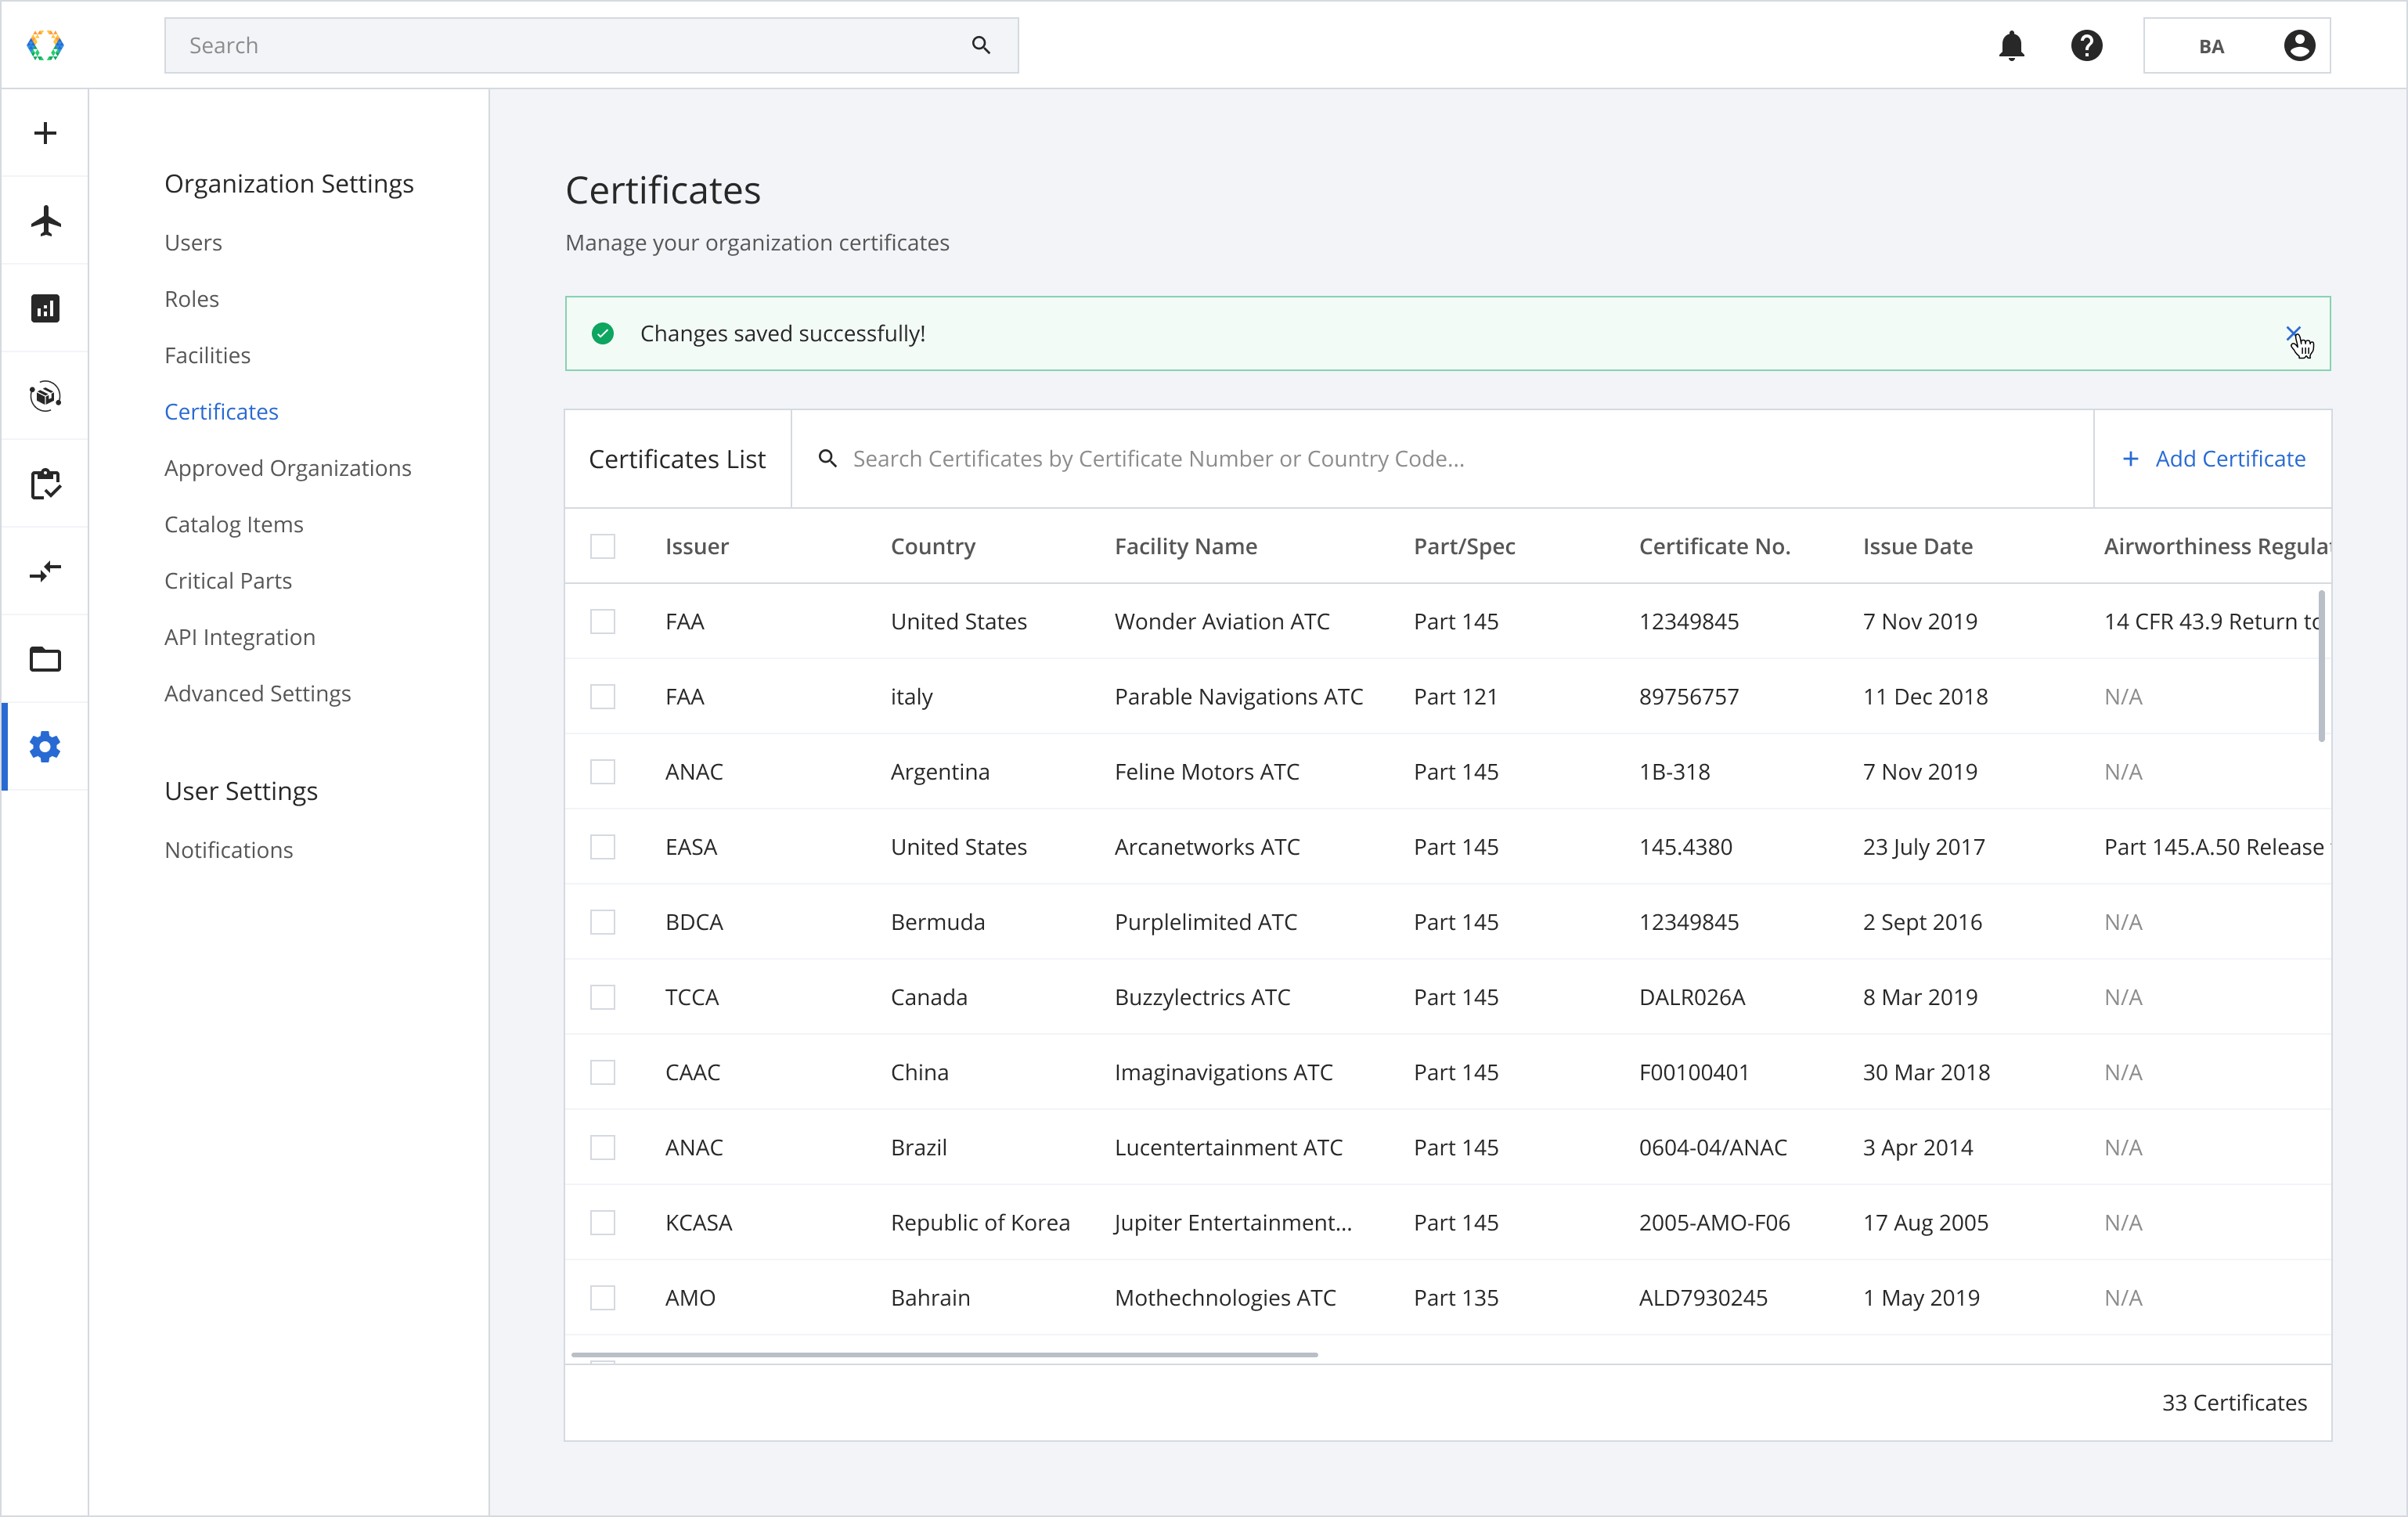
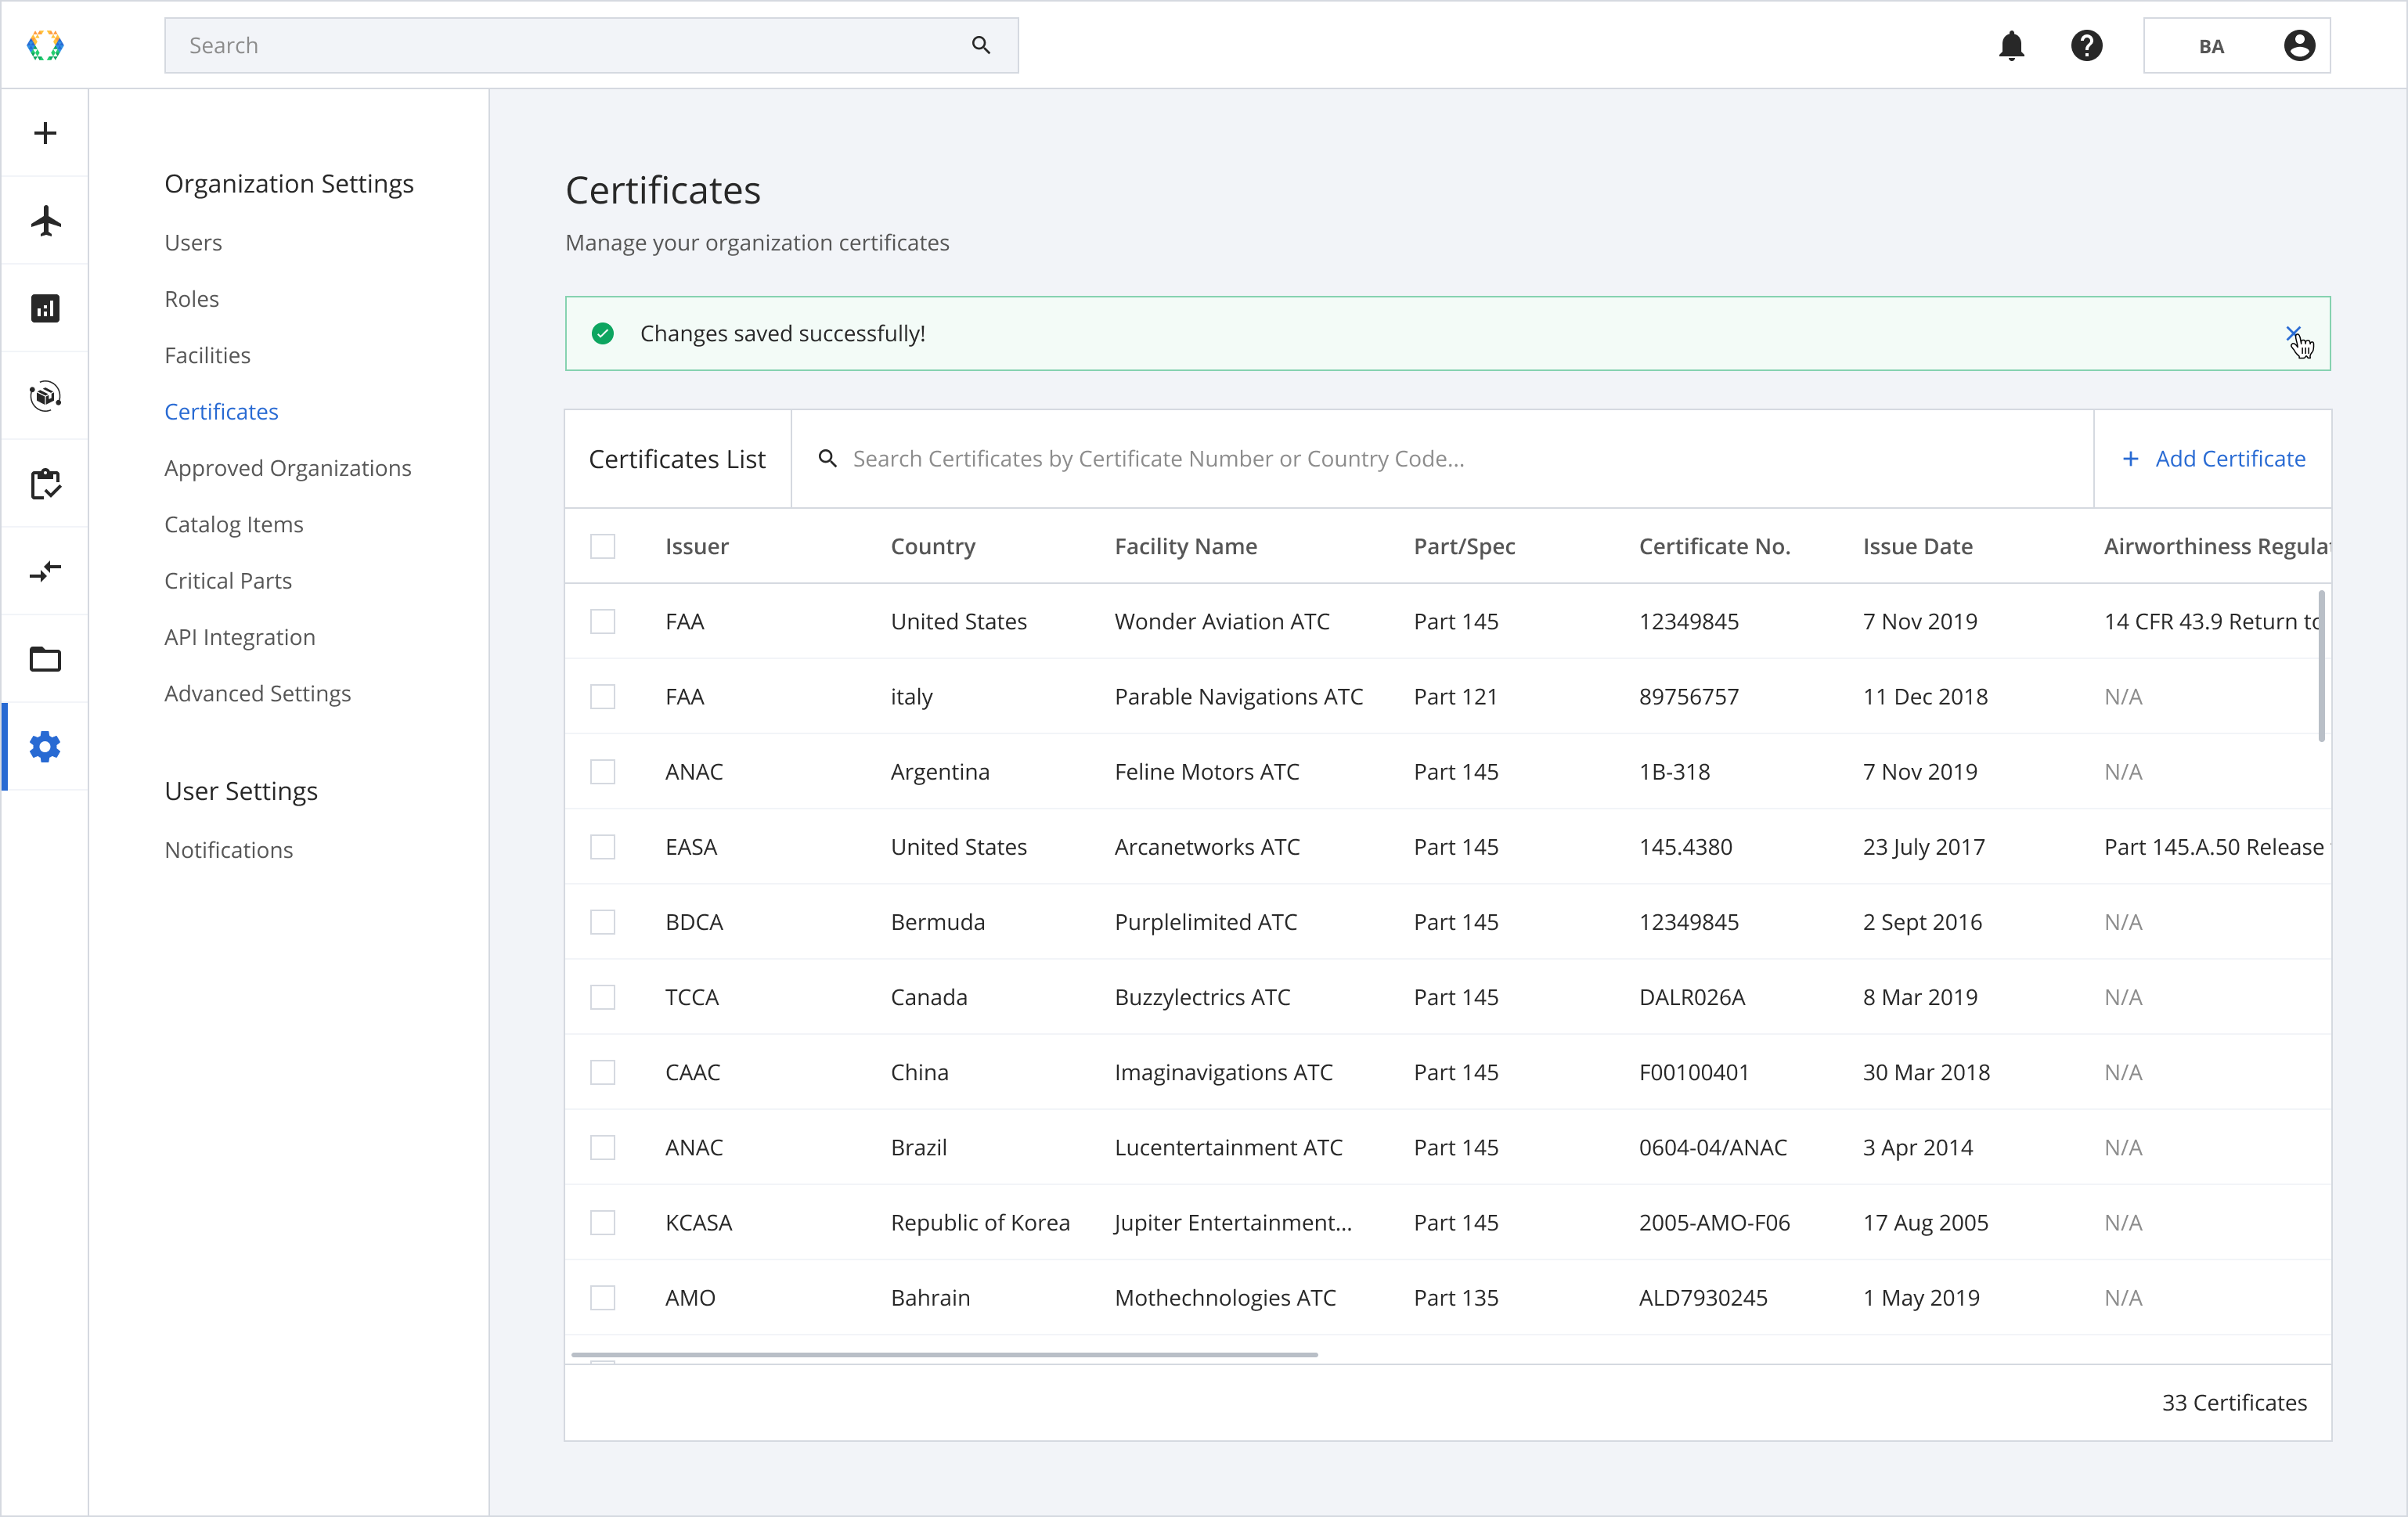
Once the certificate has been updated, a green banner will appear at the top of the certificates list.
Delete Certificates
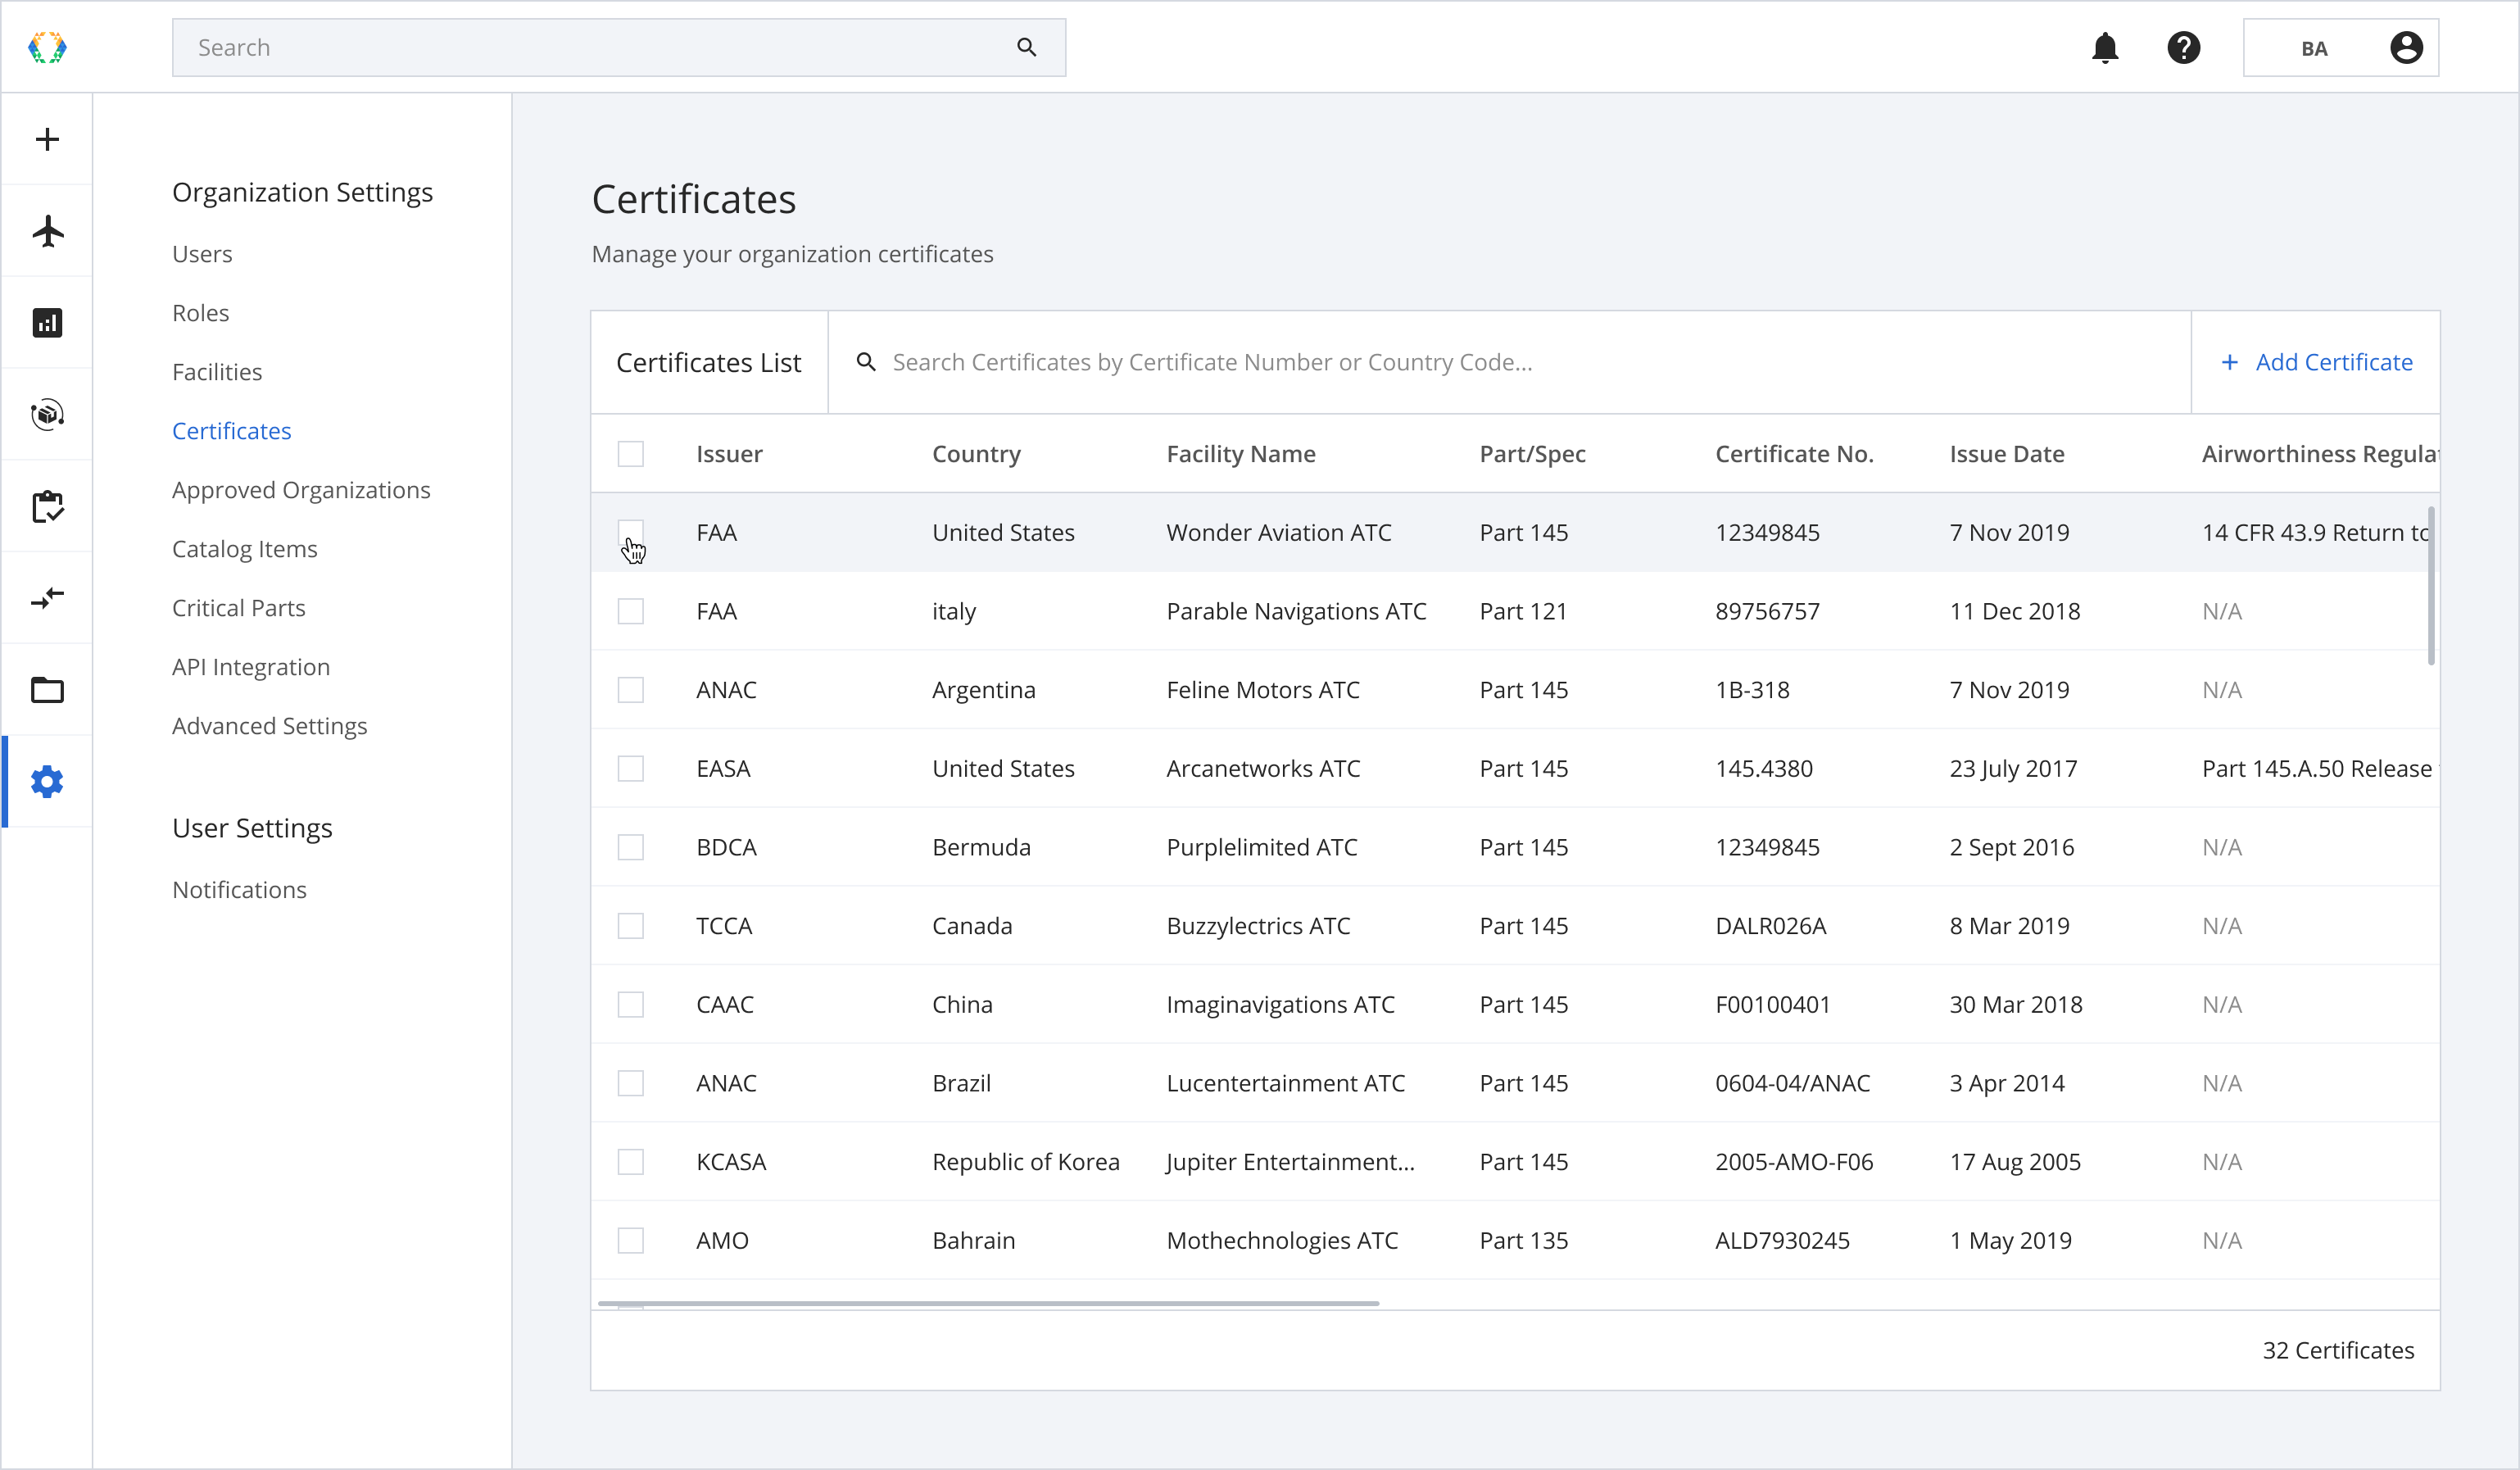
Step 1: From the Certificates List, select the certificate you want to delete.
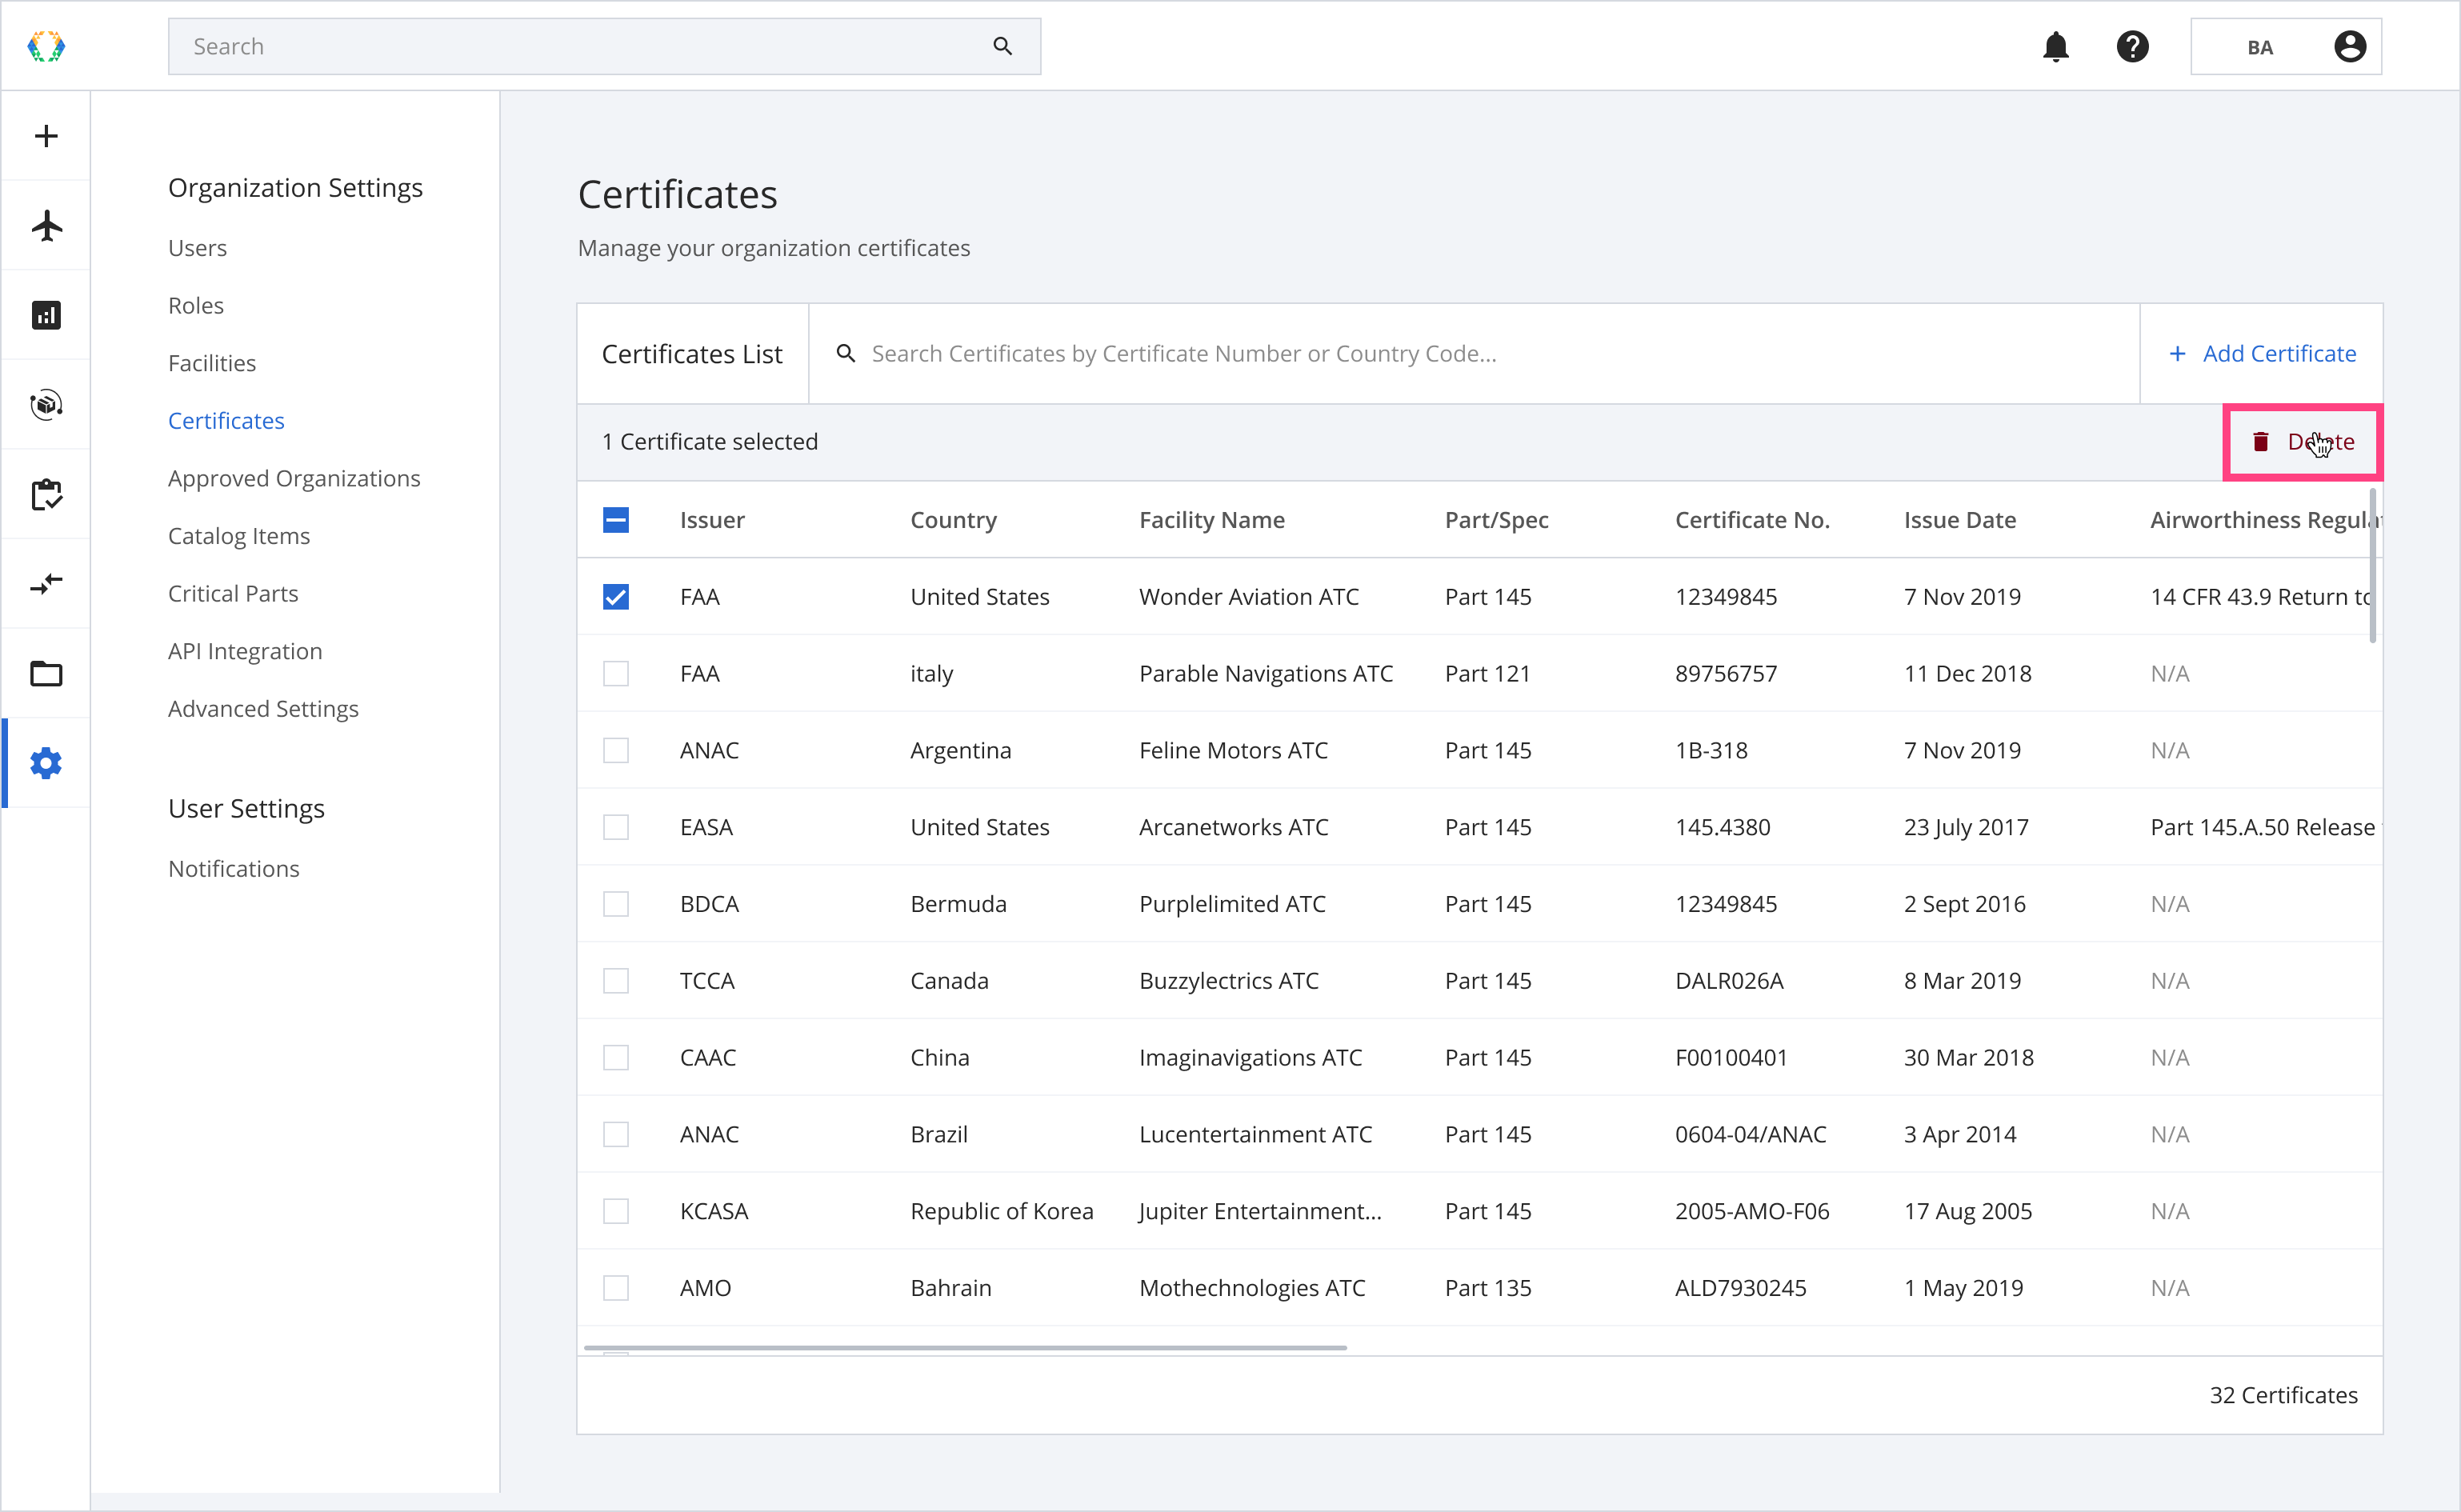
Step 2: Click ‘Delete’.
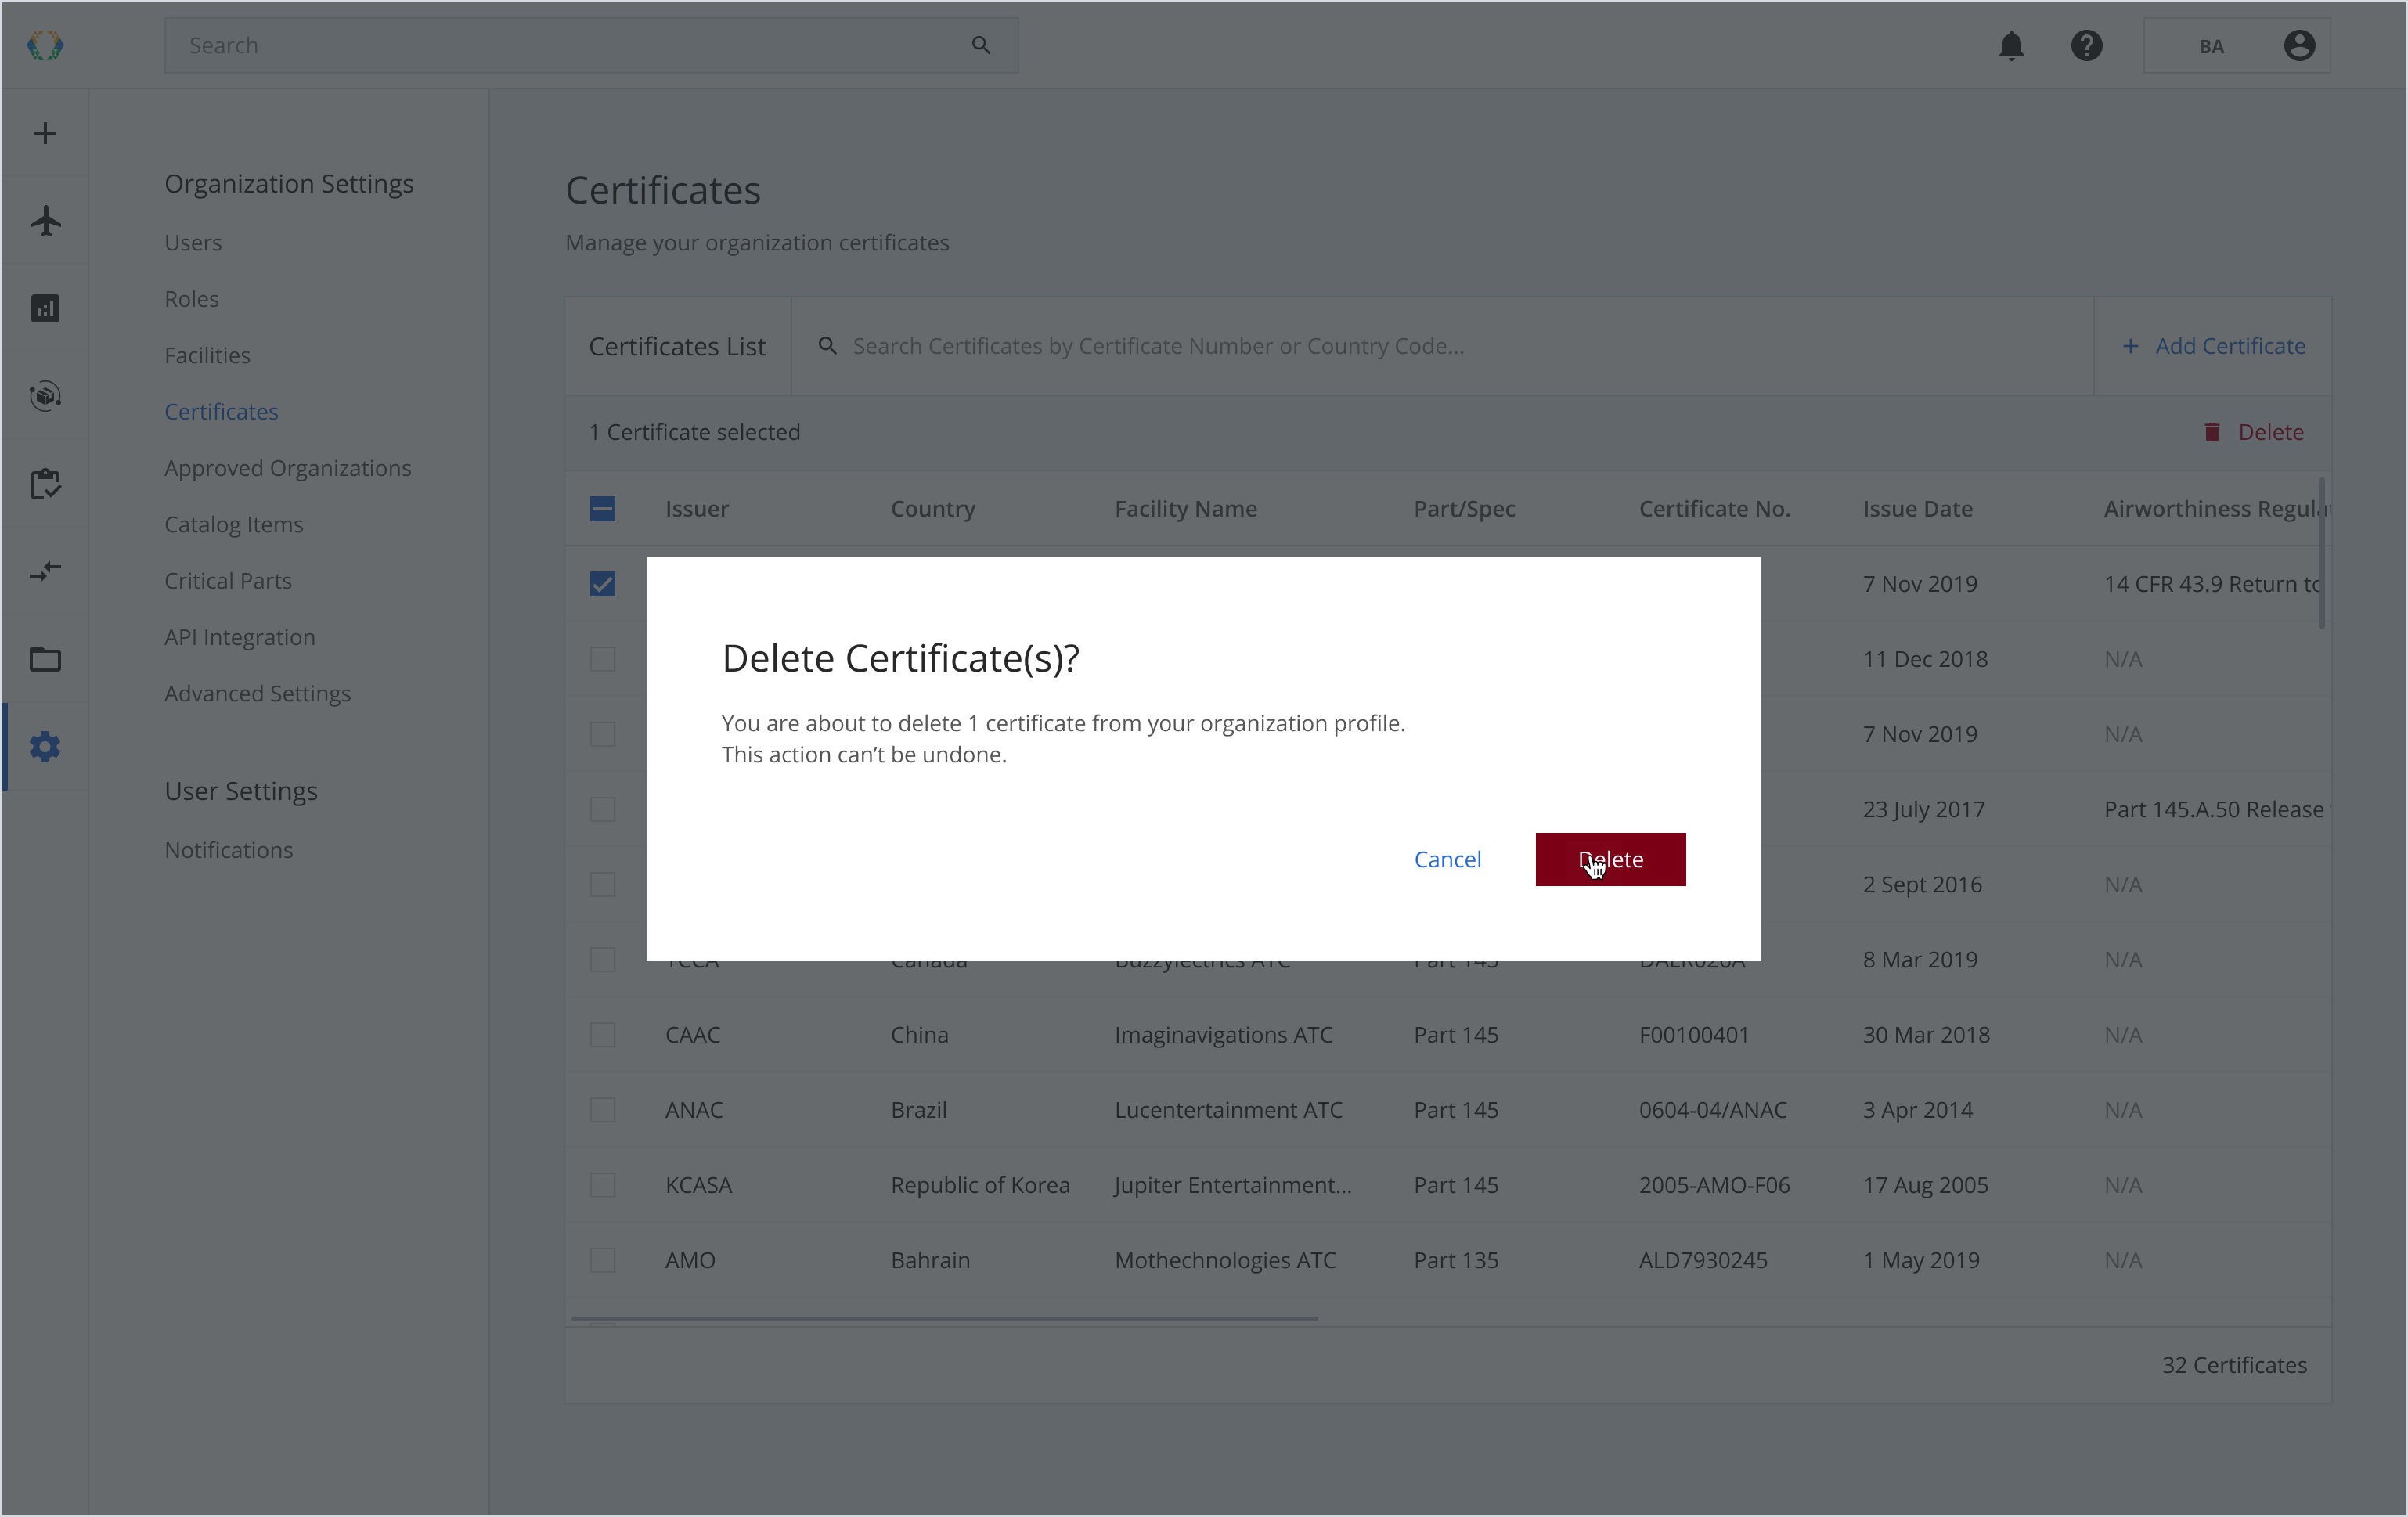
Step 3: A confirmation message will appear, click ‘Delete’.
Once the certificate is deleted, a green banner will appear at the top of the certificates list.
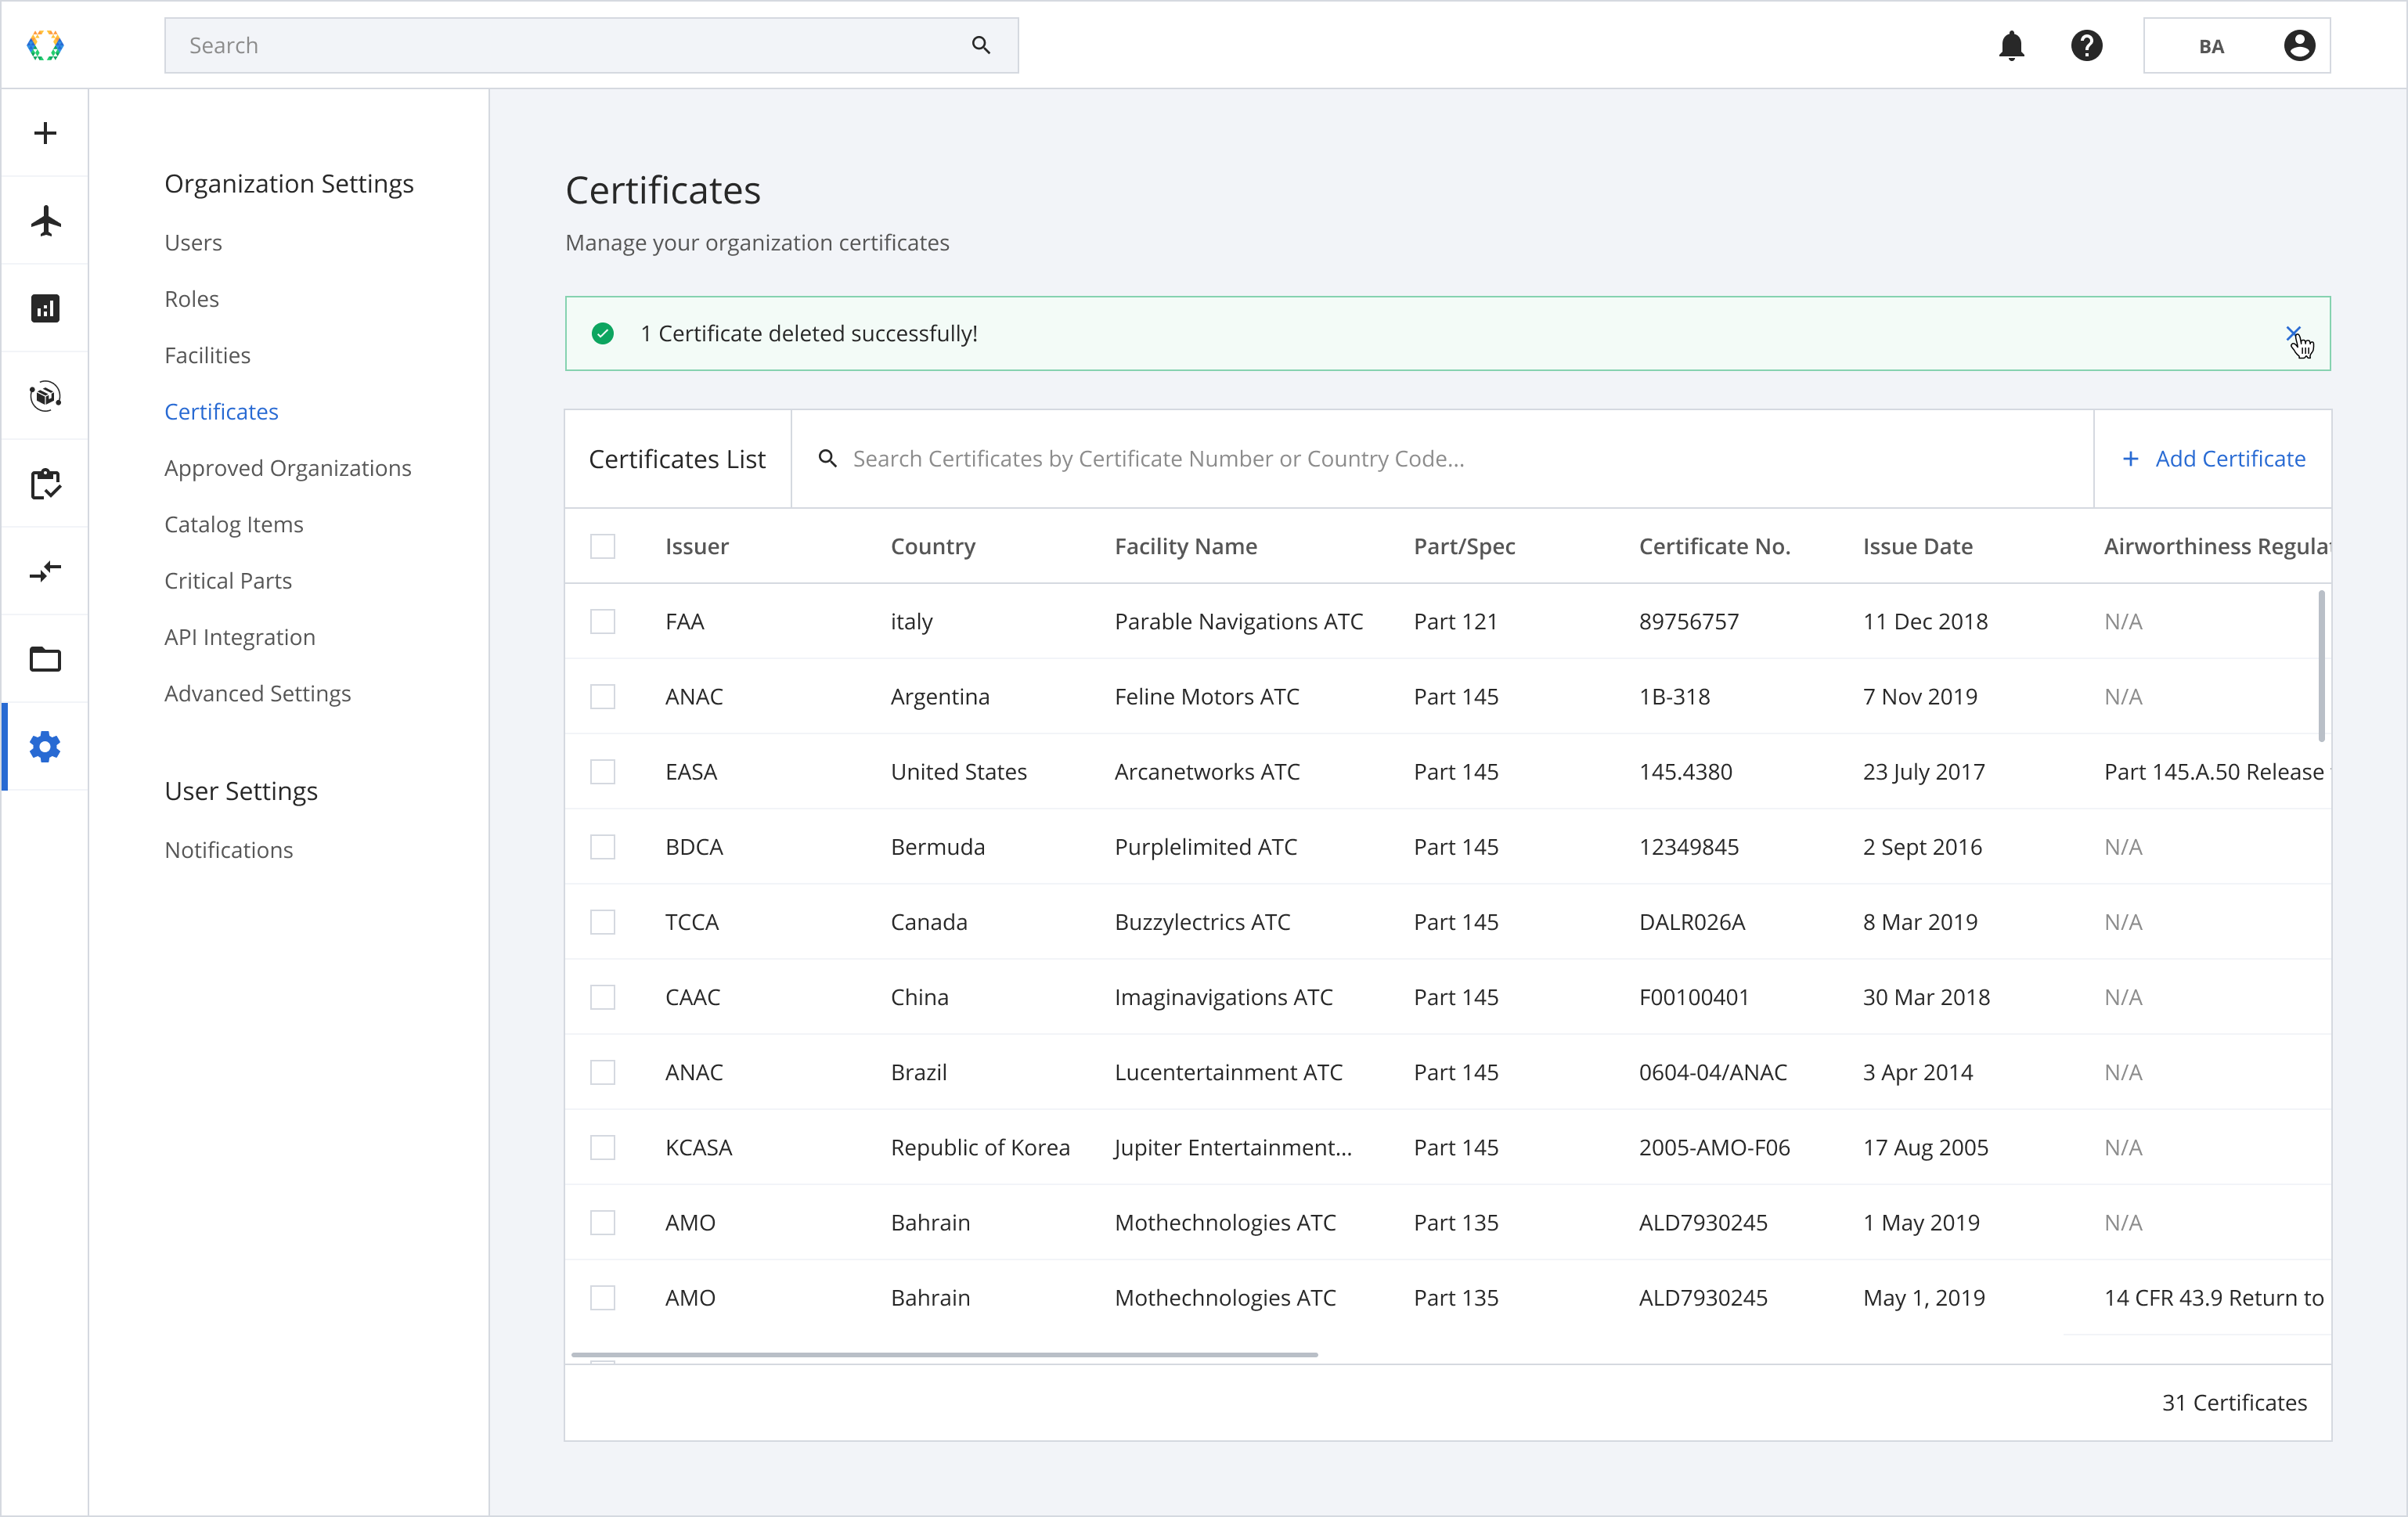
Delete Attachments
Step 1: From the Certificates List, open the certificate you want delete attachments from.
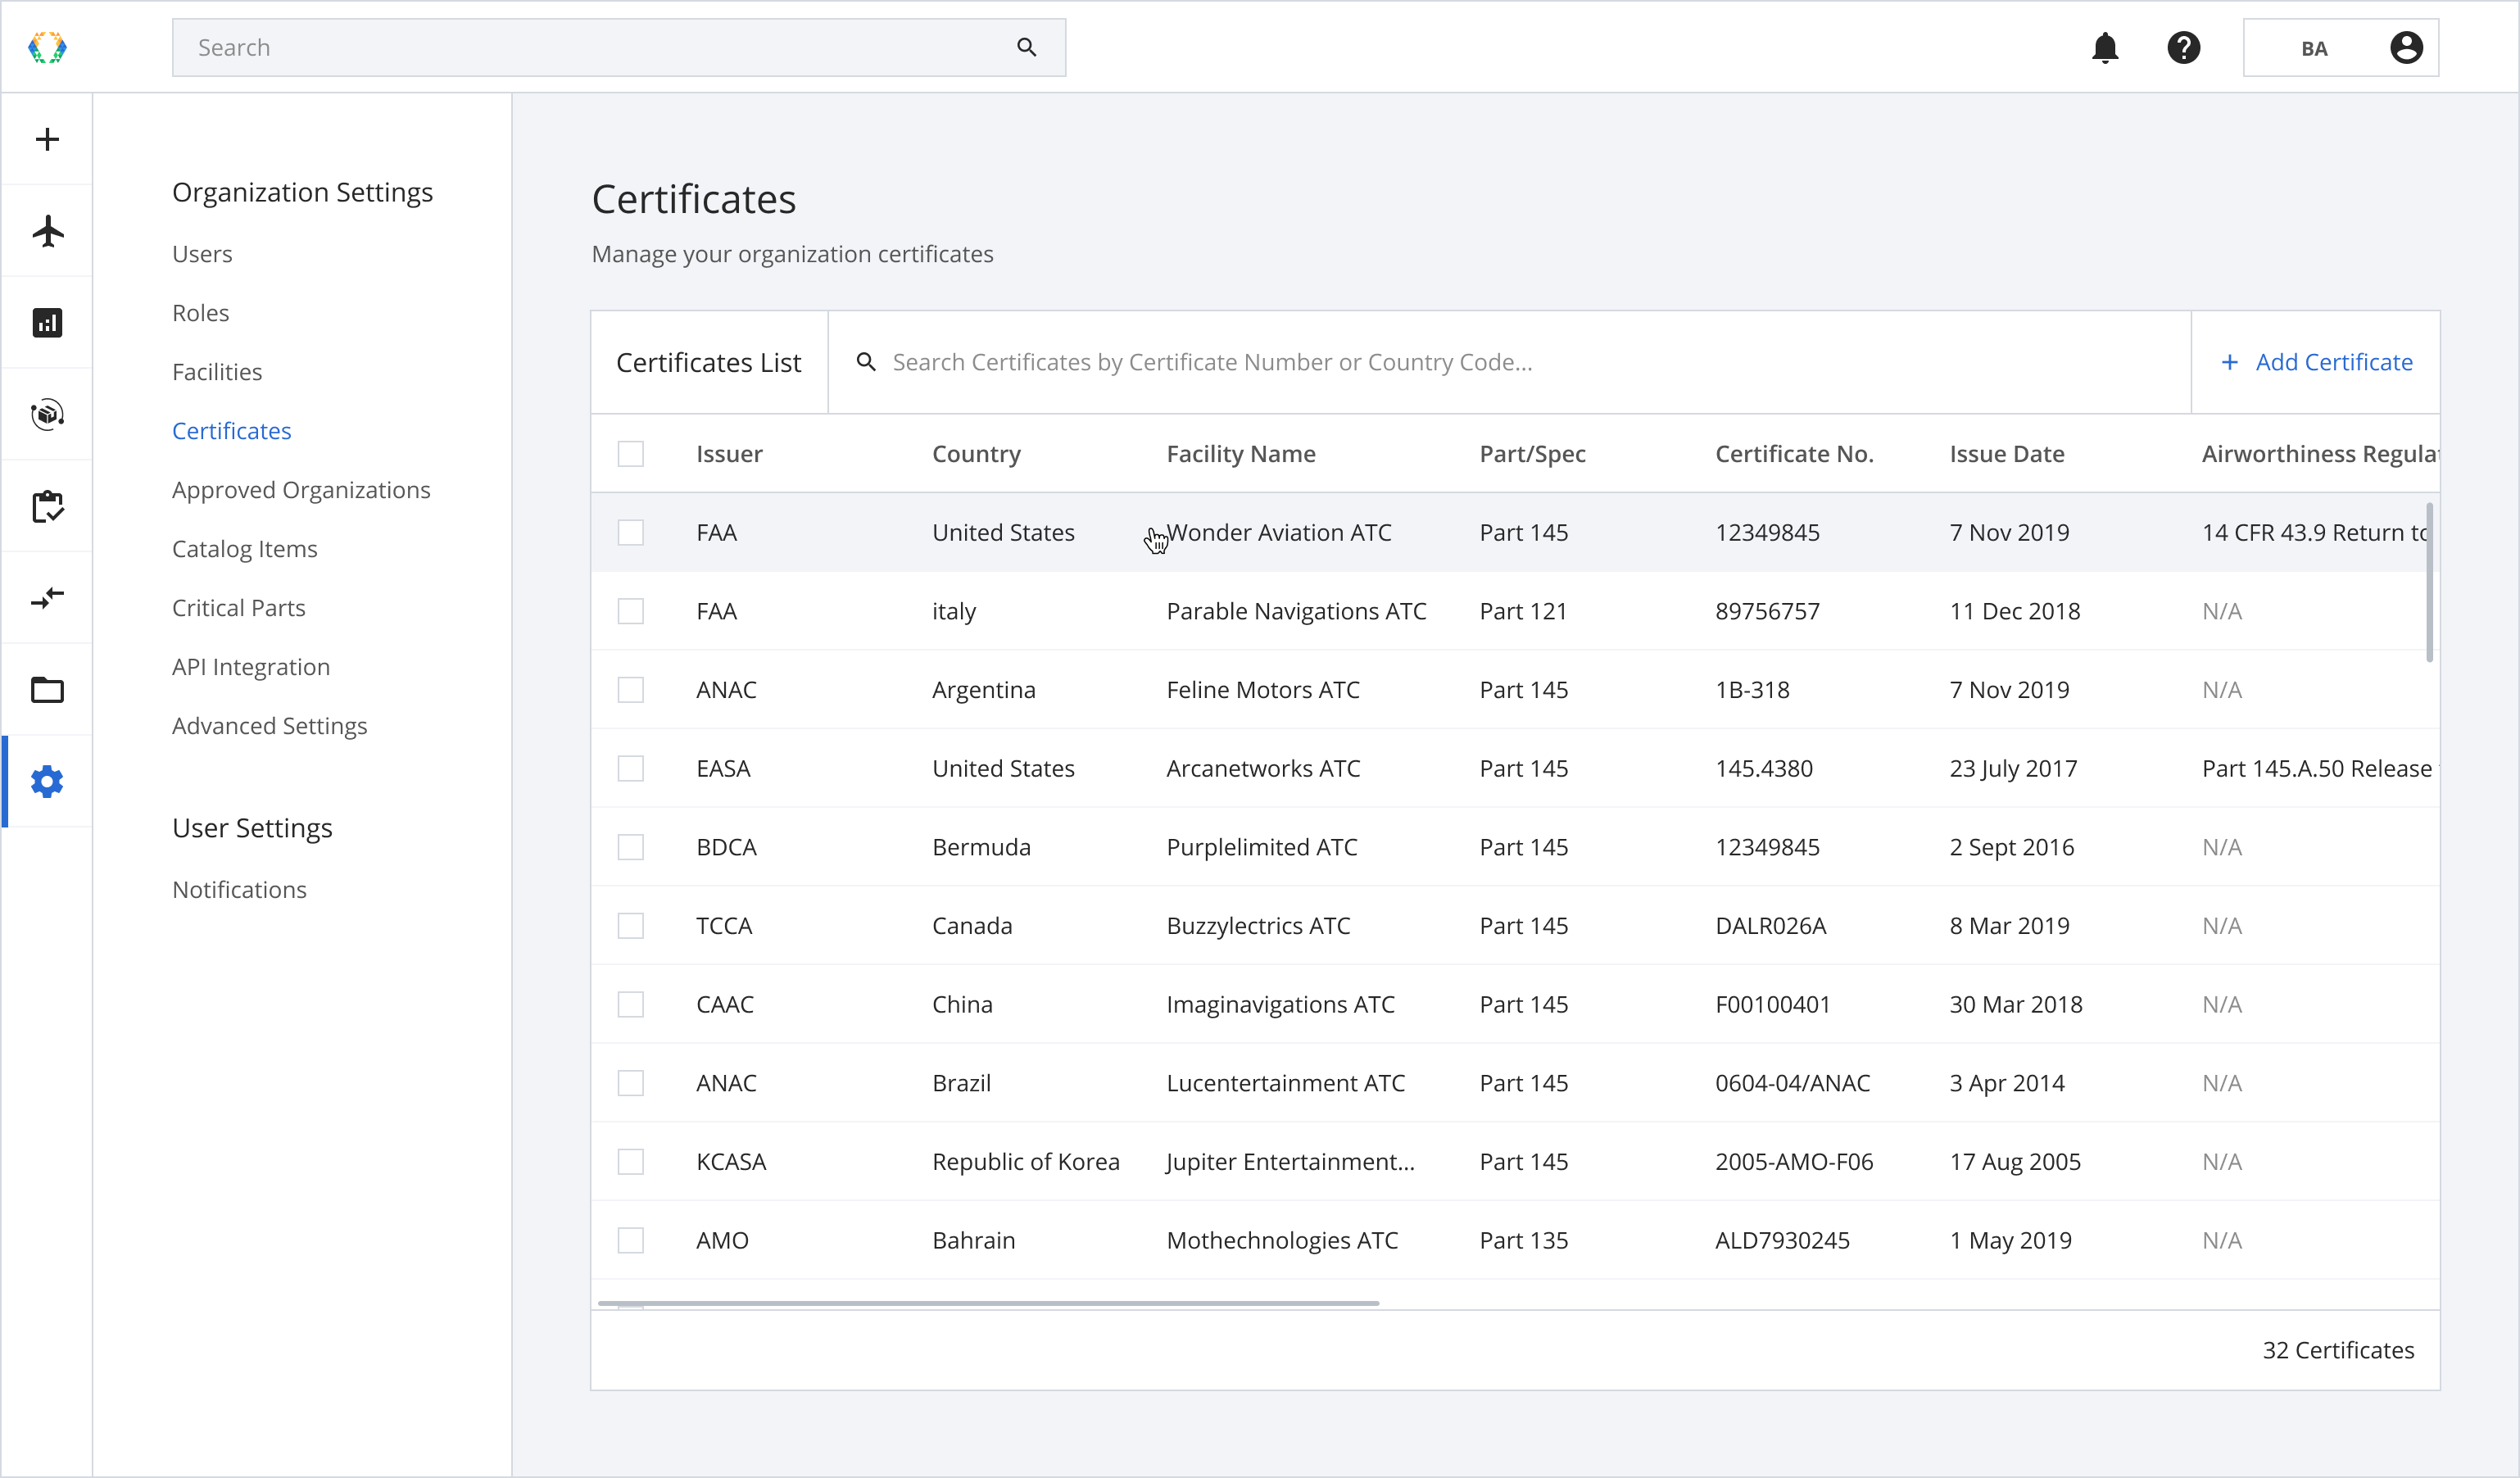
Step 2: Edit the certificates details.
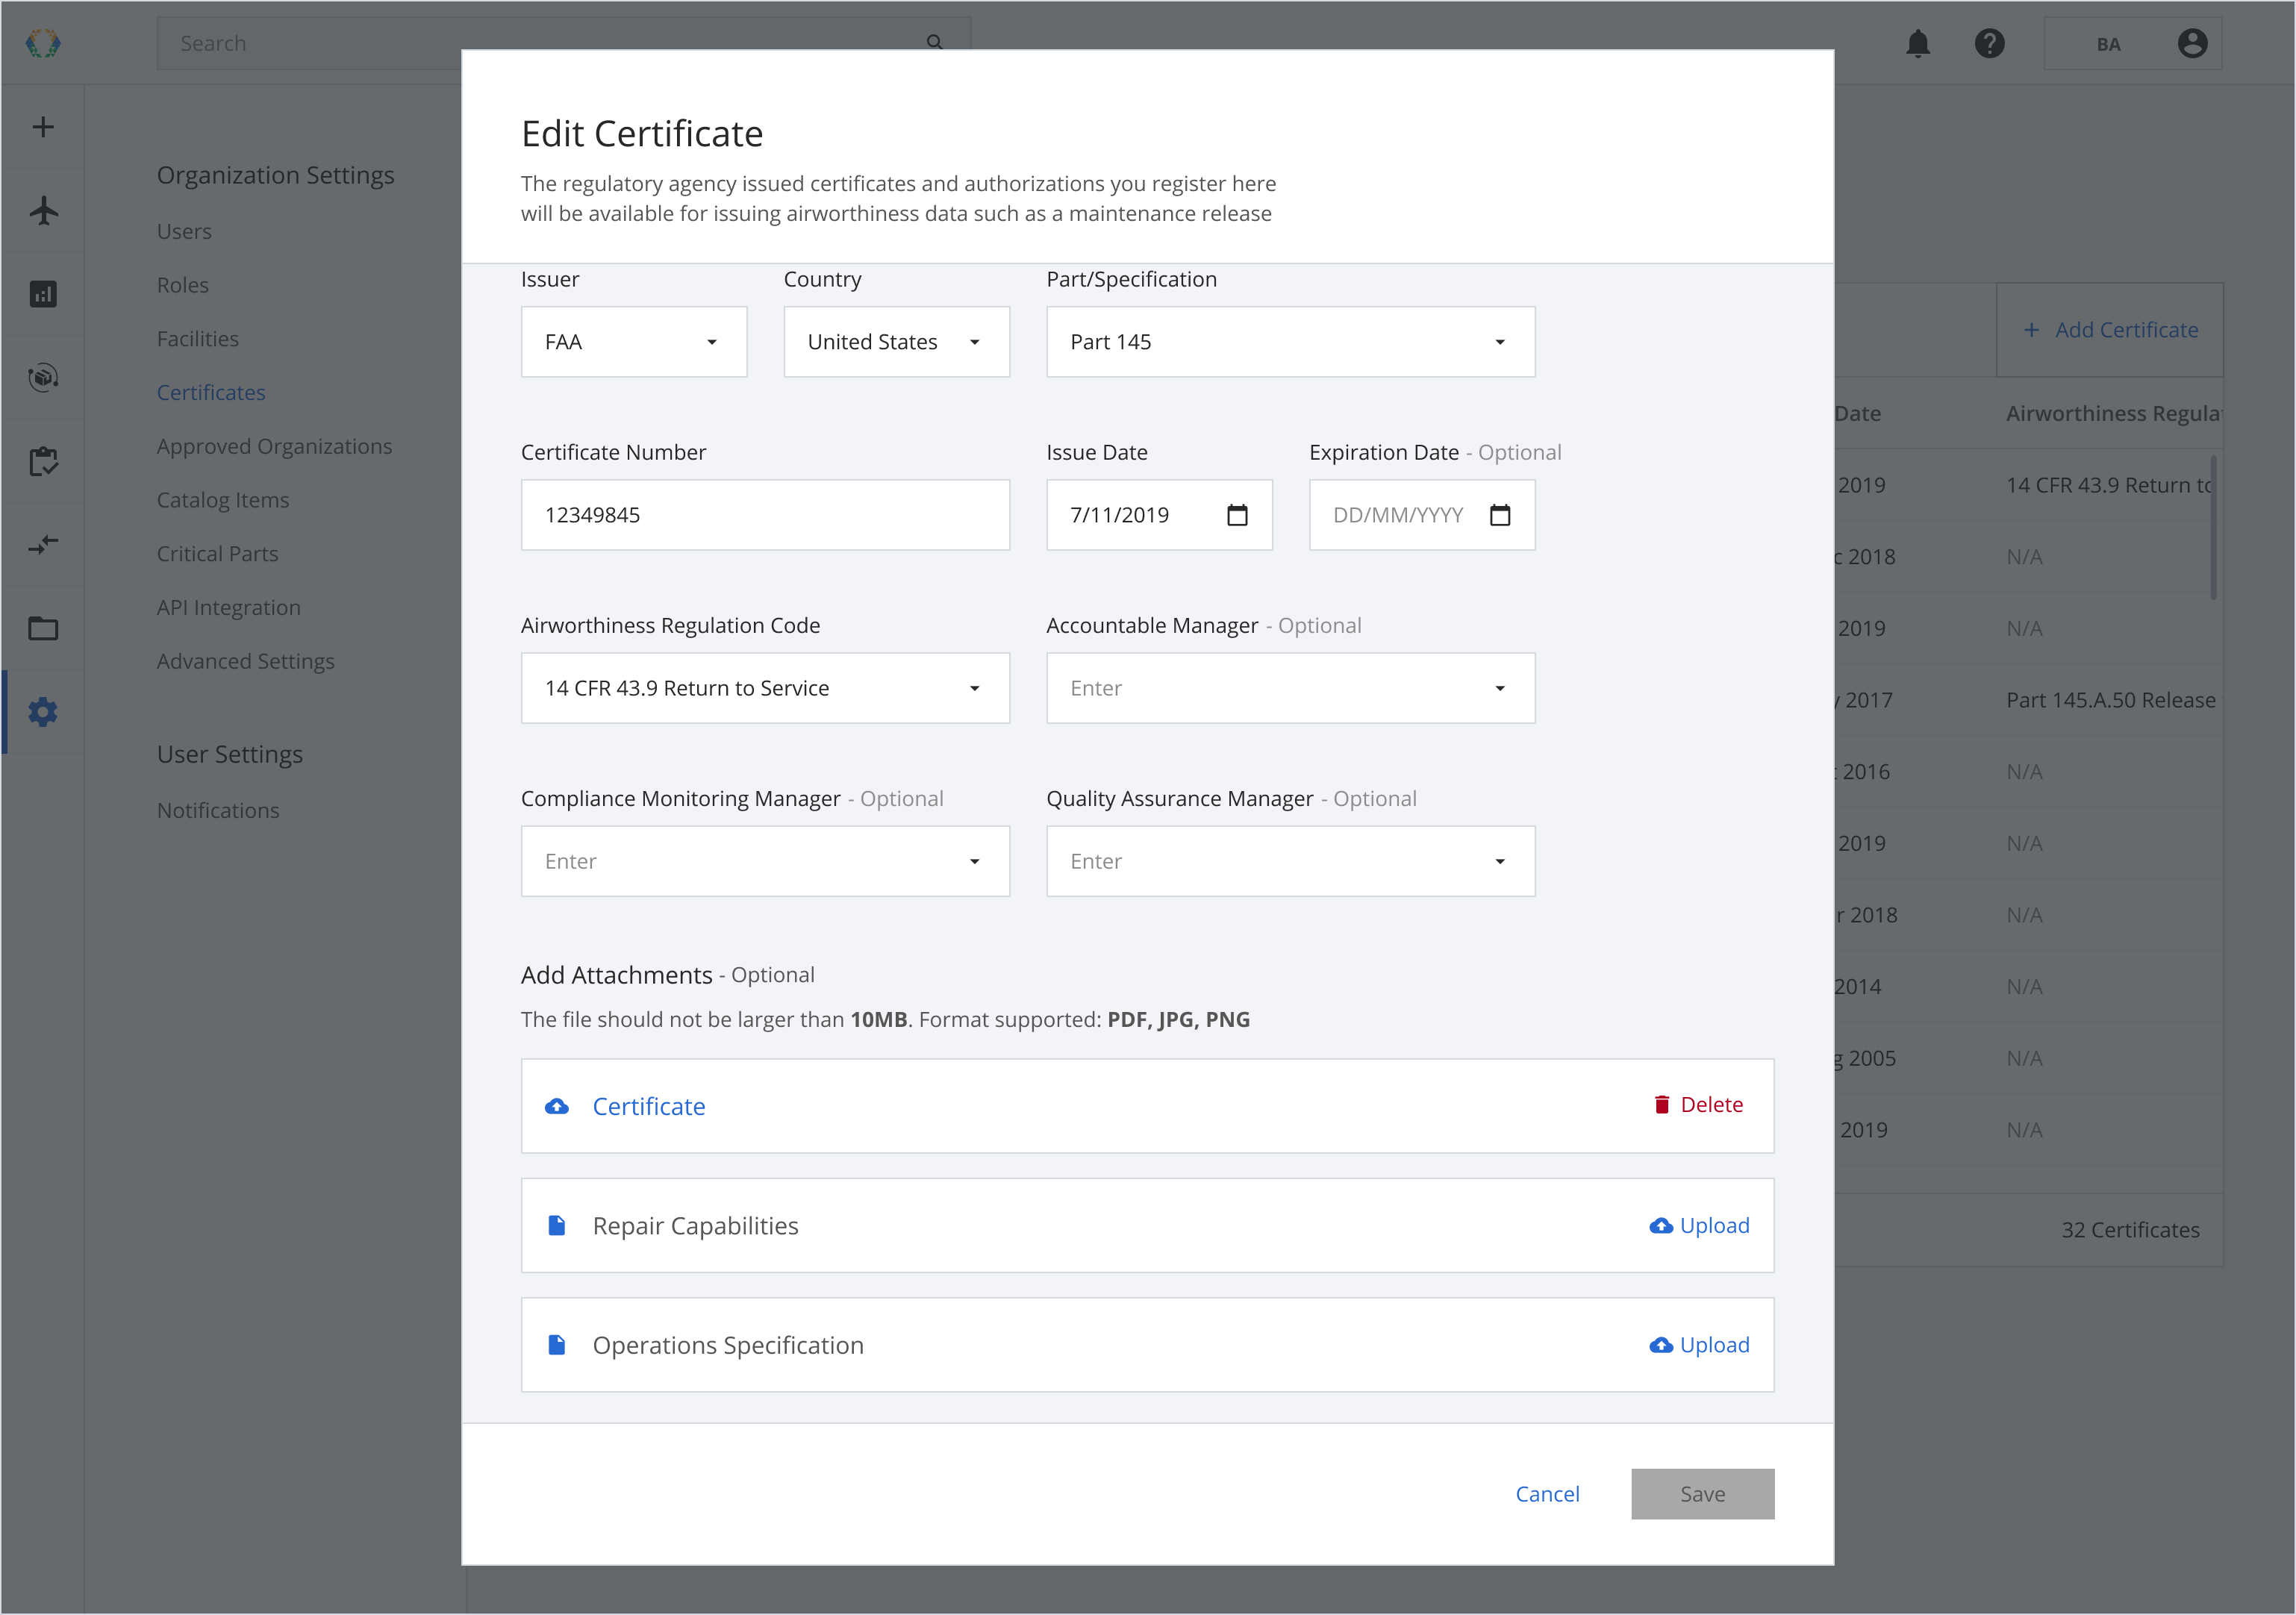
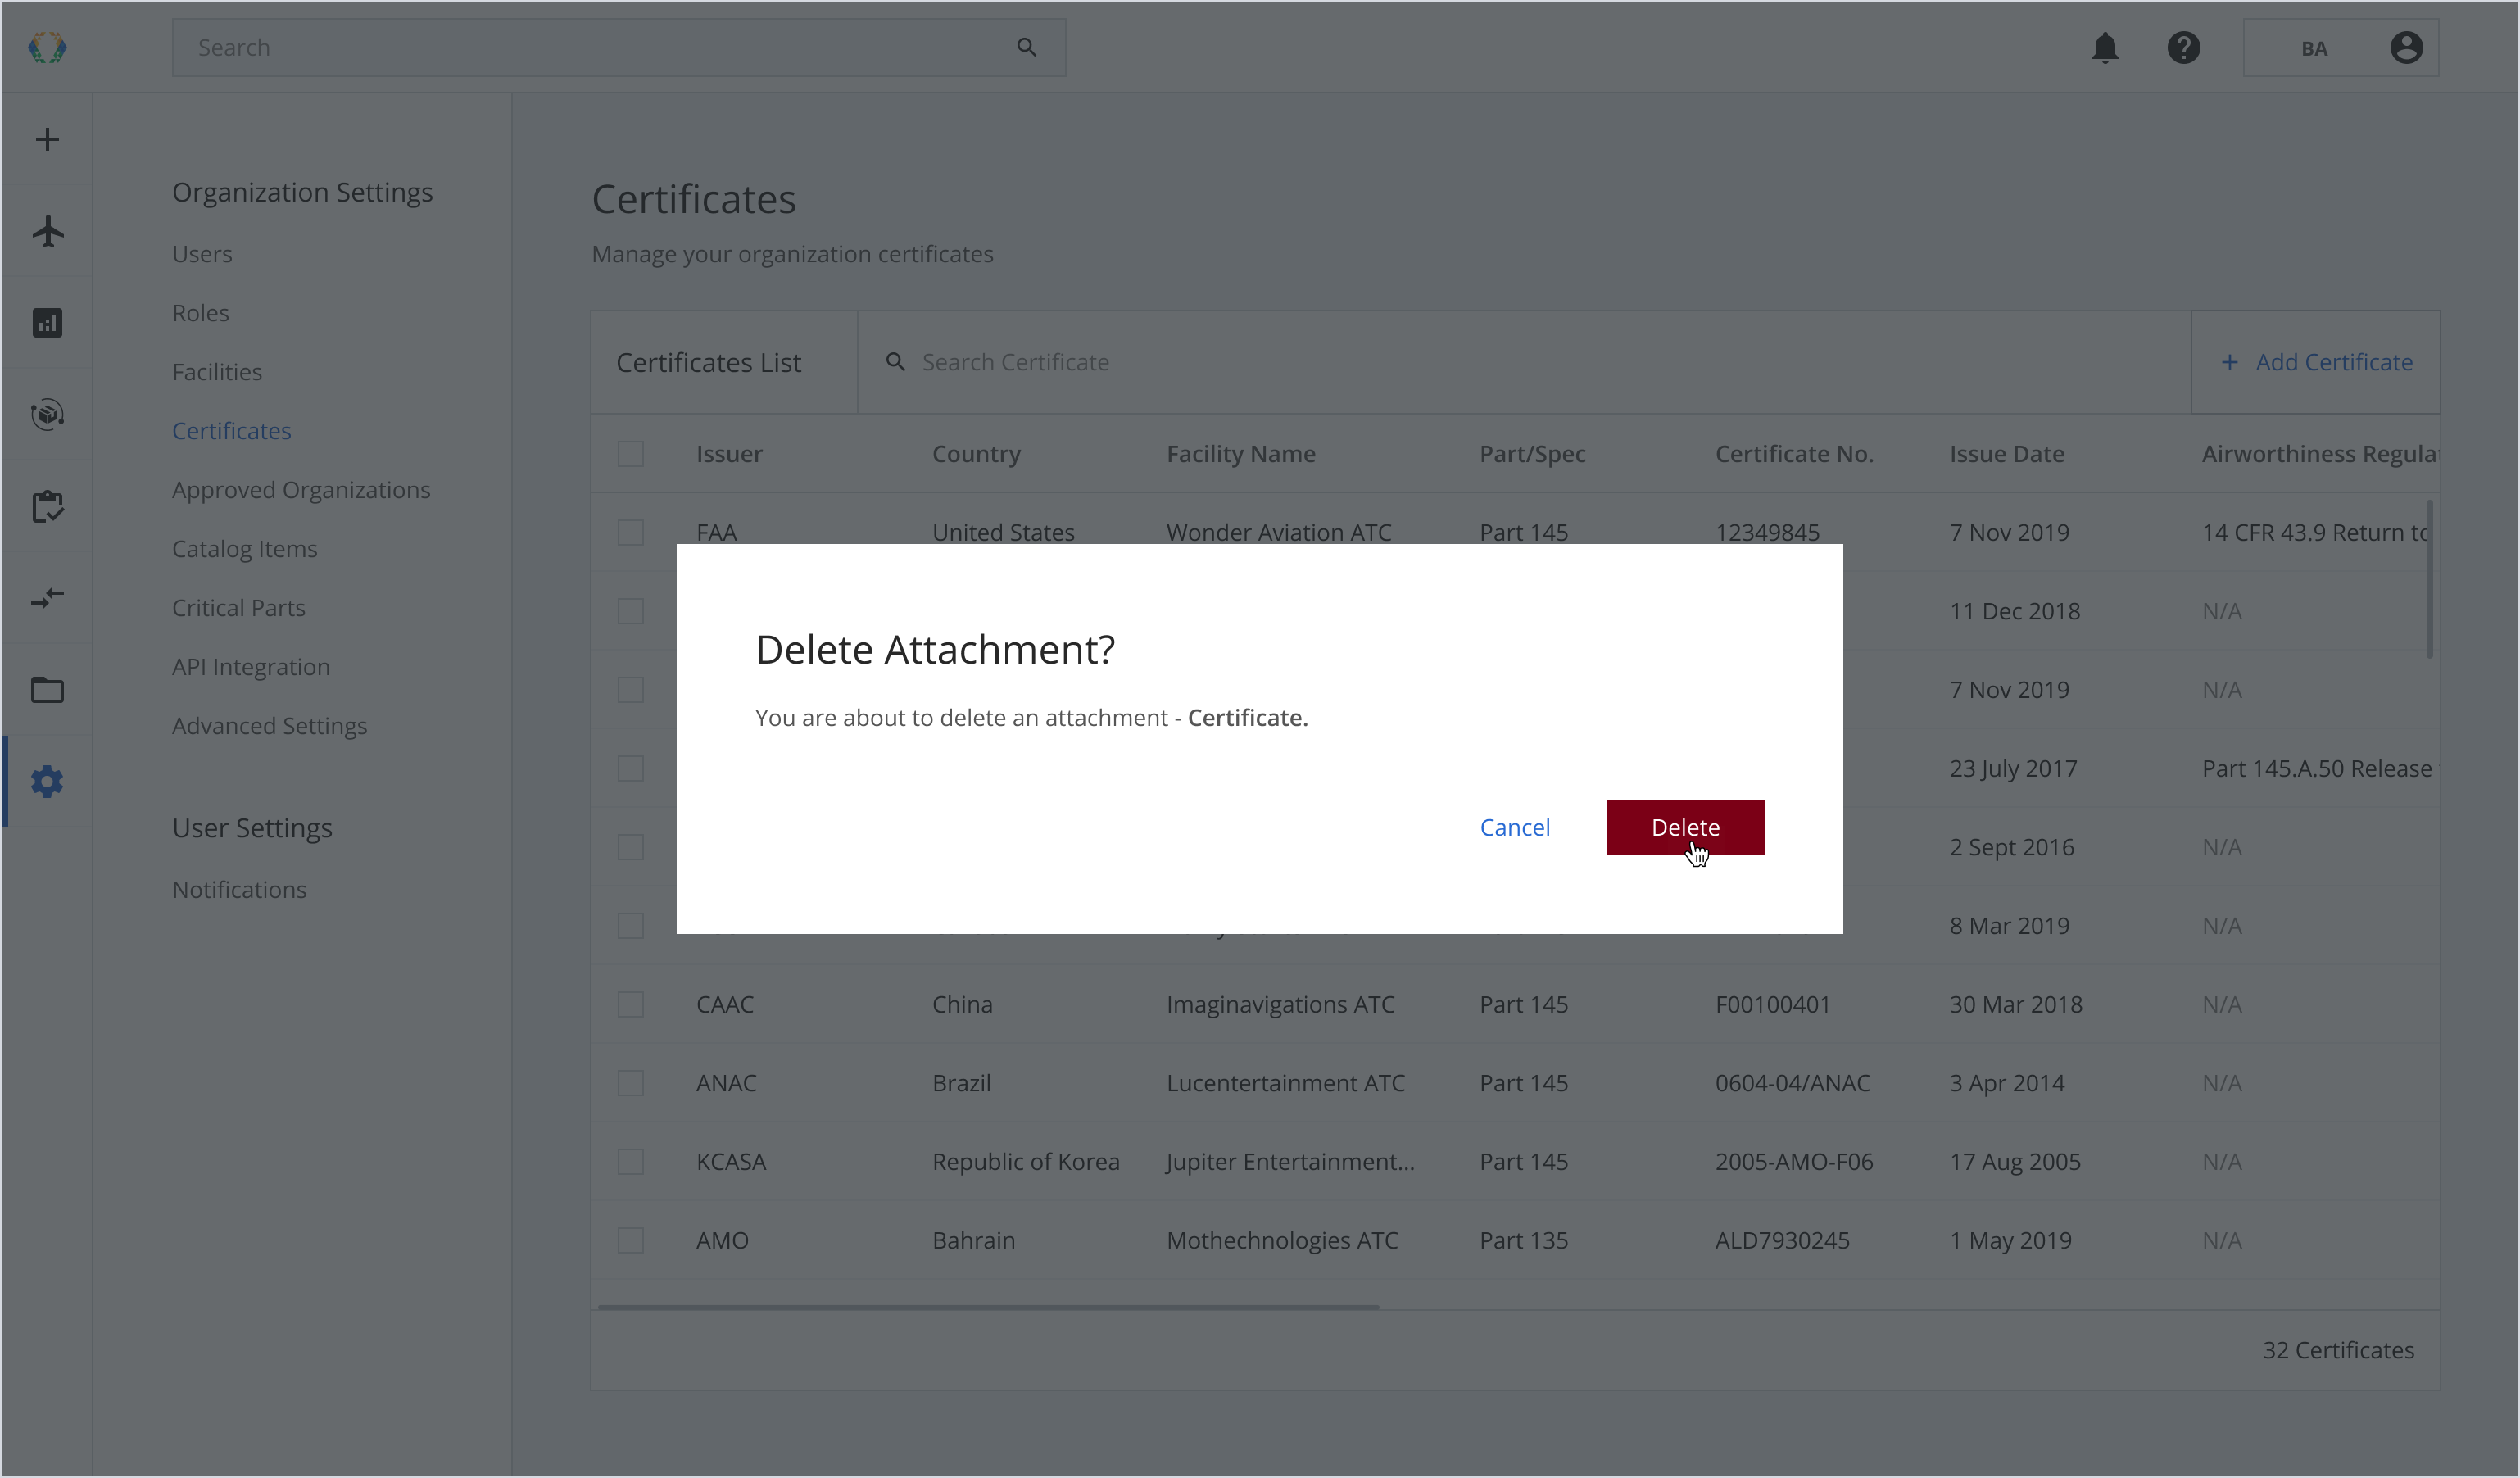
Step 3: Click ‘Delete’ next to the attachment you want to delete.
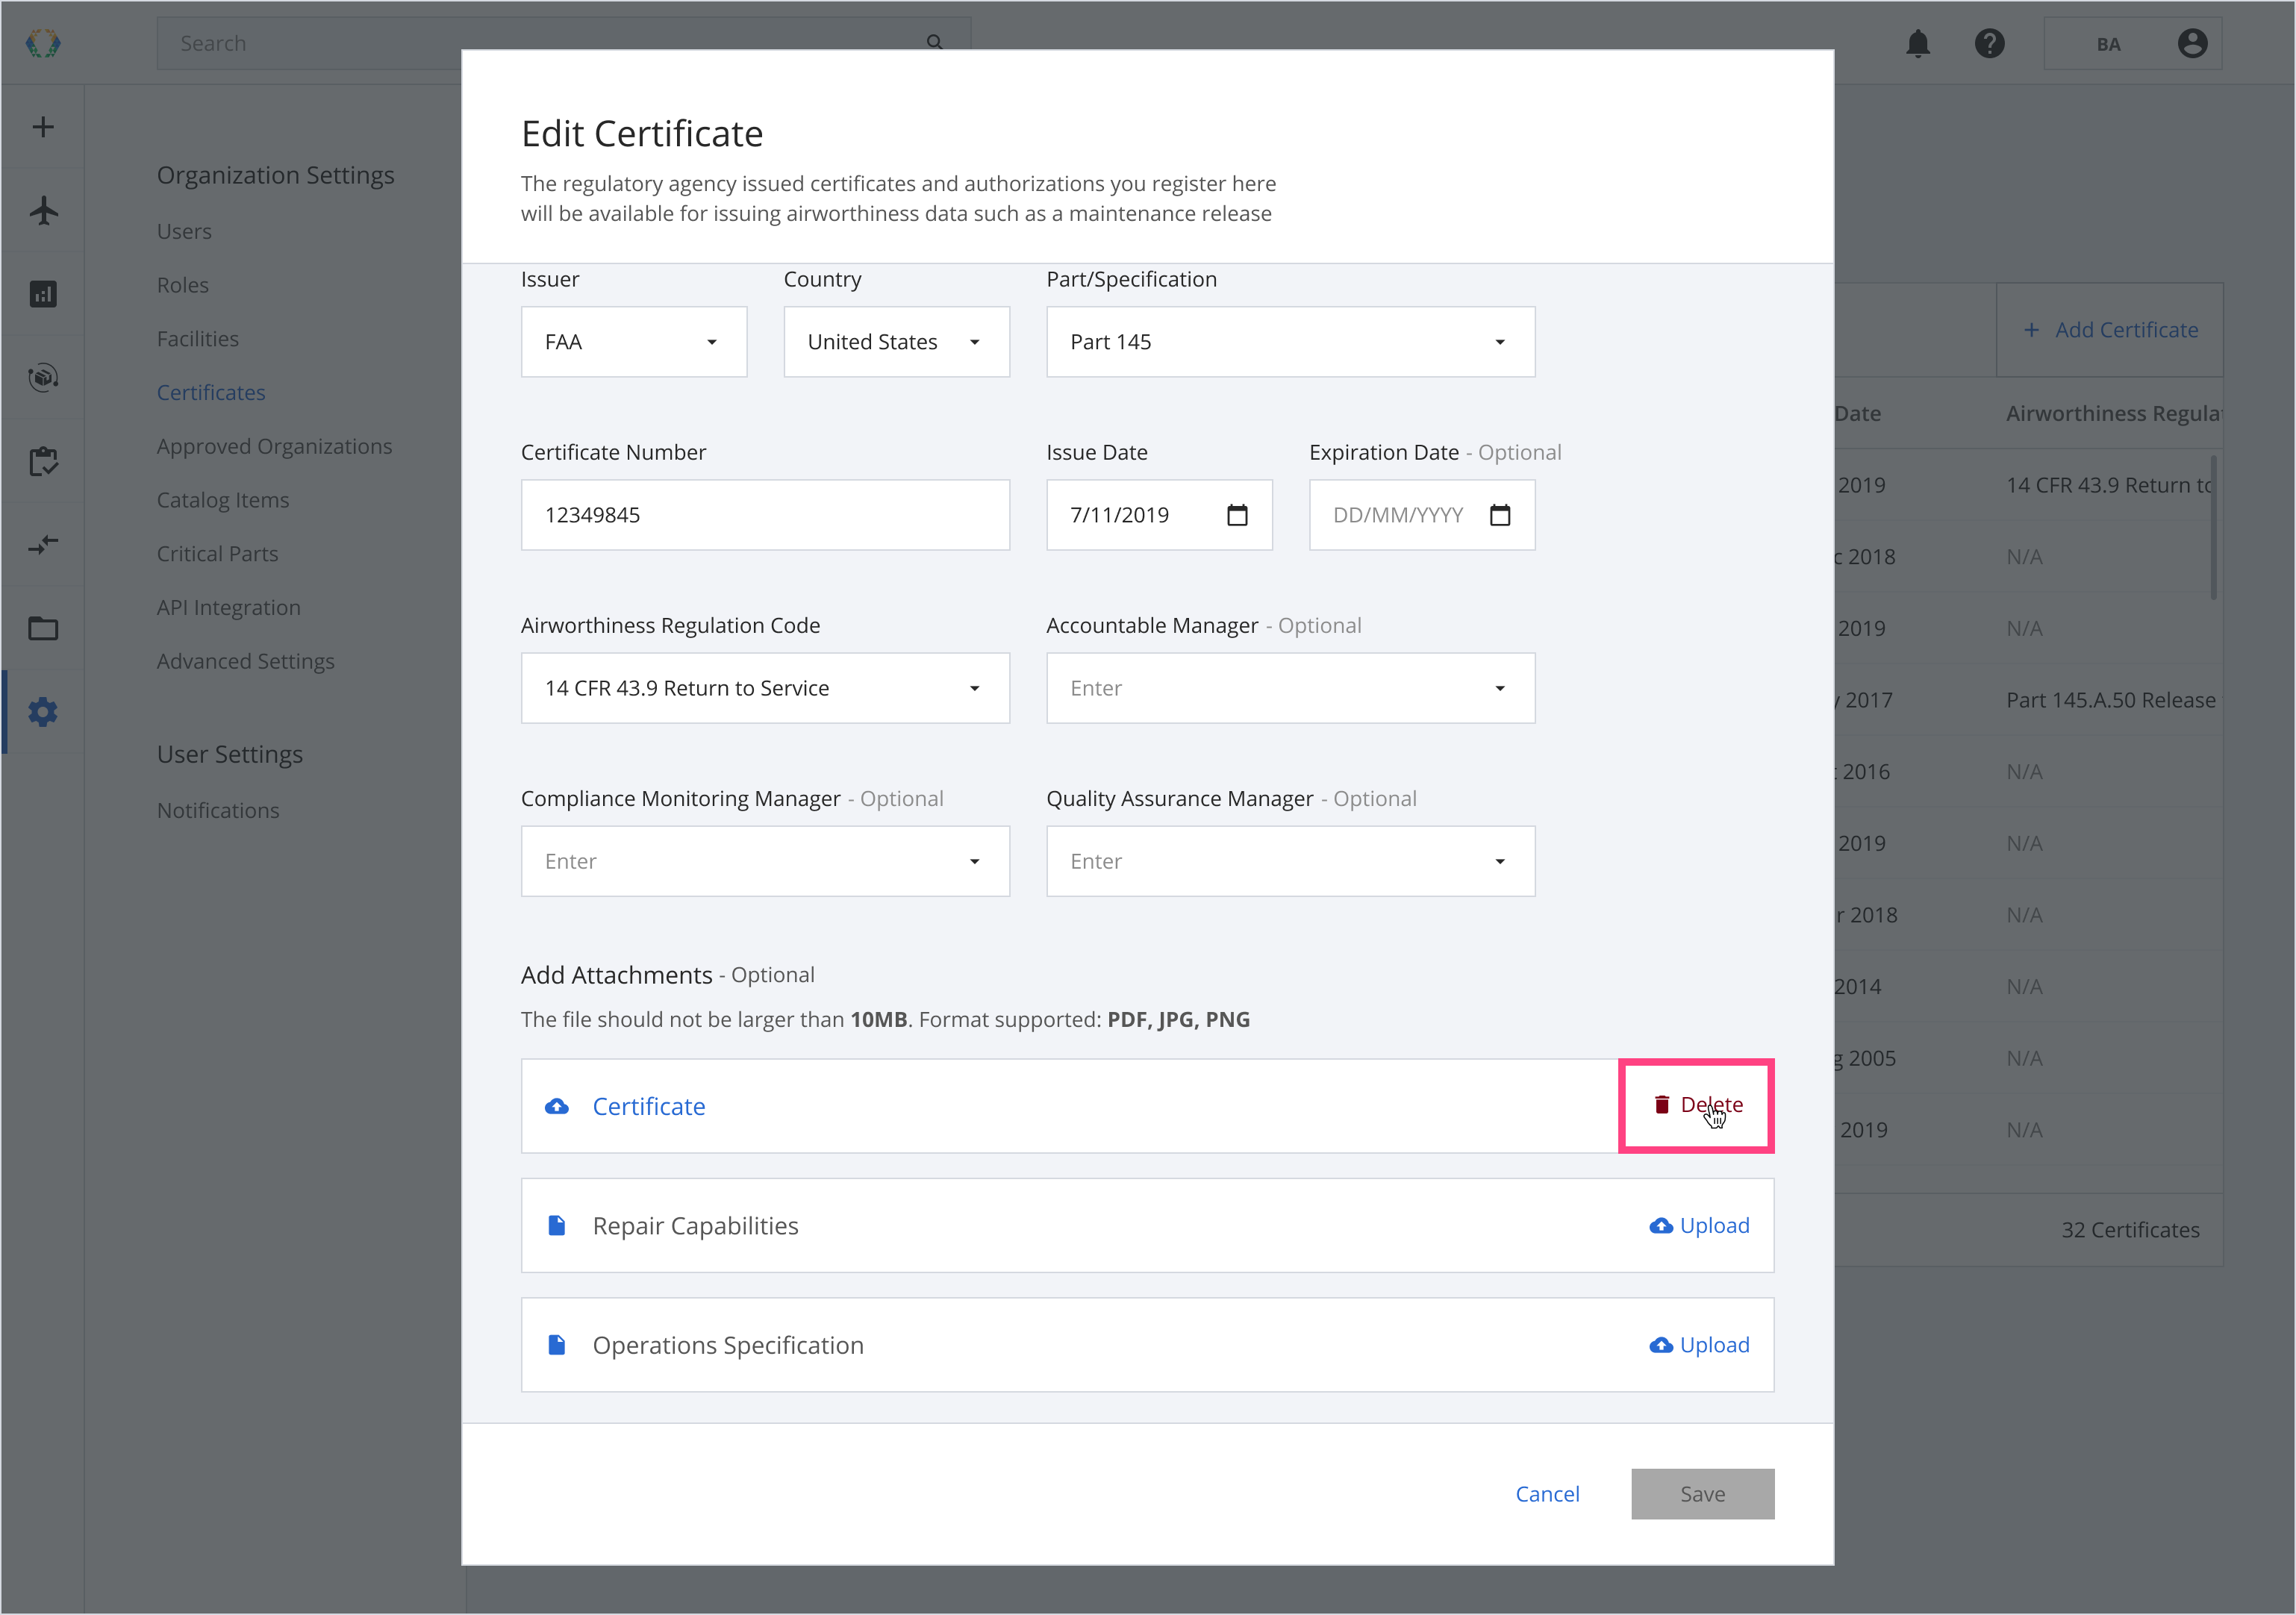
Step 4: A confirmation message will appear, click ‘Delete’.
Step 5: Click ‘Save’.
Once the changes have been saved, a green banner will appear at the top of the certificates list.
Updated about 1 year ago