Manage Shipments
Getting Started
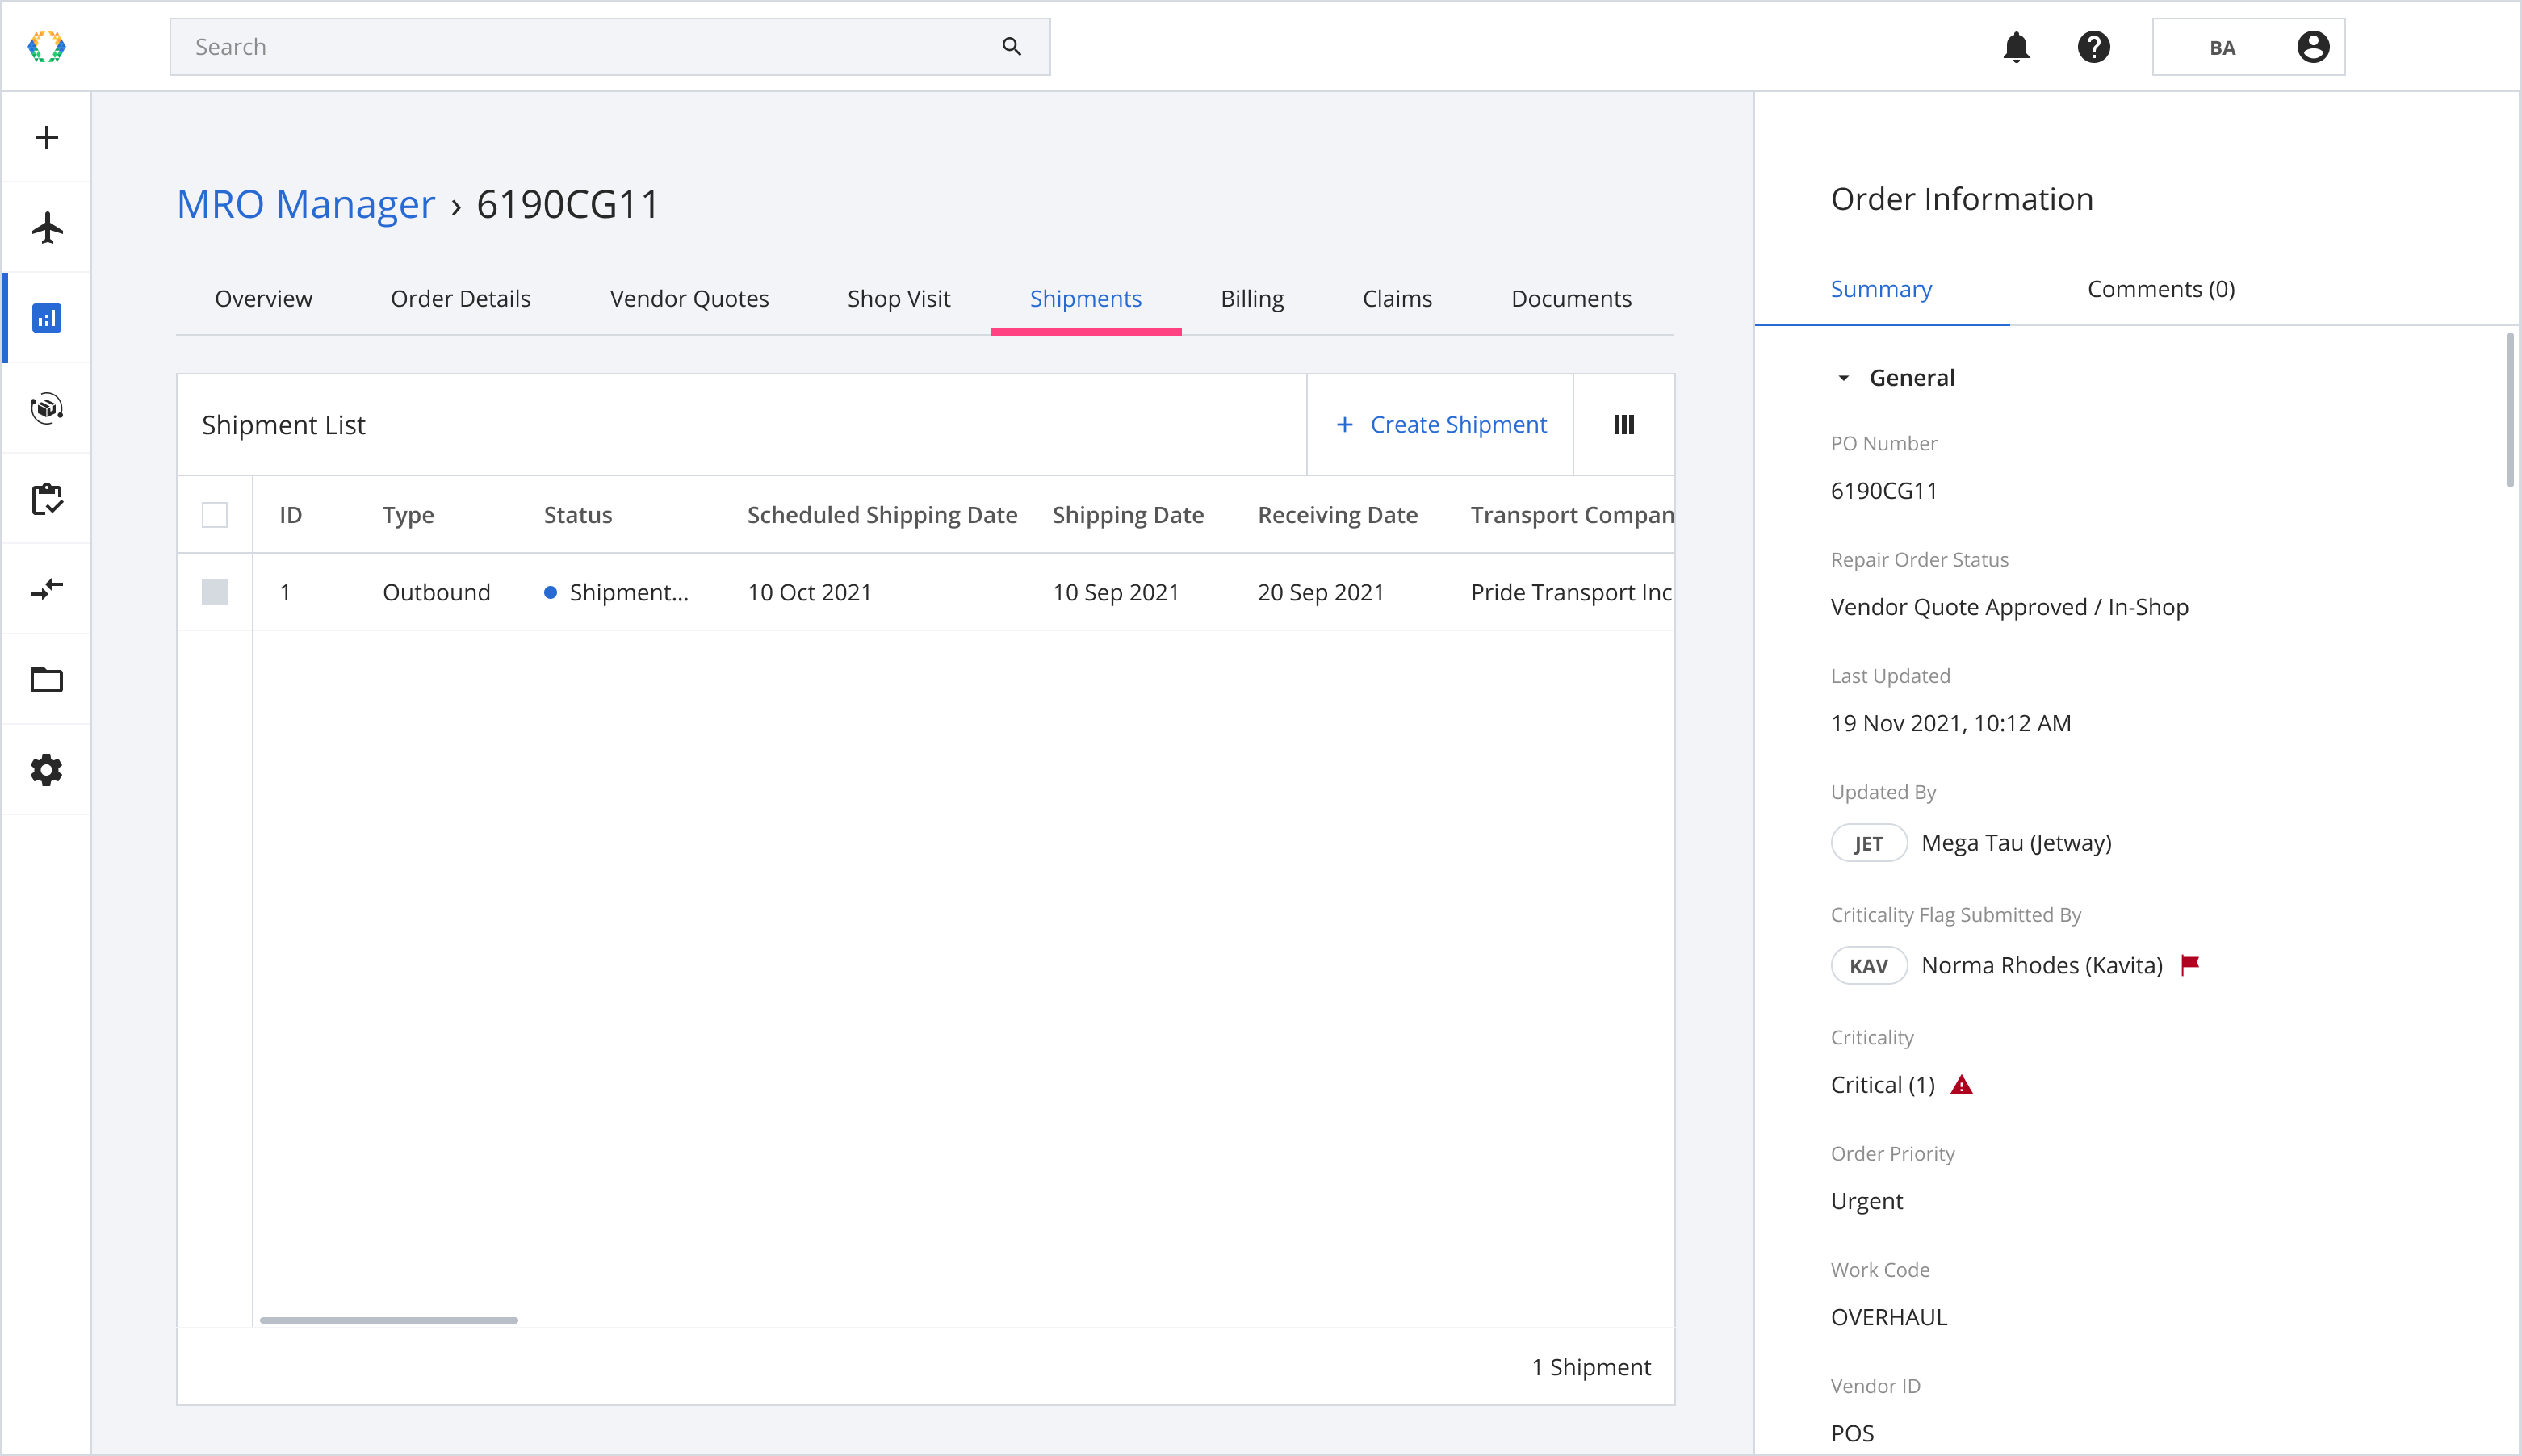
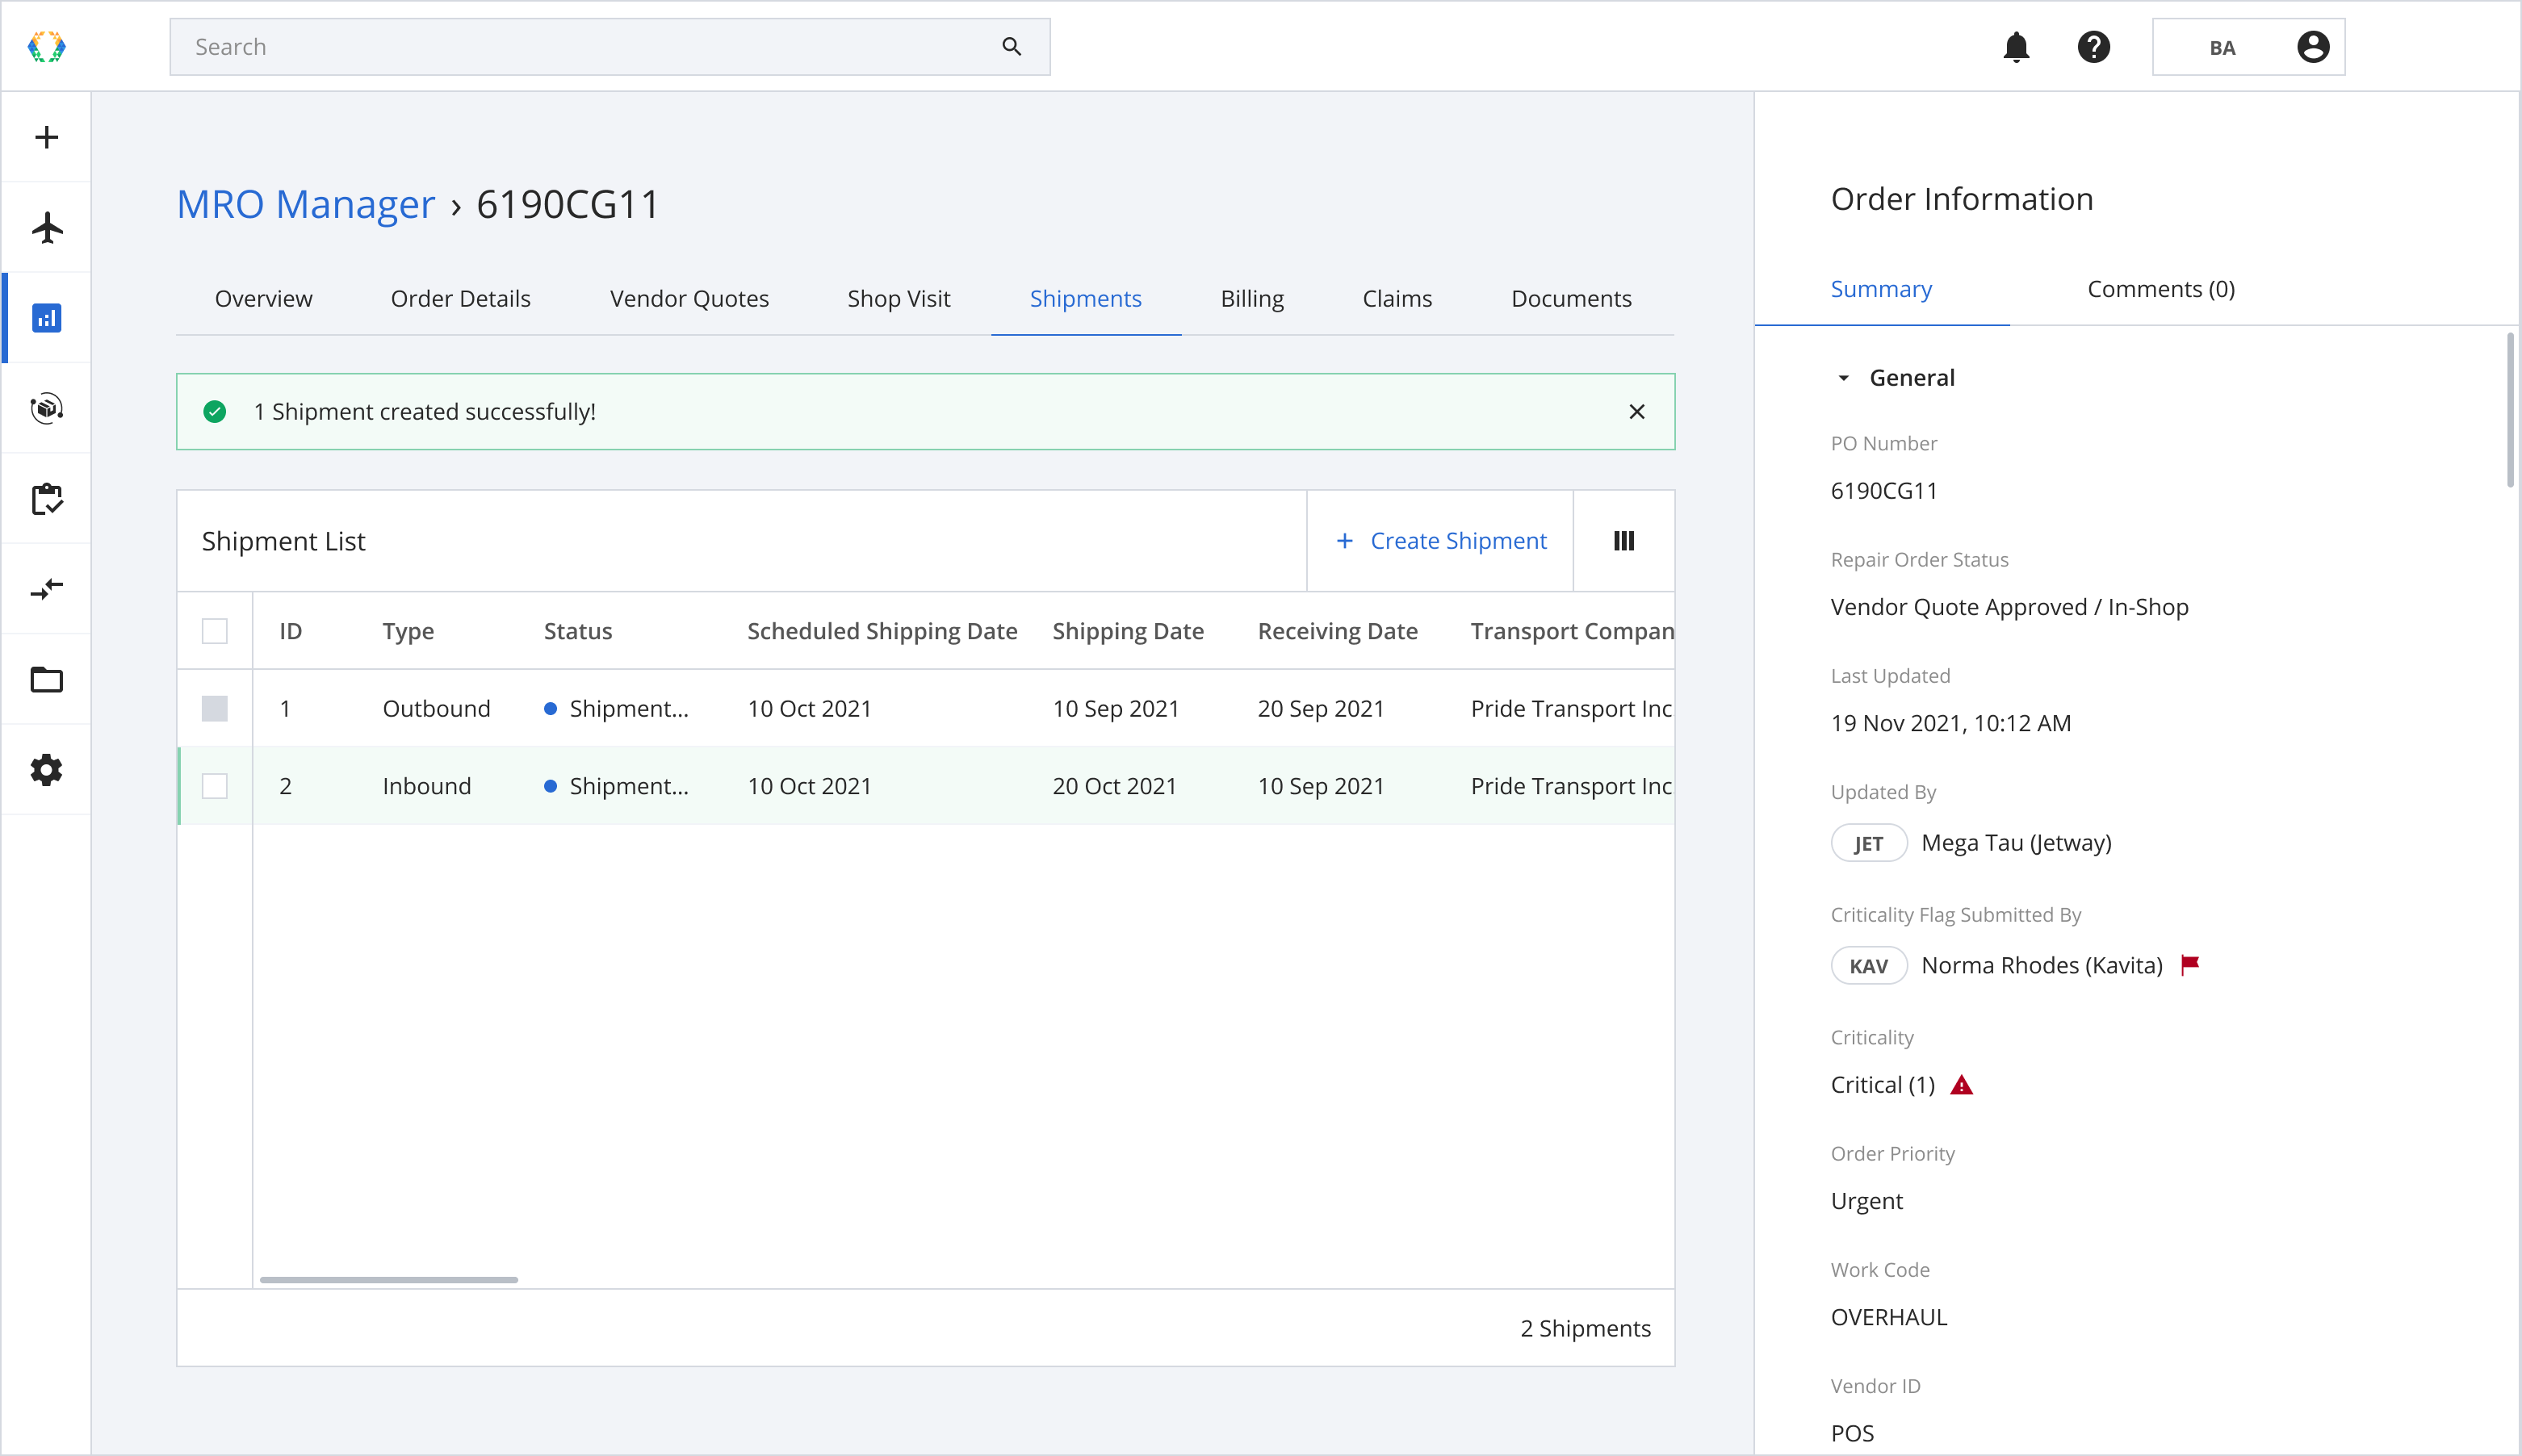
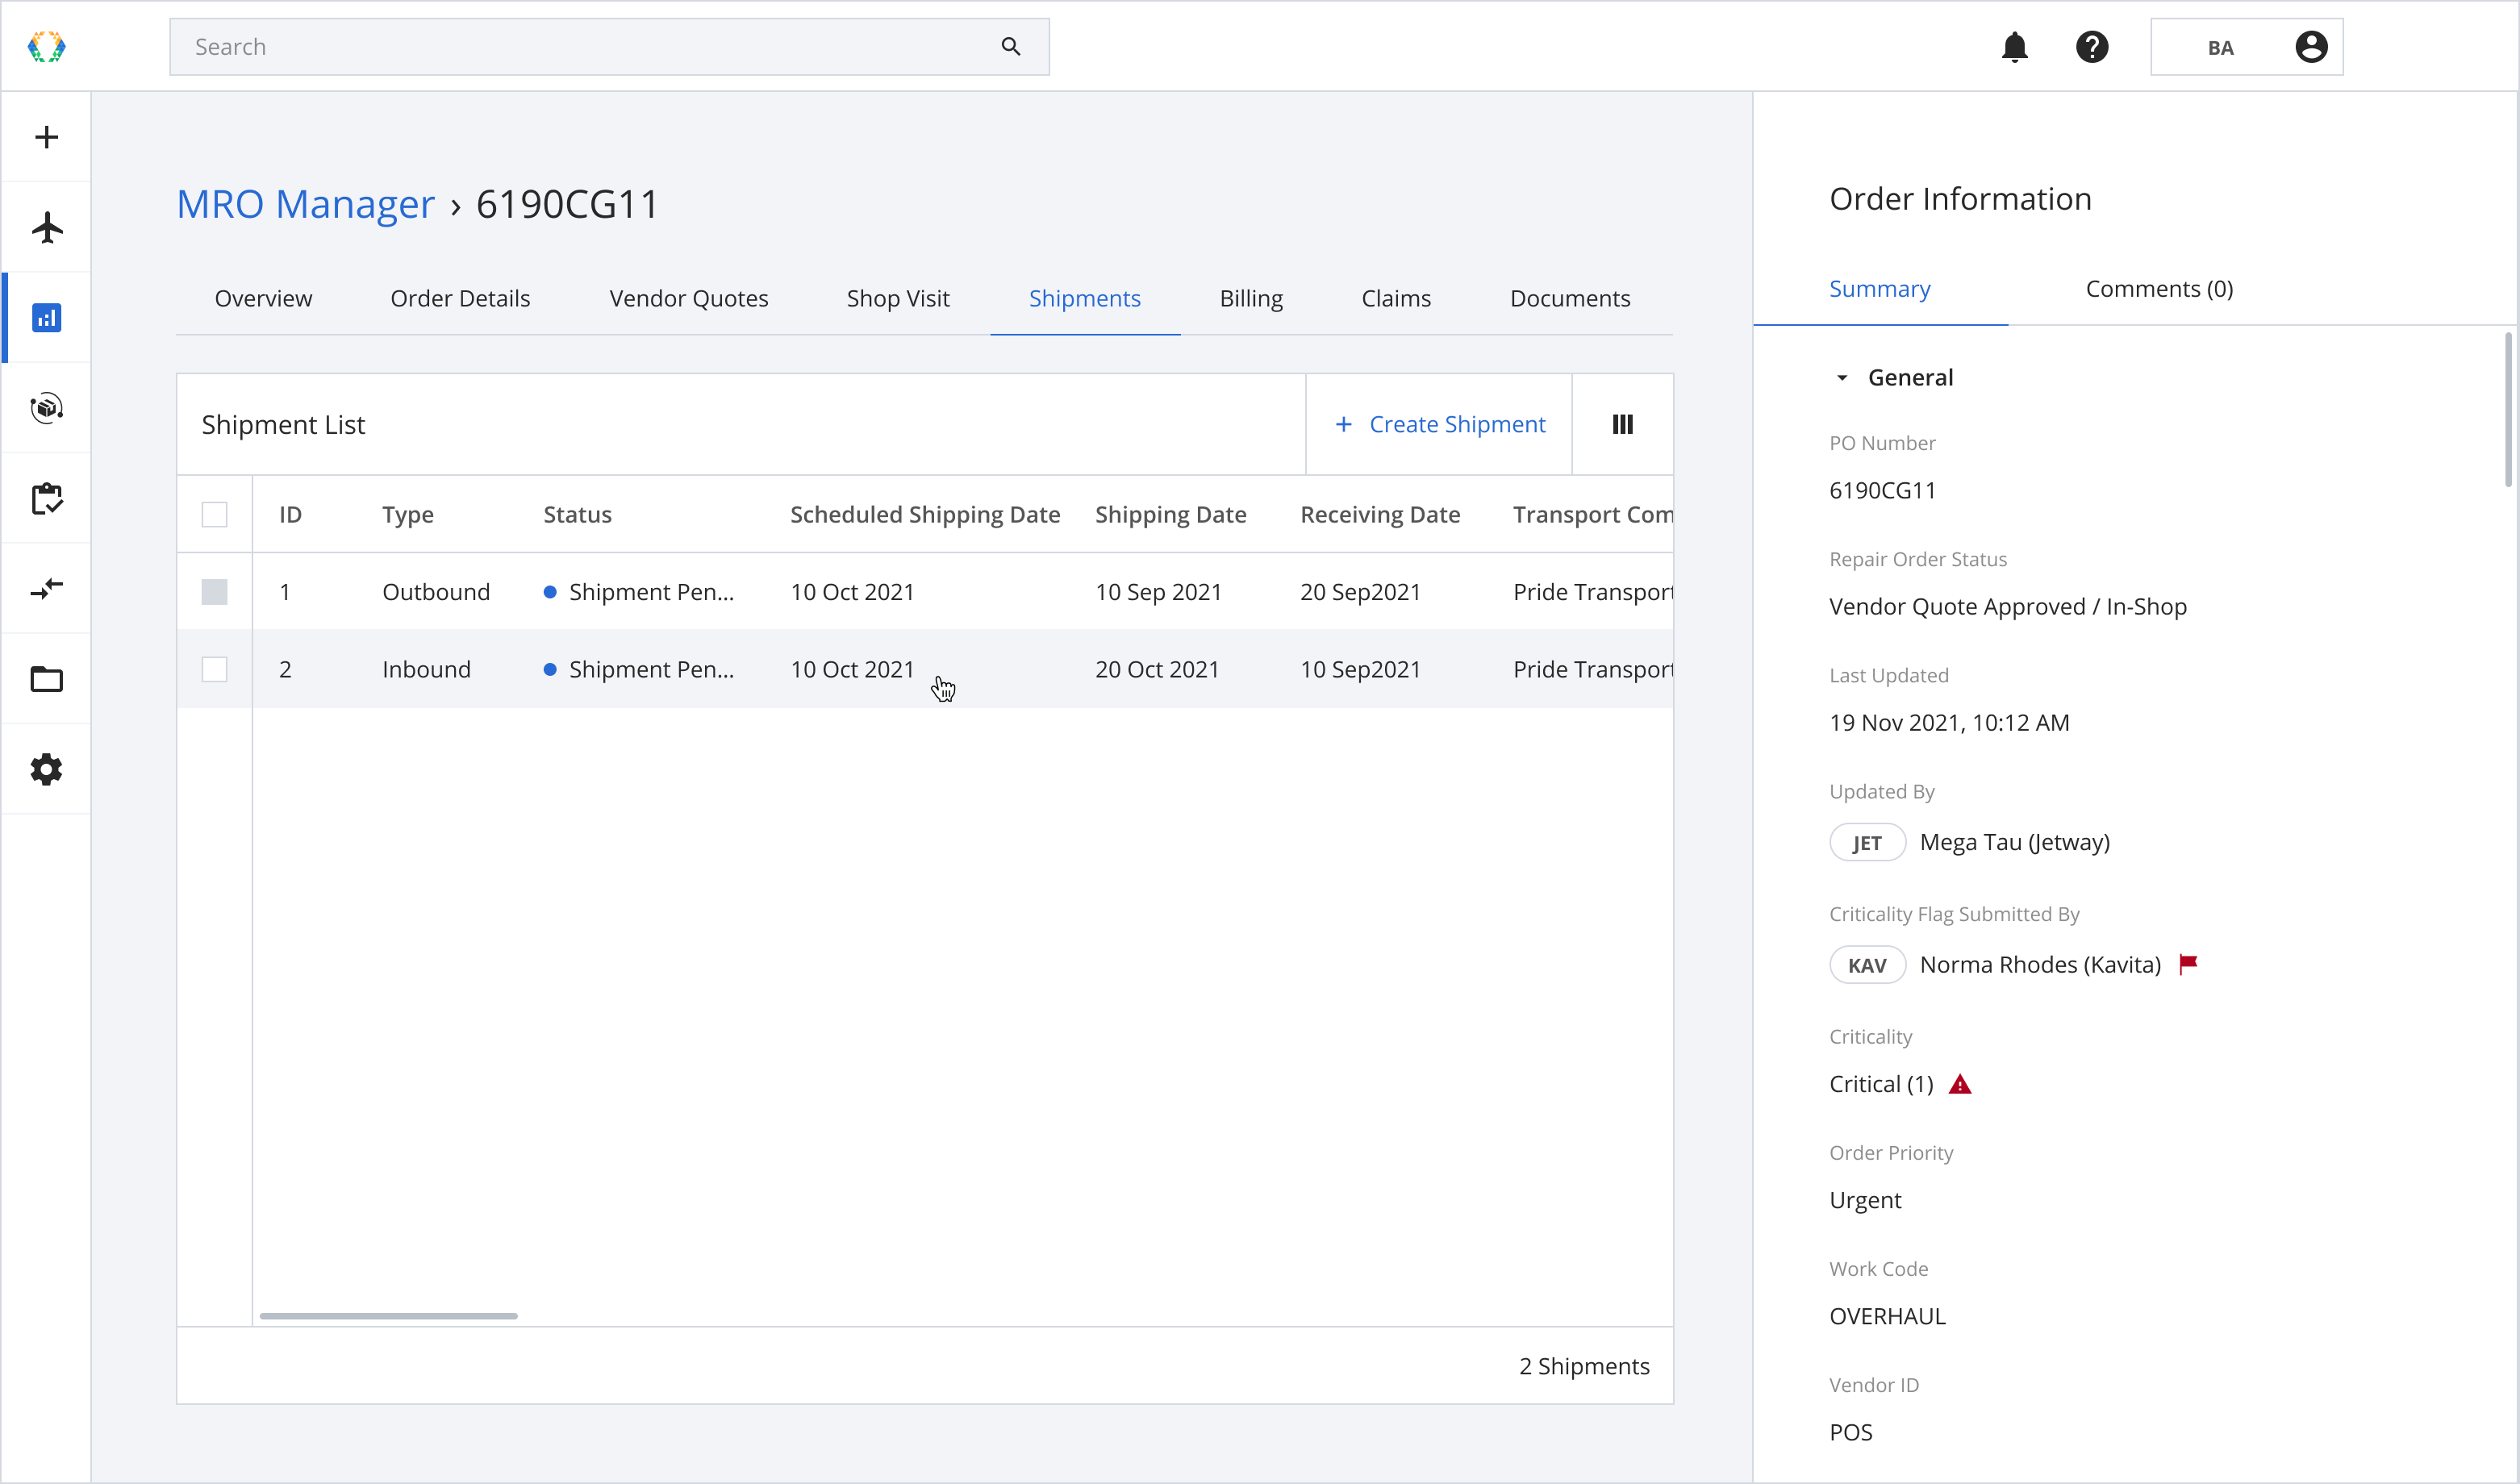
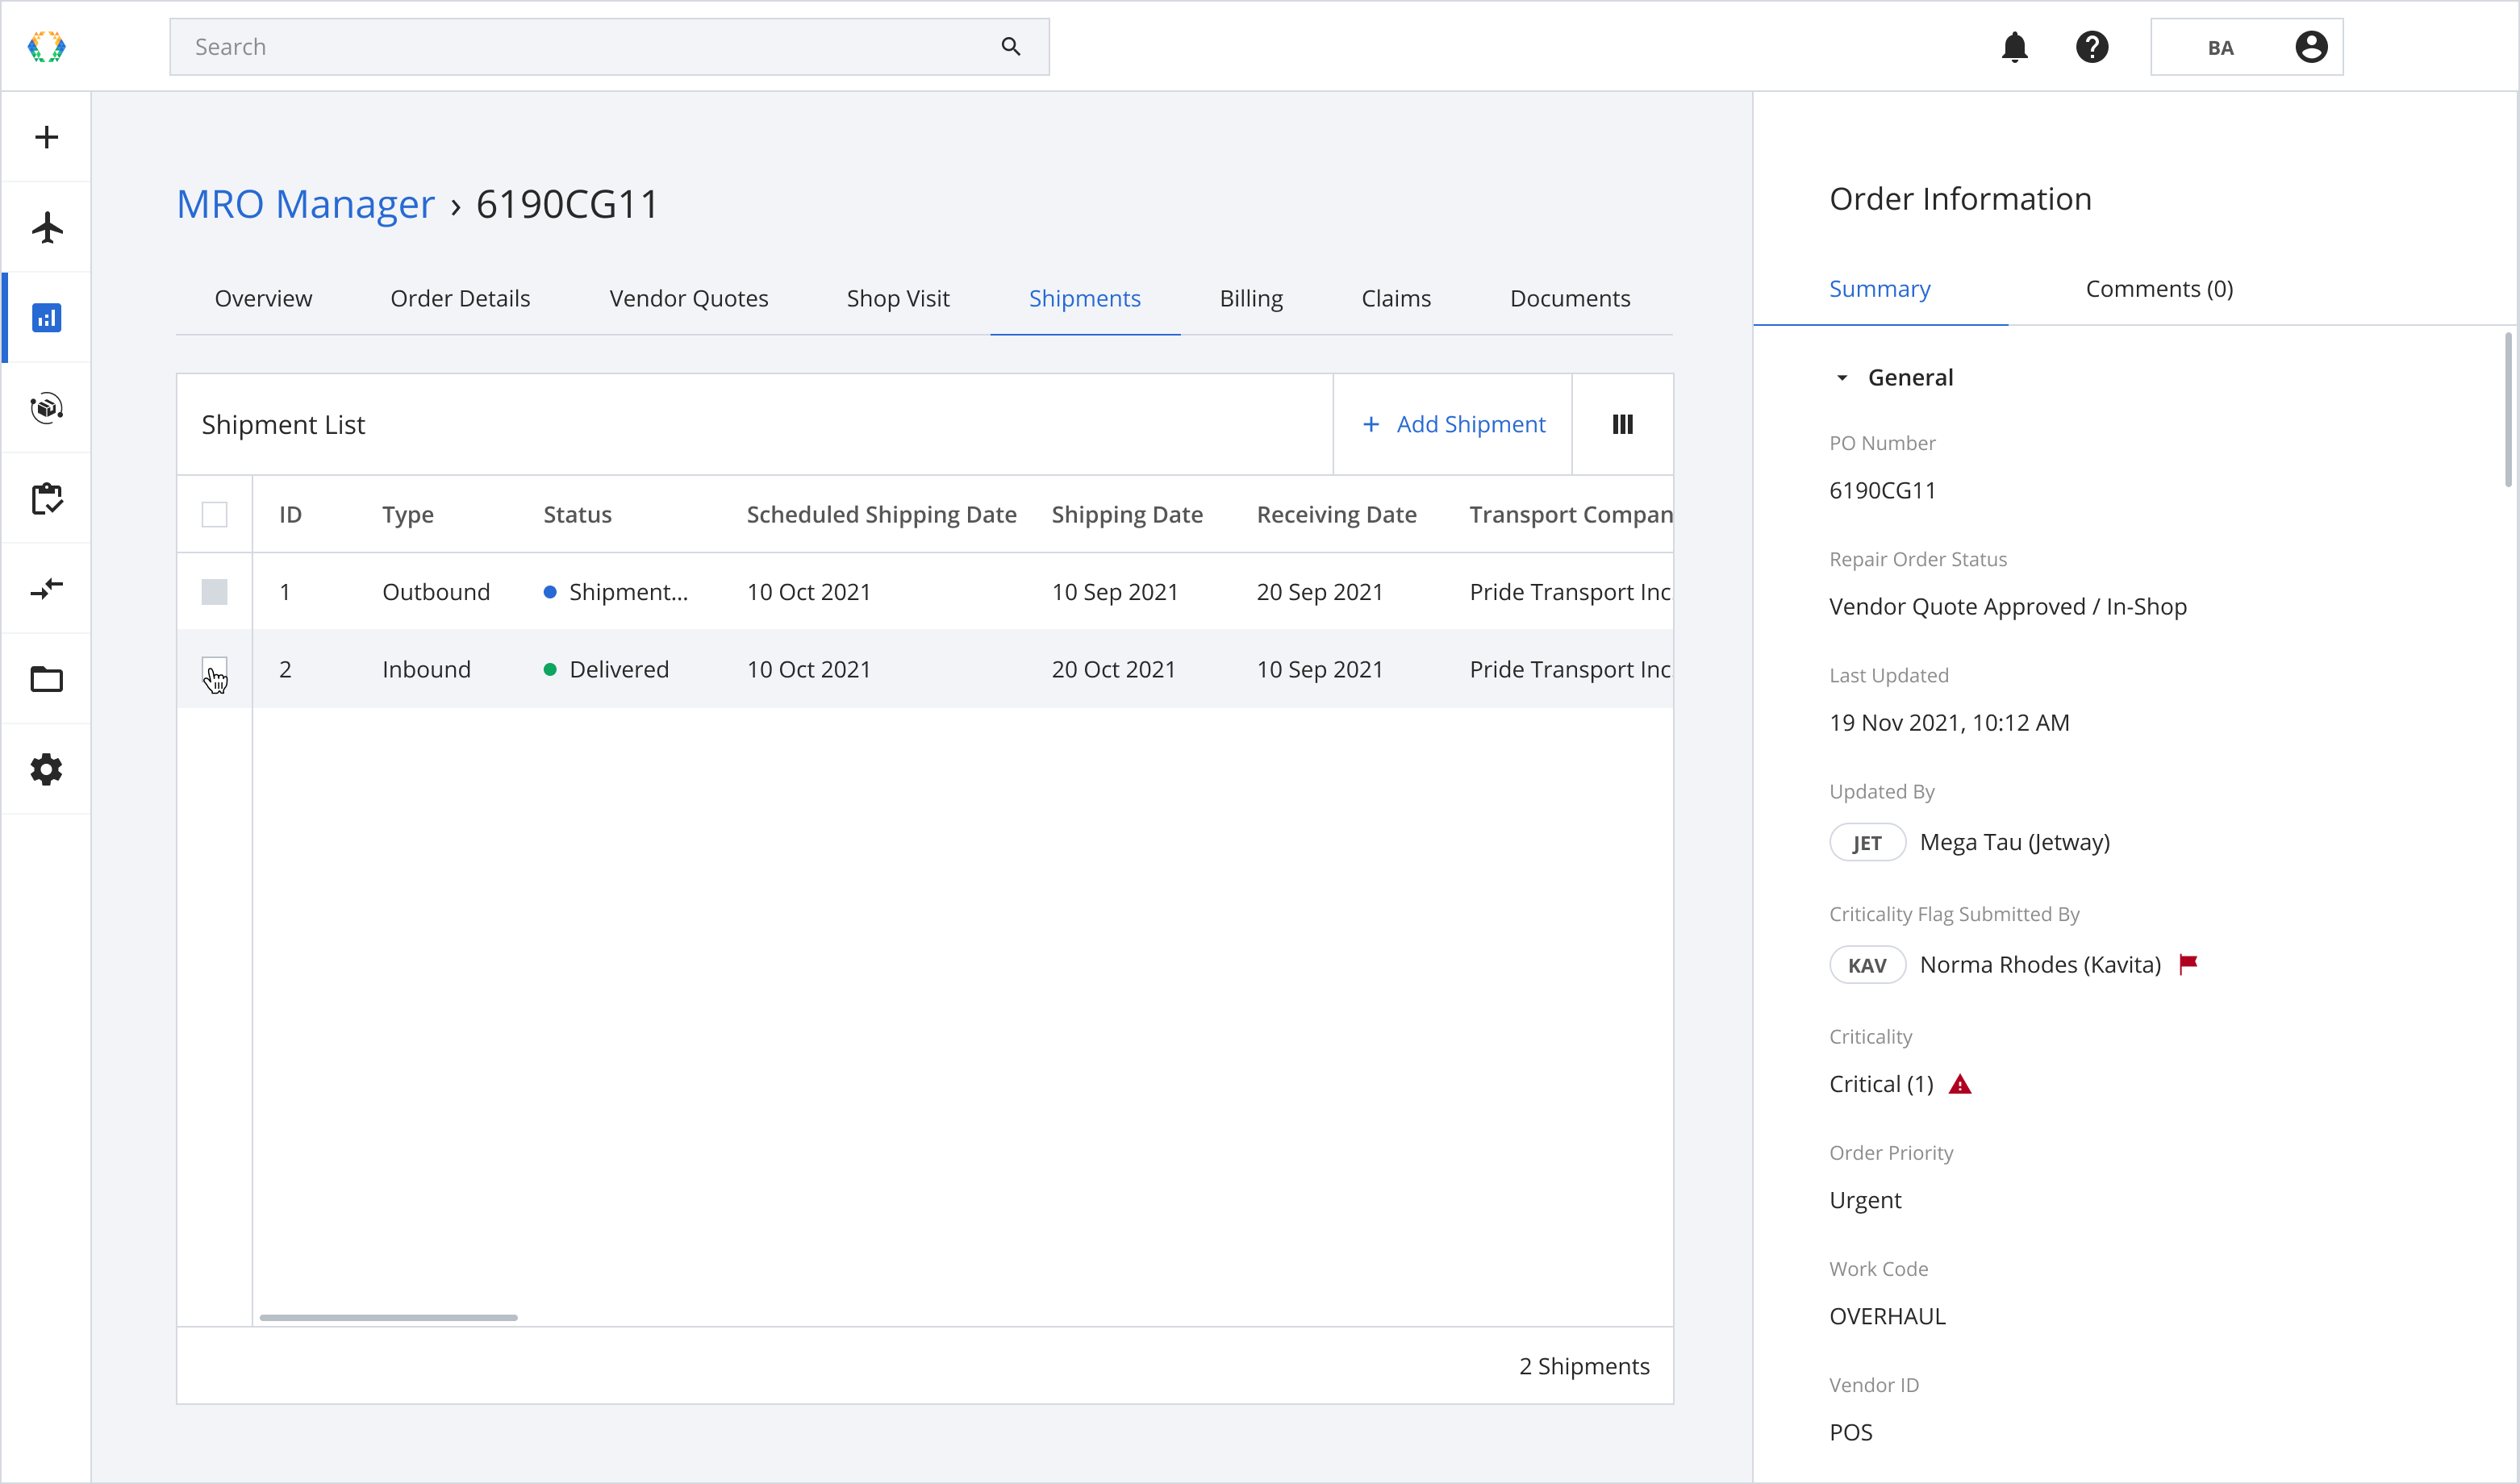
To manage your organizations's shipments, click 'Shipments' tab.
Creating Shipments
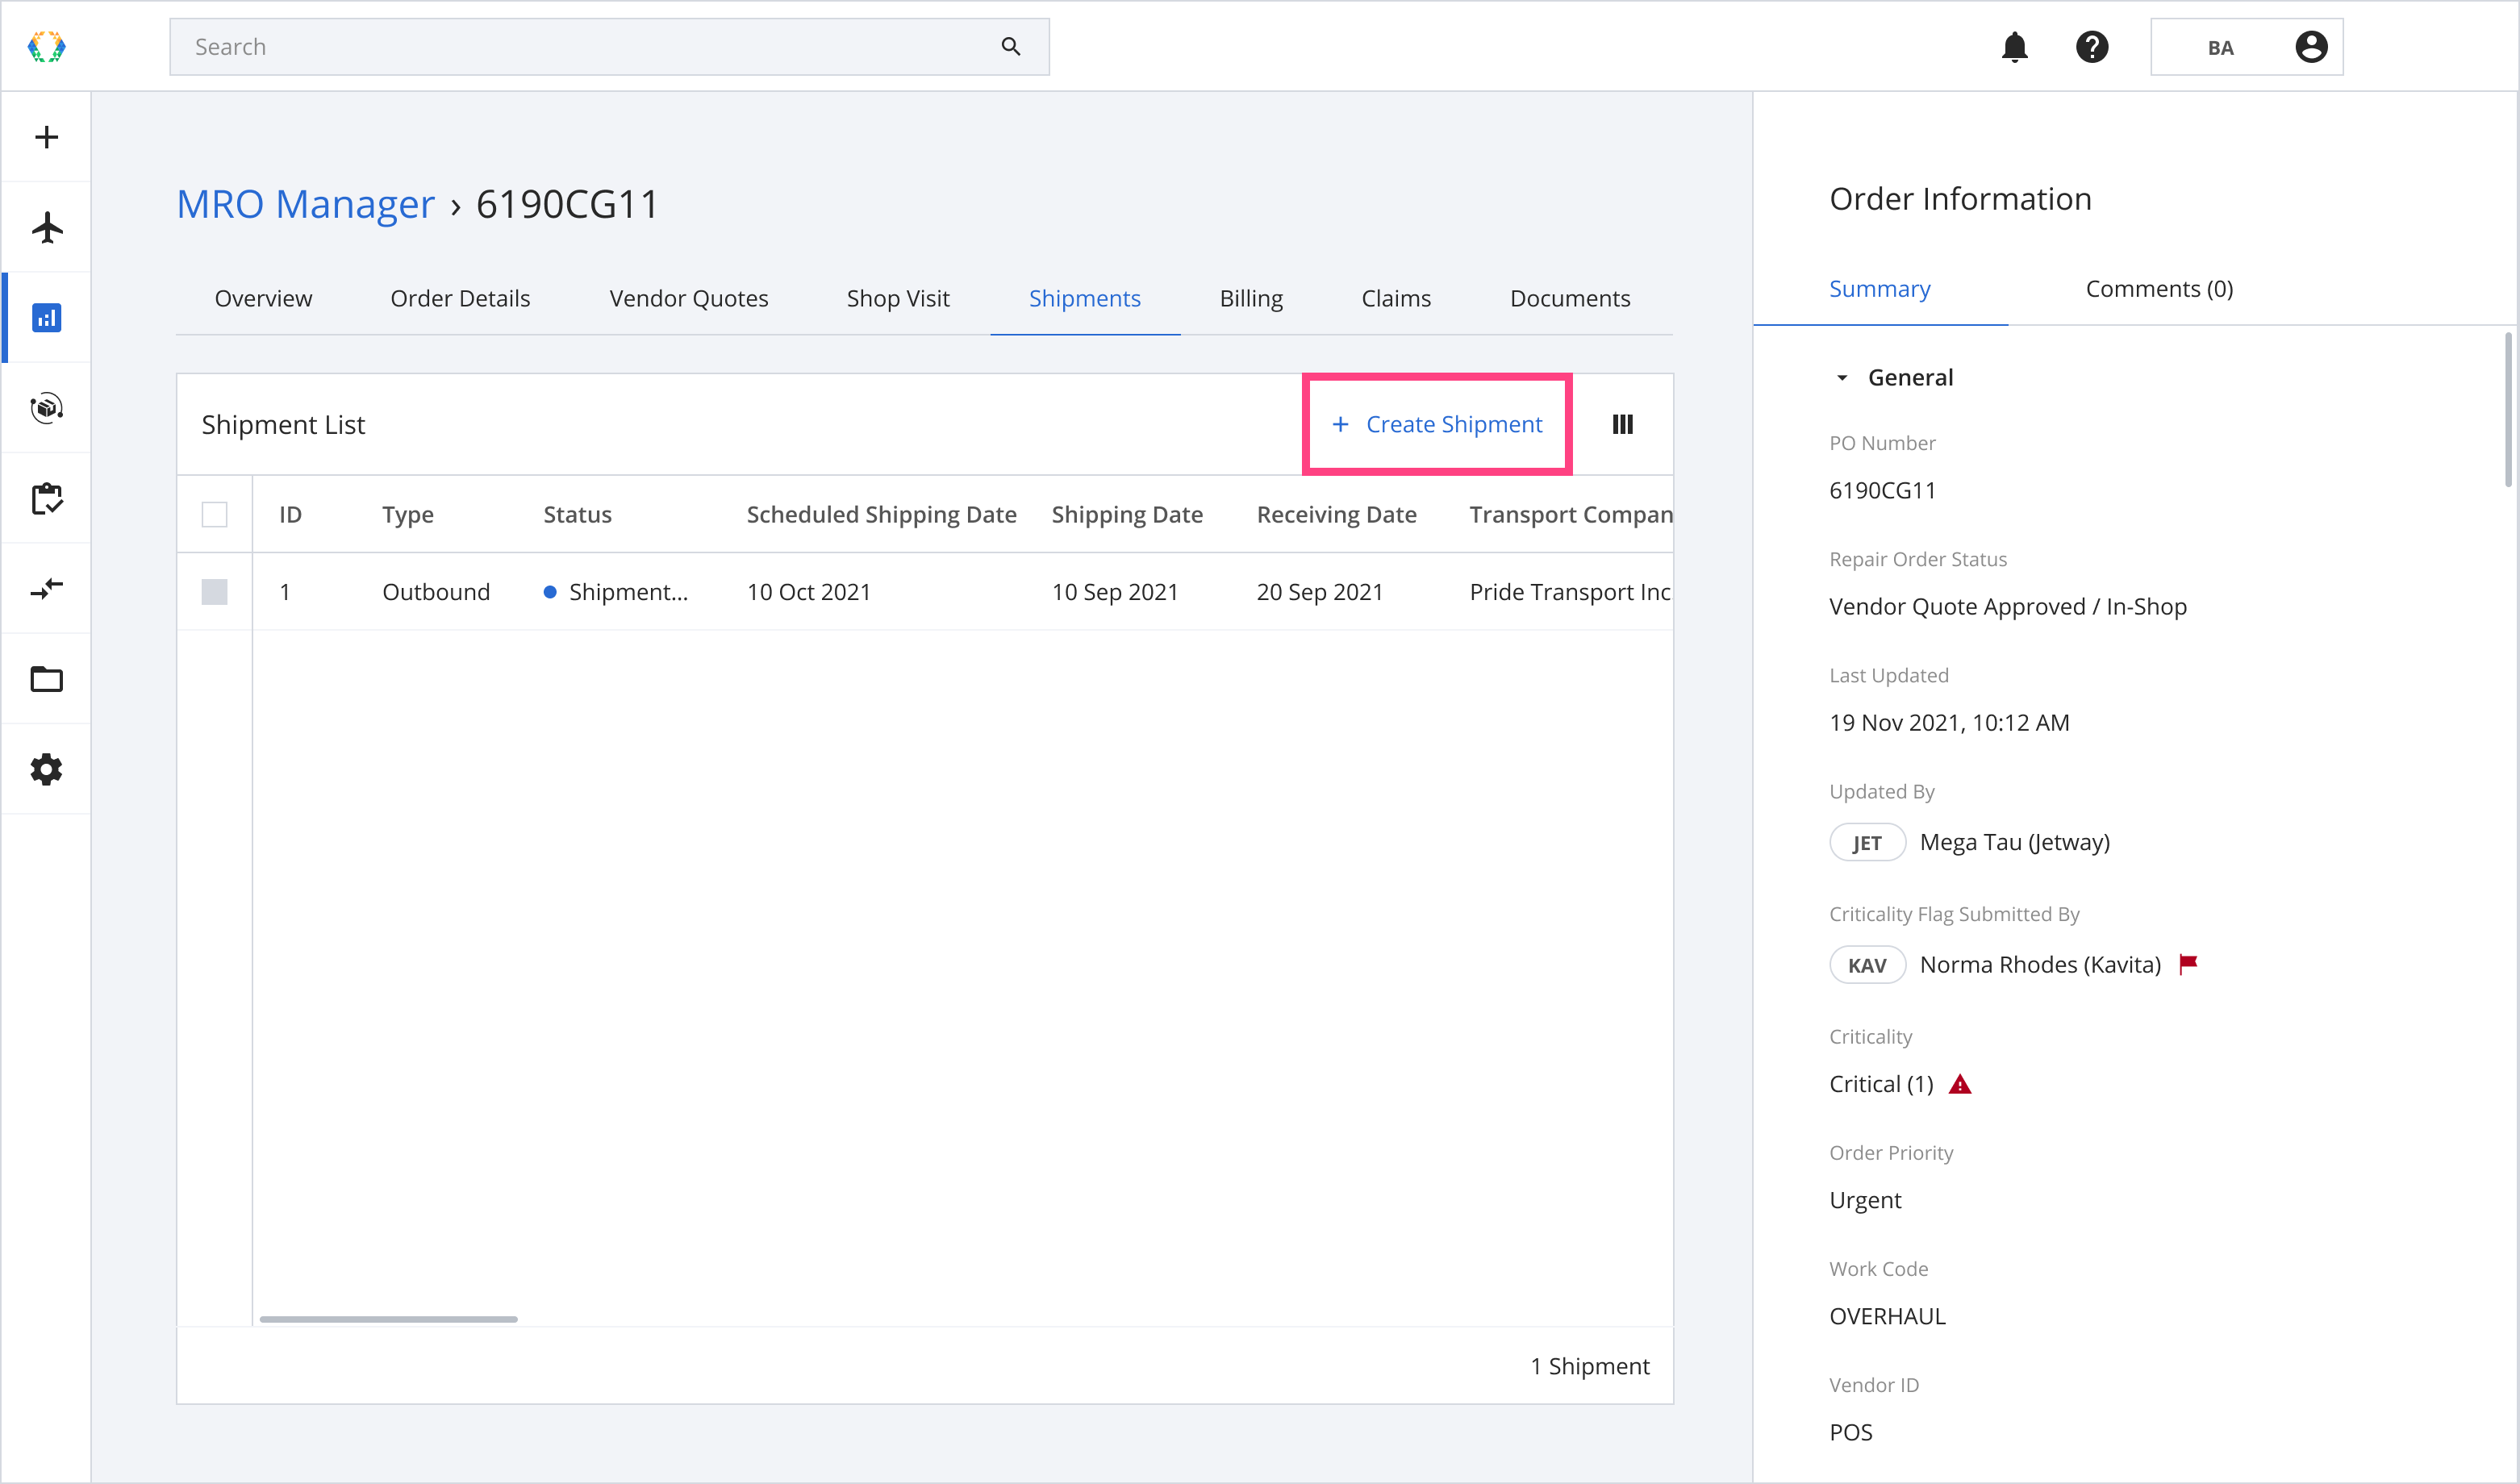
Step 1: Click ‘Create Shipment’.
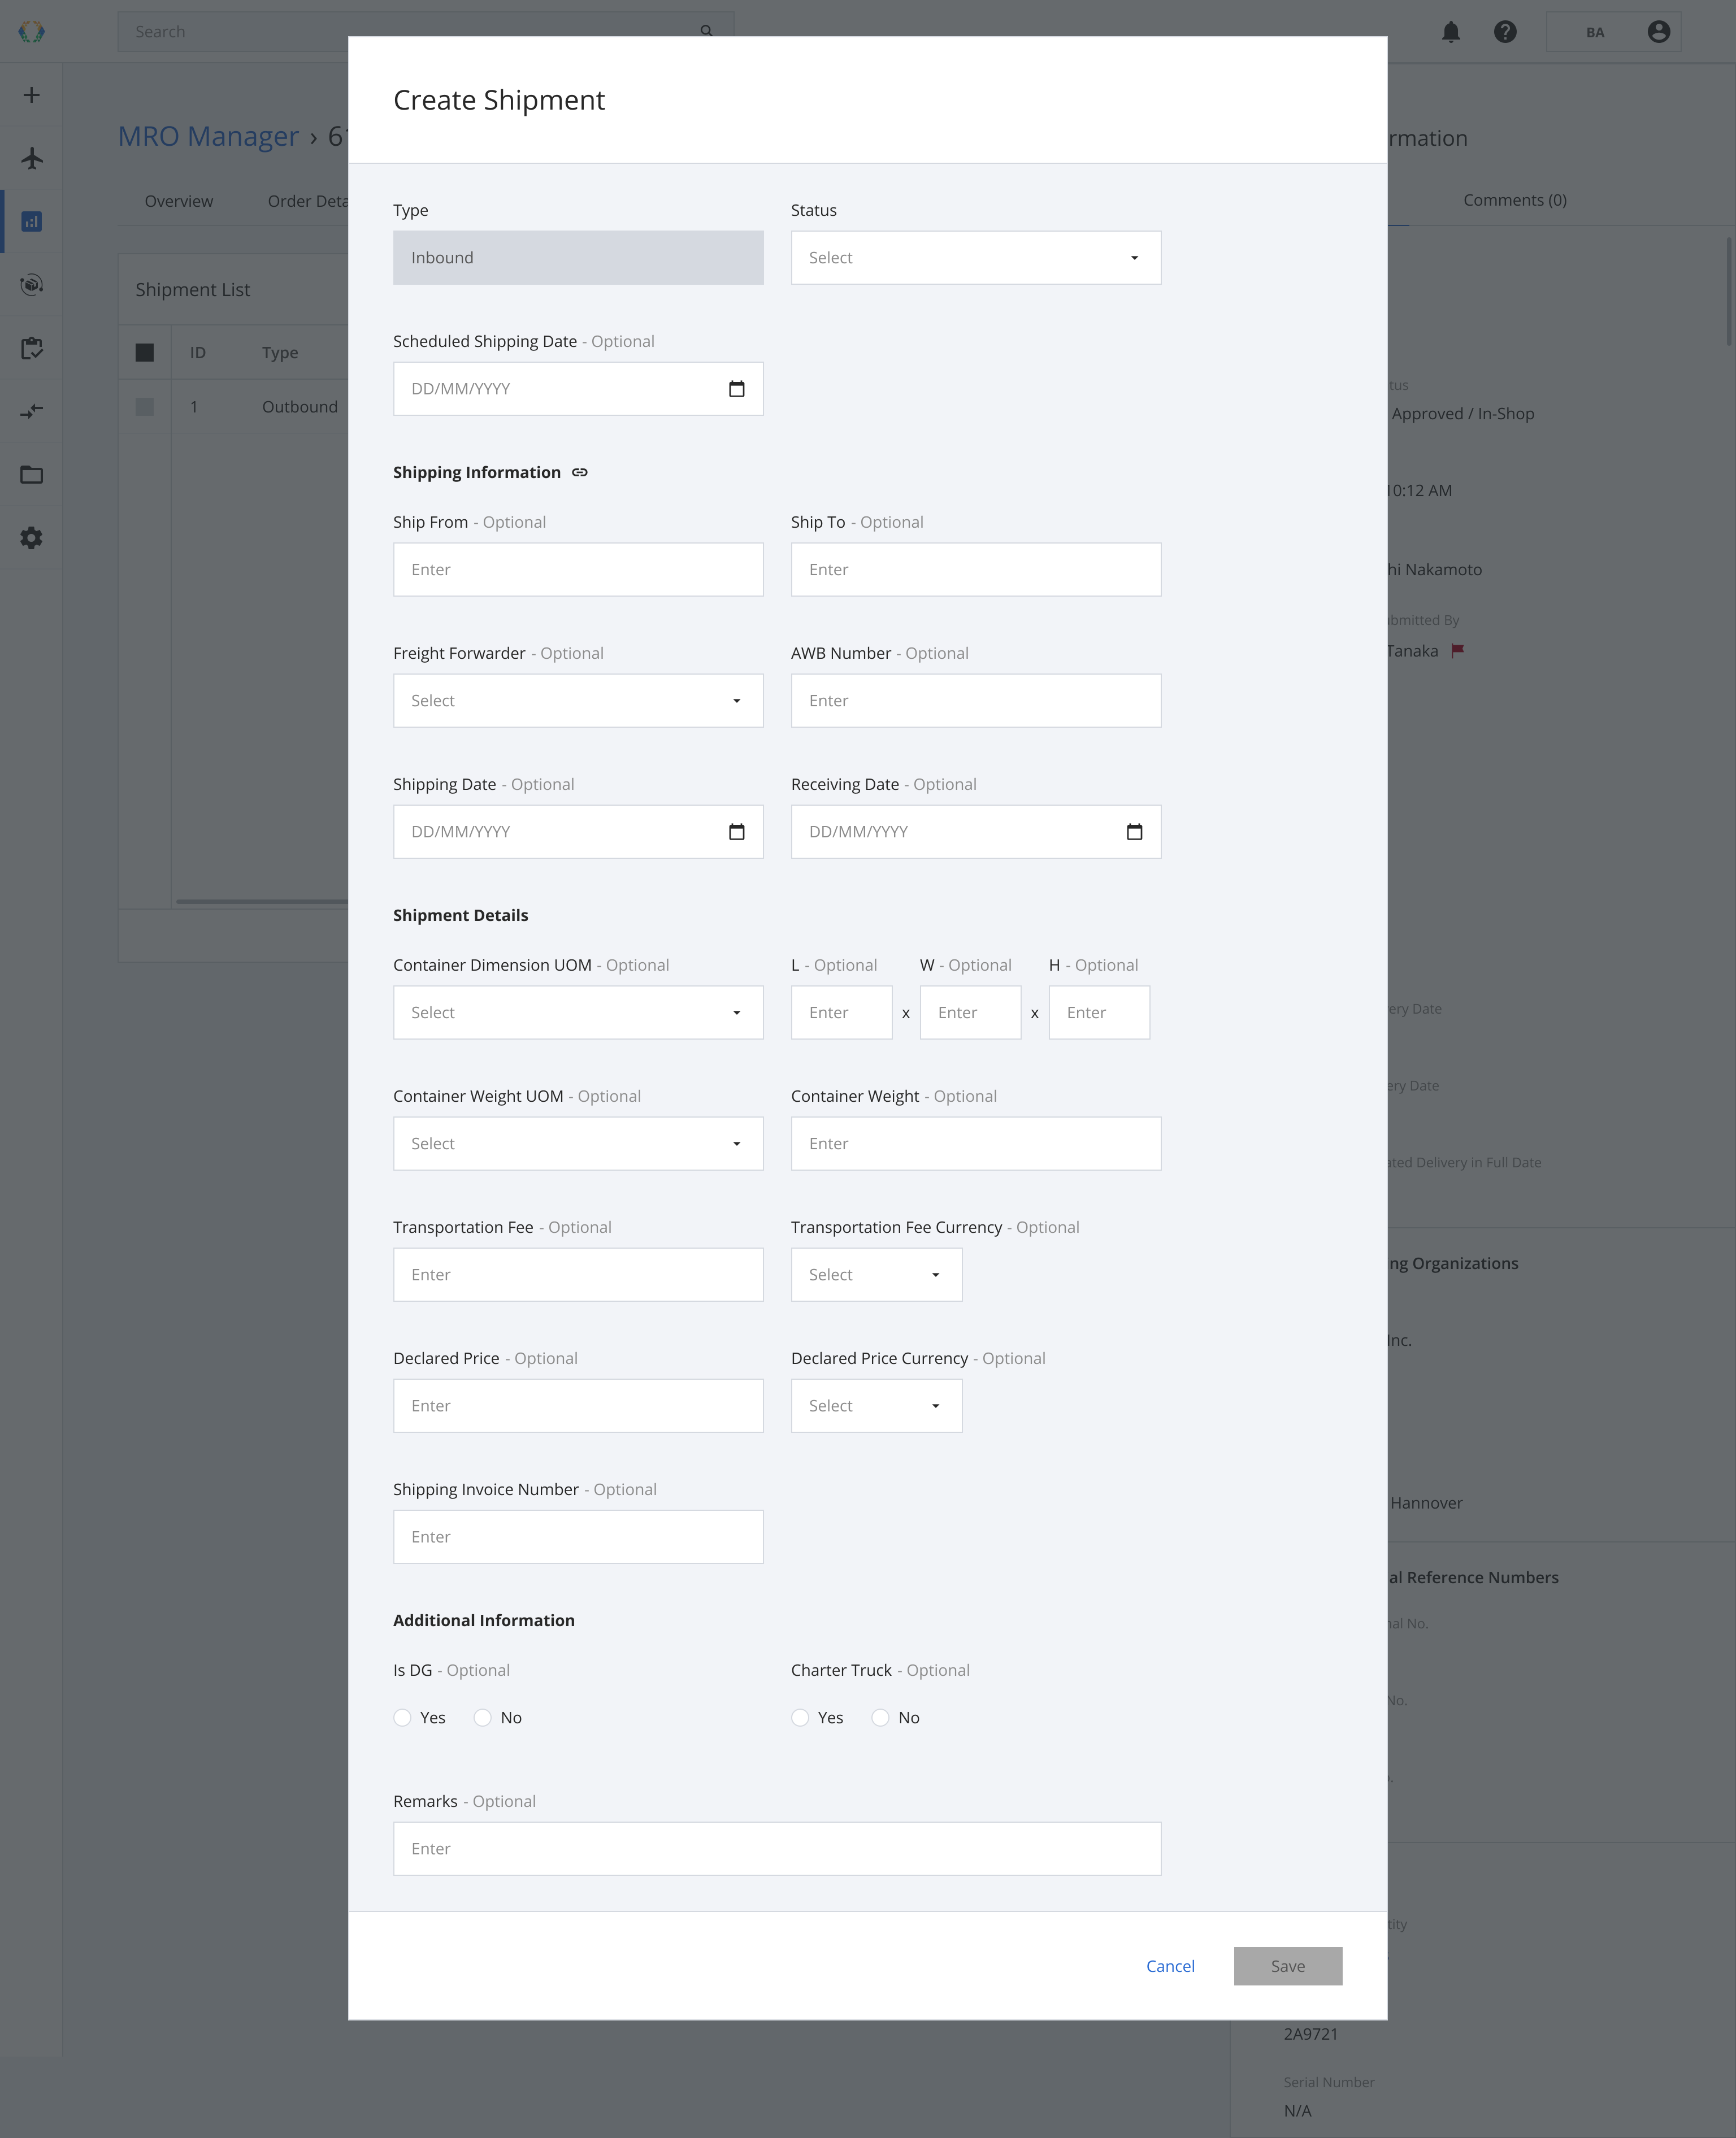
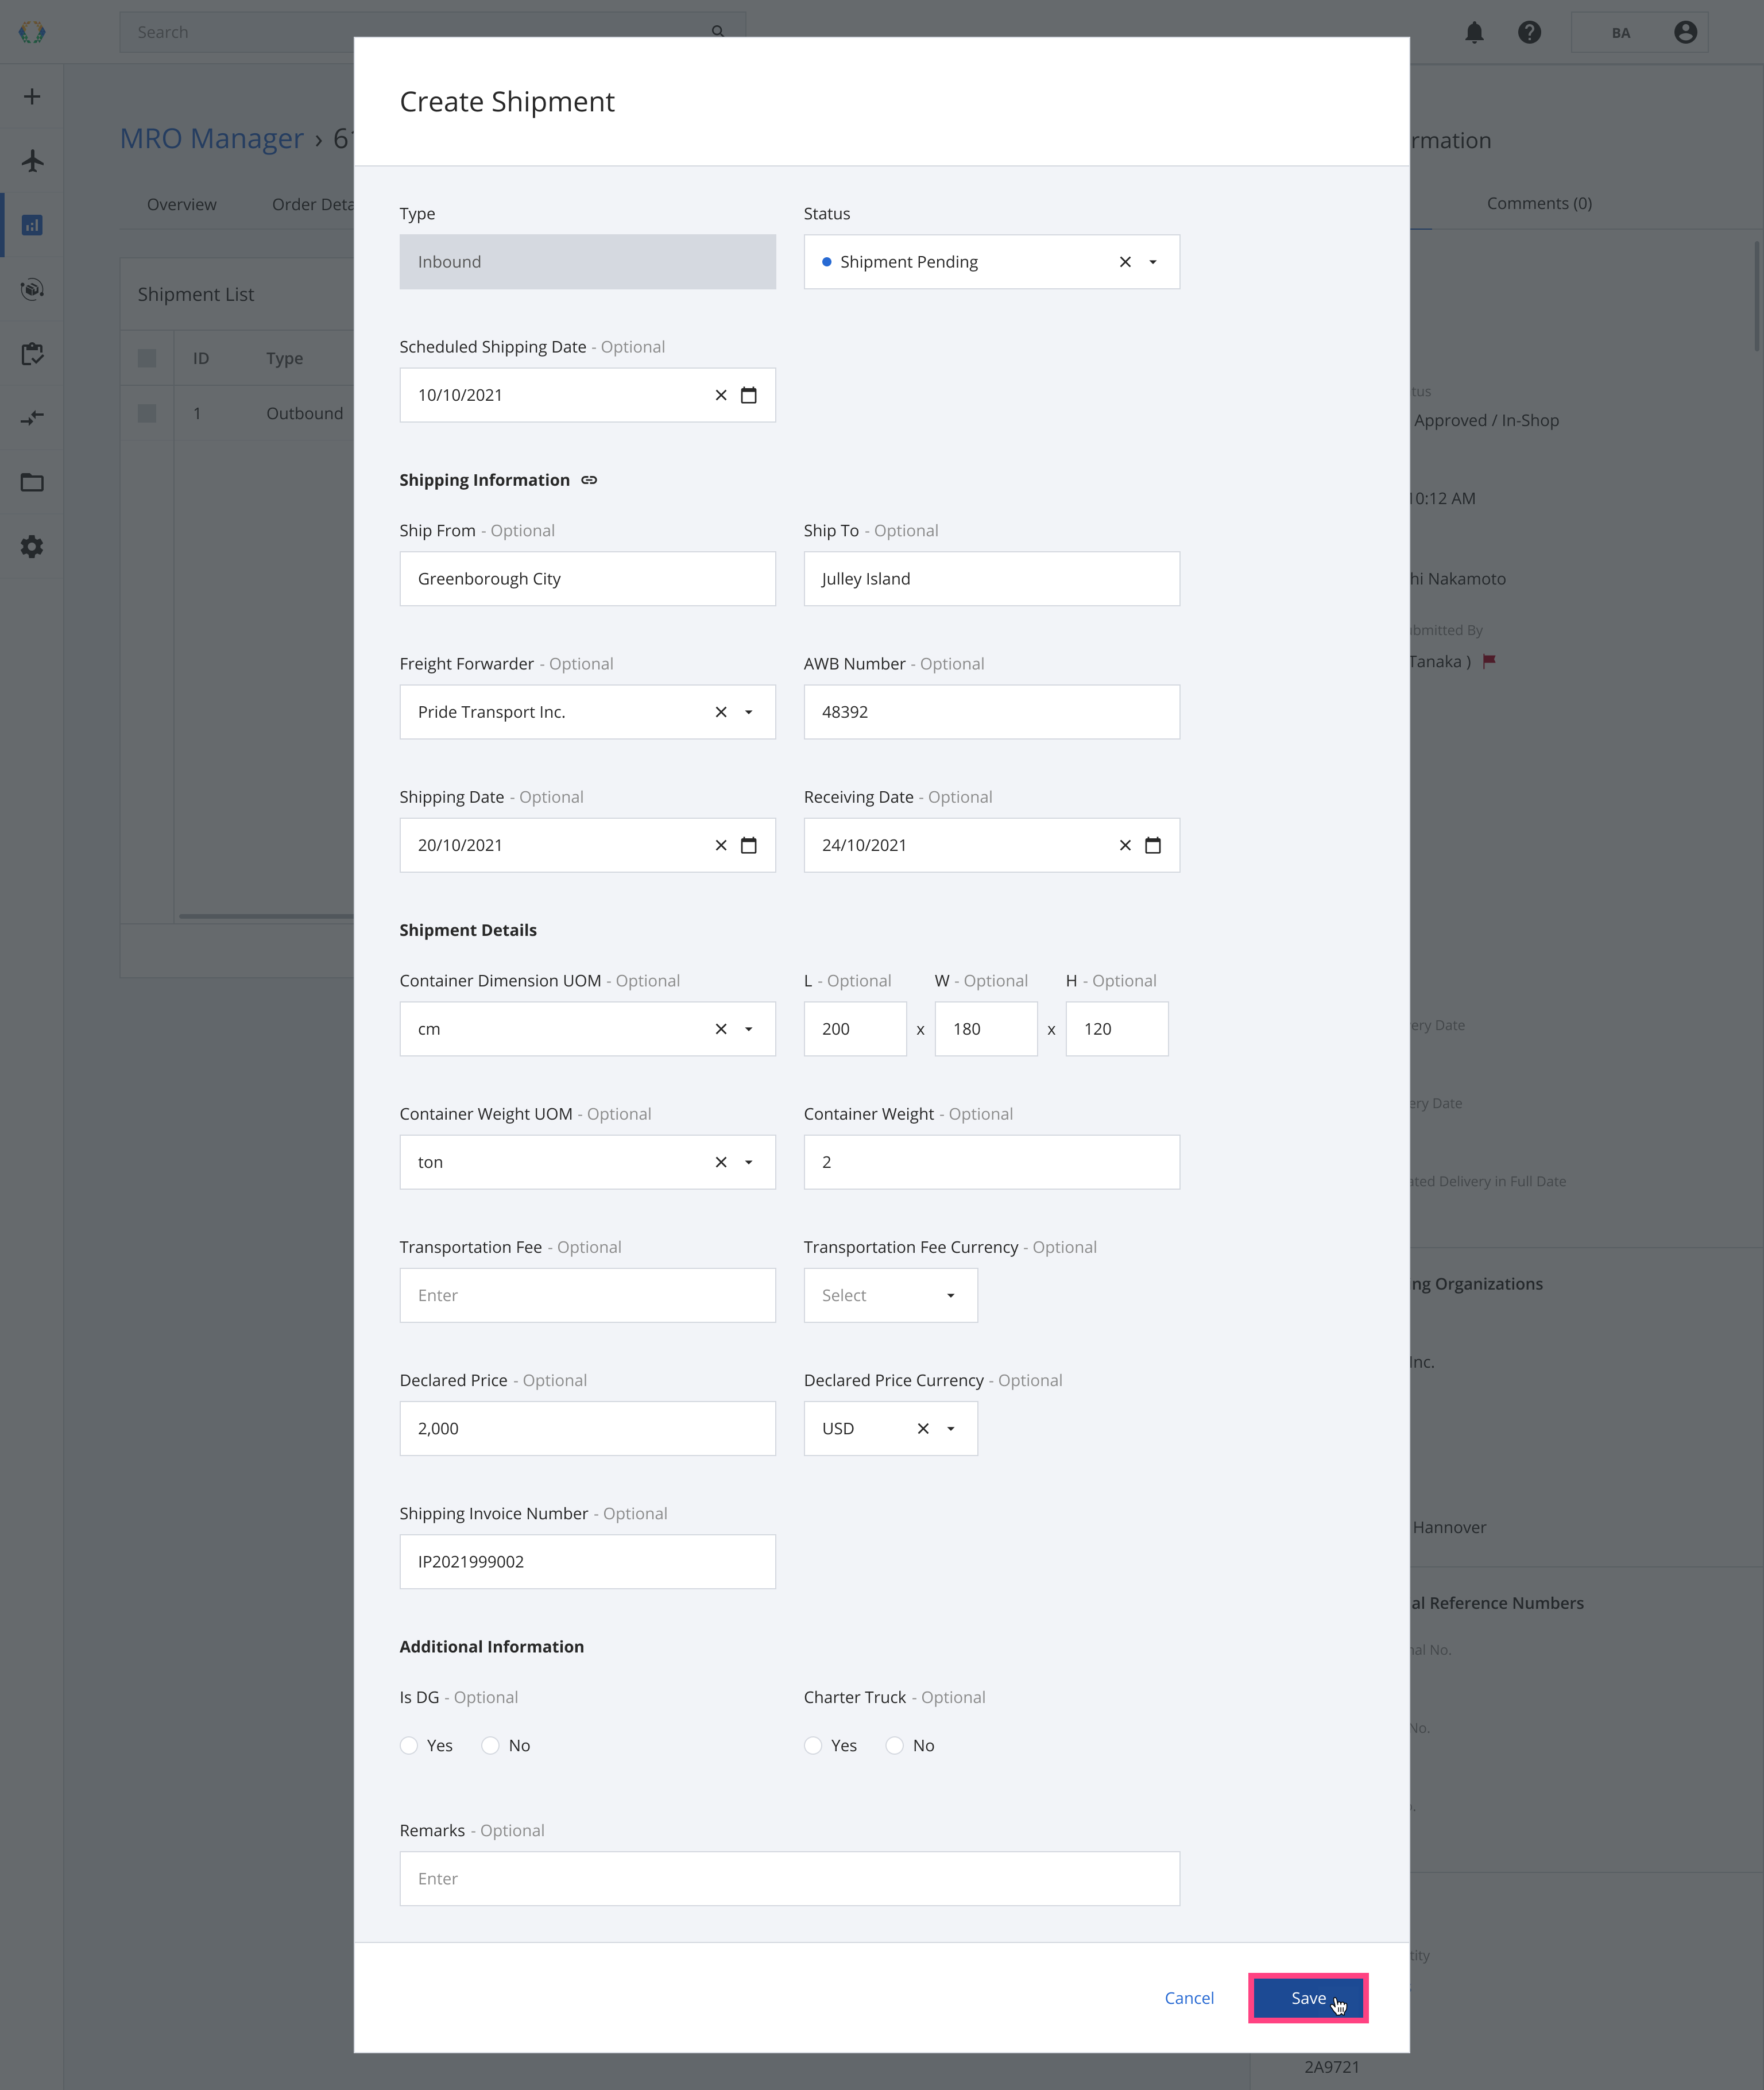
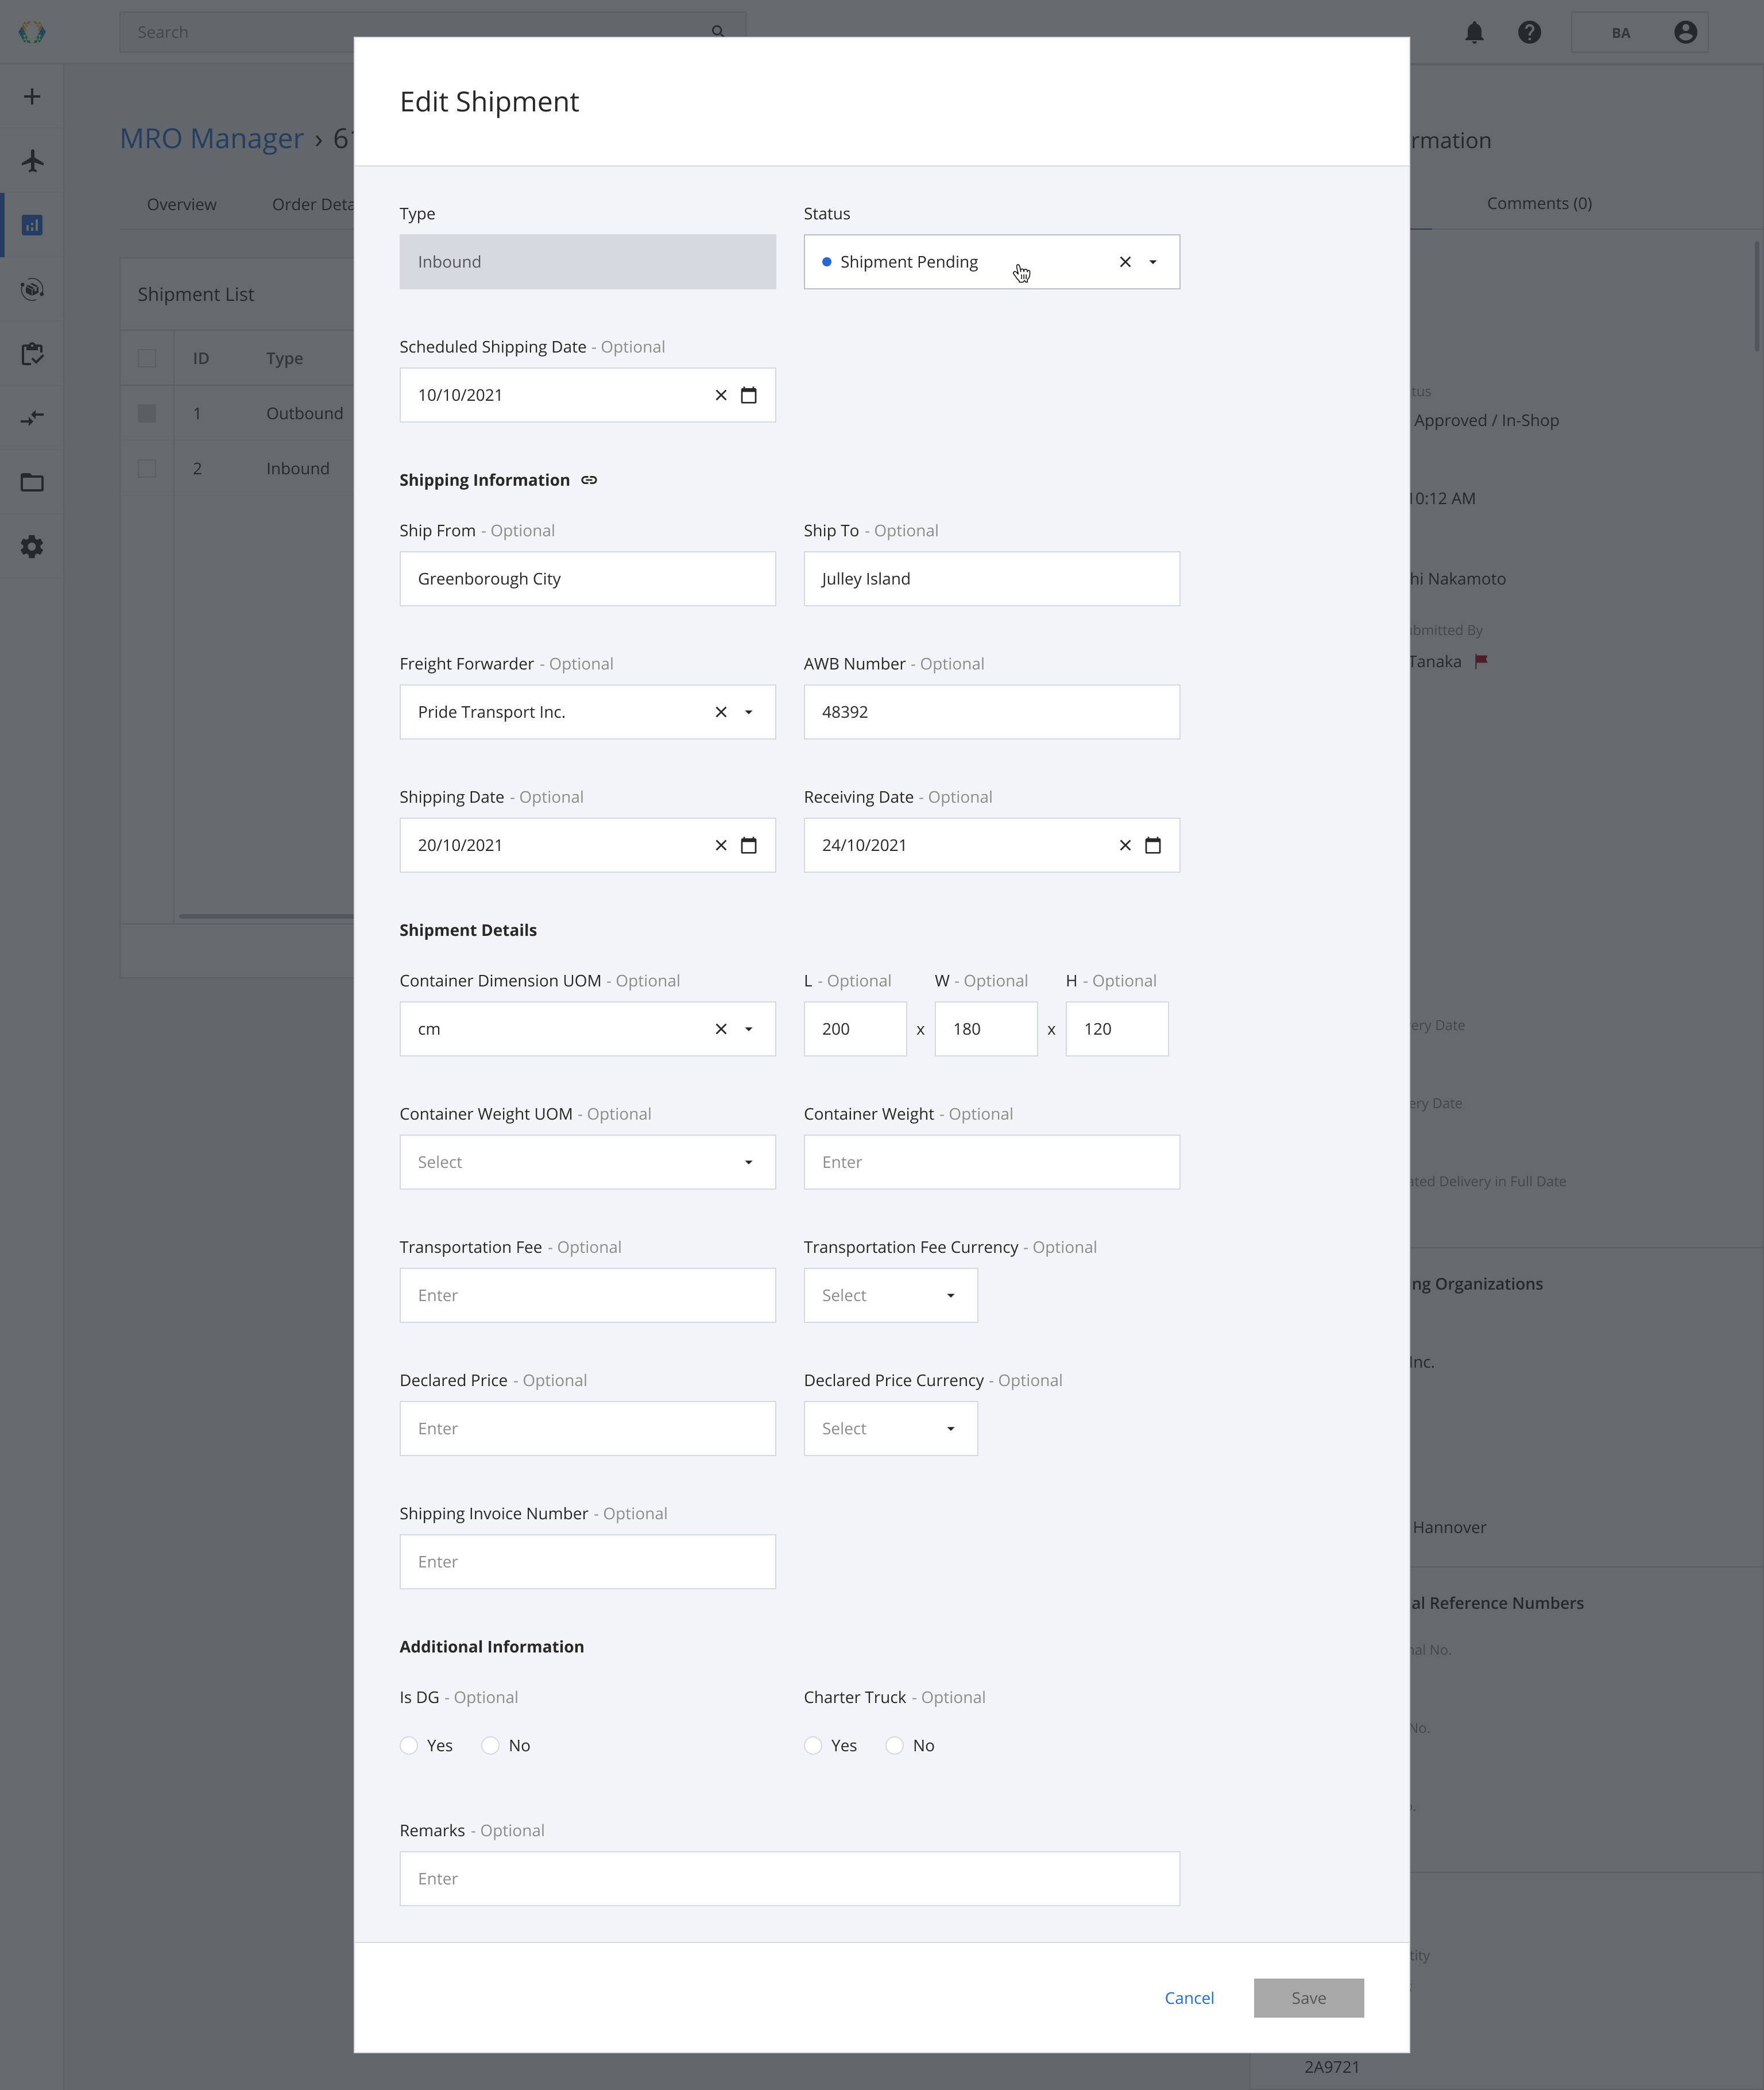
Step 2: Provide the details for your shipment.
Required fields:Status
Step 3: Click ‘Save’
Once the shipment is added successfully, a green banner will appear at the top of the shipment list.
You can add multiple inbound Shipments to your Repair Order.
Editing Shipments
Step 1: From the Shipment List, open the shipment you want to edit.
Step 2: Provide the information to edit your shipment.
Step 3: Click ‘Save’.
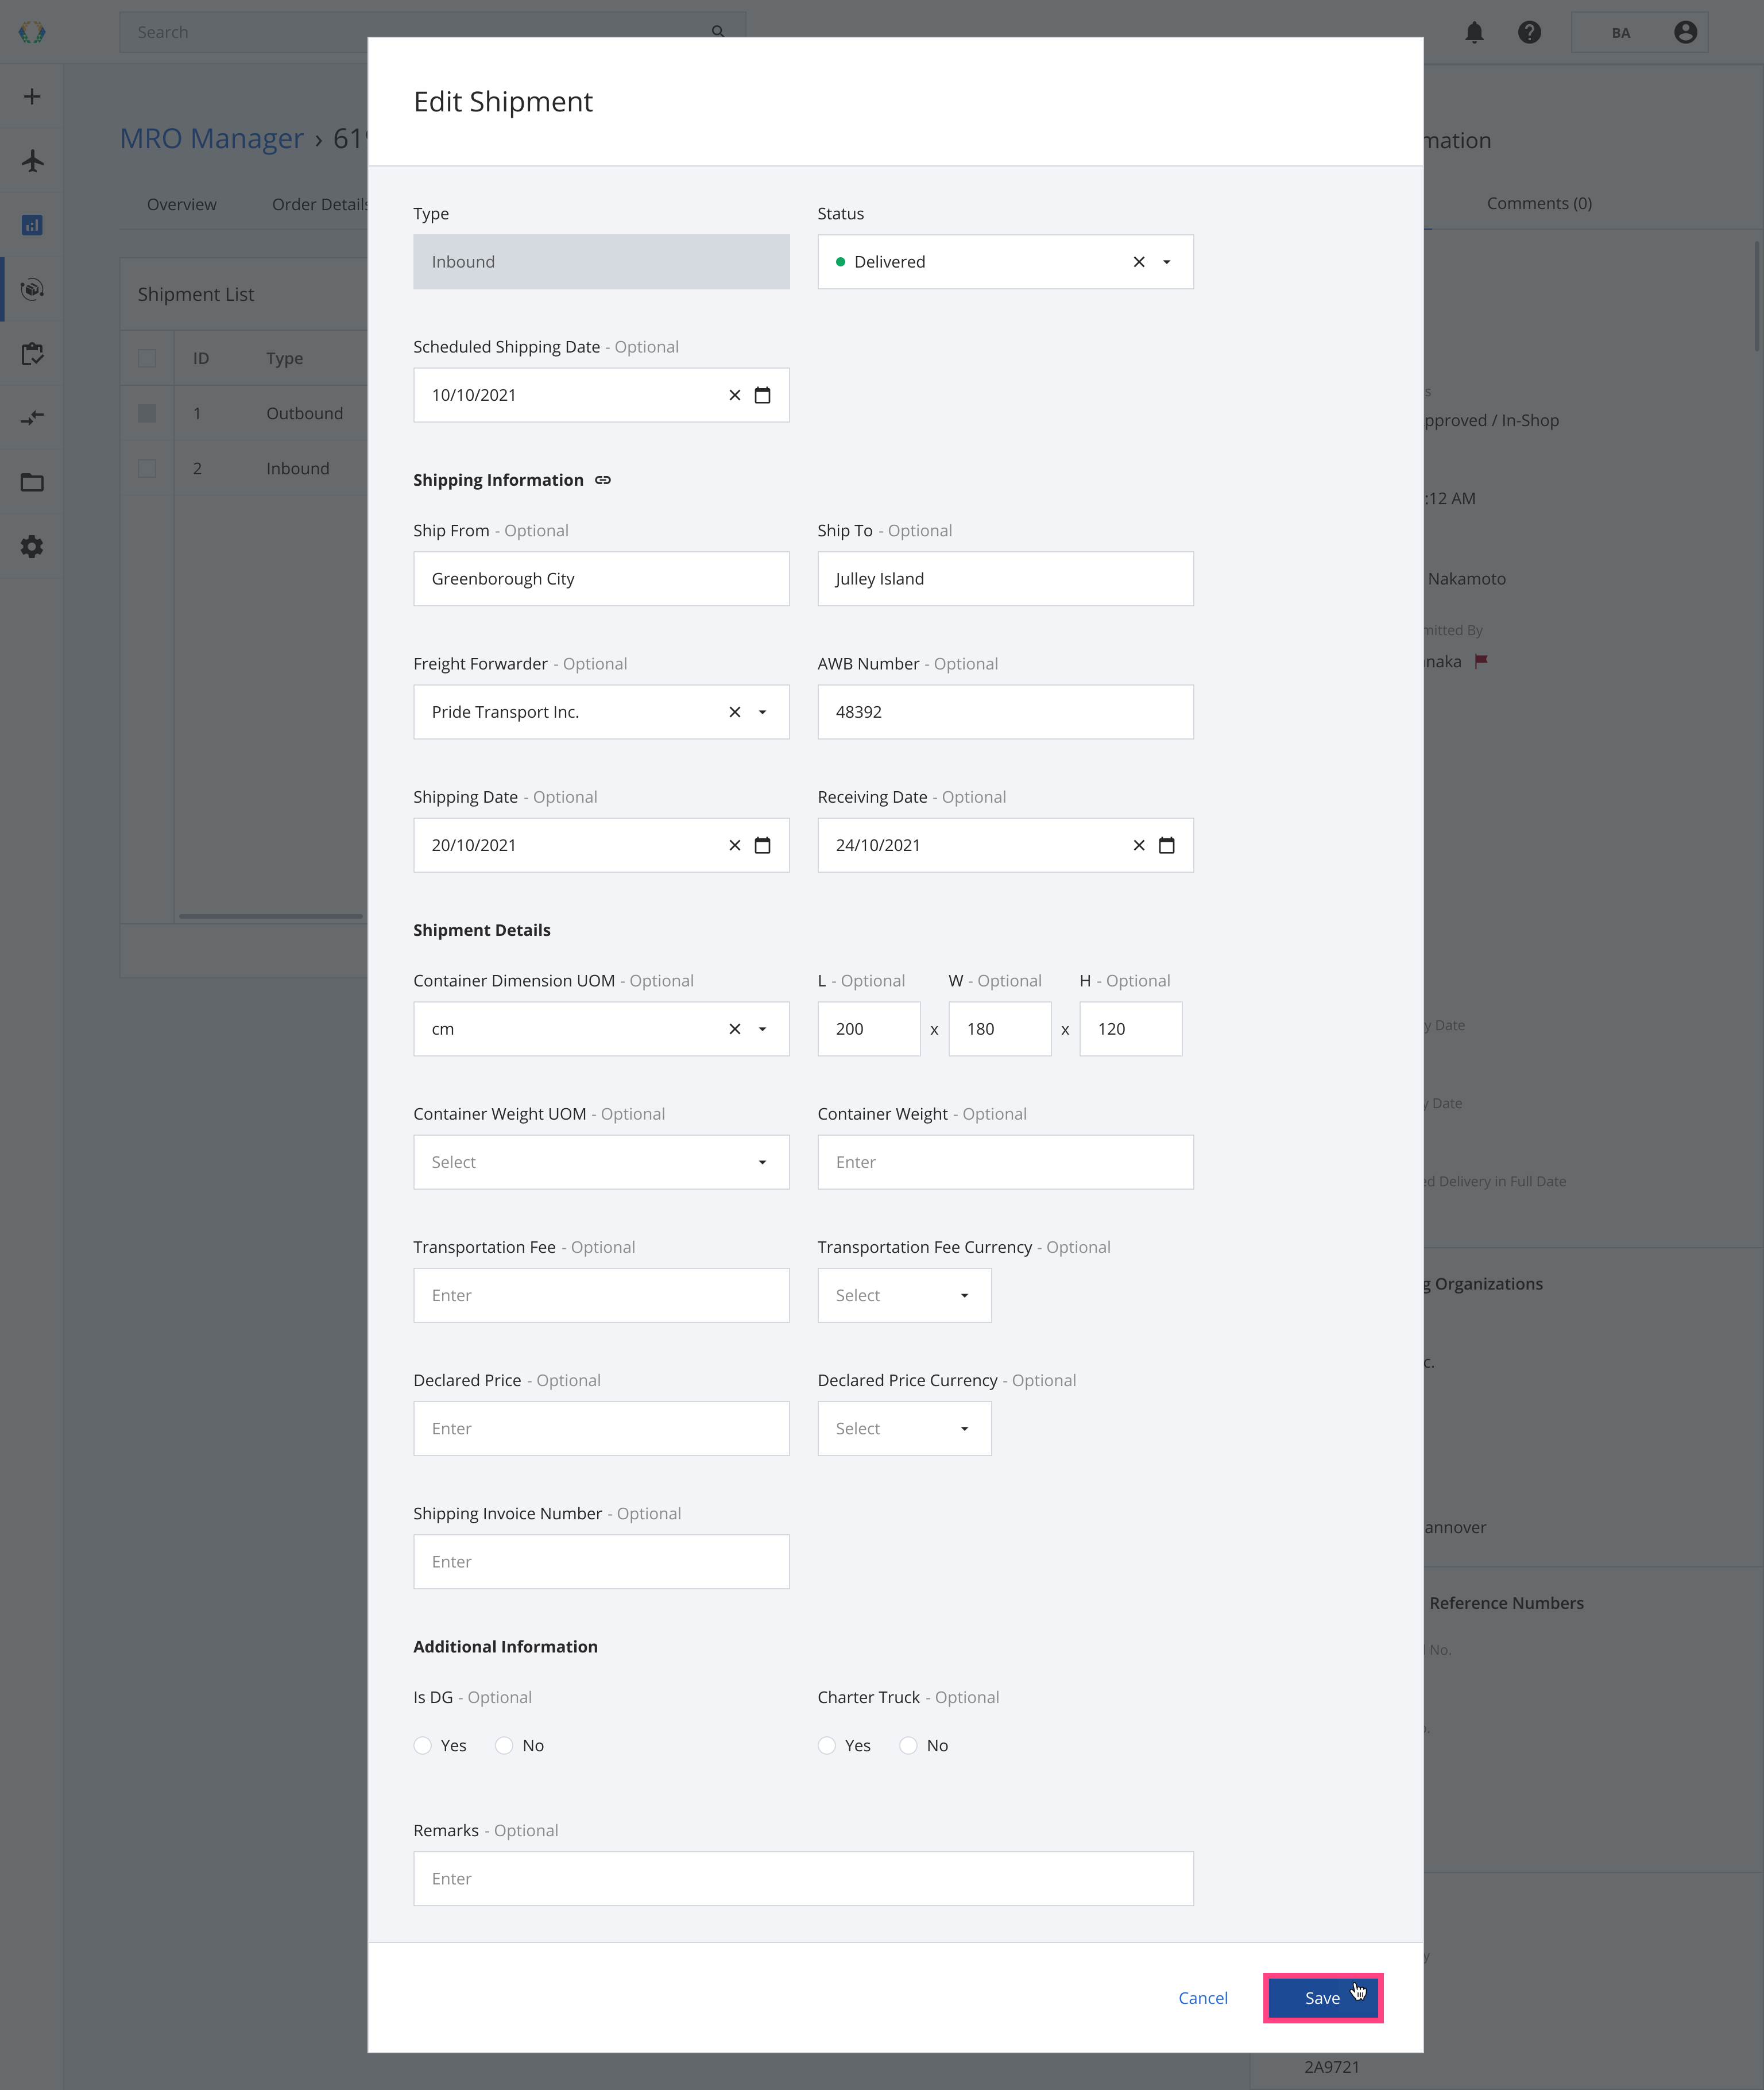
Once the shipment is updated successfully, a green banner will appear at the top of the shipment list.

Deleting Shipments
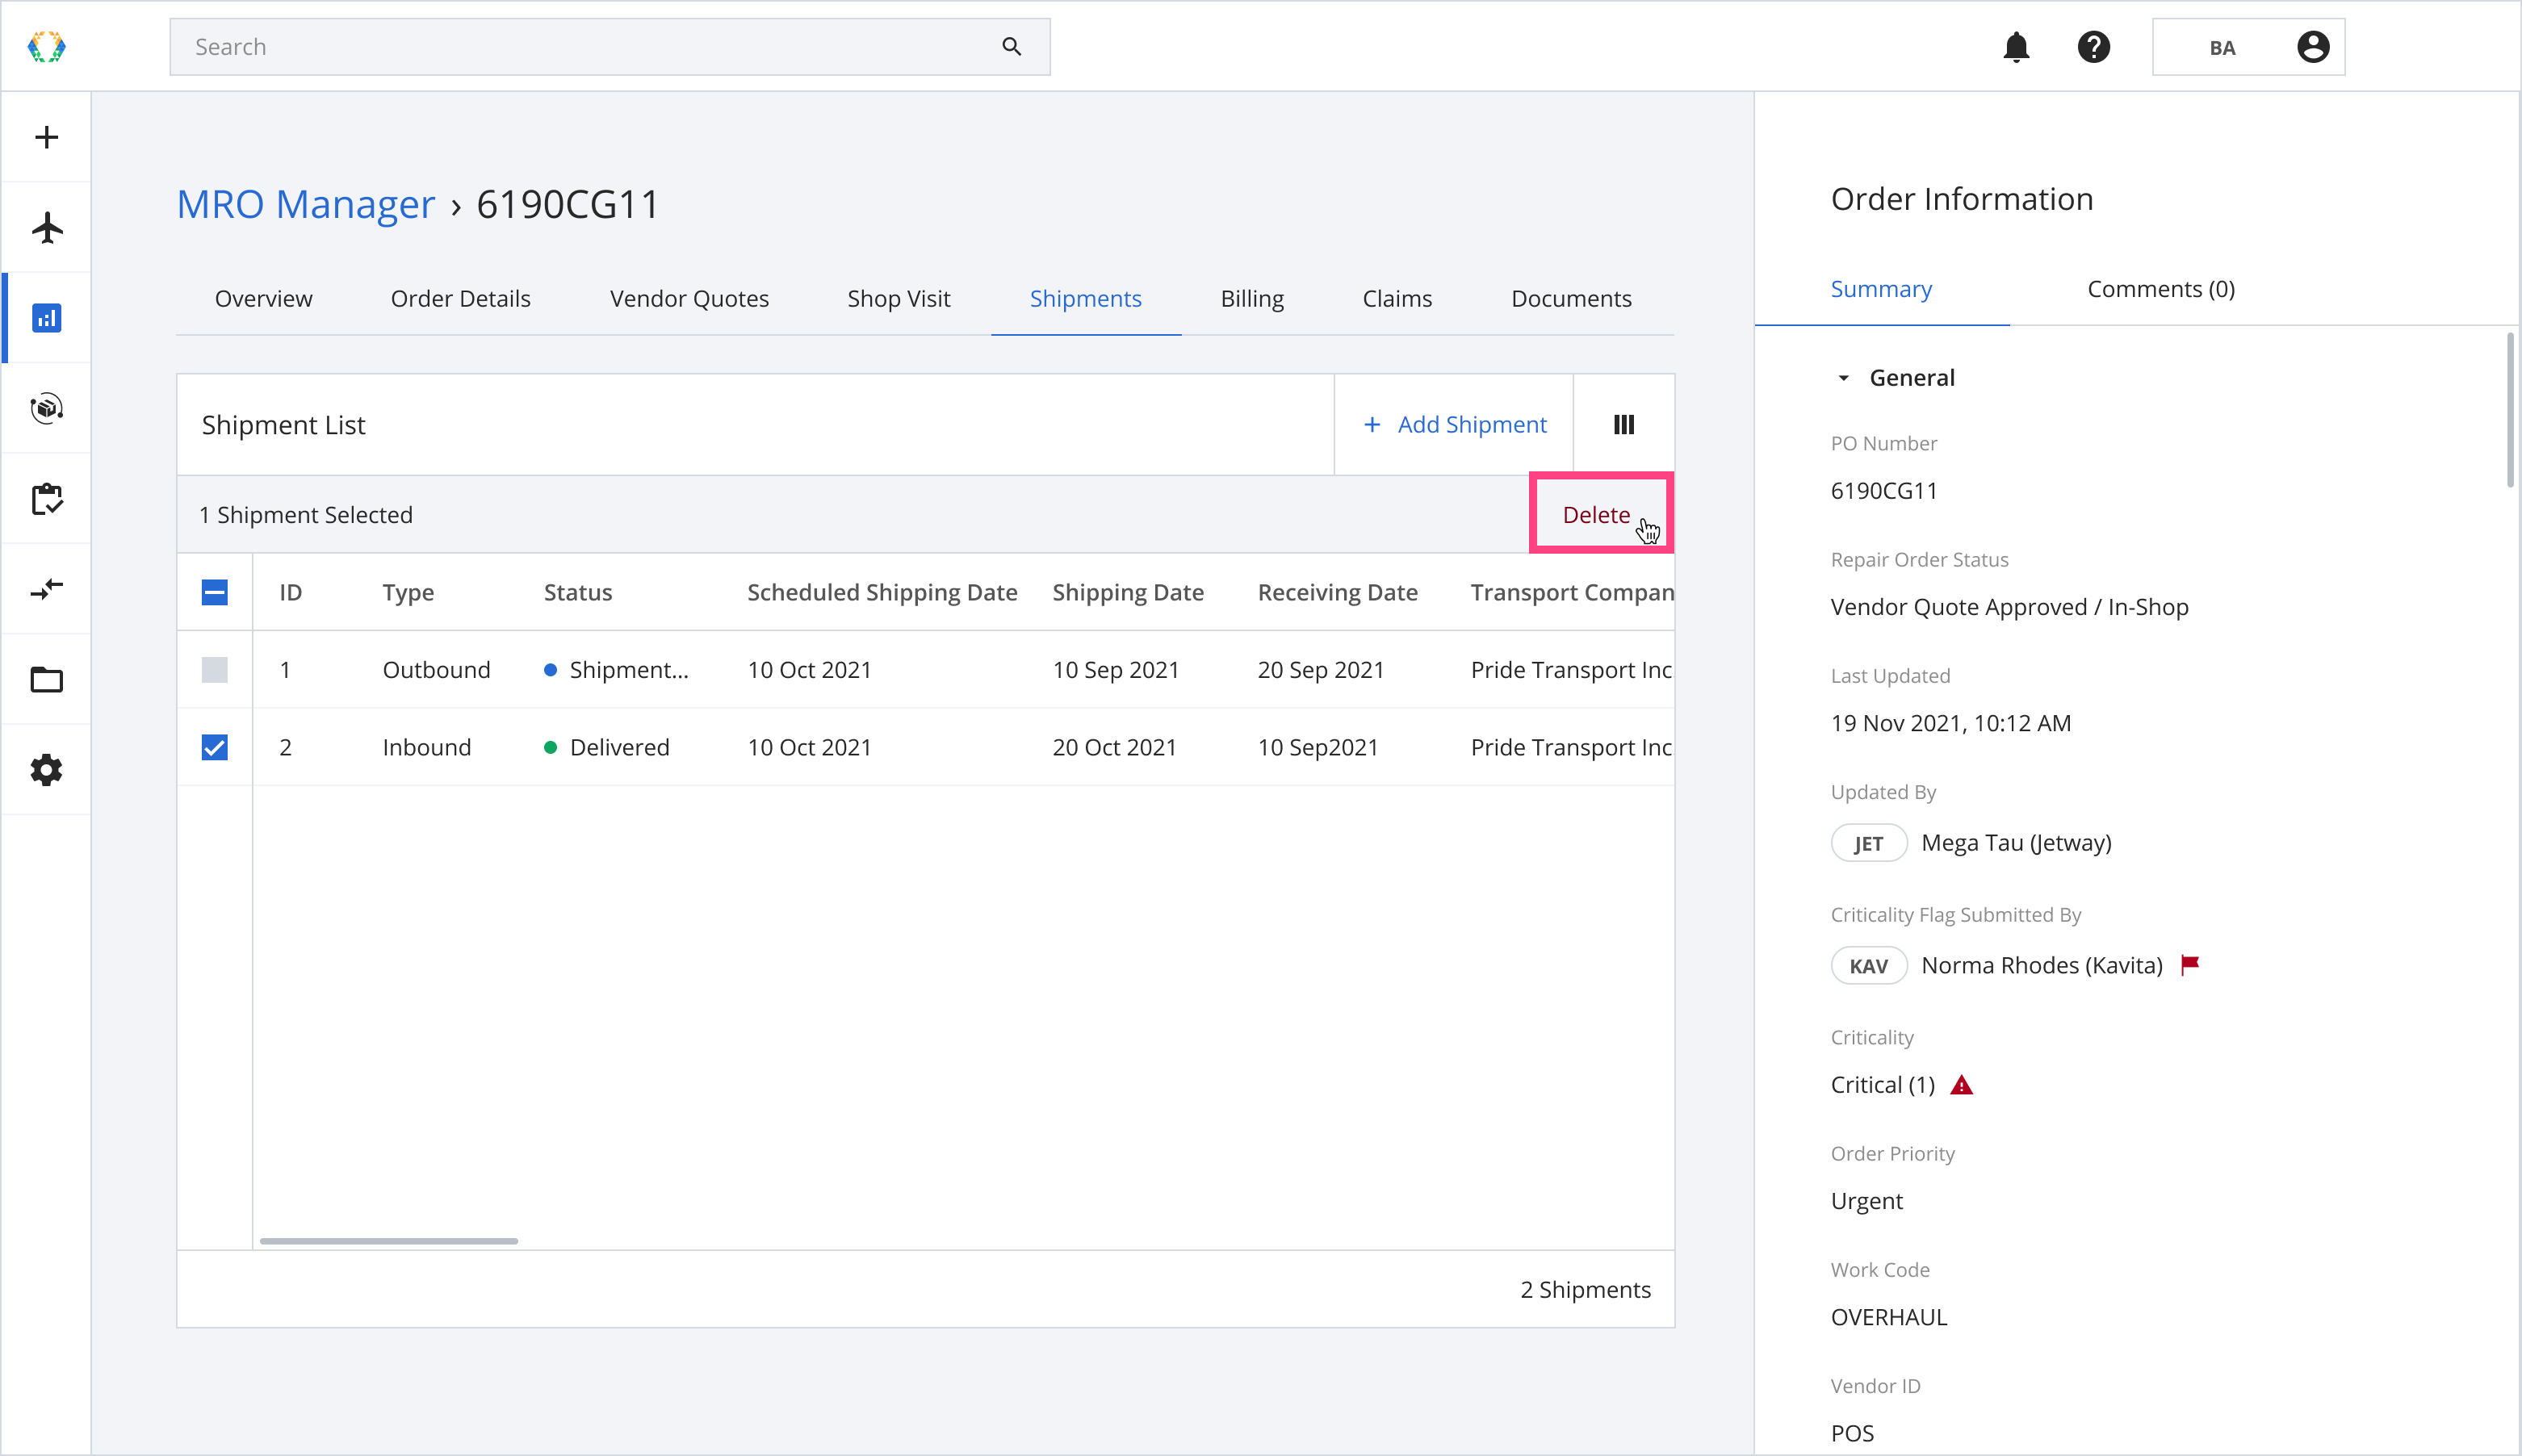
Step 1: From the Shipment List, select shipment you want to delete.
Step 2: Click ‘Delete’.
Only Inbound Shipments can be deleted. Once the Shipment is deleted, it cannot be restored.
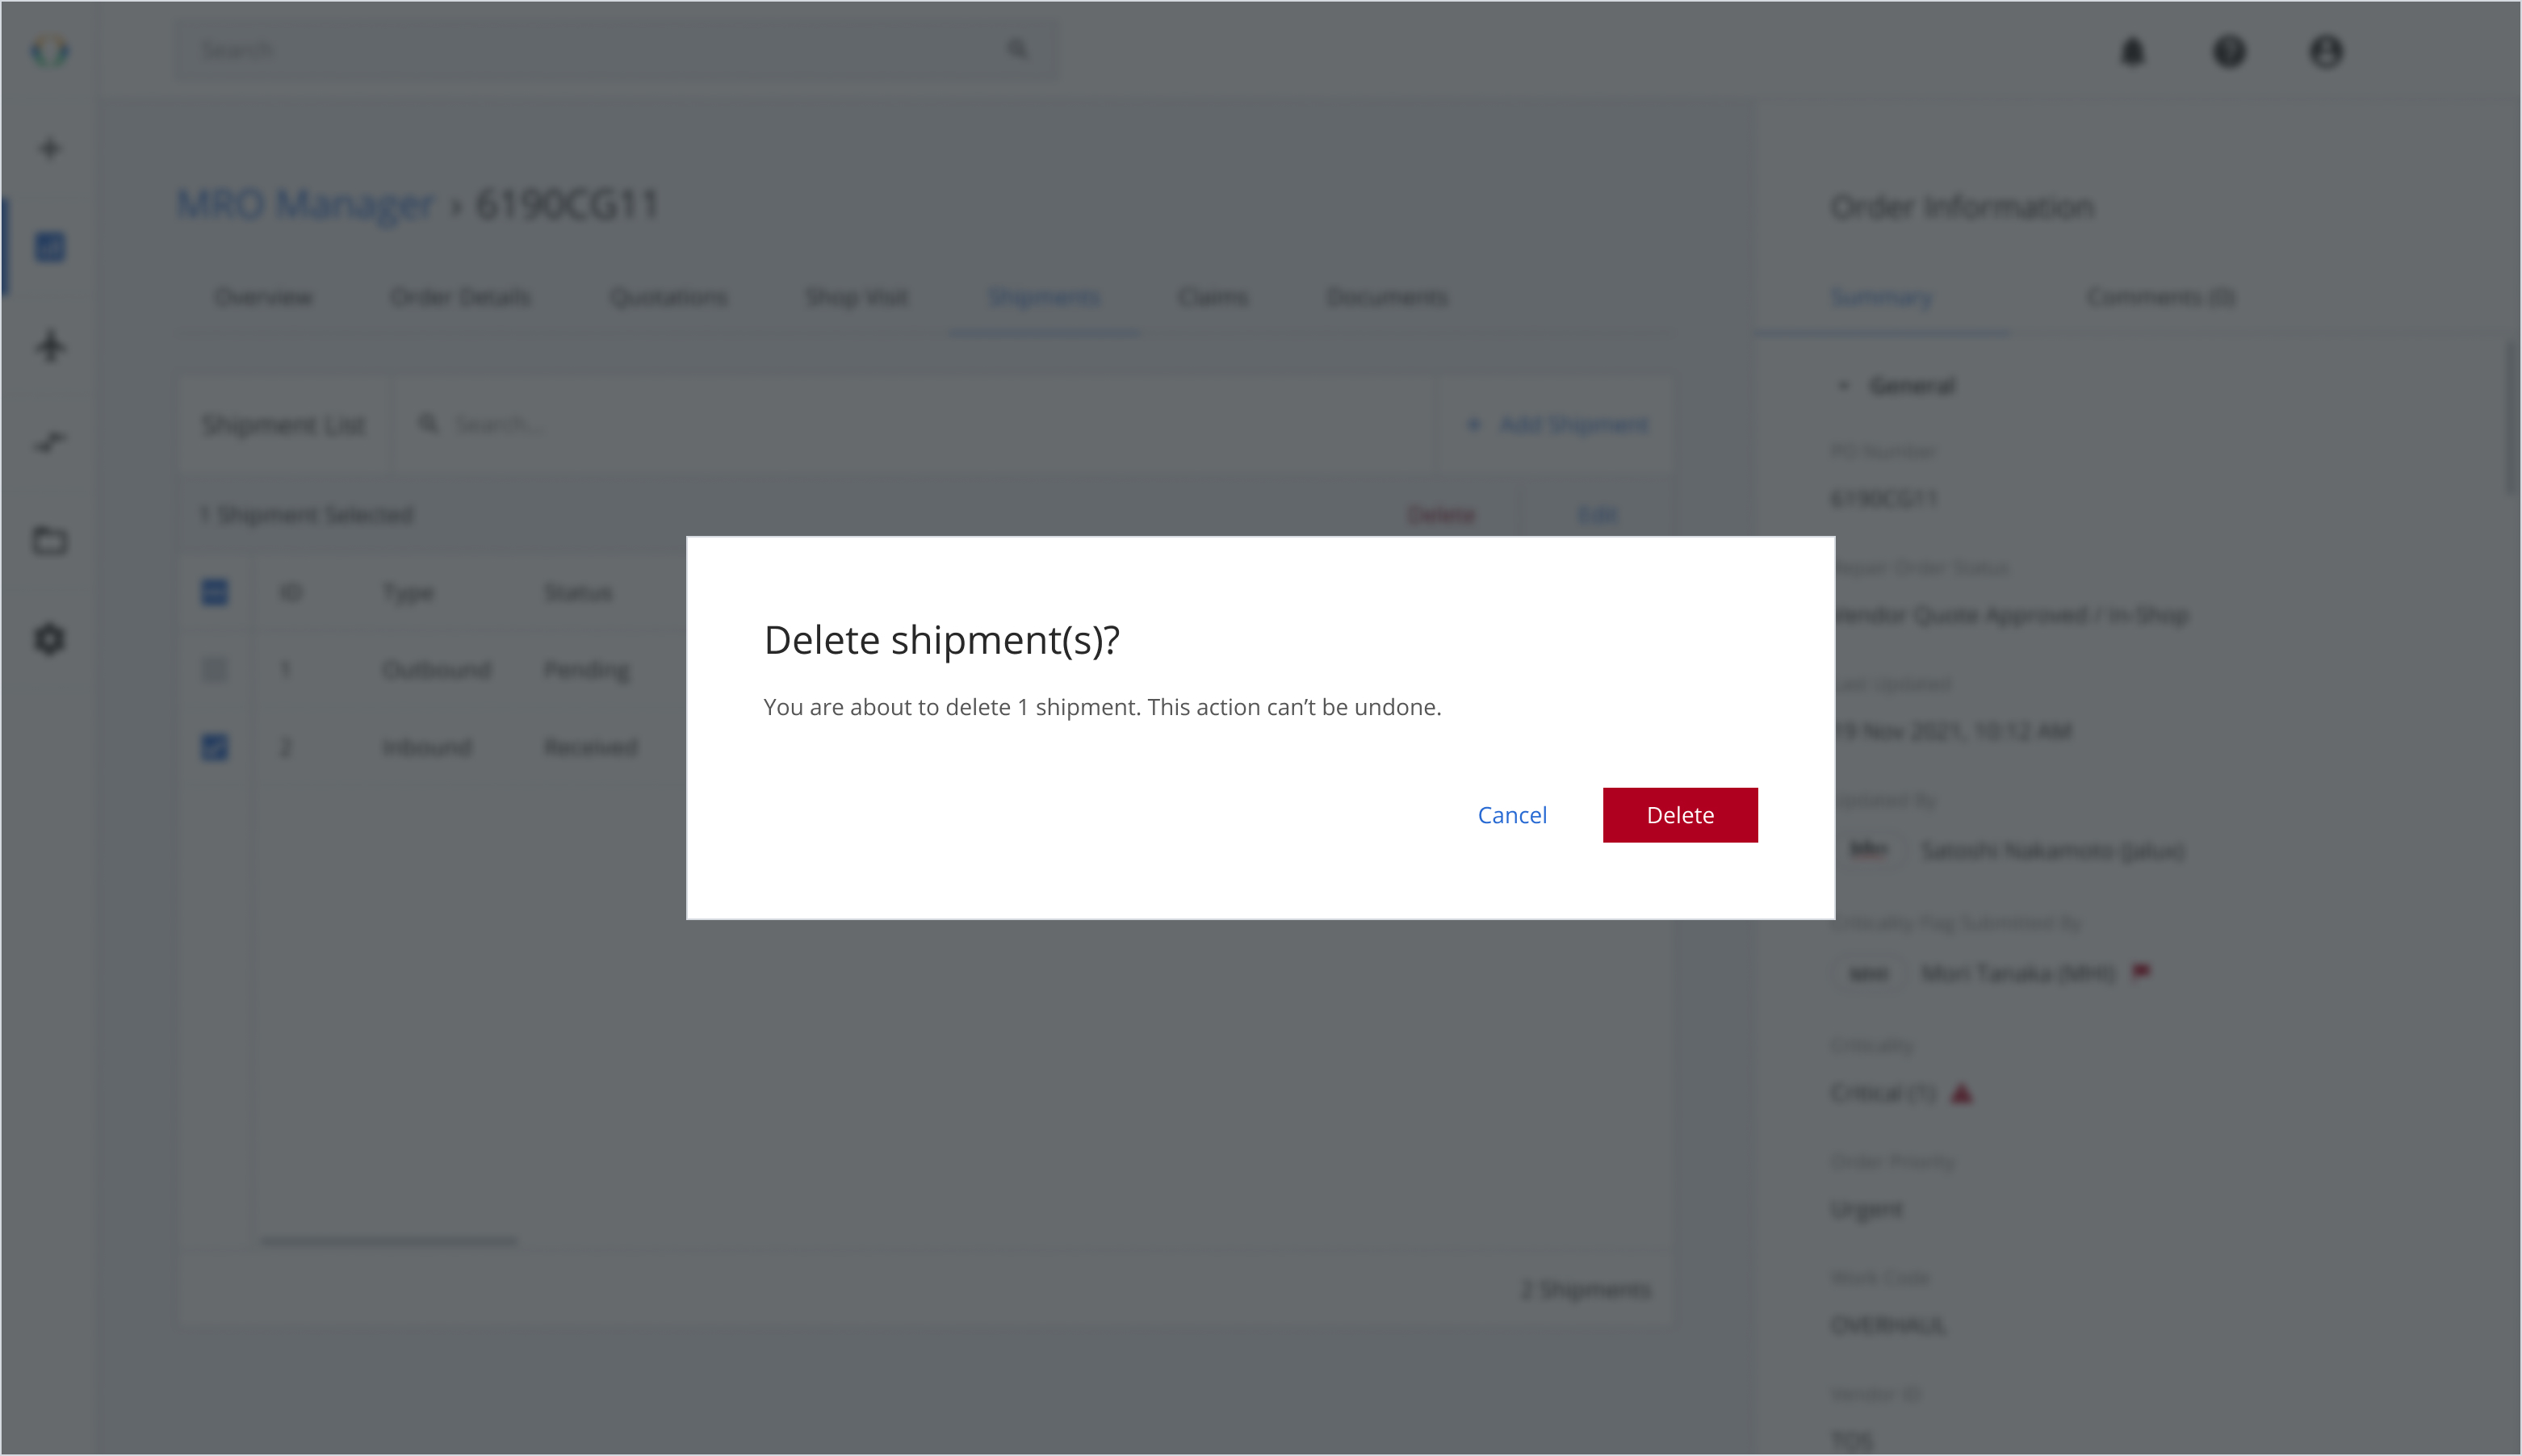
Step 3: A confirmation message will appear, click ‘Delete’.
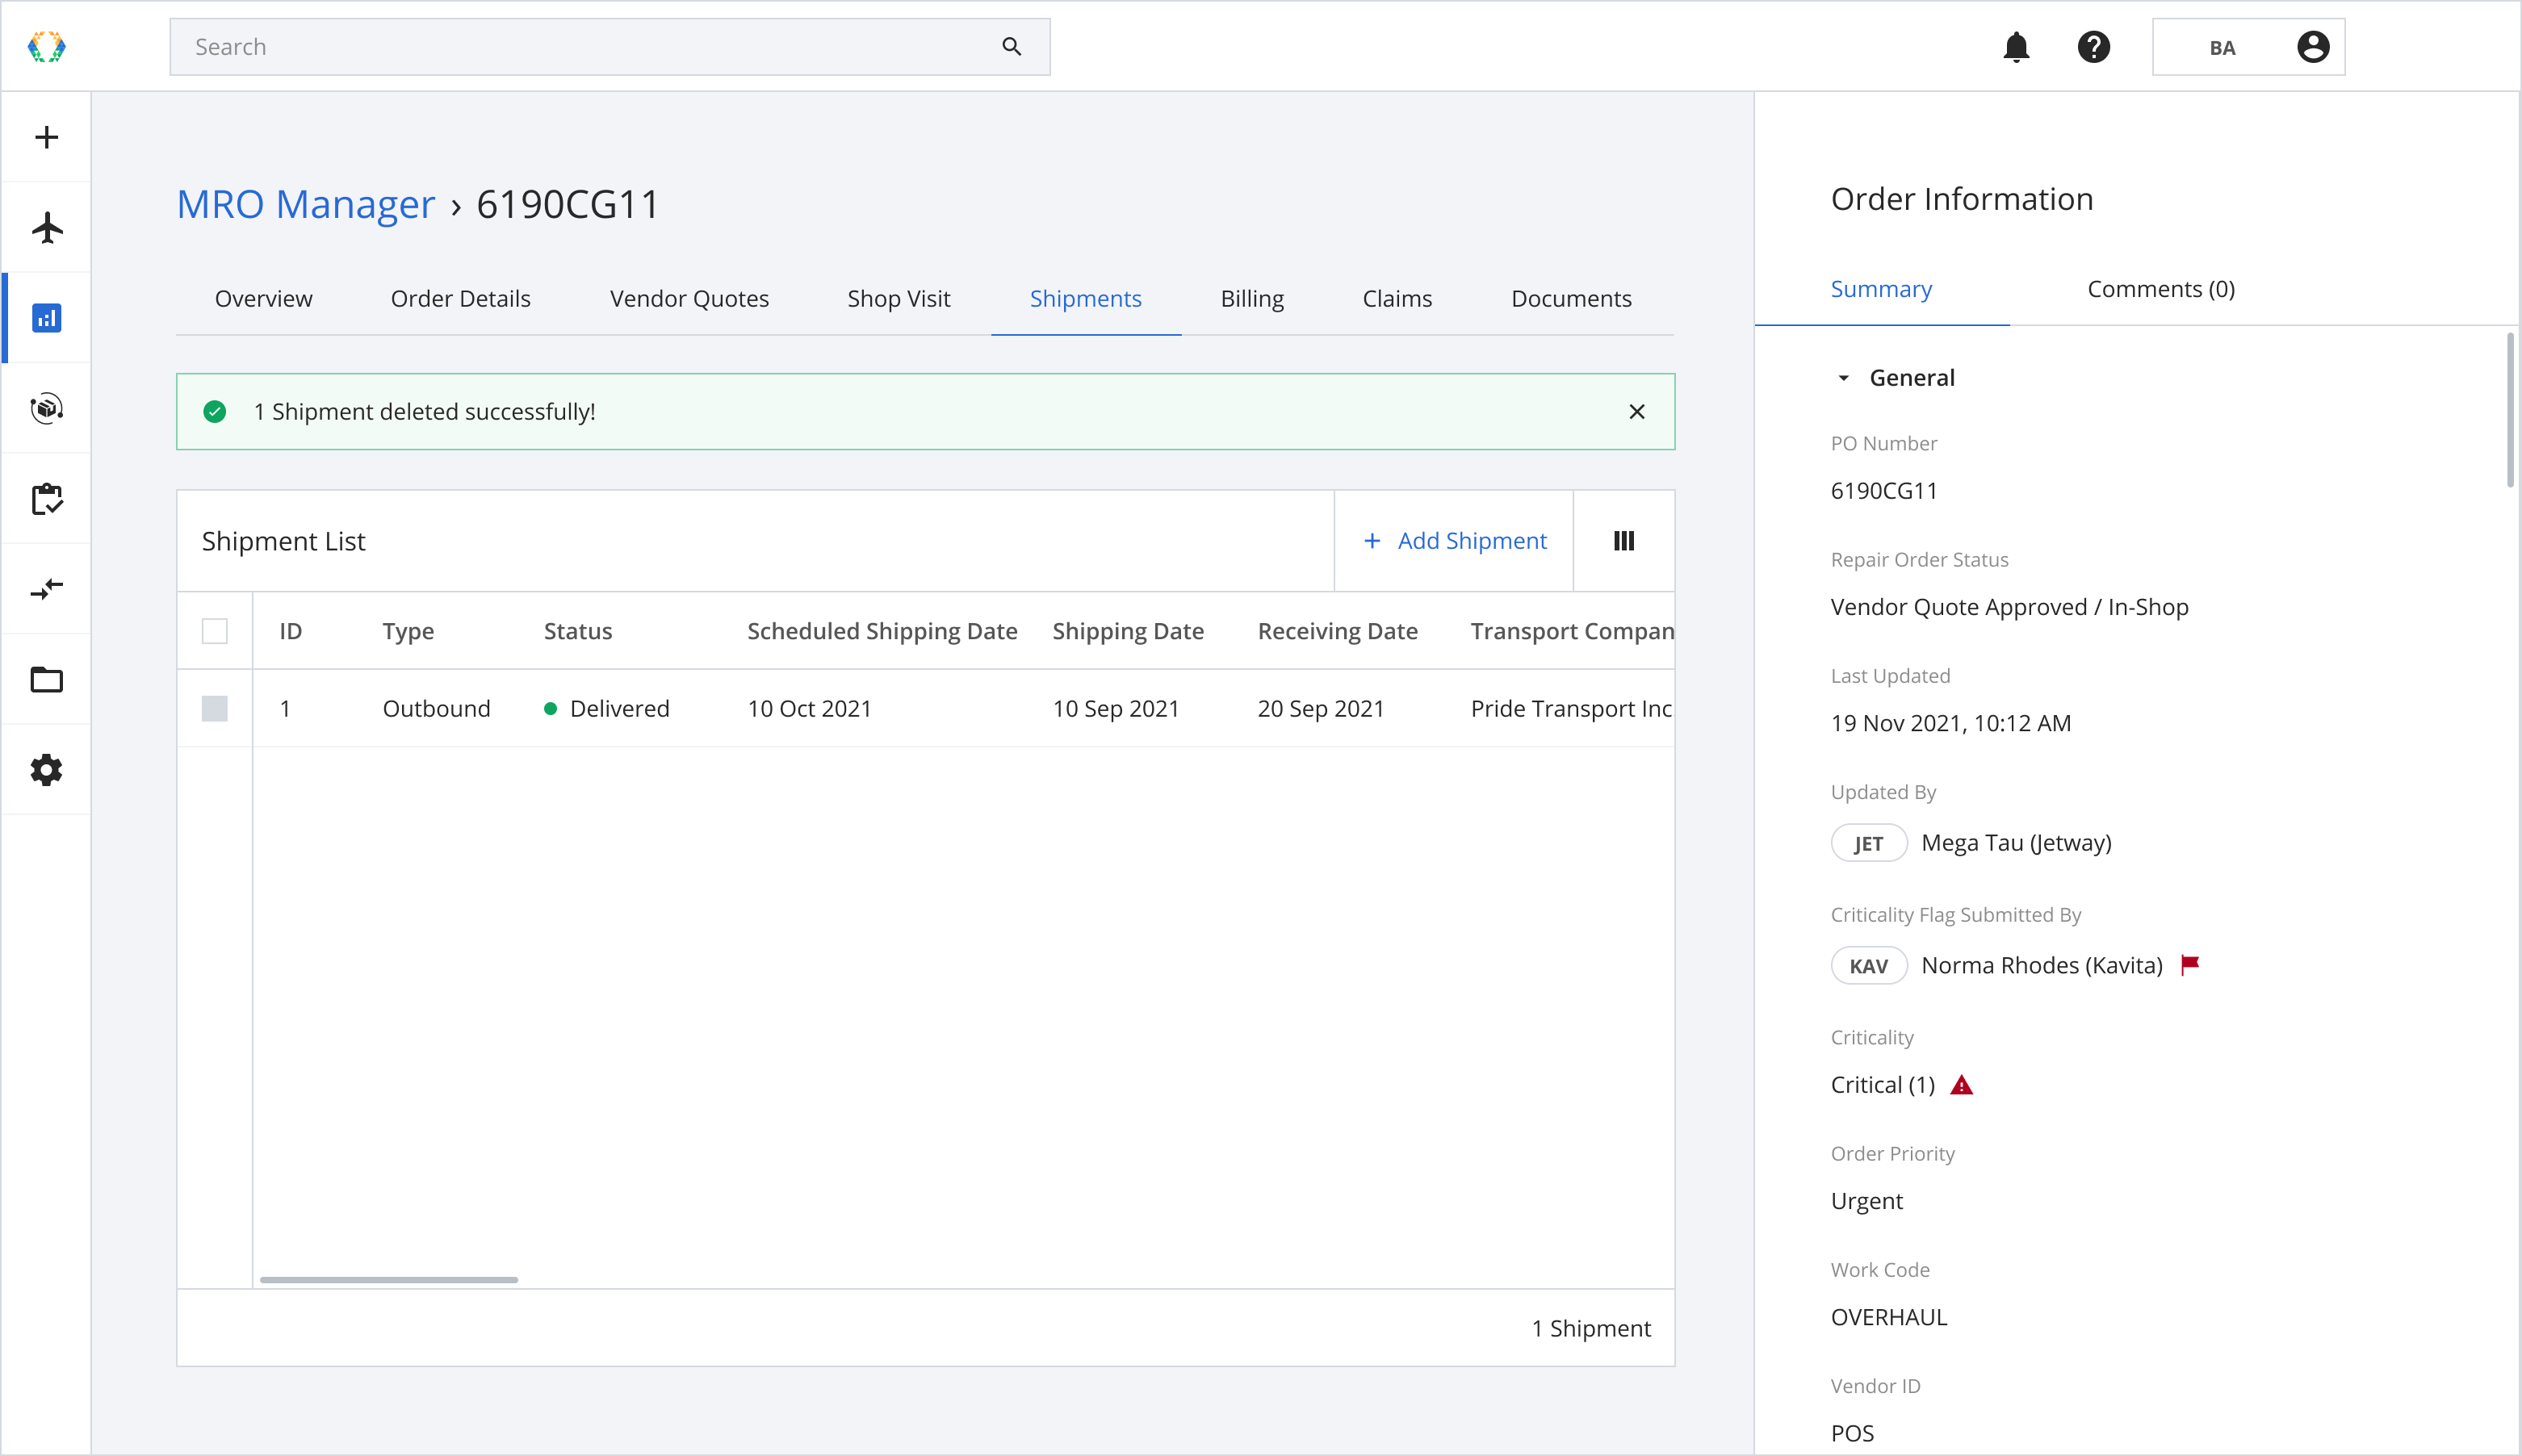
Once the shipment is deleted successfully, a green banner will appear at the top of the shipment list.
Updated over 1 year ago